
Dry vs Wet Peri-Peri Chicken
Peri-peri chicken is more than just a spicy grilled dish; it is the result of history, migration, and bold flavor.
The sauce traces back to Mozambique, where African bird’s eye chilies were blended with garlic, citrus, vinegar, and oil by Portuguese settlers. From there, peri-peri spread across Southern Africa and into Portugal, evolving slightly in every region it touched.
I grew up in Zimbabwe, where peri-peri is everywhere. Every last Friday of the month, my dad would take us to Nandos for chicken coated in that tangy, spicy, smoky sauce. It was sharp from vinegar, hot from chilies, and salty enough to make you reach for another bite immediately. Years later, I had the opportunity to taste peri-peri chicken in Portugal, and recognized the same roots, just expressed a little differently.
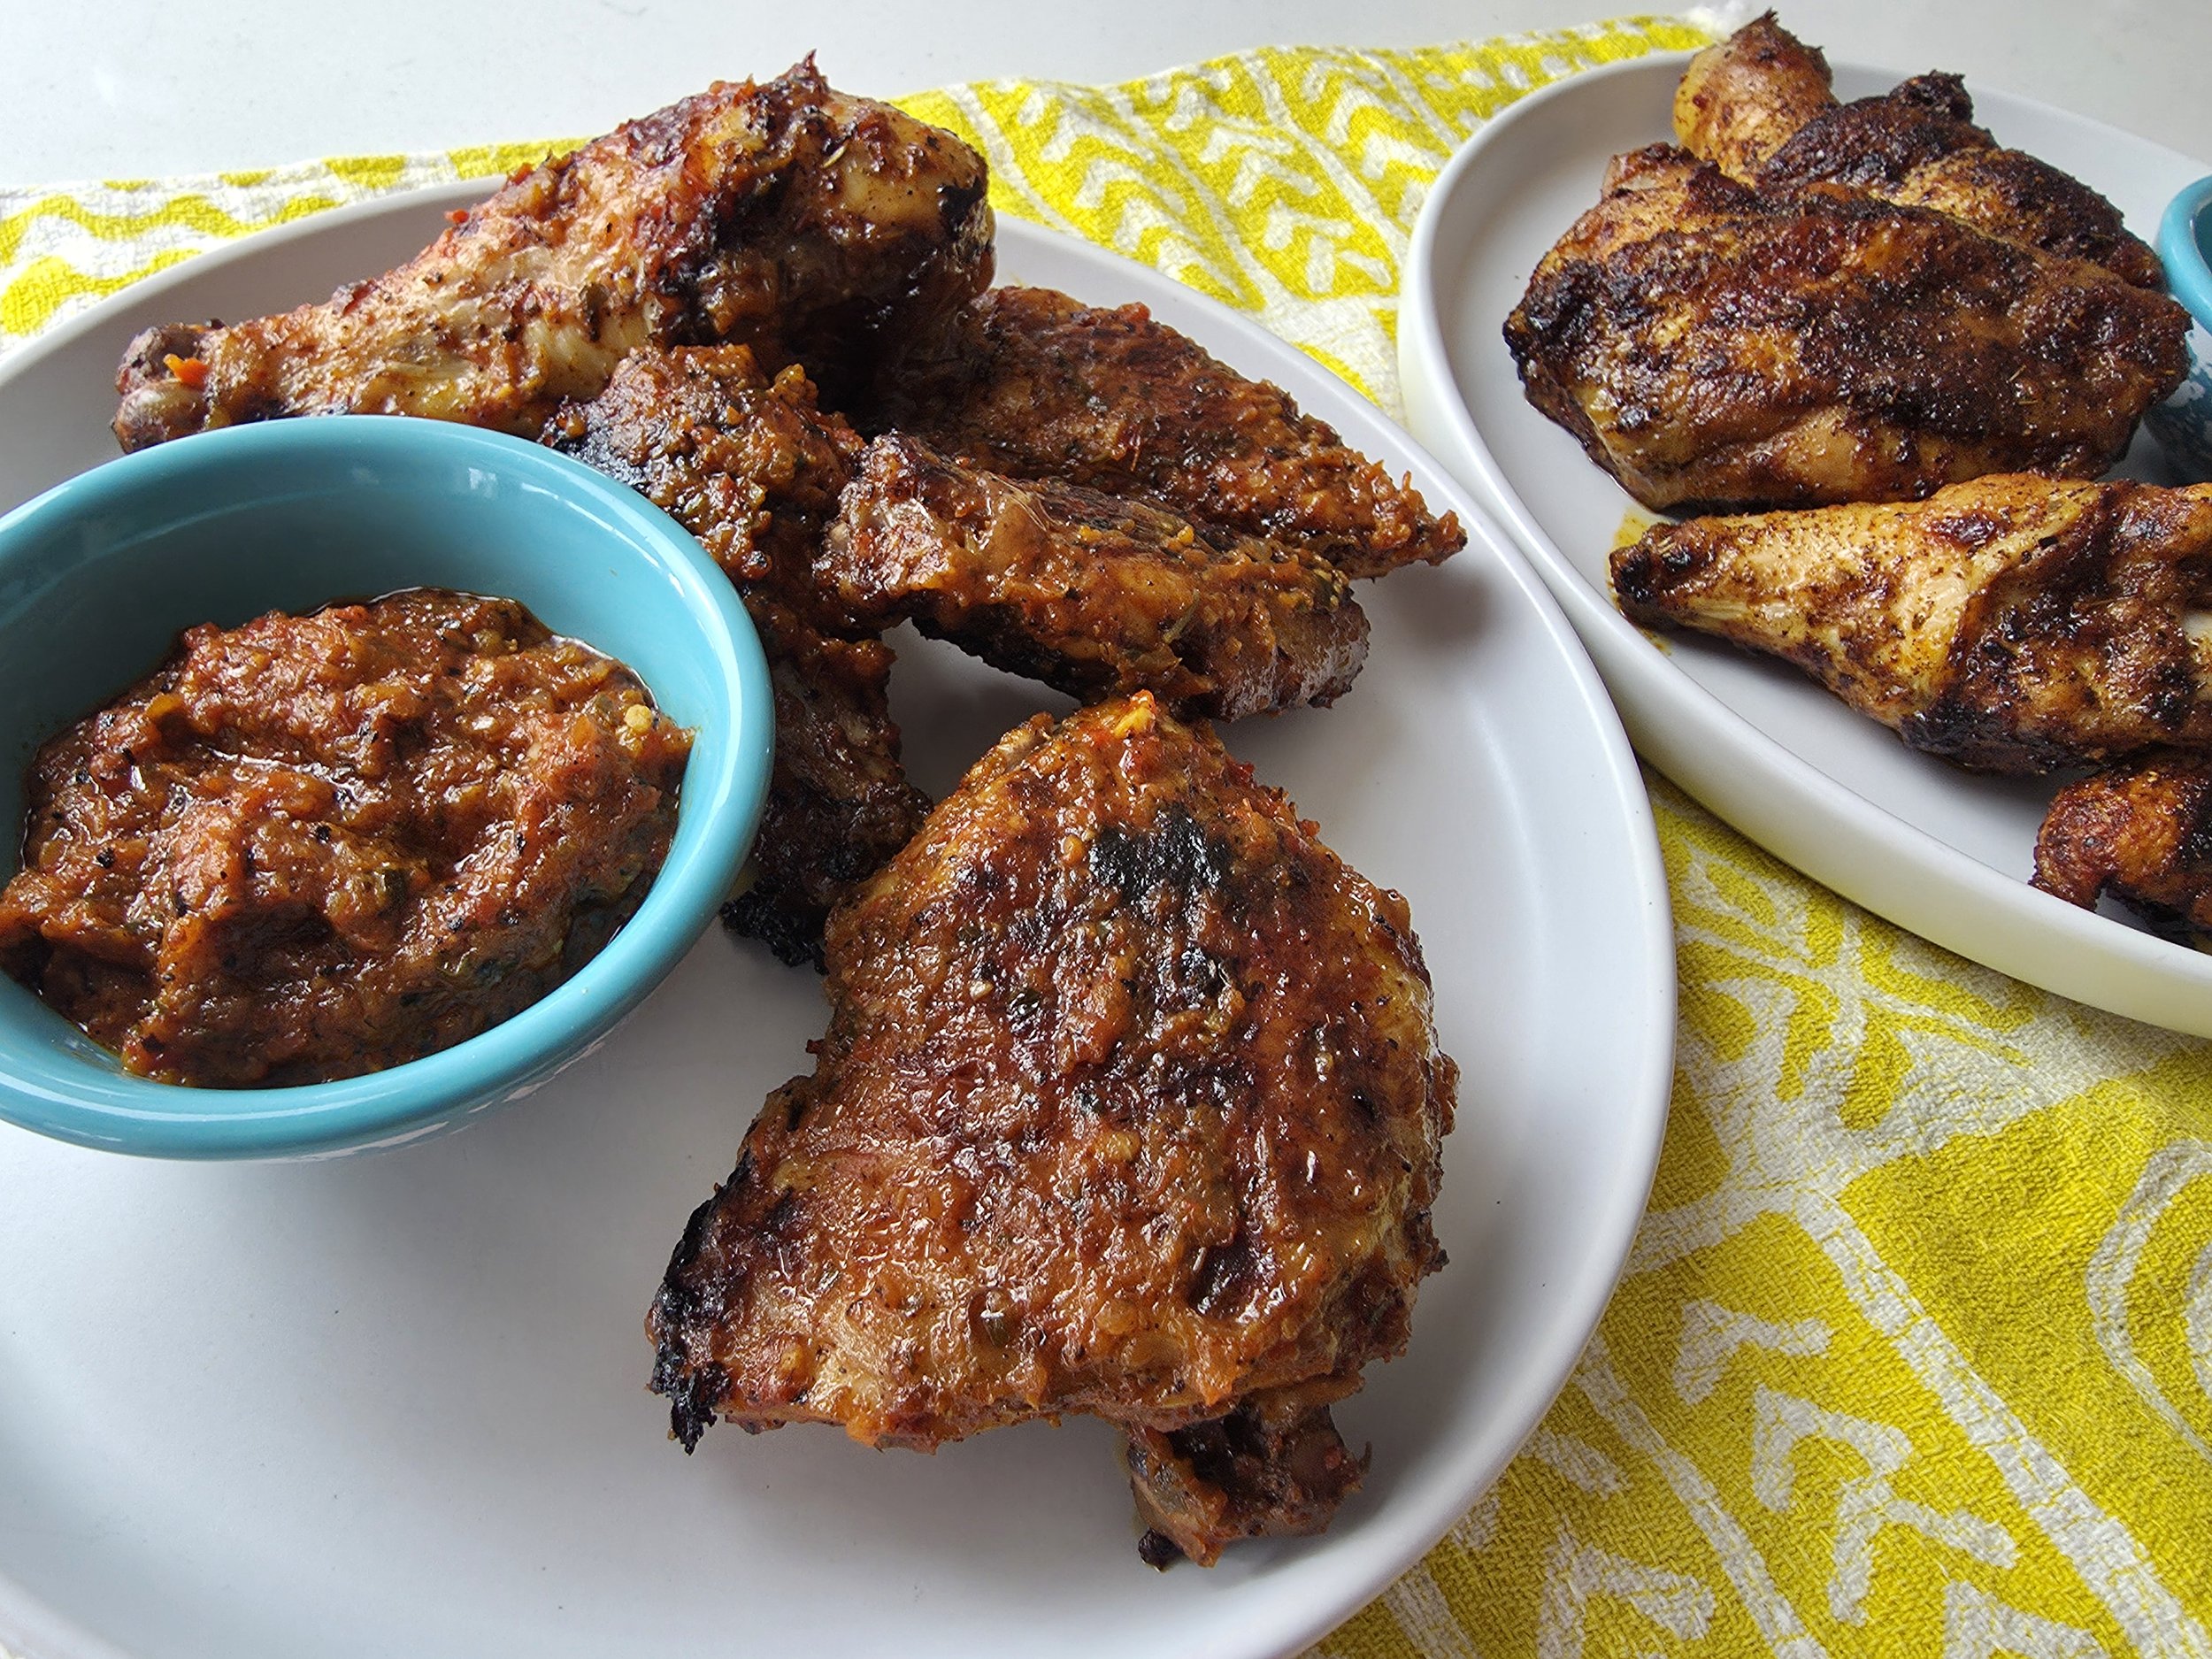
That is the beauty of peri-peri: there is not just one version.
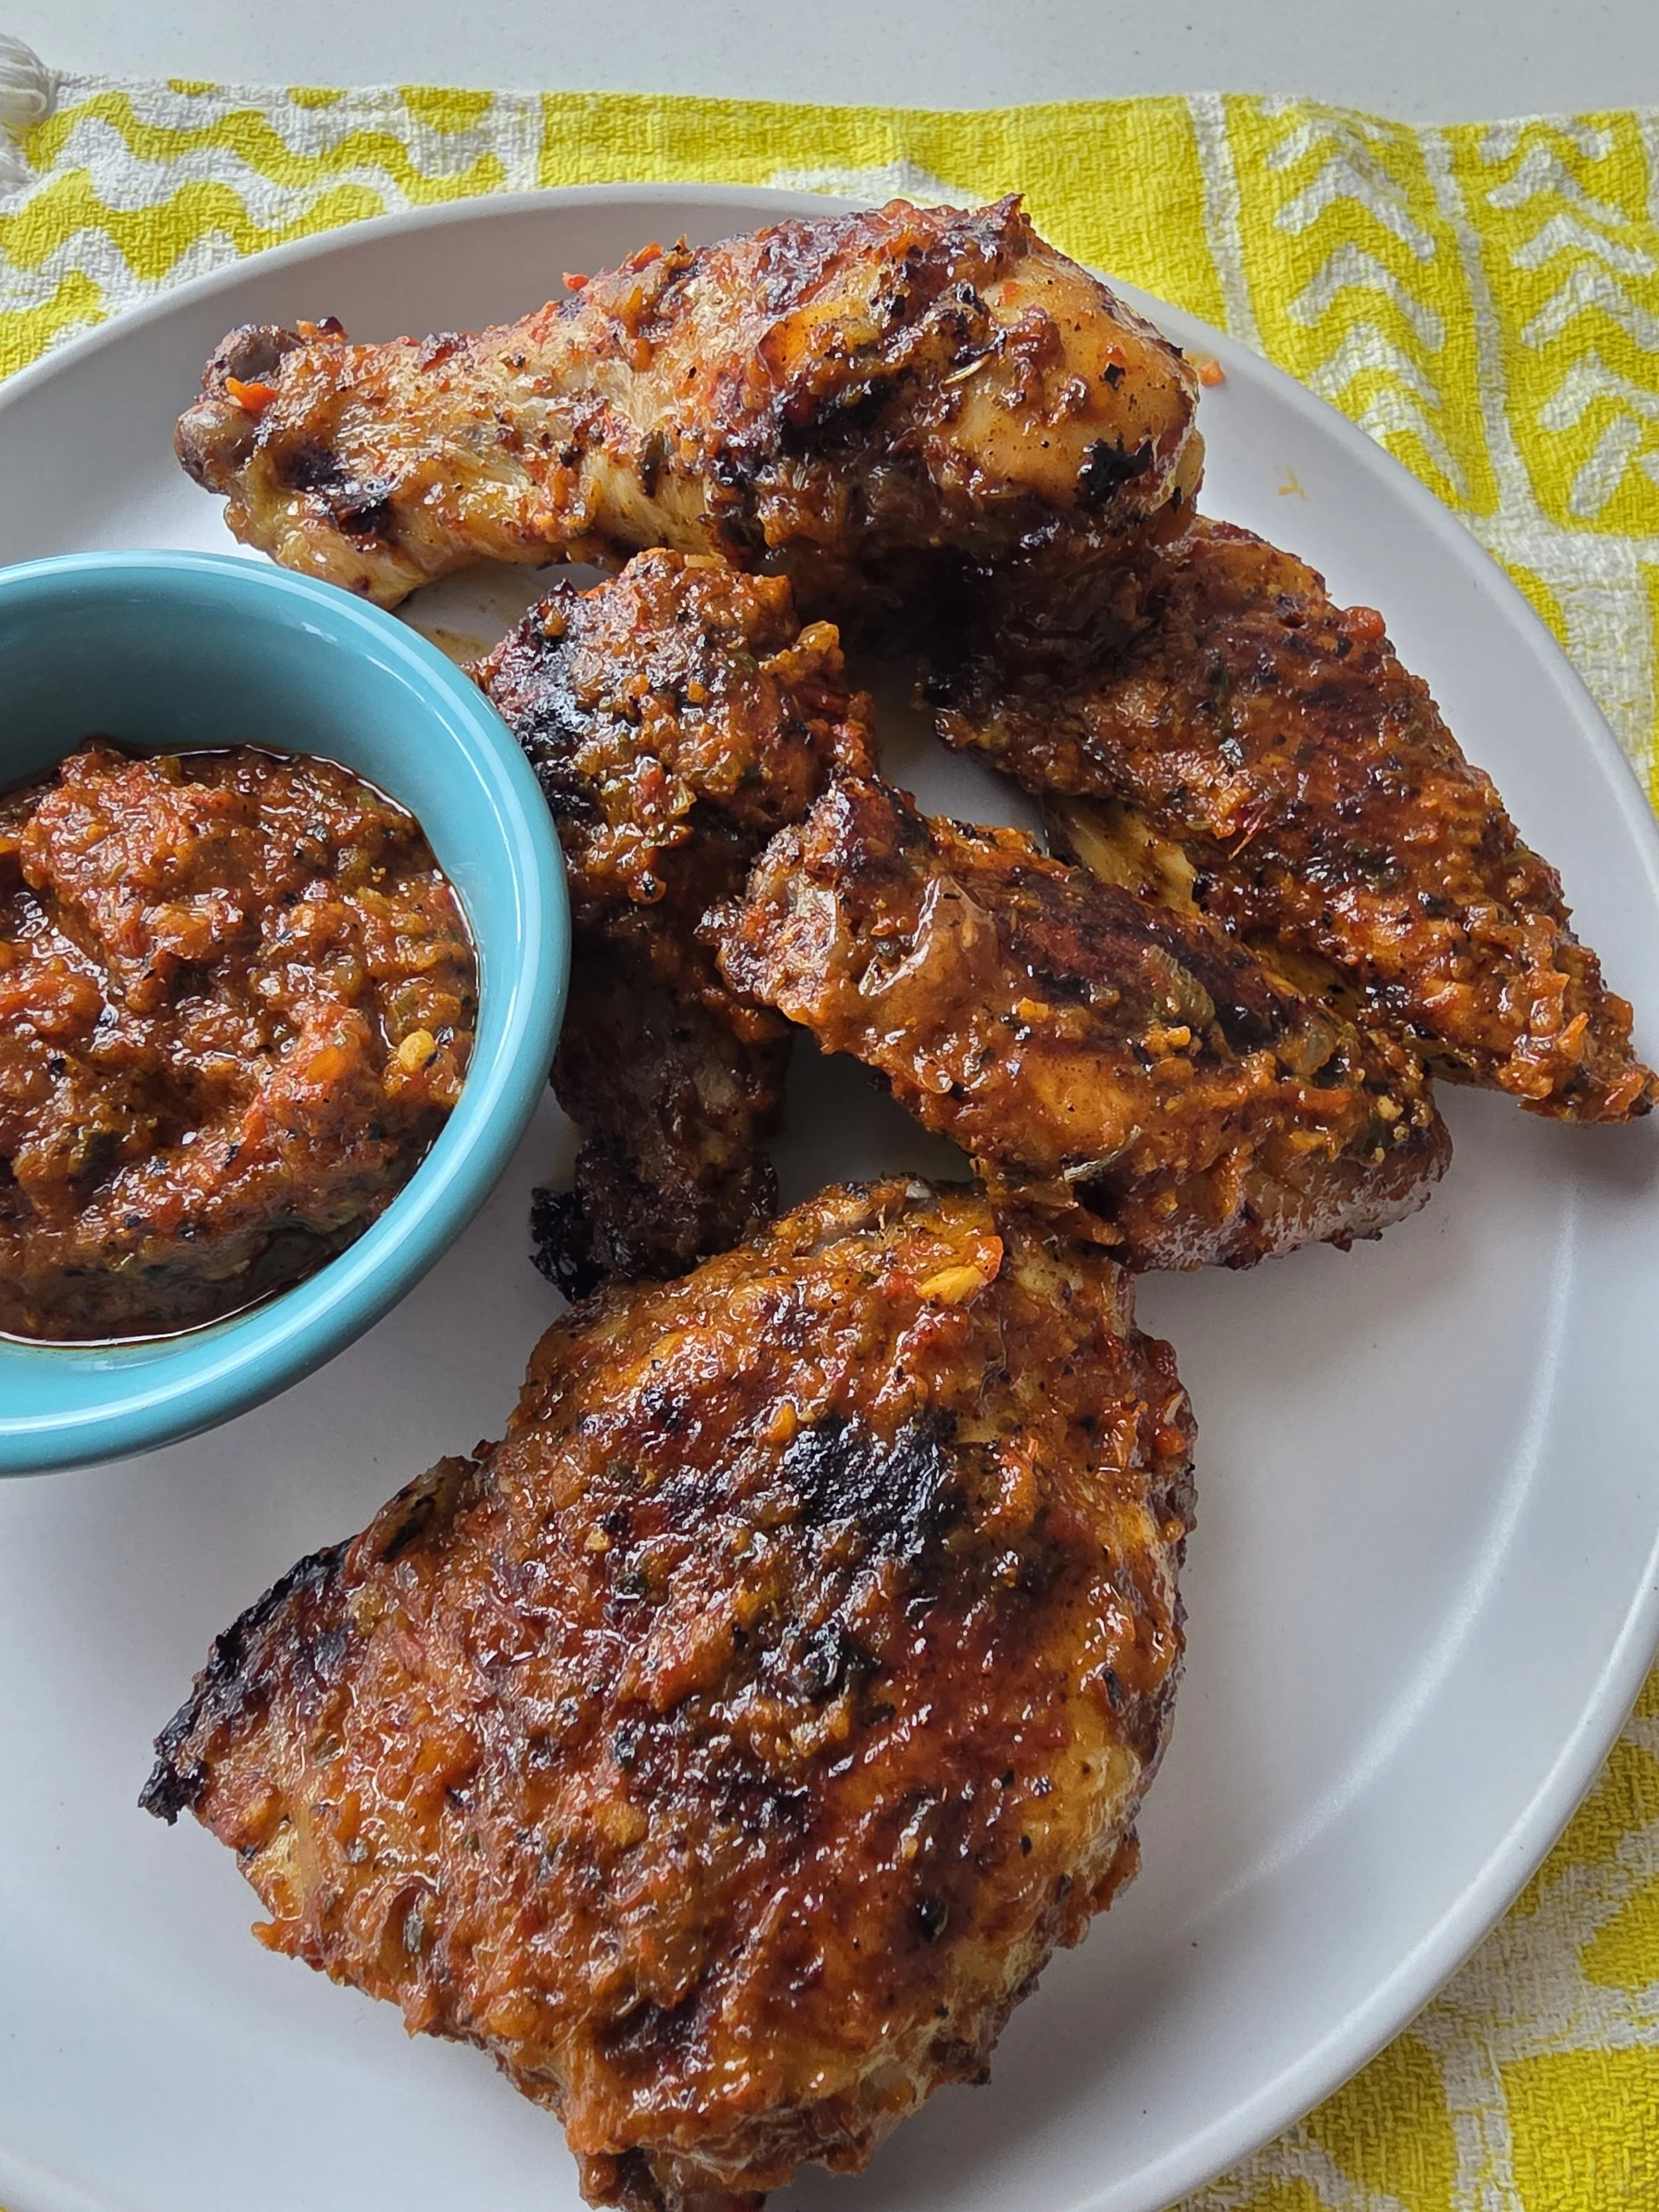
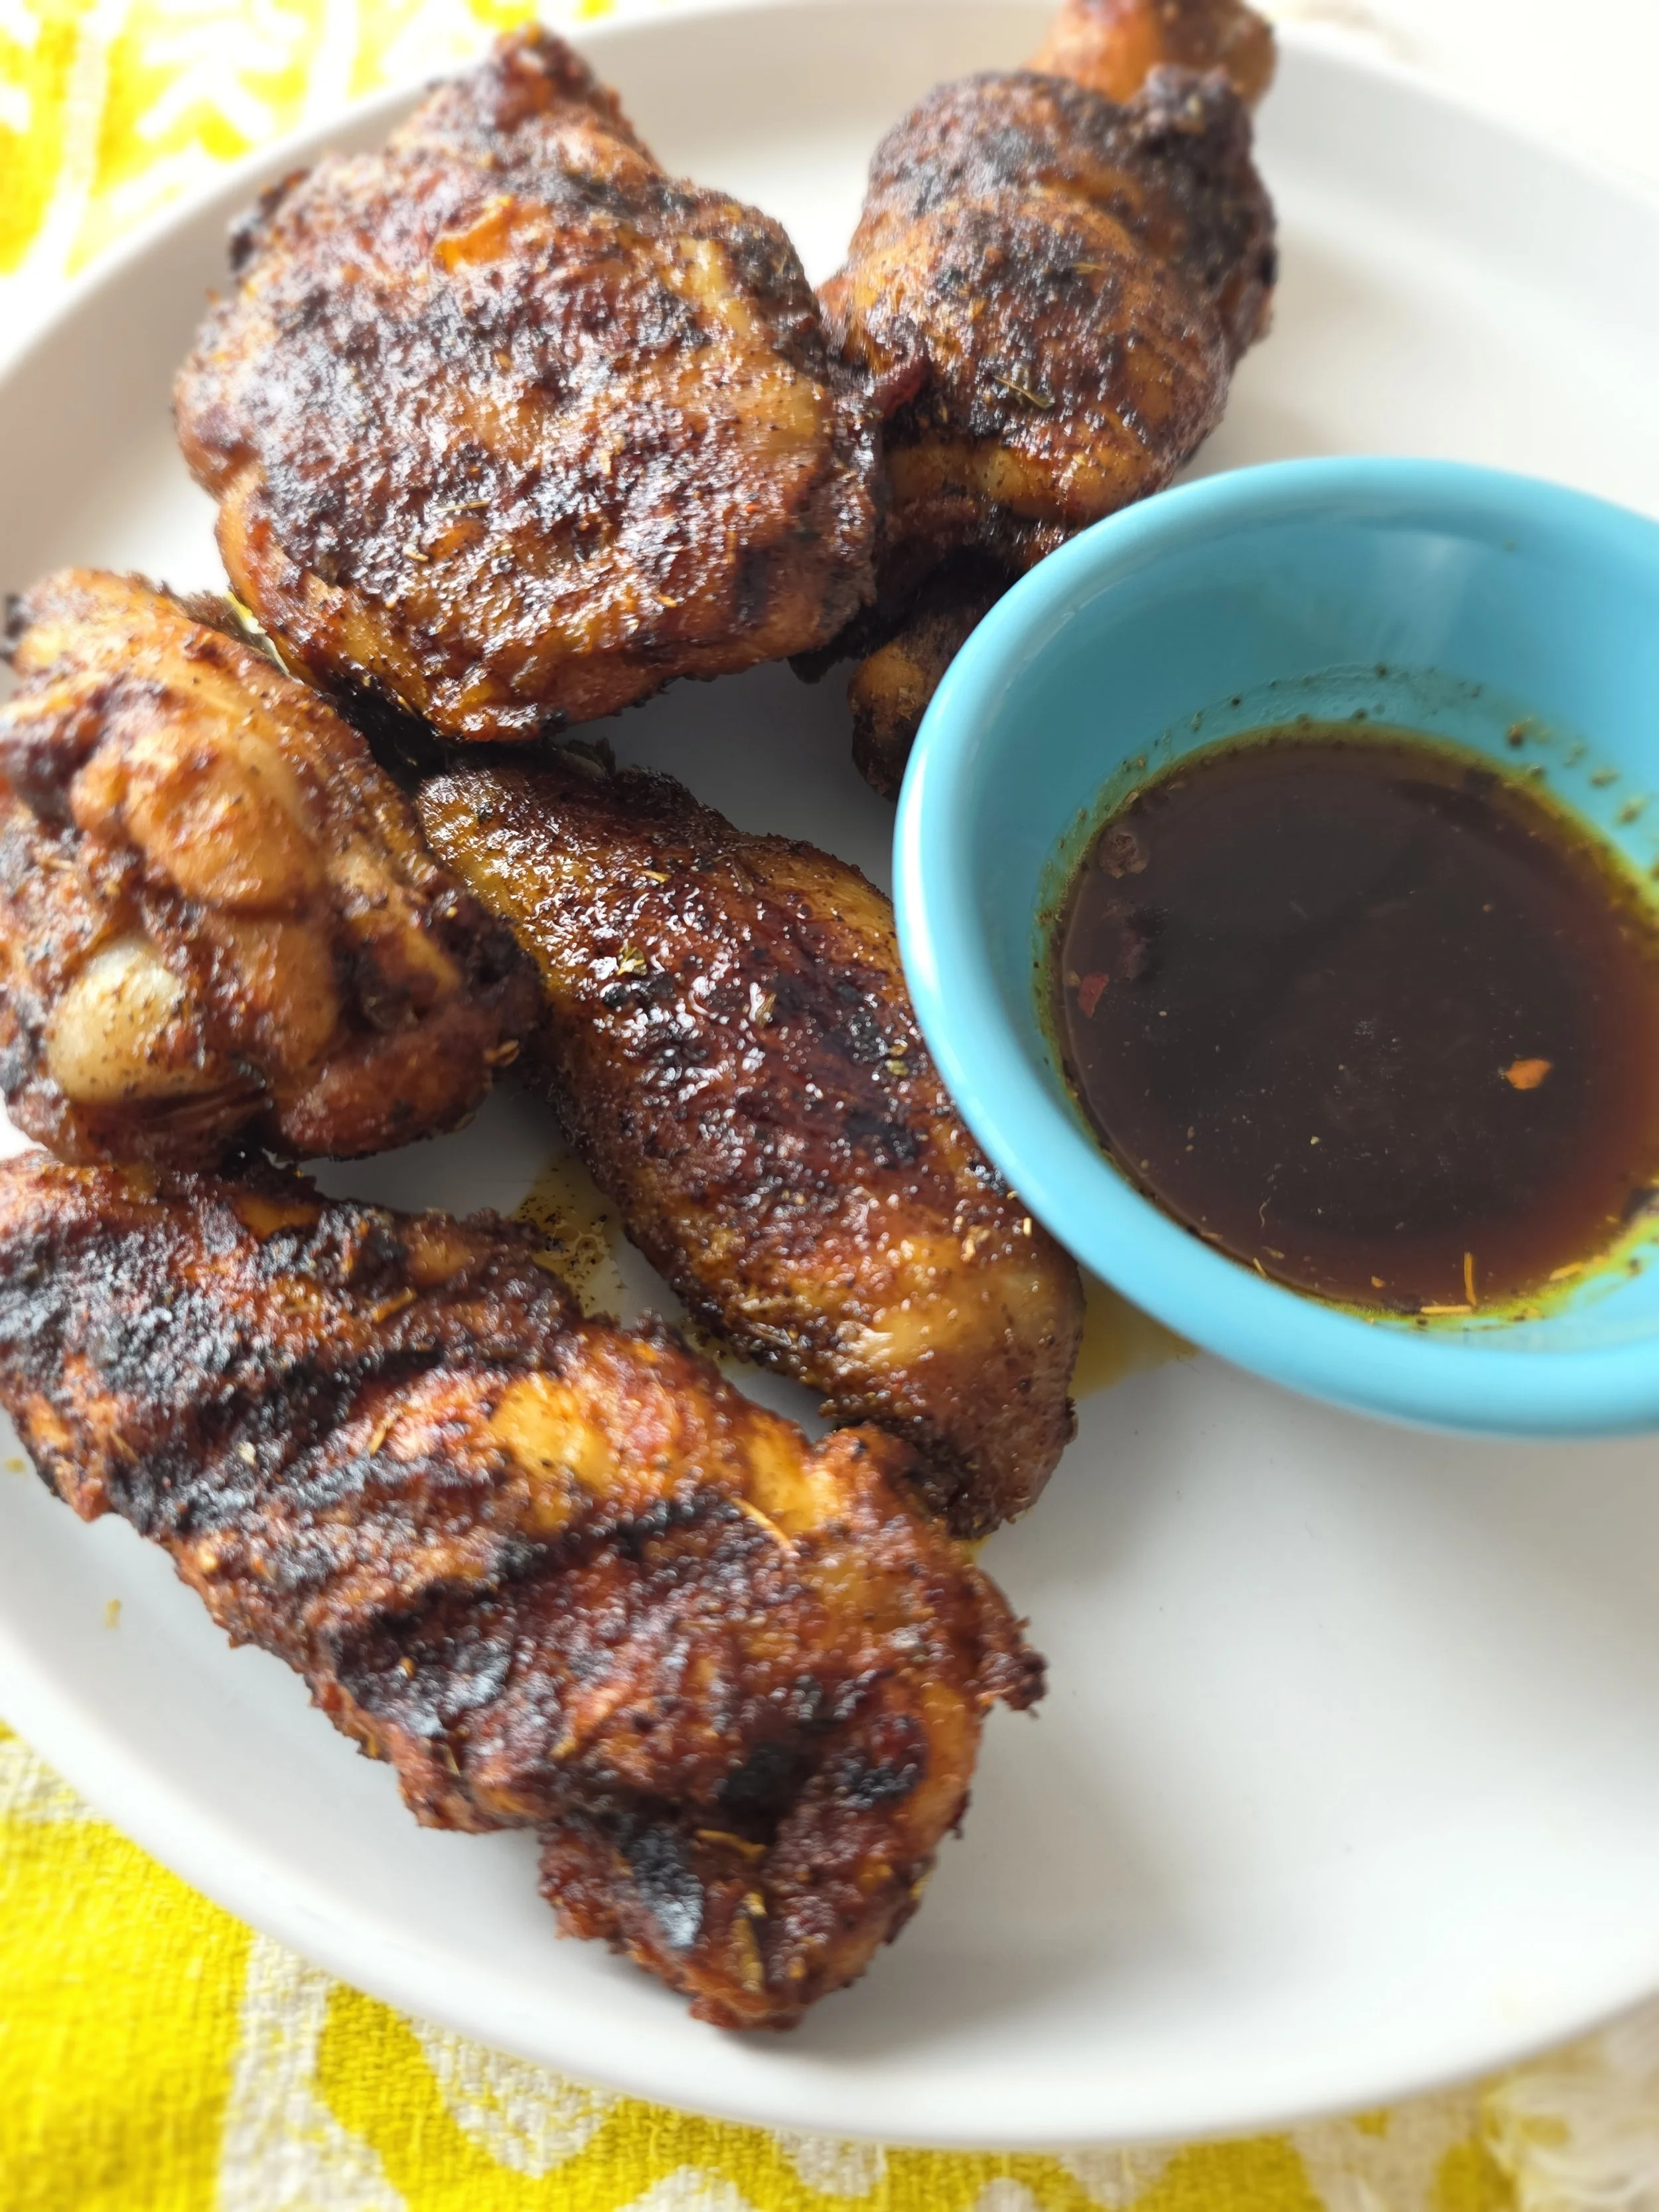
Some prefer a dry rub, smoky, crisp, and spice-forward, perfect for grilled or roasted chicken with crunchy skin. Others love the wet marinade, blended with chilies, garlic, oil, lemon, and vinegar, soaking into the meat and creating a bold, saucy finish.
Note: For the wet marinade, I typically broil my vegetables in the oven at 400°F for about 25 minutes to get the best flavor. In this recipe, I had defrosted what I had on hand, so I used a cast iron skillet instead — this helped avoid steaming and gave me more control over the char.
Choosing the Right Chili Makes All the Difference
What defines great peri-peri is not just heat — it’s balance:
• Heat from fresh chilies (traditionally African bird’s eye)
• Tang from vinegar or lemon
• Enough salt to make everything pop
• Sometimes a touch of sweetness from roasted peppers or a pinch of sugar
The type of chili you use matters. Bird’s eye chilies are classic, but depending on what’s available where you live, Thai chilies, serranos, or even habanero can work beautifully, each bringing a slightly different kind of heat. I’ve even used Fresno peppers, which gave the chicken a beautiful red color, though the sauce leaned a bit sweeter.
In this post, I’m showing you both styles, dry and wet, so you can choose your favorite or try both. Whether you love crispy skin or juicy, sauce-coated chicken, peri-peri is all about bold flavor done right.

Crispy or Juicy Peri-Peri Chicken
Learn how to make peri-peri chicken two ways: a crispy dry rub or a juicy wet marinade. Packed with bold African-inspired flavors, this recipe balances heat, tang, and seasoning for perfectly cooked chicken every time. Easy to follow and perfect for grilling, roasting, or weeknight dinners.
Ingredients
- 2 tbsp smoked paprika
- 1 tbsp paprika
- 3 tsp oregano (or 2 tsp oregano + 1 tsp dried thyme)
- 1 tsp bay leaf powder (optional)
- 1 tsp cumin
- 1 tsp coriander
- 1 tsp garlic powder
- 1 tsp onion powder
- 1 tsp cayenne pepper
- Zest of 1/2 lemon
- 1 1/2 tsp salt
- 1/2 tsp black pepper
- Pinch of sugar
- 1/2 to 1 tsp chili flakes (optional)
- 1 tsp salt
- 1 tsp paprika
- 1 tsp smoked paprika
- 1 tsp oregano
- 2 garlic cloves
- 1/3 large onion
- 1/2 large red or orange bell pepper
- 1 whole habanero (adjust for spice level)
- 2–3 tbsp olive oil, plus extra for charring vegetables
- 2 tbsp lemon juice
- 1 tsp lemon zest
- 1/2 tsp vinegar (red or white; white gives more zing — add 1/4 tsp at a time)
- 1 tsp chili flakes (optional)
- Fresh parsley
- 2 drumsticks
- 2 thighs
- 2 drumettes
- 2 winglettes
- 2 tenders
- Chicken spice (for wet marinade chicken)
- Lemon pepper seasoning (for dry rub chicken)
- Butter (for dry rub chicken finish)
Instructions
- Mix all spices together and stir in the lemon zest.
- Pat the chicken dry. Lightly season with lemon pepper, drizzle with a little olive oil, then coat with the spice rub. Refrigerate for at least 1–2 hours for maximum flavor.
- Store any leftover rub in the fridge and use within 3 days.
- Before cooking, pat the chicken dry again to remove excess moisture.
- Sear on a grill pan for 3–4 minutes per side.
- Transfer to a wire rack over a baking tray and bake at 375°F for 18–22 minutes, flipping halfway and removing pieces as they reach temperature.
- Broil at 500°F for 2–3 minutes to crisp the skin. Watch carefully to avoid burning.
- Melt butter and stir in some remaining peri-peri (1 tbsp at a time). Brush or toss the chicken in this sauce. Reserve some for serving.
- Combine the dry spices. Set aside with the lemon juice, vinegar, and olive oil.
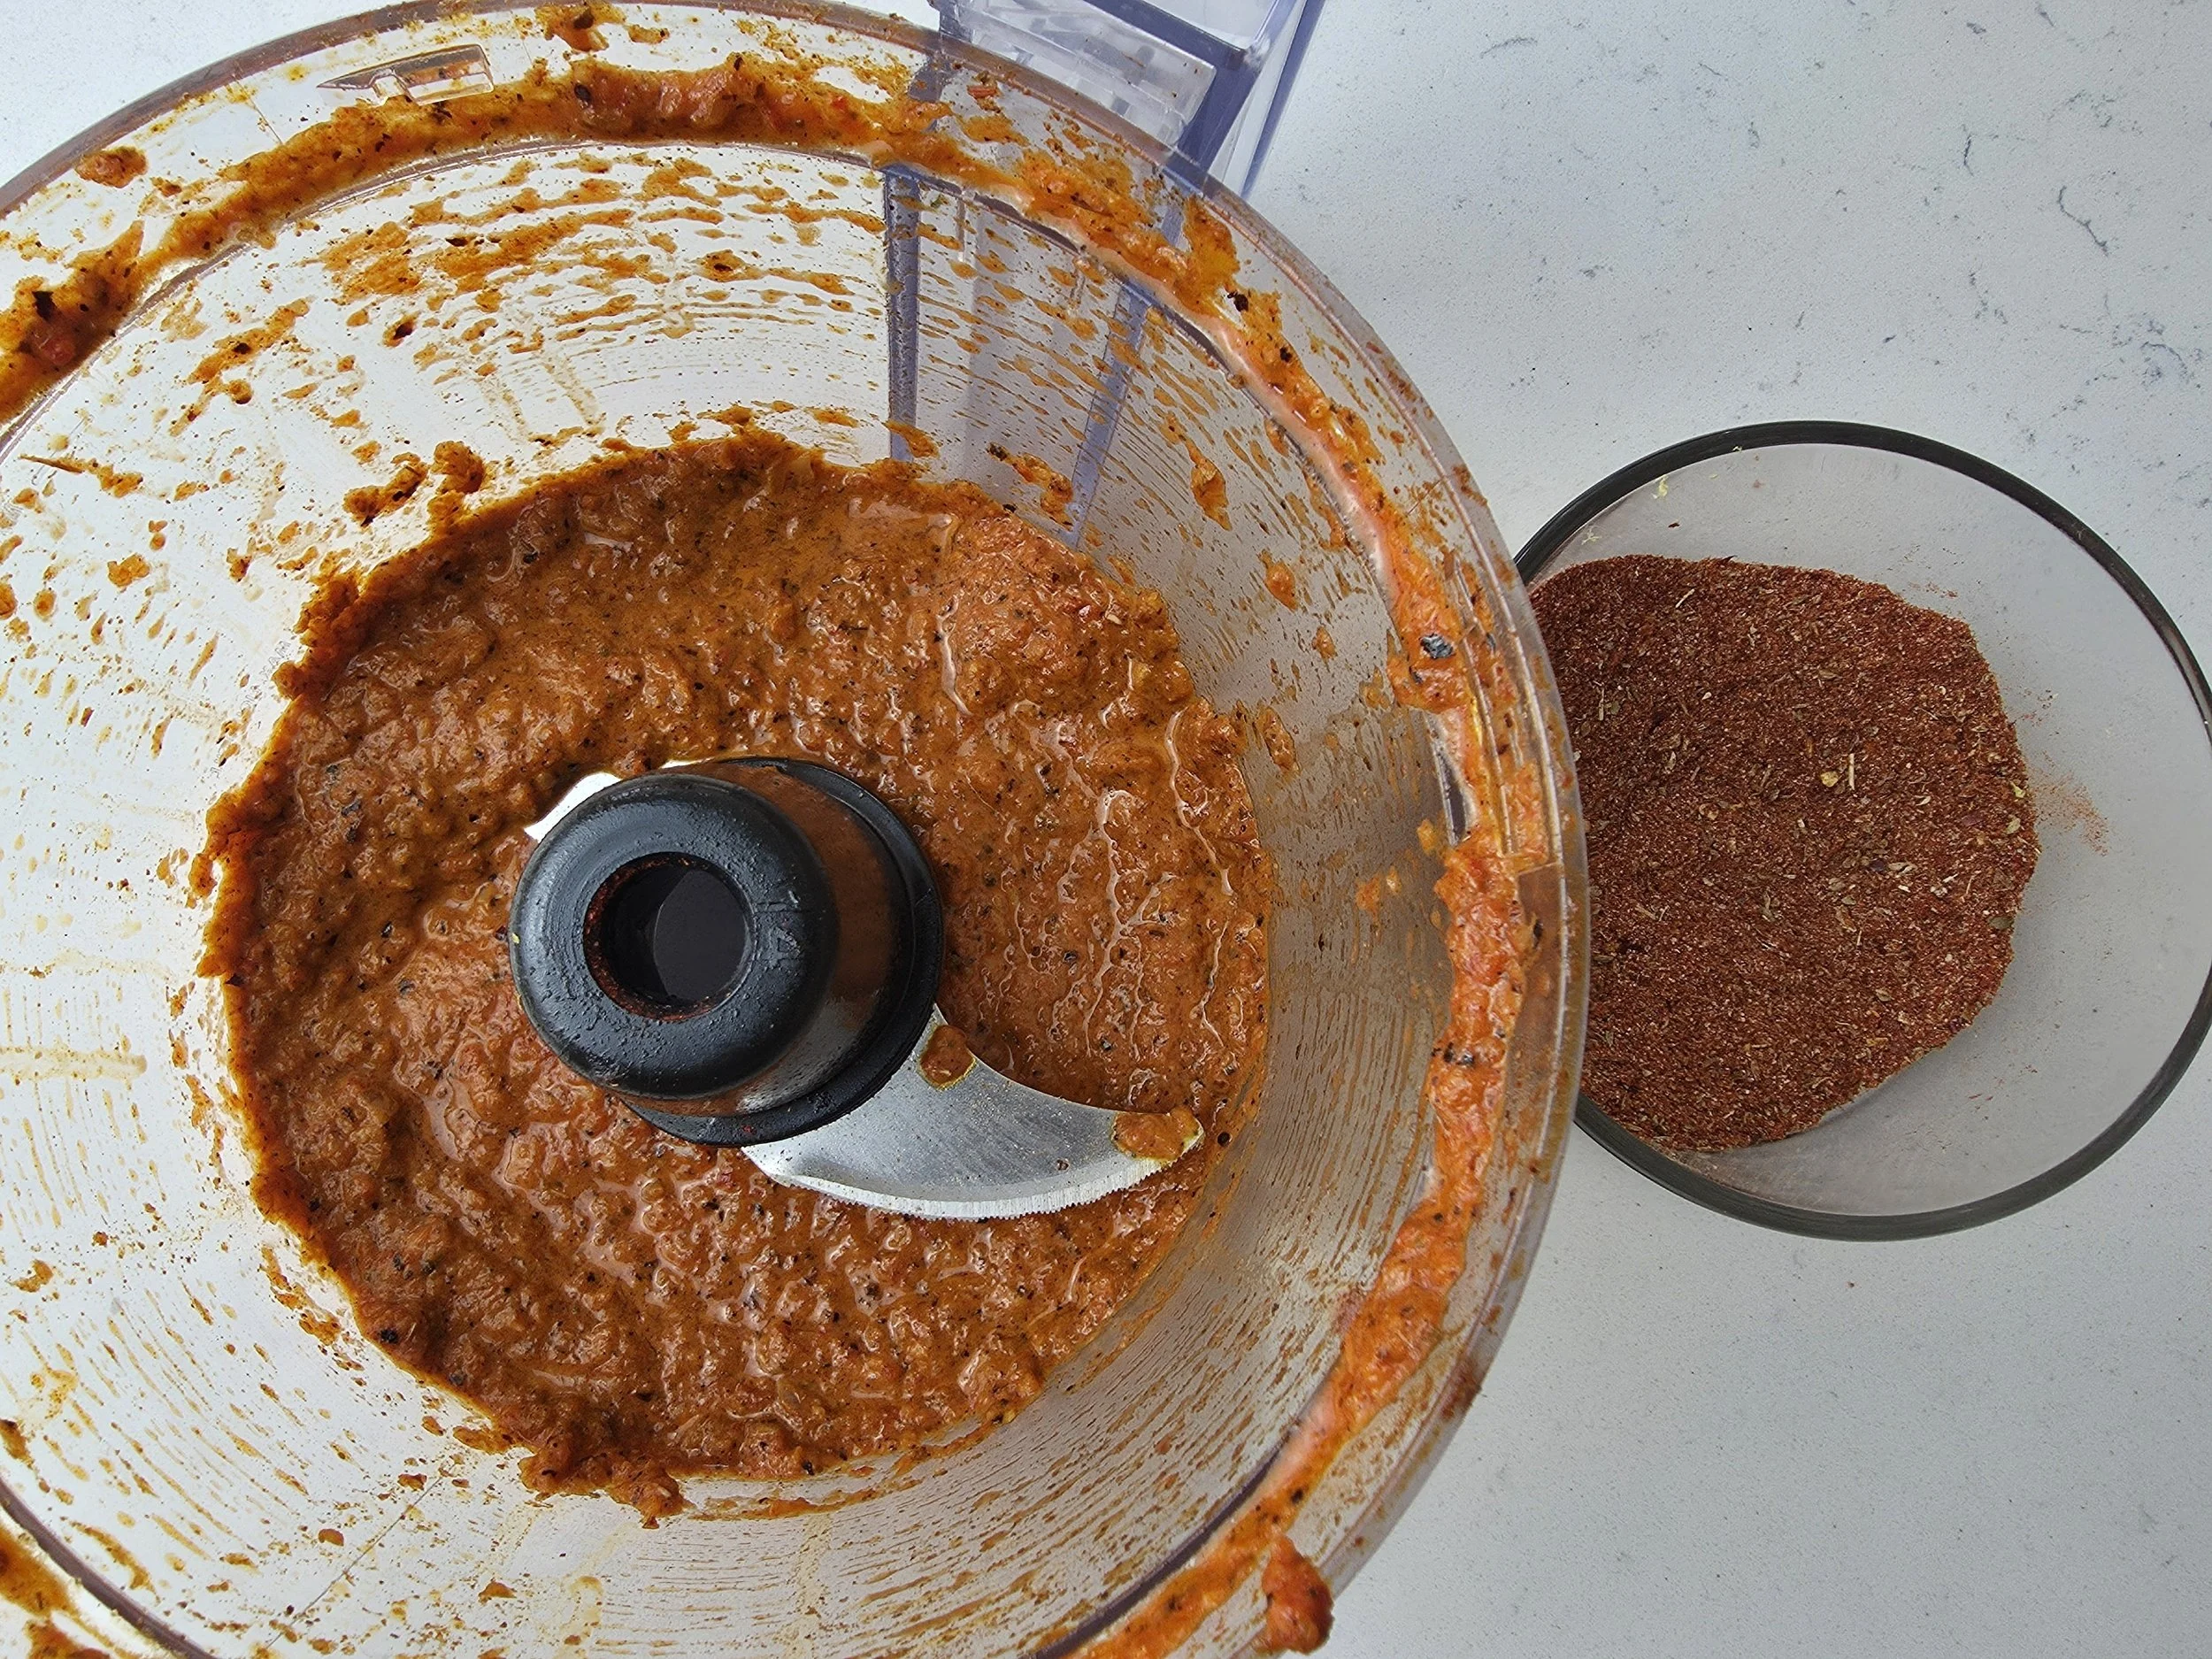
- In a lightly greased cast iron skillet (use high smoke point oil), char the bell pepper on both sides. Add onion and garlic to develop color and deepen flavor. Remove each ingredient once charred.
- In a small blender or food processor, blend the peppers, onion, garlic, lemon juice, spices, and olive oil until smooth.
- Add vinegar and lemon zest. Adjust salt, tang, and heat to taste.
- Lightly season the chicken with chicken spice. Coat with the marinade and refrigerate for at least 1–2 hours.
- Pat off excess marinade before cooking.
- Sear for 3–4 minutes per side, then transfer to a parchment-lined baking tray. Bake for 20–22 minutes at 375°F, flipping halfway and removing pieces as they reach temperature.
- Simmer the remaining sauce for at least 5 minutes. Add a splash of water if needed, plus fresh parsley, lemon zest, salt, or vinegar to adjust flavor. Brush over cooked chicken and serve extra on the side.
Notes
- Chicken: These amounts were used for testing with a whole chicken butchered at home. Use your preferred cuts and adjust cooking times accordingly. Always cook to proper internal temperature.
- Wet Marinade Pepper Choice: If possible, use bird’s eye chili first. If unavailable, Thai chili or habanero work well. Each has different heat levels and flavor characteristics, so adjust according to your spice preference.
- Scaling: Double the wet marinade as you increase the chicken quantity. The dry rub can be made in larger batches and stored (refrigerated if it contains fresh zest).
- Charring Vegetables: If using fresh vegetables, you can broil at 400°F for about 25 minutes, flipping halfway, to achieve smoky char before blending. If vegetables were previously frozen, use cast iron on the stovetop to avoid steaming.
Nutrition Facts
Calories
450Fat (grams)
30 gCarbs (grams)
5 gProtein (grams)
35 gI am not a certified nutritionist and any nutritional information on dontmissmyplate.com should only be used as a general guideline.