

Egusi Spinach-Artichoke Dip
A creamy, spinach-artichoke dip with egusi and powdered crayfish, bringing savory West African flavours to a familiar game day favourite.
Spinach-artichoke dip has always been one of those appetizers I can never resist and is popular for a reason. It is creamy, cheesy, savory, and the kind of dish that like its cousin, crab dip, disappears quickly once it hits the table. For this version, I wanted to take that familiar favorite and give it a little more depth using ingredients that are familiar in West African cooking.
I stirred ground egusi and powdered crayfish into the creamy spinach-artichoke base, adding layers of nuttiness and savory umami without changing the character of the dish completely. This is not meant to be a traditional egusi preparation or a recreation of egusi soup. Instead, it is an example of how I like to cook: taking ingredients and flavors that I know and love and finding unexpected ways to bring them into dishes you already enjoy.
The result is rich, creamy spinach-artichoke dip with a distinctly savory flavor from the egusi and crayfish. I serve it with golden fried yellow plantains, whose natural sweetness makes a really nice contrast to the richness of the dip. It is an easy appetizer for game day, parties, or any time you want something a little different from the usual spinach-artichoke dip.
If you love spinach-artichoke dip but want to try something with a little more flavor and personality, this is a fun one to add to the spread.
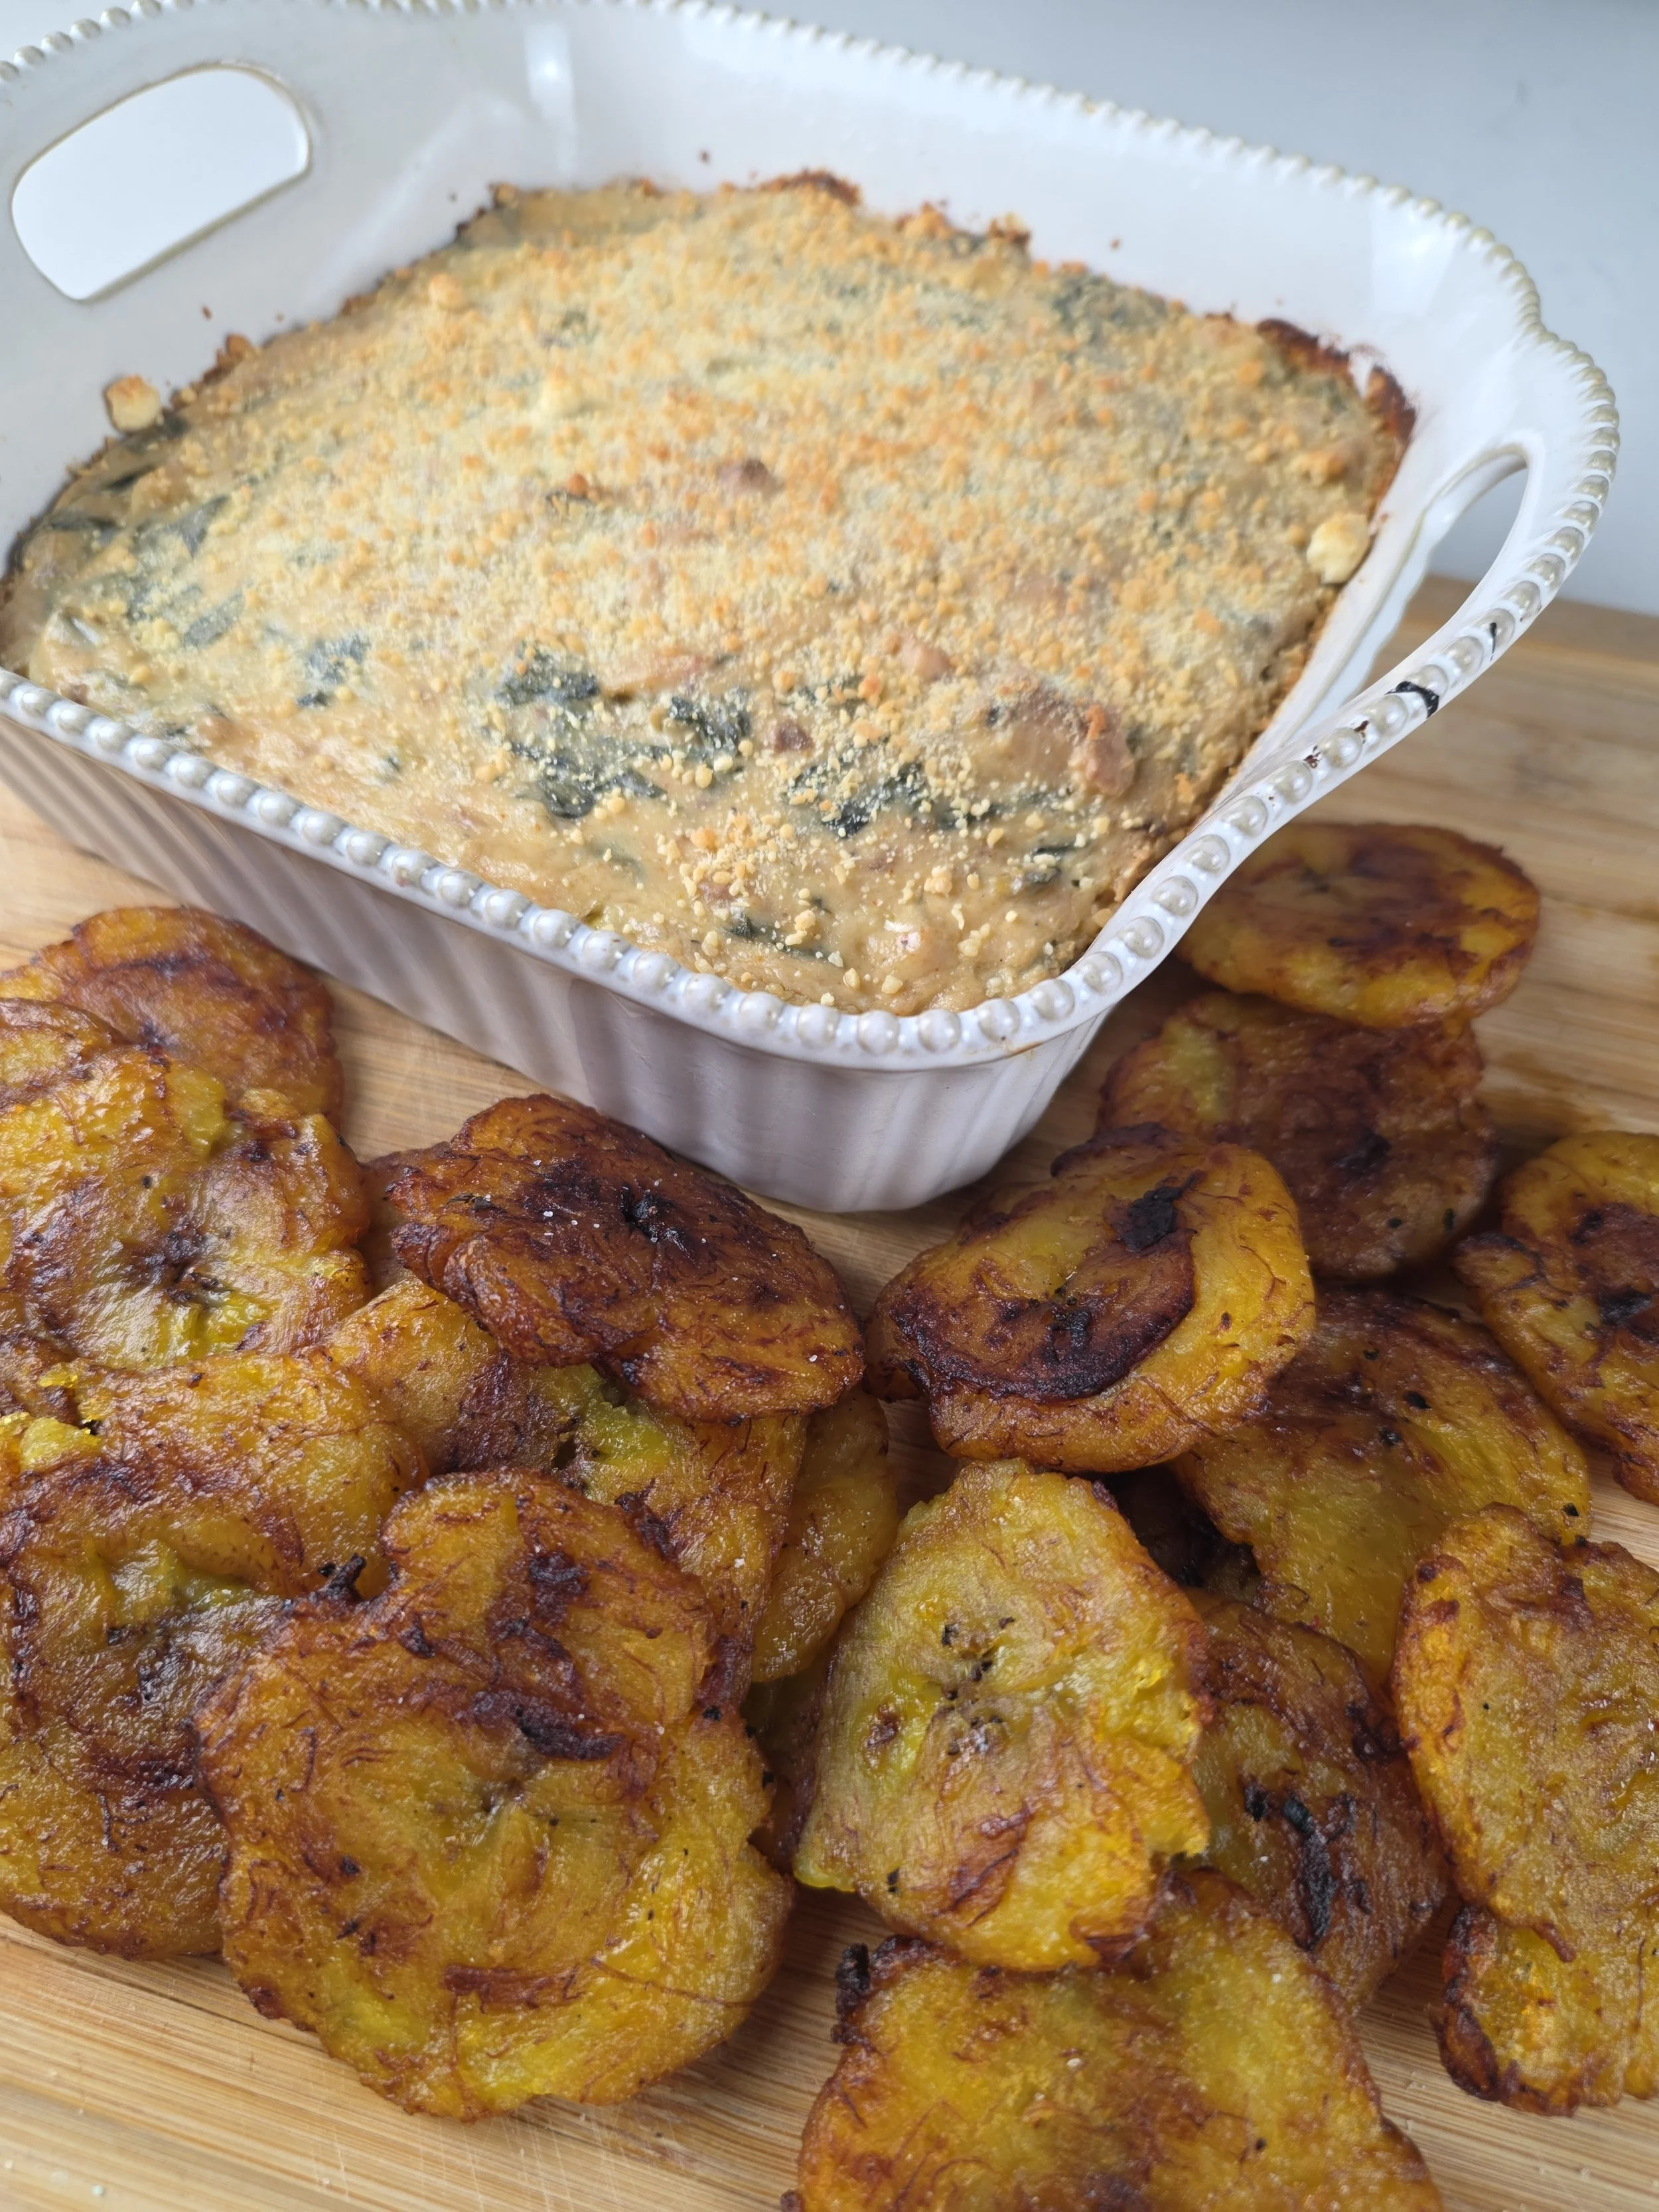
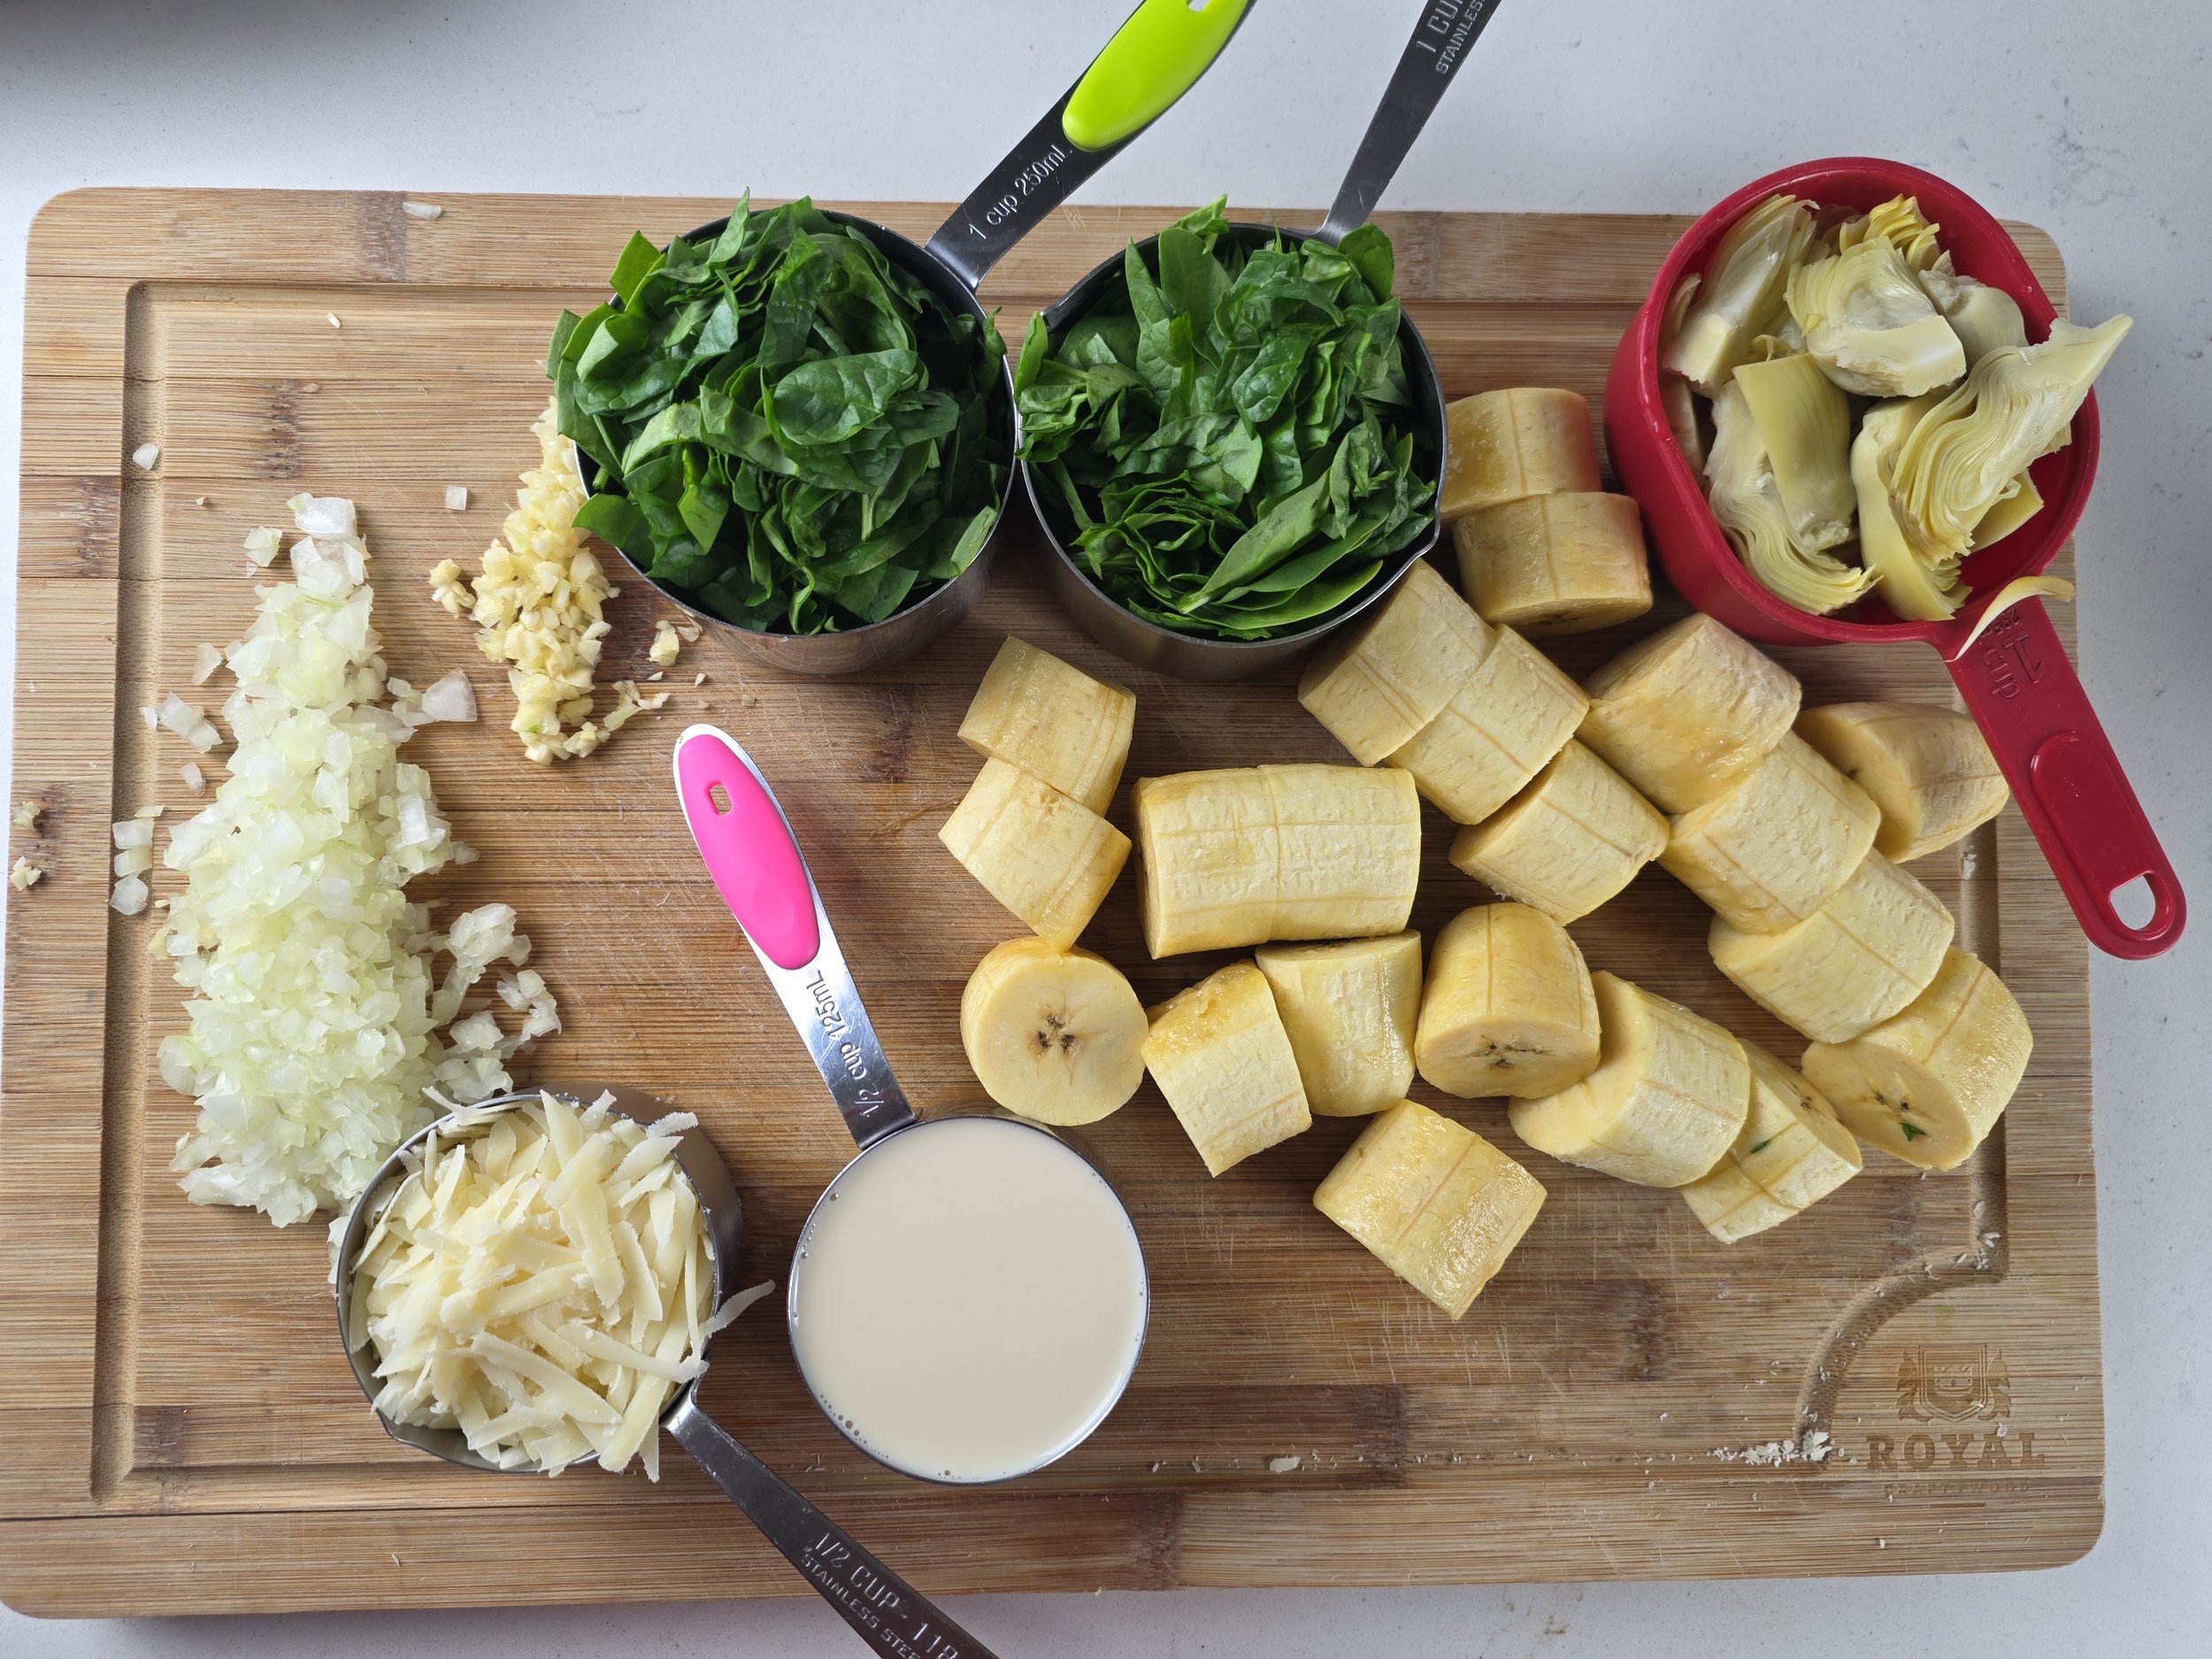

Egusi Spinach-Artichoke Dip
A creamy spinach-artichoke dip with egusi and powdered crayfish for extra savory depth, served with golden fried yellow plantains for dipping. A flavorful addition to any game-day spread.
Ingredients
- 8 oz cream cheese, softened
- 2 tbsp unsalted butter
- 2 tbsp all-purpose flour
- Approximately 8 oz evaporated milk, plus more as needed
- 3 tbsp egusi
- 2 tsp powdered crayfish
- 2 cups fresh spinach, roughly chopped
- 1 cup artichoke hearts
- ½ small yellow onion, finely chopped
- 2 garlic cloves, minced
- ½ cup grated Parmesan cheese (extra for topping, optional)
- ¼ tsp black pepper
- ¼ tsp cayenne pepper, optional
- Salt, to taste
Instructions
- Preheat the oven to 375°F.
- Melt the butter in a skillet over medium heat. Add the onion and cook for 2–3 minutes, until softened. Add the garlic and cook for about 30 seconds.
- Sprinkle in the flour and stir continuously for about 1 minute.
- Gradually whisk in the evaporated milk, starting with about ½ cup. Add more as needed until you have a smooth, creamy, but thick sauce.
- Add the softened cream cheese and stir until completely incorporated and smooth.
- Stir in the egusi, powdered crayfish, black pepper, cayenne, and a small amount of salt. Cook for 3–4 minutes, stirring occasionally. Taste and adjust the seasoning as needed.
- Add the spinach and artichokes. Cook for 2–3 minutes, stirring until the spinach wilts and everything is well combined.
- Stir in the Parmesan and taste again for seasoning. The mixture should be creamy and spoonable. If it is too thick, add another splash of evaporated milk.
- Transfer the dip to an 8x8-inch baking dish.
- Bake for approximately 15 minutes, just until heated through and lightly browned around the edges. For more color, sprinkle additional melting cheese over the top before baking.
Notes
- Plantain options: You can use green or yellow plantains. The process is the same, but green plantains are firmer and work best for making tostones that can be used as scoops, while yellow plantains are softer and sweeter and are best served as fried plantains. Use whichever you prefer or have on hand.
- Don't overbake the dip: The dip is best when it remains creamy. A short bake is enough to heat everything through and bring the flavors together.
- Adjust the consistency: Add evaporated milk a little at a time if the dip becomes too thick while cooking.
- Adjust the egusi and crayfish: These ingredients are intentionally prominent in this version so their savory flavor remains noticeable after baking.
- Serve immediately: The dip thickens as it cools. If needed, loosen it with a small splash of warm milk before serving.
- Storage: Refrigerate leftover dip in an airtight container for up to 3–4 days. Reheat gently in the microwave or on the stovetop, adding a splash of milk if needed to restore the creamy consistency. Fried plantains are best eaten fresh, but leftovers can be refrigerated and reheated in an air fryer or oven.
Nutrition Facts
Calories
410Fat (grams)
34 gCarbs (grams)
21 gFiber (grams)
3 gProtein (grams)
17 gSodium (milligrams)
540 mg
Chicken Yassa Inspired Loaded Fries
If you love loaded fries but you're ready for something beyond the usual cheese-and-bacon combination, these Chicken Yassa Inspired Loaded Fries bring a West African twist to one of America's favorite game-day foods without requiring you to cook chicken from scratch.
Inspired by Chicken Yassa, a Senegalese dish known for deeply caramelized onions, lemon, Dijon mustard, garlic and chile, this recipe uses rotisserie chicken to make the dish quick and approachable while still delivering those signature Yassa flavors. The chicken is tossed with deeply caramelized Yassa onions and their lemon-Dijon seasoning, then piled onto crispy homemade russet fries and finished with a cool garlic-yogurt sauce, crispy green onions and fresh scallions.
The Yassa onions are the heart of the dish. They're cooked slowly until soft, deeply golden and jammy, allowing the lemon, Dijon, garlic and chile to mellow into a rich, savory coating for the rotisserie chicken. Using prepared chicken means you can focus on building those bold flavors without the time required to cook chicken from scratch.
The fries are fried twice, first at a lower temperature to cook the potatoes through, then at a higher temperature to make them crisp and golden. That extra step gives them enough structure to hold up to the chicken, onions and sauce without becoming soggy.
These loaded fries are made for game day, watch parties, cookouts and casual entertaining. If you've never tried Chicken Yassa, this is a fun way to experience its signature flavors in a completely different format. If you're already a fan, you'll recognize the lemon, mustard, onion and chile combination in every bite
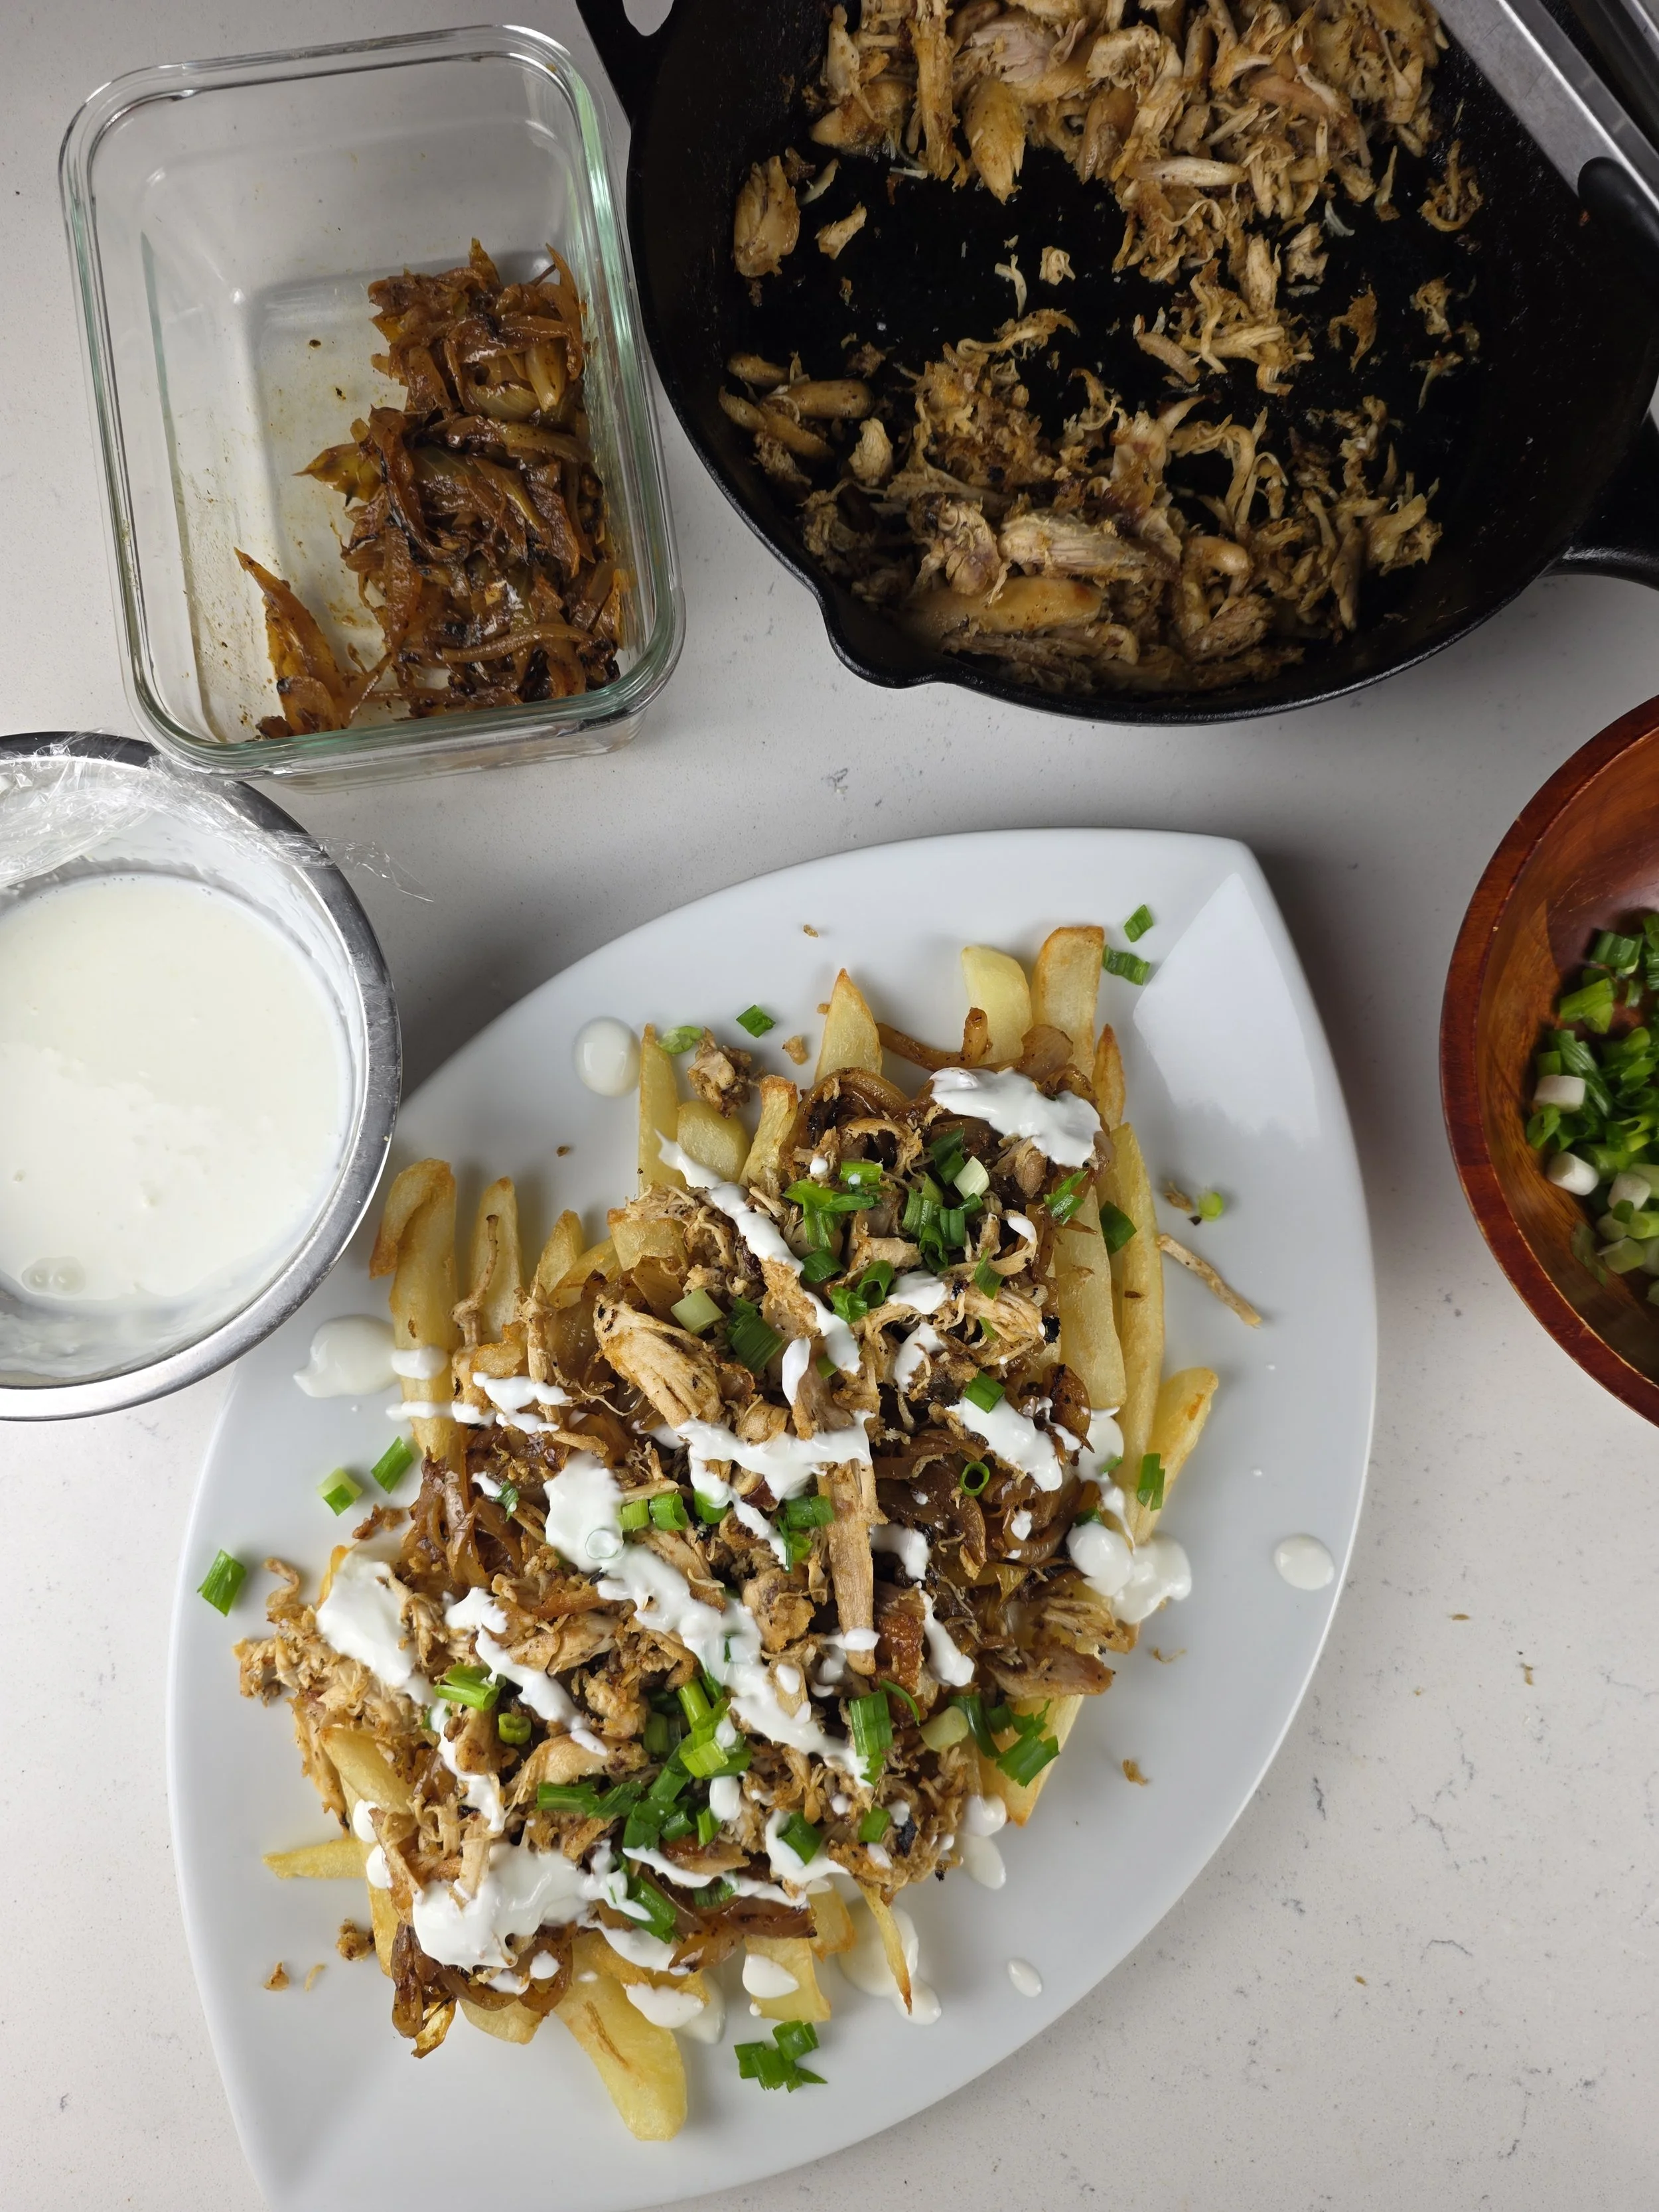

Chicken Yassa Loaded Fries
Crispy homemade fries topped with flavorful rotisserie chicken, jammy lemon-Dijon Yassa onions, garlic-yogurt sauce and crispy and fresh green onions. A quick, game-day-friendly take on Chicken Yassa without cooking the chicken from scratch.
Ingredients
- 3 cups shredded rotisserie chicken, using a combination of breast and dark meat when possible
- 2 large yellow onions
- 1 tablespoon chicken spice
- Juice of 1 lemon
- 1 tablespoon Dijon mustard
- 2 garlic cloves, minced
- ½ teaspoon cayenne
- ½ teaspoon black pepper
- 2 tablespoons water
- Pinch of salt
- 1 tablespoon neutral oil, for cooking
- 1 tablespoon butter
- 4 large russet potatoes
- Neutral high-heat oil, for frying
- Salt, to taste
- 5 ounces plain Greek yogurt
- 1 small garlic clove, finely grated or minced
- Lemon juice, to taste
- Garlic powder, to taste
- All-purpose seasoning, to taste
- Water, as needed to thin
- 4–5 green onions
- Olives, optional
- Fresh lemon wedges, for serving
Instructions
- Cut the potatoes into 1/4- to 1/3-inch fries. Place them in a large bowl of cold water and soak for 30 minutes.
- While the potatoes soak, prepare the chicken. Remove the skin and bones from the rotisserie chicken and pull the meat into irregular 1- to 1 1/2-inch pieces. You should have about 3 cups. Toss the chicken with 1 tablespoon chicken seasoning.
- Prepare the onions. Halve the onions from root to stem, peel them, and slice lengthwise into thin, approximately 1/8-inch strips.
- In a bowl, combine the juice of 1 lemon, Dijon mustard, minced garlic, cayenne, black pepper, 2 tablespoons water, and a pinch of salt. Add the sliced onions and toss well to coat. Let the onions marinate for 20 to 30 minutes.
- Drain the potatoes. If they are particularly starchy, rinse them once with cold water. Spread them in a single layer on clean kitchen towels and pat them completely dry. Let them air-dry while you prepare the chicken and onions.
- Heat 1 tablespoon neutral oil in a large skillet or cast-iron pan over medium heat. Add the marinated onions and cook for 20 to 25 minutes, stirring occasionally, until very soft, deeply golden and jammy. If the onions begin sticking or browning too quickly, add 1 to 2 tablespoons water at a time and continue cooking over medium-low heat. Remove from the heat and set aside.
- In a separate skillet, heat a small amount of neutral oil over medium-high heat. Add the seasoned rotisserie chicken and 1 tablespoon unsalted butter. Cook for about 5 minutes, tossing occasionally, until the chicken is heated through with lightly browned edges. Add a pinch of bouillon powder and toss to combine. If the chicken seems dry, add 1 to 2 tablespoons water. The chicken should be moist and well coated, not soupy. Remove from the heat.
- Make the garlic-yogurt sauce. Stir together the Greek yogurt and minced garlic. Add the lemon juice, garlic powder and all-purpose seasoning to taste. Add 1 to 2 tablespoons water as needed until the sauce is smooth and drizzleable. Refrigerate until ready to assemble.
- Heat 1 1/2 to 2 inches of neutral high-heat oil in a heavy skillet or Dutch oven to 325°F. Working in batches, fry the potatoes for 4 to 6 minutes, until cooked through but still pale. Transfer to a paper towel-lined plate or rack and allow the oil to return to 325°F between batches.
- Increase the oil temperature to 375°F. Fry the potatoes again in batches for 2 to 4 minutes, until deep golden and crisp. Drain and immediately season with salt.
- Prepare the green onions. Separate the white and light-green portions from the dark-green tops. Fry the white and light-green portions in a small amount of oil over medium-high heat until lightly browned and crisp. Drain well. Thinly slice the dark-green portions and keep them fresh for topping.
- Assemble just before serving. Arrange the hot fries on a serving platter, top with the browned rotisserie chicken and Yassa-style onions, then drizzle generously with the garlic-yogurt sauce. Finish with the crispy fried green onions and fresh scallions.
- Add olives and fresh lemon wedges, if desired. Serve immediately. For the best texture, do not assemble the fries too far in advance, as the chicken, onions and sauce will soften the fries.
Notes
- Don't skip the double fry. The first fry cooks the potatoes through; the second fry creates the crisp exterior needed to support the toppings.If the onions begin to burn before becoming tender, lower the heat and add water 1–2 tablespoons at a time.
- For the chicken, using both breast and dark meat gives the topping a better balance of texture and moisture.
- Keep the garlic-yogurt sauce relatively mild. Its purpose is to cool and balance the intensely flavored Yassa chicken and onions rather than compete with them.
- Assemble immediately before serving. The longer the fries sit underneath the toppings, the softer they will become.
- Olives are optional but work particularly well with the lemony Yassa flavor and are common in many versions of Chicken Yassa.

Apple Cider-Glazed Ribs
Let’s talk about ribs again.
My Tamarind-Glazed Ribs were all about summer: smoky, tangy, sticky, and made for those relaxed cookout days when you want something messy and delicious in the middle of the table. But now it’s early fall, and with fall comes football, game days, gatherings, and a whole new excuse to put a rack of ribs in the oven.
This time, I wanted to lean into those classic fall flavors without making the ribs taste like dessert. Apple cider felt like the obvious place to start. It is one of those ingredients that shows up everywhere this time of year, especially in drinks, baked goods, and desserts, so I started thinking: why not turn it into a glaze for ribs?
The result is a sticky apple cider glaze made with brown sugar, apple cider vinegar, Dijon mustard, ginger, garlic, and just a little cayenne. The cider brings that mellow apple sweetness, while the vinegar and Dijon keep things balanced and savory. Warm ginger and a touch of cinnamon give the glaze that unmistakable fall character without overpowering the pork.
I kept the seasoning on the ribs simple but layered, using smoked paprika, garlic, black pepper, garlic powder, a little Shisanyama seasoning, ginger, cinnamon, and cayenne. The ribs bake low and slow until tender, then get brushed generously with the apple cider glaze before going back into a hot oven to caramelize. That final blast of heat is what gives you those glossy, sticky edges that make ribs so hard to leave alone.
And because these are part of my game-day lineup, I wanted them to feel like the kind of food you can put in the center of the table and let everyone dig into. No complicated smoker setup, no special equipment, and no standing over a grill all afternoon. Just oven-baked ribs, a bold seasonal glaze, and a little patience while they get tender.
In the end, these ribs are my fall take on a classic game-day favorite.
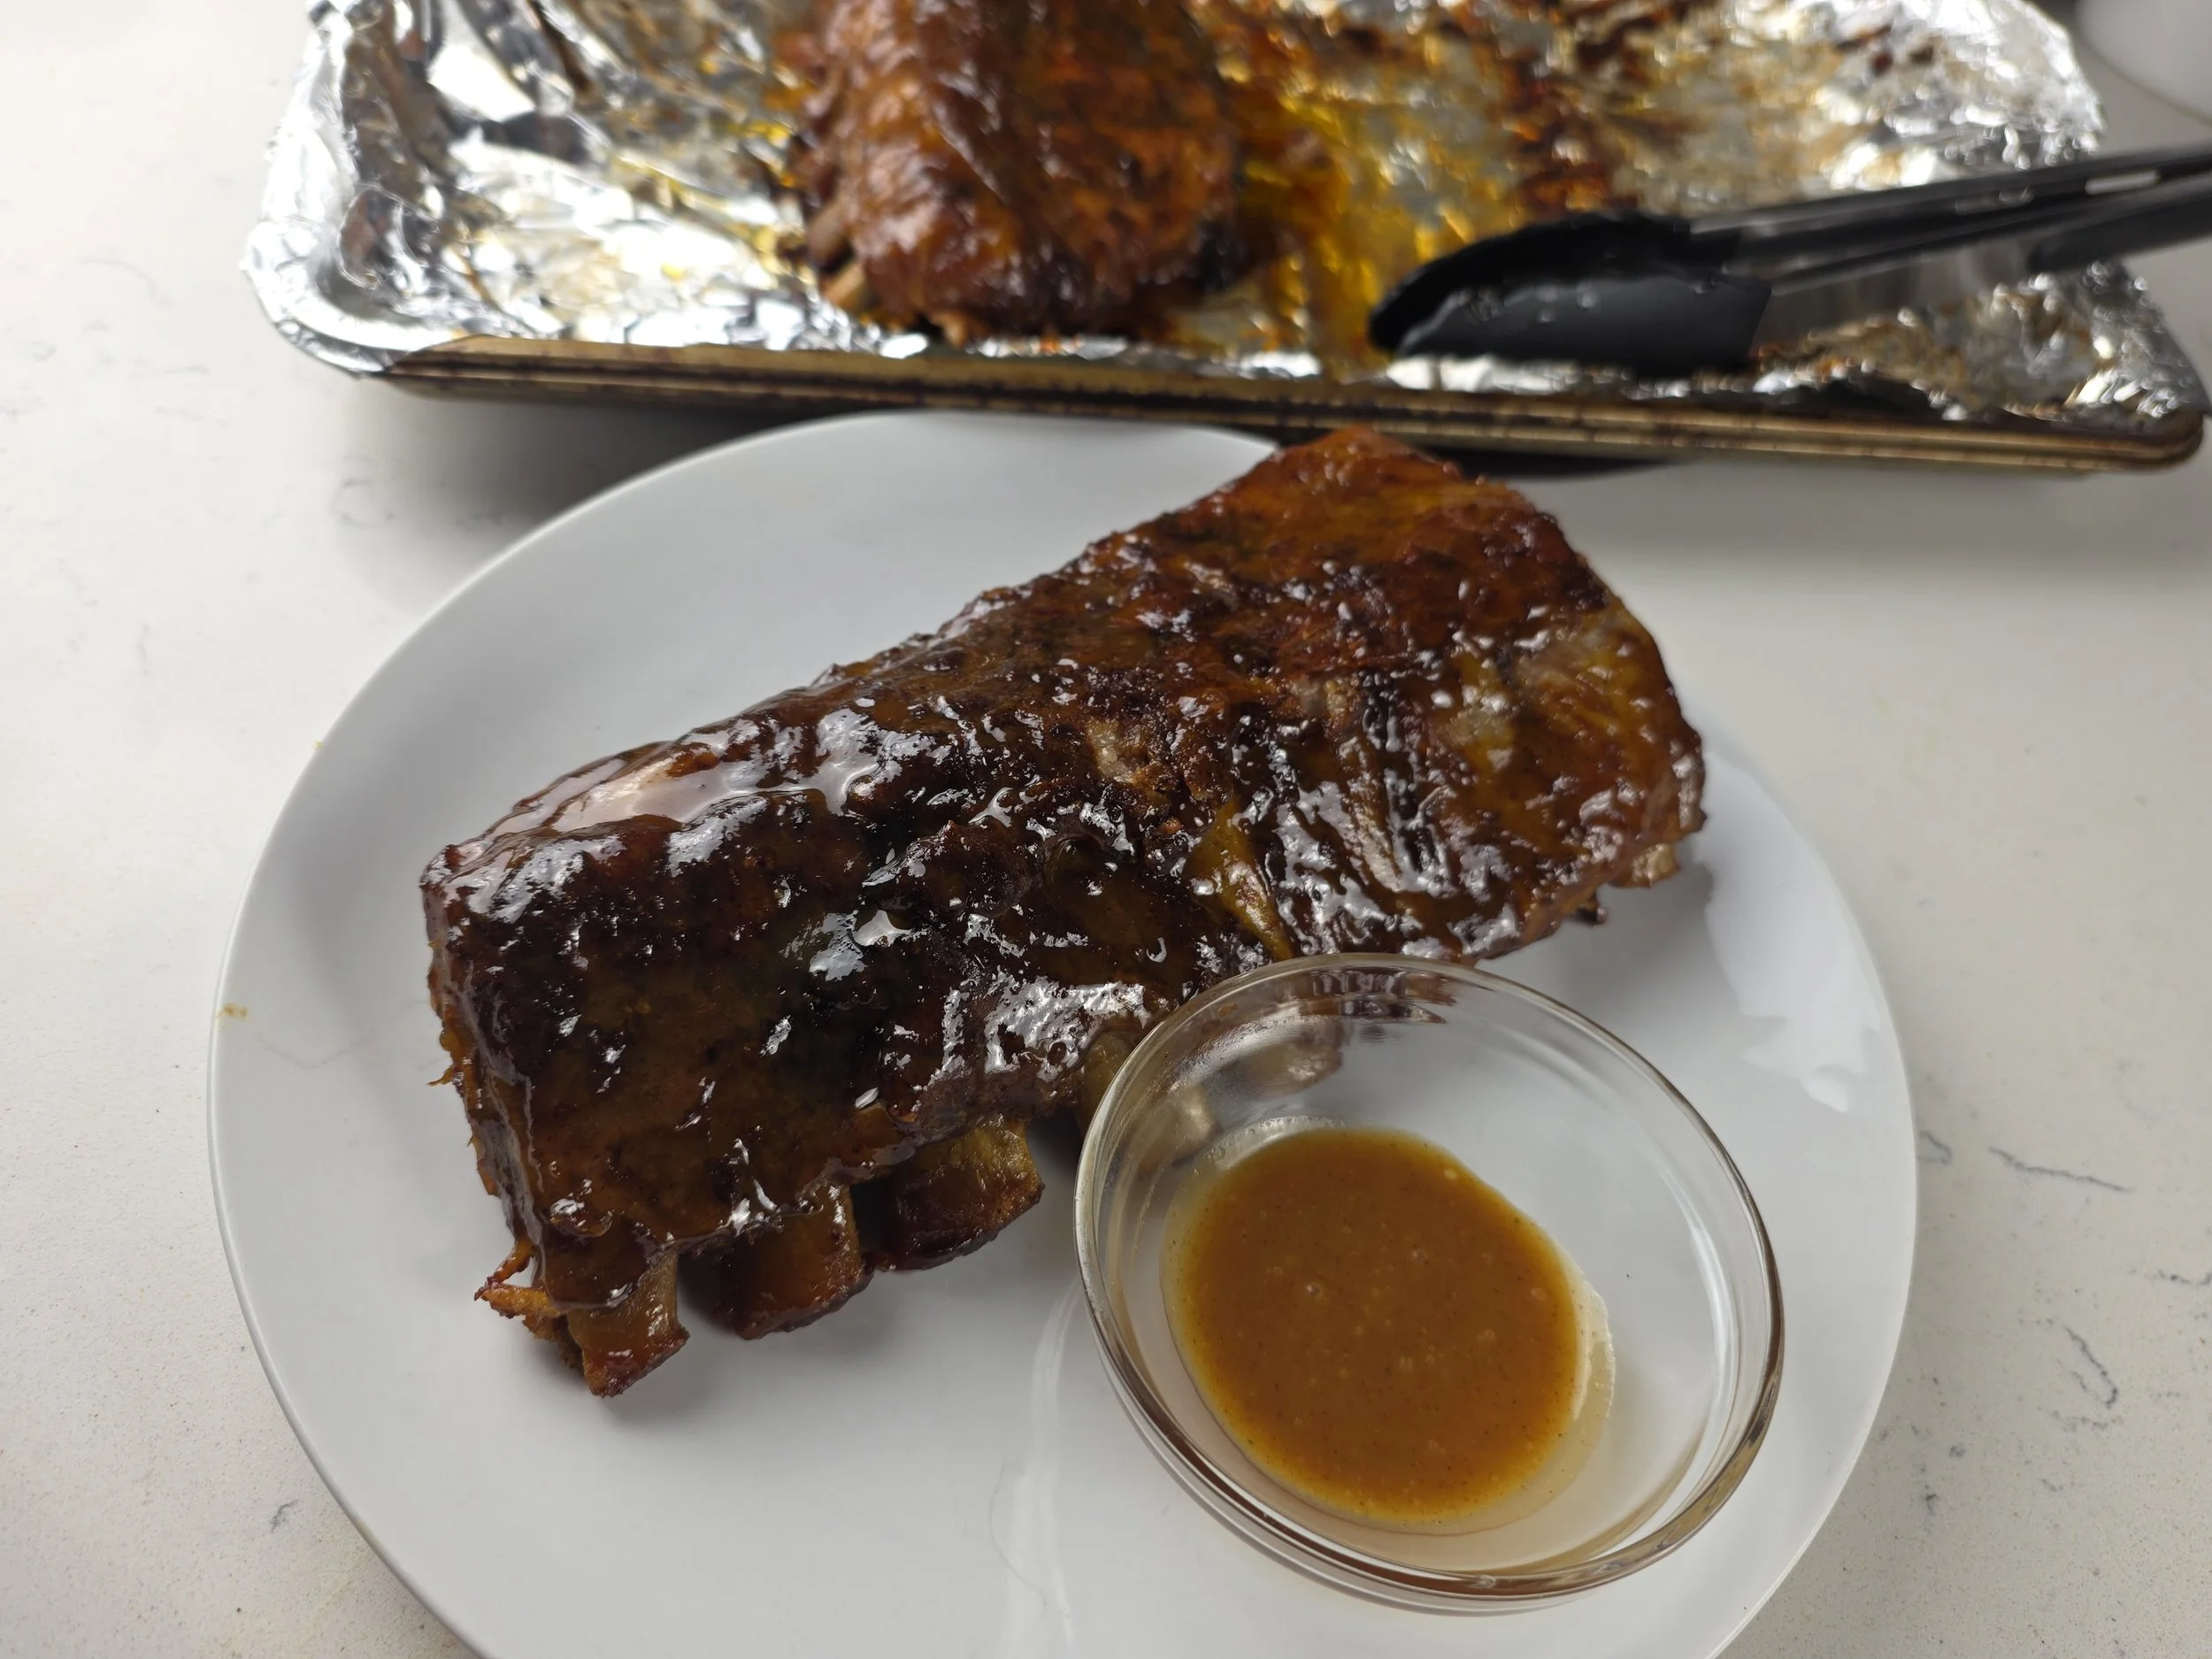
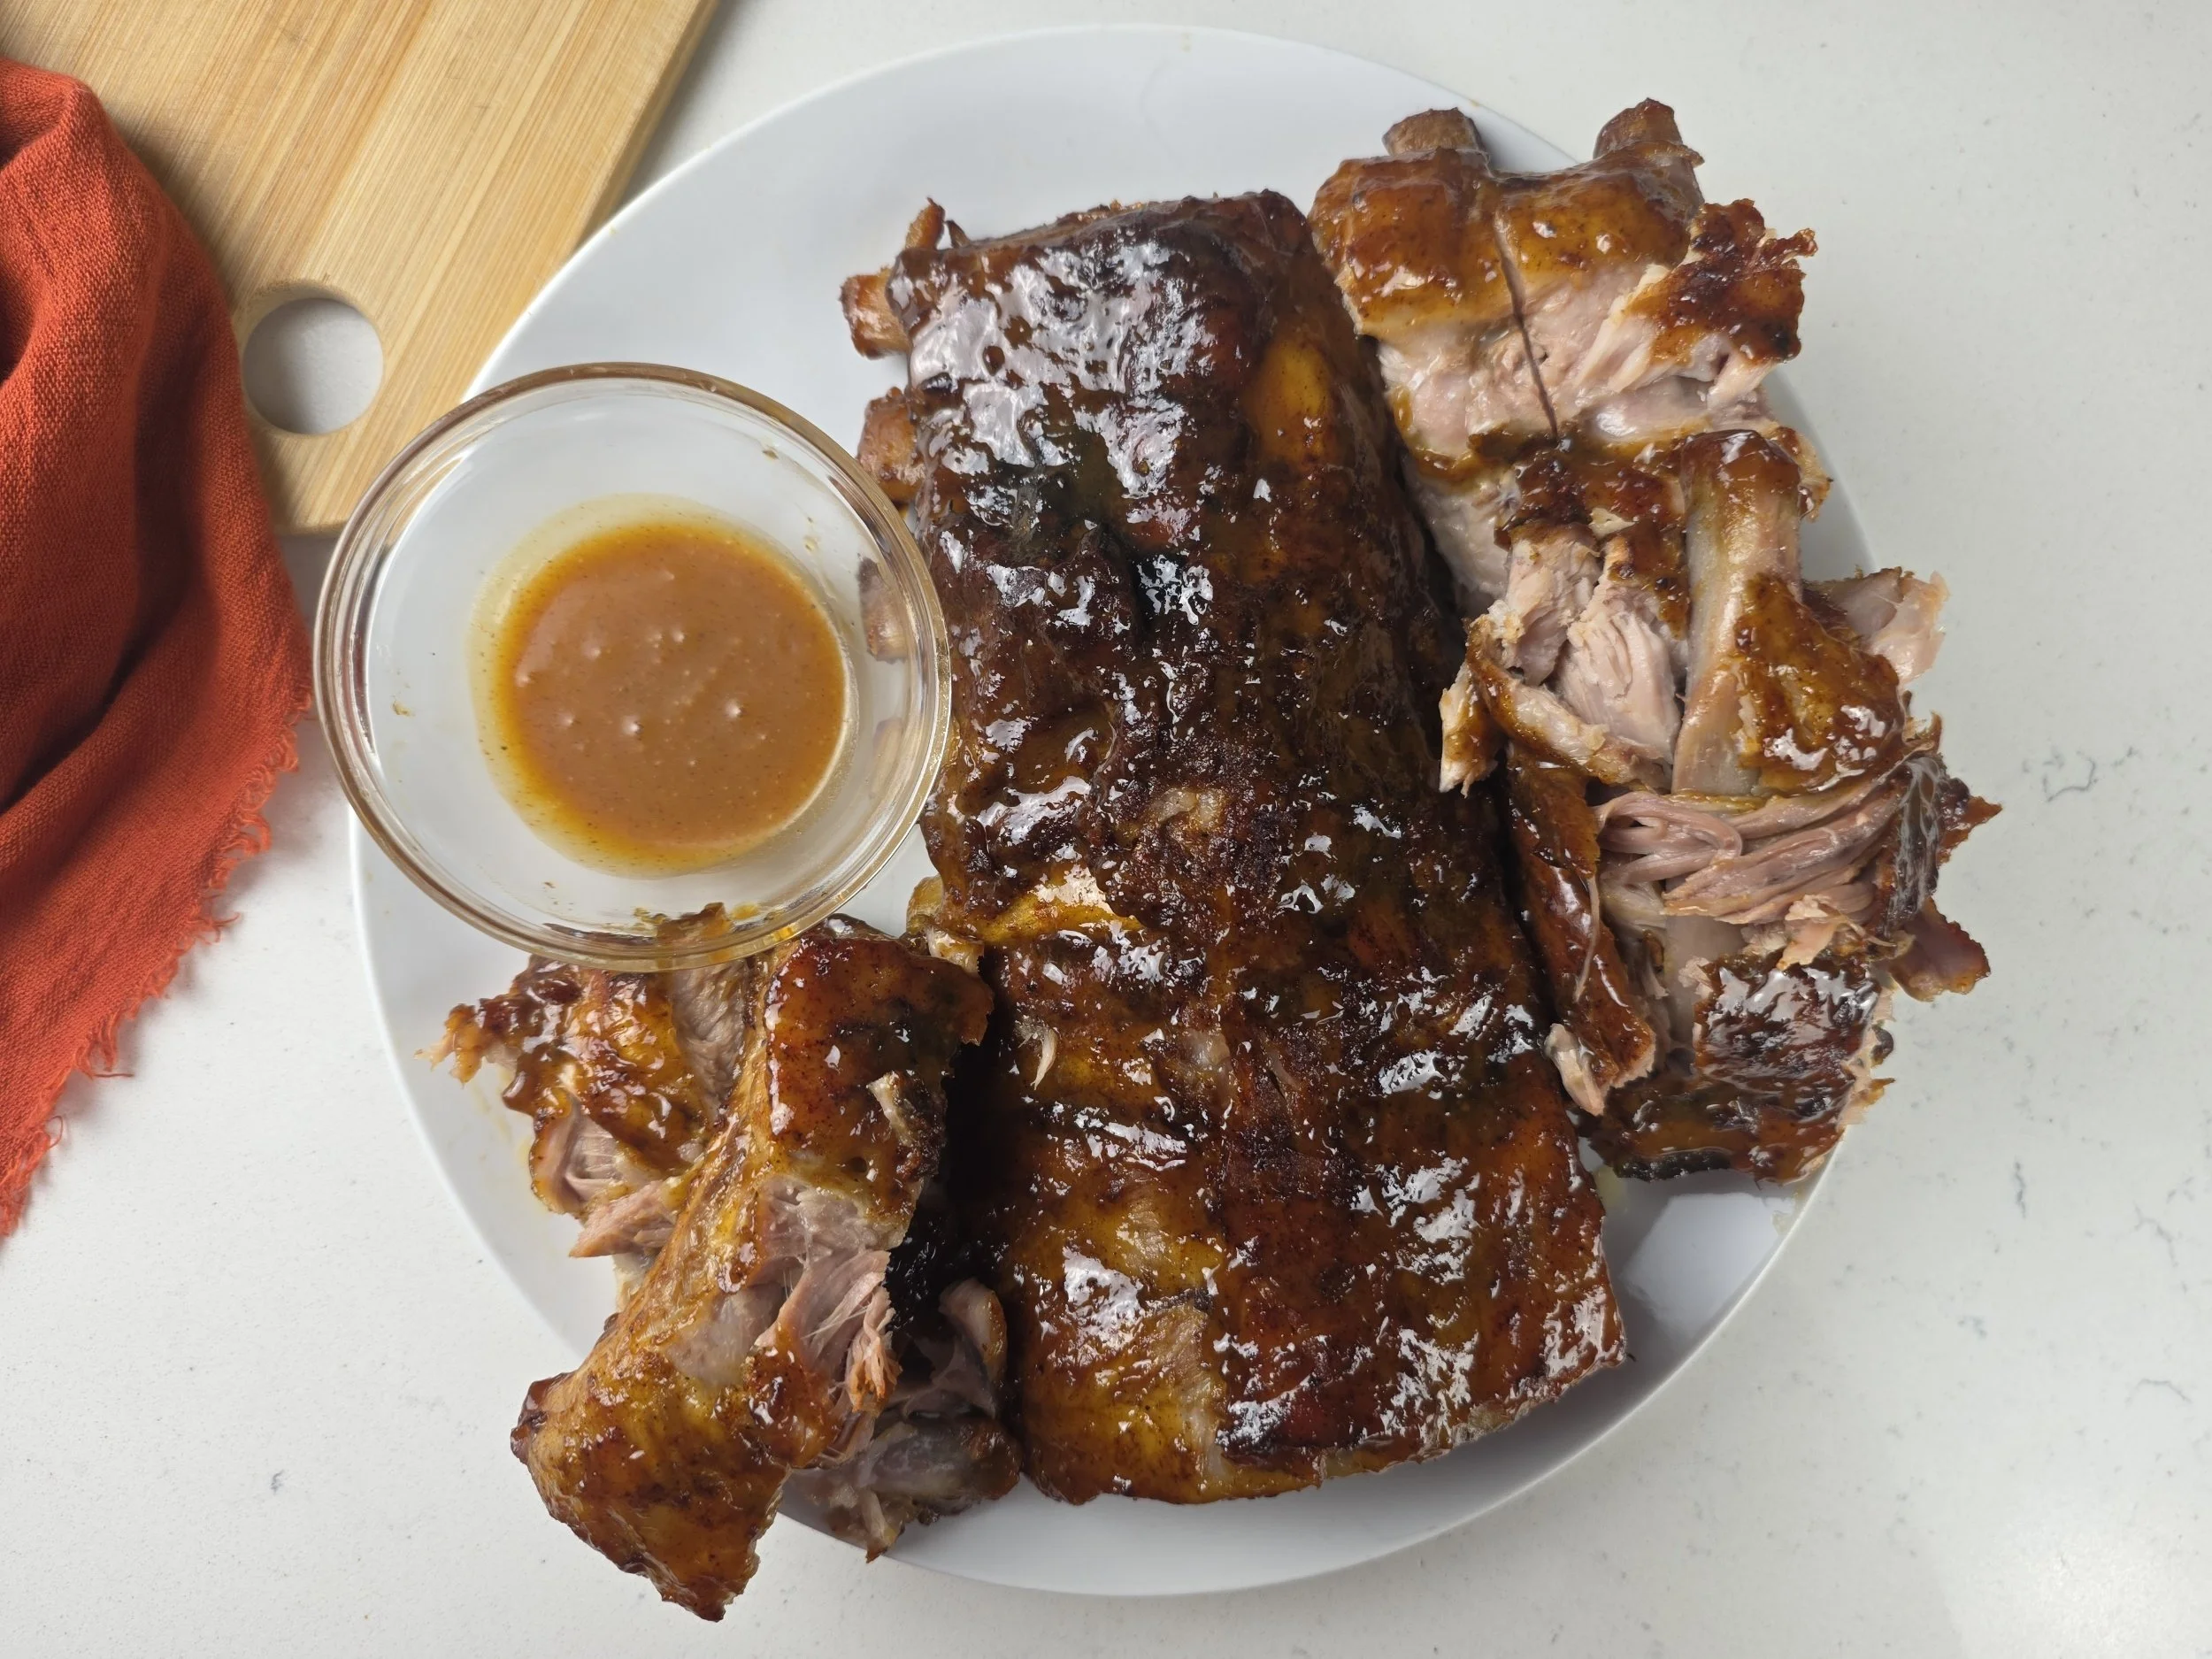

Apple Cider–Glazed Baby Back Ribs
Tender baby back ribs baked low and slow, then coated in a sticky apple cider glaze with mustard, ginger, garlic, warm spices, and a touch of heat. The glaze caramelizes beautifully under high heat, creating glossy, flavorful edges that make these ribs perfect for fall gatherings and game day.
Ingredients
- 1 rack baby back pork ribs
- 1 tsp seasoned salt
- ½ tsp umami seasoning
- 1 tsp smoked paprika
- 1 tsp garlic powder
- ½ tsp onion powder
- ¾ tsp black pepper
- ¼ tsp ground ginger
- ¼ tsp ground cinnamon
- ⅛–¼ tsp cayenne pepper
- 1 cup apple cider
- 2 tbsp brown sugar
- 2 tbsp apple cider vinegar
- 1½ tbsp Dijon mustard
- 1 tbsp unsalted butter
- 1 tsp grated frozen ginger
- 1 garlic clove, minced
- ¼ tsp cayenne pepper
- ¼ tsp black pepper