
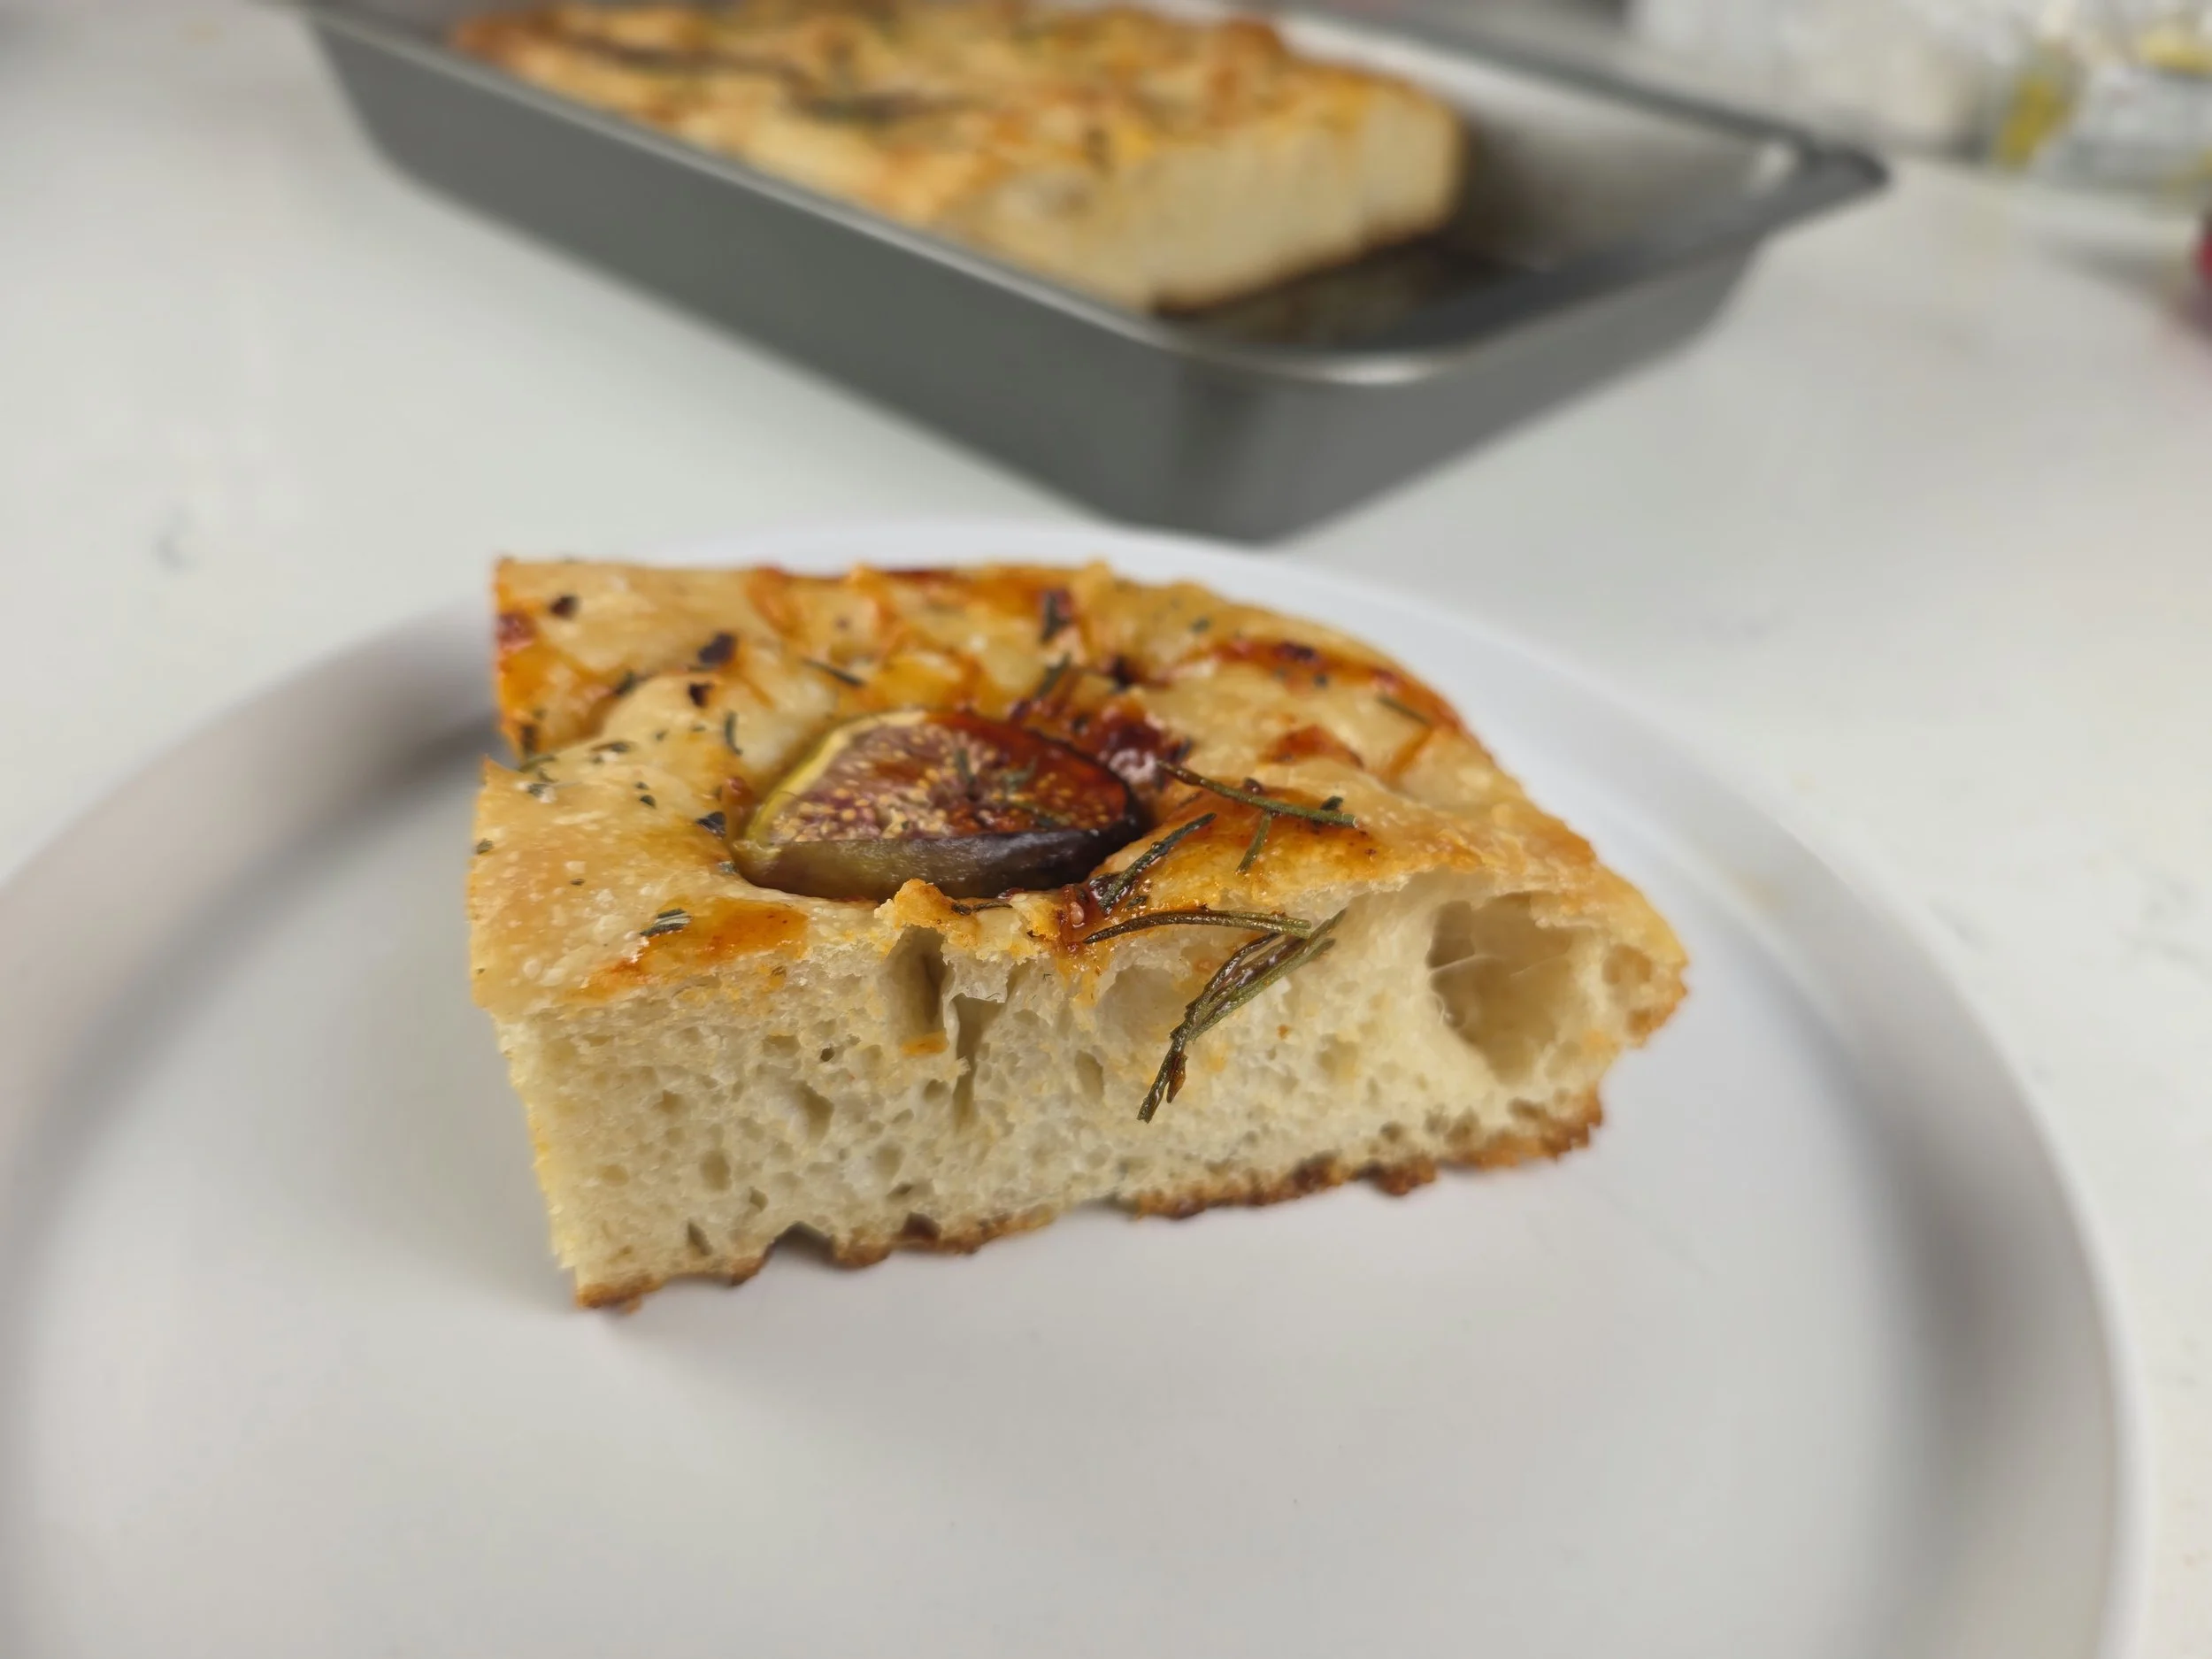
Harissa Hot Honey, Fig & Rosemary Focaccia
A golden, olive-oil-rich focaccia topped with fresh figs, rosemary, salt and a drizzle of homemade harissa hot honey. This version brings together Italian bread-making with North African heat and sweet, jammy figs.
If you've only ever had focaccia with olives, tomatoes or garlic, this one is a fun change. It keeps the classic Italian base, with a chewy, olive-oil-rich crumb, and tops it with fresh figs, rosemary and flaky salt, then finishes everything with a harissa hot honey that brings sweetness, heat and a little tang to every bite.
Figs have been around for a very long time. People have grown them across the Mediterranean and Middle East for thousands of years, and they show up throughout the Bible, including that line in 1 Kings about people living "under their own vine and fig tree." I liked the idea of putting a fruit with that much history on a loaf like this. In the oven, the figs become soft and almost jammy, with caramelized edges. Next to the salty olive oil and rosemary, they're sweet enough to notice, but the bread still eats like bread, not dessert.
The hot honey is my favorite part. Harissa is a North African chile paste with a deep, savory heat, and I warm it gently with honey, then add a squeeze of lemon and a pinch of salt. Poured over the warm focaccia, it settles into the dimples and around the figs. The leftover hot honey is also great on roasted vegetables, chicken, cheese, biscuits, pizza, pretty much anything that could use some sweet heat.
I learned a lot making this, mostly from all the bakers who've already shared what they know about folds, overnight fermentation and what properly proofed dough should look like. Two things stuck with me. First, be patient with the final proof. My kitchen was too cool and the dough just sat there. Once I moved the pan somewhere warm and draft-free, it turned bubbly and puffy, and the difference was obvious. That's why the instructions give you visual cues instead of relying on a set proofing time. Second, stop fiddling. One stretch-and-fold, two gentle coil folds 30 minutes apart, then into the fridge overnight.
This is a more moderately hydrated focaccia, which gives it a soft but chewy crumb with plenty of structure. The edges bake up crisp and golden, while the bottom becomes rich with olive oil. It's just as good eaten on its own, served alongside a meal or sliced for a sandwich.. The edges bake up crisp and golden, while the bottom becomes rich with olive oil. It's just as good eaten on its own, served alongside a meal or sliced for a sandwich. It's the kind of bread I'd happily put on the table at a dinner party, but it's also sturdy and versatile enough to become an everyday favorite.
If you're new to making focaccia, don't overthink it. Pay attention to the dough, give it enough time to proof, and let the visual cues guide you. Once you understand what the dough is supposed to look and feel like, the process becomes much less intimidating.
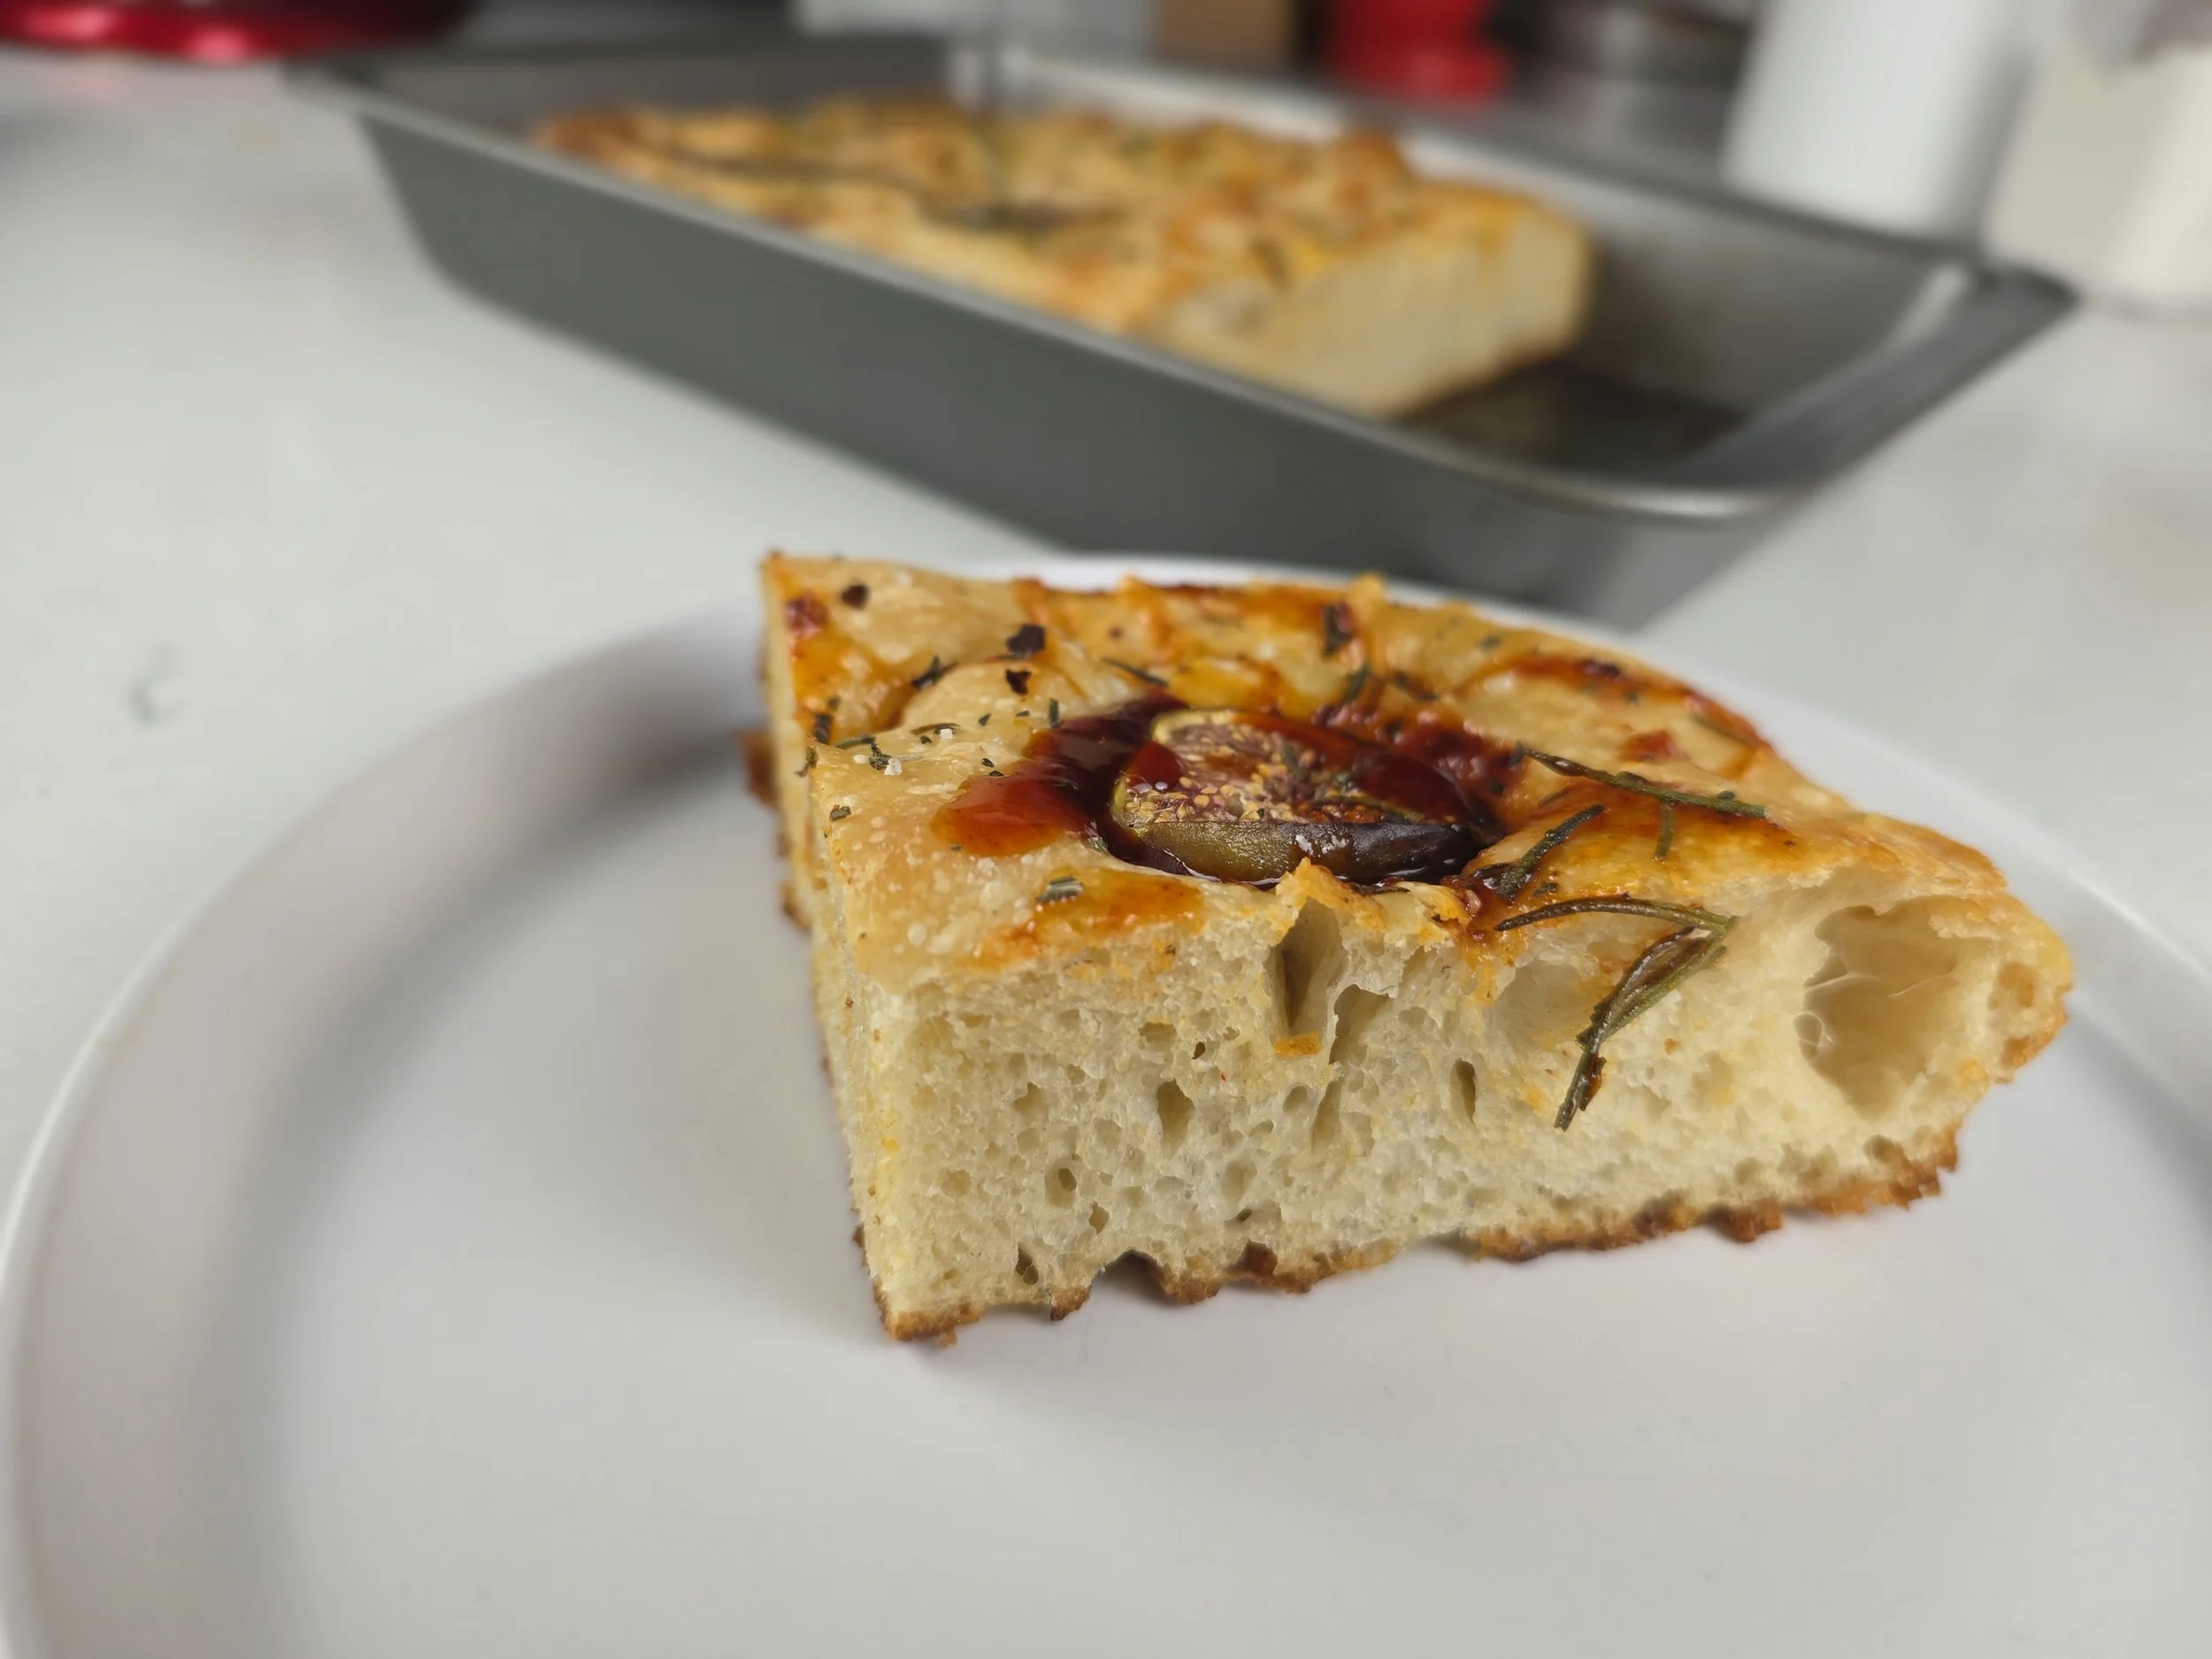
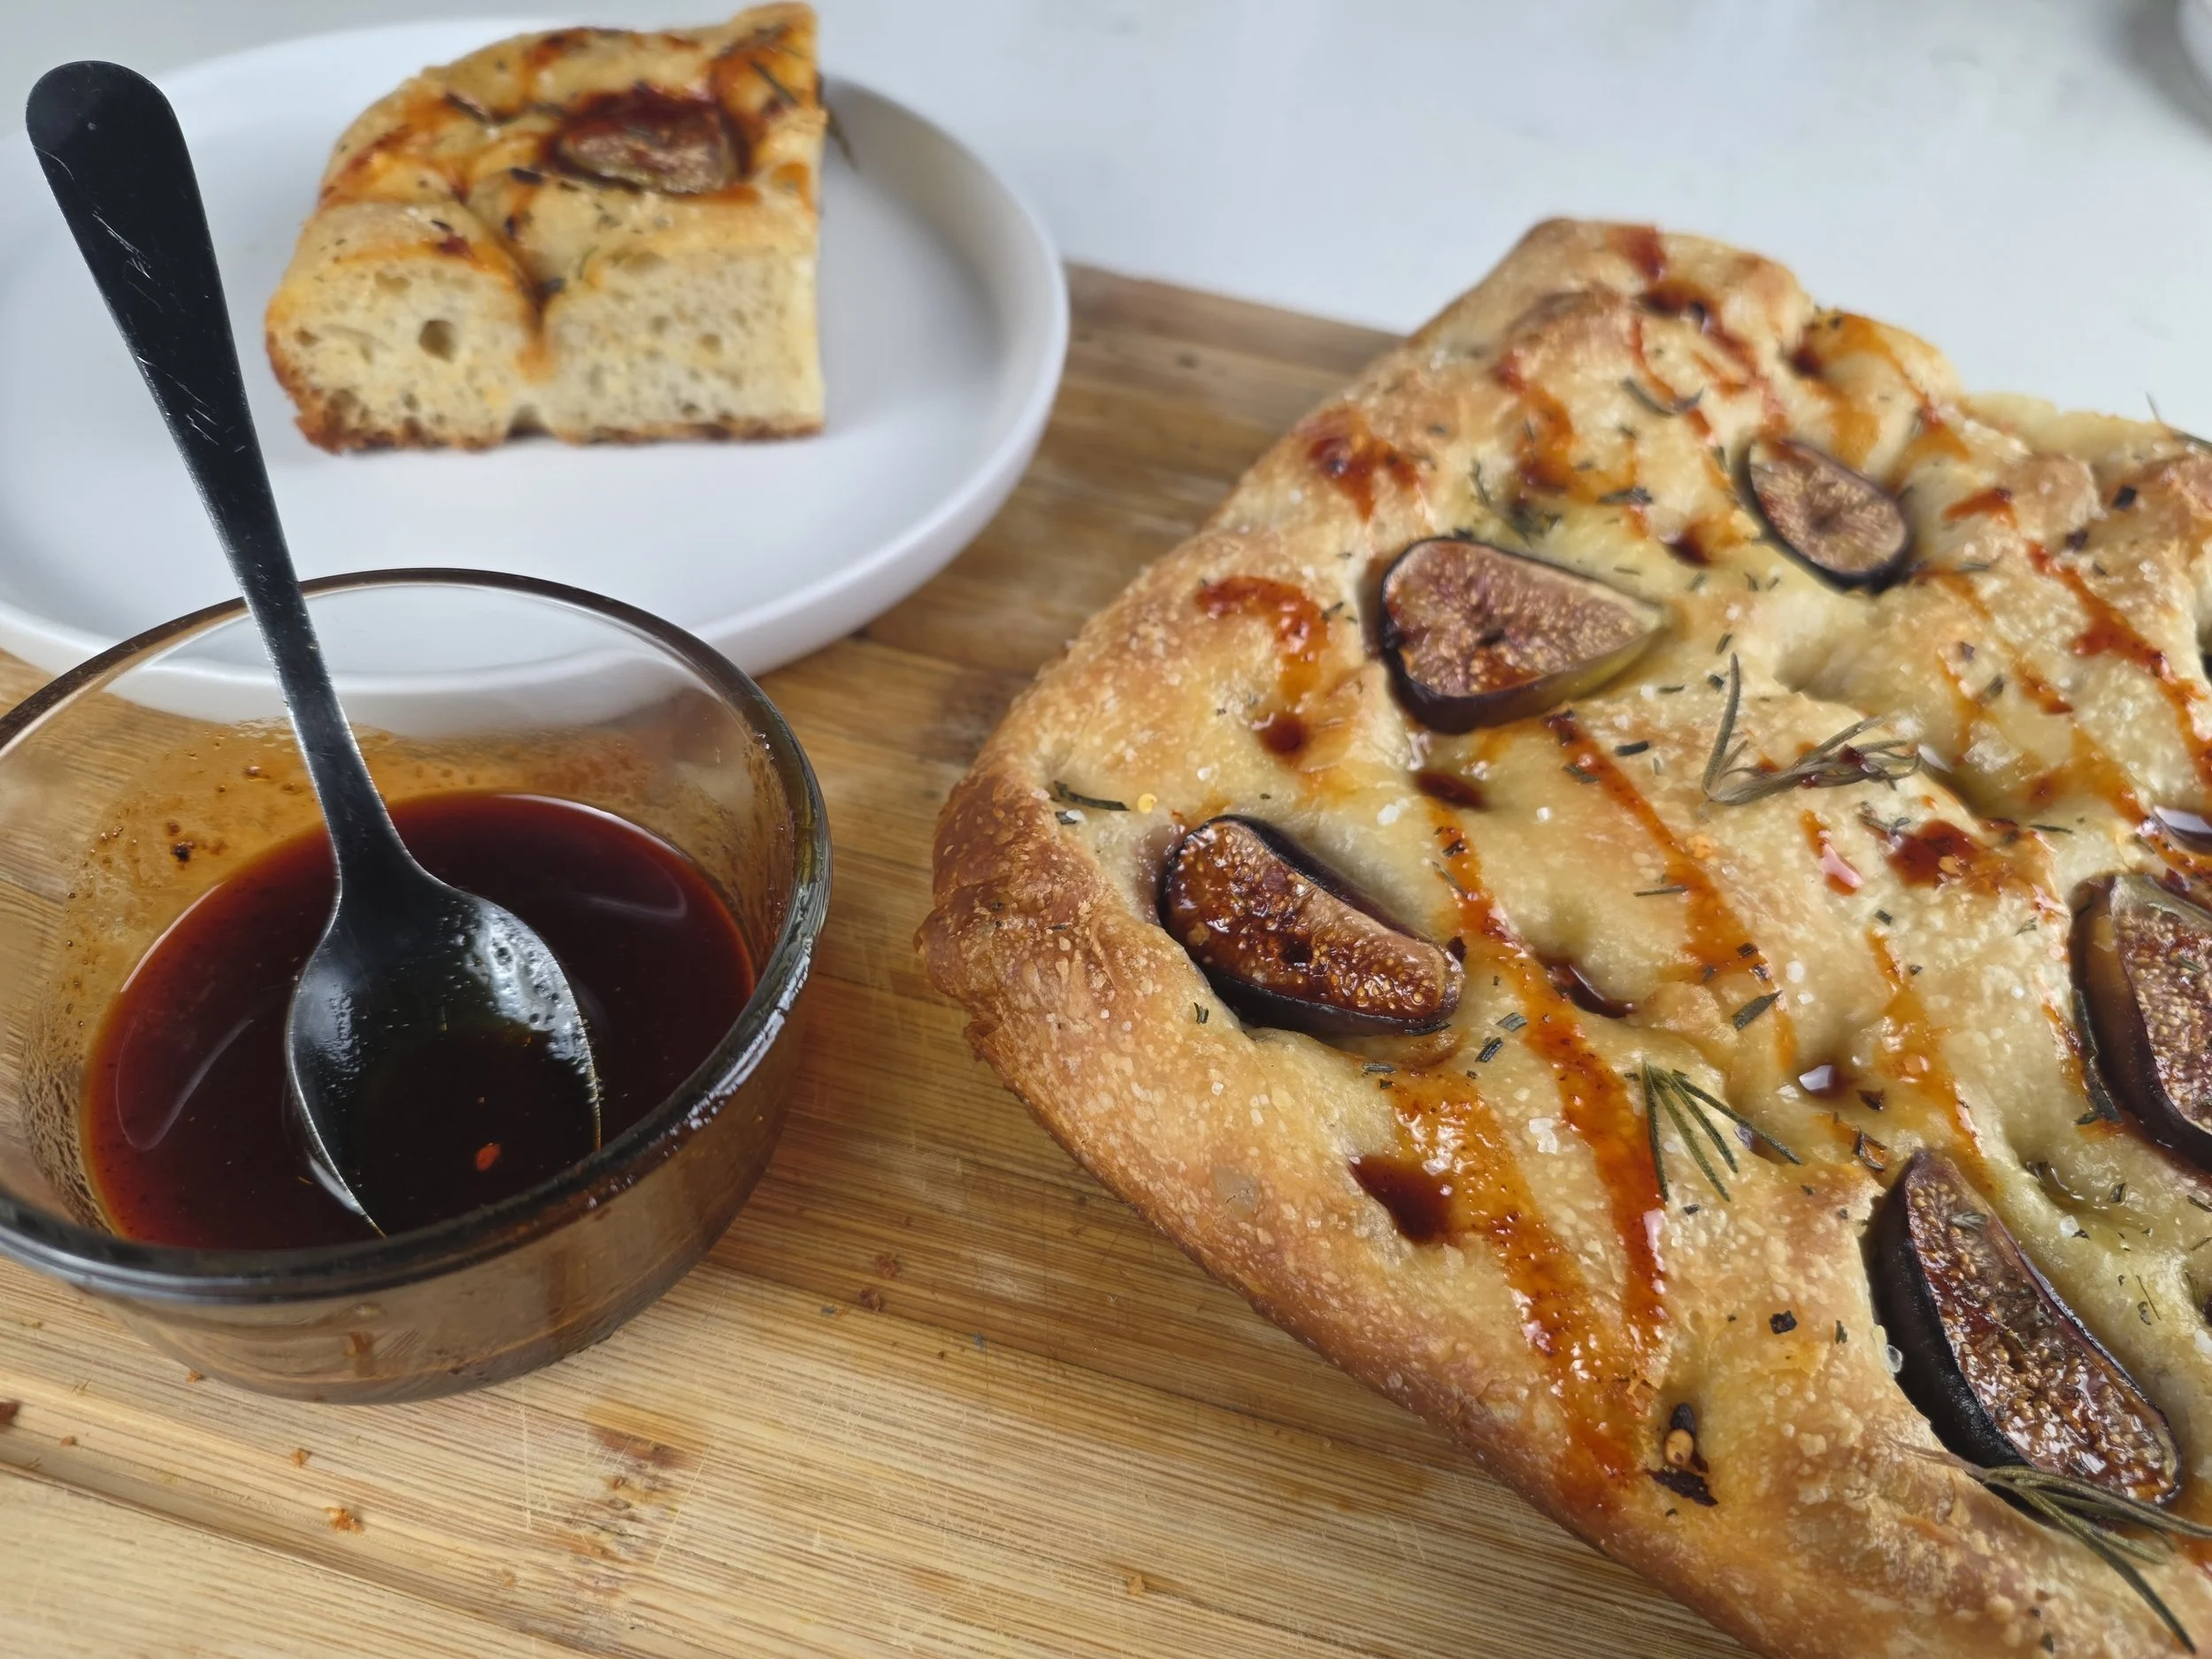

Harissa Hot Honey Fig & Rosemary Focaccia
Sweet, savory, spicy, and full of contrast, this homemade focaccia is topped with fresh figs, rosemary, flaky salt, and a drizzle of harissa hot honey. The soft but chewy bread and crisp, olive-oil-rich edges make the perfect base for jammy figs and North African-inspired chile heat.
Ingredients
- 3⅓ cups bread flour
- 1⅓ cups warm water, plus up to 3 tablespoons additional warm water as needed
- 1 teaspoon instant yeast
- 1½ teaspoons salt
- 1 tablespoon olive oil, plus approximately 2 tablespoons for the pan
- 4–6 fresh figs, halved, skin on
- 1–2 tablespoons fresh rosemary, roughly chopped
- 2 tablespoons olive oil
- Coarse or flaky salt, to taste
- ¼ teaspoon red pepper flakes, optional
- ¼ cup honey
- 1 tablespoon harissa paste
- ½ teaspoon fresh lemon juice
- Pinch of salt
Instructions
- In a large bowl, mix together 3⅓ cups bread flour, 1 teaspoon instant yeast, and 1½ teaspoons salt.
- Add 1⅓ cups warm water and 1 tablespoon olive oil and mix until a soft, cohesive, slightly sticky dough forms. The dough should not feel stiff or dry. If it does, add additional warm water 1 tablespoon at a time, mixing between additions, up to 3 additional tablespoons. For my batch, I needed all 3 tablespoons of additional water. Once the dough is soft, cohesive, and slightly sticky, cover the bowl and let it rest for 30 minutes.
- With slightly wet hands, perform a stretch-and-fold by grabbing one side of the dough, gently stretching it upward, and folding it over itself. Rotate the bowl and repeat on all four sides. Cover and let the dough rest for another 30 minutes.
- Wet your hands and perform the first coil fold by sliding both hands underneath the center of the dough and gently lifting it, allowing the ends to tuck underneath. Rotate the bowl about 90 degrees and repeat for approximately 4 gentle lifts. Cover and let the dough rest for 30 minutes.
- Repeat the same gentle coil-fold process for the second and final coil fold. Do not continue folding or manipulating the dough beyond this point. Cover the bowl tightly with foil or plastic wrap and refrigerate overnight for 8–18 hours.
- The next day, generously coat a 9×13-inch baking pan with approximately 2 tablespoons olive oil. Remove the dough from the refrigerator and transfer it directly into the prepared pan. Let it rest for 15 minutes.
- Gently stretch the dough toward the edges and corners of the pan without forcing it. If the dough resists or springs back, let it rest for another 10–15 minutes, then gently stretch it again.
- Cover the pan and place it in a warm, draft-free environment around 75–80°F (23.9–26.7°C). A turned-off oven with the light on works well. Start checking the dough at approximately 1½ hours. The dough is ready when it is visibly puffy, airy, bubbly, noticeably expanded, and gently jiggly. The exact timing will depend on the temperature of your kitchen and dough, so use the appearance of the dough as your guide rather than relying strictly on the clock. Do not rush this step, the dough needs enough time to properly proof, which helps create a softer, lighter crumb.
- While the dough finishes proofing, make the harissa hot honey. Combine ¼ cup honey and 1 tablespoon harissa paste in a small saucepan and warm gently over low heat, stirring until combined. Do not boil, you can also use the microwave. Remove from the heat and stir in ½ teaspoon lemon juice and a tiny pinch of salt. Set aside.
- Once the dough has finished proofing, carefully remove the pan from the oven and set it aside. Preheat the oven to 425°F. While the oven preheats, remove the cover from the proofed dough and drizzle 2 tablespoons olive oil evenly over the surface. Lightly oil your fingertips and press them firmly into the dough to create deep focaccia dimples without punching all the way through.
- Arrange the halved fresh figs, cut-side up, across the surface. Scatter the chopped rosemary over the top, adding a few small intact rosemary sprigs for presentation if desired. Sprinkle with coarse or flaky salt and approximately ¼ teaspoon red pepper flakes, if using. Do not add another drizzle of olive oil after this; the 2 tablespoons of topping oil are the total amount used on the surface before baking.
- Bake at 425°F for 20–25 minutes, beginning to check around the 20-minute mark. The focaccia is ready when the surface is golden, the edges are crisp and browned, and the bottom is well browned. If it needs additional color, continue baking for a few more minutes rather than significantly extending the bake time.
- Remove the focaccia from the oven and allow it to cool for 10 minutes. If it is still extremely hot after 10 minutes, give it a little longer before adding the honey. Drizzle the harissa hot honey over the warm focaccia in thin ribbons, then let it continue cooling for 15 minutes before cutting.
- Transfer the focaccia to a cutting board if it releases easily from the pan. Cut into rectangles or squares; a 9×13-inch pan can be cut into 9 large pieces or 12 medium pieces. If the focaccia sticks to the pan, run a thin metal spatula around the edges and underneath the individual pieces rather than trying to force the entire slab out at once. Serve warm or at room temperature.
Notes
- The dough should be soft, sticky, and hydrated, not stiff. If it feels dry after adding the initial water, add the additional warm water 1 tablespoon at a time, up to 3 tablespoons.
- The final proof is important. Proof the dough in a warm, draft-free environment around 75–80°F (24–27°C) and judge readiness by the dough’s appearance rather than the clock. It should look puffy, airy, bubbly, expanded, and gently jiggly. If using a turned-off oven with the light on for proofing, remove the focaccia from the oven before preheating.
- The figs are best placed cut-side up so they soften and caramelize as they bake.
- The harissa hot honey can be adjusted to taste. Add more or less harissa depending on how much heat you want.
- For the best texture, serve the focaccia the day it is baked. For longer storage, freeze individual pieces once completely cooled.
- If the focaccia sticks to the pan, run a thin metal spatula around the edges and underneath individual pieces rather than trying to lift the entire loaf at once.
About the crumb: This recipe uses a more moderate hydration, which gives the focaccia a soft but chewy crumb with plenty of structure. The edges bake up crisp and golden, while the bottom becomes rich with olive oil. It is delicious served on its own, alongside a meal, or sliced for a sandwich.
Nutrition Facts
Calories
220Fat (grams)
8 gCarbs (grams)
34 gFiber (grams)
2 gSugar (grams)
8 gProtein (grams)
5 gSodium (milligrams)
310 mg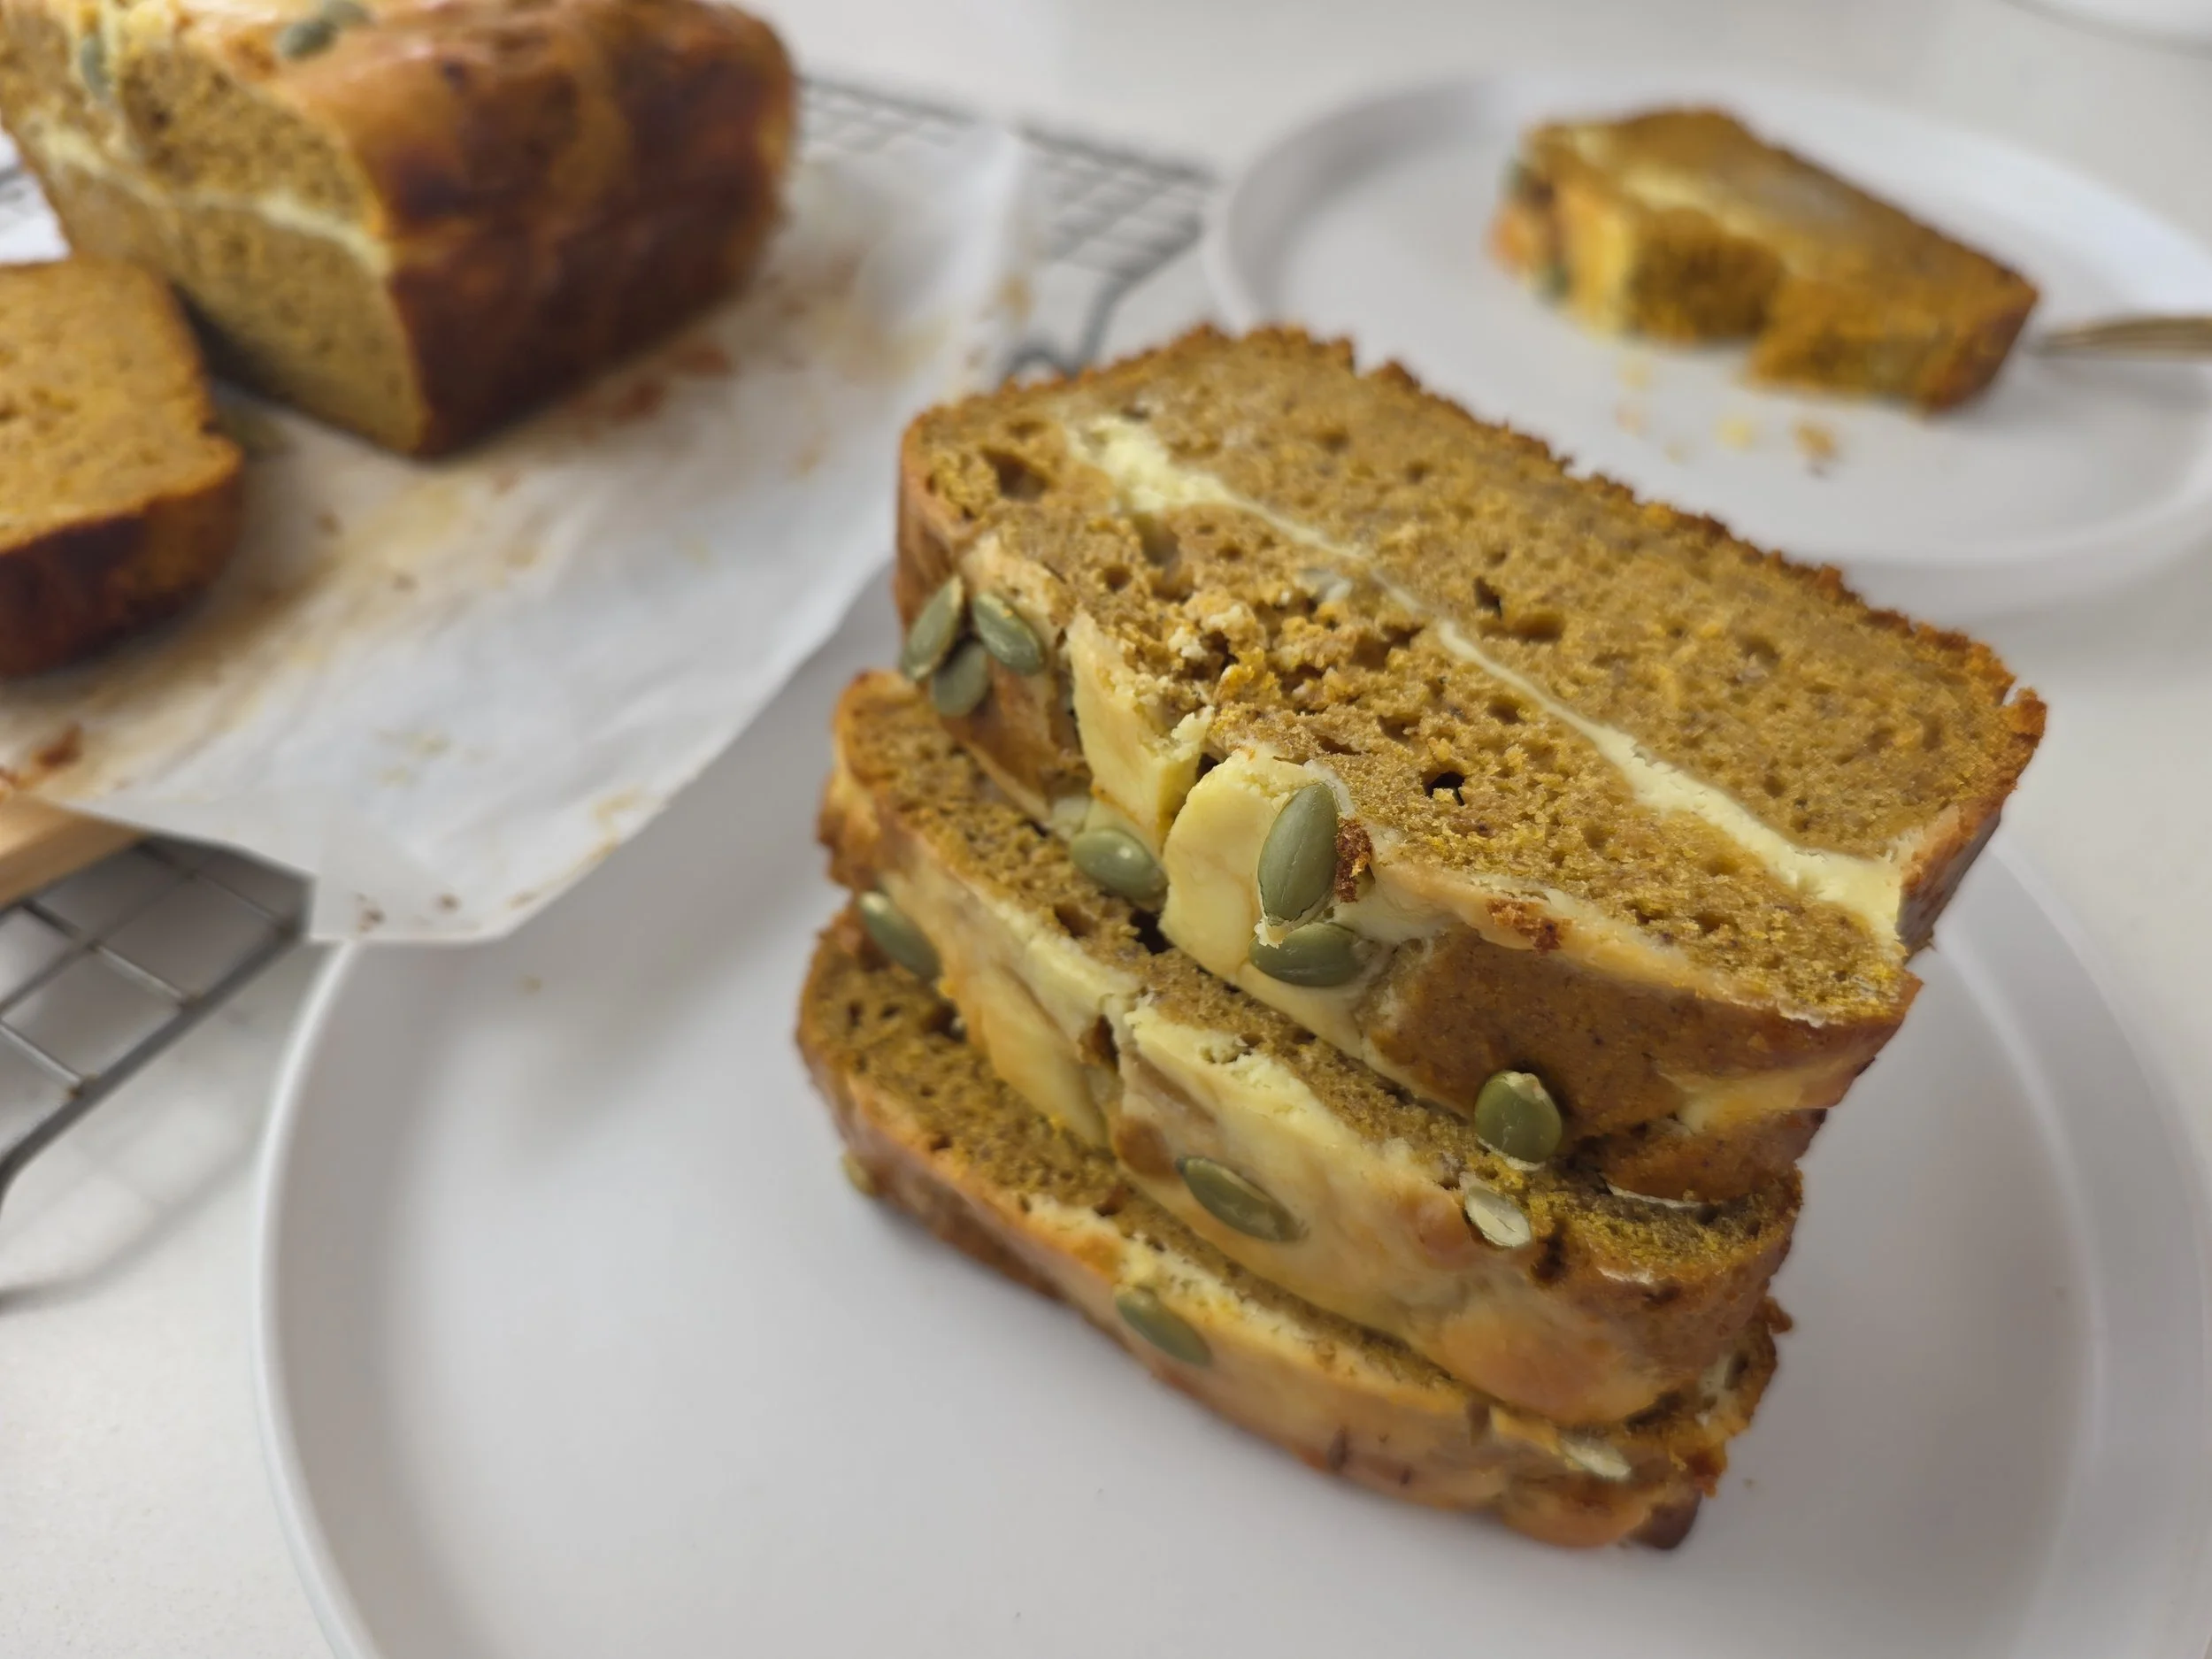
Pumpkin Banana Bread with Cream Cheese Swirl
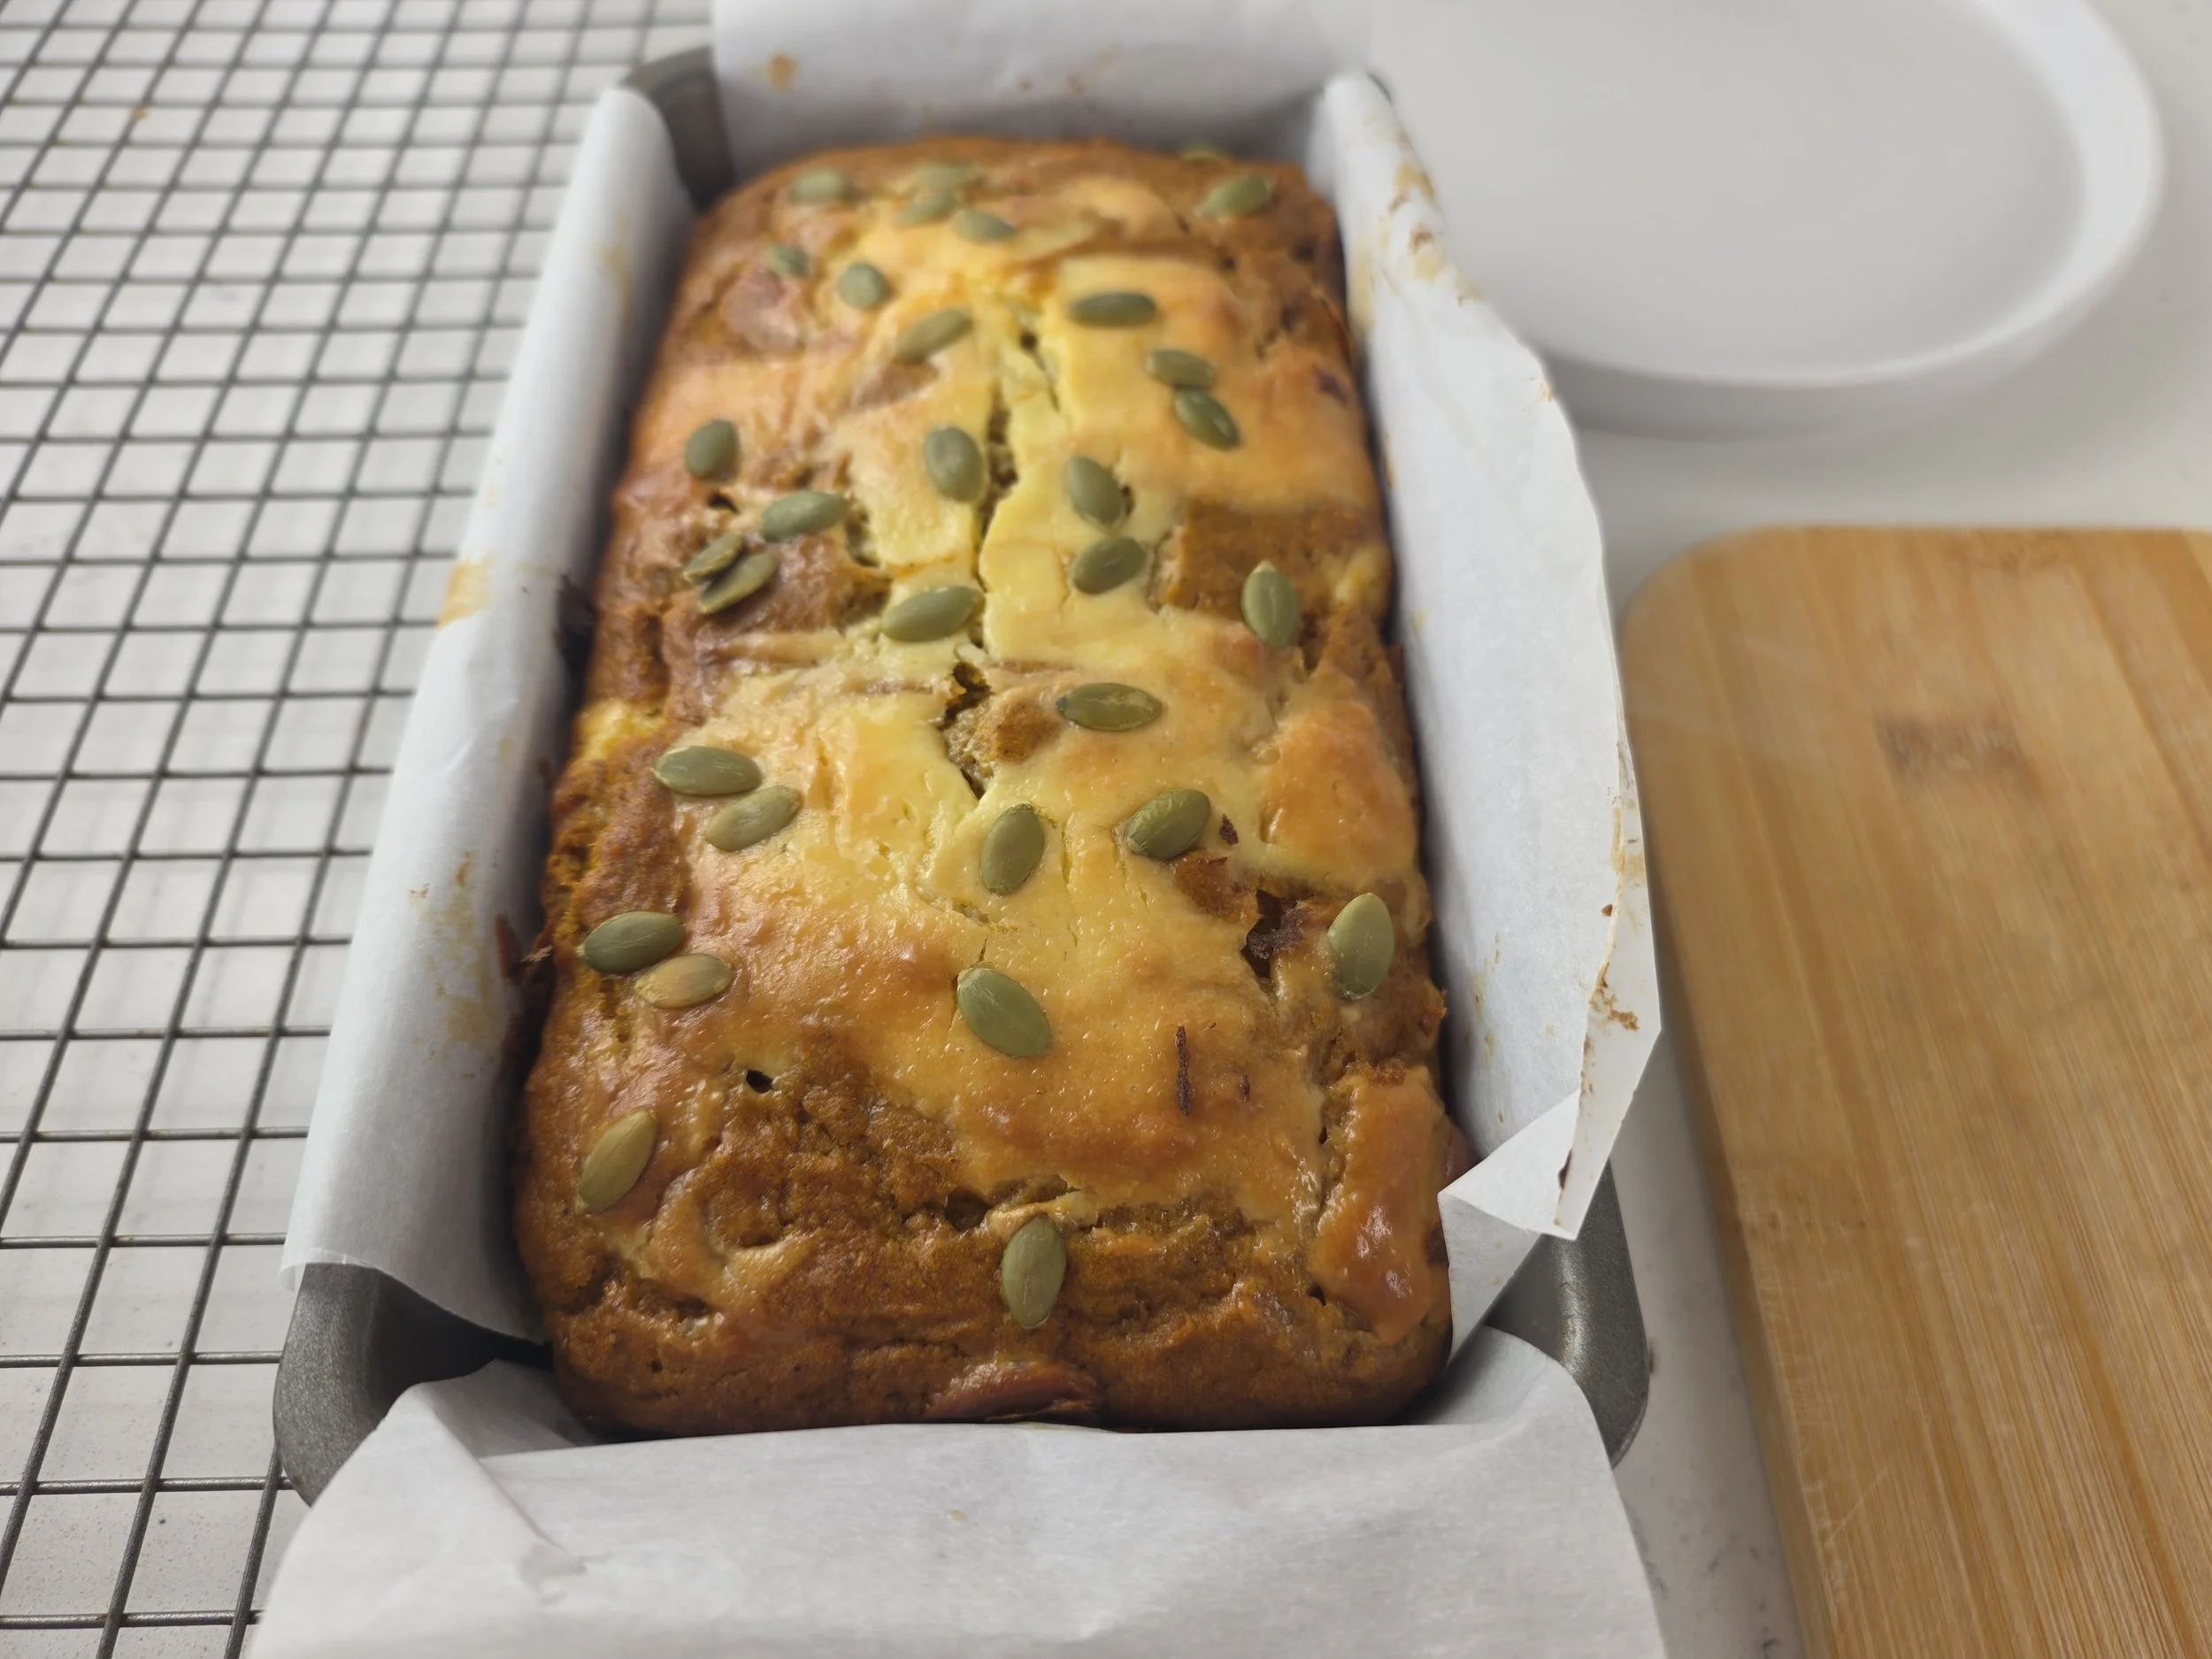
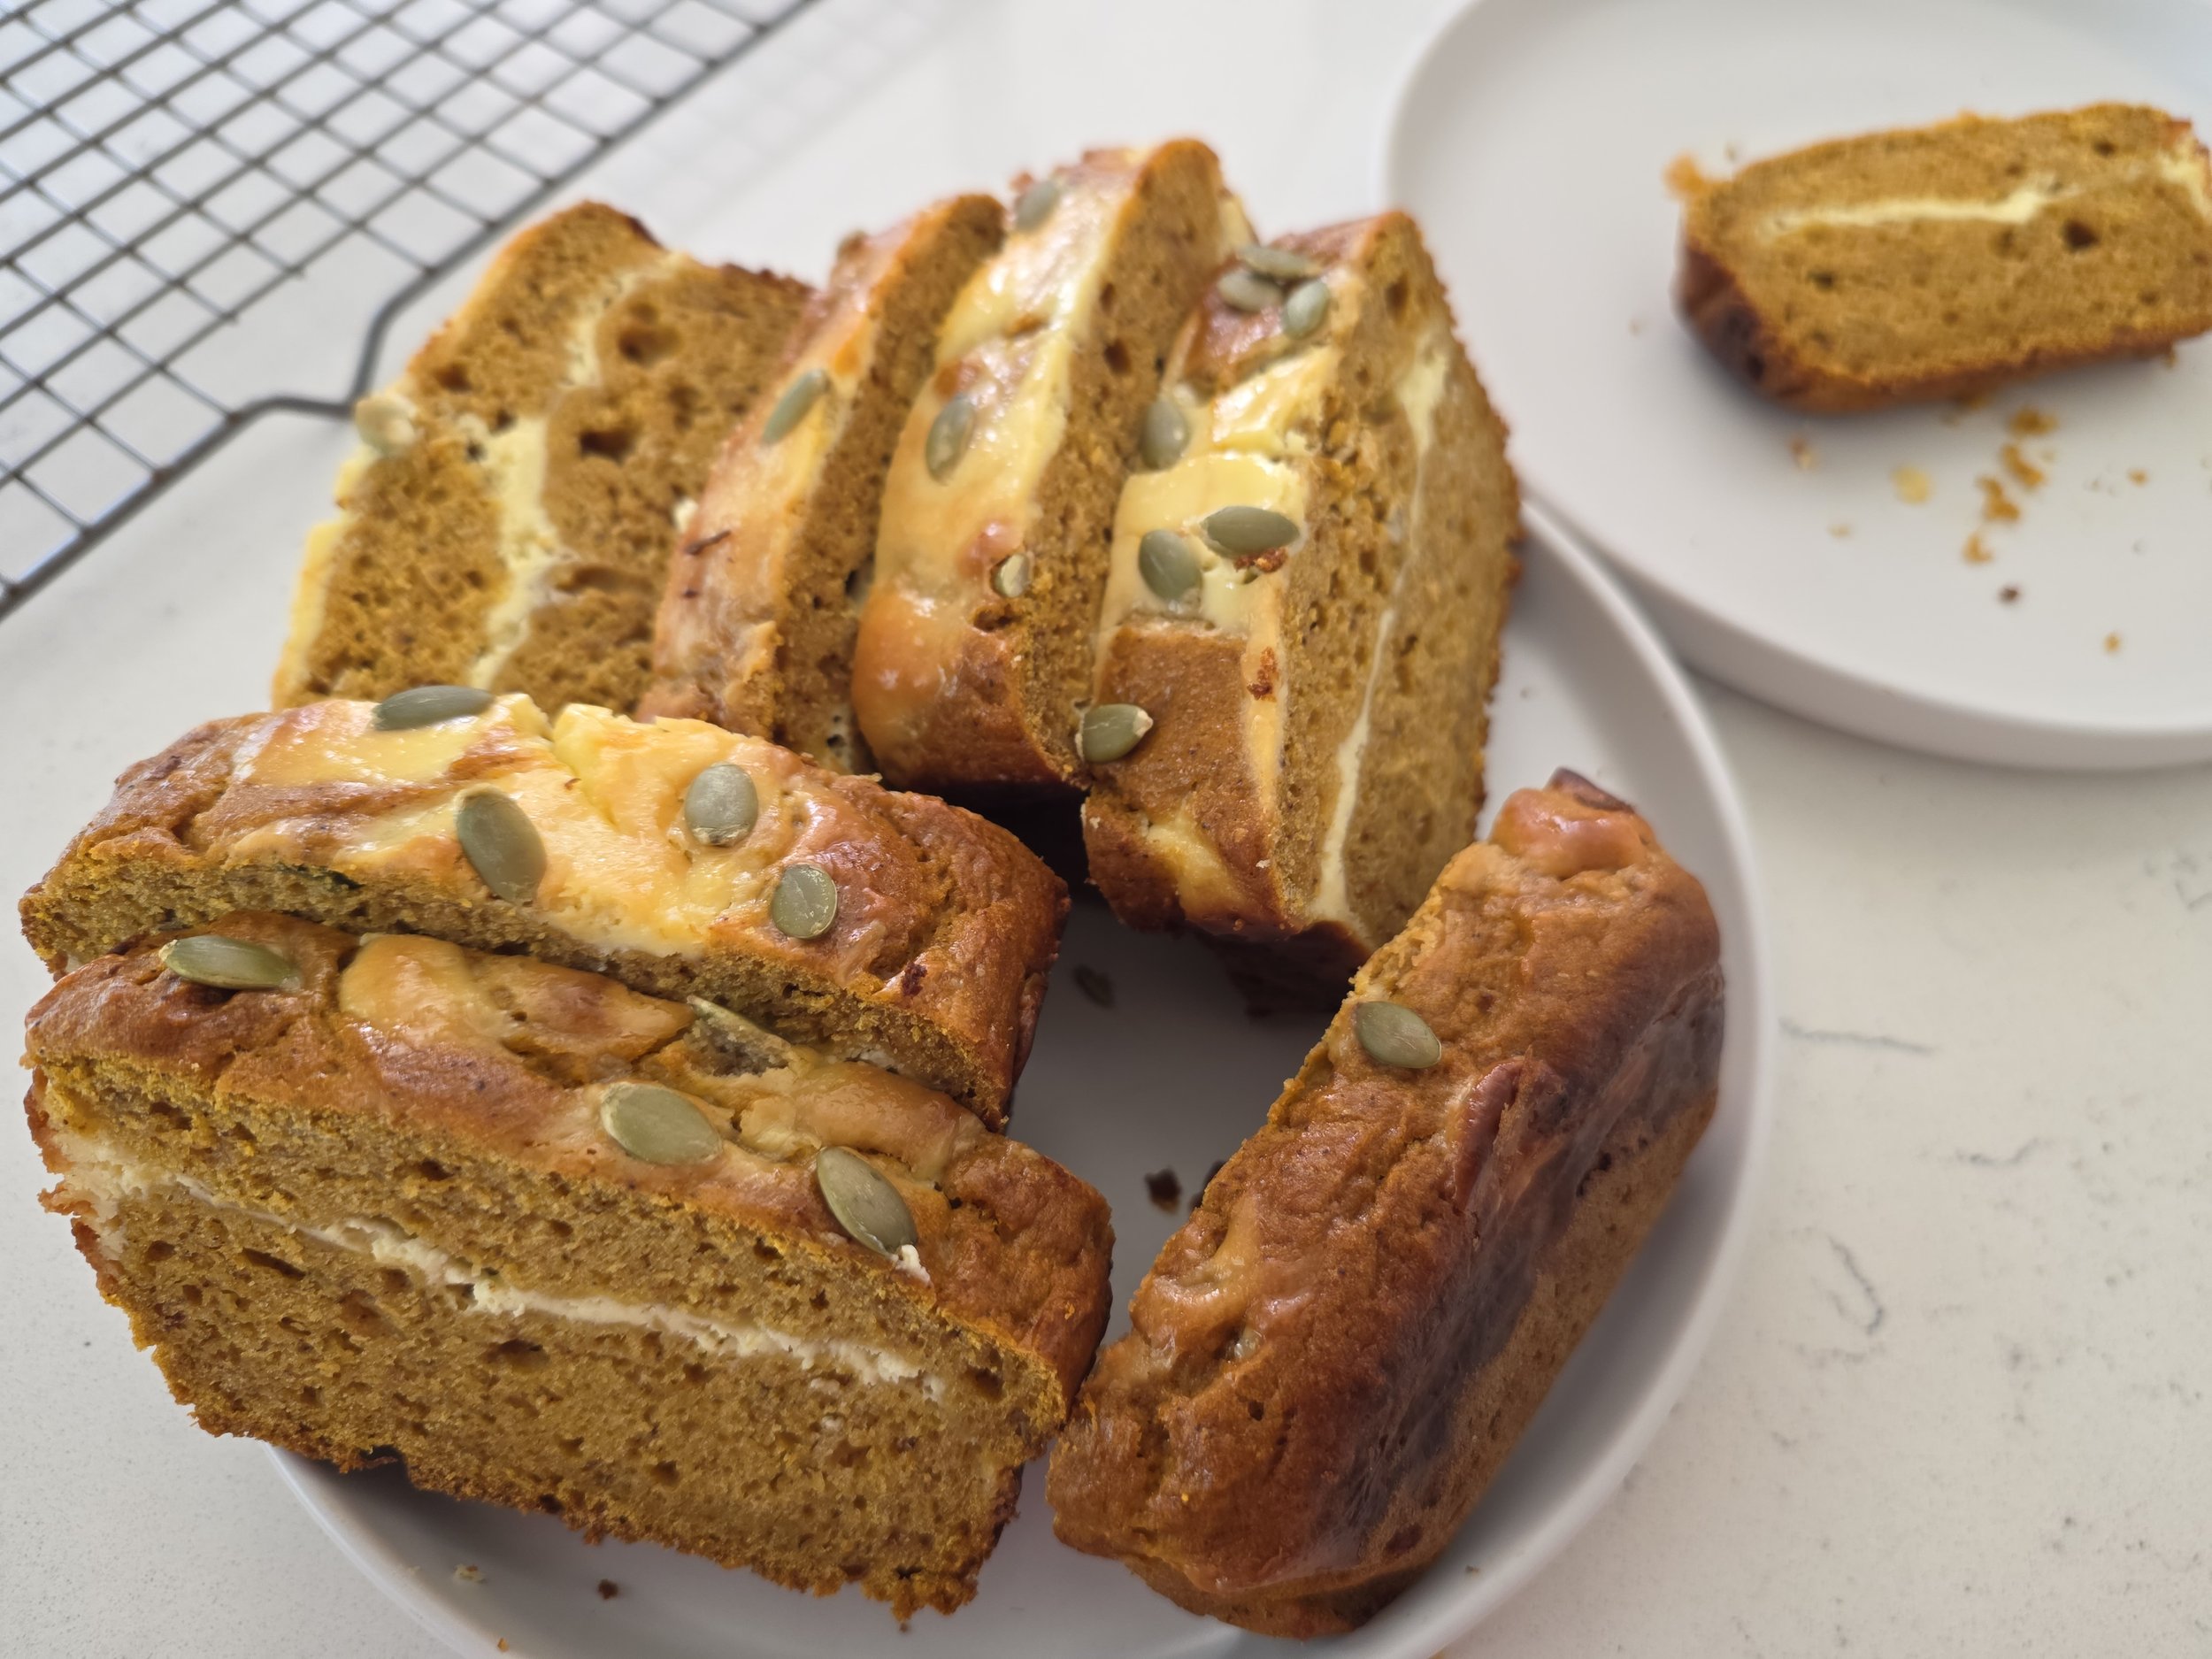
This Pumpkin Banana Bread with Cream Cheese Swirl is a soft, warmly spiced loaf that brings together pumpkin purée and ripe banana with a creamy, tangy swirl through the center. Finished with crunchy pumpkin seeds, it's an easy bake that's perfect for breakfast, tea time, or a cozy afternoon treat.
Pumpkin bread is one of those recipes I come back to every fall, and this recipe is a variation on my original, Pumpkin Harvest Loaf with Walnuts and Chocolate. That version is lightly sweetened, warmly spiced, and packed with walnuts, dark chocolate, and pumpkin seeds. This time, I wanted to take the same pumpkin-bread foundation in a different direction.
I had half a very ripe banana, some pumpkin purée, and cream cheese left in the fridge, so I decided to bring them together. The result surprised me: pumpkin is still the dominant flavor, while the banana adds a subtle fruity sweetness and a delicious banana aftertaste without making the loaf taste like traditional banana bread. A sweet cream cheese swirl runs through the center, and pumpkin seeds add a little crunch without taking away from the overall flavor or texture.
If you enjoyed my original pumpkin harvest loaf, this version is a simpler, creamier take on the same idea. It skips the walnuts and chocolate and instead lets the combination of pumpkin, banana, warm spices, and cream cheese shine.
The loaf is soft and moist with a sturdy crumb, without being overly sweet, making it just as good for breakfast as it is with an afternoon cup of tea. I especially love it slightly warm with a little butter. Better yet, toasted!

Pumpkin Banana Bread with Cream Cheese Swirl
A moist, warmly spiced pumpkin loaf made with ripe banana and a creamy cream cheese layer, finished with crunchy pumpkin seeds.
Ingredients
- ¾ cup pumpkin purée
- ½ very ripe banana, mashed
- 1 large egg
- ½ cup packed brown sugar
- 2 tablespoons sour cream
- 2 tablespoons unsalted butter, melted and slightly cooled
- 1 teaspoon vanilla extract
- ½ teaspoon lemon juice
- 1¼ cups all-purpose flour
- 1½ teaspoons baking powder
- ½ teaspoon baking soda
- 1 teaspoon ground cinnamon
- ½ teaspoon ground ginger
- ¼ teaspoon ground cloves
- ¼ teaspoon ground nutmeg
- ¼ teaspoon salt
- 2 tablespoons milk, if needed to thin the batter
- 4 ounces cream cheese, softened
- 3 tablespoons granulated sugar
- 1 large egg yolk
- ½ teaspoon vanilla extract
- Pinch of salt
- 2–3 tablespoons pumpkin seeds
Instructions
- Preheat the oven to 350°F. Line an 8 × 4-inch loaf pan with parchment paper, leaving some overhang for easy removal.
- In a small bowl, beat the softened cream cheese, sugar, egg yolk, vanilla, and salt until smooth and creamy. The cream cheese should be soft enough to spread easily, but do not melt it.
- In a large bowl, whisk together the pumpkin purée, mashed banana, egg, brown sugar, sour cream, melted butter, vanilla, and lemon juice until well combined.
- In a separate bowl, whisk together the flour, baking powder, baking soda, cinnamon, ginger, cloves, nutmeg, and salt.
- Add the dry ingredients to the pumpkin mixture and gently fold until just combined. Add the milk and fold just until incorporated, being careful not to overmix. The batter will be thick but should be spreadable.
- Spread about half of the pumpkin batter into the prepared loaf pan. Spoon the cream cheese mixture over the center and gently spread it across the batter. Top with the remaining pumpkin batter and gently spread it over the cream cheese. It's fine if a little cream cheese remains visible. For the top, gently swirl a small amount of the cream cheese through the pumpkin batter.
- Sprinkle the pumpkin seeds evenly over the top.
- Bake at 350°F for 50–60 minutes, checking around the 50-minute mark. A toothpick inserted into the pumpkin portion should come out with a few moist crumbs but no wet batter. Do not use the cream cheese portion to test for doneness.
- Allow the loaf to cool before slicing so the cream cheese can firm up and the loaf can set properly.
Notes
- Fold the dry ingredients into the wet mixture just until no visible flour remains. Overmixing can lead to a tougher crumb and larger tunnels. A few small air pockets in the finished loaf are normal.
- The cream cheese should be softened enough to spread easily but should not be melted. If using a microwave to soften it, heat it briefly at reduced power and check frequently.
- The batter is meant to be thick, but it should still be easy to spread in the pan. This recipe was tested with ¾ cup pumpkin purée. Since pumpkin purée can vary in moisture, you may need the full 2 tablespoons of milk to reach the right consistency.
- Don't worry if a little cream cheese remains visible on top after layering. A few visible streaks or pockets are part of the look of this loaf.
How to Store
- Because this loaf contains a cream cheese filling, cool it completely before storing. Place the cooled loaf in an airtight container and refrigerate for up to 3–4 days.
- For the best texture, let individual slices sit at room temperature for 15–20 minutes before serving, or warm gently if desired.
- To freeze, wrap individual slices tightly and place them in a freezer-safe container or bag. Freeze for up to 2–3 months. Thaw overnight in the refrigerator.
Nutrition Facts
Calories
205Fat (grams)
8 gSat. Fat (grams)
4 gCarbs (grams)
31 gFiber (grams)
2 gSugar (grams)
17 gProtein (grams)
5 gSodium (milligrams)
220 mgI am not a certified nutritionist and any nutritional information on dontmissmyplate.com should only be used as a general guideline.
Carrot Cake Malva Pudding with Cream Cheese Sauce
Well, this was an experiment that actually went right — I figured out the tricky parts so you don’t have to!
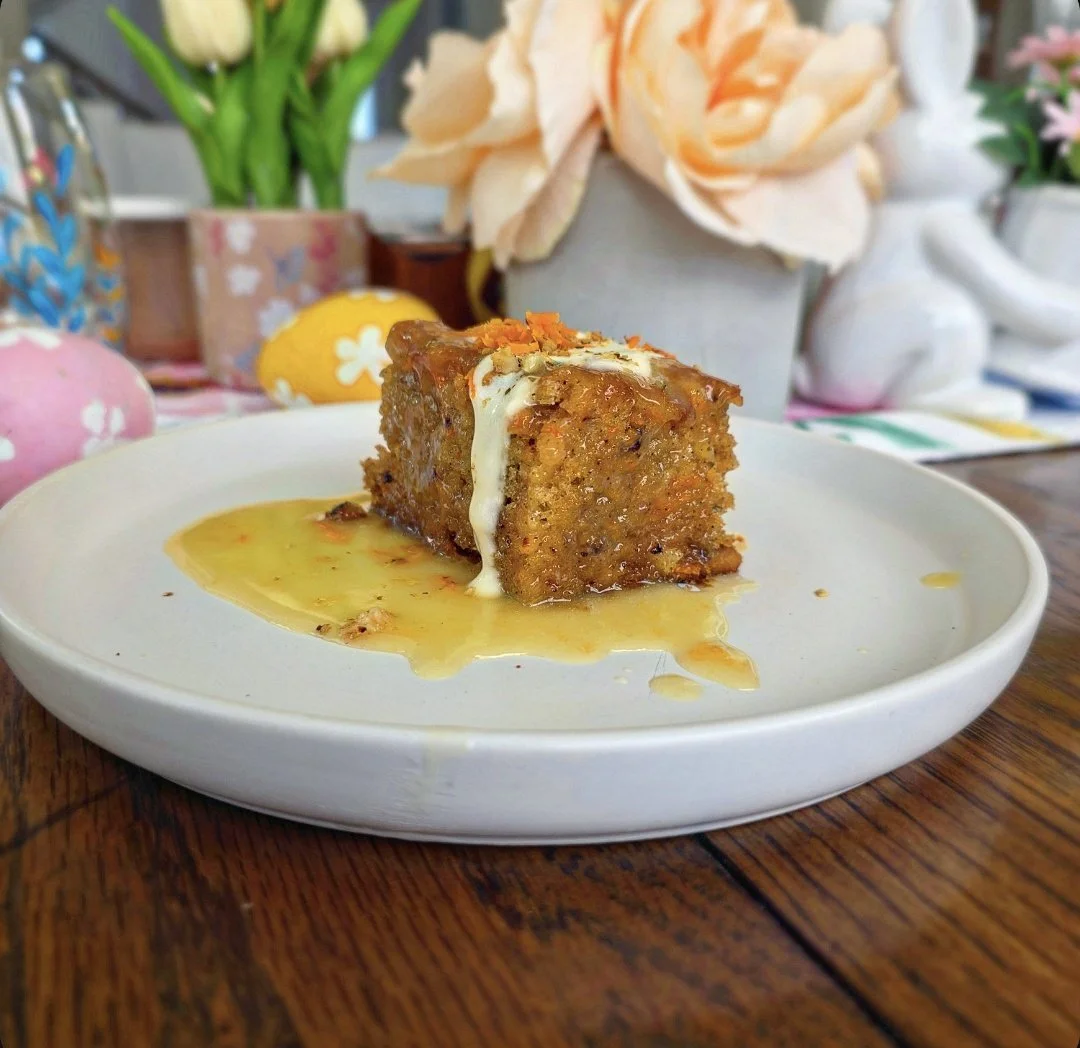
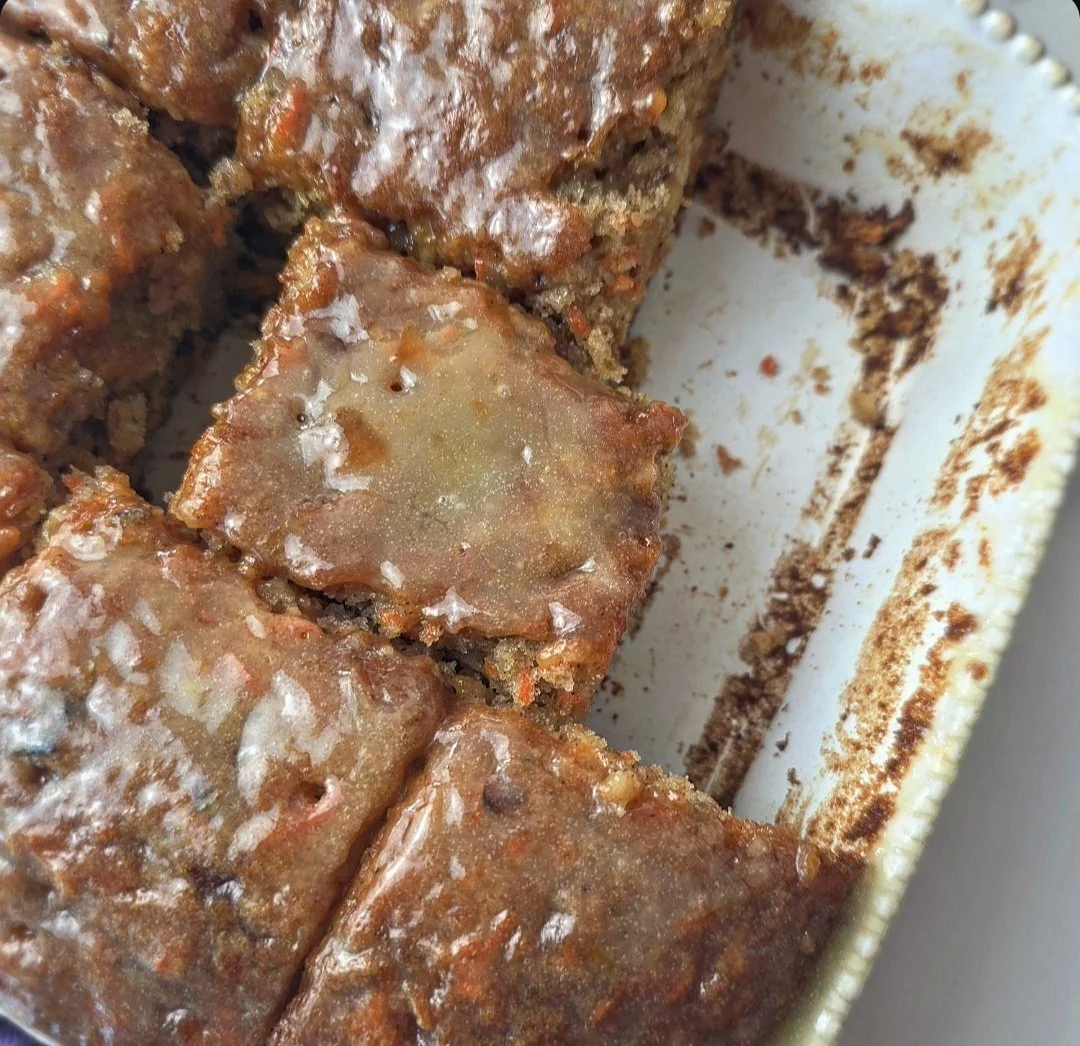
The dessert that brings together the warm, spiced flavors of carrot cake with the soft, sticky indulgence of South African malva pudding. It is not a fully traditional pudding. It has the body of a soft crumb cake, with a lightly caramelized top, a buttery, soaked texture near the surface, and a drizzle of cream cheese sauce that makes each bite rich and luscious.
I have always loved malva pudding growing up. It is a South African favorite, usually served with custard or ice cream. For this version, I swapped in a cream cheese sauce instead, giving it a slightly tangy lift that works perfectly with the carrots, walnuts, and apricot pockets. The result is soft, flavorful, and a little playful. It is perfect for spring or anytime you want a dessert that feels cozy but still a bit special.
Carrots add moisture, so it is important to pat them dry slightly before adding them to the batter. When it comes to the butter sauce, people often undersauce more than they oversauce. You can absolutely add more if you want it fully soaked, especially if you are after that classic malva pudding texture. I did not go as heavy on the soak here because the cream cheese sauce already makes it quite indulgent.
That said, if you are a malva pudding lover, you will want to make sure the butter sauce really gets in there. Just keep in mind this version leans more toward a soft crumb cake rather than the fully spongy texture of a traditional malva pudding.
Even if you have never tried malva pudding before, the combination of carrot cake flavors and that silky sauce makes it approachable and irresistible.
This version has a soft crumb cake base, so the buttery soak mostly glistens near the top. The cream cheese sauce ensures every bite is indulgent, and you can poke extra holes if you like a more fully soaked texture.
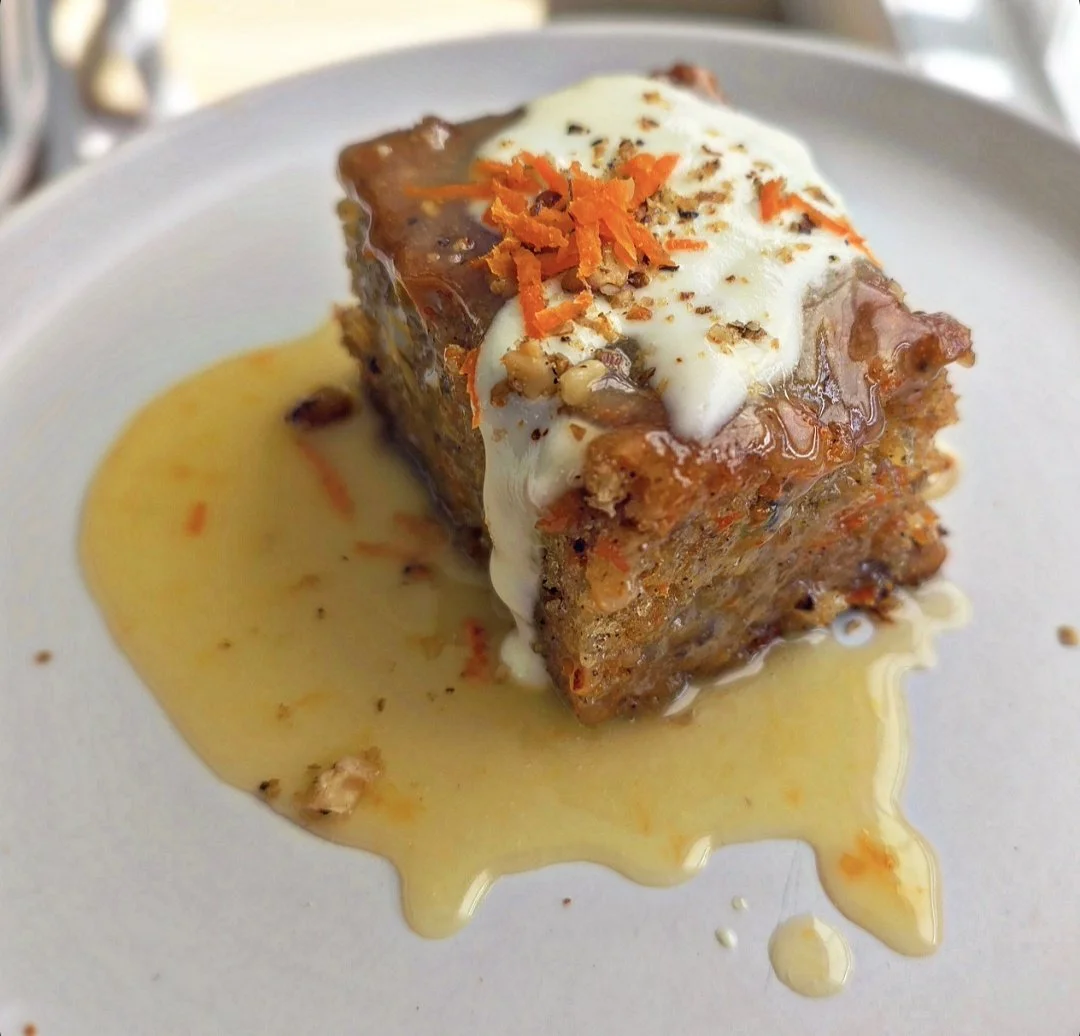

Carrot Cake Malva Pudding with Cream Cheese Sauce
This Carrot Cake Malva Pudding is a soft, spiced dessert combining the warmth of carrot cake with the buttery richness of South African malva pudding. With a tender crumb, lightly caramelized top, butter soak, and silky cream cheese sauce, it’s moist, flavorful, and perfectly balanced.
Ingredients
- 1 ½ cups grated carrot (or 1 cup lightly packed)
- 2 large eggs
- 1 cup sugar
- 1 cup flour
- 1 tsp baking soda
- ½ tsp salt
- 1 tsp cinnamon
- ½ ground ginger
- ½ tsp nutmeg
- ½ tsp vanilla
- ½ cup neutral oil (e.g. peanut or coconut)
- ½ cup milk
- 2-3 tbsp apricot jam/preserves
- 1 tsp white vinegar (or lemon juice)
- ½ cup toasted walnuts, chopped
- ½ cup butter
- ½ cup sugar
- ½ cup heavy cream
- 2 tbsp apricot jam/preserves
- 4 oz cream cheese, softened
- 2 tbsp sugar
- ½ cup milk
- ½ tsp vanilla
Instructions
- Preheat oven to 350°F / 175°C and grease an 8x8 or 9x9 pan (a 9x13 works if you prefer a thinner pudding).
- In a medium bowl, beat eggs and sugar with a hand mixer until pale and fluffy. Add oil, milk, vanilla, apricot jam, and vinegar. Whisk lightly to combine.
- In a large bowl, combine flour, baking soda, salt, and cinnamon. Make a well in the center.
- Pour the wet ingredients into the dry. Fold gently with a spatula until just combined, do not overmix! Fold in carrots and walnuts carefully, making sure everything is evenly distributed without overworking the batter.
- Spread batter evenly in the pan and lightly tap to release air bubbles. Bake 35–40 minutes, starting to check at 30 minutes. A toothpick should come out mostly clean; slight moisture in the center is okay.
- While the cake bakes, melt butter, cream, sugar, and water together until smooth. When the cake is out of the oven, poke holes all over and pour the sauce evenly over the warm cake. Let it absorb for 5–10 minutes.
- In a small pot over low heat, gently whisk cream cheese, sugar, and milk until smooth and pourable. Stir continuously for 5 minutes, then let sit for 2–3 minutes to thicken slightly. Avoid high heat to prevent clumps.
- Cut carefully with a spatula or serrated knife. Drizzle cream cheese sauce over the top, add any remaining butter sauce, and sprinkle with walnuts and a few carrot shreds.
Notes
Tips:
- Be careful not to overmix the batter to prevent tunnels and holes.
- Too-wet carrots can make the base soggy; pat them dry (not completely bone dry).
- Greasing the bottom of the pan helps create a slight crust for texture.
- The center may be slightly jiggly when removed from the oven; this is normal for a malva-style pudding.
- Don’t overbake, or the pudding will dry out.
- Use a 9x9 or 9x13 pan depending on the depth you prefer; this will affect texture.
- The butter soak naturally settles more toward the top, while the cream cheese sauce adds richness throughout. For a fully soaked effect, poke extra holes in the cake and pour a little more butter sauce over each slice.
Storage:
- Pudding/Cake: Store covered at room temperature for up to 2 days, or in the refrigerator for up to 5 days. Reheat gently if desired.
- Butter Sauce: Keep in an airtight container in the fridge for up to 1 week. Rewarm before using.
- Cream Cheese Sauce: Store in an airtight container in the fridge for up to 3 days. Rewarm gently over low heat, stirring constantly to prevent separation.
I am not a certified nutritionist and any nutritional information on dontmissmyplate.com should only be used as a general guideline.