
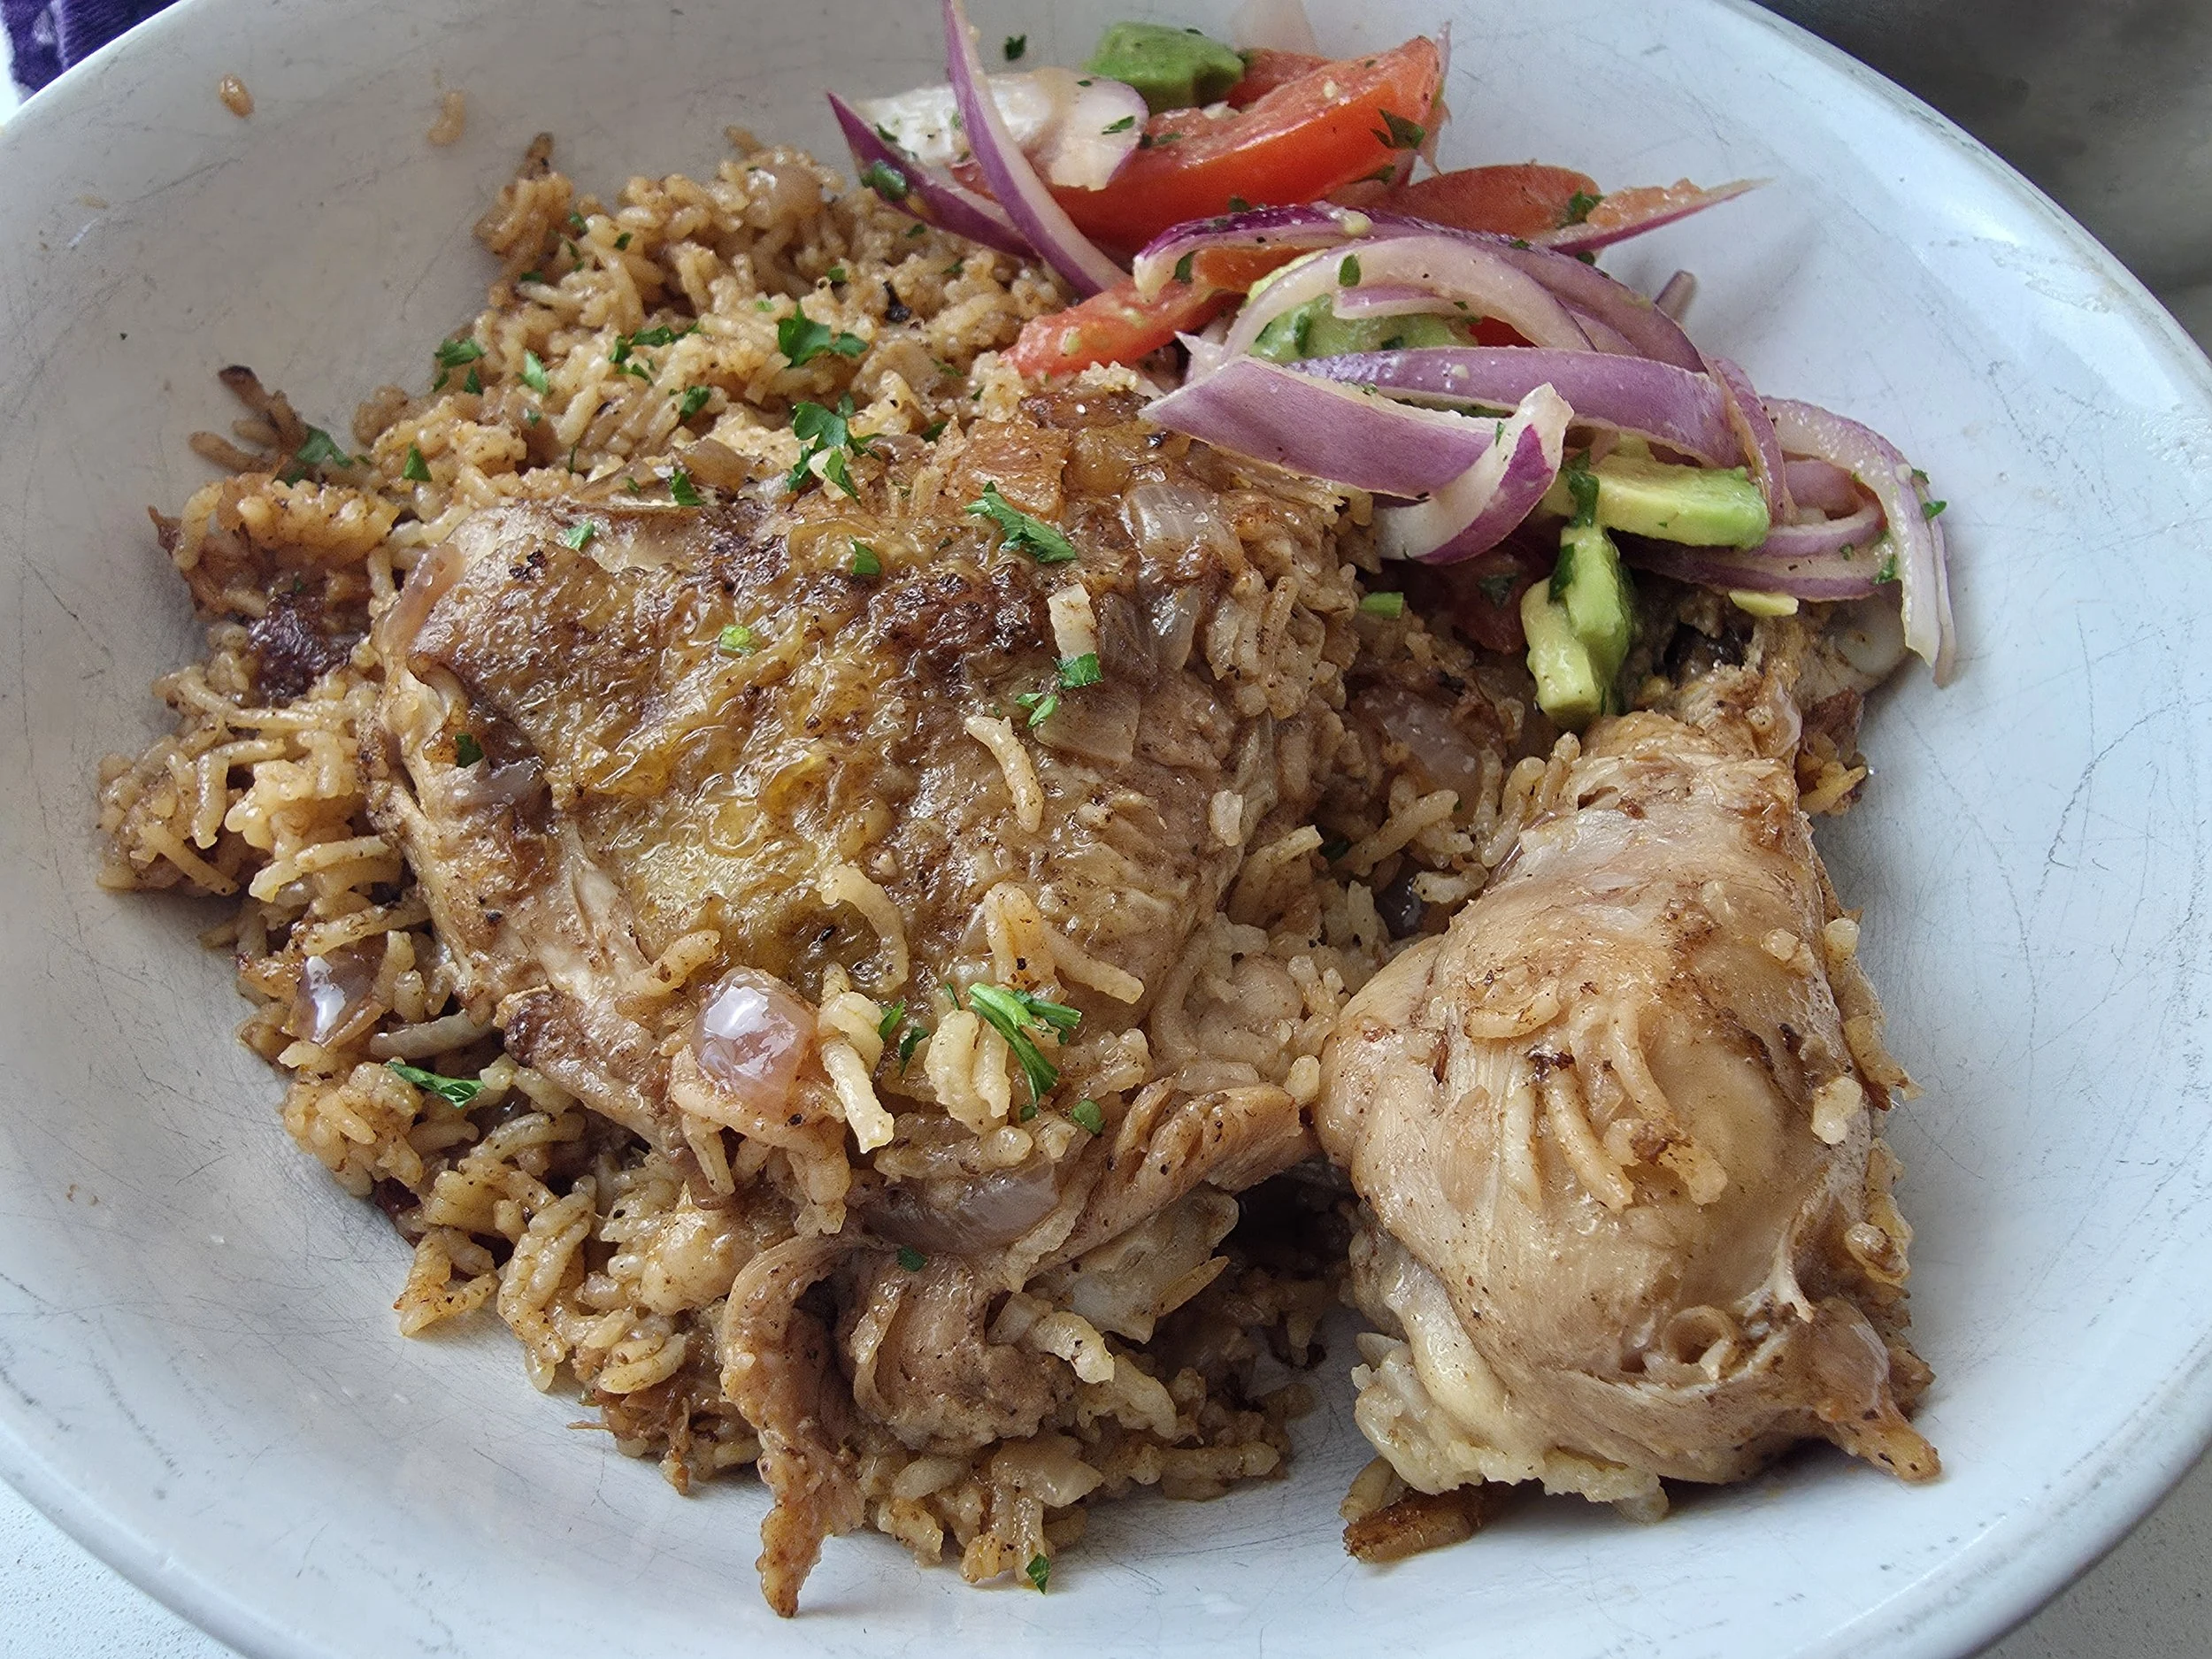
Peri-Peri Chicken Braai Plate with Cream Soda
This peri-peri chicken braai plate is Part 1 of a three-part series exploring Southern African braai culture, flavour traditions, and modern drink pairings inspired by audience voting.
At the centre of Southern African cooking is the braai, a social and culinary tradition built around fire, gathering, and shared meals. It is not just a cooking method, but a cultural experience where food, conversation, and community come together.
In this first part of the series, peri-peri marinated chicken is paired with a classic cream soda, a nostalgic Southern African soft drink known for its bright green colour and vanilla-like sweetness. The pairing reflects a common regional flavour principle: balancing heat and smoke with sweetness and carbonation to soften spice while enhancing grilled depth.
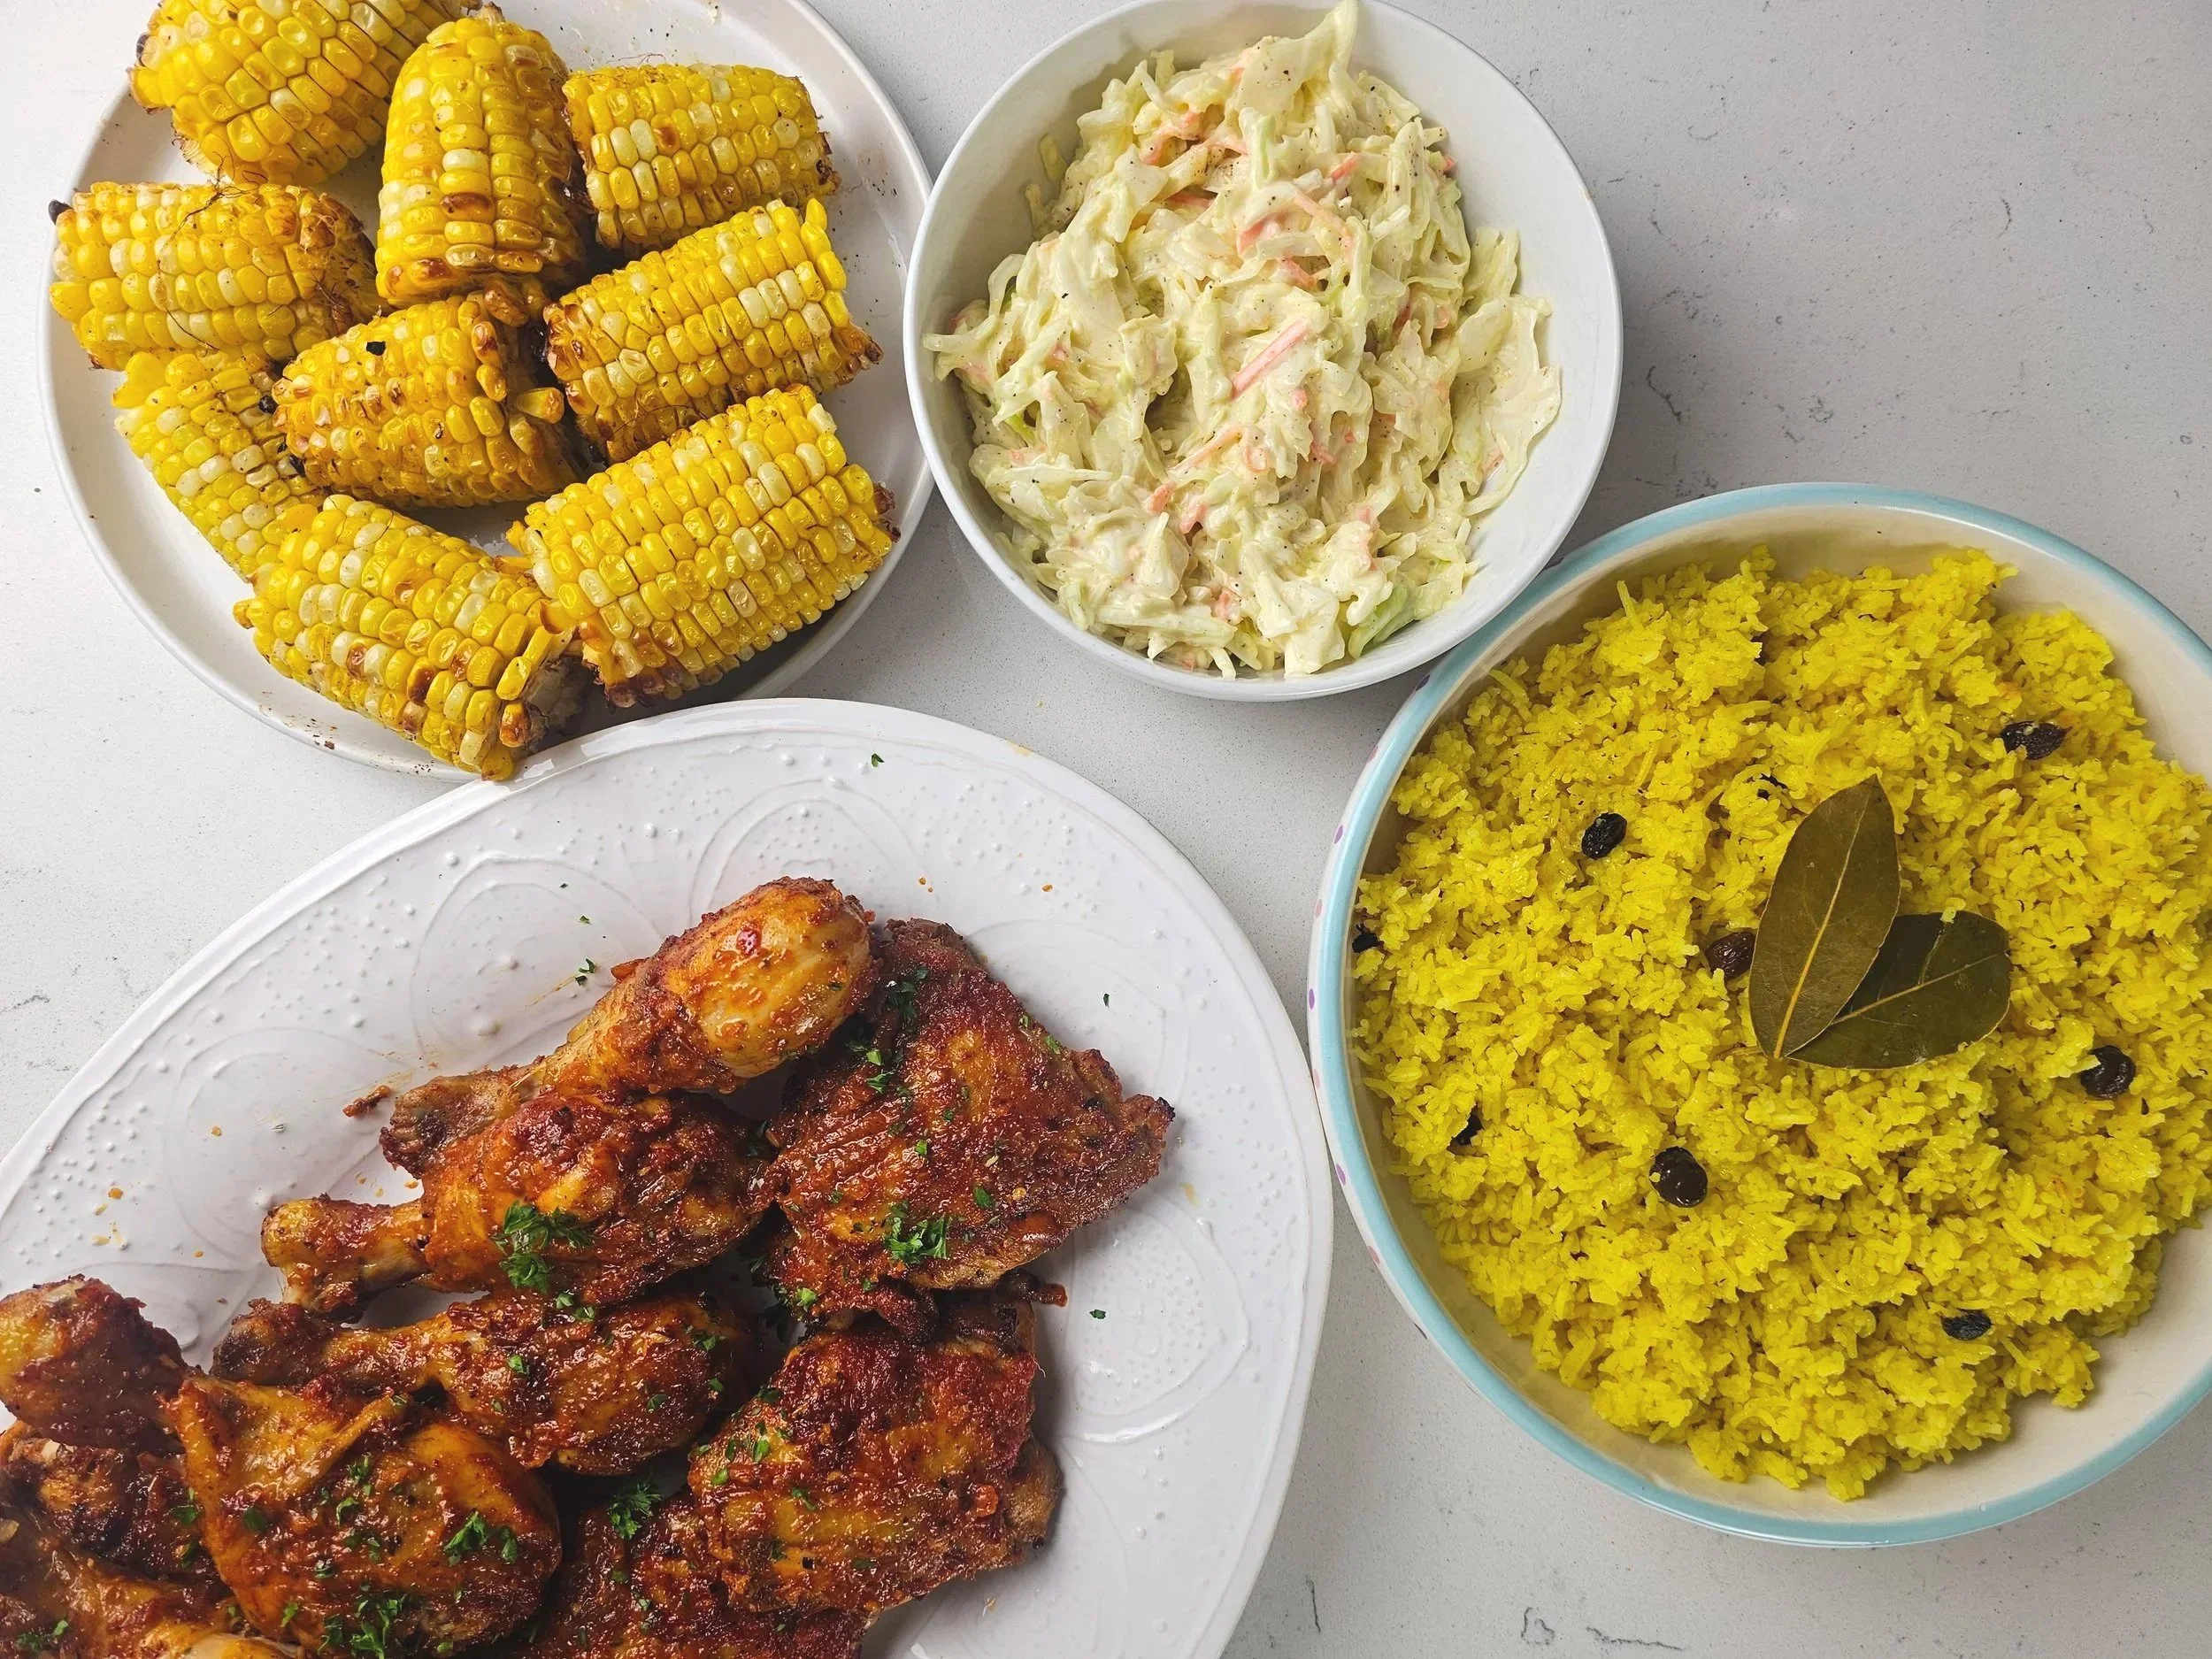
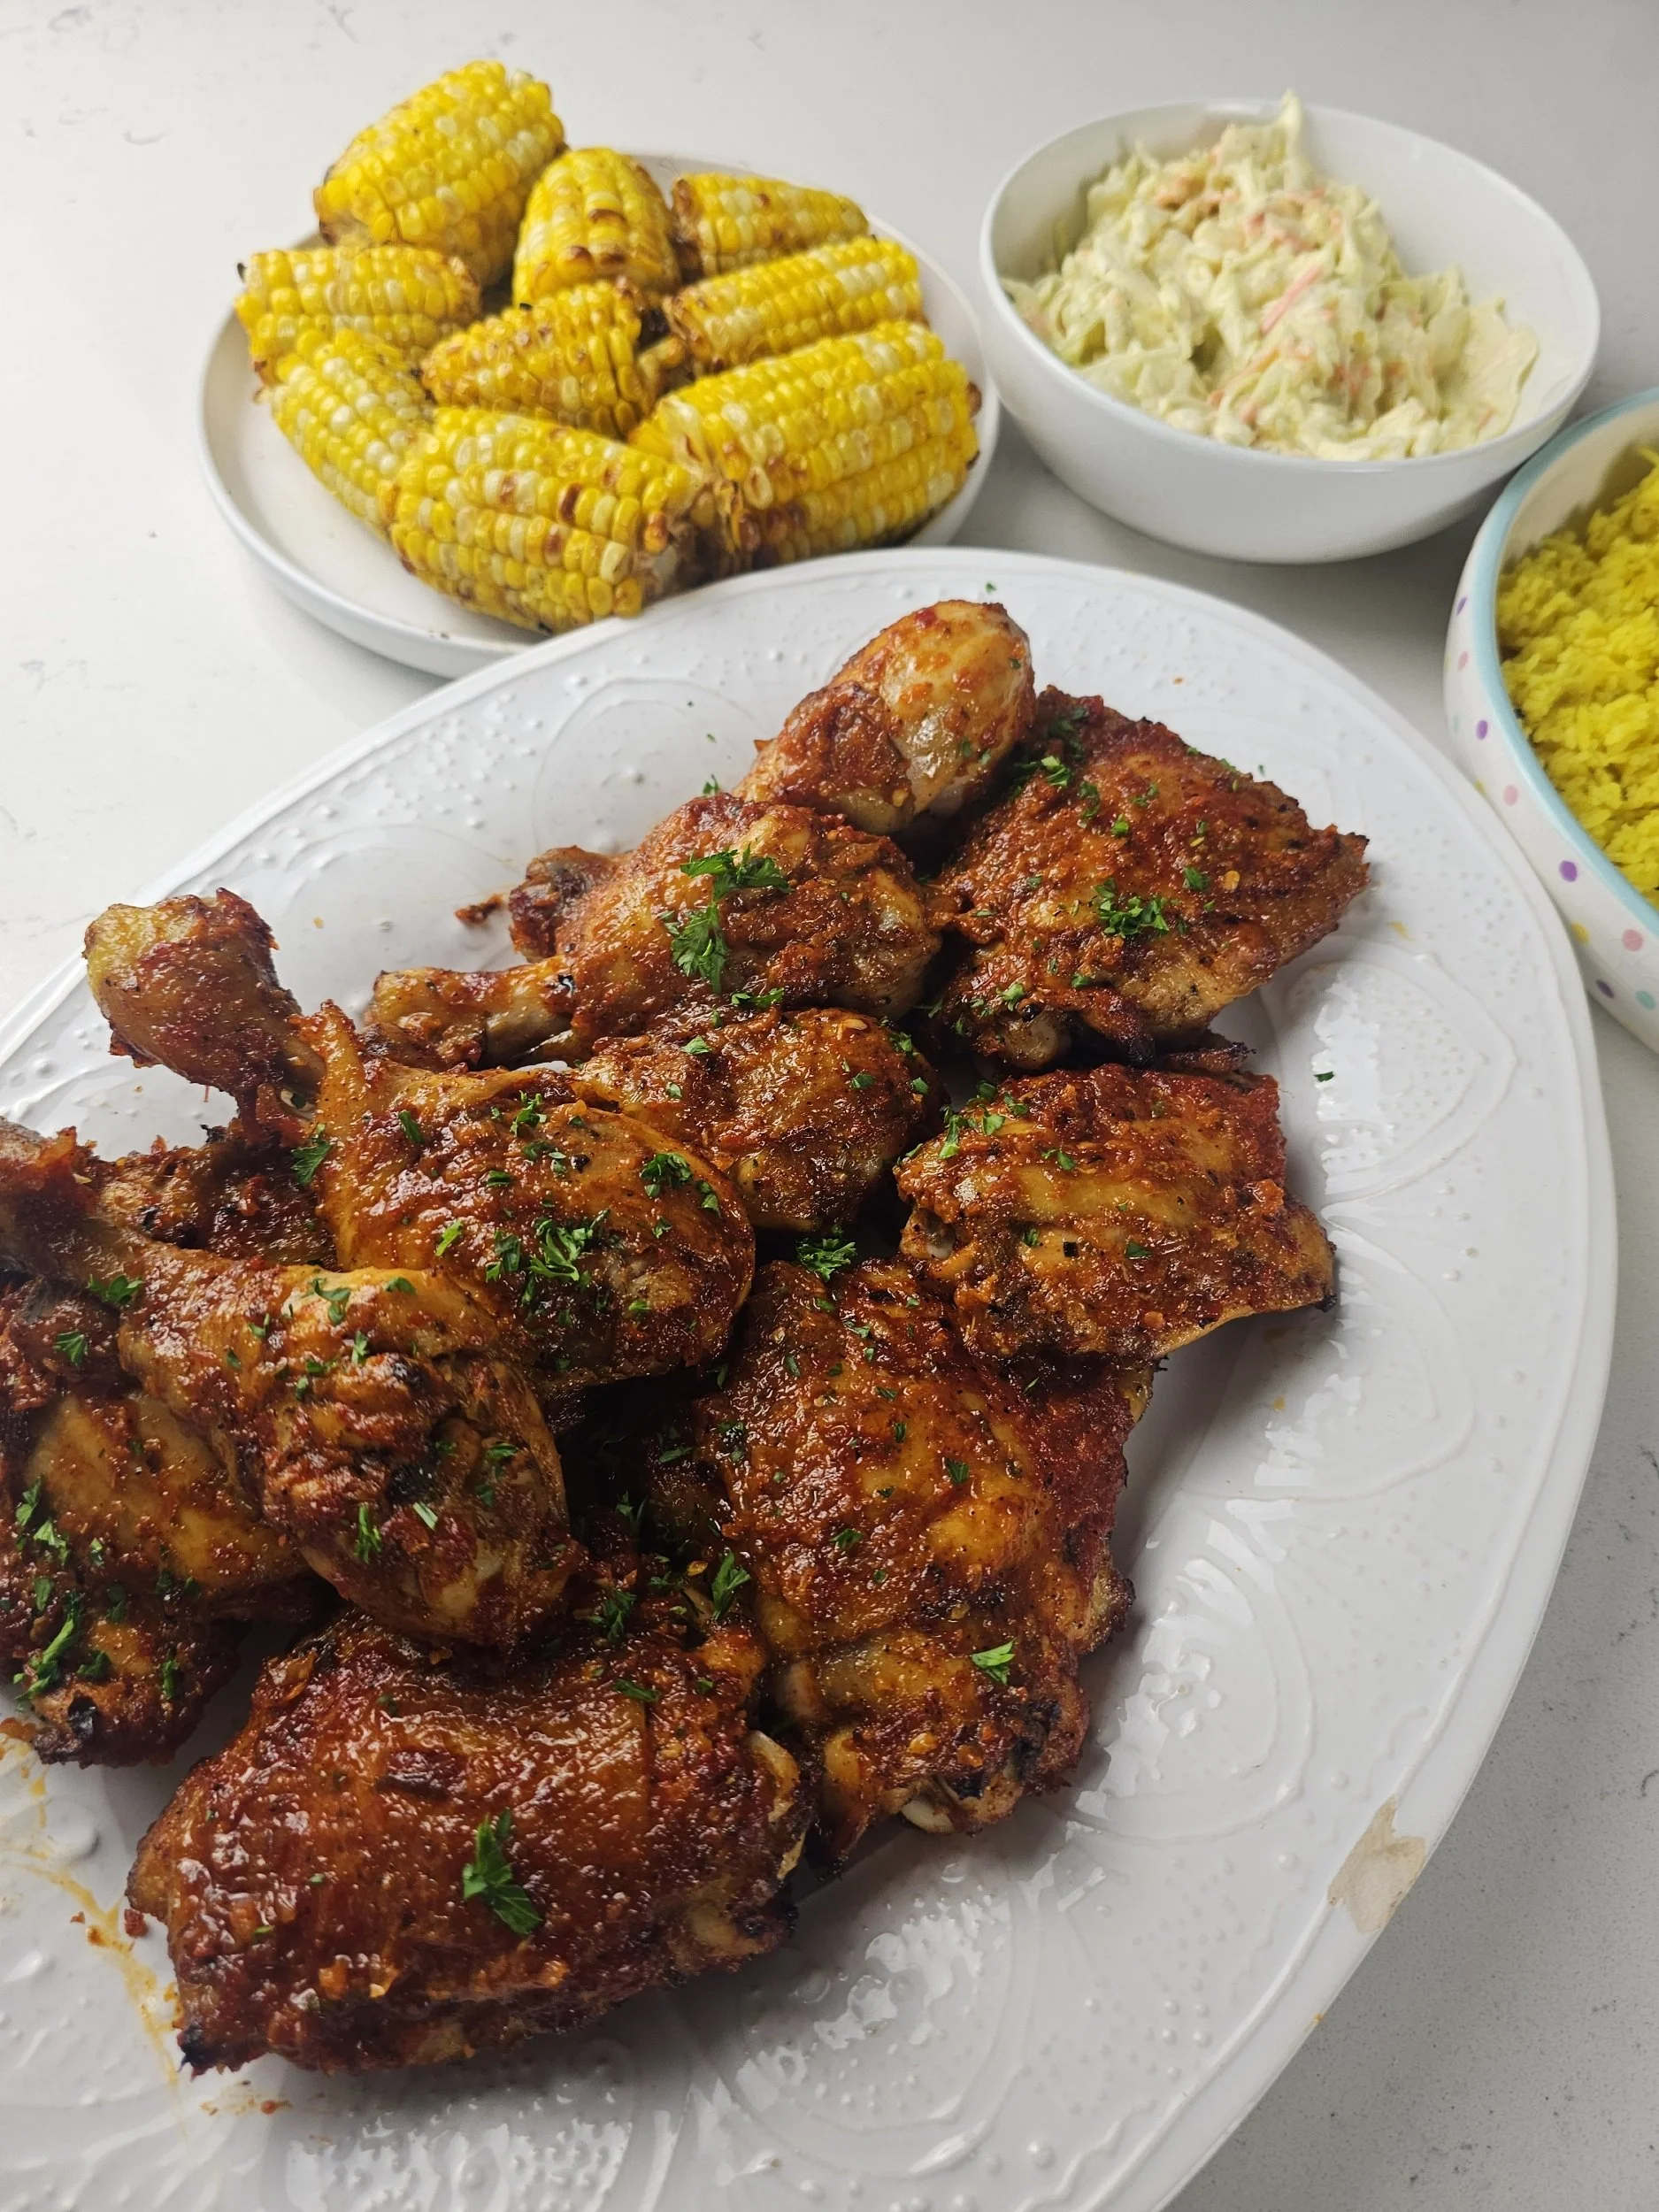
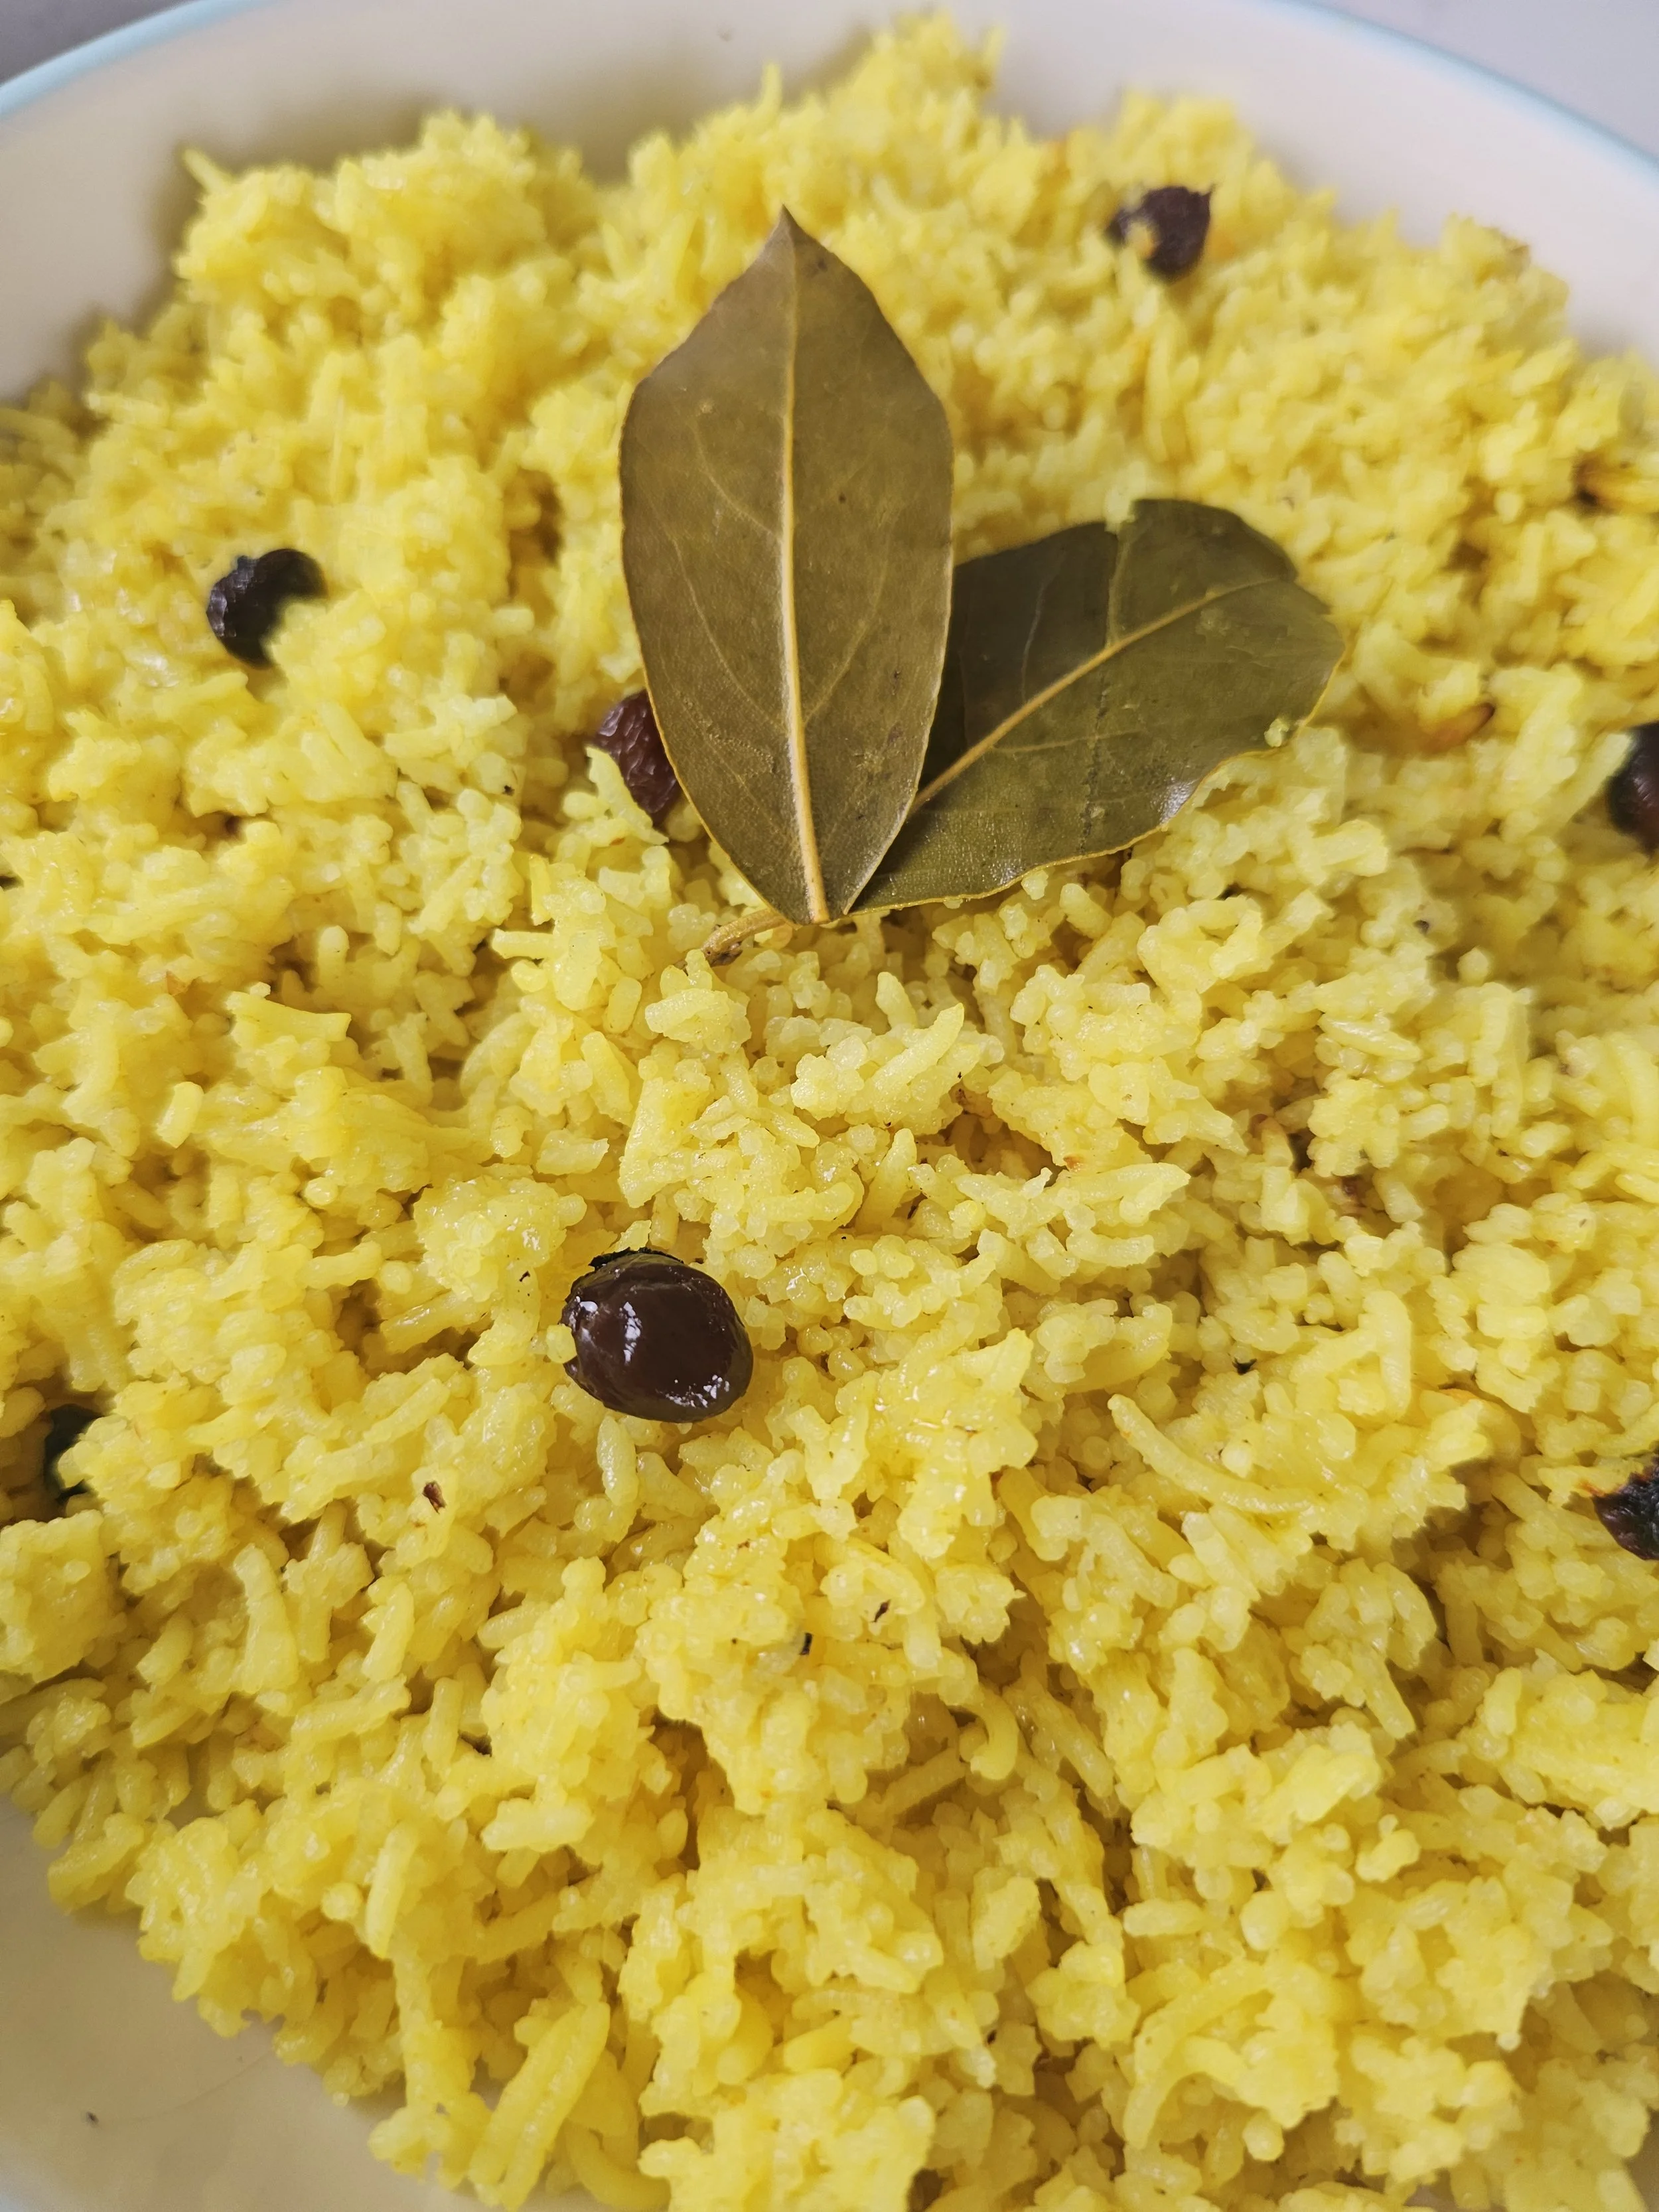
The plate is completed with turmeric yellow rice, grilled corn, and fresh coleslaw, forming a balanced, vibrant summer braai-style meal designed for both flavour and visual storytelling.
This recipe is intended not only as a step-by-step guide, but also as an introduction to how braai culture translates into home kitchens using accessible equipment like ovens and indoor grills.
Continue the series: Braai-Style Spiced Lamb Chops with Pine Nut

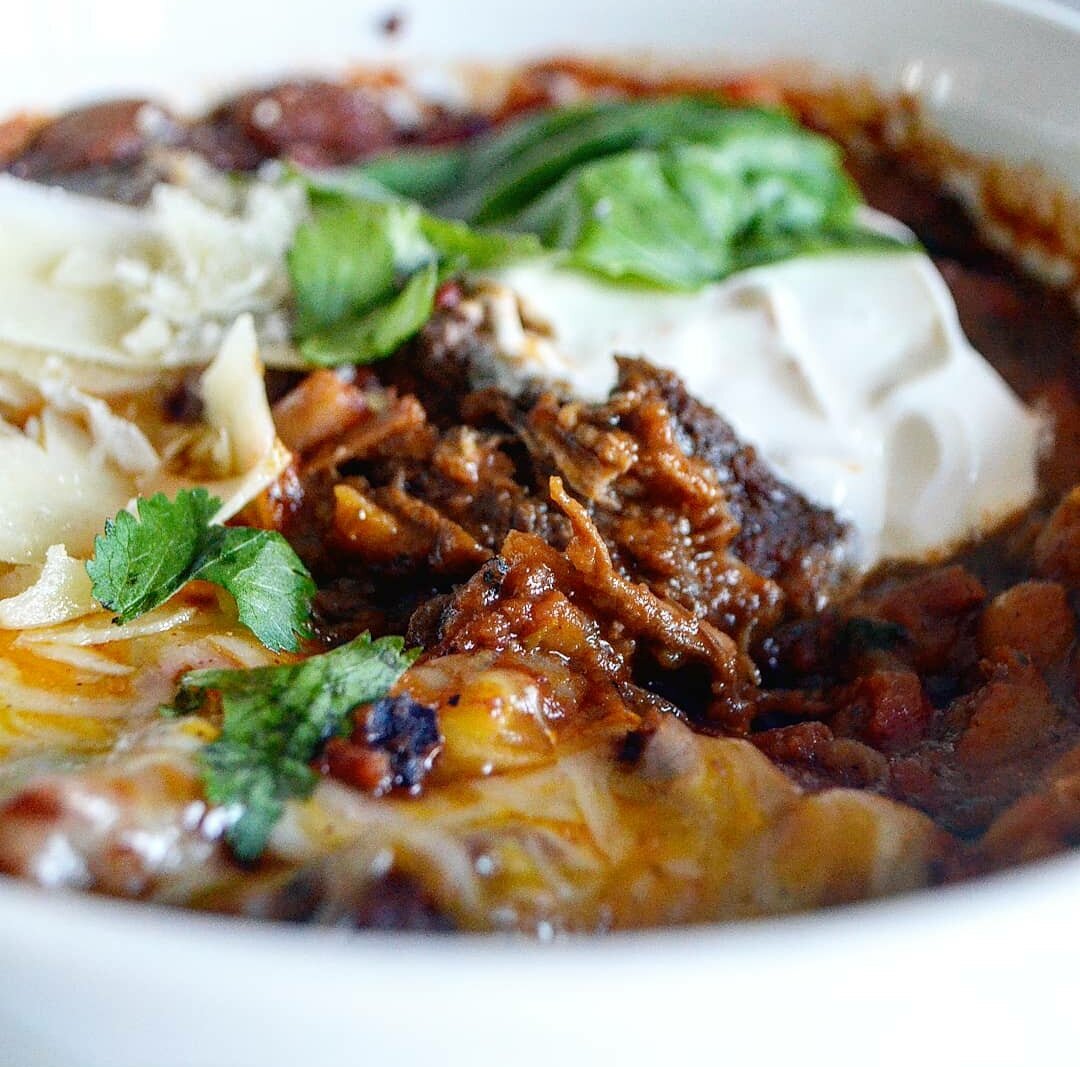
Peri Peri Chicken with Yellow Rice, Corn and Coleslaw
A bold and flavorful peri-peri chicken braai plate inspired by Southern African cookout culture. Smoky, spicy chicken is served with yellow rice, grilled corn, fresh coleslaw, and paired with cream soda for a nostalgic summer braai experience. Perfect for gatherings, weekend grilling, or an easy indoor braai-style meal.
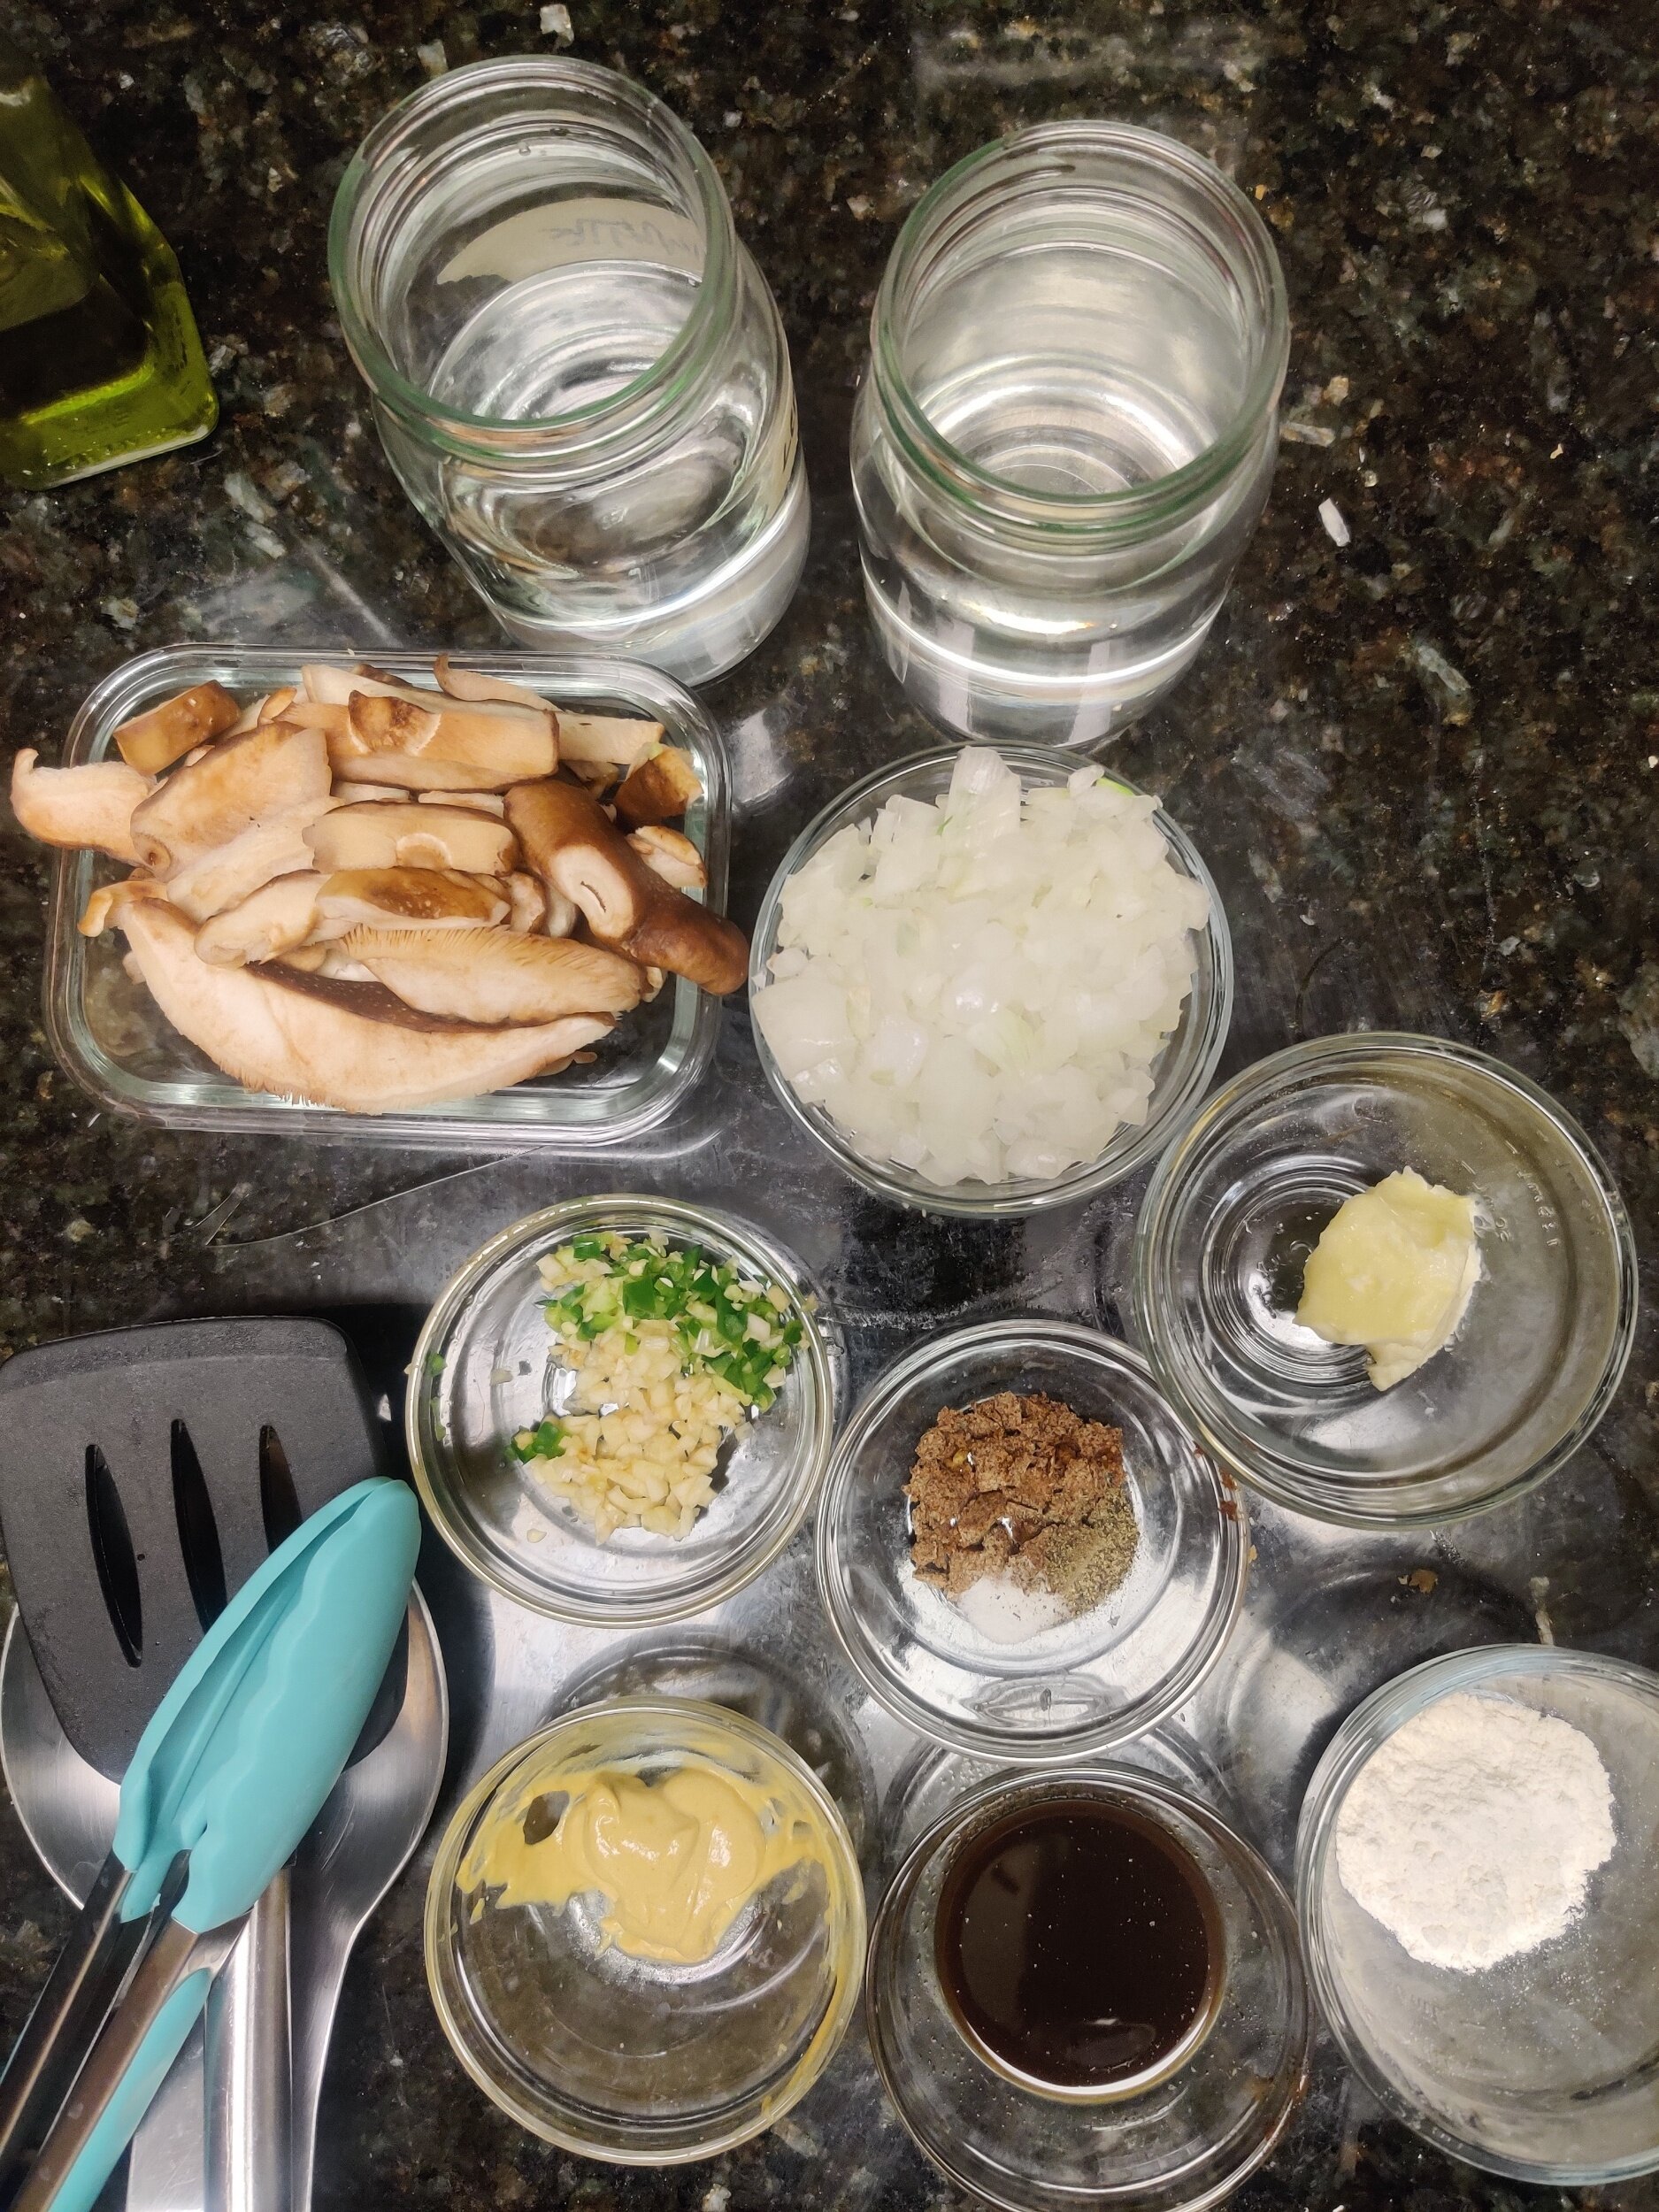
Ingredients
- 10 chicken pieces (mix of thighs and drumsticks)
- 2 tbsp Portuguese or chicken seasoning (I used Robertson’s)
- 1 tsp salt
- 1 tsp black pepper
- 1 tbsp chili flakes (optional)
- 1 tbsp olive oil
- 4–5 garlic cloves, unpeeled
- 3–4 bird’s eye or Thai chili peppers
- 1 red bell pepper, core removed and halved
- ½ large onion, cut into wedges
- 1 tsp salt
- 2 tsp smoked paprika
- 2 bay leaves
- 1 tsp dried oregano
- ¼ cup olive oil
- Juice of 1 lemon
- 2 tsp lemon zest
- 1–1½ tsp red wine vinegar
- 1 tsp chili flakes
- 2–3 tbsp fresh parsley, for garnish
- 1½ cups basmati rice
- 3 cups water
- 1 tsp curry powder
- 1 tsp rice seasoning
- 1 tbsp butter or oil
- 2–3 star anise
- 2 bay leaves
- 1 tsp salt
- ¼ cup raisins (optional)
- 4 corn cobs, in husks
- Butter
- Salt, to taste
- Peri-peri or Old Bay seasoning
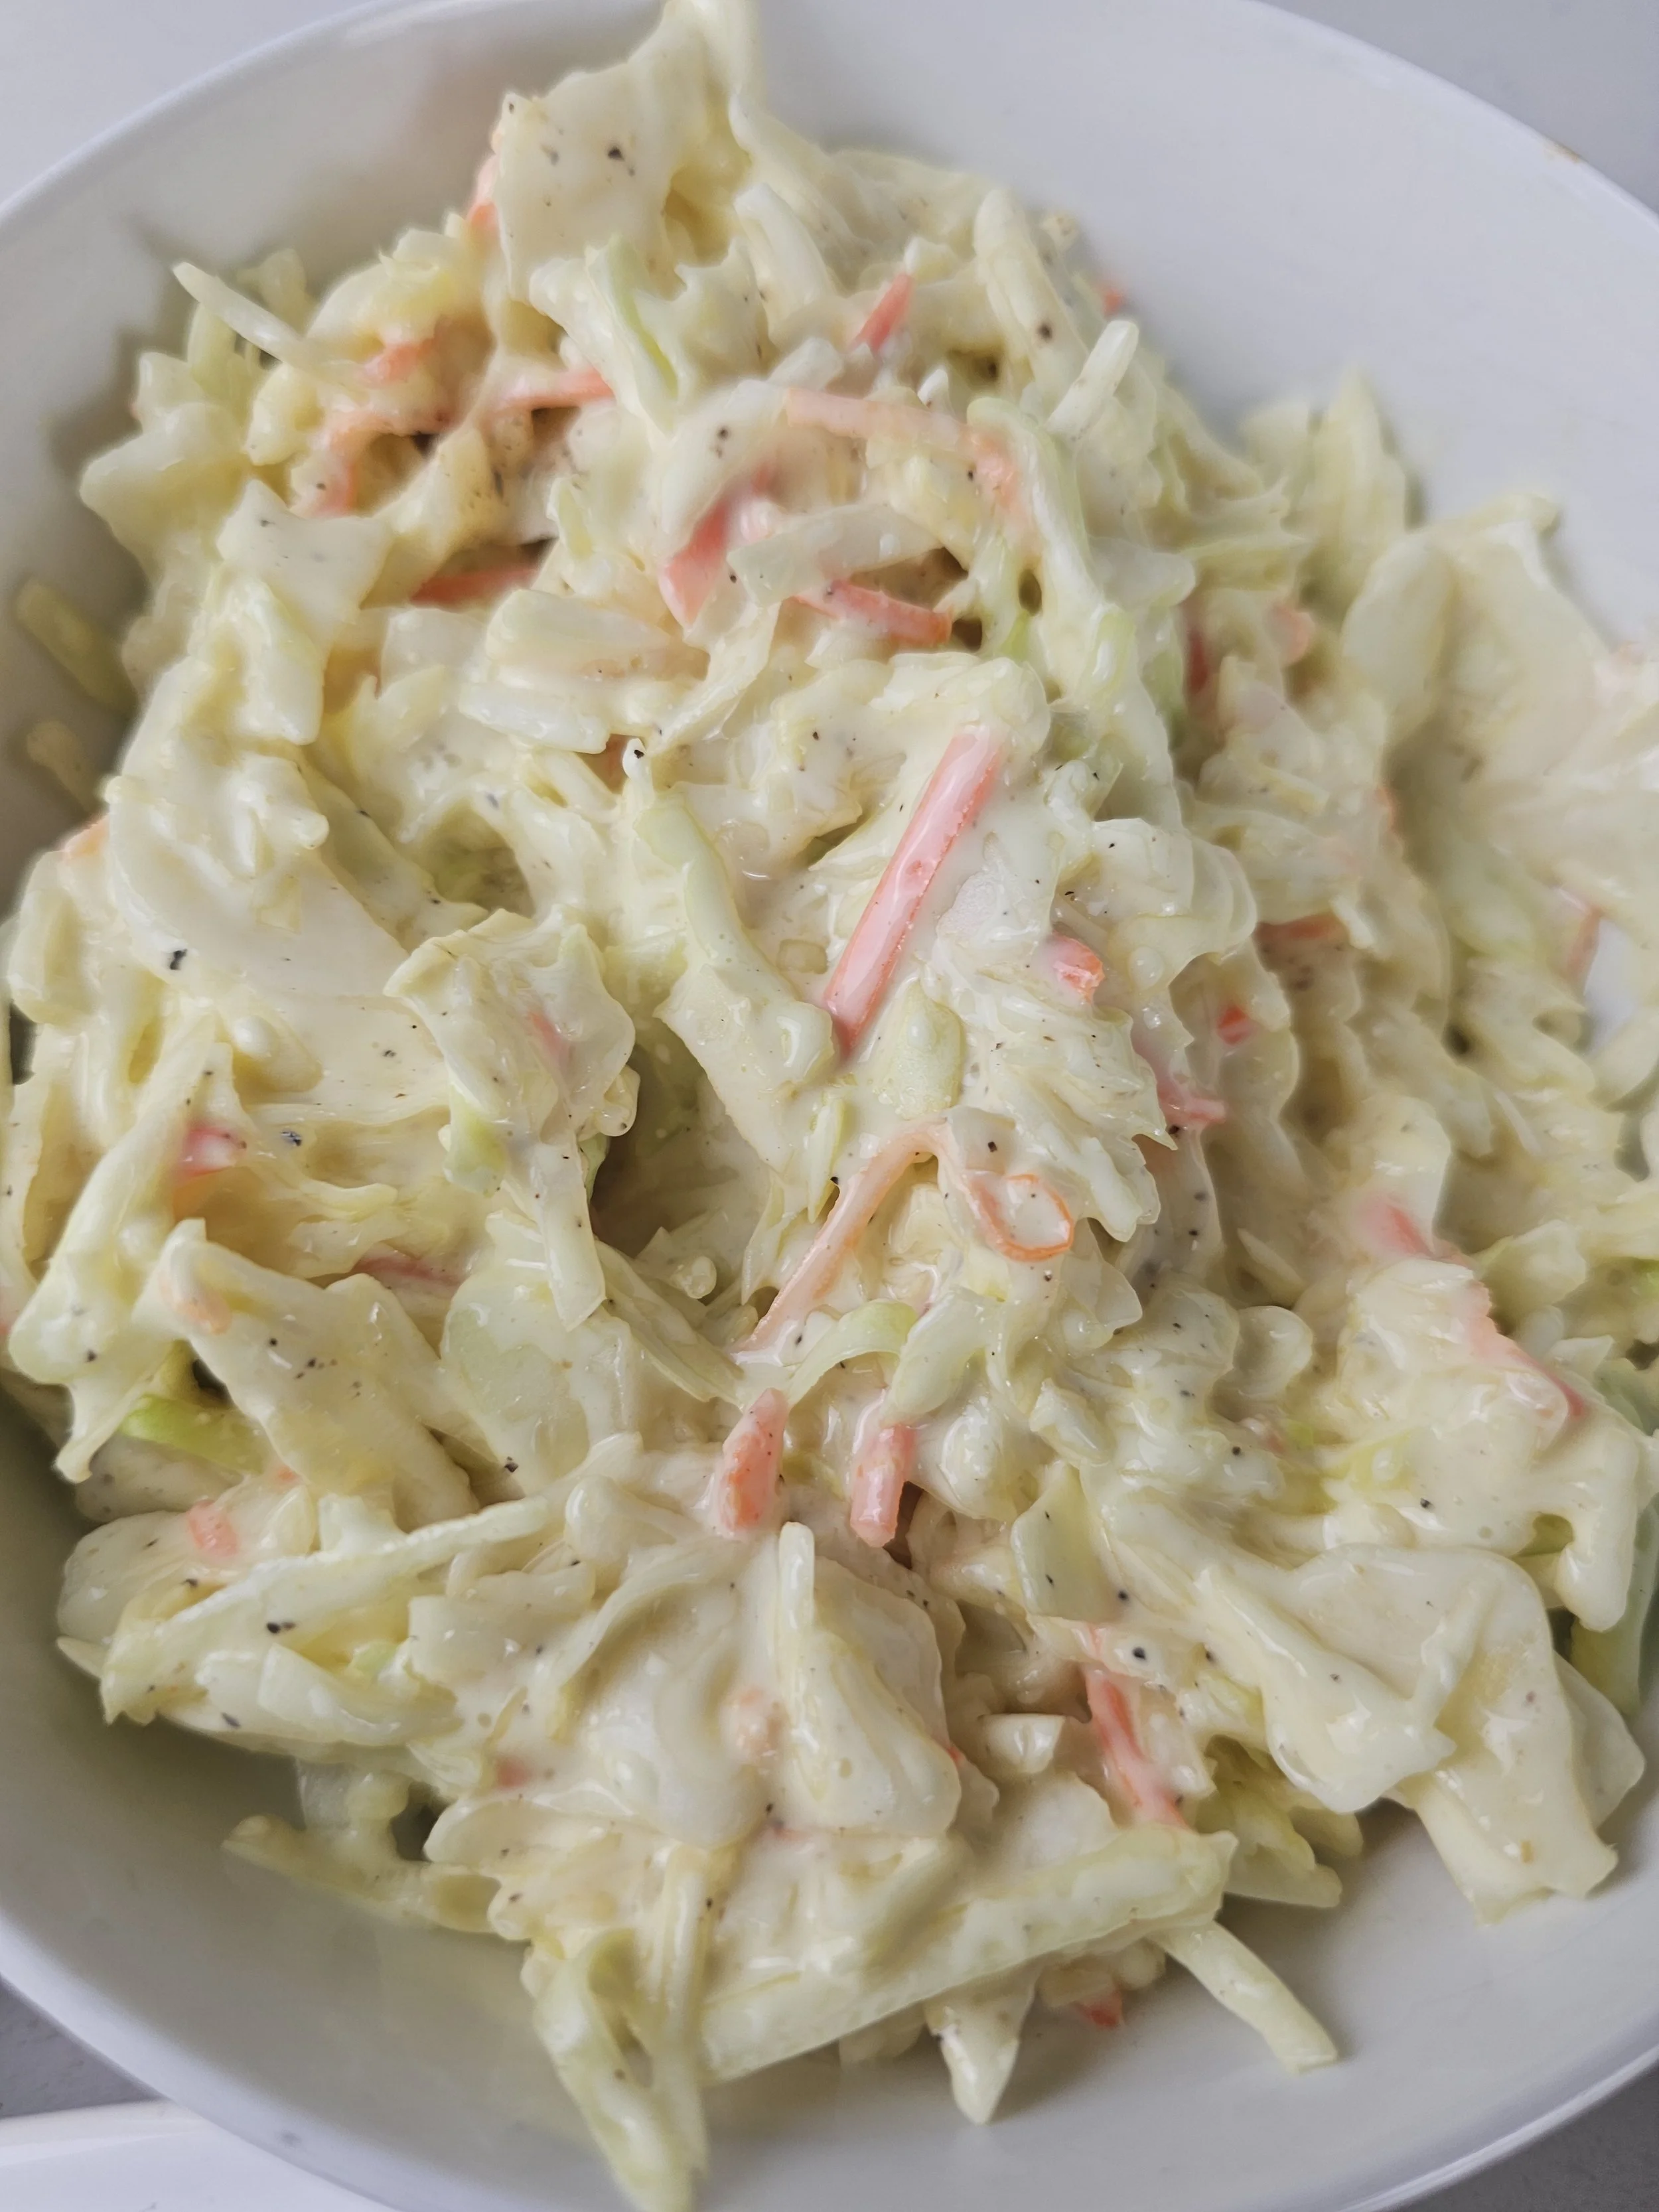
- 4 cups pre-shredded slaw mix (cabbage and carrot)
- ⅓ cup mayonnaise
- 1 tbsp vinegar
- 1 tsp sugar
- Salt and black pepper, to taste
Instructions
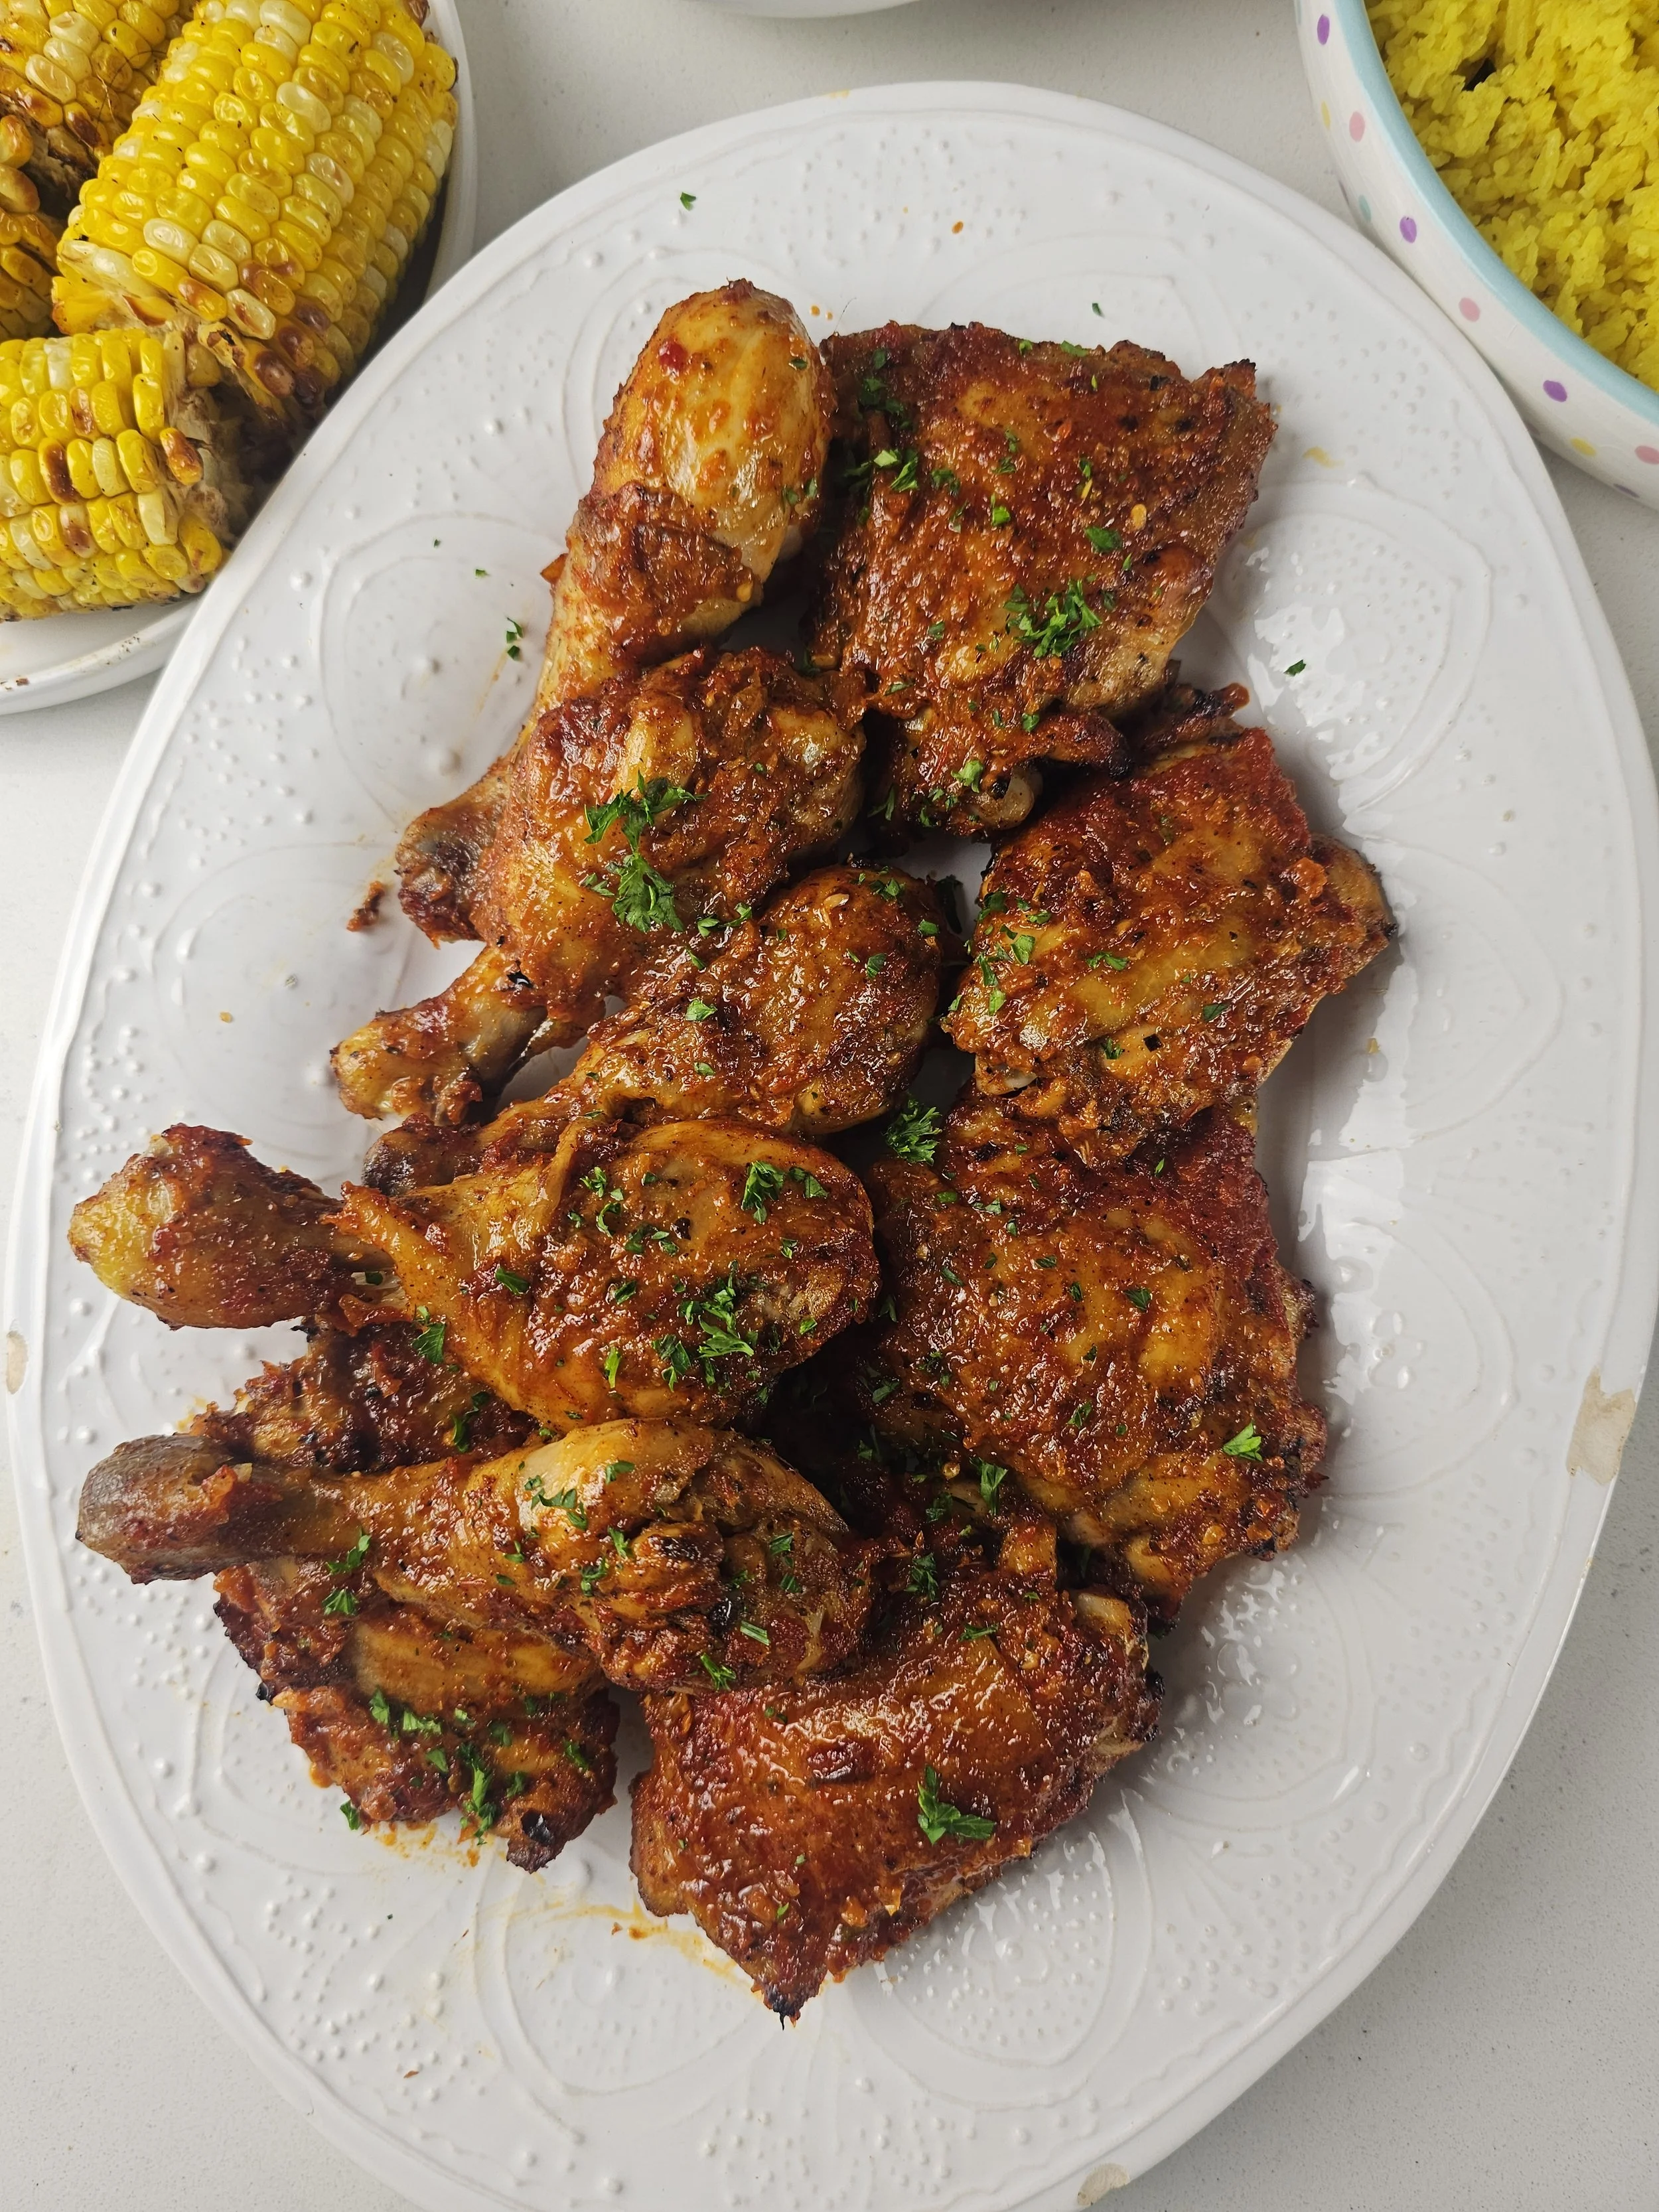
- Season the chicken with Portuguese seasoning, salt, black pepper, chili flakes, and olive oil.
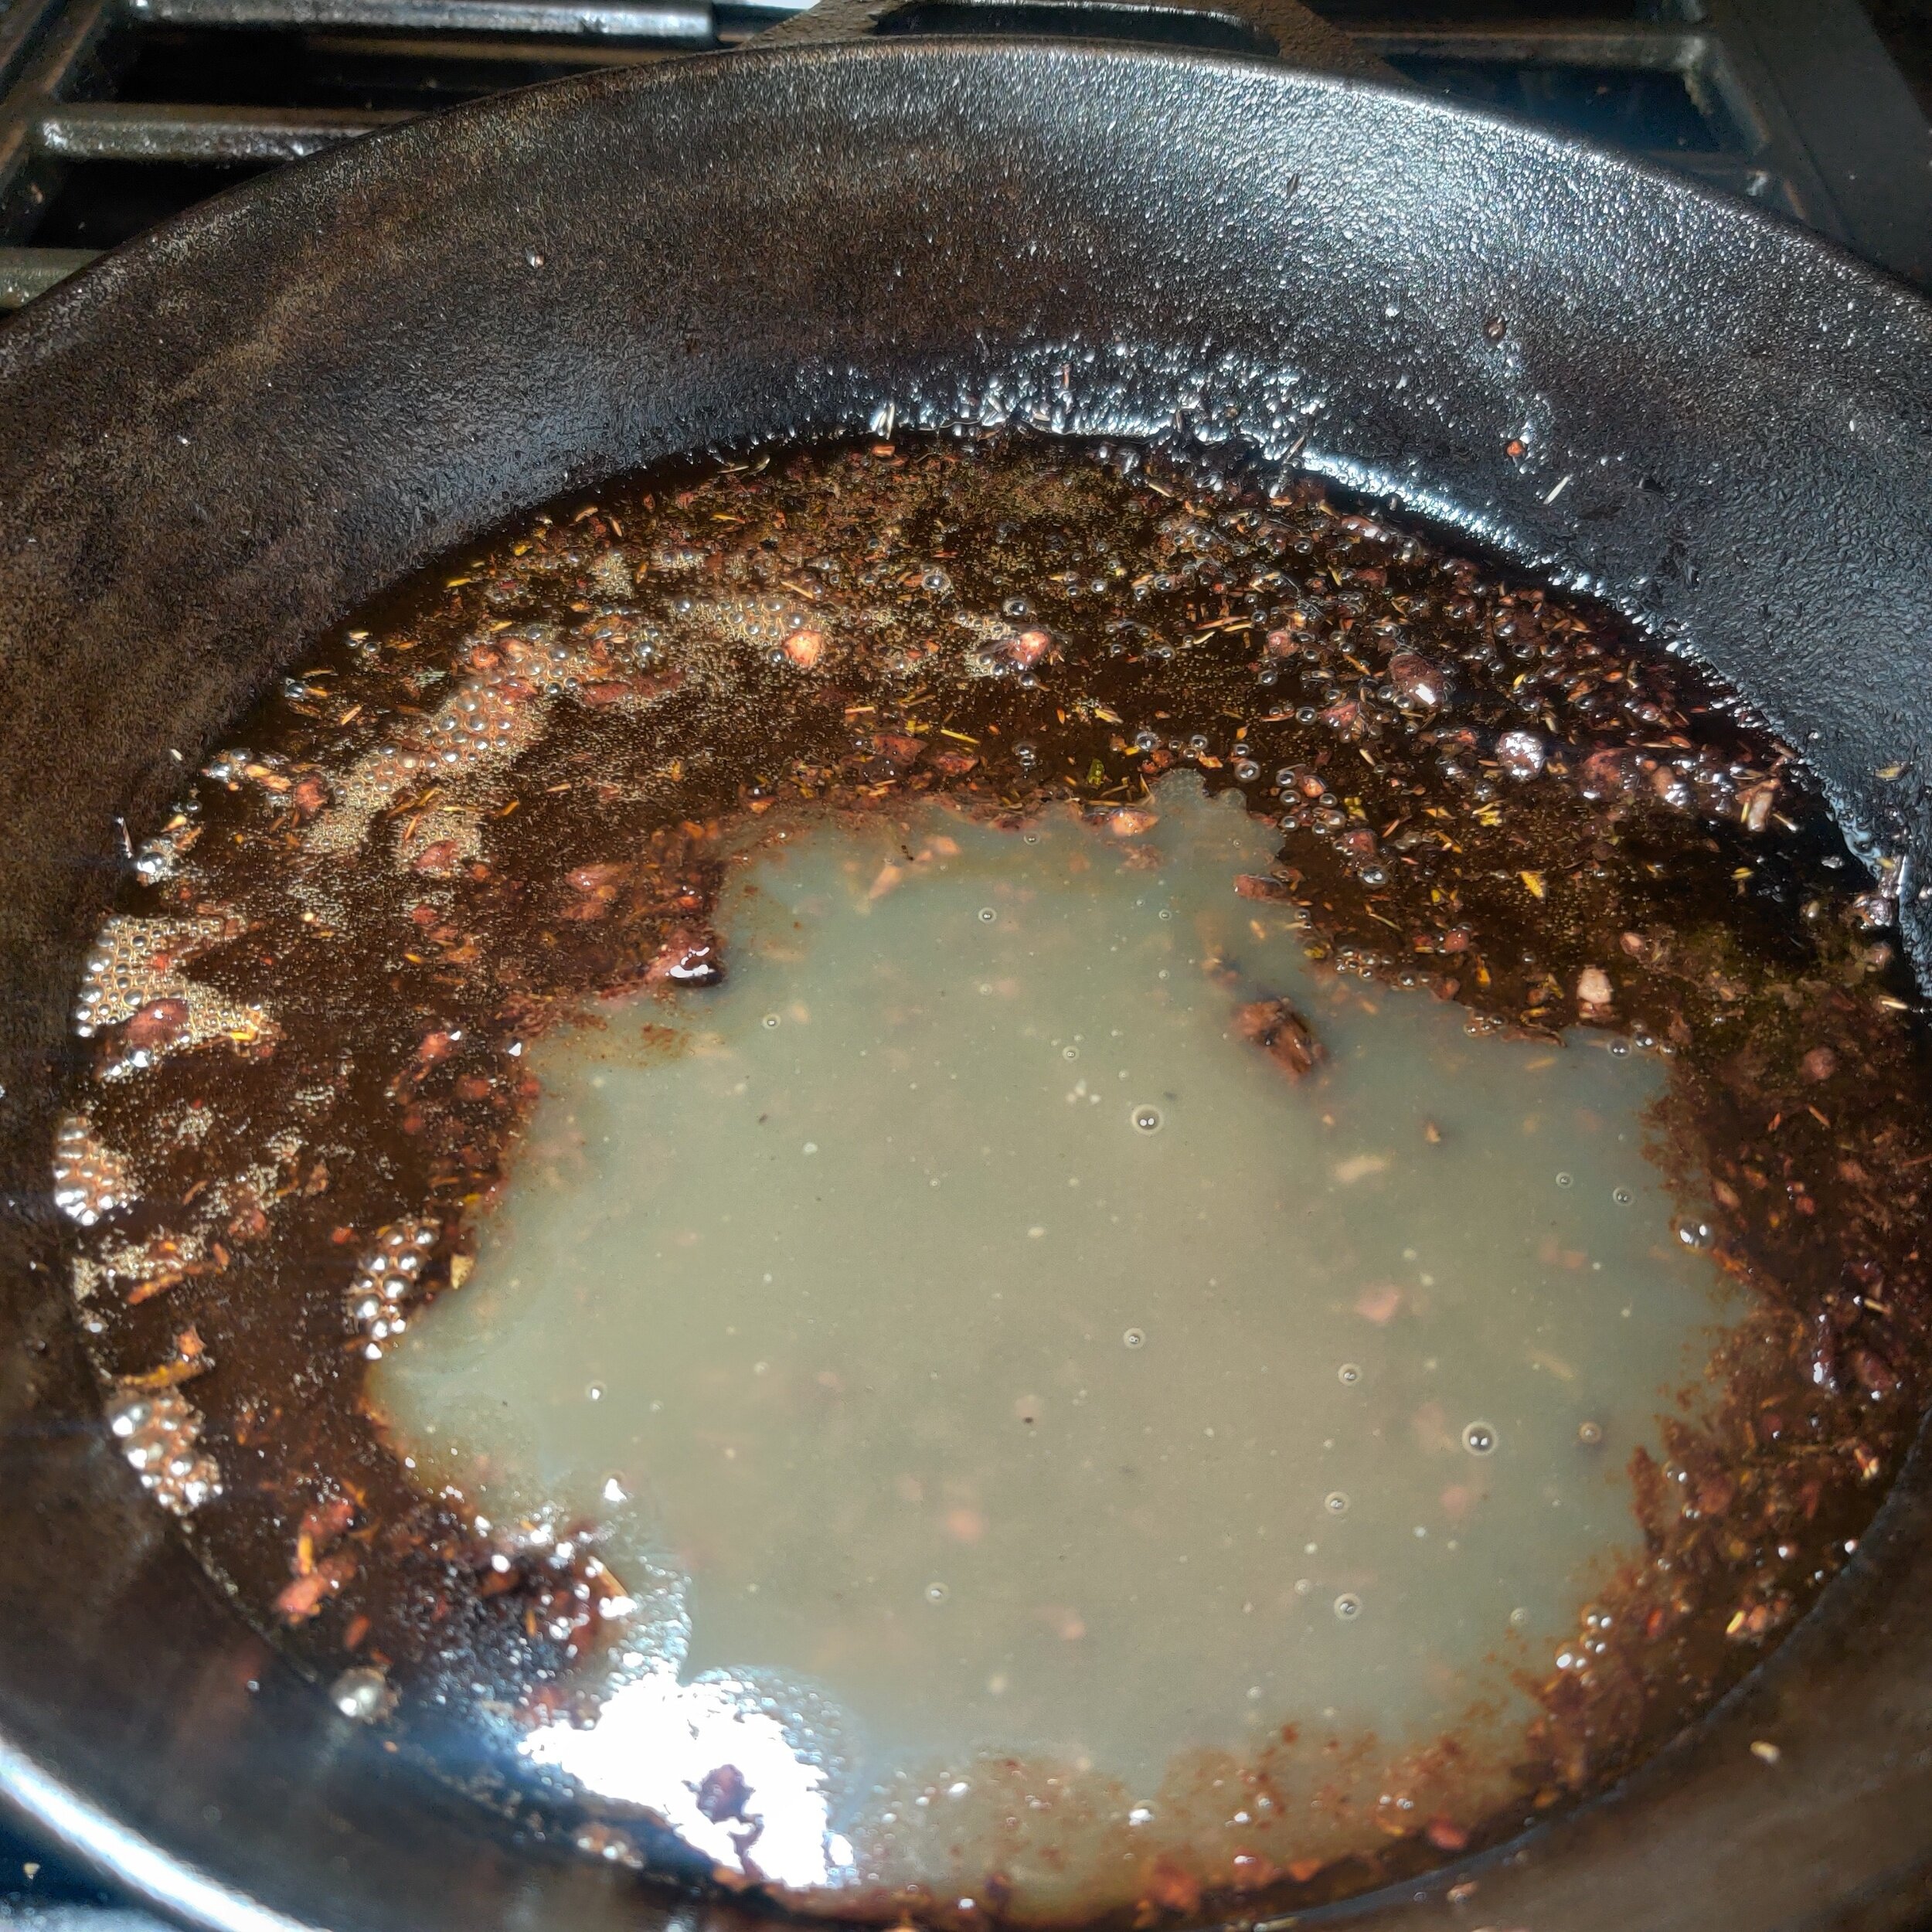
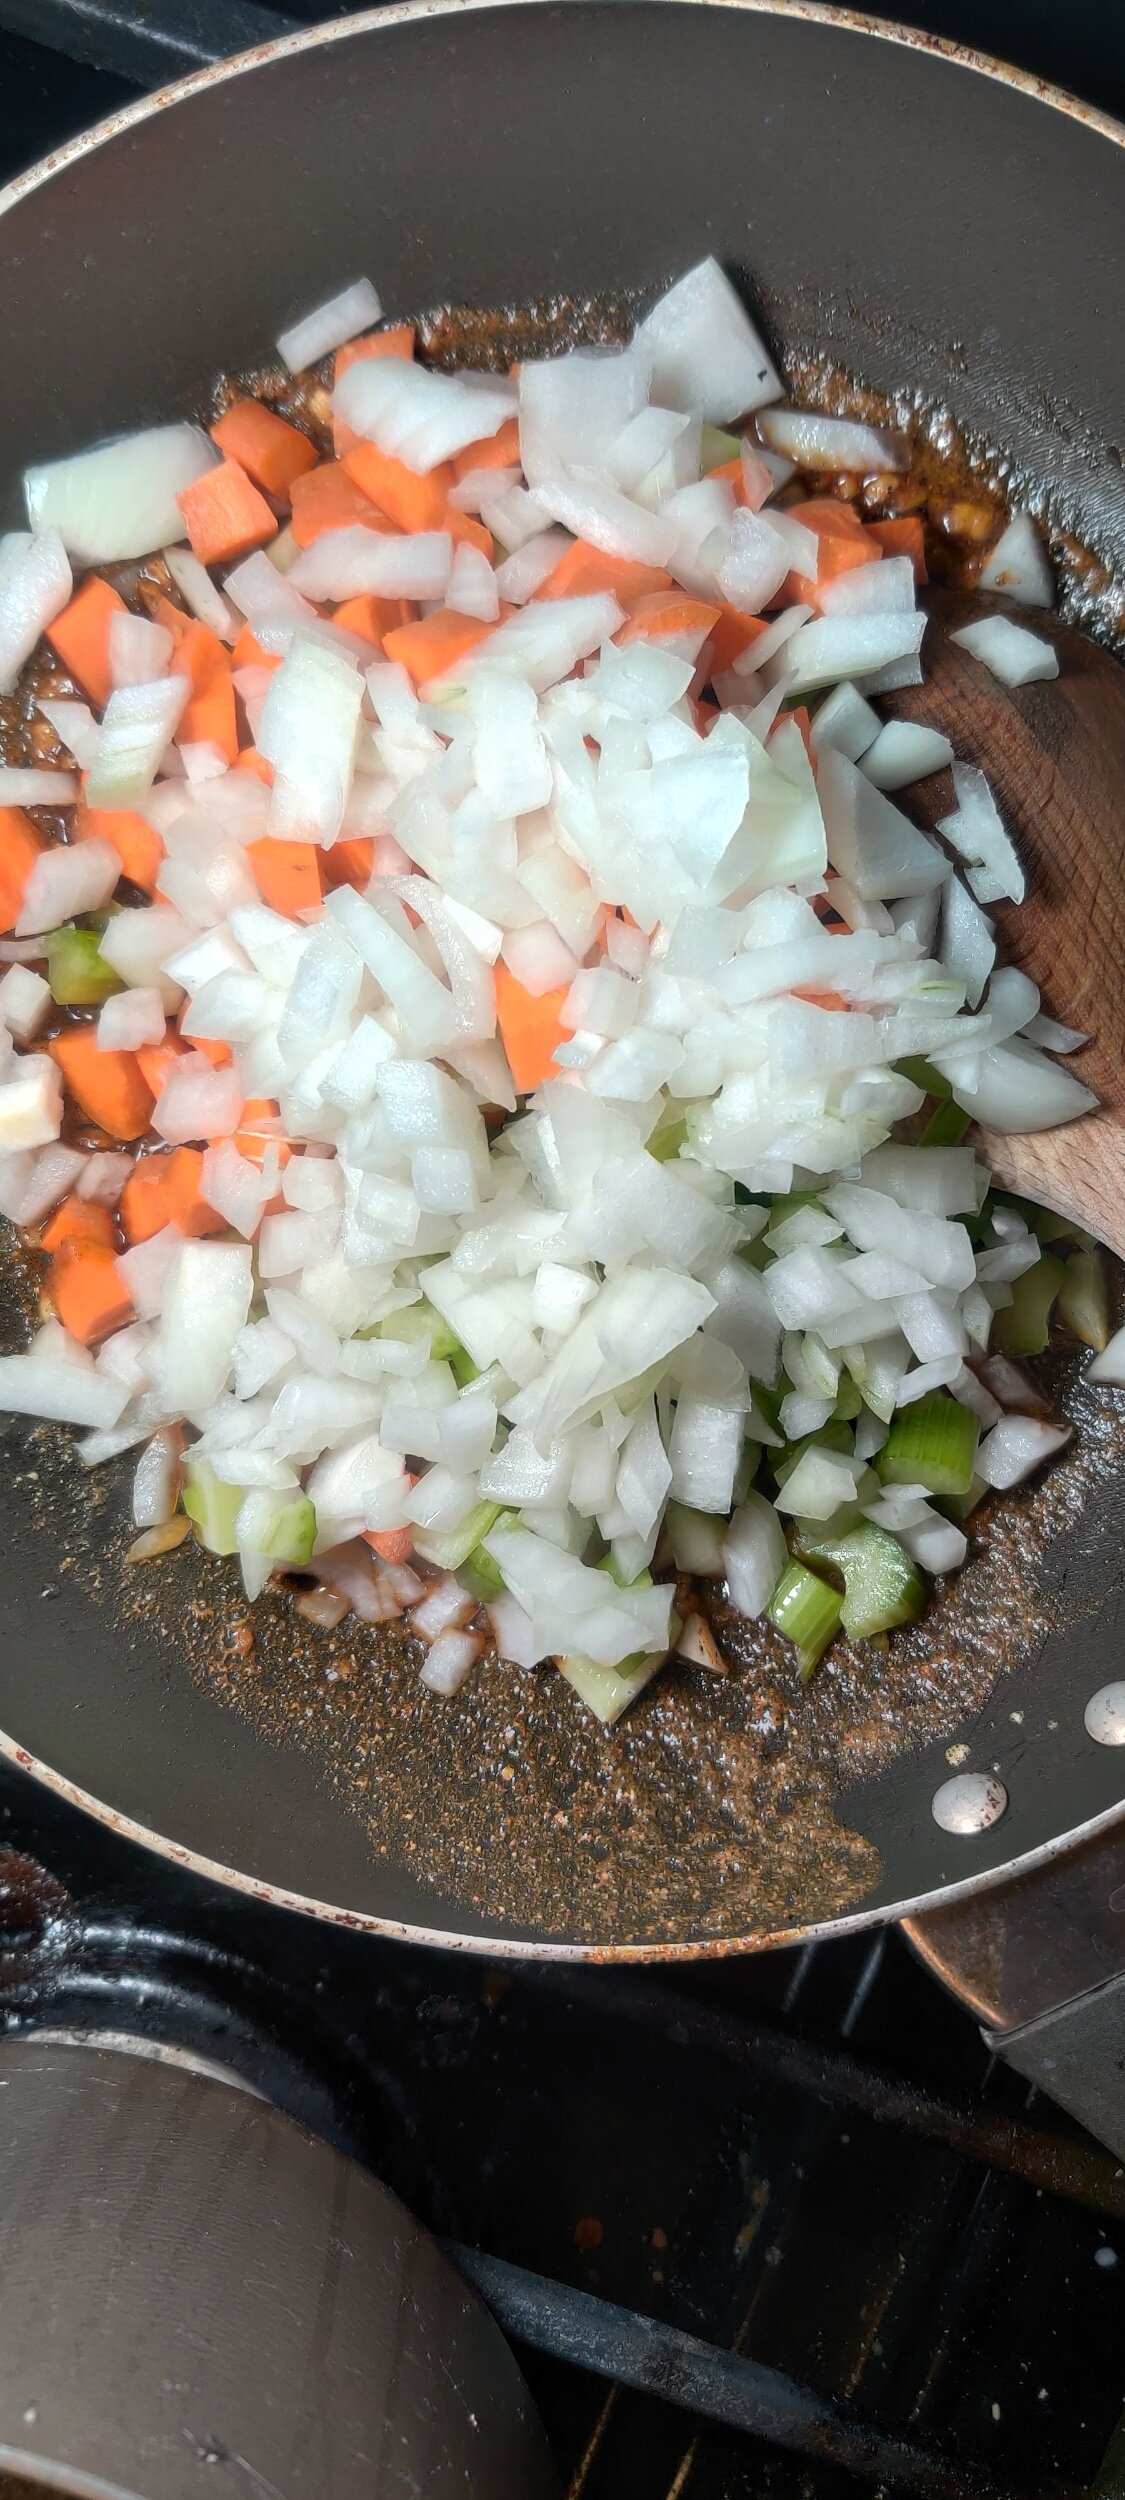
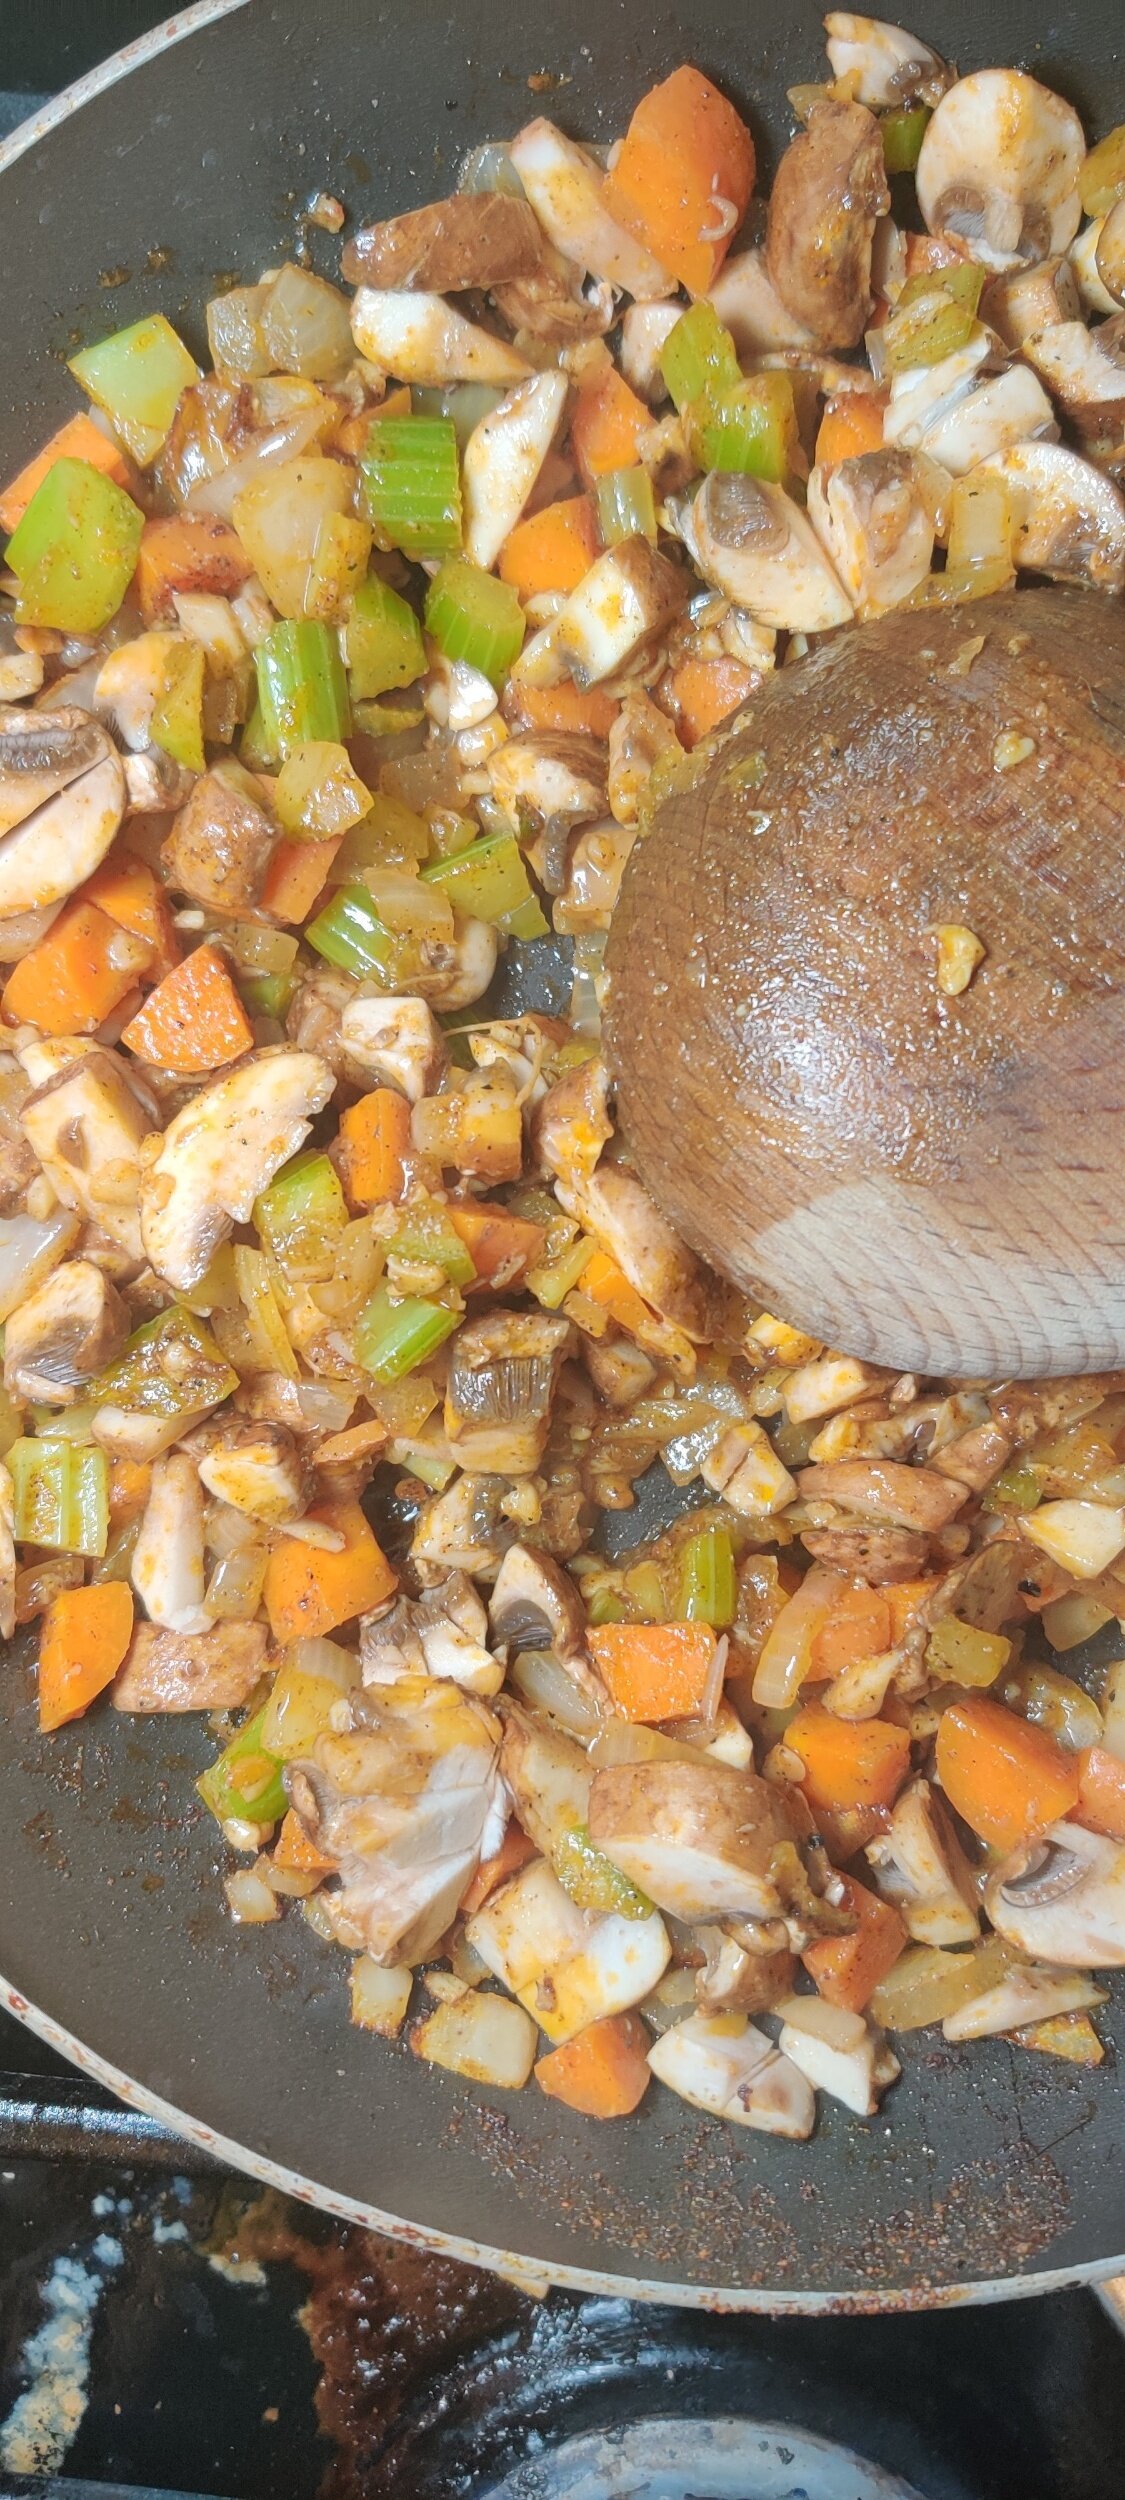
- Roast the bell pepper, chili peppers, onion, and garlic cloves at 400°F (200°C) for 15–20 minutes. Remove the chili peppers and garlic after 15 minutes to prevent burning and bitterness.
- Add the roasted vegetables to a food processor along with the remaining marinade ingredients. Blend until mostly smooth. Reserve ½ cup of the marinade and refrigerate for later.
- Coat the chicken thoroughly with the remaining marinade and marinate for at least 2 hours, preferably overnight.
- Preheat the oven to 400–425°F (200–220°C).
- Pat the chicken pieces lightly dry with a paper towel, then place them on a wire rack over a baking tray or grill pan. Roast for about 35 minutes, flipping halfway through cooking.
- Brush the chicken with some of the reserved peri-peri sauce near the end of cooking. Broil for 3–5 minutes for a lightly charred finish, if desired.
- Rinse the rice until the water runs mostly clear.
- Add the rice, water, curry powder, rice seasoning, butter, star anise, bay leaves, salt, and raisins (if using) to a pot. Bring to a boil uncovered, then reduce heat, cover, and simmer until tender and fluffy.
- Steam or grill the corn until tender. Remove the husks and lightly char if desired. Finish with butter, salt, and peri-peri or Old Bay seasoning.
- Combine the slaw mix in a bowl. In a separate bowl, whisk together the mayonnaise, vinegar, sugar, salt, and black pepper. Toss with the vegetables until evenly coated.
- Serve the peri-peri chicken with yellow rice, corn, and coleslaw. Pair with a chilled cream soda for the full braai-inspired experience.
Notes
- Traditionally, braai food is cooked over an open flame or braai stand, but oven roasting and indoor grilling work well for home kitchens.
- Cream soda is a nostalgic and widely recognized pairing in Southern Africa, especially during braais and summer gatherings.
- Leftover peri-peri chicken works well in wraps, sandwiches, or rice bowls.
Nutrition Facts
Calories
720Fat (grams)
32 gCarbs (grams)
58 gFiber (grams)
5 gSugar (grams)
12 gProtein (grams)
45 gI am not a certified nutritionist and any nutritional information on dontmissmyplate.com should only be used as a general guideline.

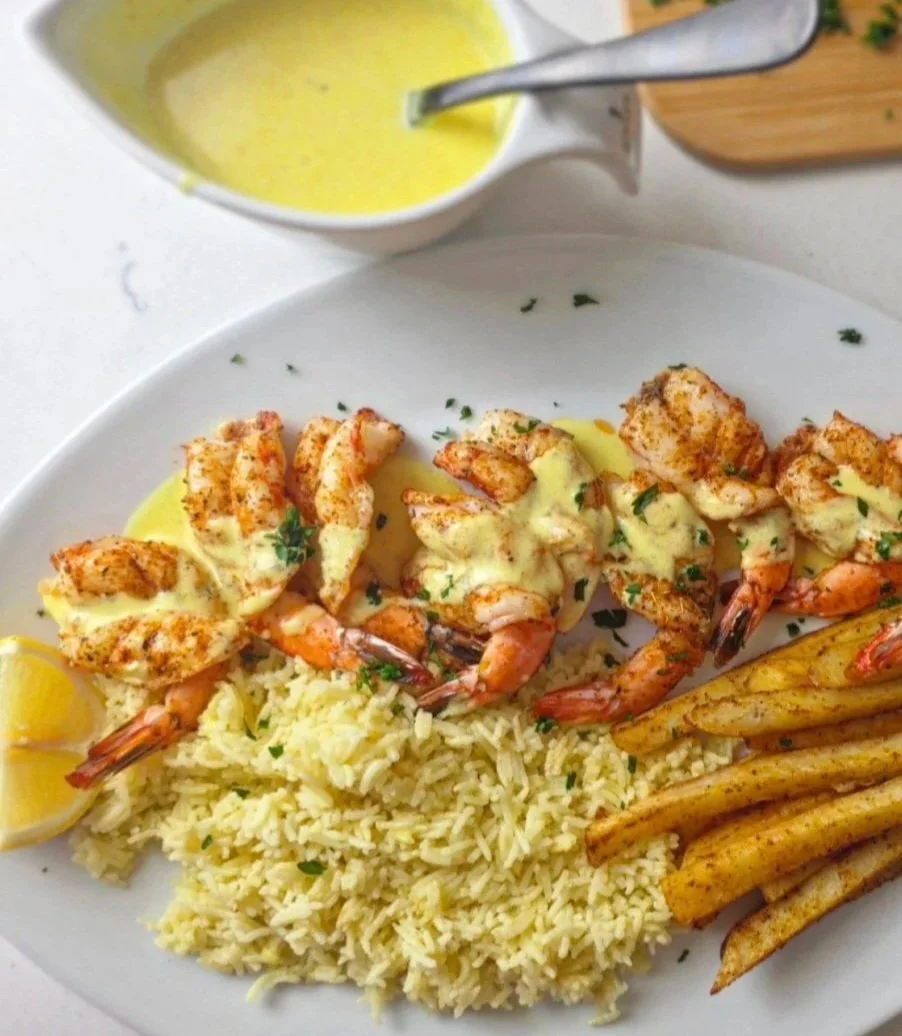
Copy Cat Ocean Basket Shrimp Platter with Lemon Cream Sauce
If you grew up in Southern Africa, or simply love a good seafood platter, you’ll recognize the iconic Ocean Basket experience. The restaurant chain became known for its generous platters of seafood, crispy fries, flagrant rice and most importantly a creamy, indulgent, lemon-forward signature that feel both comforting and celebratory.
This recipe is inspired by that classic, reimagined for a spring-ready table. The lemon cream sauce brings brightness and balance, cutting through the richness with a fresh, zesty lift that pairs beautifully with seafood. It’s a perfect example of how African coastal flavors naturally blend with Mediterranean influences (think citrus, butter, gentle spice, and herbs) creating something vibrant yet familiar. You may also see this combination with Mozambiquean peri-peri prawns.
Beyond flavor, the shrimp is a nutritional powerhouse: high in protein, low in calories, and rich in vitamin B12, selenium, and iodine. Paired with a citrus-forward cream sauce, it becomes a dish that feels indulgent without being heavy, ideal for warmer days and effortless entertaining.
Serve it simply with fries, rice, a crisp salad, or warm crusty bread to soak up the sauce.
For a wine pairing, serve with a chilled Sauvignon Blanc, crisp Chardonnay, or light rosé complements the lemon and enhances the natural sweetness of the shrimp.
Best of all, this dish comes together quickly, making it just as suited for a relaxed weekend lunch as it is for a quick but impressive spring lunch or dinner.
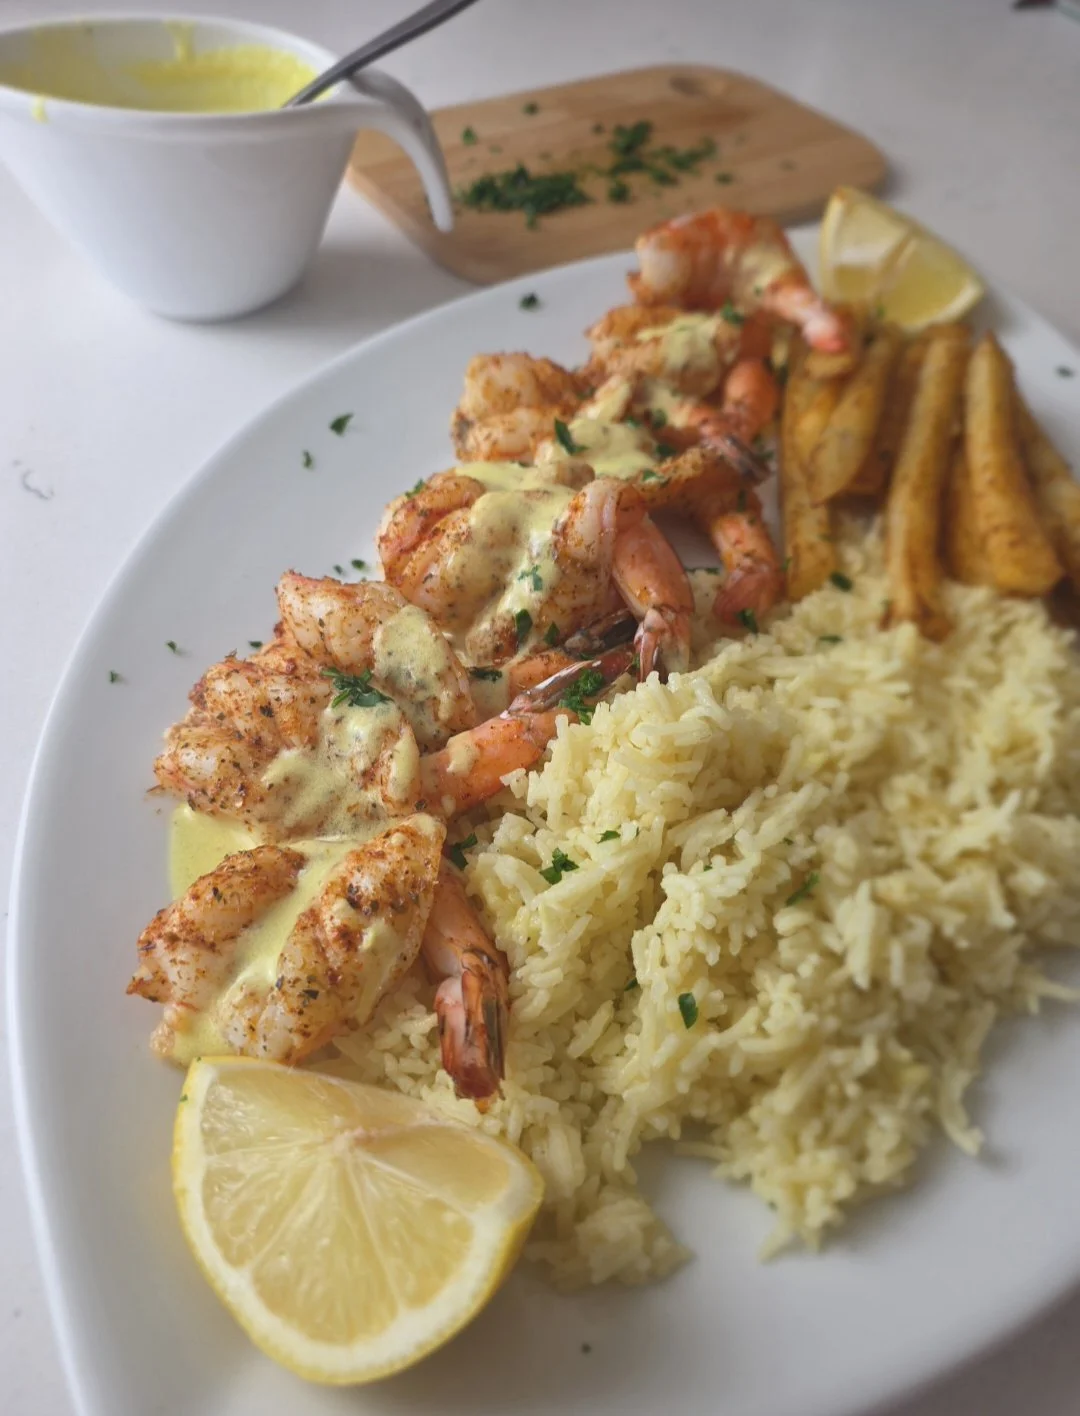

Copycat Ocean Basket Shrimp Platter with Lemon Cream Sauce
A simple, flavorful take on the iconic Ocean Basket shrimp platter. Juicy shrimp in a bright lemon cream sauce—easy enough for weeknights, but layered with flavor for something special.
Ingredients
- 1 lb (450 g) large shrimp, tail-on and deveined
- 2 tbsp olive oil
- 1 tsp Old Bay seasoning or peri-peri seasoning
- 2 tsp lemon juice (divided)
- 1/2 tsp garlic powder
- 1 tbsp smoked paprika
- 1 tbsp oregano
- Lemon wedges, for serving
- 1/2 cup (120 ml) heavy cream
- 5 tbsp unsalted butter
- 1/4 tsp flour
- 1/4 tsp turmeric (for color)
- 1 tsp Robertson’s Spice for Rice
- 1 tsp Aromat all-purpose seasoning
- Juice of 1 lemon (about 2 tbsp)
- 1 tsp lemon zest
- 1 tsp Dijon mustard
- Salt and pepper, to taste
- Chopped parsley, for garnish
Instructions
- Preheat the oven to 400°F (200°C).
- Make the lemon cream sauce: On low heat, melt the butter. Whisk in the flour until fully dissolved. Do not overheat, or the milk solids may separate.
- Turn off the heat, then add the lemon juice and zest, followed by the mustard, seasonings, salt, and pepper. Simmer for 1–2 minutes until slightly thickened. Set aside.
- Prepare the shrimp: Pat the shrimp dry. Peel the shells, keeping the tails on by pinching the tail and gently removing the outer shell. (Reserve shells for seafood stock, if desired.)
- Butterfly the shrimp: Using a sharp knife or kitchen scissors, carefully make an incision along the back of each shrimp. Do not cut all the way through. Gently open and flatten with your fingers to create a butterfly shape.
- Season the shrimp: In a bowl, mix olive oil, lemon juice, garlic powder, and Old Bay (or peri-peri). Brush the mixture evenly over the open side of the shrimp.
- Bake: Arrange shrimp flat-side down on a parchment-lined baking tray. Bake for 8–10 minutes, or until the shrimp reach an internal temperature of 145°F (63°C).
- Serve: Arrange the shrimp on a plate or tray with your chosen sides (like rice or fries). Drizzle with lemon cream sauce, garnish with parsley, and serve with lemon wedges.
Notes
- For deeper flavor, use the full spice blend listed above. You can keep it simple or build layers, it’s up to you.
- For the authentic Ocean Basket experience, serve shrimp over fries and drizzle sauce just before serving.
- Use fresh lemon juice for best flavor.
- Can be doubled for a crowd or adapted with other seafood like calamari, mussels, or fish.
- Optional: add a pinch of chili flakes for a subtle kick.
Nutrition Facts
Calories
320Fat (grams)
22 gCarbs (grams)
9 gProtein (grams)
25 gI am not a certified nutritionist and any nutritional information on dontmissmyplate.com should only be used as a general guideline.
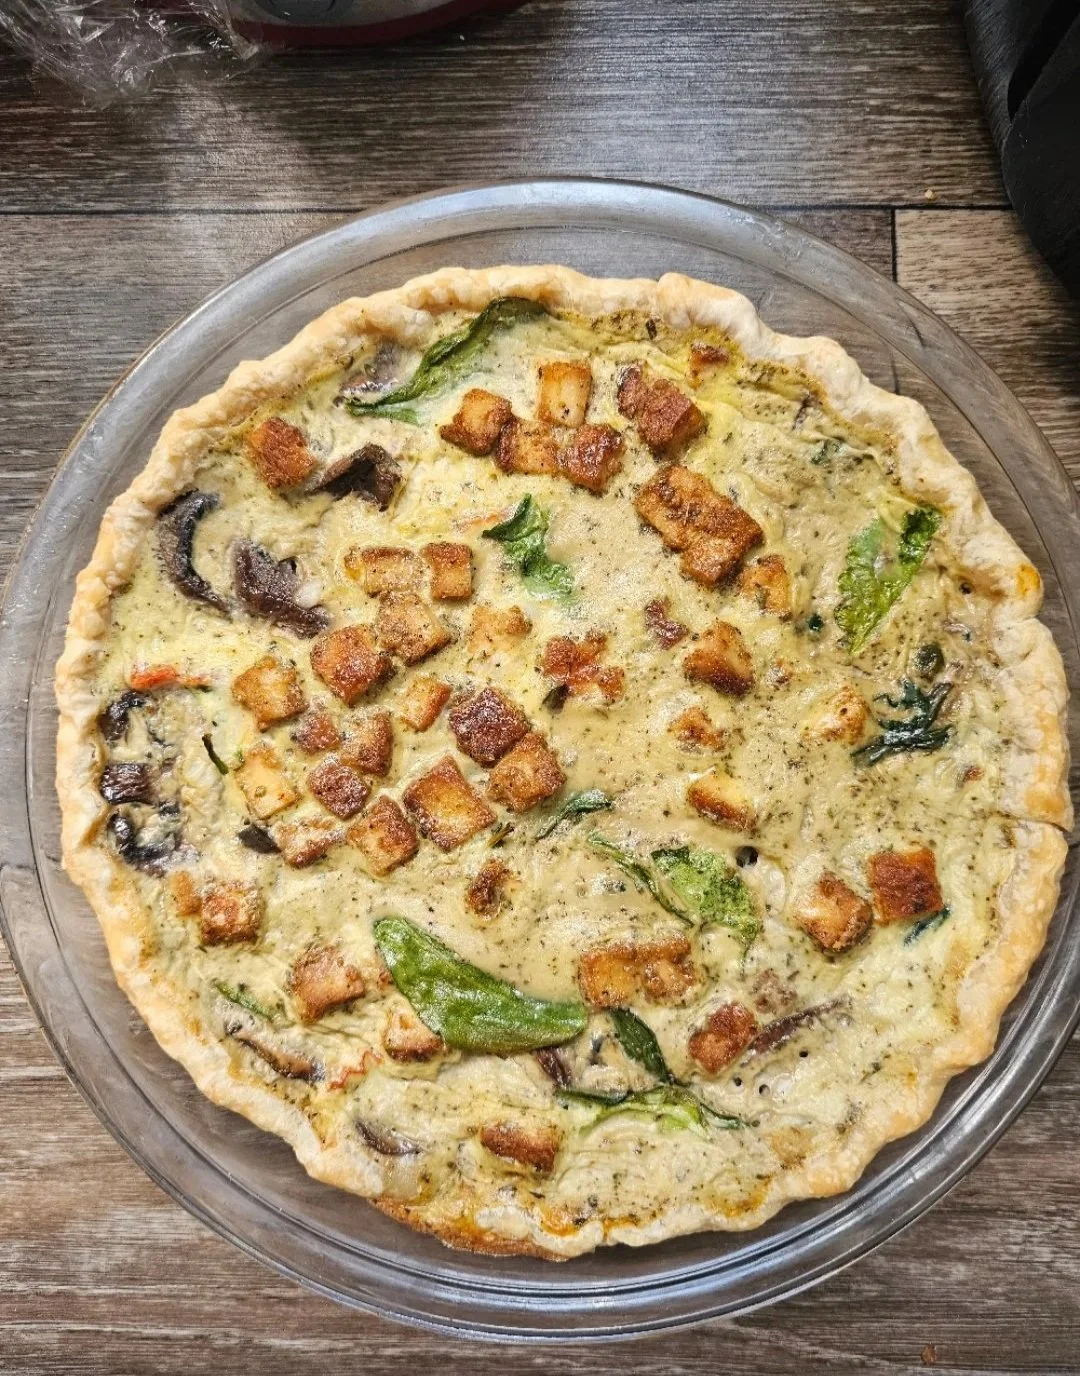
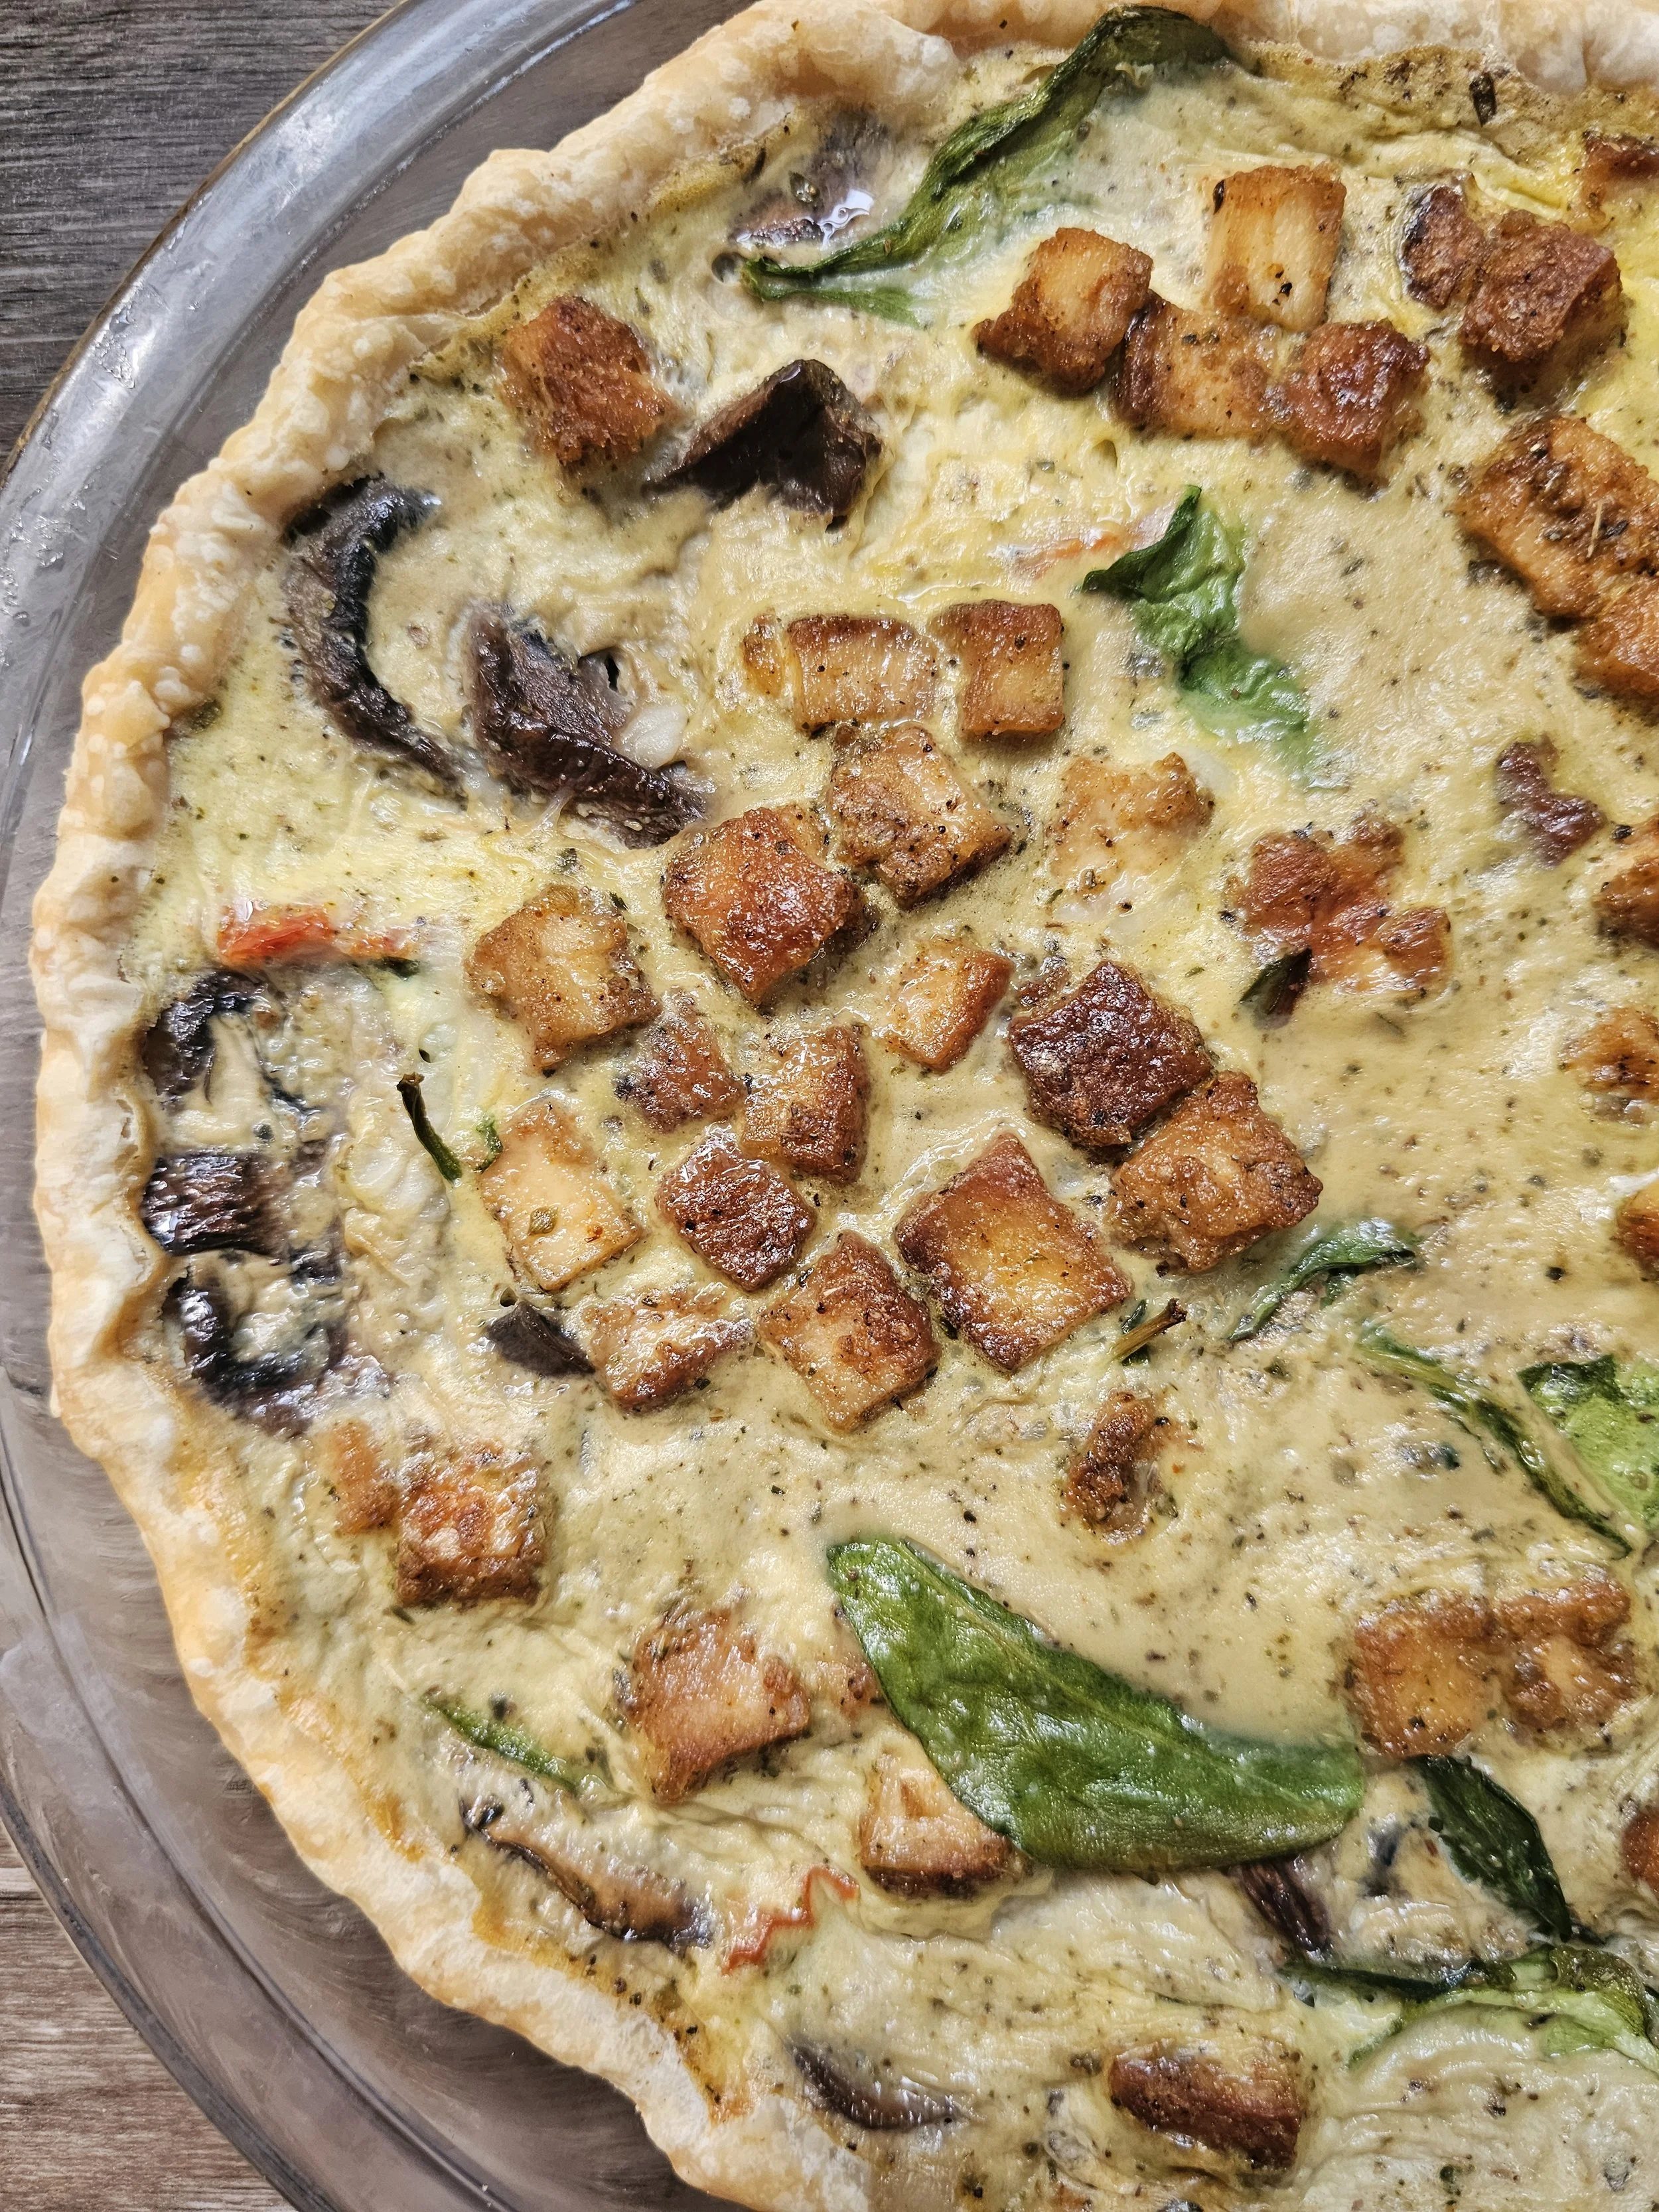
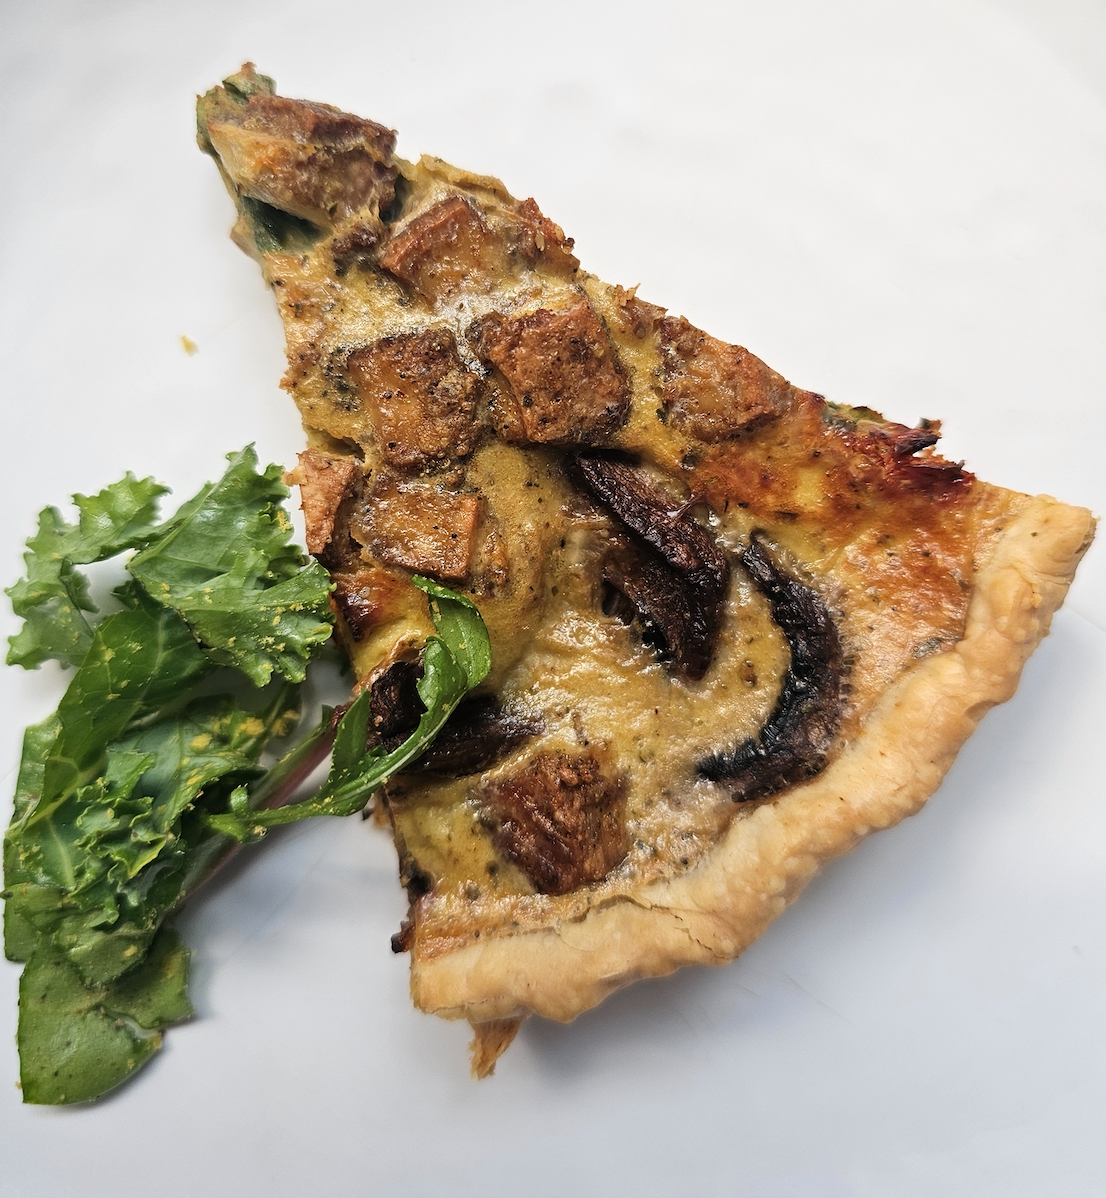
Mushroom, Spinach and Roasted Tofu Quiche
Celebrate spring and Easter with this Mushroom, Spinach and Tofu Masala Quiche, a vibrant twist on a classic brunch favorite. Crispy, oven-roasted tofu cubes bring a savory crunch and hold their shape beautifully, while creamy coconut milk adds luscious richness without heaviness. Earthy mushrooms, tender spinach, and sun-dried tomatoes provide fresh seasonal flavor, and a subtle malada-style masala infuses the quiche with aromatic warmth, giving it a uniquely Indian flair.
Perfect for a brunch spread, holiday table, or cozy weekend breakfast, this quiche is light, flavorful, and visually stunning. Serve warm or at room temperature, paired with a fresh salad or spring fruits, and it’s sure to become the centerpiece of your table.
Why this quiche works:
Roasted tofu: Adds protein, texture, and seasoning that holds up in the quiche.
Coconut milk: Replaces heavy cream for silky smoothness and subtle sweetness.
Masala seasoning: Lifts the vegetables with warm, aromatic spice without overpowering the dish.
Every spice in this recipe has a purpose: cumin and coriander bring earthiness and brightness, fenugreek deepens savory notes, garlic powder amplifies umami, oregano adds herbal lift, and just a touch of masala ties everything together with aromatic warmth.
Perfect for Easter brunch, a spring gathering, or a cozy weekend breakfast, this quiche is both visually stunning and packed with flavor.

Mushroom, Spinach and Roasted Tofu Quiche
This savory Mushroom, Spinach and Tofu Masala Quiche combines the creaminess of coconut milk, the warmth of traditional Indian spices, and wholesome vegetables for a brunch-worthy dish that’s both comforting and flavorful. Perfect for breakfast, lunch, or a light dinner, it’s a fusion of East-meets-West cuisine that will impress vegans and omnivores alike.
Ingredients
- 1/3 cup tofu, cubed and oven-roasted until golden
- 4 eggs
- 1/2 cup coconut milk
- 1/4 tsp seasoned salt
- 1/4 tsp black pepper
- 1/2 tsp garlic powder
- 1/4 tsp fenugreek
- 1/2 tsp oregano
- 1/2 tsp masala seasoning
- 1/4 tsp cumin
- 1/4 tsp coriander
- 1/2 small case of cremini mushrooms, sliced
- 1/2 cup spinach, chopped
- 2 tbsp sundried tomatoes, chopped
- 1 pastry pie crust (store-bought or homemade)
- 1/4 cup mozzarella cheese
Instructions
- Preheat oven to 375°F (190°C).
- Blind bake the pastry crust for 8–10 minutes to prevent a soggy bottom.
- Roast cubed tofu until golden and slightly crisp.
- Sauté mushrooms, spinach, and sundried tomatoes until tender. Add roasted tofu and cook 2–3 minutes more.
- In a bowl, whisk eggs, coconut milk, and all spices (salt, pepper, garlic powder, fenugreek, oregano, cumin, coriander, masala).
- Spread the vegetable and tofu mixture evenly in the pre-baked crust. Pour the egg-coconut-spice mixture over the vegetables. Stir in the mozzarella cheese directly into the custard so it melts throughout, rather than sprinkled on top.
- Bake 25–30 minutes, or until the quiche is set and lightly golden.
- Let cool 5 minutes before slicing into 6–8 pieces and serving.
Notes
- Roasted tofu provides texture and flavor that holds in the custard.
- Masala is intentionally subtle; other spices layer depth and balance.
- Pre-baking crust prevents a soggy bottom.
- Garnish with fresh herbs for color and brightness.
- Quiche can be served warm or room temperature, perfect for make-ahead Easter brunch.
Nutrition Facts
Calories
180Carbs (grams)
11 gFiber (grams)
2 gProtein (grams)
10 gI am not a certified nutritionist and any nutritional information on dontmissmyplate.com should only be used as a general guideline.
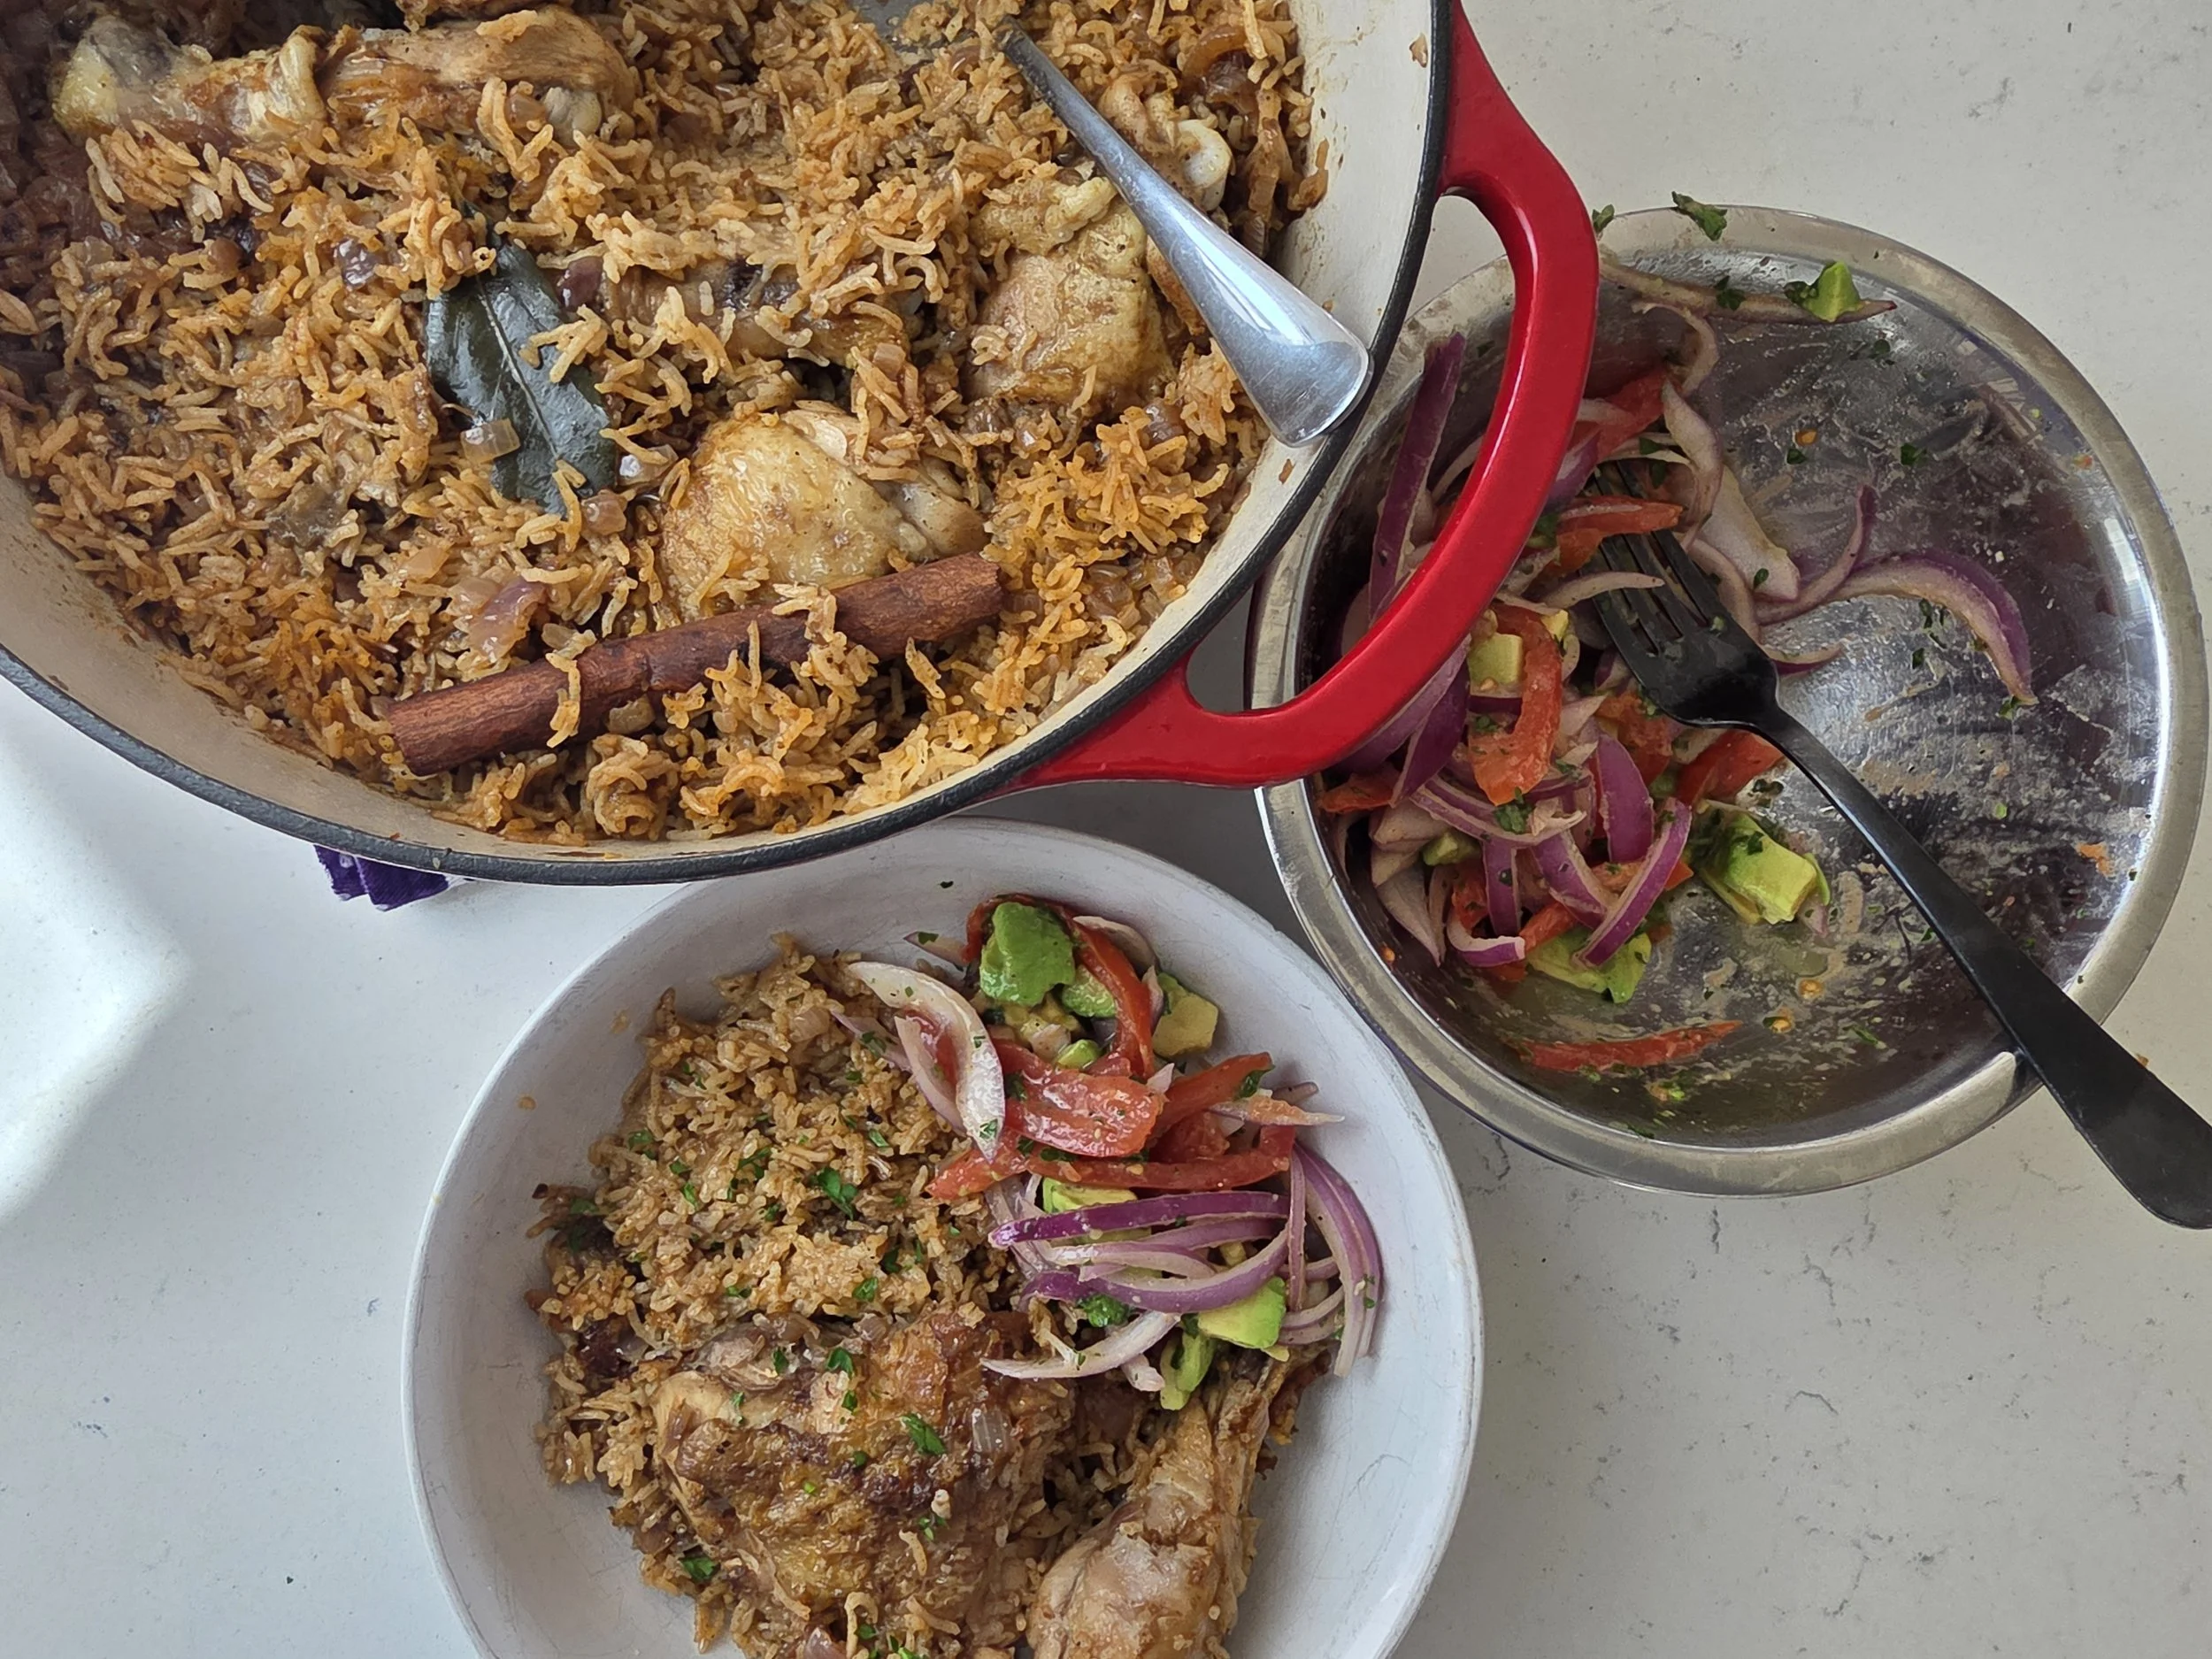
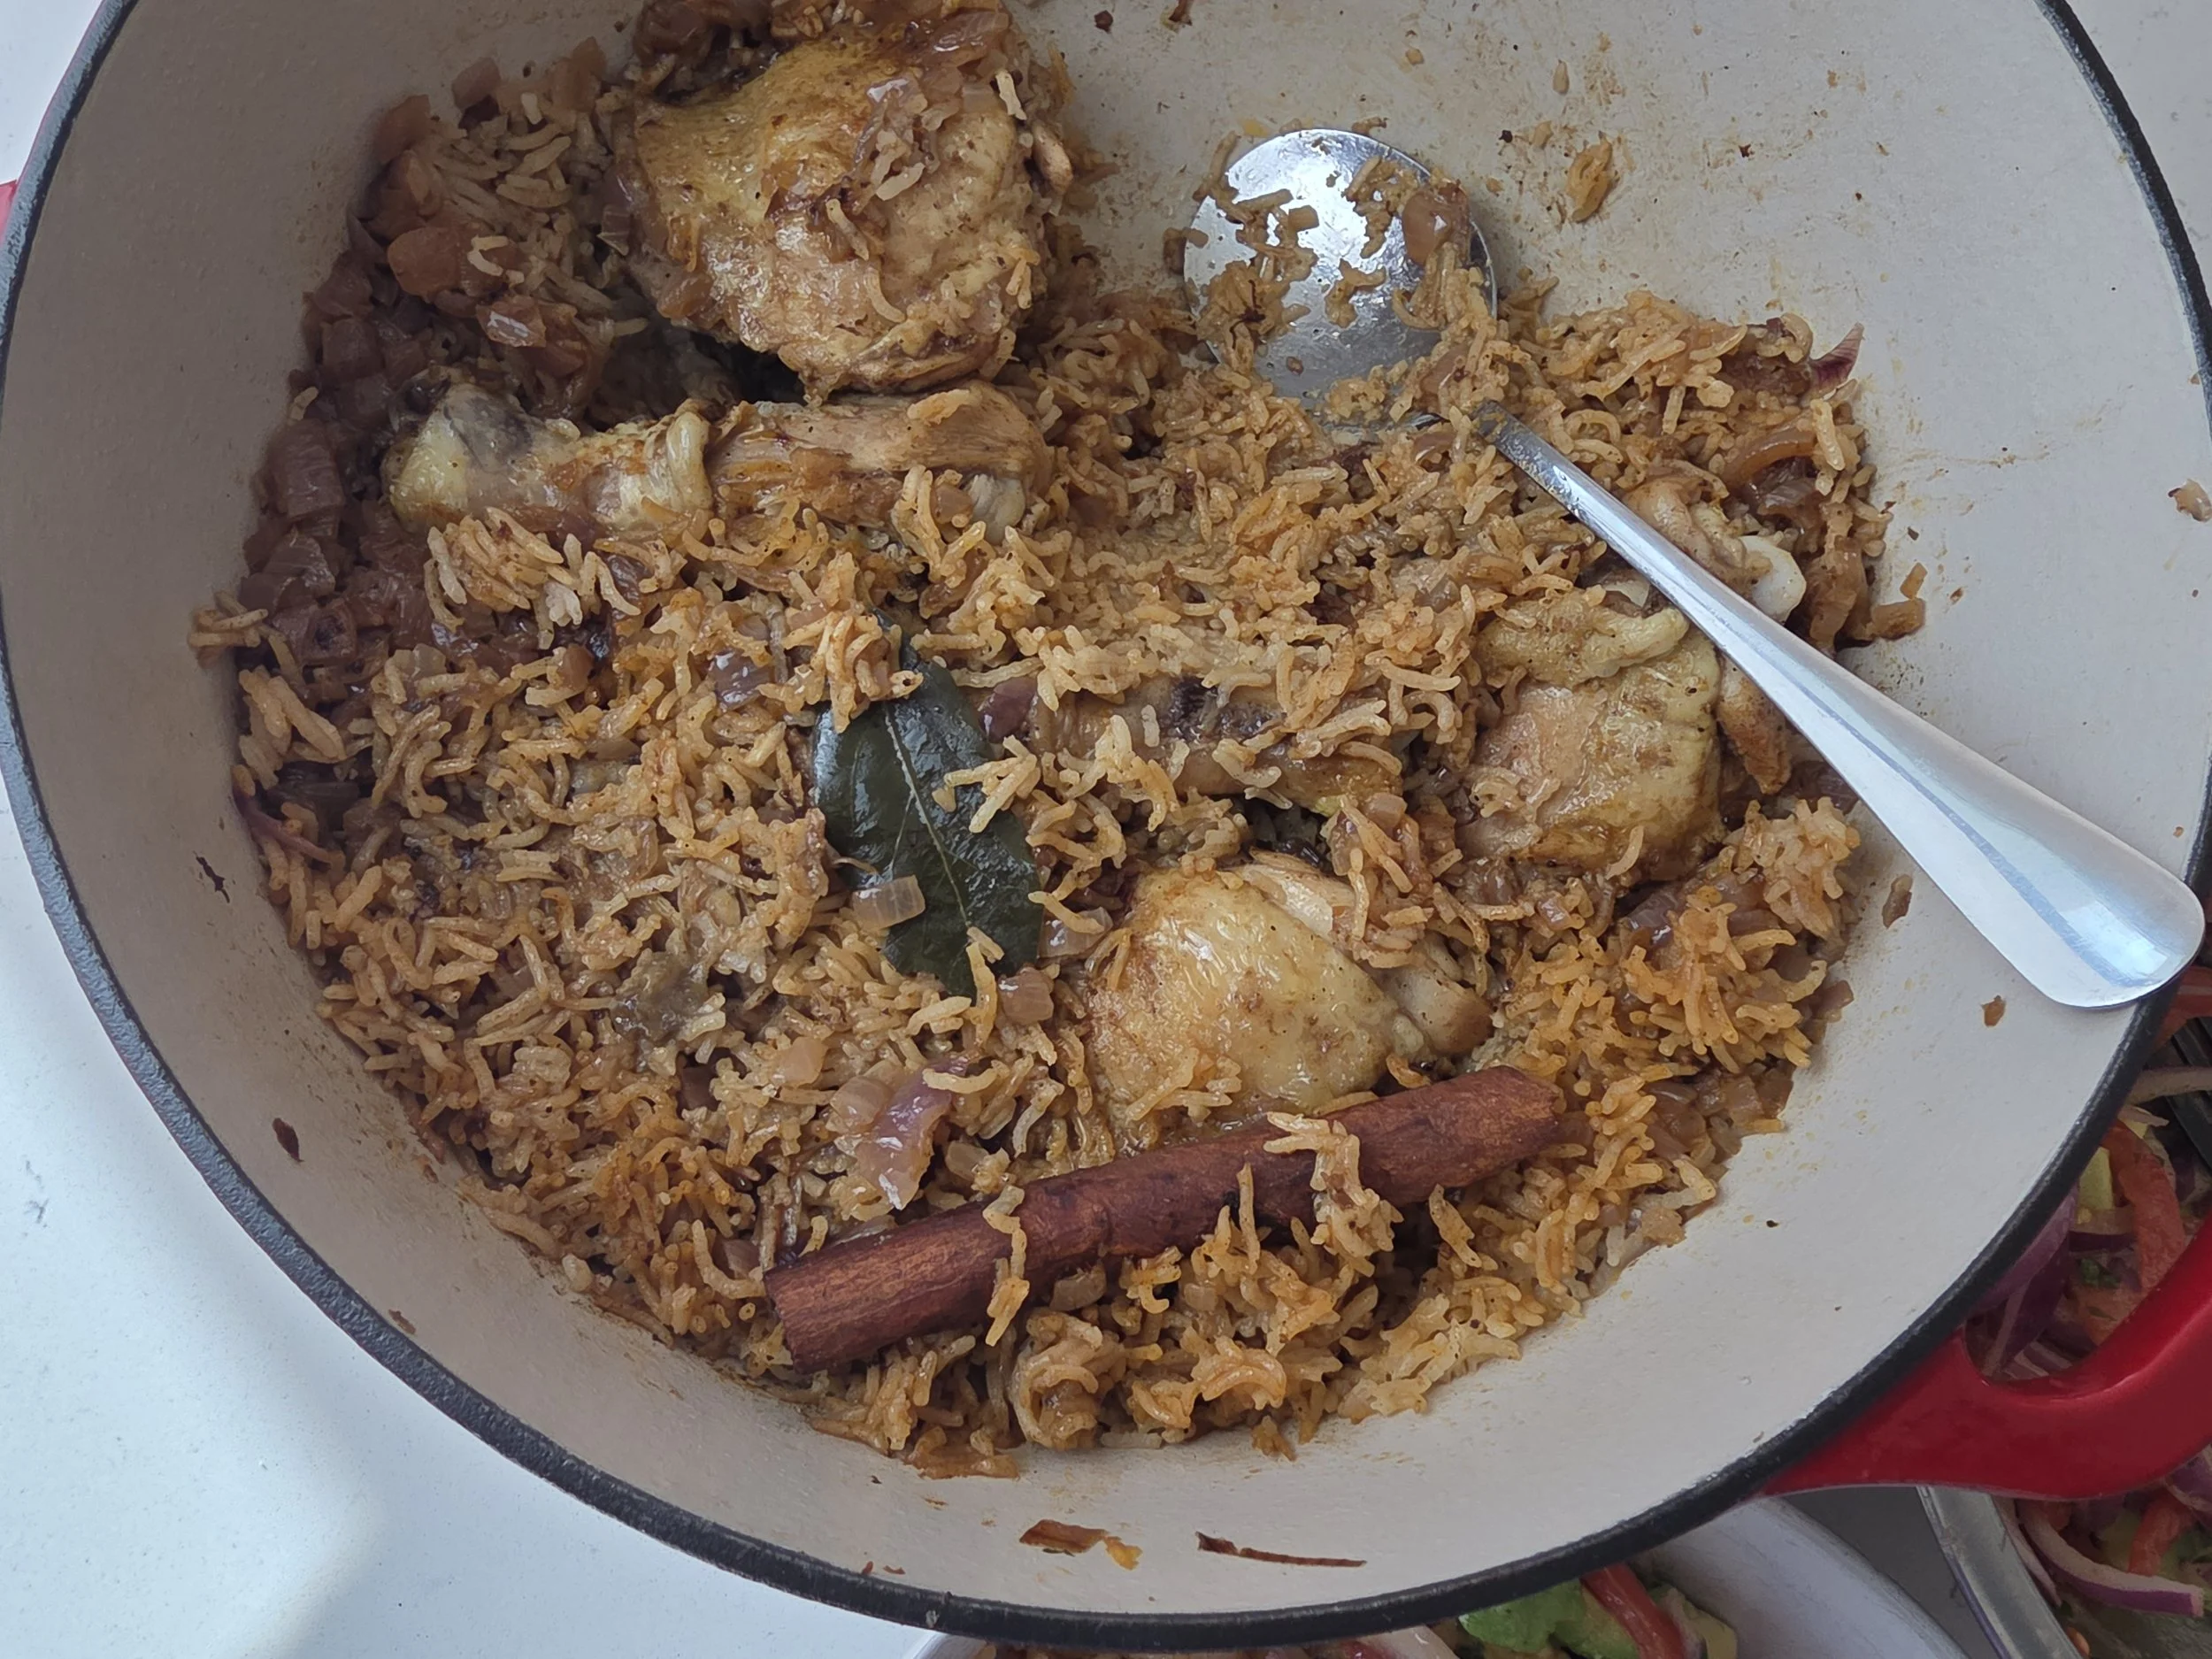
One-Pot Chicken Pilau (Zanzibar-Style East African Rice)
Pilau is more than just a rice dish, it’s a reflection of centuries of trade, culture, and shared culinary traditions. With roots linked to Persian and Indian cooking, pilau traveled along ancient trade routes to East Africa, where it became a staple in places like Kenya, Zanzibar, and Uganda. Across these regions, the common thread is a love for deeply spiced, one-pot rice dishes that bring people together for both everyday meals and celebrations.
In Zanzibar, famously known as the “Spice Island”, this connection is especially strong. The island’s history as a hub for cloves, cinnamon, cardamom, and other spices is reflected in the bold, aromatic character of pilau itself.
This version brings those flavors into a practical, weeknight-friendly format. Fragrant basmati rice is layered with caramelized onions, garlic, ginger, and a warming blend of cumin, cardamom, black pepper, cinnamon, and bay leaf. Bone-in chicken cooks directly with the rice, allowing every grain to absorb the rich, spiced broth.
I first experienced pilau in Zanzibar during a cooking class at a beachfront hotel, where the scent of spices filled the air and the ocean sat just steps away. This recipe is inspired by that moment—simple, comforting, and deeply flavorful.
Whether for a weeknight dinner or a potluck gathering, this one-pot chicken pilau is a go-to.

Zanzibar-Style One-Pot Chicken Pilau
A fragrant East African-inspired chicken pilau featuring spiced rice, caramelized onions, and tender bone-in chicken, all cooked in one pot for a rich and comforting meal.
Ingredients
- 4 bone-in, skin-on chicken thighs
- 4 chicken drumsticks
- 2 tbsp chicken spice
- 2 cups basmati rice, rinsed
- 2 large red onions, thinly sliced
- 2 tbsp ginger-garlic paste (or 2 tsp each minced)
- 2 tbsp tomato paste
- 1 tbsp Royco Usavi Mix (chicken)
- 1 tsp cumin
- 1 tsp ground cardamom
- ¼ tsp ground cloves
- 1 tsp black pepper
- 1 cinnamon stick
- 2 bay leaves
- 3 cups water
- 2 tsp bouillon paste
- ½–1 Knorr chicken bouillon cube, to taste
- 3 tbsp ghee or cooking oil
- Salt and lemon, to taste
- Optional: 1 tbsp Worcestershire sauce, for deglazing
- Optional: Lemon wedge and parsley to garnish and serve
Instructions
- Pat the chicken dry, lightly coat with oil, and season with chicken spice, salt, and pepper. Let sit for at least 5 minutes.
- Heat at least 2 tbsp ghee or oil in a large pot or Dutch oven over medium-high heat. Brown chicken 2–3 minutes per side, then remove and set aside.
- In the same pot, sauté onions until soft (2–3 minutes), or longer for a golden color and deeper flavor. Add ginger-garlic paste, Royco Usavi Mix, bouillon paste, and pilau spices. Stir 30–60 seconds until fragrant and cook an additional minute to activate the aromatics.
- Stir in tomato paste and optionally the Worcestershire sauce to lift flavors from the bottom of the pot.
- Stir in the rinsed rice, coating it evenly in the spice mixture for about 1 minute.
- Pour in the water and mix in the bouillon cube. Add cinnamon stick and bay leaves, then nestle chicken pieces on top of the rice. Bring to a gentle boil, then reduce heat to low, cover, and simmer for 20 minutes.
- Check your pot. If you notice pooling, slightly open the lid and cook an additional 5–10 minutes.
- Squeeze fresh lemon over the rice and chicken and adjust salt to taste.
- Gently fluff the rice, garnish with parsley and serve with a mixed salad (kachumbari with avocado).
Notes
- Rice texture: A quick rinse is enough, no soaking needed. Keep the lid closed during simmering to retain steam for fluffy rice.
- Chicken skin: Browning adds flavor; optional but recommended!
- Leftovers: Store in an airtight container in the fridge for up to 3 days; reheat gently.
Nutrition Facts
Calories
500Fat (grams)
17 gCarbs (grams)
50 gFiber (grams)
3 gProtein (grams)
28 gI am not a certified nutritionist and any nutritional information on dontmissmyplate.com should only be used as a general guideline.
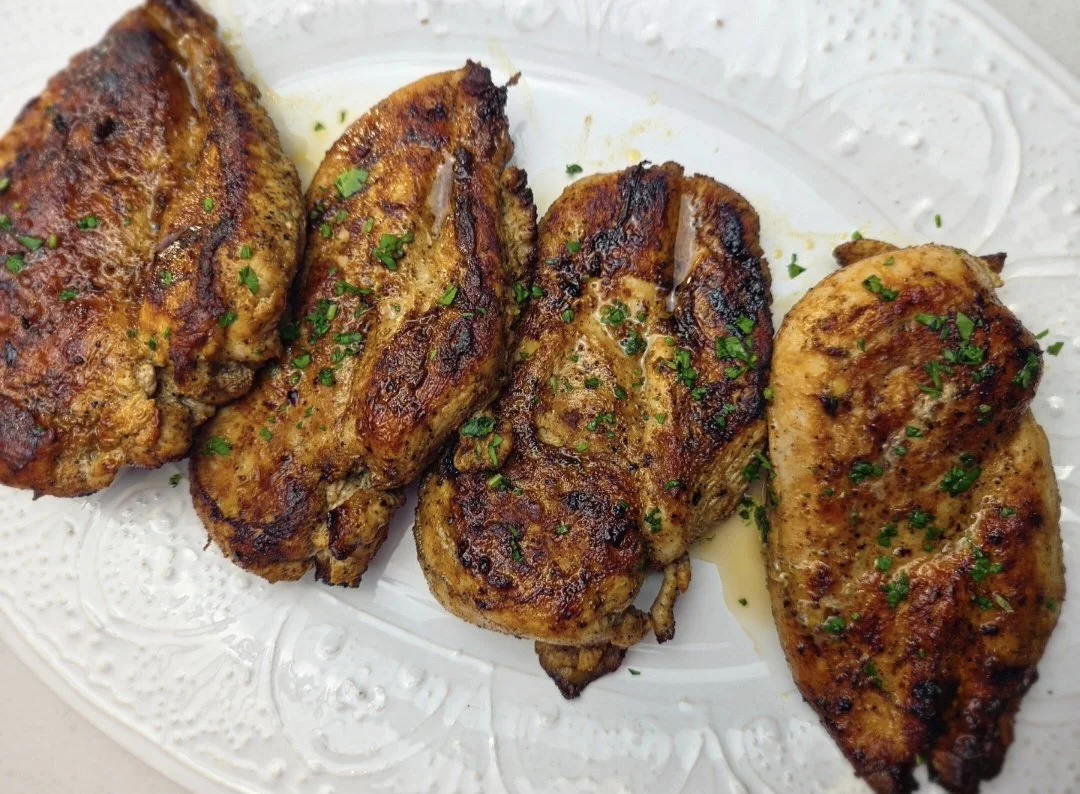
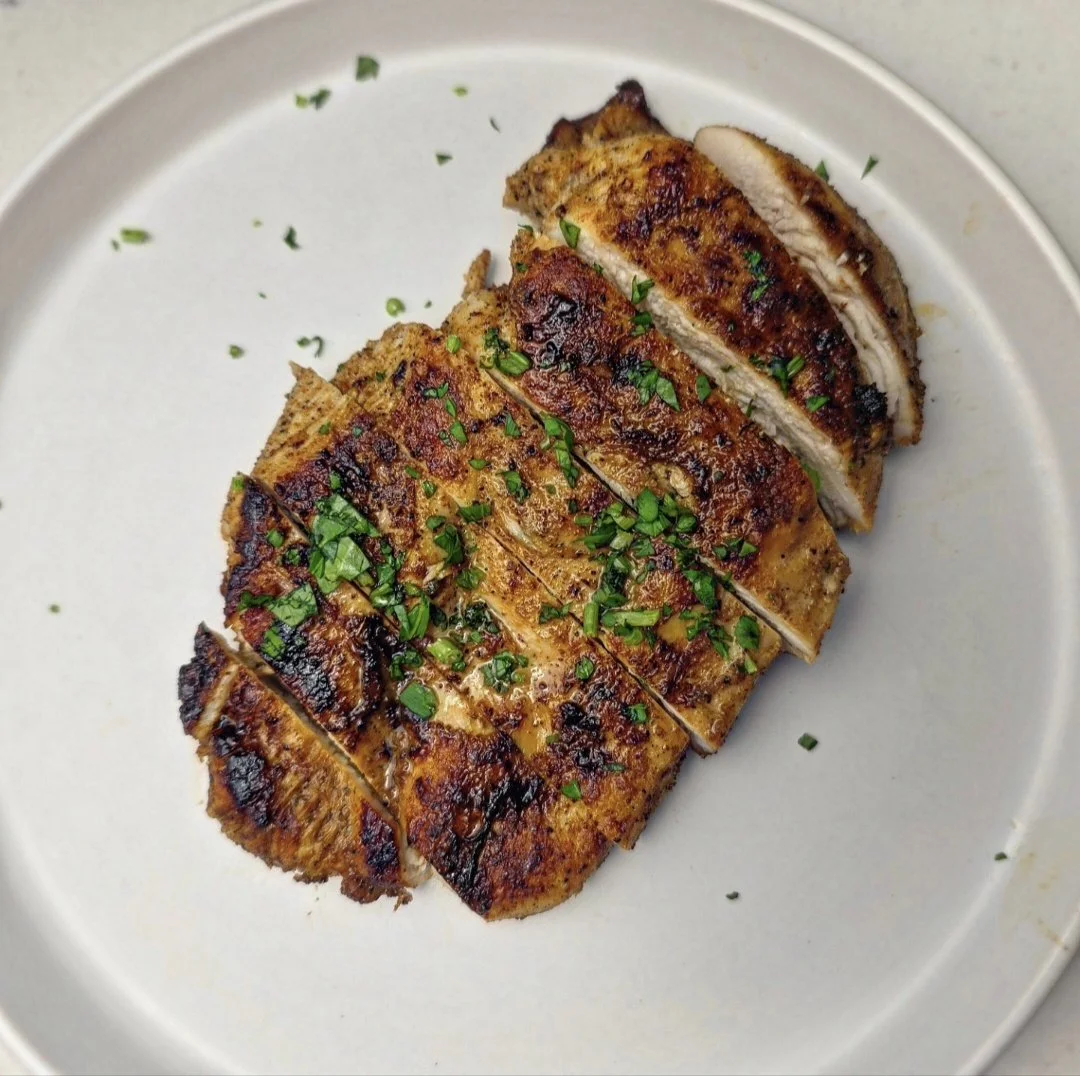
Tender, Moist Chicken Breasts for Easy Weeknight Meals
Chicken breasts have a reputation for being dry or bland, but with the right technique they can be incredibly tender, juicy, and full of flavor. This recipe uses a simple trick that makes a big difference: a quick marinade made with pickled jalapeño juice. The jalapeño brine acts as a shortcut brine, helping the chicken retain moisture while adding a subtle tangy kick that enhances the seasoning without making the dish spicy.
After marinating, the chicken is pounded to an even thickness so it cooks quickly and evenly. This step is key for juicy chicken breasts because it prevents the thinner parts from drying out while the thicker center finishes cooking. The chicken is then seared in ghee in a hot cast iron skillet, creating a beautiful golden crust and adding a rich, nutty flavor.
Ghee works especially well for this recipe because it has a higher smoke point than butter, allowing the chicken to sear properly without burning. Once the chicken develops that golden crust, it can finish cooking quickly in the oven if needed, ensuring the center reaches the perfect temperature without overcooking the outside.
The final step is one of the best parts: a drizzle of melted ghee combined with the flavorful pan drippings. Spoon this over the rested chicken breasts and finish with fresh parsley and a squeeze of lime for brightness. The result is tender, juicy chicken with layers of flavor — savory spices, a hint of jalapeño tang, and the richness of ghee.
This recipe is simple enough for a weeknight dinner but flavorful enough to serve for guests. Pair it with roasted vegetables, rice, or a fresh salad for a balanced and satisfying meal.
Why This Recipe Works
This chicken breast recipe hits the sweet spot between simplicity and flavor. The pickled jalapeño juice acts as a quick brine, keeping the chicken juicy while adding a subtle tang. Pounding the breasts to an even thickness ensures they cook evenly, while searing in ghee creates a golden, flavorful crust. Finishing in the oven if needed guarantees perfectly cooked, tender chicken every time. These small but deliberate steps make this recipe reliable for weeknight dinners or special meals.
Tips for Juicy Chicken Breasts
Even thickness matters: Use a mallet to flatten the breasts to about ½–¾ inch so they cook evenly.
Don’t skip the brine: Even a short 30–45 minute soak in pickled jalapeño juice keeps the meat moist and adds subtle flavor.
Rest before slicing: Let the chicken rest for 5 minutes after cooking to lock in juices.
Ghee finish: Spoon melted ghee and pan drippings over the cooked chicken for extra richness and a glossy finish.
Serving Suggestions
Serve this juicy chicken breast alongside simple sides like roasted vegetables, garlic mashed potatoes, or a fresh green salad. A squeeze of lime on top brightens the flavors and balances the richness of the ghee. You can also pair it with rice, quinoa, or warm bread to make it a complete, satisfying meal.

Tender, Moist Chicken Breasts for Easy Weeknight Meals
These chicken breasts stay perfectly juicy thanks to a quick brine in pickled jalapeno juice and a golden sear in ghee. Finished in the oven with a drizzle of ghee, they’re tender, flavorful, and ready for any weeknight meal. Quick, simple, and packed with a subtle kick.
Ingredients
- 4 large chicken breasts, patted dry
- 2 tbsps olive oil (for the marinade)
- 1 tbsp pickled jalapeño juice
- 1 tsp garlic powder
- 1 tsp onion powder
- 1 tsp paprika
- ½ tsp cumin
- 1 tsp chicken seasoning
- 1 tbsp ghee (for searing)
- 1 tbsp ghee (for finishing)
- Fresh parsley, chopped, for garnish
- Fresh lime wedges, for serving (optional)
Instructions
- Pat the air-chilled chicken breasts dry. Place them in a large zip-top bag and use a mallet to gently pound them to an even thickness of about ½–¾ inch (1.3–2 cm). Pounding inside the bag keeps juices from splattering and helps the chicken cook evenly.
- In a bowl, mix your seasonings with a little oil and the pickled jalapeño juice. Add the chicken breasts and turn to coat well.
- Refrigerate for at least 30 minutes, ideally about 45 minutes, and no longer than 60 minutes.
- Remove the chicken from the refrigerator and pat the breasts dry again before cooking.
- Heat a cast-iron skillet over medium-high heat and melt 2 tablespoons ghee.
- Sear the chicken 3–4 minutes per side without moving it, until golden brown. Cook in batches if needed, adding more ghee between batches. Let the first pieces rest on a plate while you cook the remaining chicken.
- Check the thickest part of the chicken with a thermometer. Chicken breasts should reach 165°F (74°C). Because thickness can vary, thinner pieces may already be fully cooked after searing.
- If the chicken hasn’t reached temperature, preheat the oven to 400°F (200°C). Place the chicken in a baking dish with 2–4 tablespoons water, lightly tent with foil, and bake about 5 minutes or until the internal temperature reaches 165°F (74°C).
- Let the chicken rest 5 minutes. Meanwhile, melt 2–4 tablespoons more ghee and combine it with any drippings from the resting plate and skillet. Spoon this over the chicken.
- Top with fresh parsley and serve with fresh lime wedges for brightness.
Notes
- Pro Tip: Pounding the chicken to an even thickness (about ½–¾ inch) helps it cook quickly and evenly, preventing dry spots.
- Brine Tip: The pickled jalapeño juice acts as a quick brine, helping the chicken stay juicy while adding a subtle tangy kick.
- Cooking Tip: Chicken breast thickness varies. Always cook until the internal temperature reaches 165°F (74°C).
Nutrition Facts
Calories
220Fat (grams)
10 gCarbs (grams)
2 gProtein (grams)
30 gI am not a certified nutritionist and any nutritional information on dontmissmyplate.com should only be used as a general guideline.
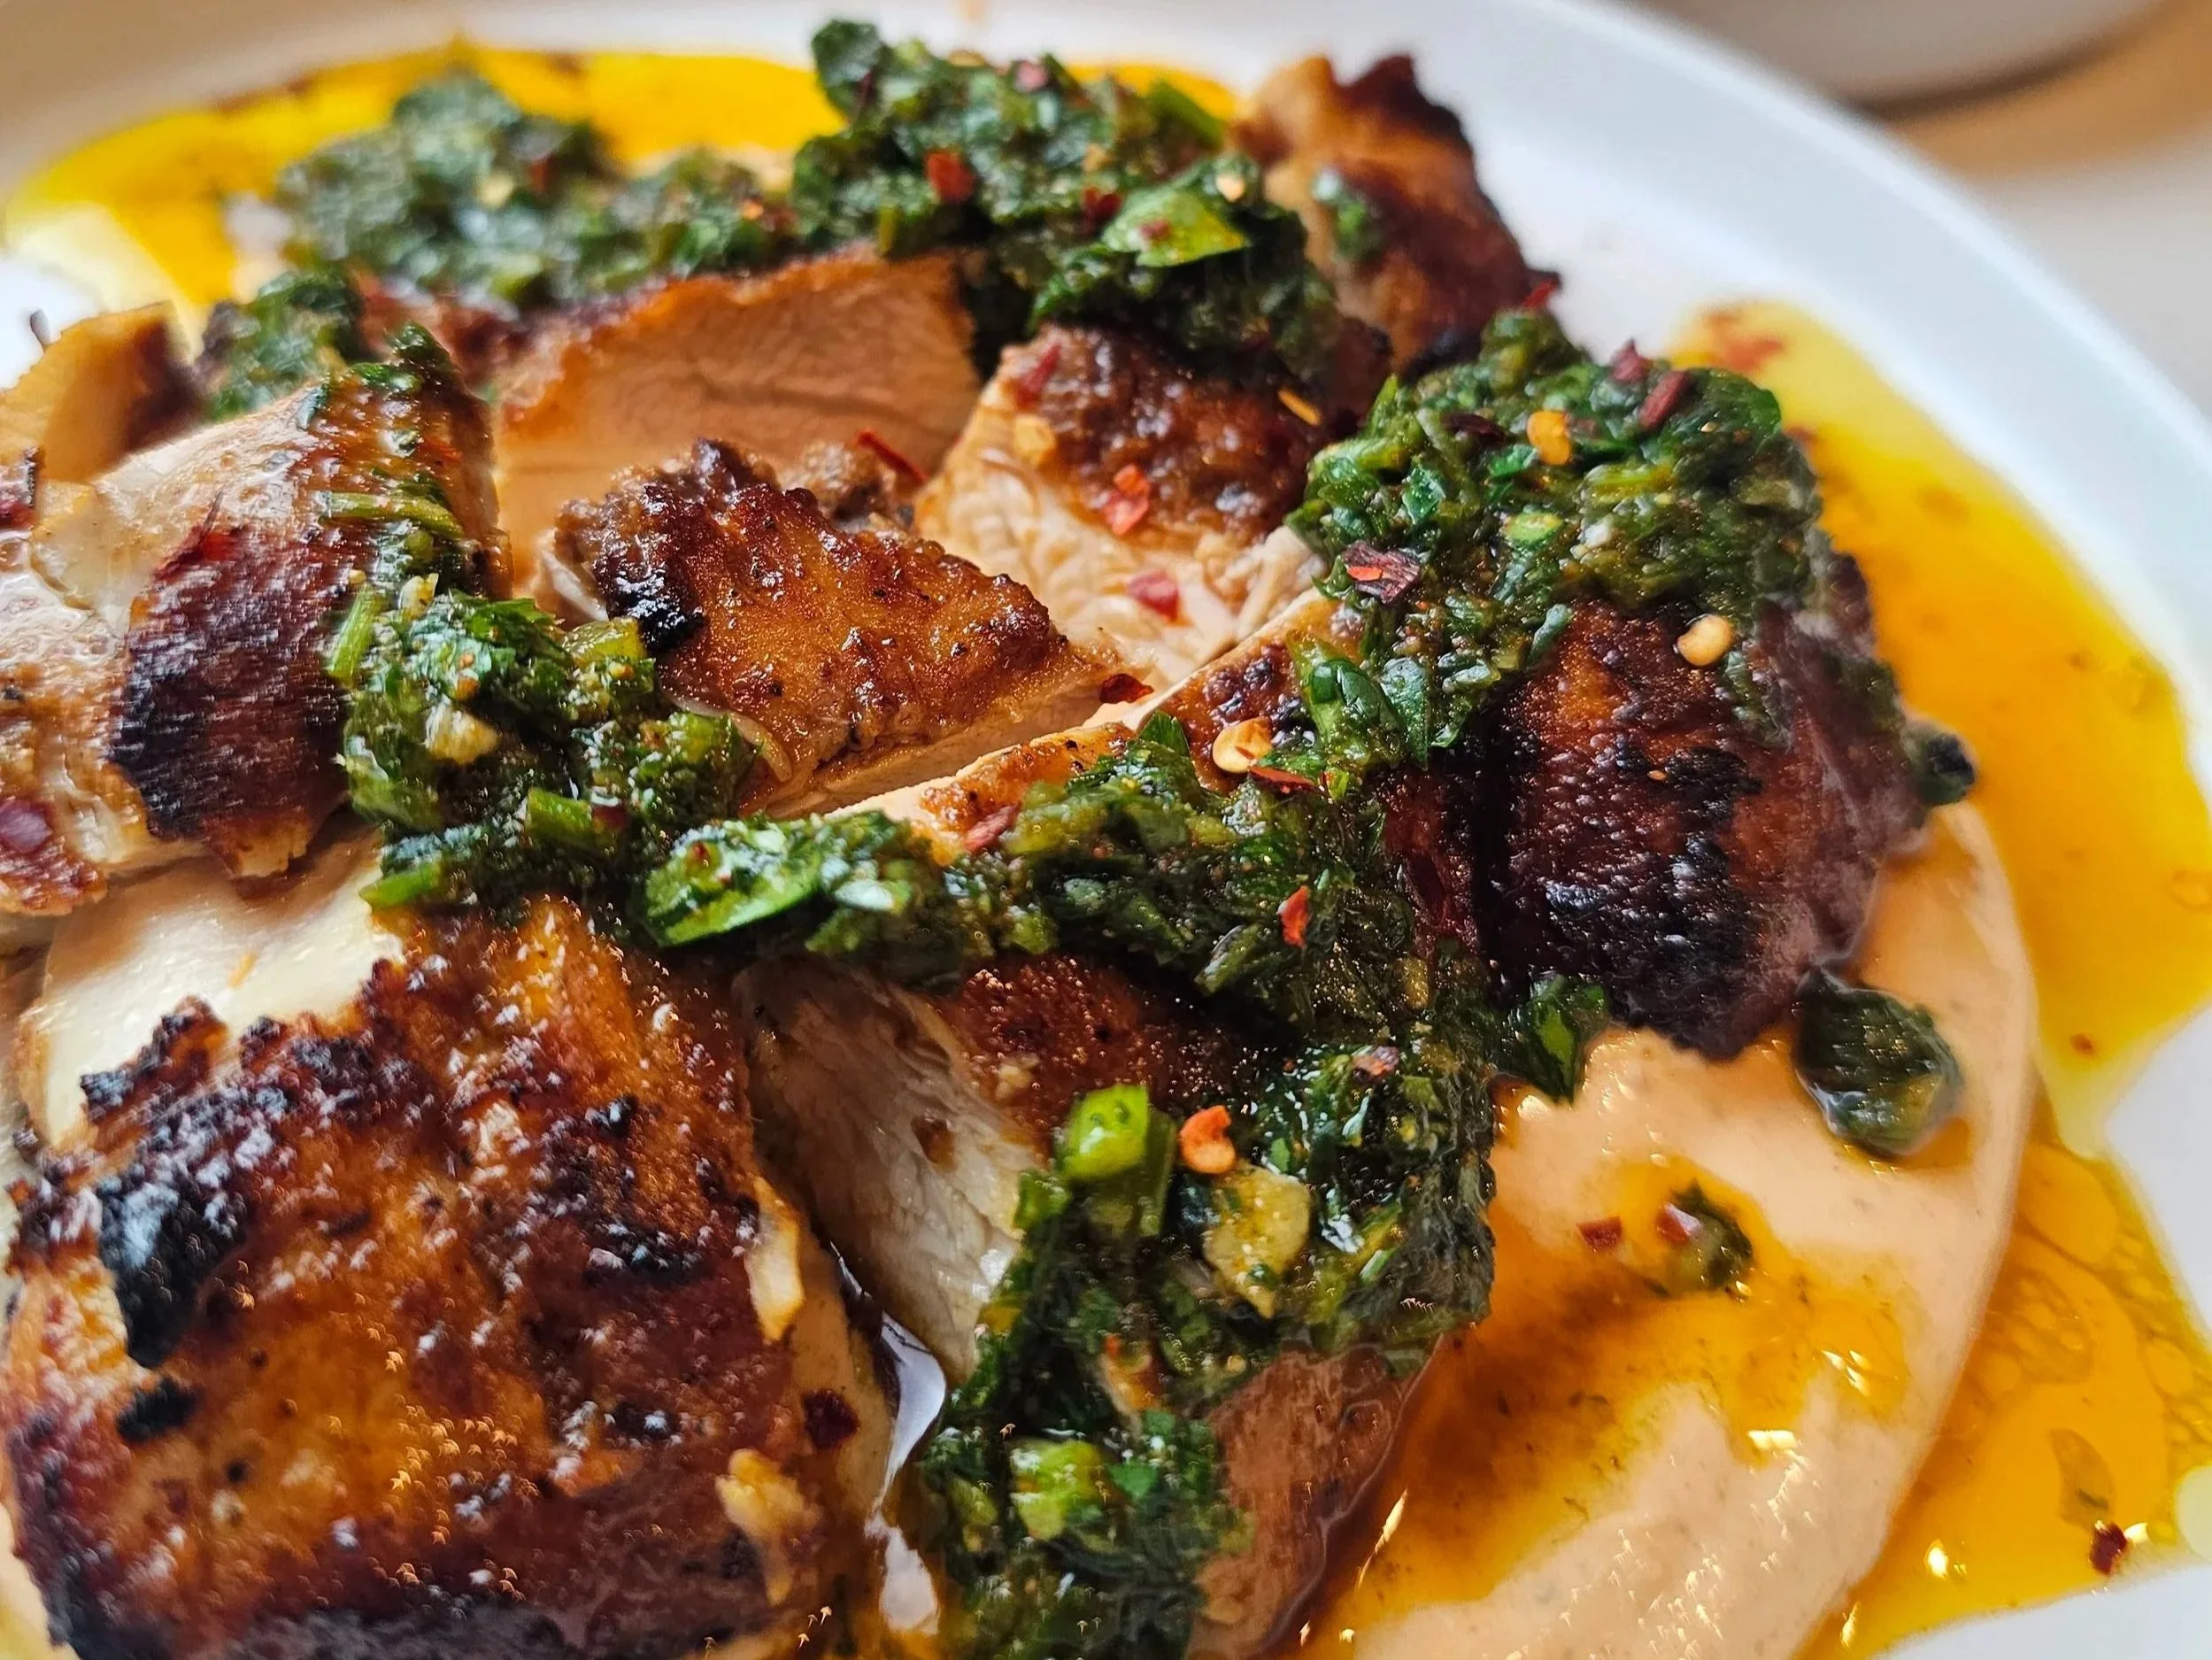
Harissa Chicken with Chermoula Sauce
Some recipes are born in your kitchen. Others follow you home from a restaurant and refuse to leave your mind.
I was inspired to make this after trying an unforgettable appetizer at Cordelia Fishbar on Valentine’s Day in DC. The chicken was extremely succulent, with perfectly crisped with skin-on goodness (breast? thigh? still debating), deeply savory, and served over a harissa-kissed yogurt that tied everything together. It didn’t taste marinated in harissa, but the warmth was there, subtle, layered, intentional.
So naturally, I did what any home cook on a flavor mission would do: I made it my own.
In my version, the chicken is marinated in harissa for bold depth. I used my often-neglected Ninja indoor grill and air fryer, and it delivered that perfect char and gentle smokiness that feels like summer, even when it’s not. And the real star? Chermoula.
If you’ve been following my kitchen journey, you already know: I’ve been championing chermoula for a while now. Think of it as North Africa’s answer to chimichurri—bright, herbaceous, alive. It reflects the Afro-fusion influences and close-to-my-roots flavors that continue shaping my evolution as a home cook. I’ve used it with croaker fish alongside peri peri and harissa, and it never disappoints.
This dish is smoky, herbaceous, creamy, spicy, and fresh all at once. The kind of layered flavor that tastes like you planned ahead—even if you just wanted something impressive for dinner.

Harissa Chicken with Chermoula Sauce
Smoky grilled Harissa Chicken with creamy harissa yogurt and vibrant chermoula. Juicy, bold, and herb-forward, this North African–inspired dish serves 4 and is perfect for weeknight dinners or entertaining.
Ingredients
- 1 cup parsley, finely chopped
- ½ cup cilantro, finely chopped
- 3 garlic cloves, minced
- 1 jalapeño, finely diced
- ½ tsp smoked paprika
- ½ tsp ground coriander
- ½ tsp cumin
- ½ tsp salt
- ¼ tsp black pepper
- 2–4 tbsp olive oil
- 4 large chicken thighs (skinless, bone-in)
- 1.5 tbsp harissa
- 3–4 tbsp olive oil
- ½ tsp garlic powder
- ½ tsp oregano
- ½ tsp cumin
- 1 tsp chicken seasoning
- ½ tsp smoked paprika
- ½ tsp black pepper
- ½ tsp onion powder
- Juice of ½ lemon
- 1 tbsp sesame oil
- 2/3 cup plain Greek yogurt
- Chilli flakes (optional)
Instructions
- Chermoula: Mix parsley, cilantro, garlic, jalapeño, spices, and olive oil. Set aside. Optional: warm slightly before serving.
- Harissa Marinade and Yogurt: In a bowl, combine harissa, olive oil, garlic powder, oregano, chicken seasoning, smoked paprika, black pepper, onion powder, lemon juice, and sesame oil. Reserve 1–2 tbsp and stir into Greek yogurt; refrigerate for yogurt sauce. Coat the chicken in the remaining marinade and refrigerate for at least 1 hour. If you are pressed for time, 30 minutes works, and overnight will give the deepest flavor.
- Grill Chicken: Preheat grill to medium. Pat chicken dry. Grill 7 minutes per side (14 minutes total) until internal temperature reaches 165°F. Rest 5 minutes, then cut into squares.
- Assemble: Spoon harissa yogurt on plates, add grilled chicken, top with chermoula, and sprinkle chili flakes if desired.
Notes
- Pat chicken dry for better char; fresh lemon brightens the dish; chermoula can be extra sauce.
Nutrition Facts
Calories
460Fat (grams)
32 gCarbs (grams)
6 gFiber (grams)
1 gSugar (grams)
2 gProtein (grams)
38 gI am not a certified nutritionist and any nutritional information on dontmissmyplate.com should only be used as a general guideline.

Pork Chop and Apple Skillet
I was inspired to update this recipe after an afternoon of apple picking. Handling all those crisp, fragrant apples made me think about the classic pairing of pork and apples—a combination I had never fully questioned before, but one that clearly has roots both in tradition and in nature. Historically, pigs would forage for fallen apples in the fall, which naturally complemented the richness of their meat. Over time, this pairing became a culinary classic, and it’s easy to see why.
Growing up, pork chops were a staple in my household, often served at braais (barbeques) or as simple weeknight dinners with mashed potatoes and peas. There’s something inherently satisfying about pork chops; I always ate them down to the bone. They carry a subtle, natural sweetness that pairs beautifully with a wide variety of flavors. Apples, with their acidity and tartness, provide a perfect counterpoint, balancing the richness of the pork while adding freshness and brightness to the plate.
This skillet recipe celebrates that harmony. The pork is seared to a gorgeous, glistening brown, while the apples and onions soften and caramelize in a creamy, herb-infused sauce. A touch of crispy pancetta adds depth and saltiness, making every bite rich, comforting, and visually stunning. It’s a dish that’s approachable enough for weeknights but elegant enough to serve to guests—a certified people-pleaser that combines nostalgia, flavor, and seasonal inspiration all in one skillet.

Pork Chop and Apple Skillet
Pork chops serve as the ultimate lunch or dinner, and when paired with apples make for a tangy, sweet and succulent meal. Don't be afraid to use fruit in your savory dishes, this one is worth it!
Ingredients
- 2 bone-in center-cut pork chops (1 to 1½ inches thick)
- 2-4 tablespoons olive oil
- 2 tablespoons soy sauce
- 2 tablespoons Worcestershire sauce
- ½ teaspoon paprika
- ½ teaspoon salt
- ½ teaspoon black pepper
- ½ teaspoon steak and chops seasoning
- ½ teaspoon dried herbs (Italian seasoning, rosemary, or oregano)
- ½ teaspoon garlic powder
- 1 teaspoon dried herbs
- 1 teaspoon flour
- 1/4 teaspoon cumin
- 1 bouillon cube to dissolved in equal parts water (or ¾ cup chicken stock)
- 1/4 teaspoon salt
- ½ teaspoon black pepper
- 1 teaspoon Royco Usavi Mix (no-sodium all-purpose seasoning)
- ½ large red onion, thinly sliced
- 1 large apple (Honeycrisp or Granny Smith work well), thinly sliced
- ¼ cup diced pancetta
- 2 tablespoons cooking oil
- 2 tablespoons butter
- 2 sprigs fresh rosemary
- 1 teaspoon mustard
- 1 teaspoon soy sauce
- ¼ cup cream or coconut milk
- Fresh parsley (to garnish)
Instructions
- Marinate the pork chops for at least 4 hours, up to 8 hours.
- In a bowl, container, or zip-top bag, combine oil, Worcestershire sauce, and soy sauce to coat the pork chops.
- Add paprika, garlic powder, dried herbs, salt, black pepper, and steak and chops seasoning.
- Add extra oil if needed to ensure the pork is fully coated.
- Cover and refrigerate until ready to cook.
- Prepare the Base Seasoning:
- Combine dried herbs, flour, cumin, chicken bouillon cube, black pepper, salt, and Royco Usavi Mix — this will be added to the sauce later to build flavor.
- Prepare the Apples and Onion:
- Peel (if desired) and slice the apples and red onion into wedges — not too thin, not too thick — for optimal texture.
- In a skillet, sauté the pancetta in cooking oil until it starts to brown and becomes slightly crunchy.
- Remove the pancetta and set aside, leaving the rendered fat in the pan.
- Brown the pork chops on each side in the same pan.
- Add butter and rosemary to baste the chops and infuse aromatics. This helps the pork sear beautifully.
- Remove the pork chops. If the internal temperature is not yet 145–160°F (63–71°C), they will finish cooking in the sauce.
- Using the same oil, cook the onions until they begin to caramelize.
- Add the apples and cook until slightly softened.
- Add butter and seasonings to release flavor and aromatics; cook for 2–3 minutes.
- Add the prepared base seasoning and water or chicken stock to the pan.
- Add soy sauce and stir to combine.
- Reduce the heat to low and return the pork chops to the pan. Cover and simmer until the pork chops are fully cooked (check with a meat thermometer).
- Once the pork is cooked through, stir in the cream and reserved pancetta.
- Cook for an additional 3–4 minutes to thicken the sauce and meld flavors.
- Remove from heat and garnish with fresh parsley.
- Serve with grits, beans, or a starch of your choice.
Nutrition Facts
Calories
333Fat (grams)
16.36 gCarbs (grams)
13.57 gProtein (grams)
32.38 gI am not a certified nutritionist and any nutritional information on dontmissmyplate.com should only be used as a general guideline.

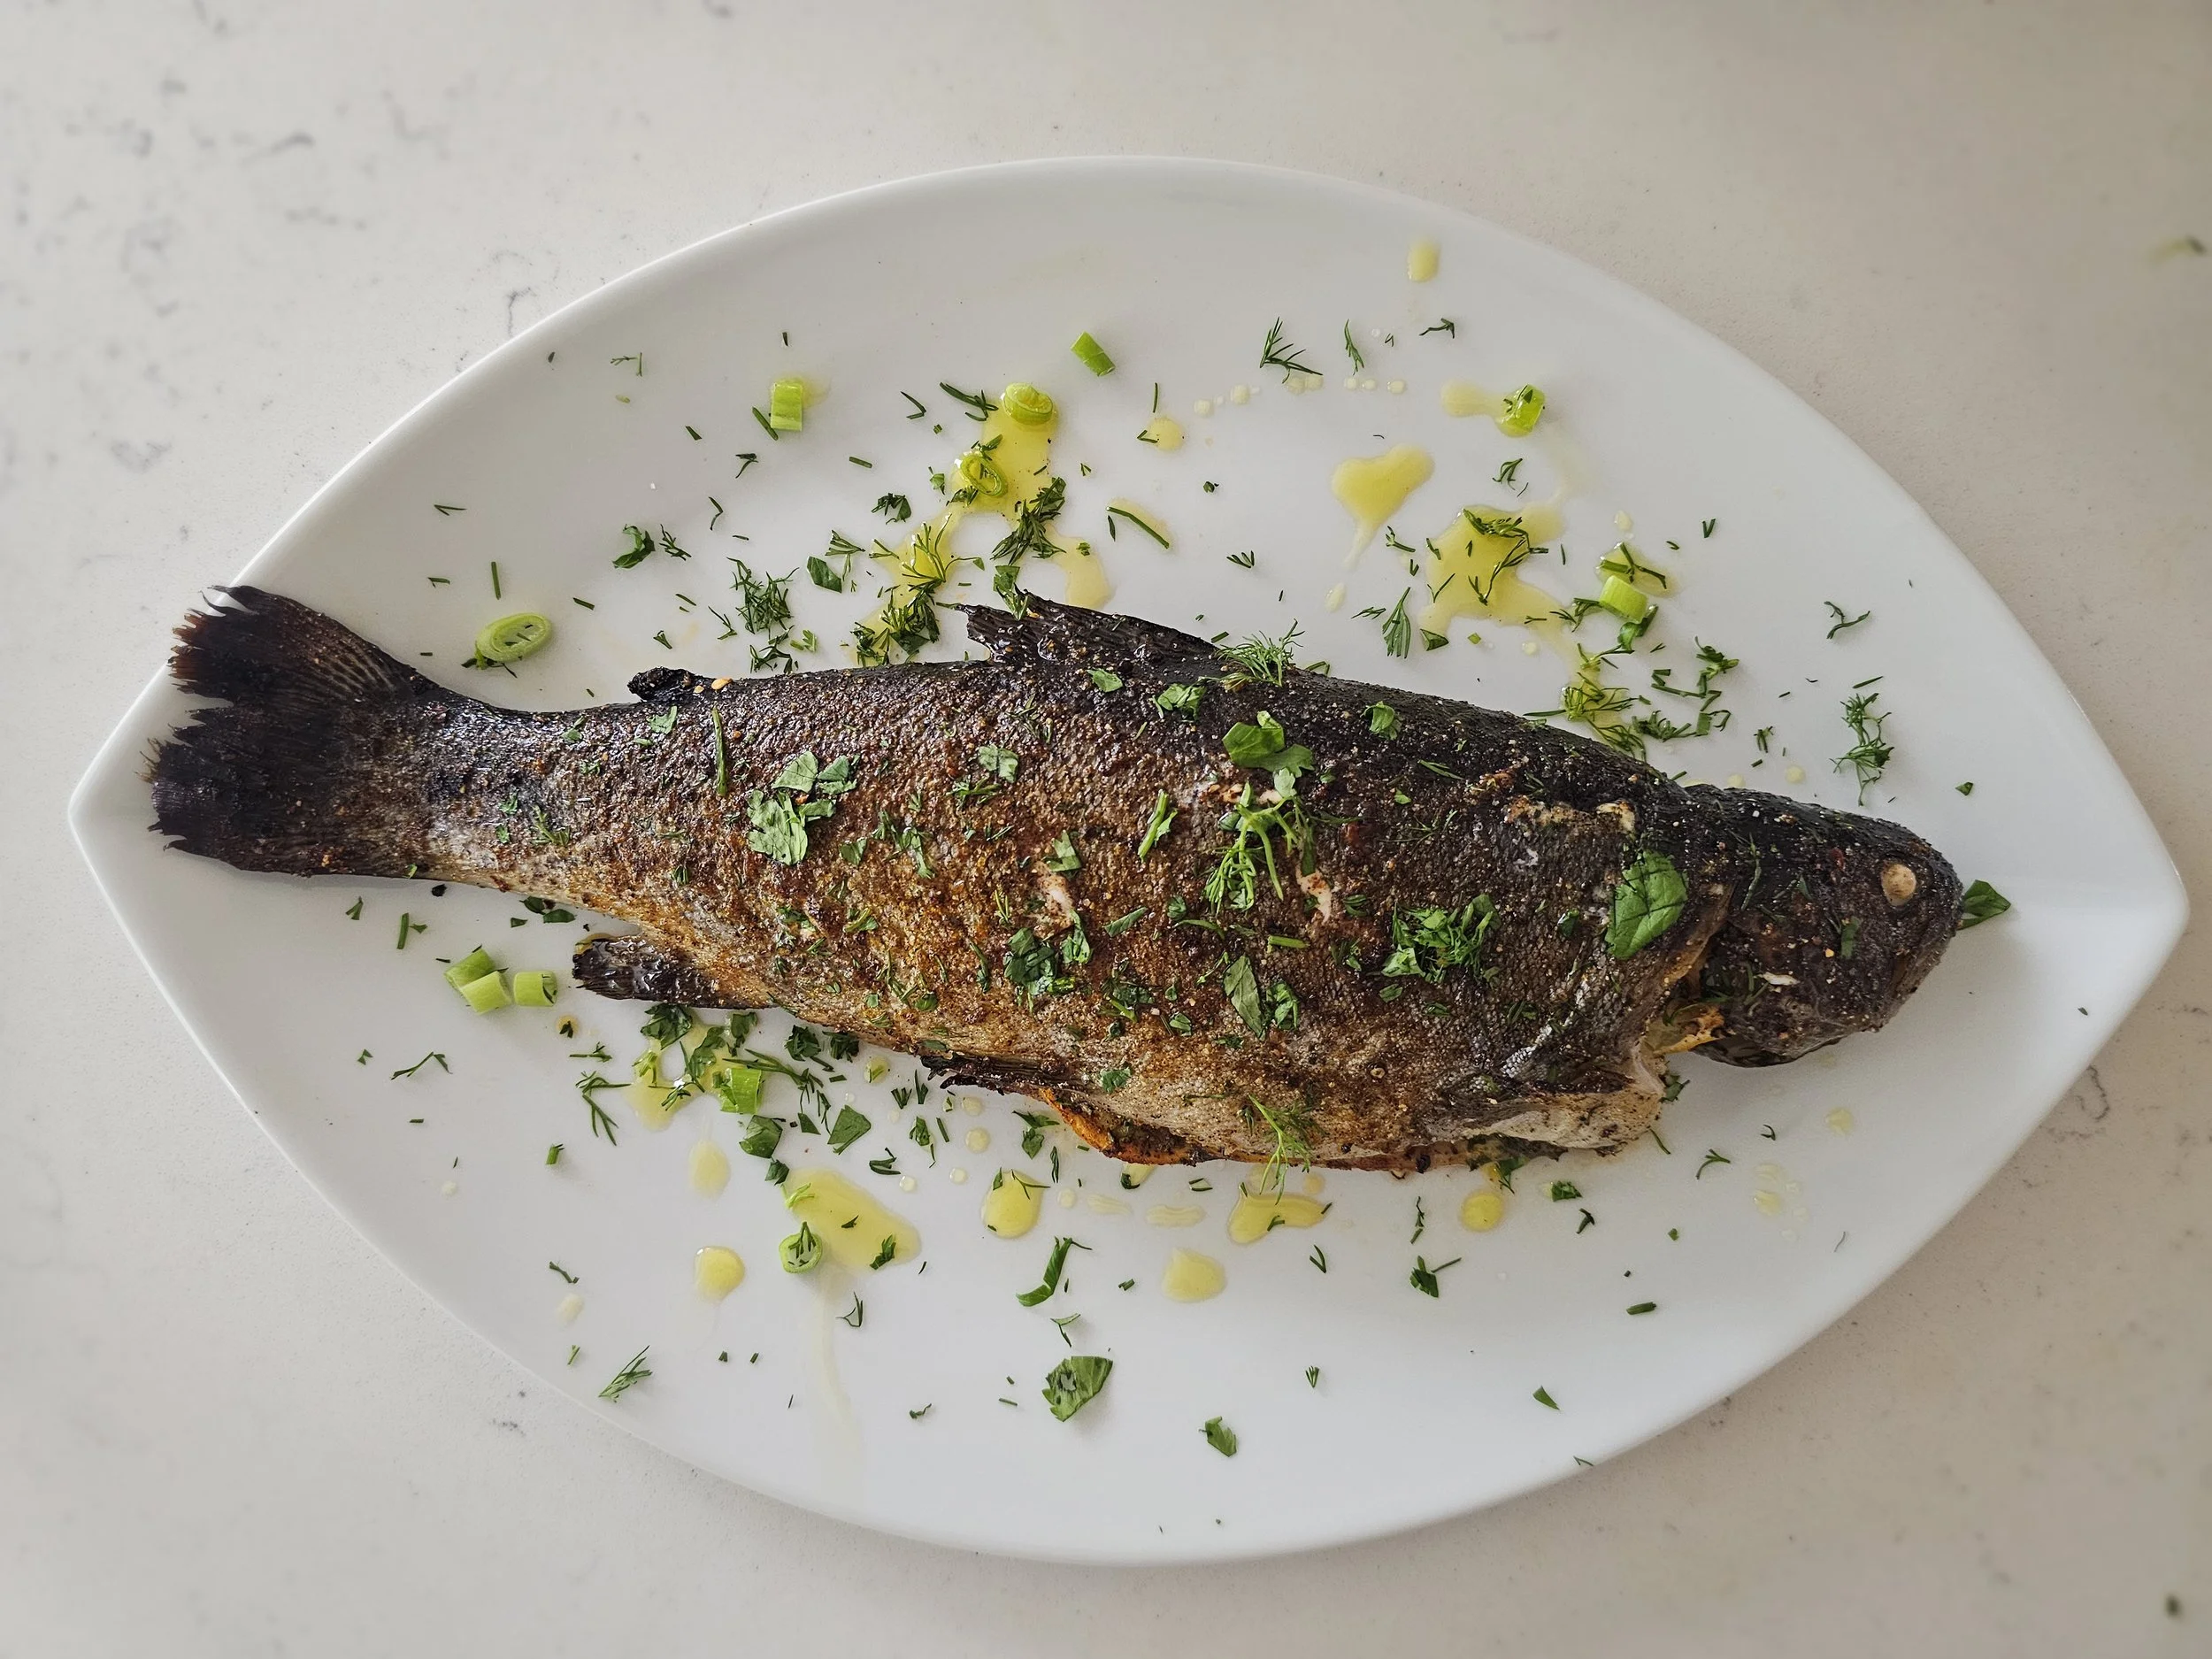
Oven-Baked Whole Trout with Herbs and Lemon
I’ve always had a particular love for cooking whole fish. There is something deeply satisfying about preparing it this way, honoring its structure, texture, and natural flavor rather than disguising it. That appreciation began long before the kitchen, through a love of fishing and the quiet patience it requires. Catching fish yourself changes the way you approach it on the plate.
This trout recipe reflects that mindset. It keeps the preparation simple while layering in thoughtful flavor. Fresh dill and parsley add brightness, while berbere, the warm and aromatic East African spice blend, brings depth and gentle heat. With its combination of chilies, garlic, and warming spices, berbere complements fish beautifully by enhancing its richness without overwhelming its delicate flesh. A squeeze of lemon at the end lifts and balances everything.
The method is straightforward. Roast the trout gently, then finish it under the broiler on parchment for a few minutes to crisp the skin while keeping the inside tender and juicy. The result is bold yet balanced, simple yet intentional, and a reminder that whole fish needs very little to feel special.
Tips for Perfect Trout:
Freshness is key: Choose trout with bright eyes, firm flesh, and a mild aroma. Fresh fish makes all the difference.
Pat dry thoroughly: Moisture is the enemy of crisp skin. Make sure the trout is well dried before applying your seasoning paste.
Herb and spice paste: Don’t skimp—it infuses flavor into every part of the fish. Rub generously inside the cavity and on the outside.
Watch the broil: Broiling is quick! Keep a close eye to avoid burning while achieving that golden, crispy skin.
Serving Suggestions:
Pair with lightly roasted vegetables like sweet potatoes, bell peppers, or zucchini to complement the spices.
A fresh, tangy salad with avocado, cucumber, and a citrus dressing balances the richness of the trout.
Just before serving, drizzle with a little extra olive oil and a squeeze of lemon for a burst of brightness.
Variations and Fusion Ideas:
Swap trout for other firm, white-fleshed fish like tilapia or bass if needed.
Add chopped chili or smoked paprika for a smoky, spicy kick.
Try a light yogurt drizzle on the side to introduce a creamy element that balances the spices.
This broiled trout is more than a meal, it’s a celebration of fresh ingredients, bold African flavors, and the simple joy of cooking whole fish. (As shown in the video, you can also fillet the fish before serving for a boneless option your family or guests will appreciate.)
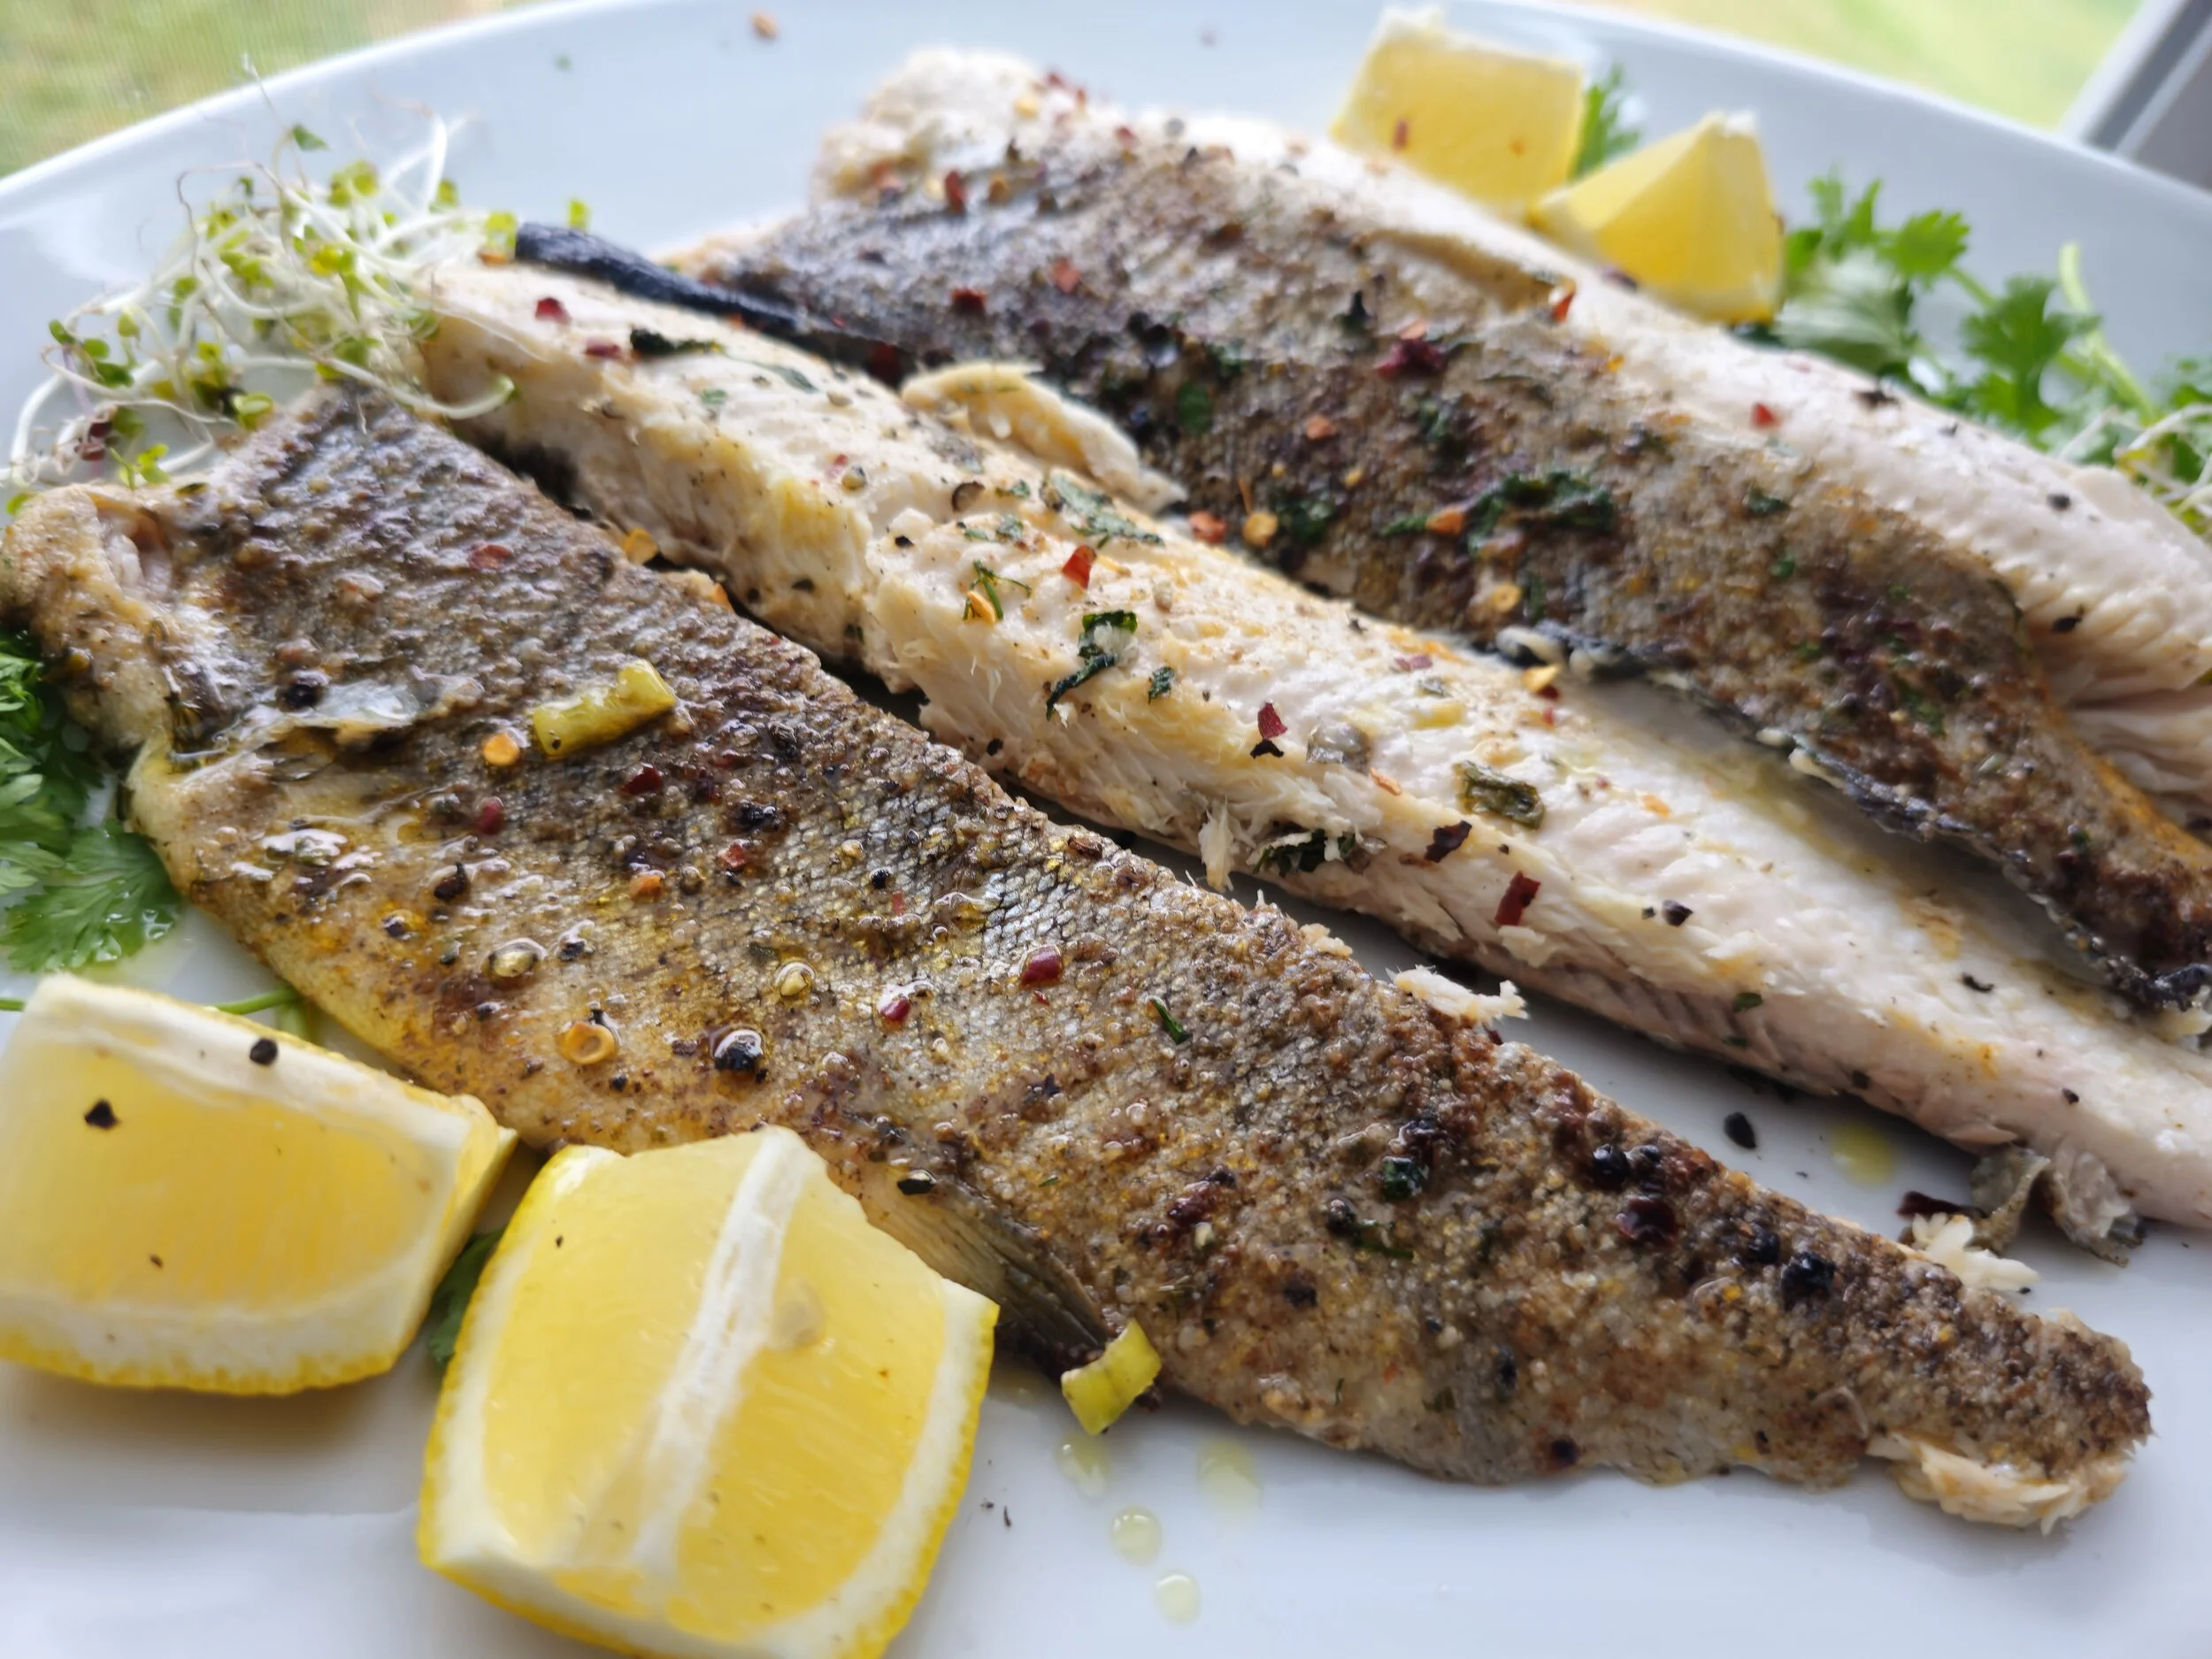
Whether it’s a weeknight dinner or a special occasion, this dish shines in both flavor and presentation. By layering herbs and spices and finishing with a quick broil for that irresistible skin, you’ll create something that’s not only visually stunning but deeply satisfying.

Oven-Baked Whole Trout with Herbs and Lemon
A simple, flavorful oven-baked whole trout recipe with herbs, lemon, and a crisp finish, perfect for weeknight dinners or special occasions.
Ingredients
- 1 whole large trout
- 2 lemons
- 1/3 cup spring onions, chopped
- 1/3 cup fresh dill, chopped
- 1/3 cup fresh parsley, chopped
- 2 garlic cloves, minced
- 2 tablespoons berbere spice
- 2 tablespoons spice for fish
- 1 tablespoon butter
- Salt and black pepper to taste
- Chili flakes (optional)
- Olive oil
Instructions
- Preheat your oven to 200°C (400°F).
- Clean and pat the trout dry. Make a few diagonal slashes on each side.
- In a small bowl, mix spring onions, dill, parsley, garlic, berbere spice, fish spice, salt, black pepper, and a drizzle of olive oil to form a paste.
- Rub the paste all over the trout, including inside the cavity. Slice one lemon and place the slices inside the fish cavity with a small knob of butter.
- Place the trout on parchment-lined baking sheet and cook in the oven until almost done, about 15–20 minutes depending on size.
- Switch the oven to broil and broil the trout for 5 minutes at the end to crisp the skin. Watch closely so it doesn’t burn.
- Serve hot with extra lemon wedges on the side and enjoy the fusion of African flavors with tender, juicy trout and perfectly crisp skin.
I am not a certified nutritionist and any nutritional information on dontmissmyplate.com should only be used as a general guideline.

Guava-Glazed Chicken Wings & Air Fryer Sweet Potato Fries
The Ultimate Sweet and Savory Snack
Wings are the ultimate snack: not too heavy, perfectly balanced between sweet and salty, and endlessly customizable with rubs, marinades, or sauces. This version adds a tropical twist with a luscious guava glaze inspired by the one guava tree I climbed growing up in Zimbabwe. Paired with crispy air fryer sweet potato fries, this combo brings a vibrant, naturally sweet edge to classic chicken and BBQ flavors.

A Perfect Game Day Snack
Wings are a game day staple for a reason: they’re shareable, satisfying, and hit that sweet-and-savory balance almost everyone loves. This version keeps things familiar while adding a glossy guava glaze that feels like a fresh take on classic BBQ wings—bold, sticky, and crowd-friendly.
Why Guava Makes an Incredible Wing Glaze
Guava naturally combines sweetness and acidity, which makes it ideal for sauces and glazes. When reduced with honey and soy sauce, it creates a smooth, flavorful coating that clings to wings without overpowering them. I’ve always been drawn to guava—partly for the taste, and partly because I grew up climbing a guava tree as a child. That early connection stuck, and it’s why guava still feels like such a natural ingredient to cook with.
Guava is also widely used in Caribbean and Latin cuisines where it shows up in pastes, sauces, and desserts. That cross-cultural familiarity is what makes this glaze feel both unique and instantly comforting.
Crispy Sweet Potato Fries, Made Easy
Sweet potato fries are the perfect pairing for sticky wings, adding a subtle sweetness and hearty texture. Using the air fryer keeps them crisp on the outside and tender inside, with less oil and less cleanup. They cook quickly, hold up well for serving, and can be made in batches, ideal for entertaining.
Designed for Game Day Hosting
This recipe is built for ease and repeatability. The wings are baked instead of fried, the glaze comes together quickly on the stovetop, and the air fryer does the heavy lifting for the fries. Whether it’s the Super Bowl, a playoff game, or a casual watch party, this is the kind of snack that disappears fast—and brings people back for more.

Guava Glazed Wings with Air Fryer Sweet Potato Fries
A finger-licking combination never gets old! Try this version to make things interesting, and get your sweet and salty fix to soothe cravings while sipping cocktails or entertaining on game night.
Ingredients
- 2 lbs chicken wings
- 2–3 tablespoons oil
- 2 Tbsp chicken spice
- 1½ tablespoon smoked paprika
- 1 tablespoon sesame seeds
- 1 tablespoon parsley
- ⅓–½ cup guava paste, chopped
- ½ cup water or orange juice
- 2 tablespoons soy sauce
- 2–3 tablespoons honey
- 1 tablespoons vinegar or lime juice
- 2 large sweet potatoes, cut evenly
- 1 tablespoon cornstarch
- 2 tablespoons canola oil
- 1½ tablespoon Old Bay
- 1 tablespoon smoked paprika
- 1 tablespoon dried rosemary, lightly crushed
- ½ teaspoon salt
- Cooking oil spray
Instructions
- In a large bowl, combine 2–3 tbsp oil, 2 tbsp chicken spice, 1½ tbsp paprika, 1 tbsp sesame seeds, and 1 tbsp parsley.
- Add 2 lbs chicken wings and toss well to coat. Let sit for 10–15 minutes.
- Transfer wings to a parchment-lined baking tray—make sure they’re in a single layer, not piled up.
- Bake at 425°F (220°C) for 25 minutes.
- Flip each wing, reduce oven temperature to 350°F (175°C), and bake for another 15–20 minutes until caramelized and golden.
- In a nonstick saucepan, combine ⅓–½ cup chopped guava paste, ½ cup water (or orange juice), 2 tbsp soy sauce, 2–3 tbsp honey, and 1 tbsp lime juice or vinegar.
- Bring to a boil, then reduce heat to low.
- Simmer gently, stirring frequently, until the glaze thickens and is smooth and glossy (about 5–10 minutes).
- Peel and cut 2 large sweet potatoes into thin fries (1/4 inch thick).
- Optional: Soak in cold water for 20–30 min, drain and pat dry.
- Toss fries in 1 tablespoon cornstarch until evenly coated.
- Drizzle with 2 tablespoons canola oil and toss.
- Season with 1½ tbsp Old Bay, 1 tbsp smoked paprika, 1 tbsp dried rosemary, and ½ tsp salt.
- Line the air fryer basket with foil or parchment and add fries in a single layer. Cook in batches if needed.
- Air fry at 400°F (204°C) for 8–10 minutes, toss and lightly spray with oil, then cook another 10–12 minutes or until crispy and golden.
- Serve immediately.
To serve:
- When wings are done, toss them gently in the warm guava glaze until well coated. Serve wings hot with the crispy sweet potato fries on the side.
- Garnish wings with extra sesame seeds and parsley for that final touch.
- Offer extra guava glaze on the side for dipping.
Nutrition Facts
Calories
530Fat (grams)
32 gCarbs (grams)
36 gSugar (grams)
18 gProtein (grams)
26 gI am not a certified nutritionist and any nutritional information on dontmissmyplate.com should only be used as a general guideline.


Burrata, Melon, and Prosciutto Galette
What's not to love about this combo? Fruit and cured meat is an ancient pairing meant to help boost the immune system. With the addition of burrata and arugula, melon and prosciutto are some of the most well-known Italian antipasti out there, and that's not a shock! I'm a sucker for the sweetness from the melon, saltiness from the prosciutto, creaminess from the burrata, freshness, and slightly bitter notes from the arugula put together.
How about baking all these ingredients together? Explore the website for sweet and savoury recipes, which use the galette, a perfect vehicle to combine what you love and experiment. All you need is some pastry dough, either store-bought or homemade and some egg wash. Save the arugula to top at the end; this changes the characteristics a bit but leaves what we love about the combo intact.
Enjoy a slice for lunch or dinner or as a warm, tasty appetizer before the main meal. Many restaurants have embraced the approach in the form of a pizza; why not create the experience in your own home?
Ingredients
1 pie pastry dough, thawed
4-5 slices of prosciutto
1/2 cup arugula
1 burrata
3/4 cup melon
1/4 teaspoon black pepper
1/8 teaspoon salt
1 teaspoon steak seasoning
1 teaspoon date syrup
1 teaspoon olive oil
1 egg (for egg wash)
Hot honey
Red chili flakes
Instructions
Roll out the thawed pastry dough.
Remove the melon flesh from the skin and slice it into thin, flat pieces. Toss in a bowl with salt, pepper, date syrup and olive oil.
Lay the melon pieces in the middle of the dough. Leave about an inch of the outside to fold over part of the filling.
Place the cured meat and cheese broken up evenly over the melon. For the prosciutto, you can bunch it up or lay the pieces flat.
Fold the pastry sides all the way around, tucking in or folding any corners that stick out.
Beat the egg, then use a basting brush to coat the edge of the galette, then garnish with steak seasoning.
Bake the galette for 20-2r minutes at 350F; the contents will be bubbling hot.
Remove from heat, then top with the arugula and a drizzle of hot honey and chili flakes. Serve warm.

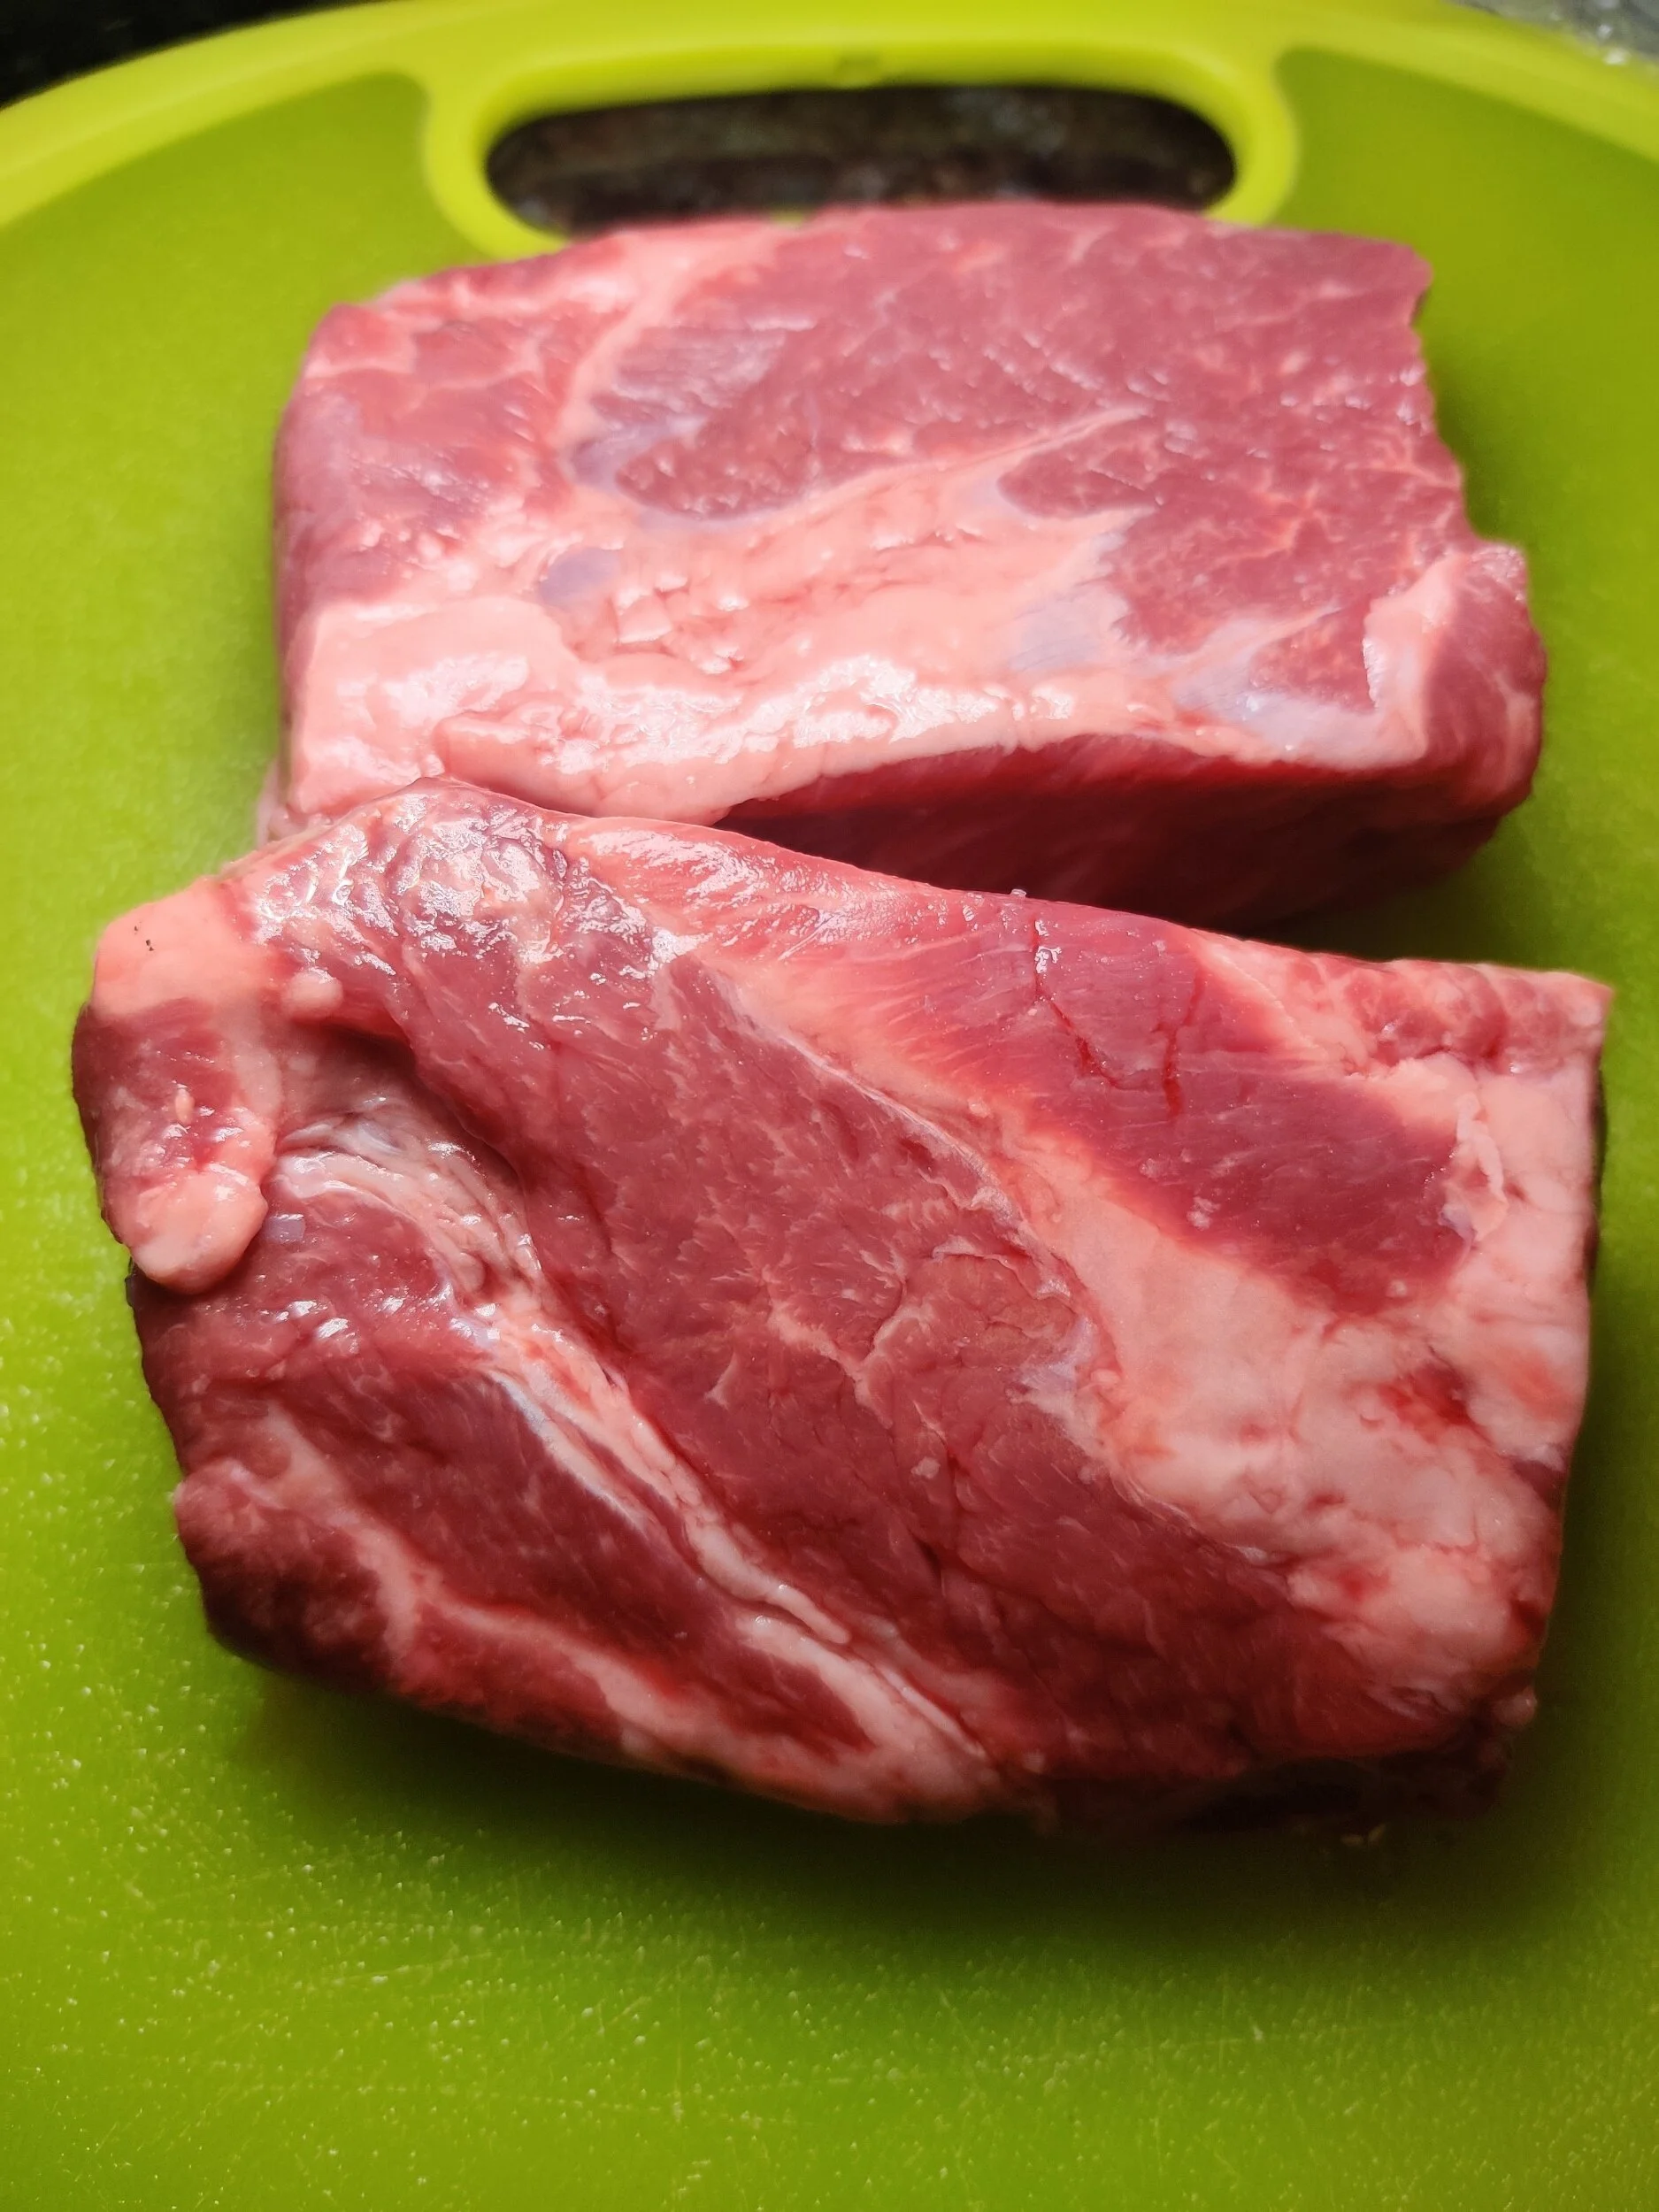
Pork Chops, Purple Peppers, and Peaches with Wine Sauce
John Harris' Peter Piper picked a peck of pickled peppers came to mind when I began writing out this recipe!
After a trip to the farmer's market, I left with some fresh purple peppers, which taste mostly like their green, orange and red cousins; subtle, but a little bitter, which can be a nice contrast in the suitable dish. Given the colour, they could be a great addition to a salad. I also happened to have some peaches from a previous recipe.

To keep pork chops juicy and prevent them from drying out, you want to sear both sides on high heat in a cast iron or non-stick pan to give them a nice colour and crisp, then poach in the wine with the lid to finish. To avoid overcooking the peaches and peppers, you can sauté separately in the same pan the chops are prepared once the remaining poaching liquid is moved to a saucepot to reduce.


Pork Chops, Purple Peppers, and Peaches with Wine Sauce
Ingredients
- 2 large pork chops
- 2 peaches, sliced into segments
- 1 tablespoon steak and chops seasoning (I used Roberston’s)
- 1/3 cup white wine (real wine preferred)
- 2 tablespoons olive oil
- 2 tablespoons butter
- 2 bell peppers, sliced into strips (I used purple, you can also use green)
- Rosemary sprigs
- 4 garlic cloves
- 2 tablespoons butter
- 1 tablespoon shallots, finely chopped (optional)
- 2 tablespoons mirin
- 1 teaspoon red wine vinegar
- 1 teaspoon Worchester sauce
- Salt and pepper to taste
Instructions
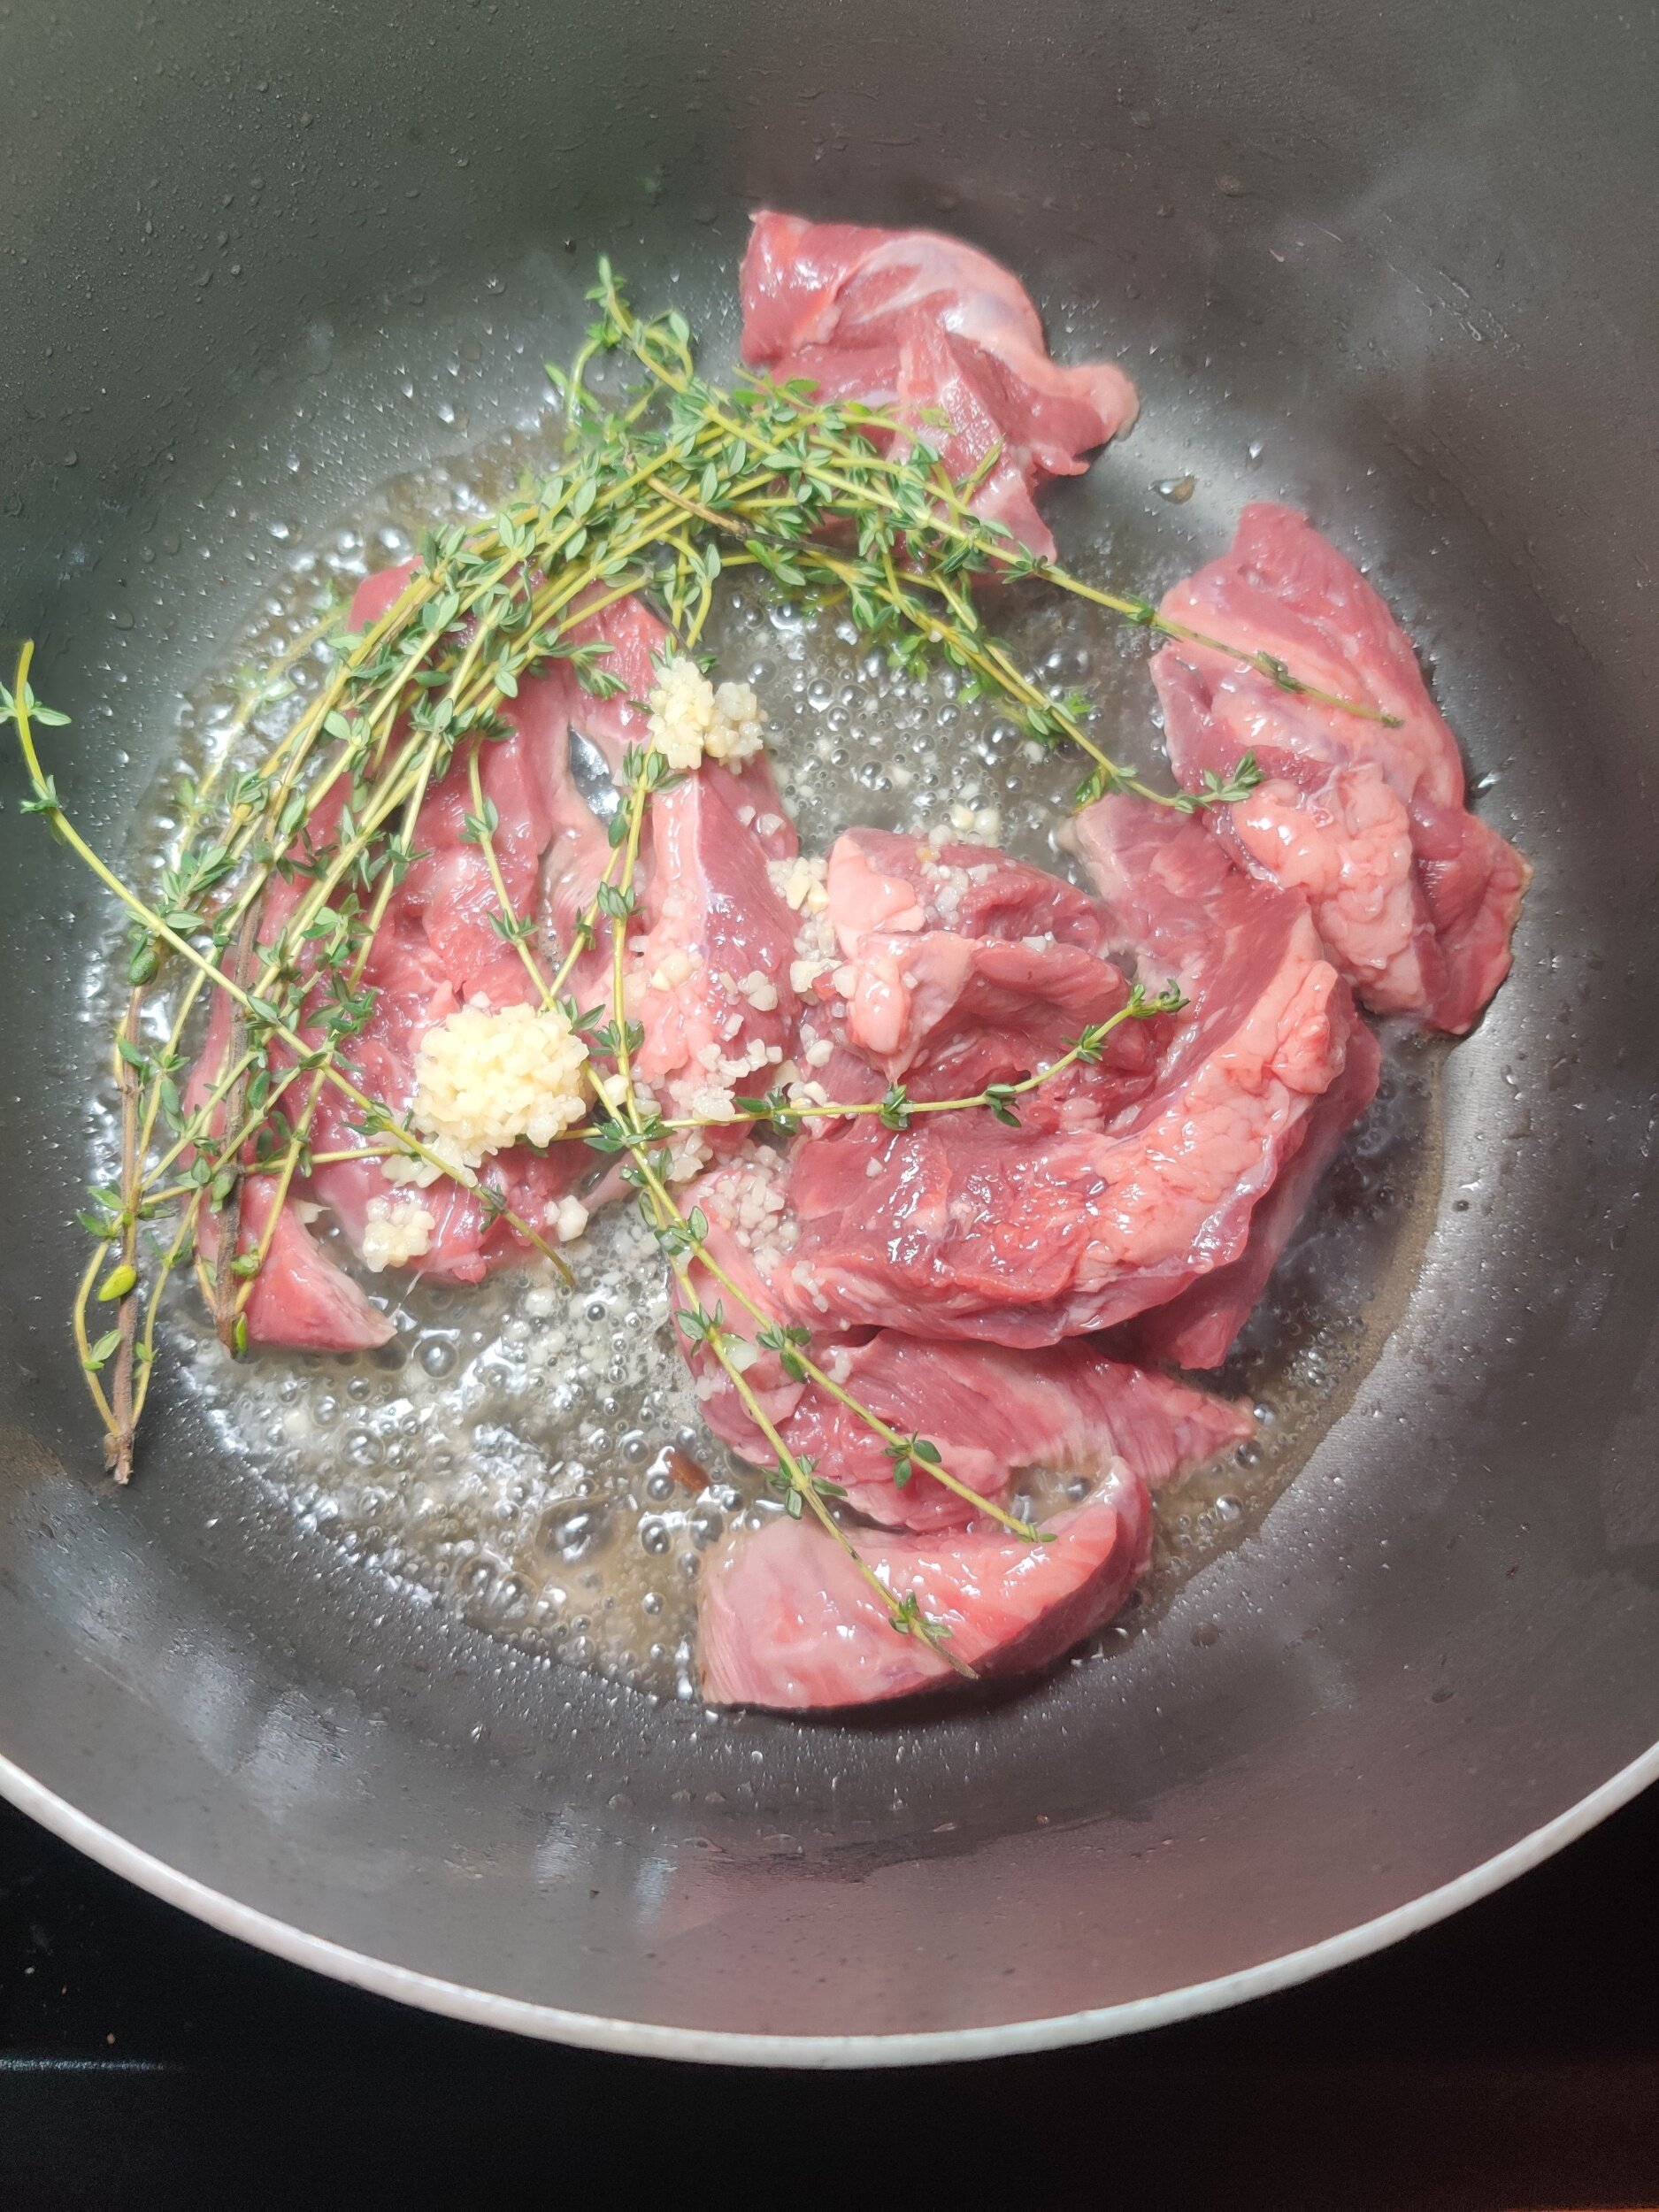
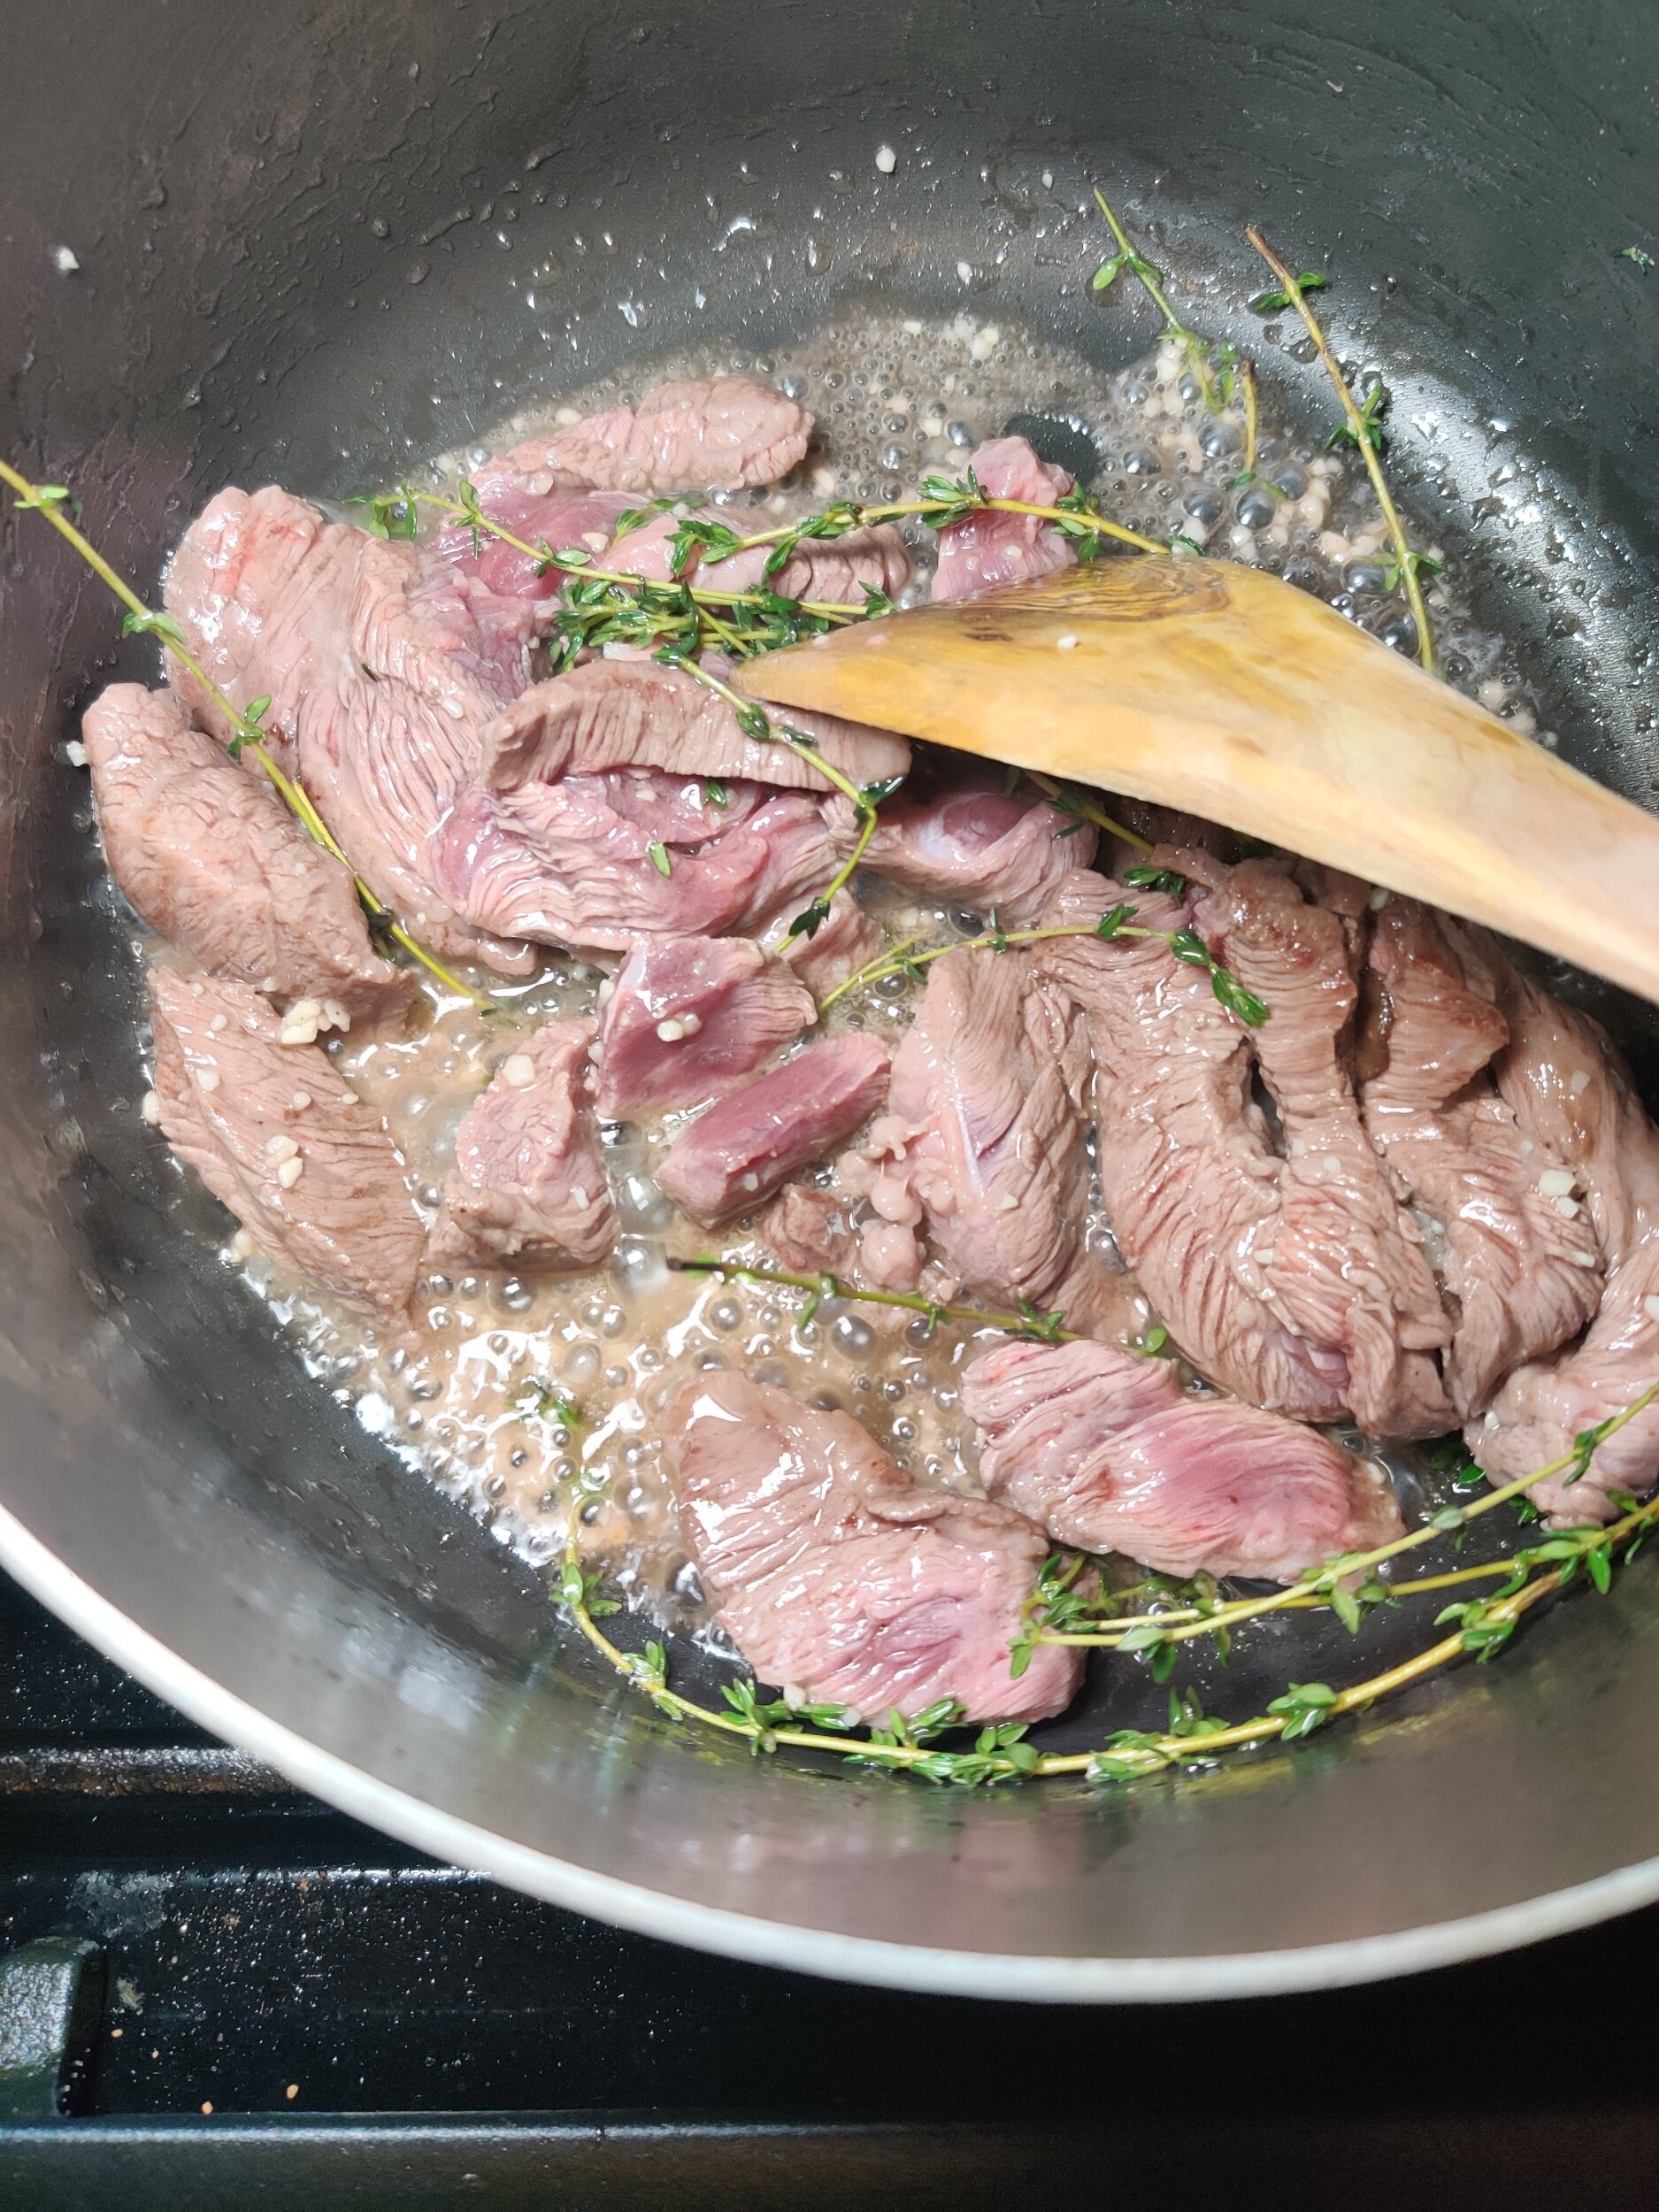
- Pat the pork chops dry. Make small lengthwise slices in the fat to prevent shrinkage—season. Lay them in a cast iron pan once the olive oil and 1 tablespoon of butter are heated. Sear on each side for about 4 minutes until golden brown and crispy. Once flipped to the other side, add the garlic, rosemary and remaining butter.
- Pour in the wine, then cover with a lid on low heat and poach until the thickest parts are 165F. Remove the pork chops from the pan and allow to rest for 10 minutes.
- While the sauce is simmering, saute the peach segments and bell pepper slices, season to taste for about 3 minutes until slightly softened.
- Pour the sauce into a serving cup, return all the ingredients to the skillet, and serve with sides of your choice.
- Remove the rosemary and garlic.
- Transfer the liquid to a small saucepot, and bring the liquid to a boil.
- Add the butter, mirin, vinegar, and Worchester—adjust and season to taste.
- Lower the heat to simmer and reduce the liquid until thickened, and stir occasionally.
- You can also add some shallots with the butter first for additional flavour, but don't burn it to avoid bitter taste.
Nutrition Facts
Calories
749Fat (grams)
57.7Carbs (grams)
34.4Sugar (grams)
24.4Protein (grams)
21.4I am not a certified nutritionist and any nutritional information on dontmissmyplate.com should only be used as a general guideline.
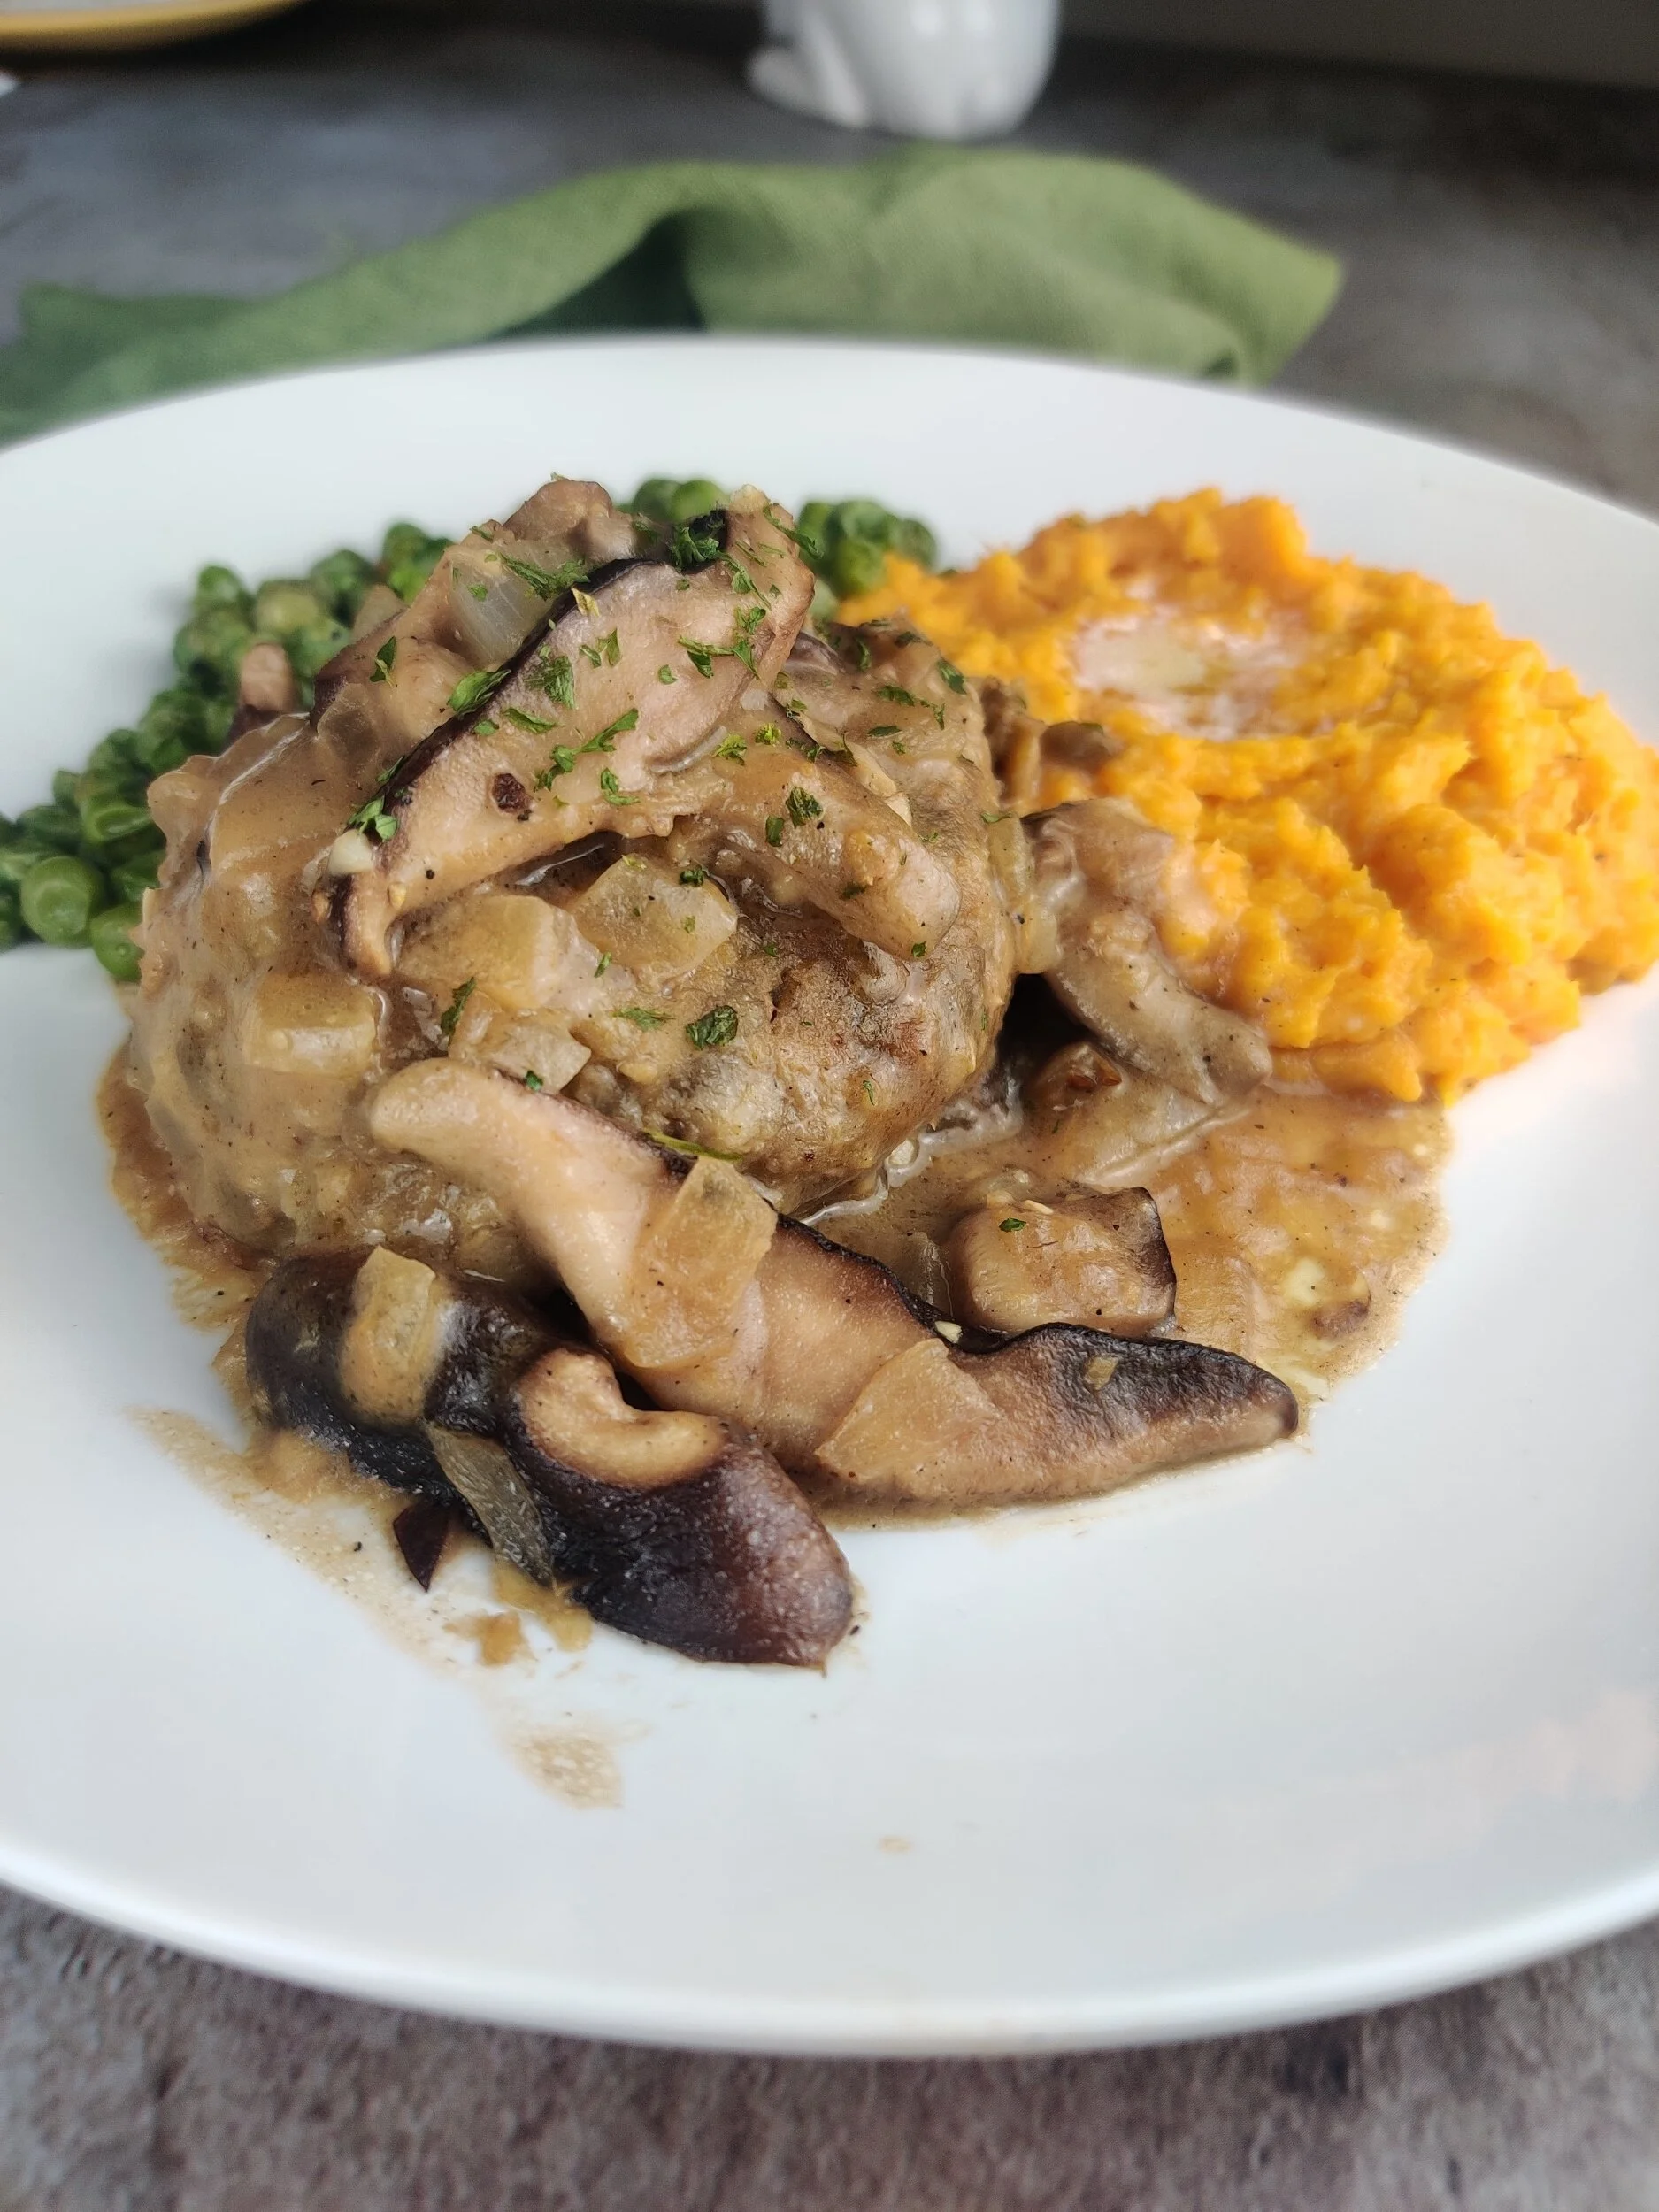
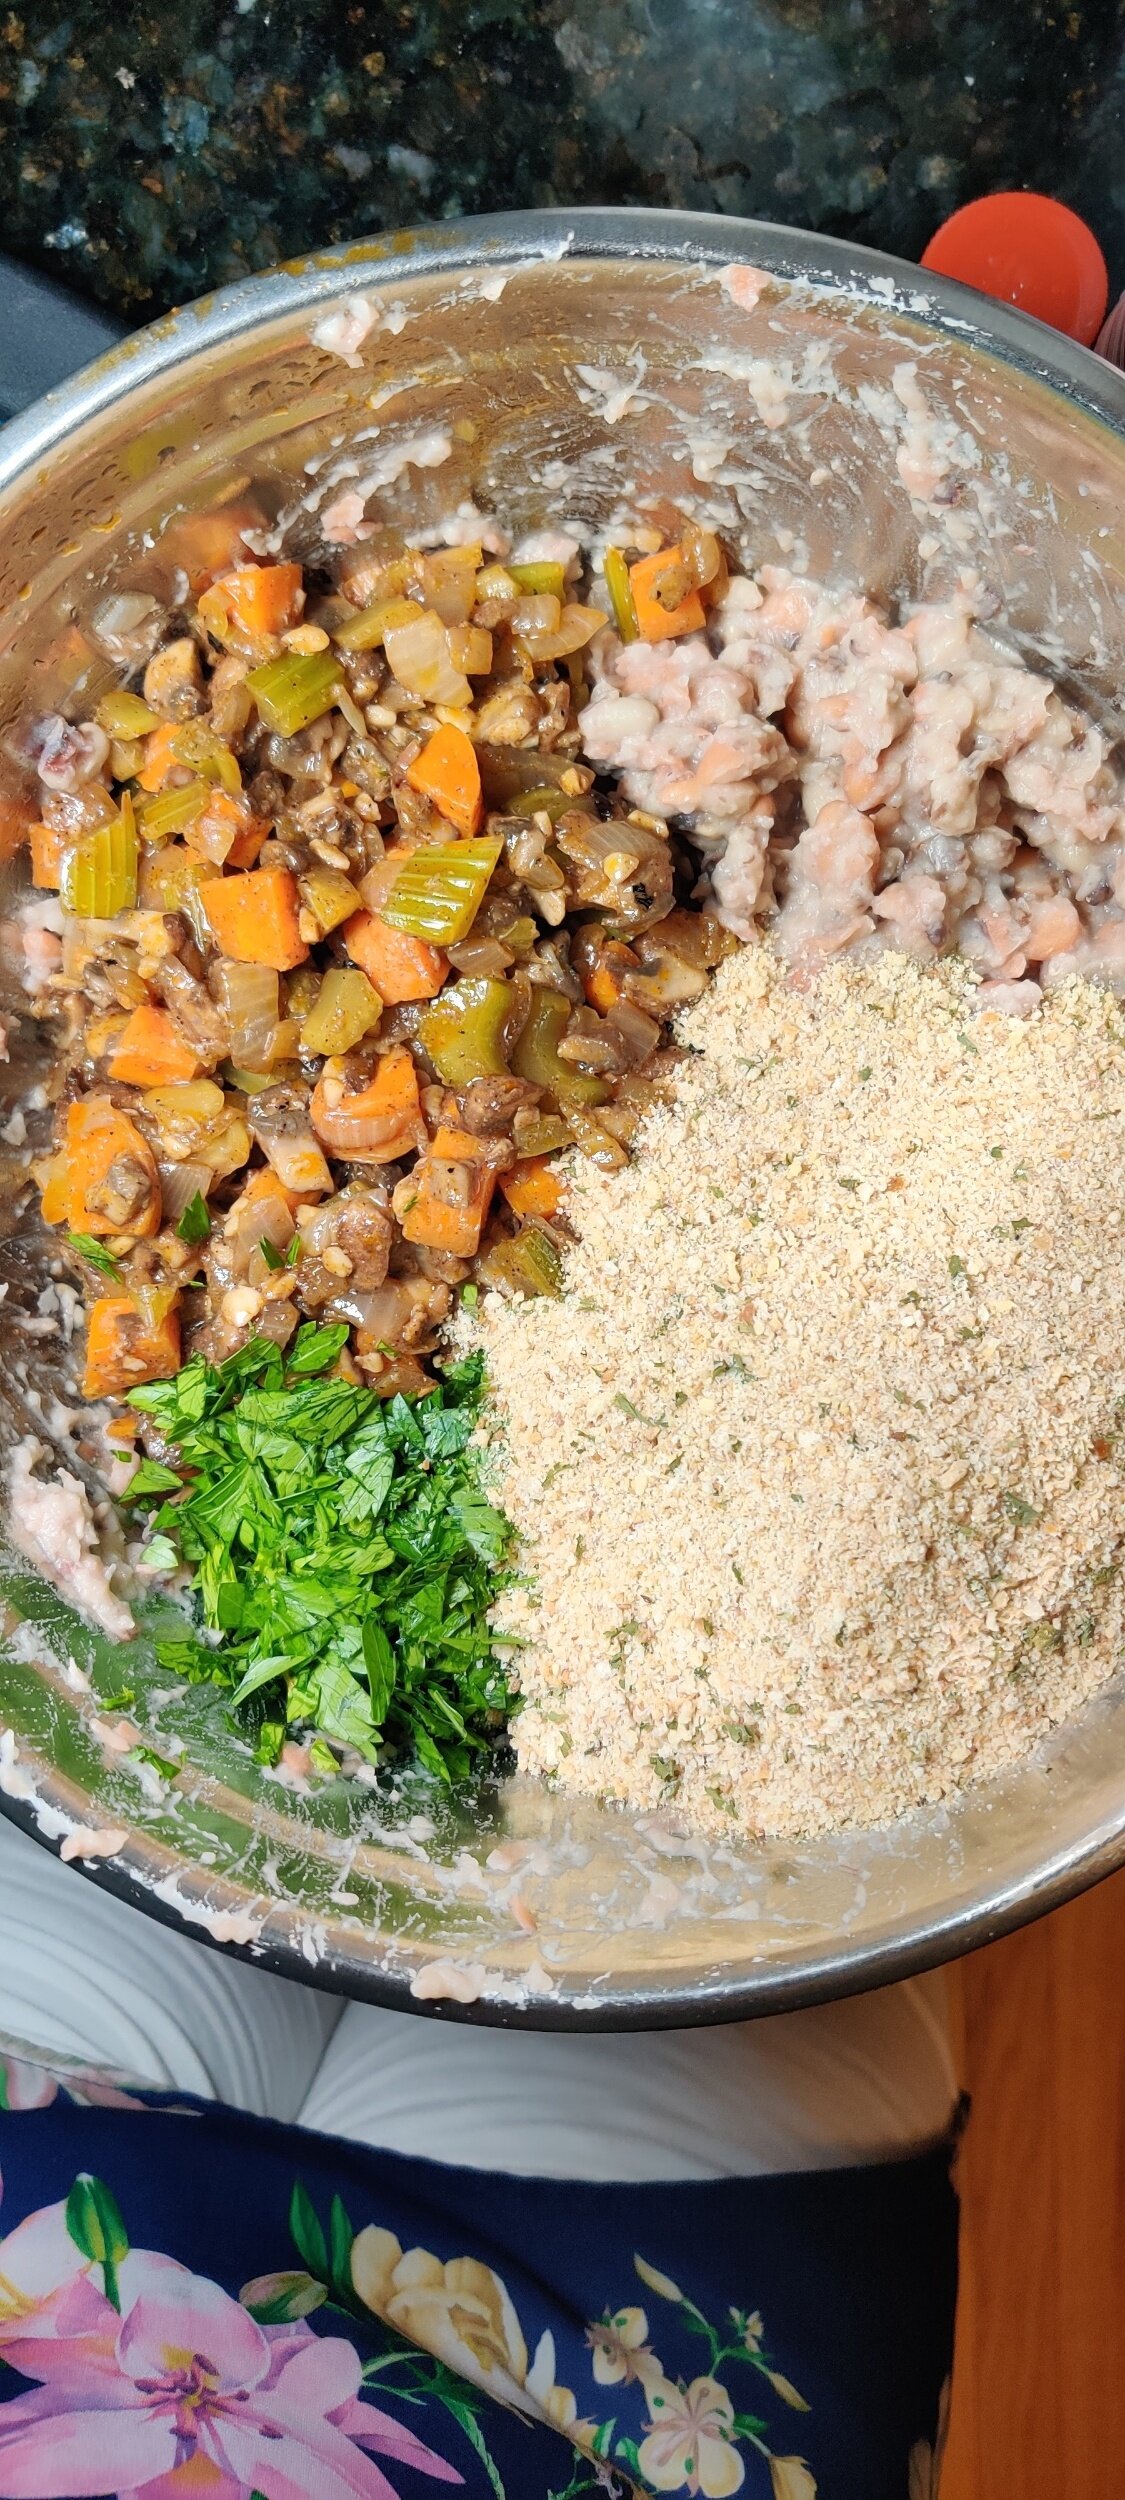
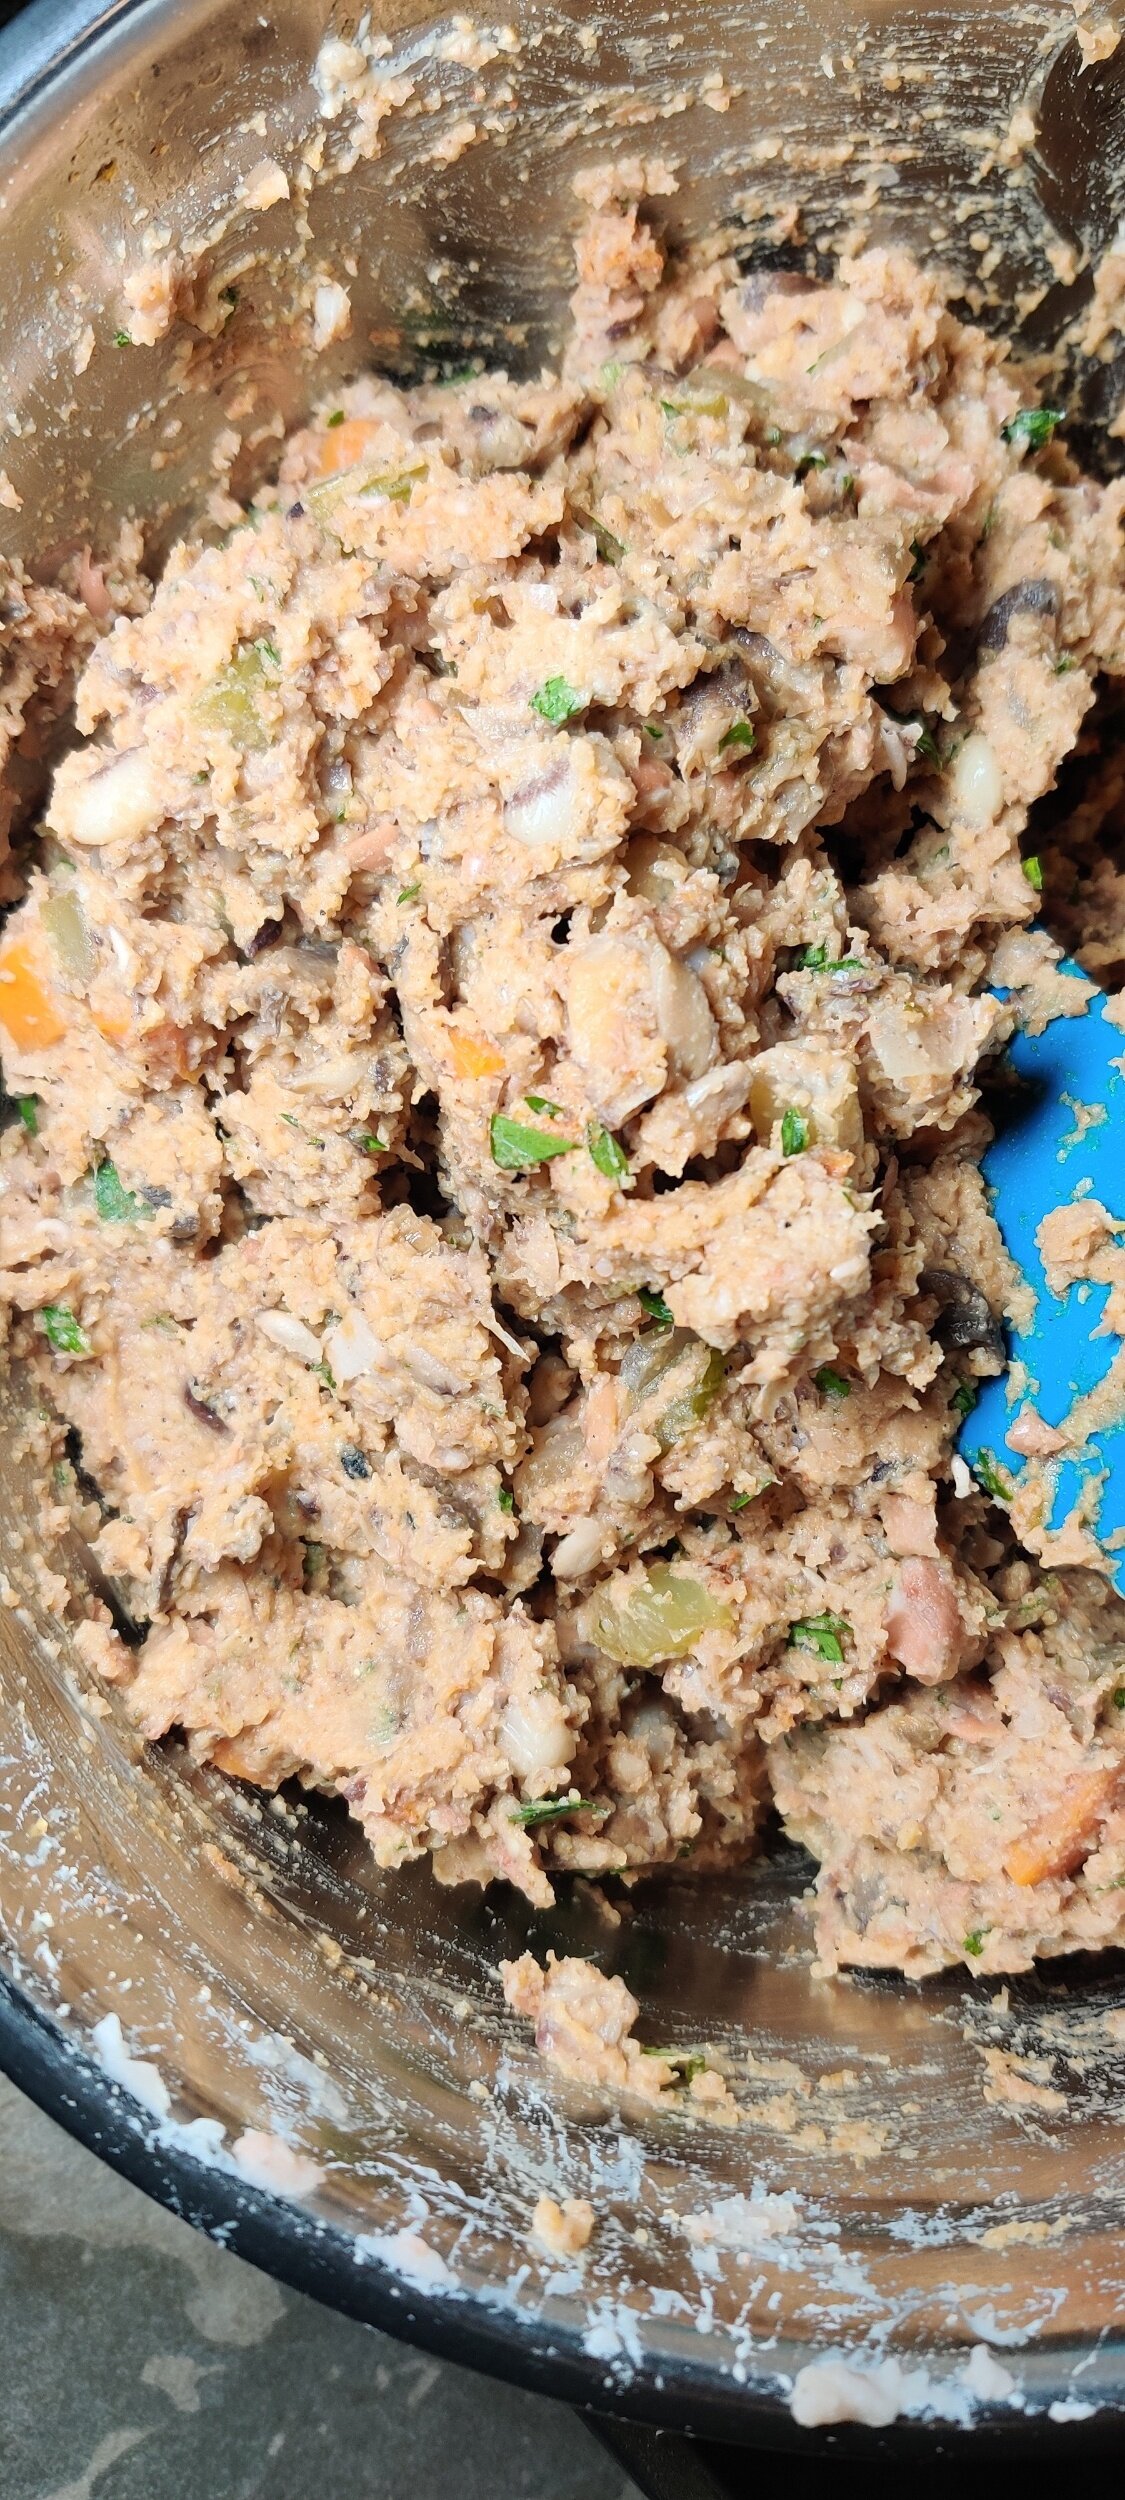
Lentil and Mushroom Salisbury 'Steak’
I love the combination of lentils and mushrooms. It made sense to put them together for this recipe. Familiar to many but obscure to some, a Salisbury steak is typically a ground beef burger patty served with gravy. Modern versions call for the addition of sauteed mushrooms, and the dish is generally paired with green beans or peas and mashed potato. I steamed some peas and made a quick sweet potato mash. http://npengage.com/nonprofit-fundraising/design-fundraising-appeal-that-raises-more-this-december/
I made sure the lentils and mushrooms were well-flavoured for the patty base. You could get pre-cooked vegetables and beans, which saves you time if you don’t meal prep, but it gives you more control. For a homemade mix, get dried lentils, soak them overnight, then cook in broth and store until it’s time to make the patties. As for the button mushrooms, you can roughly chop and saute in advance, then mix with the cooked lentils. I kept mine as larger chunks to give the patties textures.
For the mushrooms in the gravy, I used shiitake. They are juicy, packed with flavour and enhance whatever you add them to, serving as the perfect bite and umami. You get the creamy, ‘meaty’ taste while enjoying the lentil patties with even more mushroom.
Ingredients
Patties/’steak’:
1 1/2 cups cooked lentils
1/2 cup cooked button mushroom, roughly chopped
1 teaspoon Worcester sauce
1 large garlic clove, minced
1/2 teaspoon salt
1 teaspoon black pepper
1/2 teaspoon Fenugreek powder
1/2 teaspoon coriander
1/2 teaspoon cumin
2 vegetable bouillon cubes, crushed
2 tablespoons Italian seasoning
1/4 cup Panko breadcrumbs
1/4 cup regular breadcrumbs
1 egg
1/2 yellow onion, grated
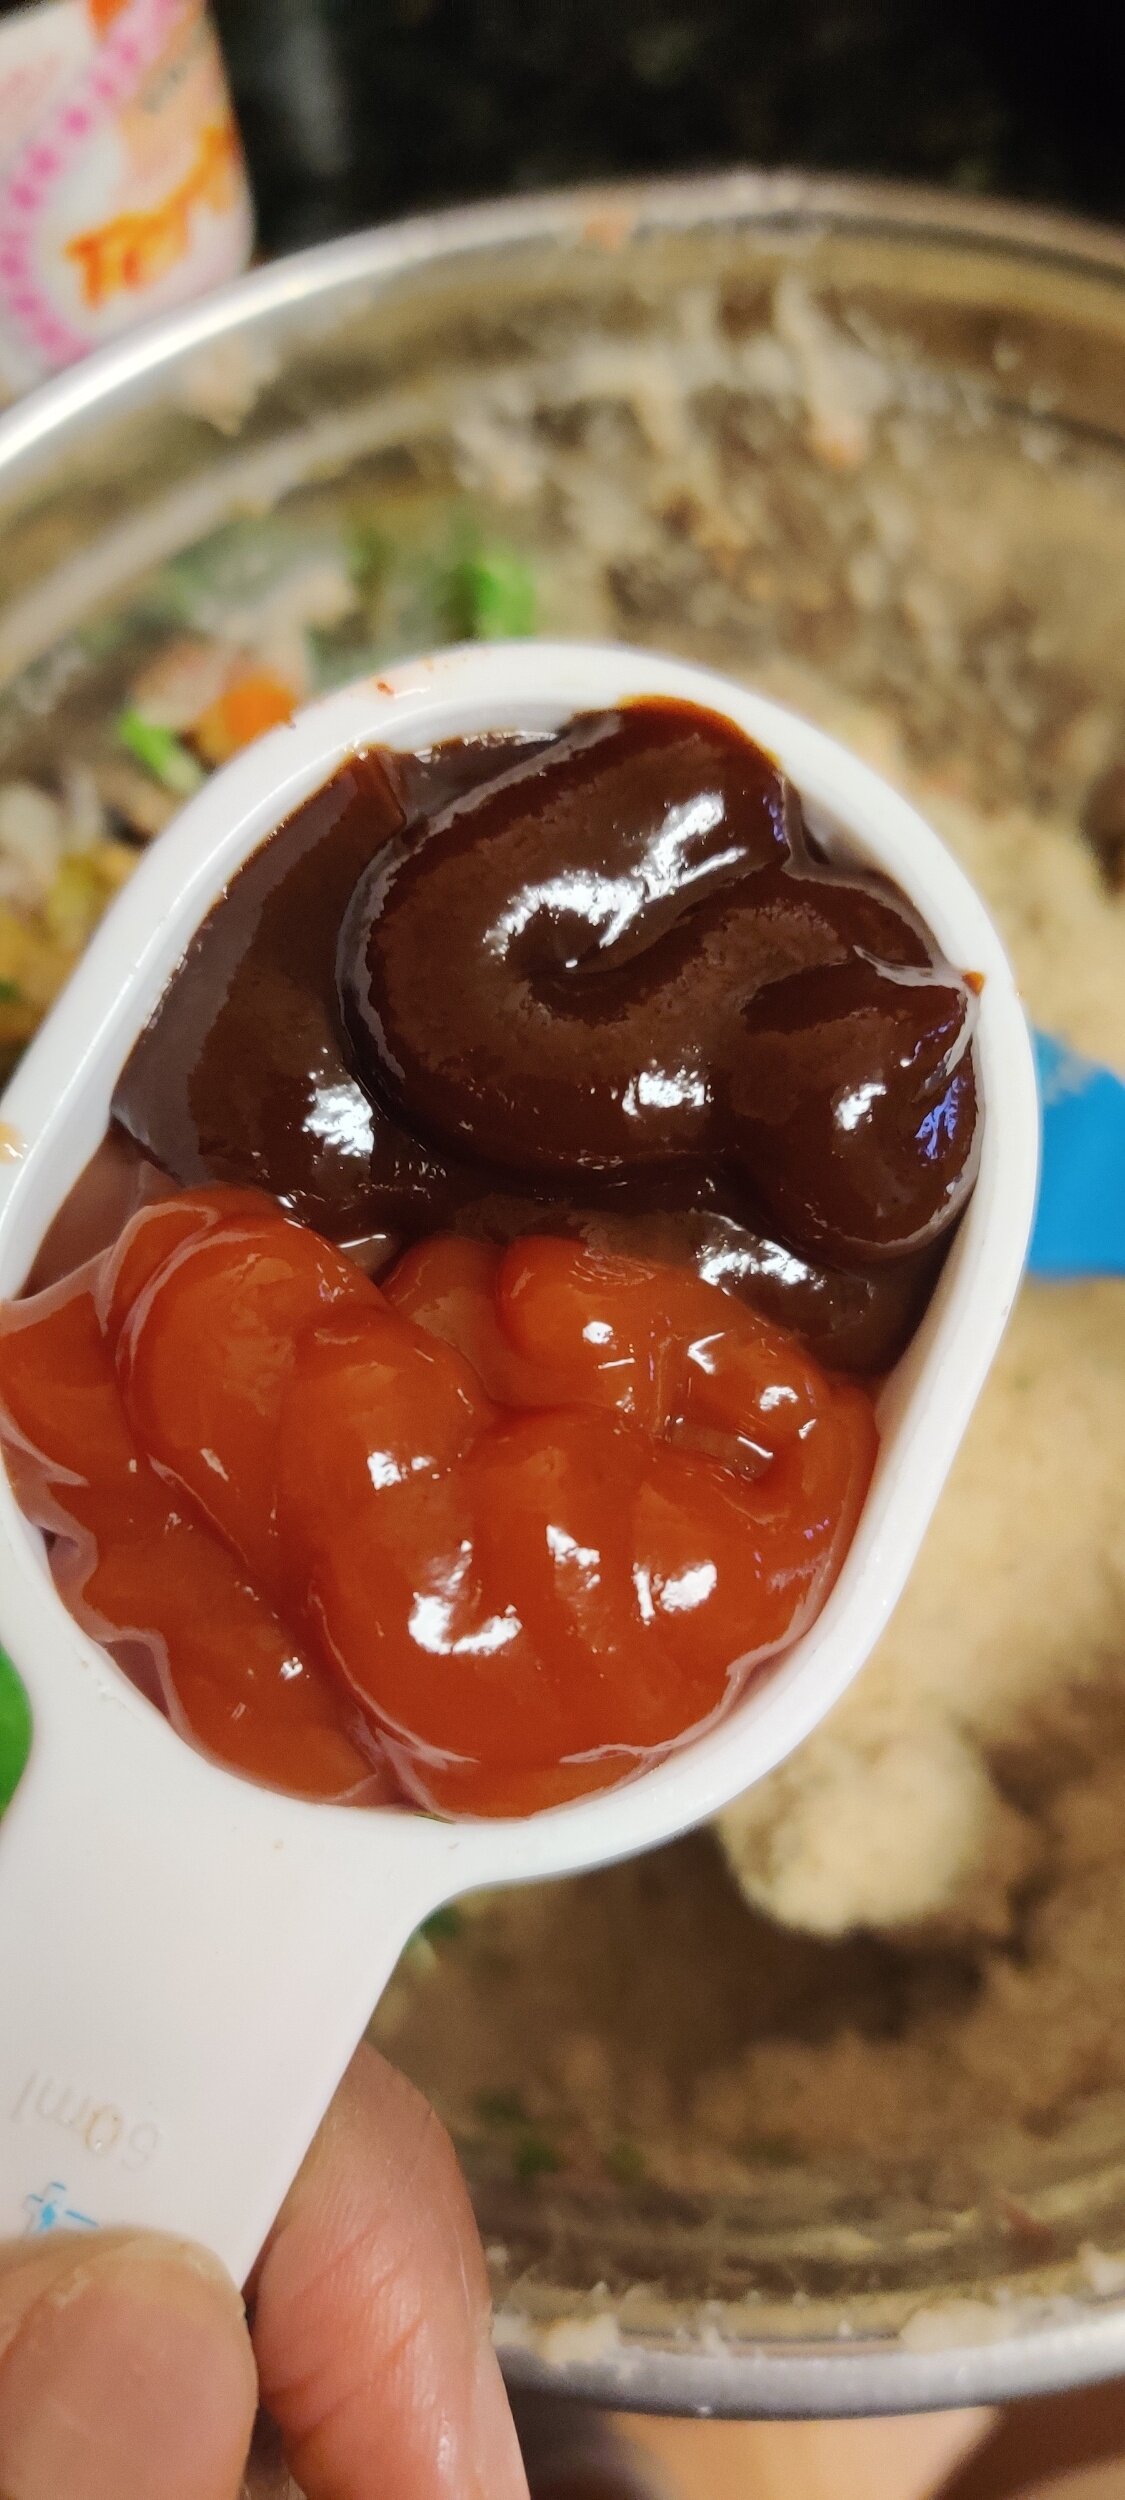
2 tablespoons tomato sauce/ketchup
2 teaspoons Dijon mustard
Mushroom gravy:
1/2 cup Shiitake mushrooms
1/2 teaspoon salt
1 teaspoon cracked pepper
1-2 cup(s) vegetable broth
Olive oil
2 tablespoons butter
1/2 teaspoon lemon juice
2 tablespoons flour
1 tablespoon mustard
2 teaspoons Worcester sauce
1/2 yellow onion. diced
1 teaspoon minced serrano pepper
1 large garlic clove, minced
Instructions
First, make your steaks! In a large bowl, add the onion, garlic, and breadcrumbs, mix with your hands and set aside for 5-10 minutes.
Add cumin, coriander, fenugreek powder, Italian seasoning, salt, pepper, bouillon cubes, lentil and mushroom mix, mustard, tomato sauce, and egg. Give it another good mix until the ingredients are evenly distributed, then shape your patties to the desired size and thickness - don't make them too thick and make sure they are the same size and cook evenly. Chill in the fridge for 10 minutes.
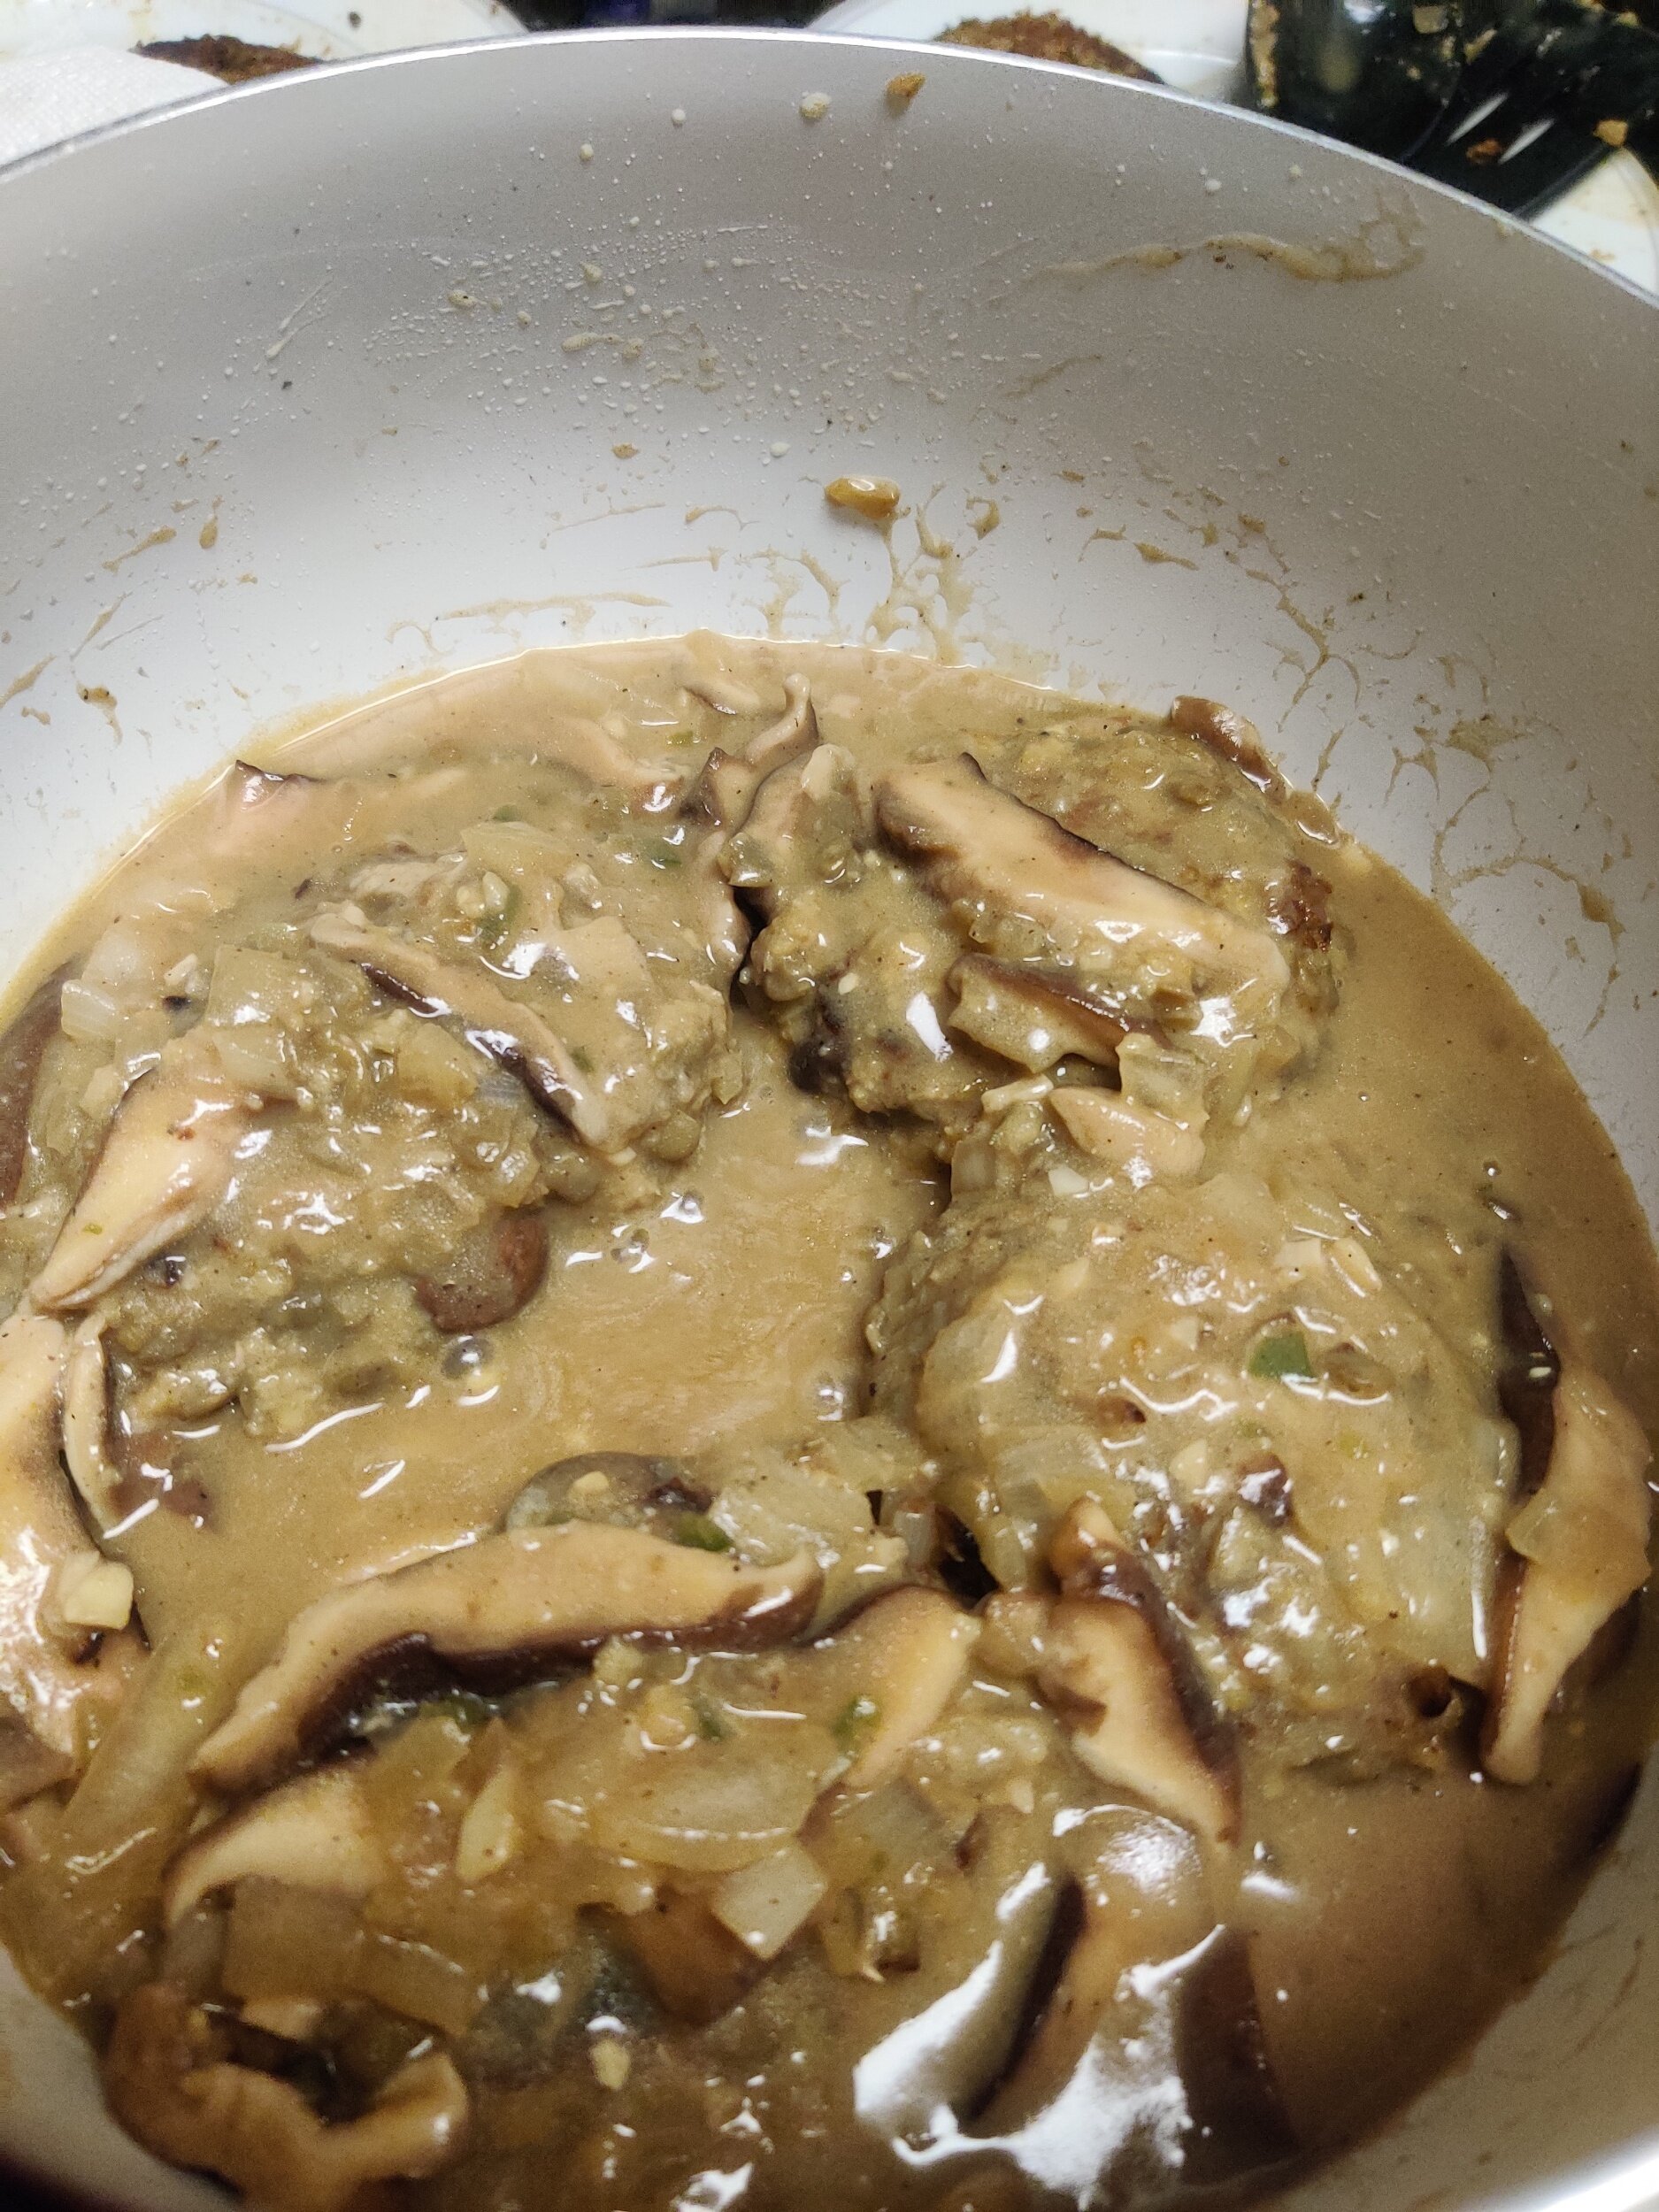
Fry the lentil mushroom steaks on medium-high heat in some olive oil, 4-5 minutes each side or until the surface begins to brown and get crispy. Remove from the nonstick pan set aside.
Time for the gravy. Using the same large pan or a large pot, saute the onion, chilli pepper, and garlic with olive oil for about 3 minutes, until fragrant and softened. Add the butter followed by the shiitake mushrooms. Sweat out for another 6-8 minutes. Add the Worchester sauce, mustard, and broth, and stir.
Gradually add the flour in parts, mixing each time to thicken the gravy. Add the patties back and nestle in the gravy, scoping over each patty.
Serve hot with sweet mashed potatoes, butter and steamed peas.

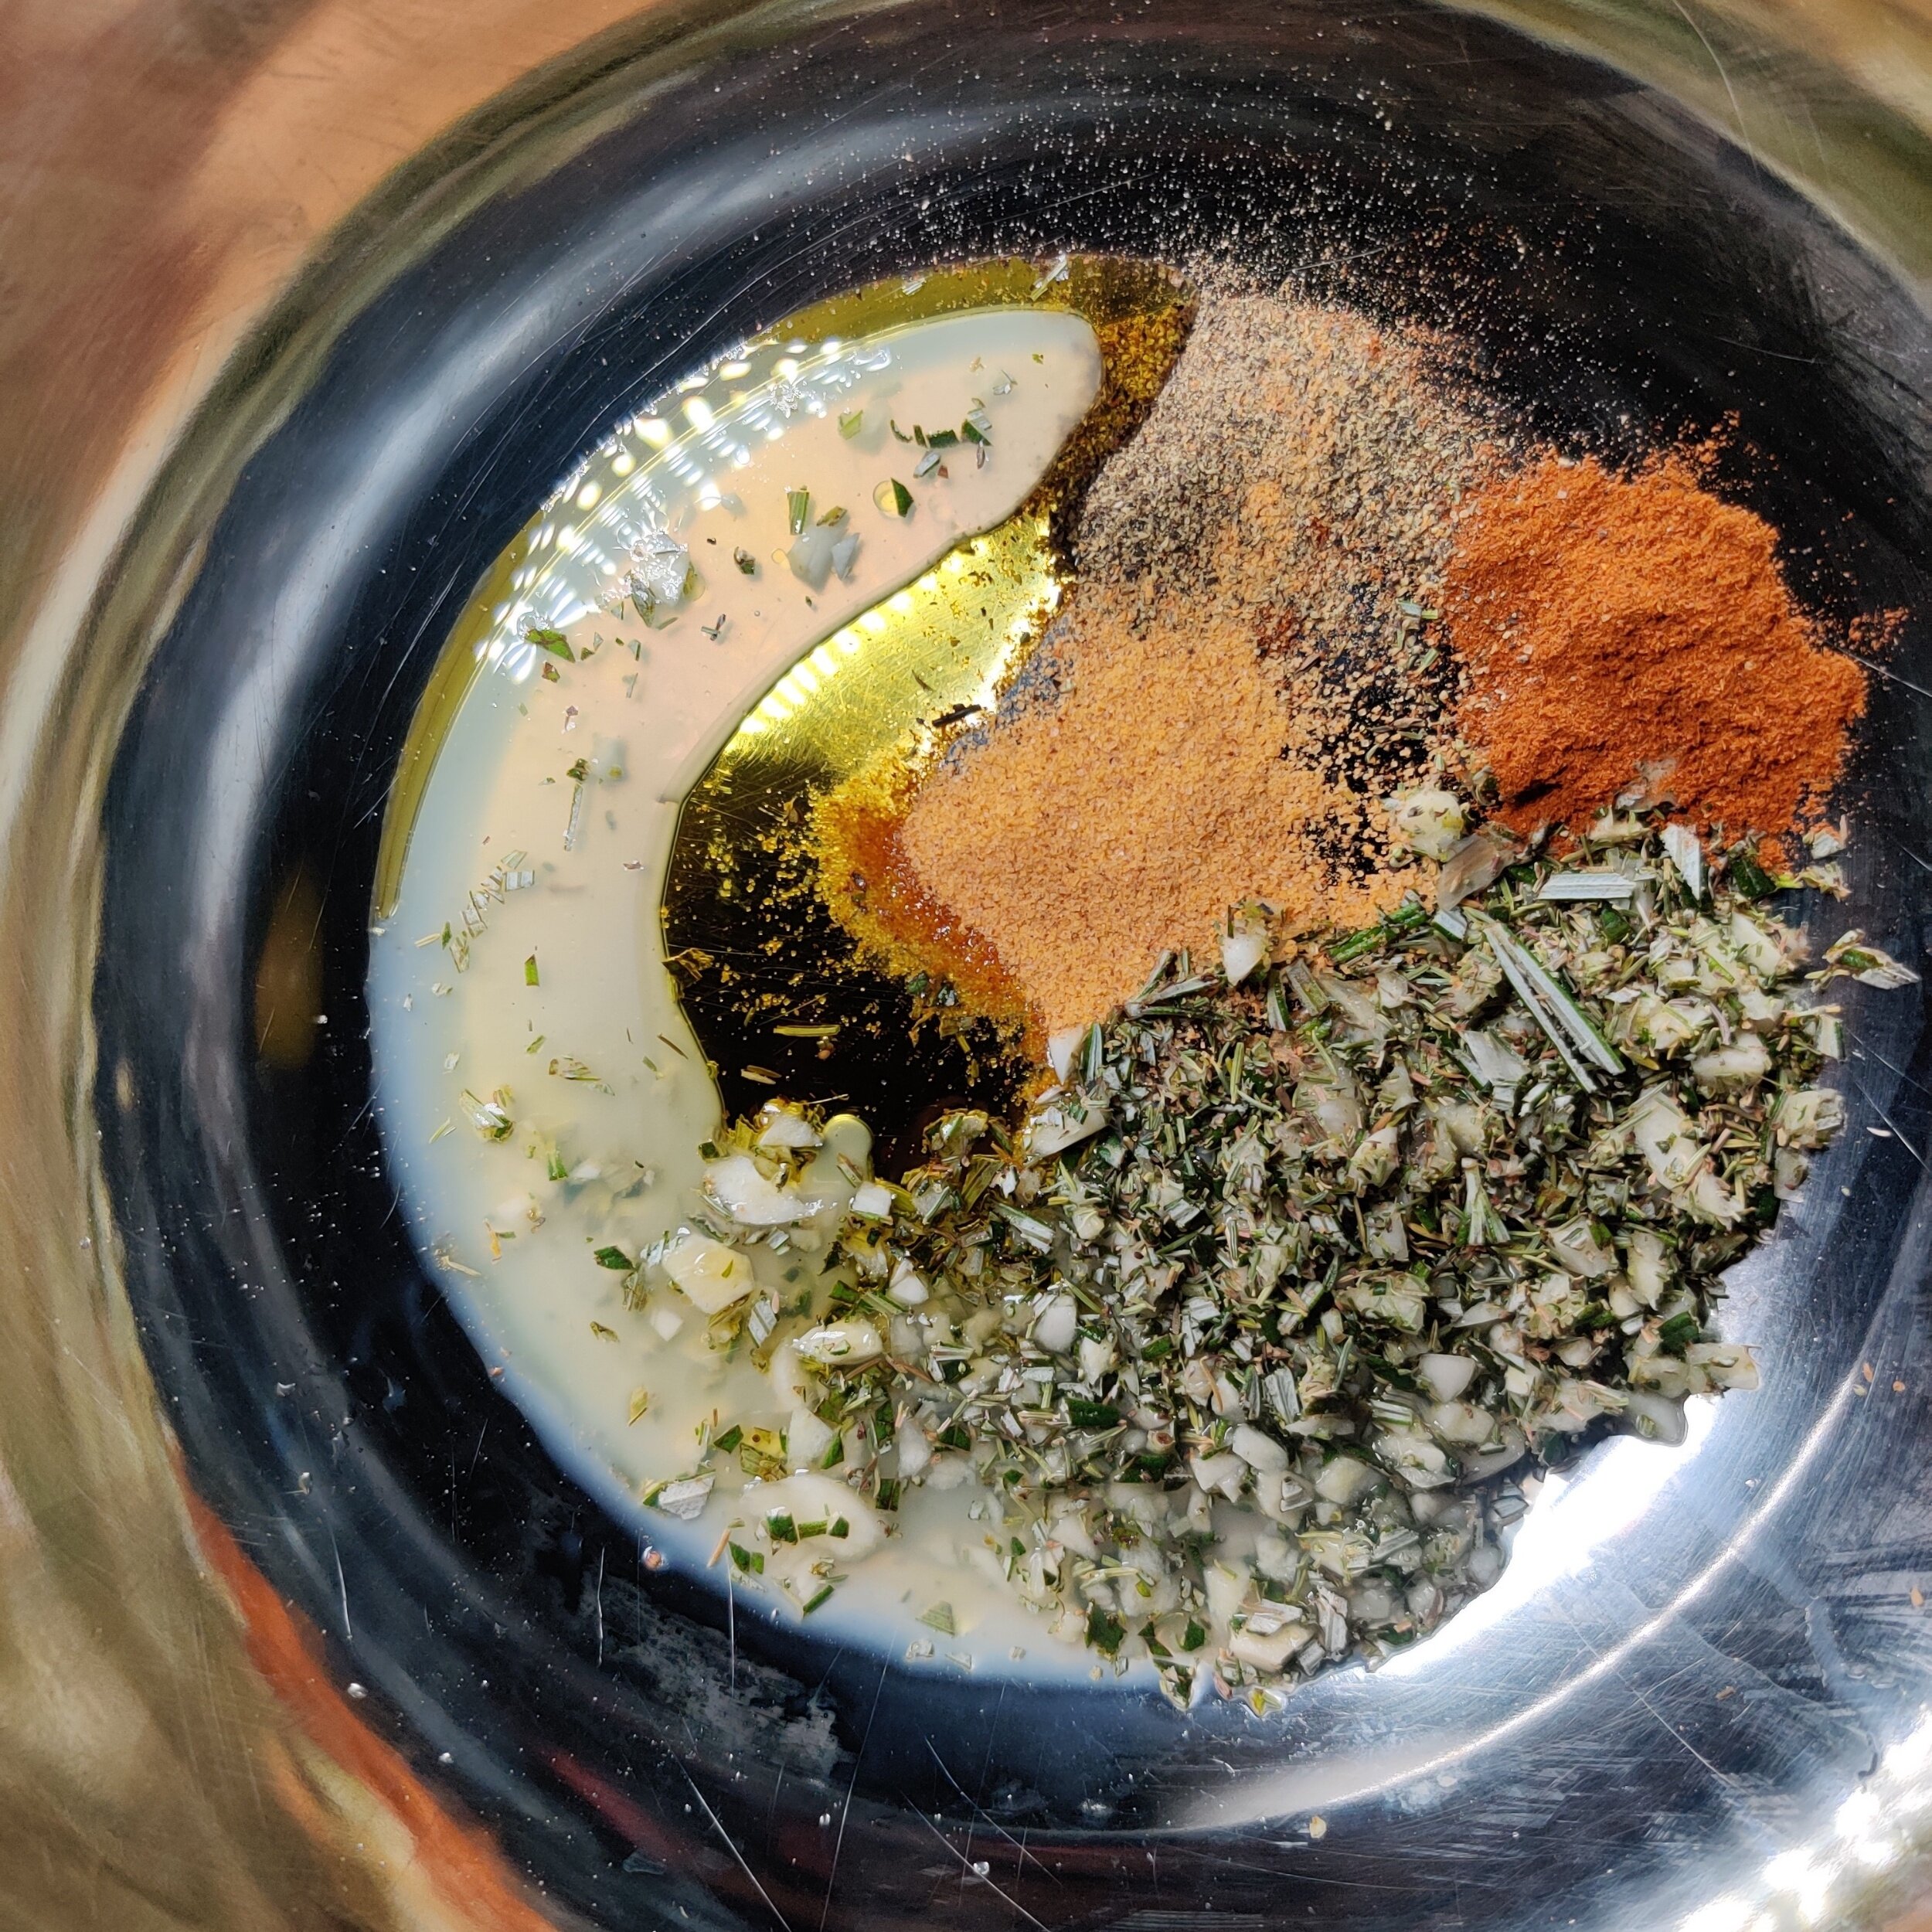
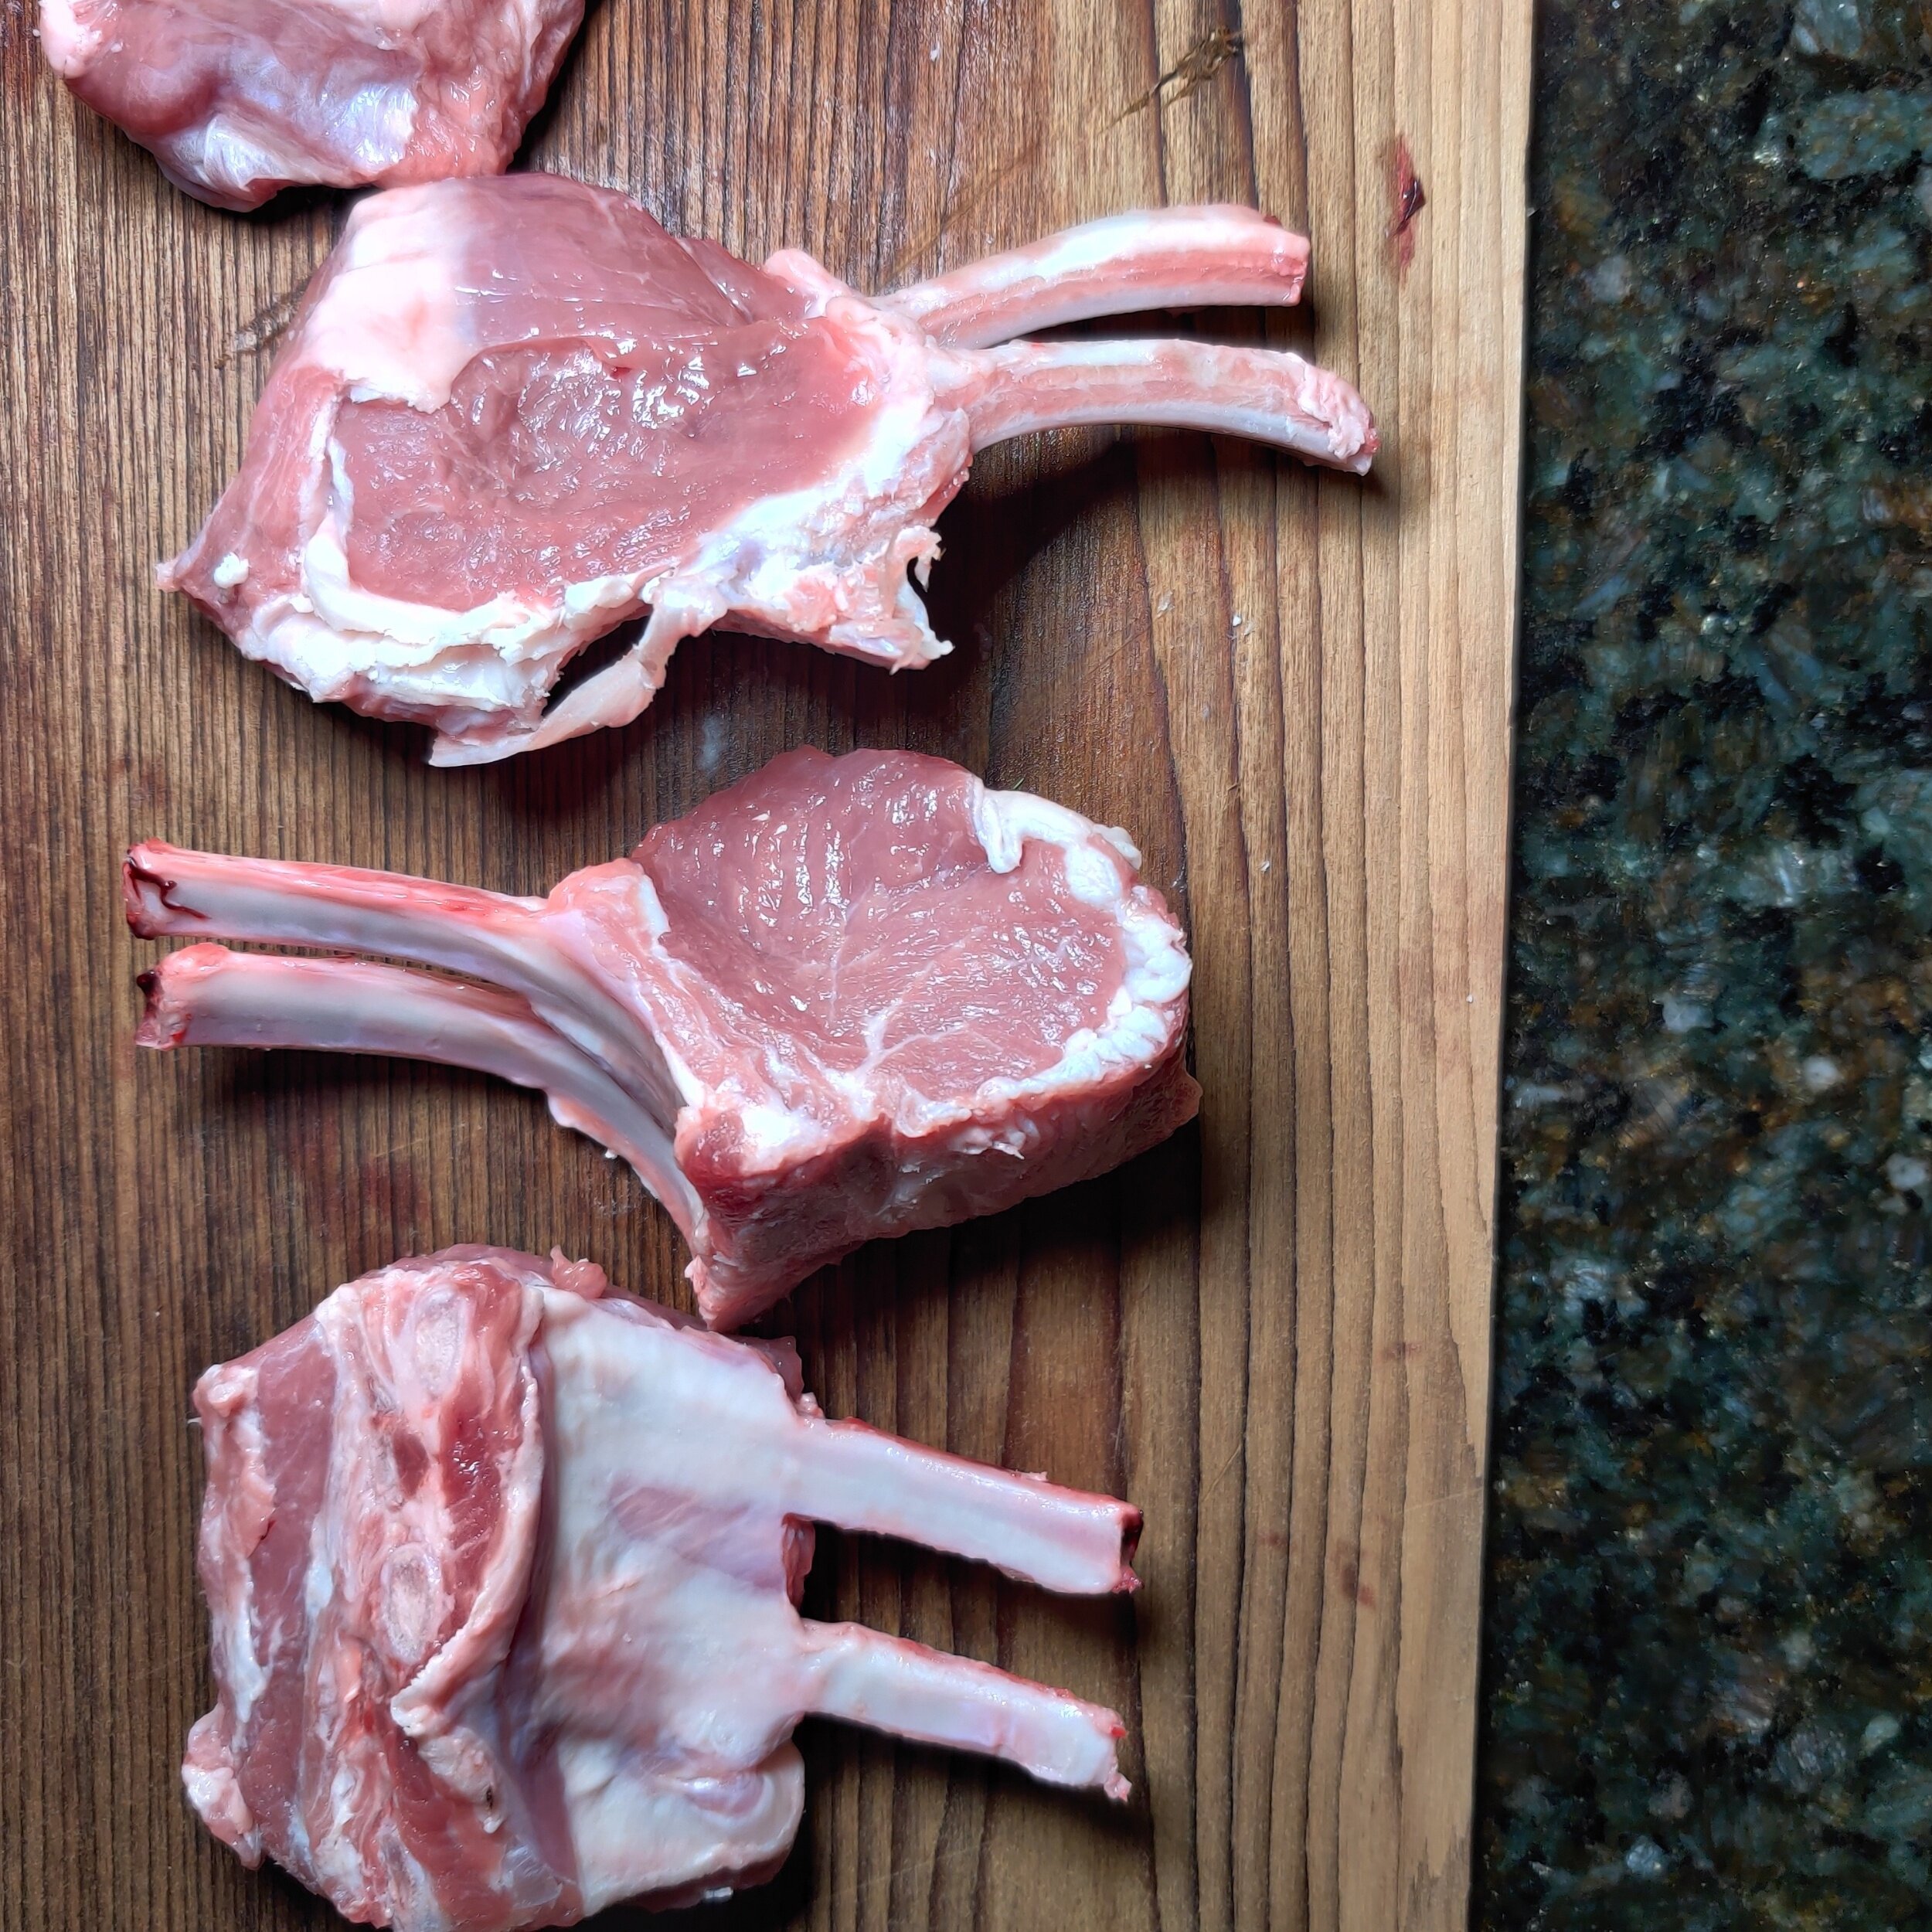
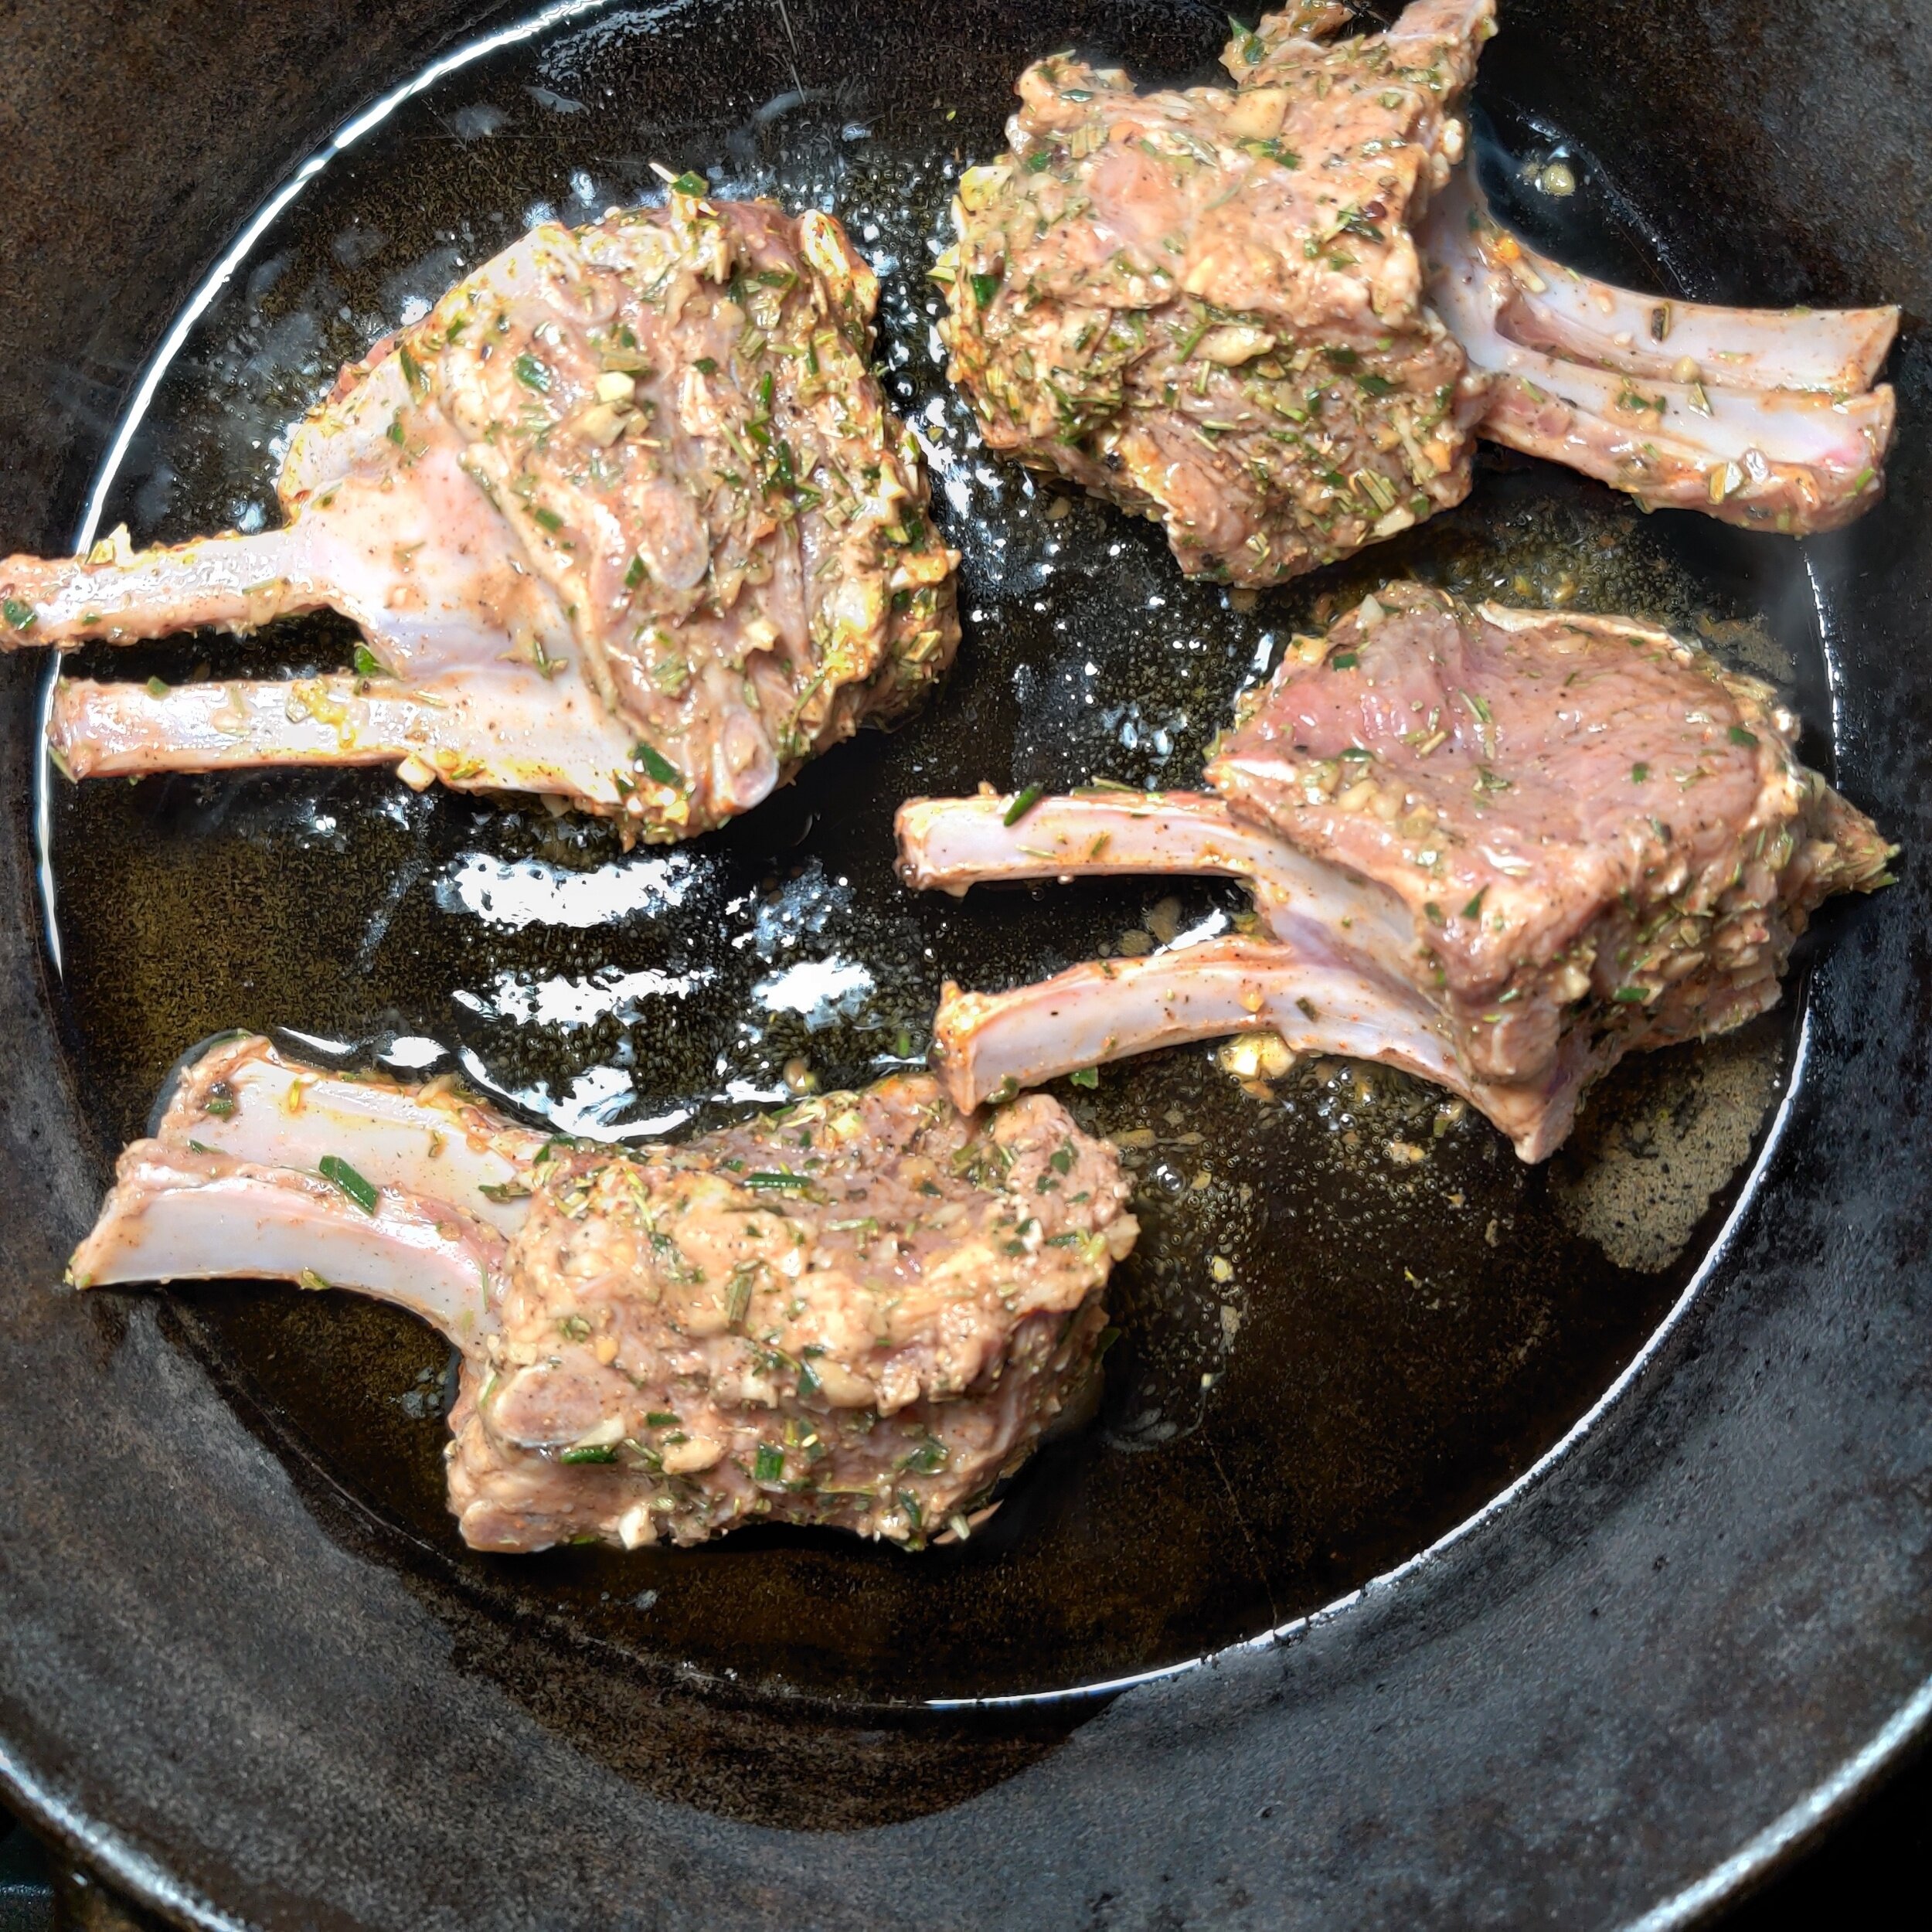
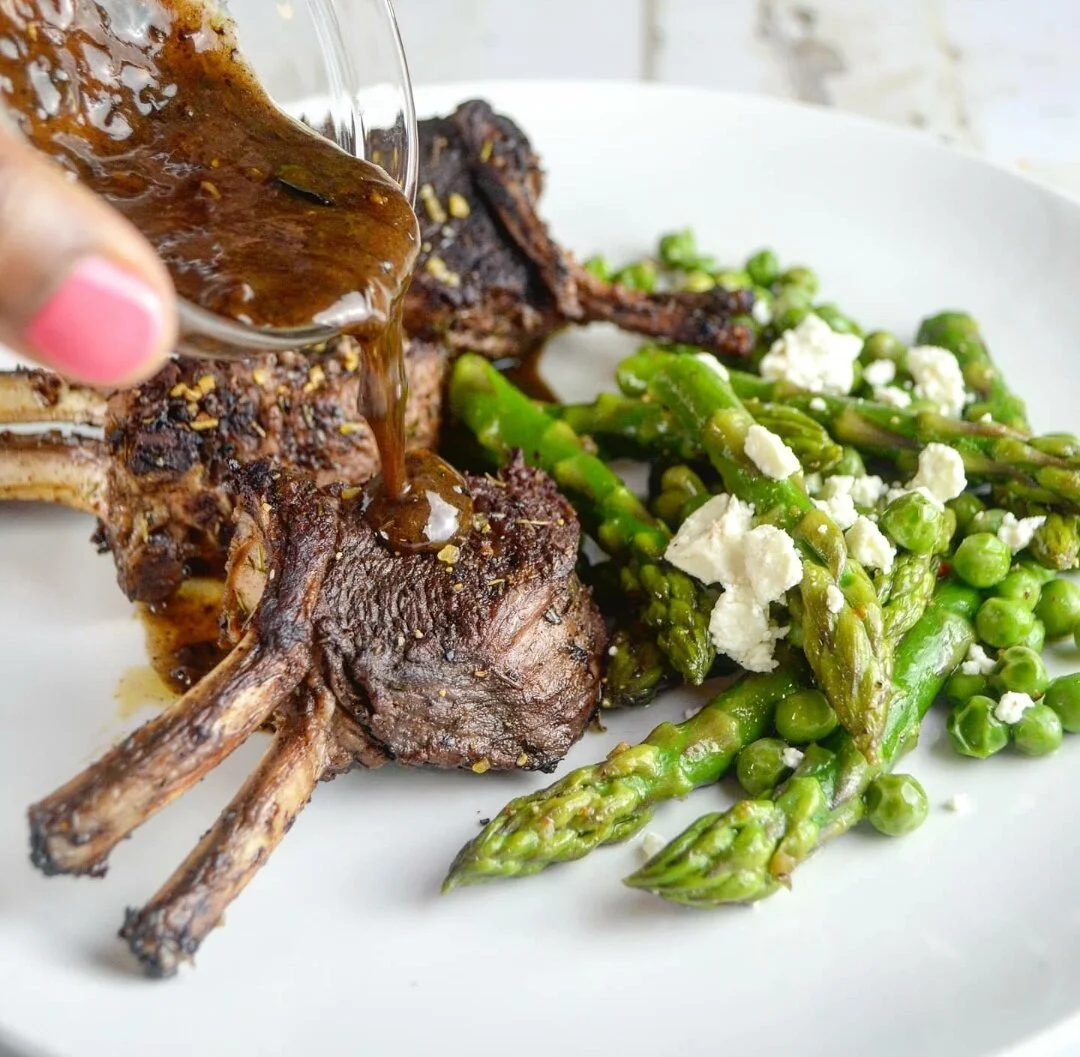
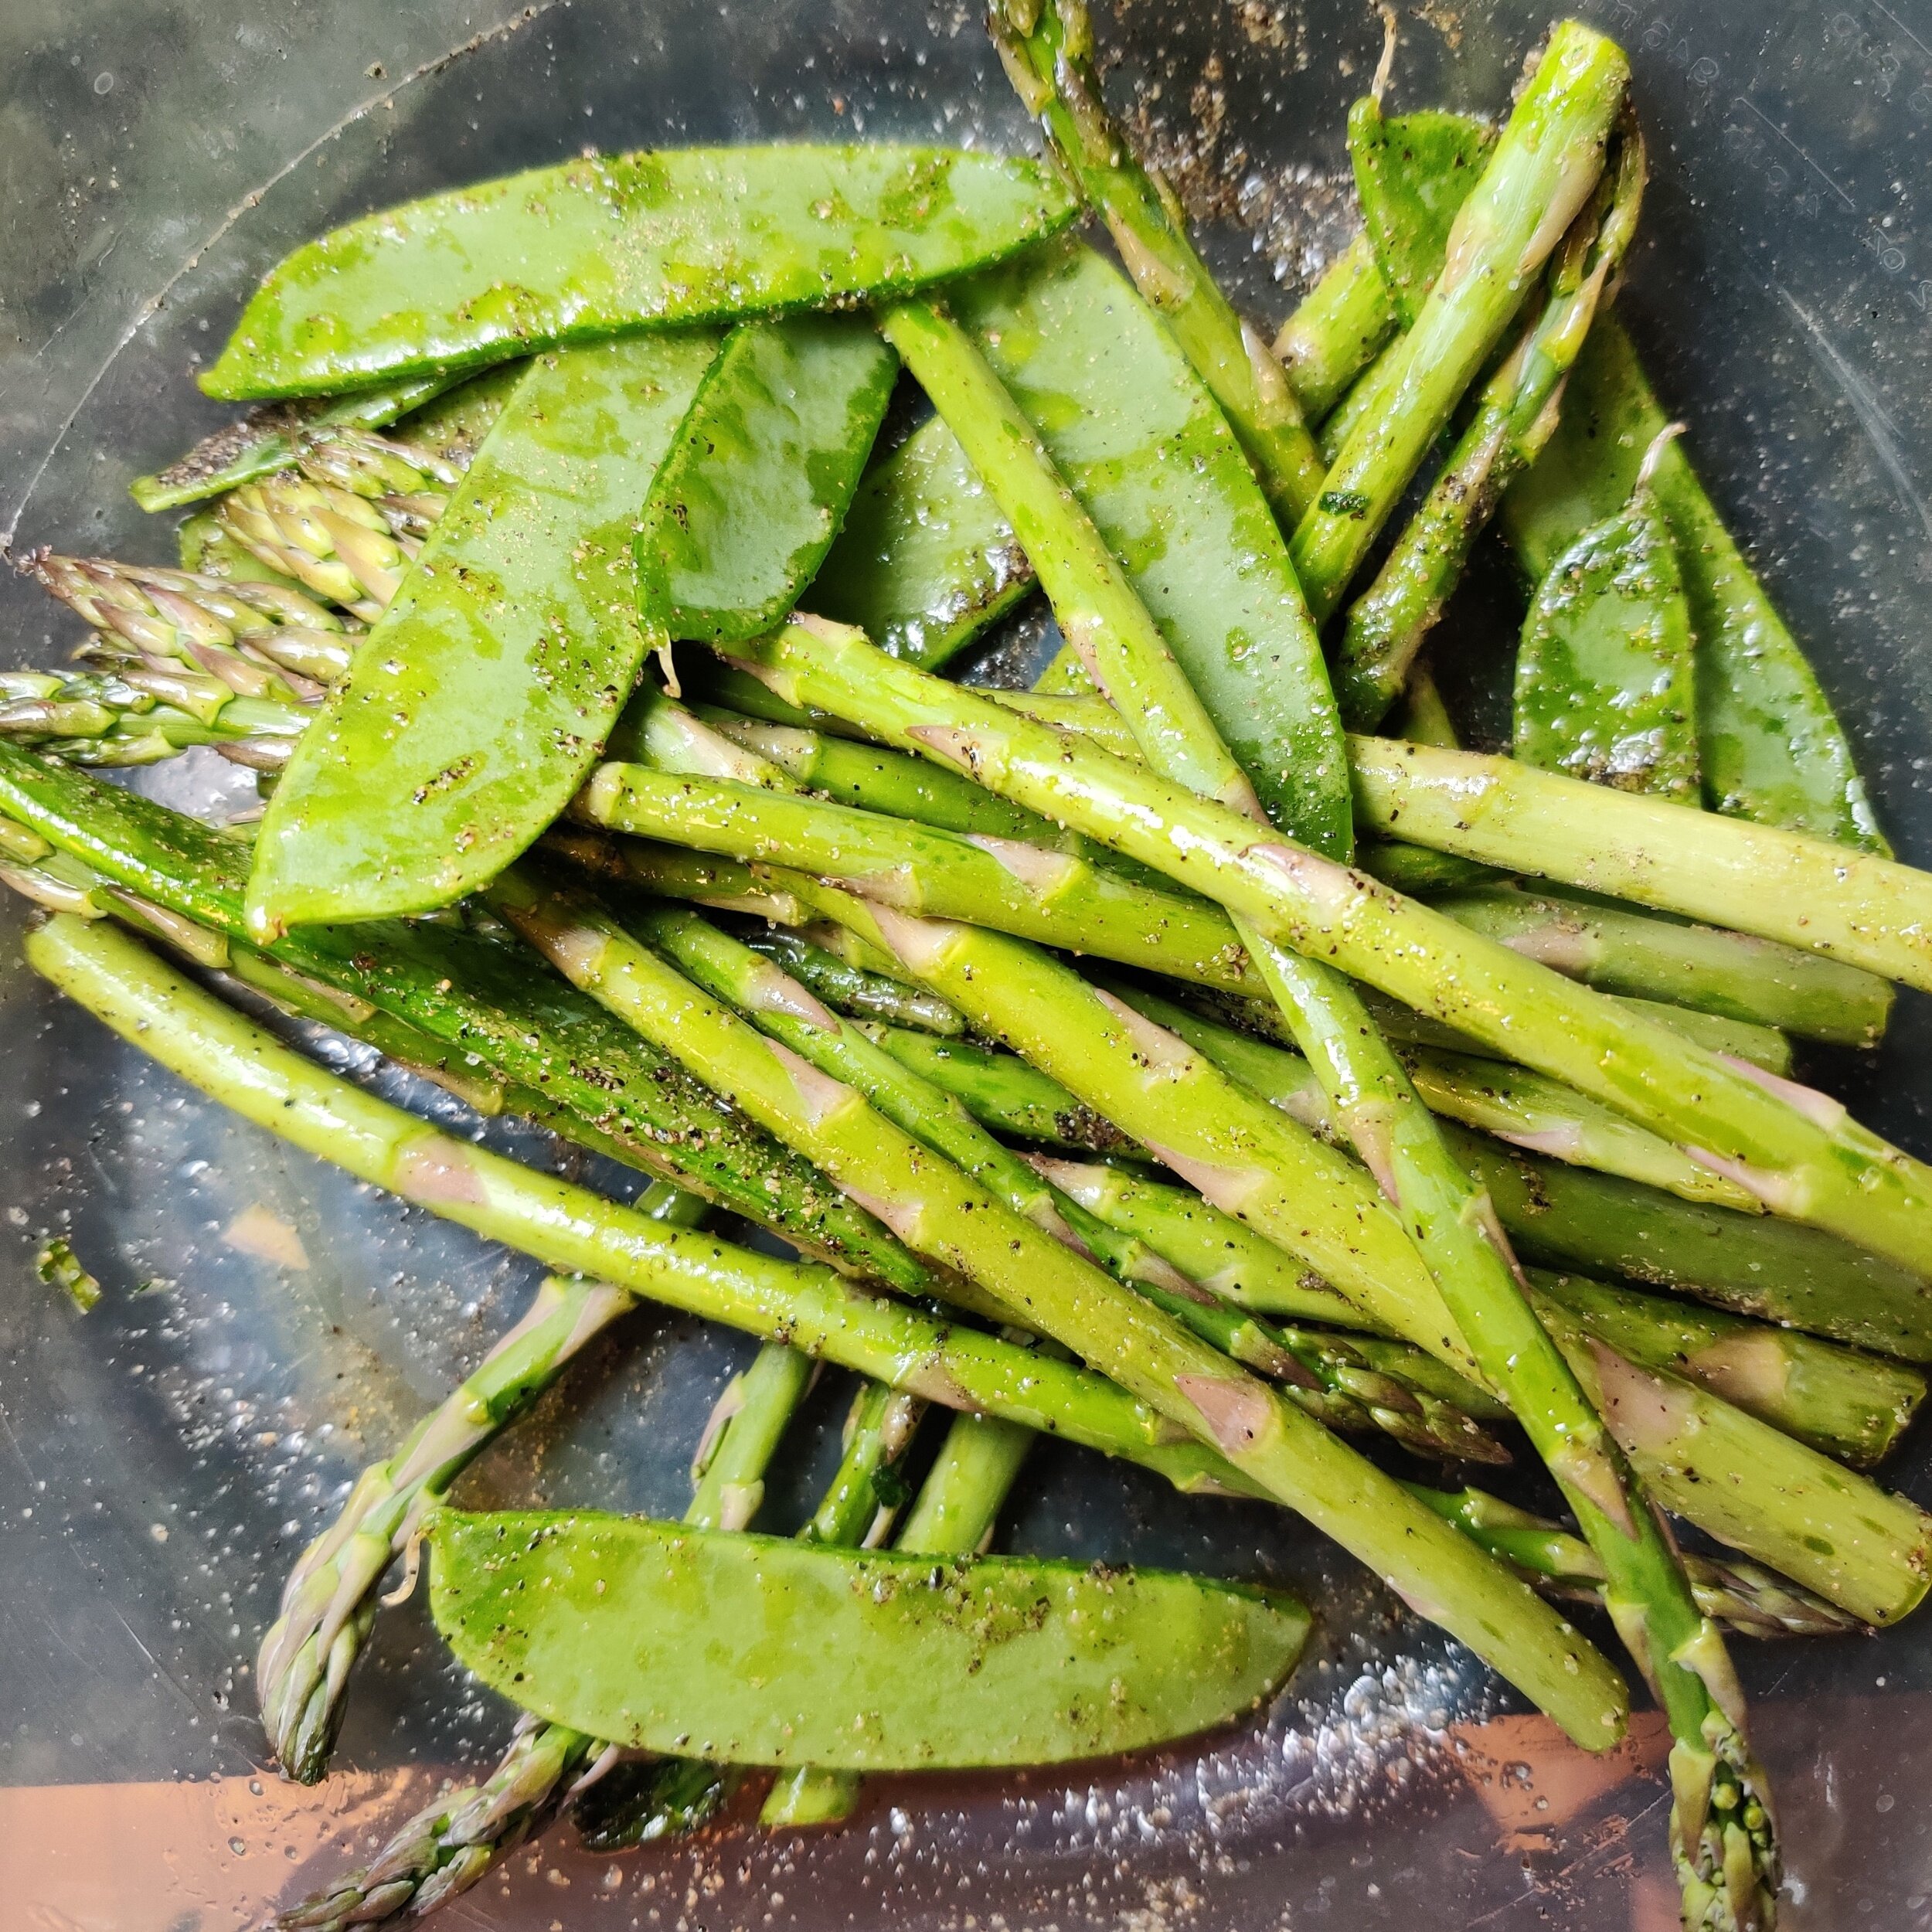
Red Wine Glazed Lamb Chops With Asparagus Pea Salad
Elevate your spring and summer hosting with these Red Wine Glazed Lamb Chops with Asparagus and Pea Salad, a dish that feels both elegant and effortlessly seasonal. Juicy, herb-marinated lamb chops are seared to perfection, then finished in a rich red wine glaze that adds depth and a subtle sweetness. The bold flavors of garlic, rosemary, thyme, and paprika create a beautifully seasoned crust, while the glaze brings everything together with a glossy, restaurant-quality finish.
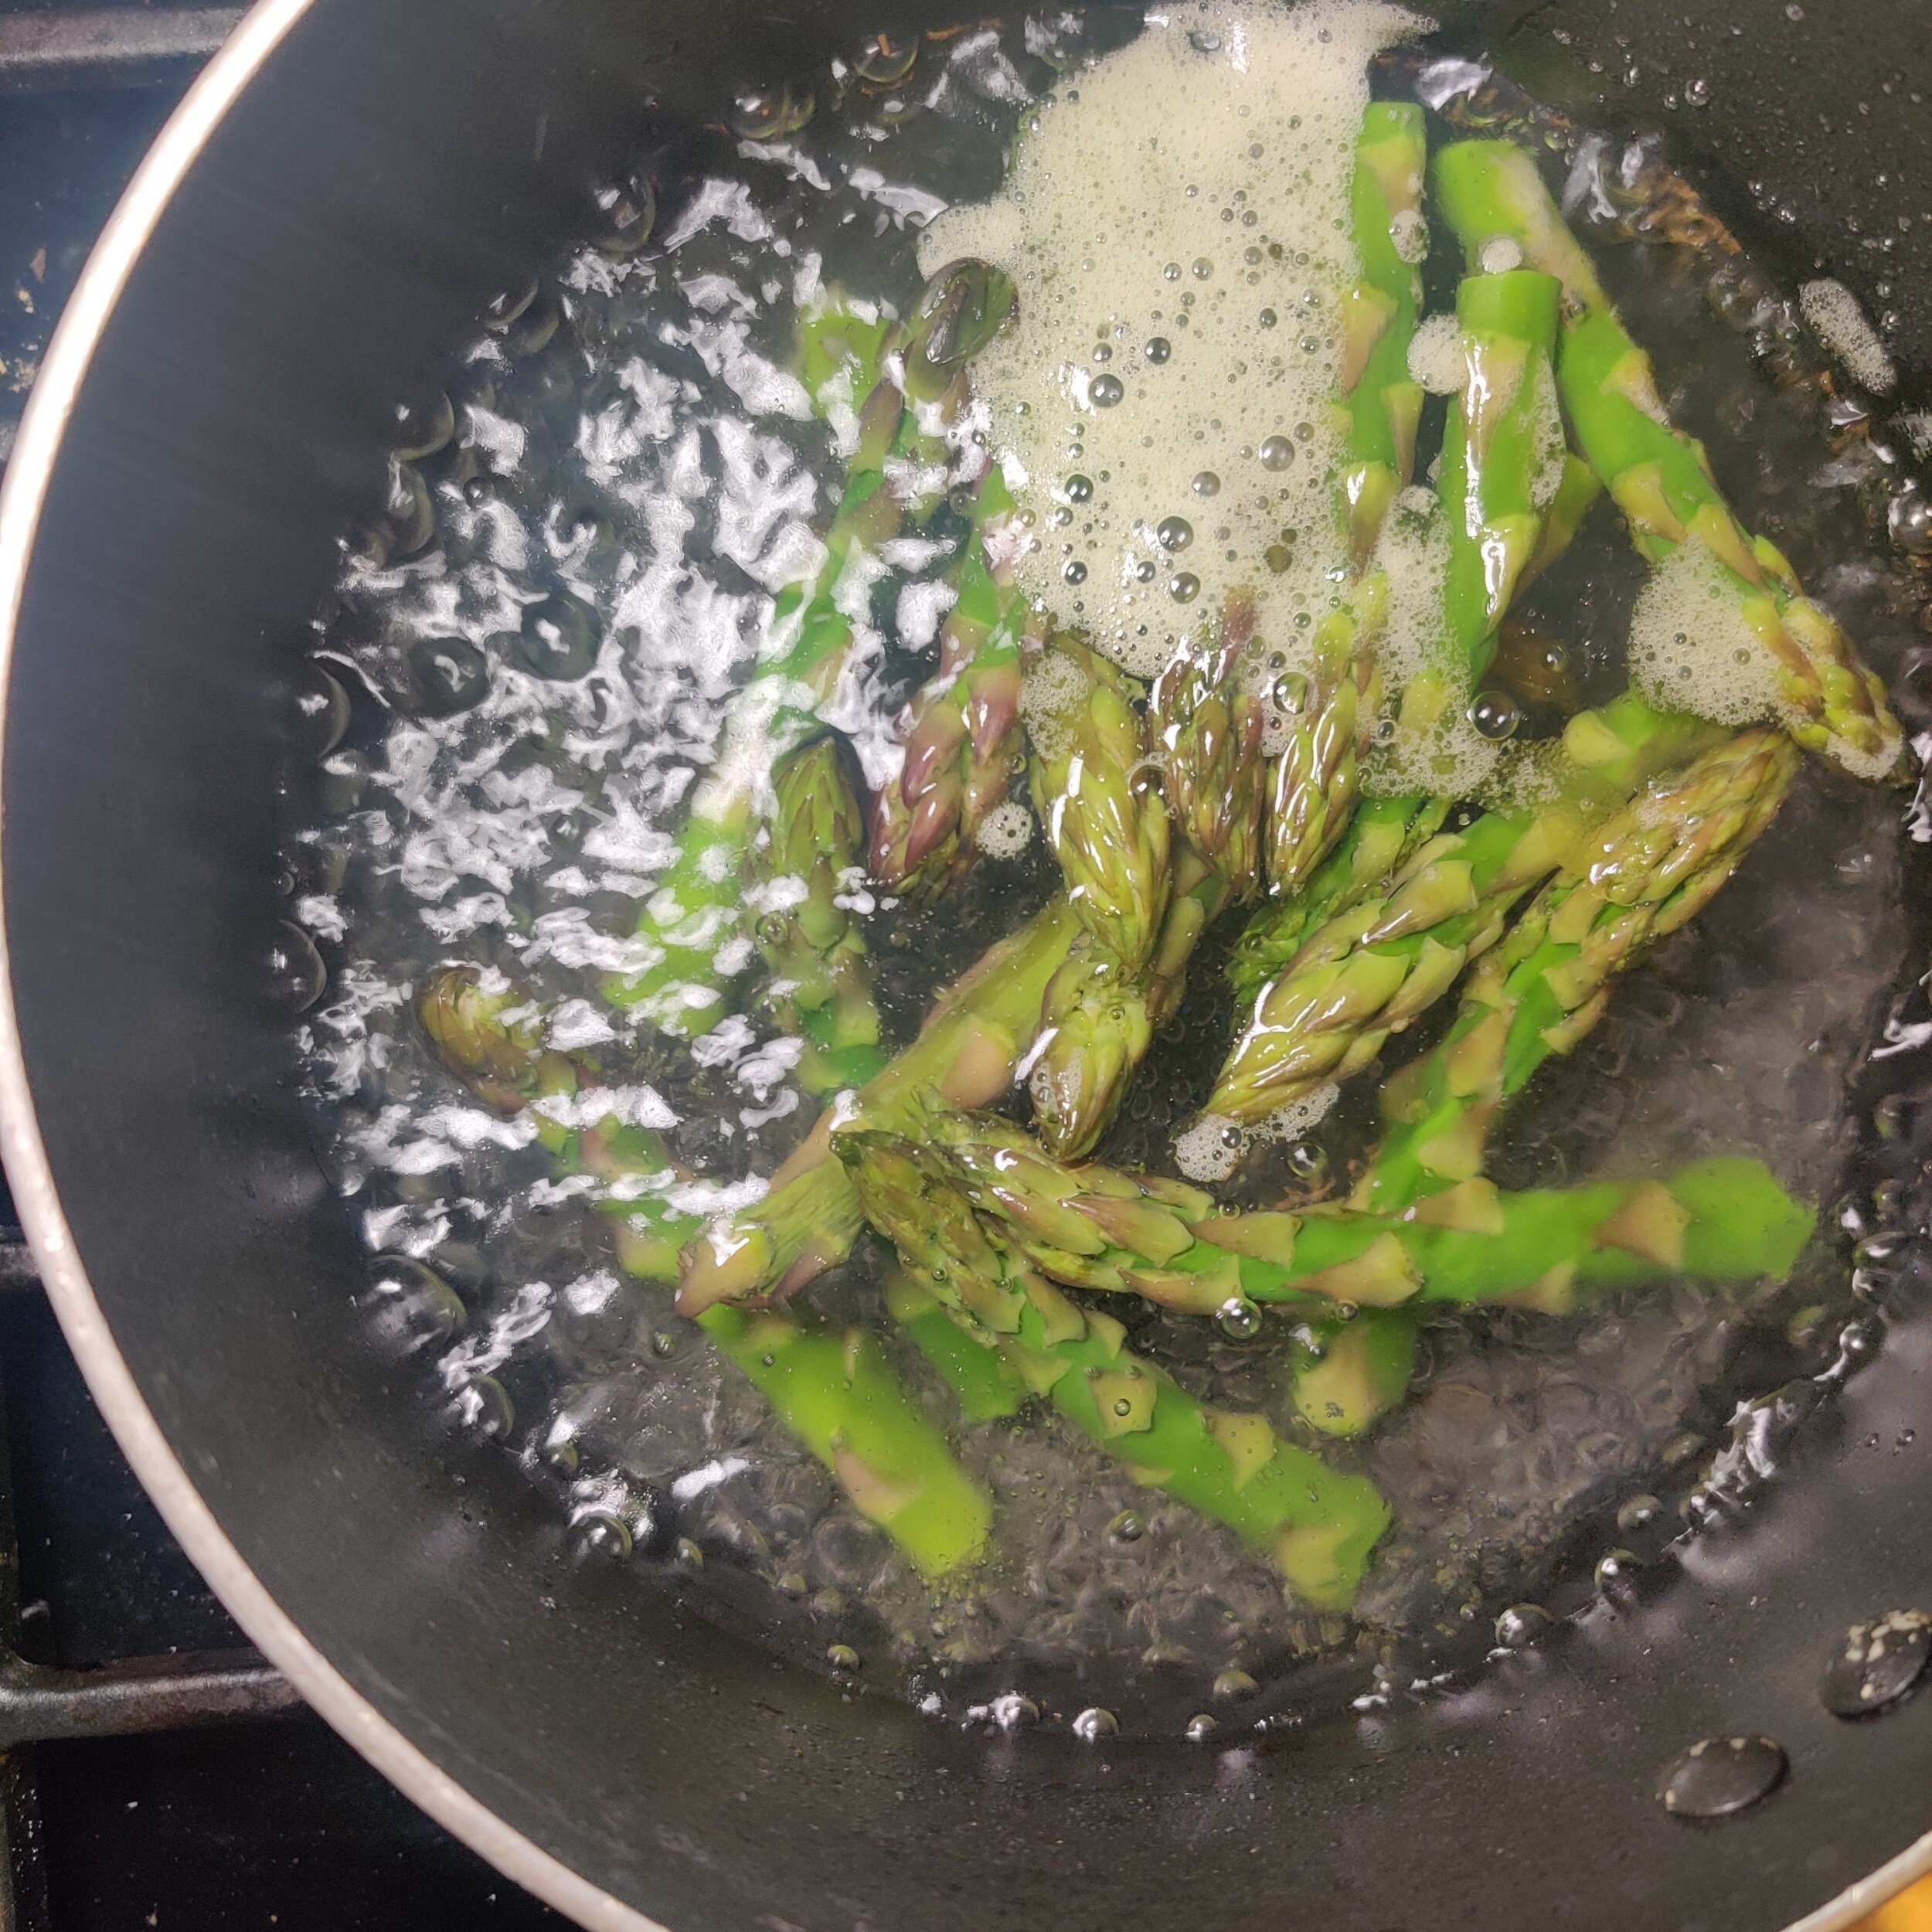
To balance the richness of the lamb, this dish is paired with a bright and refreshing asparagus and pea salad. Crisp asparagus tips and tender English peas are lightly blanched and tossed with olive oil, balsamic vinegar, and garlic, then finished with creamy feta for a salty, tangy contrast.
Perfect for dinner parties, date nights, or a special weekend meal, this recipe highlights the best of warm-weather ingredients while delivering bold, satisfying flavor. It’s a complete plate that feels elevated without being overly complicated—ideal for impressing guests or treating yourself.

Red Wine Glazed Lamb Chops With Asparagus Pea Salad
Celebrate spring with these succulent red wine glazed lamb chops and a fresh asparagus and pea salad. Herb-marinated lamb is seared and finished with a rich red wine reduction, while the crisp, feta-topped salad balances the plate. Perfect for holiday dinners or special weekend meals.
Ingredients
- 1 trimmed rack of lamb (6–8 small chops, about 1 lb / 450 g)
- 1 tbsp seasoned salt
- 1 tsp black pepper
- 1 tsp cracked black pepper
- 1 tbsp paprika
- 2 tbsp olive oil
- 1/4 cup lemon juice
- 1 tbsp Worcestershire sauce
- 1 tbsp dried mint
- 2 tbsp dried thyme
- 3 sprigs fresh rosemary
- 3 garlic cloves, minced
- 1 cup red wine (bold red recommended)
- 2 tbsp butter
- 1/4 cup mushroom gravy
- Mint sauce (optional, for serving)
- 1 cup asparagus tips
- 1 cup peas
- 1/2 tsp salt
- 1/2 tsp black pepper
- 1/2 tsp garlic powder
- 1 tbsp olive oil
- 1 tsp balsamic vinegar
- 1/3 cup feta cheese
Instructions
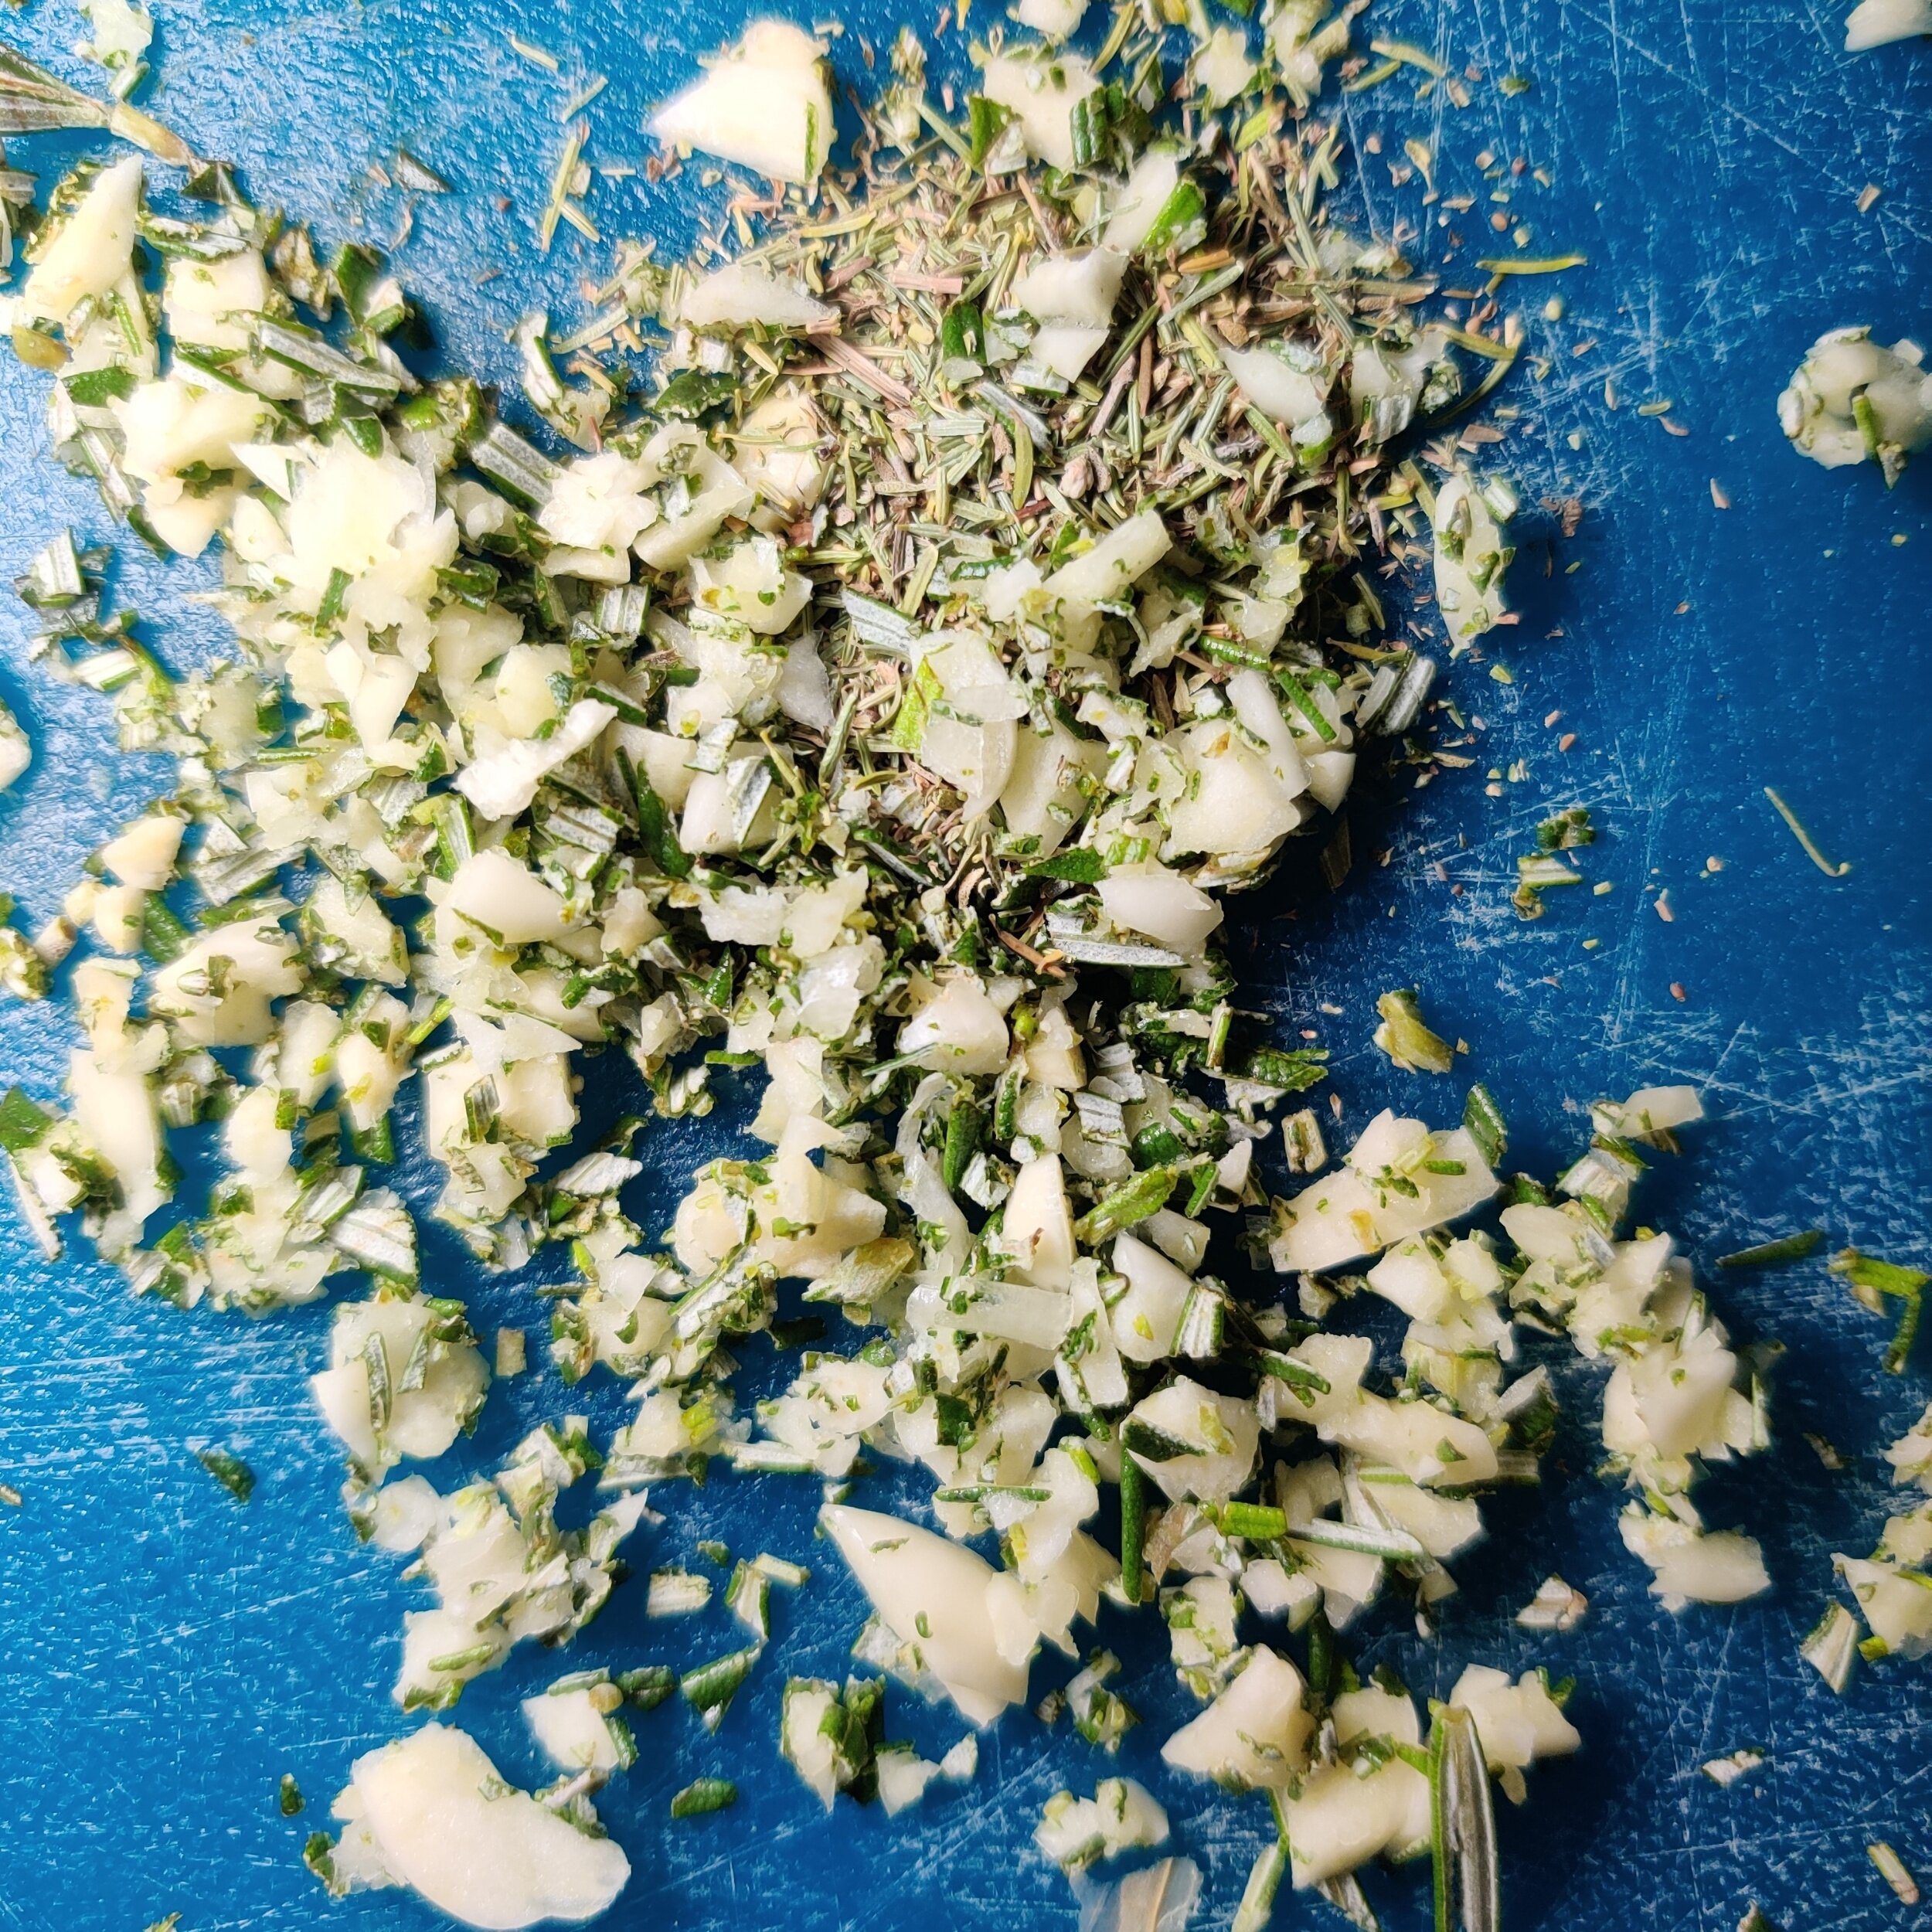
- In a bowl, combine seasoned salt, black pepper, cracked pepper, paprika, olive oil, lemon juice, Worcestershire sauce, dried mint, thyme, rosemary, and garlic. Coat the lamb thoroughly and marinate in the refrigerator for at least 30 minutes (or up to 2 hours for deeper flavor).
- Preheat oven to 350°F (175°C).
- Heat 1–2 tablespoons of cooking oil in a large skillet over medium-high heat. Pat the marinated lamb dry to remove excess moisture, then add it to the hot pan.
- Sear each side for 2–3 minutes in a preheated skillet with a small drizzle of oil added just before the lamb. Use a heavy-bottomed or cast-iron pan for even heat, avoid overcrowding, and don’t move the lamb too much so each side develops a deep, golden-brown crust.
- Pour in the red wine to deglaze the pan, scraping up any browned bits, then transfer the skillet to the oven and roast for about 12–15 minutes for medium (135°F / 57°C) or about 15 minutes for medium-well (145°F / 63°C). Remove the lamb and let it rest for 10 minutes before slicing to keep it juicy and flavorful.
- Bring a pot of salted water to a boil. Blanch the asparagus and peas separately for about 3–6 minutes, until tender but still vibrant. Drain and let cool.
- Toss the vegetables with the olive oil, balsamic vinegar, salt, pepper, and garlic. Top with feta cheese just before serving.
- Return skillet to medium heat. Add mushroom gravy, butter, and additional red wine if needed. Stir until slightly thickened and glossy.
- Slice lamb, spoon over red wine glaze, and serve alongside the asparagus pea salad. Add mint sauce if desired.
Notes
- Marinating enhances both flavor and tenderness, don’t skip it.
- A bold red wine (like Cabernet or Merlot) gives the best depth for the glaze.
- Blanching keeps vegetables bright, crisp, and fresh, not mushy.
- Feta adds saltiness, adjust seasoning accordingly.
- Mint sauce adds a classic, refreshing contrast to rich lamb.
- Letting the lamb rest ensures juicy, tender slices.
Nutrition Facts
Calories
380Carbs (grams)
9 gProtein (grams)
29 gFat (grams)
24 gI am not a certified nutritionist and any nutritional information on dontmissmyplate.com should only be used as a general guideline.


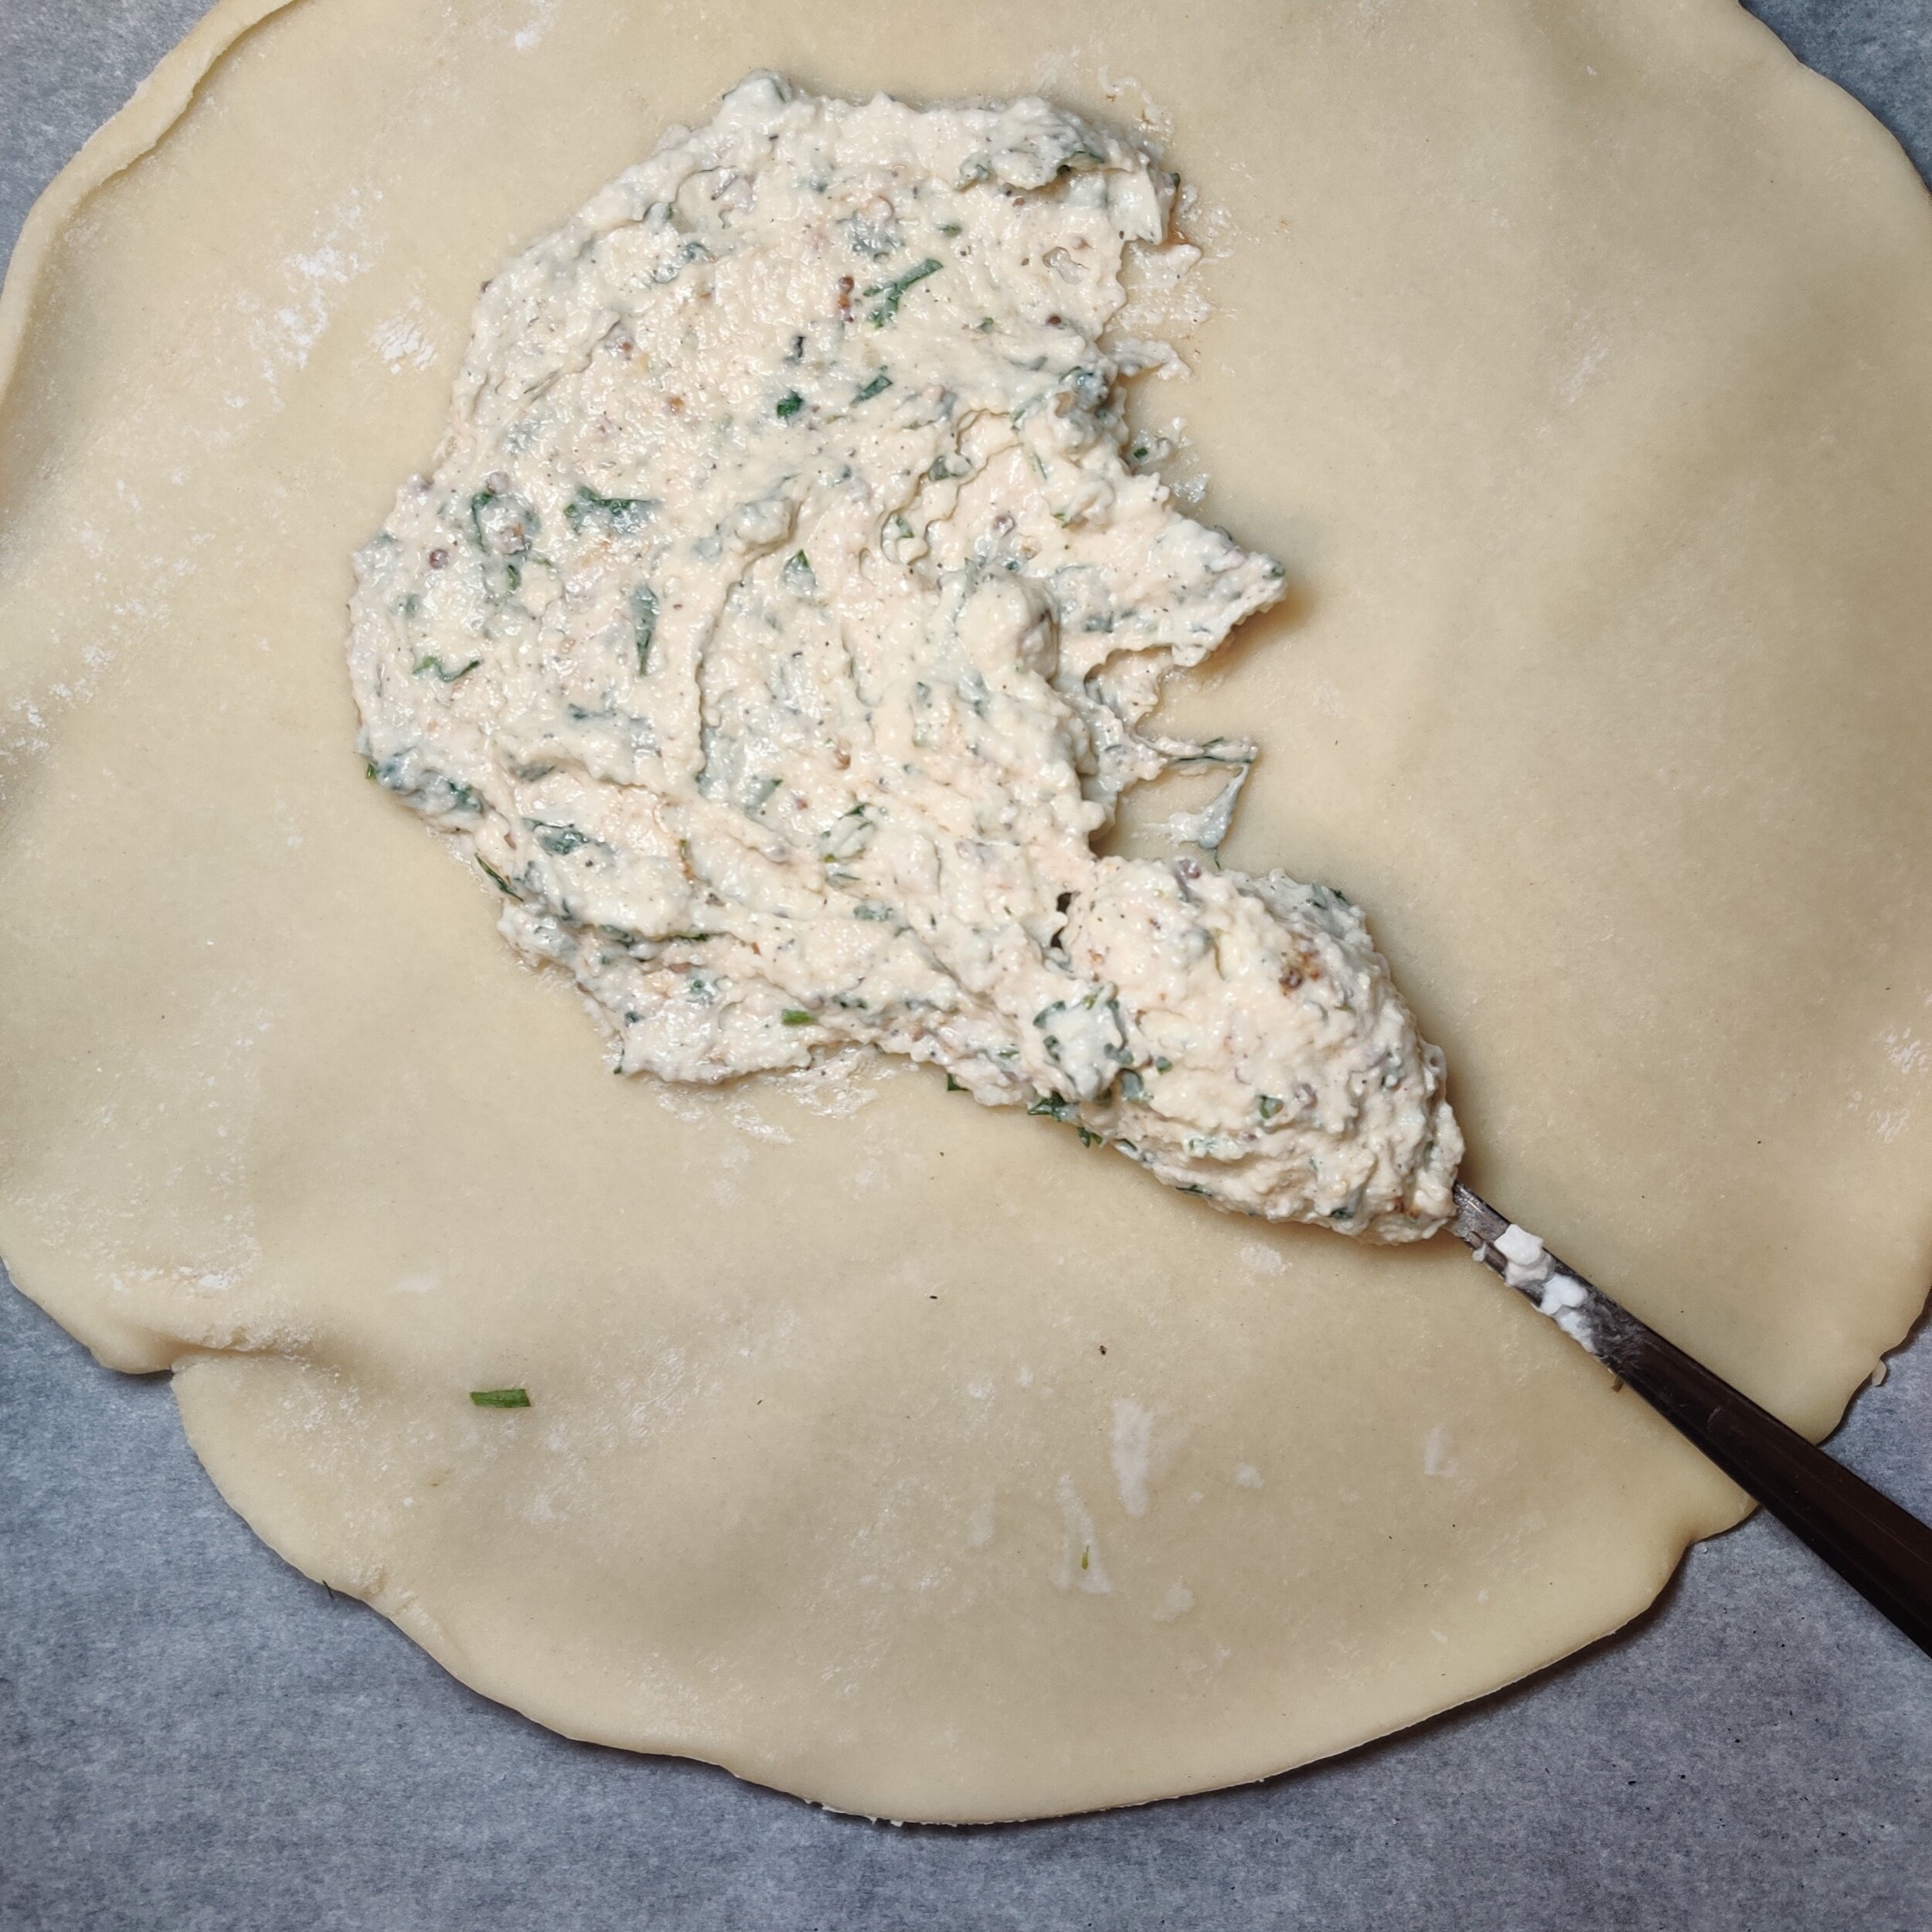
Asparagus, Snap Pea, and Blue Cheese Galette
Another galette just in time for spring! Coming out of a snow-filled, bitterly cold winter, the change in weather and daylight hours could not have come at a better time. This isn't just because I prefer the sun and greenery, but because the season welcomes a new set of ingredients that brighten up your plates and make people more aware of what they are eating in some ways. Winter has a lot to offer, but I'm excited for this new chapter and recipes we can make together!
Galettes, which I have praised for many reasons before, are a perfect way to celebrate the slew of returning vegetables and fruits. I have several across the seasons on this website you can try out, including the Tomato, Thyme and Cheese, the Pumpkin, Caramelized Onion, the Blackberry, Mint and Ricotta, and the Cheesy Mushroom Galette with Ricotta and Gruyere.
This galette, like the others, is a quick, easy, and ideal solution if you have extra greens lying around - although fresh is king!
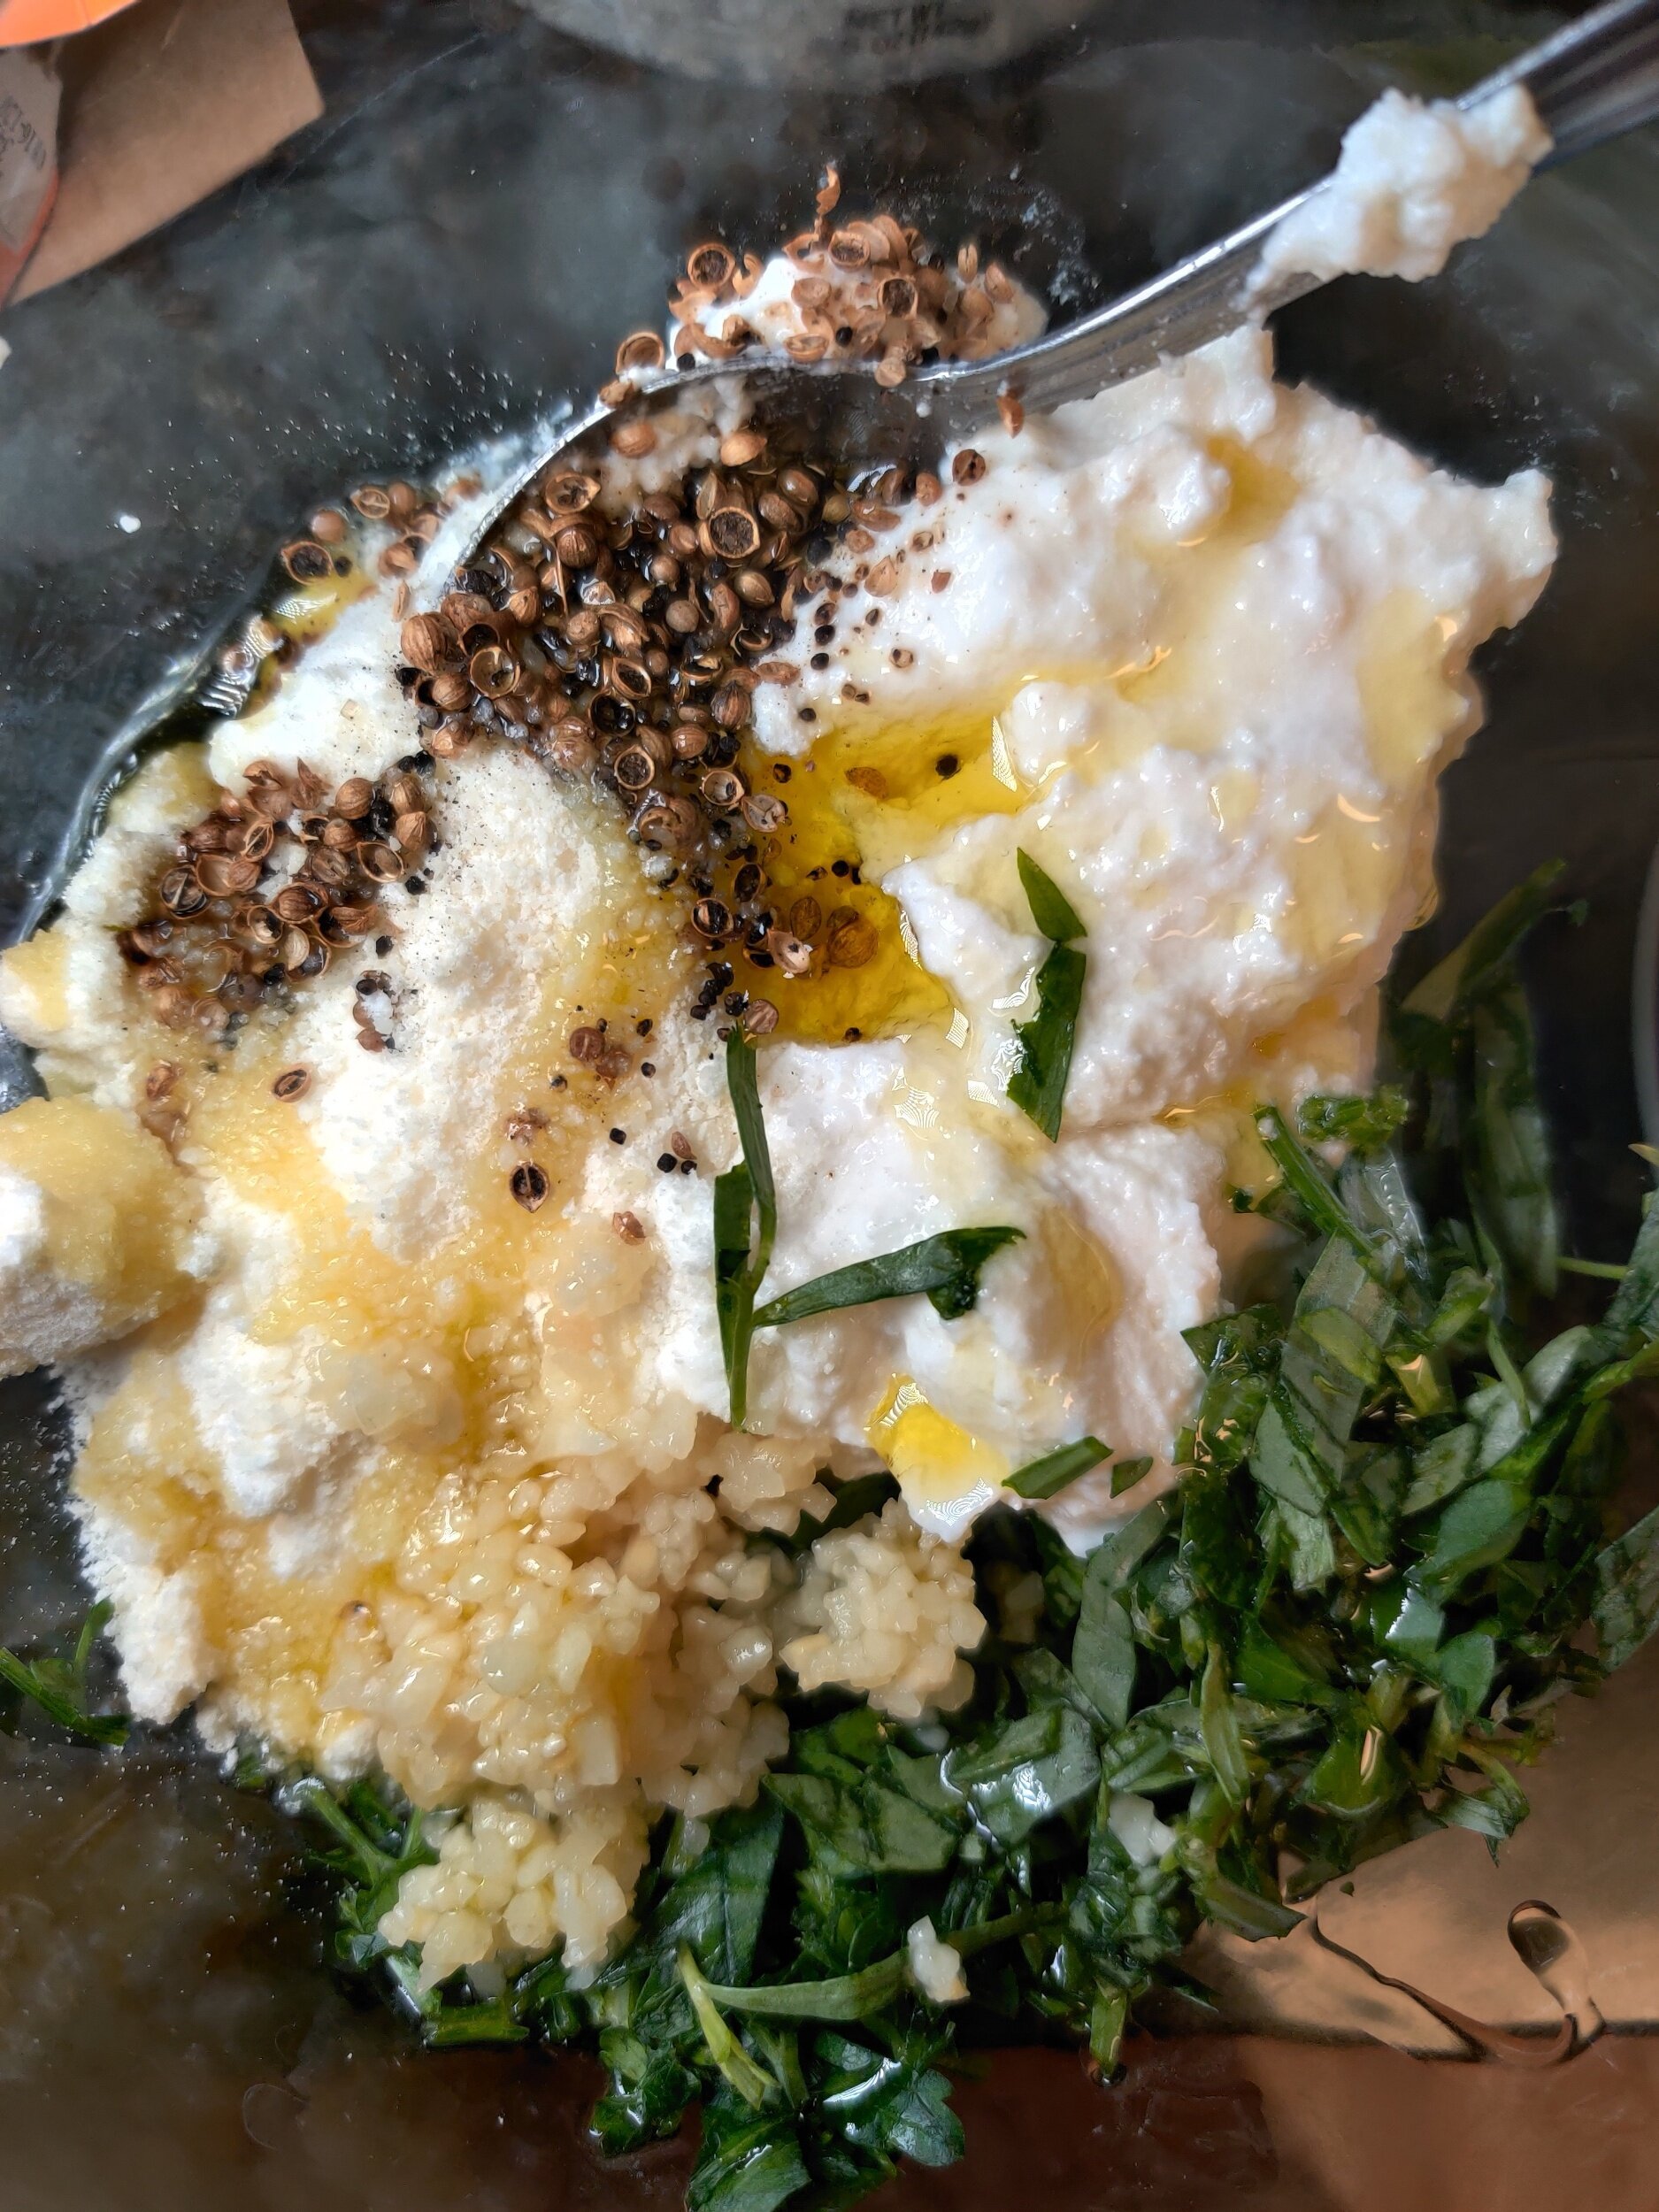
I used asparagus stalks and snap peas for this recipe, both of which offer texture and substance. I combined the (non-dairy) parmesan cheese mixed with the tofu ricotta, fresh herbs, and seasoning for the cheesy filling.
Before adding it to the pie crust plate, season to taste to make sure it’s good before baking!
Ingredients
1 pie crust, thawed in the fridge
1 handful snap peas
1/3 cup ricotta cheese (I used a vegan brand)
1/3 cup parmesan cheese, grated finely
About 20 stalks of green asparagus (woody, thick part cut off)
1/4 cup fresh parsley, finely chopped
1/4 cup fresh tarragon leaves, finely chopped + extra for topping and garnish
1 tablespoon fresh garlic, minced
1 teaspoon lemon juice
2 tablespoons biltong seasoning (optional - I used Freddy Hirsch Biltong Spice)
1 spring onion, finely chopped - mostly the green part)
1 teaspoon black pepper
1 teaspoon salt
2 tablespoons olive oil
Pinch of hot chilli flakes
2 tablespoons crumbled blue cheese
1 tablespoon parmesan cheese, grated
1 egg + 1 teaspoon water
Sesame seeds


Instructions
Take your pie crust out of the fridge to get it to room temperature, this should take about 20 minutes.
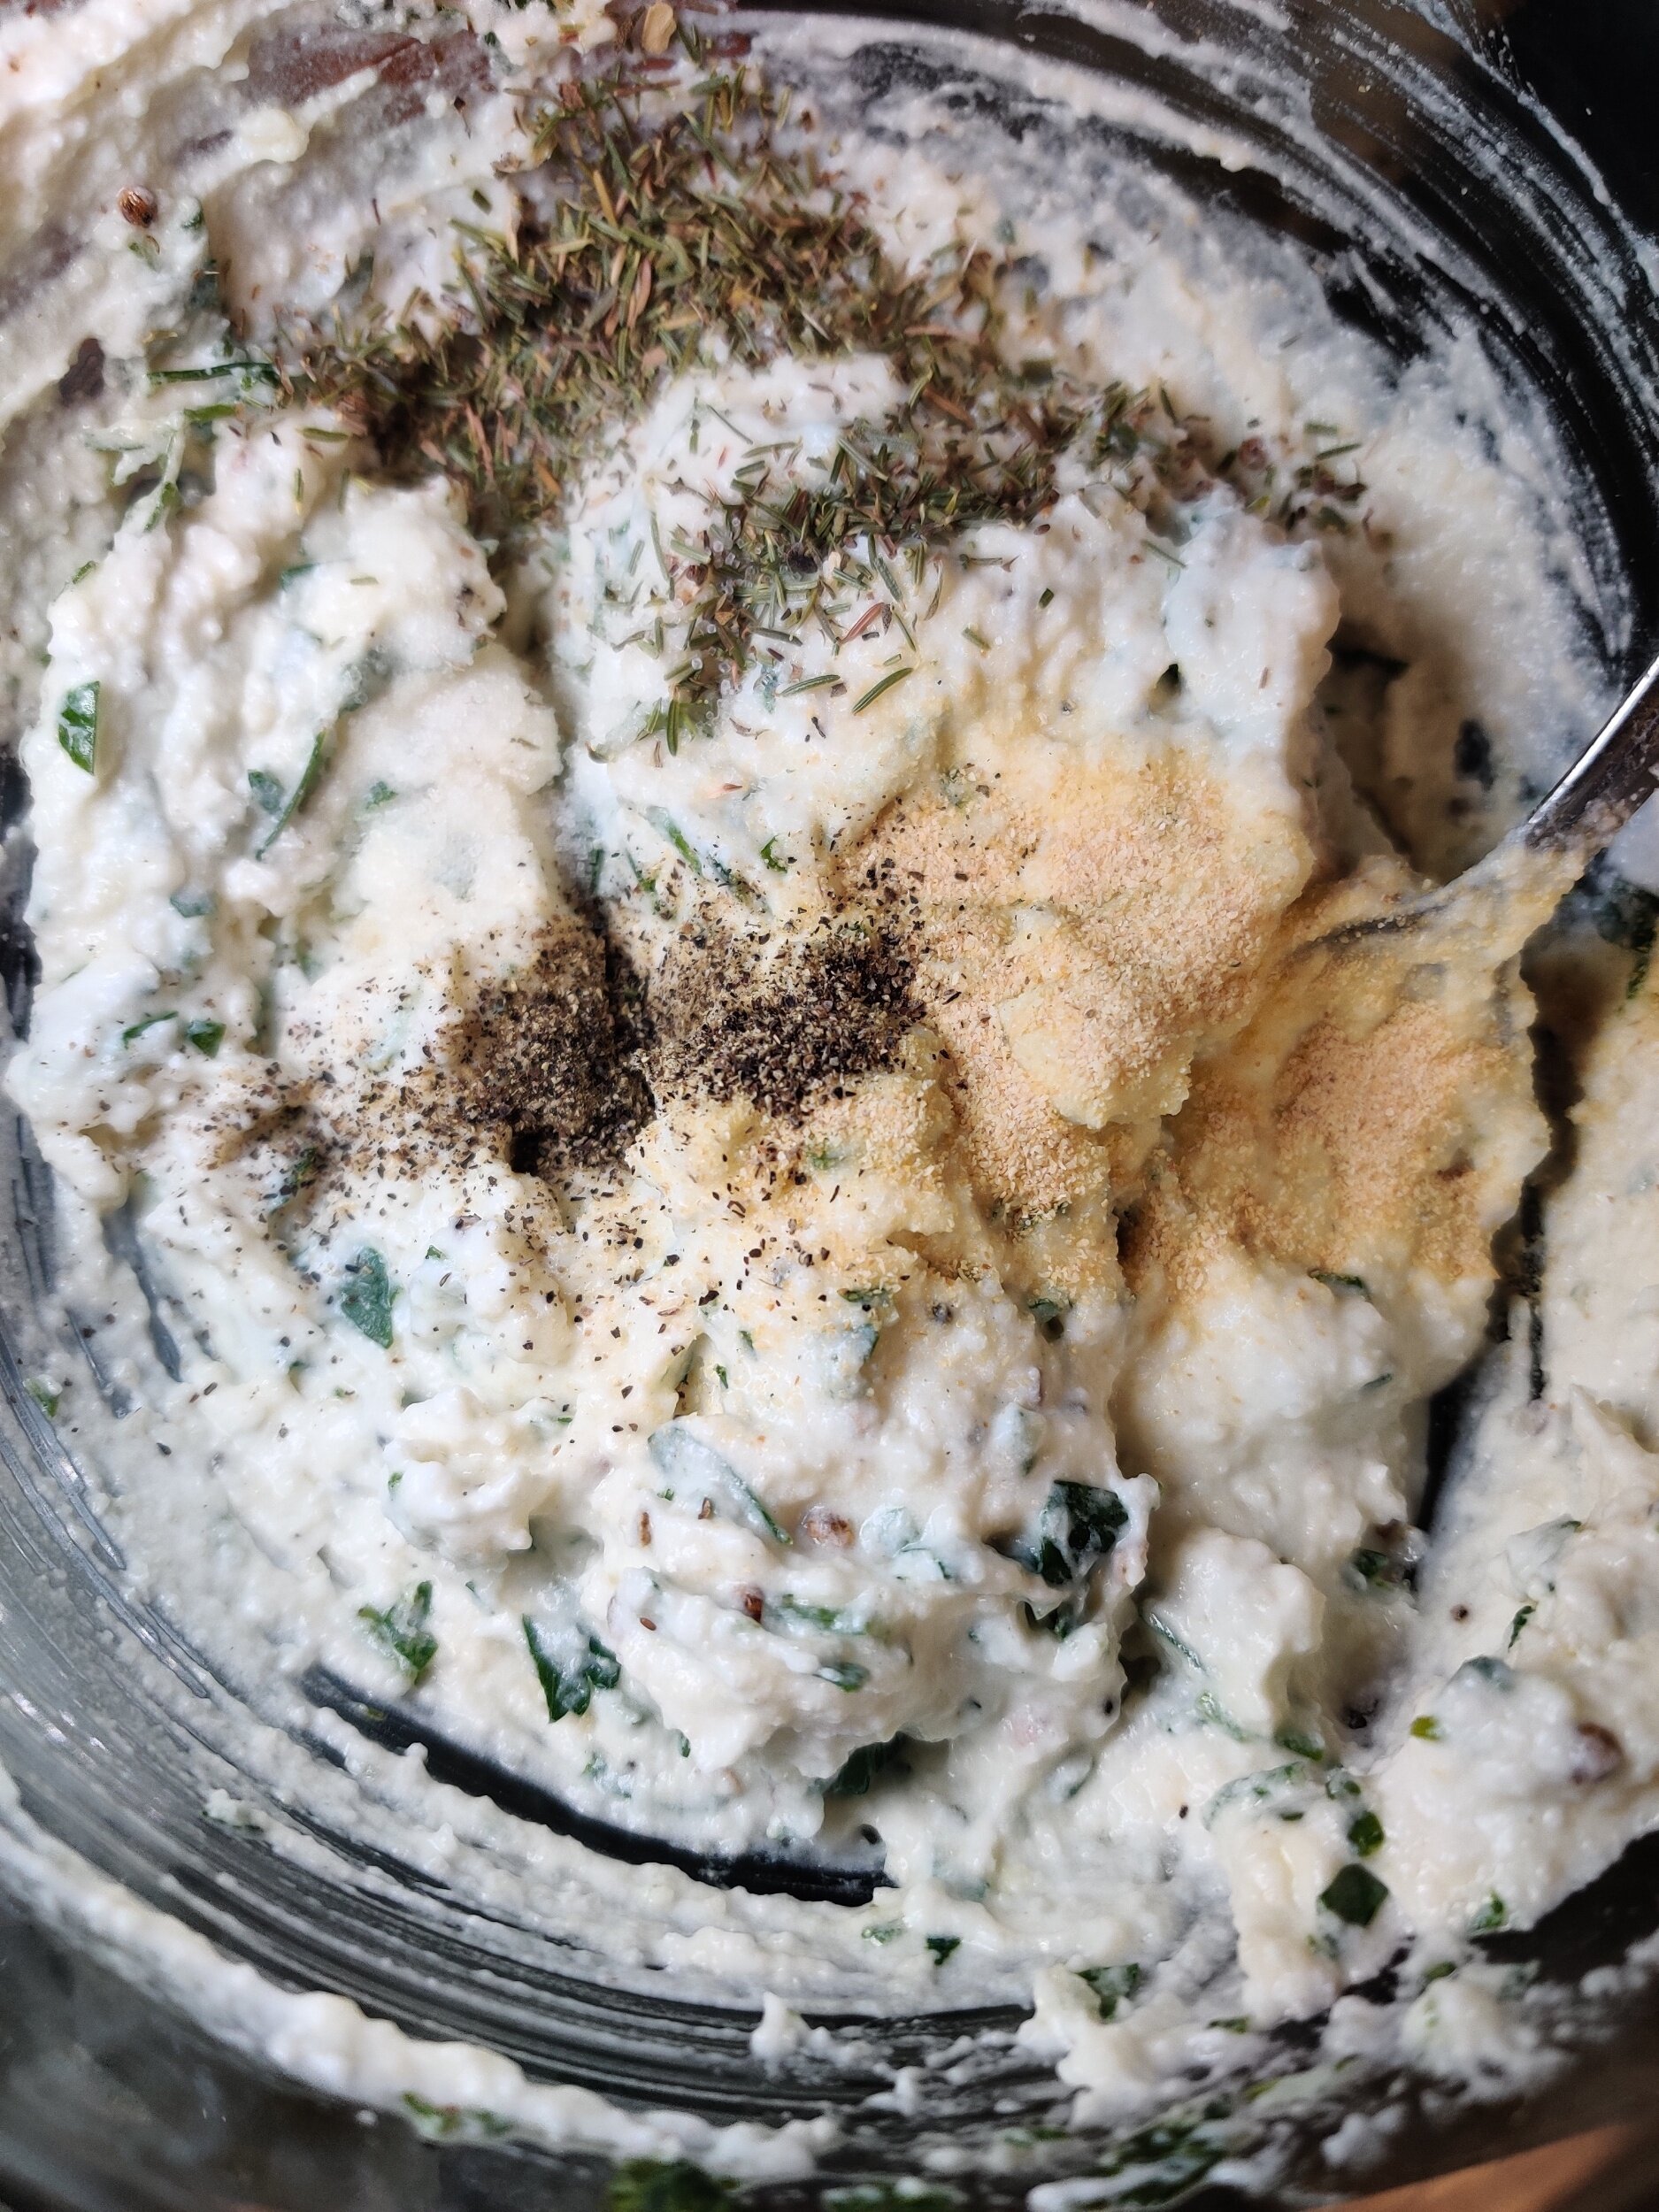
Get a medium-sized bowl, and mix the parmesan cheese, ricotta, tarragon, fresh garlic, parsley, olive oil, biltong seasoning, salt, dried thyme, black pepper, lemon juice, and garlic powder until evenly incorporated. Season to taste!
Spread the mixture over the unrolled pie crust gently with a spoon, making sure not to 'overfill' the inside and leaving at least a 1/2 inch border.
In a large bowl, toss the asparagus and snap peas in a little olive oil, salt and pepper. Lay the stalks over the cheese mix, followed by the snap peas, some additional tarragon leaves, the blue cheese and some parmesan cheese to garnish.
Fold the border edges over to make an open-faced frame, making sure both ends of the asparagus are tucked in or not visible.
Brush with the pie crust edges with the egg wash and sprinkle the sesame seeds on top.
Bake at 400F for 35-40 minutes on a parchment-lined baking tray, then remove from the oven.
Allow for the bubbling to stop and set the galette aside to cool for about 10 minutes. Garnish with additional tarragon leaves and scallions.

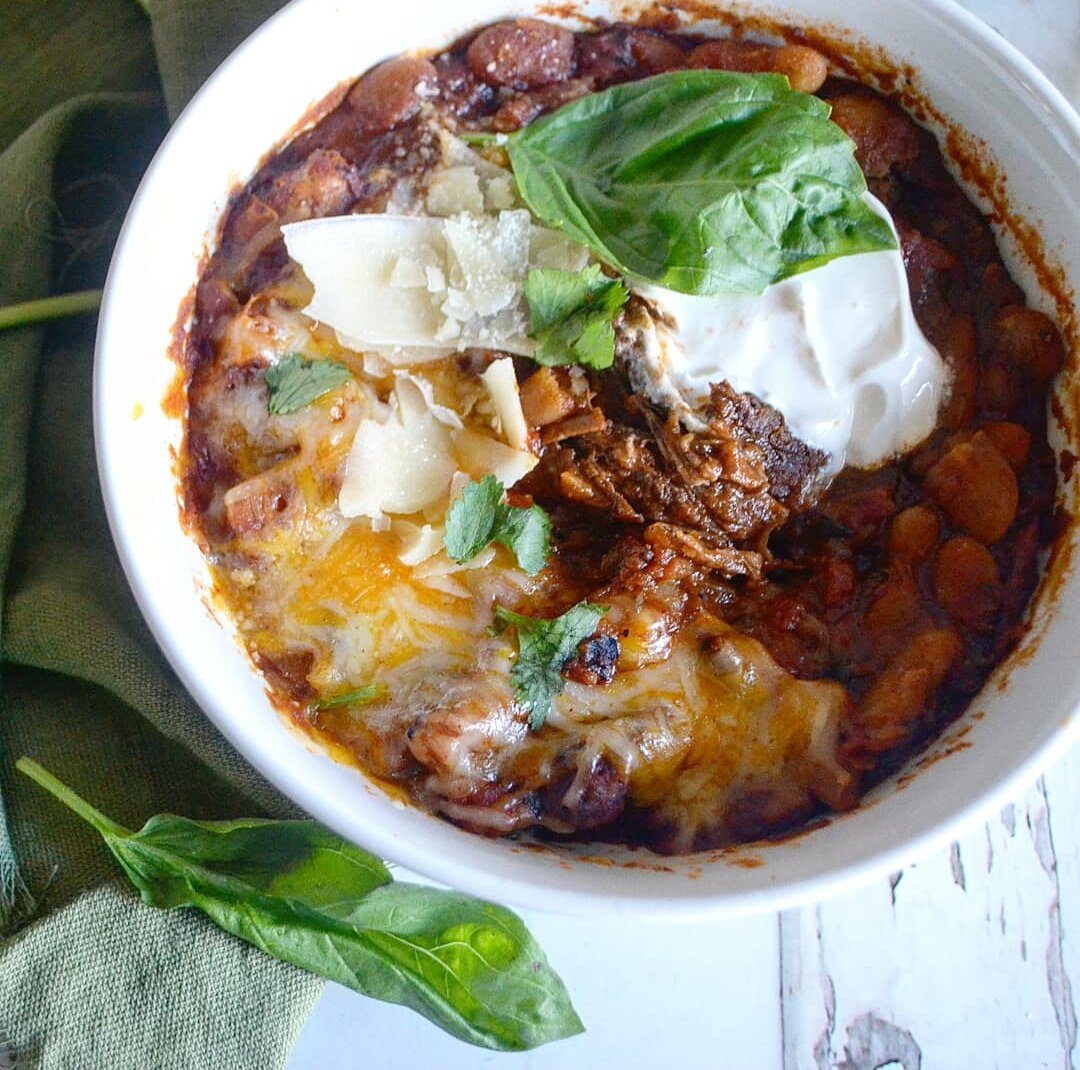
White Bean and Short Rib Chilli
Who doesn't love a warm bowl of chilli when it's rainy or cold outside? Perhaps it's a year-round lunch go-to for you. Whatever the case, I recommend this recipe. It's a great meal just for you, or for the family.
Short rib. For many of us, barbeque comes to mind when we think about the cut, a portion of the rib bone taken from the brisket part of cattle. It's tender, flavourful, and takes some time to cook to break down the connected tissues. The result? Shreds of beef, high in fat, but well worth the wait!
I hope you now understand why it makes sense to integrate short rib into a chilli from that description. This cut was made for it.
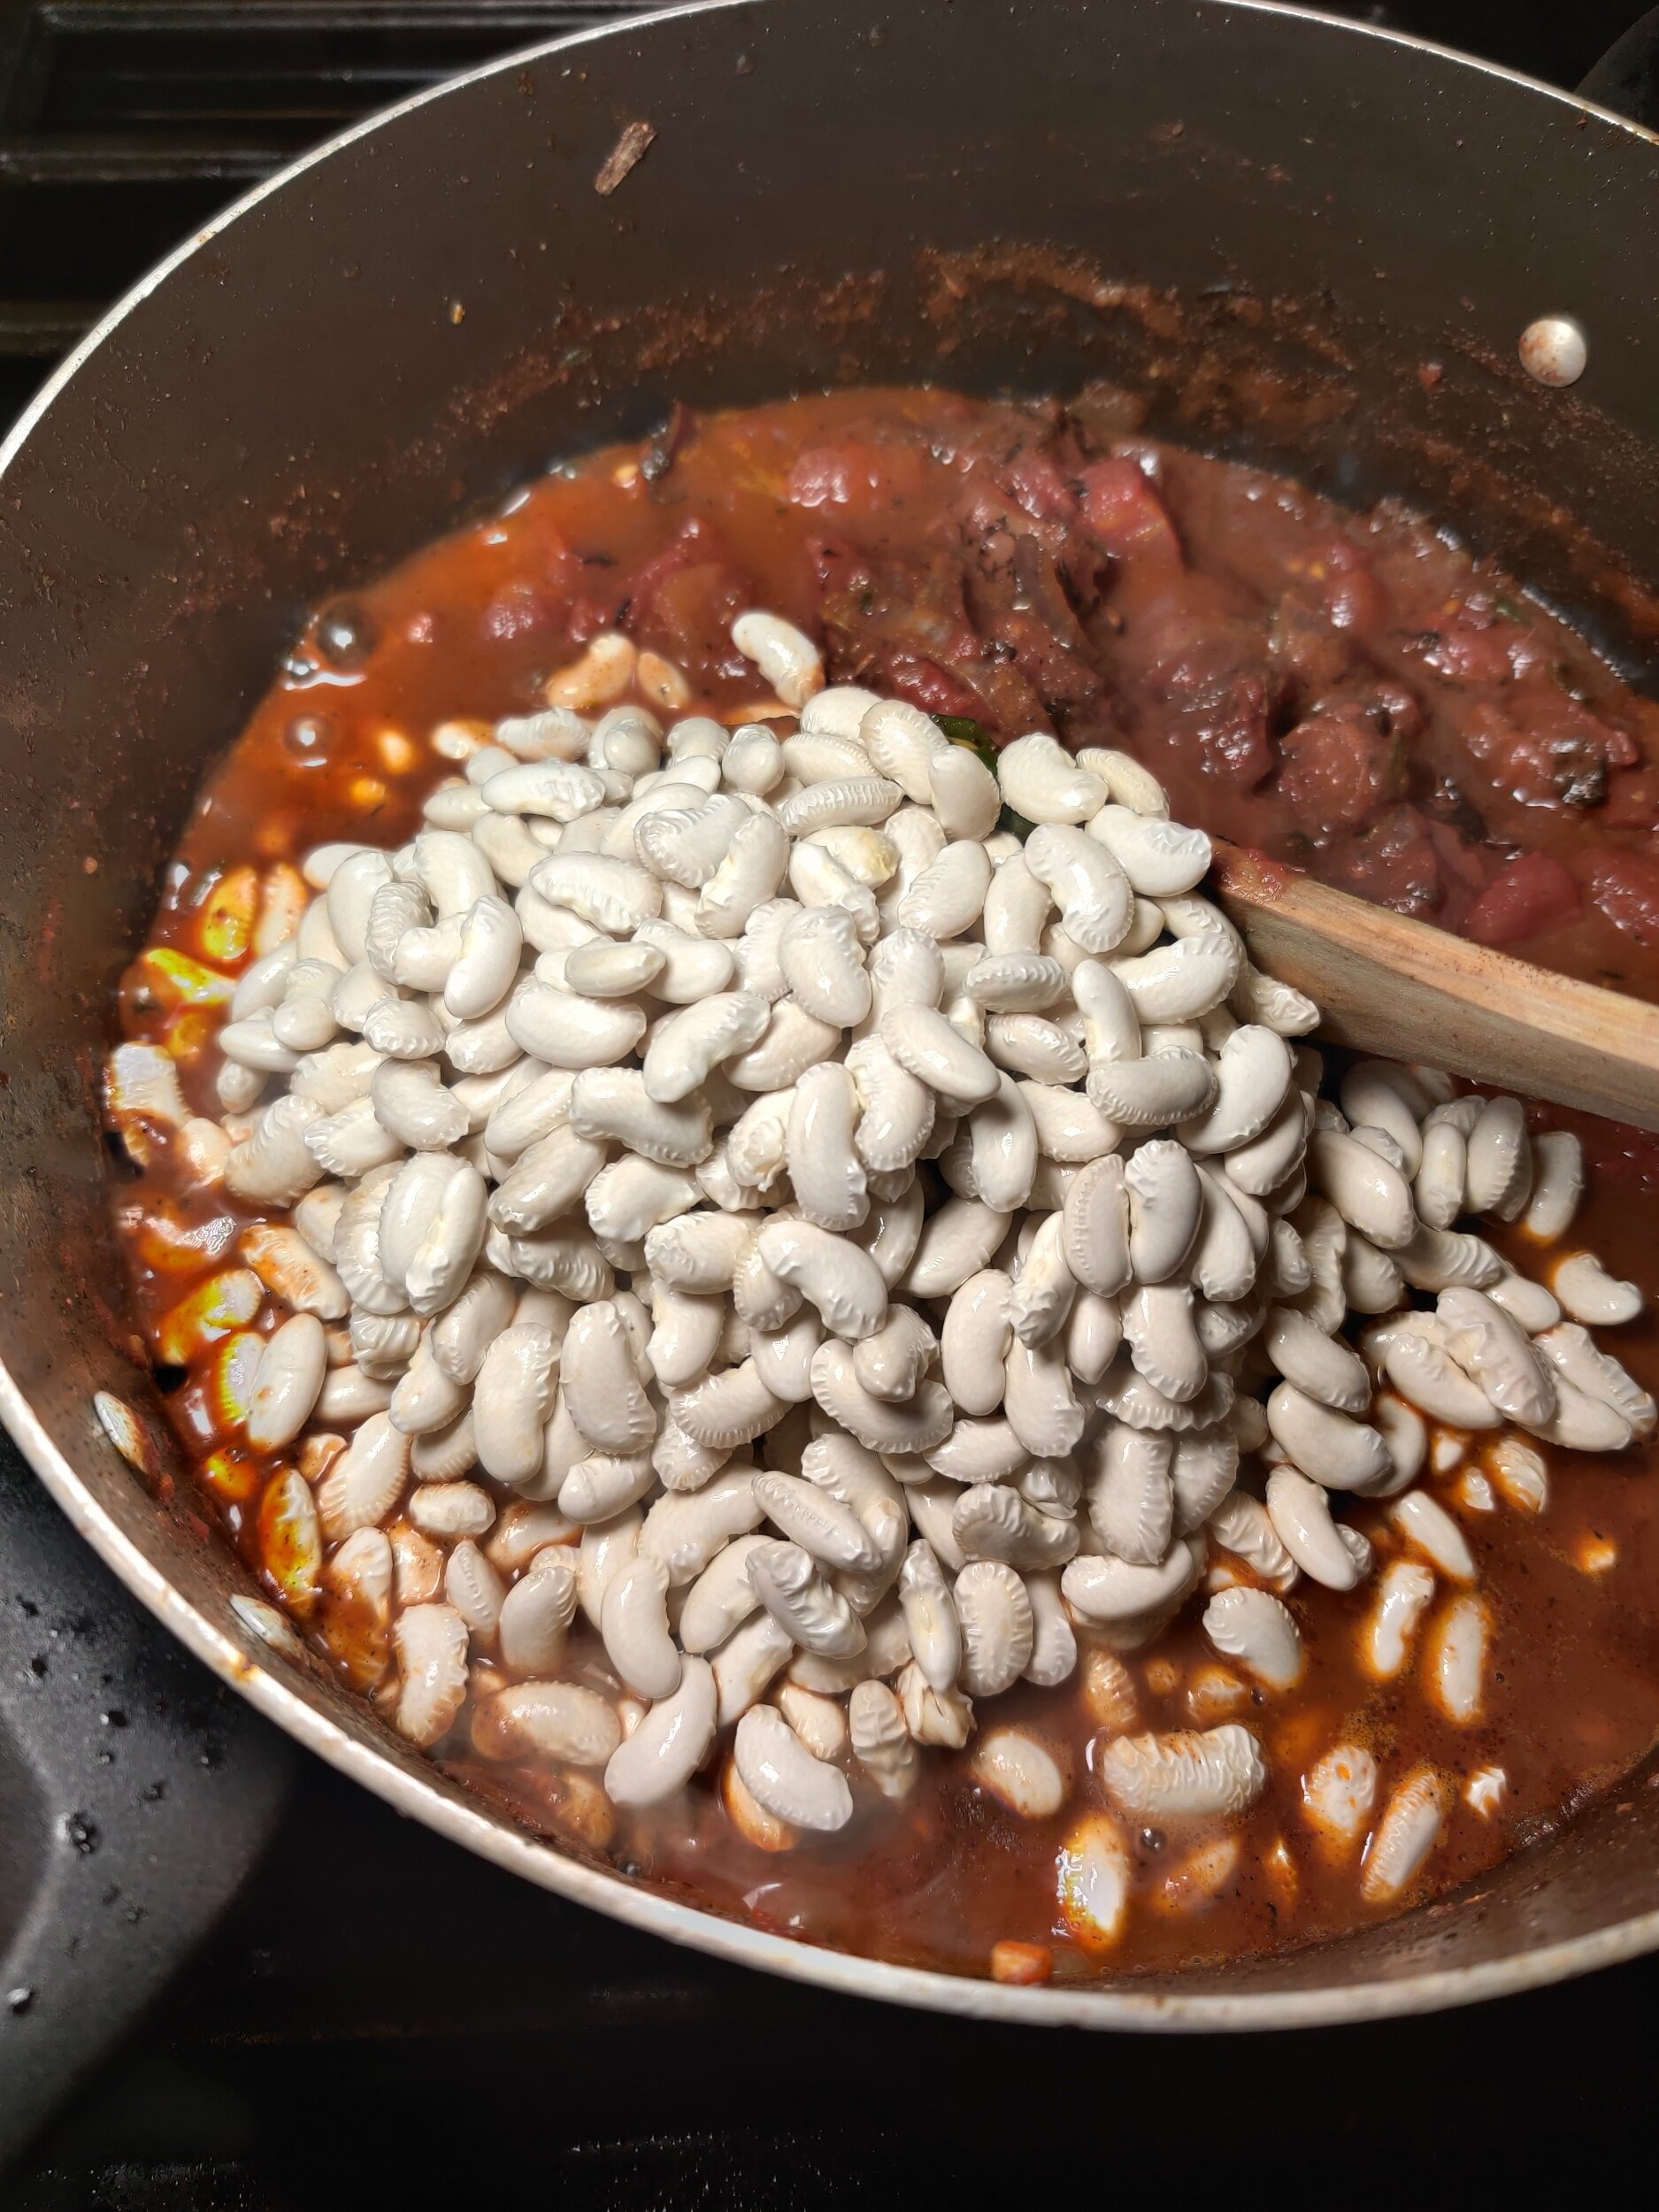
In this case, the short rib is typically sauteed then stewed along with the beans, spices and tomato-based broth, cooking for 3 hours or more. This is known as braising, a combination cooking method that uses both dry and wet heat.
The great thing about this recipe is that you don't need a crockpot or slow cooker either, stove top on low heat works just as well!
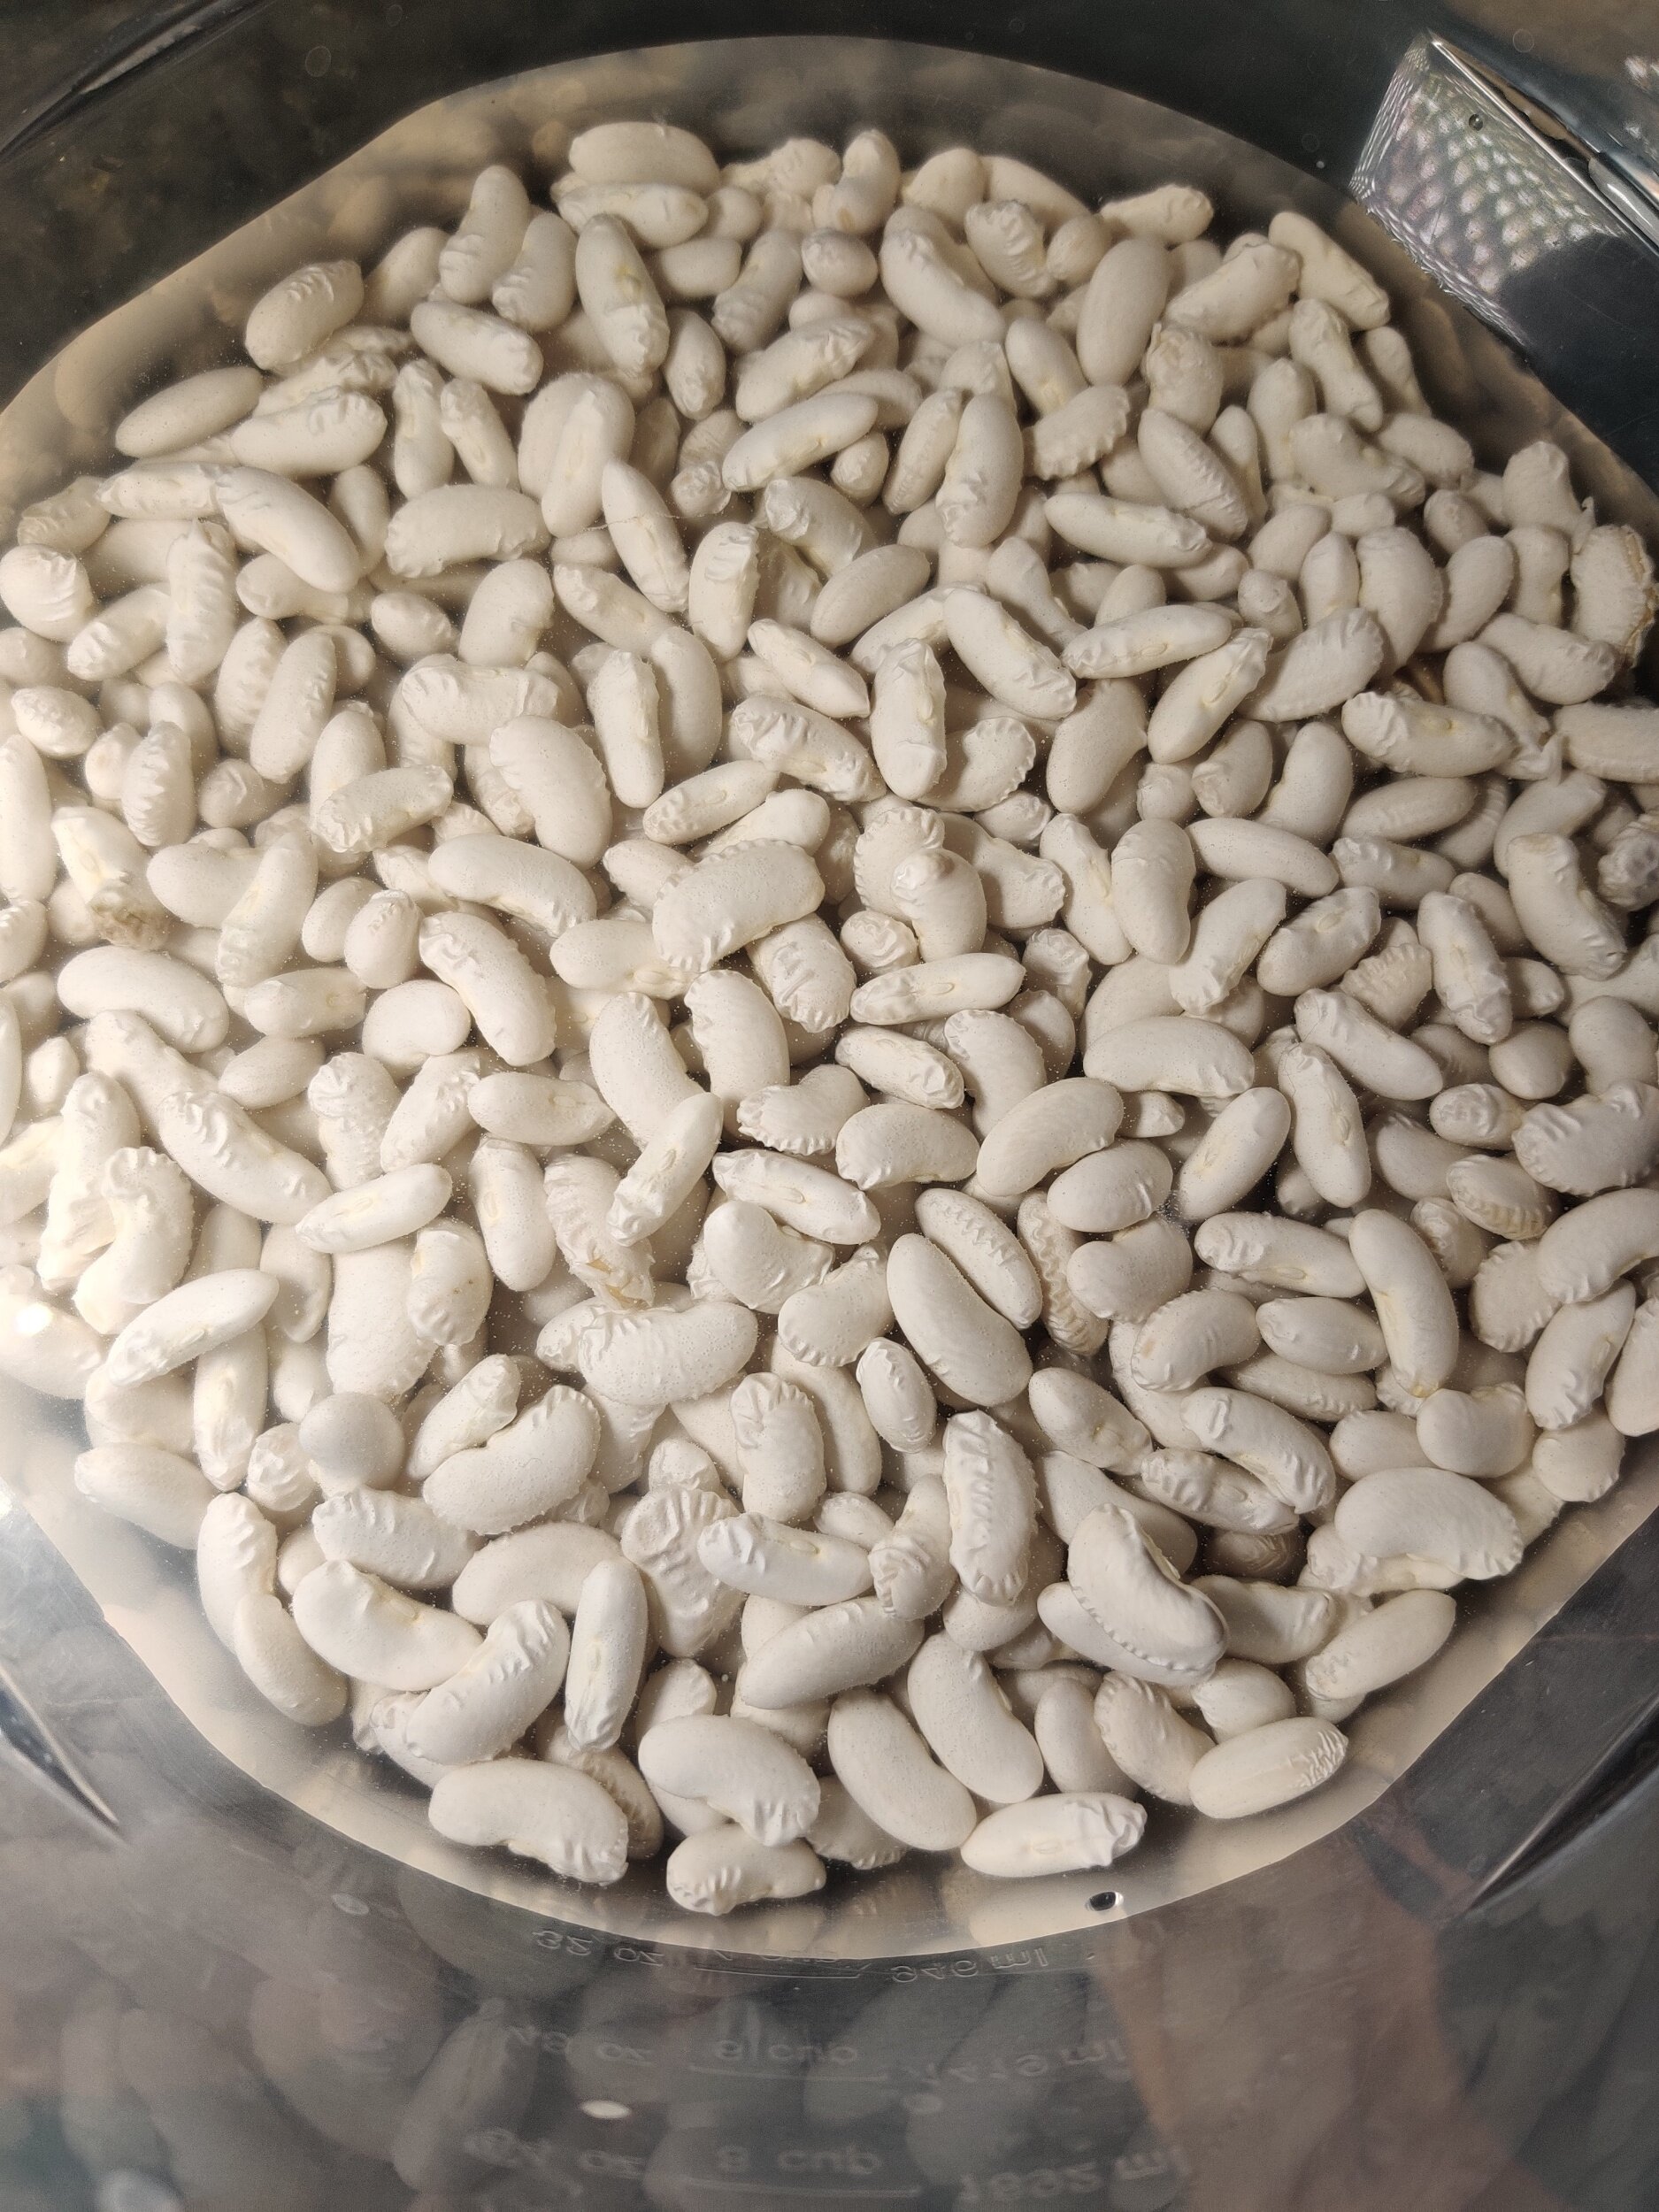
As for the type of bean(s) you use for your chilli, that's up to you. I used white kidney beans, which have a nutty, earthy flavour profile I think goes well with the steak. My one recommendation would be to select a bean that can hold well for hours of boiling in terms of structure - you wouldn't want to use beans that quickly get mushy. I'd also suggest staying away from canned beans! Even though they take longer to cook, dried beans aren't as high in sodium as any canned vegetables, have more flavour, and you get more out of them through your finished product.
Ingredients
1 pound short rib beef
2 tablespoons chipotle powder
3 tablespoons chilli powder
1 tablespoon salt
2 tablespoons black pepper
1 teaspoon curry powder
1 tablespoon coriander
1 tablespoon cumin
1 tablespoon dried basil
1 tablespoon dried thyme
1 bag dry white beans
1 (28-ounce) can fire-roasted tomatoes
1 red onion, diced
2 tablespoons fresh thyme
3 spring onions
2 tablespoons garlic, minced
2 tablespoons butter
2 tablespoons olive oil
1 jalapeno, diced
1 green pepper, diced
Instructions
Soak the beans in cold water, set aside.
Slice the short rib into thin pieces. You can also cut it into 2-3 larger pieces (if it doesn't come packed that way already) then shred them up with a fork once cooked and broken down after the 3 hour cook time.
In a large pot, sear the short rib in the olive oil and butter with fresh thyme and garlic for about 5 minutes. N.B. At this point, you can also remove the short rib form the pot, then add it back after the tomatoes have simmered. I wanted mine to absorb all those flavours in between as well.
Add the salt, pepper and spices and saute for another 2 minutes.
Add the peppers, jalapenos and onions and cook for another 3-4 minutes.
Finally, mix in the diced tomatoes and tomato paste, followed by the broth and Worcester sauce. Simmer for 5 minutes.
Drain the beans and add them to the pot, reduce the heat to low. Close the pot and simmer for 3 hours. Every 20 minutes or so, stir to ensure even cooking and prevent the chilli from sticking to the bottom of the pot. Season and adjust to taste as necessary while the chilli cooks.
Note: to test readiness, the beans must be soft and edible, and the short rib should break down easily. Shredding along the grain with a fork should pull it apart!
Serve hot with sour cream, cheese, and fresh basil, scallions or parsley! You can also make my Quick Cornbread as a side dish to compliment the chilli.
To store and reheat: allow the contents to cool. You can separate the chilli into single servings in small, airtight containers.
Put them in the freezer (for 3 months maximum) or the fridge to consume in 3-4 days.


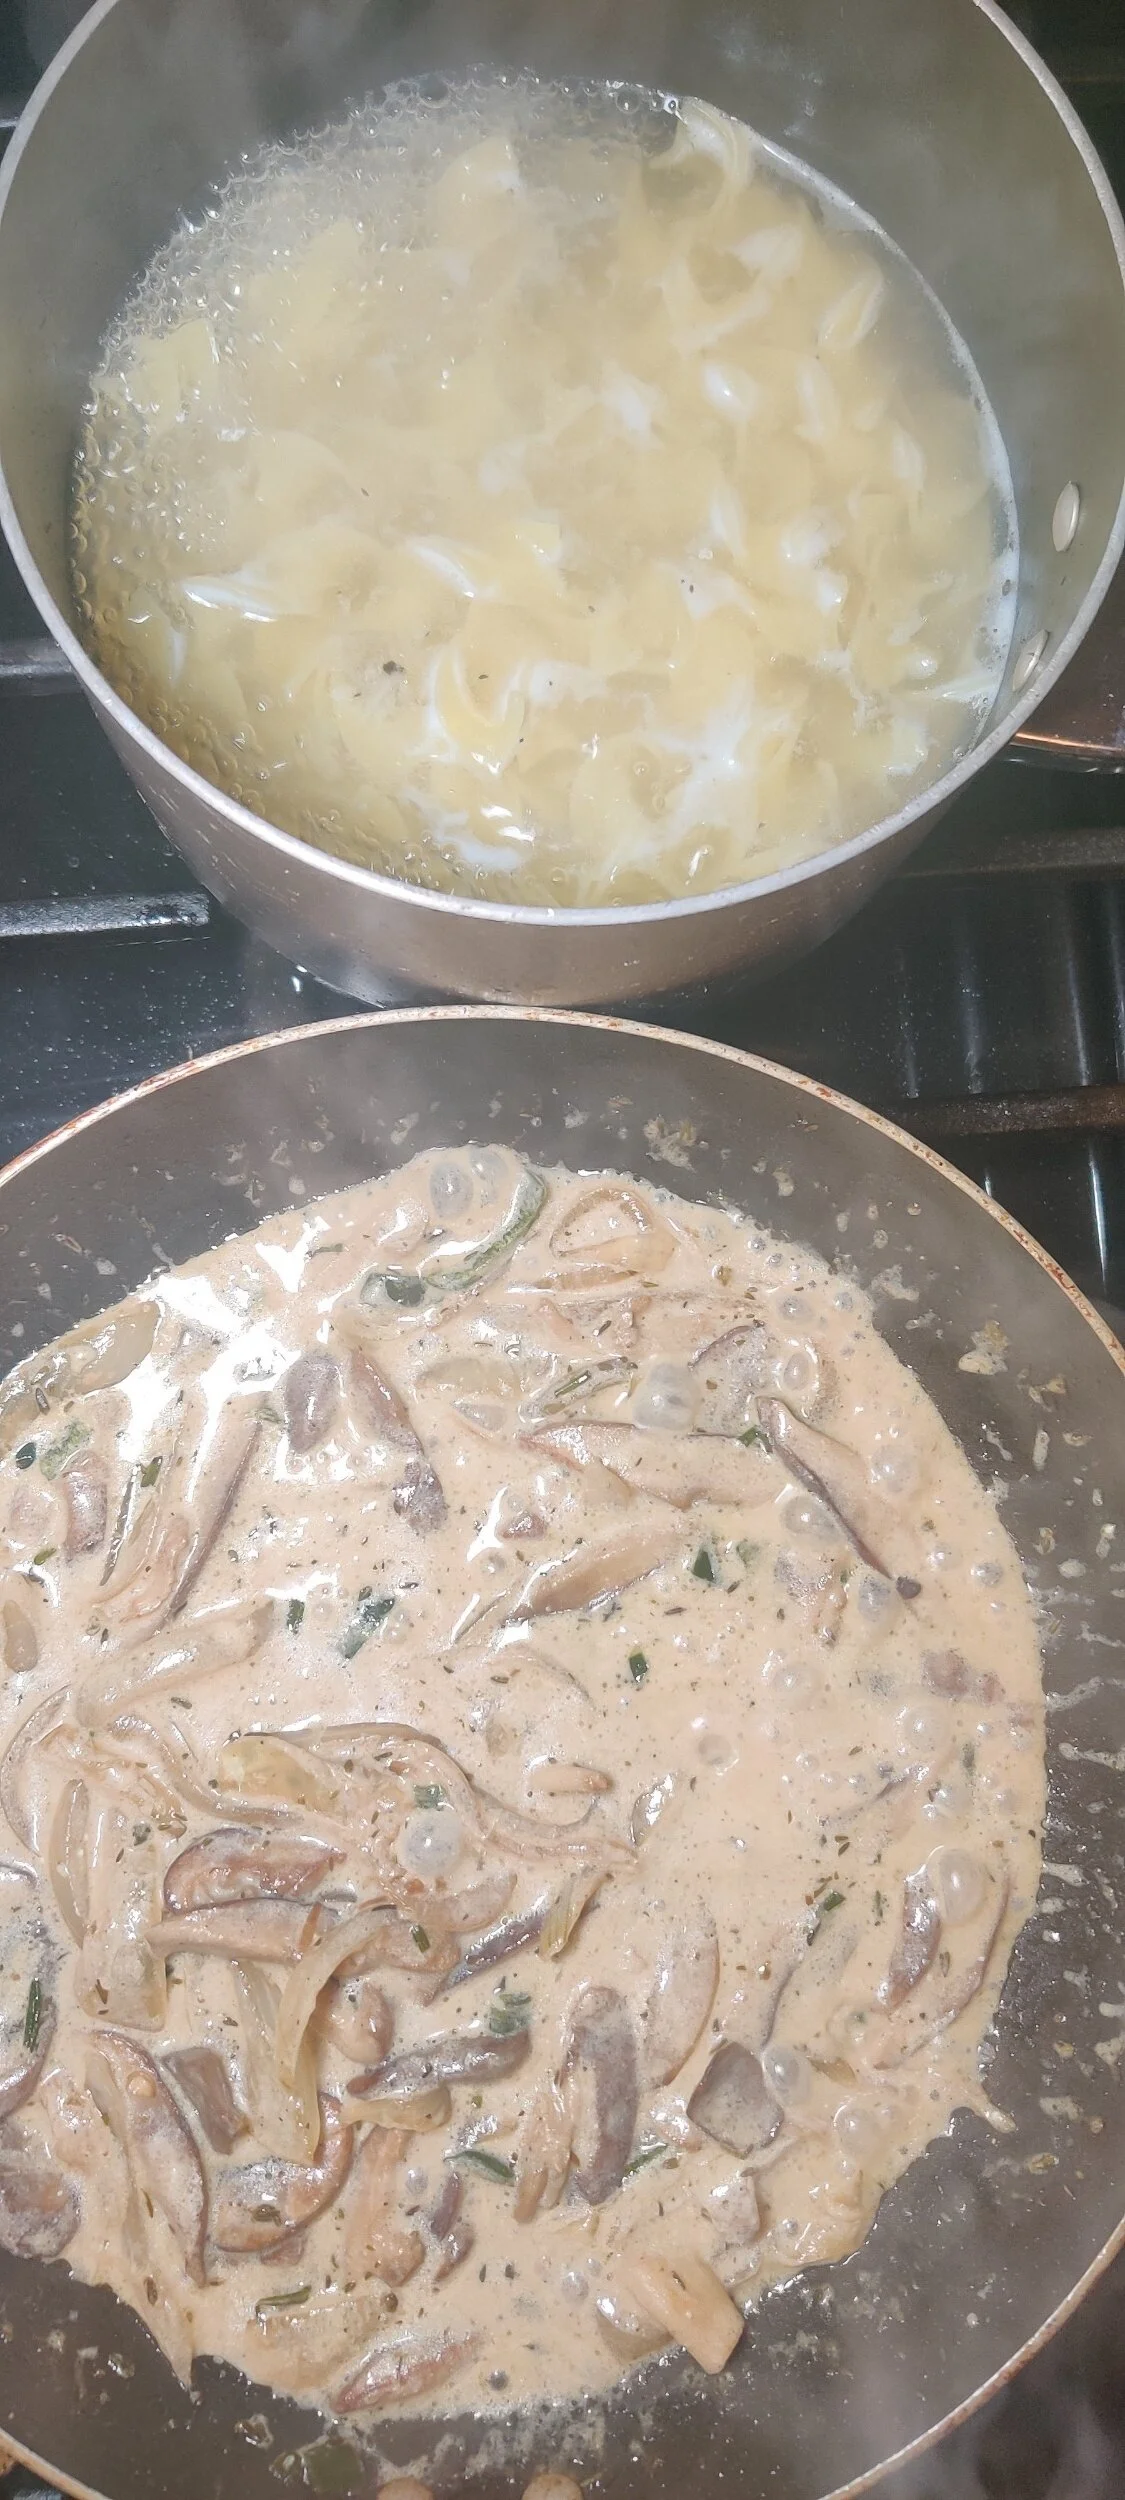
Mushroom Stroganoff
If you're looking for a delicious, quick and easy lunch or dinner meal, this is it!
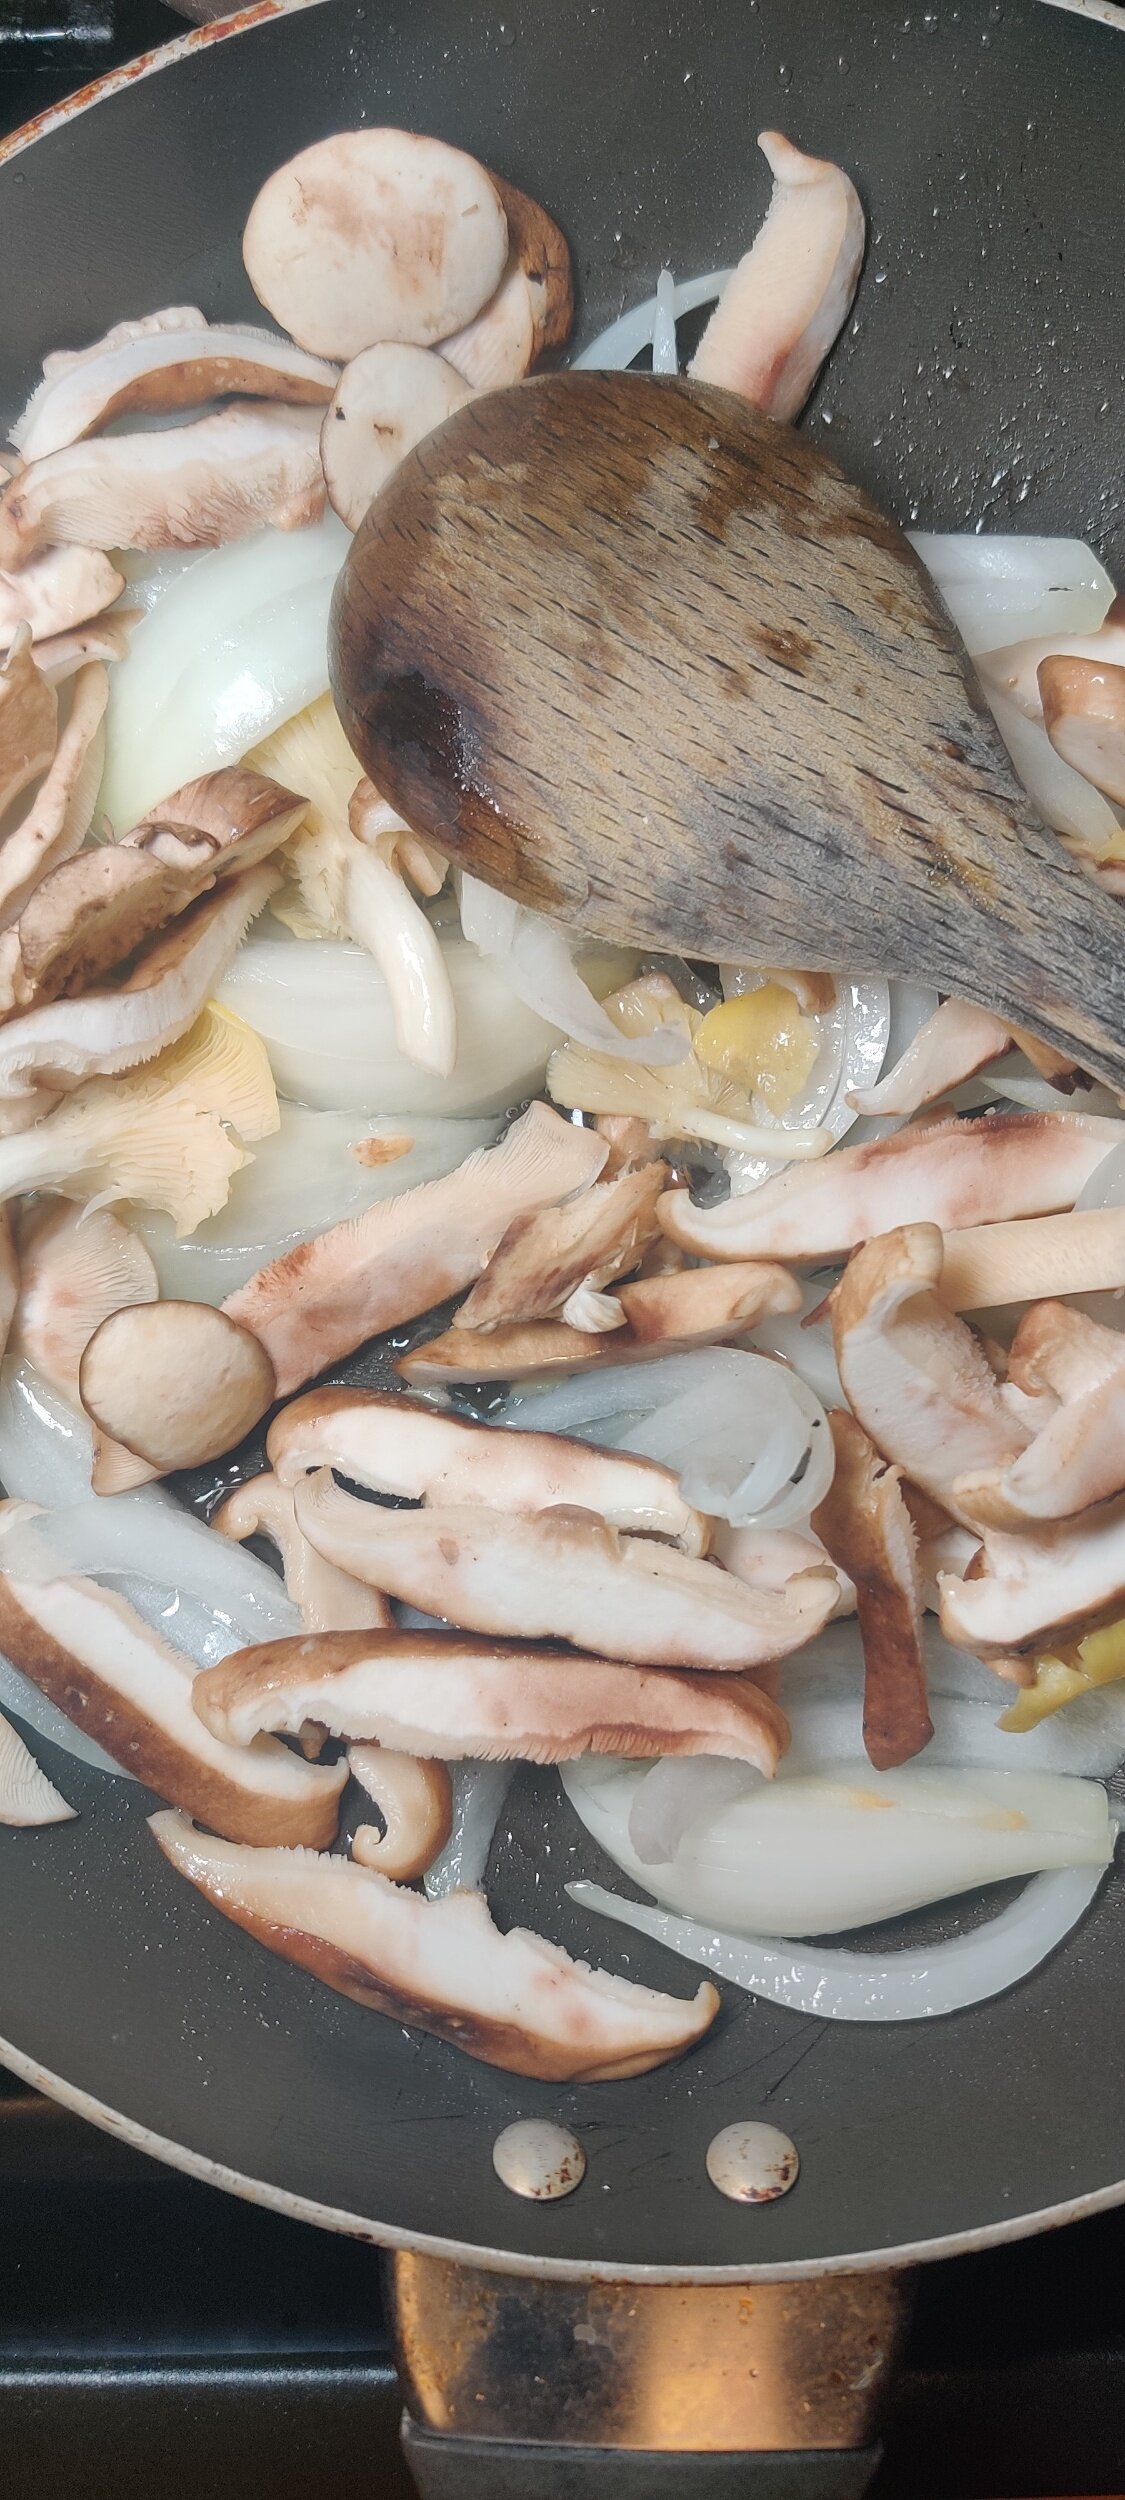
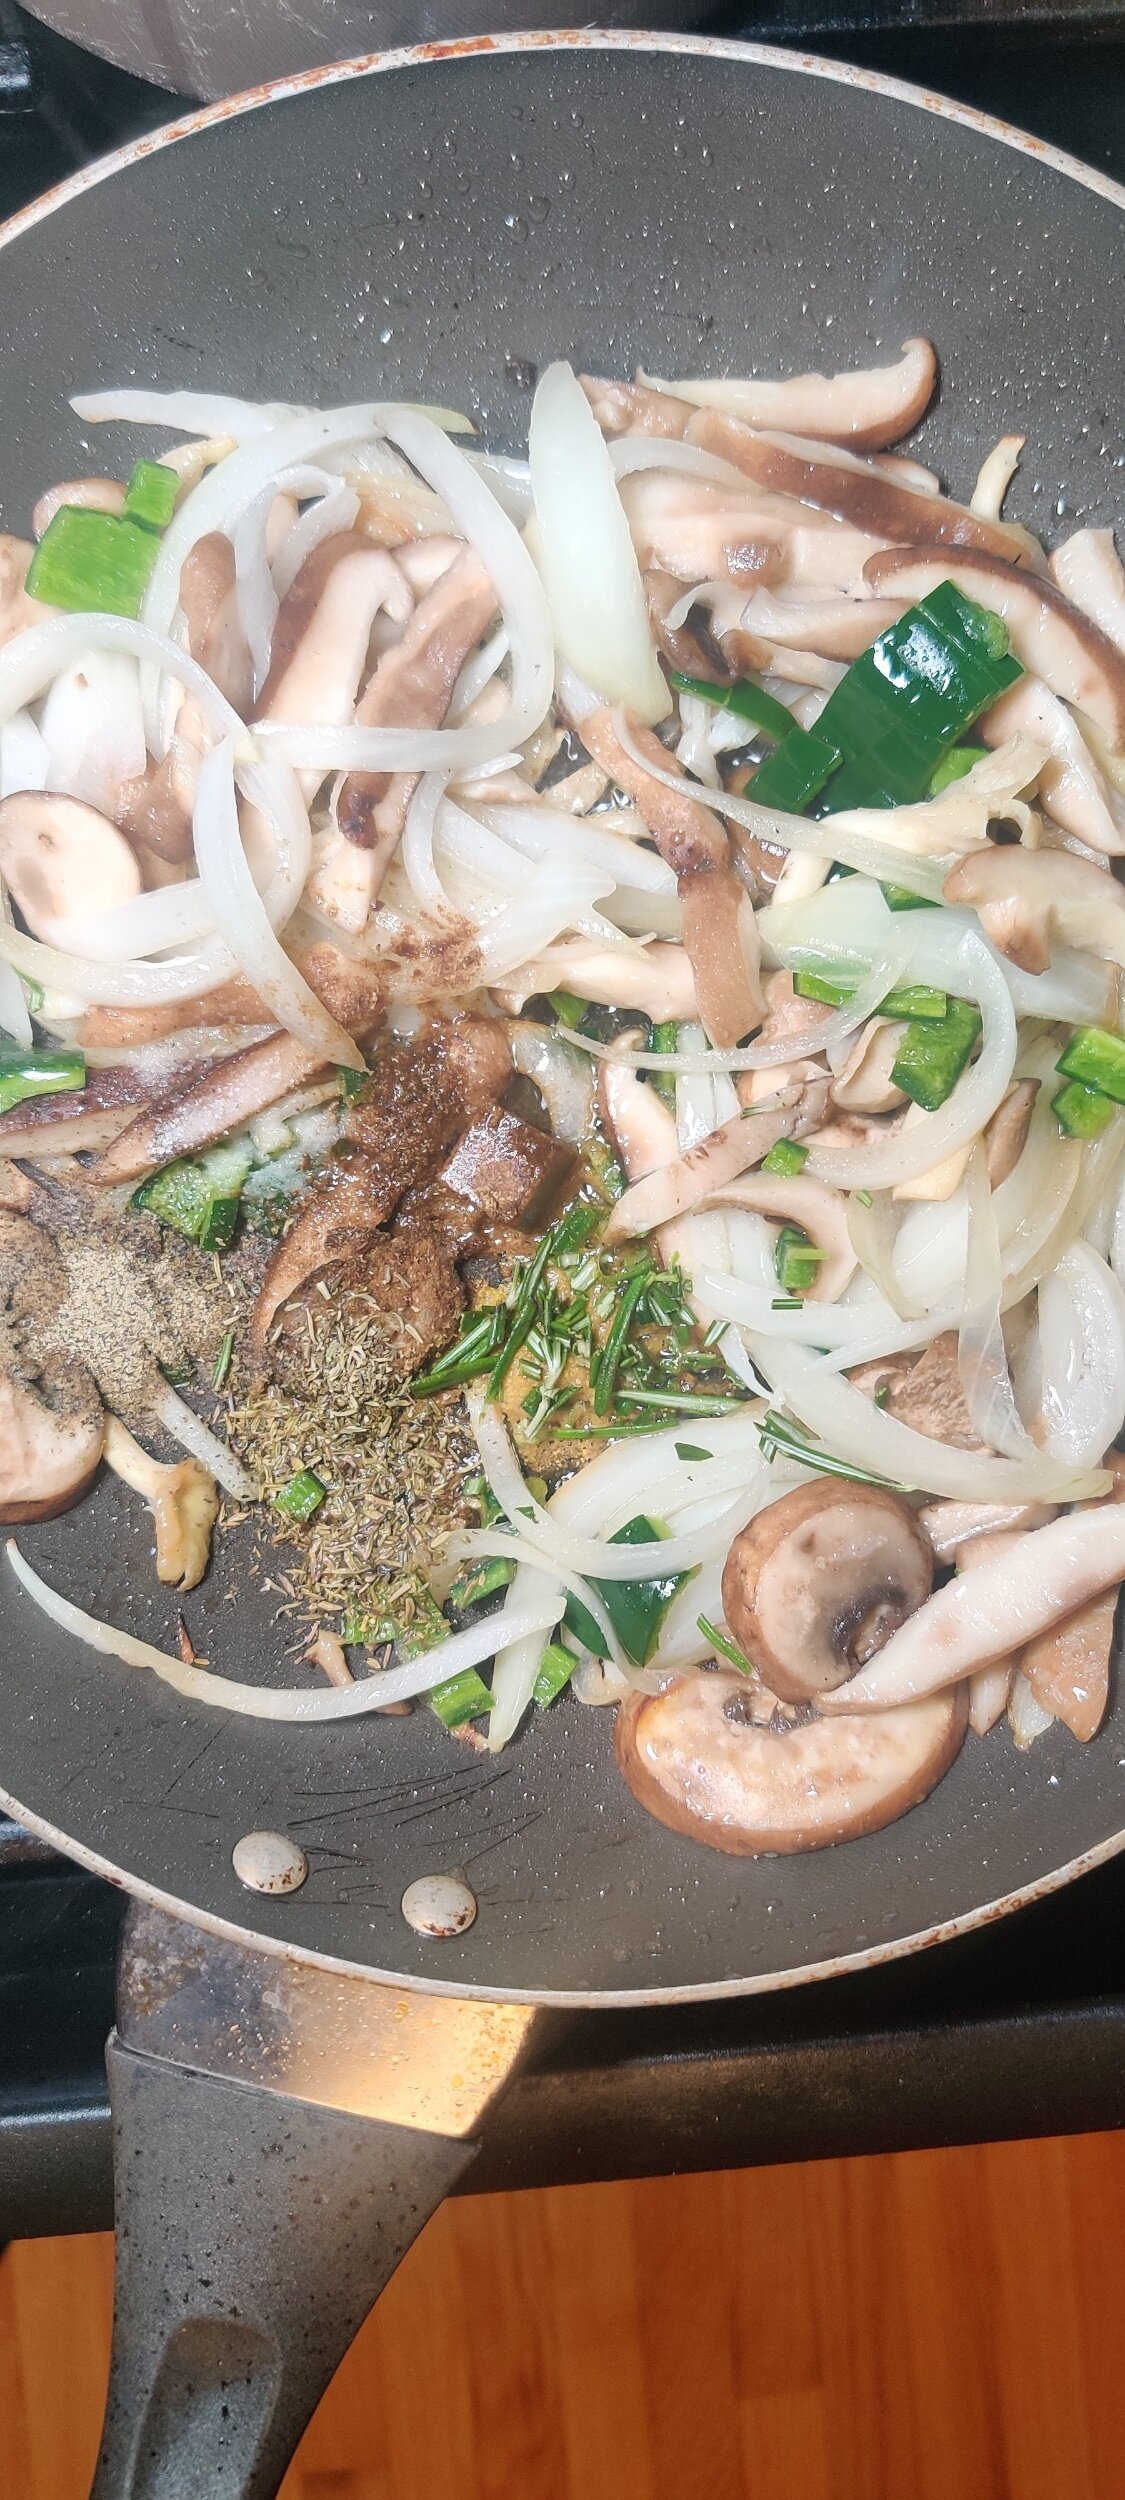
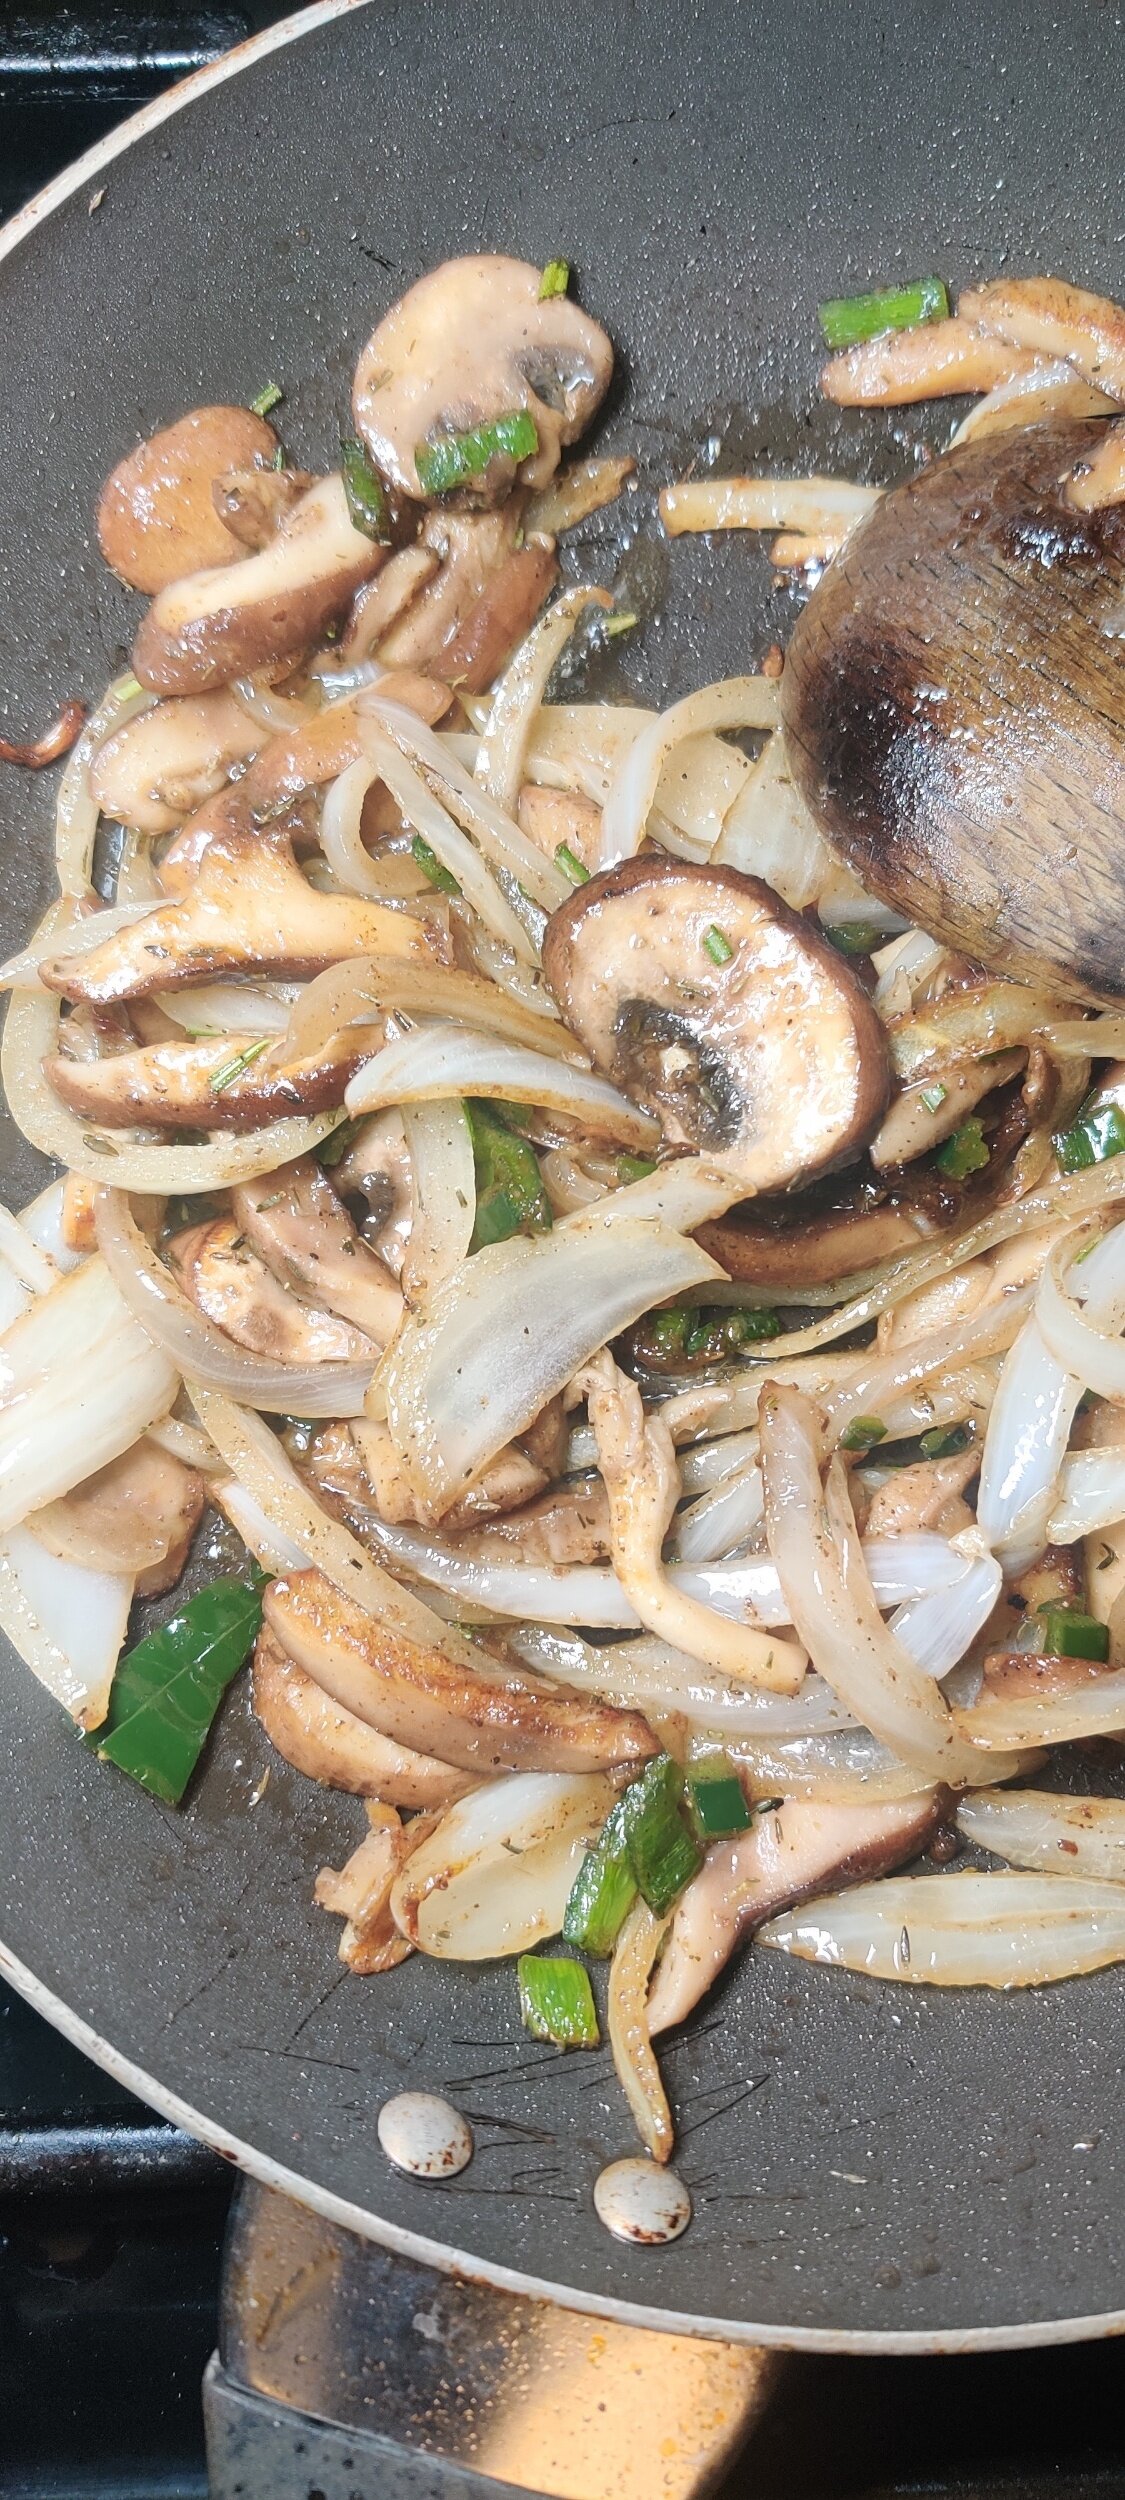
I used a mixture of mushrooms to give the dish more flavour and dimension, adding rosemary, dried thyme, and other spices.
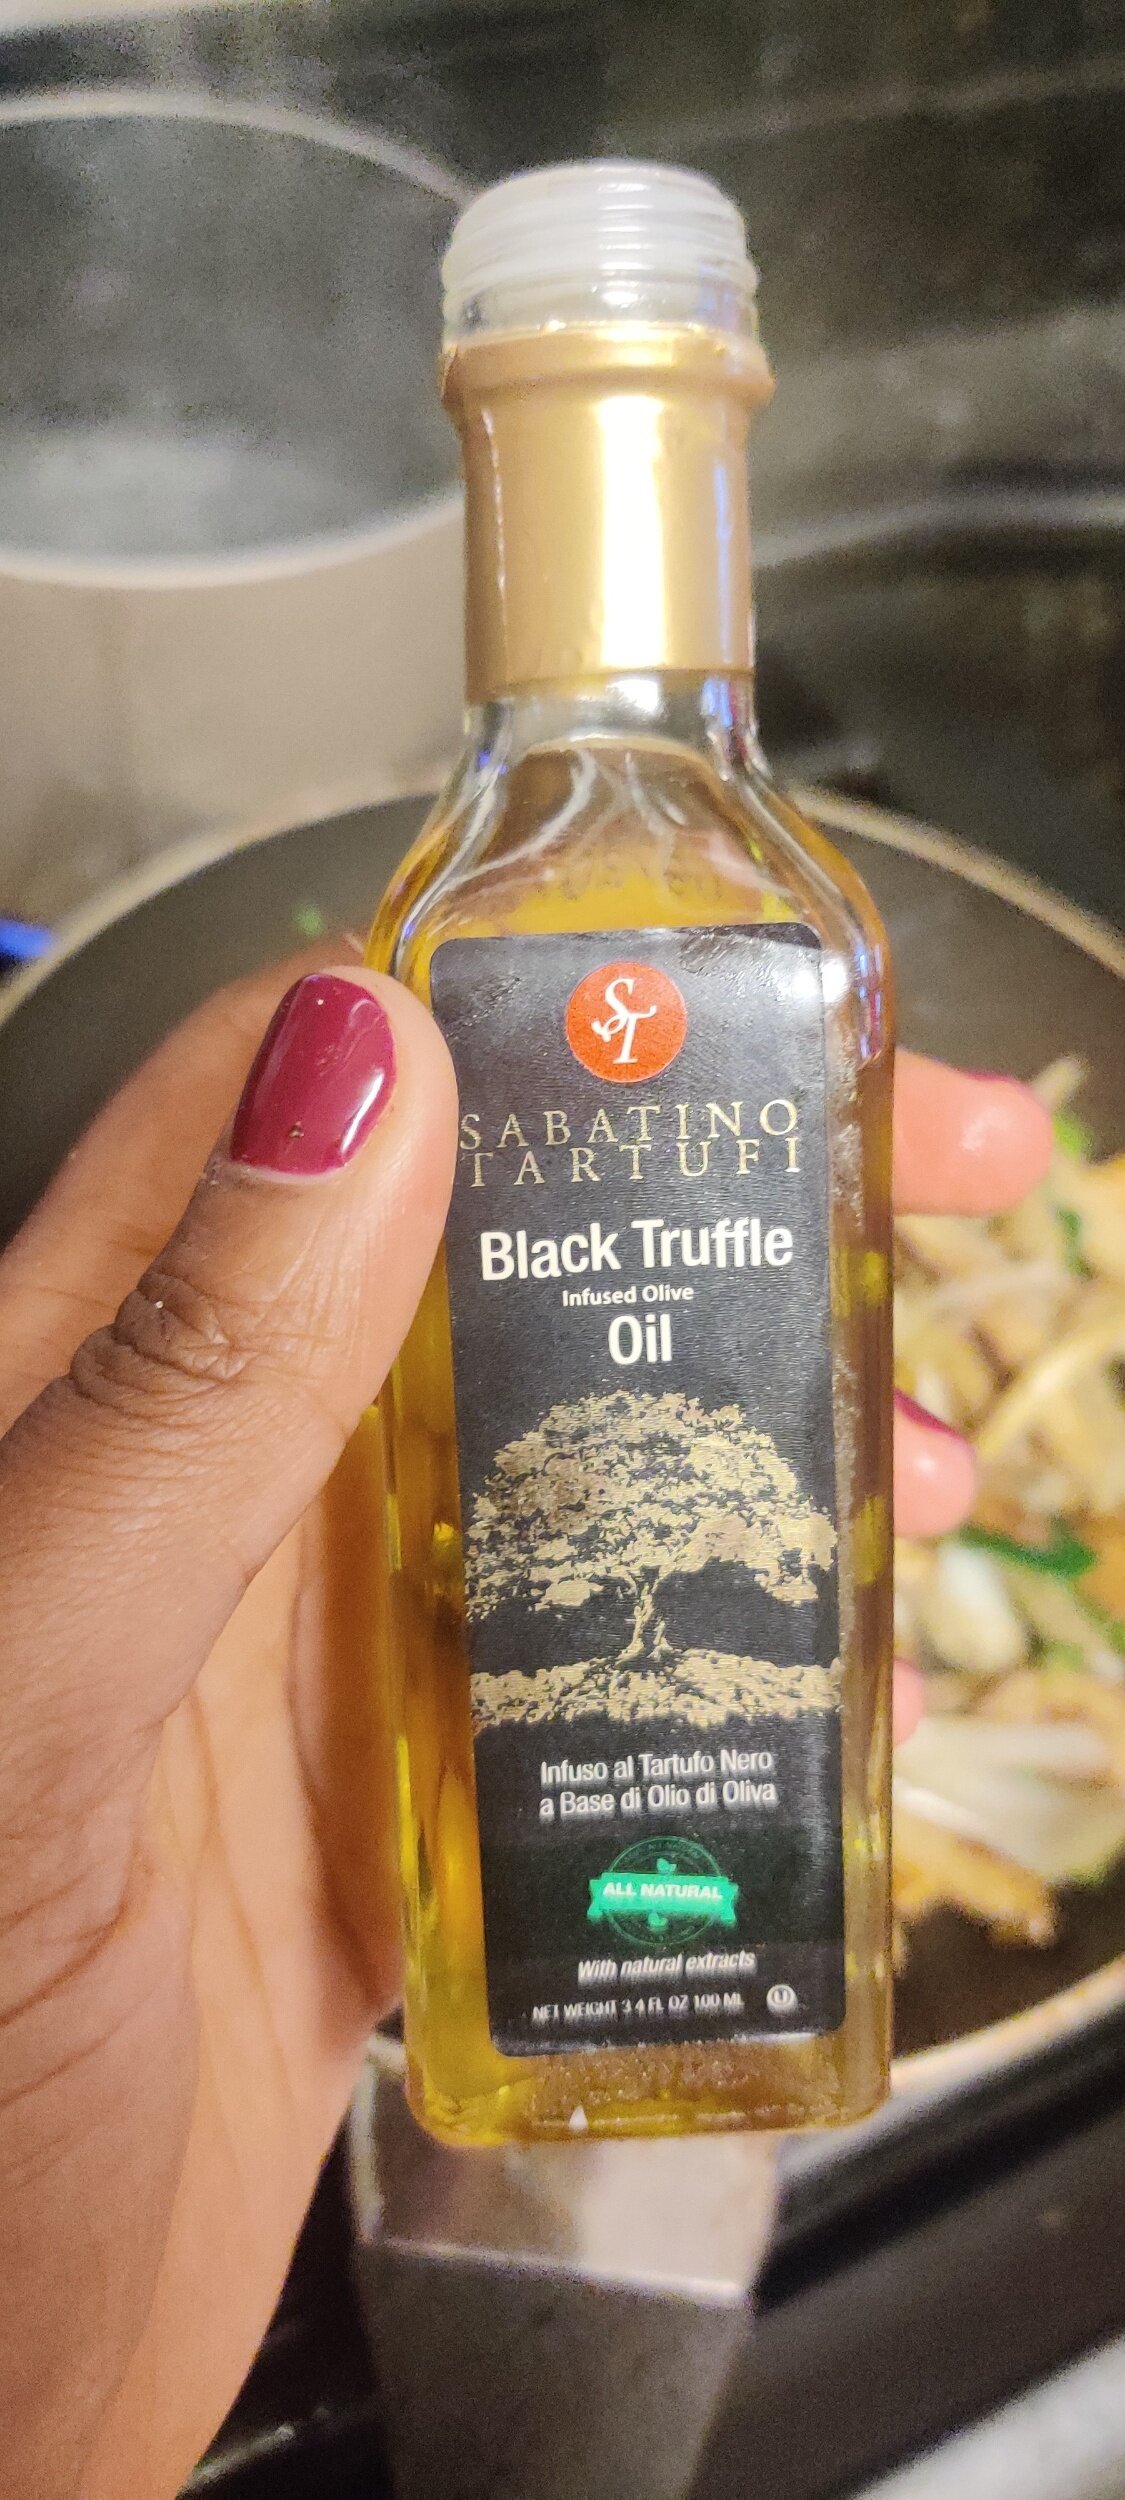
I also choose to deglaze the pan with cooking wine, adding truffle oil and sautéing the onions and mushrooms in peanut oil.
These kinds of choices make a huge difference when it comes to a finished product.
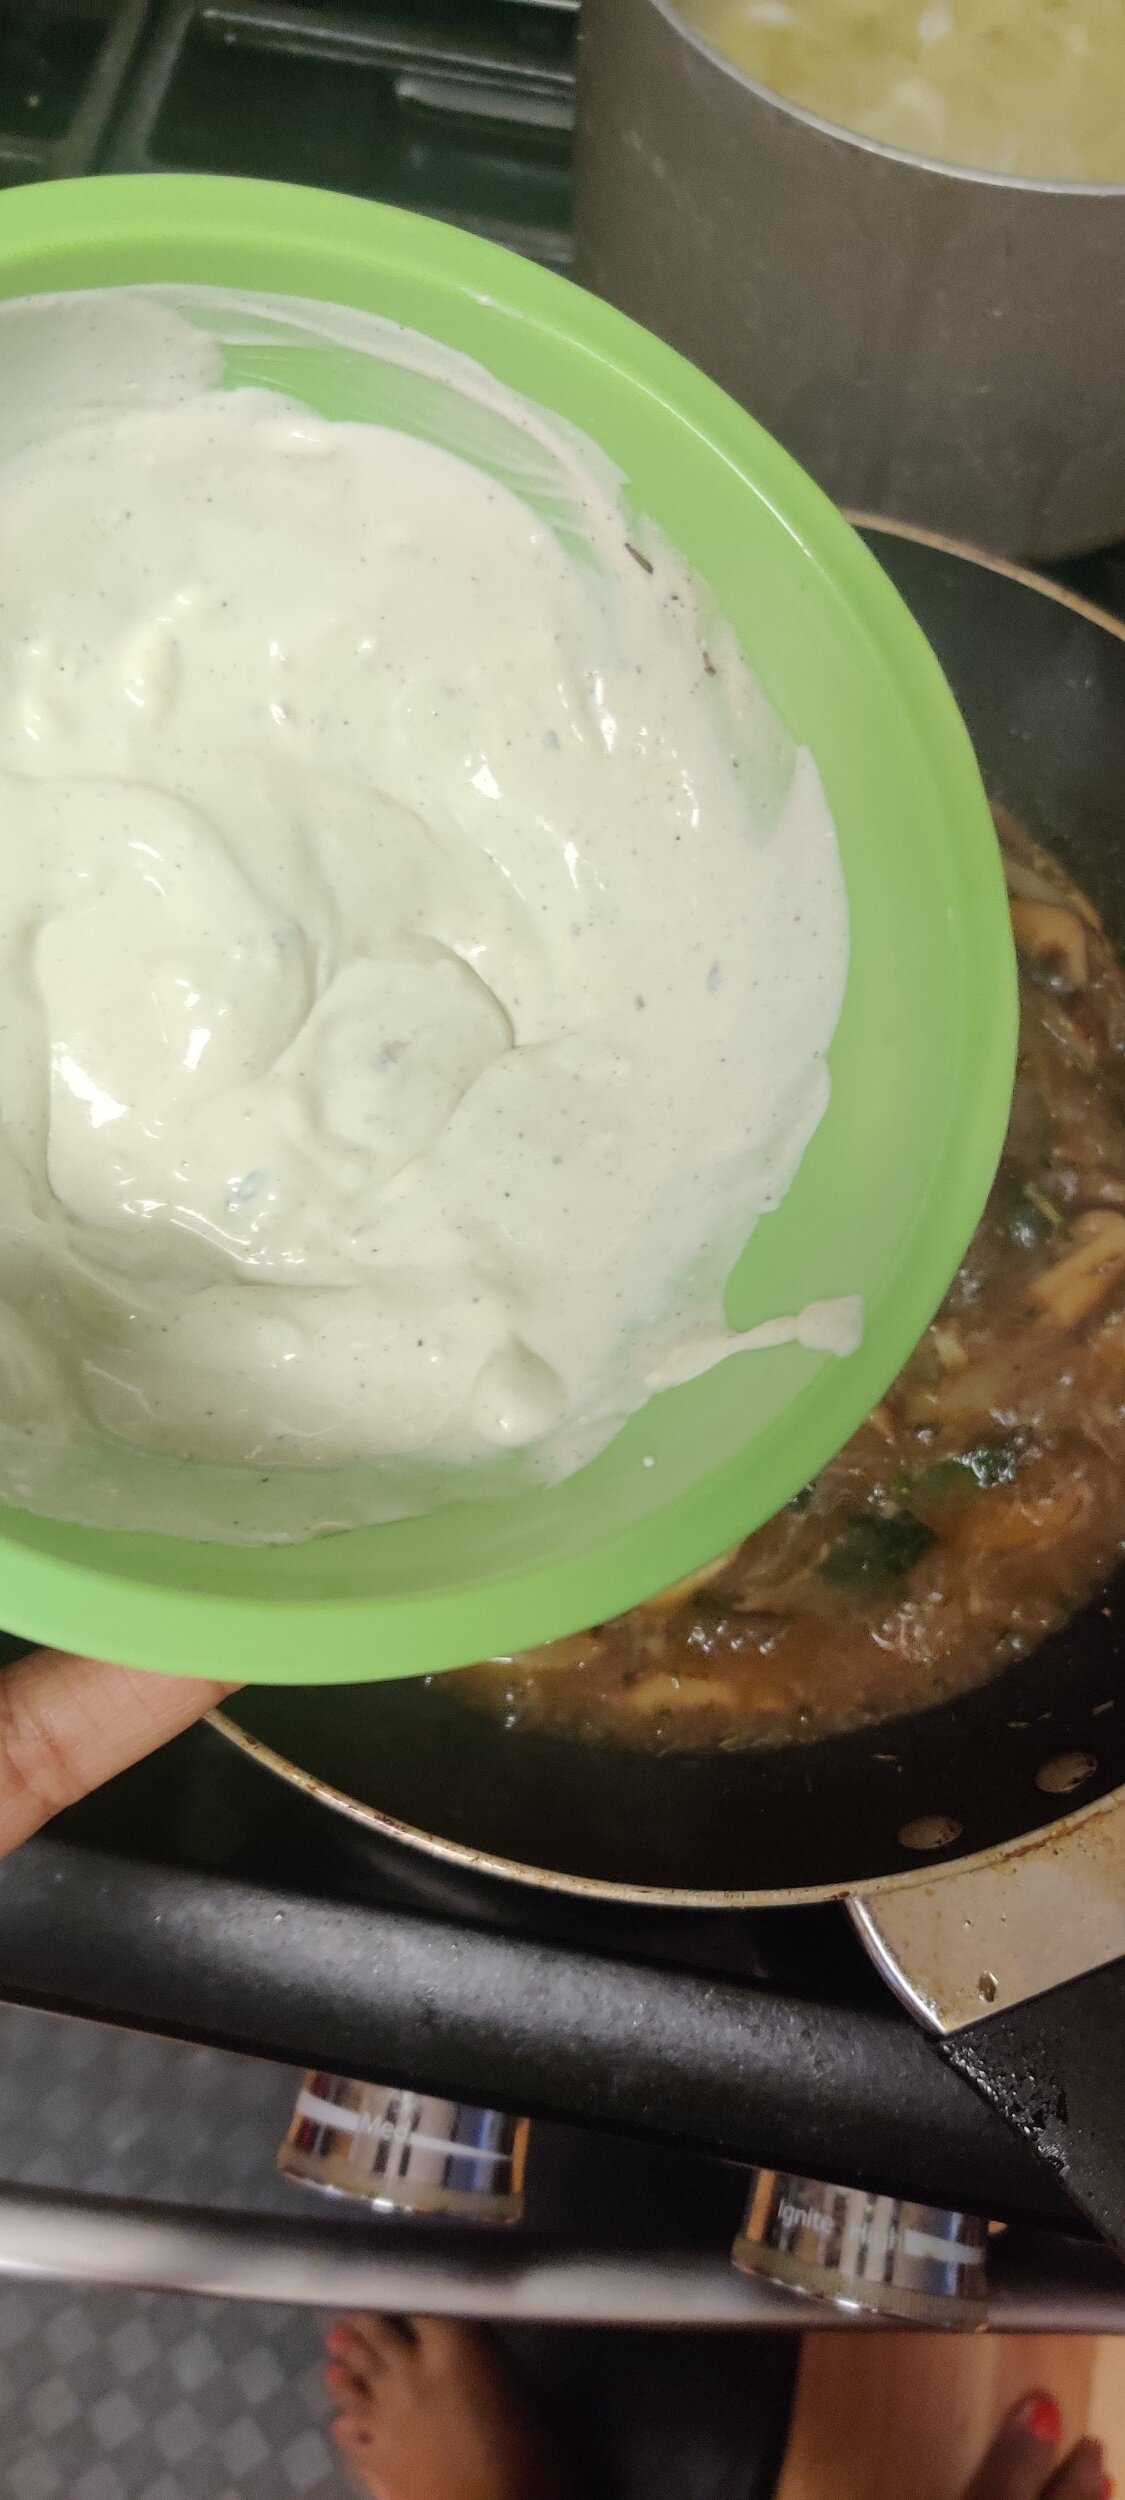
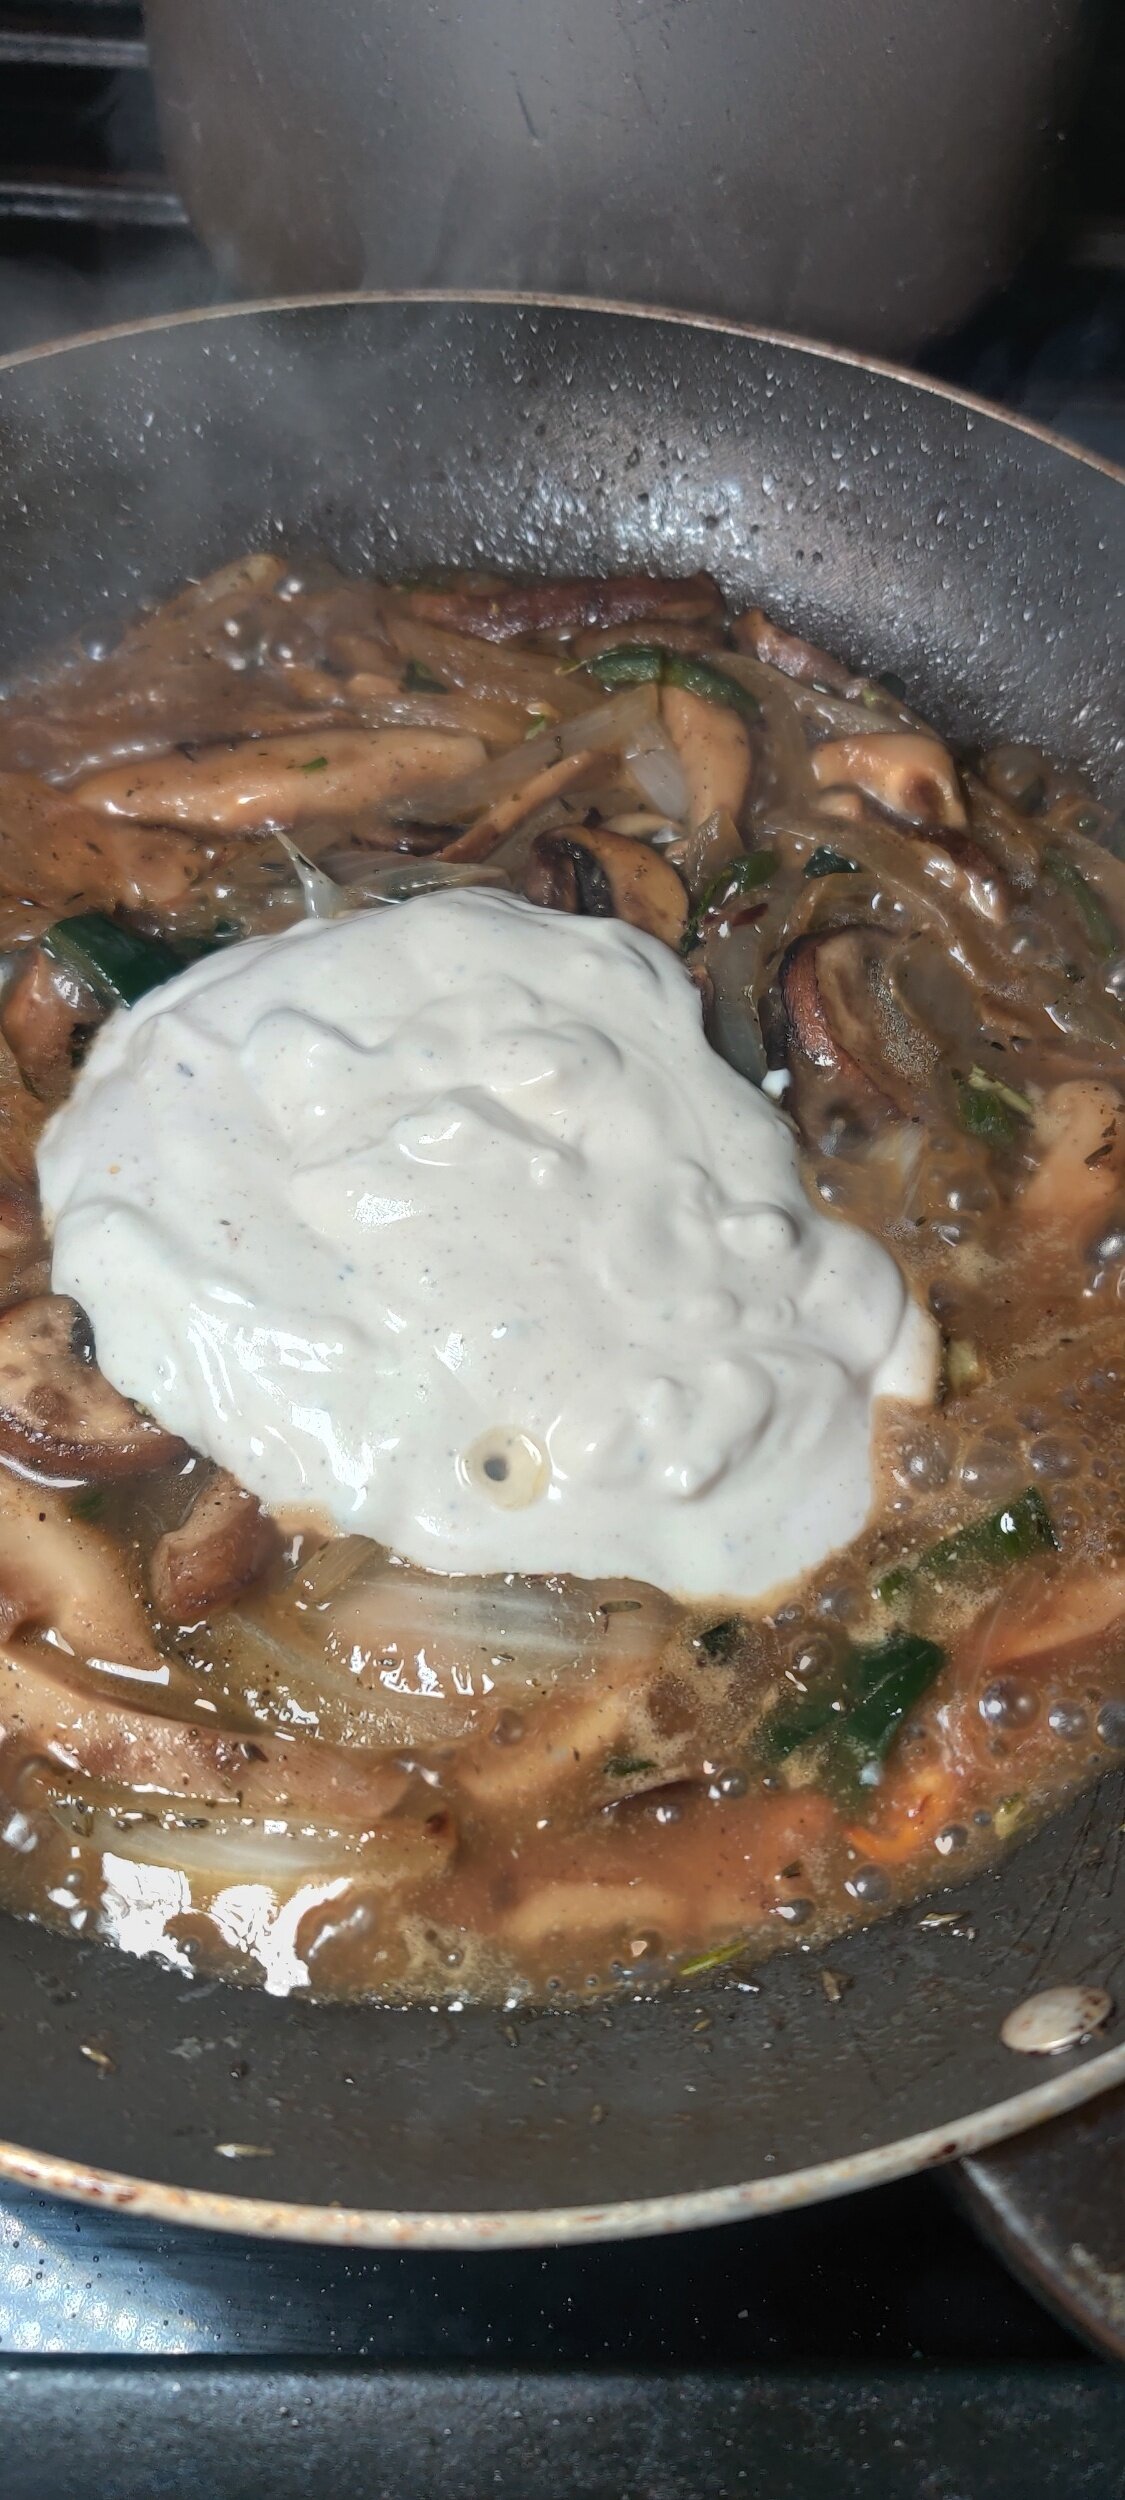
You won’t want to skip the step where you mix the sour cream with a bit of broth - this helps to prevent the dairy product from curdling.

Mushroom Stroganoff
Ingredients
- 4-ounces mushrooms (mix of shitake, oyster, and cremini)
- 1 teaspoon salt
- 3 tablespoons peanut oil
- 1/3 of a poblano pepper
- 1 tablespoon black pepper
- 1 tablespoon truffle oil
- 2 tablespoons cooking wine
- 1/4 cup sour cream
- 1 teaspoon dried thyme
- 1 tablespoon fresh rosemary
- 1 teaspoon cumin
- 1 teaspoon chili flakes
- 1 teaspoon fenugreek powder
- 1 cup beef broth (or 1 bouillon cube + 1 cup water)
- 1/2 yellow onion
- 2 cups egg noodles
Instructions
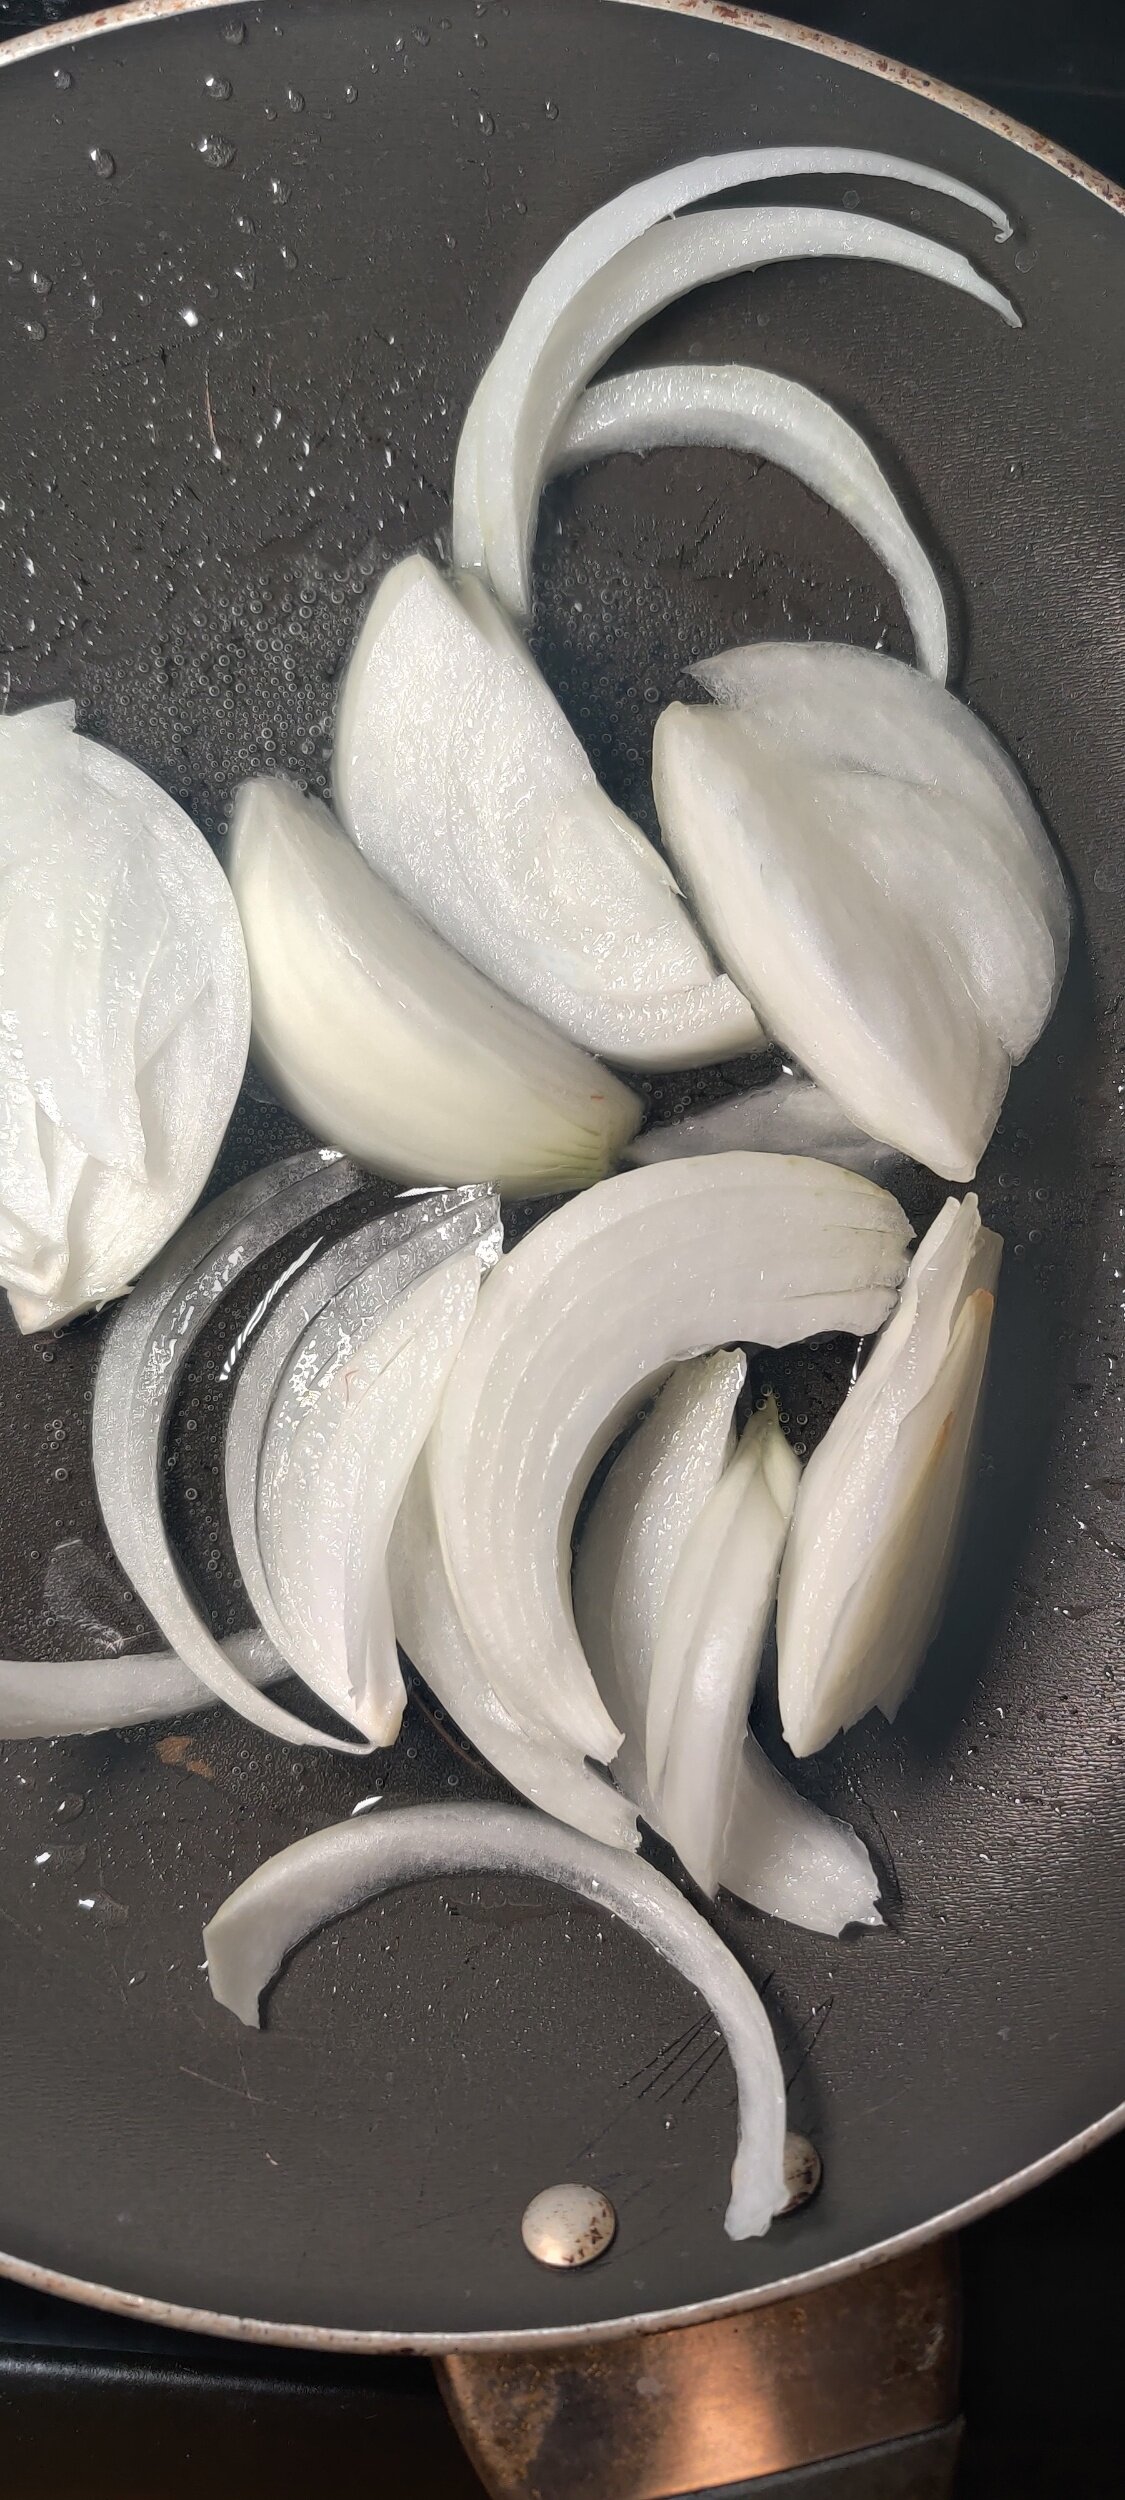
- Slice the onions lengthways and sauté in a pan with the mushrooms, rosemary, dried thyme, cumin, fenugreek, chili flakes, salt, pepper and the poblano pepper in peanut oil. Cook for about 10 minutes to sweat out the mushrooms and caramelize the onions.
- Drizzle the truffle oil then deglaze the pan with the cooking wine.
- Add the broth and simmer for 2-3 minutes. Scoop out about 2 tablespoons of the broth and mix it with the sour cream. Add it back to the mushrooms and mix well.
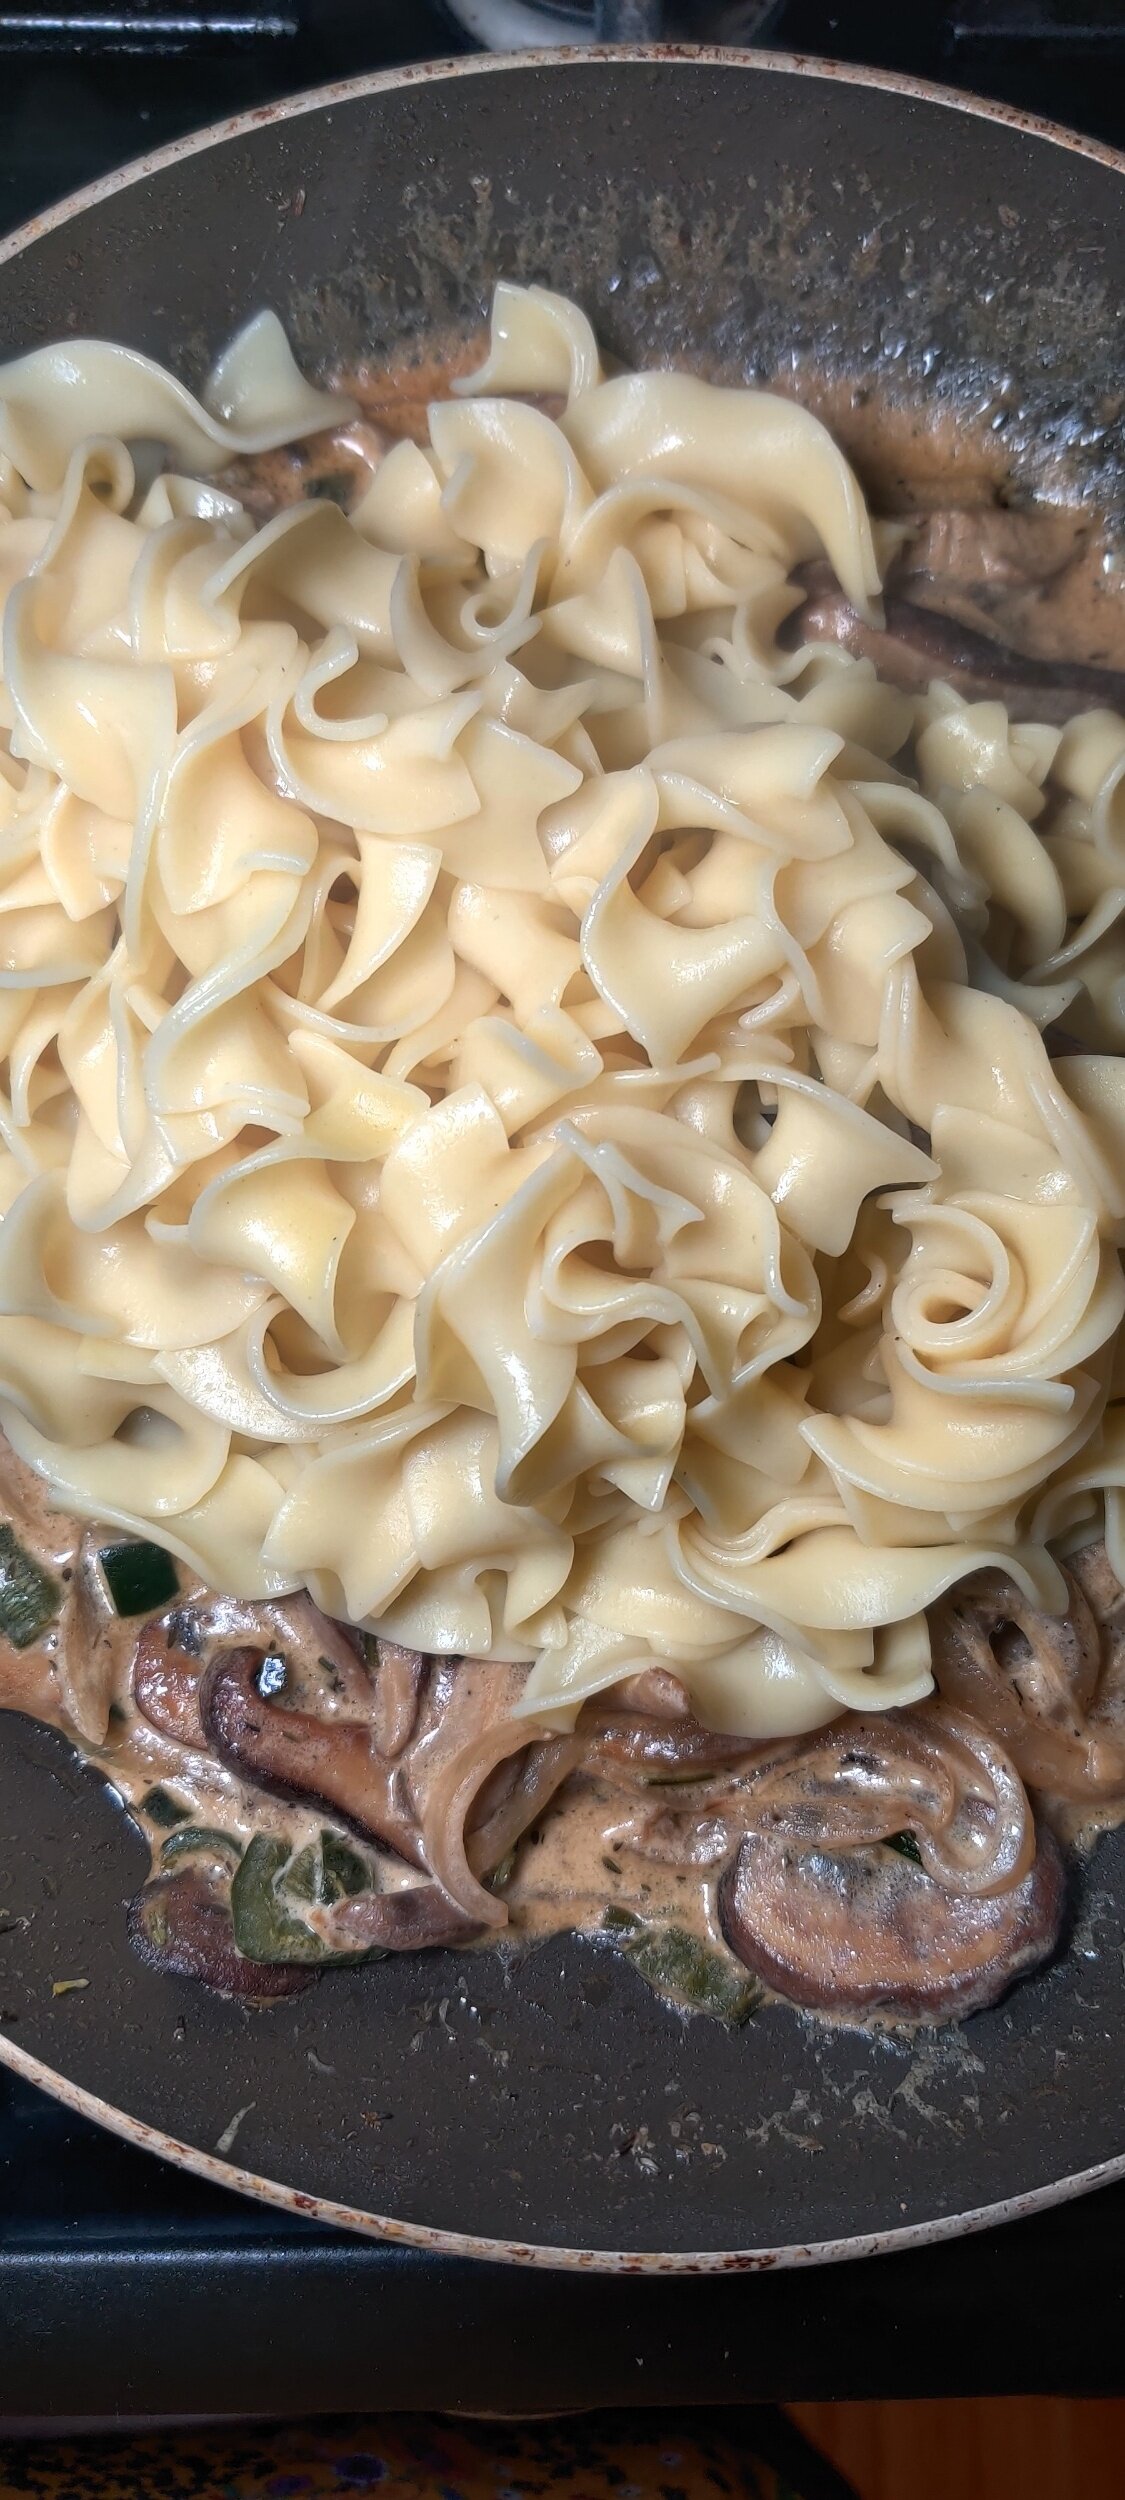
- Prepare the noodles as instructed on the bag, wait to drain until you combine with the mushrooms.
- Mix the noodles in with the creamy mushroom mixture. Season with additional black pepper and chili flakes.
Nutrition Facts
Calories
600Fat (grams)
38.1Carbs (grams)
51.7Protein (grams)
13.7
Creamy Celery Soup
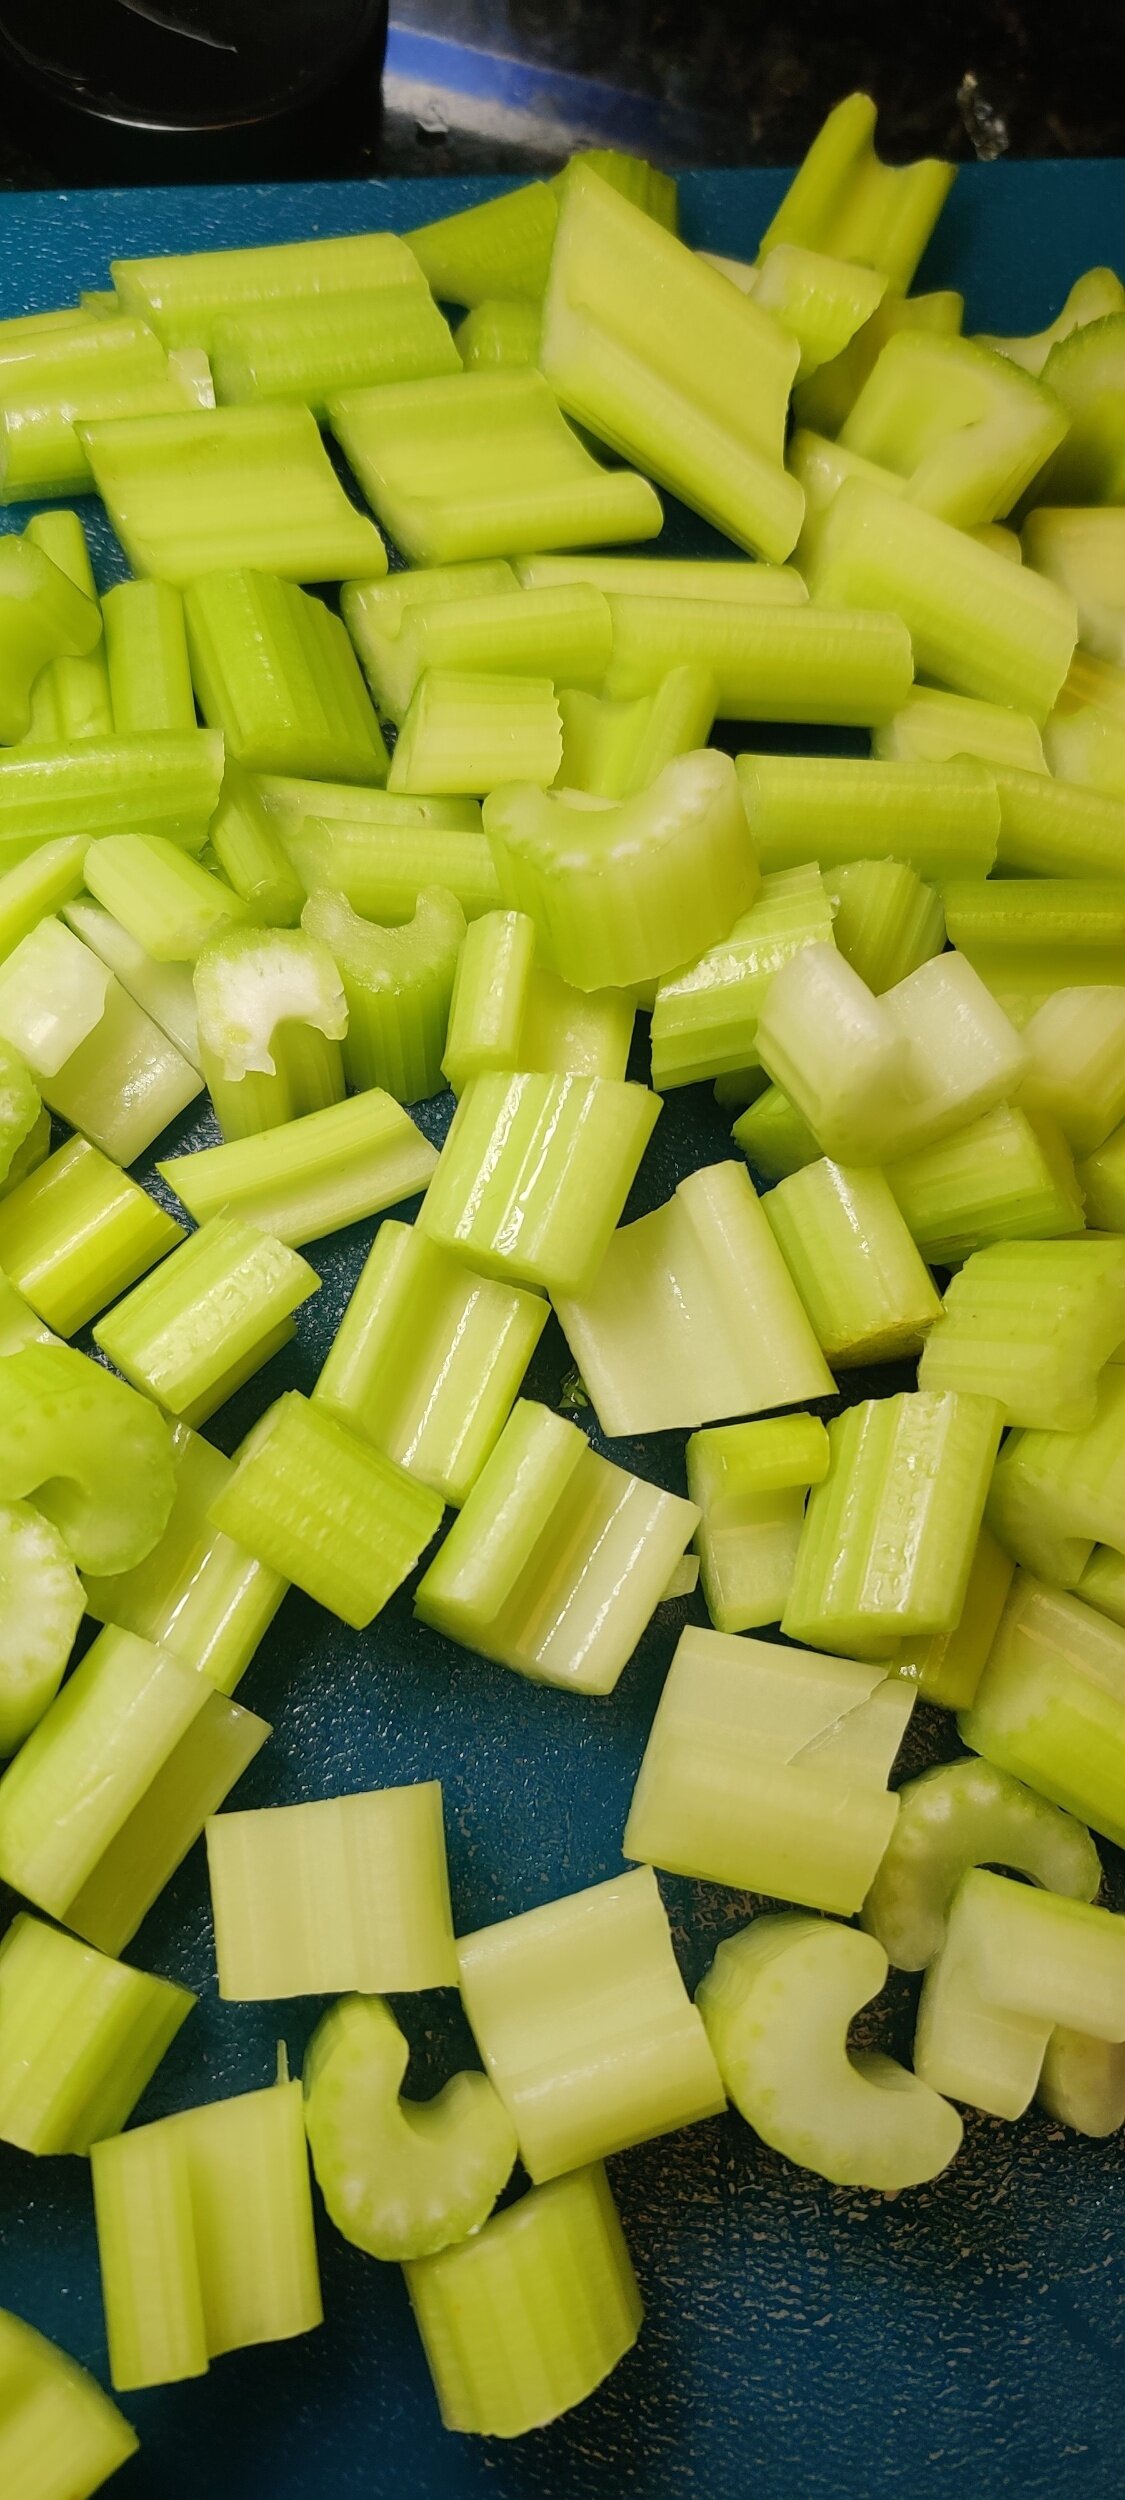
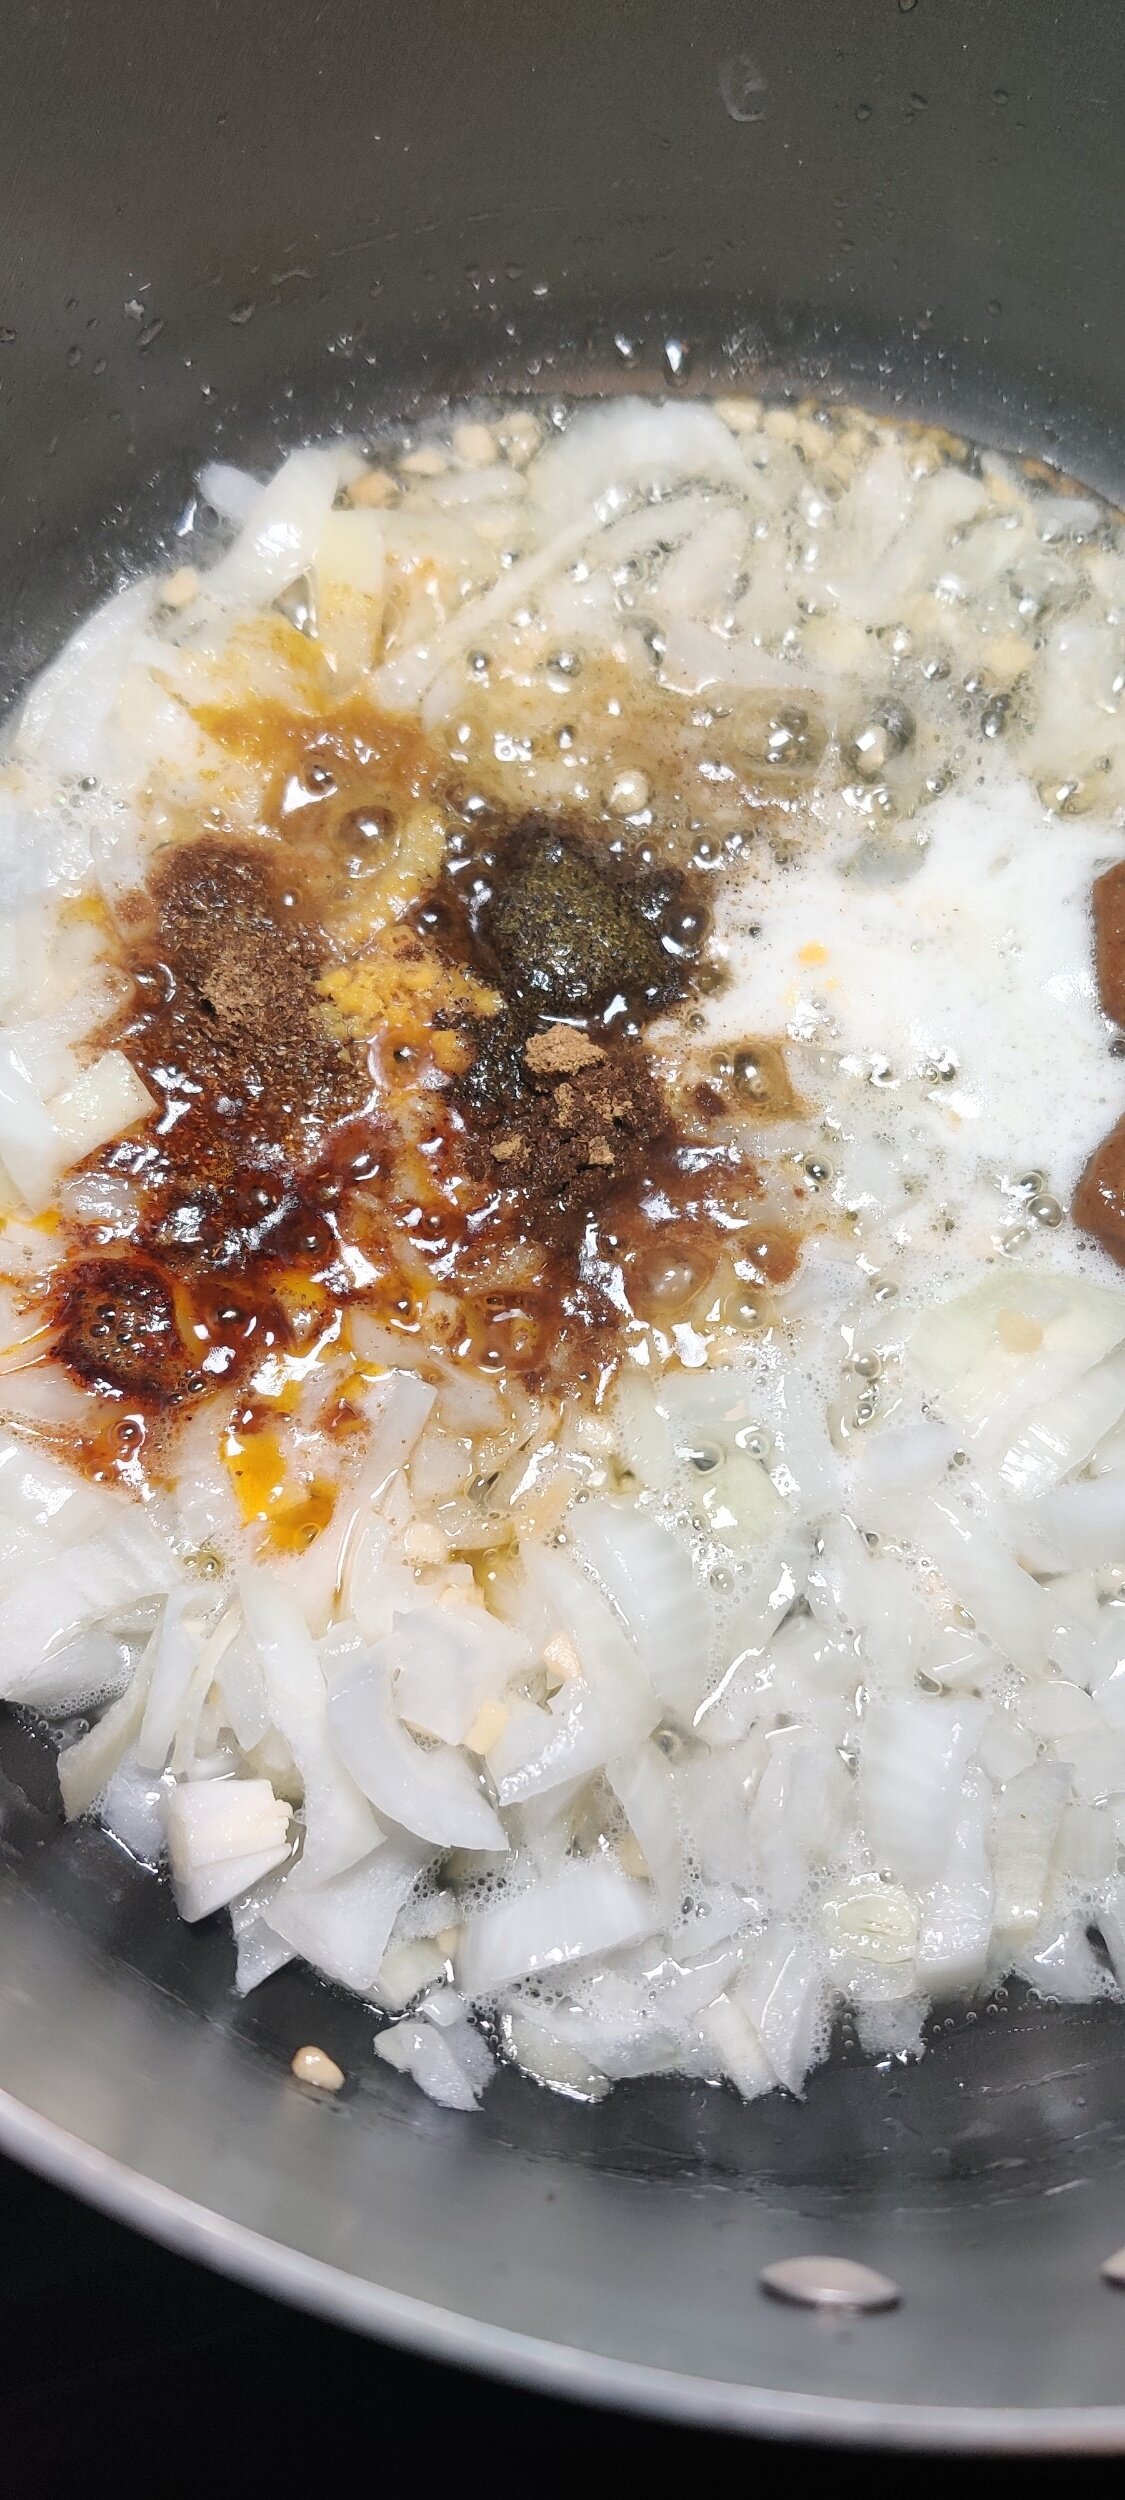
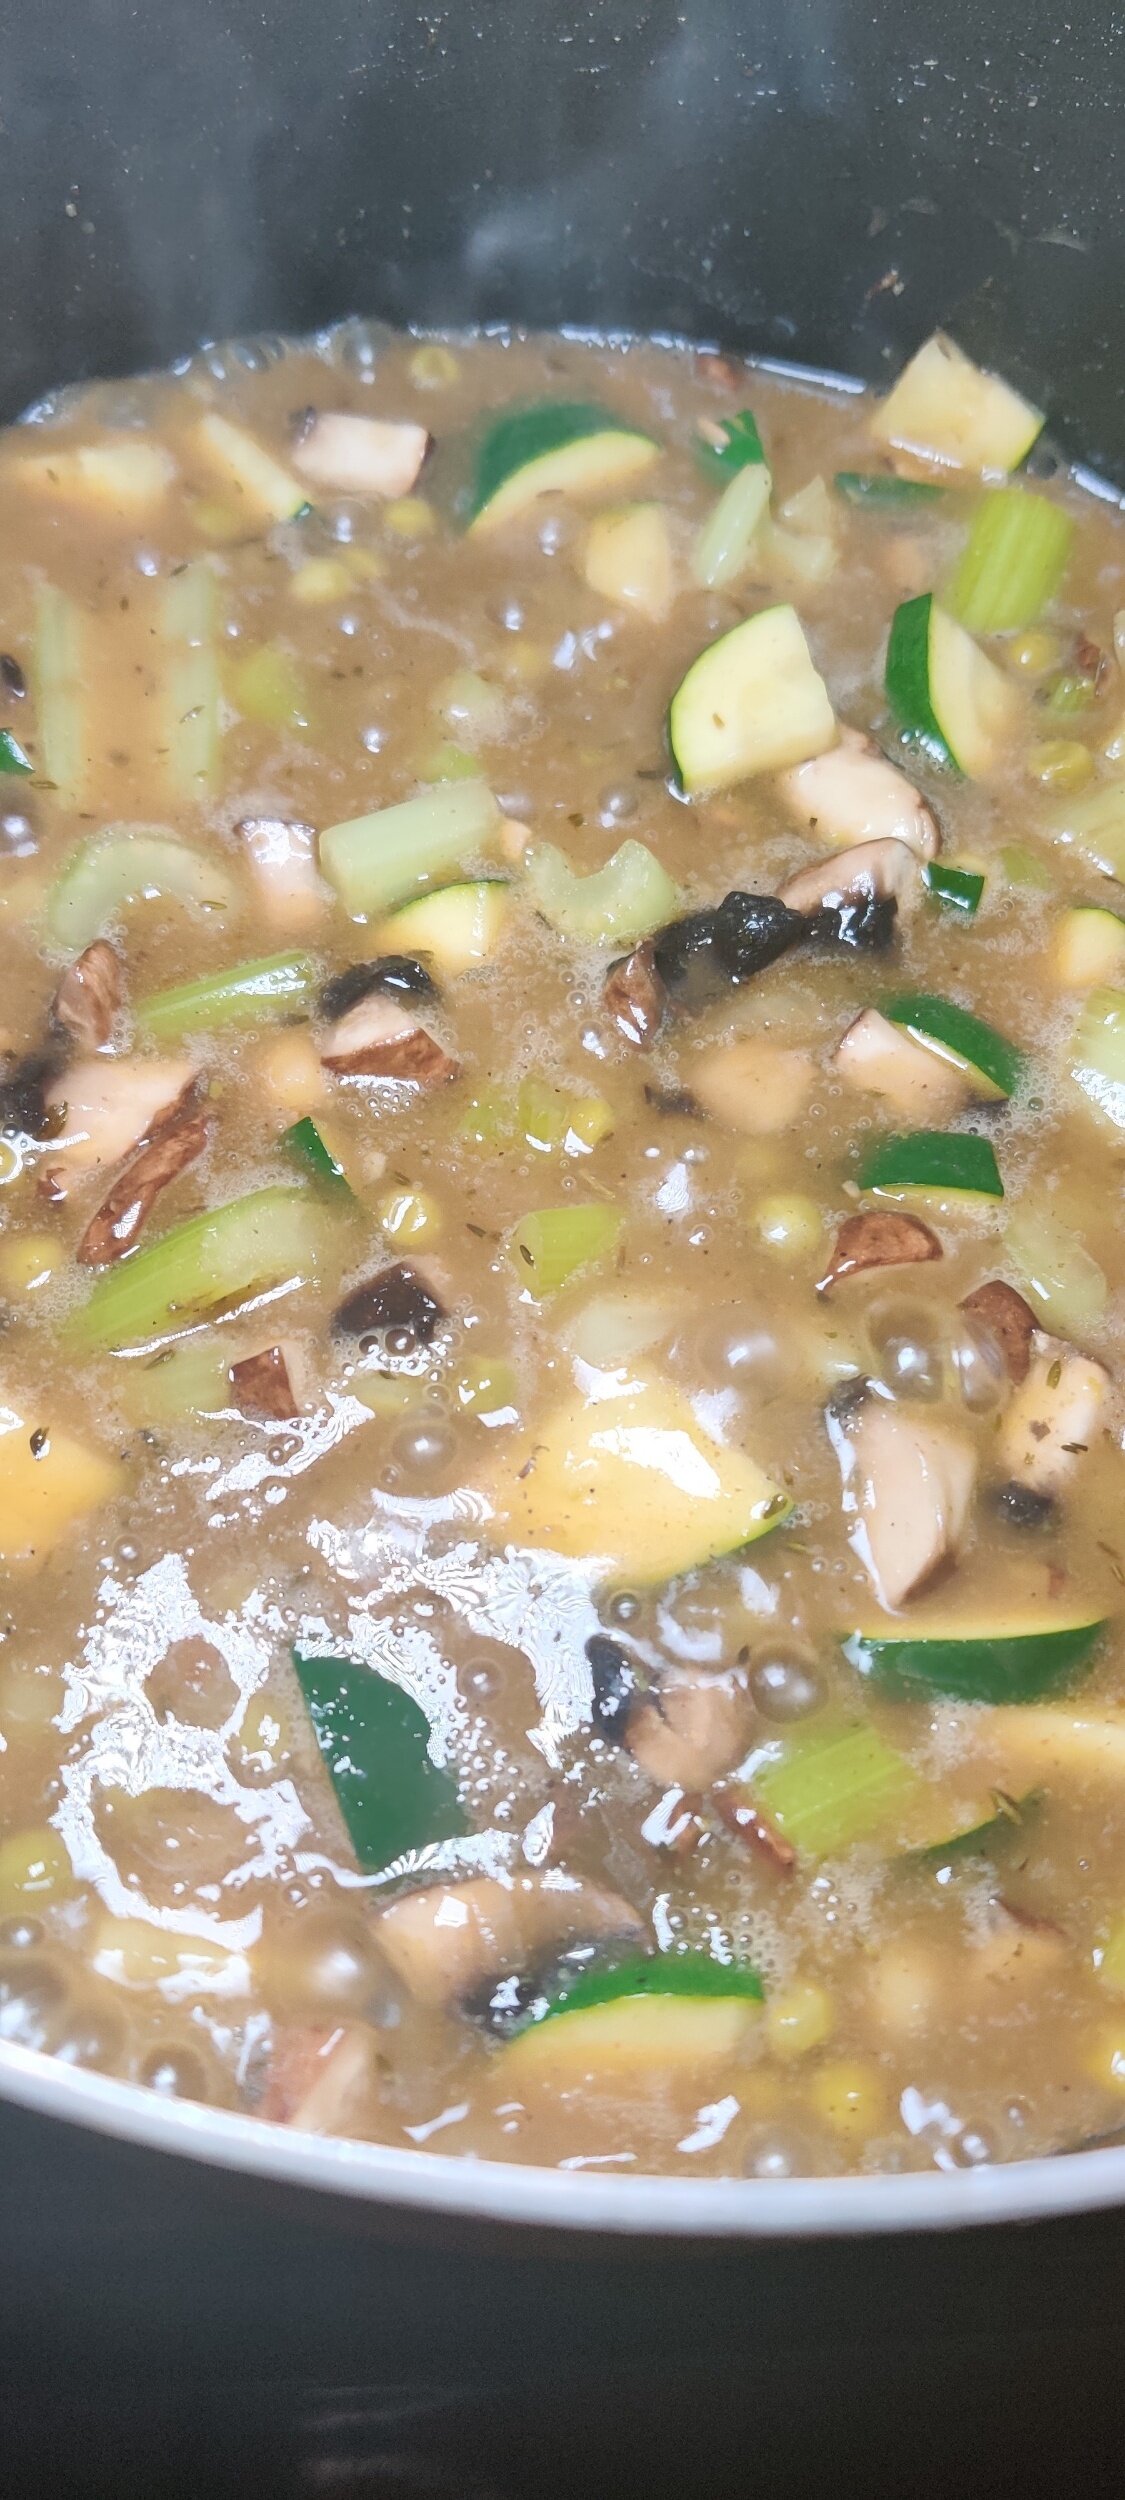
The recipe for this soup came about by chance. I had a whole bunch of celery that I didn't want to toss! The vegetable lends itself brilliantly to soups, and the underlying taste can go either way depending on the additional ingredients. Due to the chickpeas, mushroom and peas, this soup has a sweet, earthy, nutty, lentil-like flavour.
Celery also has a lot of health benefits, such as helping to reduce inflammation and aid digestion. It’s heavy in water content and is often praised by those into fitness and weight loss. No need, in this case, to blend the celery into a bland juice! It's a lot more versatile than that.
Like with all soups, you can get creative, put in your favourite ingredients, and make use of other vegetables you don’t want to go waste.
You also don't need to wait for the cold weather for this one. Celery is in season, and make for a great summertime soup.
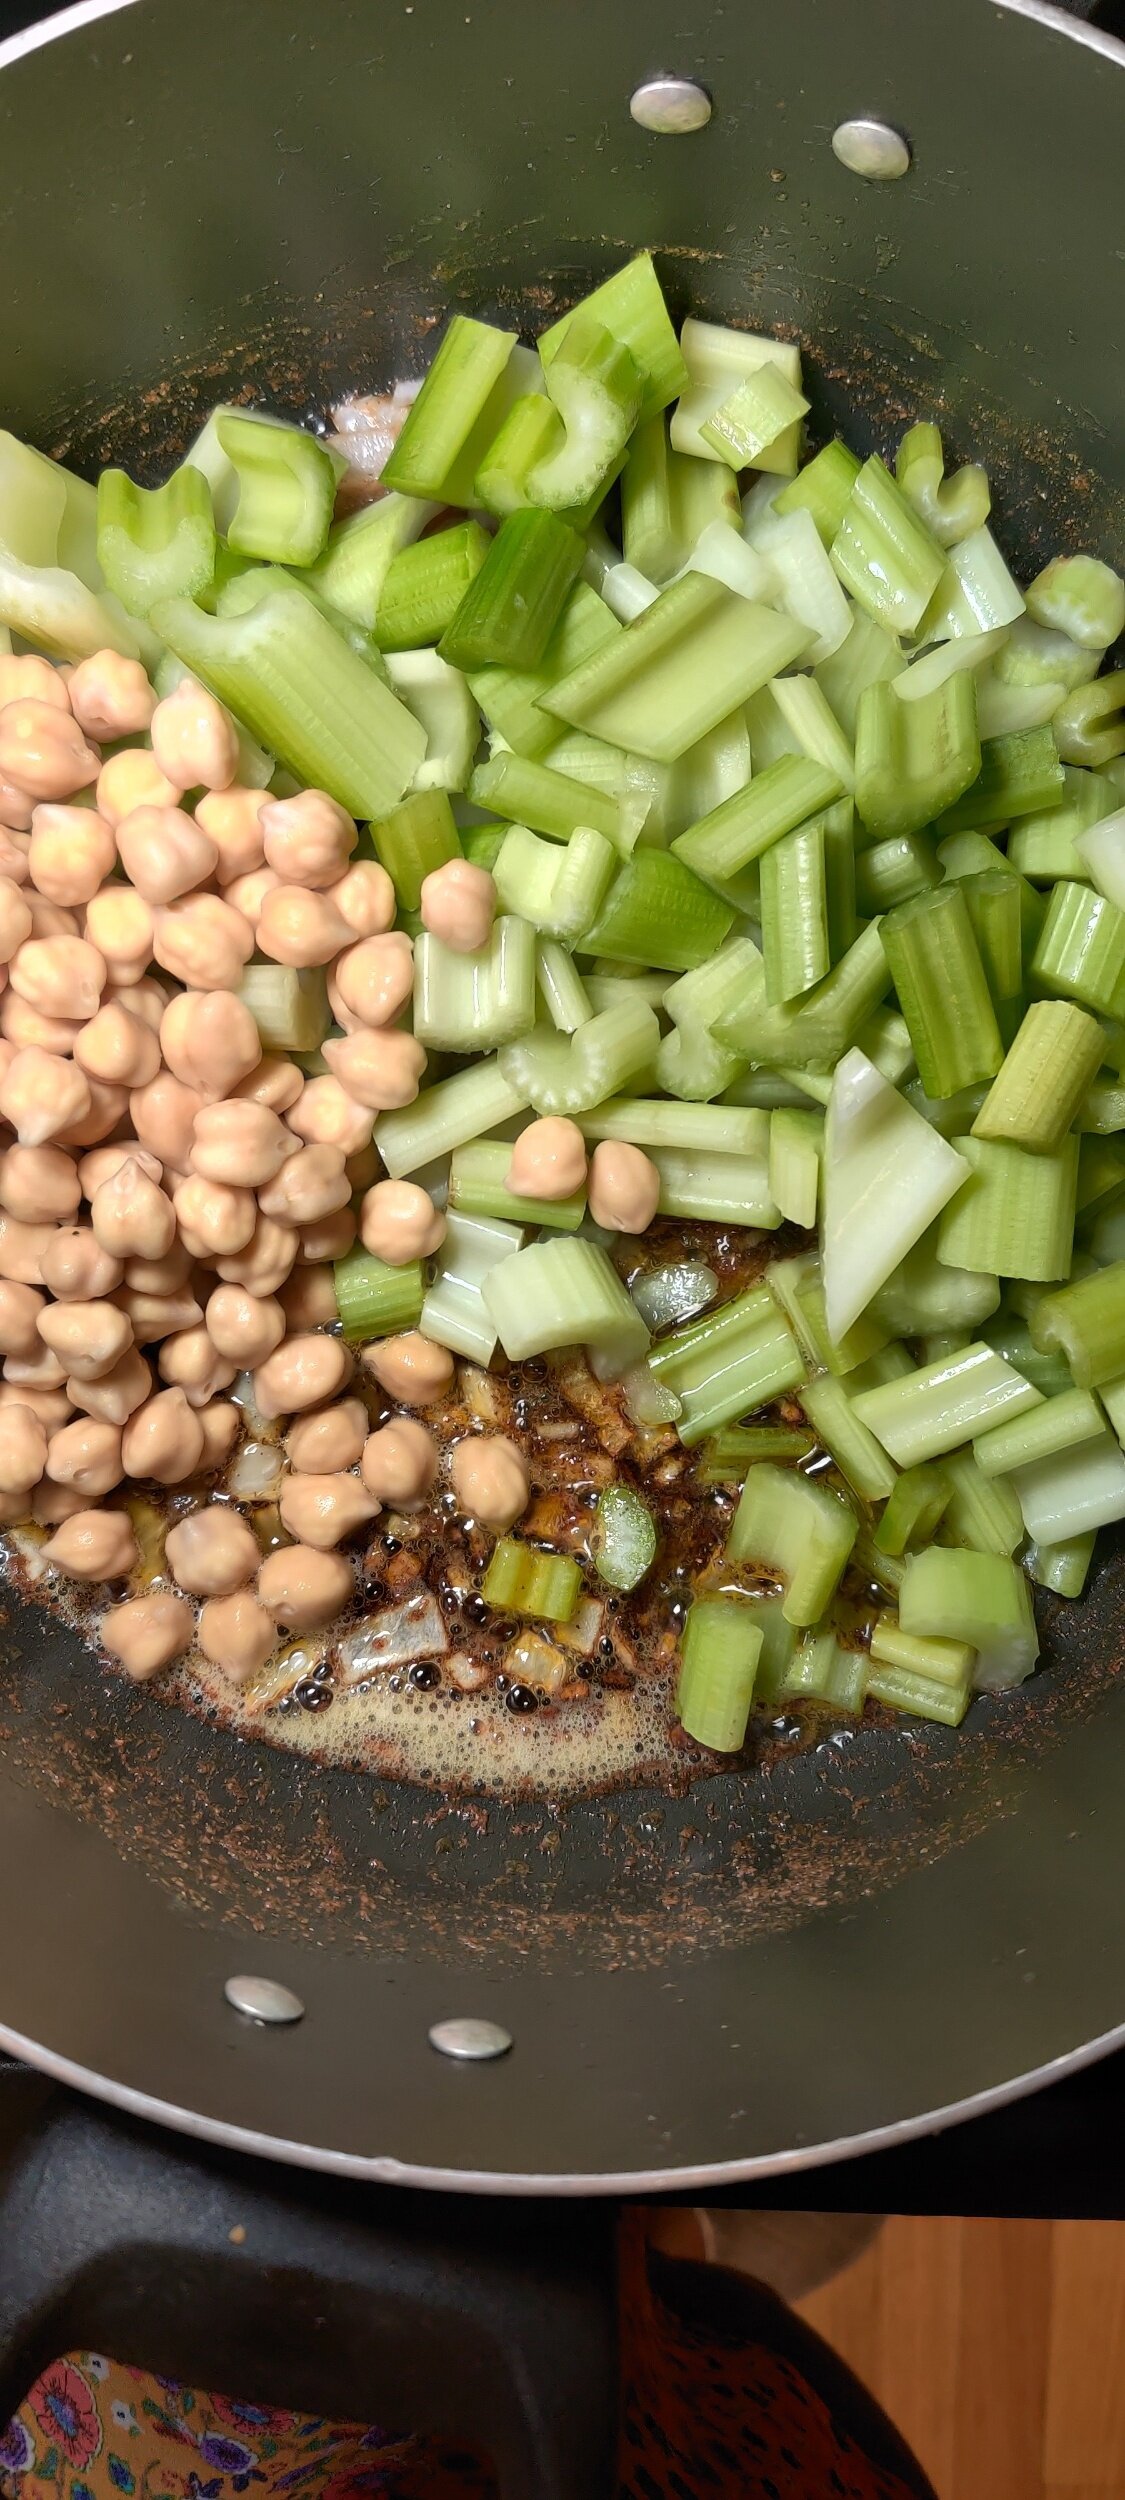
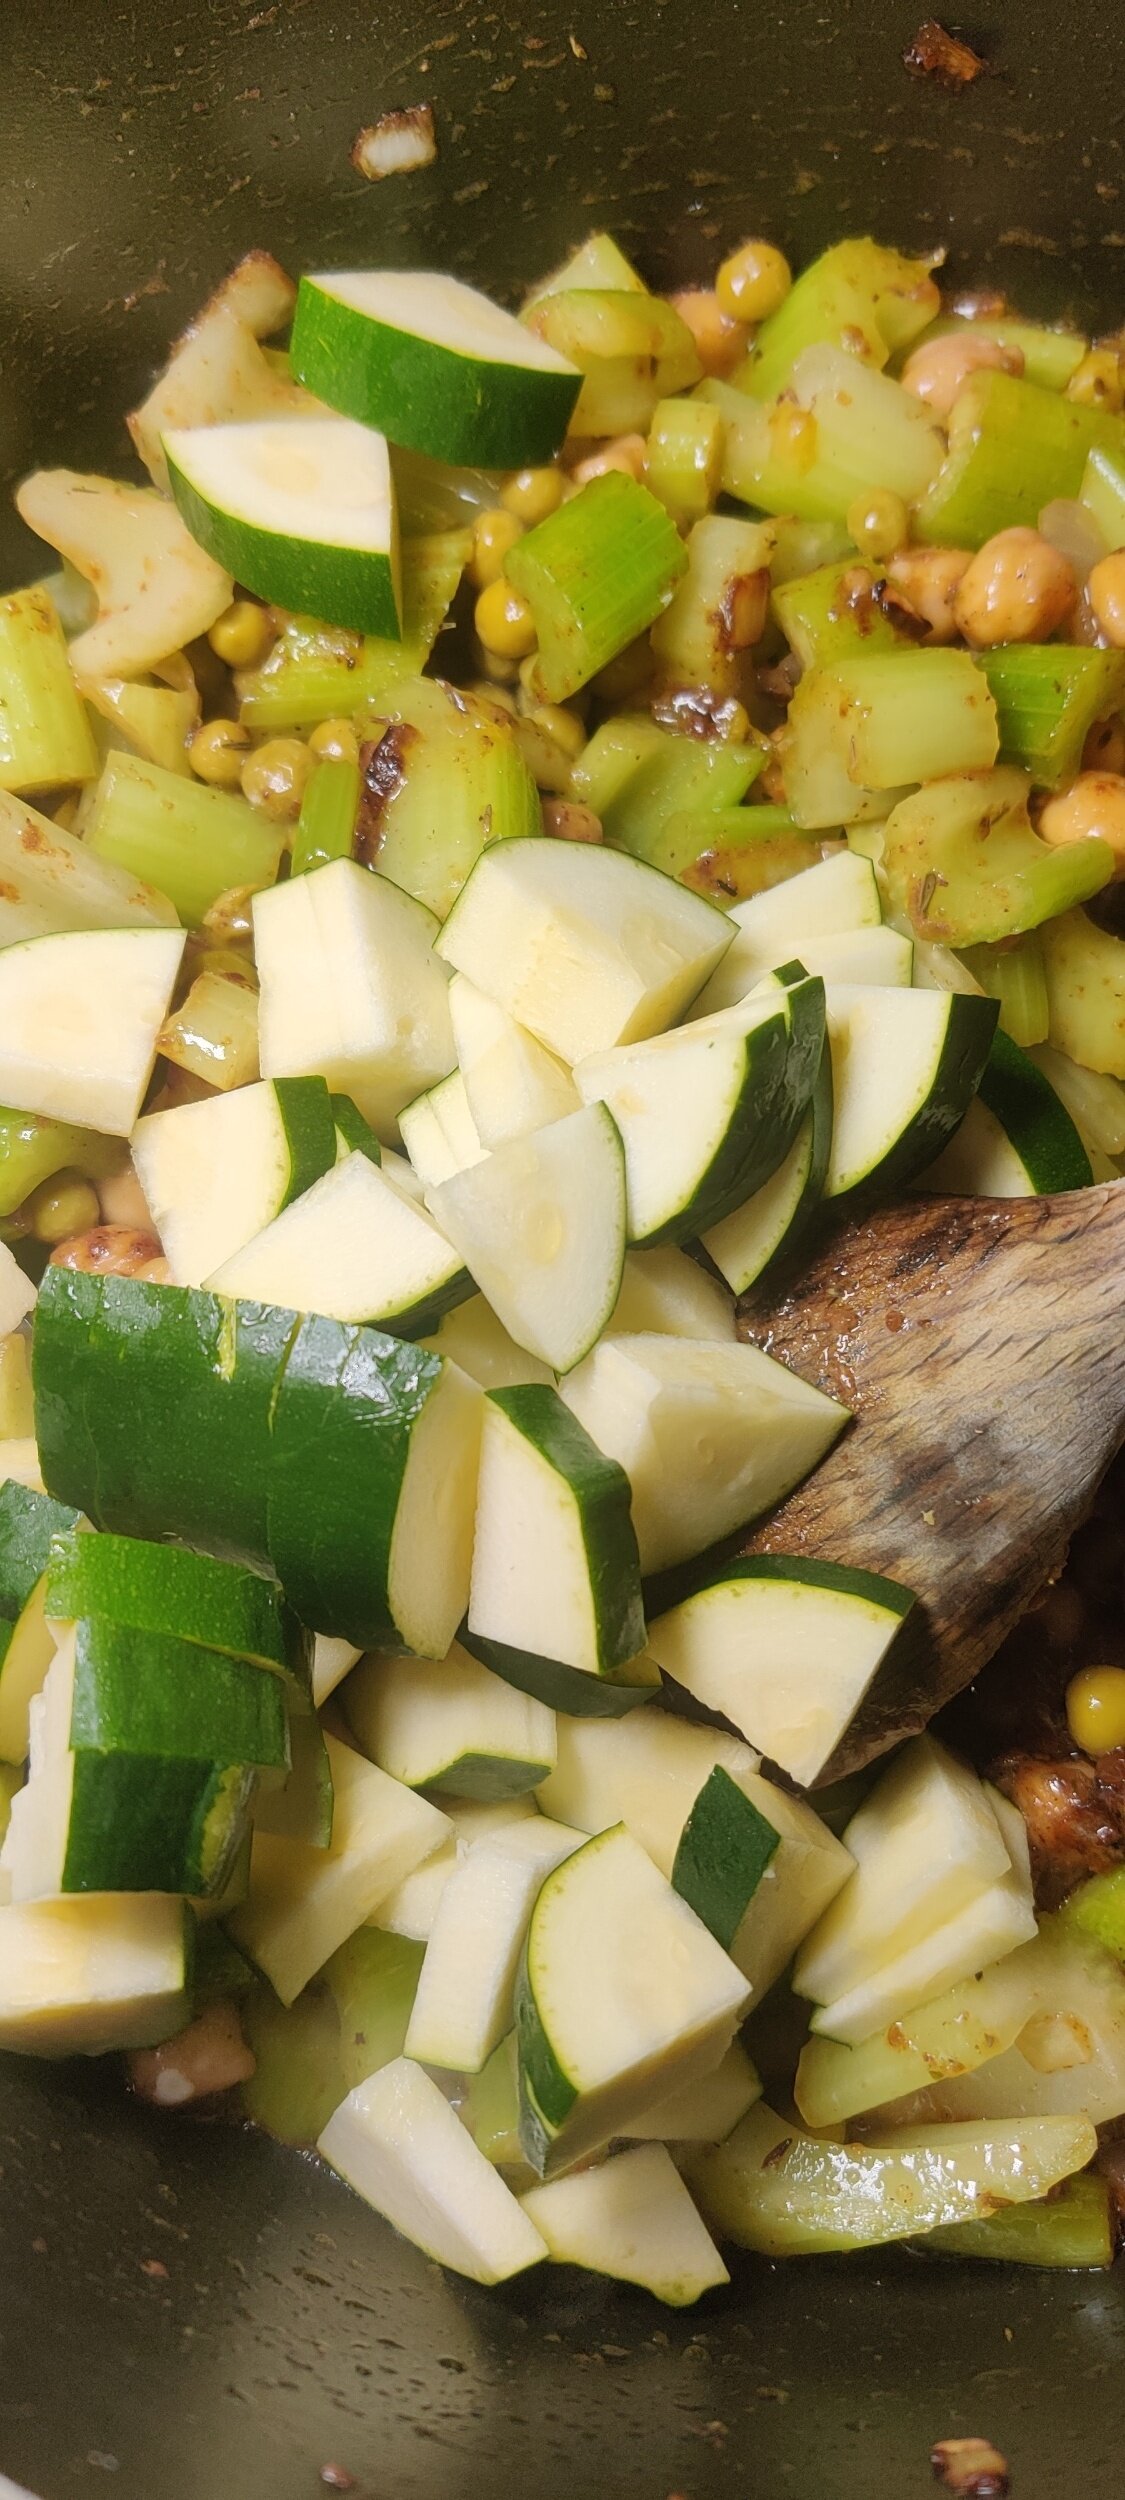
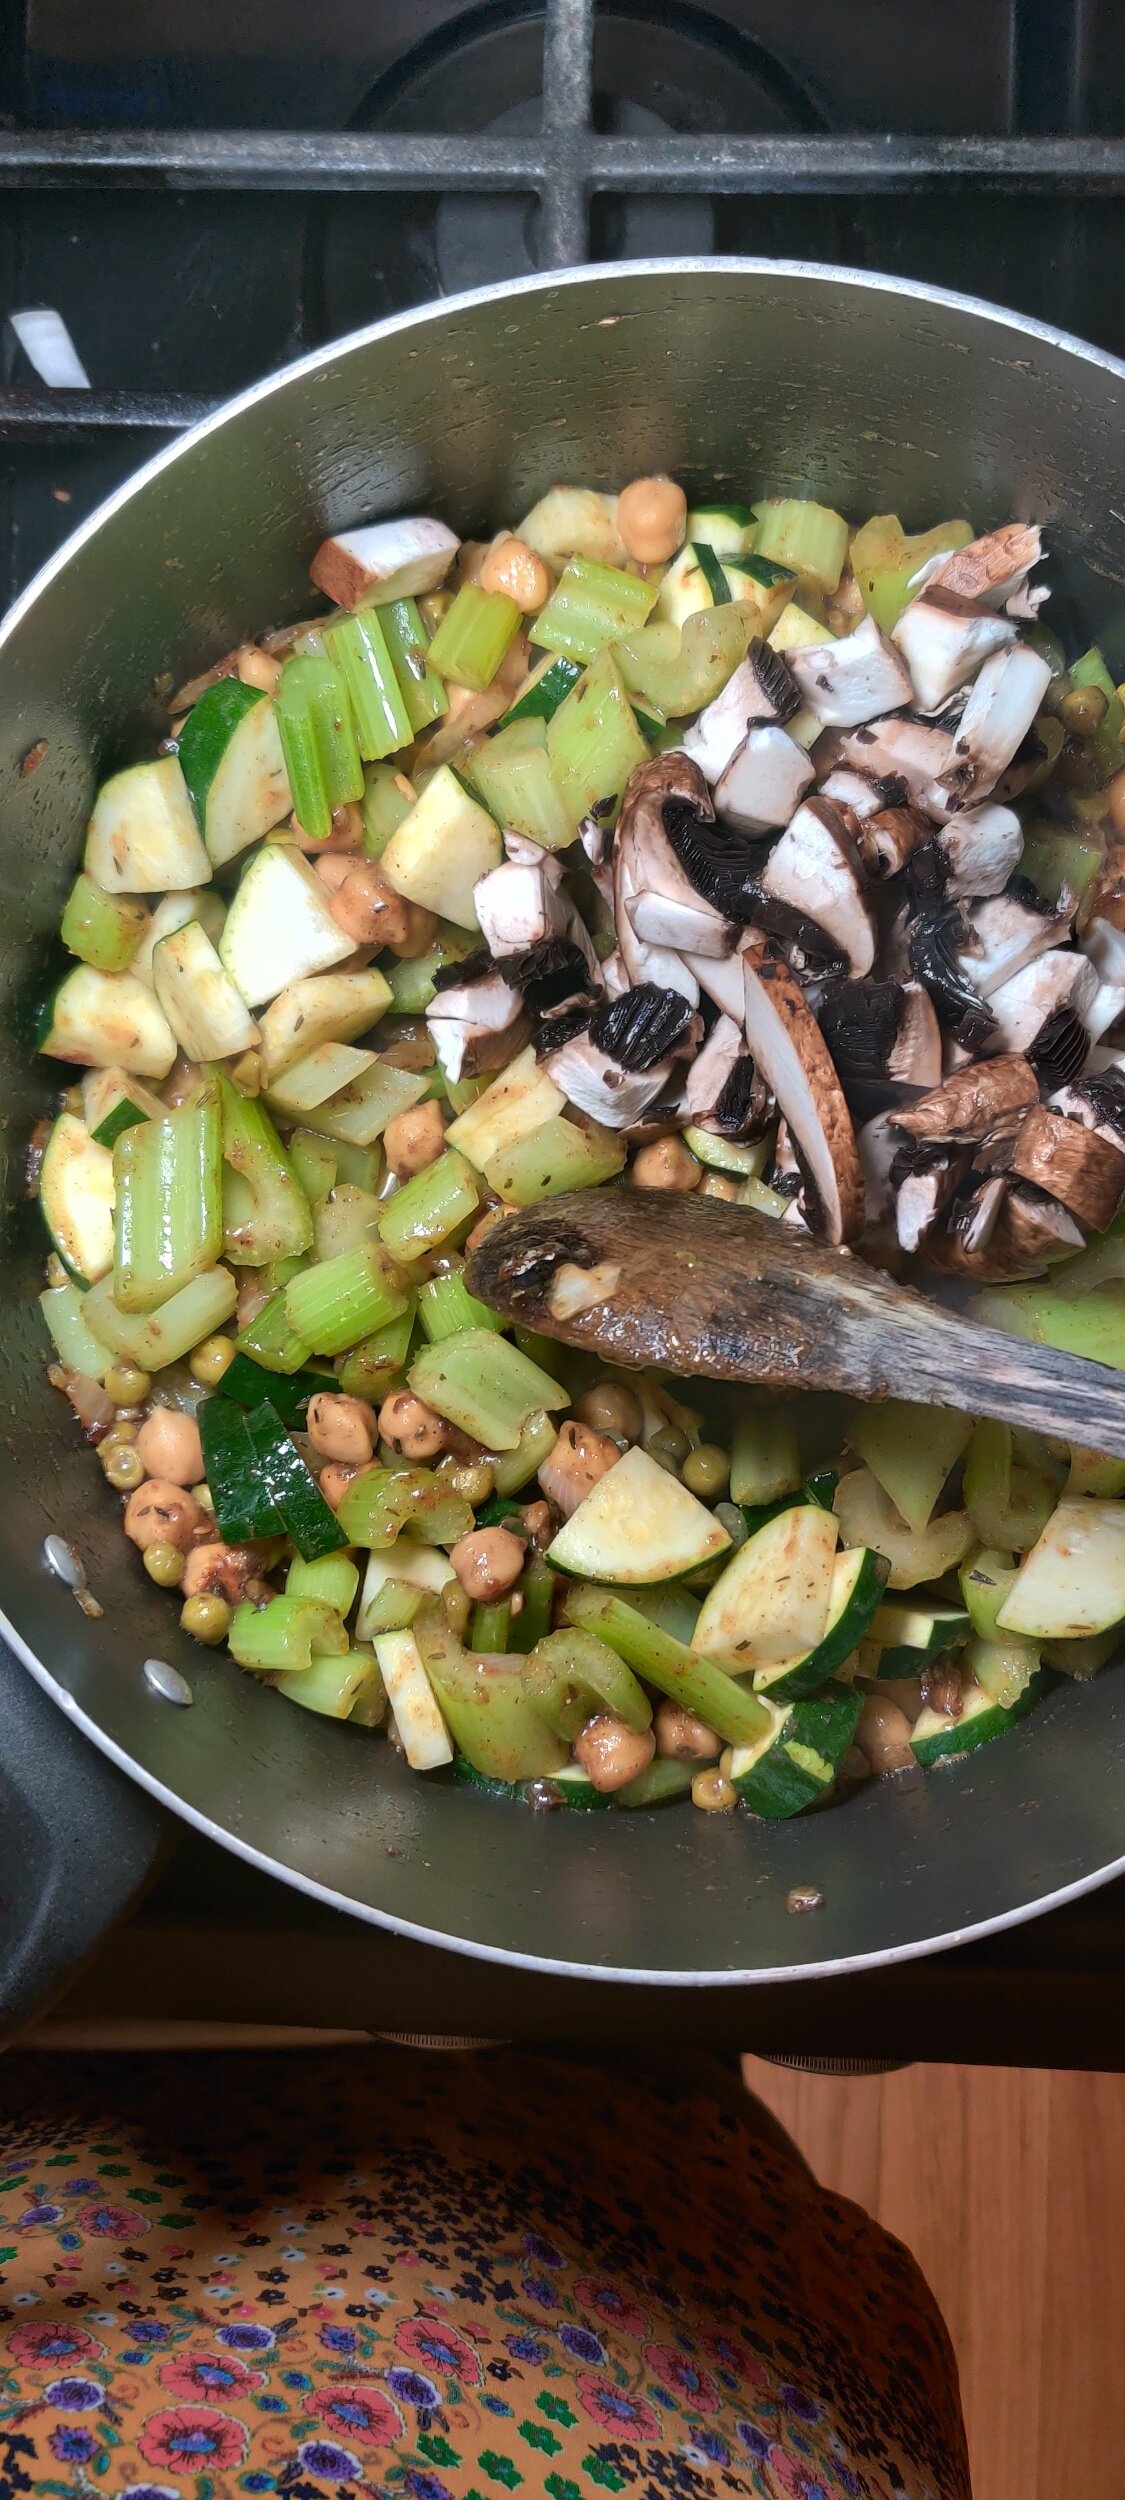
I would recommend incorporating some extra greens - I add some zucchini and peas for nutritional value and sweetness. The chickpeas for another flavour element (the nuttiness) and to help thicken the soap. Potatoes are another great option for that. Give it a go!
Ingredients
1 large bunch celery sticks
1 large portobello mushroom, chopped
1 small zucchini, sliced and chopped
1 cup dried chickpeas (soaked overnight and drained)
1/3 cup frozen peas
2 tablespoons vegetable oil
2 tablespoons butter
1/2 large onion, chopped
1 tablespoon garlic, minced
1 tablespoon fenugreek
1 teaspoon mustard powder
1 teaspoon chili powder
1 teaspoon salt
1 tablespoon black pepper
3 vegetable bouillon cubes
1 tablespoon cumin
1 tablespoon coriander
1 tablespoon dried thyme
4-5 cups water
1/4 cup heavy cream or coconut cream
Instructions
Wash, peel and chop the celery into small pieces - peeling will get rid of the larger strands and make for a more pleasant celery eating experience!
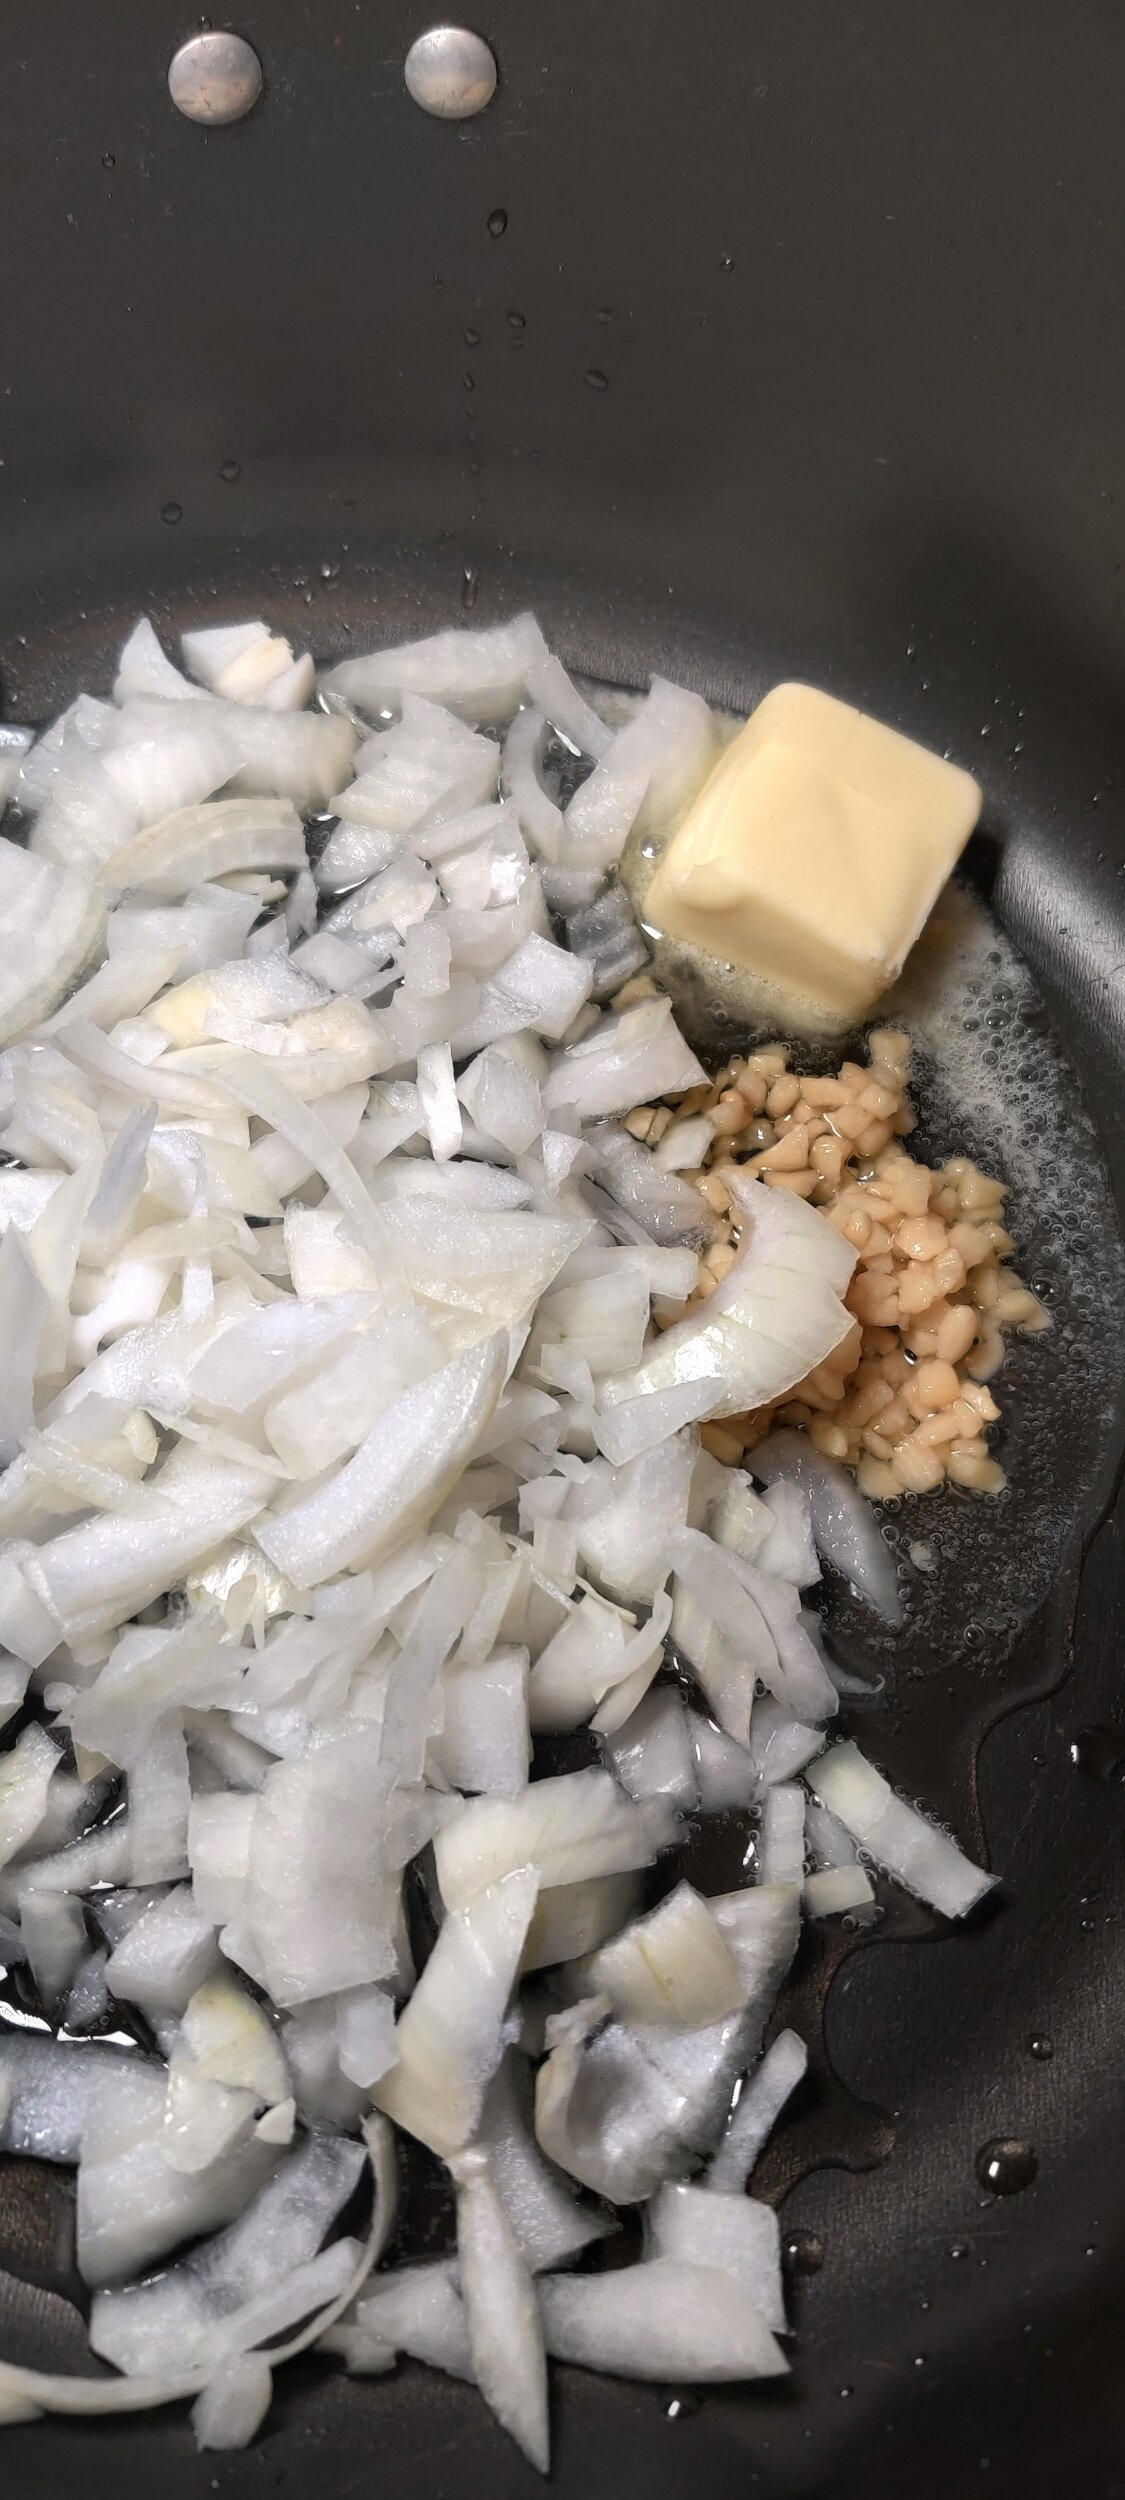
In a large pot, sauté the garlic and onion in the butter and vegetable oil for about 2 minutes. Add the spices, bouillon cubes, salt and pepper, and cook for another 3 minutes.
Add the chickpeas, celery and zucchini. Sweat out the vegetables for about 5 minutes.
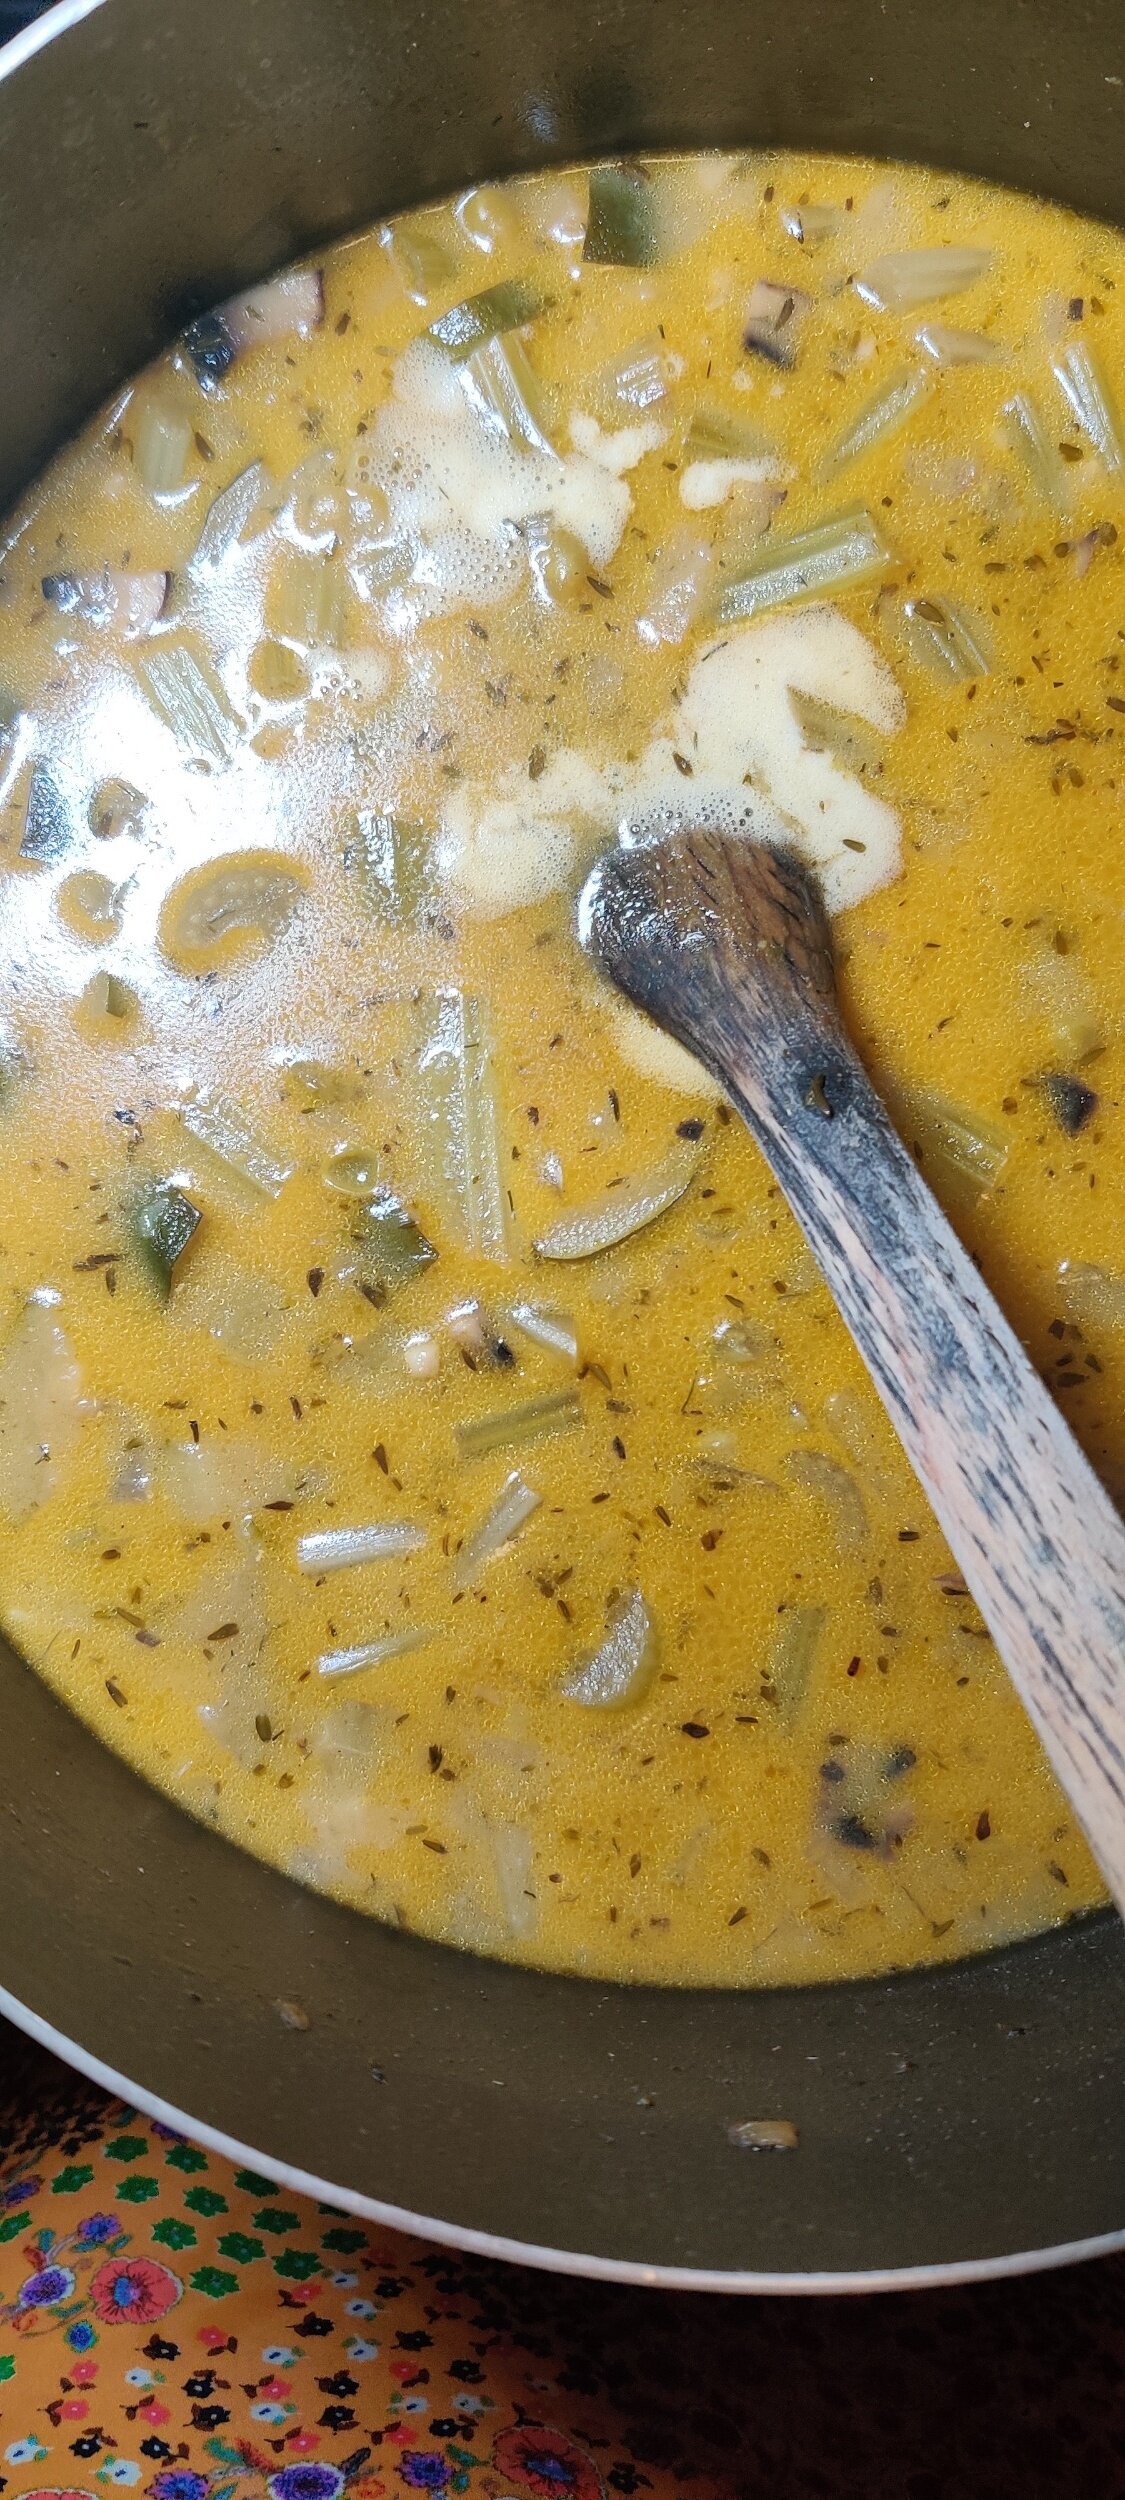
Add the peas and mushroom, cook for another 2 minutes. Pour in the water and simmer on reduced heat with the lid on. Stirring occasionally, do this for about 30 minutes or until the chickpeas and celery have softened. Season to taste.
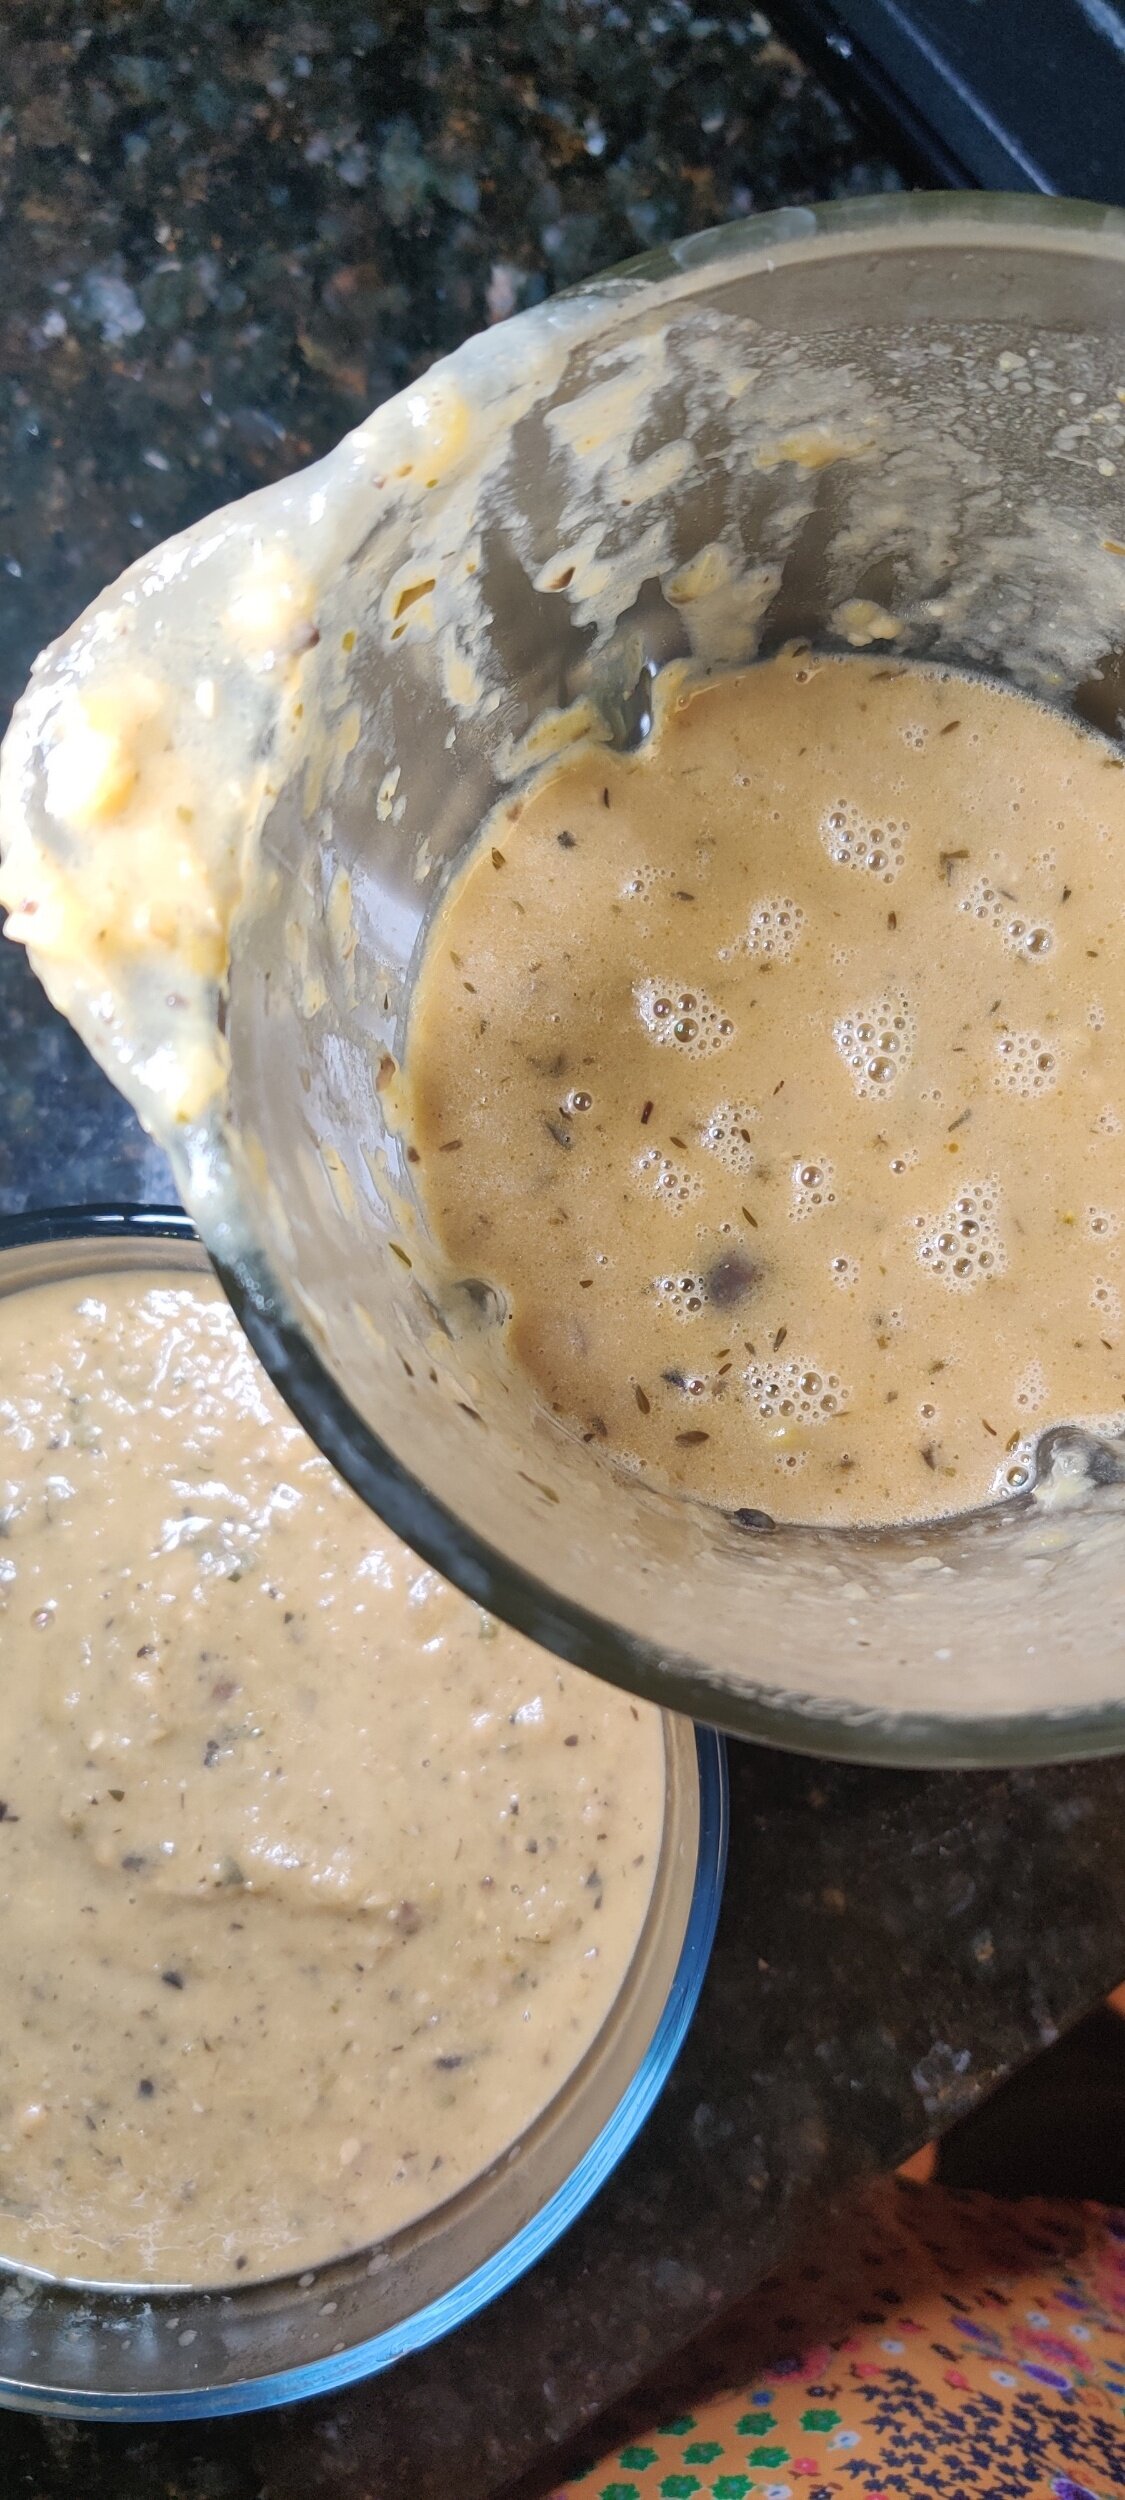
Remove from the heat and stir in the cream, set aside to cool for 10 minutes.
Using a hand mixer or blender, cream the soup until smooth.
Top with fresh basil, thyme and cream, and serve with toasted bread. Enough for 4-5.

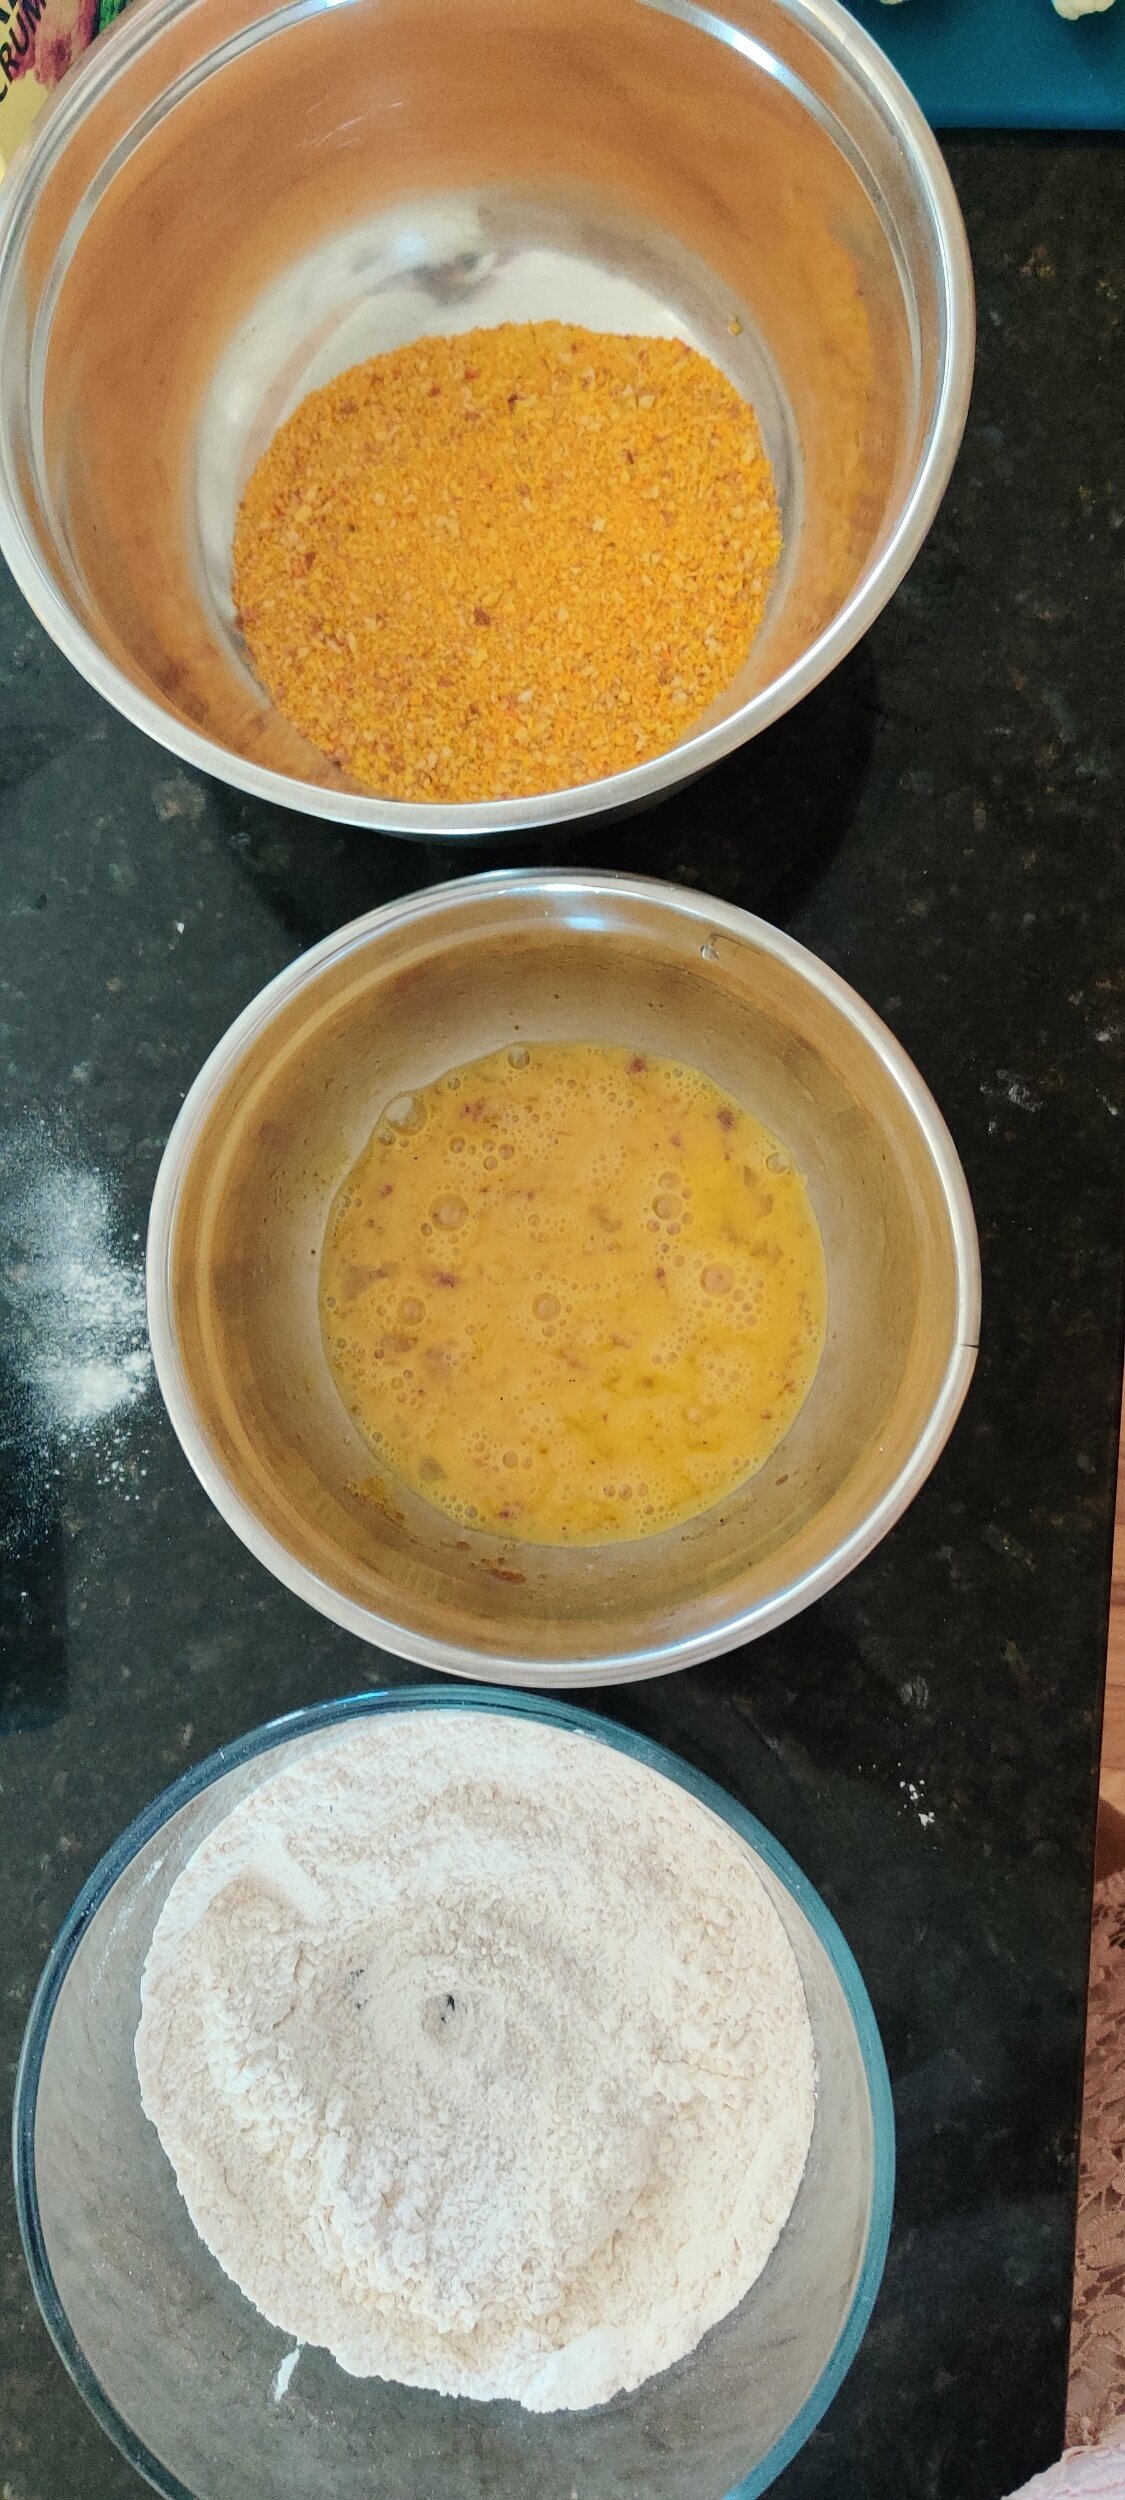
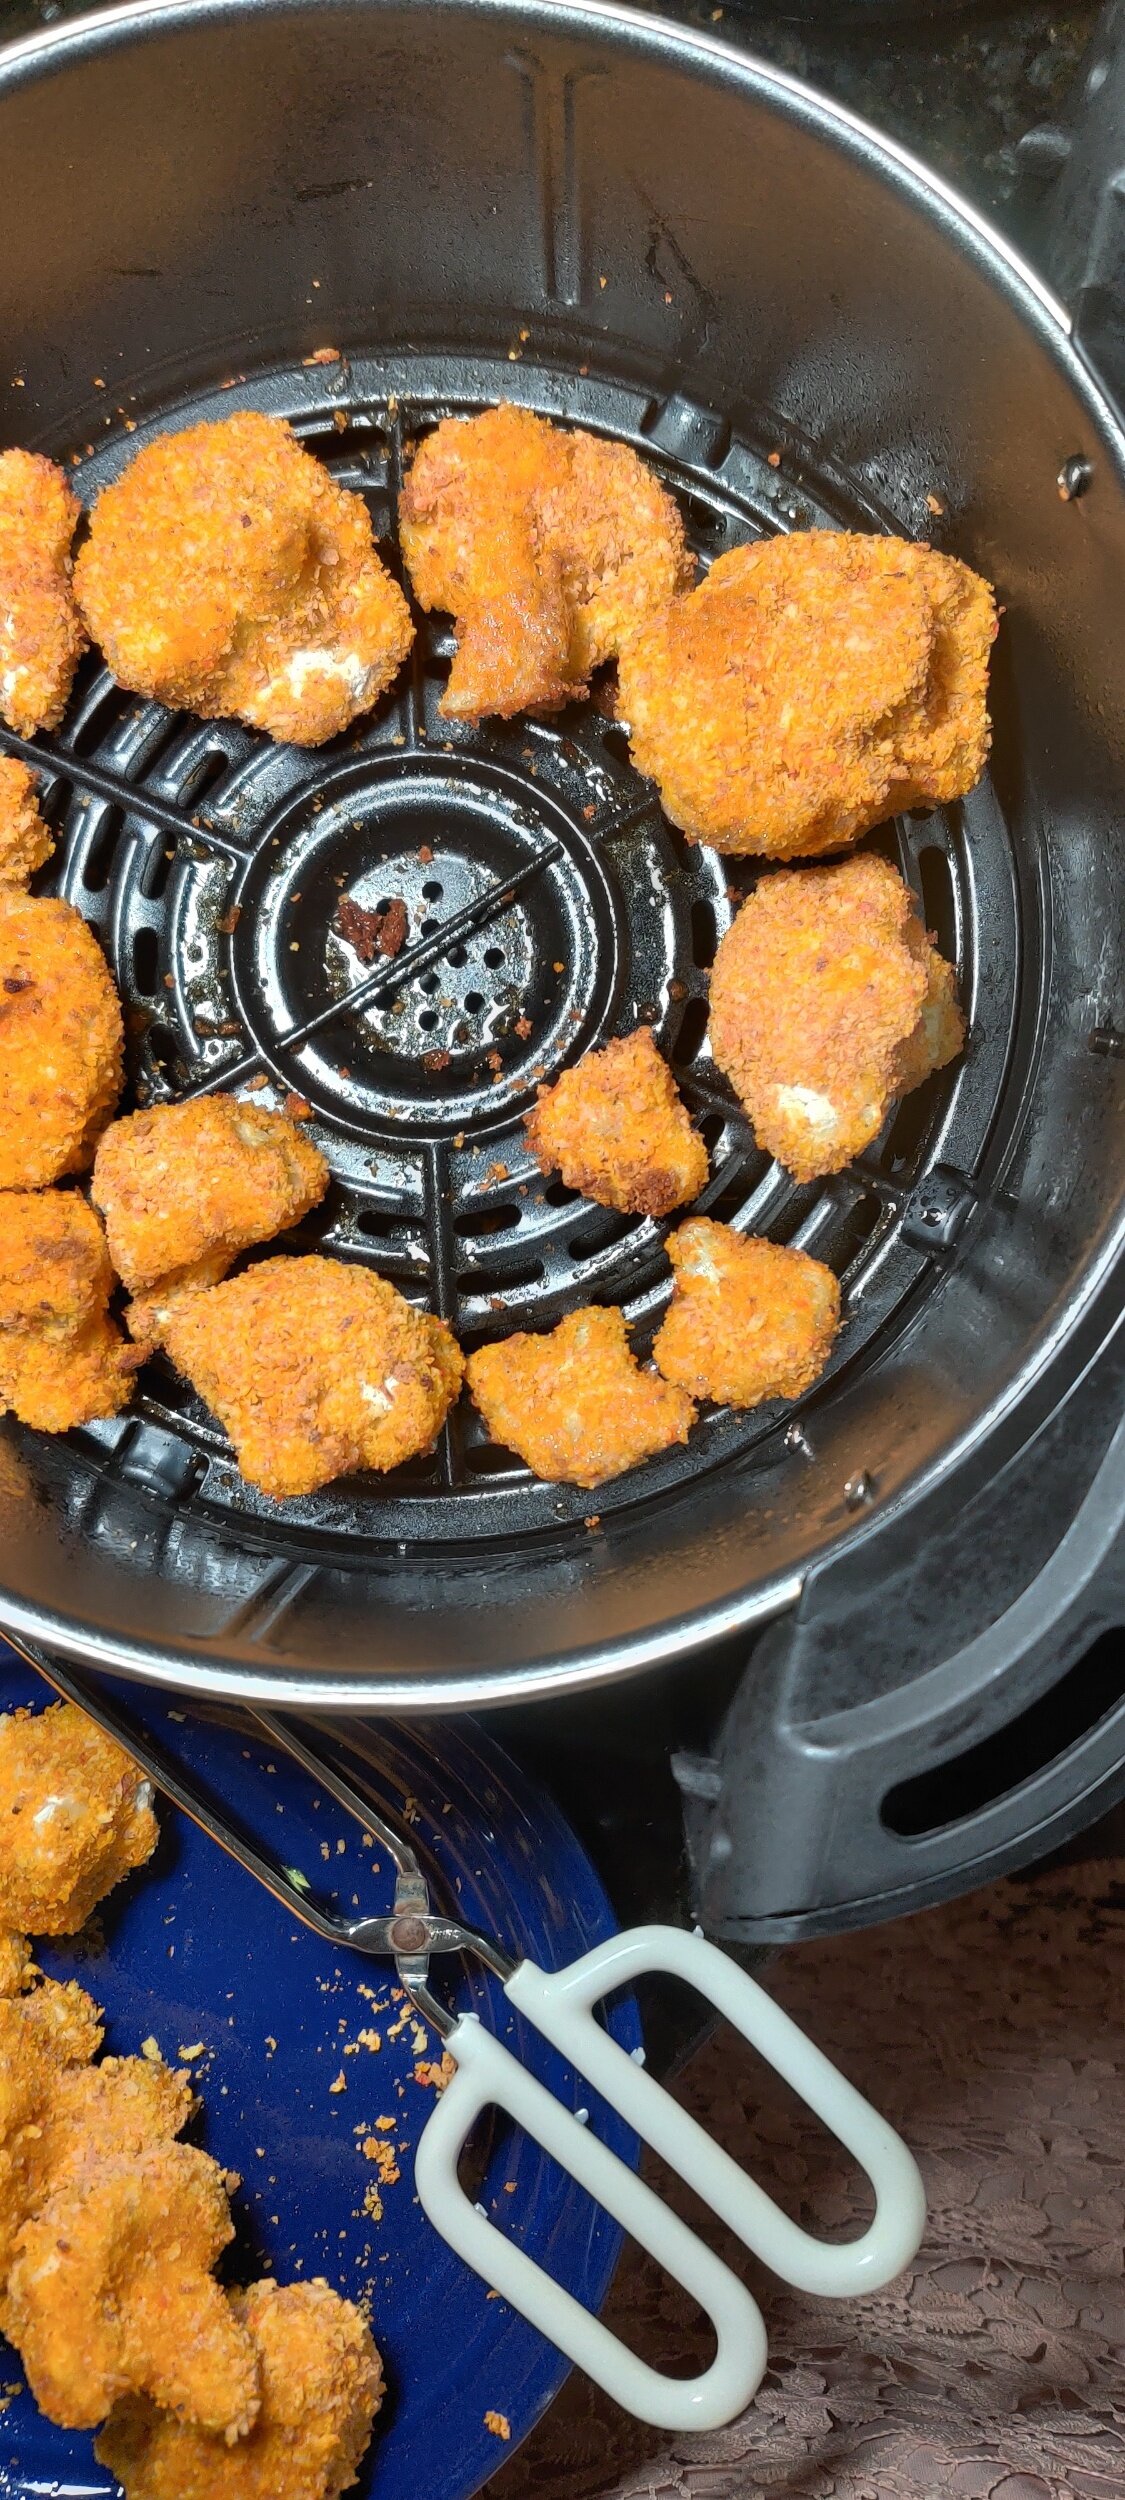
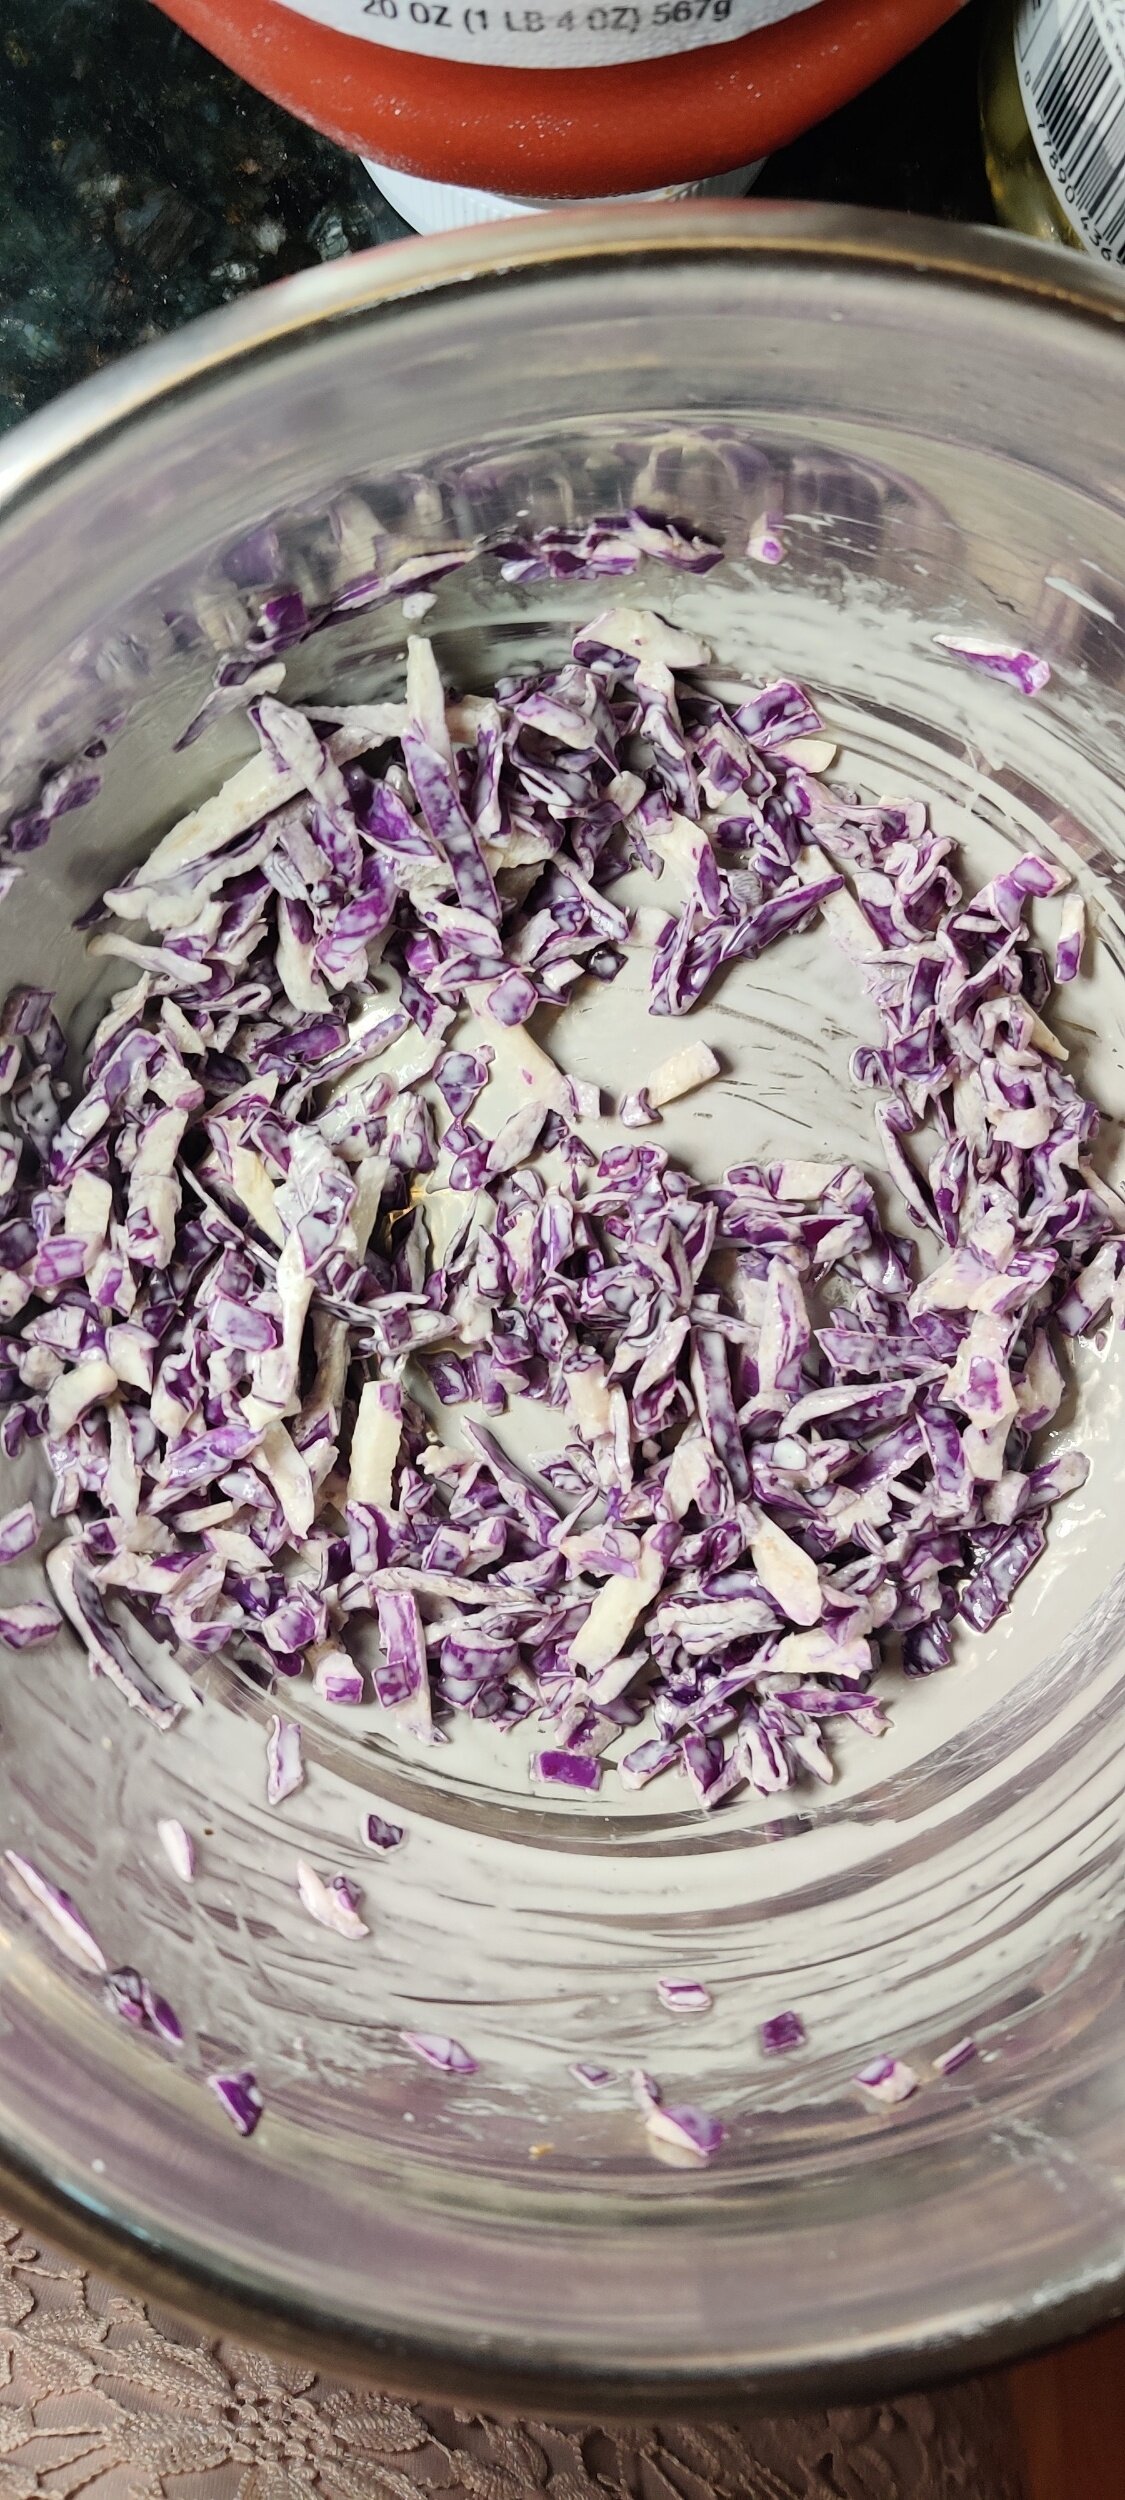
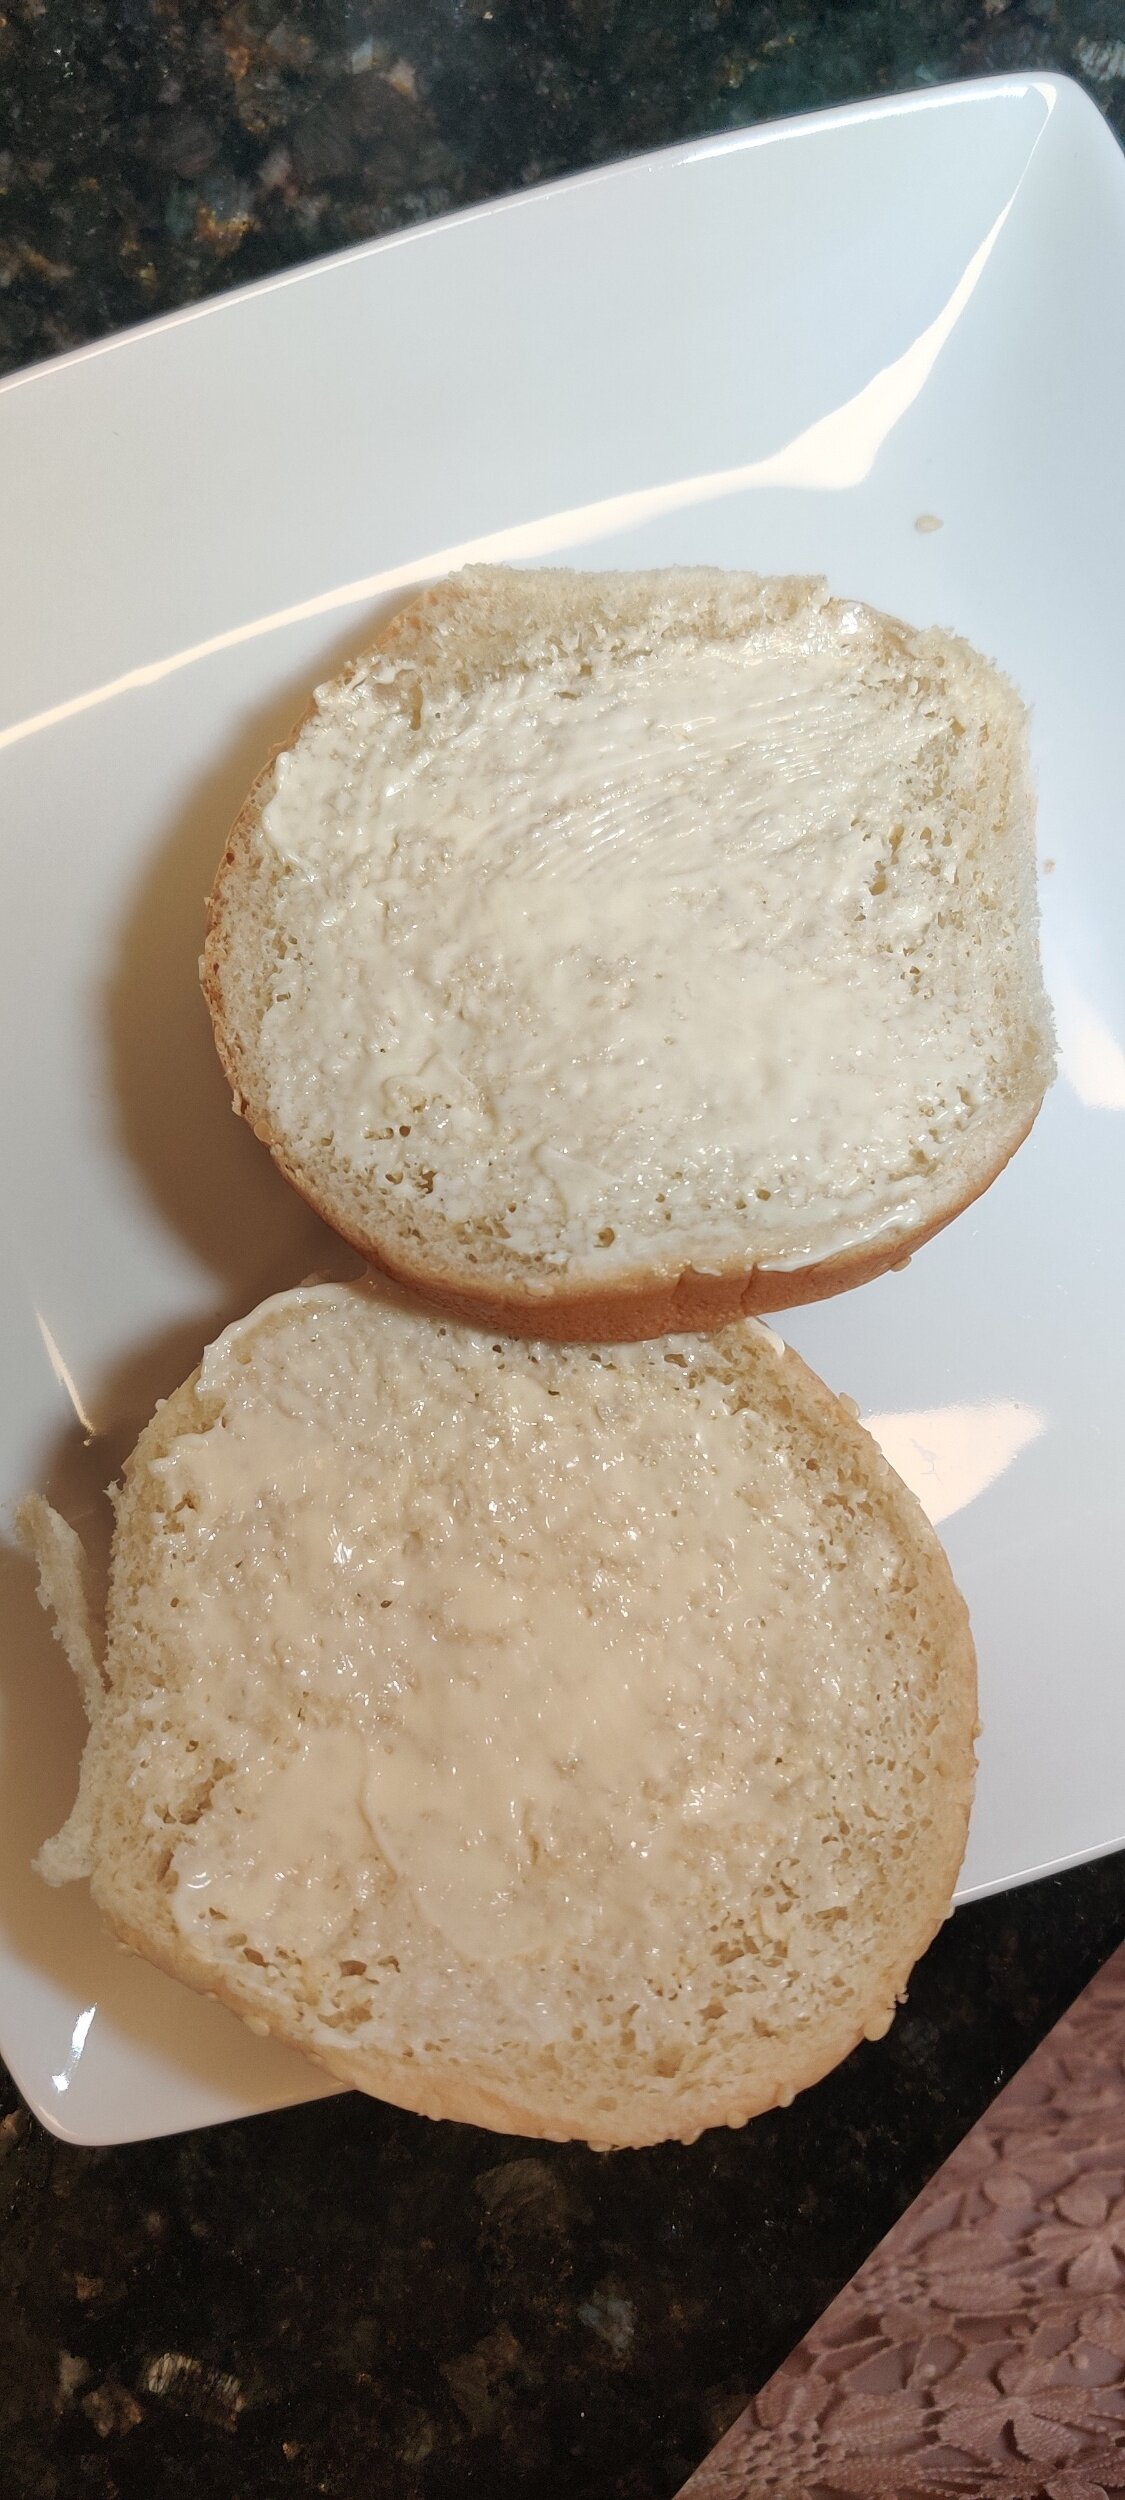
Fried Cauliflower 'Chicken’ Sandwich
There is nothing quite like a sandwich with a fried something that has all the textures and flavours going on, especially when you are hungry! This sandwich takes the joys of a fried chicken sandwich but makes it plant-based by switching out the chicken with cauliflower.
Cauliflower is great because it’s surprisingly more versatile than you may expect. Not to mention the health benefits.
You get the crunch from the breaded cauliflower and slaw, the tang from the ranch and pickles, the juiciness from the tomato, and of course the soft bun.
This is a great sandwich for lunch or dinner and will get you filled up. Pair it up with some sweet potato fries or zucchini crisps!
Ingredients
12 ounces cauliflower florets
1 cup red cabbage, chopped into a slaw
Ranch
2 cups breadcrumbs
2 eggs
1 cup all-purpose flour
2 tablespoons all-purpose seasoning or old bay (I used Primal Palate’s New Bae)
Mayonnaise and butter
1/2 cup pickles, sliced
1 large, sturdy tomato, cut into thin slices
4 hamburger buns


Instructions
Prepare the cauliflower. Line up your flour, egg mix, and breadcrumbs in separate bowls. Season the eggs and flour. Reserving one hand for dry dipping and one hand for wet dipping, dunk the cauliflower florets in the flour, then egg mix, and breadcrumbs. Set aside in preparation for frying.
I used an air fryer, but you can use vegetable oil in a pot and drain the excess fat on a paper towel. Do it in batches to prevent overcrowding both the air fryer and the pot.
For the air fryer, I sprayed the coated florets who olive oil spray to ensure there would be a nice crunch. Fry at 400F for 14 minutes, turning over after 7 minutes, set aside.
In a small bowl, toss the cabbage in about a tablespoon of the ranch to give it a bit of flavour, but no need to drench the slaw!
Toast your buns! Smother the insides of each bun with mayonnaise and butter, then broil at 500F for about 2 minutes. Keep an eye to avoid burning anything.
Assemble your sandwich. Place the tomato on the bottom of the bun, then a few pickles, the cauliflower florets, the slaw, and then drizzle with some ranch.

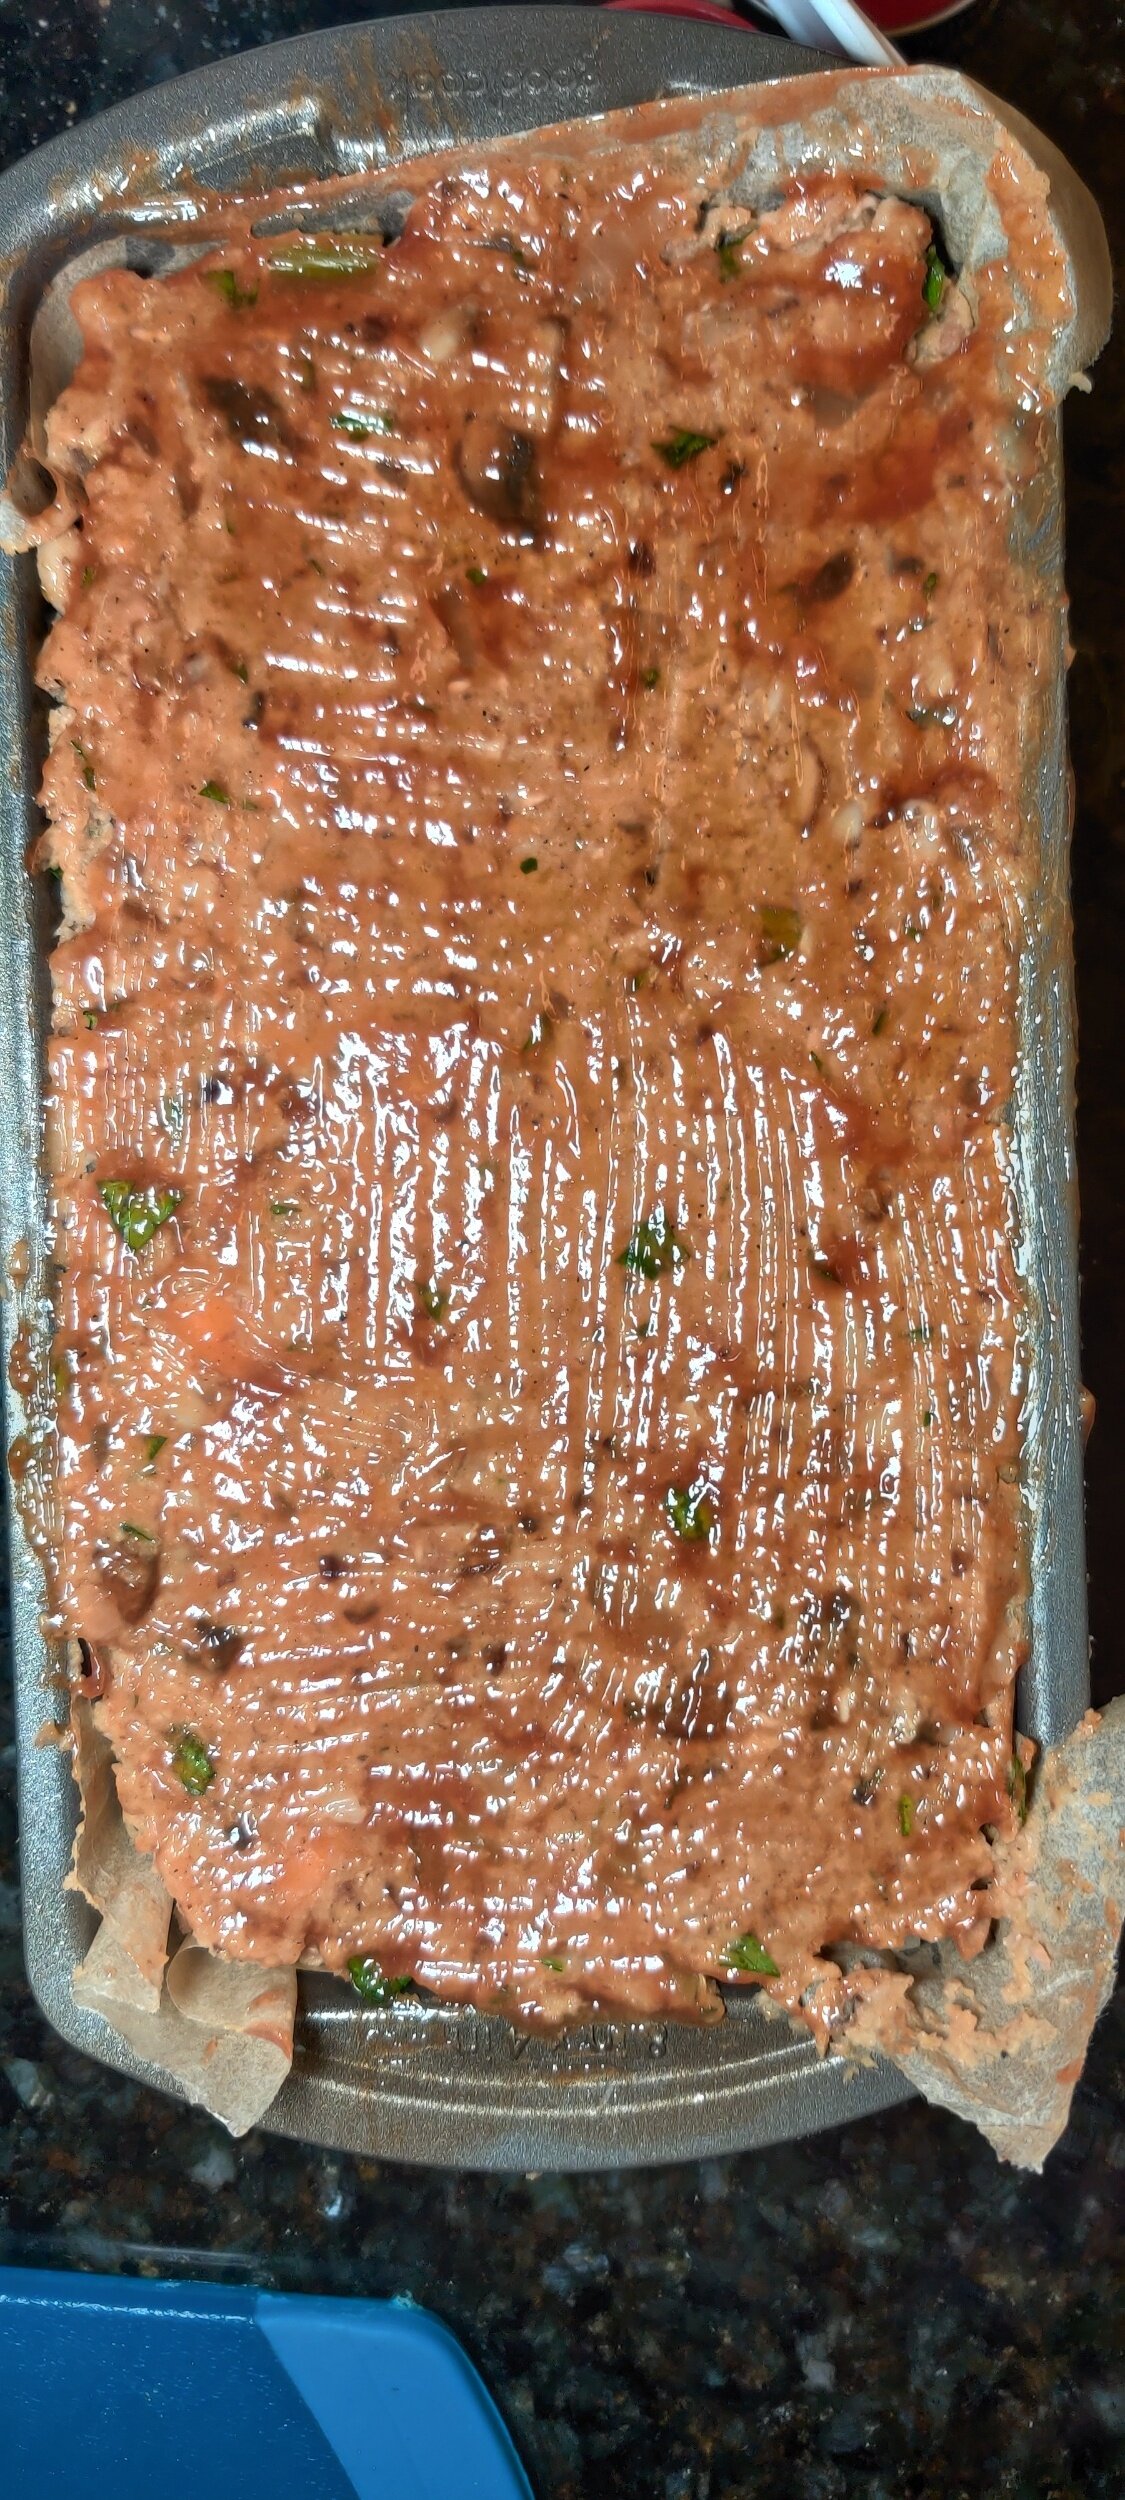
Black-Eyed Pea and Pinto Bean Meatloaf
If you're like me and have reduced your weekly meat intake for health purposes or otherwise, that shouldn’t mean you can’t eat certain meals! Especially with recipes that are flexible about the form of protein you use - and that doesn’t have to be meat! Beans and tofu are just two examples of additions you can make for a recipe that can be equally as delicious, especially when you season everything well. How about some meatloaf? Using black-eyed peas and pinto beans I put together a recipe that should satisfy most vegetarians, and no need for Beyond Meat (although I'm a fan, no shade).
It's quite easy and something you can eat for lunch or dinner. I like to think of meatloaf as a giant, rectangular meatball. For those who find meatloaf to be heavy, this version is light but still filing - you’ll probably get seconds though like I did!
If you're worried about your loaf drying, don't skip on sautéing your vegetables, adding the ketchup and BBQ sauce, and consider soaking your breadcrumbs.
The other thing I did is reduce the temperature halfway into baking to take it nice and easy, and it came out great! Luckily, unlike with meat, you don’t have to worry about the ‘doneness’ as much.
Ingredients
12-ounces black-eyed peas, cooked
15-ounces pinto beans, cooked
1 medium carrot, finely chopped
1 1/2 mushrooms, finely minced
2 celery sticks
1/2 yellow onion, finely chopped
1 tablespoon garlic, minced
2 tablespoon olive oil
1 tablespoon butter
1 teaspoon salt
2 teaspoons black pepper
1/4 teaspoon powdered mustard
2 teaspoons smoked paprika
1/2 teaspoon coriander
1 teaspoon cumin
1/4 teaspoon fenugreek, ground
1 teaspoon cayenne pepper
1/3 cup ketchup
1/3 cup BBQ sauce
2 tablespoons teriyaki sauce
1 tablespoon soy sauce
1 tablespoon plant-based mayonnaise
1/4 cup fresh parsley, finely chopped
1 cup bread crumbs
Instructions
Prepare the black-eyed peas and pinto beans. If you're using dried beans you’ll want to soak them overnight or for at least 4-6 hours. You can also use drained, canned beans.
While your beans are cooking, melt the butter with the olive oil and sauté the garlic for about 2 minutes. Add the spices, salt and pepper (reserve 1 teaspoon paprika, 1 teaspoon black pepper, 1/2 teaspoon cayenne, and 1/2 teaspoon salt). Cook for another minute before adding the vegetables - onion, carrot, celery sticks, and mushrooms. Cook for about 5-7 minutes, until the juices, evaporate and the mixture is somewhat dry, set aside.
Mash the pinto beans and black-eyed peas until a mush forms - you can use a potato masher or your (clean) hands. It’s okay if you have larger bits as long as the mixture is mostly mashed.
Combine this in a large bowl with breadcrumbs, mayo, parsley, cooked veggies, teriyaki sauce, soy sauce, and the reserved spices.
Combine the ketchup and BBQ sauce, add to the bowl and mix until combined but don't overmix - you may end up with a tough meatloaf!
Add the mixture to a bread loaf pan prepped with parchment and cooking spray, then brush with some more of the ketchup and BBQ sauce. Bake the meatloaf at 350F for 30 minutes.
Remove and baste with more of the ketchup and BBQ sauce mixture. Don’t be afraid to lay it on so you have a nice coating once the meatloaf is done! Reduce the temperature to 325F and bake for another half hour.
Remove from oven and rest for at least 10 minutes then chill in the fridge to firm. Serve hot with more sauce.

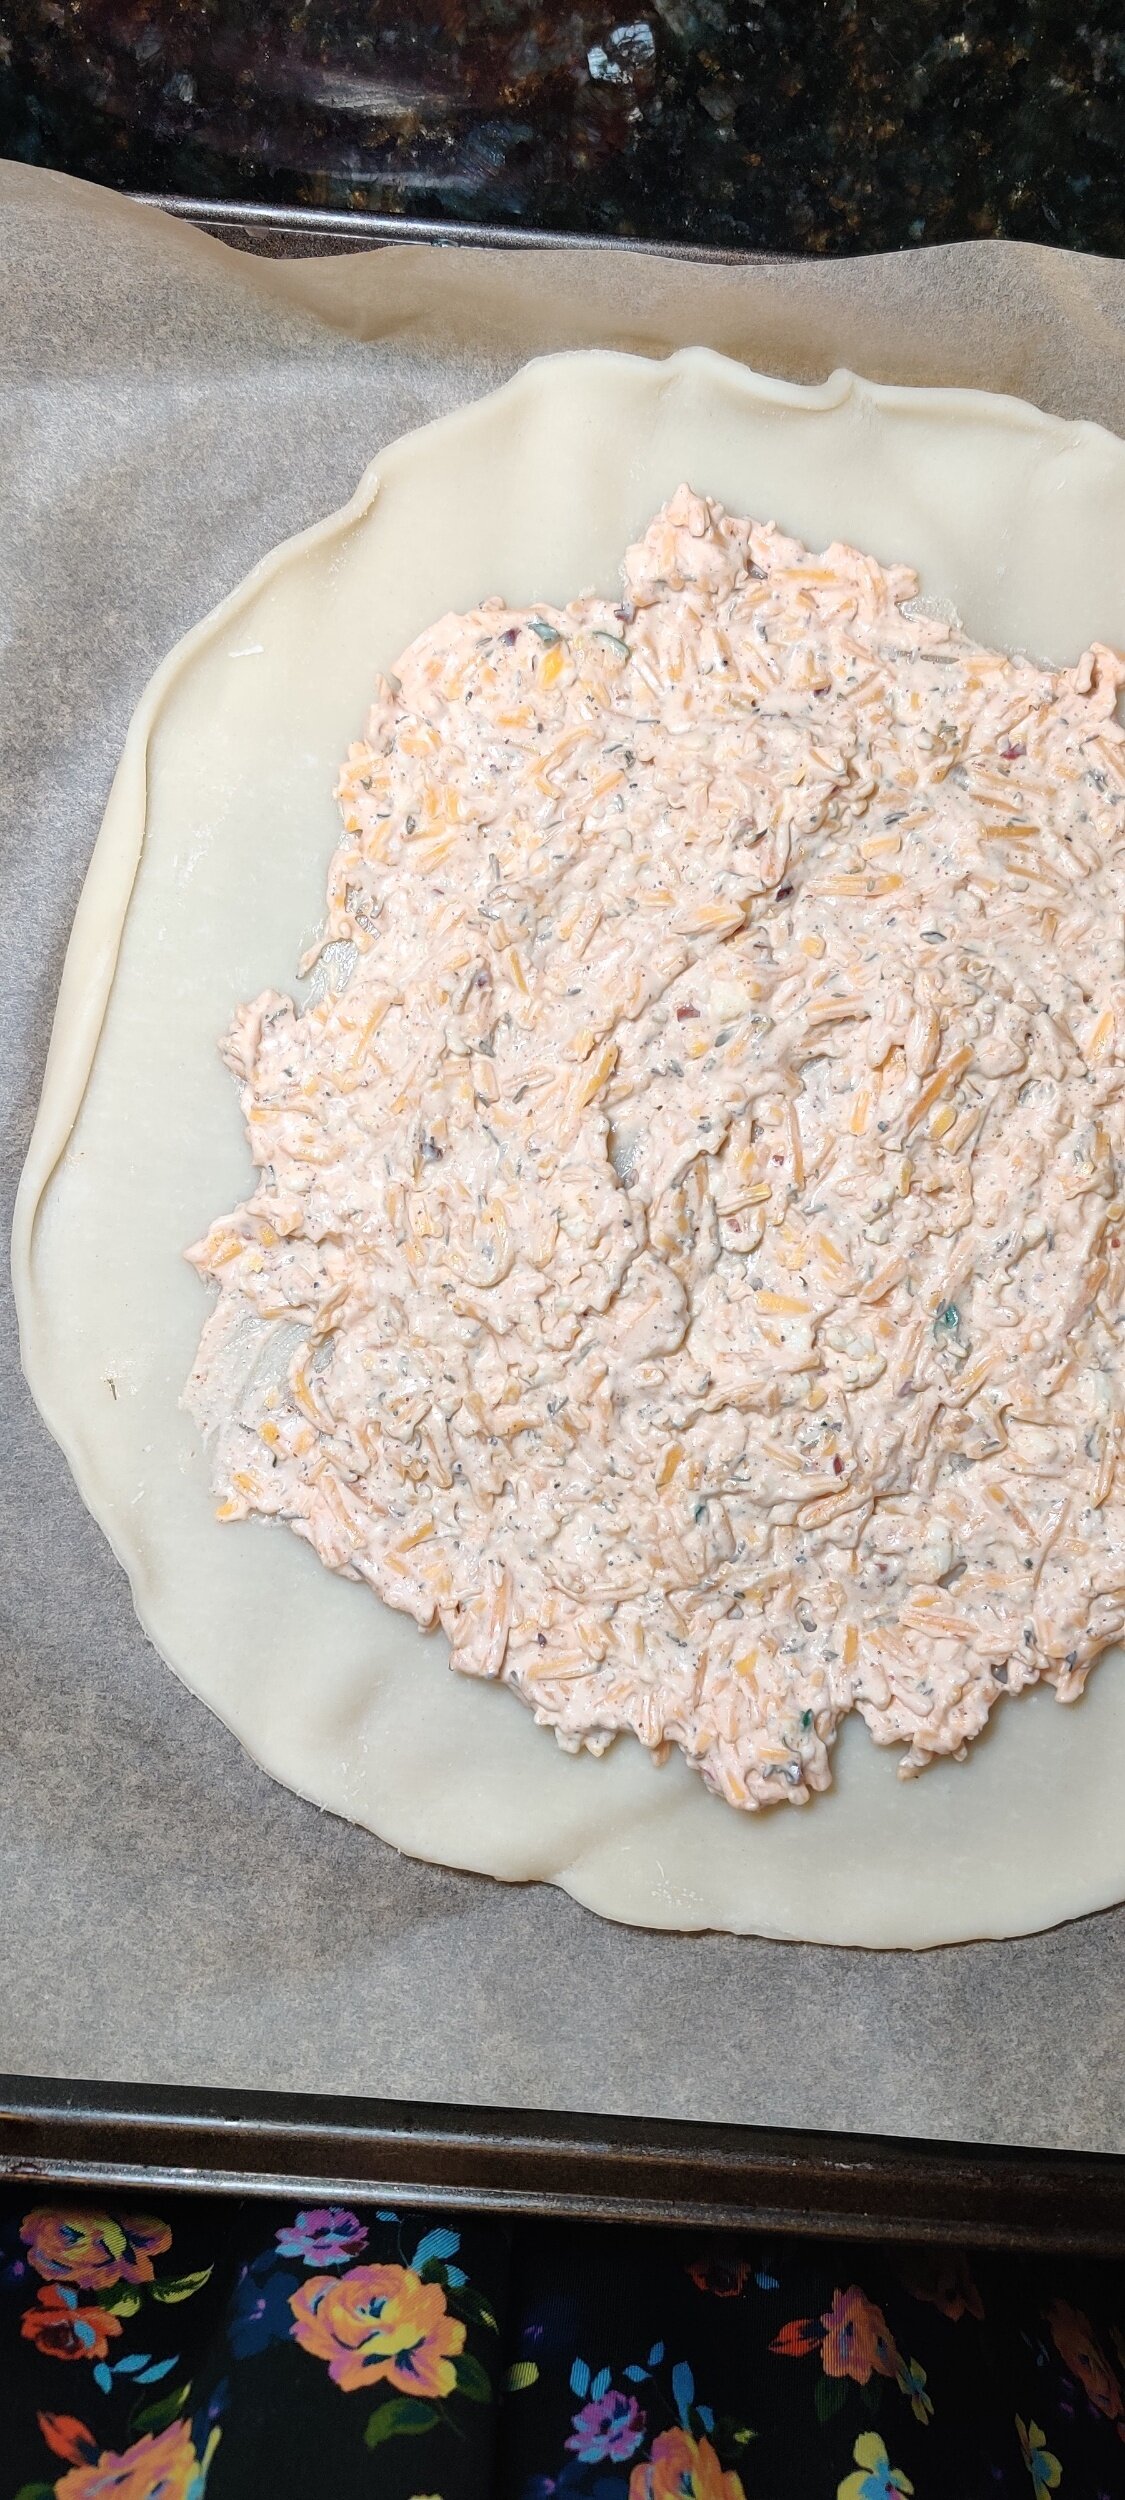
Tomato, Thyme and Cheese Galette
Do you need a delicious summertime pie for brunch or dinner? If you are a lover of fresh tomatoes and thyme, this galette is for you! It's an amazing combination of sweet and savoury and perfect on a hot day. The cheese base provides the fat, which the acidity and the tartness from the tomatoes cut through. Then you have the pie crust which offers a crunchy, buttery, flakey texture.
I love this galette pie and hope you will try it! You can serve it as it is or with a small scoop of sour cream.
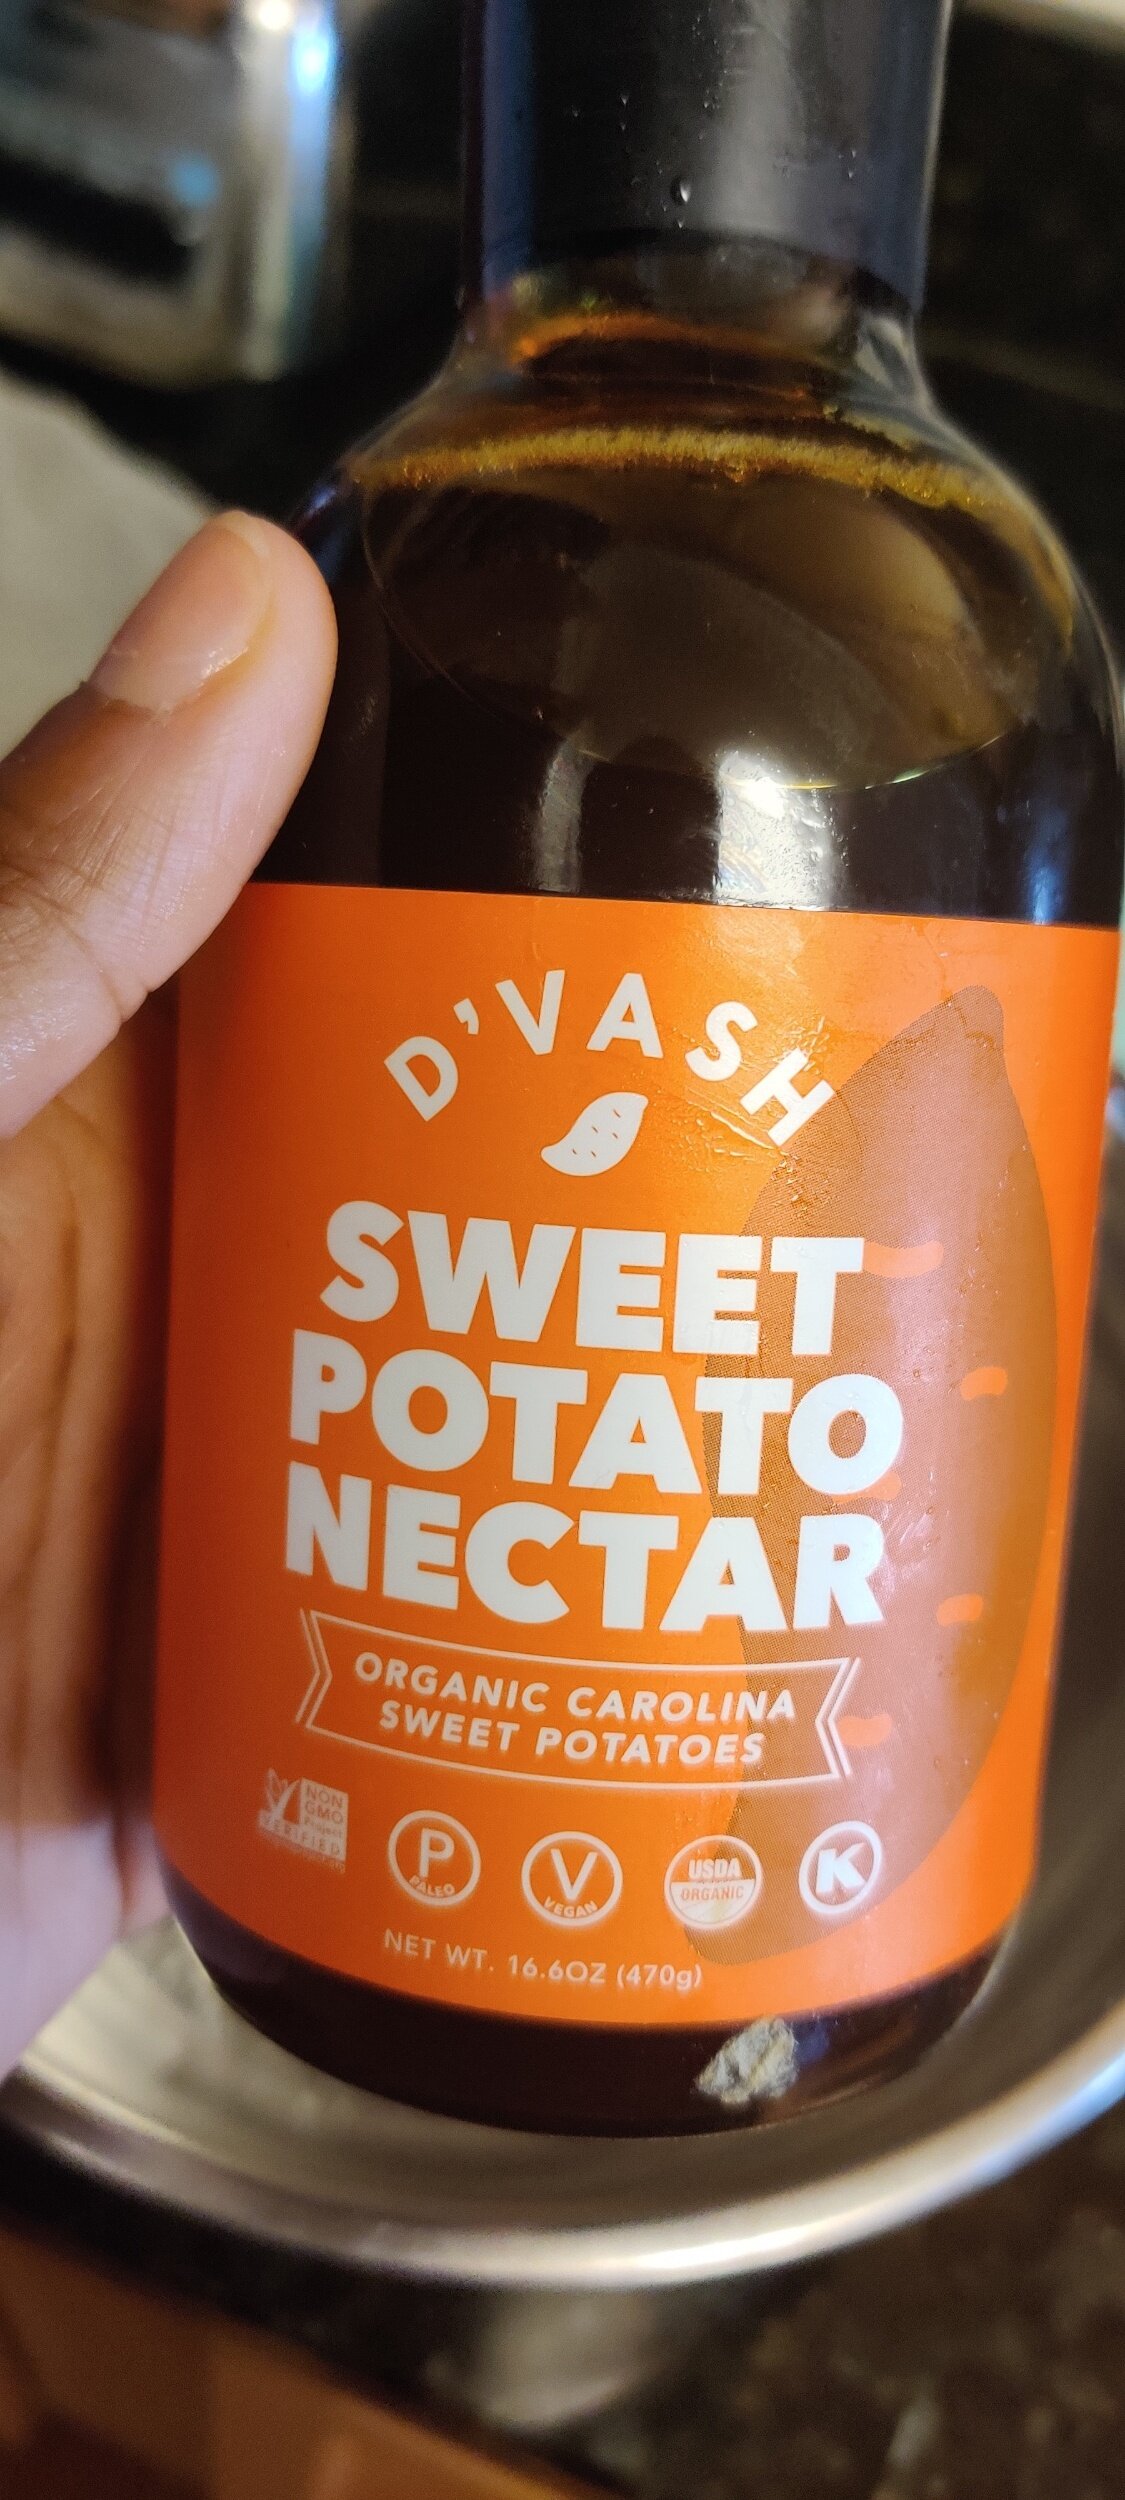
The sweet potato nectar in the marinade adds a subtle sweetness as well as a concentrated, depth of flavour that mingles well with the tomatoes.
The great thing about this free from crust pie is that it doesn't have to be perfect, so have fun with it!
Ingredients
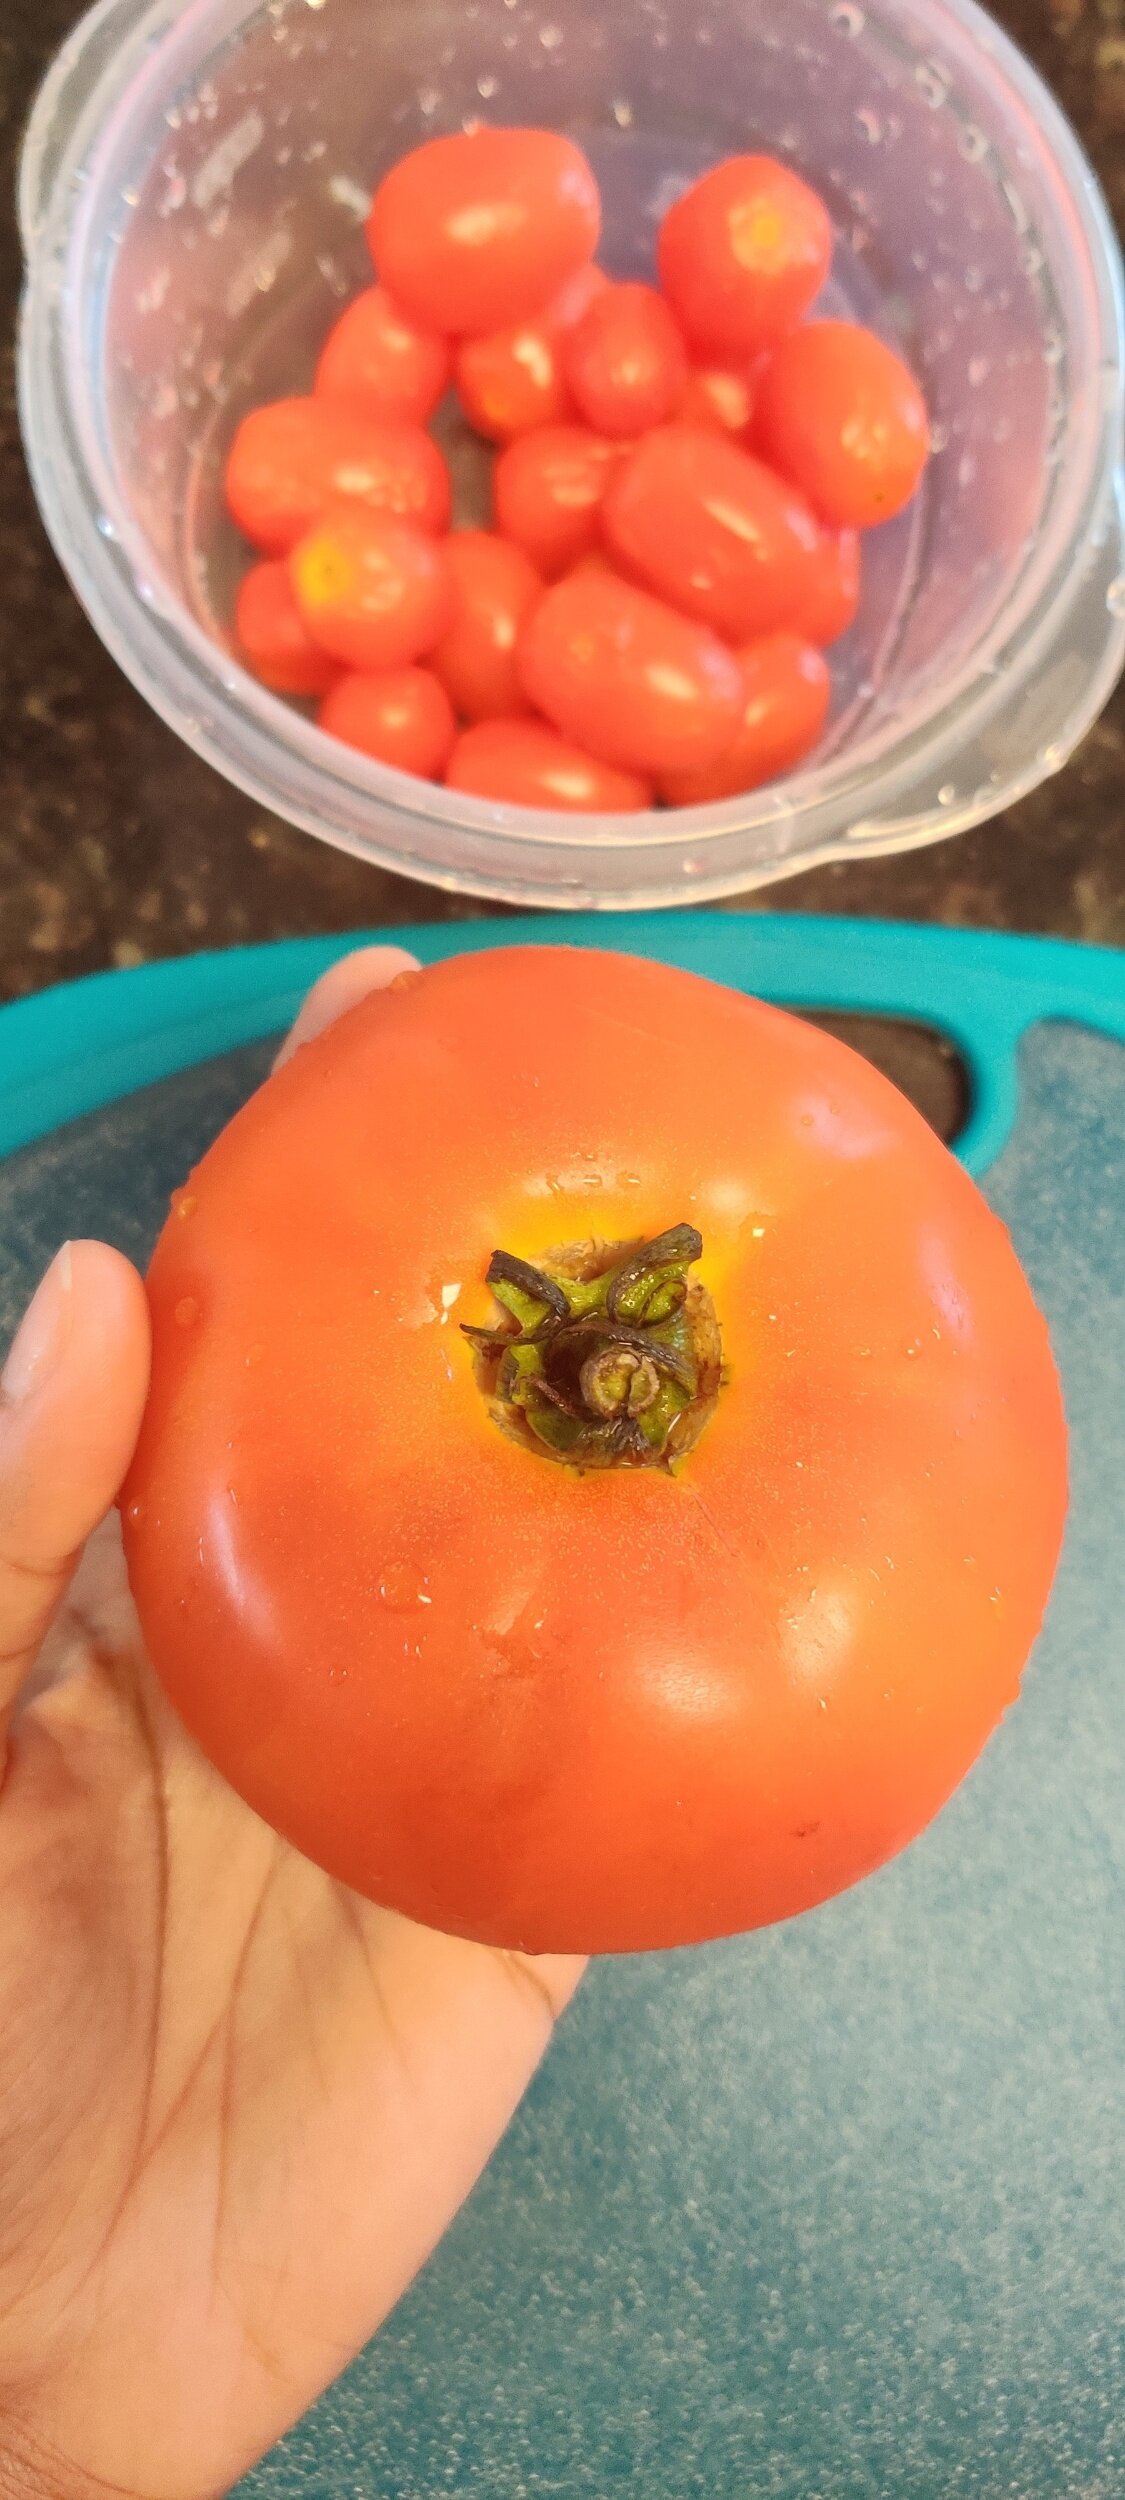
1 large beefsteak tomato
1/4 cup cherry tomatoes
1 tablespoon fresh thyme
1 tablespoon dried thyme
1/4 cup sweet potato nectar (I used D’Vash but you can use another plant-based sweetener)
1 teaspoon salt
1 tablespoon black pepper
1 teaspoon coarsely ground steak seasoning
1 teaspoon chili flakes
1 heaped teaspoon garlic, minced
1 tablespoon Worchester sauce
1 tablespoon olive oil
1 tablespoon smoked paprika
1 teaspoon dried parsley
1 pie crust
1 egg, beaten
Cheese base:
1/8 cup heavy cream
1/3 cup cheddar cheese, grated
1 tablespoon queso fresco, crumbled
1/2 teaspoon fresh thyme
1/2 teaspoon dried thyme
1 teaspoon smoked paprika
1 teaspoon cayenne pepper
1/2 teaspoon salt
1 teaspoon black pepper
1 tablespoon sour cream


Instructions
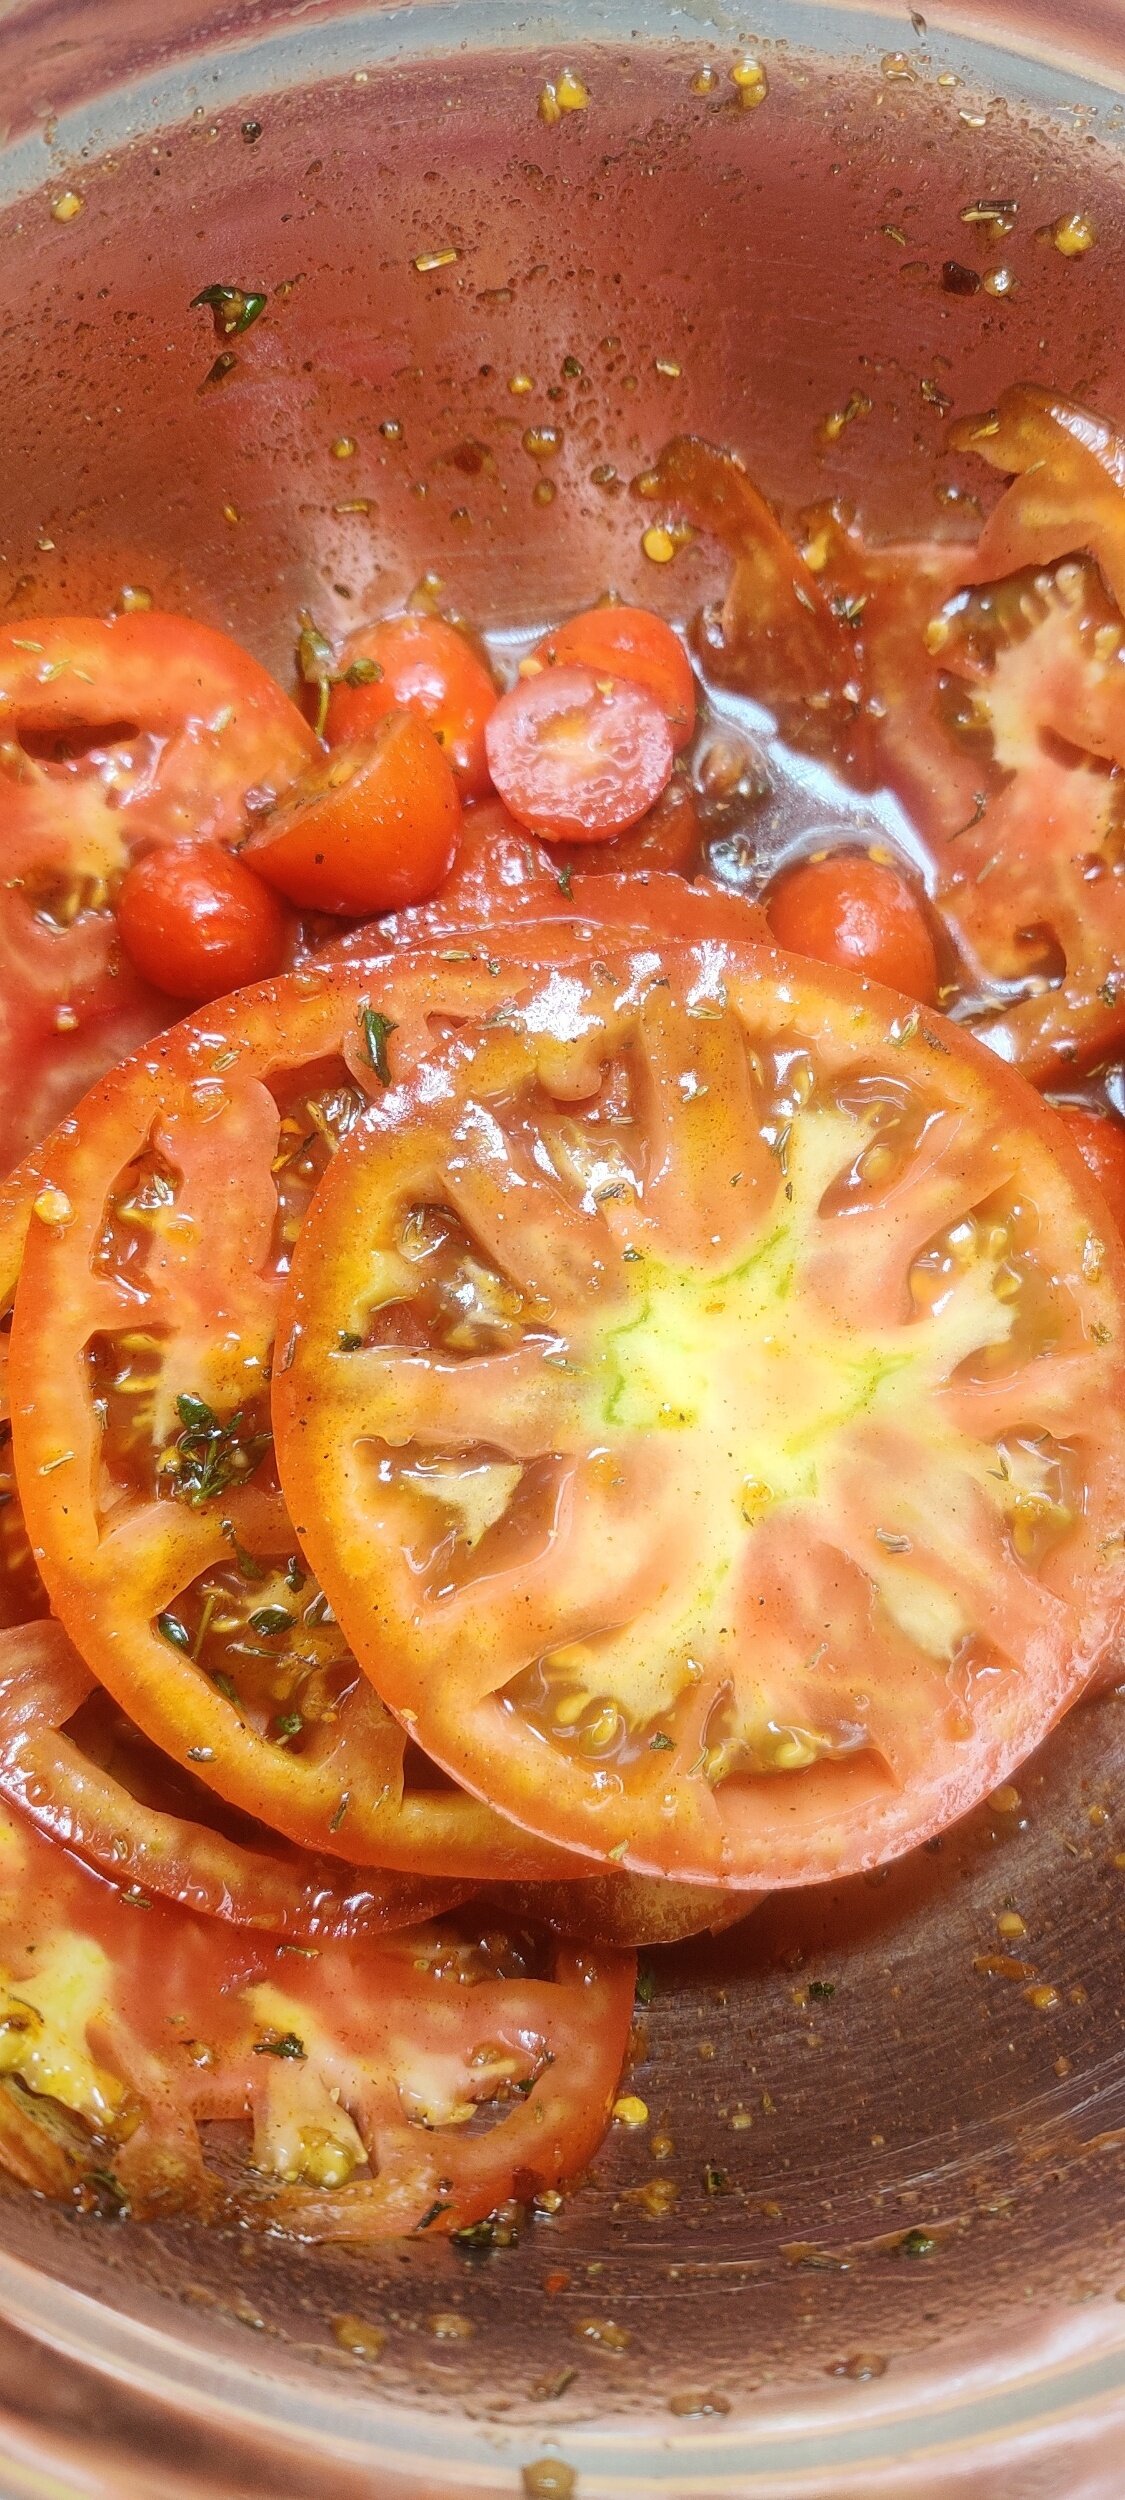
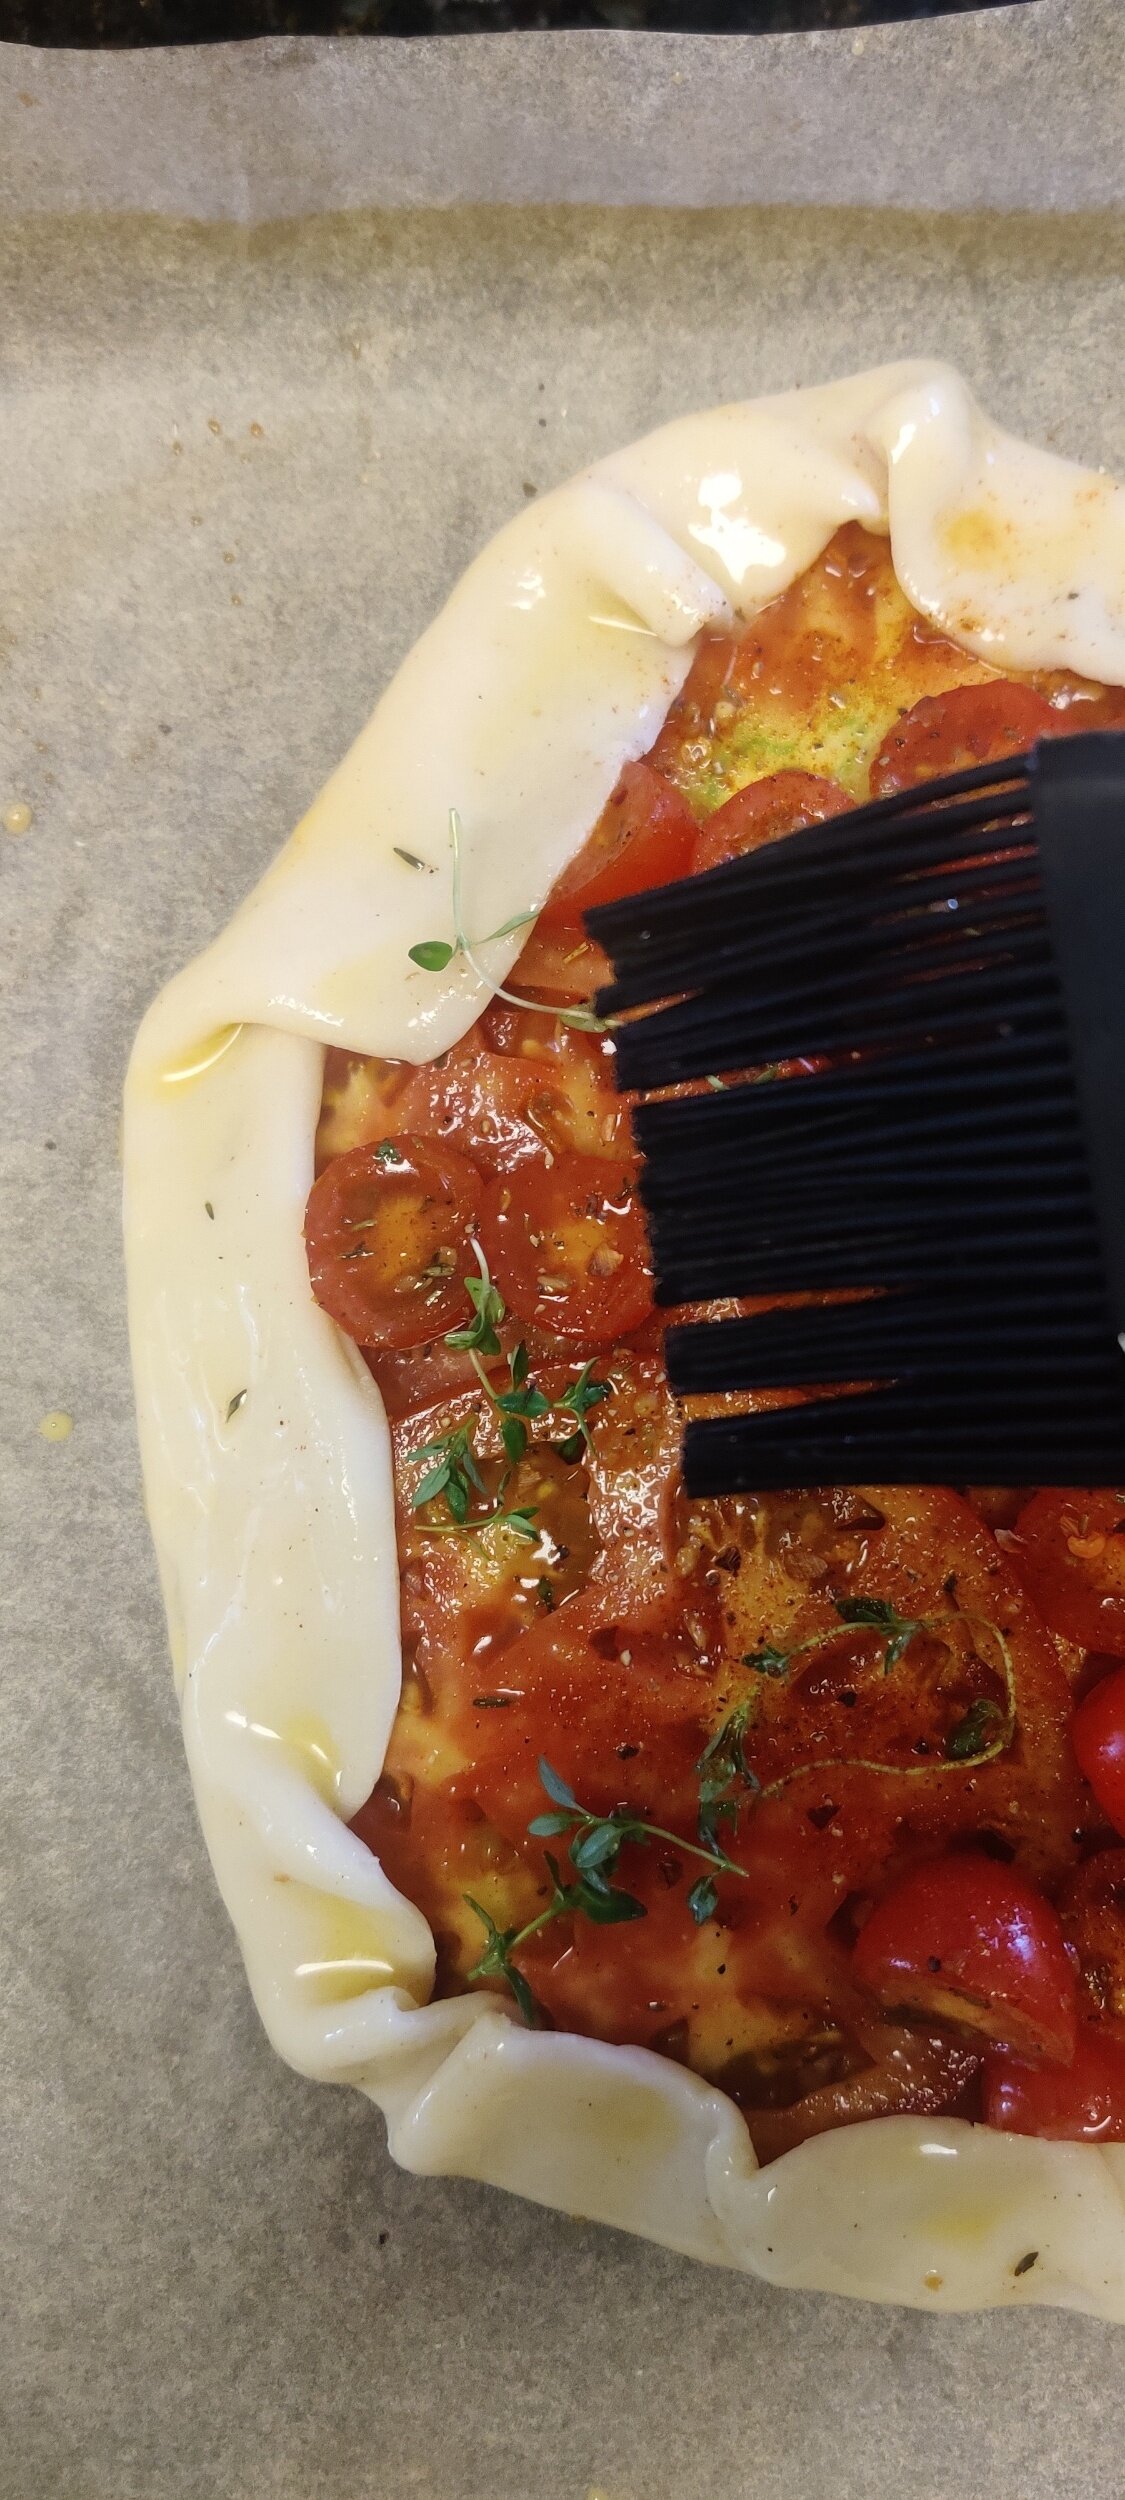
Prepare your tomatoes. Thinly slice the beefsteak tomato and slice the cherry tomatoes in half.
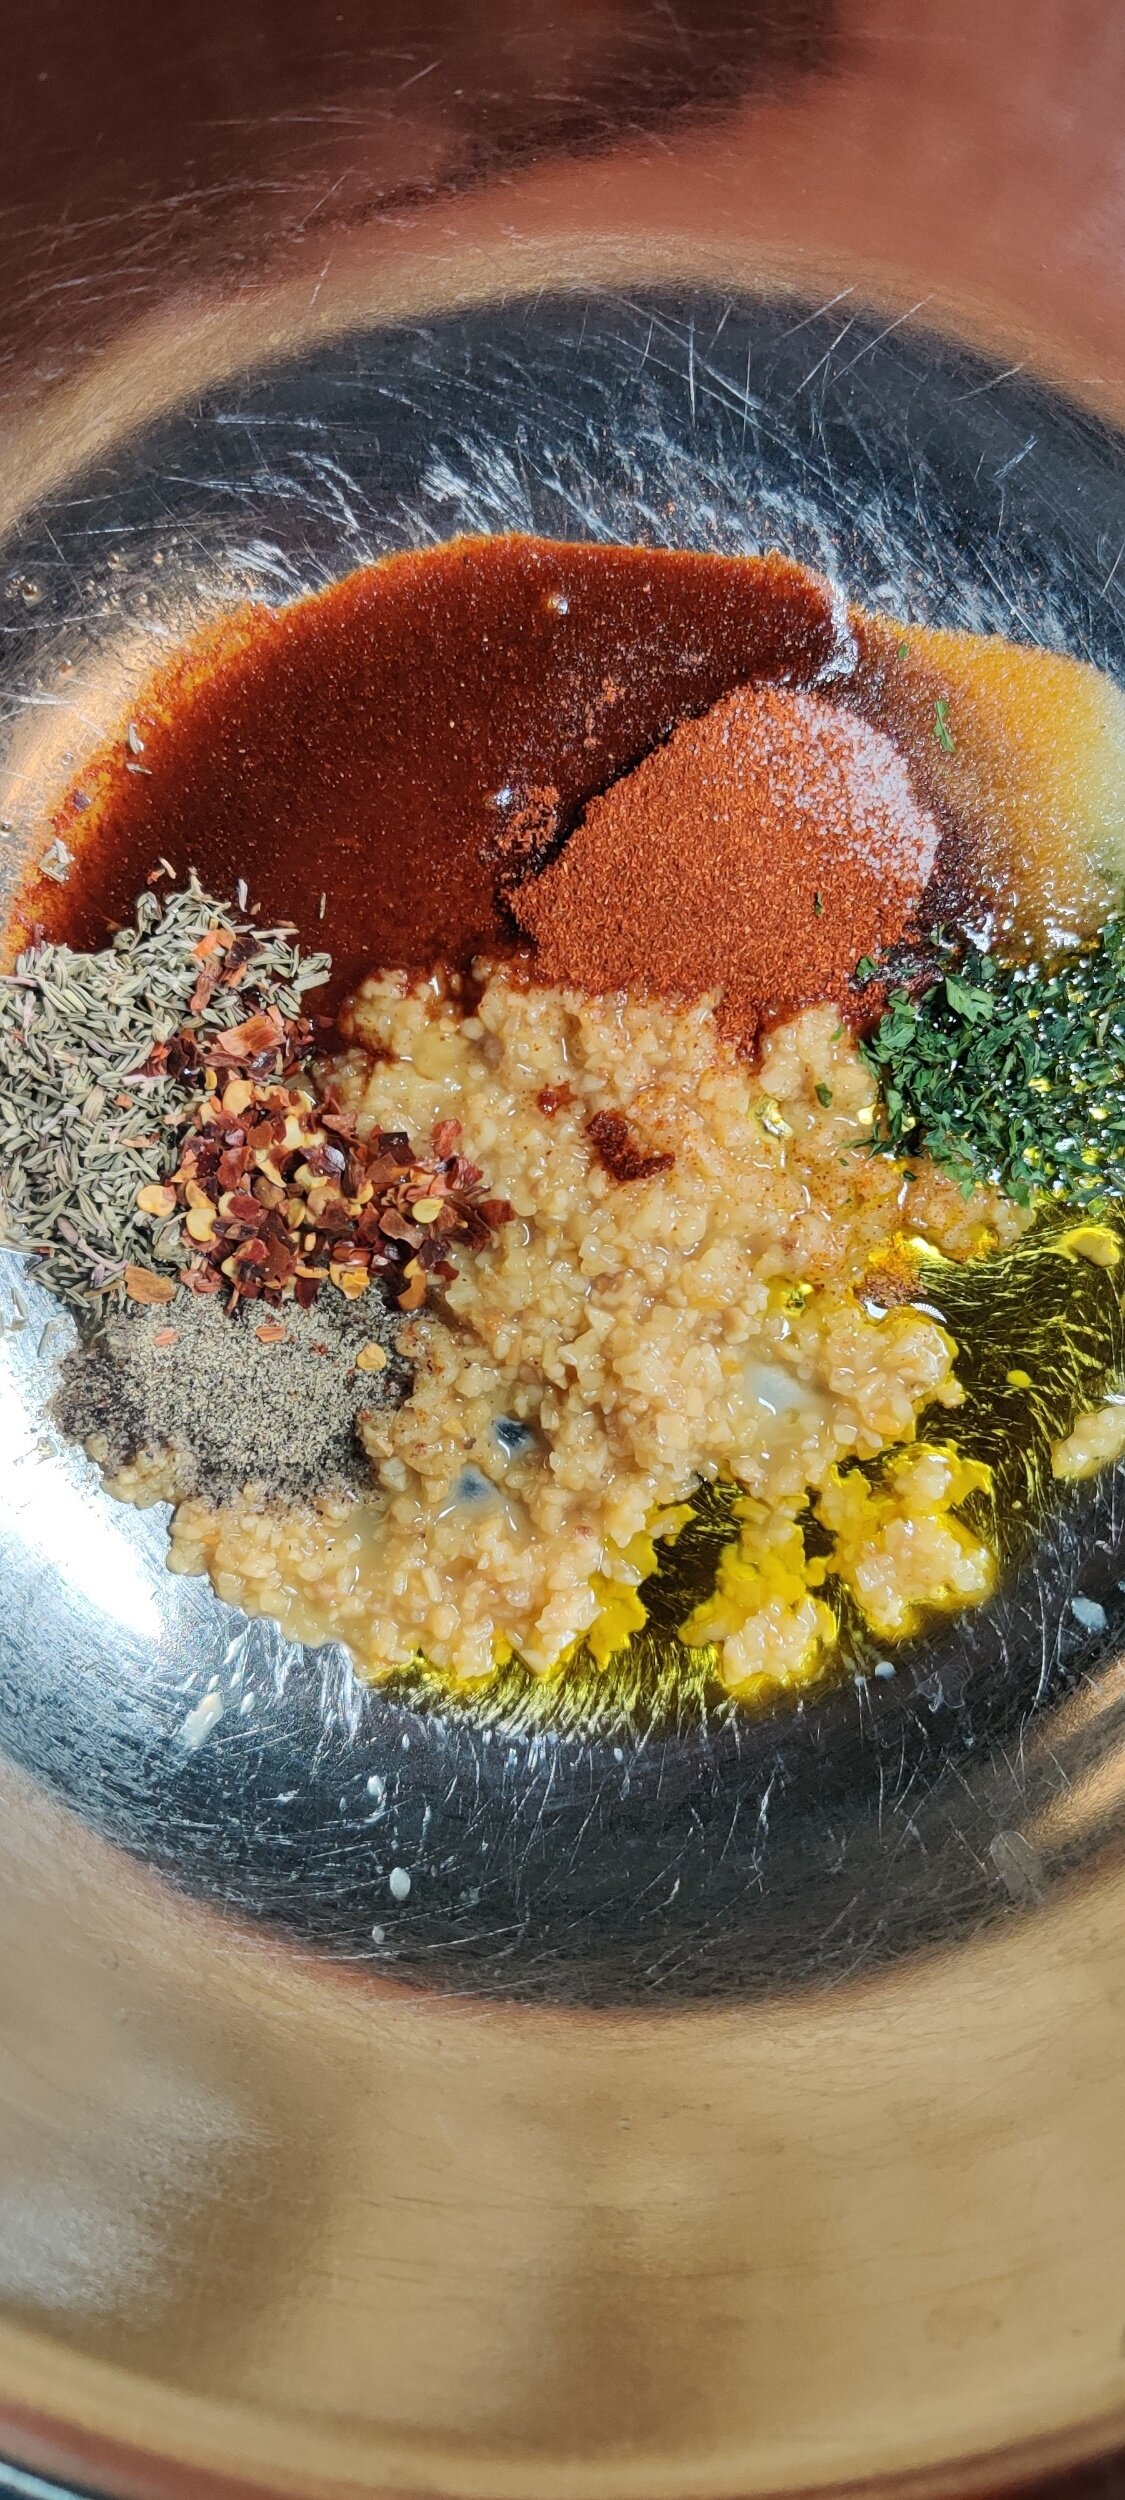
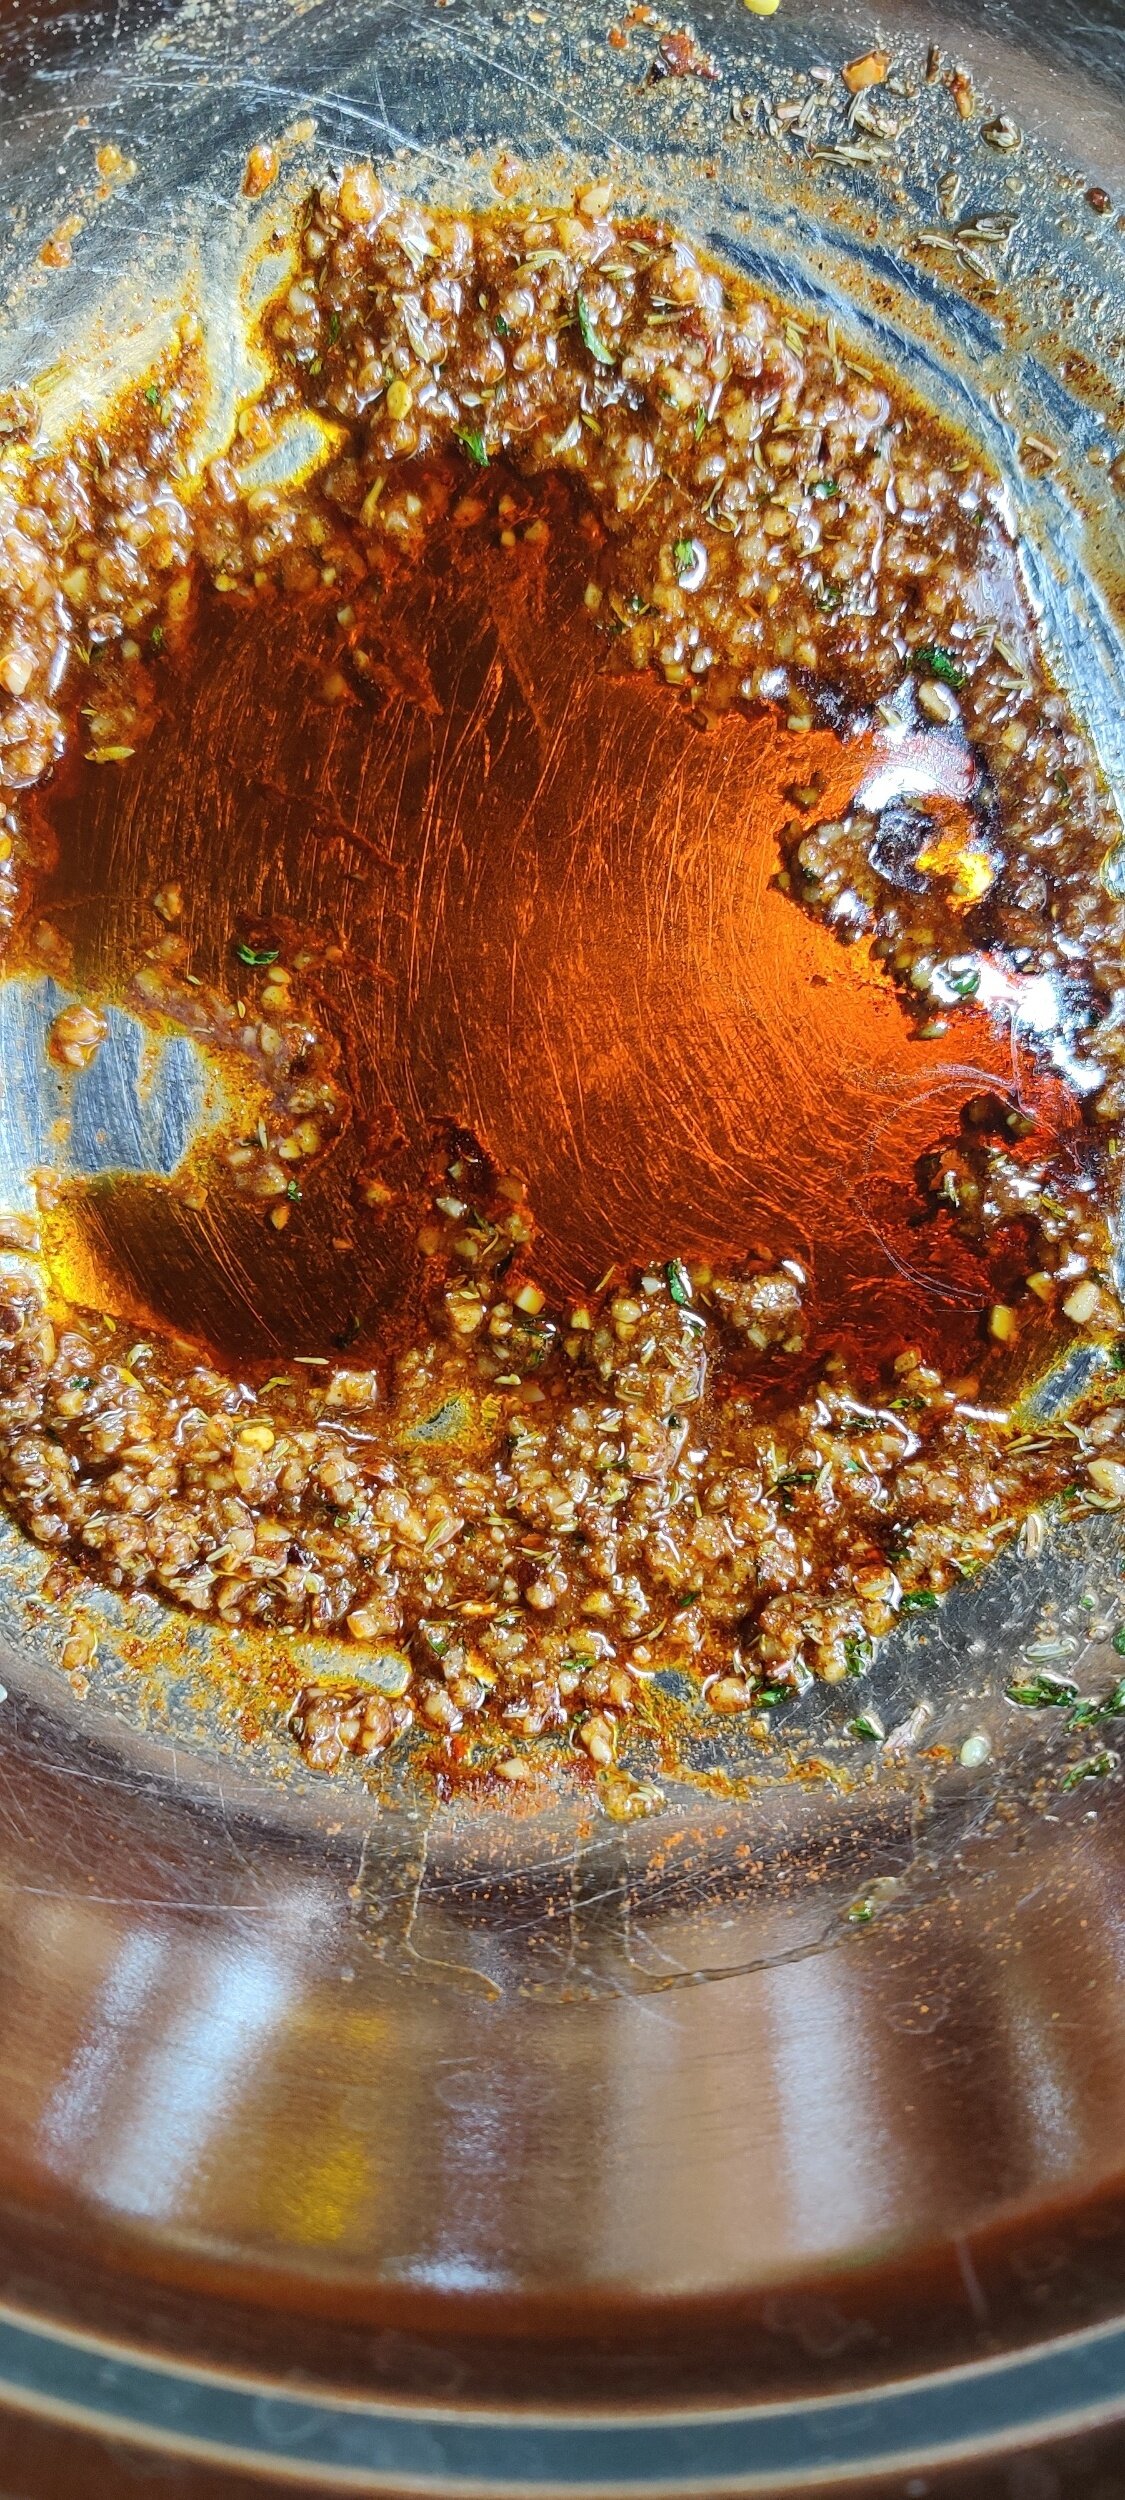
Make the marinade. Whisk together the olive oil, garlic, paprika, salt, pepper, Worchester, sweet potato nectar, chilli flakes, and thyme in a bowl. Place the tomatoes in the bowl and gently mix until all are coated evenly. Set aside.
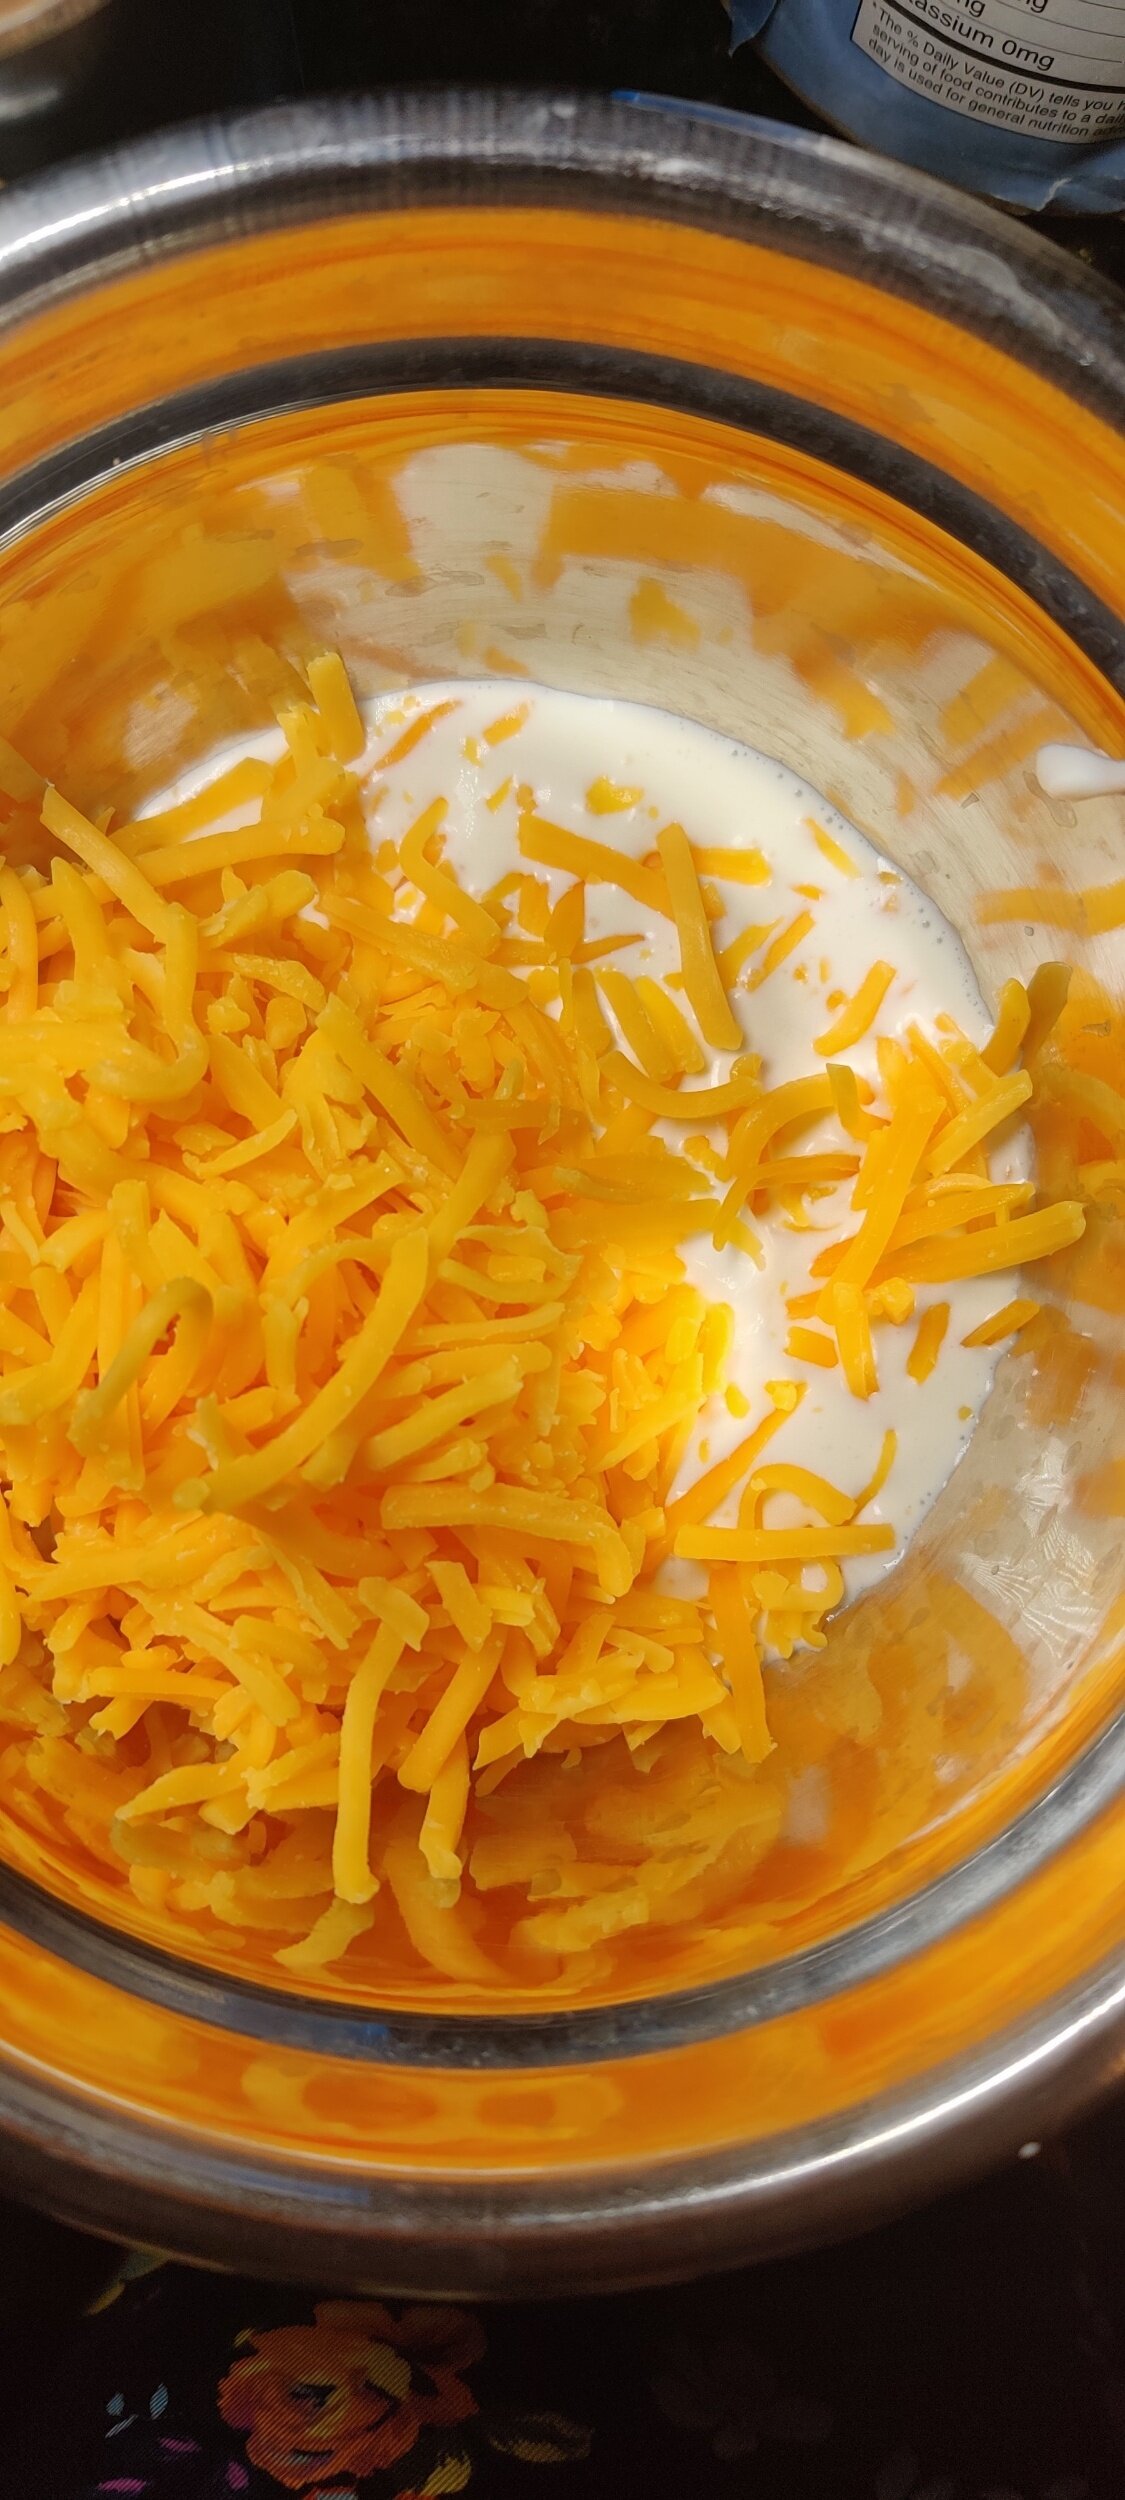
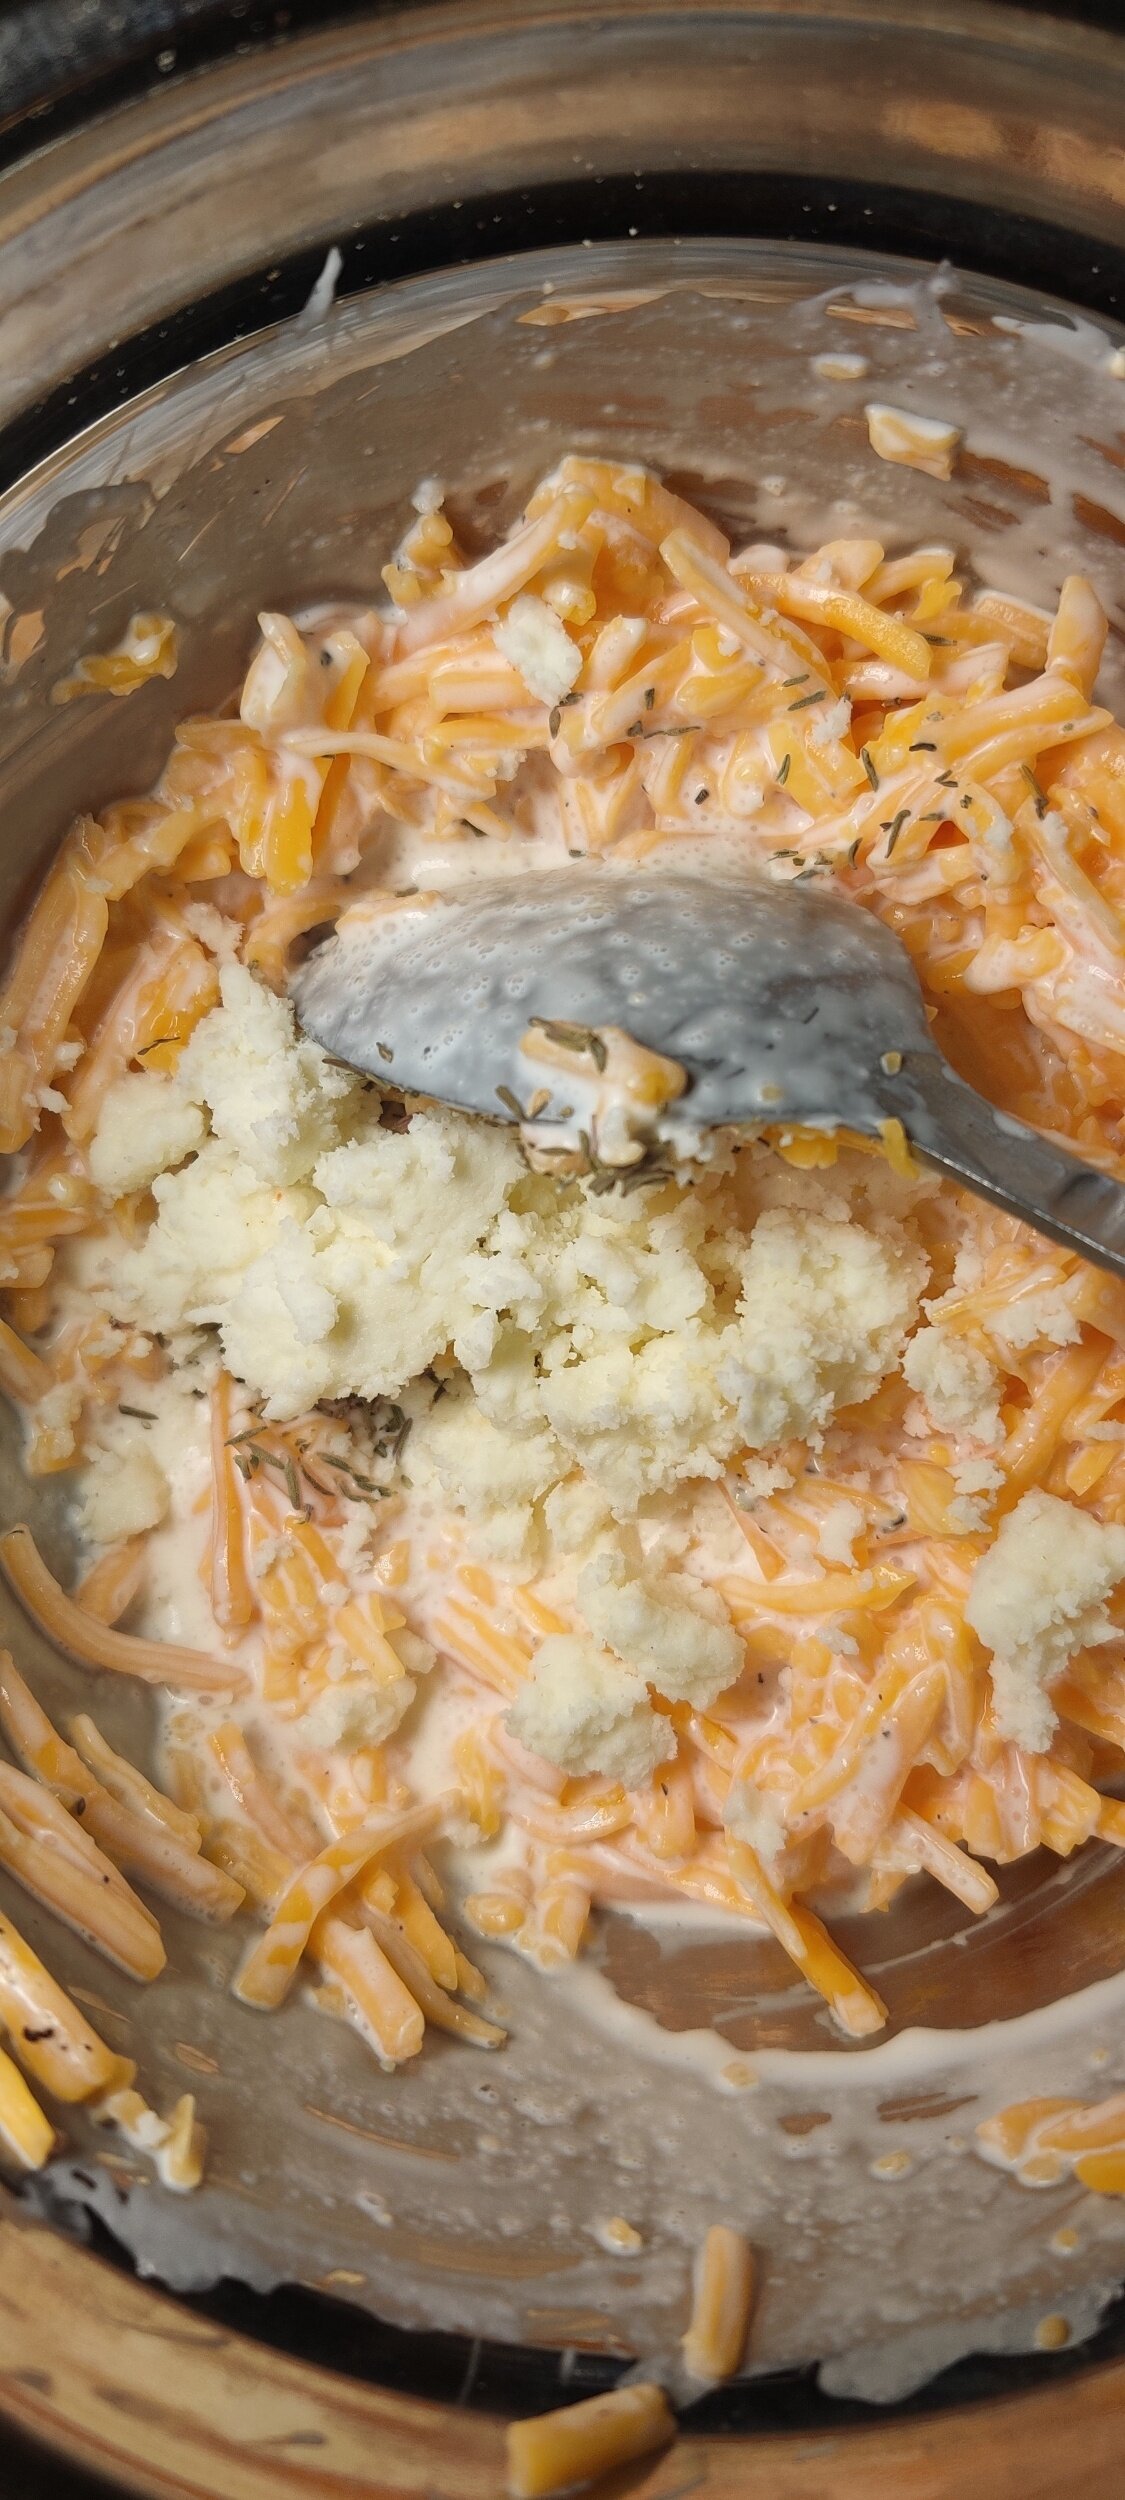
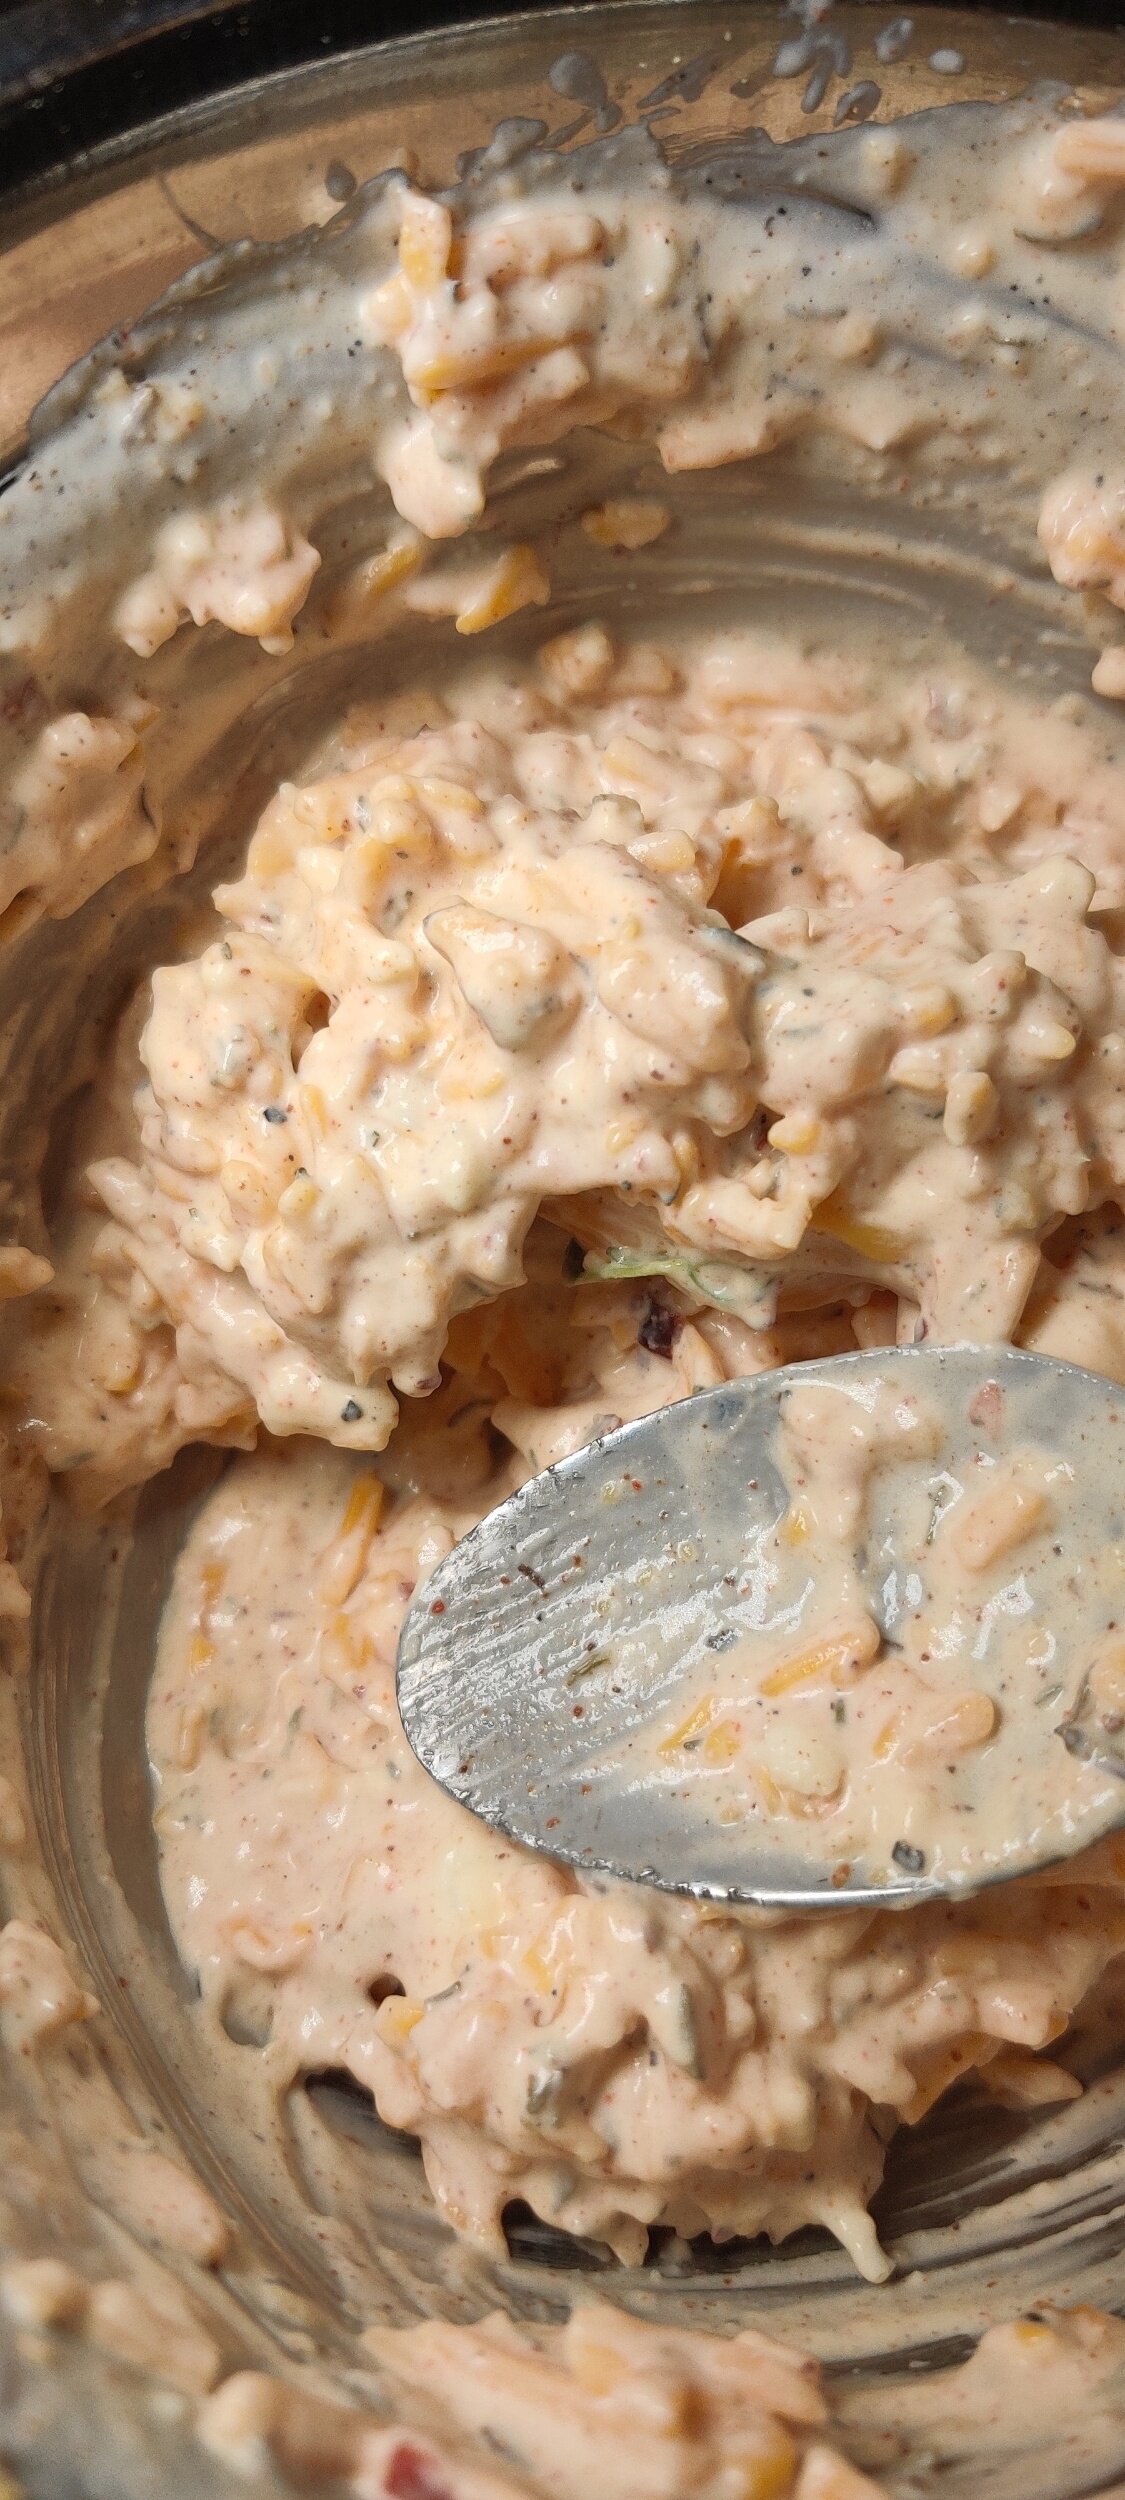
Make the cheese base. Mix the cheddar cheese, queso cheese, seasoning, fresh thyme, heavy cream, and sour cream. Taste and make sure you like the flavour. Spread the cheese mix over the centre of the pie crust, leaving a few inches to fold over.
Lay the marinaded tomatoes on top, then fold the edges of the pie crust to encase the filling (leave the remaining liquid out).
Brush the sides of the pie with the egg wash, then sprinkle with the steak seasoning for texture and taste.
Bake in a 425F oven for 25-30 minutes. Watch so the crust and tomatoes on top don't burn.
Remove the galette from the oven and garnish with fresh thyme, chili flakes, queso, and a drizzle of olive oil.