

Ugandan Rolex Egg Wrap (Street Food Recipe)
Good street food does not need to stay on the street. It can absolutely live in your kitchen.
The Rolex is a beloved Ugandan street food made from a simple vegetable omelette wrapped in soft chapati, a flaky unleavened flatbread similar to roti. I have spent time in Uganda and other parts of East Africa, and I draw inspiration from the way street food culture shows up across the region, fast, fresh, and deeply satisfying.
Across East Africa, chapati is a staple that shows up at breakfast, lunch, and everything in between. It is often used as the base for quick handheld meals like the Rolex, which makes it one of the most practical and versatile snacks you can make at home.
For me, this recipe is part of a wider way of cooking, taking inspiration from street foods across Uganda and the region, then recreating them in a home kitchen where they are just as accessible, flexible, and fun to eat.
The Rolex is exactly what it sounds like. Eggs are cooked into a thin omelette, layered with vegetables, and rolled tightly in flatbread to create a warm portable wrap. It works just as well for breakfast as it does for a midday snack or quick dinner.
There is no single correct way to make it. Some versions are simple with just eggs, onion, and tomato, while others are packed with cabbage, peppers, or whatever you have on hand. That flexibility is what makes it such a perfect everyday dish. It adapts to your kitchen and your schedule.
In this version, I keep it simple, fast, and home friendly so you can recreate it without special ingredients or long prep times. It is proof that street food does not have to stay on the street. It can become part of your everyday cooking rhythm.
Whether you are looking for a quick breakfast wrap, an easy lunch, or a satisfying snack, this Ugandan Rolex is the kind of recipe that fits into real life. No rules, just good food.
")
Ugandan Rolex (Omelette Rolled in Chapati)
A delicious and satisfying East African street food classic, fluffy vegetable omelette wrapped in soft, flaky chapati flatbread. This “rolex” is customizable, quick to make, and perfect for breakfast, brunch, or anytime you want a flavorful, handheld meal.
Ingredients
- 1 cup all-purpose flour
- 1 teaspoon salt
- 1 tablespoon vegetable oil, plus extra for cooking
- 1/4 cup hot water + 1 tablespoon hot water (adjust as needed)
- 4 eggs
- 1/2 teaspoon black pepper
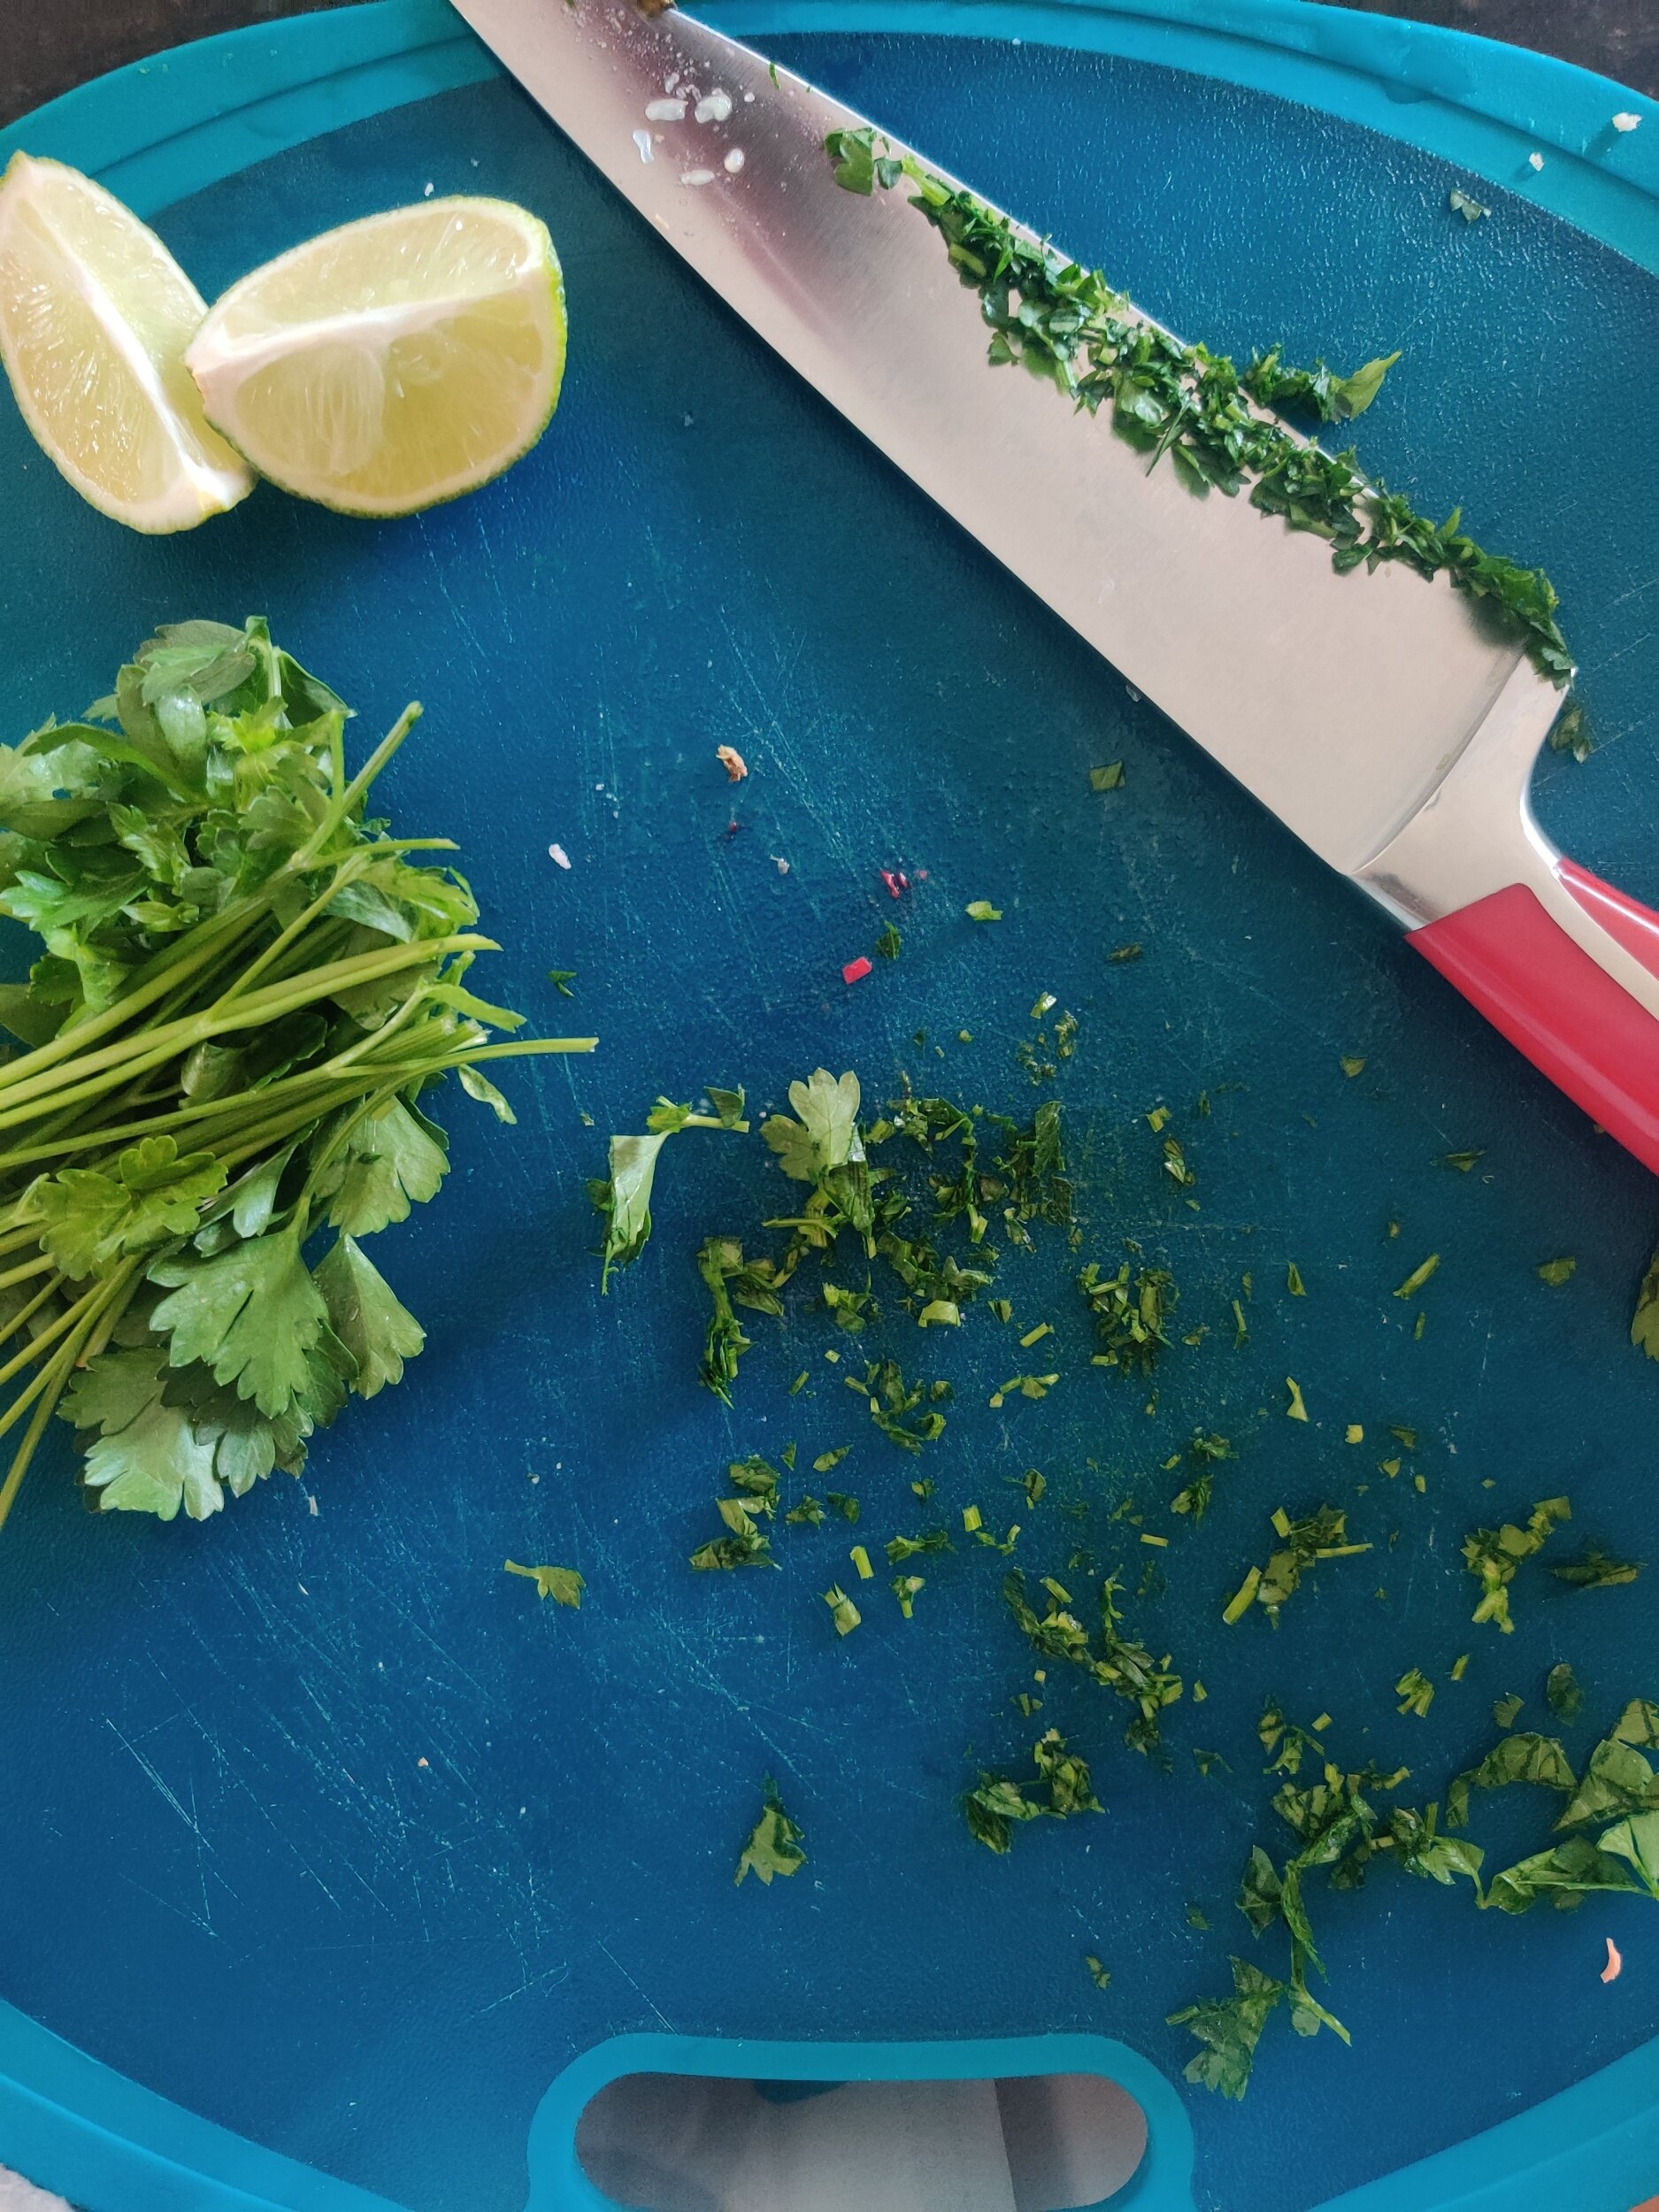
- 1 tablespoon fresh parsley, chopped
- 1 teaspoon Italian seasoning
- 1 teaspoon dried parsley
- Pinch of salt
- 2 tablespoons pesto
- 1/4 cup Parmesan cheese, grated
- 2 tablespoons sun-dried tomatoes, chopped
- 2 tablespoons goat cheese
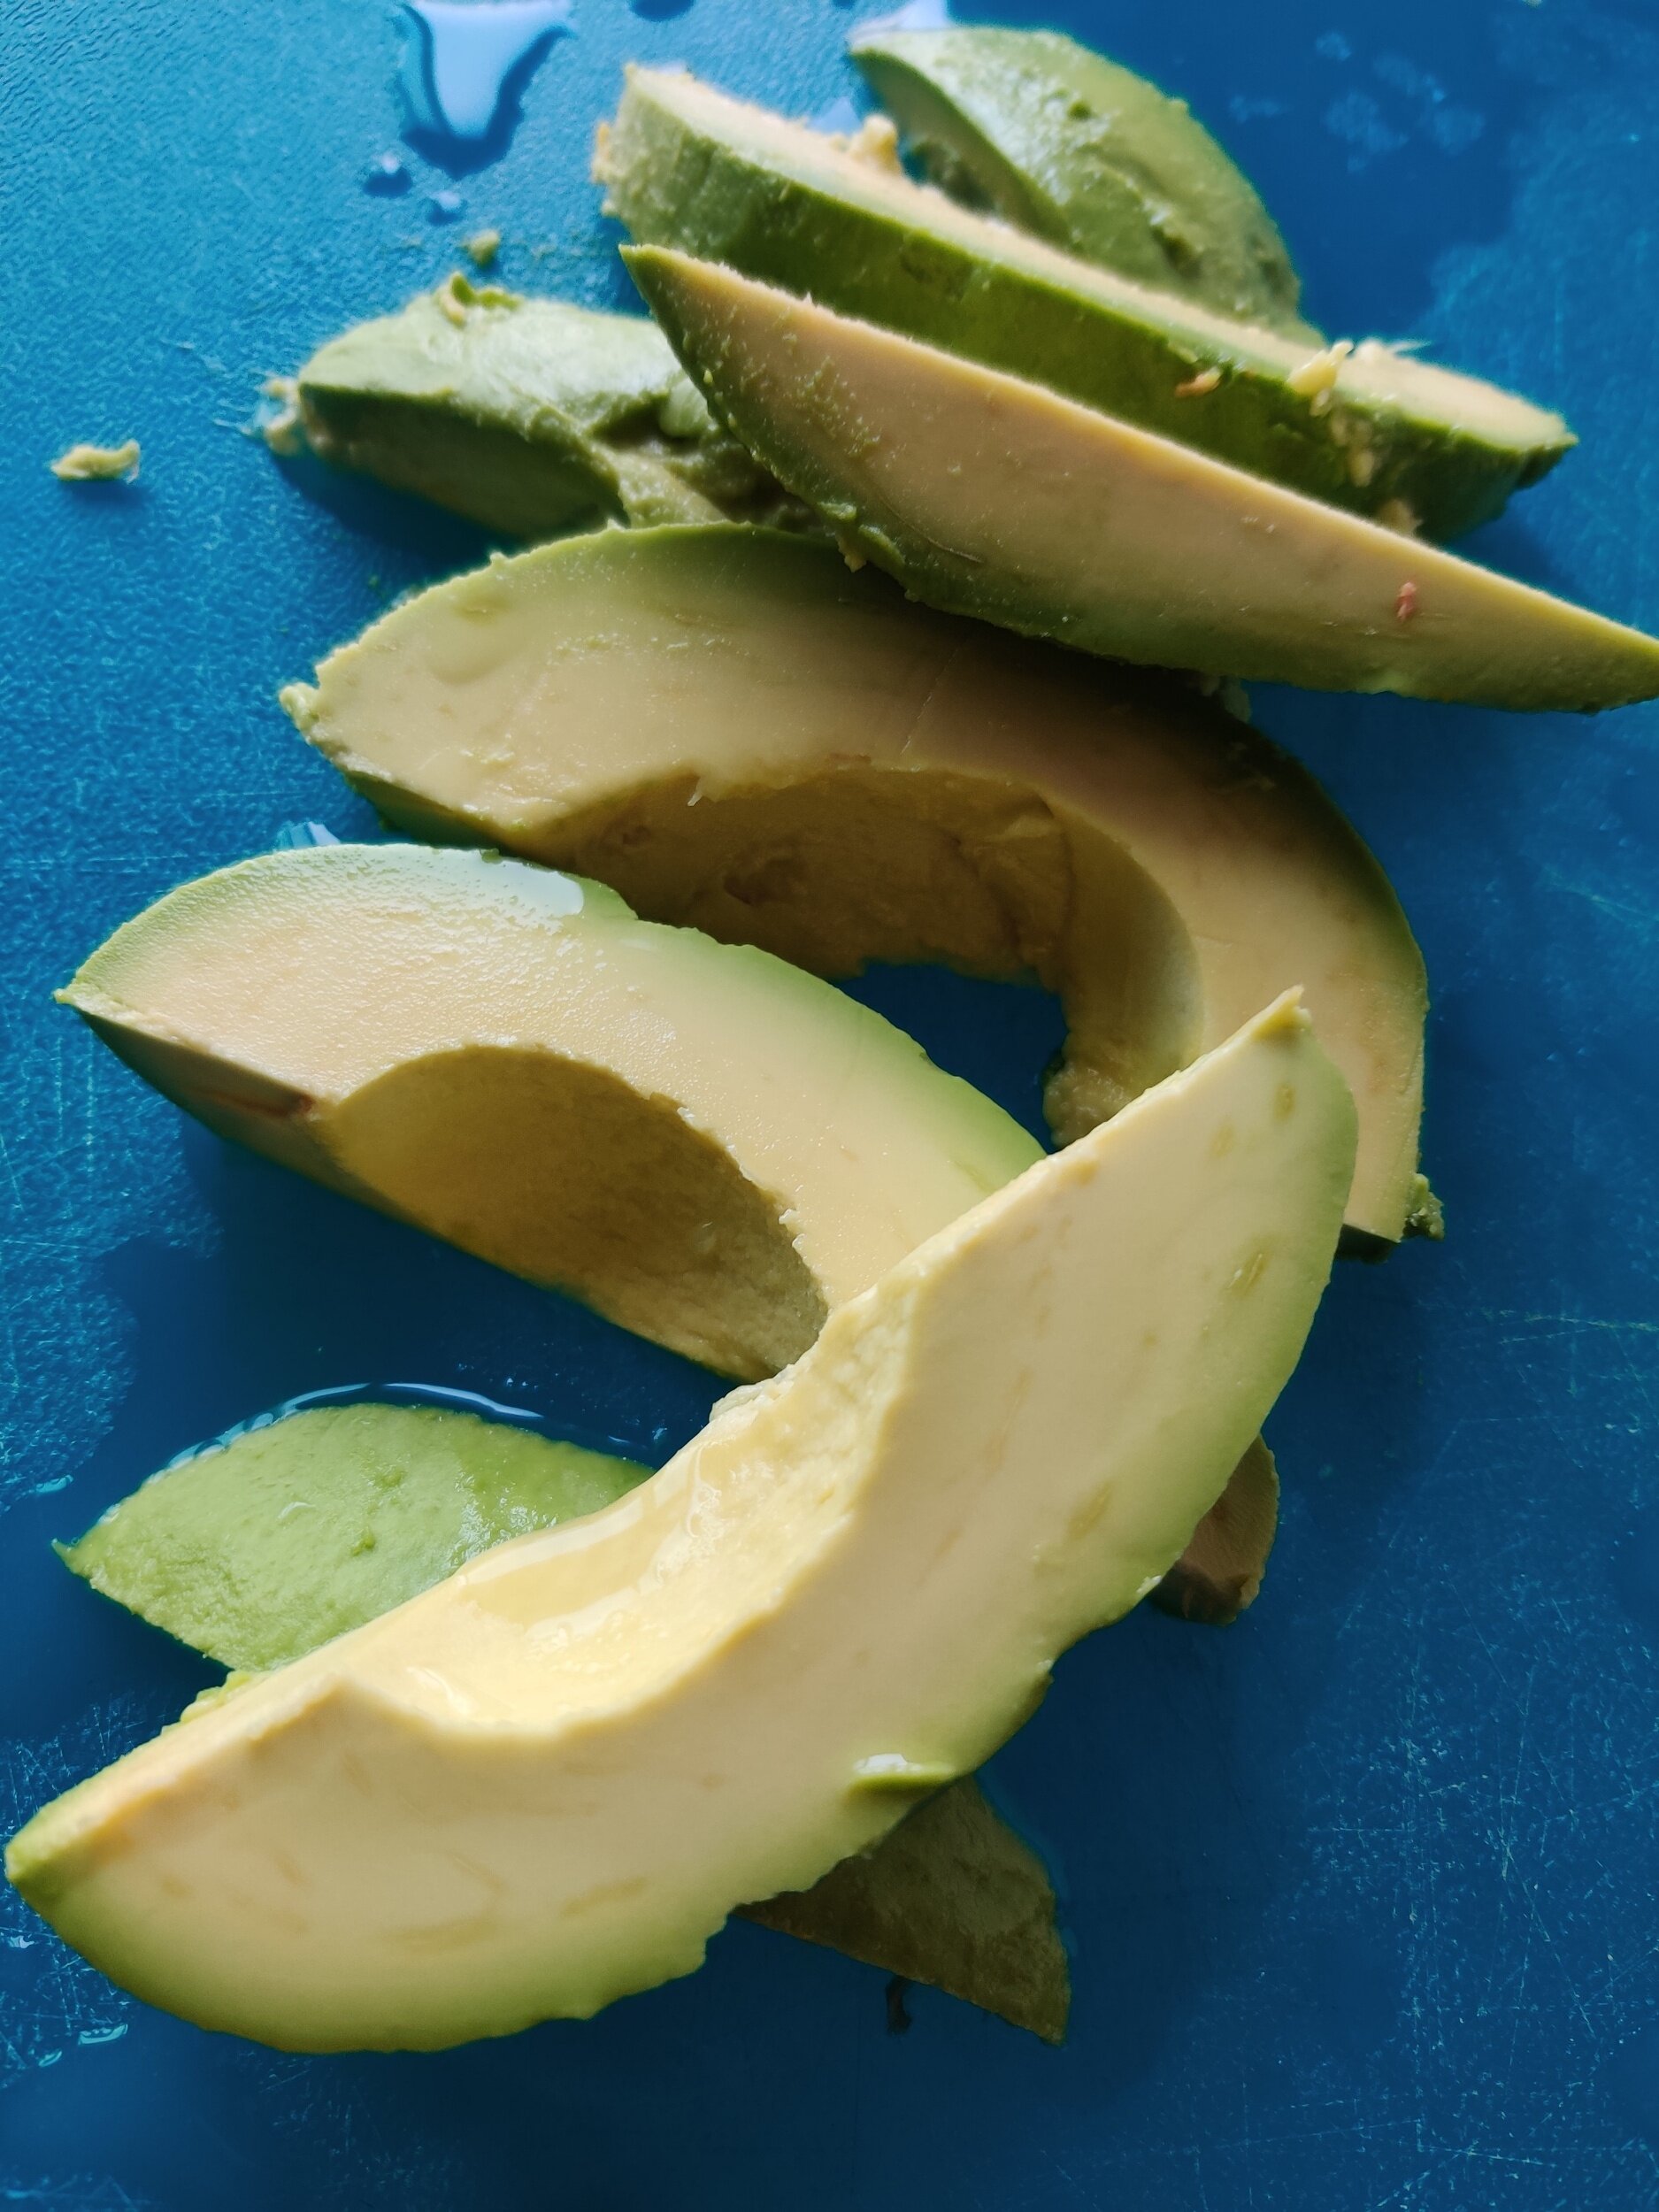
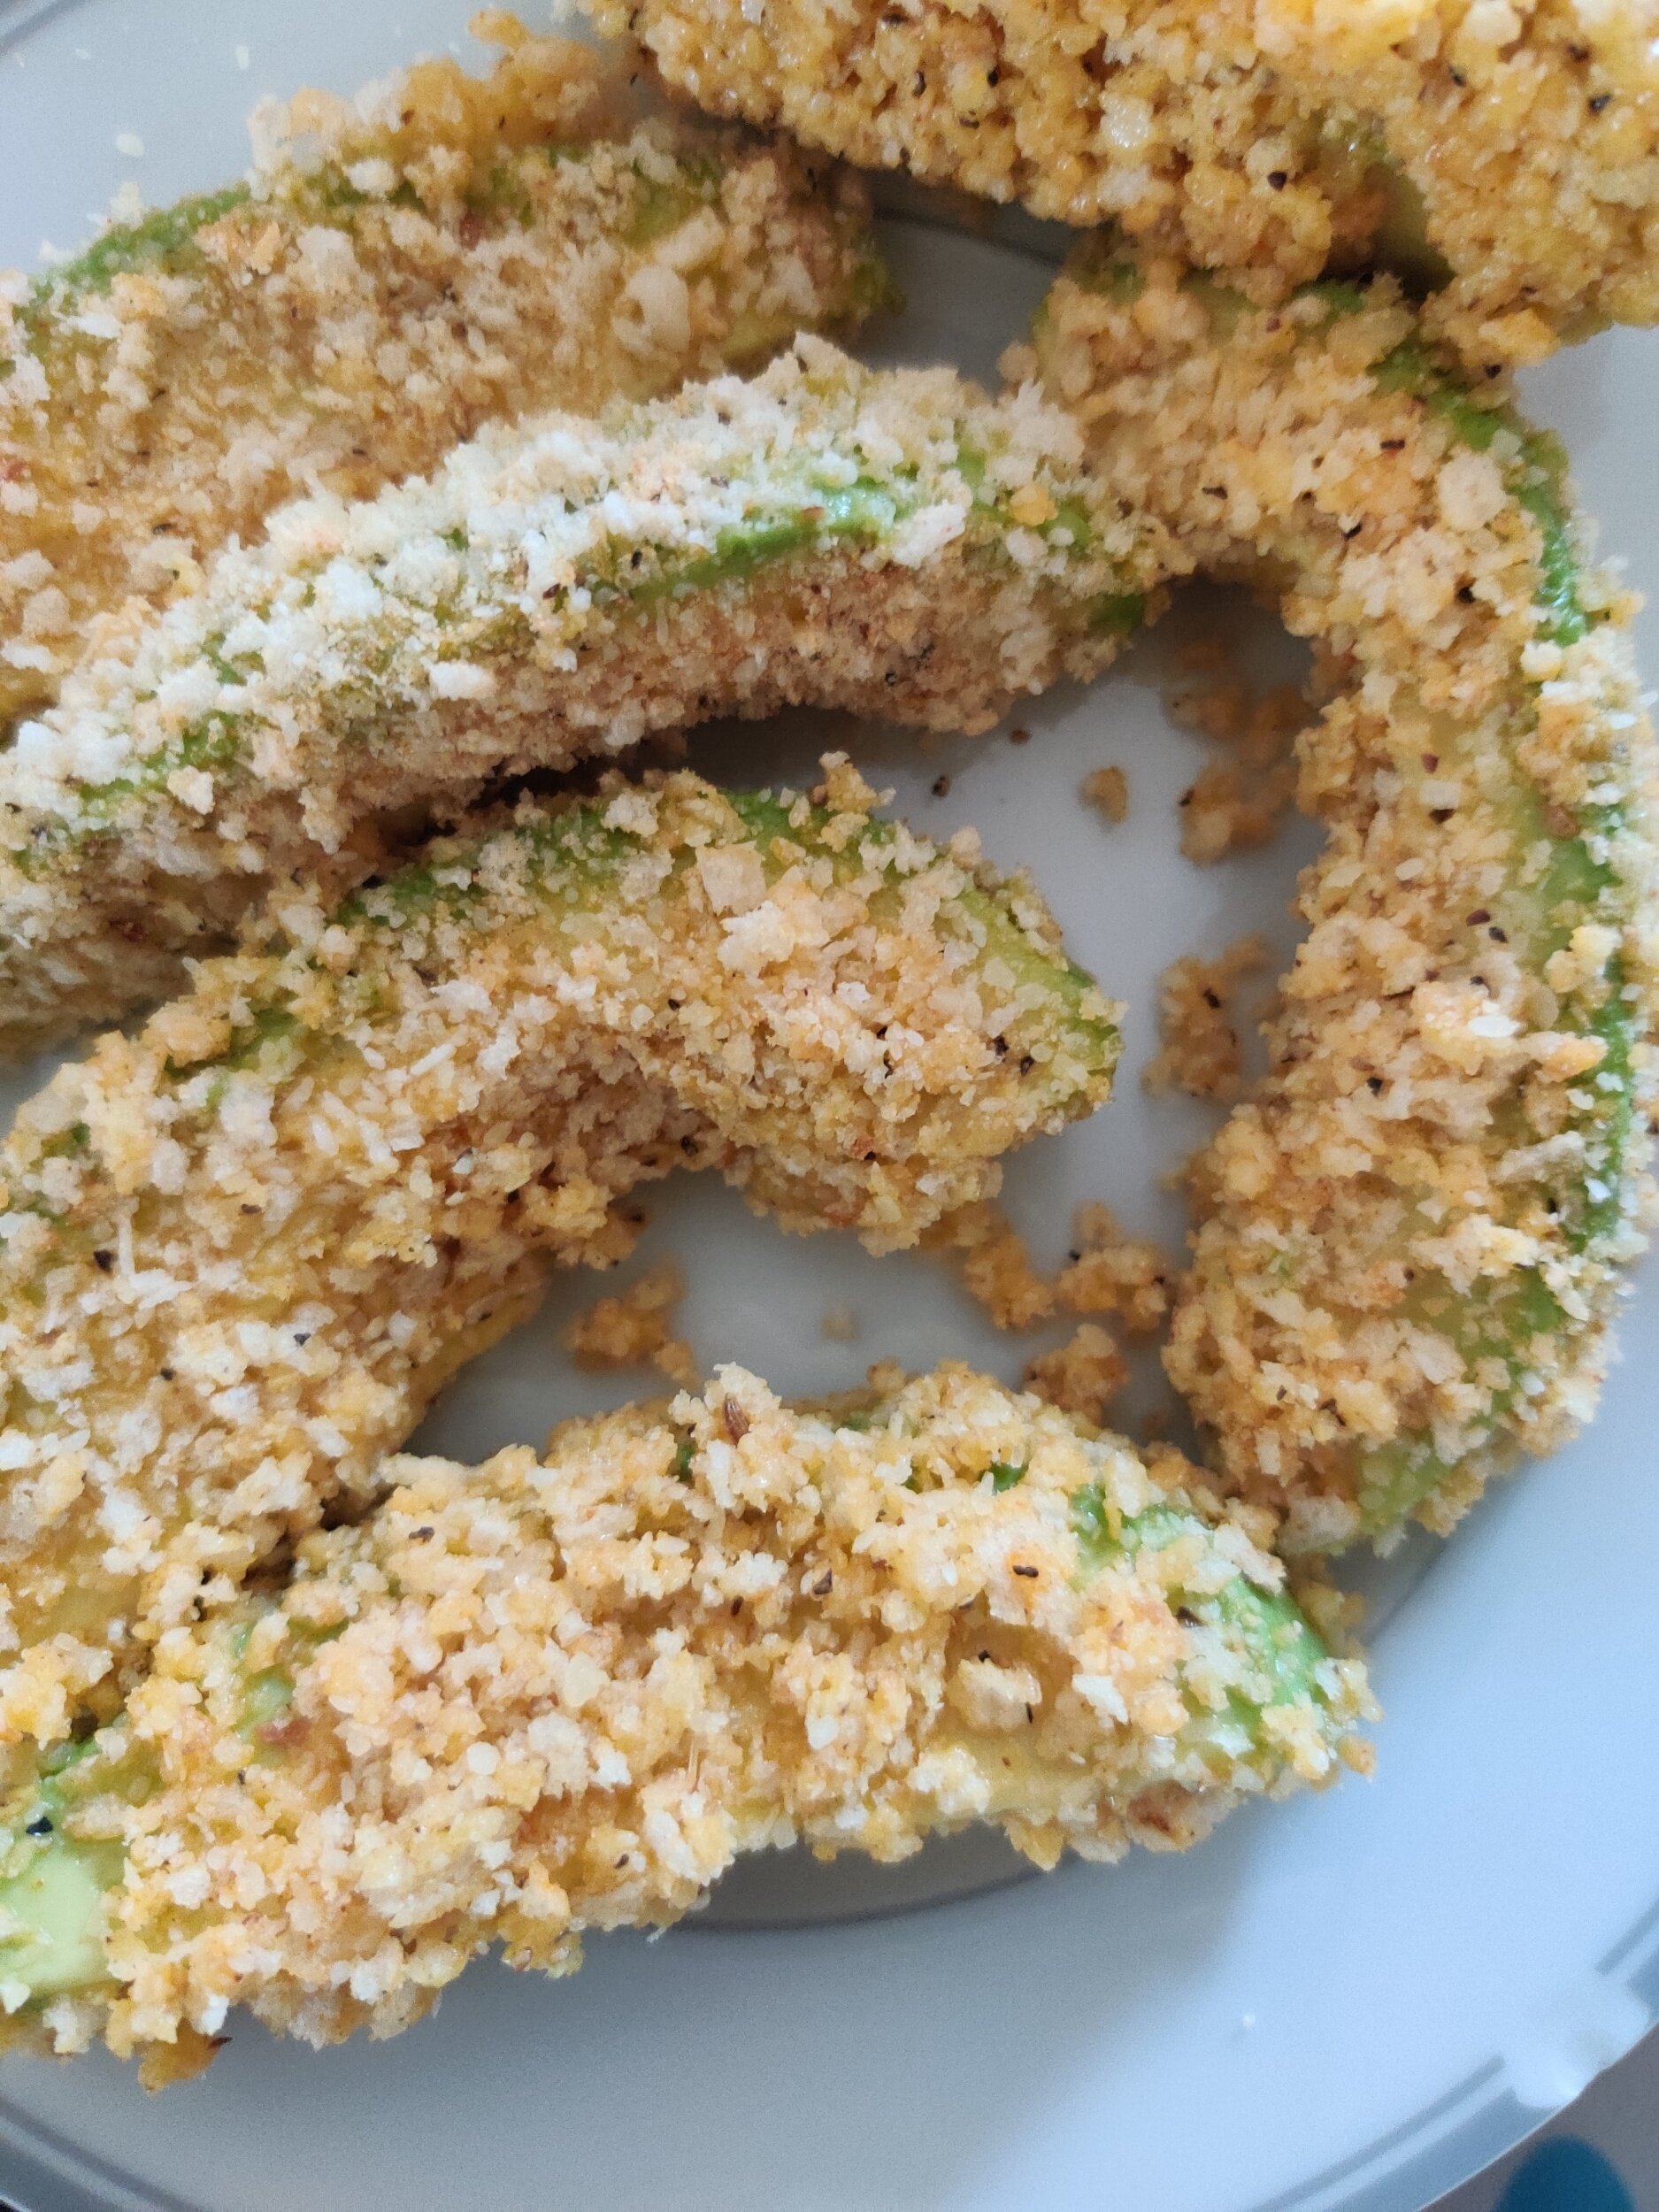
- 1 avocado, mashed or sliced with lemon juice
Instructions
- In a medium bowl, mix the flour and salt. Add the vegetable oil and mix. Gradually add the hot water while stirring to form a soft dough. On a lightly floured surface, knead the dough for about 5 minutes until smooth. Shape into a ball, then divide into two equal pieces. Cover and let rest for 10 minutes.
- On a lightly floured surface, roll each dough ball into a circle about 1/4 inch thick and roughly the size of the pan you’ll use to cook the omelette.
- Lightly brush each chapati with oil, then press into a lightly floured shallow plate. Flip and repeat.
- Heat a non-stick pan over medium-high heat and lightly oil it. Cook each chapati for about 15 seconds per side, flipping once, until you see brown spots and the chapatis are cooked through. Set aside.
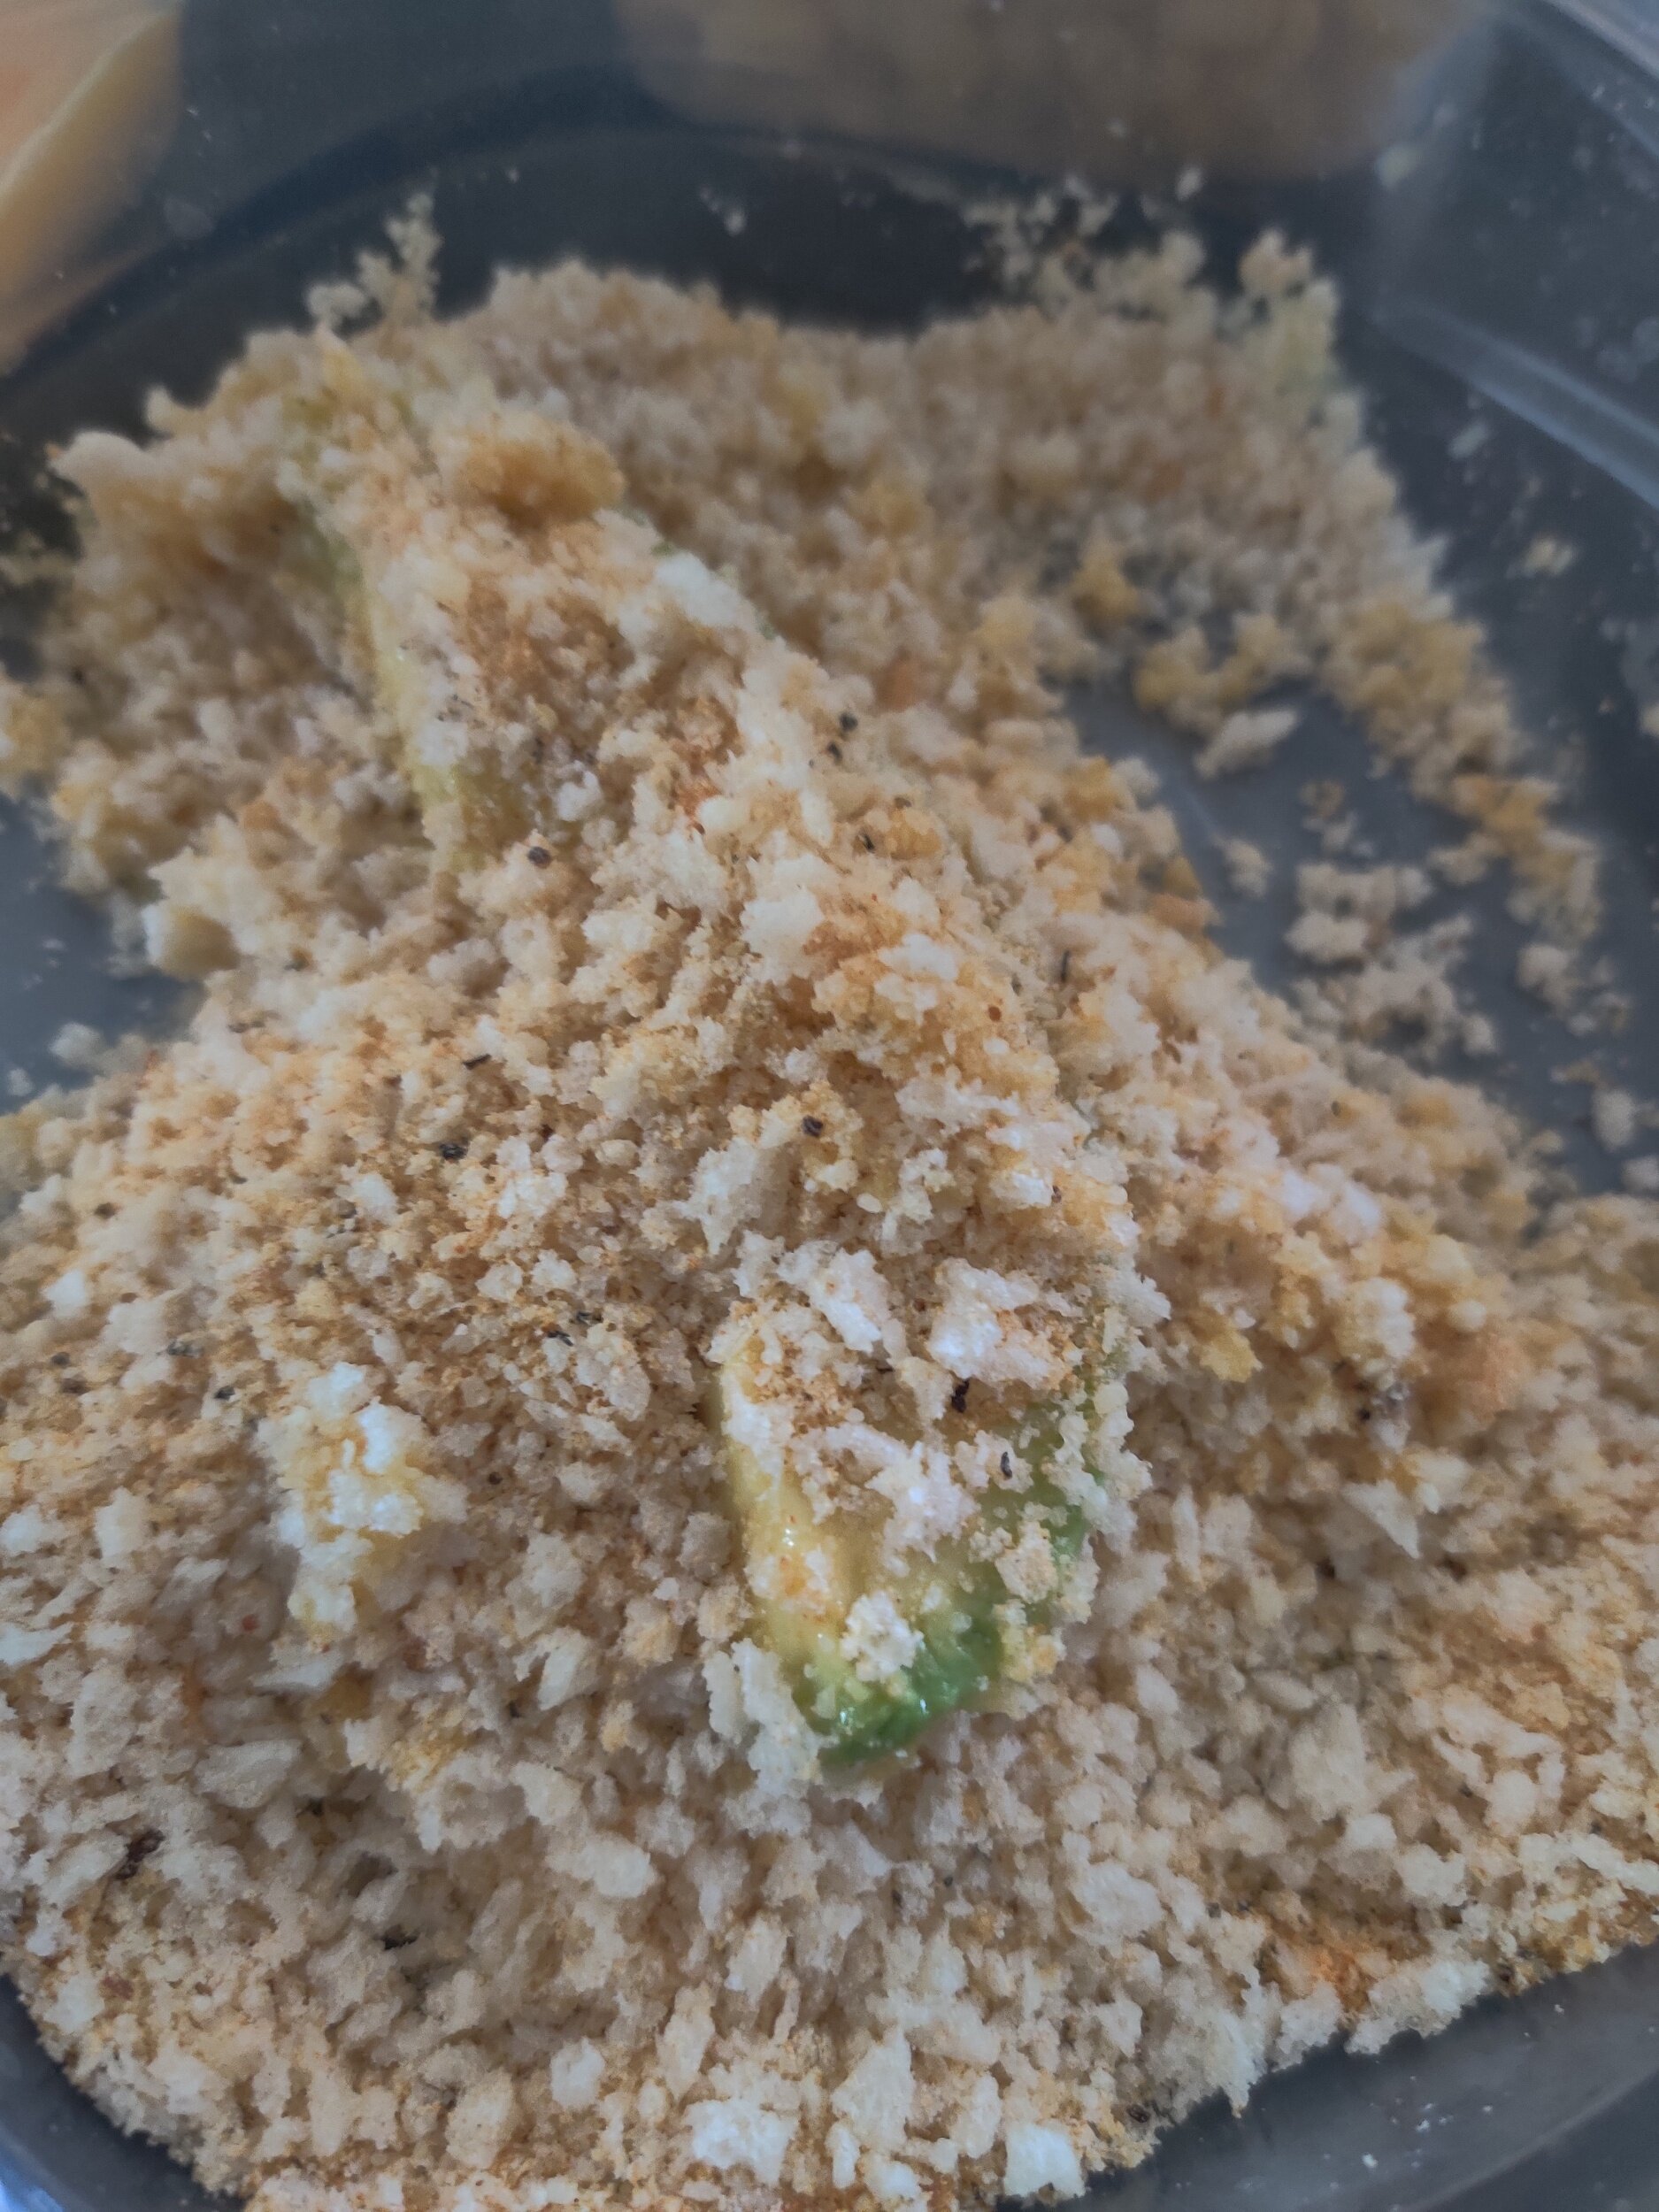
- In a bowl, beat the eggs with black pepper, fresh parsley, Italian seasoning, dried parsley, salt, Parmesan cheese, half of the goat cheese, and half of the sun-dried tomatoes.
- Pour the egg mixture into the hot pan and cook omelettes one at a time until set.
- Place each omelette on top of a chapati. Top each with half an avocado and 1 tablespoon of pesto. Sprinkle with the remaining sun-dried tomatoes and goat cheese.
- Roll up each chapati tightly to form a “rolex.” Cut each in half, secure with toothpicks, and serve hot.
I am not a certified nutritionist and any nutritional information on dontmissmyplate.com should only be used as a general guideline.
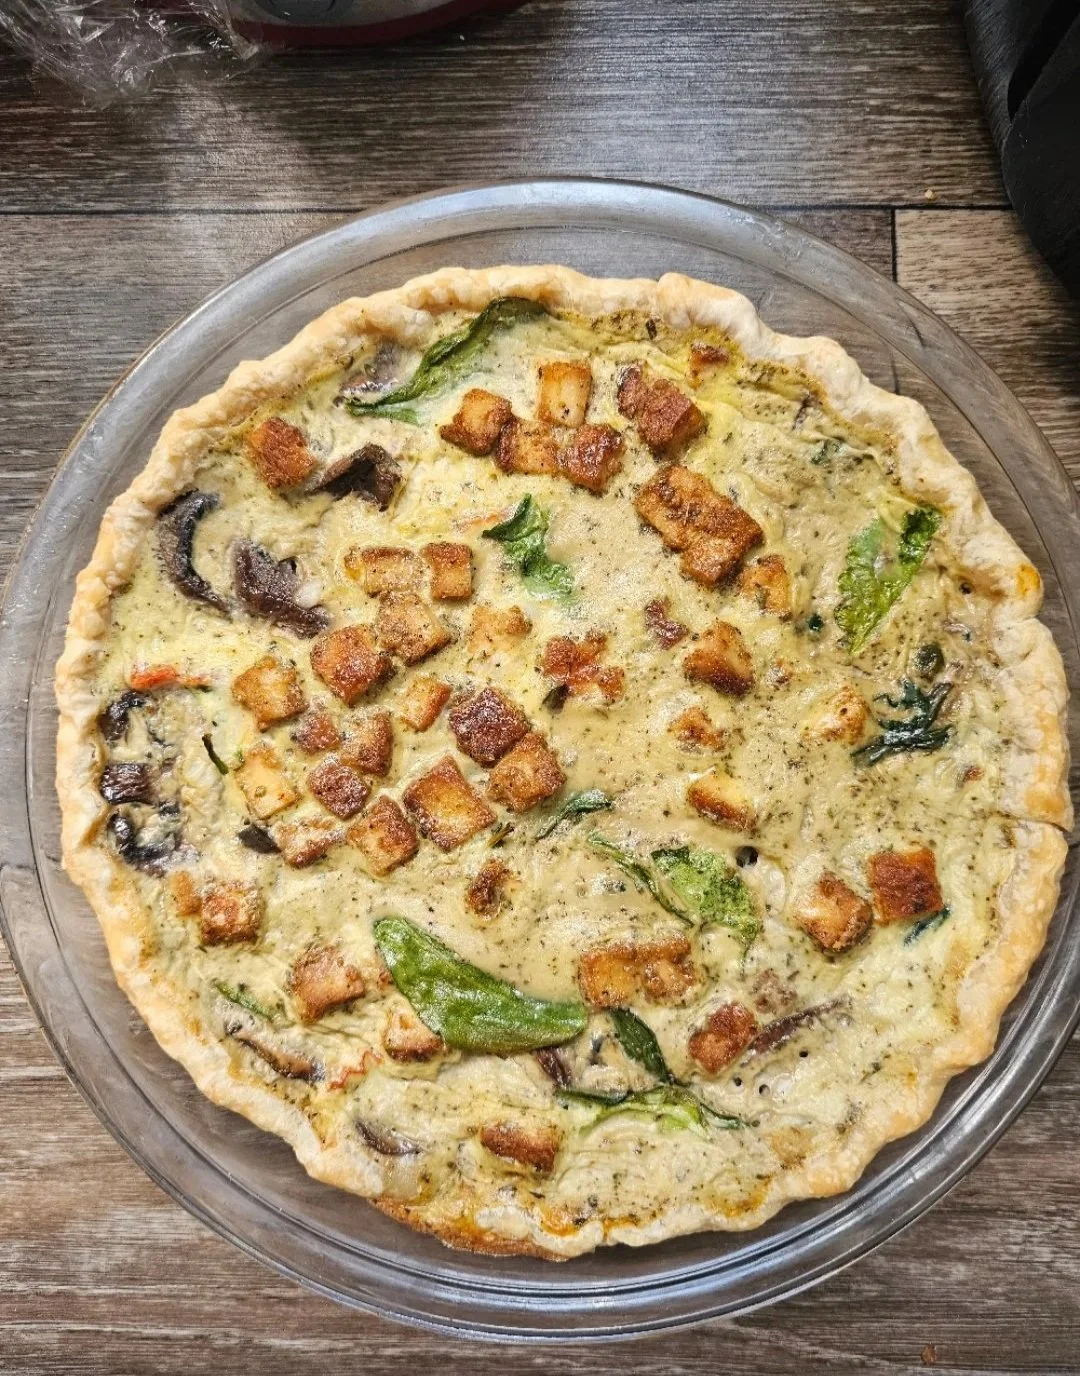
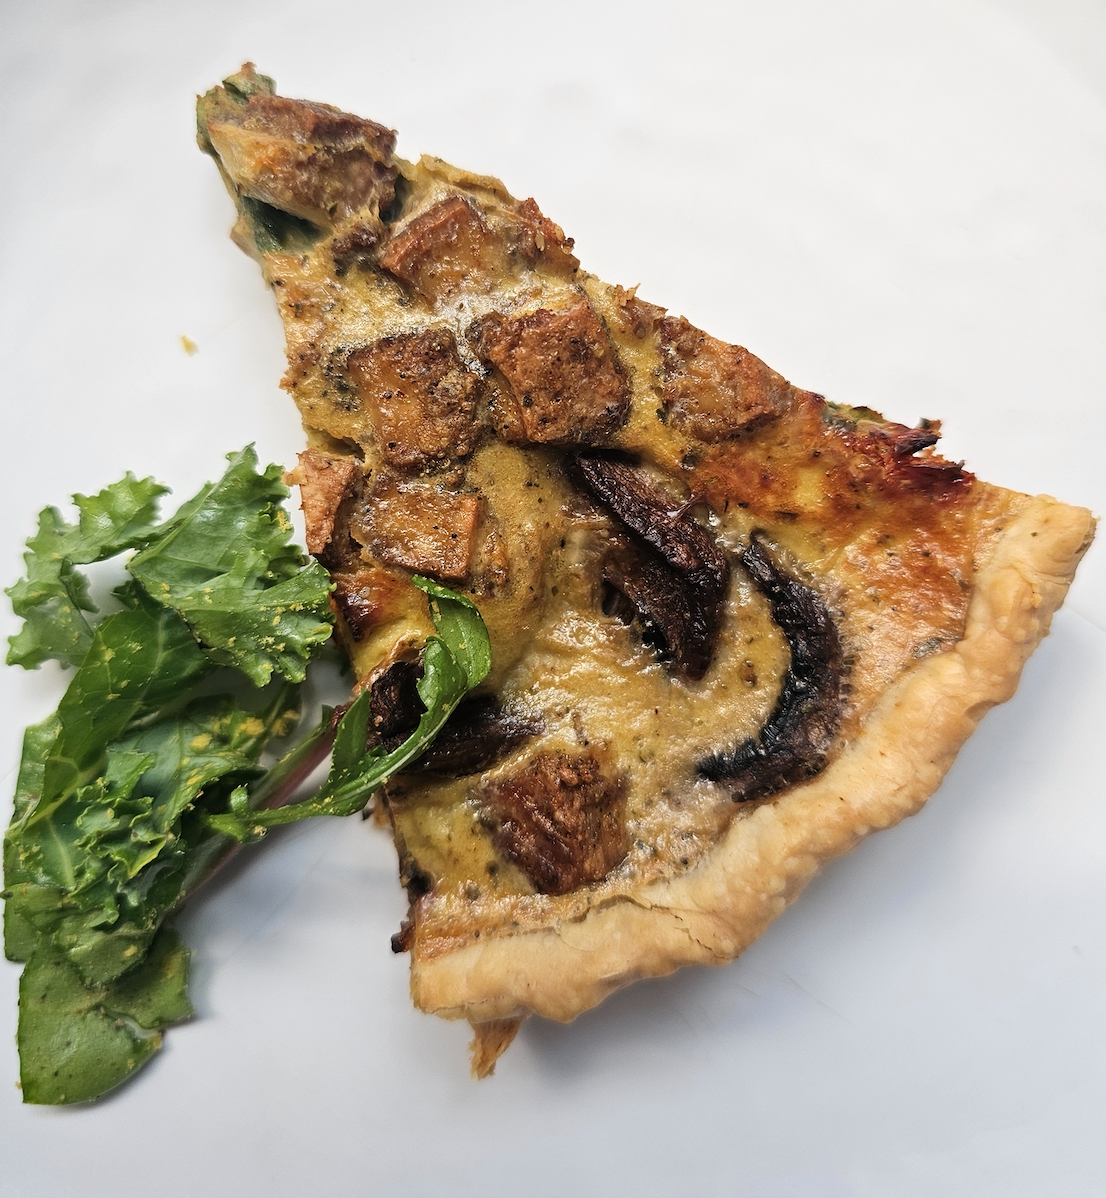
Mushroom, Spinach and Roasted Tofu Quiche
Celebrate spring and Easter with this Mushroom, Spinach and Tofu Masala Quiche, a vibrant twist on a classic brunch favorite. Crispy, oven-roasted tofu cubes bring a savory crunch and hold their shape beautifully, while creamy coconut milk adds luscious richness without heaviness. Earthy mushrooms, tender spinach, and sun-dried tomatoes provide fresh seasonal flavor, and a subtle malada-style masala infuses the quiche with aromatic warmth, giving it a uniquely Indian flair.
Perfect for a brunch spread, holiday table, or cozy weekend breakfast, this quiche is light, flavorful, and visually stunning. Serve warm or at room temperature, paired with a fresh salad or spring fruits, and it’s sure to become the centerpiece of your table.
Why this quiche works:
Roasted tofu: Adds protein, texture, and seasoning that holds up in the quiche.
Coconut milk: Replaces heavy cream for silky smoothness and subtle sweetness.
Masala seasoning: Lifts the vegetables with warm, aromatic spice without overpowering the dish.
Every spice in this recipe has a purpose: cumin and coriander bring earthiness and brightness, fenugreek deepens savory notes, garlic powder amplifies umami, oregano adds herbal lift, and just a touch of masala ties everything together with aromatic warmth.
Perfect for Easter brunch, a spring gathering, or a cozy weekend breakfast, this quiche is both visually stunning and packed with flavor.


Mushroom, Spinach and Roasted Tofu Quiche
This savory Mushroom, Spinach and Tofu Masala Quiche combines the creaminess of coconut milk, the warmth of traditional Indian spices, and wholesome vegetables for a brunch-worthy dish that’s both comforting and flavorful. Perfect for breakfast, lunch, or a light dinner, it’s a fusion of East-meets-West cuisine that will impress vegans and omnivores alike.
Ingredients
- 1/3 cup tofu, cubed and oven-roasted until golden
- 4 eggs
- 1/2 cup coconut milk
- 1/4 tsp seasoned salt
- 1/4 tsp black pepper
- 1/2 tsp garlic powder
- 1/4 tsp fenugreek
- 1/2 tsp oregano
- 1/2 tsp masala seasoning
- 1/4 tsp cumin
- 1/4 tsp coriander
- 1/2 small case of cremini mushrooms, sliced
- 1/2 cup spinach, chopped
- 2 tbsp sundried tomatoes, chopped
- 1 pastry pie crust (store-bought or homemade)
- 1/4 cup mozzarella cheese
Instructions
- Preheat oven to 375°F (190°C).
- Blind bake the pastry crust for 8–10 minutes to prevent a soggy bottom.
- Roast cubed tofu until golden and slightly crisp.
- Sauté mushrooms, spinach, and sundried tomatoes until tender. Add roasted tofu and cook 2–3 minutes more.
- In a bowl, whisk eggs, coconut milk, and all spices (salt, pepper, garlic powder, fenugreek, oregano, cumin, coriander, masala).
- Spread the vegetable and tofu mixture evenly in the pre-baked crust. Pour the egg-coconut-spice mixture over the vegetables. Stir in the mozzarella cheese directly into the custard so it melts throughout, rather than sprinkled on top.
- Bake 25–30 minutes, or until the quiche is set and lightly golden.
- Let cool 5 minutes before slicing into 6–8 pieces and serving.
Notes
- Roasted tofu provides texture and flavor that holds in the custard.
- Masala is intentionally subtle; other spices layer depth and balance.
- Pre-baking crust prevents a soggy bottom.
- Garnish with fresh herbs for color and brightness.
- Quiche can be served warm or room temperature, perfect for make-ahead Easter brunch.
Nutrition Facts
Calories
180Carbs (grams)
11 gFiber (grams)
2 gProtein (grams)
10 gI am not a certified nutritionist and any nutritional information on dontmissmyplate.com should only be used as a general guideline.

Honey-Glazed Tofu with Beet Purée, Roasted Mushrooms, and Eggplant Crisp
This dish started with a trip to the farmer’s market, where the deep purple of late-season eggplants and the vibrant reds of fresh beets caught my eye. A few days later, with some tofu and mushrooms already waiting in the fridge, it all started to come together. This recipe is a great way to make use of what you have and stop you from being so quick to toss older vegetables in the fridge. It took a while for me to use the Japanese eggplant!
The beets were roasted and blended into a smooth, earthy-sweet purée. The eggplant was sliced thin and baked until golden and crisp around the edges. Tofu was pressed and roasted until perfectly crisp, then tossed in a sticky glaze of honey and soy sauce. Mushrooms, slightly forgotten in the back of the fridge, got a second life in the oven with olive oil and ras el hanout—a North African spice blend that adds warmth, complexity, and just a hint of spice I love cooking with.
What came together was a dish full of contrast and character: soft and crisp, sweet and savory, humble and elegant. It’s proof that a few fresh ingredients and some leftovers can become something unexpected and deeply flavorful. Whether served as a starter, a shared small plate, or the centerpiece of a plant-based meal, it delivers on texture, color, and bold flavor, with just the right touch of comfort and creativity.
Tips for Making Beet Purée Smooth and Velvety
1. Roast or Steam the Beets Thoroughly
Roasting (wrapped in foil at 400°F/200°C for 45–60 minutes) brings out their natural sweetness and softens them deeply. Steaming also works well and helps preserve the vivid color. Make sure the beets are fork-tender—completely soft—before blending.
2. Peel for Smooth Texture
After cooking and cooling slightly, remove the skins by rubbing them off with a paper towel or your hands. Leaving the skins on can lead to a gritty texture in the purée.
3. Use a High-Speed Blender
A blender will yield a much smoother purée than a food processor. Add a small amount of liquid to help it blend evenly—this can be water, olive oil, cream, coconut milk, lemon juice, or vinegar, depending on your flavor goals. Blend in stages, starting slow and increasing speed for 1–2 minutes to achieve a silky consistency.
4. Strain for Extra Smoothness (Optional)
For an ultra-smooth finish, pass the purée through a fine-mesh sieve or chinois after blending. This removes any remaining fibrous bits.
5. Add a Fat or Binder for Creaminess
Incorporating a bit of butter, cream, Greek yogurt, or olive oil enhances texture and richness. For a vegan option, use tahini or avocado oil.

Honey-Glazed Tofu with Beet Purée, Roasted Mushrooms, and Eggplant Crisp
A beautifully plated vegetarian dish that balances bold flavors and contrasting textures: crisp honey-glazed tofu, silky beet purée, roasted mushrooms, and crunchy eggplant slices. Perfect for showcasing seasonal produce in a refined and modern way.
Ingredients
- 14 oz (400 g) firm tofu
- 1 tablespoon soy sauce
- 1 tablespoon teriyaki sauce
- 1 teaspoon garlic powder
- 1 teaspoon onion powder
- 1 tablespoon baking powder
- 1 teaspoon salt
- 1 teaspoon black pepper
- 1 teaspoon paprika
- 1 teaspoon chili flakes
- 1 teaspoon dried oregano
- Sesame seeds, for garnish
- Sprouts or fresh parsley, for garnish
- 4 tablespoons honey
- 4 tablespoons soy sauce
- 4 teaspoons sesame oil
- 4 teaspoons rice vinegar
- 2 large beets, roasted or boiled
- ¼ cup + 3 tablespoons olive oil (total: 7 tablespoons or ~105 ml)
- 2 teaspoons rice vinegar
- 1½ teaspoons salt
- ½ cup broth or water (about 120 ml)
- 8 oz (225 g) wild or brown button mushrooms, sliced
- 1 tablespoon olive oil
- 1 tablespoon dried thyme
- 1 teaspoon garlic powder
- 1 tablespoon rice vinegar
- 1 tablespoon ras el hanout (Moroccan spice blend)
- 1 Japanese eggplant, sliced
- 1 to 2 tablespoons olive oil
- ½ teaspoon salt
- ½ teaspoon black pepper
Instructions
- Start with the beets, since they take the longest. Remove the stems, peel, and dice. In a bowl, toss with olive oil, salt, pepper, and oregano. Wrap tightly in foil and bake at 400°F (200°C) for 45–60 minutes, tossing halfway through, until fork-tender.
- Remove excess moisture from the tofu. Either microwave the block wrapped in paper towels for 2 minutes or gently press and let drain for at least 10 minutes.
- Slice the tofu into 1-inch cubes. In a bowl, toss with soy sauce, teriyaki sauce, garlic powder, onion powder, salt, oregano, paprika, black pepper, and chili flakes. Coat well, then add baking powder to help crisp the surface. Spread the tofu on parchment paper and bake at 400°F for 35–40 minutes, flipping halfway, until golden brown. Be careful not to burn.
- In a bowl, toss mushrooms with olive oil, ras el hanout, oregano, garlic powder, and rice vinegar. Spread on a baking sheet and bake at 400°F for 25 minutes, flipping halfway. Season to taste if needed.
- Trim the top and slice very thinly (a mandoline works great). Discard any discolored sections. Toss slices in olive oil, salt, and pepper. Spread on a baking sheet and bake alongside the mushrooms for 25–30 minutes, flipping halfway, until crisp and slightly golden.
- Once the tofu is ready, combine soy sauce, honey, and sesame oil in a small saucepan over medium heat. Cook for 3–5 minutes, stirring, until thickened enough to coat the back of a spoon. Do not overcook. Toss the tofu in the glaze just before serving. If the sauce thickens while sitting, rehydrate with a splash of soy sauce and rice vinegar.
- Once the roasted beets have cooled slightly, transfer to a blender. Add rice vinegar and begin blending. Slowly drizzle in olive oil and/or broth as you blend until the purée is smooth—this can take up to 10 minutes. Taste and adjust seasoning. If you like a bit of texture (as I do), leave it slightly rustic.
- Spoon the beet purée onto the plate first. Add 2–3 pieces of glazed tofu on top, followed by roasted mushrooms and crispy eggplant slices. Garnish with sesame seeds, fresh sprouts, or parsley. Drizzle with extra glaze if desired.
I am not a certified nutritionist and any nutritional information on dontmissmyplate.com should only be used as a general guideline.

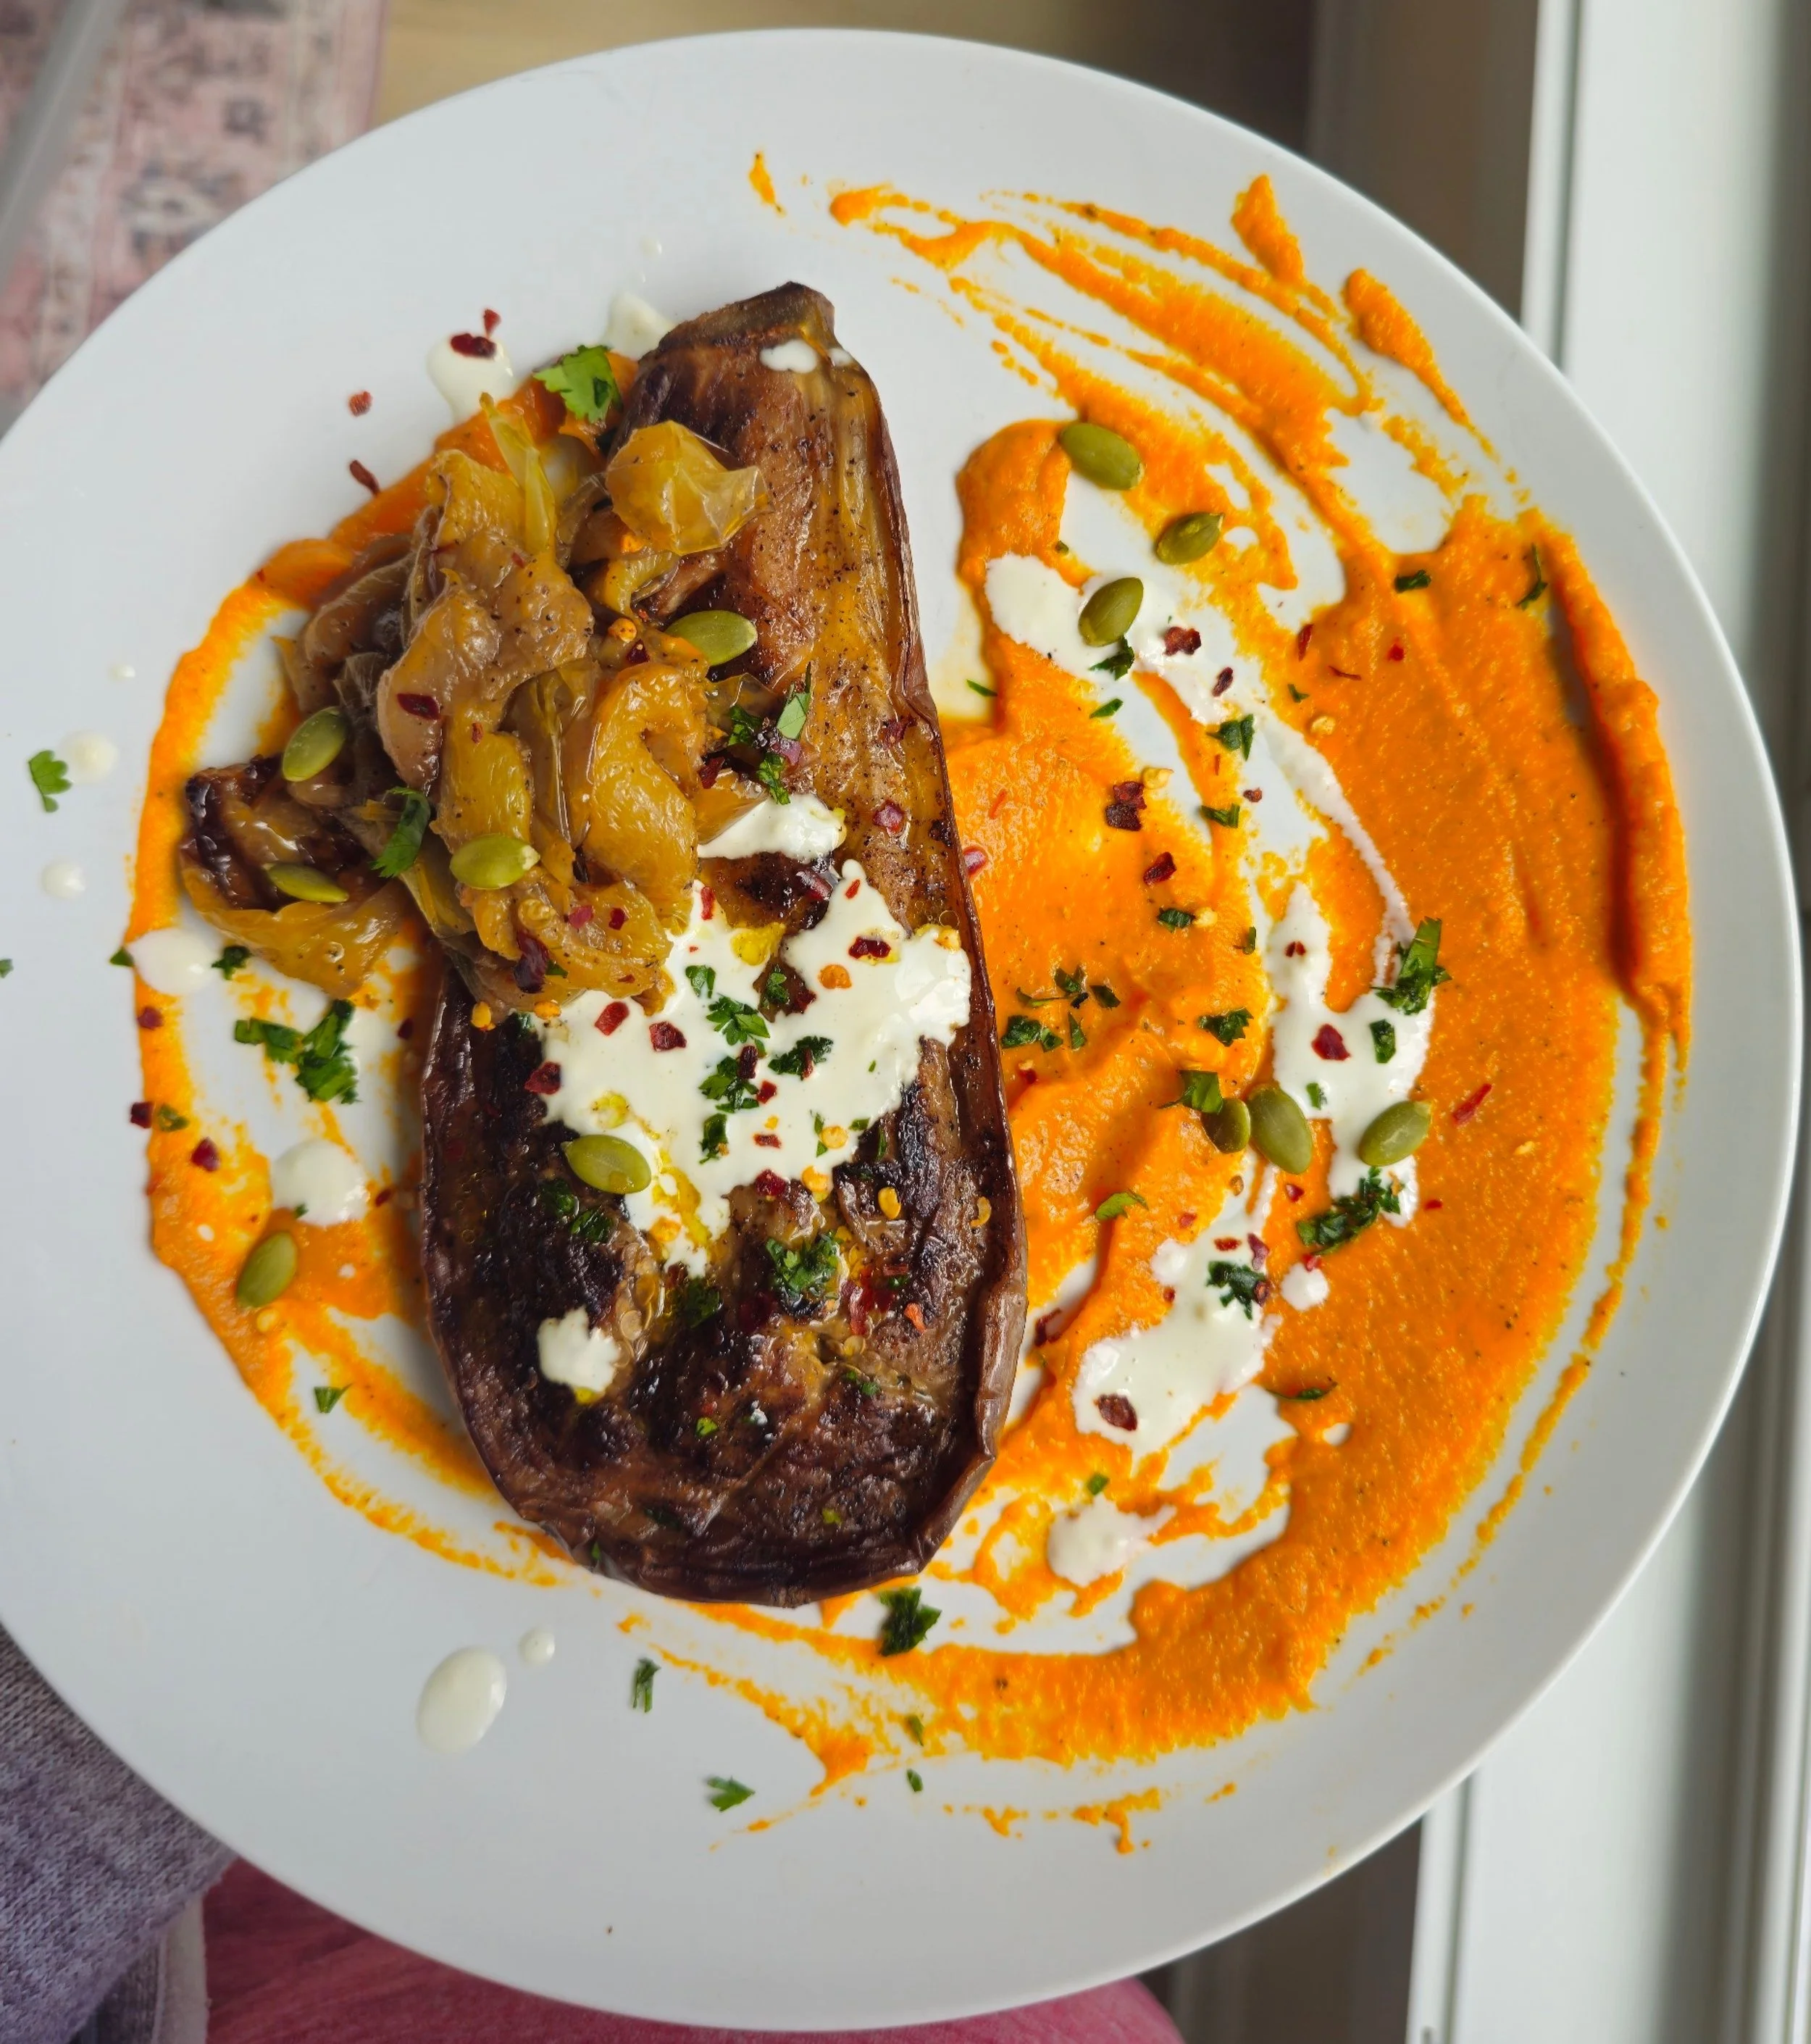
Roasted Eggplant and Blistered Peppers with Carrot and Sweet Potato Purée
As usual, this dish started at the farmers market — one of my favorite places to find inspiration. I love picking up vegetables I haven’t cooked with before, or ones I don’t use often enough. Sometimes it’s the shape or color that draws me in. This time, it was a mix of eggplants: a striking graffiti eggplant, a classic American, and some slender Japanese varieties. I didn’t end up using the Japanese eggplants in this recipe (they’ll star in something else soon), but the others became the foundation for this vibrant, plant-based plate.
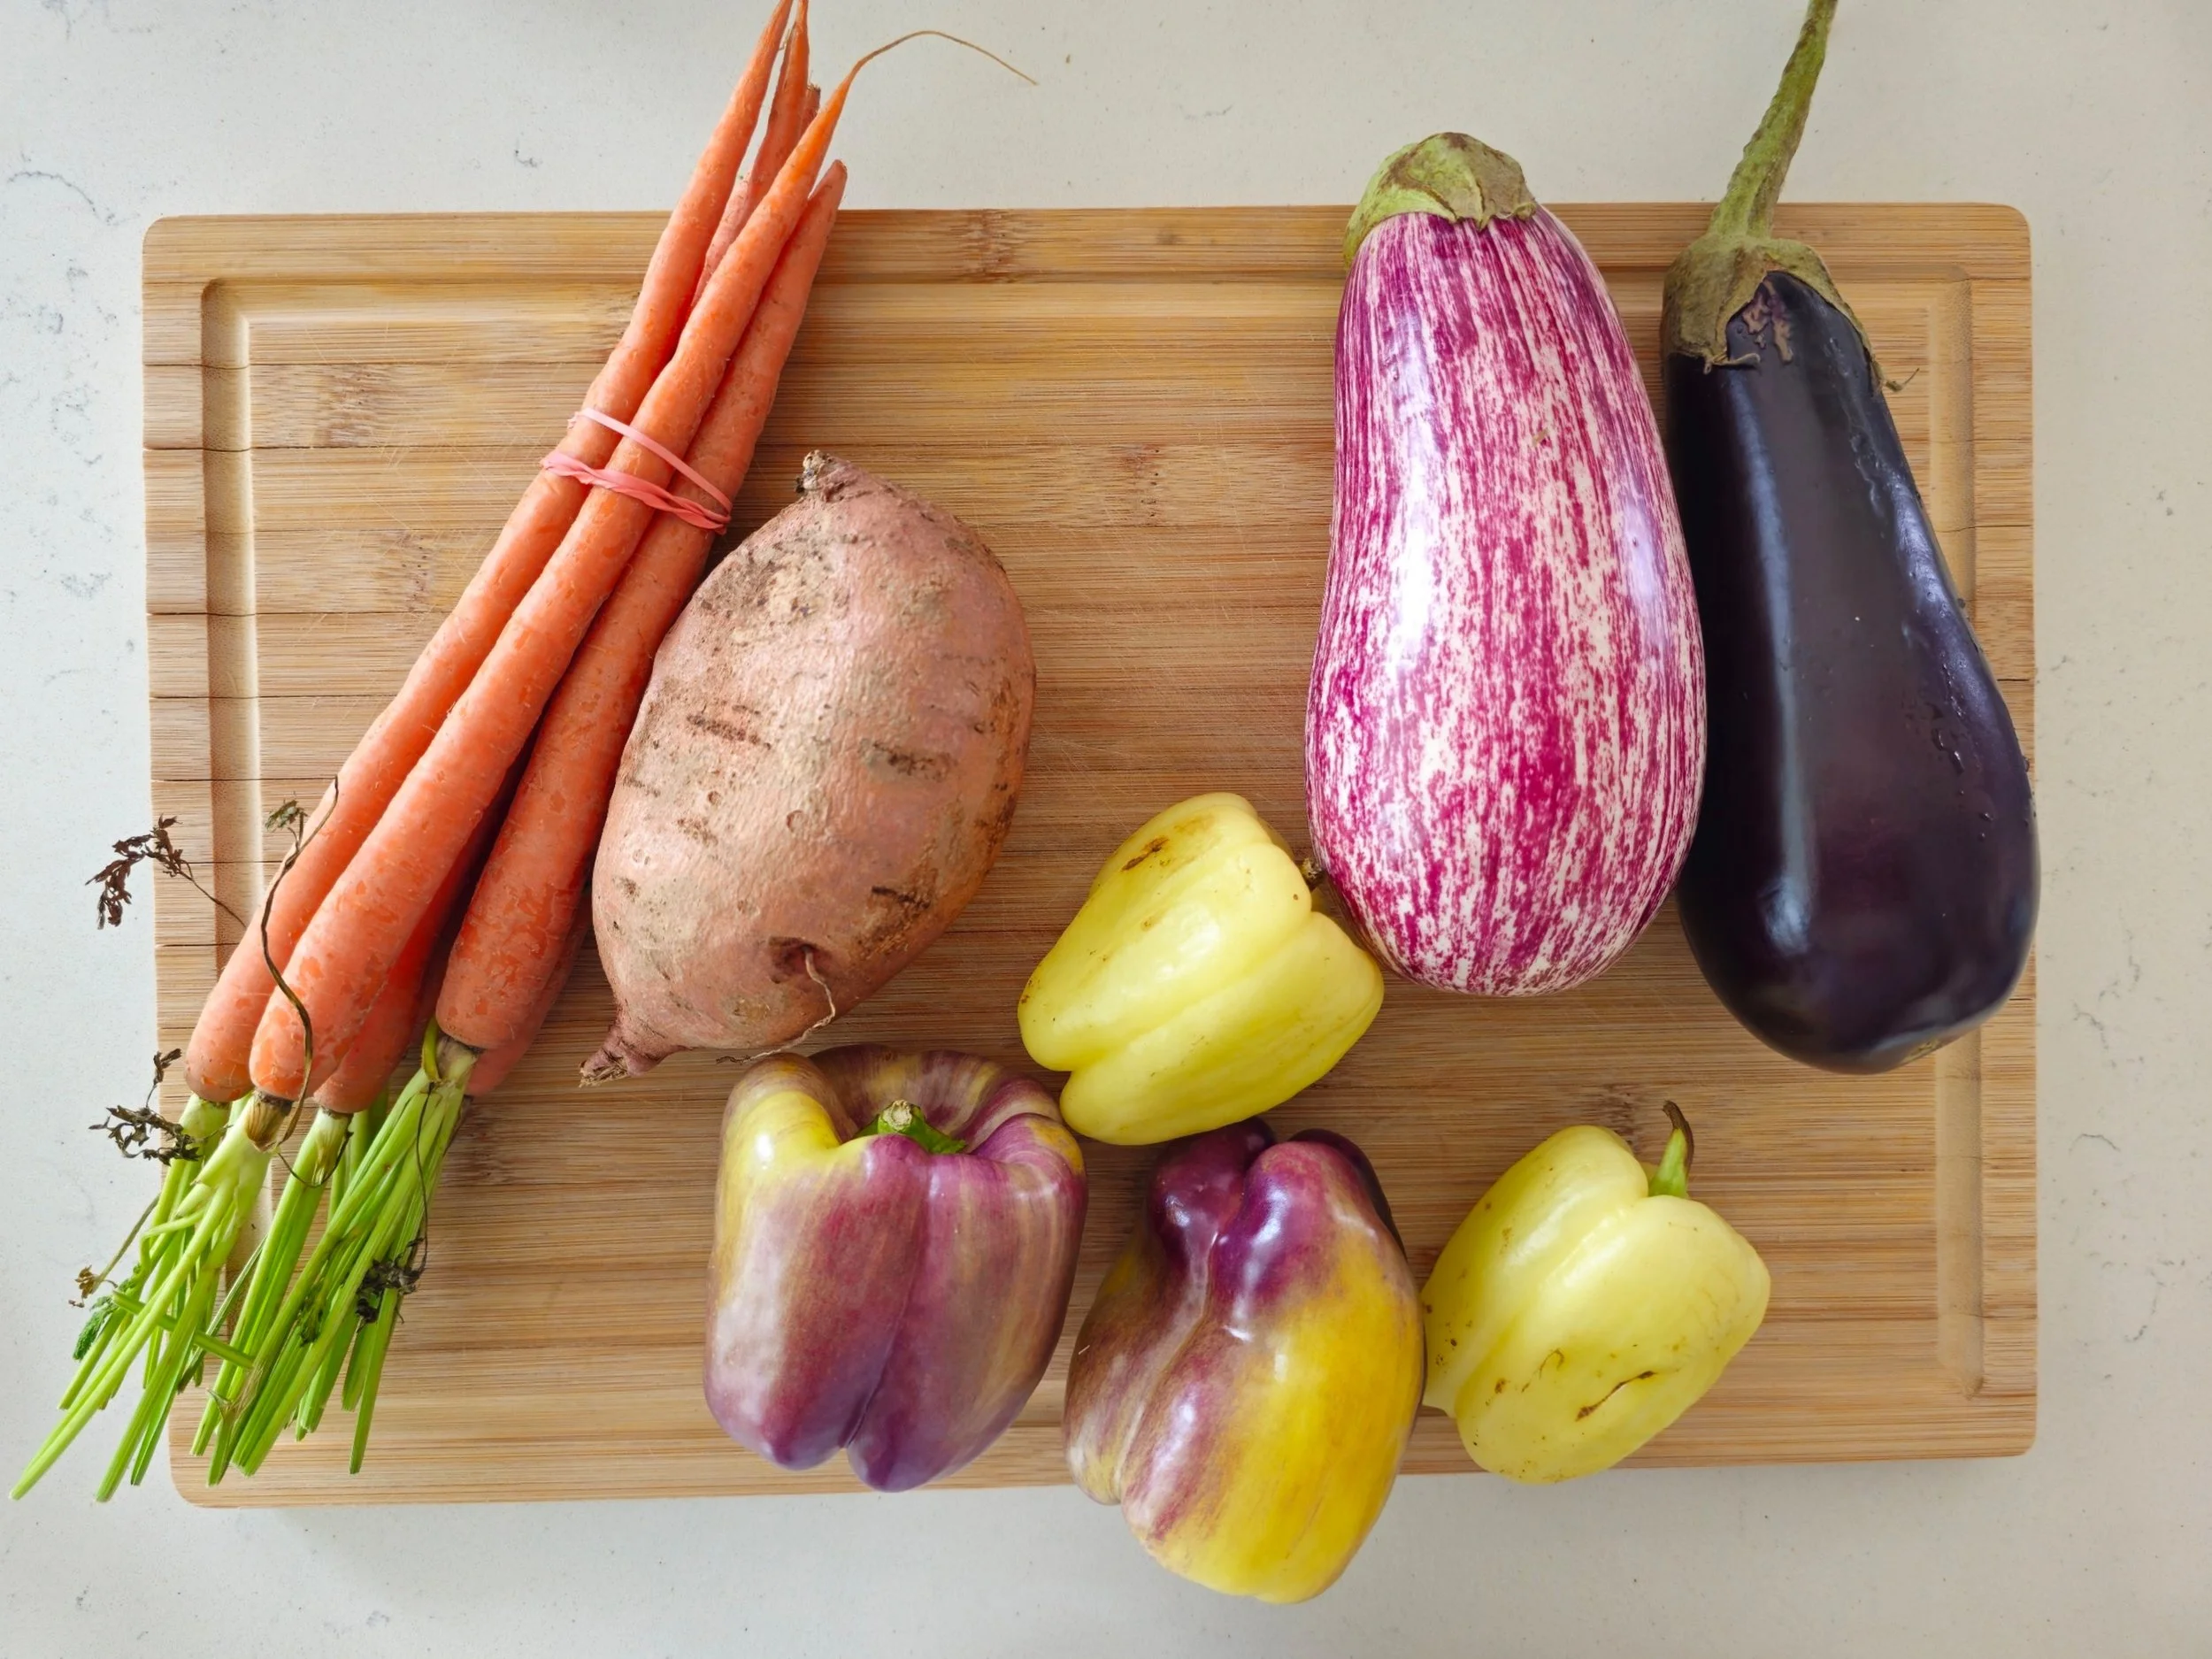
I also came across a basket of purple, white, and white bell peppers — softer, sweeter, and more delicate than the standard green or red. The white ones almost looked like frosted glass, and the purples had this beautiful, muted lavender tone. I couldn’t resist grabbing a few, even though I wasn’t sure how I’d use them yet. They ended up being perfect for blistering: their thinner skins charred quickly, adding a subtle smokiness without overpowering their natural sweetness.
I cross-hatched the eggplants and pan-seared them first to give them a beautiful char, then finished them in the oven for that perfect melt-in-your-mouth texture. I had carrots on hand and was originally going to roast them, but visually I knew they’d shine more as a purée. Since I’d also picked up a sweet potato, I blended them together for a purée that’s not only naturally sweet, but also thick enough to support the roasted vegetables on top. The blistered peppers, in all their unusual colors, add not just contrast, but personality to the finished dish.
This is a recipe that’s all about contrast: tender eggplant, creamy purée, and blistered skins, all coming together in one beautiful, nourishing plate.
Why I’m Choosing Graffiti Eggplants from Now On
I used both graffiti and American (globe) eggplants in this recipe, and the difference was clear. Graffiti eggplants are smaller with thin, purple-and-white striped skin and a naturally sweeter, creamier flesh. American eggplants are larger, darker, and have a firmer, spongier texture with a hint of bitterness. While both roasted well, the graffiti eggplants stood out for their tender texture and balanced flavor. For future versions of this dish, I’ll be reaching for graffiti eggplants — they’re perfect for plant-based recipes where texture and flavor really matter.

Roasted Eggplant and Blistered Peppers with Carrot and Sweet Potato Purée
Inspired by a farmers market bounty, this vibrant dish features charred eggplant, a silky carrot–sweet potato purée, and blistered heirloom peppers. It’s all about contrast—creamy, tender, smoky, and sweet in every bite.
Ingredients
- 2 medium to large graffiti and/or American eggplants
- Drizzle of olive oil
- 2 tablespoons coconut, sesame or peanut oil
- 2 teaspoons sea salt crystals
- 2 teaspoons black pepper
- 2 teaspoons Aromat (or all-purpose seasoning)
- 1 bunch carrots (about 4–5 medium carrots)
- 4–6 white and purple bell peppers
- 1 tablespoon + 1/8 cup olive oil
- 1 tablespoon Aromat (or all-purpose seasoning)
- 1 tablespoon black pepper
- 1 medium or large sweet potato
- 1 teaspoon cinnamon
- 1 teaspoon smoked paprika
- 1/4 teaspoon cumin
- 1/2 teaspoon oregano (dried or fresh)
- 1/4 teaspoon garlic powder
- 1–2 tablespoons milk or cream
- 1–2 tablespoons olive oil
- 1 tablespoon honey
- 1 teaspoon salt
- 1 teaspoon black pepper
- 1 tablespoon rice vinegar or lemon juice
- 2 tablespoons fresh parsley, chopped
- 1 teaspoon chili flakes (plus extra for garnish)
- Mexican crema or crema sauce, for drizzling
- Pumpkin seeds (optional), for garnish
Instructions
- Preheat the oven to 450°F (or use a grill if preferred).
- Toss the peppers with 1 tablespoon of olive oil and season with Aromat and black pepper.
- Roast on a tray until the skins blister and begin to blacken (about 15–20 minutes), turning once or twice.
- Once done, place the peppers in a bowl with the remaining olive oil. Peel off any extremely charred skin and slice.
- Peel and chop the sweet potato and carrots into chunks.
- Boil or steam until tender (15–20 minutes); test with a fork.
- Drain, then add olive oil, milk or cream, honey, salt, pepper, and spices.
- Add a splash of rice vinegar or lemon juice for brightness, if desired.
- Blend until smooth, adding more olive oil or milk for a silky texture.
- Slice the eggplants in half lengthwise.
- Score the flesh in a crosshatch pattern (deep but not all the way through).
- Drizzle and brush with olive oil, then sprinkle sea salt over the surface to help release moisture. Let sit for 10 minutes.
- Blot off excess moisture, then season with black pepper and Aromat.
- Heat coconut or peanut oil in a grill pan over medium-high heat. Sear the eggplants cut-side down for 5–7 minutes, then flip and cook the other side for 3 minutes.
- Transfer to a baking dish, cover with foil, and roast at 375°F for 25–30 minutes or until soft and golden inside. Check often, as time may vary based on eggplant size.
- Spoon a generous layer of warm carrot–sweet potato purée onto each plate.
- Place a roasted eggplant half on top.
- Drizzle with Mexican crema and layer the blistered peppers over or around the eggplant.
- Garnish with pumpkin seeds, fresh parsley, and chili flakes.
- Optional: Finish with a drizzle of olive oil or use the pepper-infused oil for extra flavor.
Notes
Serving Suggestions:
- Serve warm or at room temperature.
- This makes a beautiful vegetarian main course or a vibrant side dish alongside grilled chicken, fish, or tofu.
I am not a certified nutritionist and any nutritional information on dontmissmyplate.com should only be used as a general guideline.

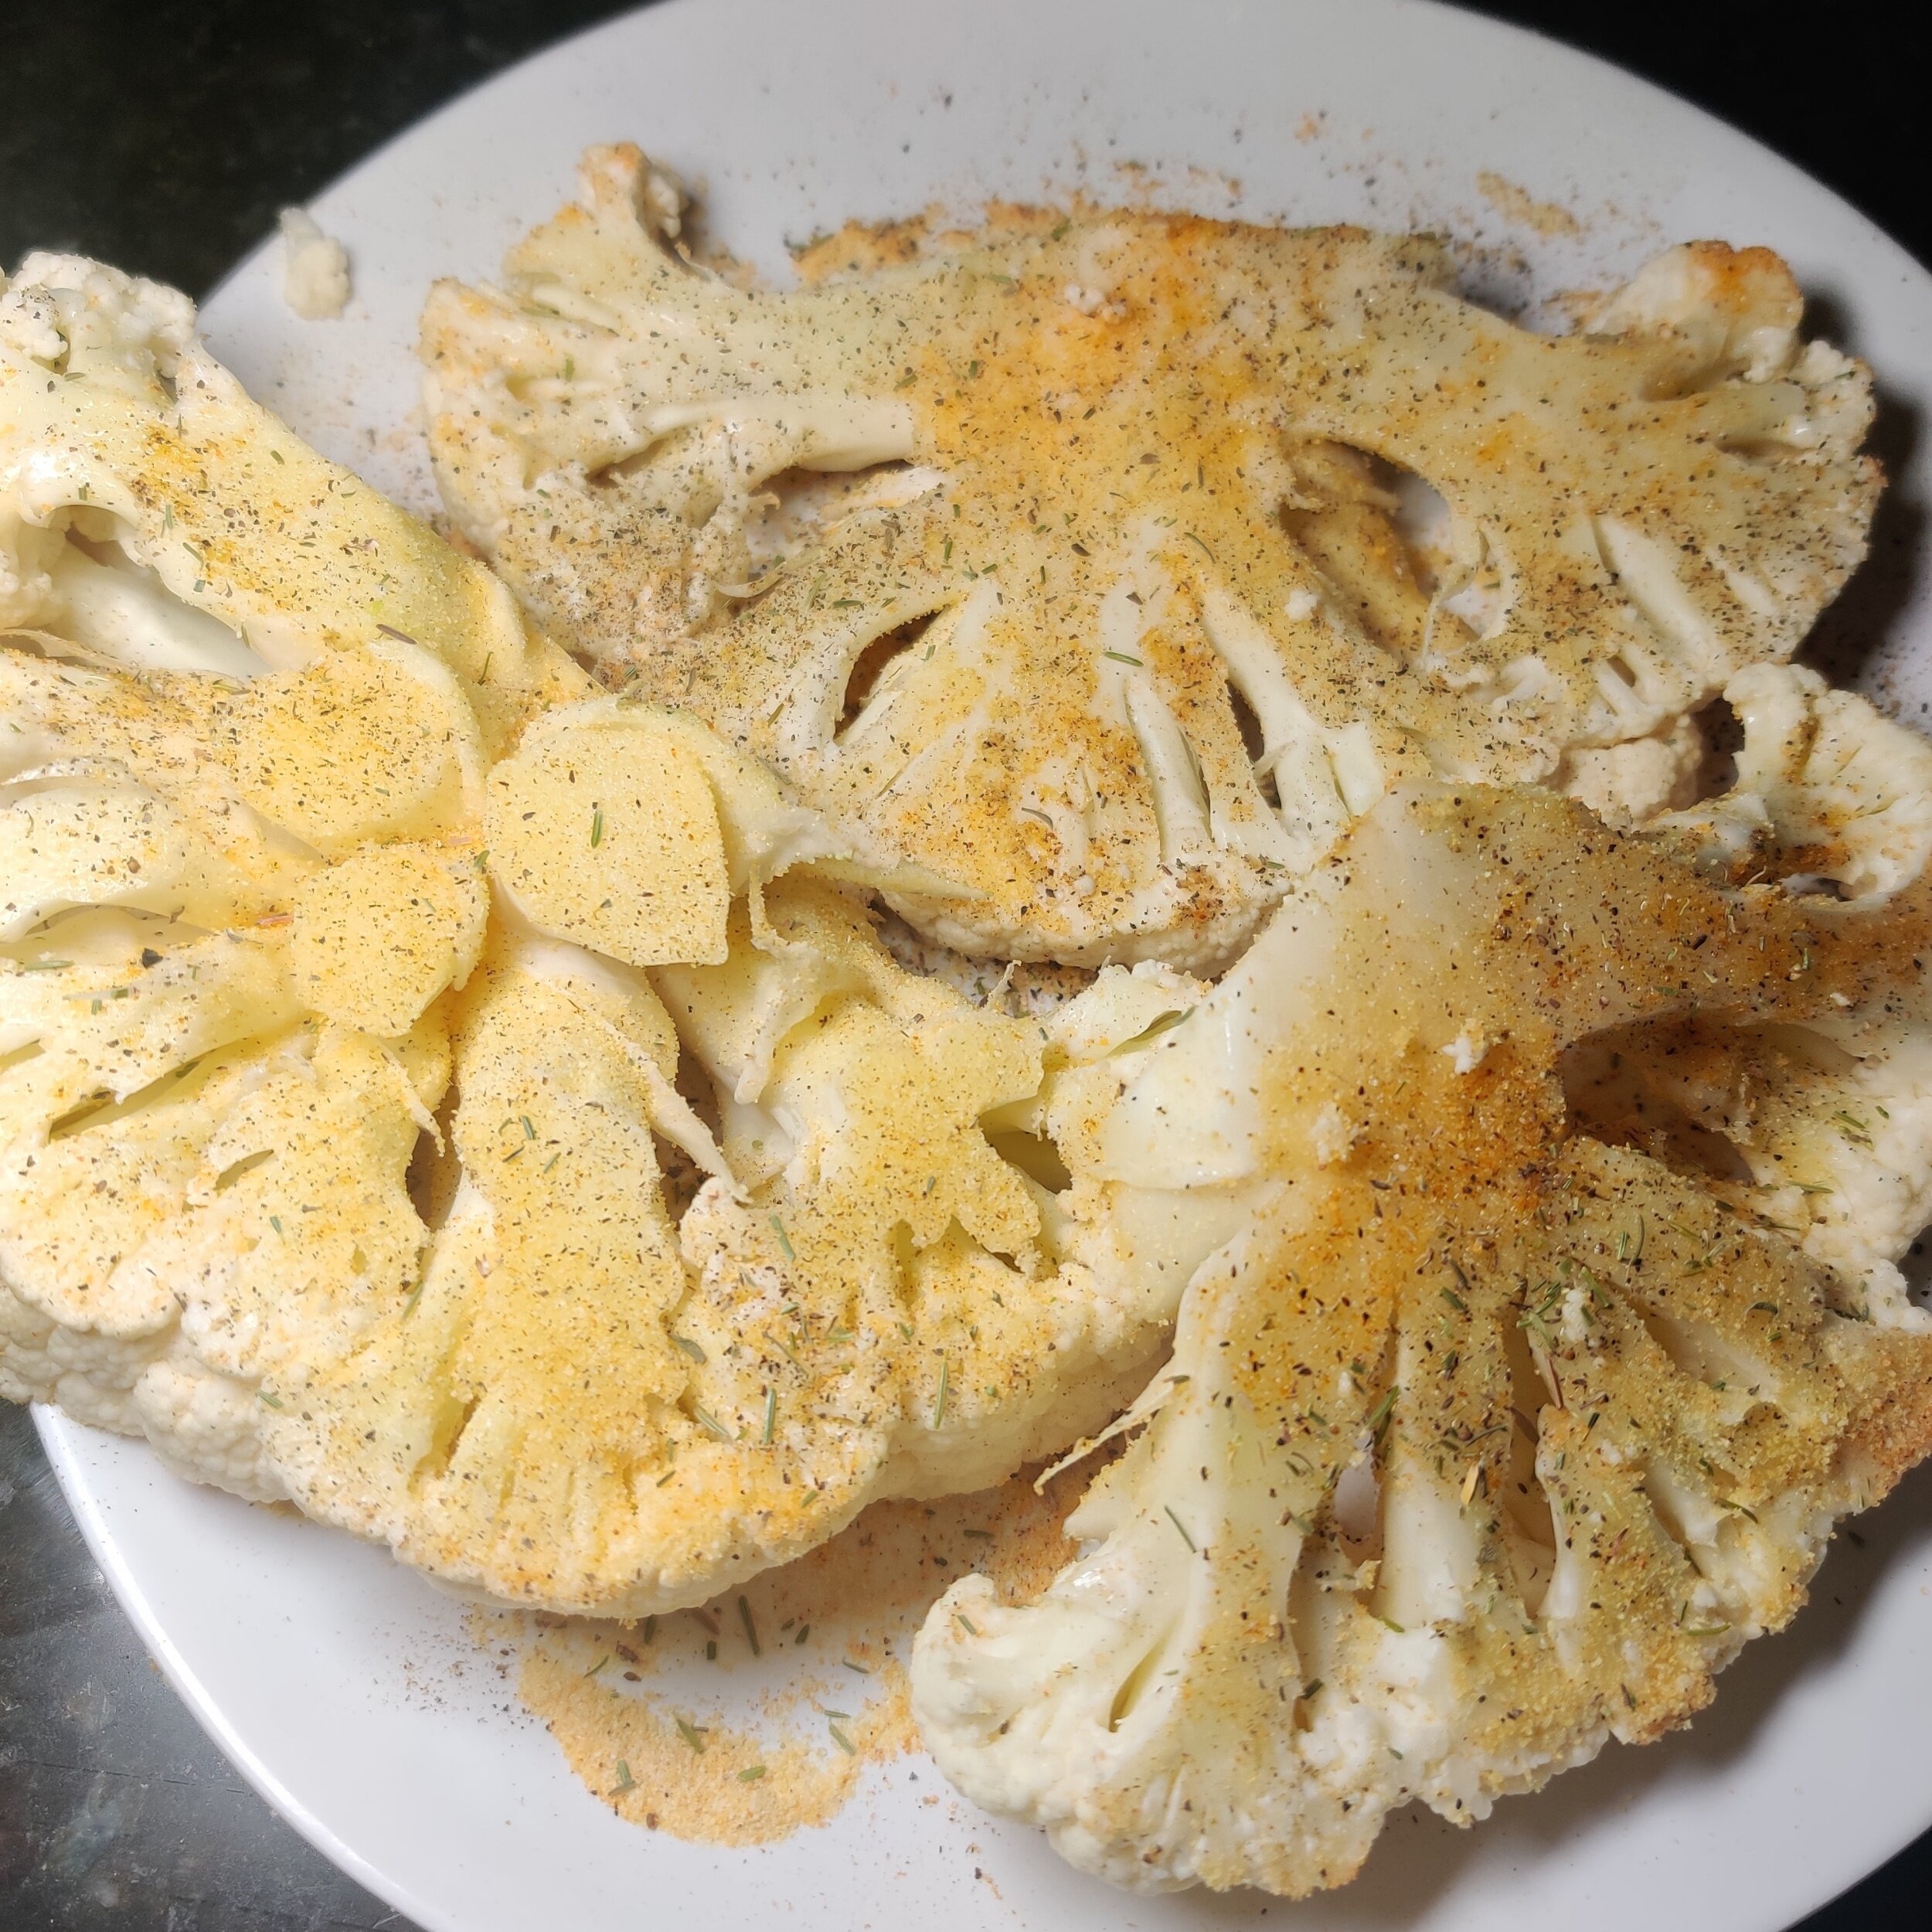
Harissa Cauliflower Steak and Puree with Chimichurri
Cauliflower steak is proof that a humble vegetable can take center stage with the right preparation. Thick-cut slices are pan-seared until golden and crispy, then finished with a steam to keep them tender at the center. What sets this version apart is a harissa paste built from North African spices rubbed into the steaks before they hit the pan, a silky cauliflower puree underneath that uses the leftover florets, and chimichurri and toasted aromatics to finish. Bold, layered, and completely plant-based.
Not Your Hospital Cauliflower
I remember the first time I heard of cauliflower steak. It didn’t immediately appeal to me. In fact, I only started paying attention to it when I went vegan for about nine months. Like many people, I associated cauliflower with bland, overcooked hospital food—soggy, flavorless, and uninspired. But I quickly learned how wrong I was.
When prepared the right way, cauliflower can truly shine. It becomes tender and crisp, rich with flavor, and—yes—magnificent. Especially when paired with bold seasonings like cumin, toasted almonds, or North African spice blends like harissa, cauliflower in steak form is elevated into something special. These flavors bring out its natural nuttiness and depth, turning a humble vegetable into the star of the plate.
Tips for Perfect Cauliflower Steaks
Choose the Right Cauliflower. Pick a large, firm head of cauliflower with tight, white florets. A larger head gives you more surface area to cut sturdy "steaks" without them falling apart.
Cut Carefully. Slice straight through the center to get thick steaks—about ¾ to 1 inch thick. You’ll usually get 2–3 solid steaks from one head. The rest can be roasted as florets.
Don't Skimp on Seasoning. Cauliflower loves bold flavors. Use a generous amount of oil and spice rub so the steaks get a nice crust. North African spices like harissa, cumin, coriander**, paprika, and a dash of cinnamon really elevate it.
Preheat Your Pan or Oven. Whether roasting or pan-searing, make sure your cooking surface is hot. This helps caramelize the edges and gives a golden-brown crust without overcooking the center.
For more cauliflower recipes, check out more on the website including Cauliflower Tumeric Chickpea Soup, Cauliflower Piccata, Fried Cauliflower 'Chicken’ Sandwich, Cauliflower Kedgeree with Farro and Raisins, Creamy Roasted Broccoli and Cauliflower Bake, and Mushroom, Broccoli and Cauliflower Stirfry.

Harissa Cauliflower Steak and Puree with Chimichurri
Elevate your veggie game with cauliflower steak—roasted or grilled until golden, then infused with bold North African spices like cumin and harissa. A hearty, flavor-packed plant-based dish that proves cauliflower is anything but bland.
Ingredients
- 1 tablespoon harissa spice
- 2 tablespoons olive oil
- 1 teaspoon garlic powder
- 1 teaspoon tomato sauce
- ½ teaspoon salt
- ½ teaspoon black pepper
- 2 cups steamed cauliflower
- 2 tablespoons olive oil
- 1 garlic clove (optional)
- Pinch of nutmeg
- Splash of rice wine vinegar
- ¼ cup water
- ½ teaspoon salt
- ¼ teaspoon black pepper (optional)
- Optional for creamier purée: 2–3 tablespoons cream and/or 2 tablespoons butter, cooked briefly with aromatics before blending
- 1 cup Italian parsley
- 3 garlic cloves
- ½ cup olive oil
- 2 tablespoon red wine vinegar
- 1 teaspoon chilli flakes
- 1 tablespoon sesame oil
- 2 tablespoons slivered almonds
- 1 tablespoon coriander seeds
- 1 tablespoon caraway seeds
- 1 tablespoon ghee
- 1 tablespoon sesame oil
- 2 tablespoons olive oil
- 2 tablespoons butter
- Splash of lemon juice
- Fresh herbs and butter (optional, for finishing)
- Water or broth (for steaming)
Instructions
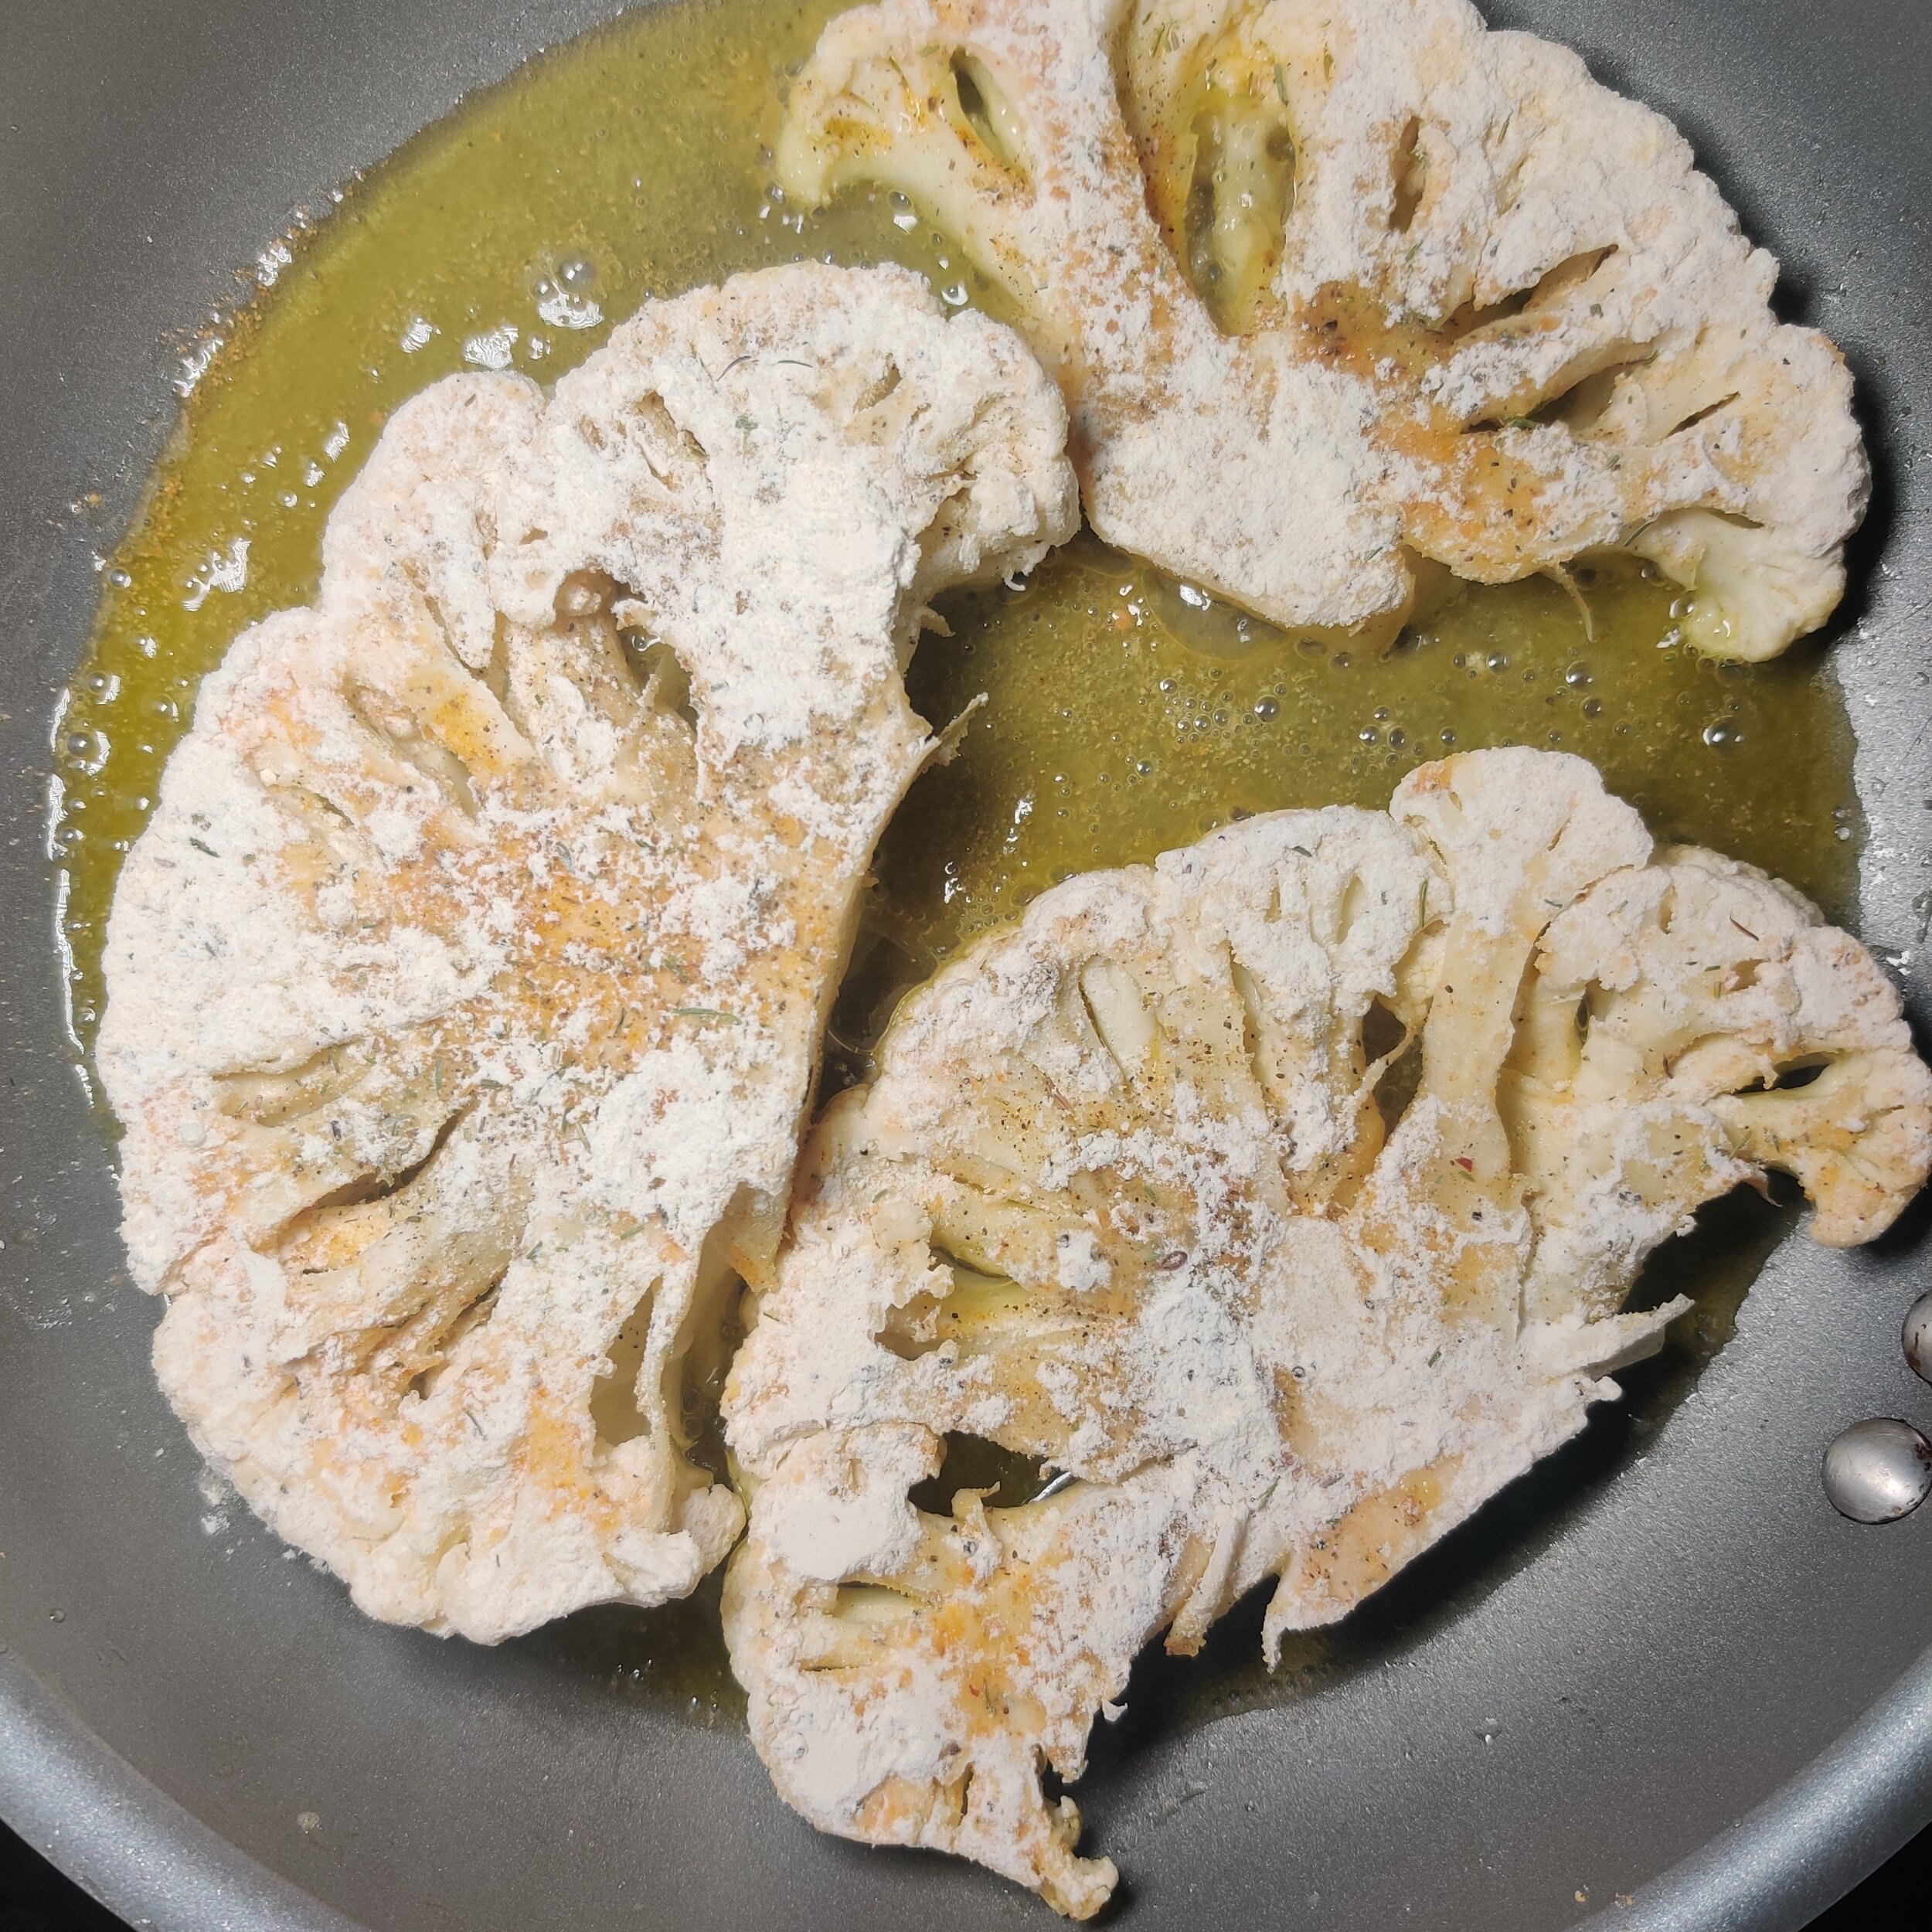
- Slice thick “steaks” from the center of the cauliflower head. Set aside remaining florets for the purée.
- Steam or blanch the extra florets for 8–10 minutes until tender. Drain and cool slightly.
- While the cauliflower cools, mix the harissa spice, olive oil, garlic powder, tomato paste, salt, and pepper into a thick paste. Set aside.
- Blend the cooled cauliflower with olive oil, garlic (if using), rice wine vinegar, water, salt, pepper, and nutmeg until smooth.
- Optional creamier version: In a small pan, gently heat cream and/or butter with the garlic and a pinch of nutmeg before adding it to the cauliflower in the blender. This releases more flavor and creates a richer, silkier purée. Adjust seasoning to taste.
- Lightly toast the almonds, coriander seeds, and caraway seeds in sesame oil over medium heat for 5–6 minutes until fragrant.
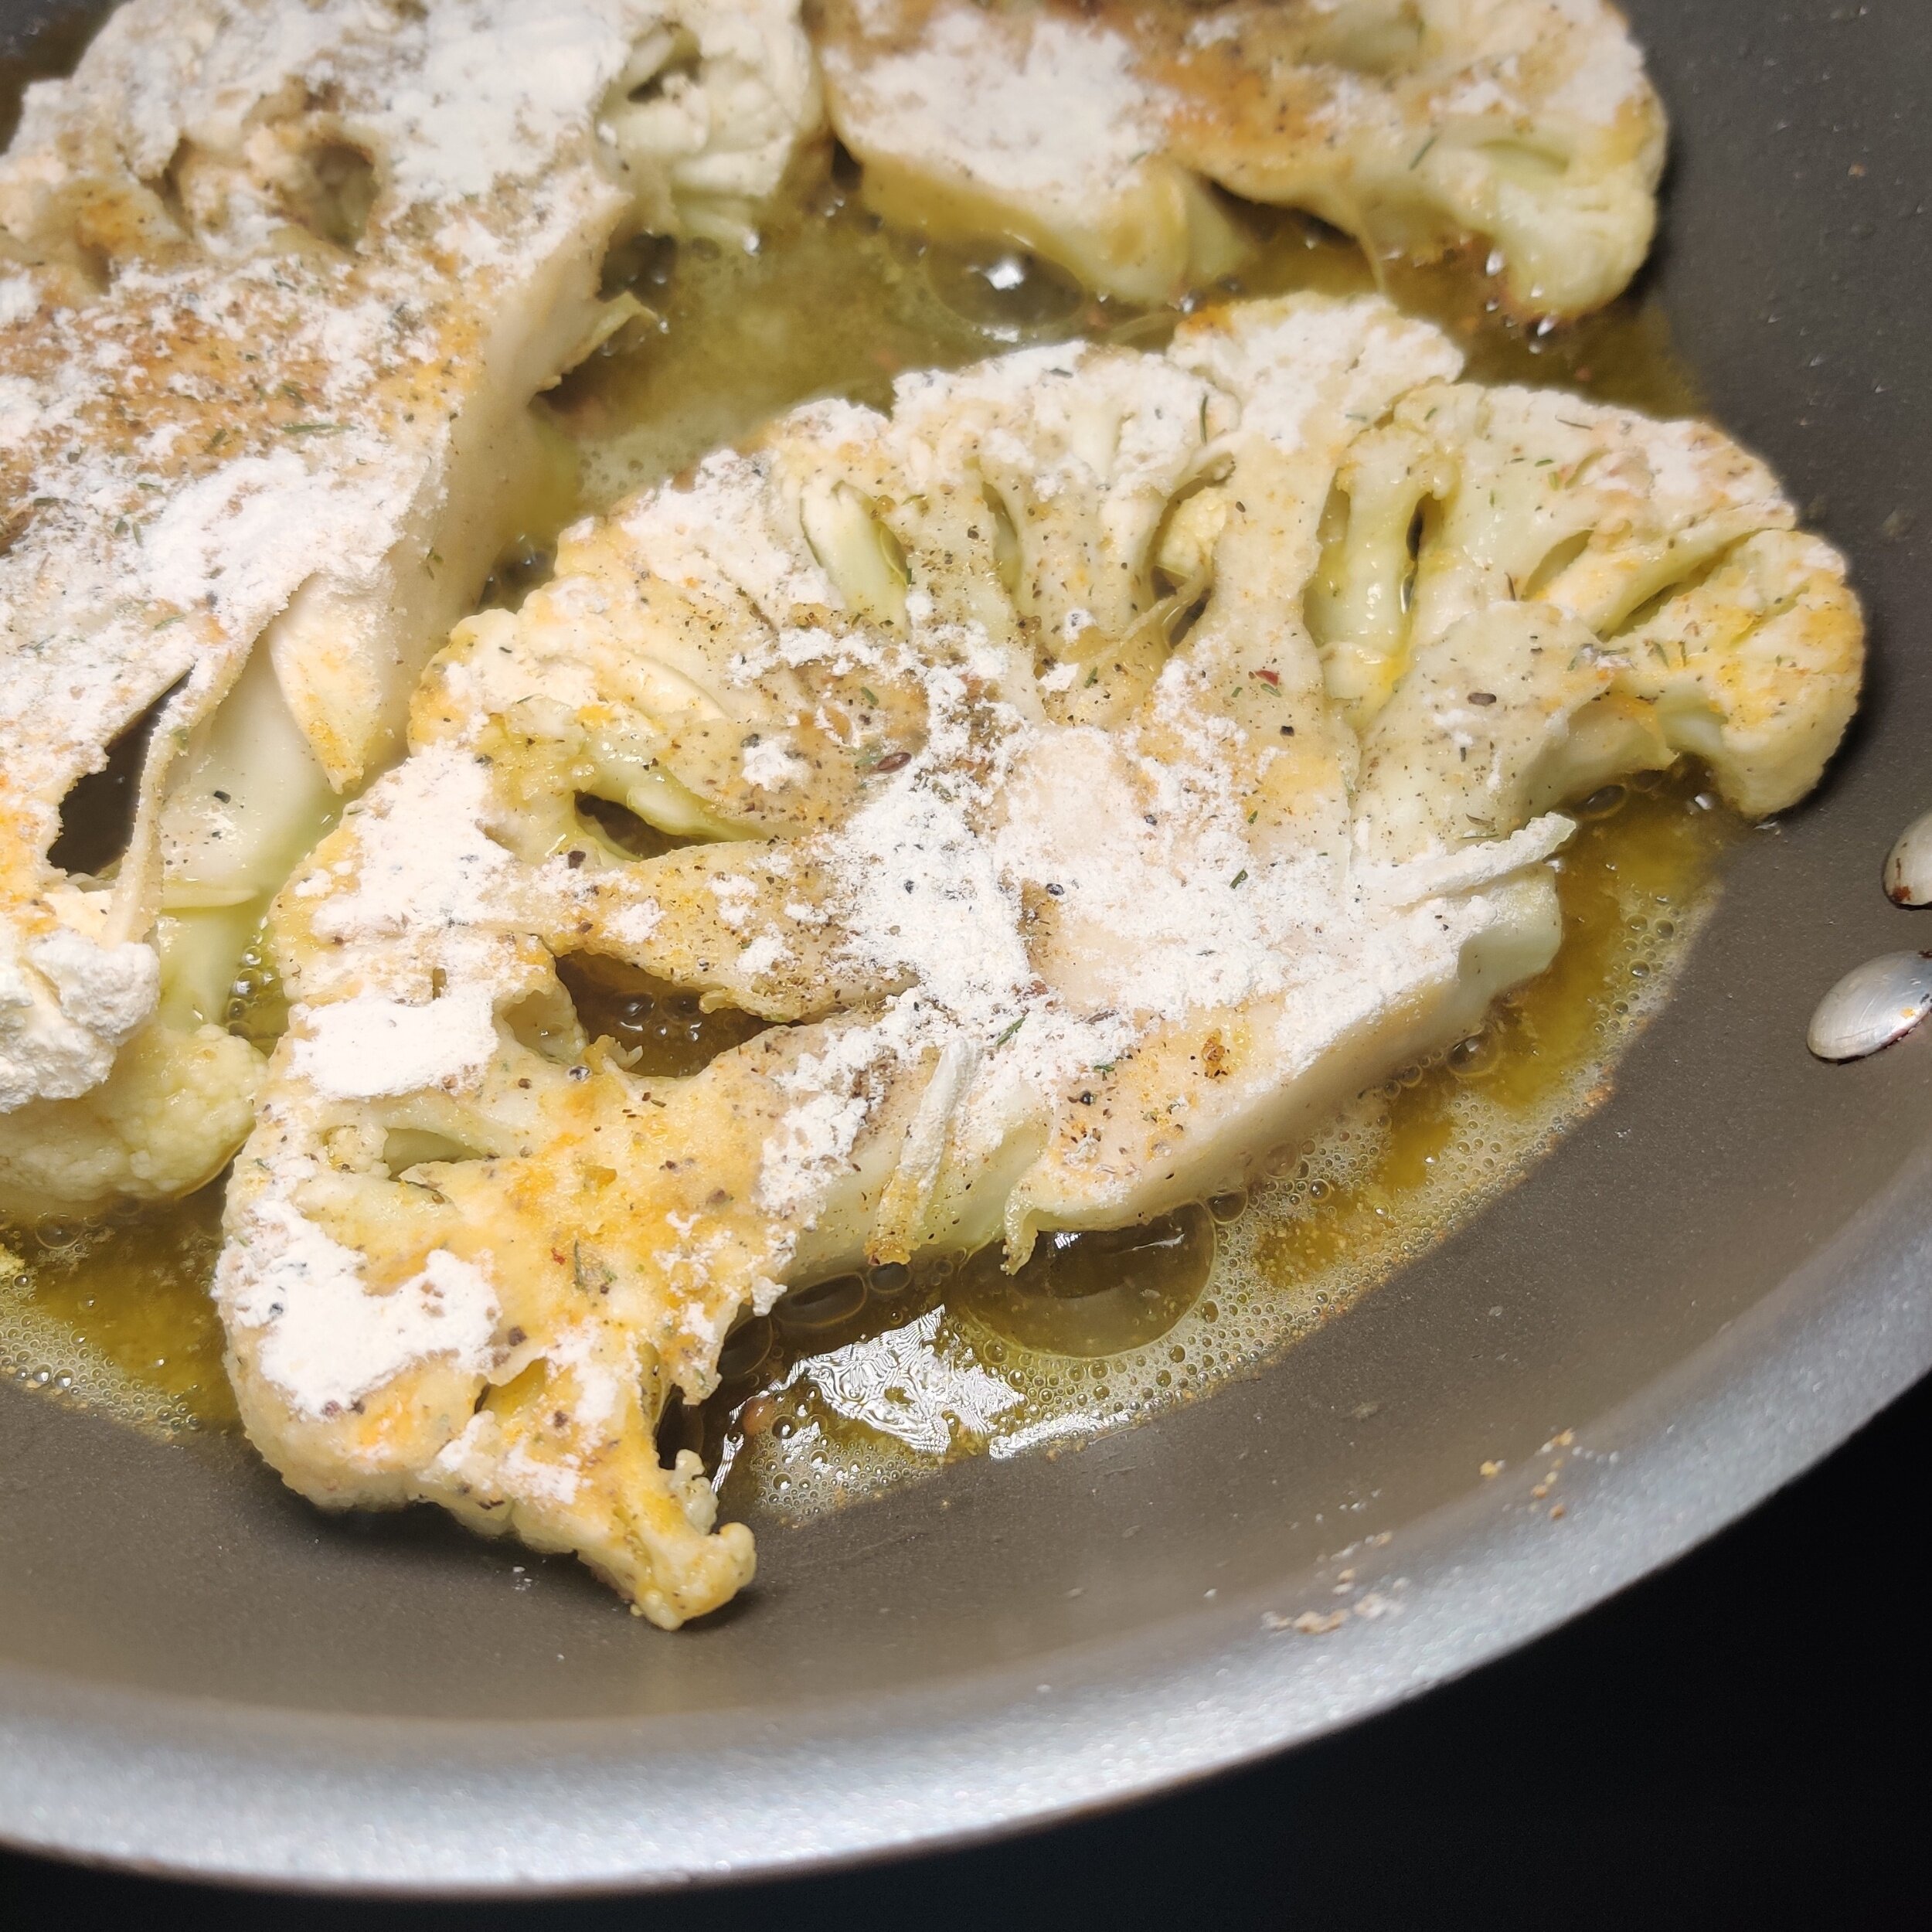
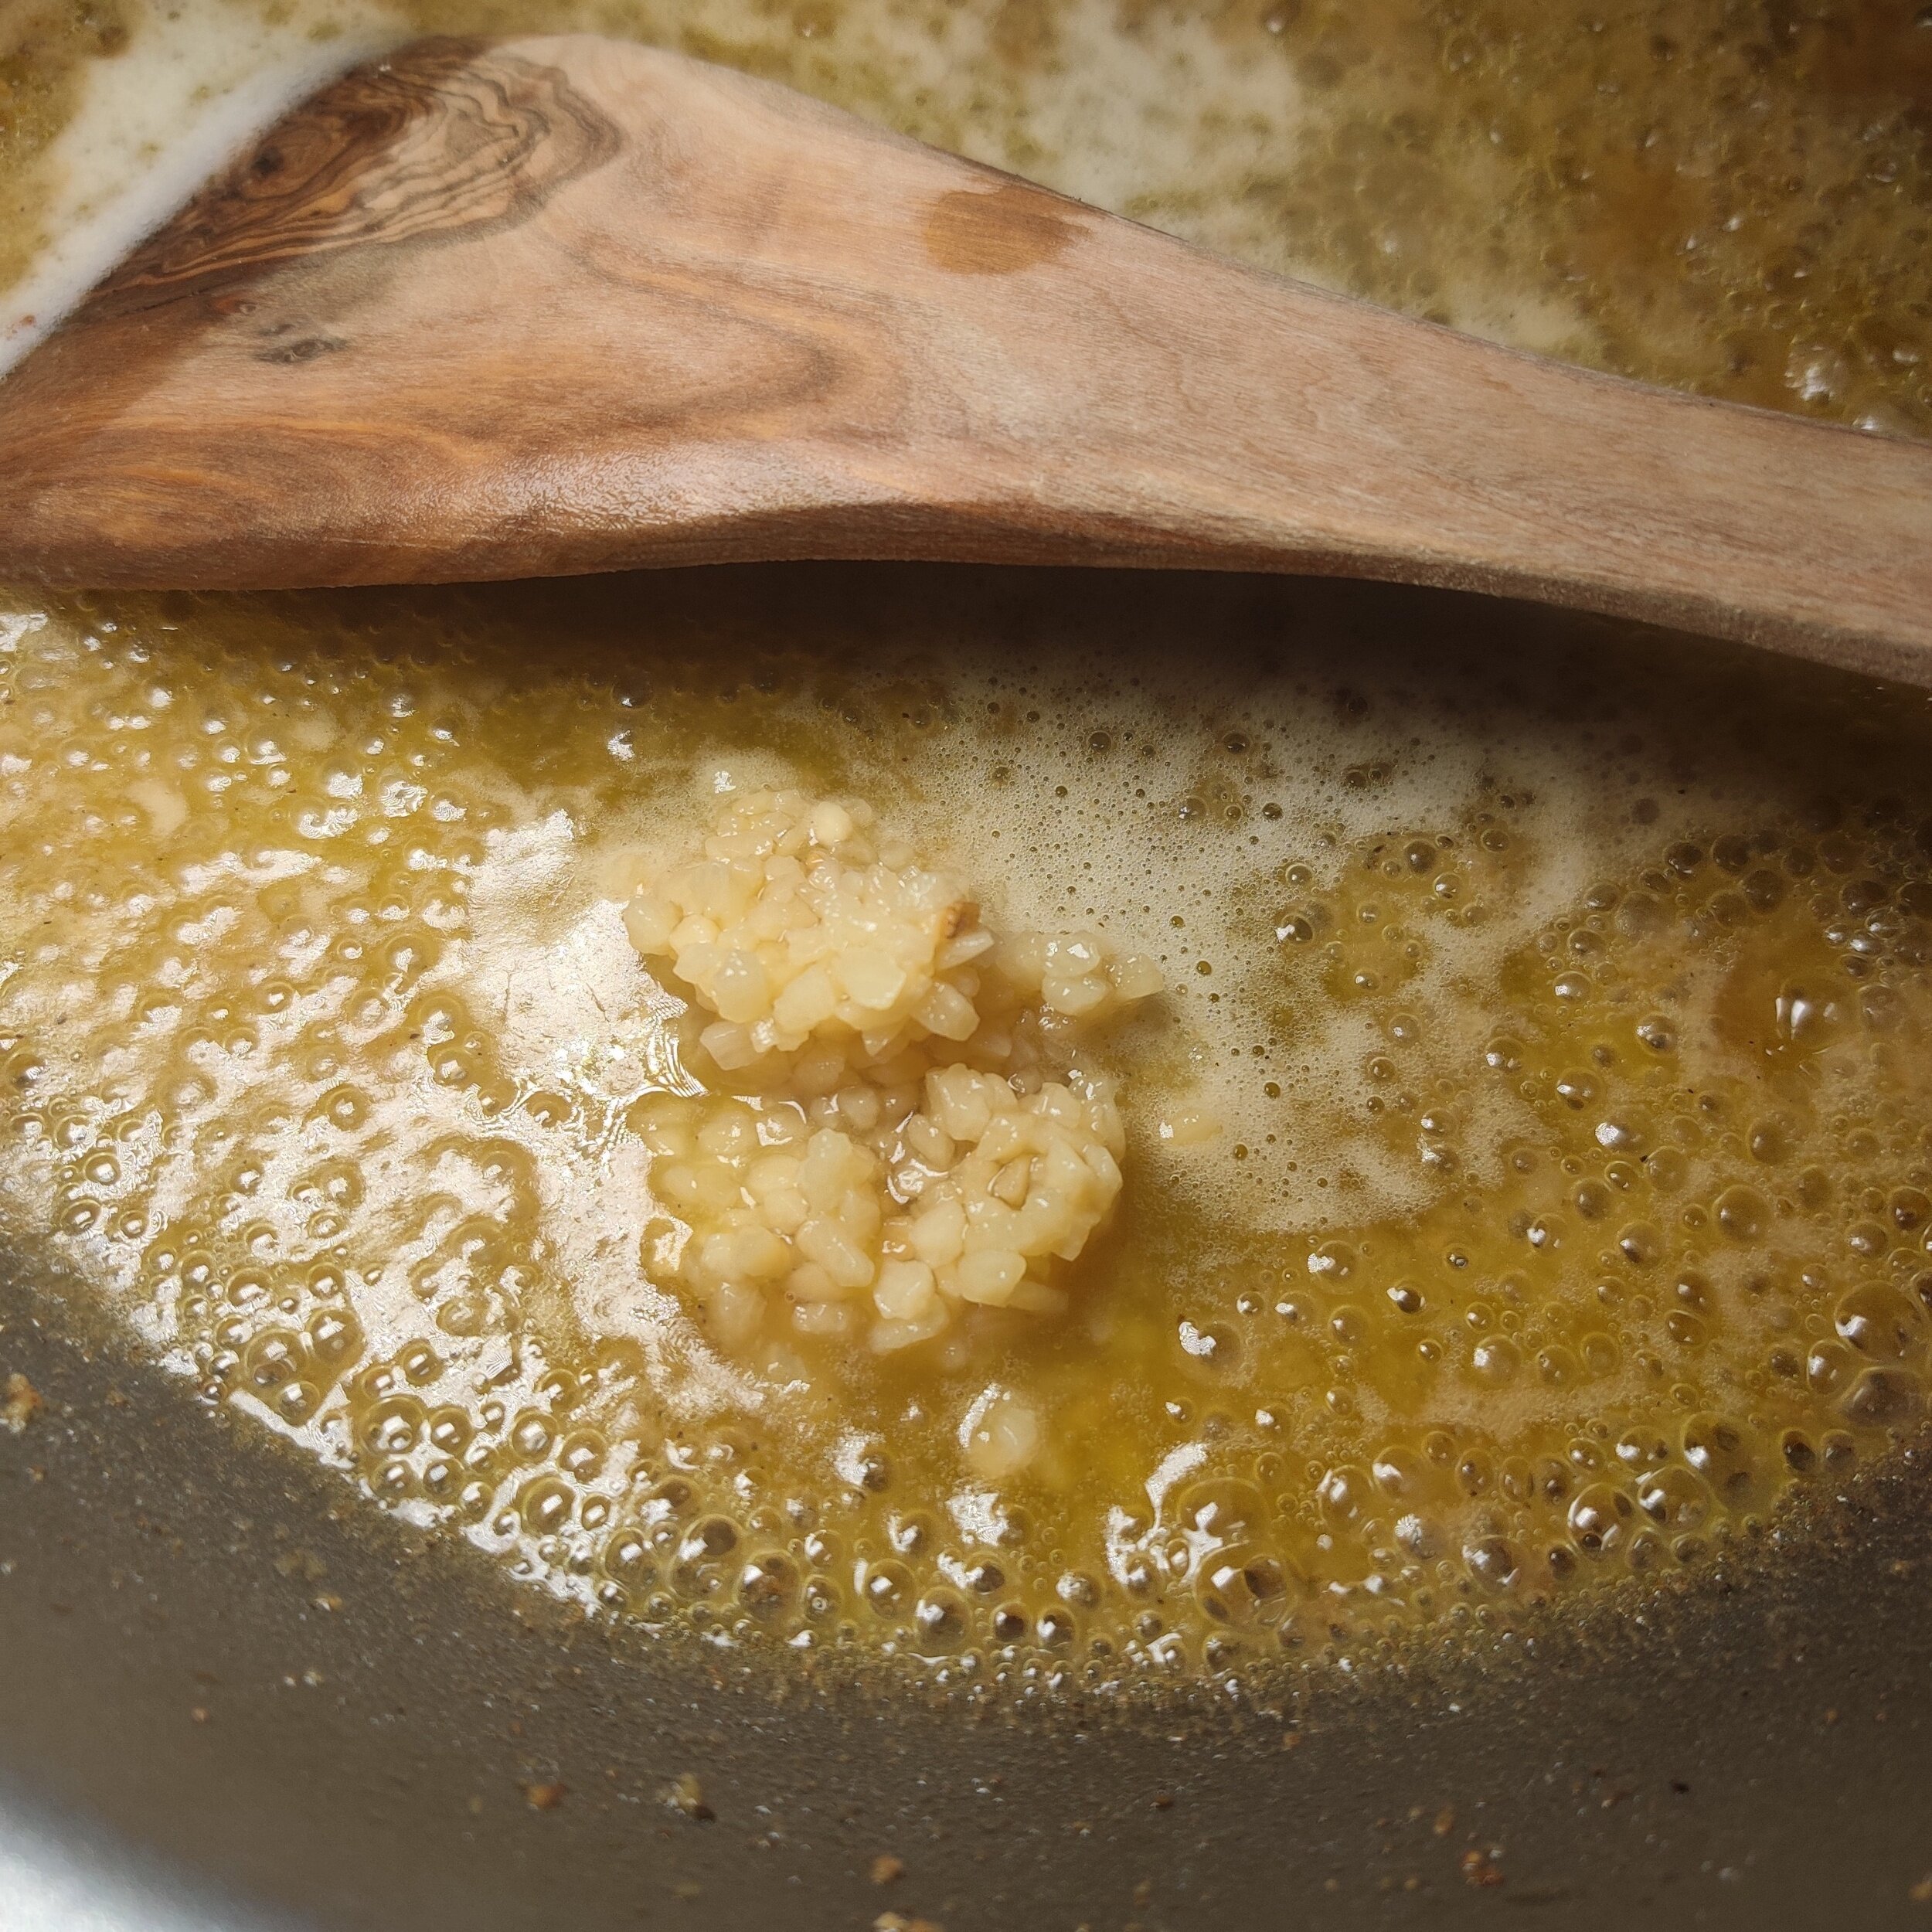
- In a pan with a bit of butter or ghee, gently bloom the harissa paste for 5 minutes on low heat. Let cool slightly, then rub generously over the cauliflower steaks.
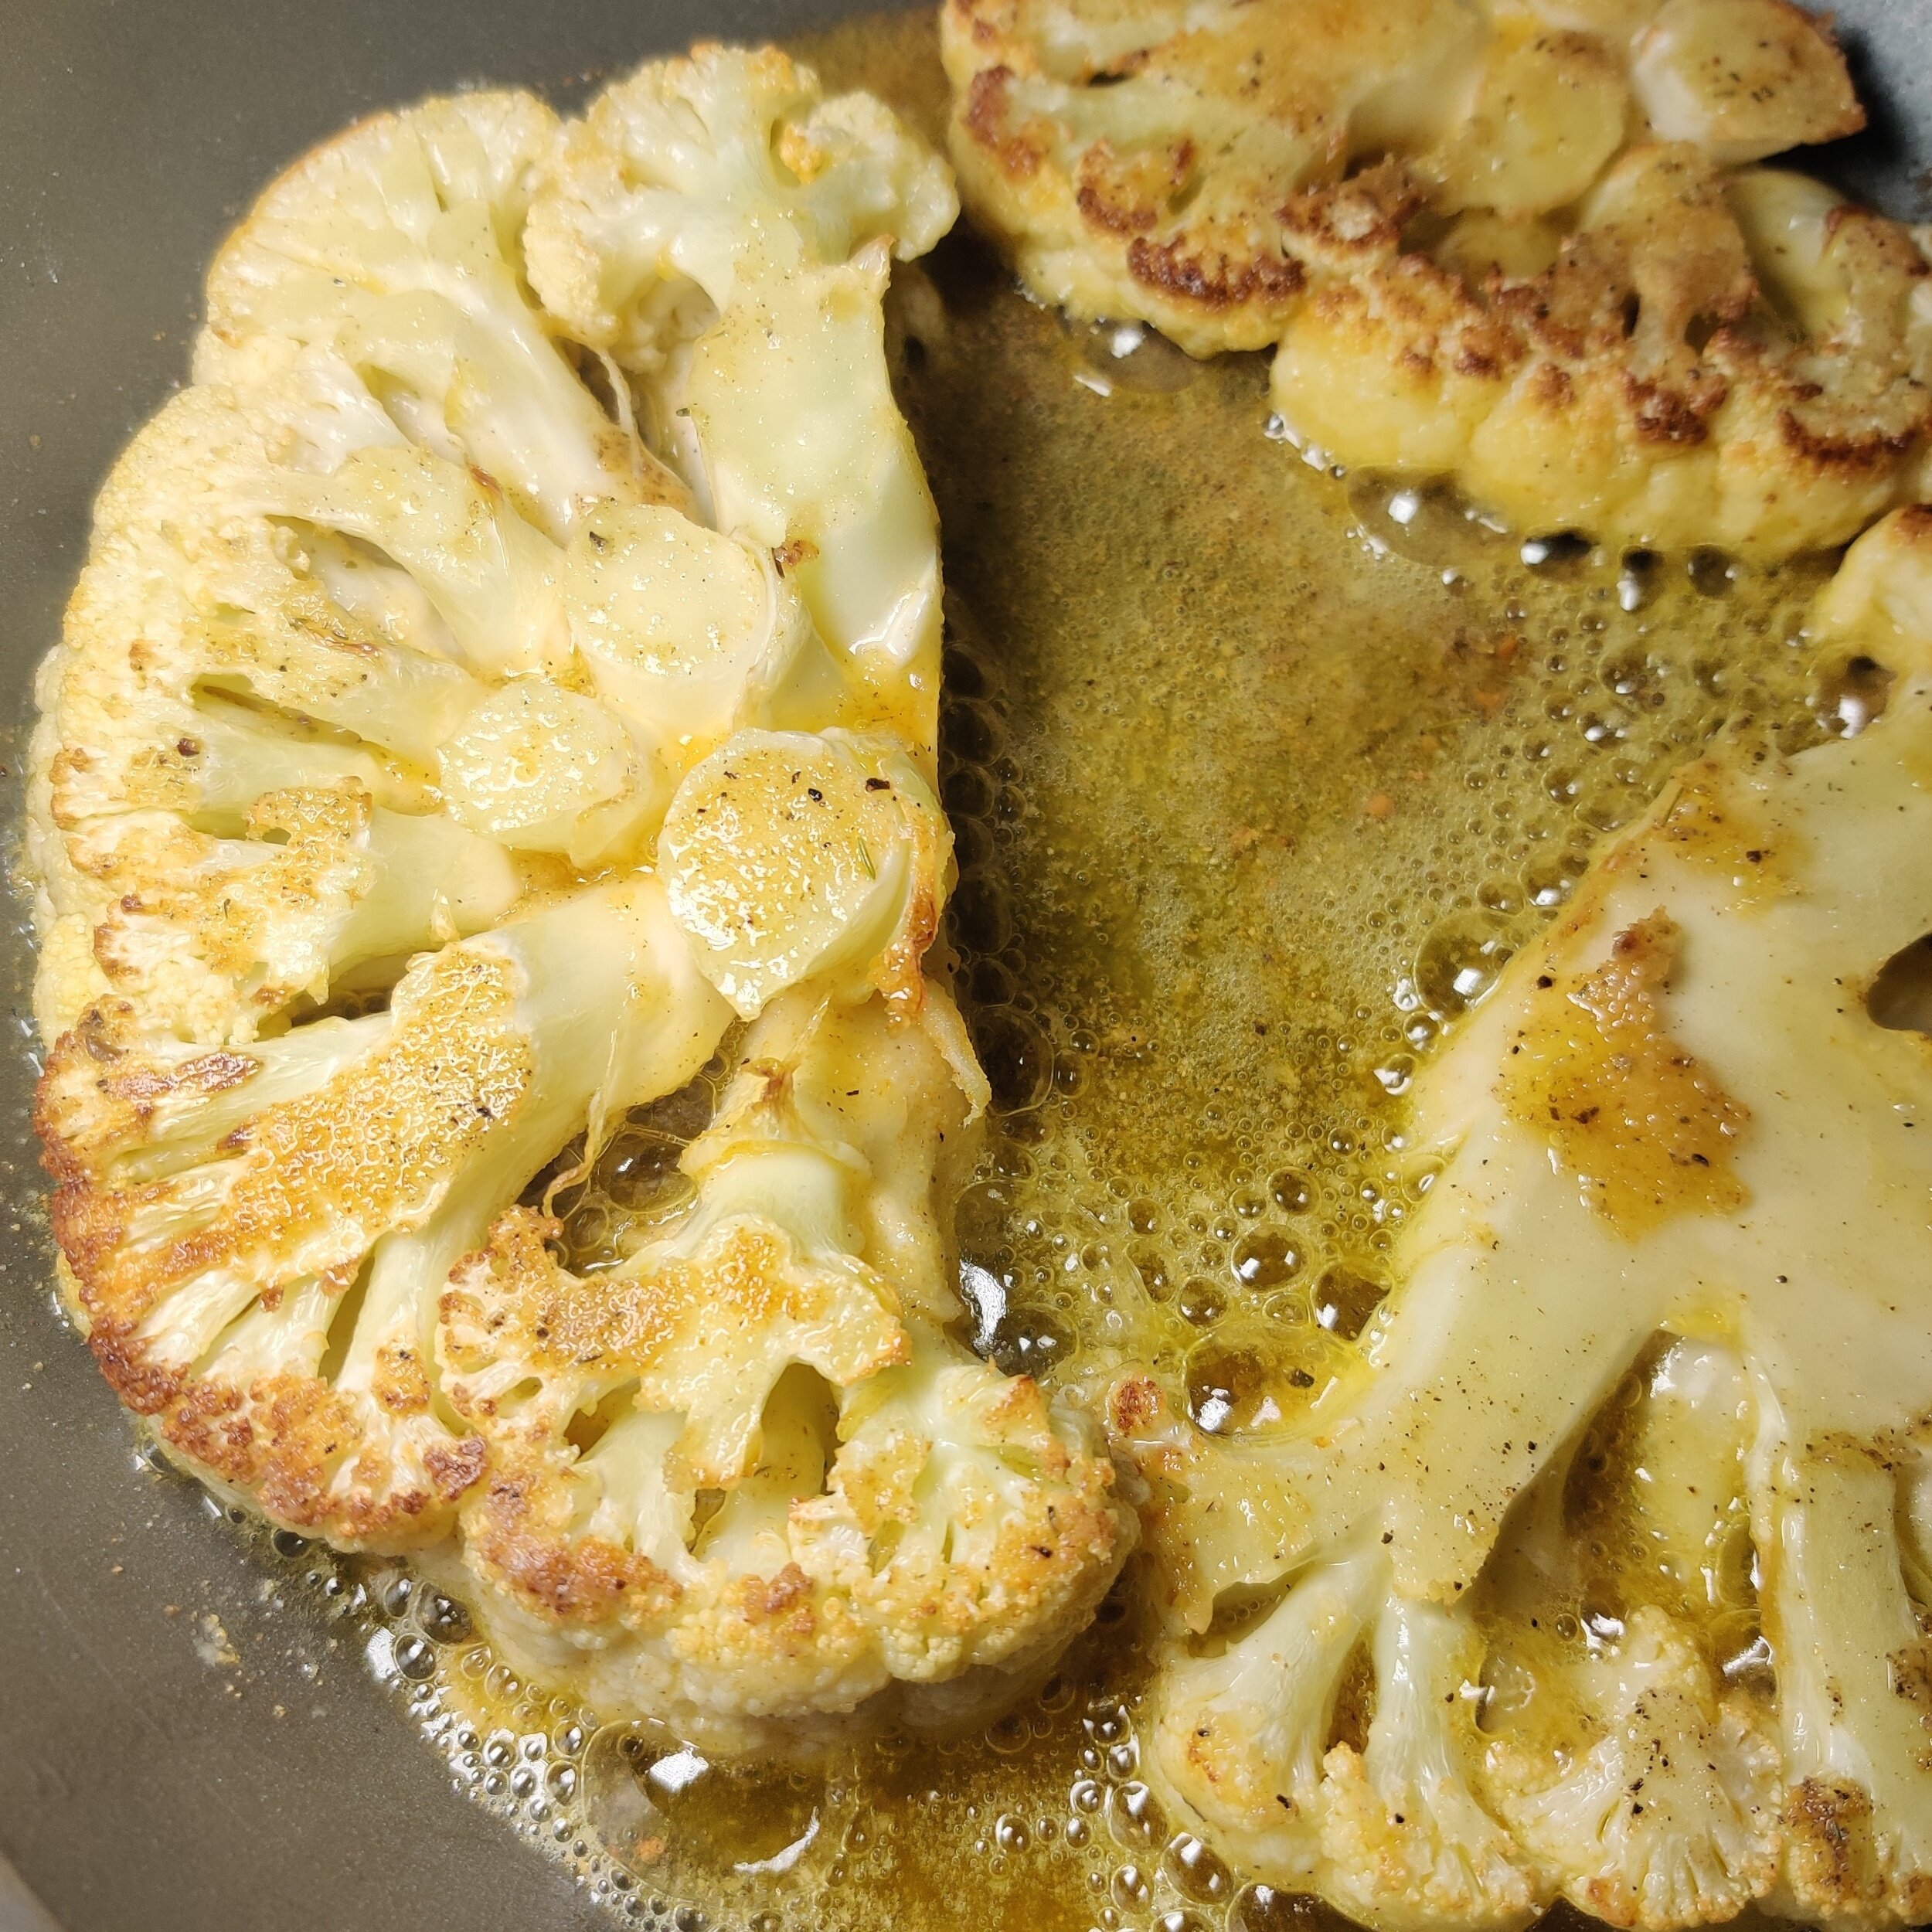
- Heat ghee, sesame oil, and olive oil in a pan. Sear the cauliflower steaks 5–7 minutes per side until golden and crispy.
- Pour a splash of water or broth around the steaks, cover, and steam for 2–3 minutes until tender.
- Plate the steaks over the cauliflower purée. Drizzle with chimichurri, top with the toasted aromatics, a squeeze of lemon, and optional fresh herbs or butter.
Nutrition Facts
Calories
280Fat (grams)
18 gCarbs (grams)
24 gFiber (grams)
6 gSugar (grams)
5 gProtein (grams)
7 gI am not a certified nutritionist and any nutritional information on dontmissmyplate.com should only be used as a general guideline.

Coconut Eggplant and Lentil Masala Curry
A cozy, plant-based curry with creamy lentils, tender eggplant, and fragrant coconut—served with spiced rice.
Hearty, fragrant, and deeply satisfying, this Eggplant and Lentil Coconut Curry is comfort in a bowl. Slow-cooked eggplant melts into a spiced lentil base, infused with ginger, garlic, and creamy coconut milk for a rich, velvety finish. Served with fluffy aromatic rice—steamed with warming spices like cardamom, cinnamon, or bay leaf—it’s a nourishing, plant-based dish that’s as cozy as it is flavorful. Whether you're looking for a weeknight dinner or a meatless showstopper for guests, this curry brings warmth and depth to any table.
Cooking eggplant is all about unlocking its rich, silky texture and ability to soak up flavor. When properly cooked, eggplant transforms from firm and spongy to tender and luscious, making it perfect for curries, stews, and roasts. Salting it beforehand can help reduce any bitterness and improve its ability to brown, while slow cooking allows it to absorb spices and sauces deeply. Whether roasted, sautéed, or simmered, eggplant acts like a sponge for bold aromatics—especially in dishes like coconut curries where it adds both body and depth.
General Tips for Cooking Eggplant
Salt First (Optional but Helpful):
Lightly salt sliced or cubed eggplant and let it sit for 20–30 minutes. This draws out excess moisture and any bitterness, helping it cook more evenly and brown better.Don’t Undercook It:
Eggplant should be fully tender when done—undercooked eggplant can be spongy or rubbery. Cook it until it’s soft and creamy inside.Use Enough Oil (or Bake/Roast):
Eggplant absorbs oil quickly, so don’t be afraid to use a bit more when pan-frying or roasting. Alternatively, brush with oil and bake at a high temperature for a healthier option.Pair with Bold Flavors:
Eggplant soaks up spices and sauces beautifully. It works especially well with garlic, ginger, curry spices, tomatoes, and coconut milk.Roast or Grill for Extra Depth:
Roasting or grilling brings out eggplant’s natural sweetness and gives it a smoky, rich flavor—perfect for dips, salads, or hearty stews.
A rich, spiced plant-based curry inspired by East African flavors, with tender eggplant, hearty lentils, and creamy coconut milk.
Combining lentils and eggplant creates a beautiful balance of texture and depth—soft, creamy eggplant melds with hearty lentils to form a rich, comforting base that’s both nourishing and satisfying. This pairing is common in many African and Indian-influenced dishes, especially in East African coastal cooking, where flavors are bold, layered, and full of warmth.
In East African cuisine, particularly along the Swahili coast, the use of spices like cumin, coriander, turmeric, and cloves is deeply rooted in centuries of trade with India and the Arabian Peninsula. Coconut milk is another hallmark of the region’s cooking, adding creaminess and a subtle sweetness that tempers the heat of spices while enriching the overall dish. When combined, lentils, eggplant, aromatic spices, and coconut create a dish that’s deeply flavorful, comforting, and rooted in tradition—perfect for sharing and savoring.


Coconut Eggplant and Lentil Masala Curry
Discover the rich, comforting flavors of lentils and eggplant simmered with creamy coconut milk—a staple in East African coastal cuisine. This nourishing plant-based dish blends hearty lentils with silky eggplant and bold, layered spices for a satisfying vegan meal inspired by African and Indian culinary traditions. Perfect for fans of coconut curry and wholesome comfort food.
Ingredients
- 1 large eggplant, chopped
- 1 small onion, chopped
- 1 teaspoon ground ginger
- 1/2 teaspoon paprika
- 2 teaspoons masala curry powder
- 1 teaspoon oregano
- 1 teaspoon salt (plus 1 teaspoon extra to remove water from eggplant)
- 1 teaspoon chilli flakes
- 1 can coconut, full cream
- 1/2 cup green lentils
- 2 cups chicken broth
- 1 teaspoon black pepper
- 1/4 teaspoon cumin
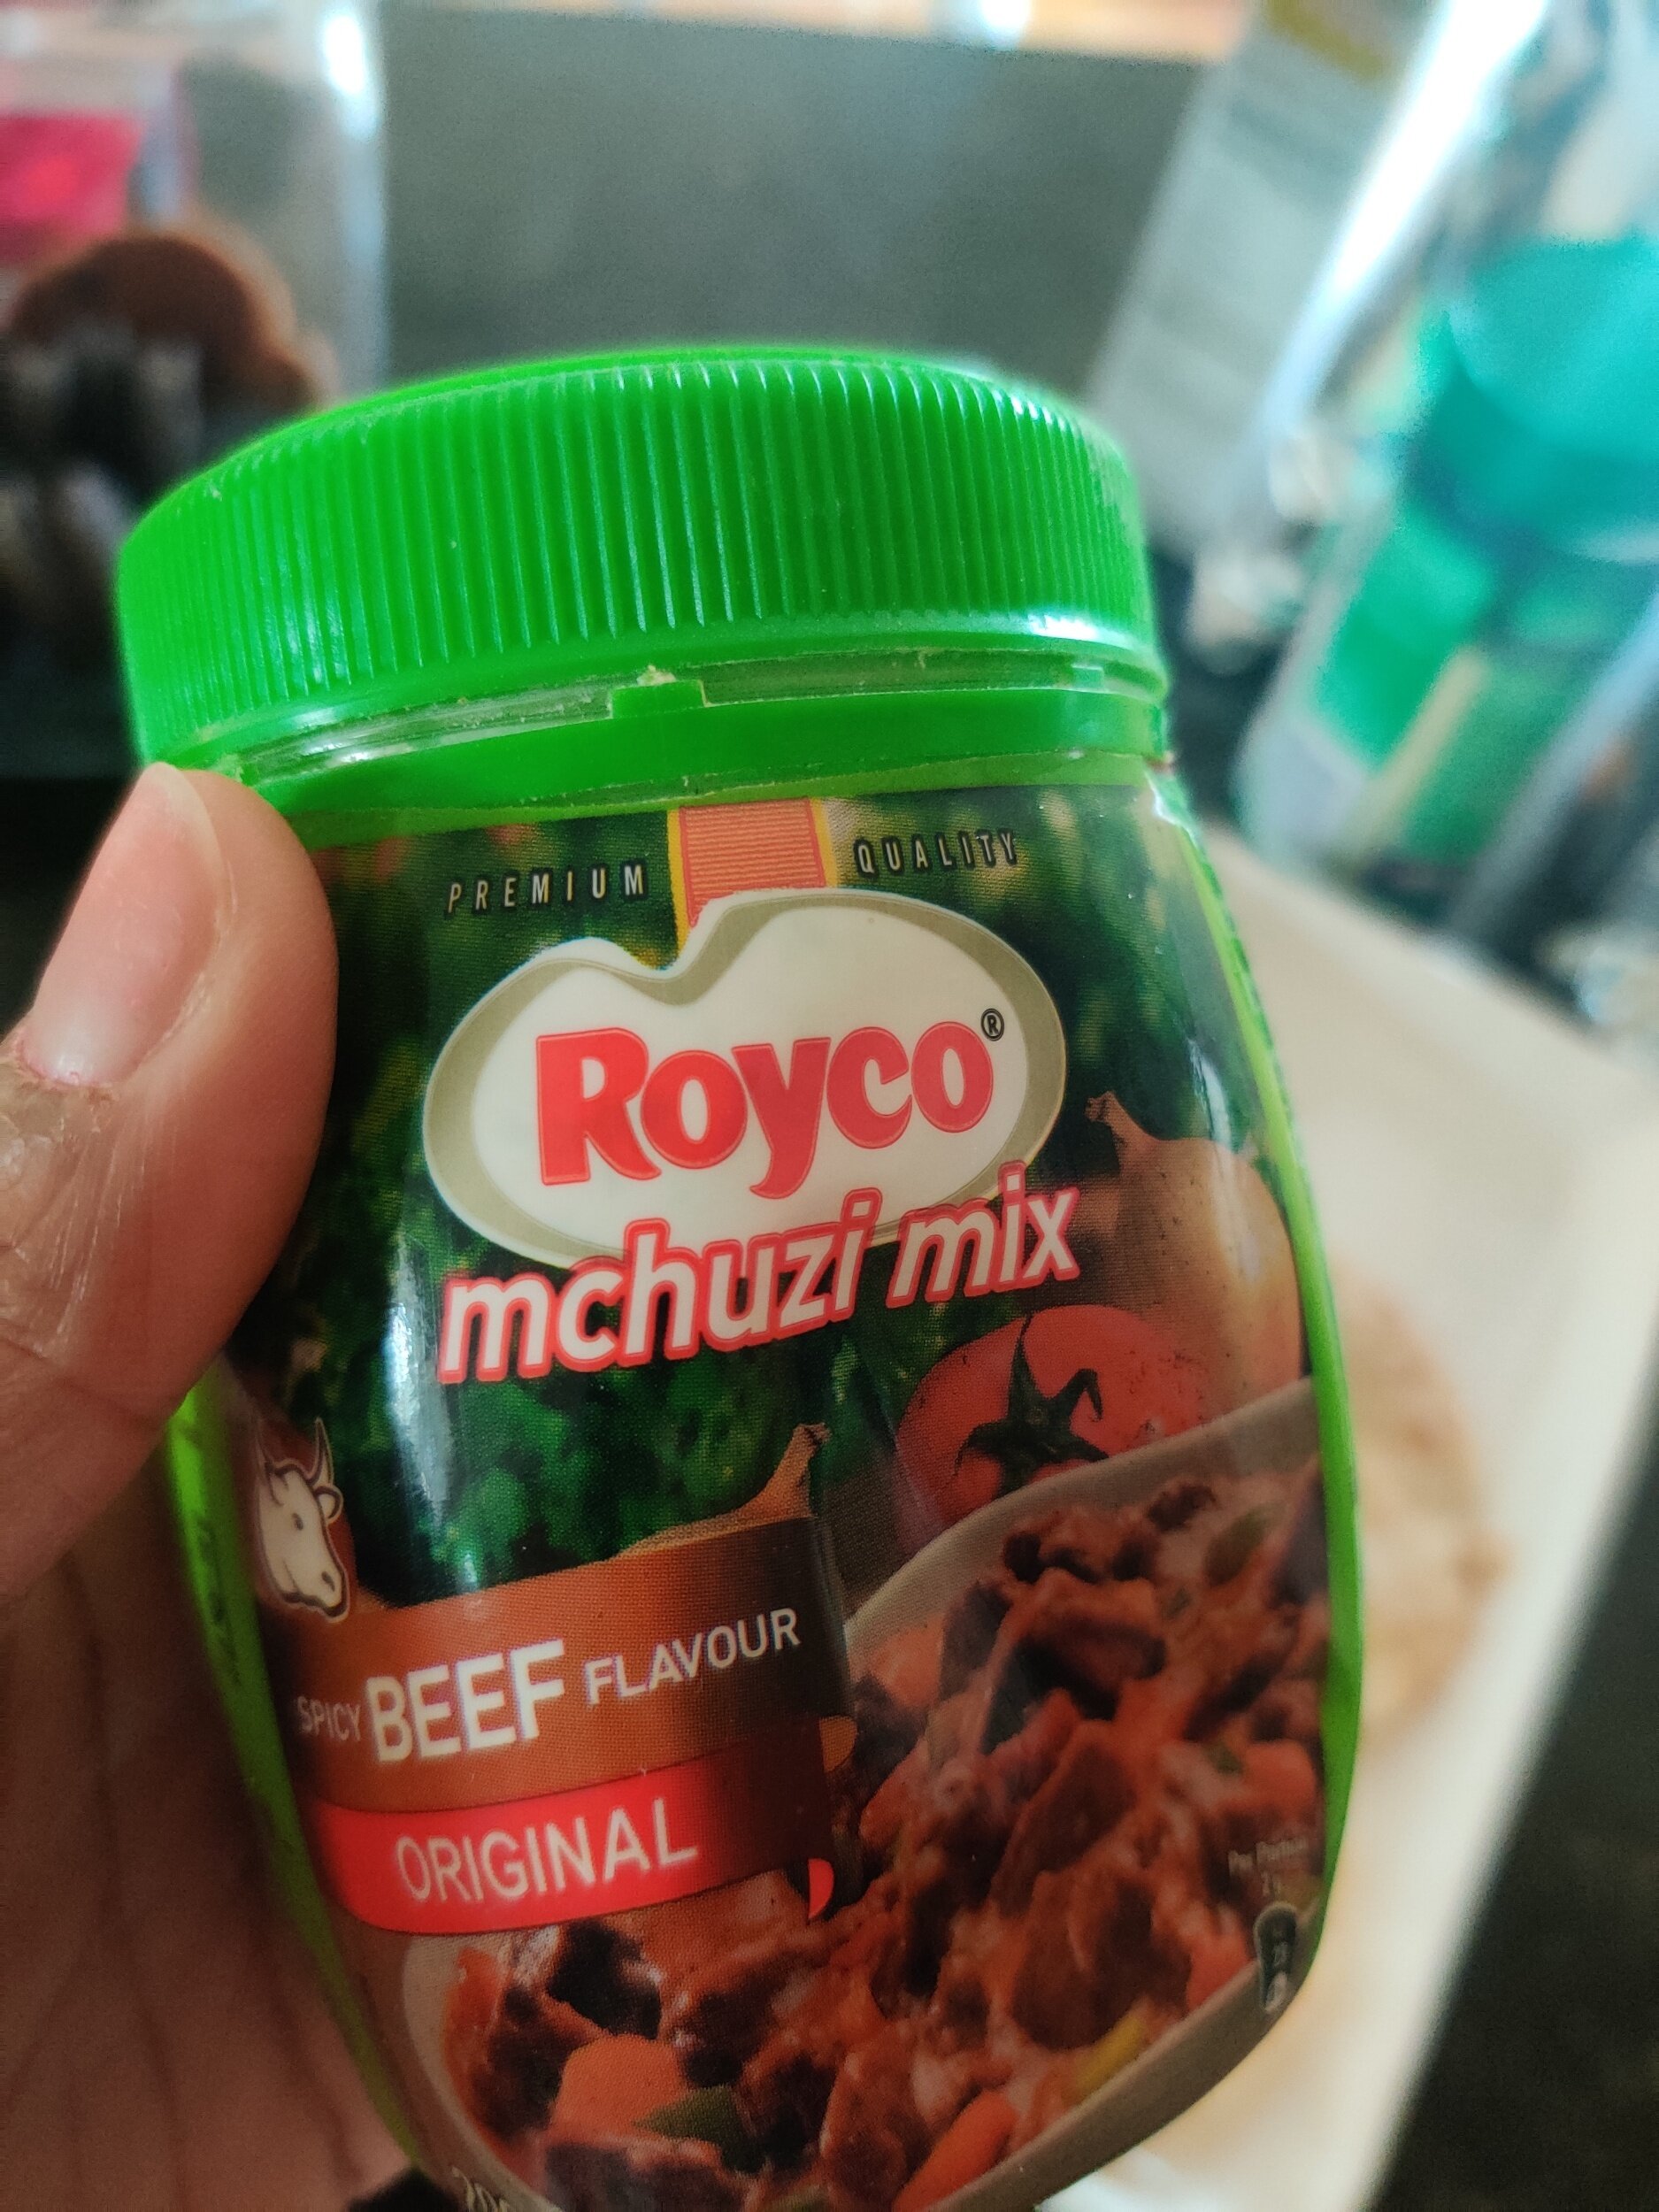
- 1/2 teaspoon Royco Usavi mix, chicken (optional)
- 2 bay leaves
- 1/2 cup fire-roasted tomatoes, diced
- 3 garlic cloves
- 2 tablespoons ghee
- 2 tablespoons olive oil
- 2 tablespoons sesame seed oil
- 1 tablespoon soy sauce
- 1 tablespoon red wine vinegar
- 1 teaspoon fish sauce
- 1 teaspoon rice vinegar
- 2 tablespoons + 1/2 cup fresh cilantro, roughly chopped (optional)
- 1/3 cup silvered almonds (optional)
Instructions
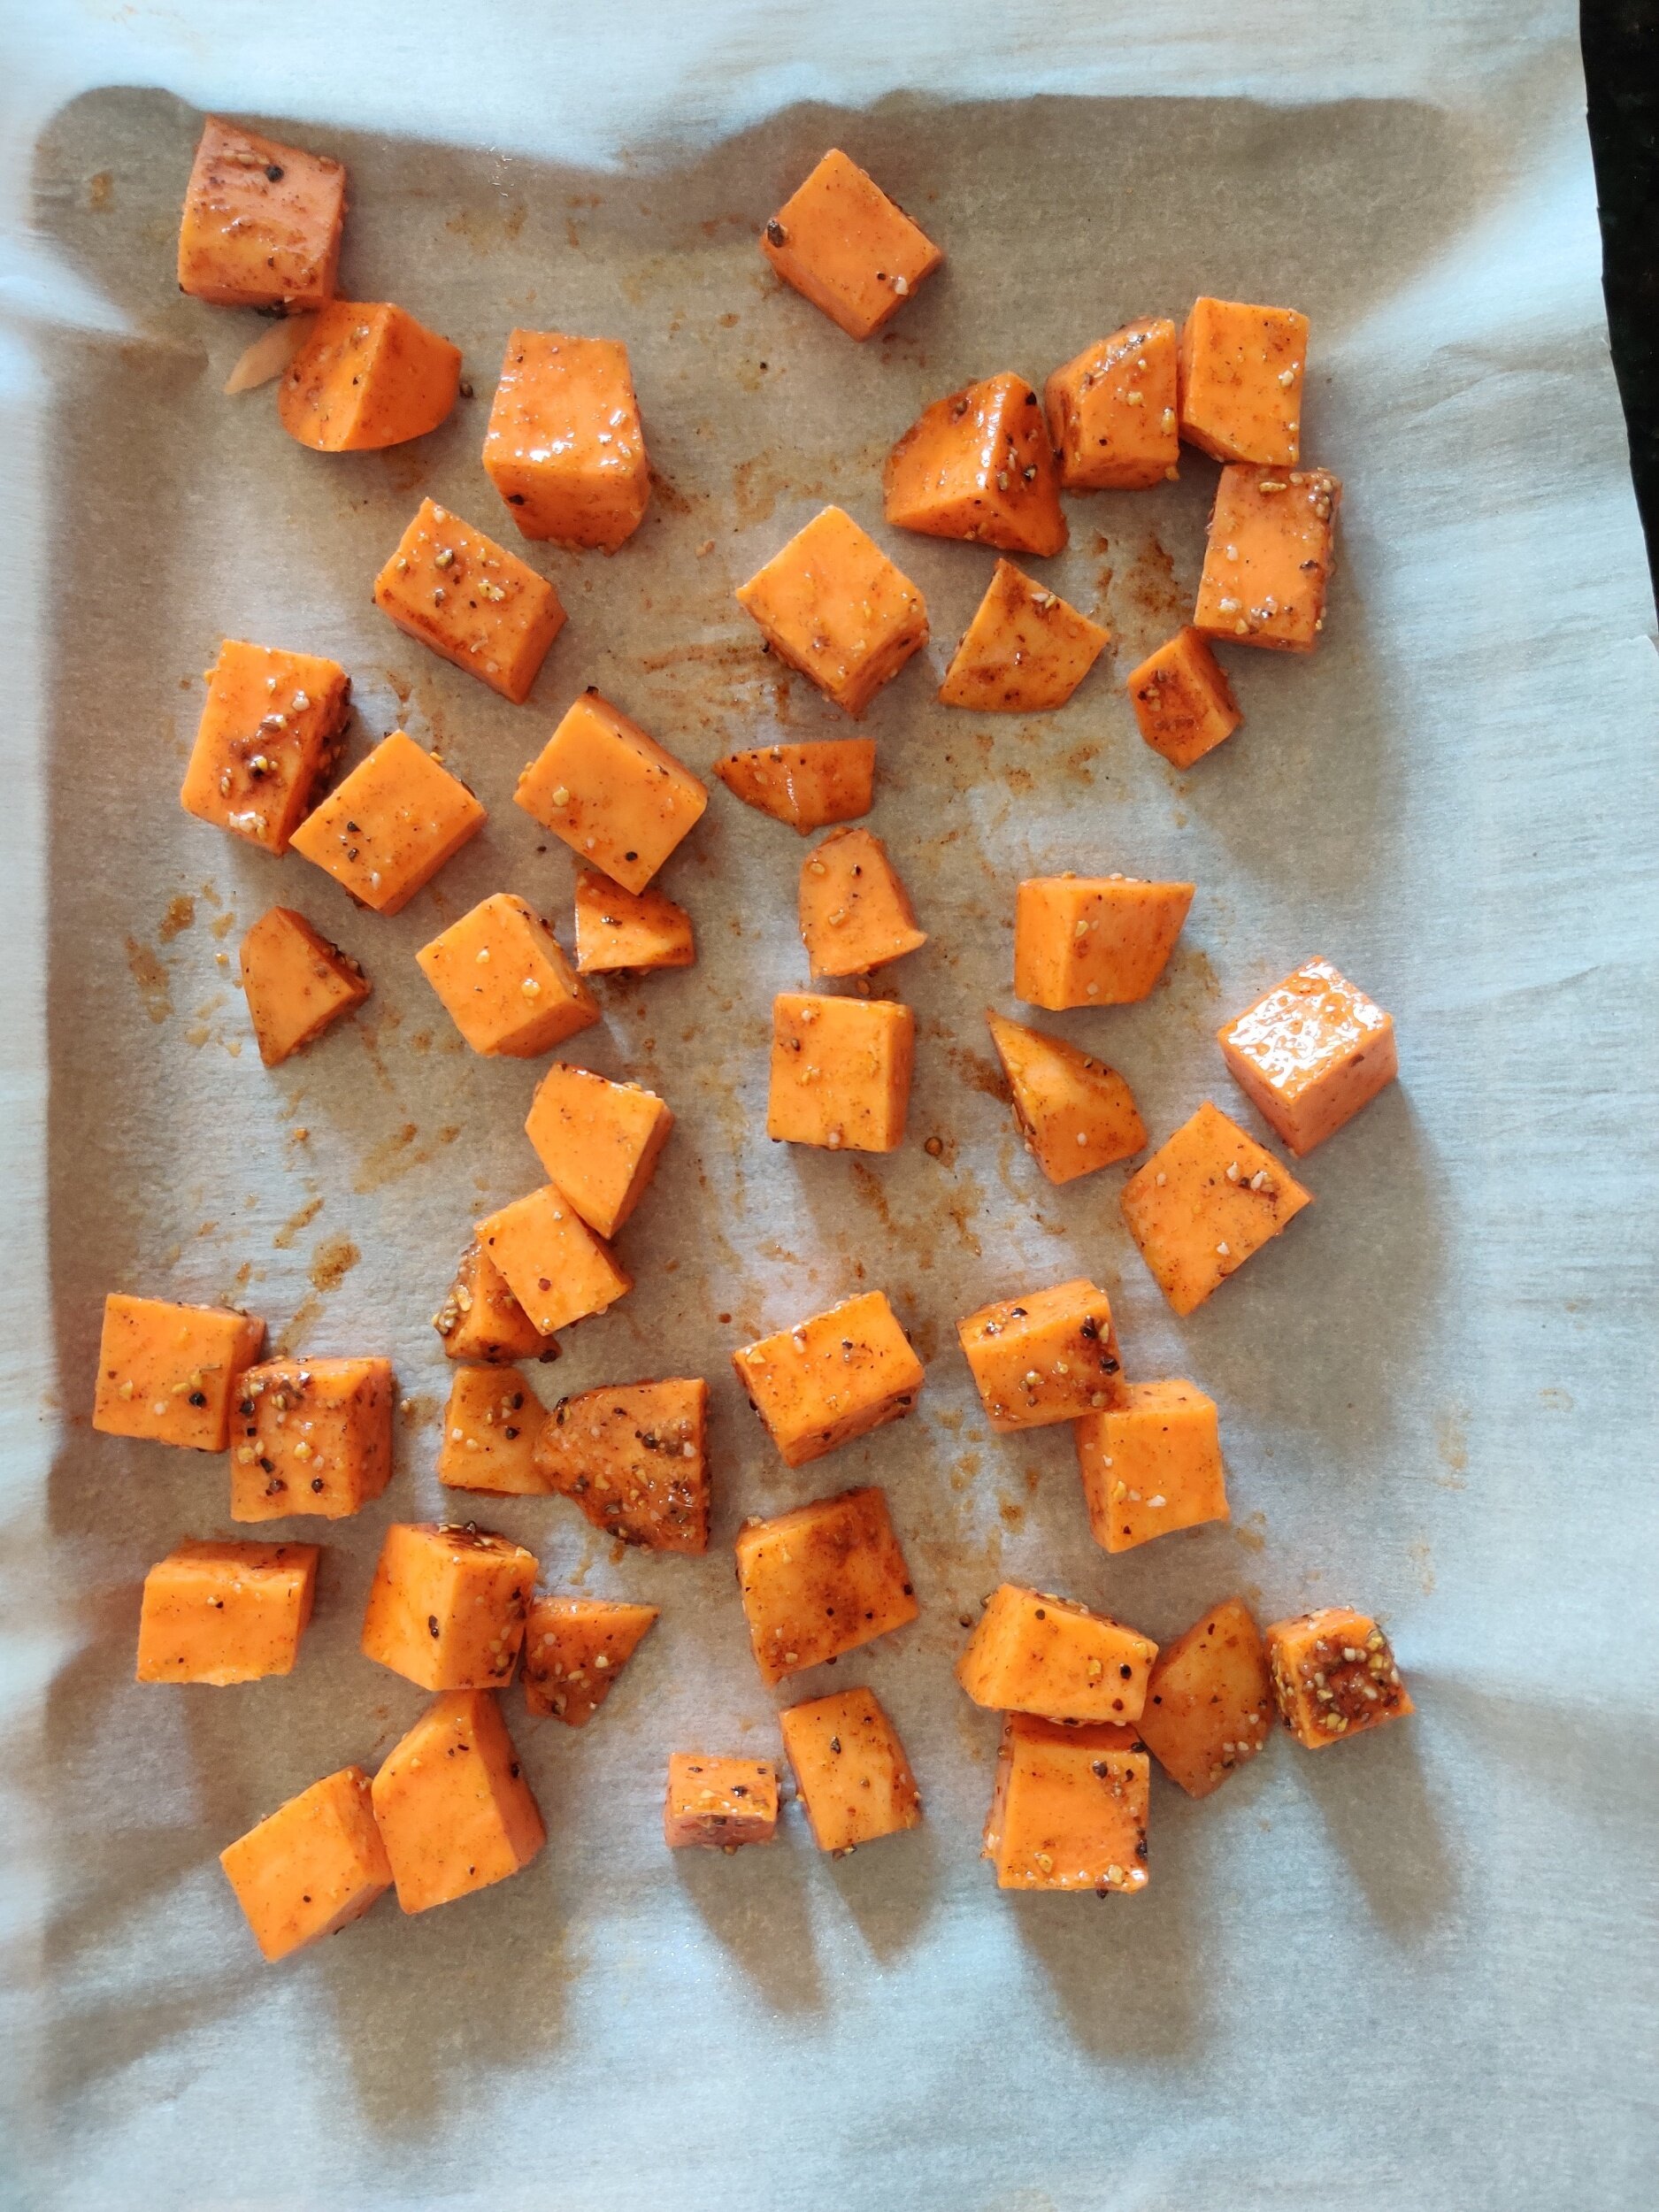
- Slice the eggplant in half and sprinkle with 1 teaspoon salt to draw out excess moisture. Let sit, then pat dry when ready to prepare.
- Peel and mince the garlic cloves. Roughly chop your washed parsley.
- In a separate bowl, combine your spices: ginger, masala curry powder, paprika, oregano, salt, pepper, chili flakes, and any other spices.
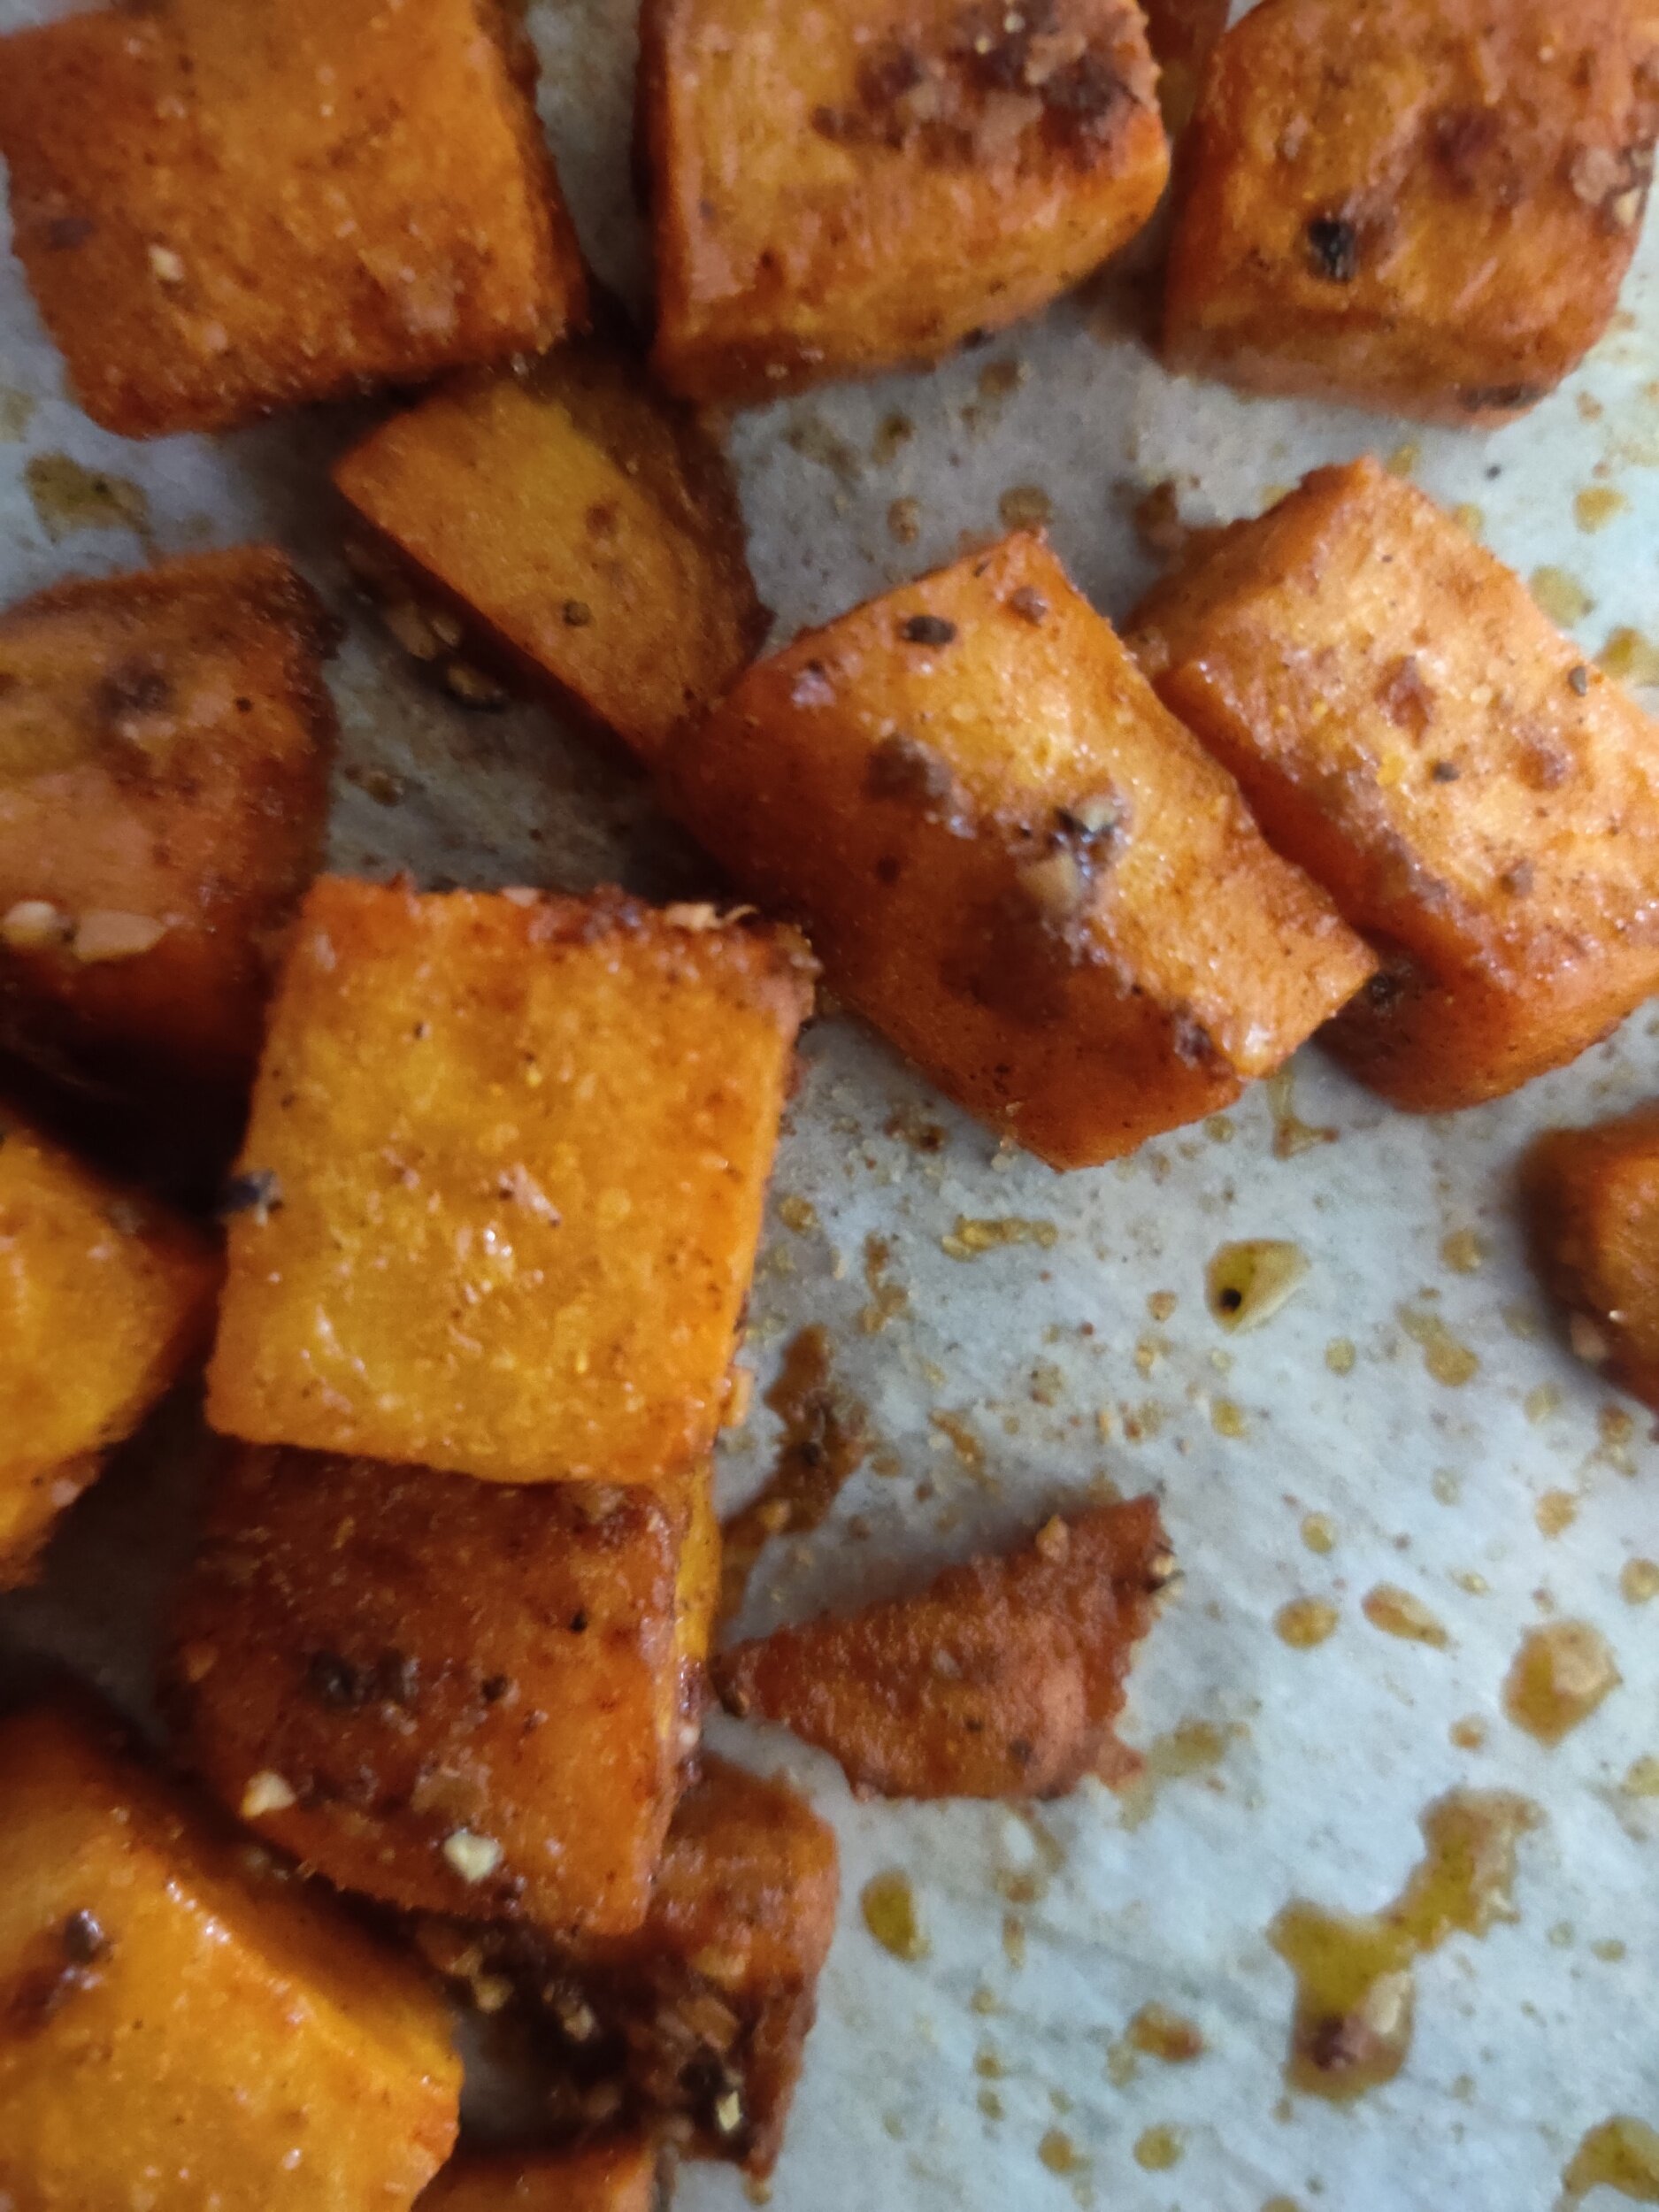
- Chop the eggplant into bite-sized pieces and sauté with the sesame oil until softened and golden brown. Remove from the pan and set aside.
- In the same pot, melt ghee over medium heat. Sauté the onion and garlic for 2–3 minutes, or until the onions are translucent. Add the spice mix and stir to bloom the flavors for about 1 minute (add a bit more ghee or the olive oil if needed.
- Deglaze the pot with soy sauce. Add the tomato, red wine vinegar, and lentils. Stir and cook for 1–2 minutes, then pour in the broth to cover and bring to a boil. Reduce heat and simmer for about 15 minutes, or until the lentils are softened.
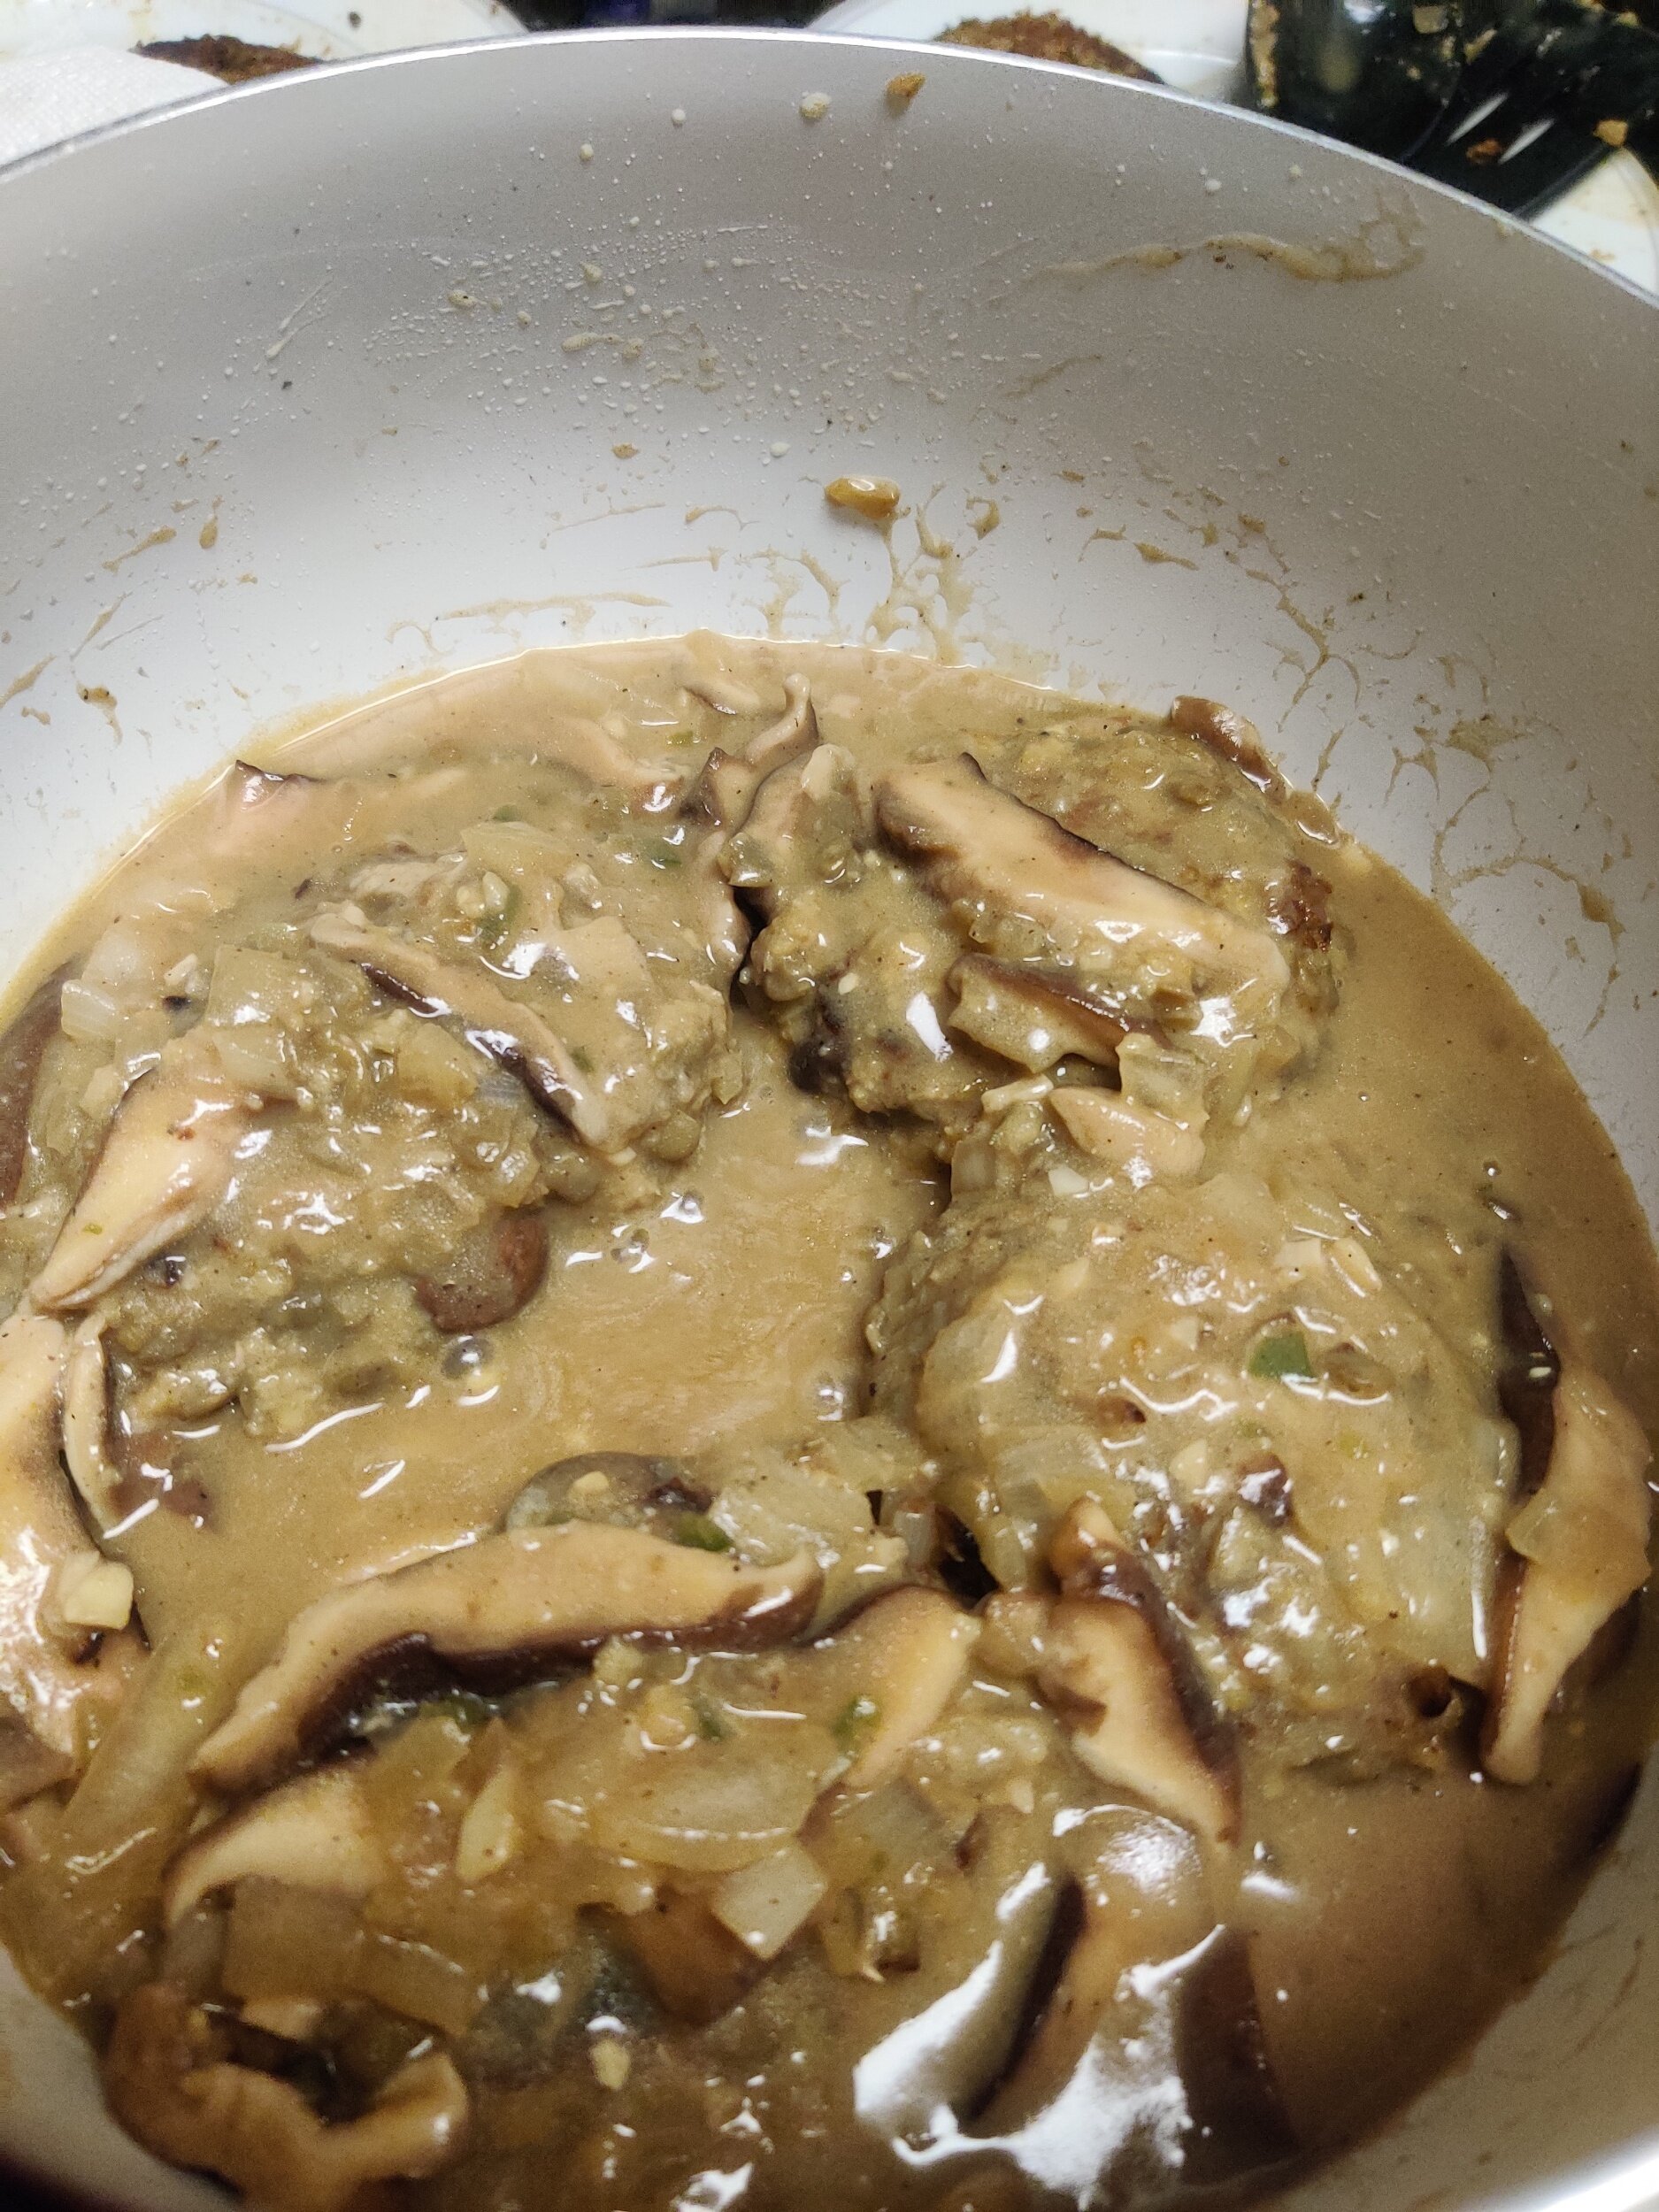
- Add the eggplant back to the pot, followed by the coconut milk, bay leaves and 2 tablespoons parsley. Simmer for another 10 minutes.
- Finish with a splash of fish sauce and rice vinegar. Season to taste. Remove from heat and let sit for 2–3 minutes.
- Serve topped with extra parsley, sliced almonds, and a scoop of aromatic rice.
Nutrition Facts
Calories
378Fat (grams)
24.9 gCarbs (grams)
27.5 gFiber (grams)
12.6 gSugar (grams)
8.8 gProtein (grams)
10.2 gI am not a certified nutritionist and any nutritional information on dontmissmyplate.com should only be used as a general guideline.

Spaghetti Squash with Creamed Beet Greens and Roasted Mushrooms
If you're looking for a delicious, gluten-free alternative to pasta, spaghetti squash is a game-changer. This versatile winter squash transforms into tender, noodle-like strands once roasted, making it perfect for soaking up sauces, tossing with fresh ingredients, or enjoying on its own with a simple drizzle of olive oil. Not only is it low in calories and carbs, but it's also packed with fiber, vitamins, and antioxidants. Whether you're trying to eat healthier or just want to mix up your meals, spaghetti squash is a tasty and satisfying option worth adding to your kitchen rotation.

Roasted Mushrooms with Basil: A Flavorful Upgrade
Roasted mushrooms bring a rich, savory depth to any dish, and when paired with fresh basil, they add an aromatic, slightly sweet contrast that elevates the flavors of spaghetti squash. As the mushrooms roast, they develop a deep umami flavor with crispy edges and a tender bite, making them the perfect complement to the squash’s delicate texture. Tossed with olive oil, garlic, and a sprinkle of sea salt, these mushrooms become irresistibly flavorful, while the fresh basil adds a burst of brightness. Together, they turn this simple dish into a satisfying, restaurant-quality meal.

Beet Greens: A Nutrient-Packed, Flavorful Boost
Beet greens are often overlooked, but they’re a powerhouse of nutrients and add a beautiful pop of color to any dish. Rich in vitamins A, C, and K, along with iron and calcium, these leafy greens bring both health benefits and a mild, earthy flavor. When sautéed and combined with a creamy sauce, the beet greens soften into a velvety texture that beautifully balances the roasted mushrooms and spaghetti squash. Their slight bitterness is mellowed out, making them a perfect addition to this dish, creating a harmonious blend of flavors and textures that’s as nourishing as it is delicious.

A Cozy, Flavor-Packed Dish
If you’re looking for a satisfying, veggie-forward meal that’s both comforting and nutritious, this **Spaghetti Squash with Creamed Beet Greens and Roasted Mushrooms** is the perfect choice. It’s a delicious balance of earthy, roasted mushrooms, silky creamed greens, and tender spaghetti squash that twirls beautifully on your fork—no pasta required!
Roasting the squash enhances its natural sweetness, while the mushrooms develop a deep umami richness. The creamed beet greens tie everything together with their vibrant color and luscious texture, making this dish feel indulgent yet wholesome. Whether you’re looking for a light but hearty dinner or a creative way to incorporate more vegetables into your meals, this recipe delivers on both flavor and satisfaction.
Serve it as a meatless main or alongside your favorite protein for a complete meal. Either way, get ready to enjoy a dish that’s simple, nourishing, and packed with bold flavors!

Spaghetti Squash with Creamed Beet Greens and Roasted Mushrooms
If you’re looking for a satisfying, veggie-forward meal that’s both comforting and nutritious, this Spaghetti Squash with Creamed Beet Greens and Roasted Mushrooms is the perfect choice. It’s a delicious balance of earthy, roasted mushrooms, silky creamed greens, and tender spaghetti squash that twirls beautifully on your fork—no pasta required!
Ingredients
- 1 medium to large spaghetti squash
- 2 teaspoons salt
- 2 teaspoons black pepper
- 1/4 cup water
- 2 tablespoons olive oil
- 8 oz Bella mushrooms
- 2 teaspoons seasoned salt
- 2 teaspoons black pepper
- 2 teaspoons onion powder
- 2 teaspoons garlic powder
- 2 teaspoons oregano
- 4 tablespoons olive oil
- 1 bunch beet greens
- 1 tablespoon butter
- 2 tablespoons olive oil
- 1 teaspoon salt
- 1 teaspoon black pepper
- 1 teaspoon cumin
- 1 teaspoon chilli flakes
- 1 cup half-and-half or heavy cream
- 1/4 teaspoon cornstarch (if using half-and-half)
- 1 tablespoon soy sauce
- 1/3 large yellow onion, chopped
- 2–3 garlic cloves, minced
- 2 green onions, chopped
- 2 tablespoons fresh Thai basil (plus extra for garnish; smaller leaves preferred)
- 2 tablespoons fresh sage, chopped
- Optional:Parmesan cheese for garnish
- Optional: 1 teaspoon spaghetti squash or pumpkin seeds per serving (or substitute with walnuts)
Instructions
- Microwave the spaghetti squash for 4–6 minutes if large, or 1–2 minutes less if medium. Set it aside to cool slightly before cutting it in half. In the meantime, turn your attention to the other vegetables you’ll be roasting.
- Drizzle the mushrooms with olive oil, then season with seasoned salt, black pepper, garlic powder, oregano, and onion powder. Set aside.
- Preheat the Oven and turn the it on to 400°F.
- Using a sharp chef's knife, hold the squash steady with a paper towel or kitchen cloth. Pierce down vertically in the center and push down slowly and carefully lengthwise to cut it open on one side. Turn it around and repeat the process on the other side. You’ll feel some resistance, but microwaving the squash softens it enough to cut through.
- Scoop out the seeds with a spoon and transfer them to a small bowl. **Optional:** Pat them dry, drizzle with oil, and roast them separately with the mushrooms and squash until toasted and crunchy—just be careful not to burn them! This reduces waste and adds texture to your final dish.
- Drizzle the squash with olive oil and brush it all over before seasoning with salt and black pepper. Line a baking tray with parchment paper and place both halves face-down.
- Place the squash on the middle rack and the mushrooms on the top rack. Roast the *mushrooms for 35 minutes and the squash for 45 minutes.
- Halfway through, flip the mushrooms with a spatula. For the squash, check to ensure it isn’t burning. When 10 minutes remain add 1/3 cup of water to the tray, ensuring the squash sits in the pooled water to steam rather than burn in the final stage of cooking. Remove both when done.
- Prepare the creamed beet greens. This will serve as the sauce for the spaghetti squash and mushrooms. Crush and mince the garlic, then place it in a bowl. Chop the yellow onion and add it to the bowl.
- Remove basil leaves from their stems, roll them tightly, and slice thinly (a technique called chiffonade..
- Trim the roots from the green onions, then finely chop both the white and green parts.
- Roll the sage leaves, slice them thinly, then chop across the sliced sage.
- Wash the beet greens. Remove the leaves from the stems and separate them from the center rib. Roll the leaves together and slice thinly.
- Cook the sauce. Melt butter in a pan over medium heat. Add the yellow onion and sauté for 1–2 minutes. Stir in the green onions and garlic and cook briefly. Add salt, cumin, black pepper, and other desired spices, along with the olive oil, then mix well, then deglaze the pan with soy sauce.
- Stir in the beet greens and cook until slightly wilted. Pour in the half-and-half, followed by the chili flakes, and cook for 1–2 minutes, seasoning as needed.
- Assemble the dish. Using a fork, gently pull the spaghetti squash strands with a raking motion. Transfer them to a bowl. Depending on the squash's size, you may want to set some aside for another meal and add the bulk to the creamed beet greens.
- Using tongs, gently incorporate the spaghetti squash, ensuring it’s well mixed. Add in the roasted mushrooms.
- Plate and serve. Use tongs to twirl the spaghetti squash onto the center of your plate. Sprinkle with parmesan cheese, toasted seeds (if using), and the smallest basil leave for garnish. Serve while hot!
Nutrition Facts
Calories
304Fat (grams)
19 gCarbs (grams)
31.2 gFiber (grams)
4.4 gSugar (grams)
3.2 gProtein (grams)
8.7 gI am not a certified nutritionist and any nutritional information on dontmissmyplate.com should only be used as a general guideline.


Creamy Roasted Broccoli and Cauliflower Bake
If you’re looking for a comforting, veggie-packed dish, this cheesy roasted broccoli and cauliflower bake is an easy winner. Roasting the vegetables brings out their natural sweetness and nuttiness, while a rich, creamy cheese sauce ties everything together. It works beautifully as a hearty side or even a main for a simple weeknight meal.
Start by tossing broccoli and cauliflower florets with a little olive or avocado oil, seasoning generously with salt, pepper, and perhaps a hint of smoked paprika or garlic powder. Roast at high heat until the edges are golden and crispy, giving them a stir halfway through. The dry heat intensifies the flavors and adds a satisfying texture that boiling or steaming just can’t match. A squeeze of fresh lemon or a drizzle of balsamic glaze right before serving brightens the dish and balances the richness.
Once the veggies are roasted, fold them into a smooth cheese or mornay sauce, topping with extra cheese or breadcrumbs for a golden, bubbly finish. Serve it straight from the oven for maximum comfort, or make it ahead and reheat—it’s just as delicious the next day. Whether you’re cooking for a crowd, prepping meals for the week, or just craving something cozy, this bake delivers flavor, texture, and ease in every bite.


Creamy Roasted Broccoli and Cauliflower Bake
If you’re craving a cozy, veggie-packed dish, this creamy vegetable bake is perfect! Roasting enhances the natural sweetness of the broccoli and cauliflower, while a rich, cheesy mornay sauce and crispy topping make it irresistible..
Ingredients
- 32 oz cauliflower florets
- 32 oz broccoli florets
- 1/4 cup olive oil
- 1 tbsp garlic powder
- 1 tbsp onion powder
- 1 tsp seasoned salt
- 1 tsp cayenne pepper
- 2 garlic cloves, minced
- 1 medium yellow onion, chopped
- 1 tbsp butter
- 3 tbsp flour
- 8 oz heavy cream
- 1 chicken bouillon cube + 1 cup water (or 1 cup chicken broth)
- 1 tbsp oregano
- 1 tsp cayenne pepper
- 1 tsp Royco Usavi Mix (or all-purpose seasoning)
- 1 tsp salt (optional)
- 1 1/2 cups grated pepper jack cheese
- 3 tbsp grated Parmesan (optional)
Instructions
- Roast the vegetables: Preheat oven to 350°F. Toss broccoli and cauliflower with olive oil, garlic powder, onion powder, seasoned salt, and cayenne. Spread on a baking sheet and roast 15–20 min, tossing halfway.
- Prepare aromatics: In a skillet, sauté onion and garlic until soft. Add to roasted vegetables in a baking dish.
- Make the sauce: Melt butter in a small saucepan over medium-low heat. Stir in flour to form a roux. Gradually whisk in cream, water, and crushed bouillon cube. Add oregano, cayenne, Royco Mix, and salt. Cook until thick and smooth.
- Assemble bake: Pour sauce evenly over vegetables. Sprinkle with pepper jack cheese (and Parmesan if using).
- Bake: Bake at 350°F for 15–20 min. Broil 2–3 min until cheese is golden and bubbling.
- Serve: Let set slightly, then serve hot.
Notes
- For best texture, roast the vegetables until lightly golden before baking. This prevents the dish from becoming watery.
- You can substitute broccoli or cauliflower with other vegetables like zucchini or mushrooms, but adjust roasting time as needed.
- For a milder version, reduce or omit the cayenne and use a mild cheese instead of pepper jack.
Nutrition Facts
Calories
470Fat (grams)
35 gSat. Fat (grams)
21 gCarbs (grams)
12 gFiber (grams)
4 gProtein (grams)
12 gI am not a certified nutritionist and any nutritional information on dontmissmyplate.com should only be used as a general guideline.

Creamy Coconut Cornbread Ice Cream (No Churn)
Who isn't down for eating ice cream regardless of the season? As Summer ends and makes way for the Fall, flavours change, and various fruits and vegetables will take the stage, from pumpkins and sweet potatoes to corn and apples, pears and figs. When people think about corn (or maize, or mealie cobs), ice cream probably doesn't come to mind--although some of the more experimental producers, companies like Van Leeuwen and Jeni's may have made that the case.
But what if you want to make some corn ice cream in your own at home? Better yet, still decadent, possibly dairy-free, and without an ice cream maker.
Be sure to explore the website for other sweet recipes, the no churn ice cream recipes listed below which you can use with dairy or alterative milk products to make.
Nature's Charm produces two main ingredients (linked below) you need for your ice cream base - whipped cream (to help add air to the mixture, especially since you won't be getting the smooth, light texture that typically comes from the churning motion of an ice cream maker) and condensed milk (which supplies the sugar and fat content). I am a fan of their quality, organic products and recommend trying them. They even make condensed oat milk! Even if you don't have specific dietary requirements and restrictions, check out some of my favourite gluten-free and vegan baking items here.
If you are in need of some quality loaf pans, for ice cream, bread, or whatever else, try these!

These Nordic Ware Aluminum Loaf Pans (Set of 2) , 1.5-pound pans can do it all—and then some with oven-safe aplomb. They’re made of pure cast aluminum reinforced with steel, so they’ll heat up in a flash and bake extra-evenly time after time. Even more: They’ve got galvanized steel rims to prevent warping, and they’ll never rust either.
Have you ever used coconut milk products as your base?
How to Make Non-Dairy No-Churn Ice Cream
This website has several recipes that do not require an ice cream maker. There is no need to purchase an overpriced machine; you have total control over what goes into your easy, homemade sweet treat.
As previously noted, an integral part of making ice cream is the churning process or adding air into the mixture, which you can achieve using a hand mixer (in addition to the whipped cream). There is also no need for eggs or to cook the main ingredients. You can substitute the coconut products with another alternative or dairy milk with this recipe. One thing to note is that using products with less fat or sugar could impact the creaminess factor and how hard the ice cream turns out. This is because fat doesn't freeze, and sugar helps keep ice cream softer in texture (by preventing some of the water from turning into ice, but it works both ways, so there's no need to overdo it!)
You can substitute the coconut products with another alternative or dairy milk with this recipe.
Why is My No Churn Ice Cream hard?
Yep, I had asked myself this question before and even tried homemade ice cream recipes a few times before getting it right, especially when switching to low-fat and reduced-sugar products. The main potential drawback or challenge with no-churn ice cream is the consistency and texture not meeting expectations. You will likely need to leave it out longer once it is frozen.
Be sure to do two things during the process:
Mix your ingredients well, but don't beat to the point of separating or depleting your whipped cream.
Make sure the container is airtight when you freeze the ice cream.
These are not the only factors; for example, cling wrap helps prevent water particles from crystalizing on top of the ice cream. You can add alcohol to the base mixture, which does not freeze, ensuring you whip your cream adequately. There are also natural additives known as 'stabilizers' like guar gum or thickeners like tapioca flour (used in gelato), and keeping all your ingredients and the freezer cold!
")
Creamy Coconut Cornbread Ice Cream (No Churn)
Ingredients
- 1 can (14-ounces) coconut condensed milk
- 1 can (15-ounces) coconut whipped cream
- 1 can (8.5-ounces) creamed corn
- 1 box gluten-free cornbread (I used Bob's Red Mill Mix)
- 1 tablespoon pure vanilla extract or paste
- 1 teaspoon lemon juice
- 1/2 teaspoon lemon zest
- 1/2 teaspoon salt
- Pinch of cinnamon
Instructions
- Follow the instructions for the cornbread premix: bake, cool and crumble the desired amount into pieces, set aside.
- Combine the condensed milk, creamed corn, and vanilla, whisking until well incorporated in a large bowl.
- Add the (chilled overnight) whipped coconut cream to another separate bowl and beat for about three minutes on high speed and/or until stiff peaks form. Watch for curdling or separation in the coconut mix; you will want to mix sparingly, or else the ice cream may have an undesirable texture.
- Using a large spoon or whisk, fold the whipped cream into the corn mixture, starting with two or three initial portions--this will help ensure you don't deflate the whipped air.
- Fold in the crumbled cornbread pieces, then pour the mixture into a loaf pan or ice cream container. You can also swirl in any extra creamed corn and condensed milk mixture.
- Cover with cling film, laying it directly on the ice cream's surface, then place in the freezer overnight or for at least four hours.
- When ready to serve, leave the ice cream at room temperature for about 10 minutes, then enjoy it in cups or cones!
I am not a certified nutritionist and any nutritional information on dontmissmyplate.com should only be used as a general guideline.

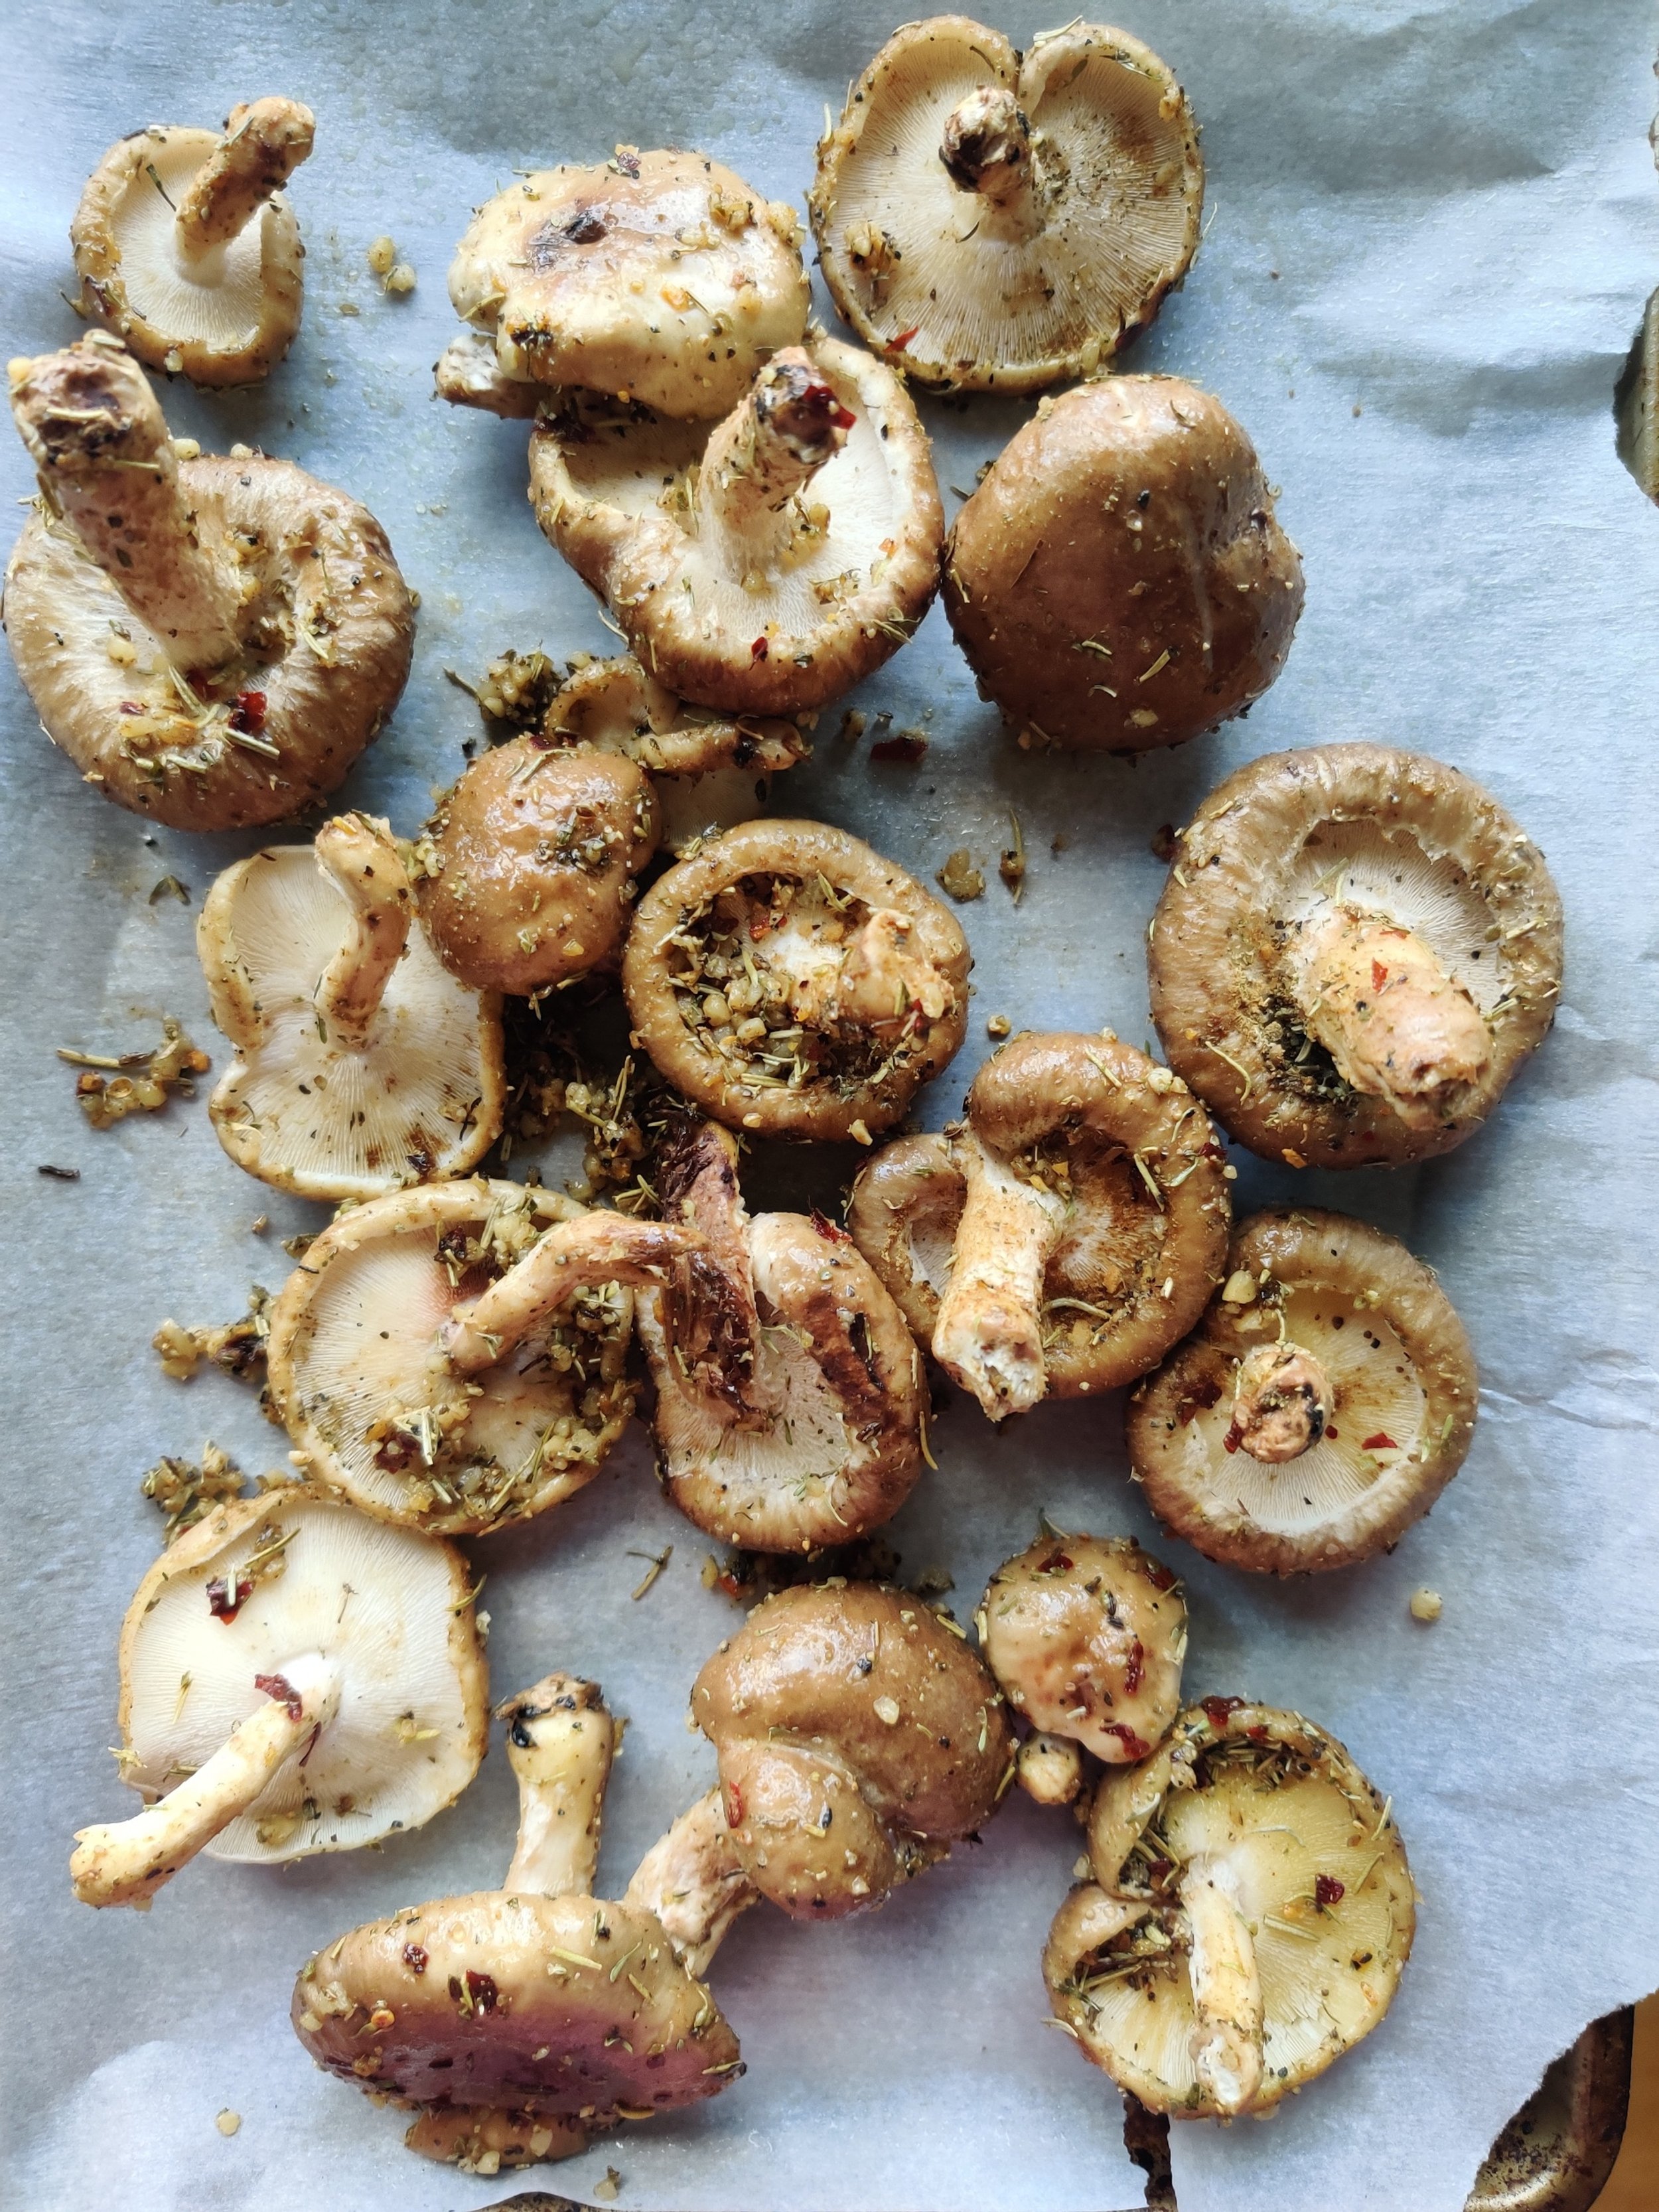
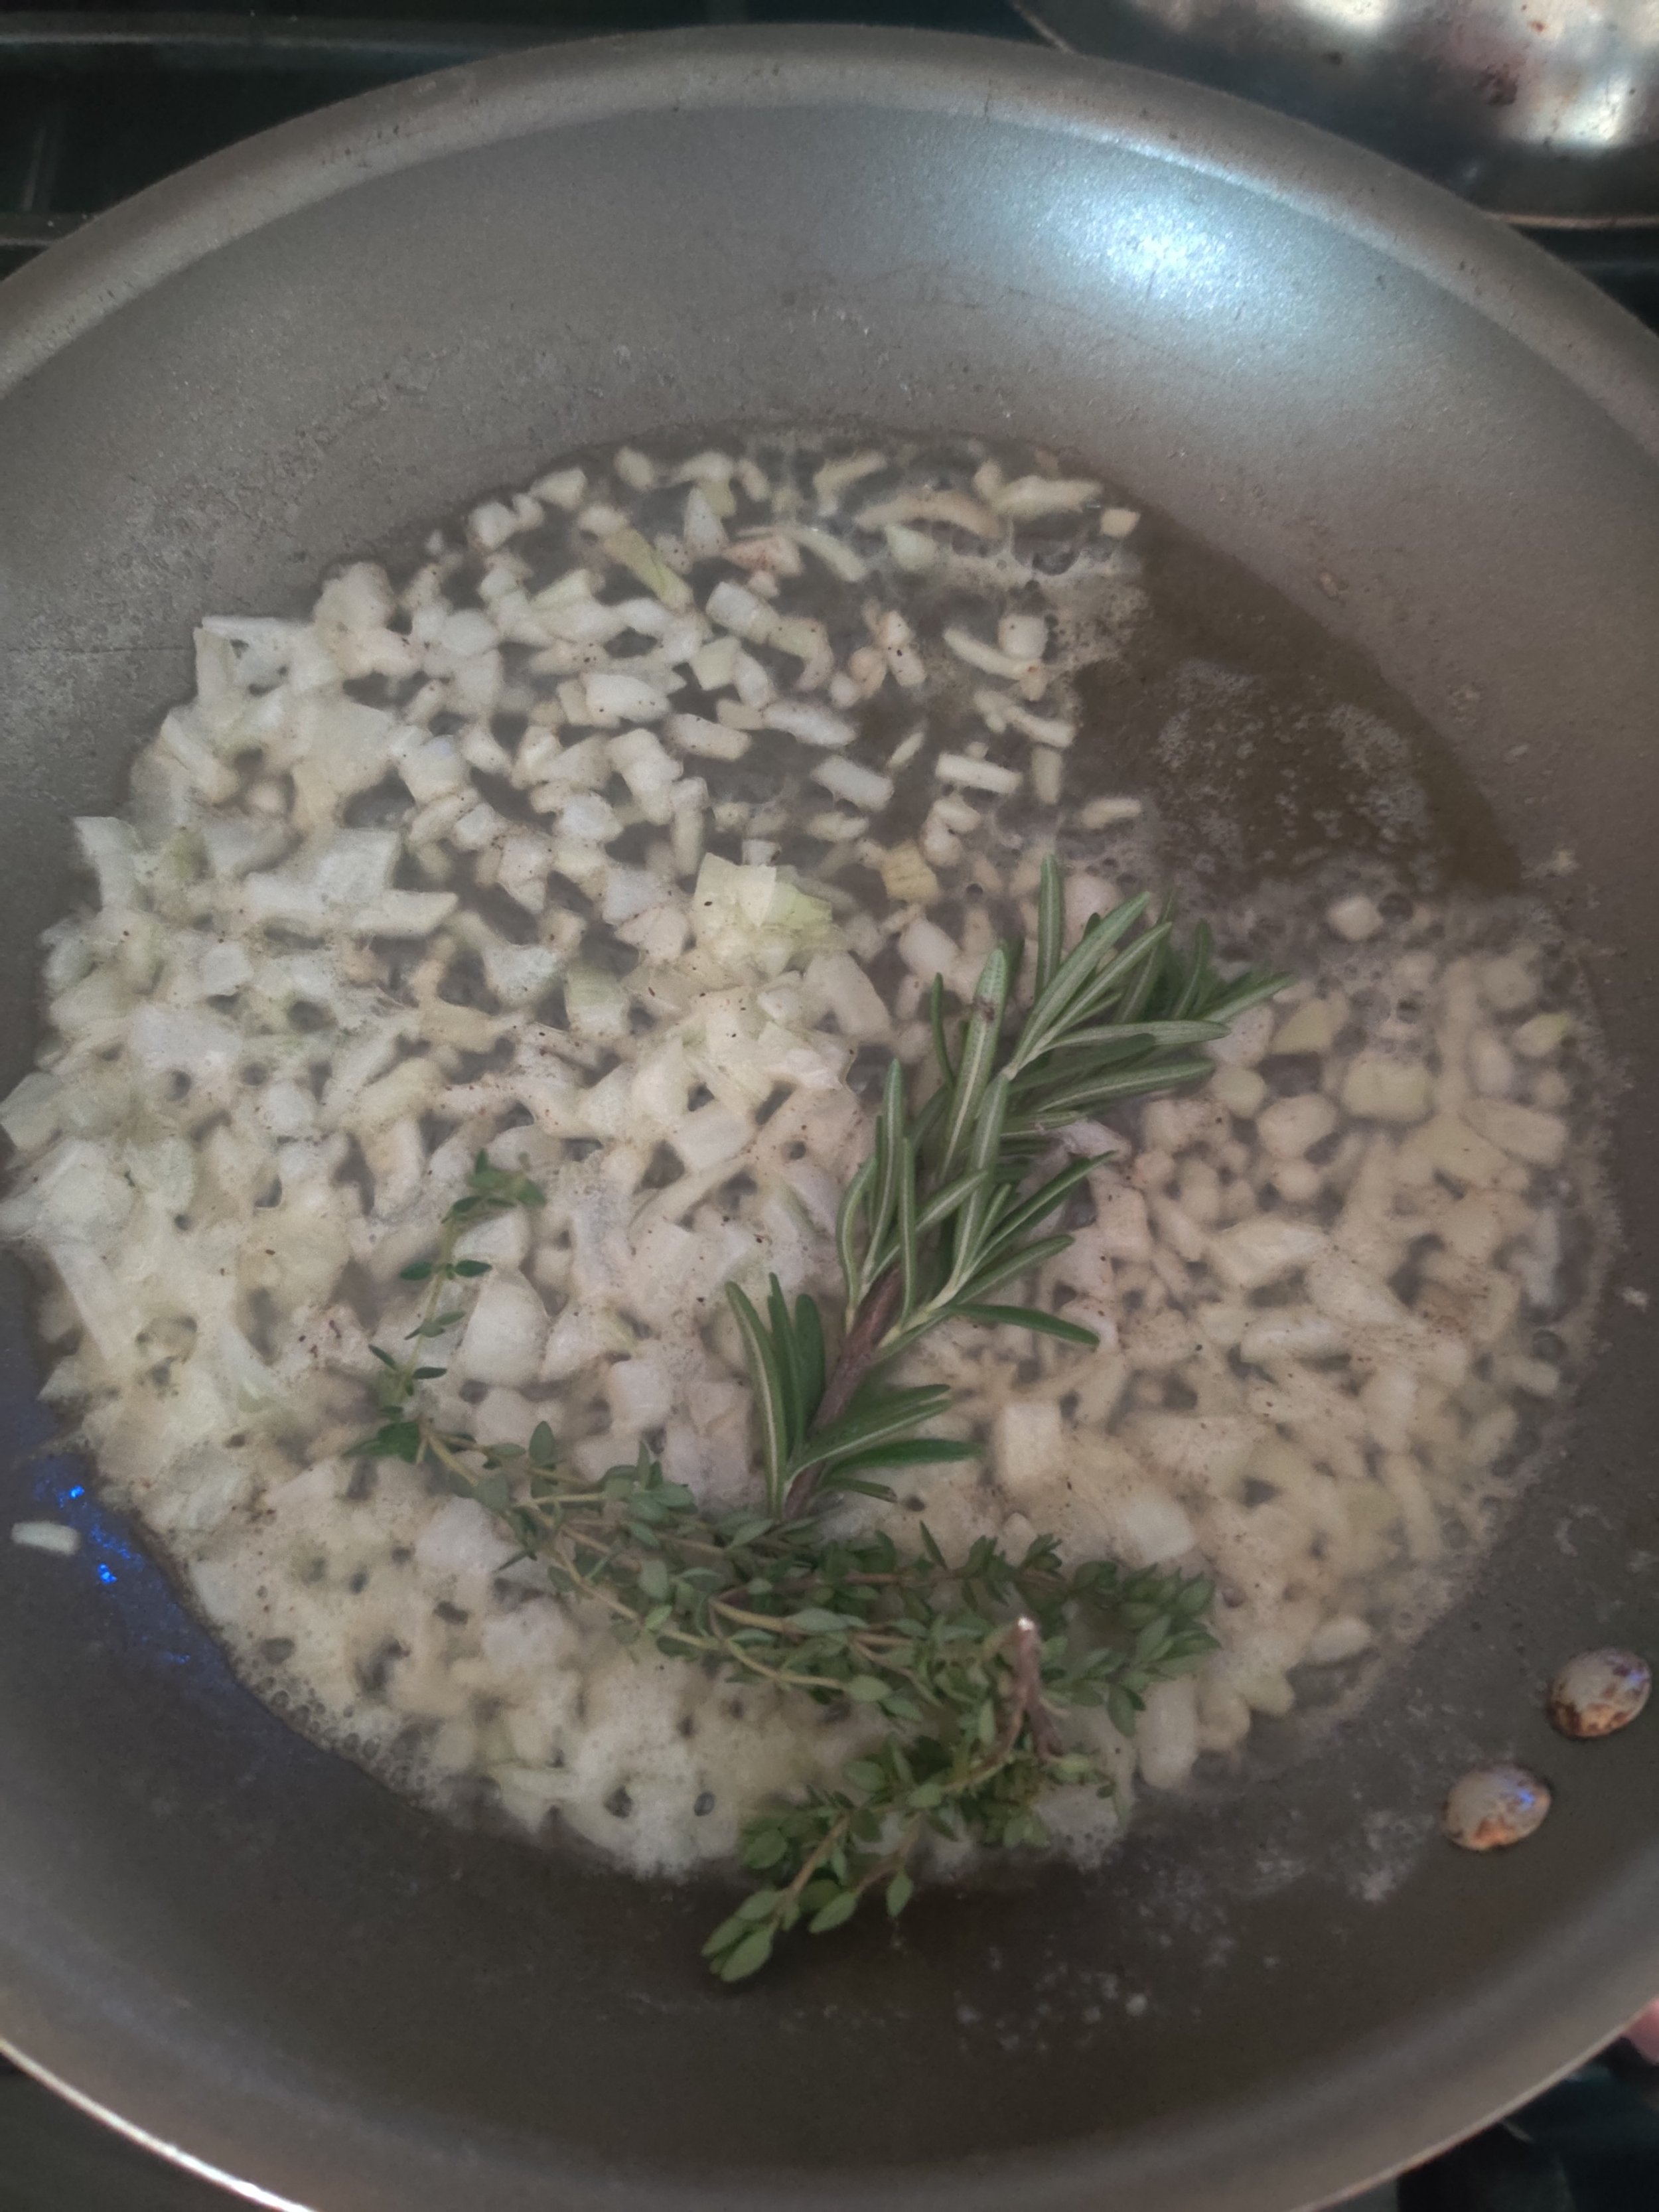
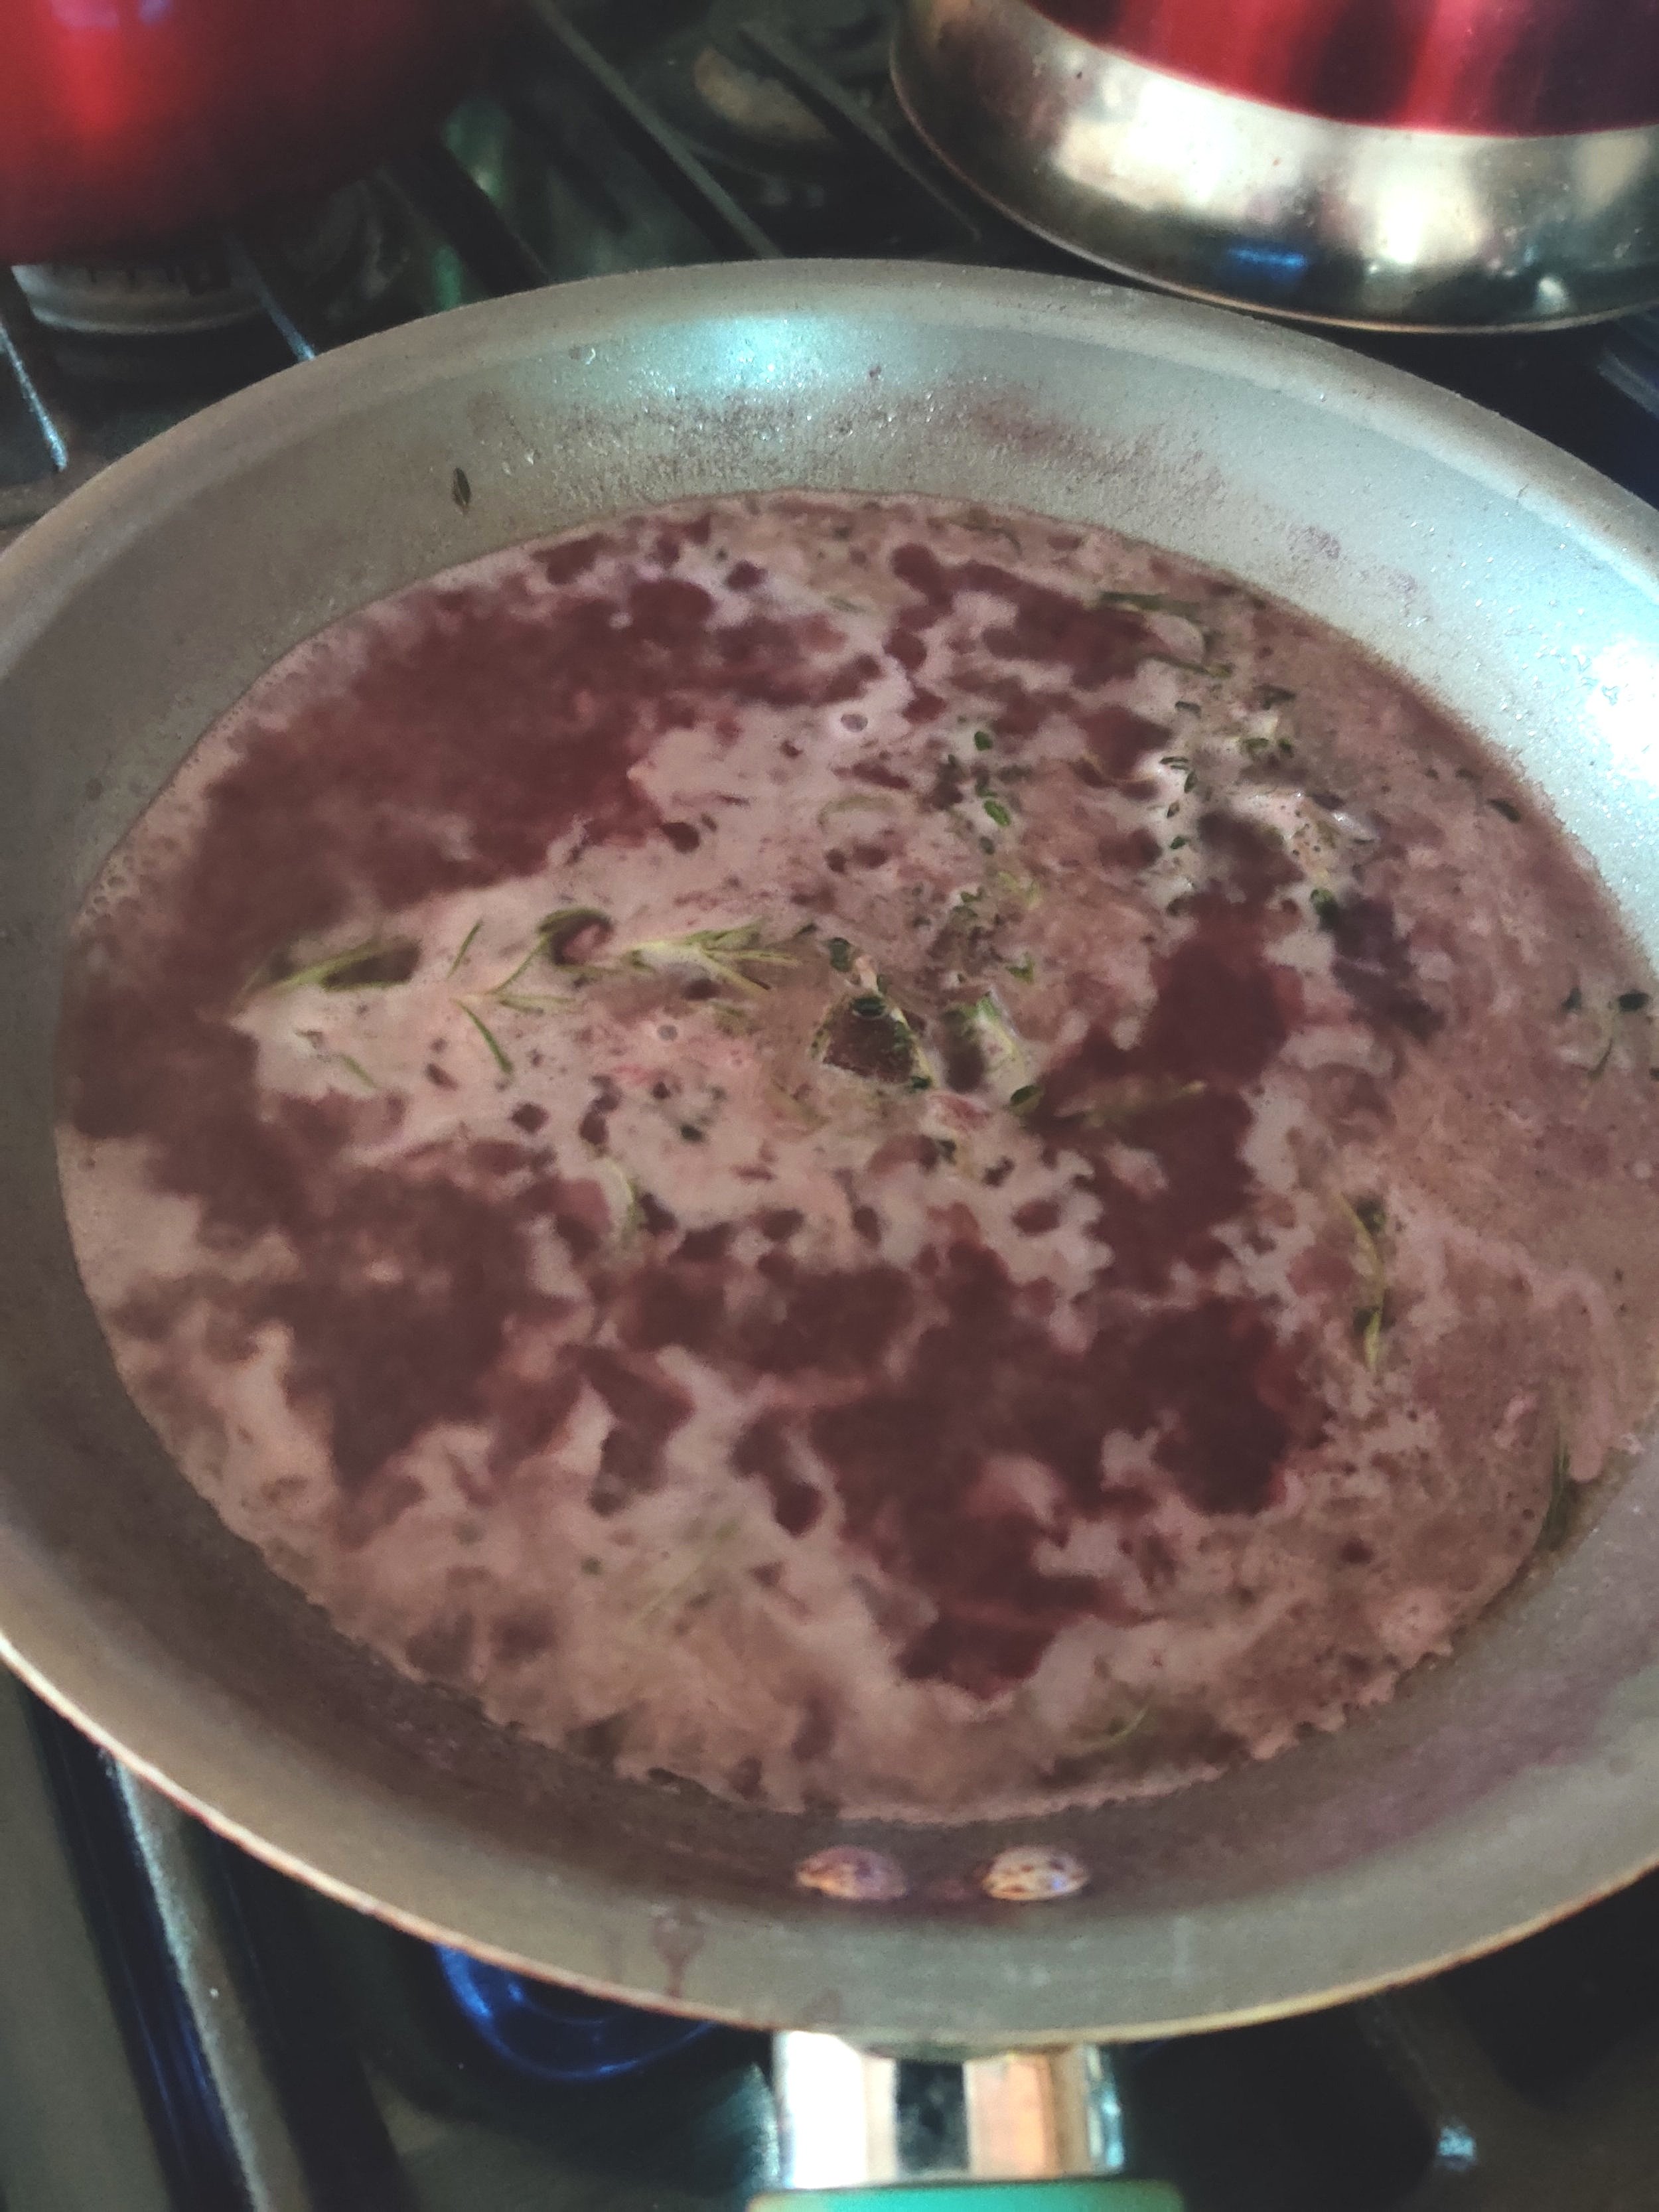
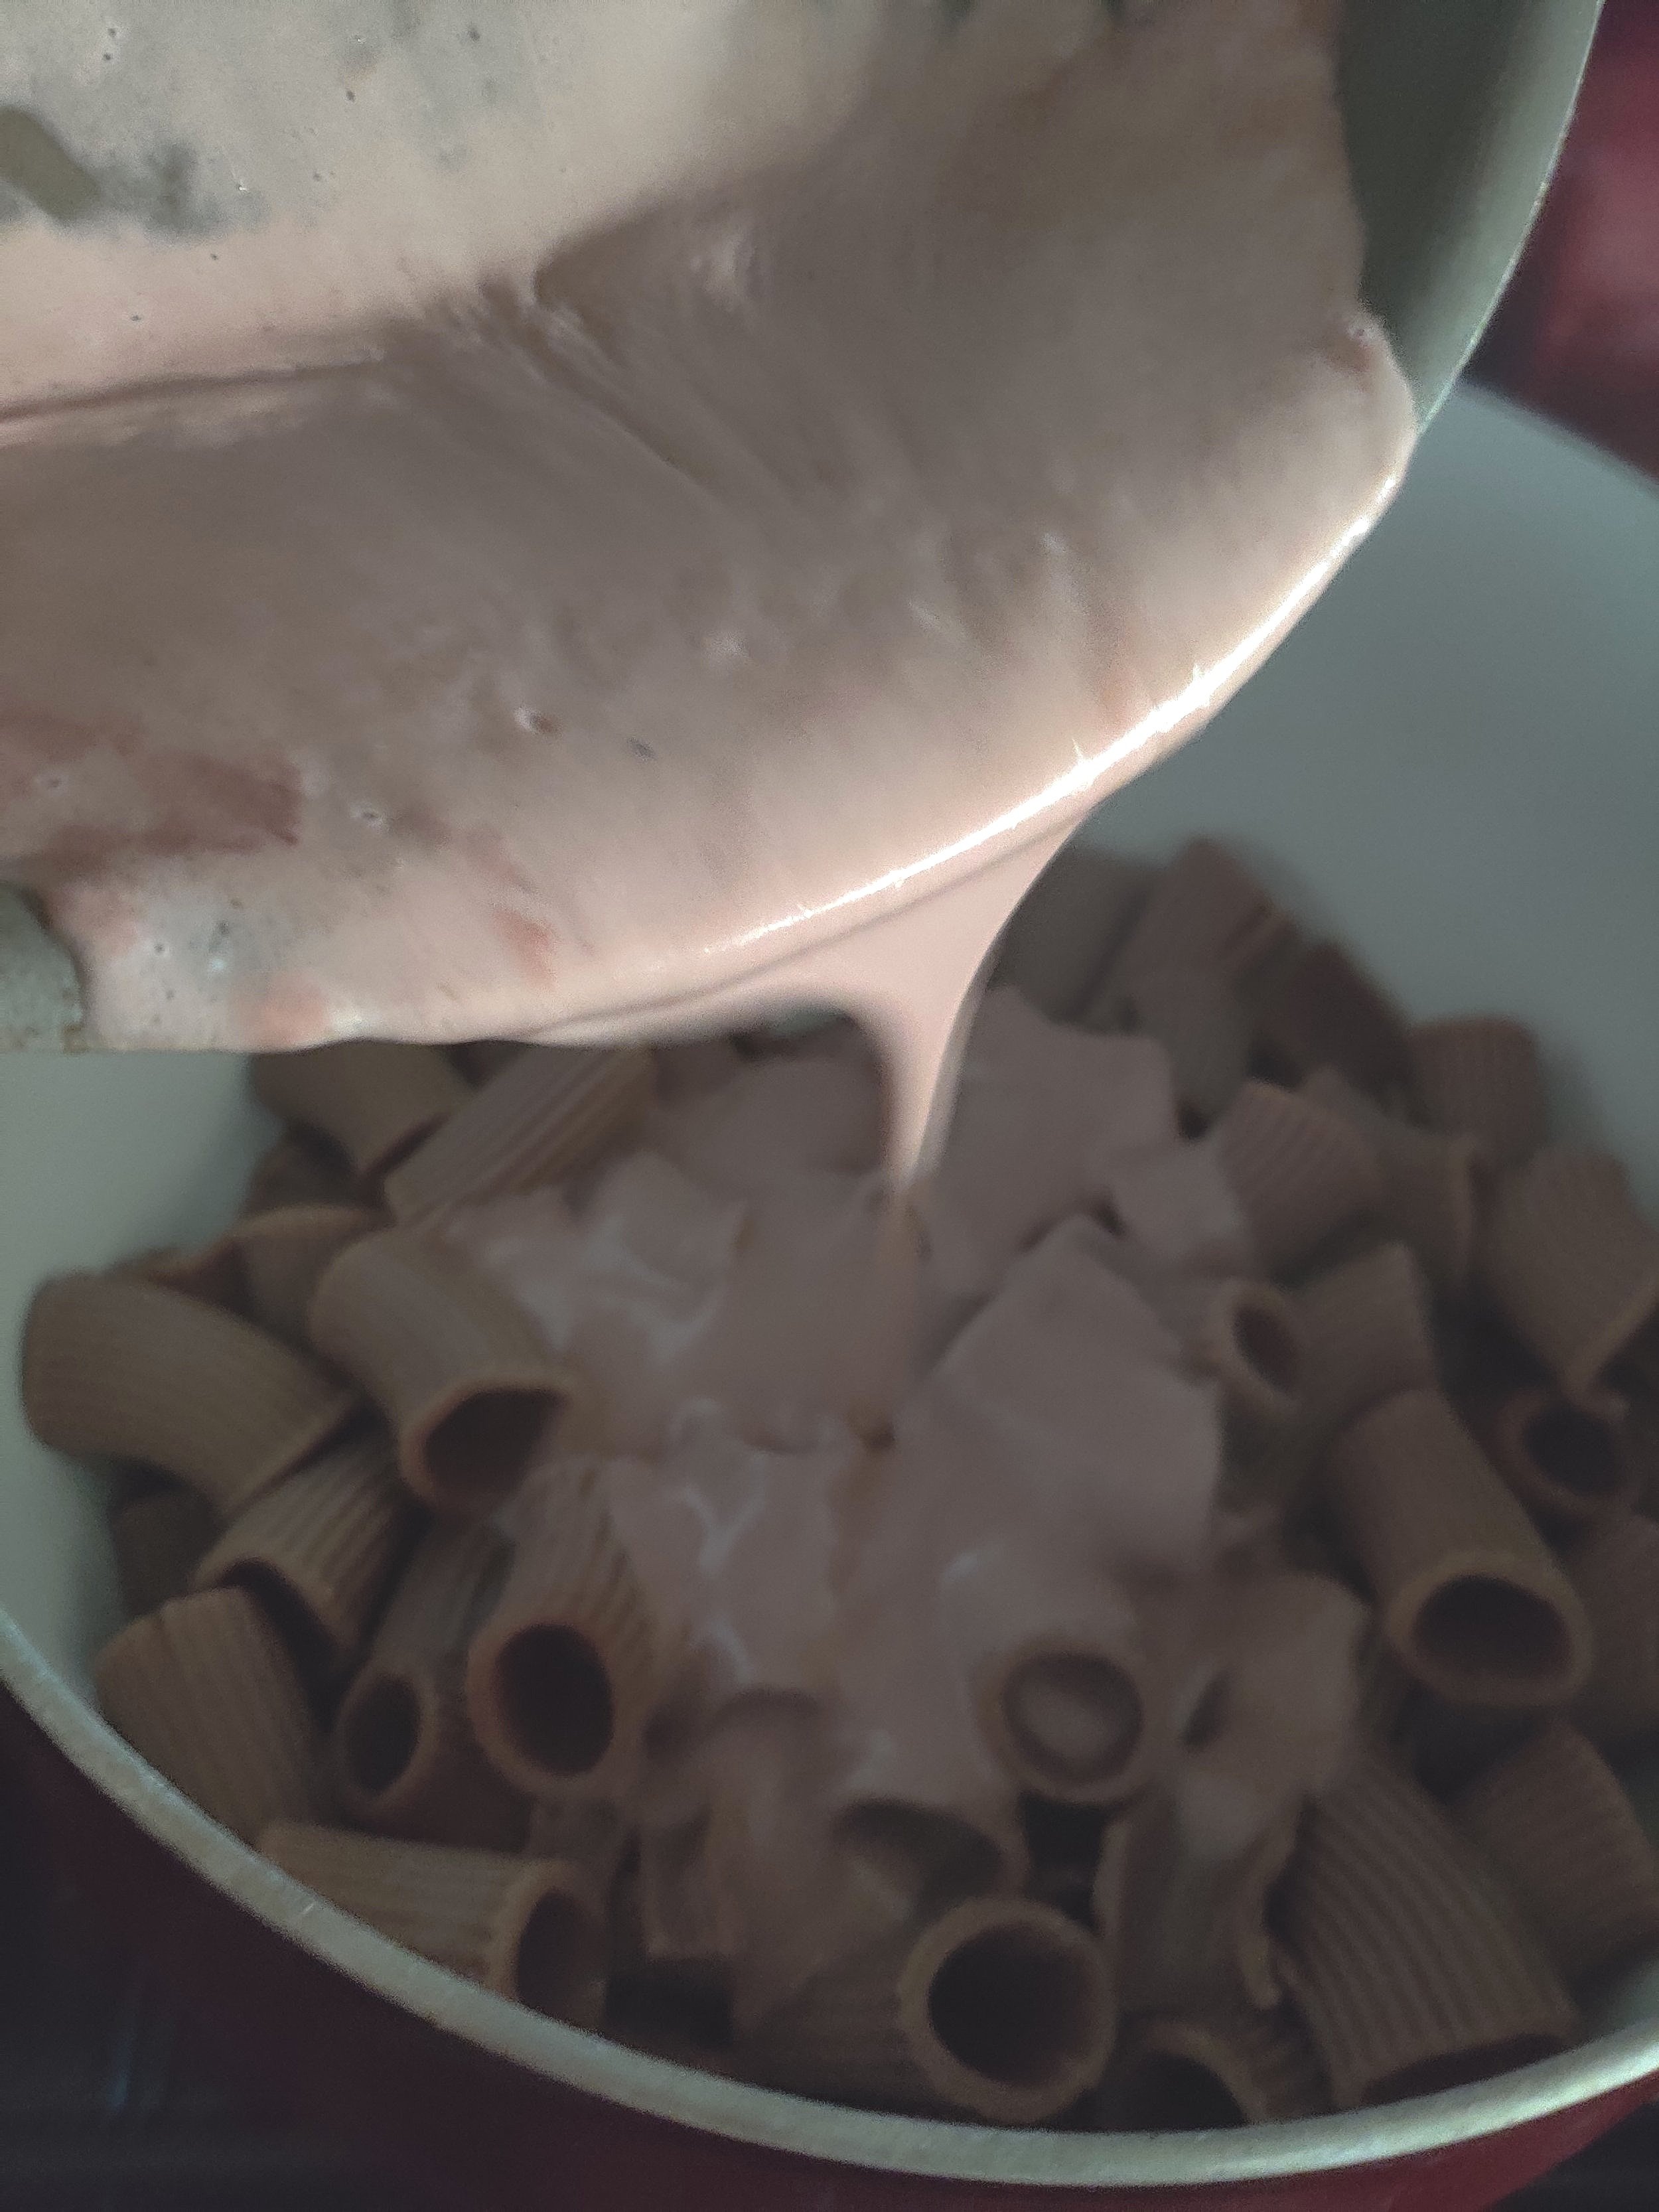
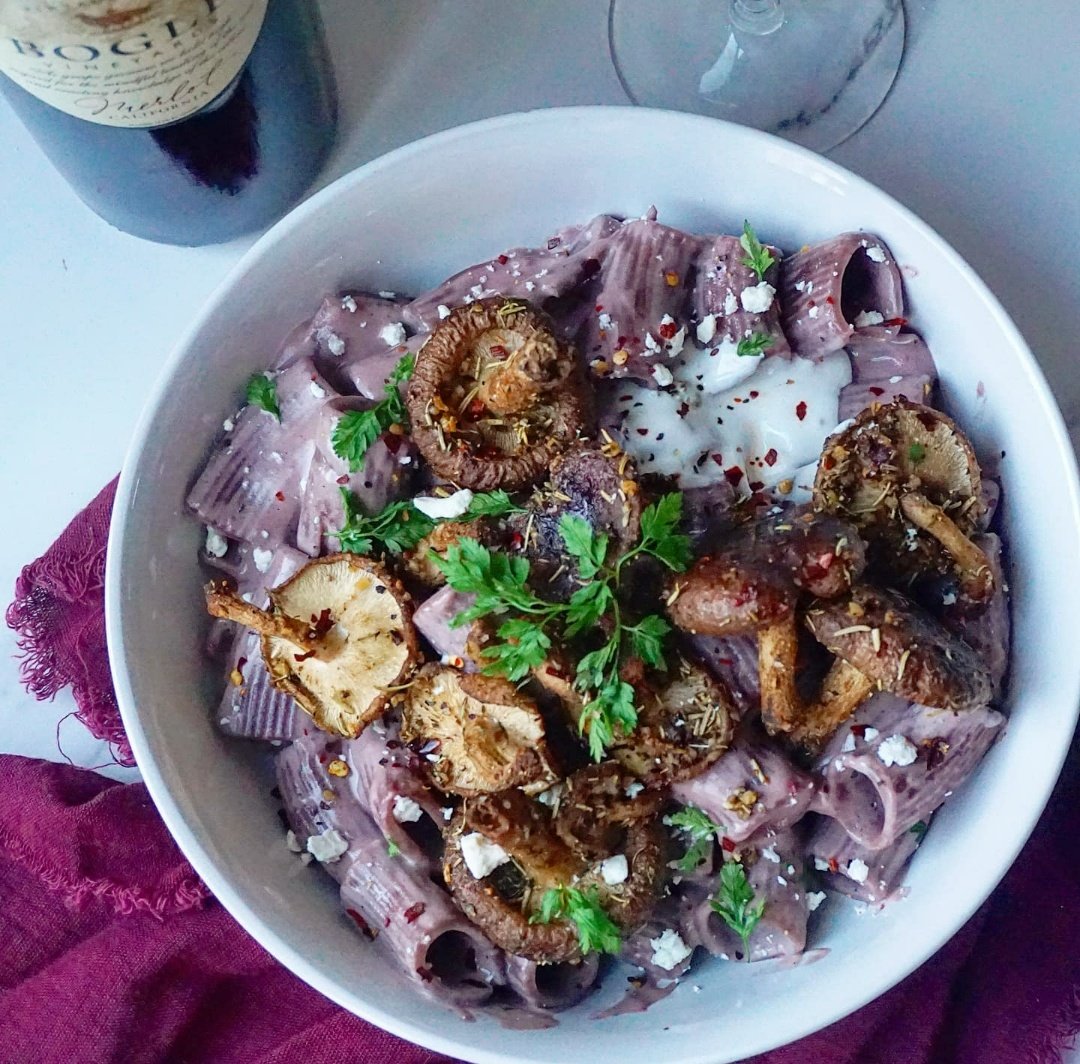
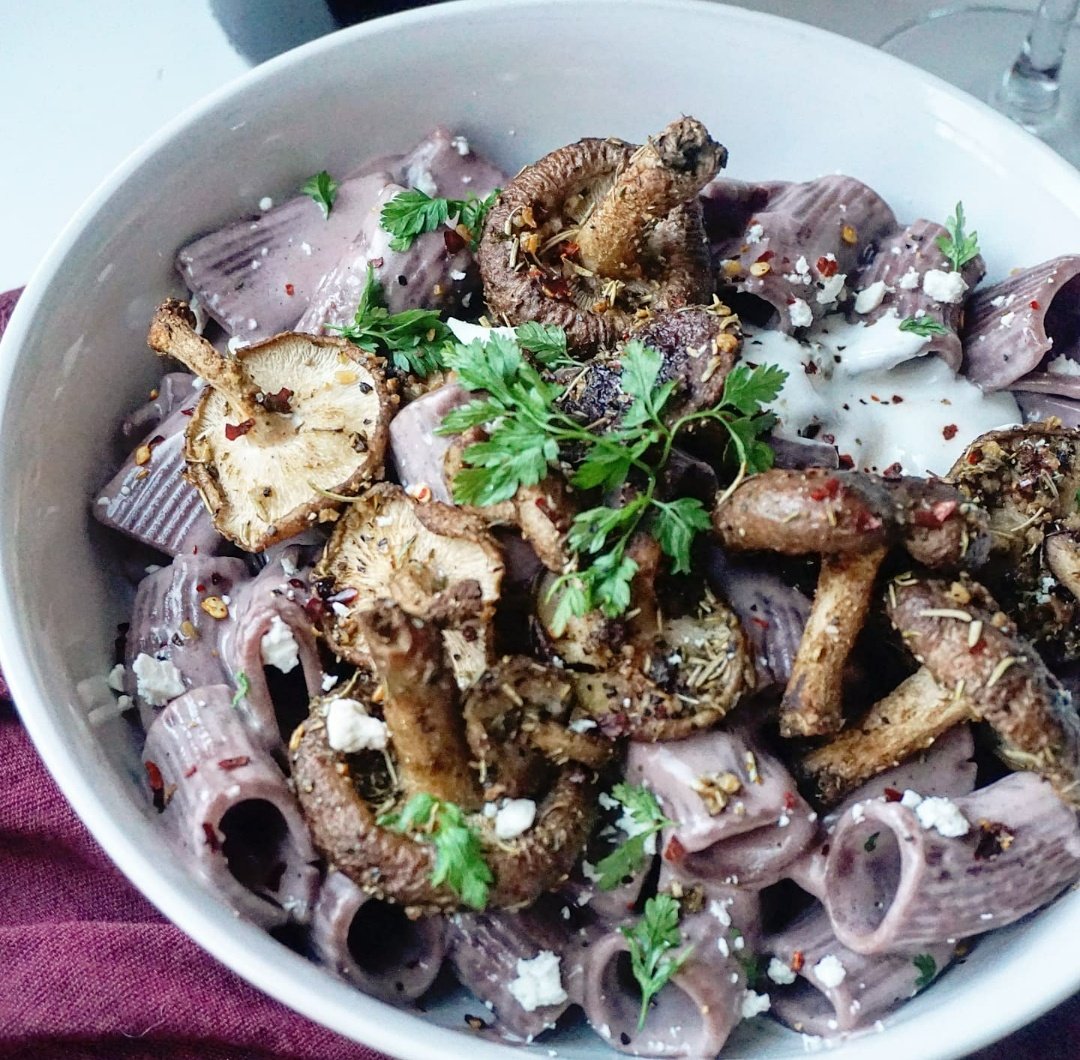
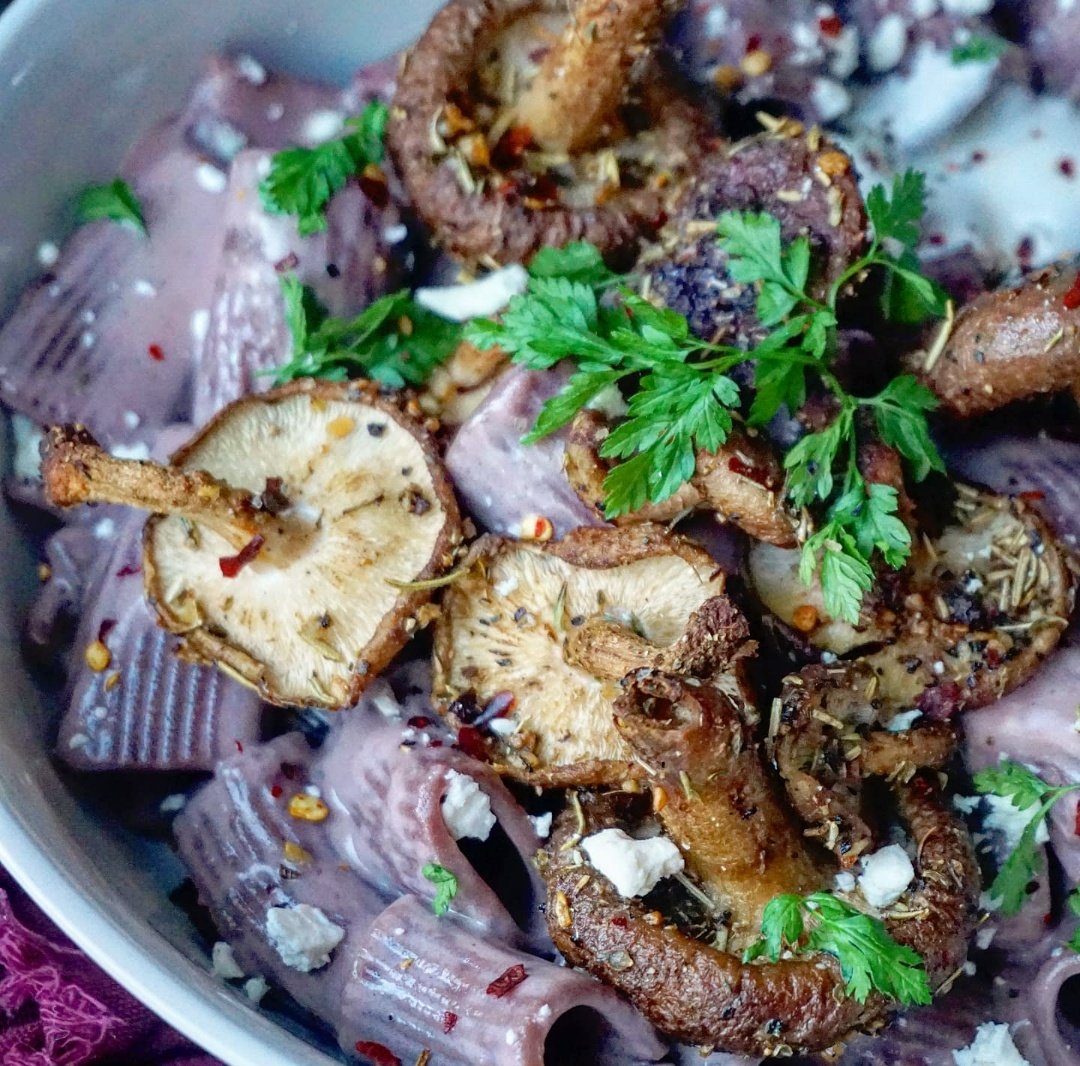
Red Wine Cream Sauce with Rigatoni Pasta and Shiitake Mushrooms
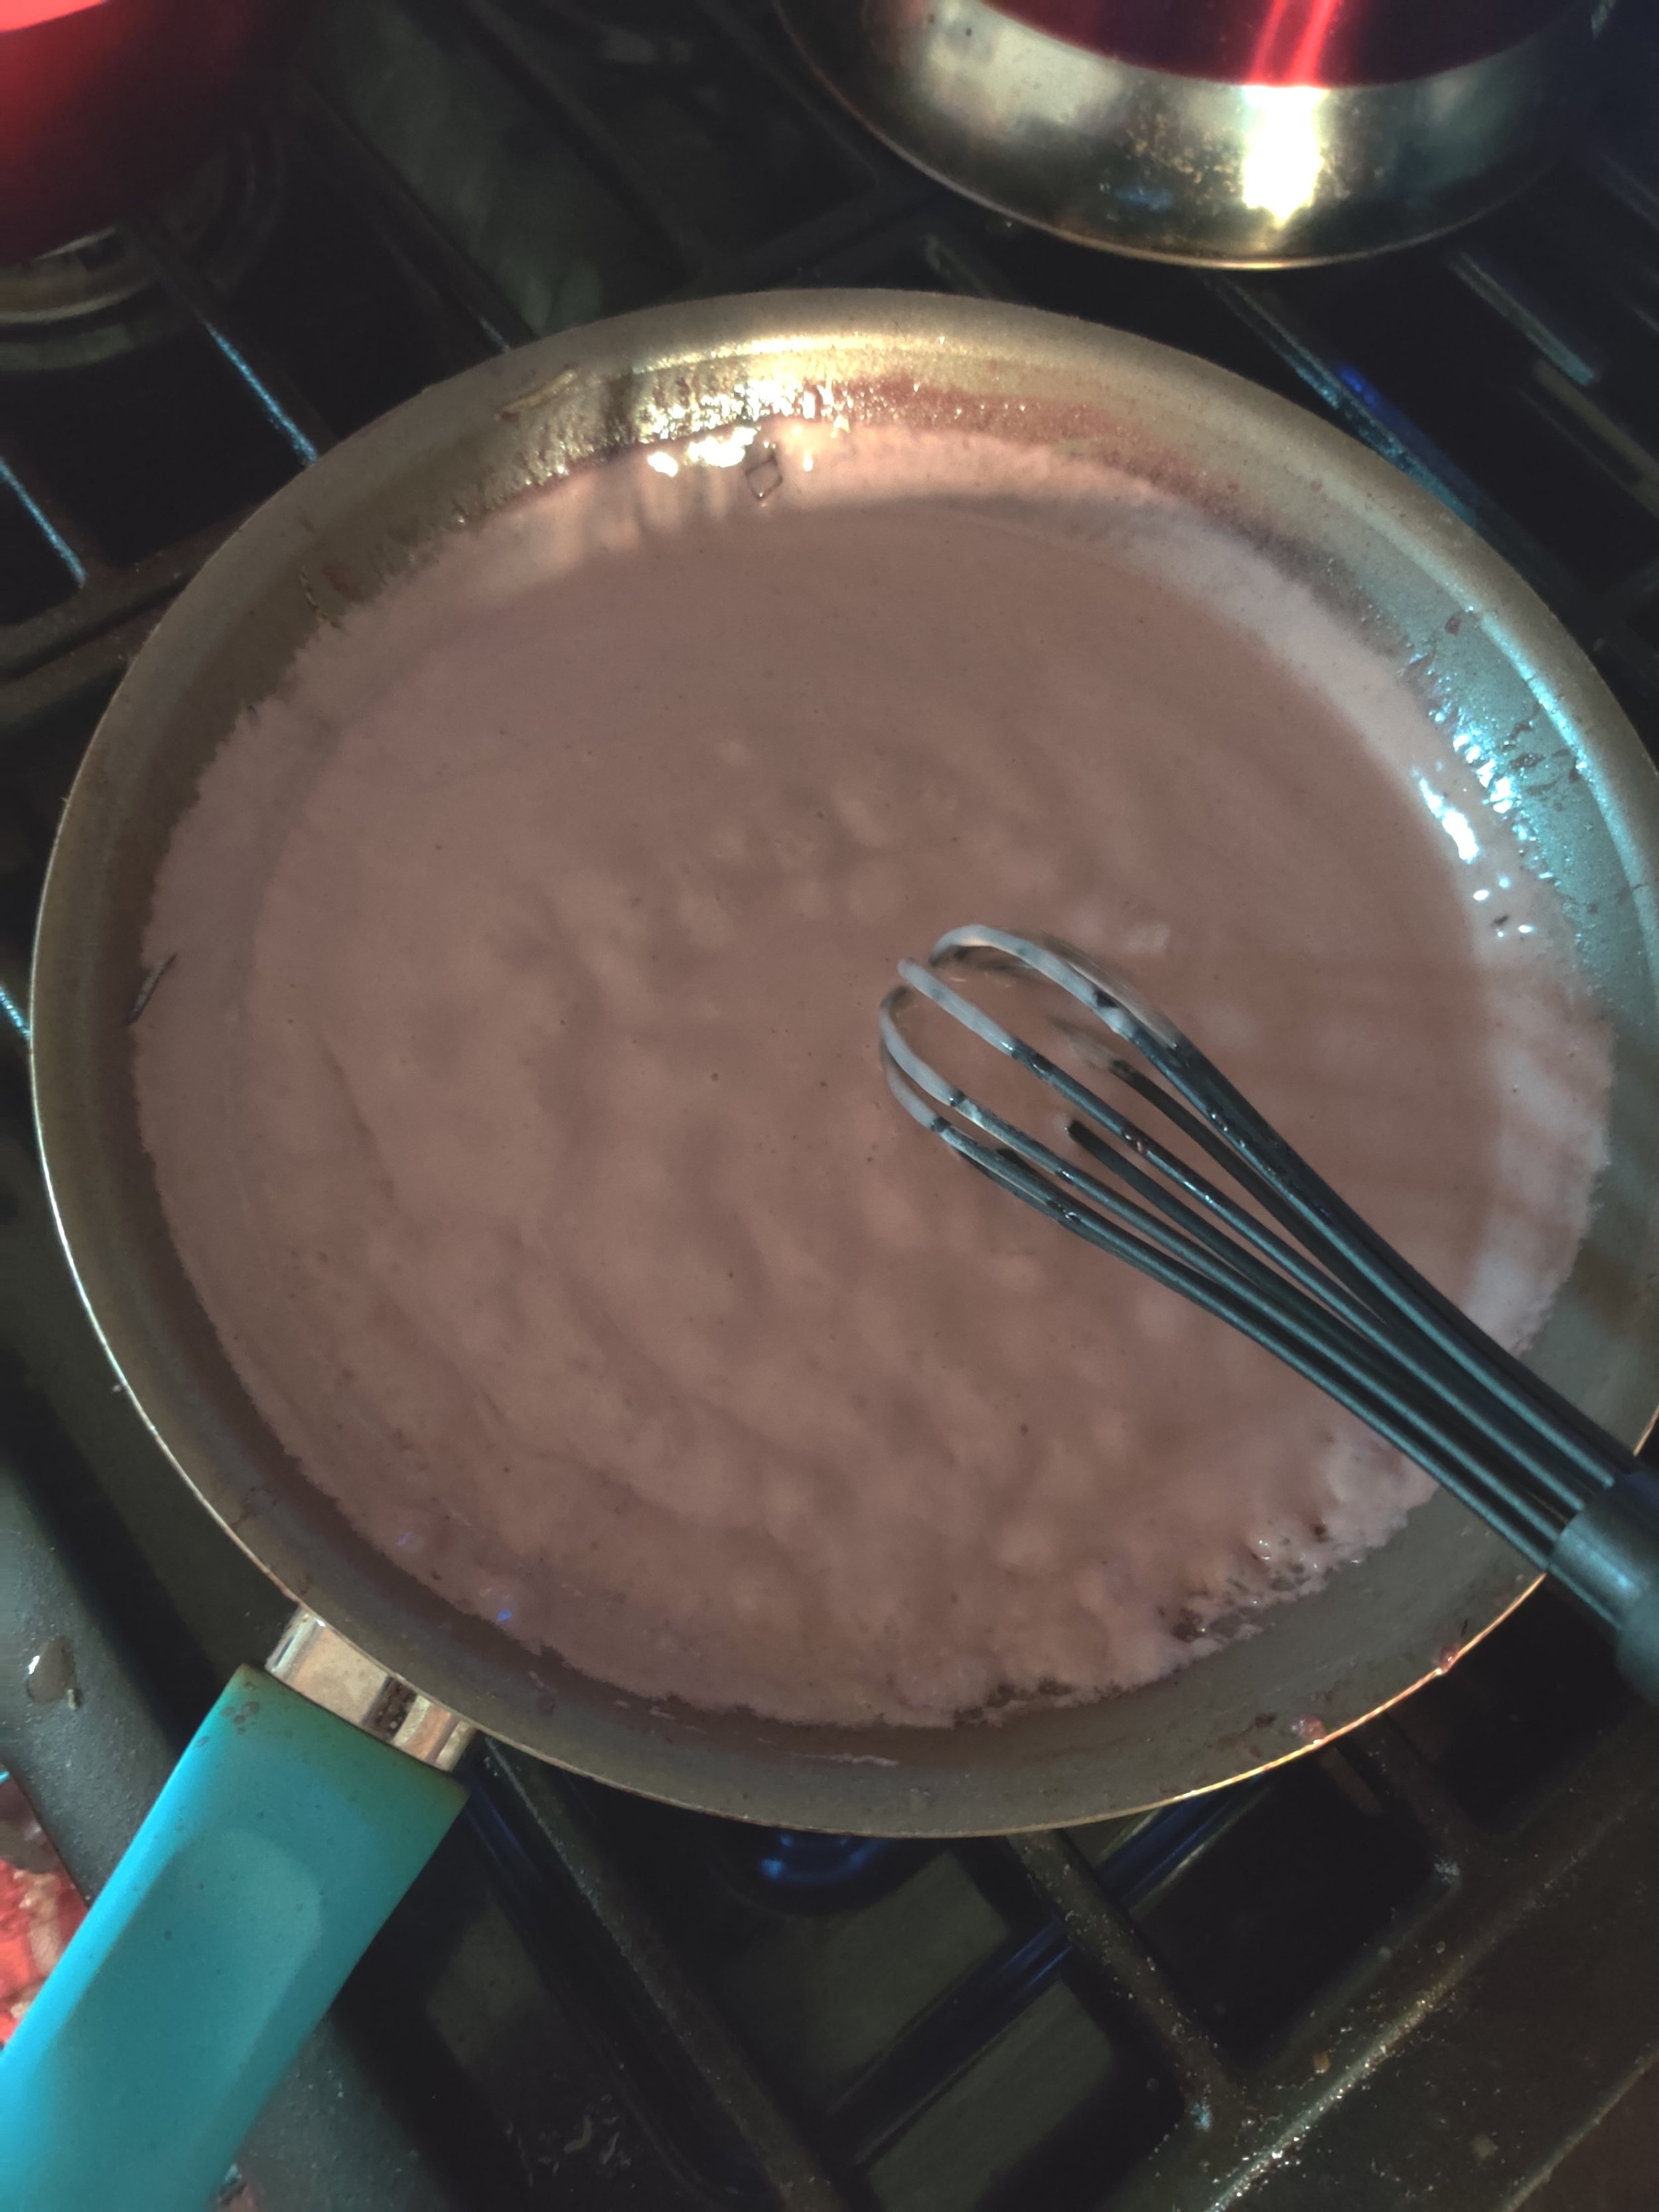
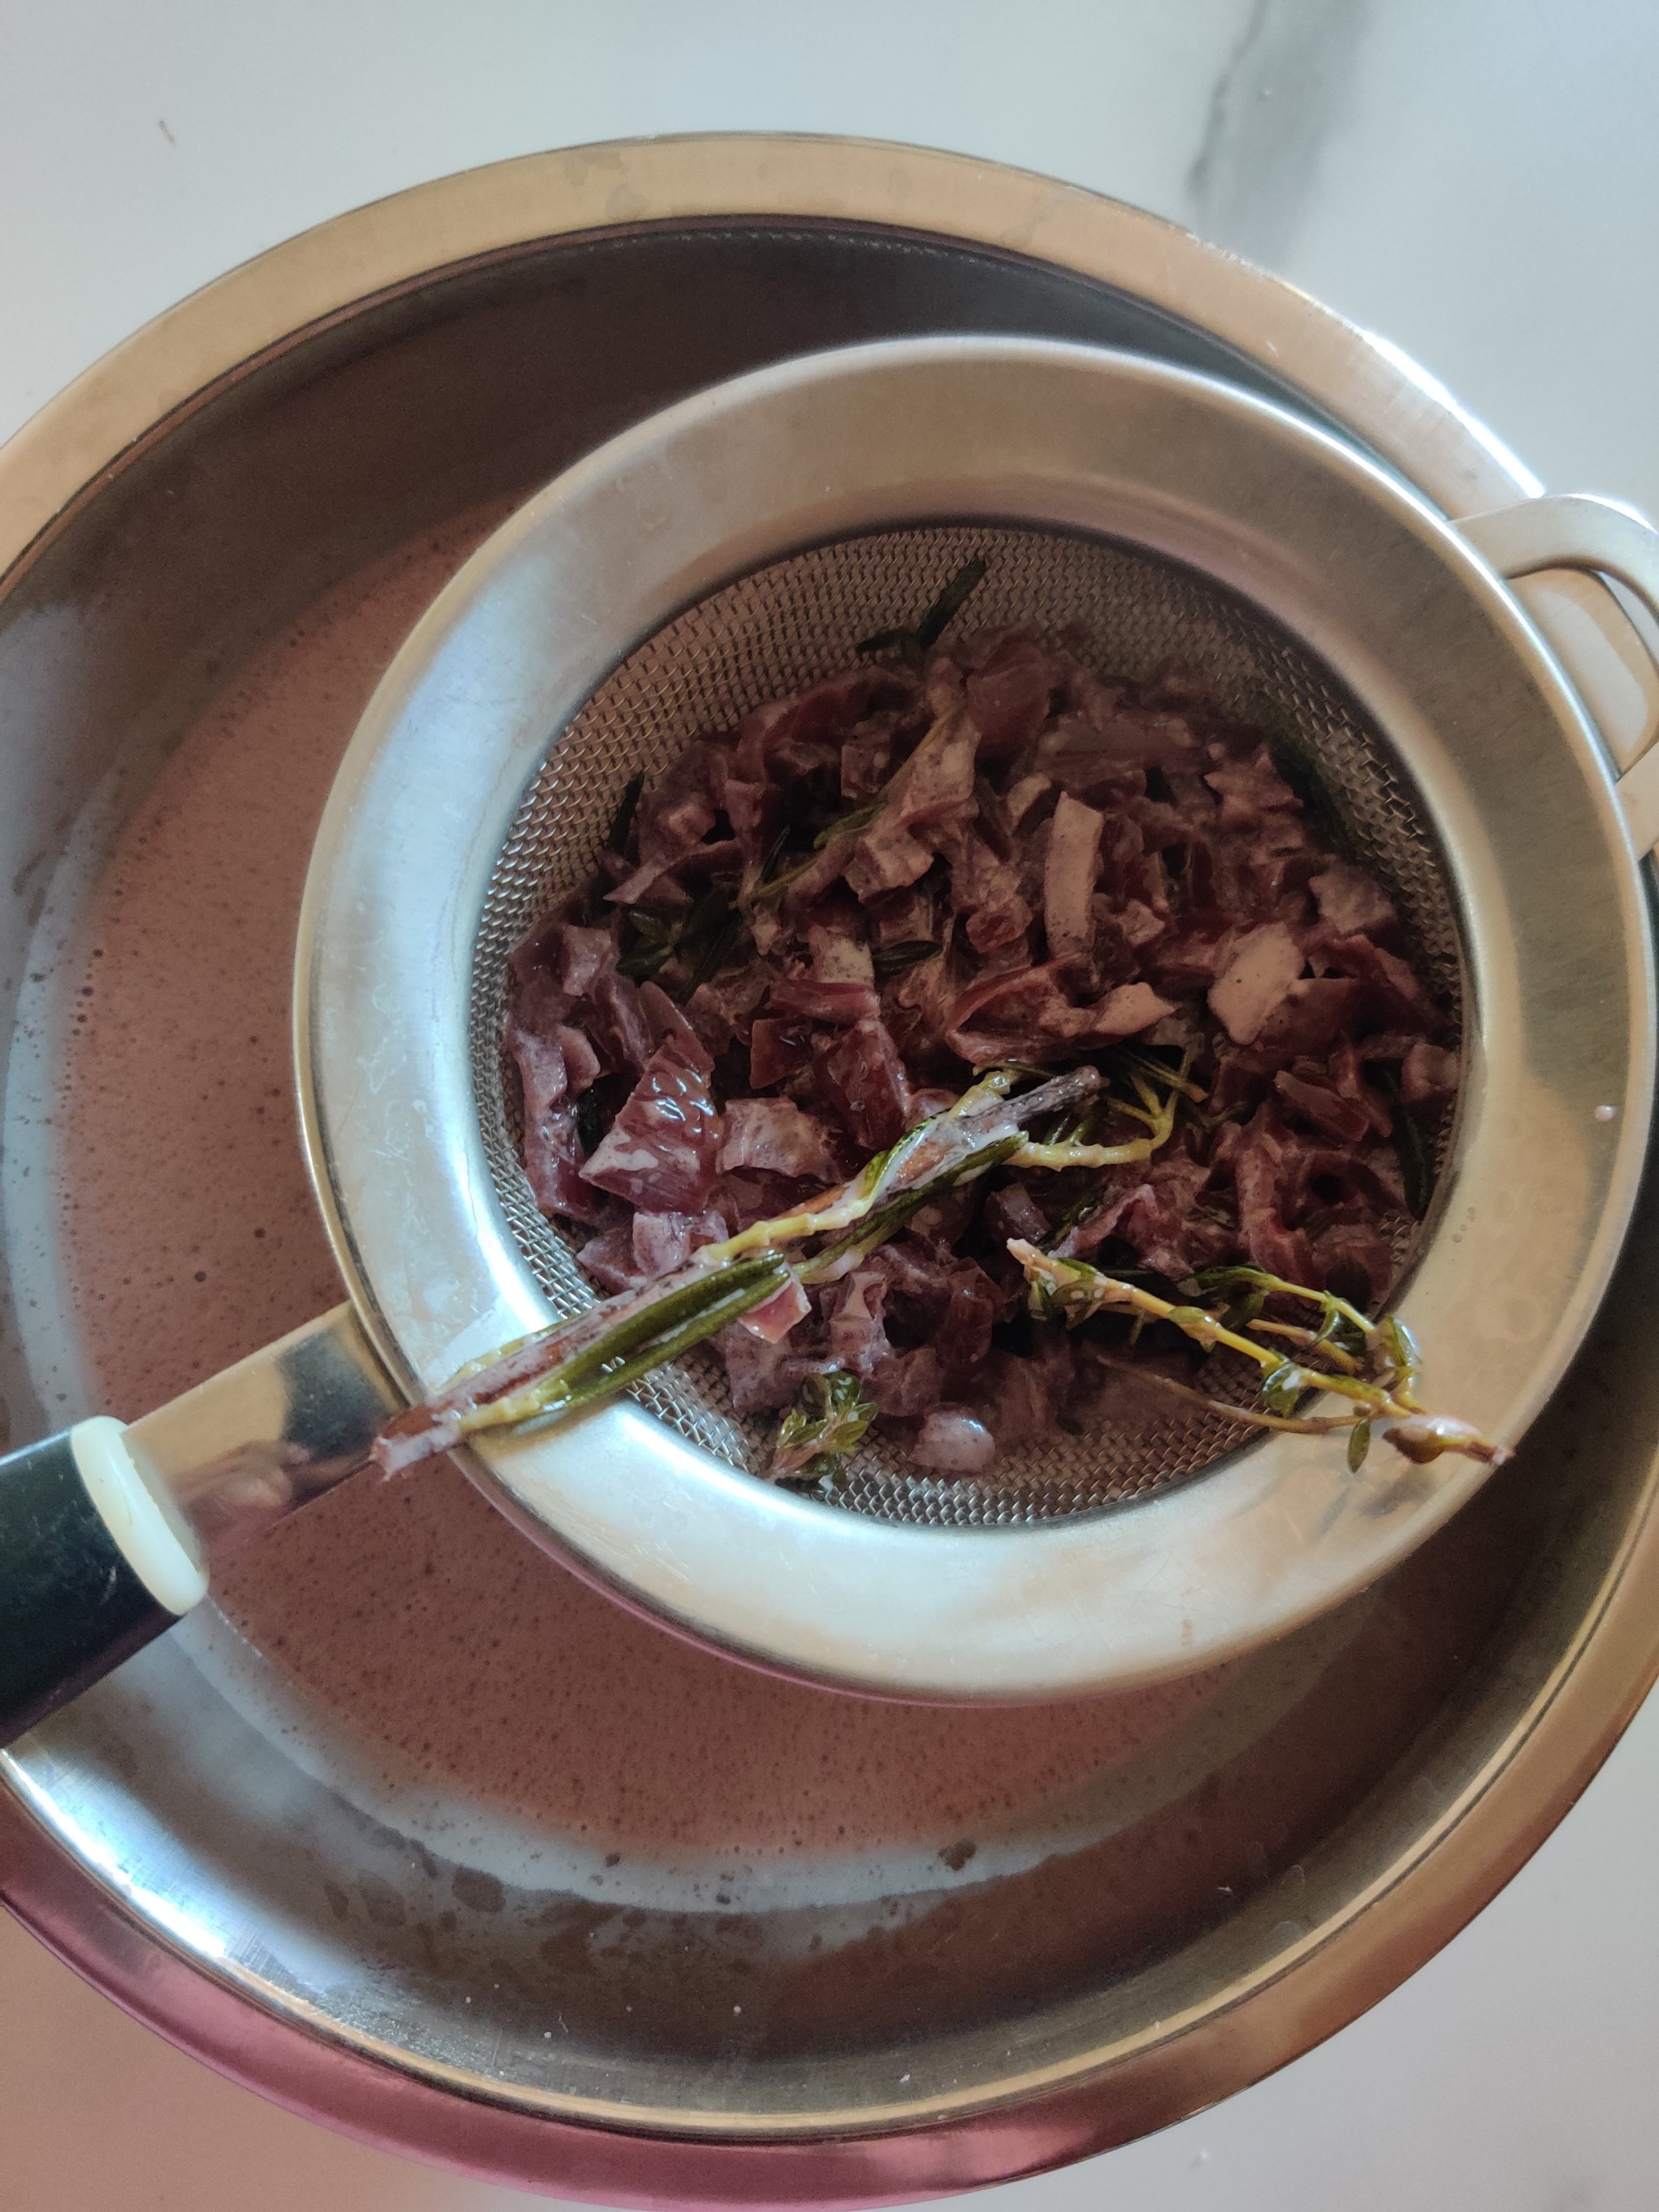
Red wine is my favourite alcoholic beverage, hands down. How ideal that some studies show a glass a day is good for the heart! You can use cooking wine to mimic the taste as an alternative, but I would recommend going for high quality in both cases. It doesn't have to be vintage from the 18th century at $100 a bottle, but something with body and good flavour! I used a merlot from Bogle.
The great thing about pasta is that we can infuse it with many non-traditional ingredients, from greens to starchy fibres to herbs to, well, wine! I used some red wine rigatoni from the Pasta Palette. You should find something similar in a speciality store near you. If not, regular rigatoni will do!
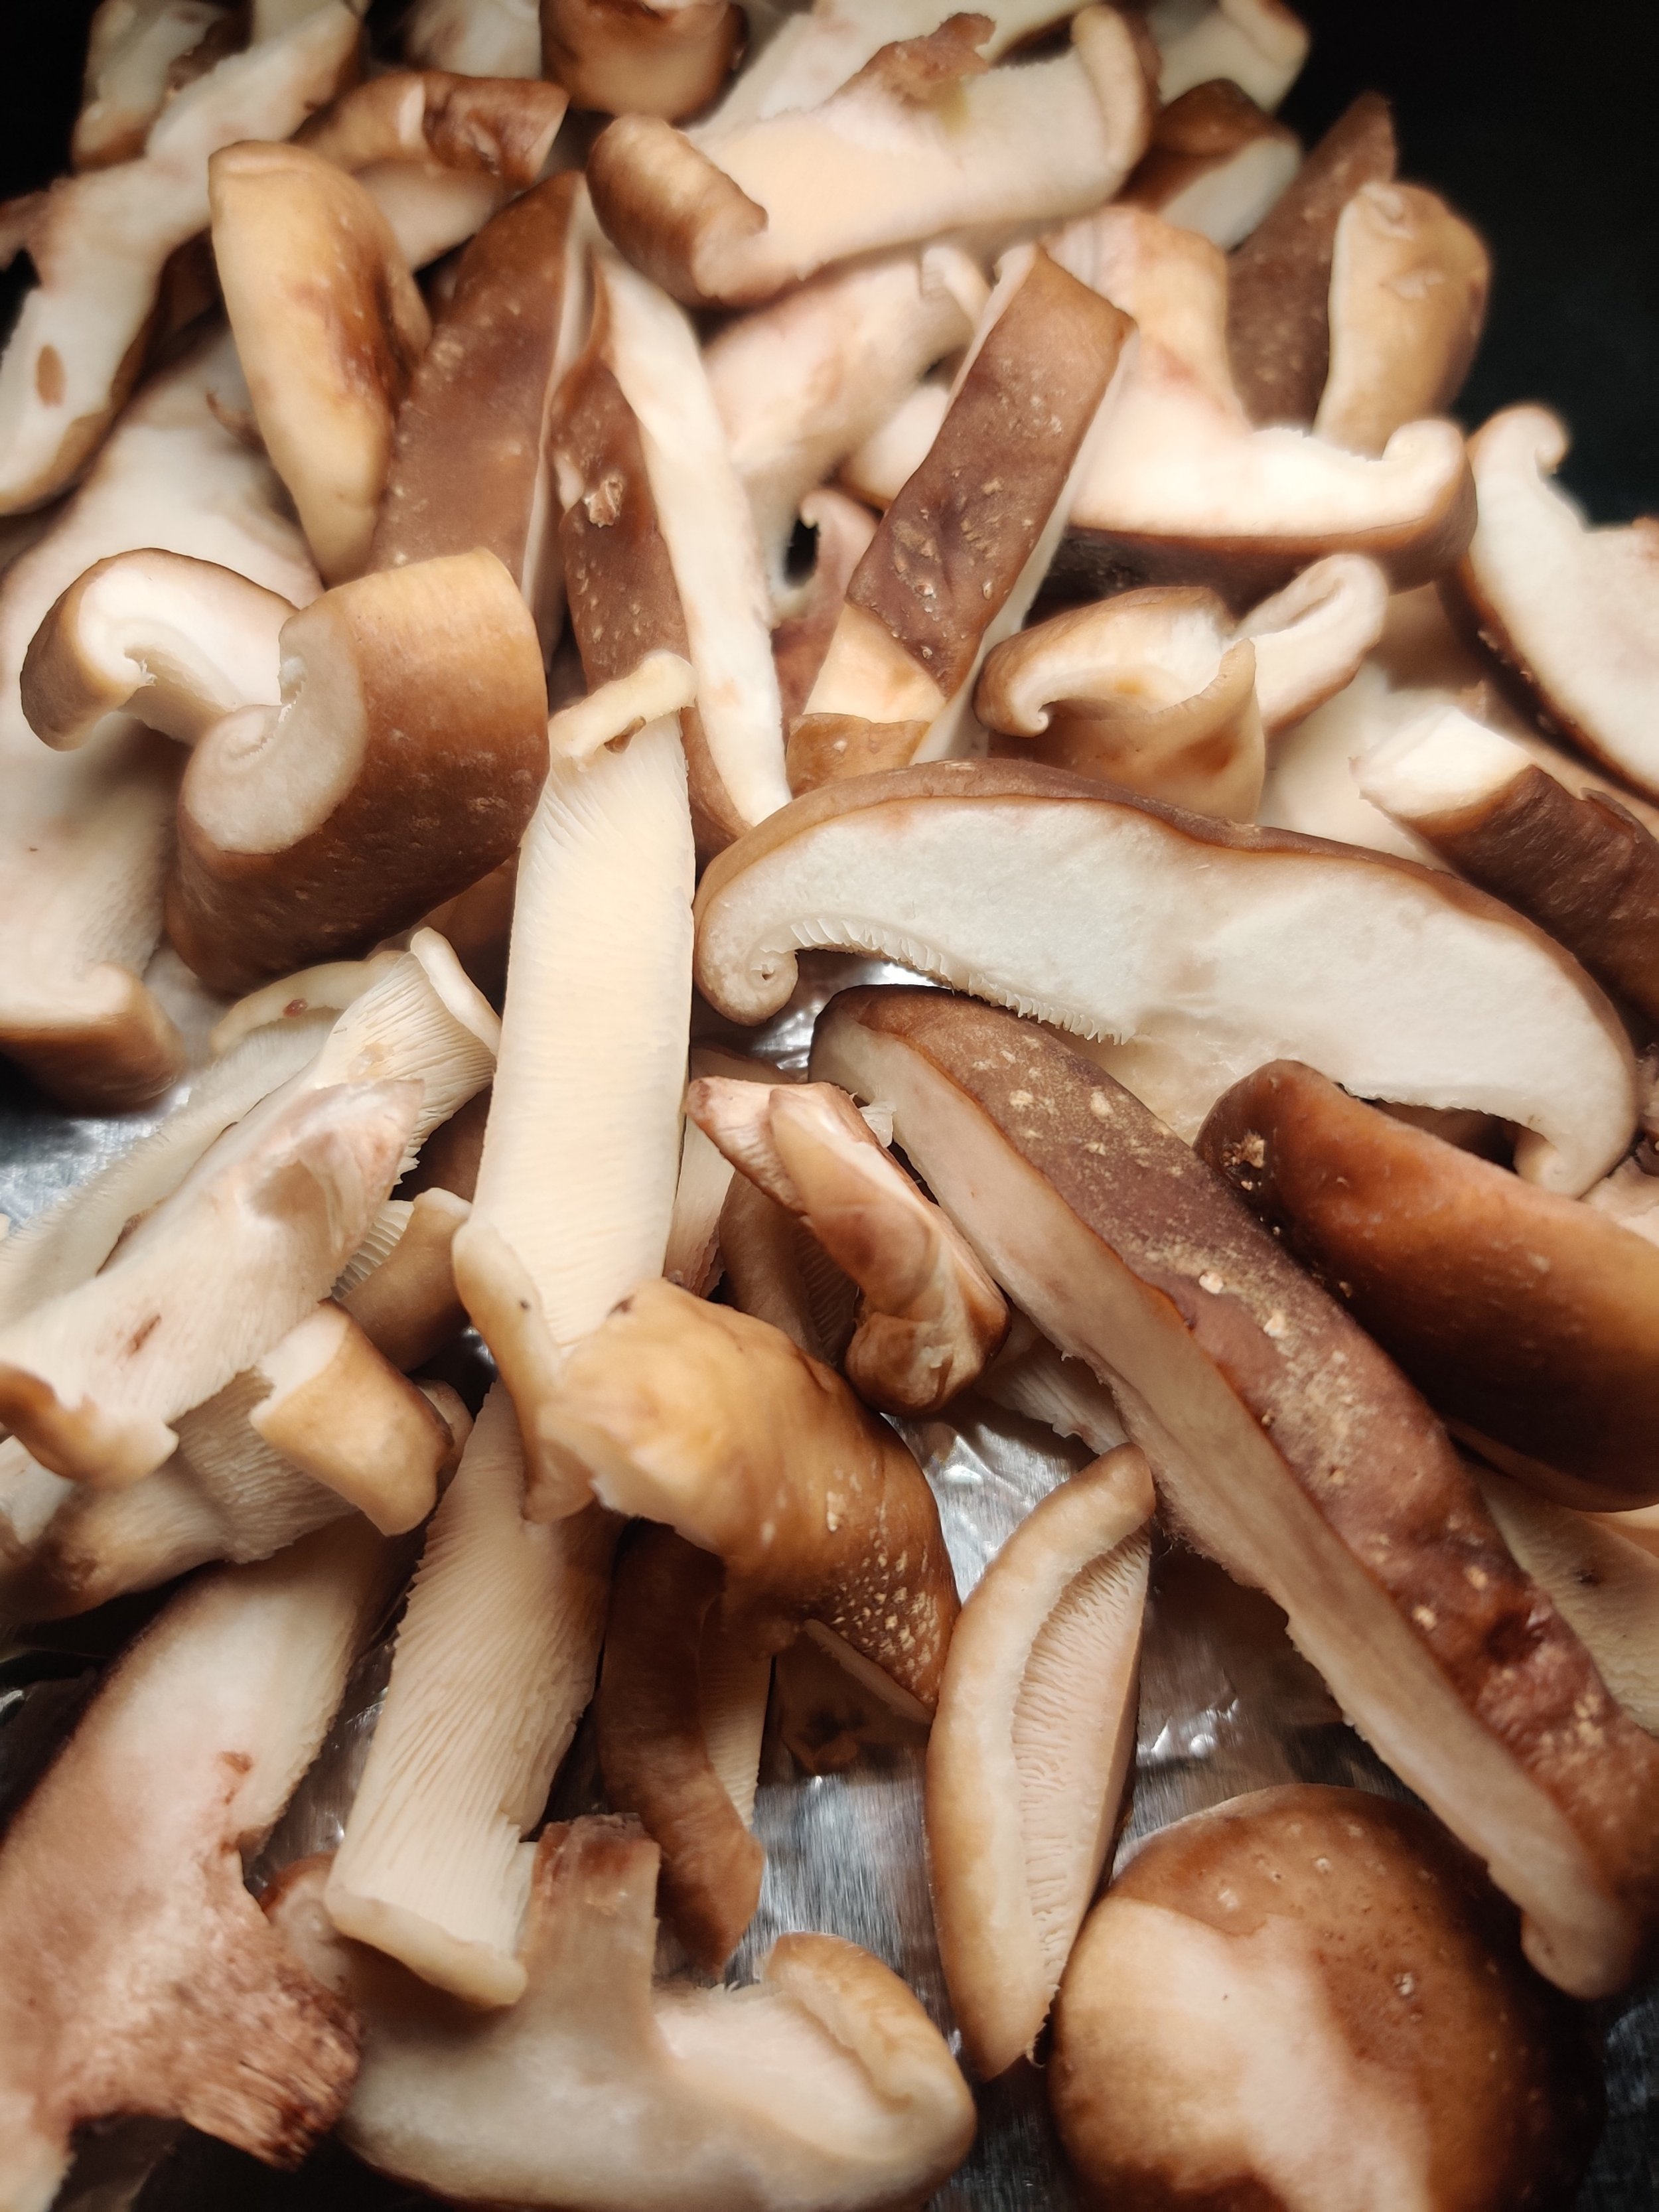
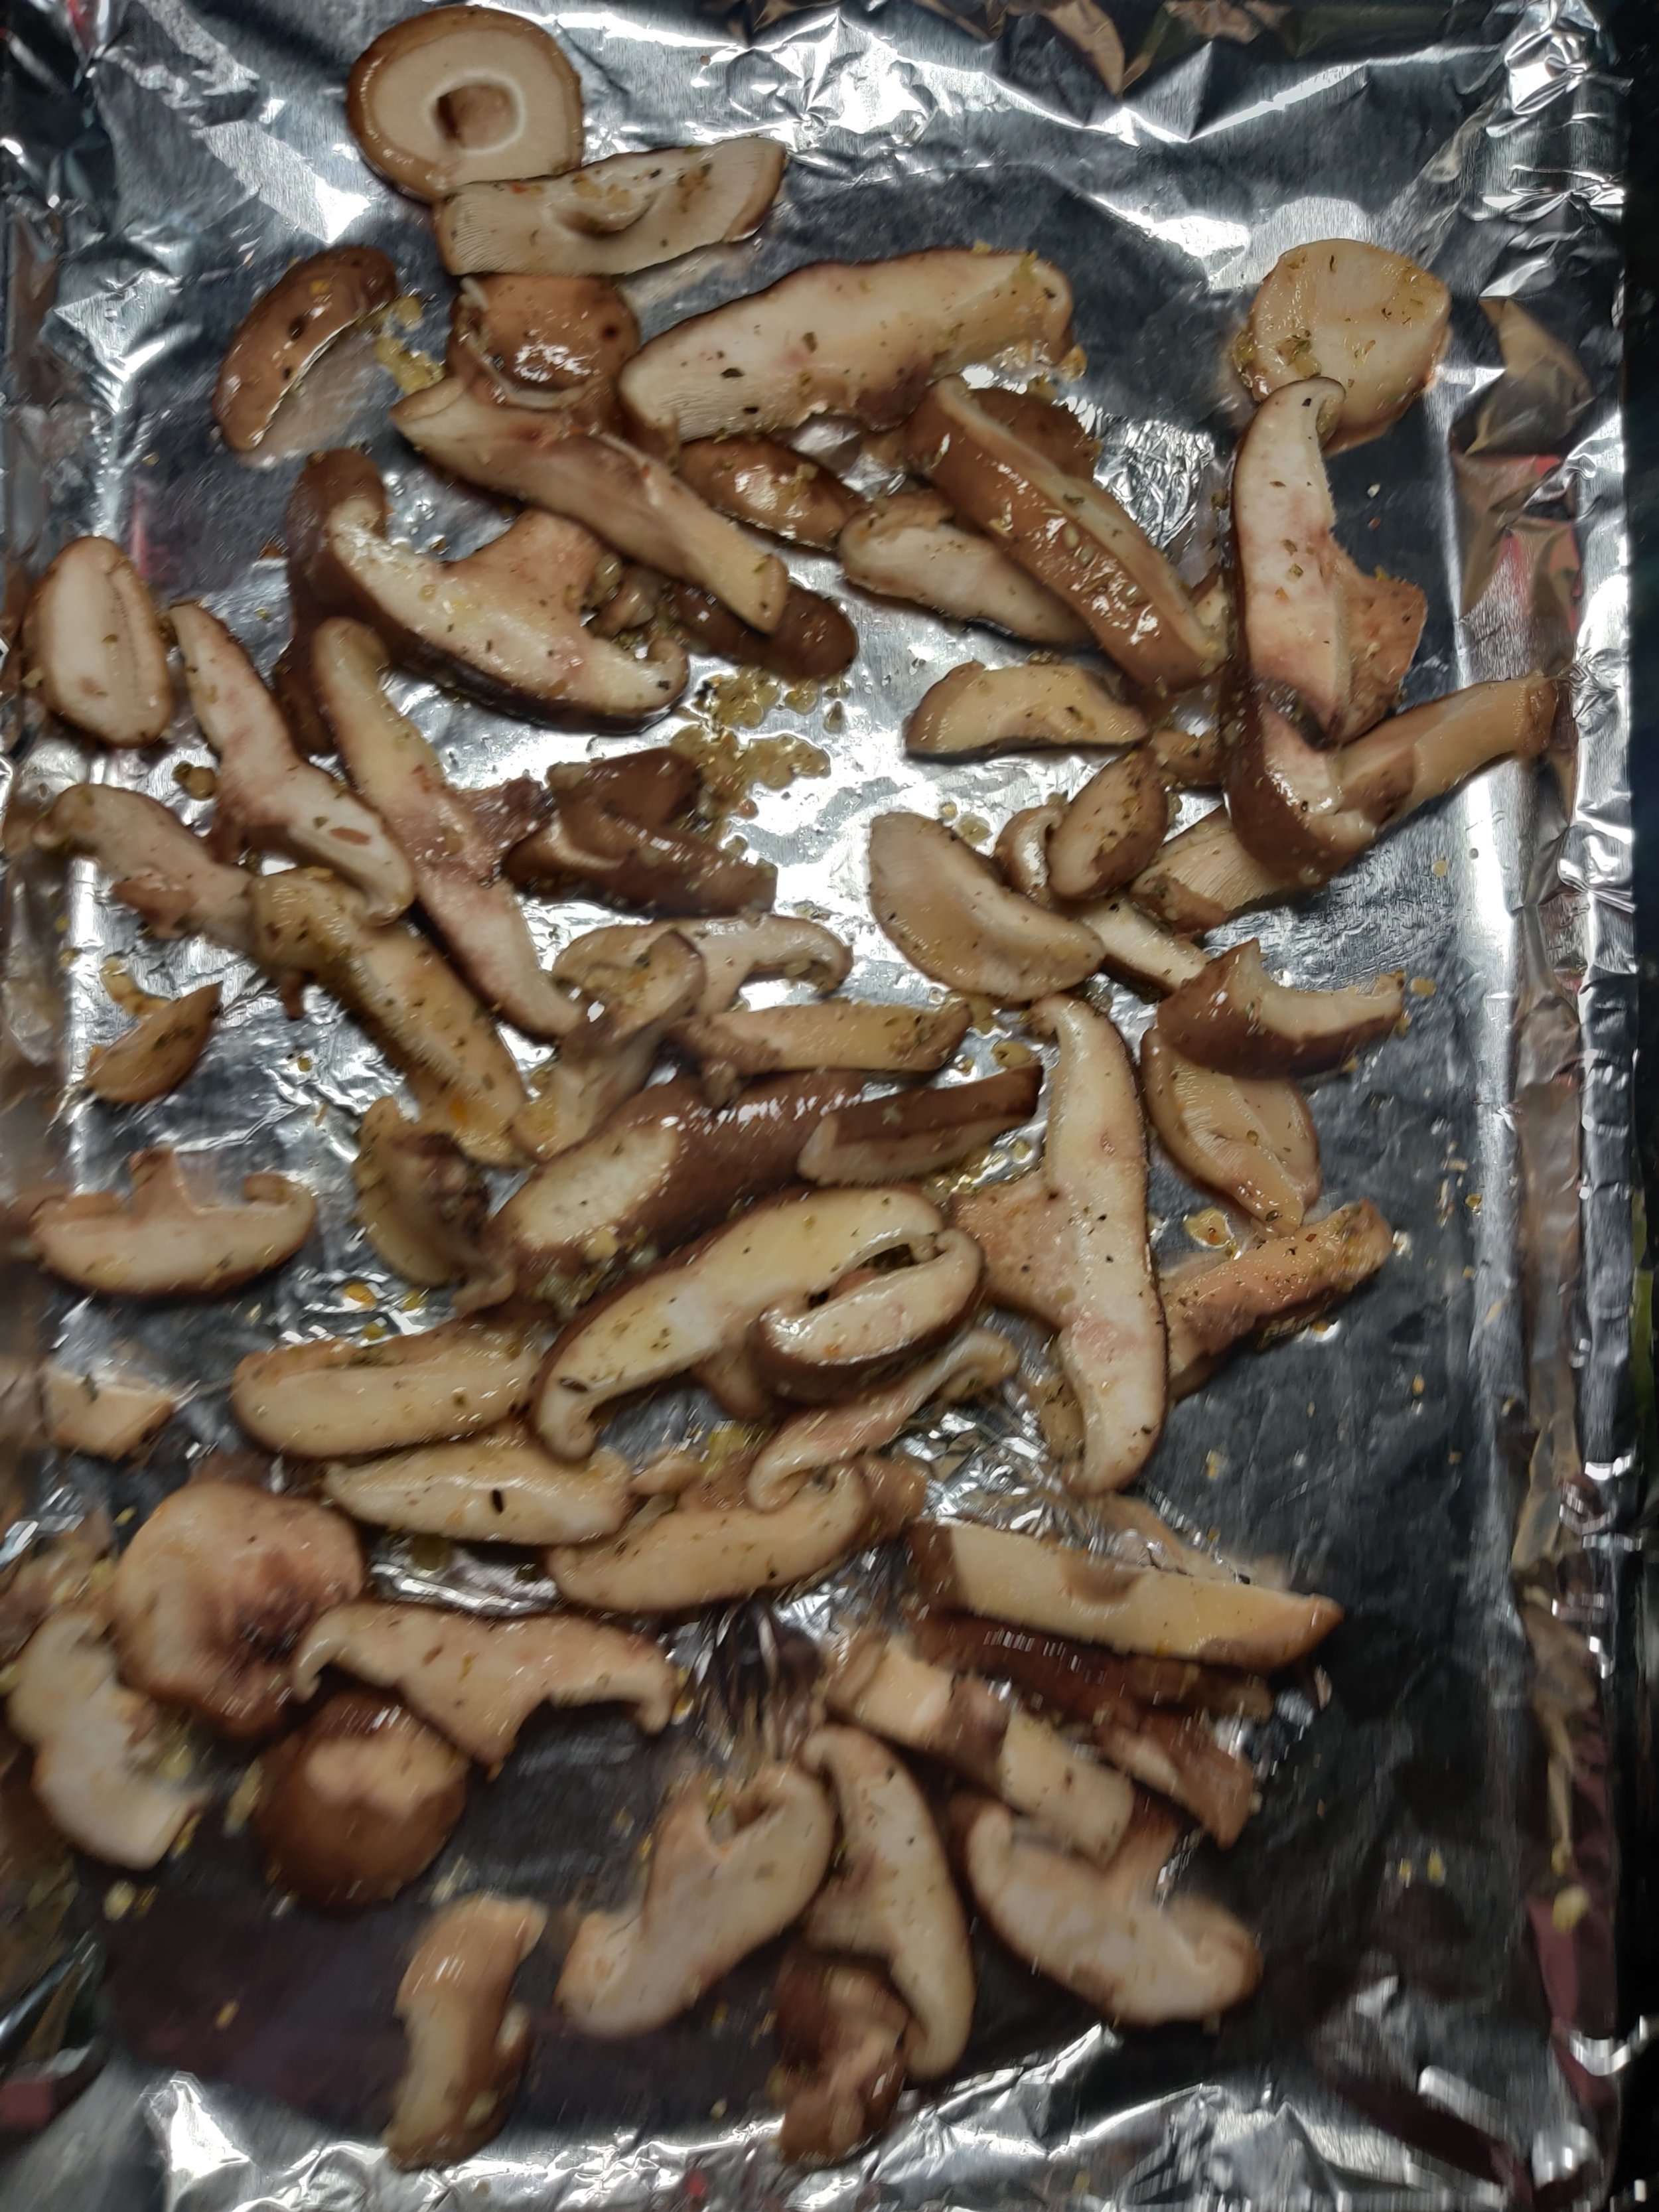
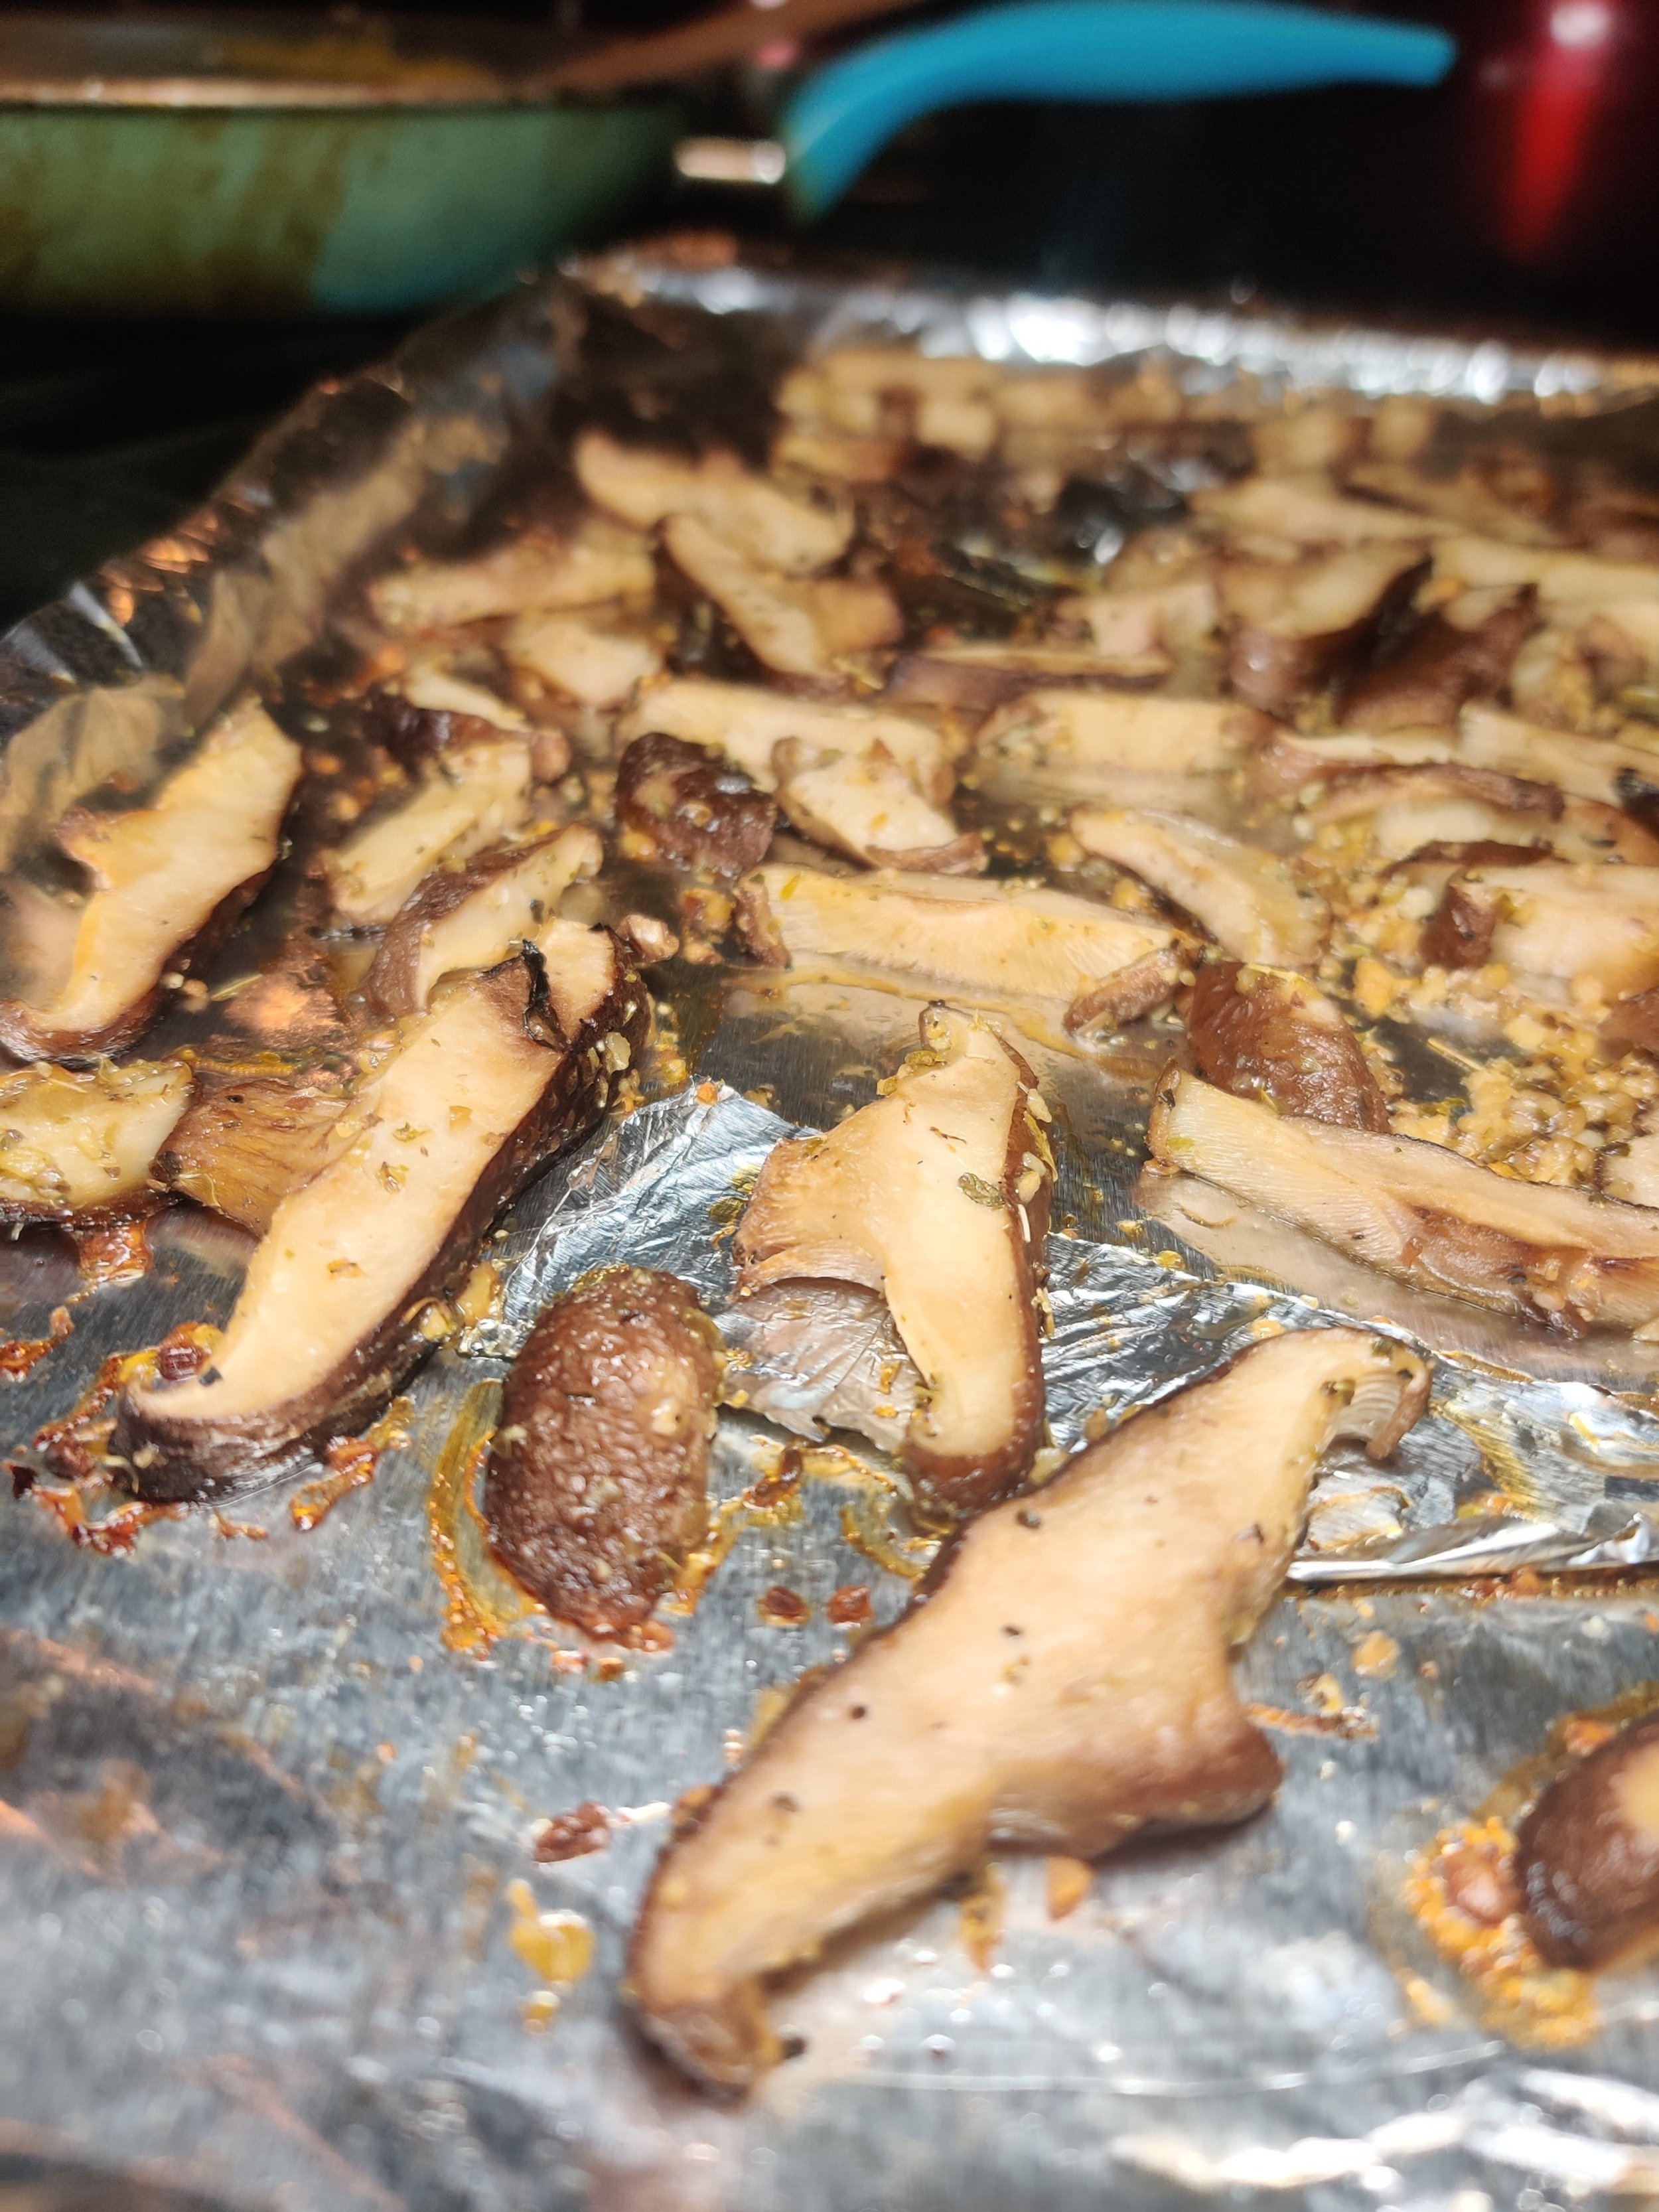
As for the mushrooms, shiitake mushrooms are the way to go! Not only do they add a striking visual component, but the natural umami makes them perfectly balanced and an ideal meat substitute (although braised beef or short rib would compliment this dish just fine).


Homemade Falafel Salad with Sesame Tahini Dressing
I love chickpeas in every shape and form, but falafel makes the top of the list! Most people wait to enjoy falafels at the store, but they are pretty simple to make in the comfort of your own home. All you need are dried chickpeas, fresh herbs and some spices. A food processor for appliances will make this a lot easier. I used this one from Hamilton Beach.

I'm not going to assume everyone reading this knows what falafel is or where it originated! As a Southern African, I was introduced as a young adult on the streets of New York, from one of the many mouthwatering Halal trucks parked on the side of the road or one of the shawarma stores littered throughout Lower Manhattan. Falafel balls are deep-fried fritters that came out of the Middle-East, and can also be made using fava or broad beans. They can be eaten as they are, on top of a salad or bed of vegetables, but typically stuffed in a pita or flatbread pocket.
Served with what you may ask? Tahini-based sauces, derived from sesame seeds.
This small women-owned business makes natural vinaigrettes and dressings. Their Sesame Tahini is not only one of my favourites but goes perfectly with my homemade version of falafel; I recommend giving it a try; it will give a lot of other dishes a toasty tang. It has two awards for a reason: a 2018 Good Food Award and a 2018 SOFI Award! No junk, just delicious flavour to compliment the food! This recipe calls for a condiment you can find at your local grocery store or online at dressitupdressing.com.

Ingredients
2 cups dried and (soaked overnight) chickpeas--don't use canned!
1/2 teaspoon baking soda (to help soften the chickpeas)
1/2 cup fresh dill
1 cup fresh parsley
6 fresh garlic cloves
1/2 medium yellow onion
1 tablespoon salt
1 tablespoon black pepper
1 teaspoon cayenne
1/2 jalapeno
2 tablespoons toasted sriracha sesame seeds
1/2 teaspoon ground cardamom
1 tablespoon smoked paprika
1/2 teaspoon baking powder
1/2 teaspoon fenugreek powder
1 tablespoon cumin
1 tablespoon coriander
Peanut oil for frying
Salad:
1/2 bag arugula
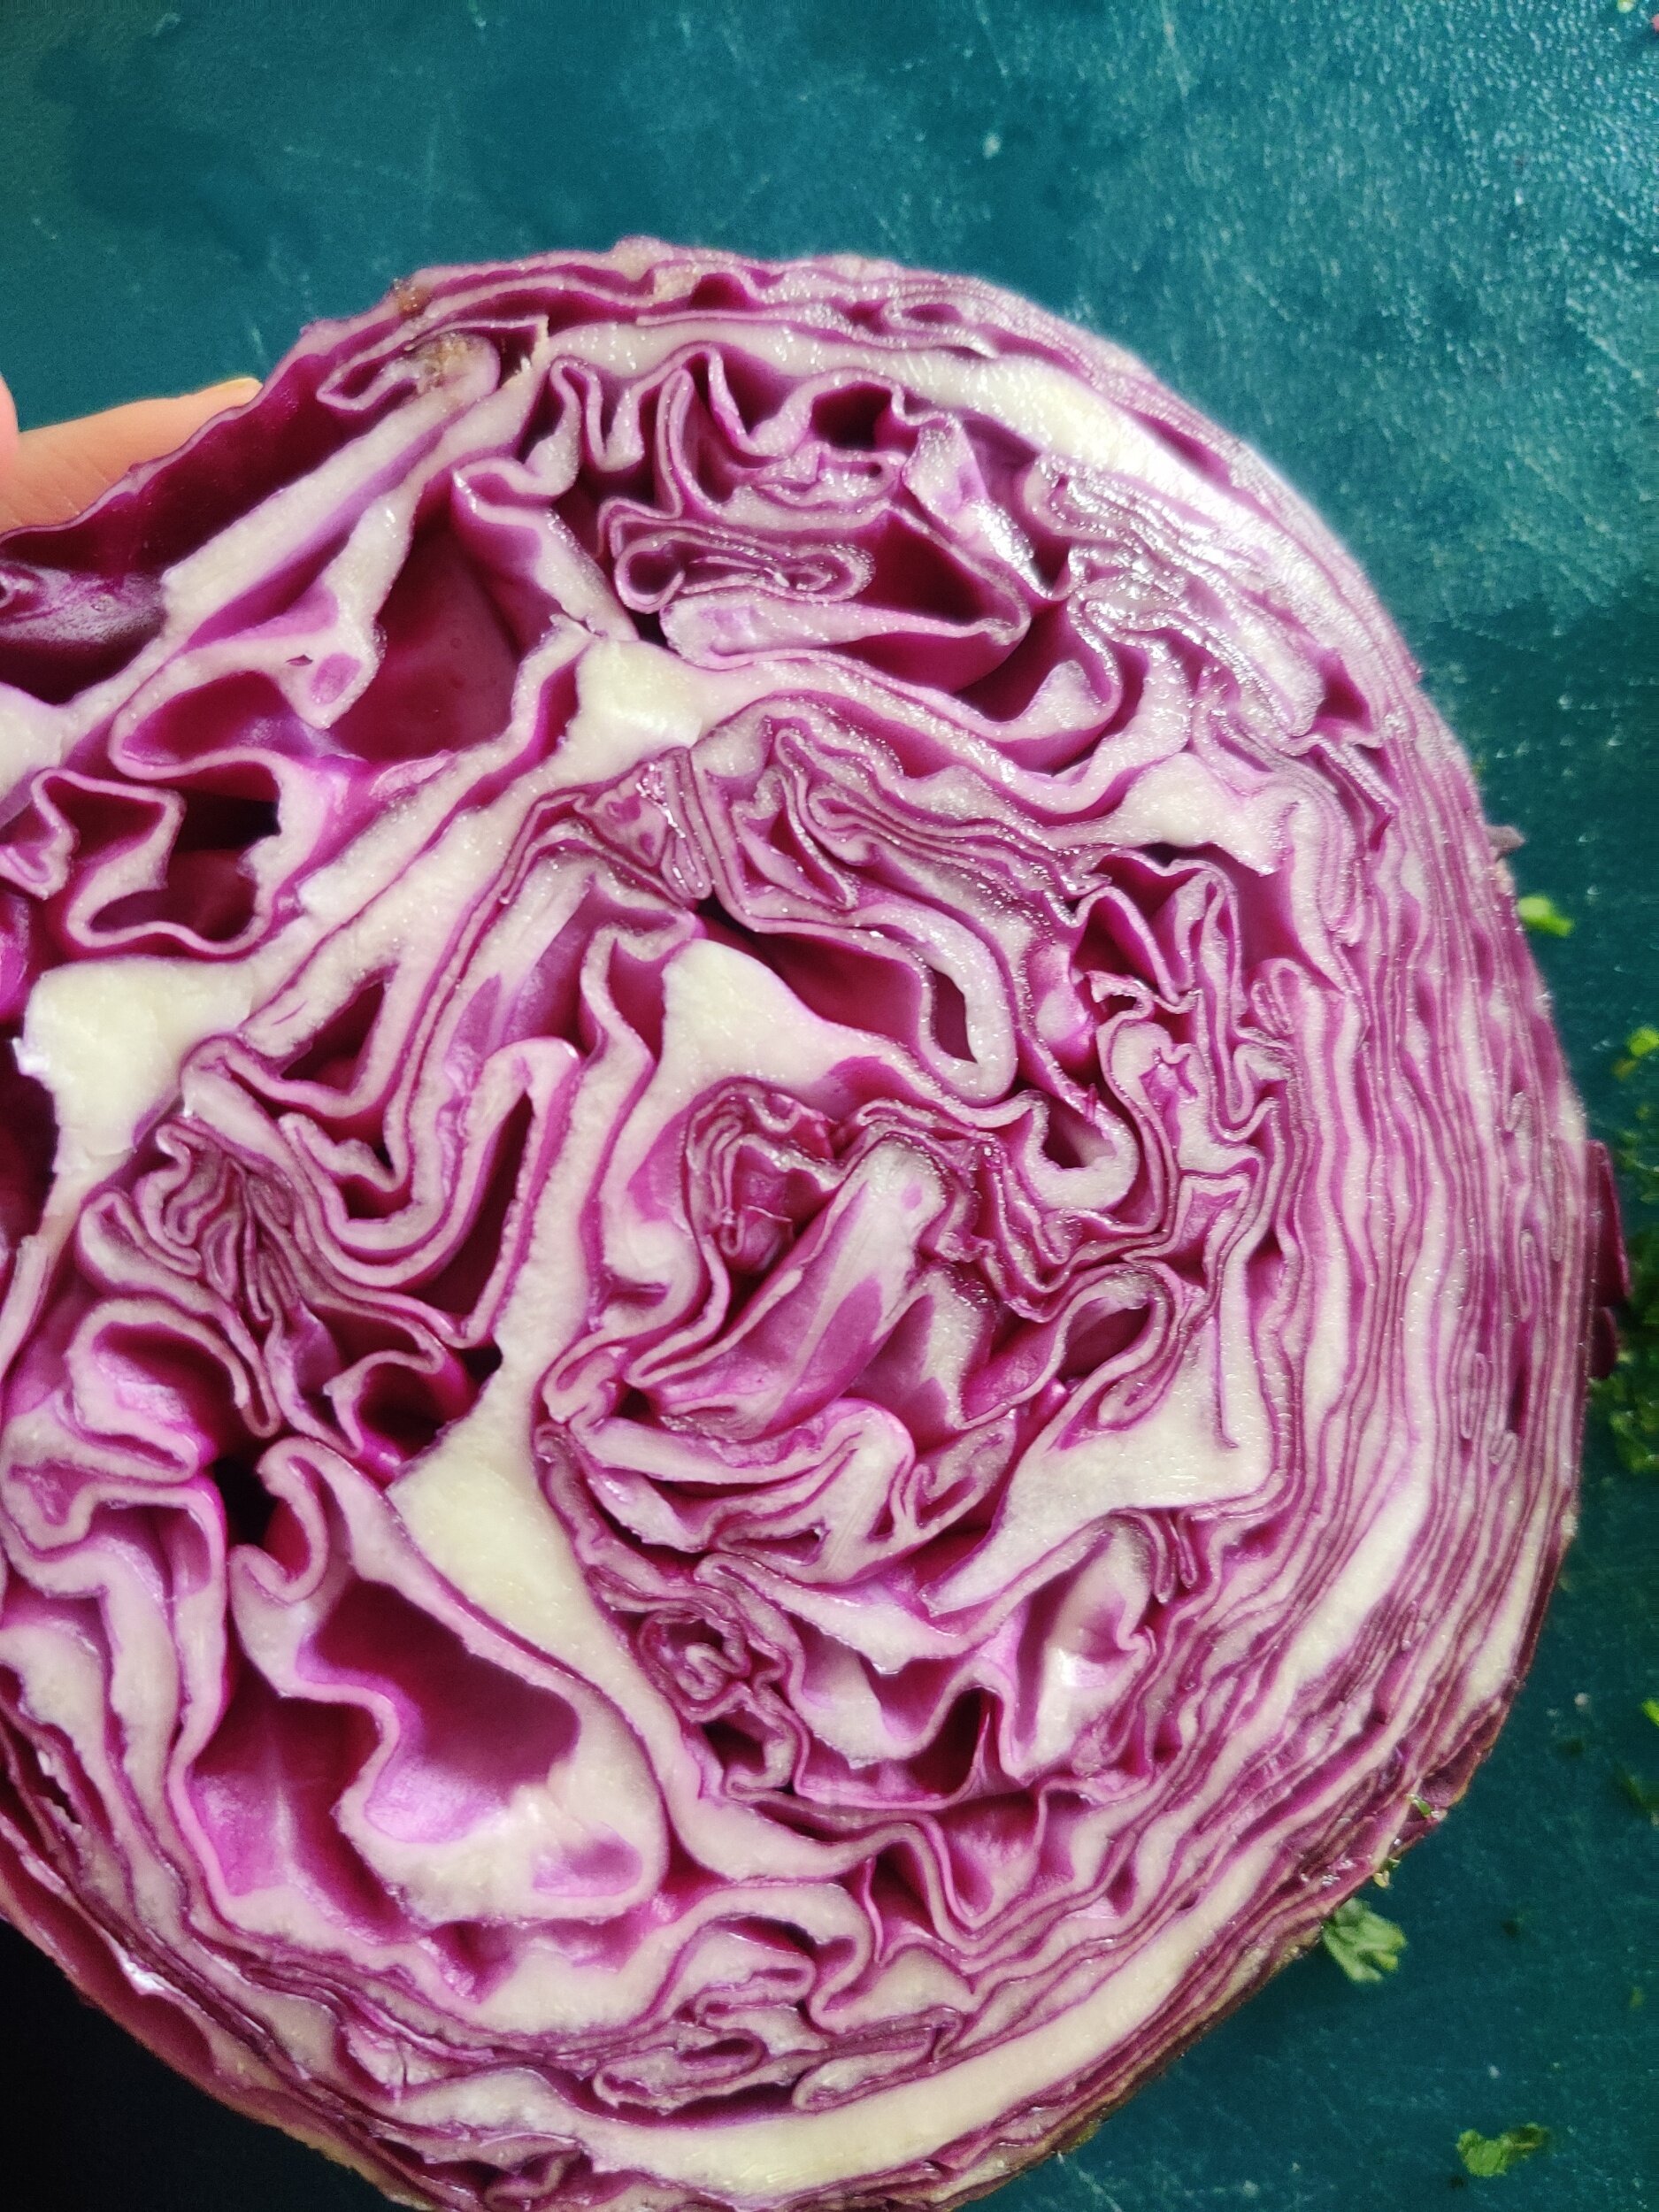
1 cup purple cabbage, shredded
1/2 cup cherry tomatoes
1/2 large seedless cucumber
Sesame oil
2-4 scoops roasted red pepper hummus
1-2 avocadoes
Sriracha mayo
Wasabi sauce
Sesame tahini vinaigrette


Instructions
You'll need to start this recipe the day before to soften the pulses. Soak the dried chickpeas by submerging them in water with baking soda. Drain when ready to use.
Combine the chickpeas, dill, parsley, garlic, onion, sesame seeds, jalapeno, spices, salt, and pepper in a bowl. Transfer to a food processor, then pulse or blend ib high until thick paste forms.
Heat the oil in a frying pot—mix in the baking powder then cook the falafel in batches at 350F until brown and crunchy. Use a cookie dough scooper for uniform balls. To freeze the remaining dough, allow scoops to harden, then transfer to a zip lock bag for up to 3 months.
In a large serving bowl for the salad, combine the cabbage and arugula, drizzle lightly with sesame oil and toss. Slice and overlay the tomatoes, avocado, hummus, and falafel, then drizzle with the sesame tahini dressing and a bit of sriracha drizzle. Serve!
The recipe makes about 24 falafel balls; salad serves 3-4. Freeze the falafel dough once scooped into balls to fry another time.


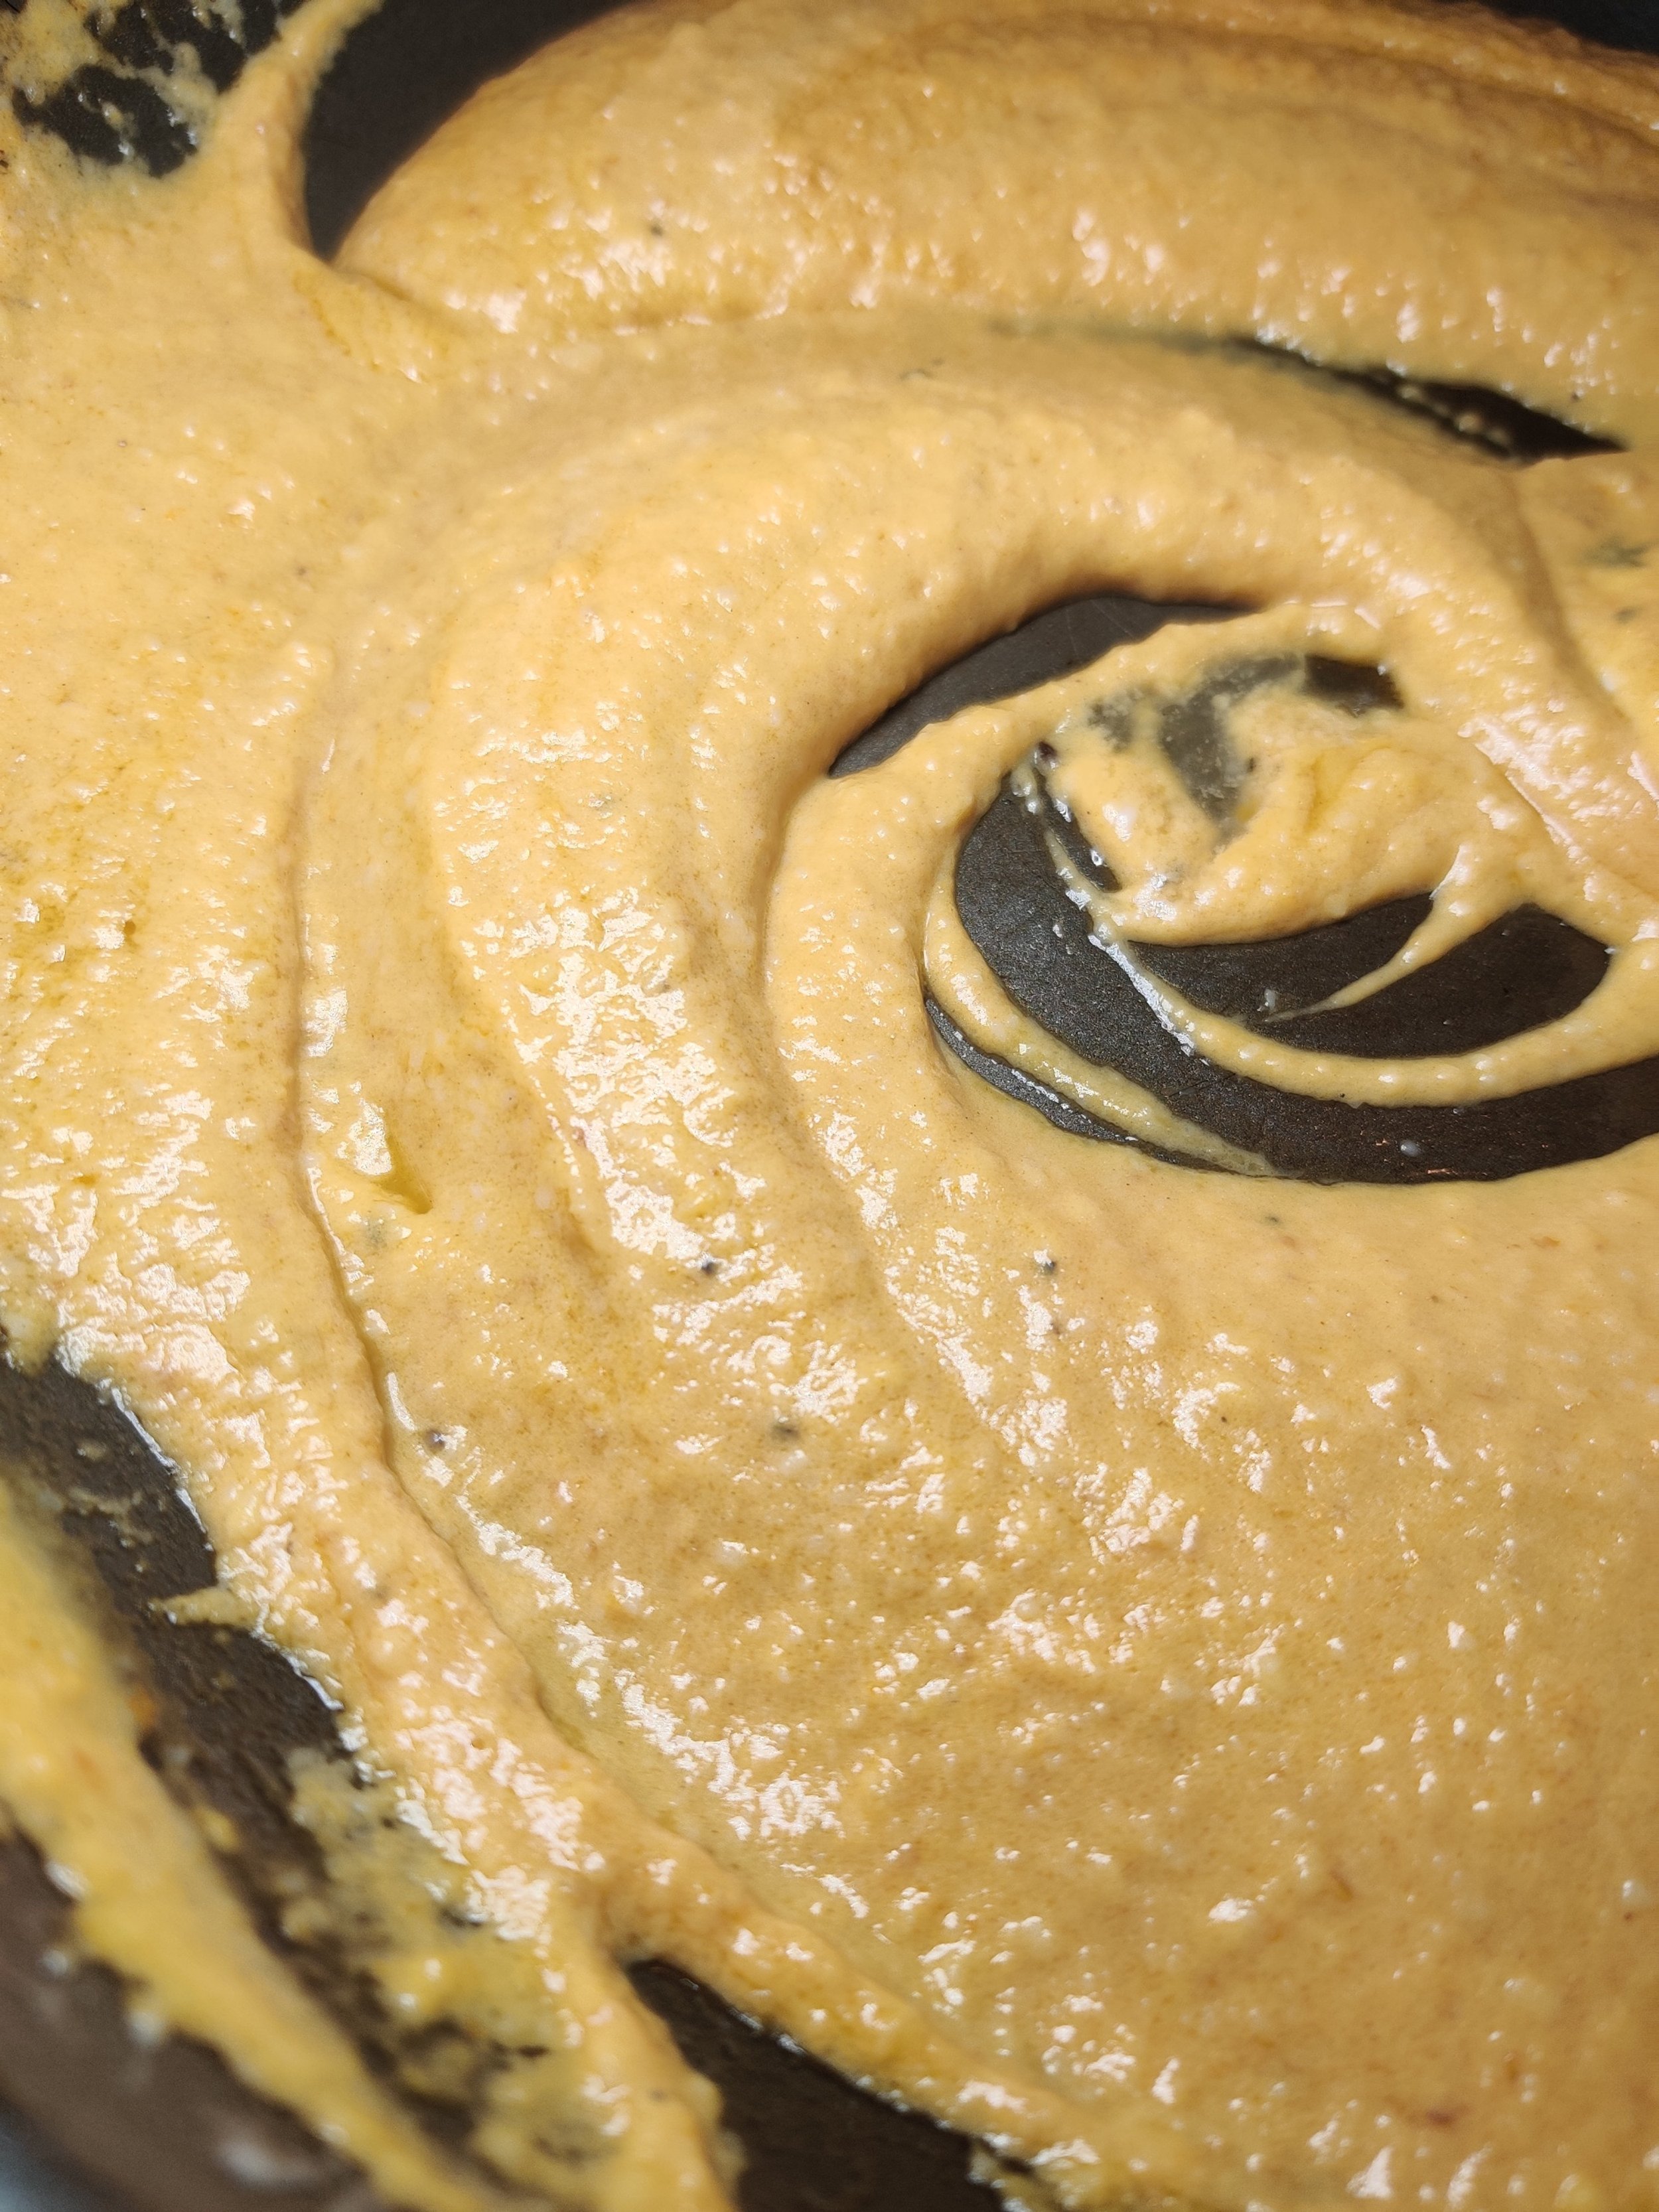
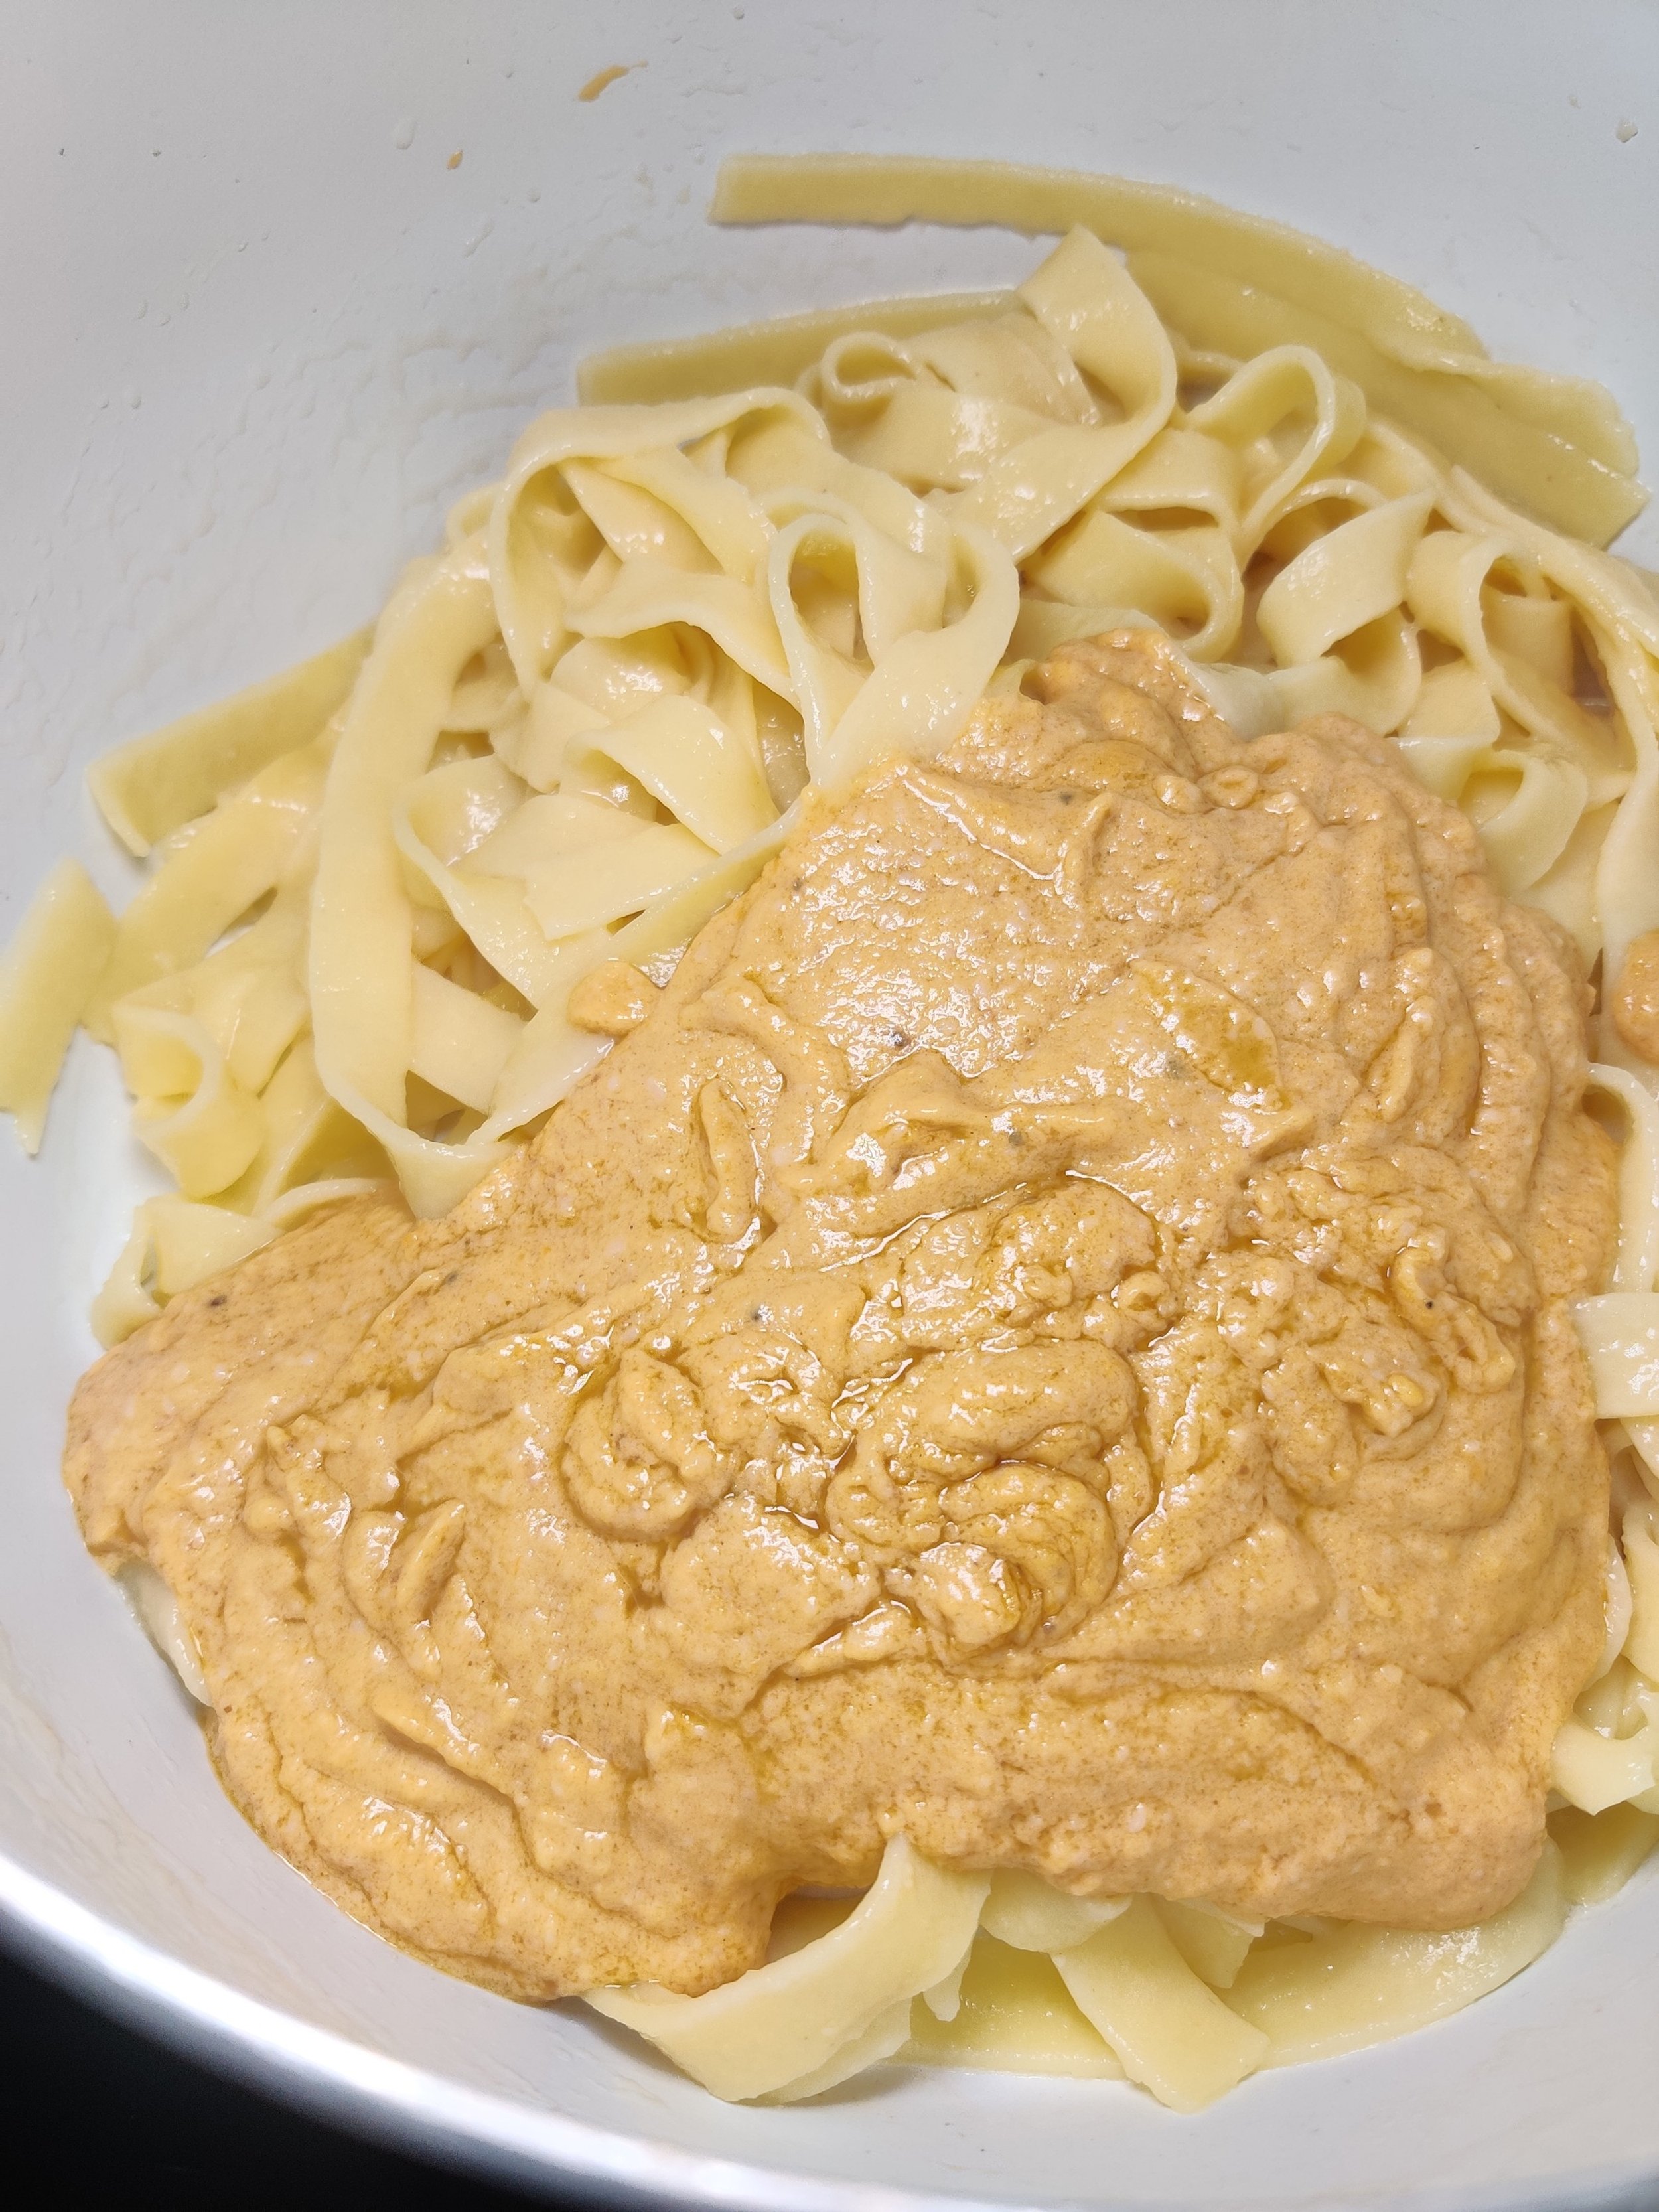
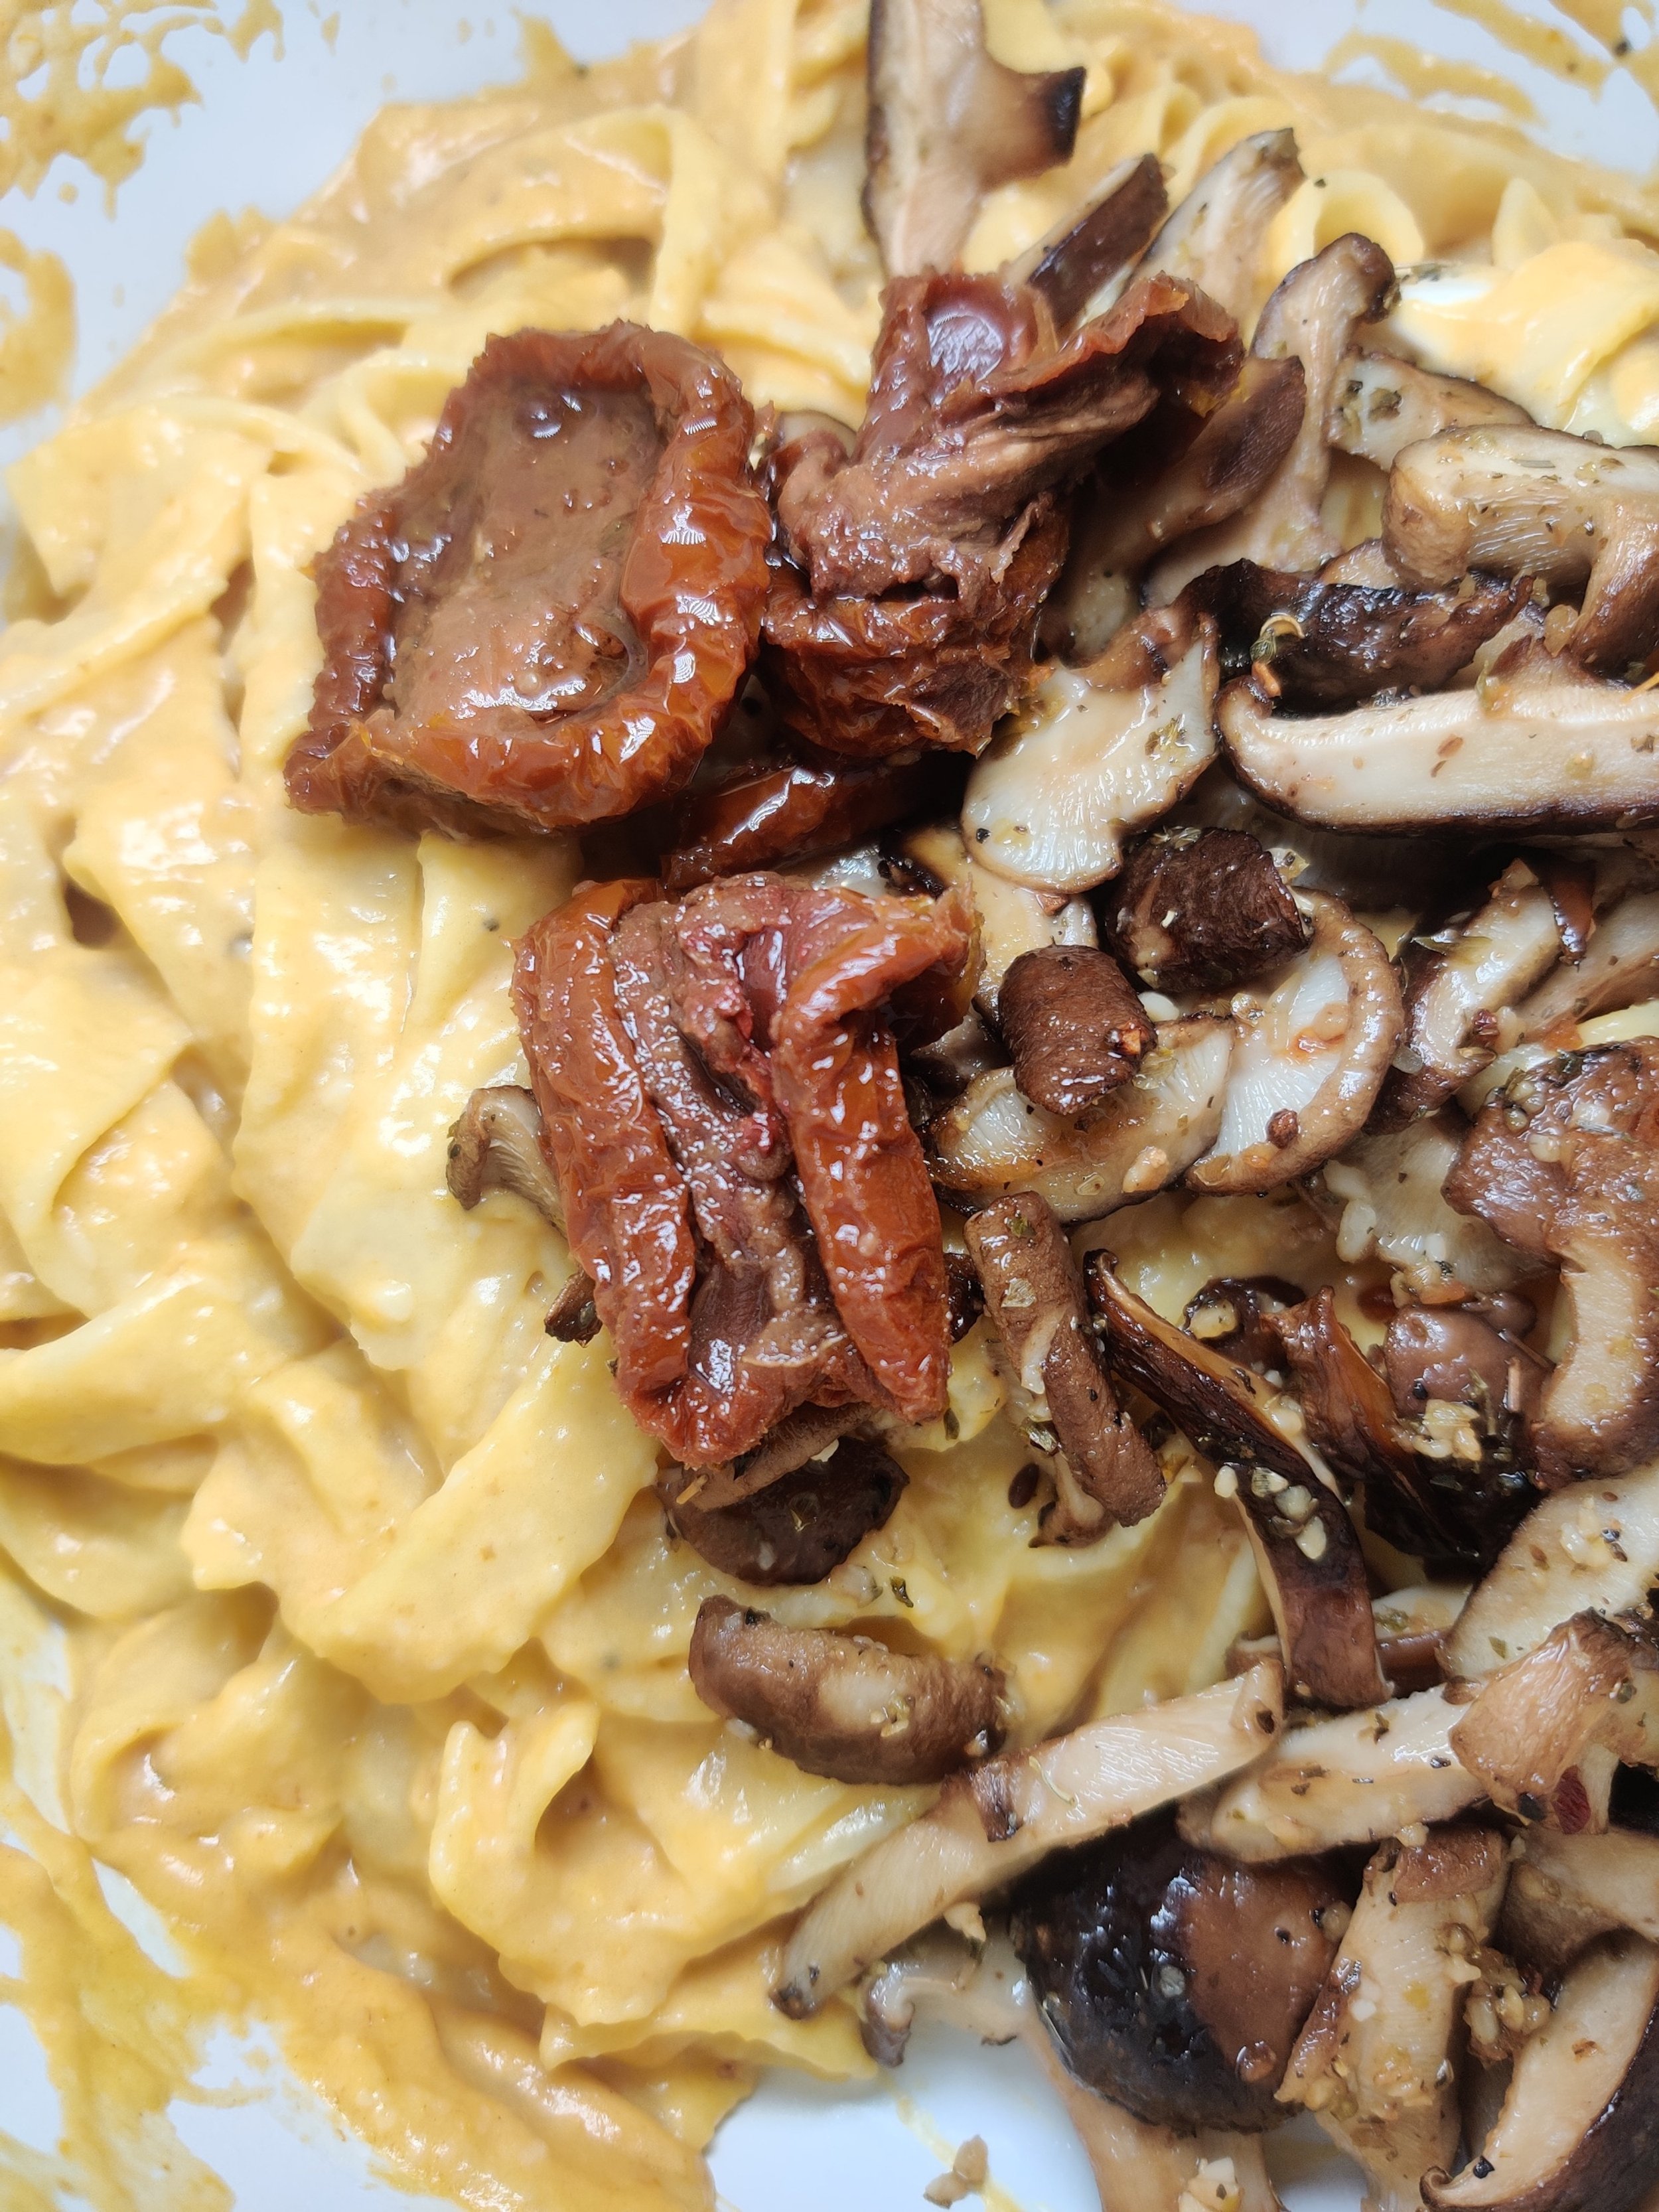
Pumpkin Alfredo and Roasted Mushrooms with Sage Butter
Who doesn’t want a bowl of flavorful pasta swimming in a homemade sauce?
Depending on the season and the star ingredient, you can get quite experimental to make a rich alfredo to coat your pasta. The only thing you need to add is seasoning and parmesan cheese and adjust to your liking! This recipe uses pureed pumpkin, which lends itself well to the sauce, but you could also use sweet potato, squash, etc.
To enhance the flavour, lightly fry the sage leaves to extract the earthy, peppery taste in butter before combining with the cream, pumpkin and parmesan.
Ingredients
14-ounces pumpkin puree
3/4 cups heavy cream
1/2 cup parmesan cheese
1 teaspoon salt
1 tablespoon cracked black pepper
1 tablespoon garlic powder
1 stick butter
9-ounces tagliatelle pasta
Bunch of fresh sage leaves
Sundried tomatoes (optional)
4-ounces shiitake mushrooms
1/4 cup olive oil
1 teaspoon salt
1 tablespoon cracked black pepper
2 tablespoons olive oil
1 tablespoon minced garlic
1 tablespoon dried thyme
1 tablespoon onion powder
Instructions
Place the mushrooms on a baking tray with parchment paper after coating and seasoning with fresh garlic, olive oil, salt, pepper, thyme, and onion powder. Bake at 400F for 12-15 minutes until crispy; observe to ensure they don't burn, remove from heat.
Prepare the pasta as directed by the package instructions, drain and set aside.
Add the butter to a large nonstick and melt, then add several sage leaves.
Cook on medium heat until leaves are lightly fried, and the butter has turned a goldish colour, but don't burn, or else it will have a bitter taste!
Remove the leaves, add the cream and pumpkin, and reduce heat to simmer for about 1-2 minutes, mixing the sauce is combined. Add the parmesan and seasoning and stir until smooth, adjusting as needed, adding a bit more cream if desired.
Pour the alfredo sauce in with the drained pasta, followed by the roasted mushrooms, sun-dried tomatoes, and crispy sage leaves as garnish. Dust with extra parmesan cheese and serve hot.
Serves 2.


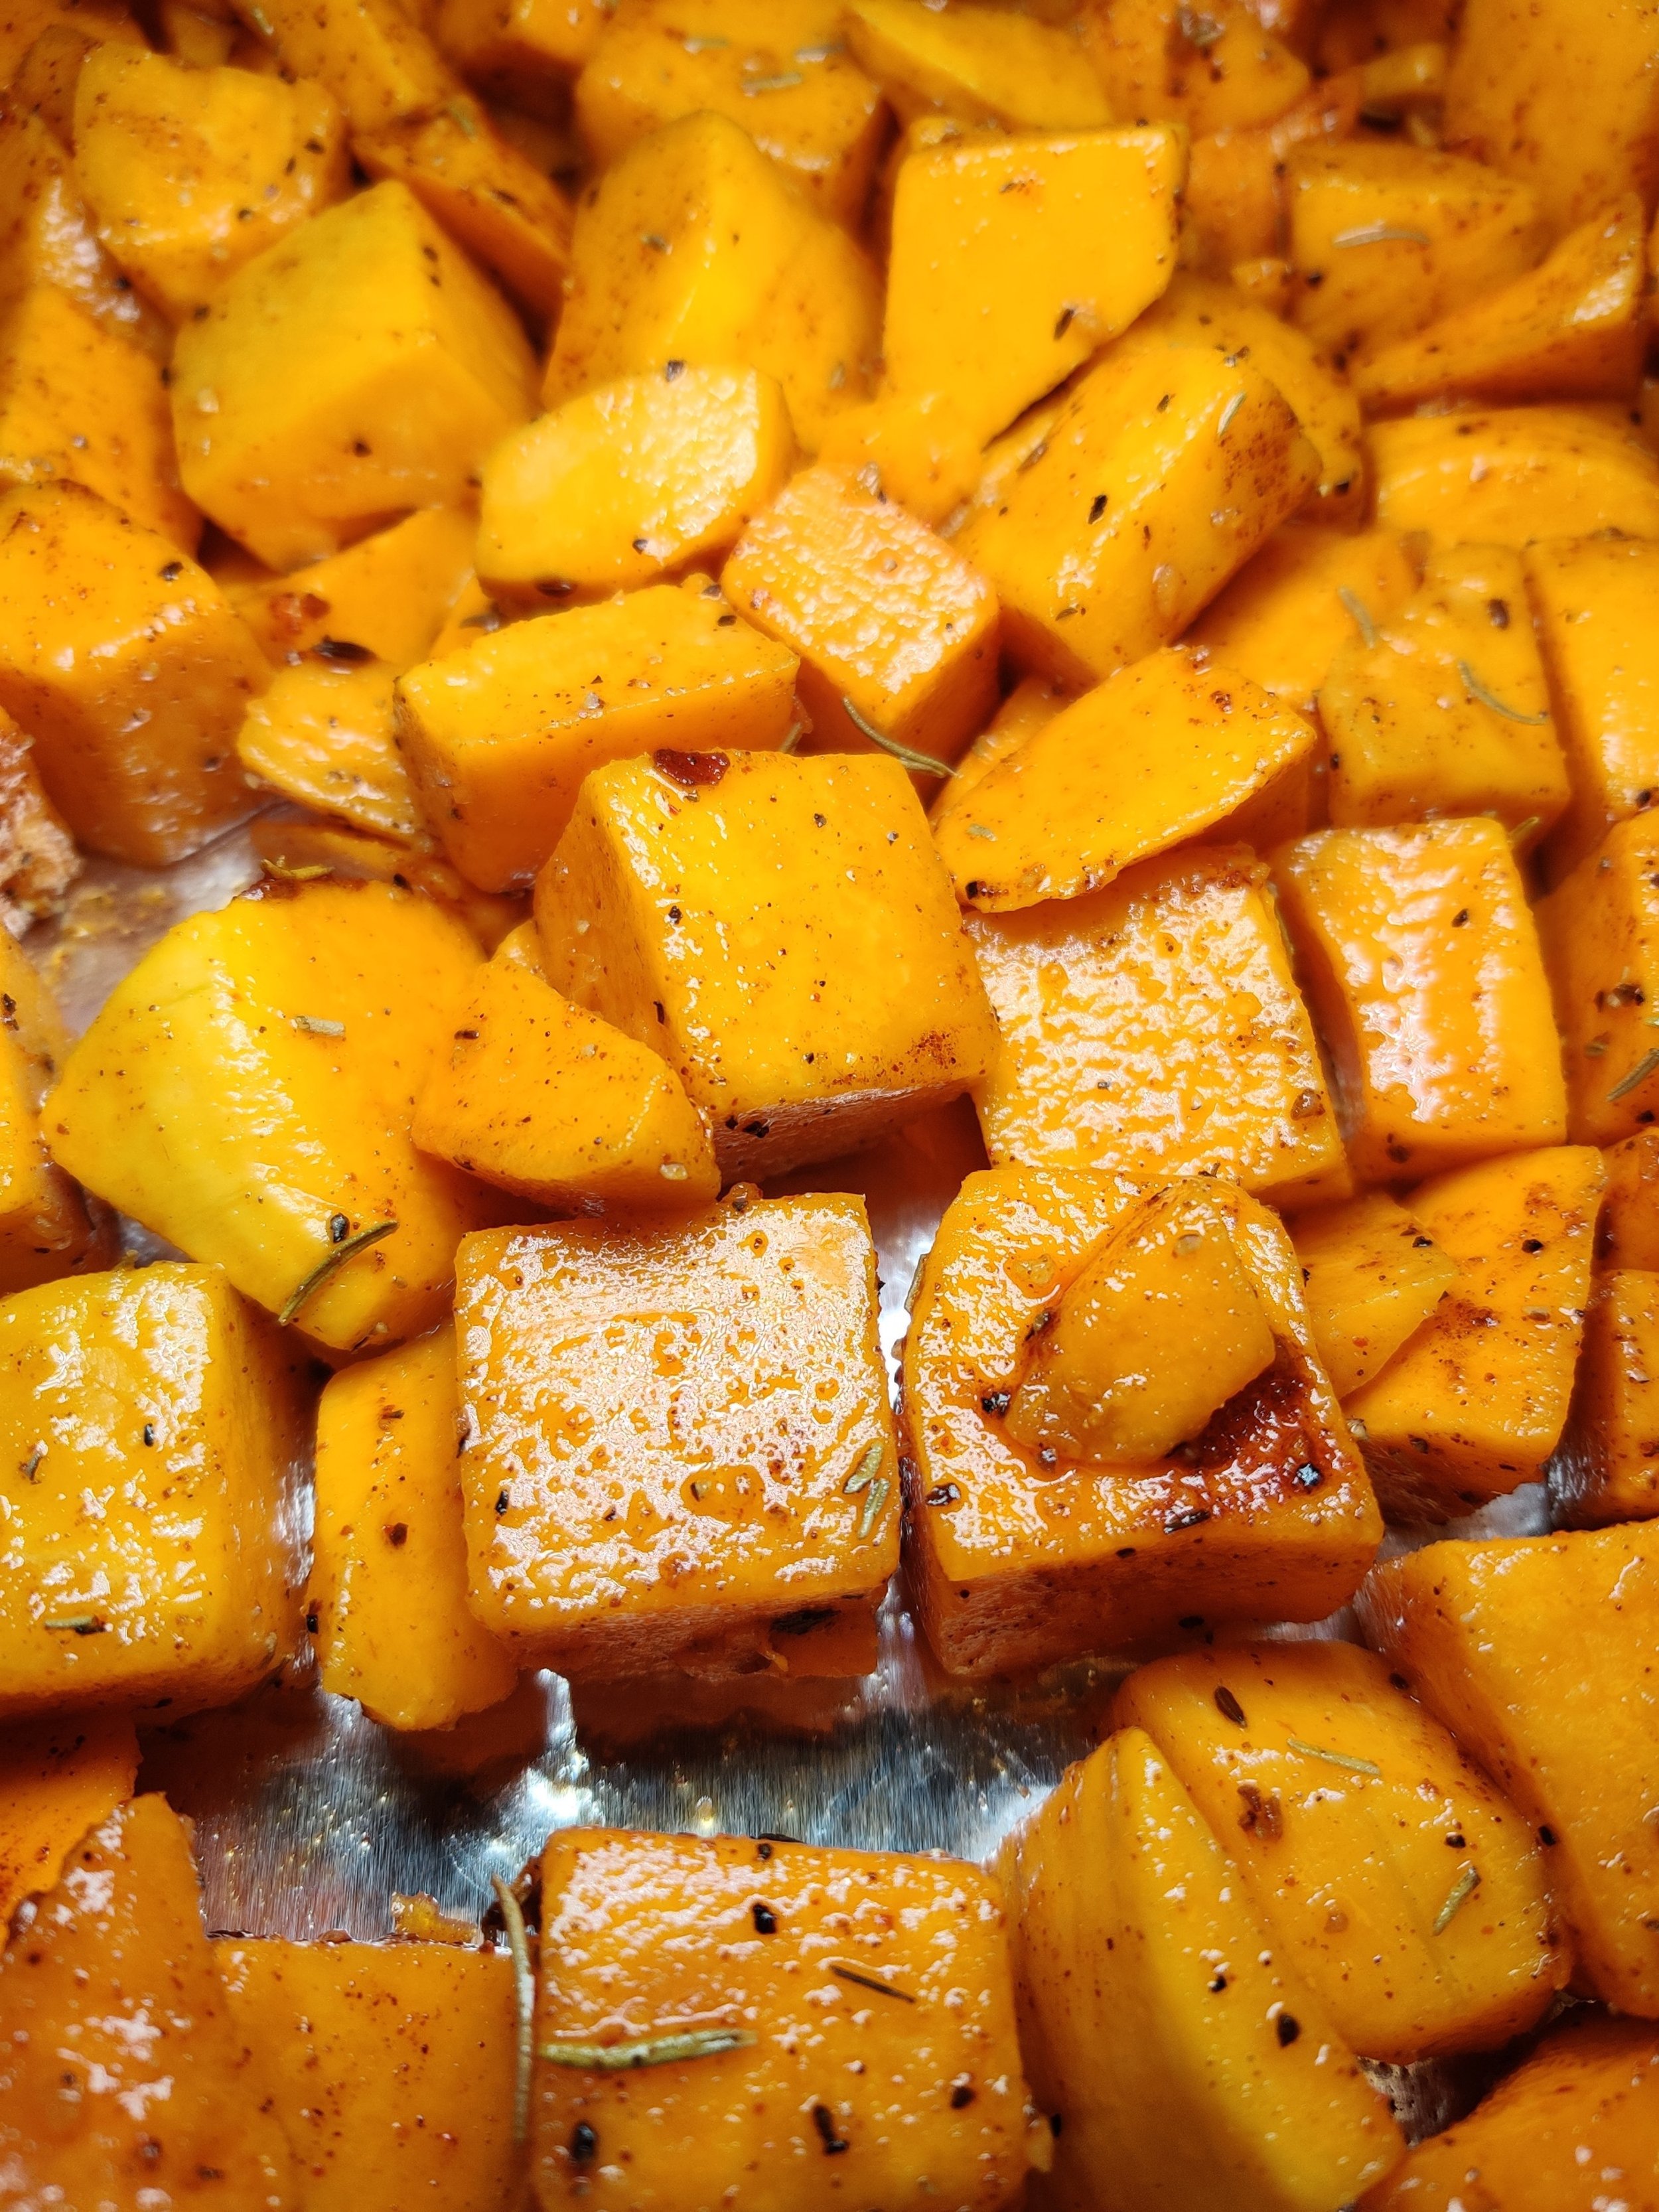
Spicy Roasted Butternut and Peanut Soup
When the weather gets chilly, all you need is a hot bowl of soup. This recipe will give you something rich, creamy, smooth, and flavorful, thanks to the spices and, of course, the texture of the peanut butter.
Yes, butternut (or pumpkin and other members of the squash family) goes well with the nutty condiment. In Zimbabwe, it's a common practice to combine the two, whether it's the flesh of the vegetable or the leaves (muboora or pumpkin leaves cooked with peanut butter and chilies, for instance, is quite popular--the peanut butter serving as a substitute protein from meat and well, to enjoy!).
The trick to get the silky texture if you desire is to use a good quality blender, and to be patient; you'll get there! This soups is super easy and will impress anyone you make it for.
Ingredients
Spicy Roasted Butternut:
48-ounces chopped butternut
1 tablespoon chili flakes
1 tablespoon garlic powder
1 tablespoon steak seasoning (mixture of ground salt and black pepper)
1 teaspoon dried rosemary
1 tablespoon cayenne powder
1 tablespoon smoked paprika
1/4 cup olive oil
8-ounces mirepoix (mix of 2 parts onion, 1 part carrots and 1 part celery)
1 red bell pepper, diced
1 jalapeno, diced
1 teaspoon salt
1 tablespoon black pepper
1 teaspoon cayenne powder
1 tablespoon curry powder
1 teaspoon Royco Usavi (optional)
1 teaspoon smoked paprika
1 tablespoon garlic powder
1 teaspoon ginger powder or fresh, grated ginger
2 1/2 cups broth (add more as needed)
1 2 tablespoons butter
12 tablespoons bacon fat (optional)
2 tablespoons tomato sauce
1/4 cup Worchester sauce
1/2 cup heavy cream
1/3 cup peanut butter
Cilantro
Peanuts


Instructions
Toss the diced butternut in the olive oil, spices and rosemary, and bake at 400F for 12-15 minutes on parchment paper and a baking tray. The butternut should be fully cooked and caramelized on the outside. Remove from oven and set aside, including a few pieces to garnish.
Heat the butter and bacon fat in a large pot, and bloom the spices (cook for about 1-2 minutes on medium-high heat to bring out the flavour).
Add the mirepoix and sauté for 3-4 minutes until fragrant, then add the Worchester sauce and tomato sauce, cook for another 1-2 minutes.
Add the broth and 1/2 of the heavy cream, stir and simmer on low heat for 10 minutes. Mix until peanut butter is fully incorporated. Stir in the butternut and cook for another 5 minutes, then remove from heat. Take out a 1/2 cup and use the hot broth to temper and smoothen the peanut butter before adding it to the pot.
Using a mesh spoon, remove the solids and add them to the blender. Cover the lid and blend the solids until smooth. Season to taste, mixing until you have your desired texture. Control this by using the remaining broth and cream to thin it out.
Return to heat and simmer for 1 minute, season to taste and ensure the cream is incorporated and there are no large chunks of butternut, then serve. Garnish with roasted butternut, peanuts and cilantro.


Fried Pumpkin Flowers
In Zimbabwean cuisine, the pumpkin leaves (nhanga) known as muboora are commonly consumed as a relish or dried first, often stewed with peanut butter. They can be bitter similar to mustard greens, and a little tough - but nothing a little bicarbonate soda can't fix. Neighbouring countries like Mozambique like to add shrimp and coconut milk to the mix.
This recipe is super easy and makes for a light and fluffy batter, thanks to carbonated tonic water and egg white.
You'll need to be gentle with them, not overly dredge in batter and shake the excess off, not wash them roughly, and try to keep them as dry as possible before frying. Inspect the flowers for pollen and anything else.


How do they taste? Next time you see the flowers at the farmer's market, give them a try! In this case, sweet and subtle, a floral taste, not like a pumpkin, but delicious and melts in your mouth. Not only can you fry them in a light batter, but you can also stuff the flowers with a filling of your choice and bake or fold them into tortillas.


Fried Pumpkin Flowers
Ingredients
- 12 clean pumpkin flowers
- 1/2 cup + 2 tablespoons flour
- 1 egg white
- 3/4 cups tonic water
- 1 teaspoon sugar
- 1/2 teaspoon table salt
- Sea salt crystals
Instructions
- In a shallow bowl, add the flour, table salt and sugar, set aside.
- Heat your oil in a pan; it should be about 300F+ at the time of frying - you can use a thermometer to check. Make sure the panhandle is turned away from you/not easy to knock over.
- Beat the egg white until stiff peaks form.
- Whisk the tonic water into the bowl into large lumps are gone, and flour is mostly dissolved - don't over mix to keep the batter airy and light from the carbonation. Gently fold in the egg whites.
- Dip each flower carefully into the batter, shaking off excess before placing it in the hot oil )(away from you to avoid the splatters). Keep a close eye; they fry quickly! Flip over after about 20 seconds (30 seconds if you want the batter a bit brown more, though it lightens up a bit after cooling).
- Remove from the pan with a draining spoon and place on paper towels to absorb extra fat. Sprinkle with sea salt crystals and enjoy hot.
Nutrition Facts
Calories
72Fat (grams)
3.5Carbs (grams)
8.7Sugar (grams)
5.1Protein (grams)
1.4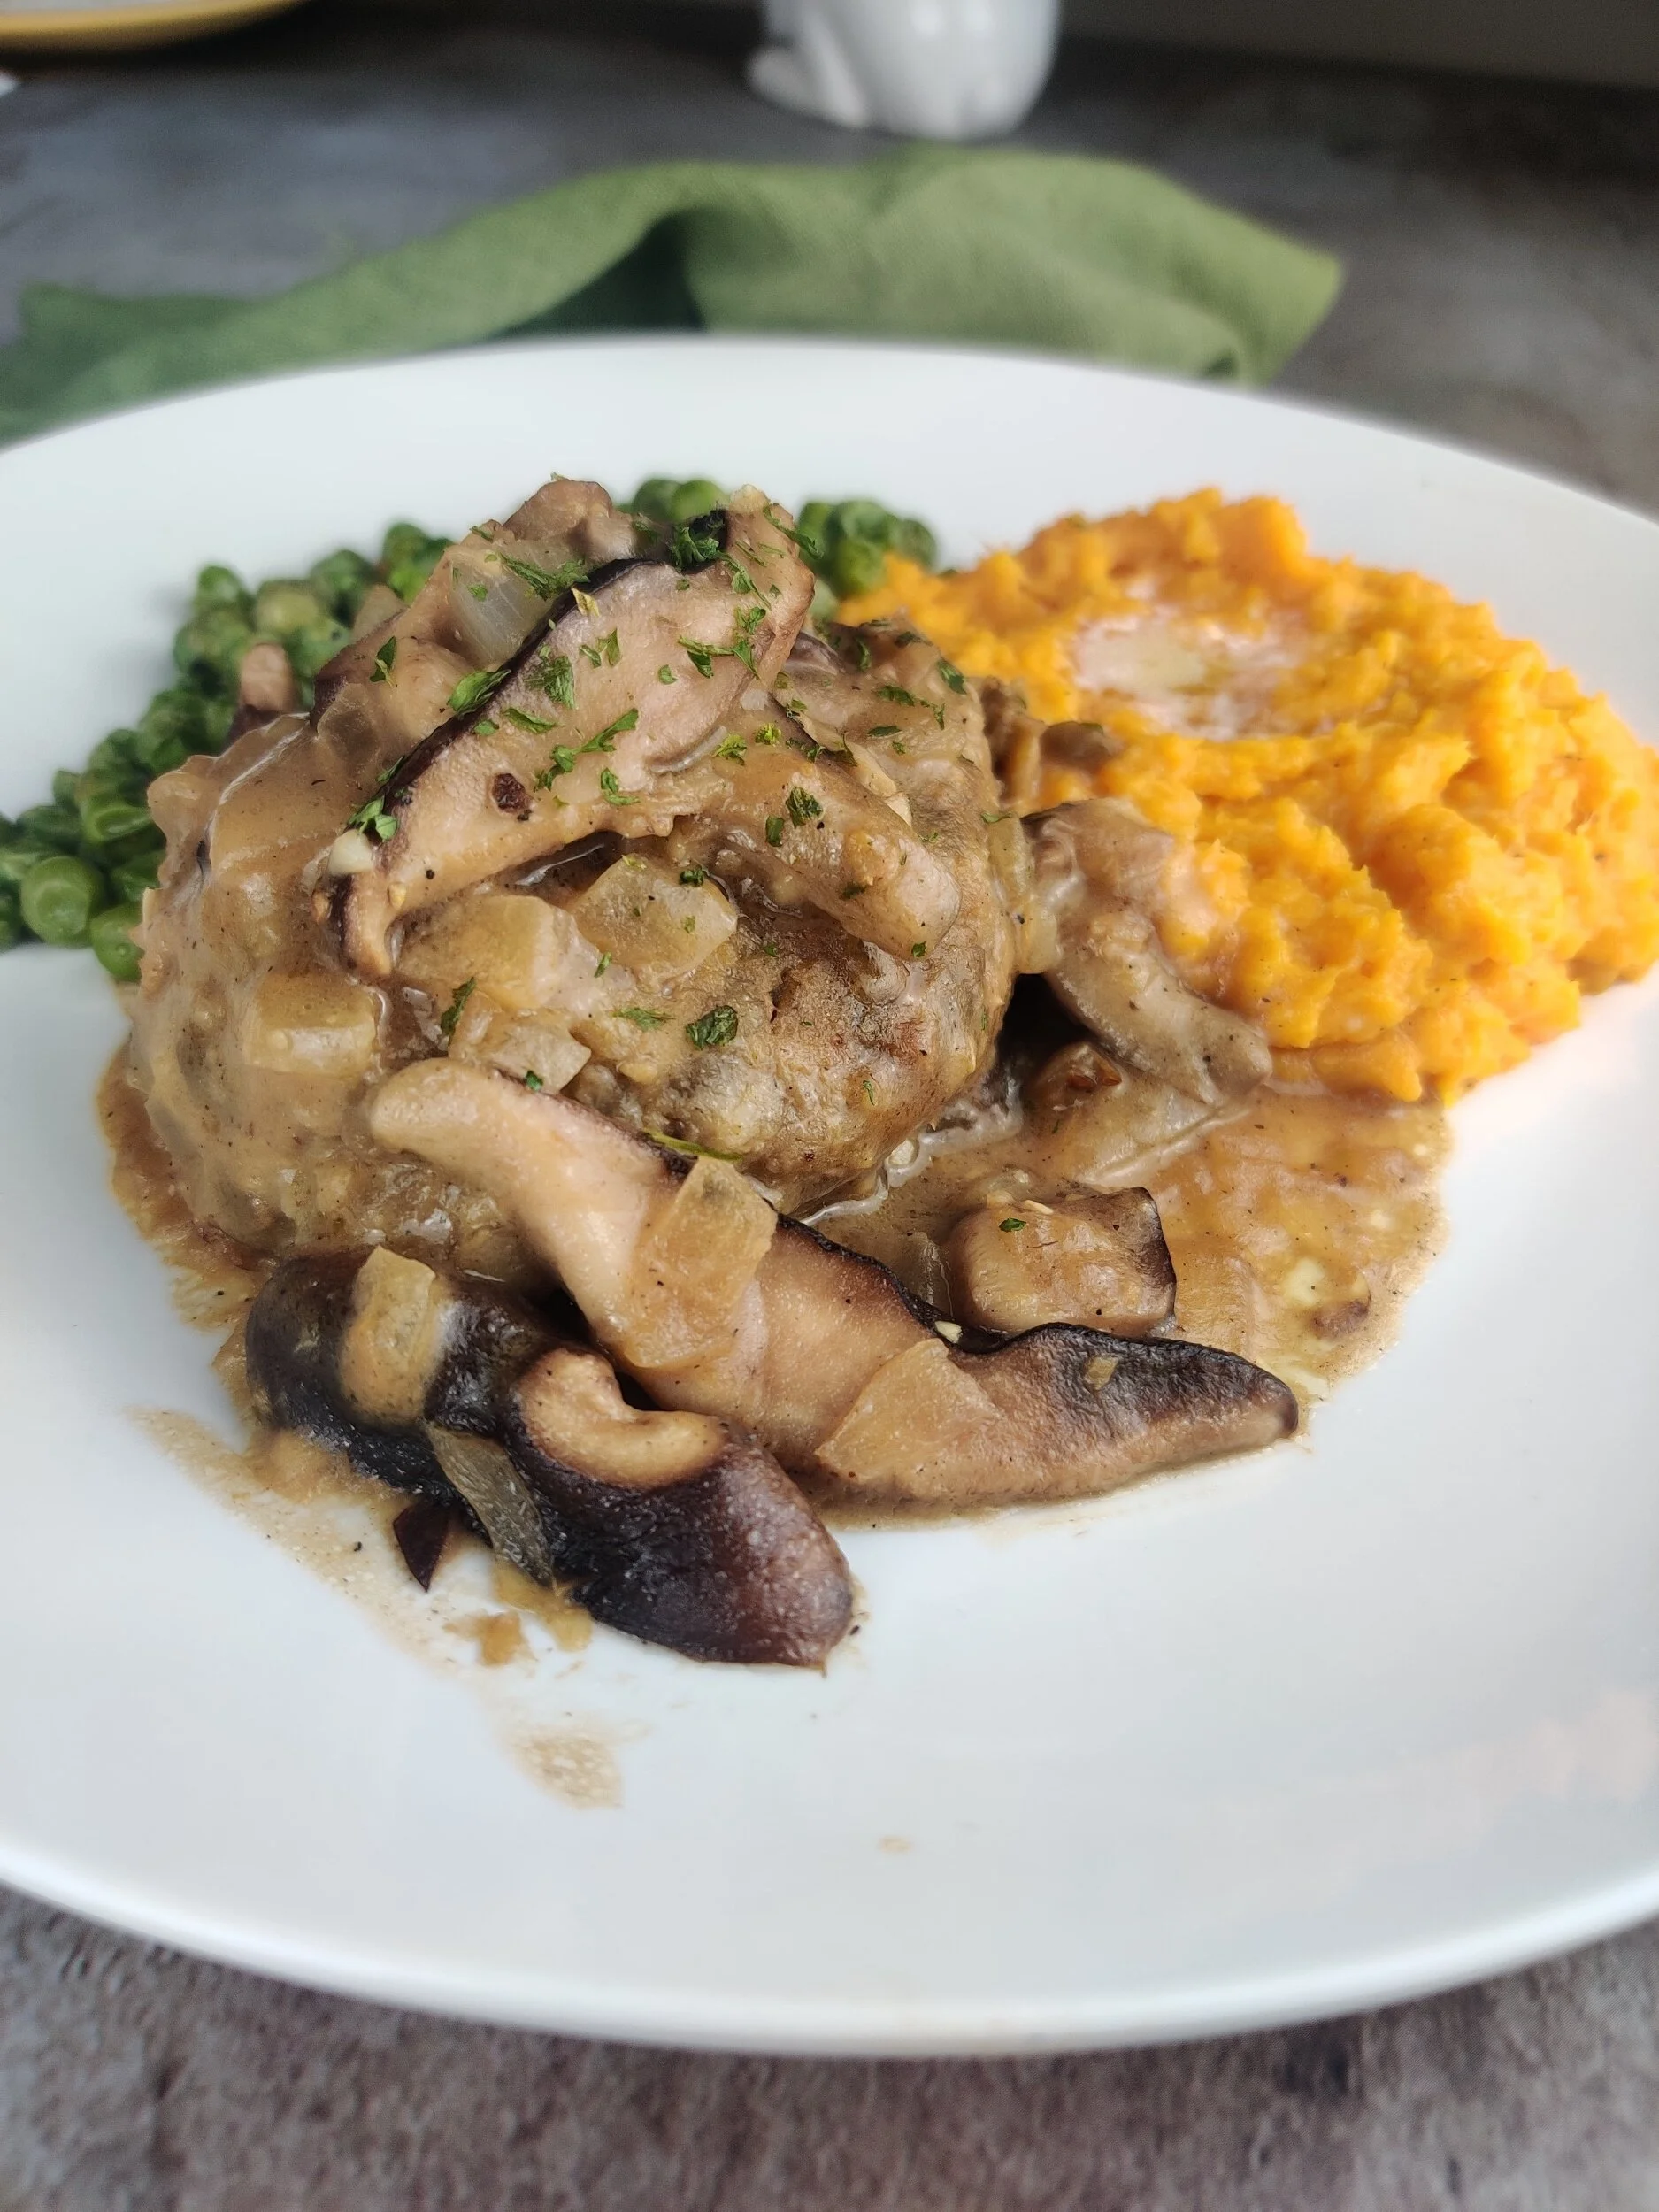
Lentil and Mushroom Salisbury 'Steak’
I love the combination of lentils and mushrooms. It made sense to put them together for this recipe. Familiar to many but obscure to some, a Salisbury steak is typically a ground beef burger patty served with gravy. Modern versions call for the addition of sauteed mushrooms, and the dish is generally paired with green beans or peas and mashed potato. I steamed some peas and made a quick sweet potato mash. http://npengage.com/nonprofit-fundraising/design-fundraising-appeal-that-raises-more-this-december/
I made sure the lentils and mushrooms were well-flavoured for the patty base. You could get pre-cooked vegetables and beans, which saves you time if you don’t meal prep, but it gives you more control. For a homemade mix, get dried lentils, soak them overnight, then cook in broth and store until it’s time to make the patties. As for the button mushrooms, you can roughly chop and saute in advance, then mix with the cooked lentils. I kept mine as larger chunks to give the patties textures.
For the mushrooms in the gravy, I used shiitake. They are juicy, packed with flavour and enhance whatever you add them to, serving as the perfect bite and umami. You get the creamy, ‘meaty’ taste while enjoying the lentil patties with even more mushroom.
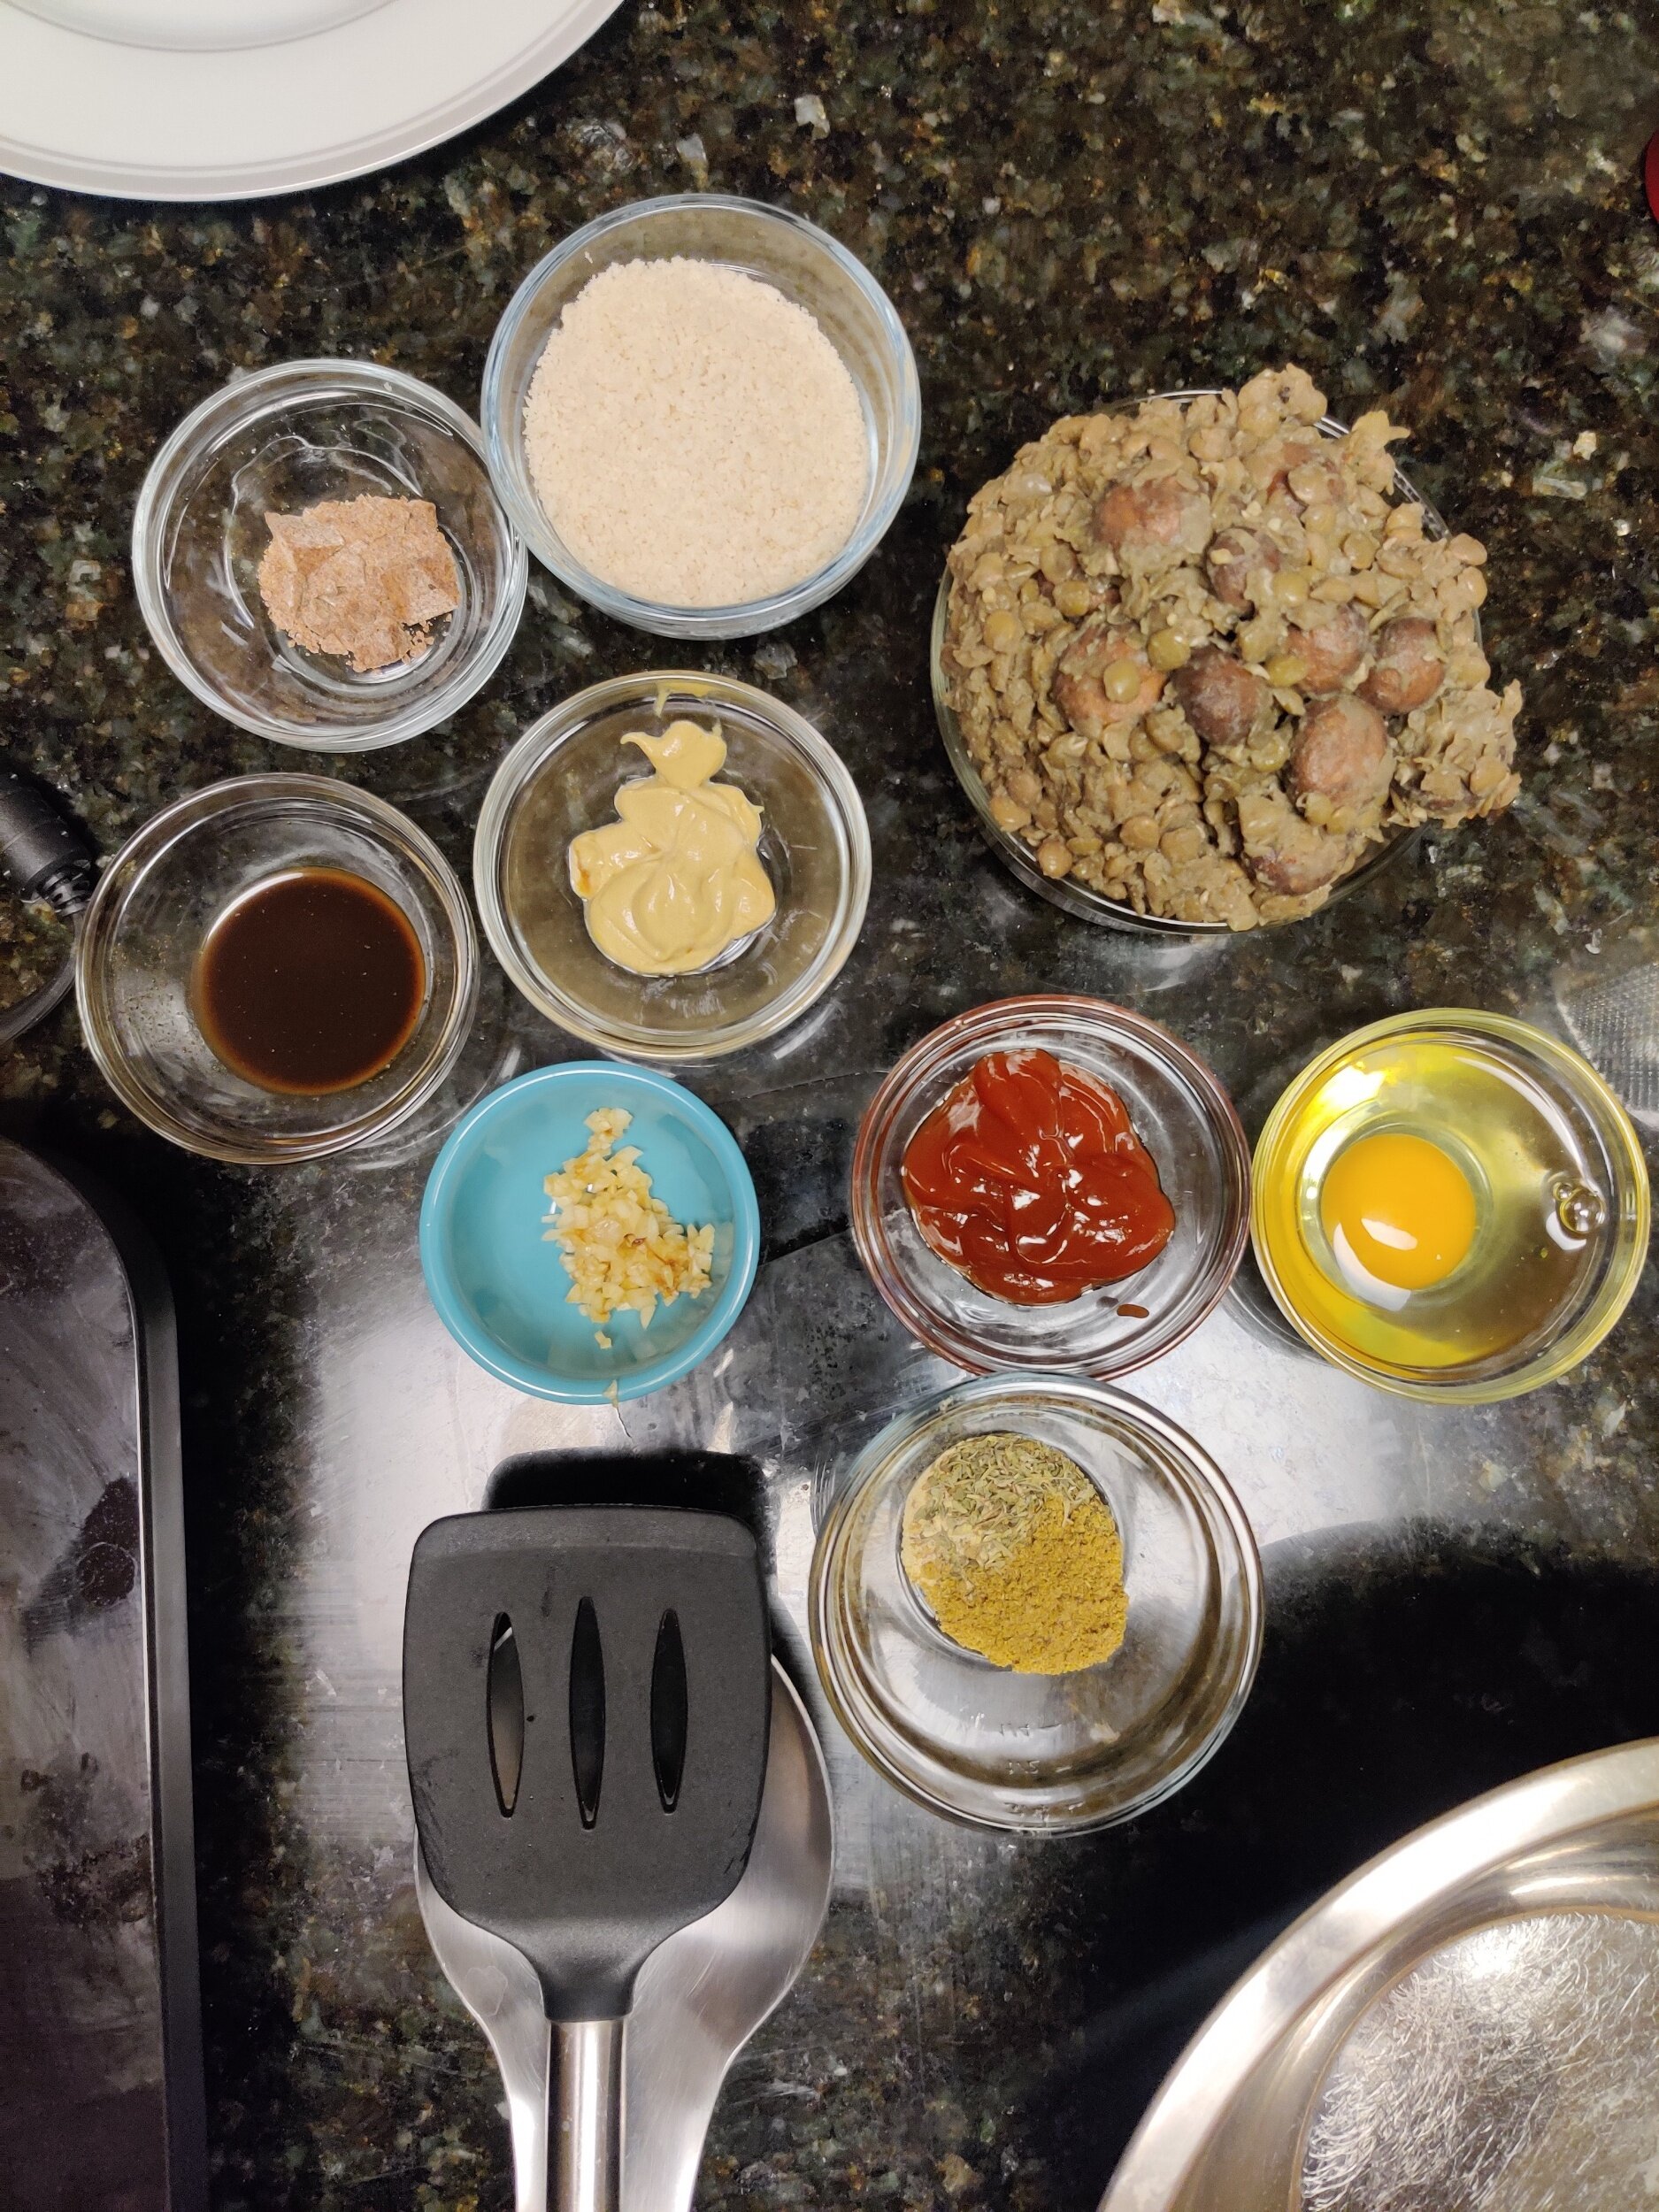
Ingredients
Patties/’steak’:
1 1/2 cups cooked lentils
1/2 cup cooked button mushroom, roughly chopped
1 teaspoon Worcester sauce
1 large garlic clove, minced
1/2 teaspoon salt
1 teaspoon black pepper
1/2 teaspoon Fenugreek powder
1/2 teaspoon coriander
1/2 teaspoon cumin
2 vegetable bouillon cubes, crushed
2 tablespoons Italian seasoning
1/4 cup Panko breadcrumbs
1/4 cup regular breadcrumbs
1 egg
1/2 yellow onion, grated
2 tablespoons tomato sauce/ketchup
2 teaspoons Dijon mustard
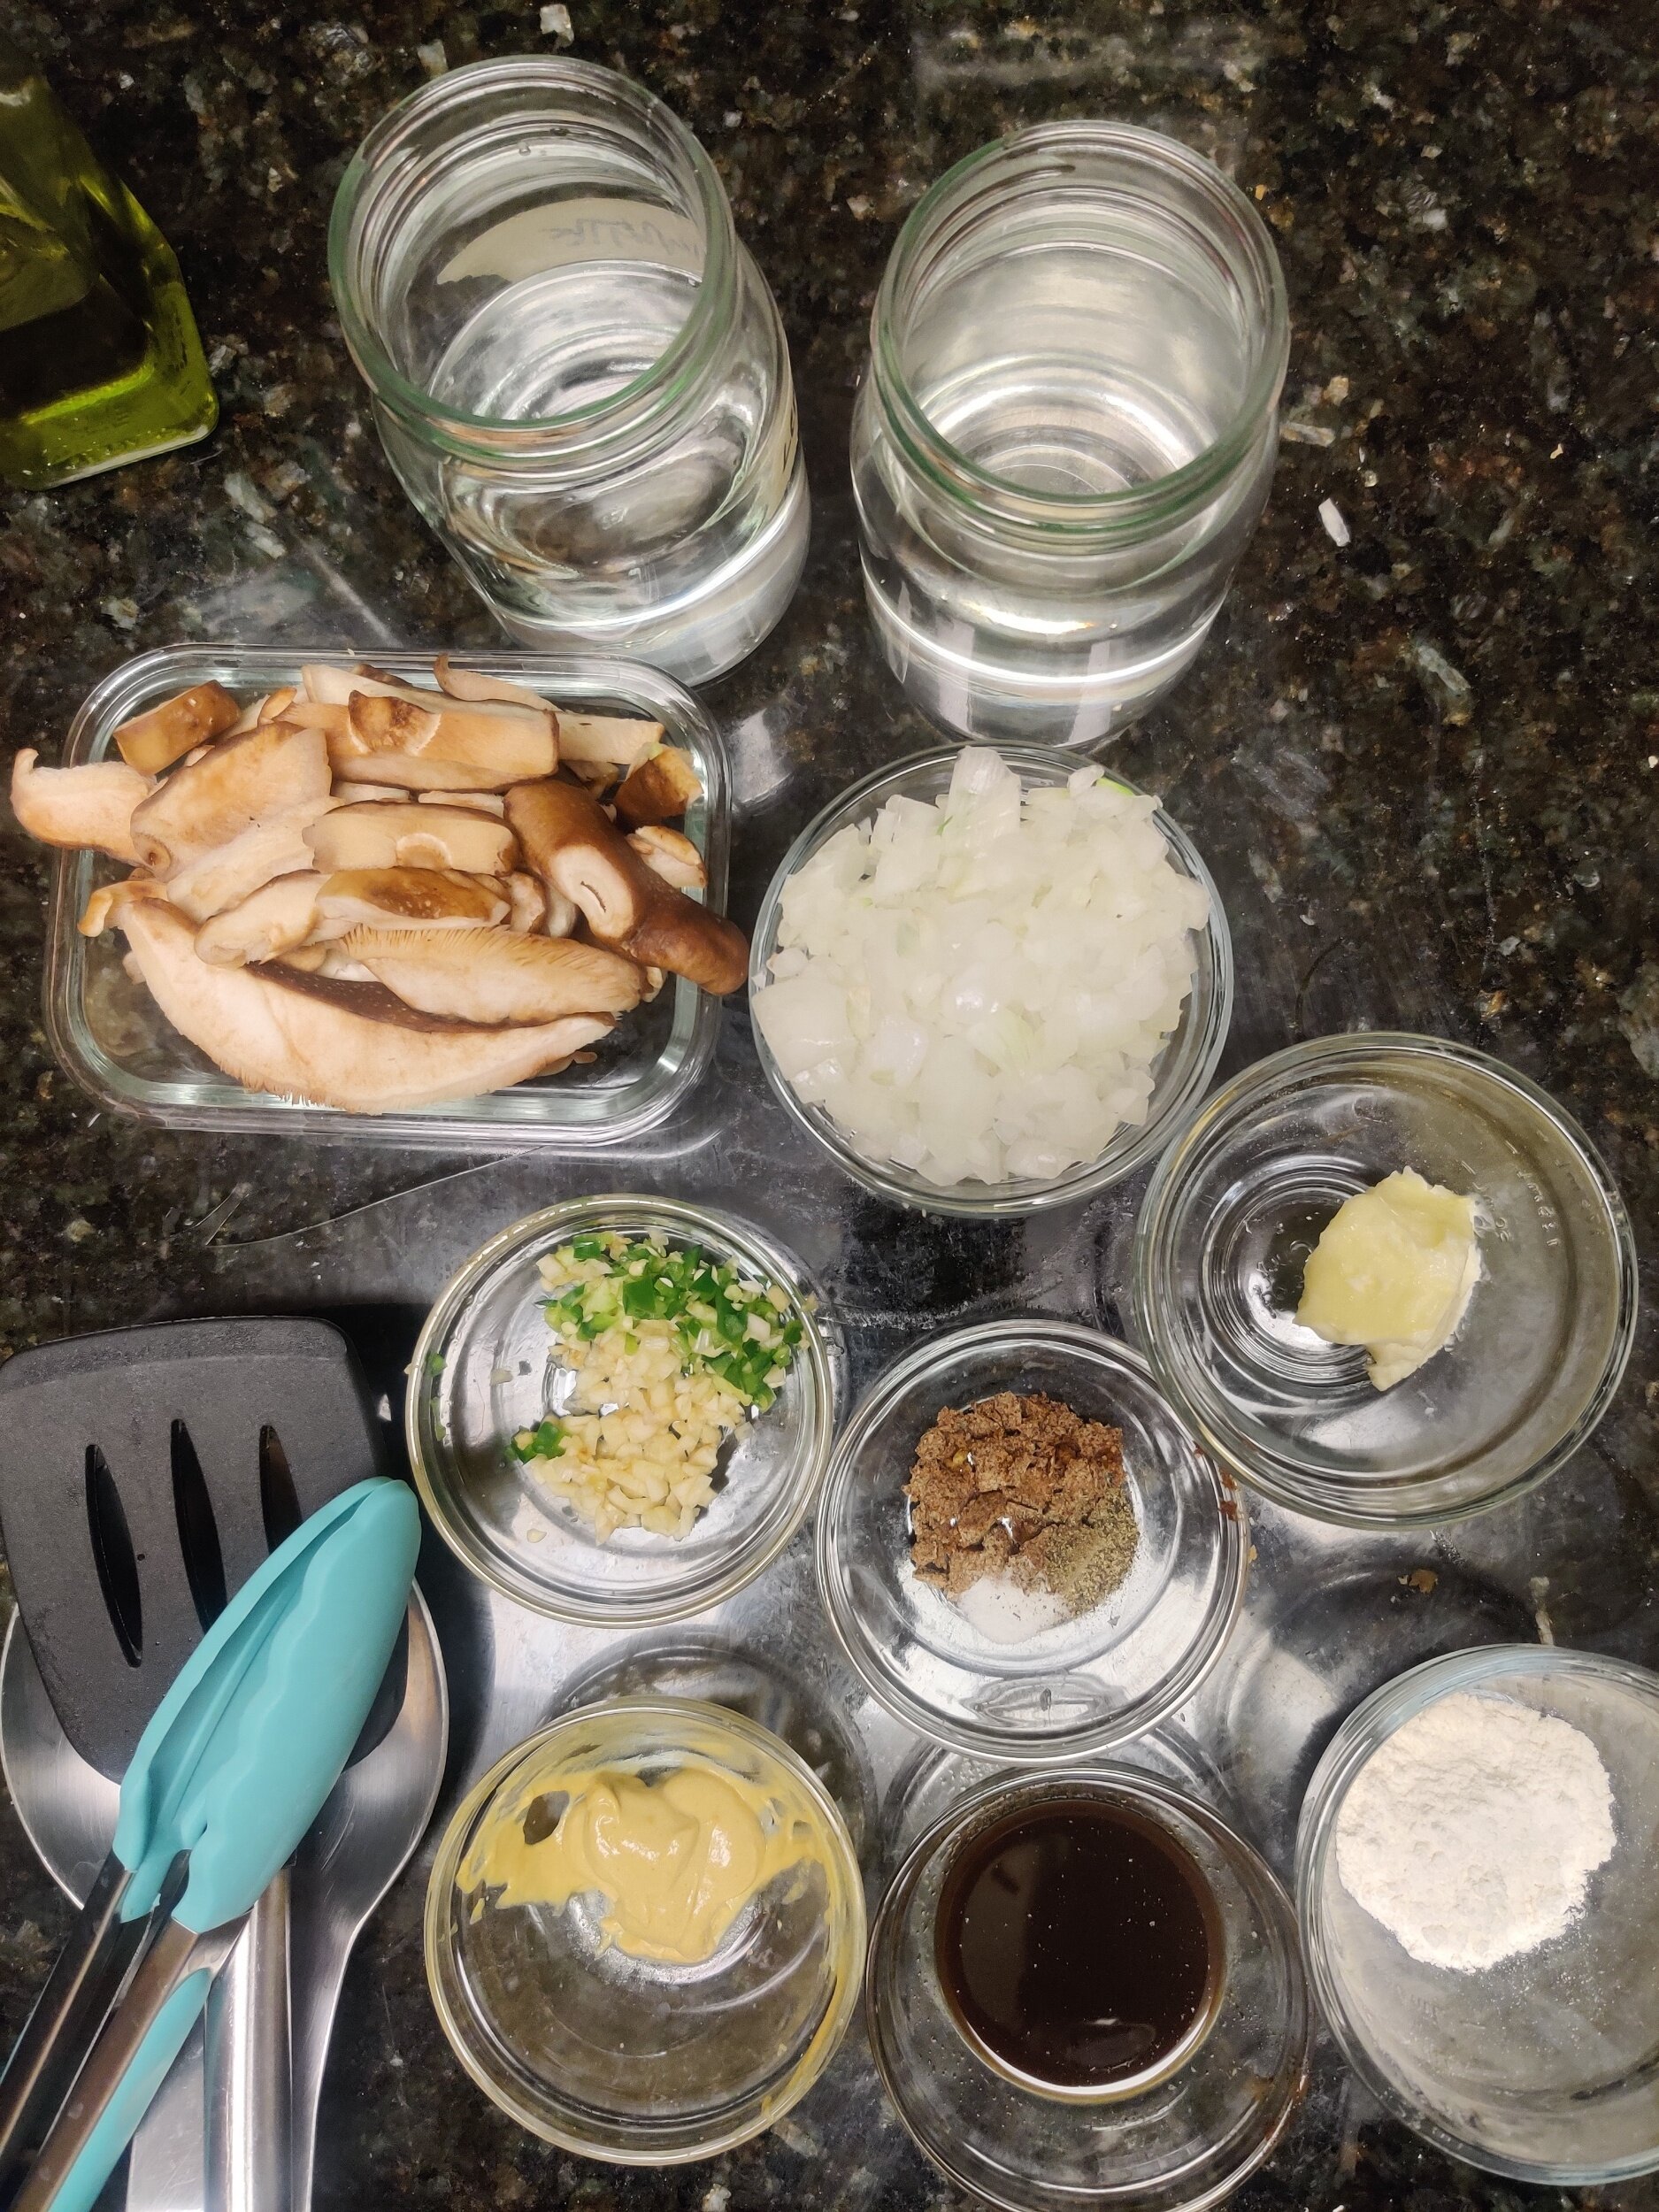
Mushroom gravy:
1/2 cup Shiitake mushrooms
1/2 teaspoon salt
1 teaspoon cracked pepper
1-2 cup(s) vegetable broth
Olive oil
2 tablespoons butter
1/2 teaspoon lemon juice
2 tablespoons flour
1 tablespoon mustard
2 teaspoons Worcester sauce
1/2 yellow onion. diced
1 teaspoon minced serrano pepper
1 large garlic clove, minced
Instructions
First, make your steaks! In a large bowl, add the onion, garlic, and breadcrumbs, mix with your hands and set aside for 5-10 minutes.
Add cumin, coriander, fenugreek powder, Italian seasoning, salt, pepper, bouillon cubes, lentil and mushroom mix, mustard, tomato sauce, and egg. Give it another good mix until the ingredients are evenly distributed, then shape your patties to the desired size and thickness - don't make them too thick and make sure they are the same size and cook evenly. Chill in the fridge for 10 minutes.
Fry the lentil mushroom steaks on medium-high heat in some olive oil, 4-5 minutes each side or until the surface begins to brown and get crispy. Remove from the nonstick pan set aside.
Time for the gravy. Using the same large pan or a large pot, saute the onion, chilli pepper, and garlic with olive oil for about 3 minutes, until fragrant and softened. Add the butter followed by the shiitake mushrooms. Sweat out for another 6-8 minutes. Add the Worchester sauce, mustard, and broth, and stir.
Gradually add the flour in parts, mixing each time to thicken the gravy. Add the patties back and nestle in the gravy, scoping over each patty.
Serve hot with sweet mashed potatoes, butter and steamed peas.

Fried Avocado and Roasted Sweet Potato Tacos
Tacos. They're quick, easy, and delicious if you do them right. What prompted me to create these tacos was the Mexican holiday Cinco de Mayo, which I didn't realize for some time was actually a celebration of a victory that the Mexicans won in a battle over the French. For many, it's an opportunity to embrace Mexican food and the culture, and tacos are just one of those things everyone loves to come together for.
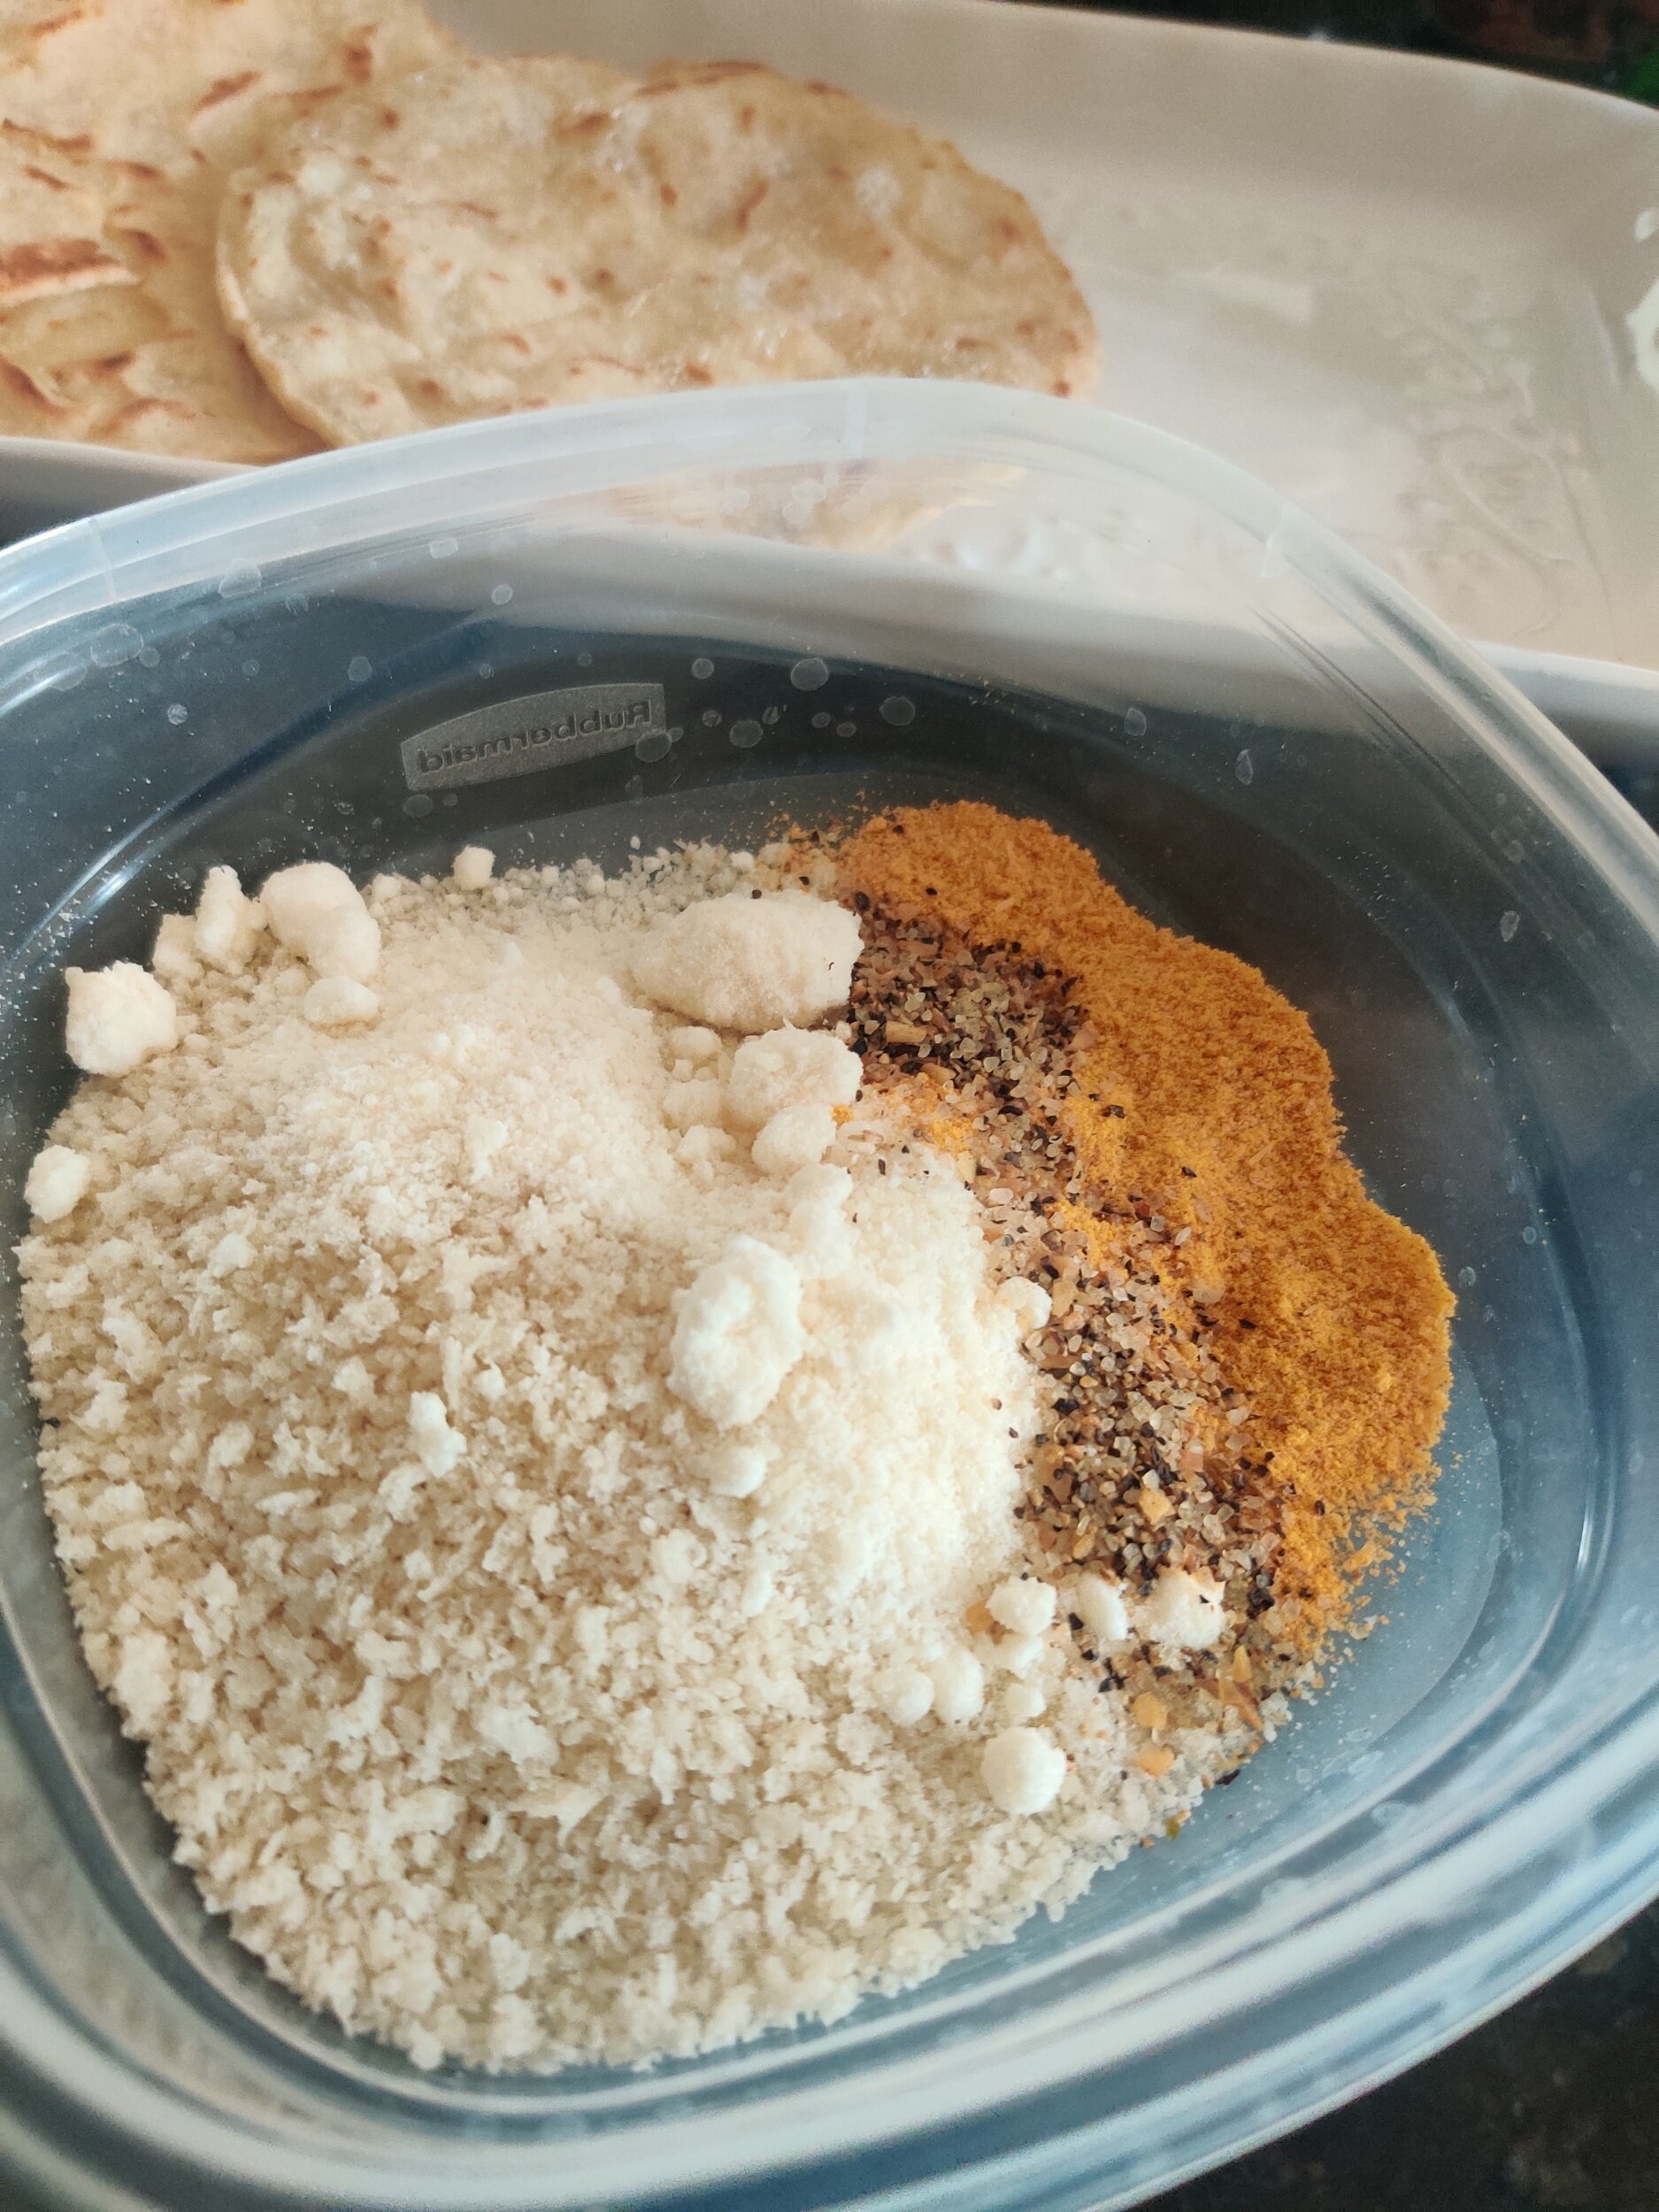
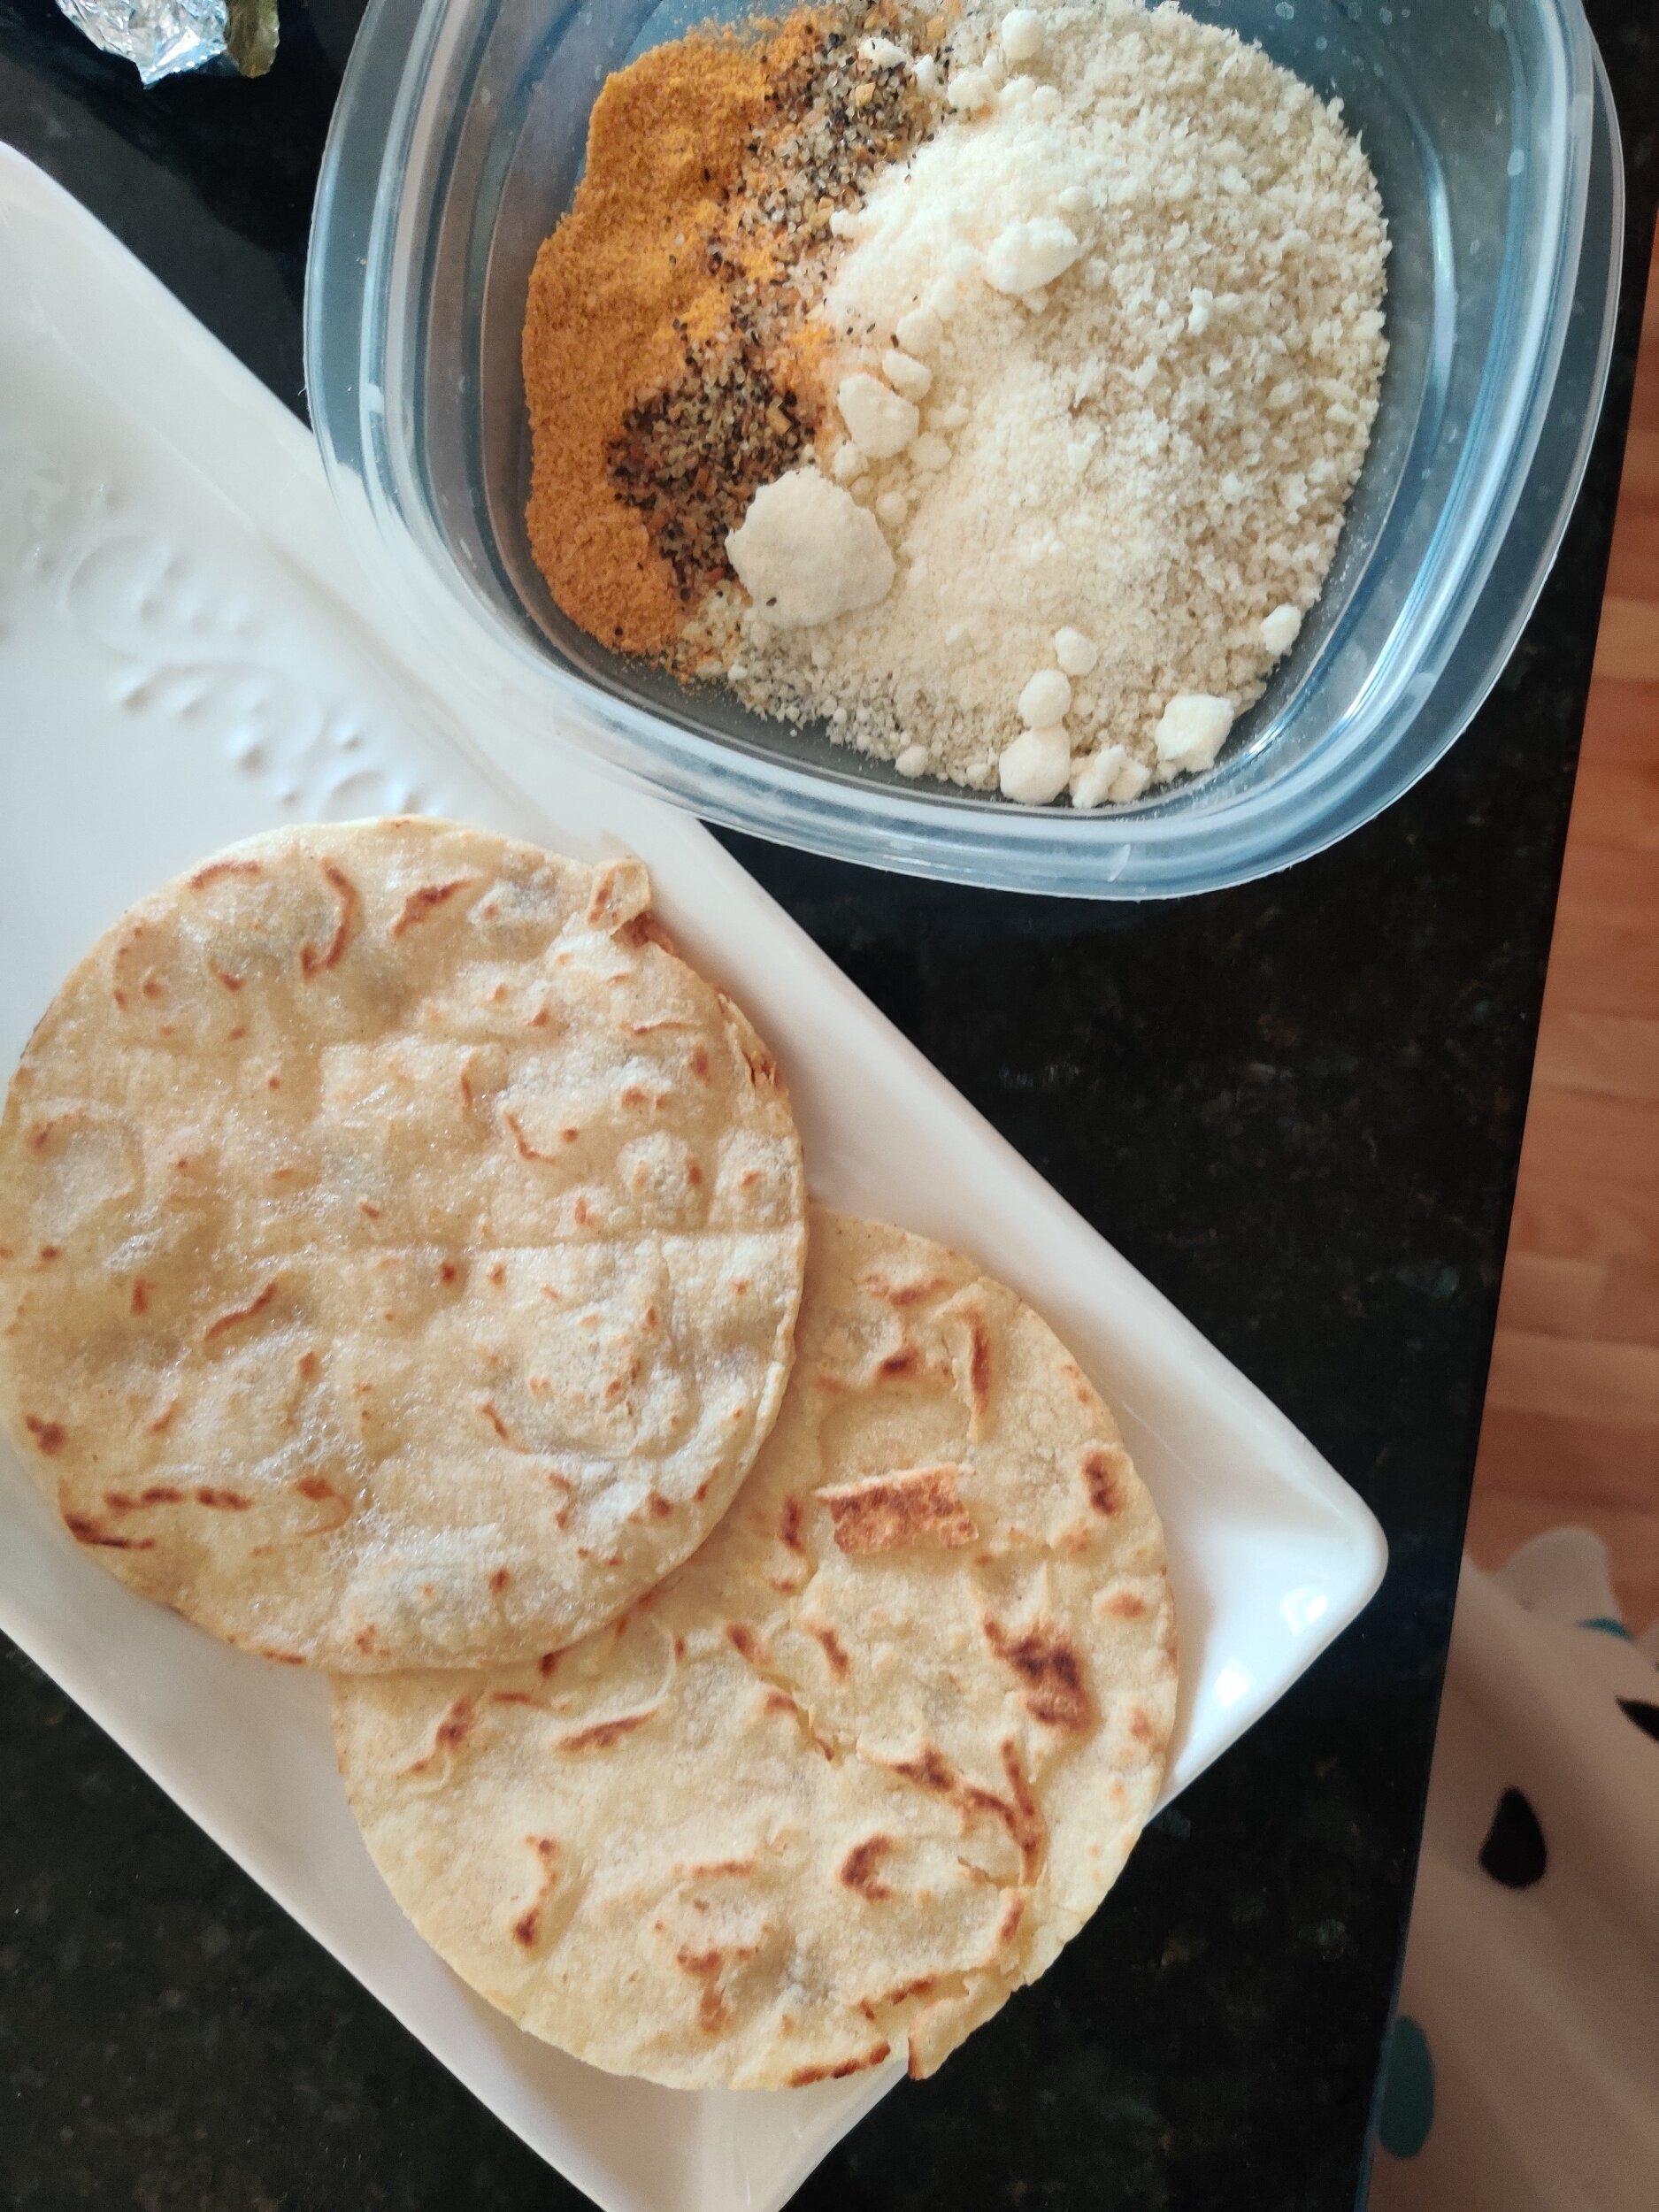
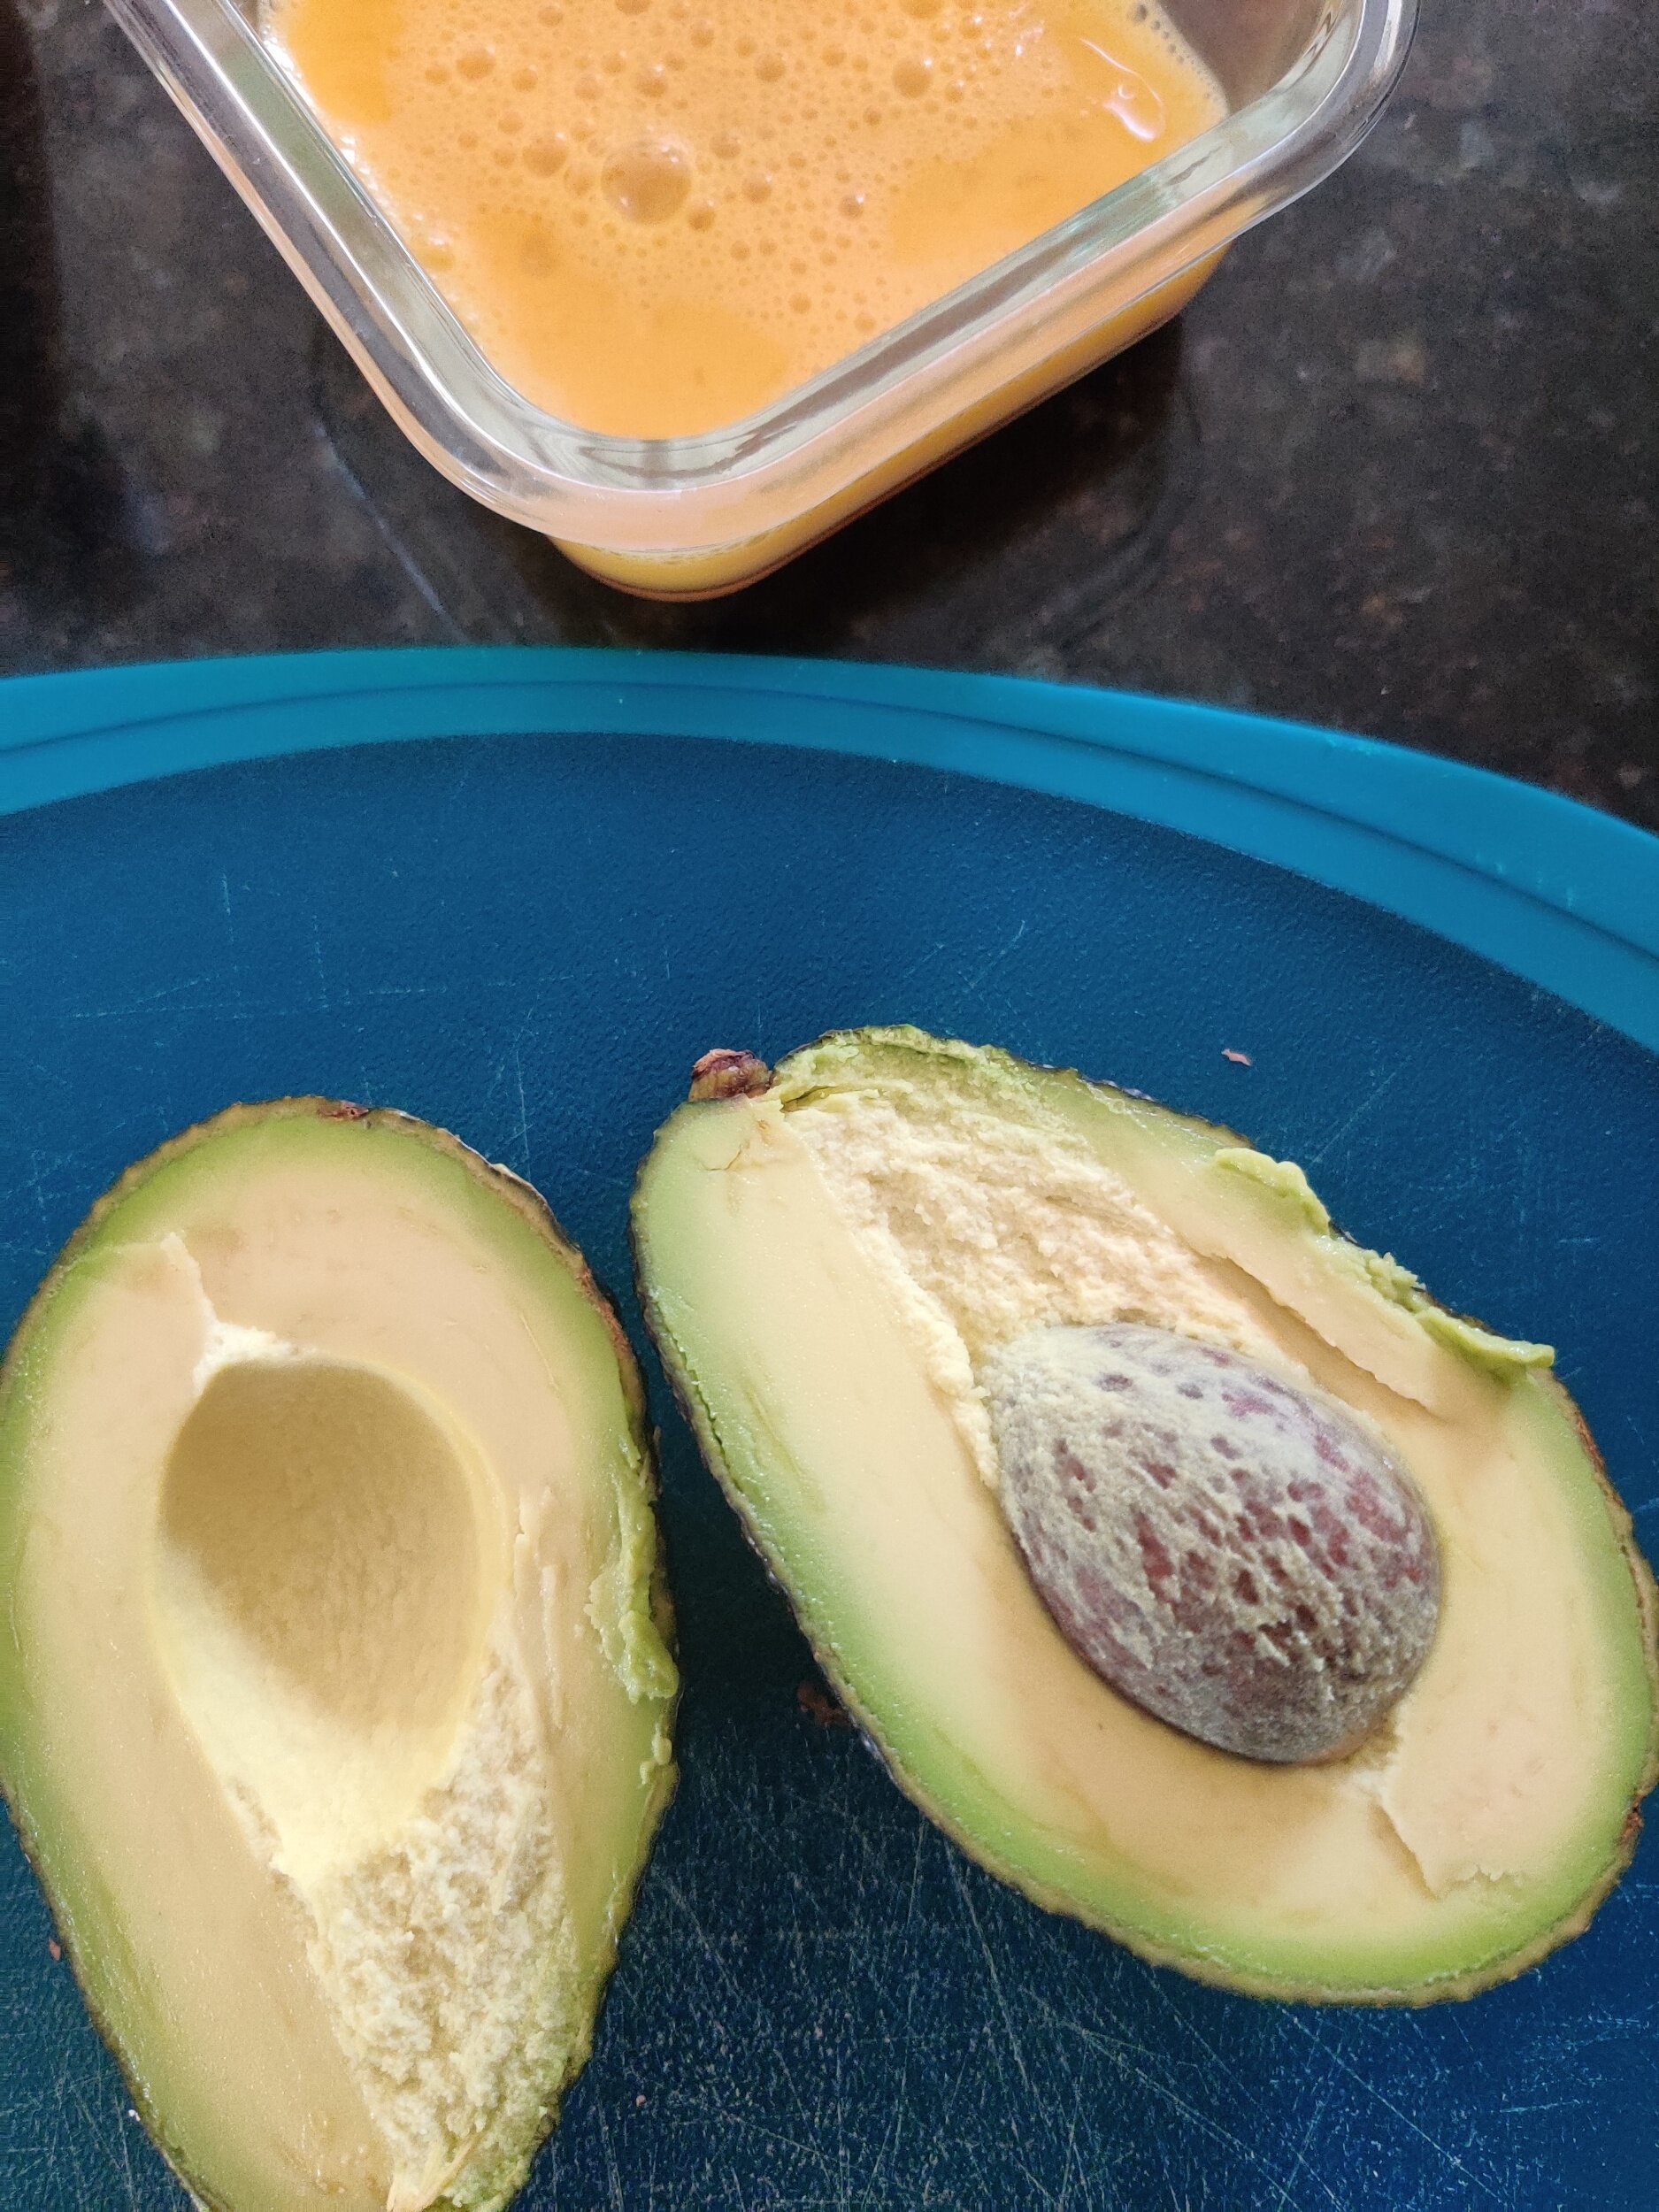
I decided to go simple with these and use a fruit and vegetable that I grew up constantly eating in Zimbabwe -- sweet potato and the avocado. I wanted to add texture and depth to the flavor for both, so I roasted the potatoes after tossing them in a combination of spices that I thought would enhance the natural flavor, including one of my favourite spice blends very common in Zimbabwean kitchens. As for the avocados, I coated them in panko breadcrumbs and parmesan cheese. I also used rice seasoning, which many people I don't realize can add great flavour to most savoury dishes. I used Robinson's, which is a South Africa brand and tastes great. All the toppings I included in the recipe add to the overall taste and texture to compliment the tacos.
I hope you enjoy these and make them a staple in your home; I certainly have!
Ingredients
Olive oil
1 large sweet potato, peeled and diced
1 tablespoon taco seasoning or your favorite spice blend (I used Royco Usavi mix)
1/2 teaspoon cinnamon
1/2 teaspoon salt
1 teaspoon cracked black pepper
1 teaspoon paprika
1/4 teaspoon nutmeg
1 Hass avocado, a bit under ripe/not too soft
1 egg, beaten
Lime juice
1/2 cup panko breadcrumbs
1/4 cup parmesan cheese, grated
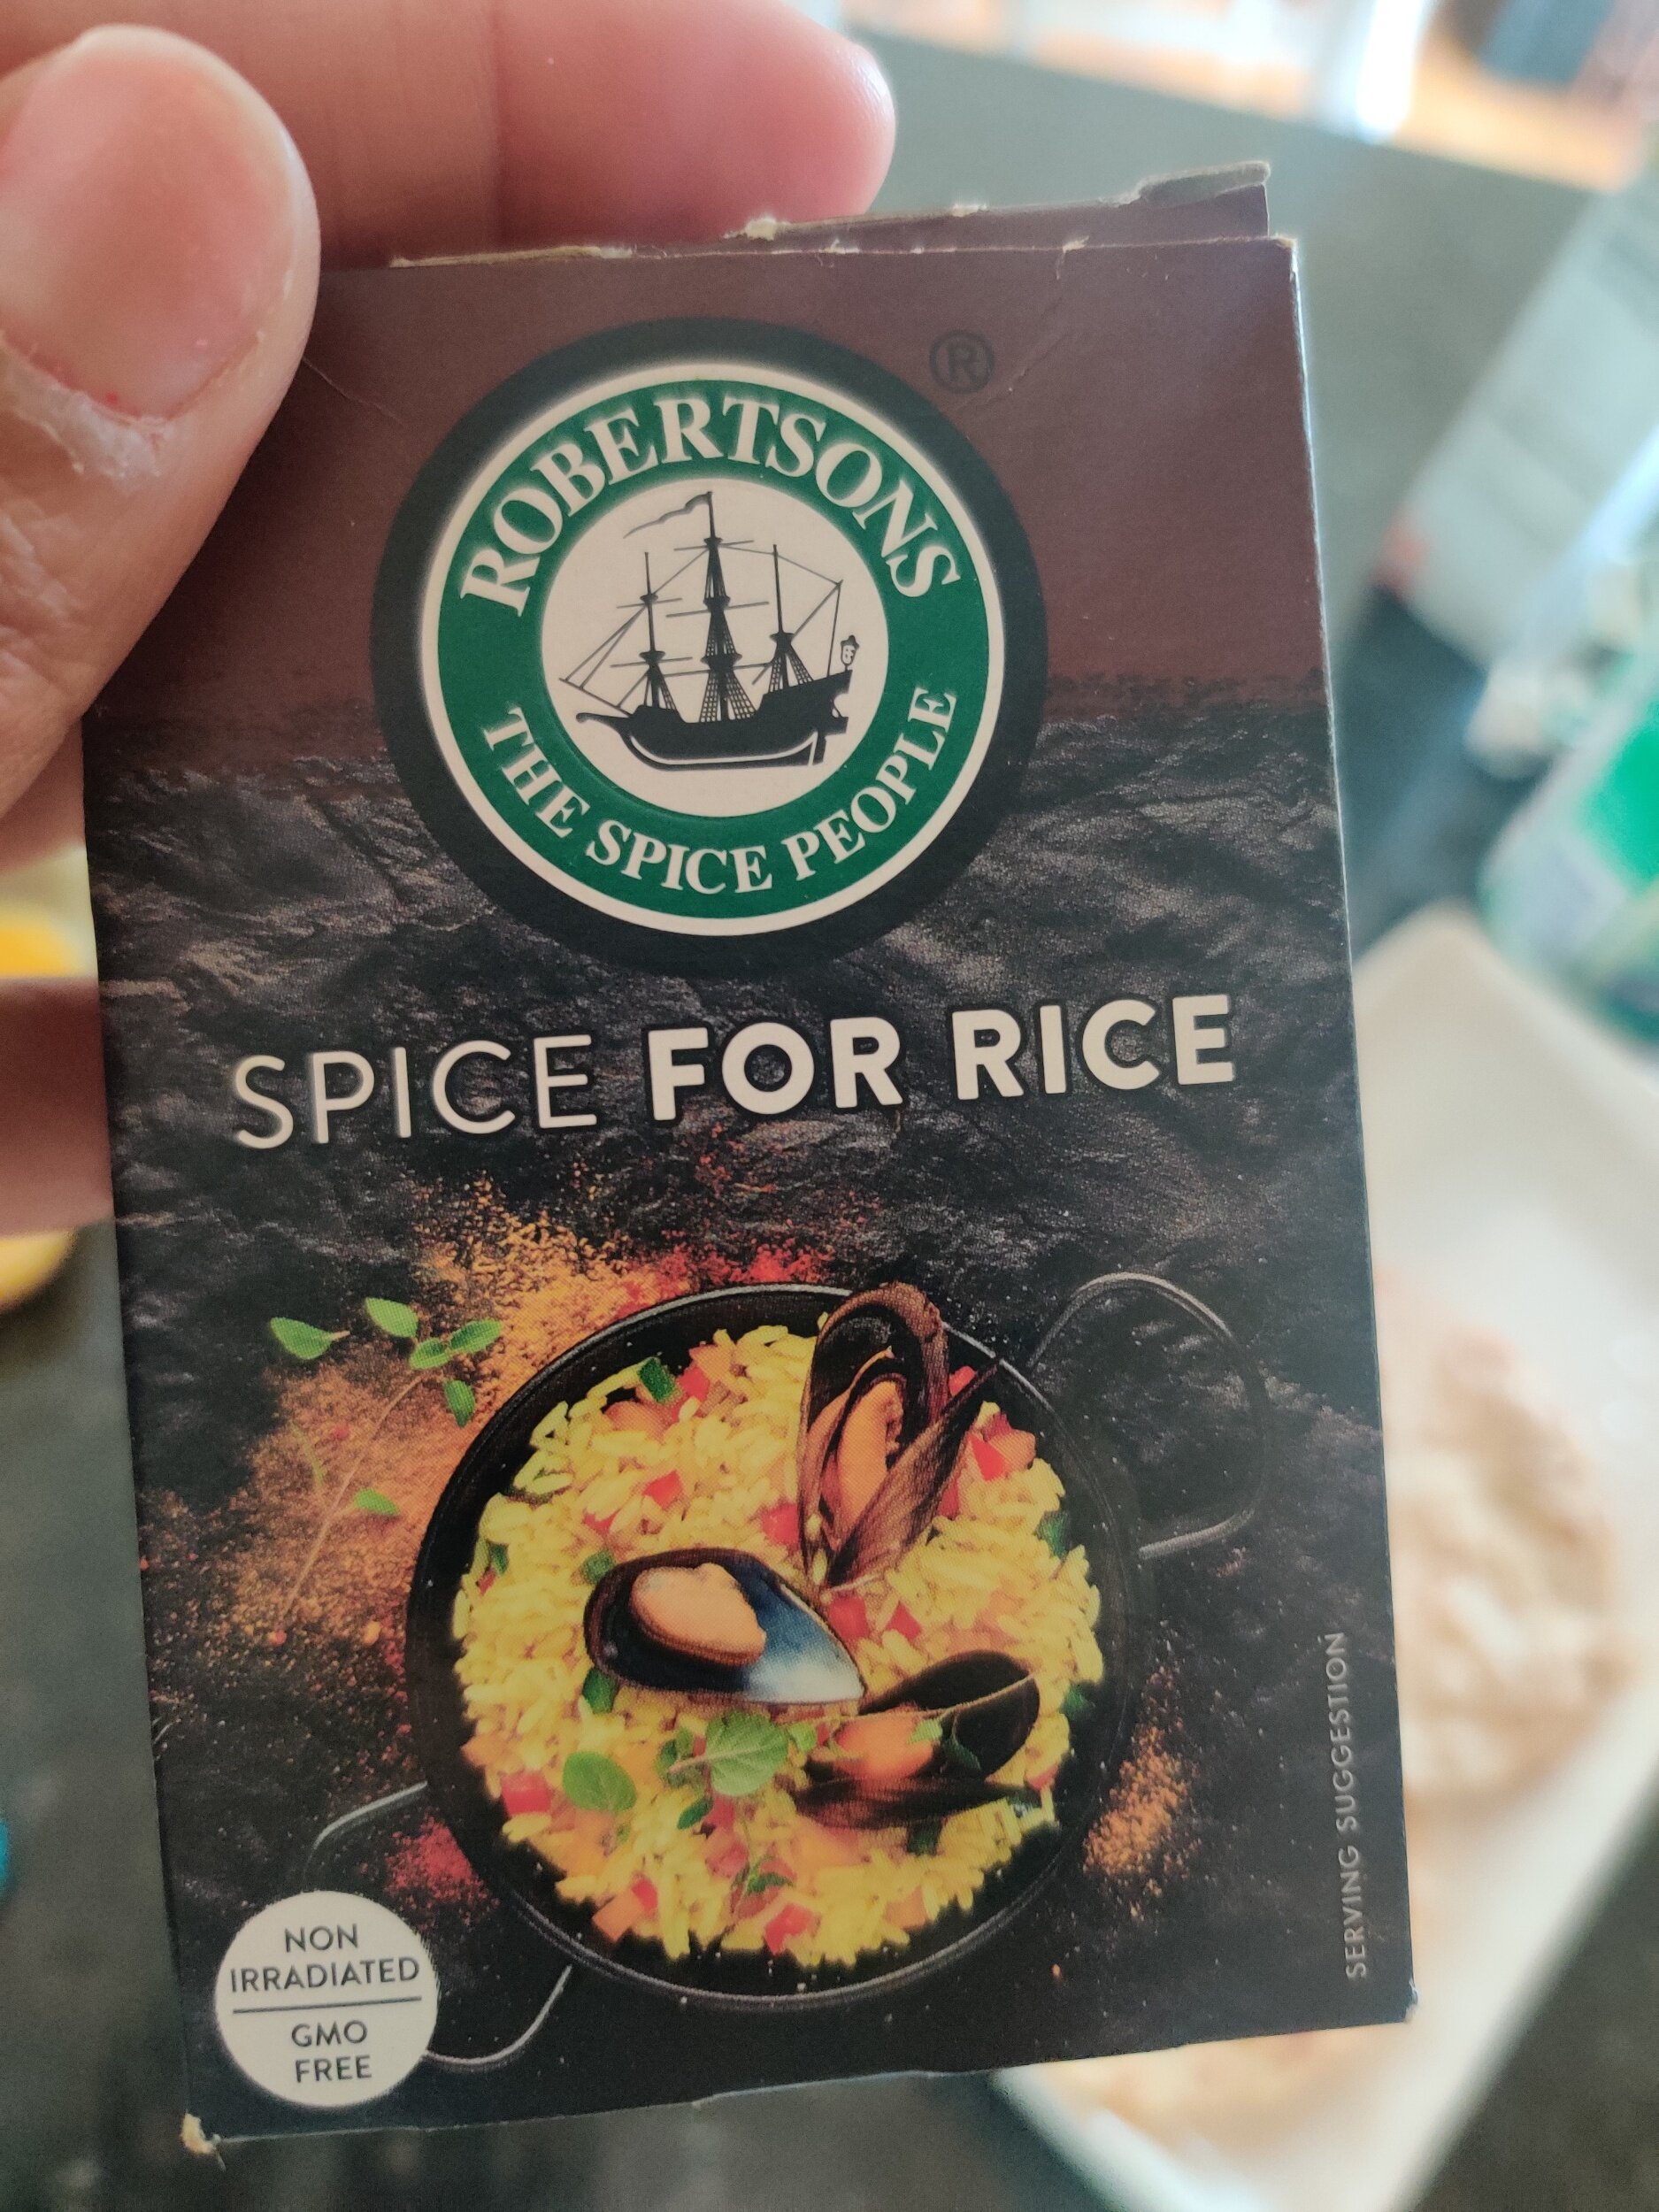
1 tablespoon spice for rice
1 teaspoon steak seasoning
3 taco flour tortillas
1/4 cup red cabbage, shredded
2 tablespoon corn
Cilantro
Limes
1 small thinly sliced radish
Feta cheese
Remoulade
Instructions
In a bowl, toss the cubed sweet potato with enough olive oil to coat with the first set of spices. Bake at 375F for about 25 minutes, turning/stirring once. Remove and set aside, don't overcook.
Slice avocado thickly, drizzle with lime juice.
Mix the breadcrumbs, parmesan, rice spice and steak seasoning. Drench the avocado in the egg, then the breadcrumb mix.
Coat the inside of an air fryer with cooking spray, and place each avocado piece separately. Spray with oil. Cool at 350 for 3 minutes on one side and 4 minutes after flipping. (You can also fry in a shallow pan of vegetable oil, then drain on paper towels).
In a non-stick pan, with some cooking spray, toast the tortillas until slightly crispy.
Assemble tacos with all your toppings and the feta and remoulade. Squeeze a bit of fresh lime over each taco. Enjoy!


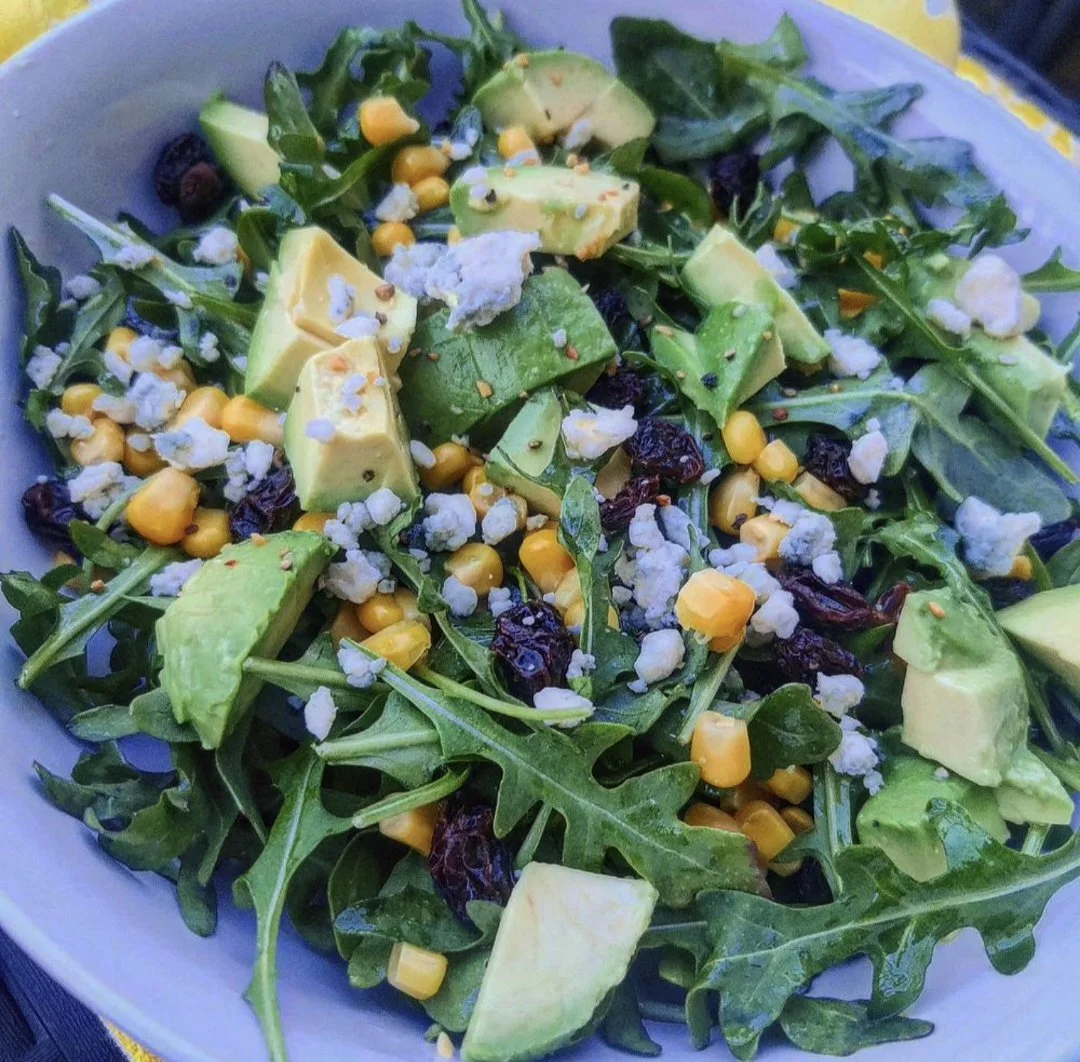
Corn, Arugula, and Avocado Salad with a Lemon Vinaigrette
Greens don’t always get the spotlight at brunch, but they should. While the table is often filled with pastries, eggs, and rich dishes, a fresh salad brings balance, something light, vibrant, and refreshing to cut through it all. It wakes up the palate and adds a bit of color to the spread, especially during the warmer months.
This Corn, Arugula, and Avocado Salad is simple but full of contrast. Peppery arugula is paired with sweet corn, creamy avocado, tangy blue cheese, and a touch of sweetness from raisins, all brought together with a bright lemon-thyme vinaigrette. It’s the kind of dish that quietly rounds out the table but ends up being one people keep going back to.
Perfect for sharing, it’s an easy way to bring something fresh and seasonal into your brunch rotation.

Corn, Arugula, and Avocado Salad with Lemon Vinaigrette
A bright, fresh, salad that’s perfect for spring or a vibrant brunch table. Peppery arugula pairs with sweet corn, creamy avocado, tangy blue cheese, and chewy raisins, all tossed in a zesty lemon-thyme vinaigrette. Quick to assemble and packed with color and nutrients, this vegetarian salad makes a healthy, satisfying side or a light main.
Ingredients
- 1/2 cup freshly squeezed lemon juice (reduced slightly for balance)
- 2 tsp Dijon mustard
- 1 tsp black pepper
- 1 tsp salt
- 2 tsp fresh garlic, minced
- 1 tsp dried thyme
- 1 tsp fresh thyme
- 1 tsp balsamic vinegar
- 2 tsp honey
- Pinch chili flakes (optional)
- 1/3 cup olive oil (important for balance + body)
- 8–10 cups arugula (6–8 handfuls)
- 1 cup corn (fresh, roasted, or canned)
- 3 tbsp blue cheese, crumbled
- 2–3 tbsp raisins
- 1–2 large avocados, cubed
- ¼ cup walnuts or pecans, toasted and chopped (optional but recommended)
Instructions
- In a jar or bowl, combine lemon juice, Dijon mustard, garlic, thyme, balsamic vinegar, honey, salt, pepper, and chili flakes.
- Slowly whisk or shake in the olive oil until emulsified. Set aside.
- Add arugula to a large serving bowl. Scatter corn, blue cheese, raisins, and toasted nuts evenly over the greens.
- Cube the avocado and toss lightly with a squeeze of lemon to prevent browning. Add to the salad.
- Drizzle vinaigrette over the salad just before serving and toss gently to coat. Serve immediately.
Notes
- Don’t overdress, start light, then add more if needed
- Add avocado last to keep it fresh
- Toasting nuts equals big flavor upgrade (2–3 mins in a dry pan)
Nutrition Facts
Calories
145Fat (grams)
10 gSat. Fat (grams)
2 gCarbs (grams)
12 gFiber (grams)
4 gSugar (grams)
4 gProtein (grams)
3 gI am not a certified nutritionist and any nutritional information on dontmissmyplate.com should only be used as a general guideline.

Cauliflower Piccata
Is cauliflower underrated? Yes, and I think part of the reason is its association with broccoli, which many people don't like-- probably because they haven't had it cooked right! Strictly boiled is a terrible idea; generally, I recommend it roasted with parmesan, garlic, salt, and black pepper.
I'm sure you've seen cauliflower served in a variety of ways on restaurant menus. I'm talking cauliflower steak, rice, or soup to name a few.
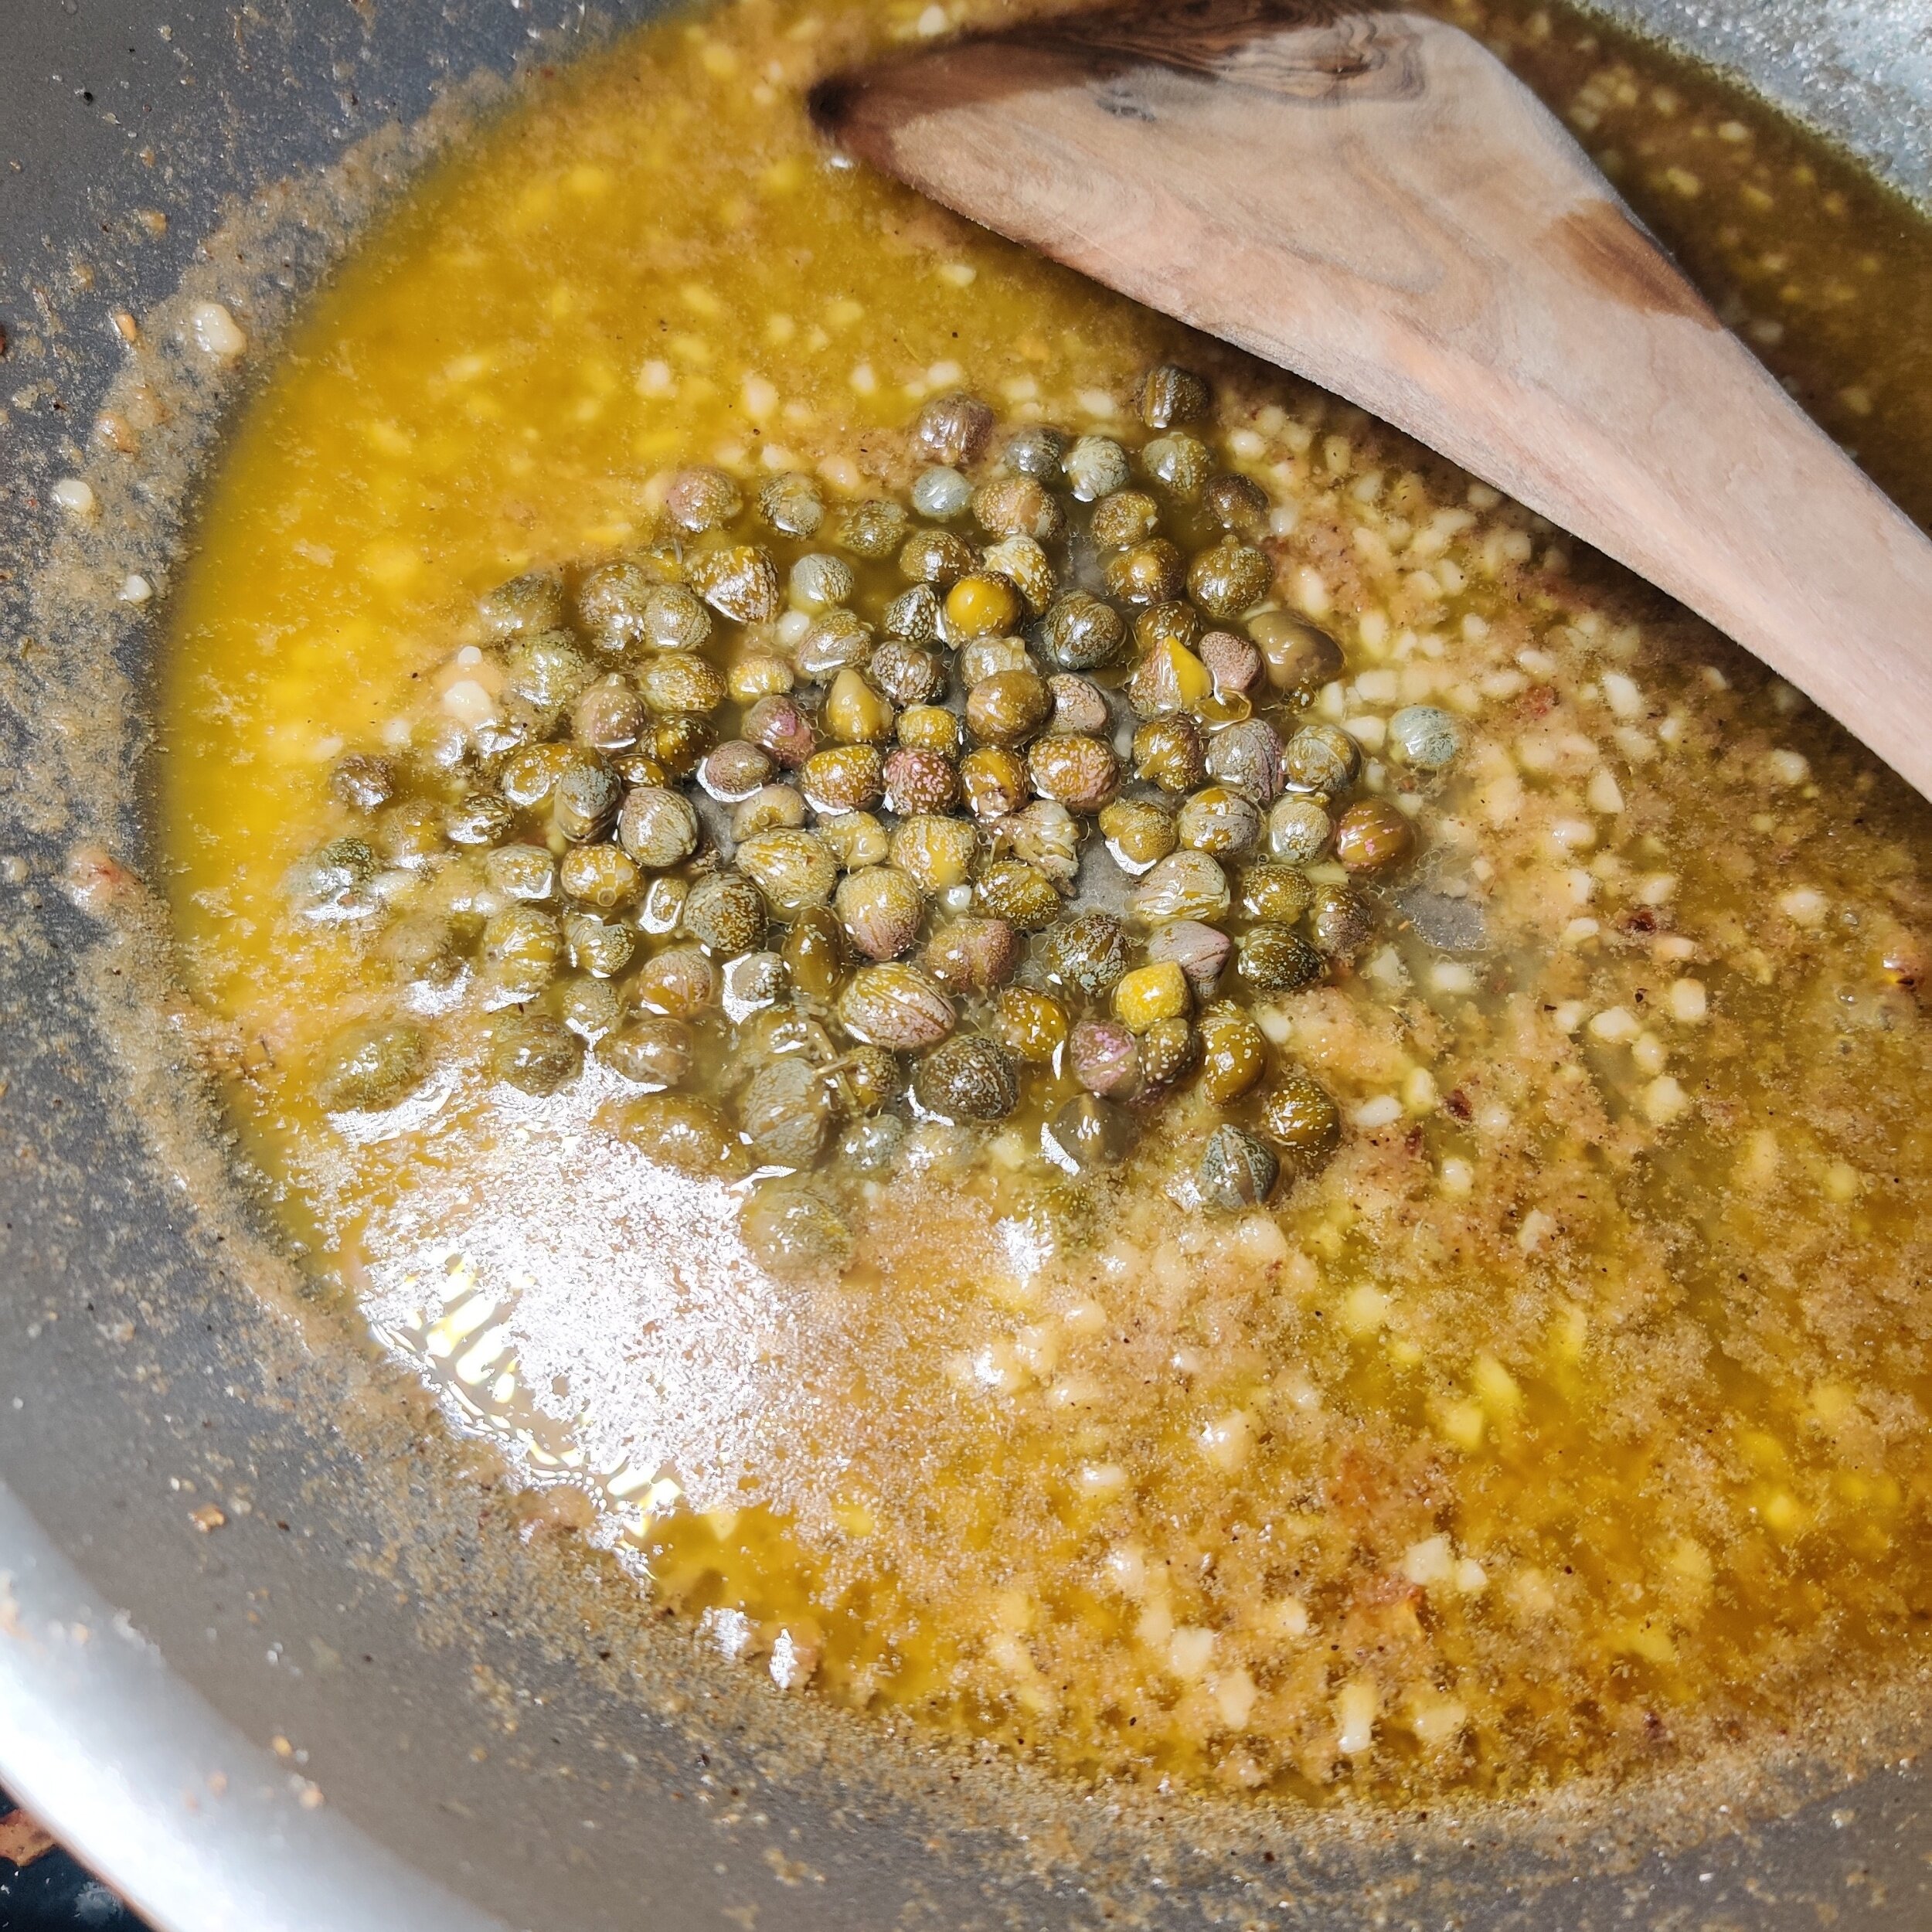
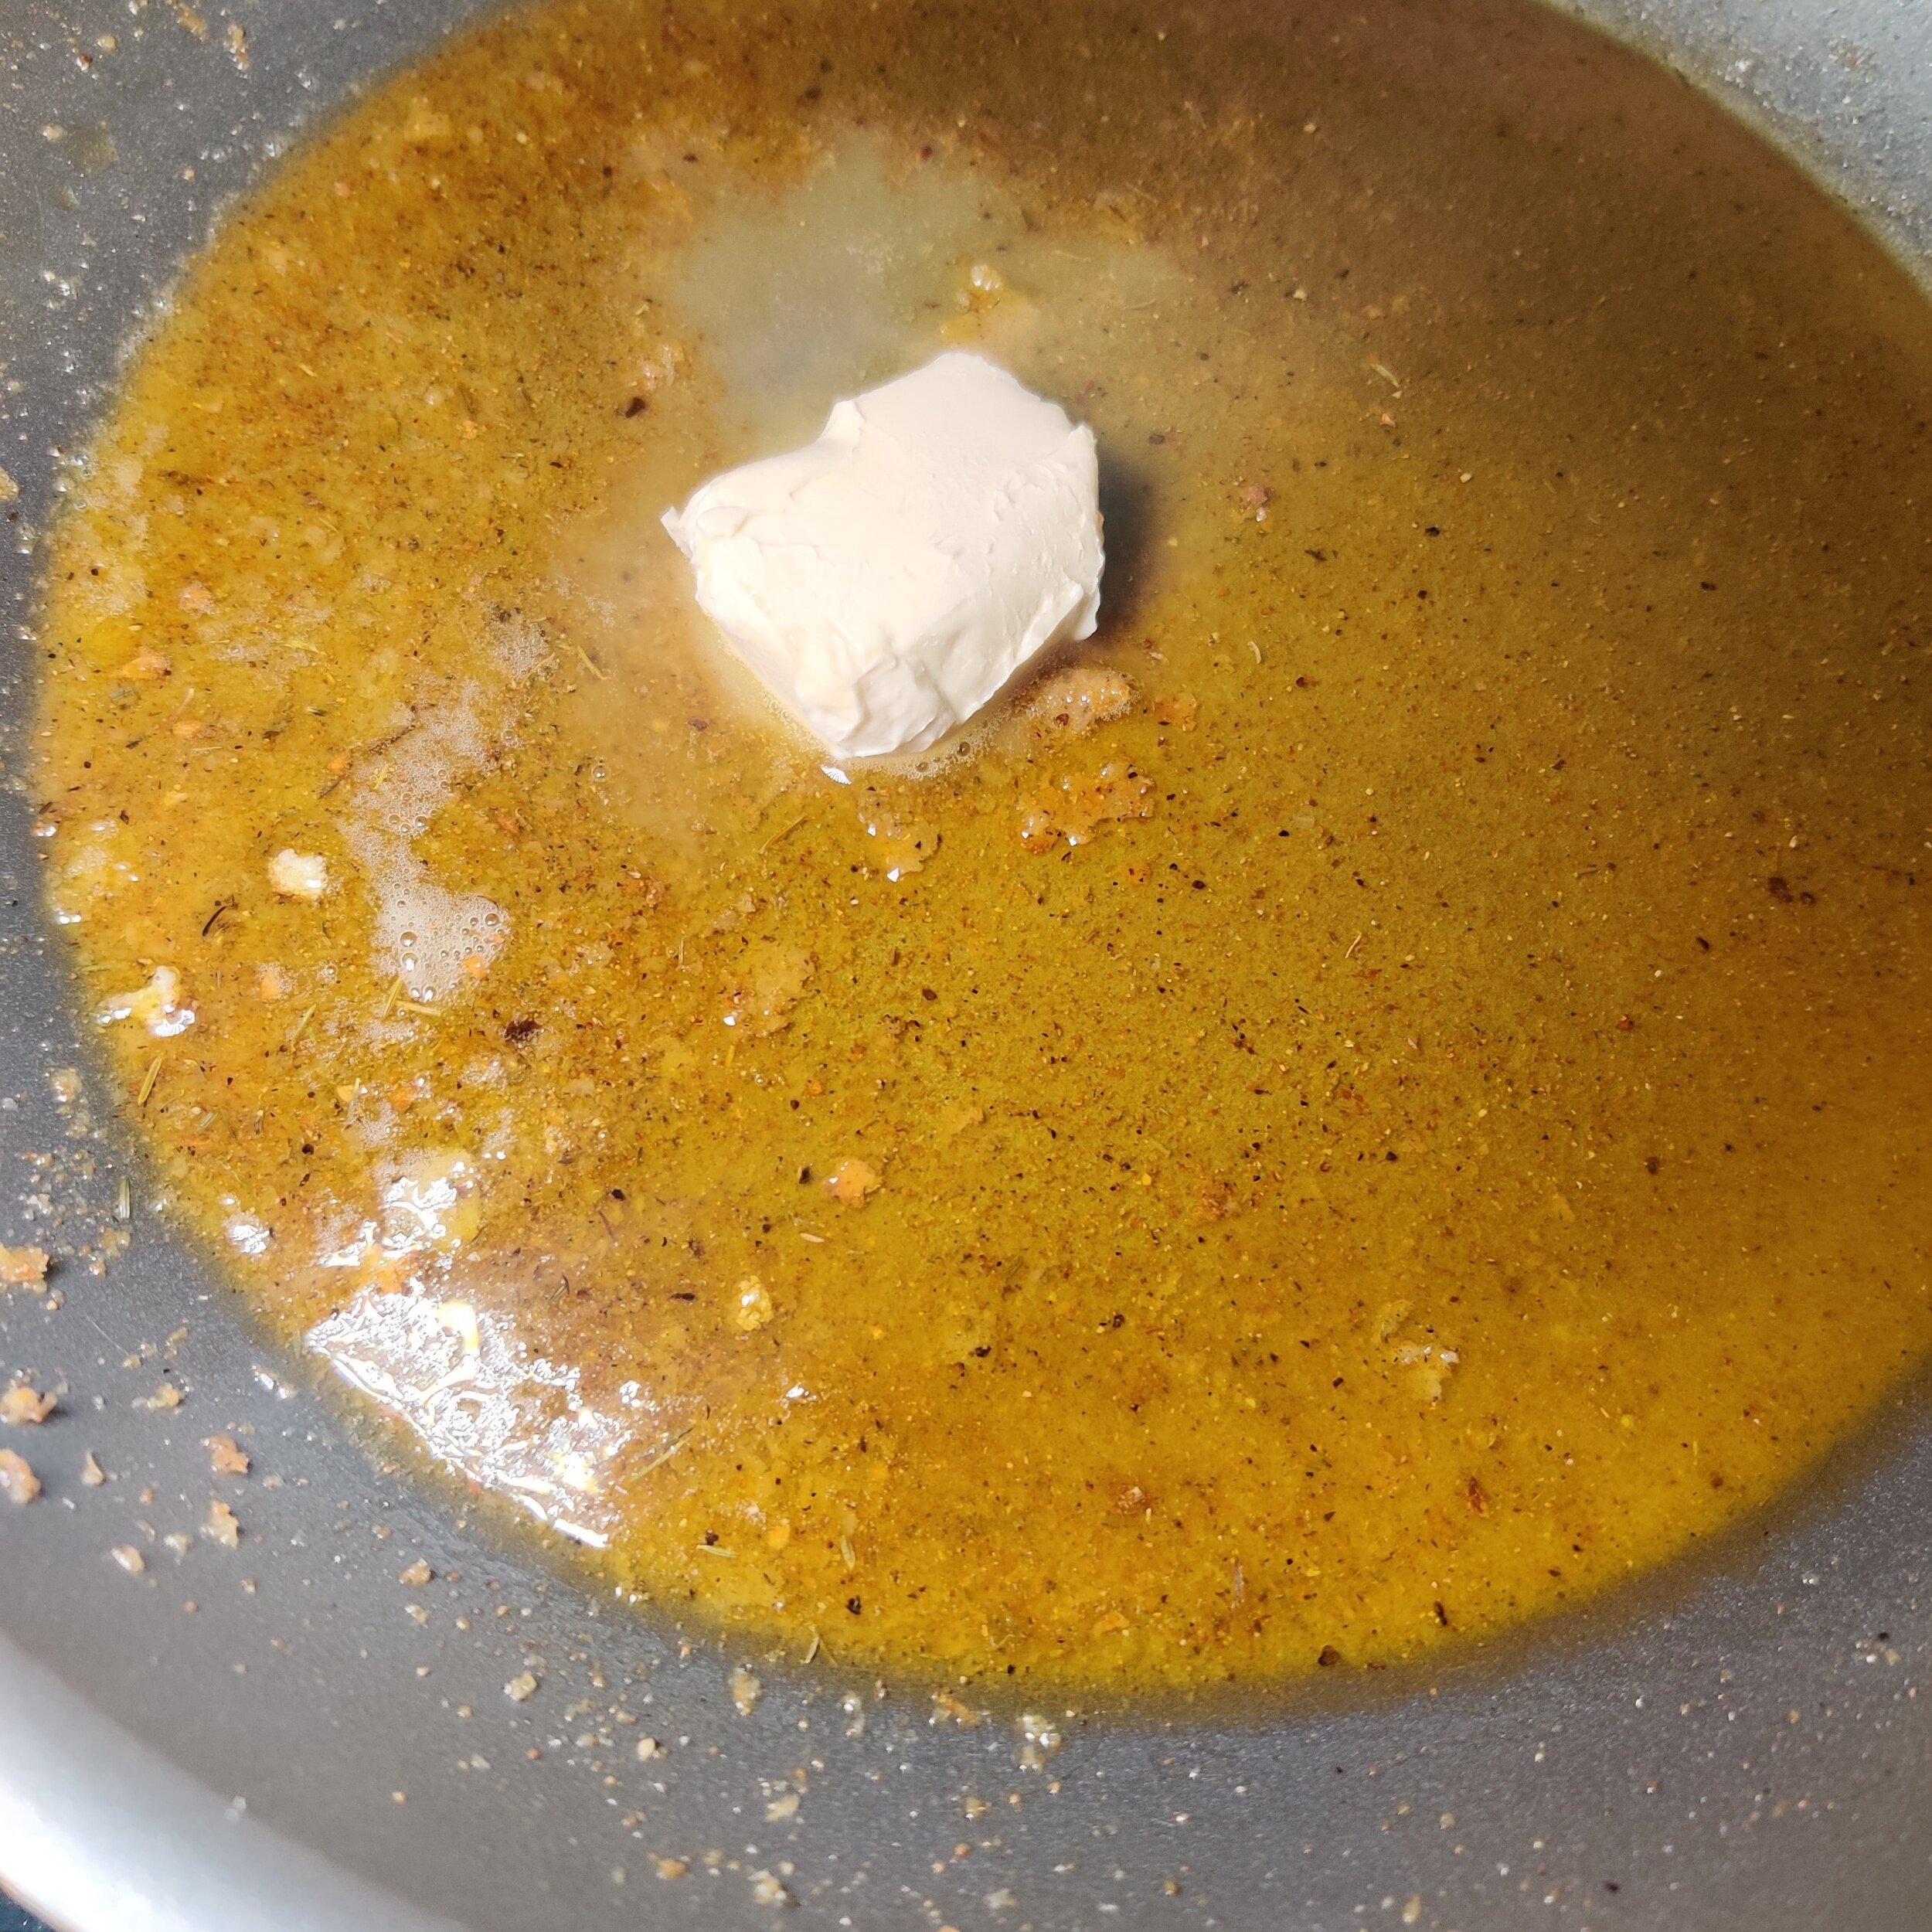
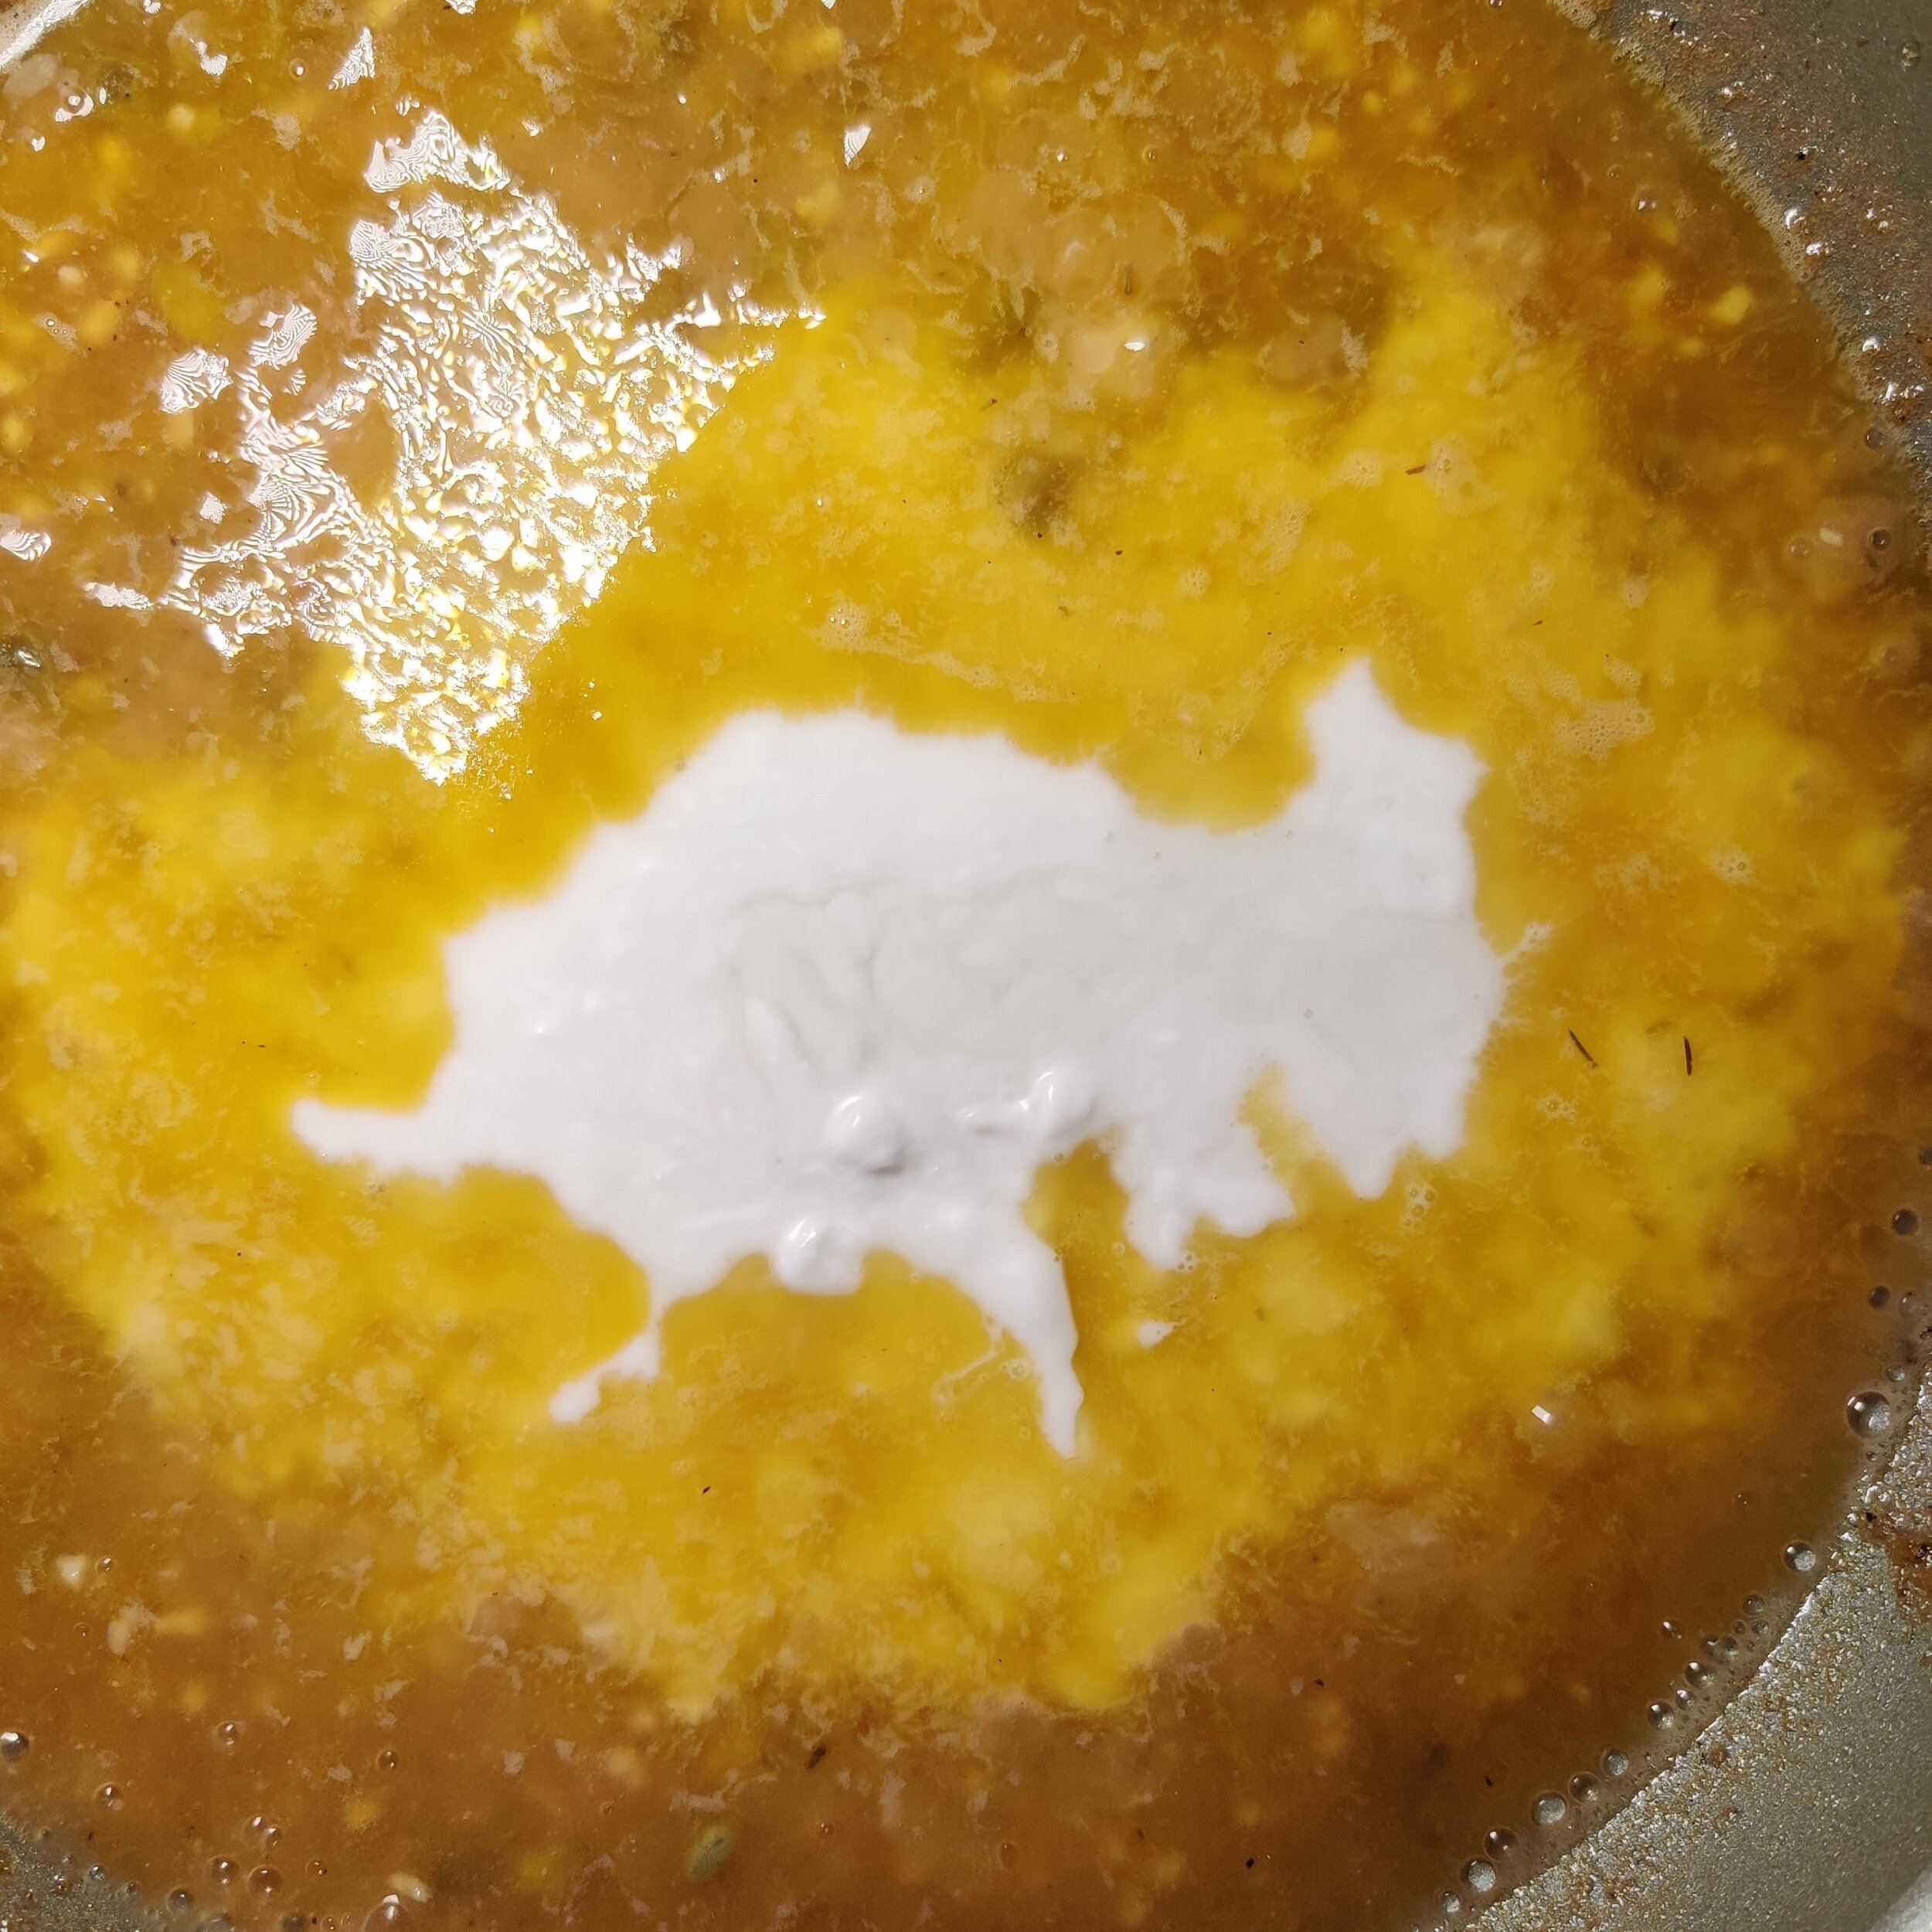
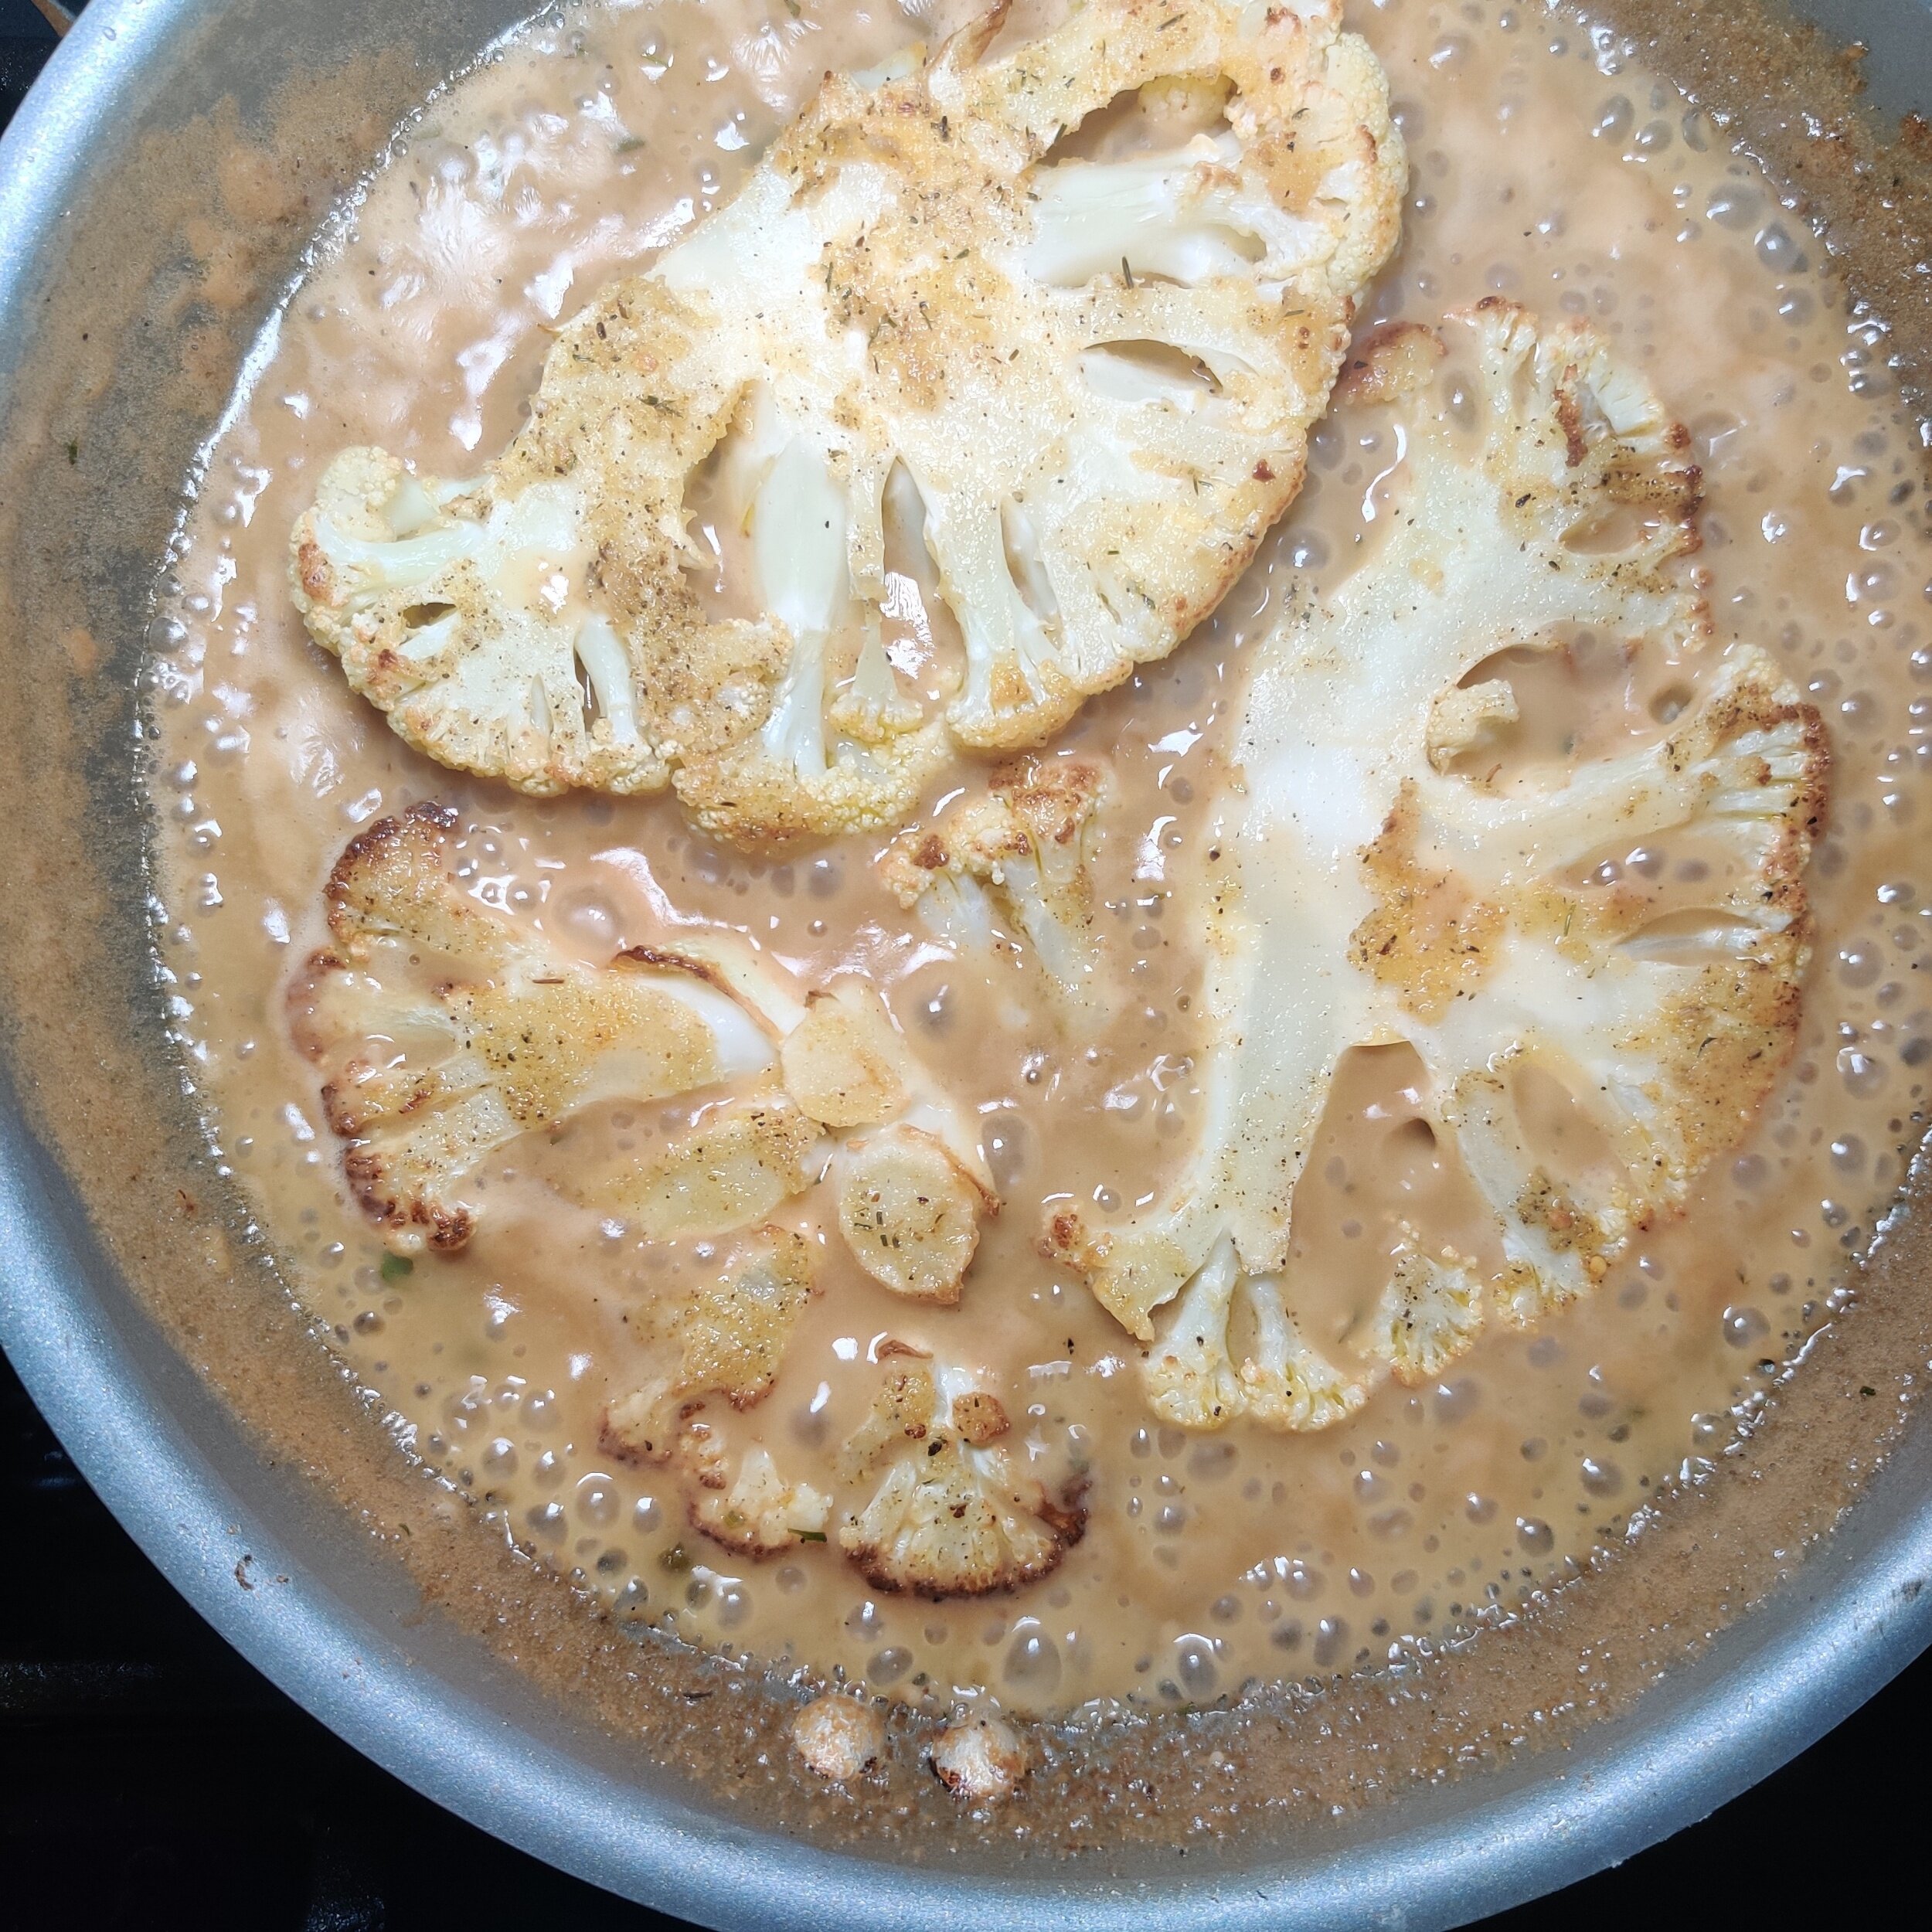
This recipe, of course, treats the vegetable like a piece of butterflied, flattened chicken breast (or veal, actually) to make the classic Italian piccata. The dish combines capers and lemon juice with heavy cream (I used coconut to make it vegan), white wine, fresh parsley, garlic, and butter which brings everything together.
You can eat it as is Secondo style or with some hot pasta!
Ingredients
1 large cauliflower head (you will likely have a some individual florets left over)
2 tablespoons capers
1/4 - 1/3 cup olive oil
1 tablespoon butter
1/2 teaspoon salt
1 teaspoon black pepper
2 teaspoons garlic powder
1/2 cup flour (more or less depending on what you need to drench the cauliflower)
1 tablespoon steak seasoning
1/3 cup white wine
2-3 tablespoons lemon juice + slices to garnish
1-1 1/2 cups vegetable broth (depending on how saucy you want the dish)
2 teaspoons garlic, minced
Cooking spray
2-3 tablespoons fresh parsley, chopped
5 ounces coconut cream


Instructions
Remove the leaves and stem from the cauliflower head and cut lengthwise into 1/2-1 inch slices - you want them thick enough to not break down while cooking, but not too thick. 1 large head will give you 3-4 slices; you can keep the extra florets for another recipe. Make sure the cauliflower is dry so that it does not become soggy!
Season the cauliflower with 1 teaspoon garlic powder, salt, and black pepper.
Season the flour with the steak seasoning and 1 teaspoon garlic, mix well. Drench the cauliflower slices one by one, set aside.
Pour the olive oil into the nonstick pan until the entire surface is covered (you can adjust accordingly) and turn the heat to medium-high.
Add the cauliflower slices to the pan and cook for 2-3 minutes, cooking each side until golden. Remove from the pan.
Add the butter to the remaining oil and melt, and deglaze with the white wine, cook for about 1 minute. Add the garlic and capers, cook for about 2 minutes.
Follow this with the lemon and broth, then simmer for about 5 minutes (you can reduce the heat if necessary).
Mix in the coconut cream and stir; the mixture should start to thicken—if too watery, add 1/2 teaspoon of flour. Add the cauliflower back to the pan and cook on both sides for 1 minute each (you don’t want to overcook though!), and make sure you flip over the cauliflower slices gently to prevent them from breaking down.
Sprinkle with fresh parsley and gently shake the pan to distribute the sauce and herbs.
Remove from heat and serve hot with extra capers and lemon slices - I used limes because that's what I had! Serves 2.


Asparagus, Snap Pea, and Blue Cheese Galette
Another galette just in time for spring! Coming out of a snow-filled, bitterly cold winter, the change in weather and daylight hours could not have come at a better time. This isn't just because I prefer the sun and greenery, but because the season welcomes a new set of ingredients that brighten up your plates and make people more aware of what they are eating in some ways. Winter has a lot to offer, but I'm excited for this new chapter and recipes we can make together!
Galettes, which I have praised for many reasons before, are a perfect way to celebrate the slew of returning vegetables and fruits. I have several across the seasons on this website you can try out, including the Tomato, Thyme and Cheese, the Pumpkin, Caramelized Onion, the Blackberry, Mint and Ricotta, and the Cheesy Mushroom Galette with Ricotta and Gruyere.
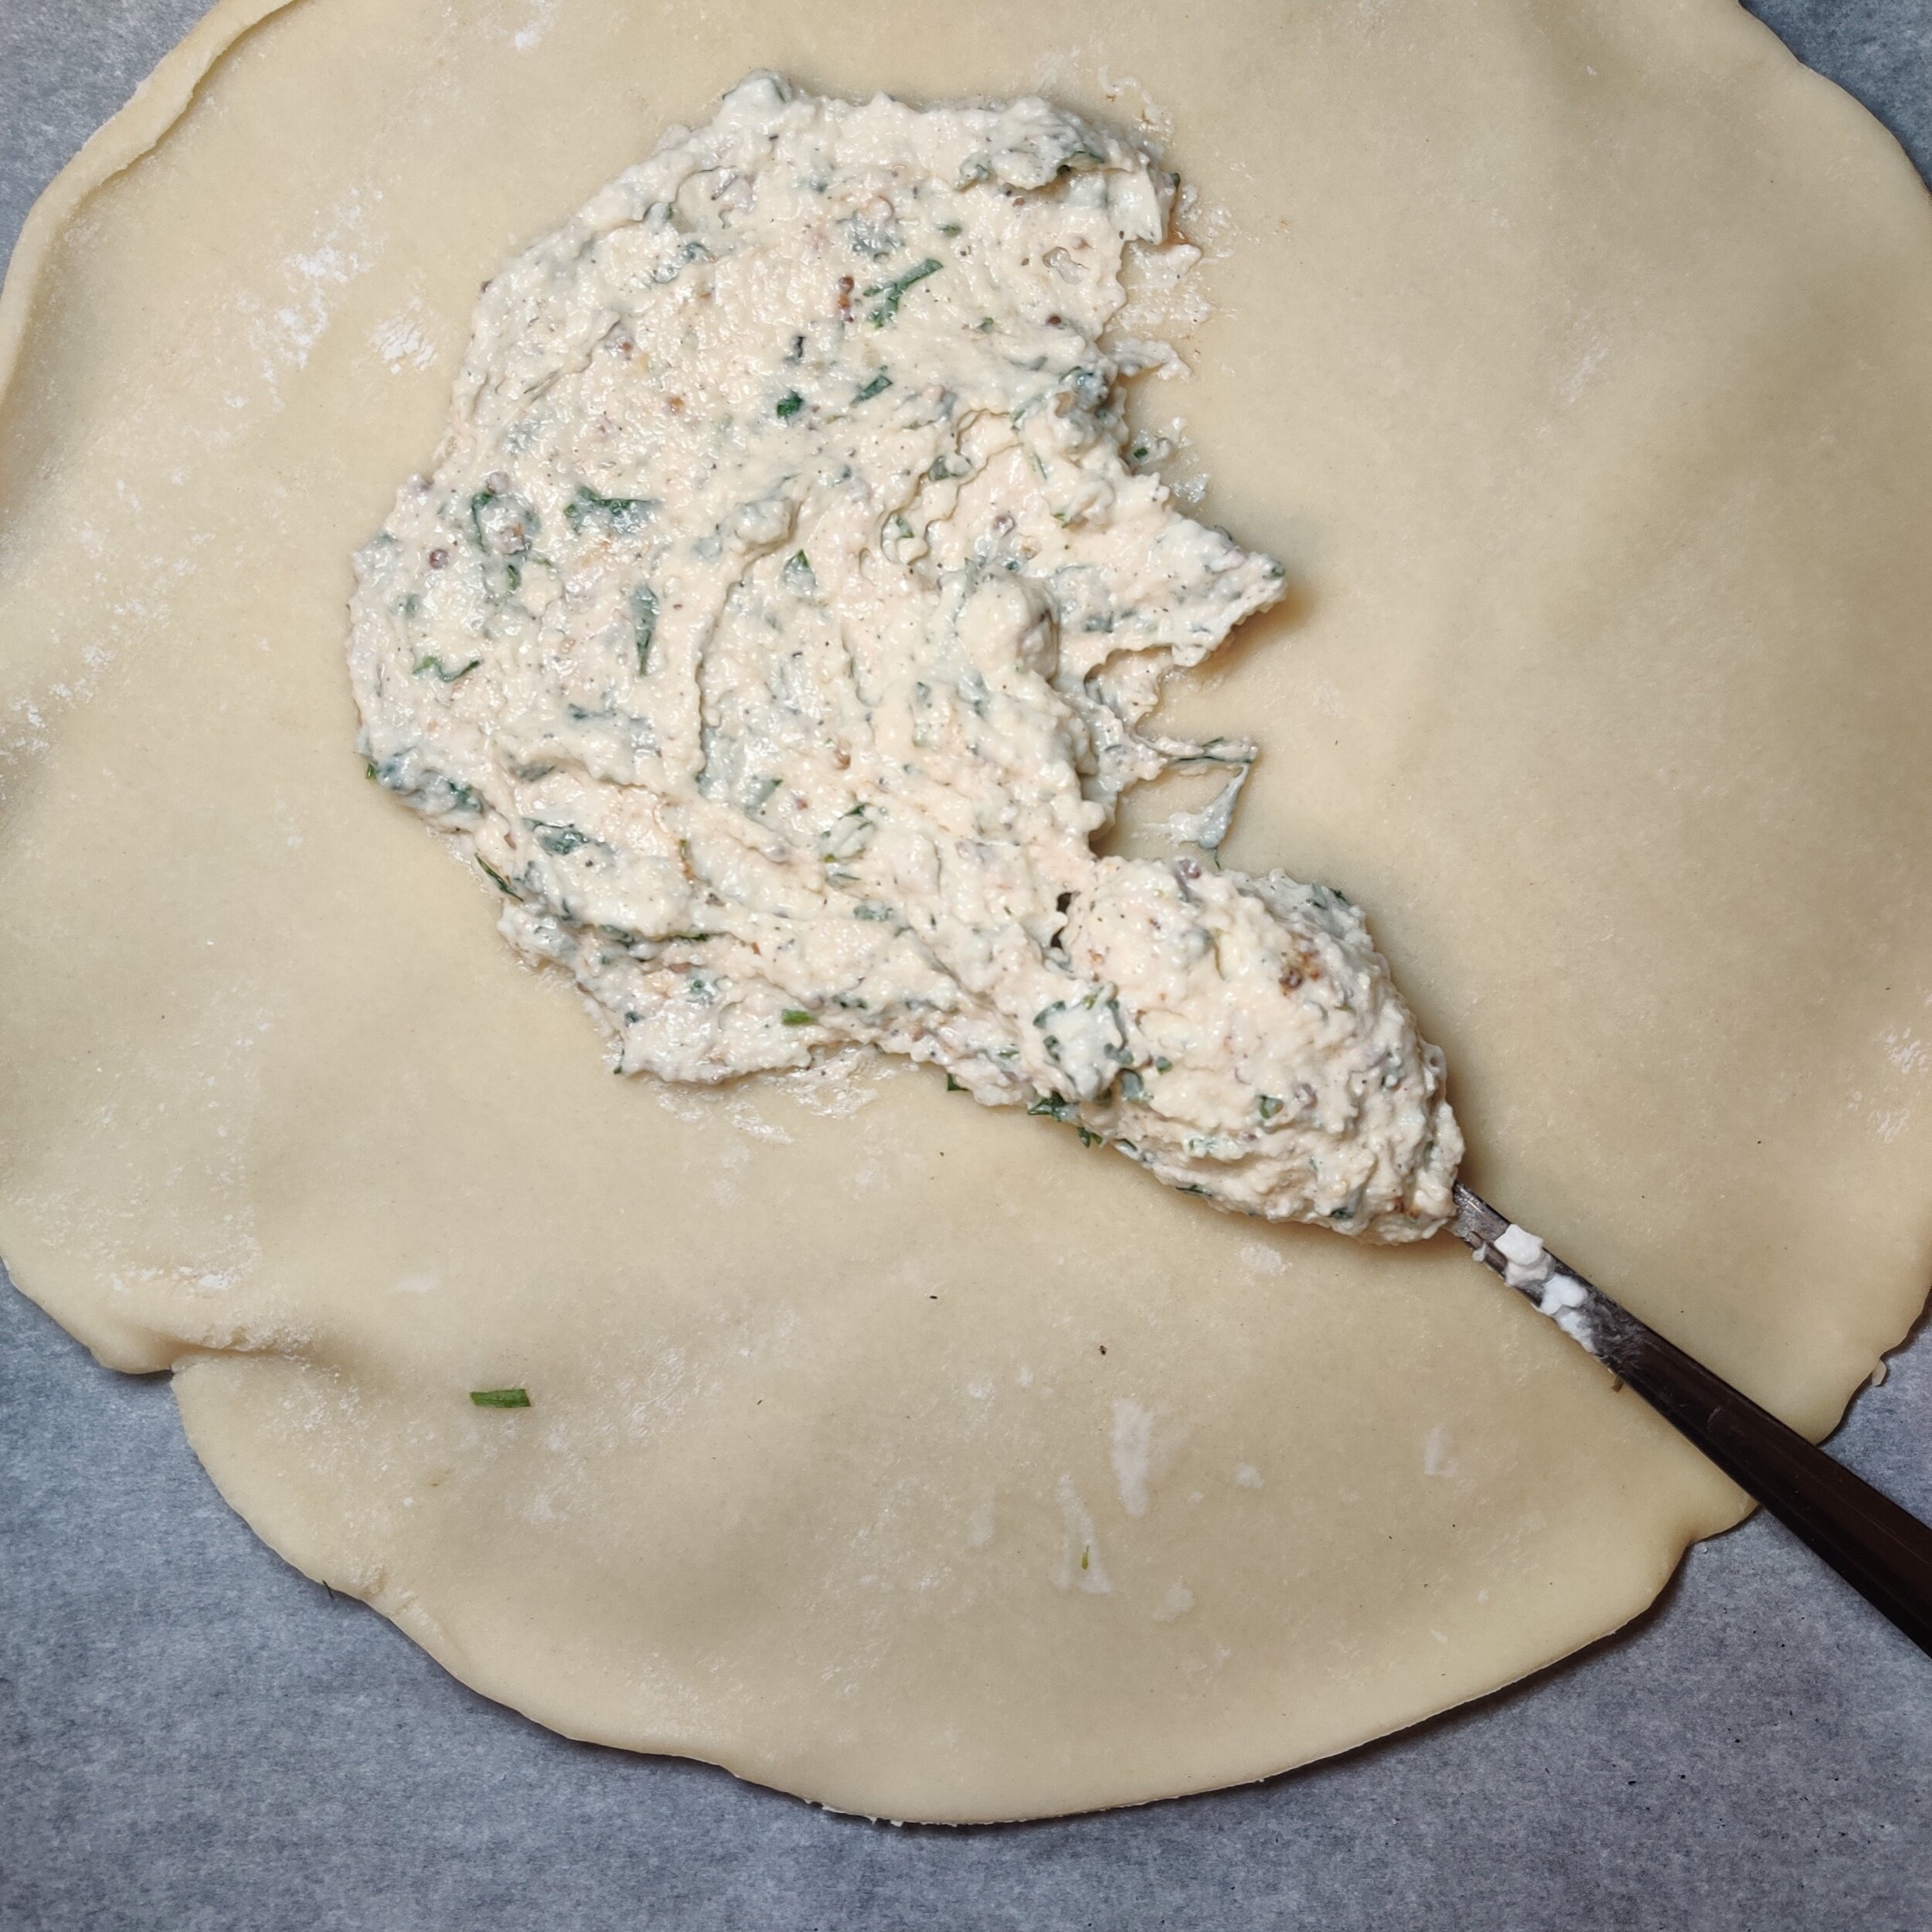
This galette, like the others, is a quick, easy, and ideal solution if you have extra greens lying around - although fresh is king!
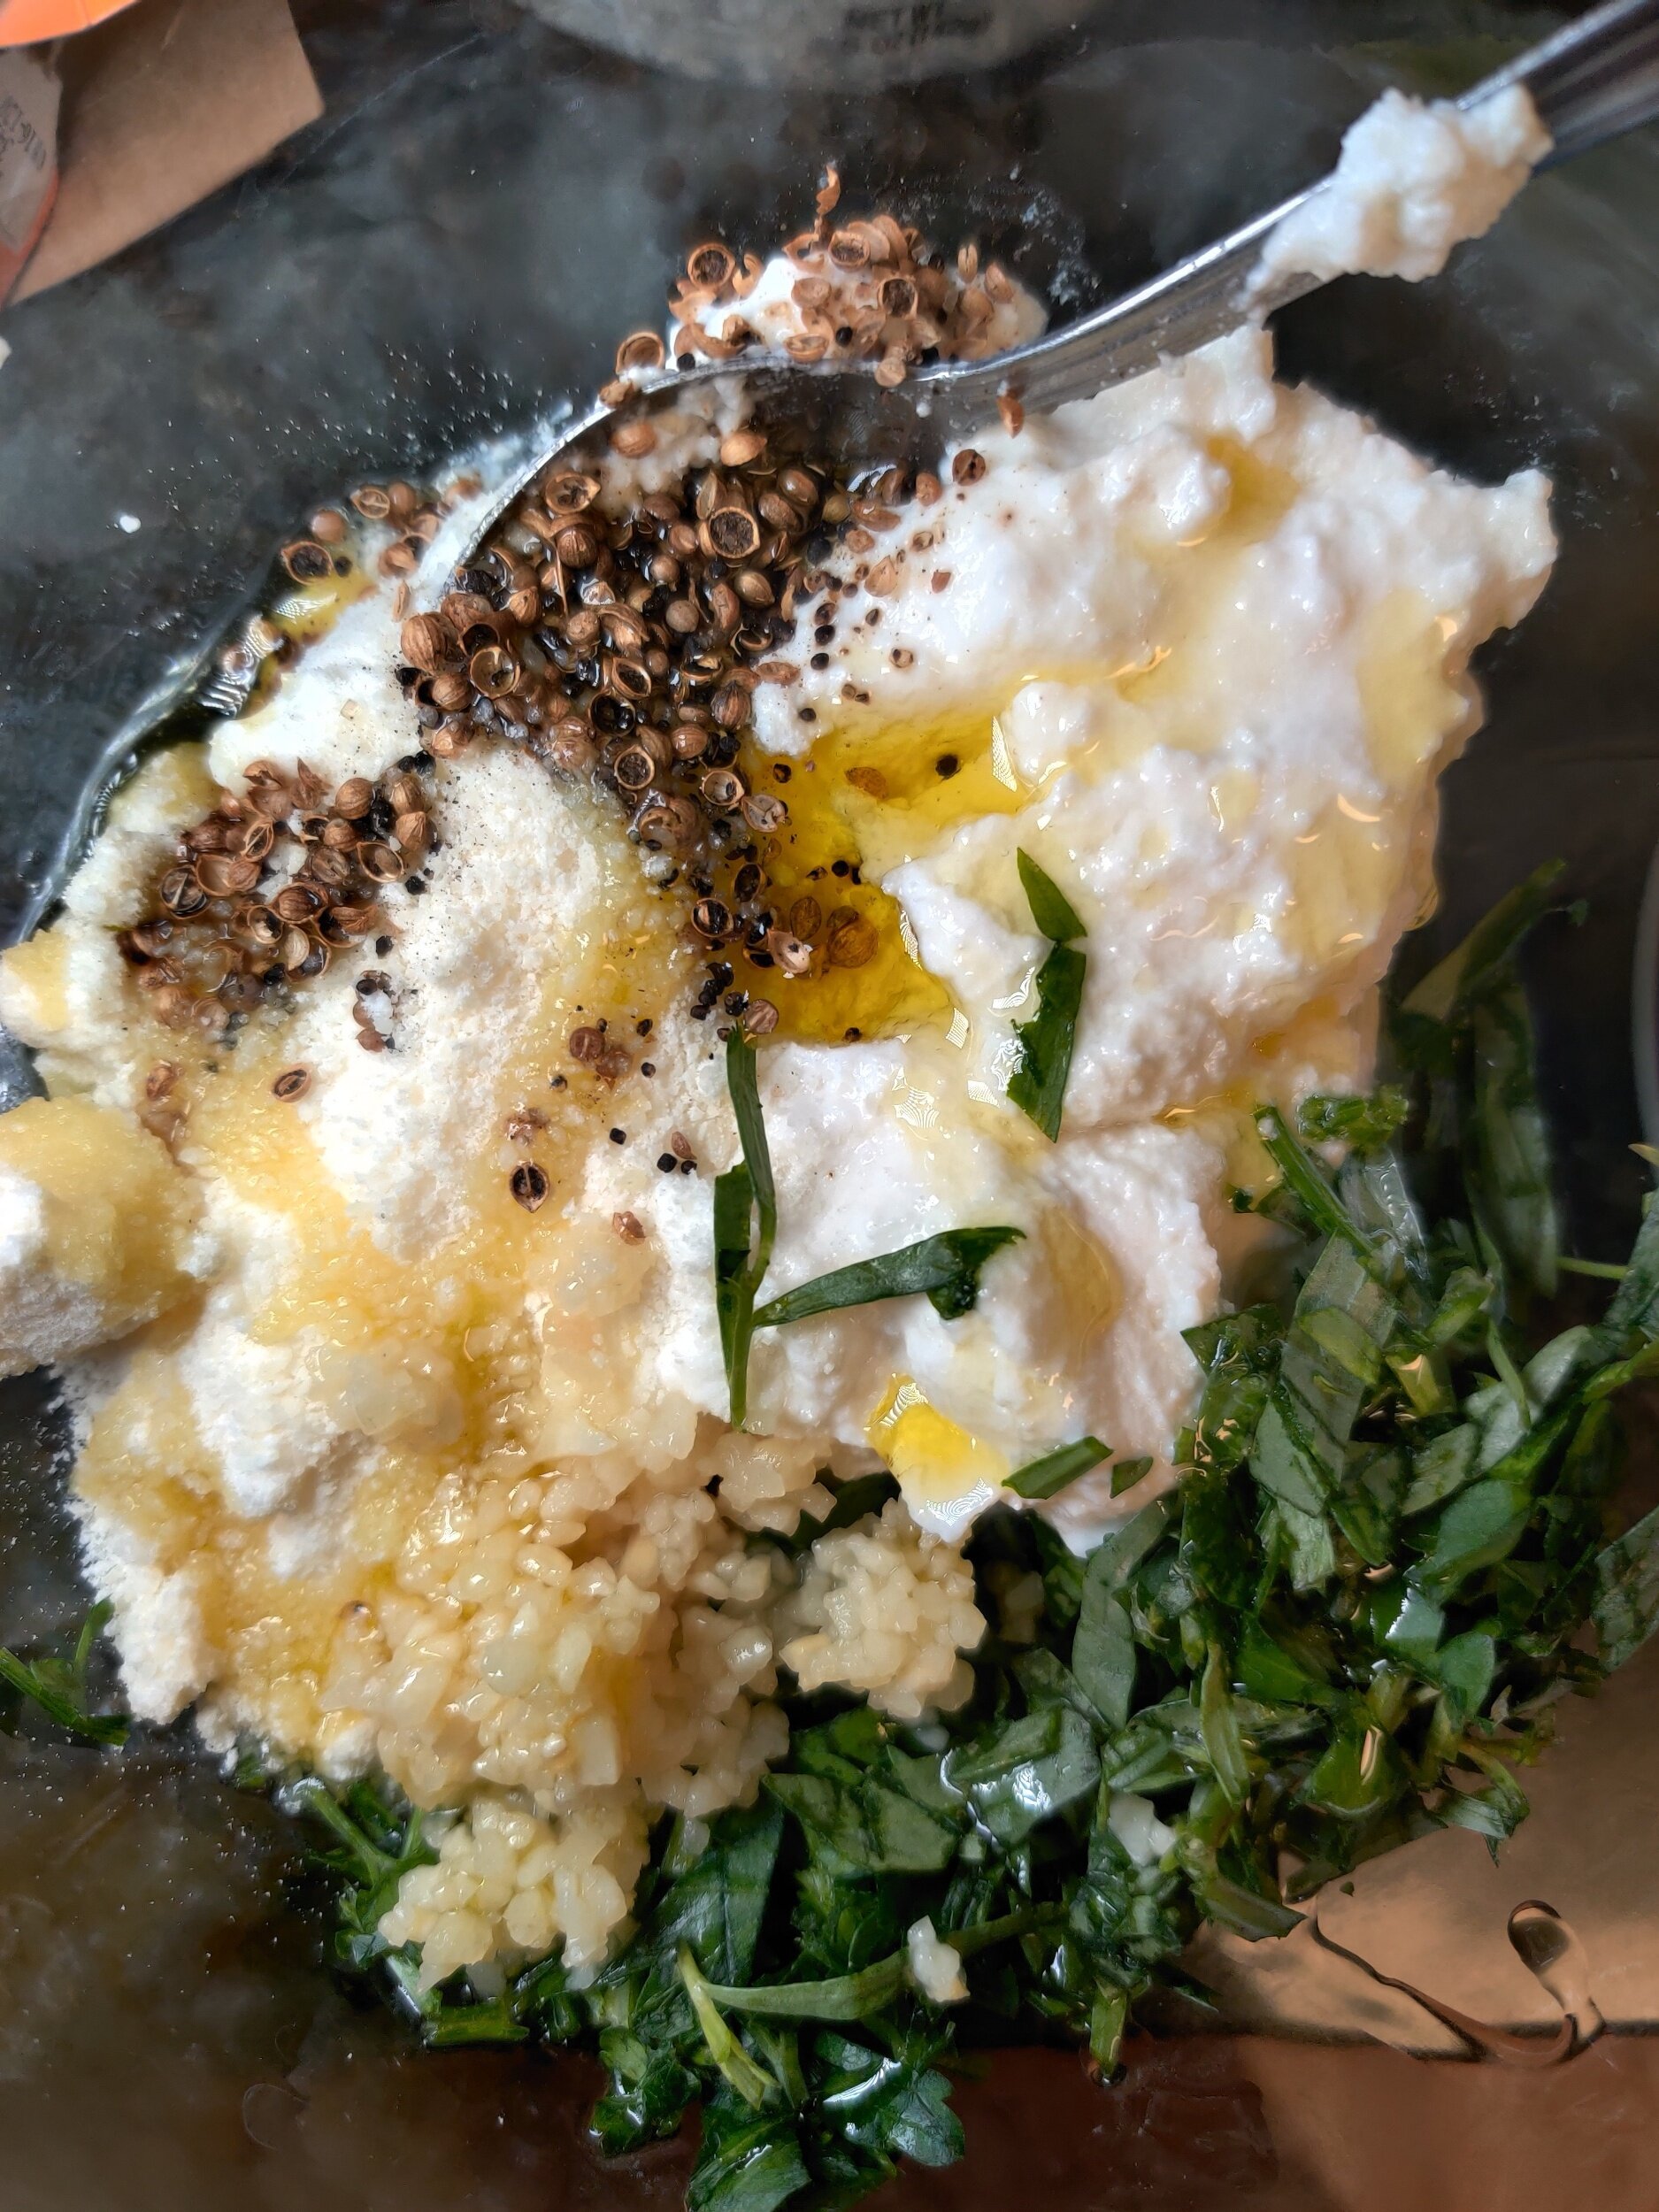
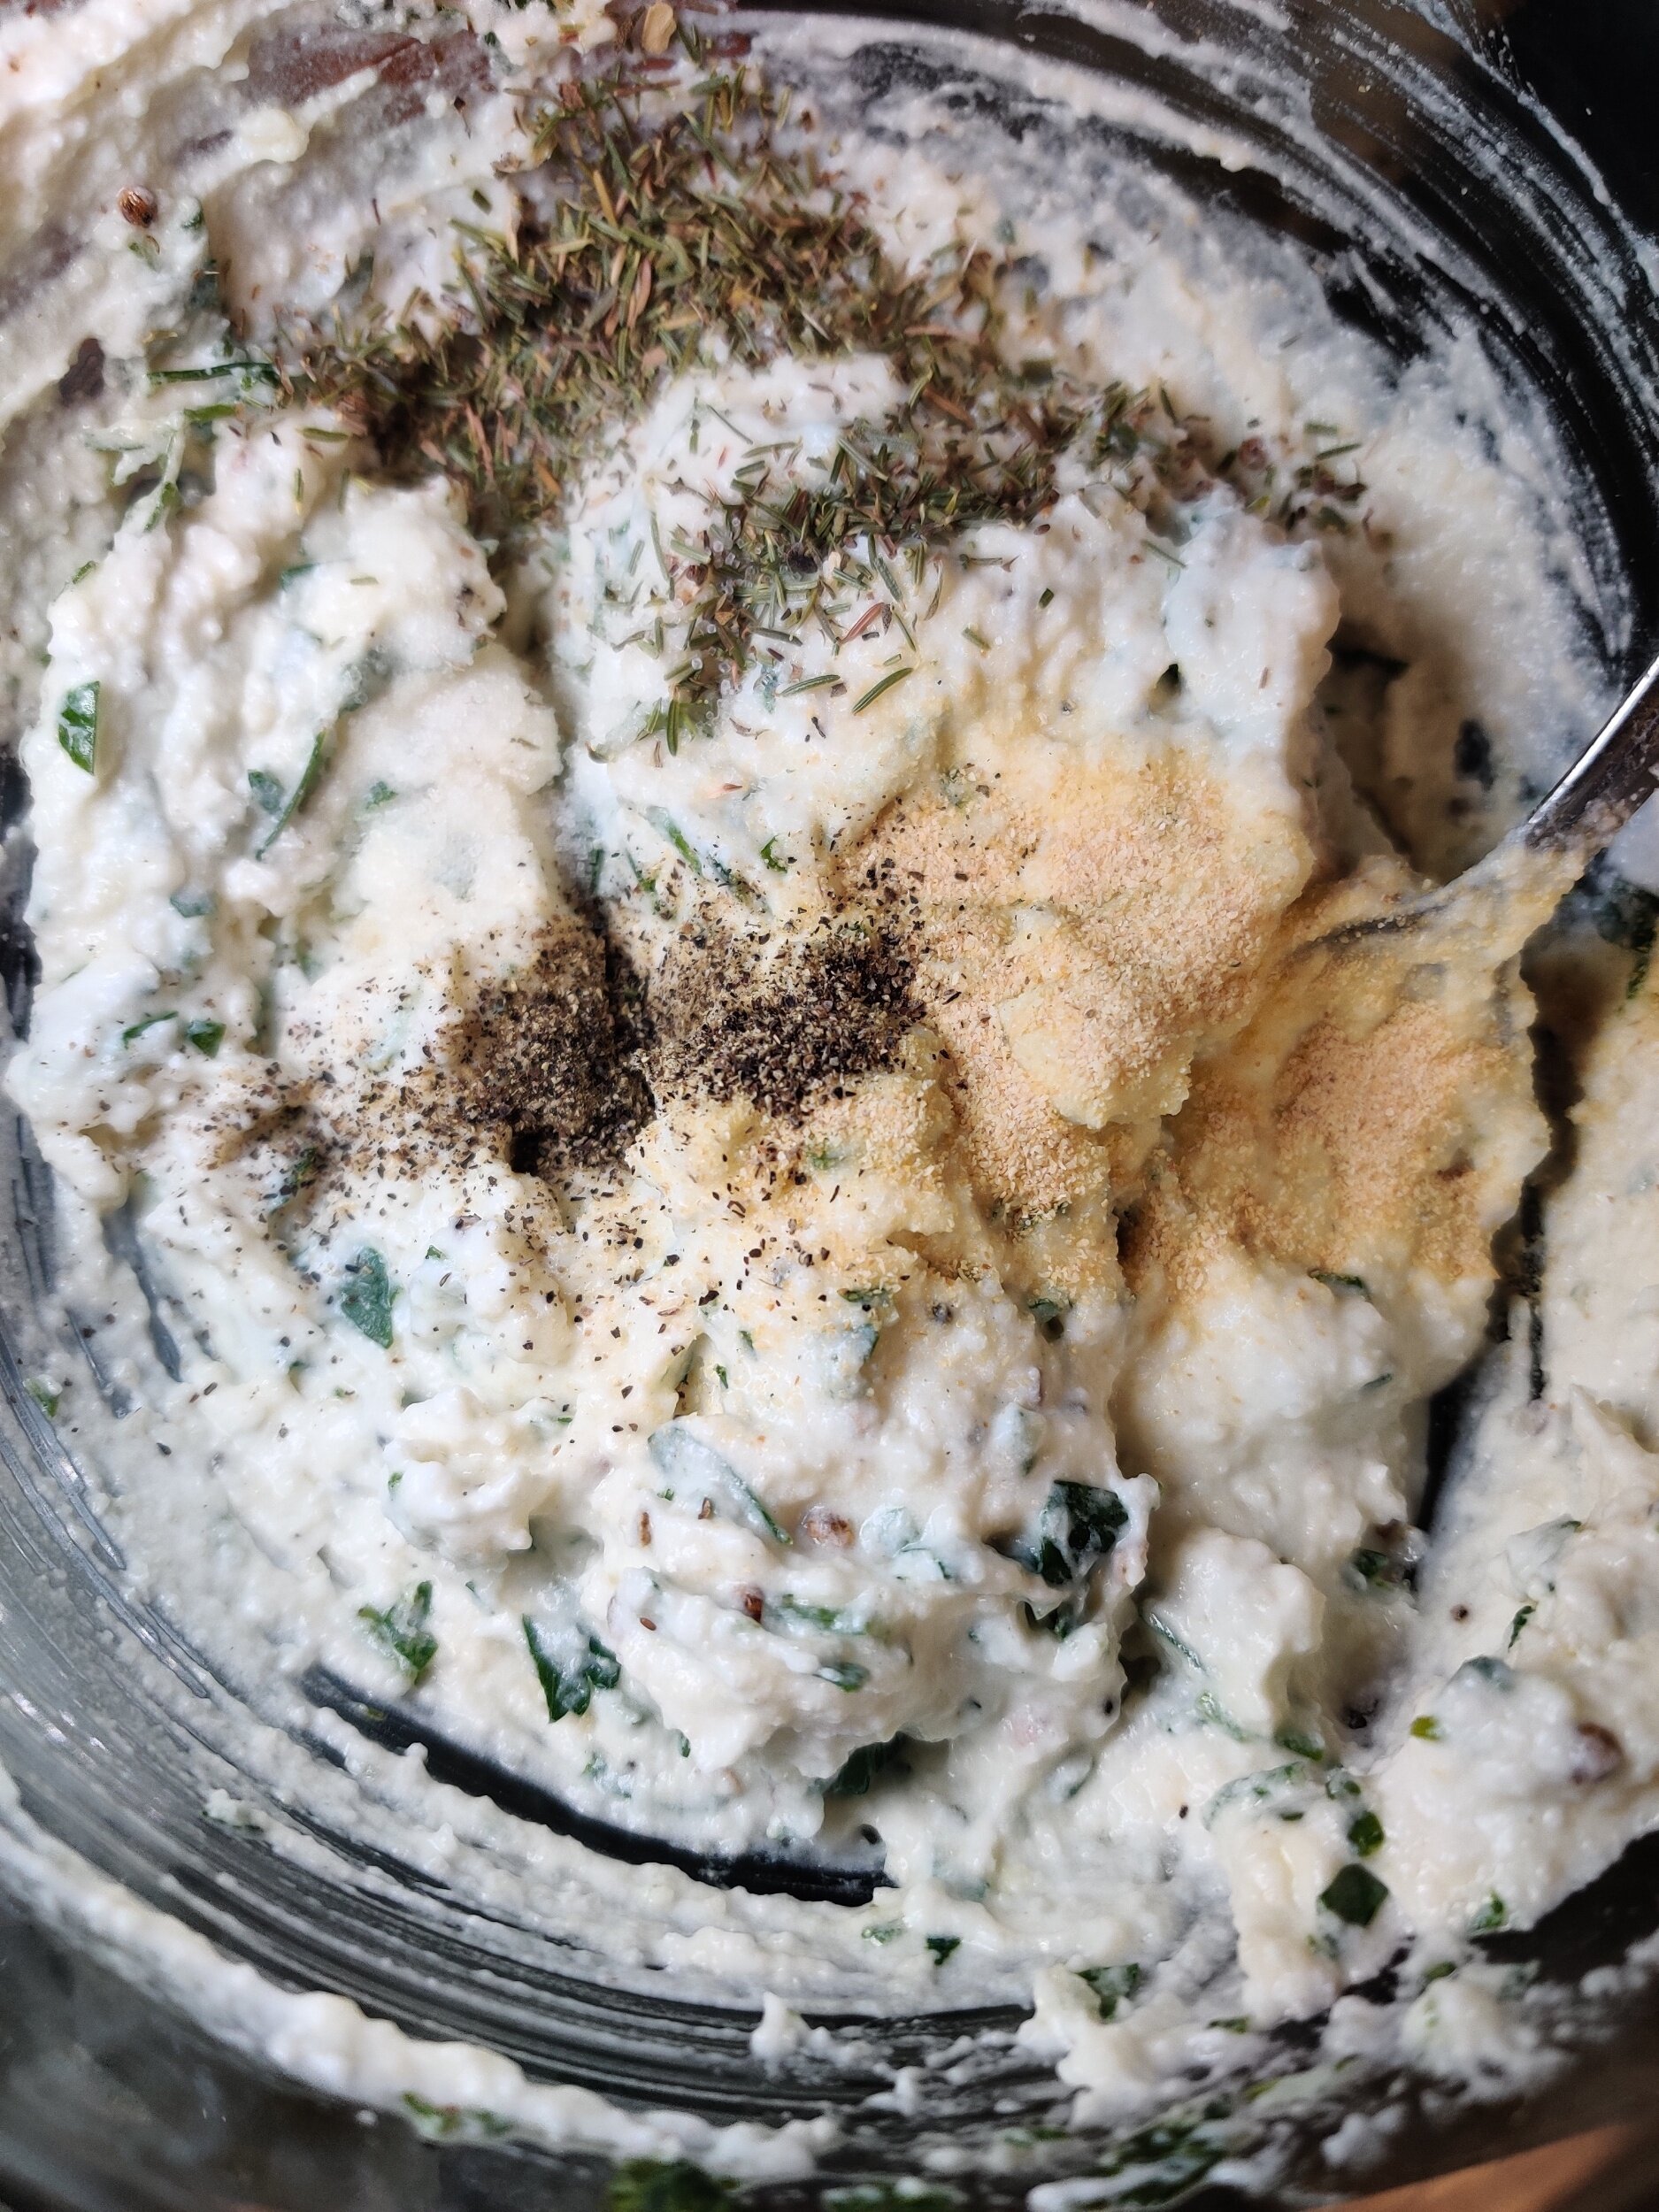
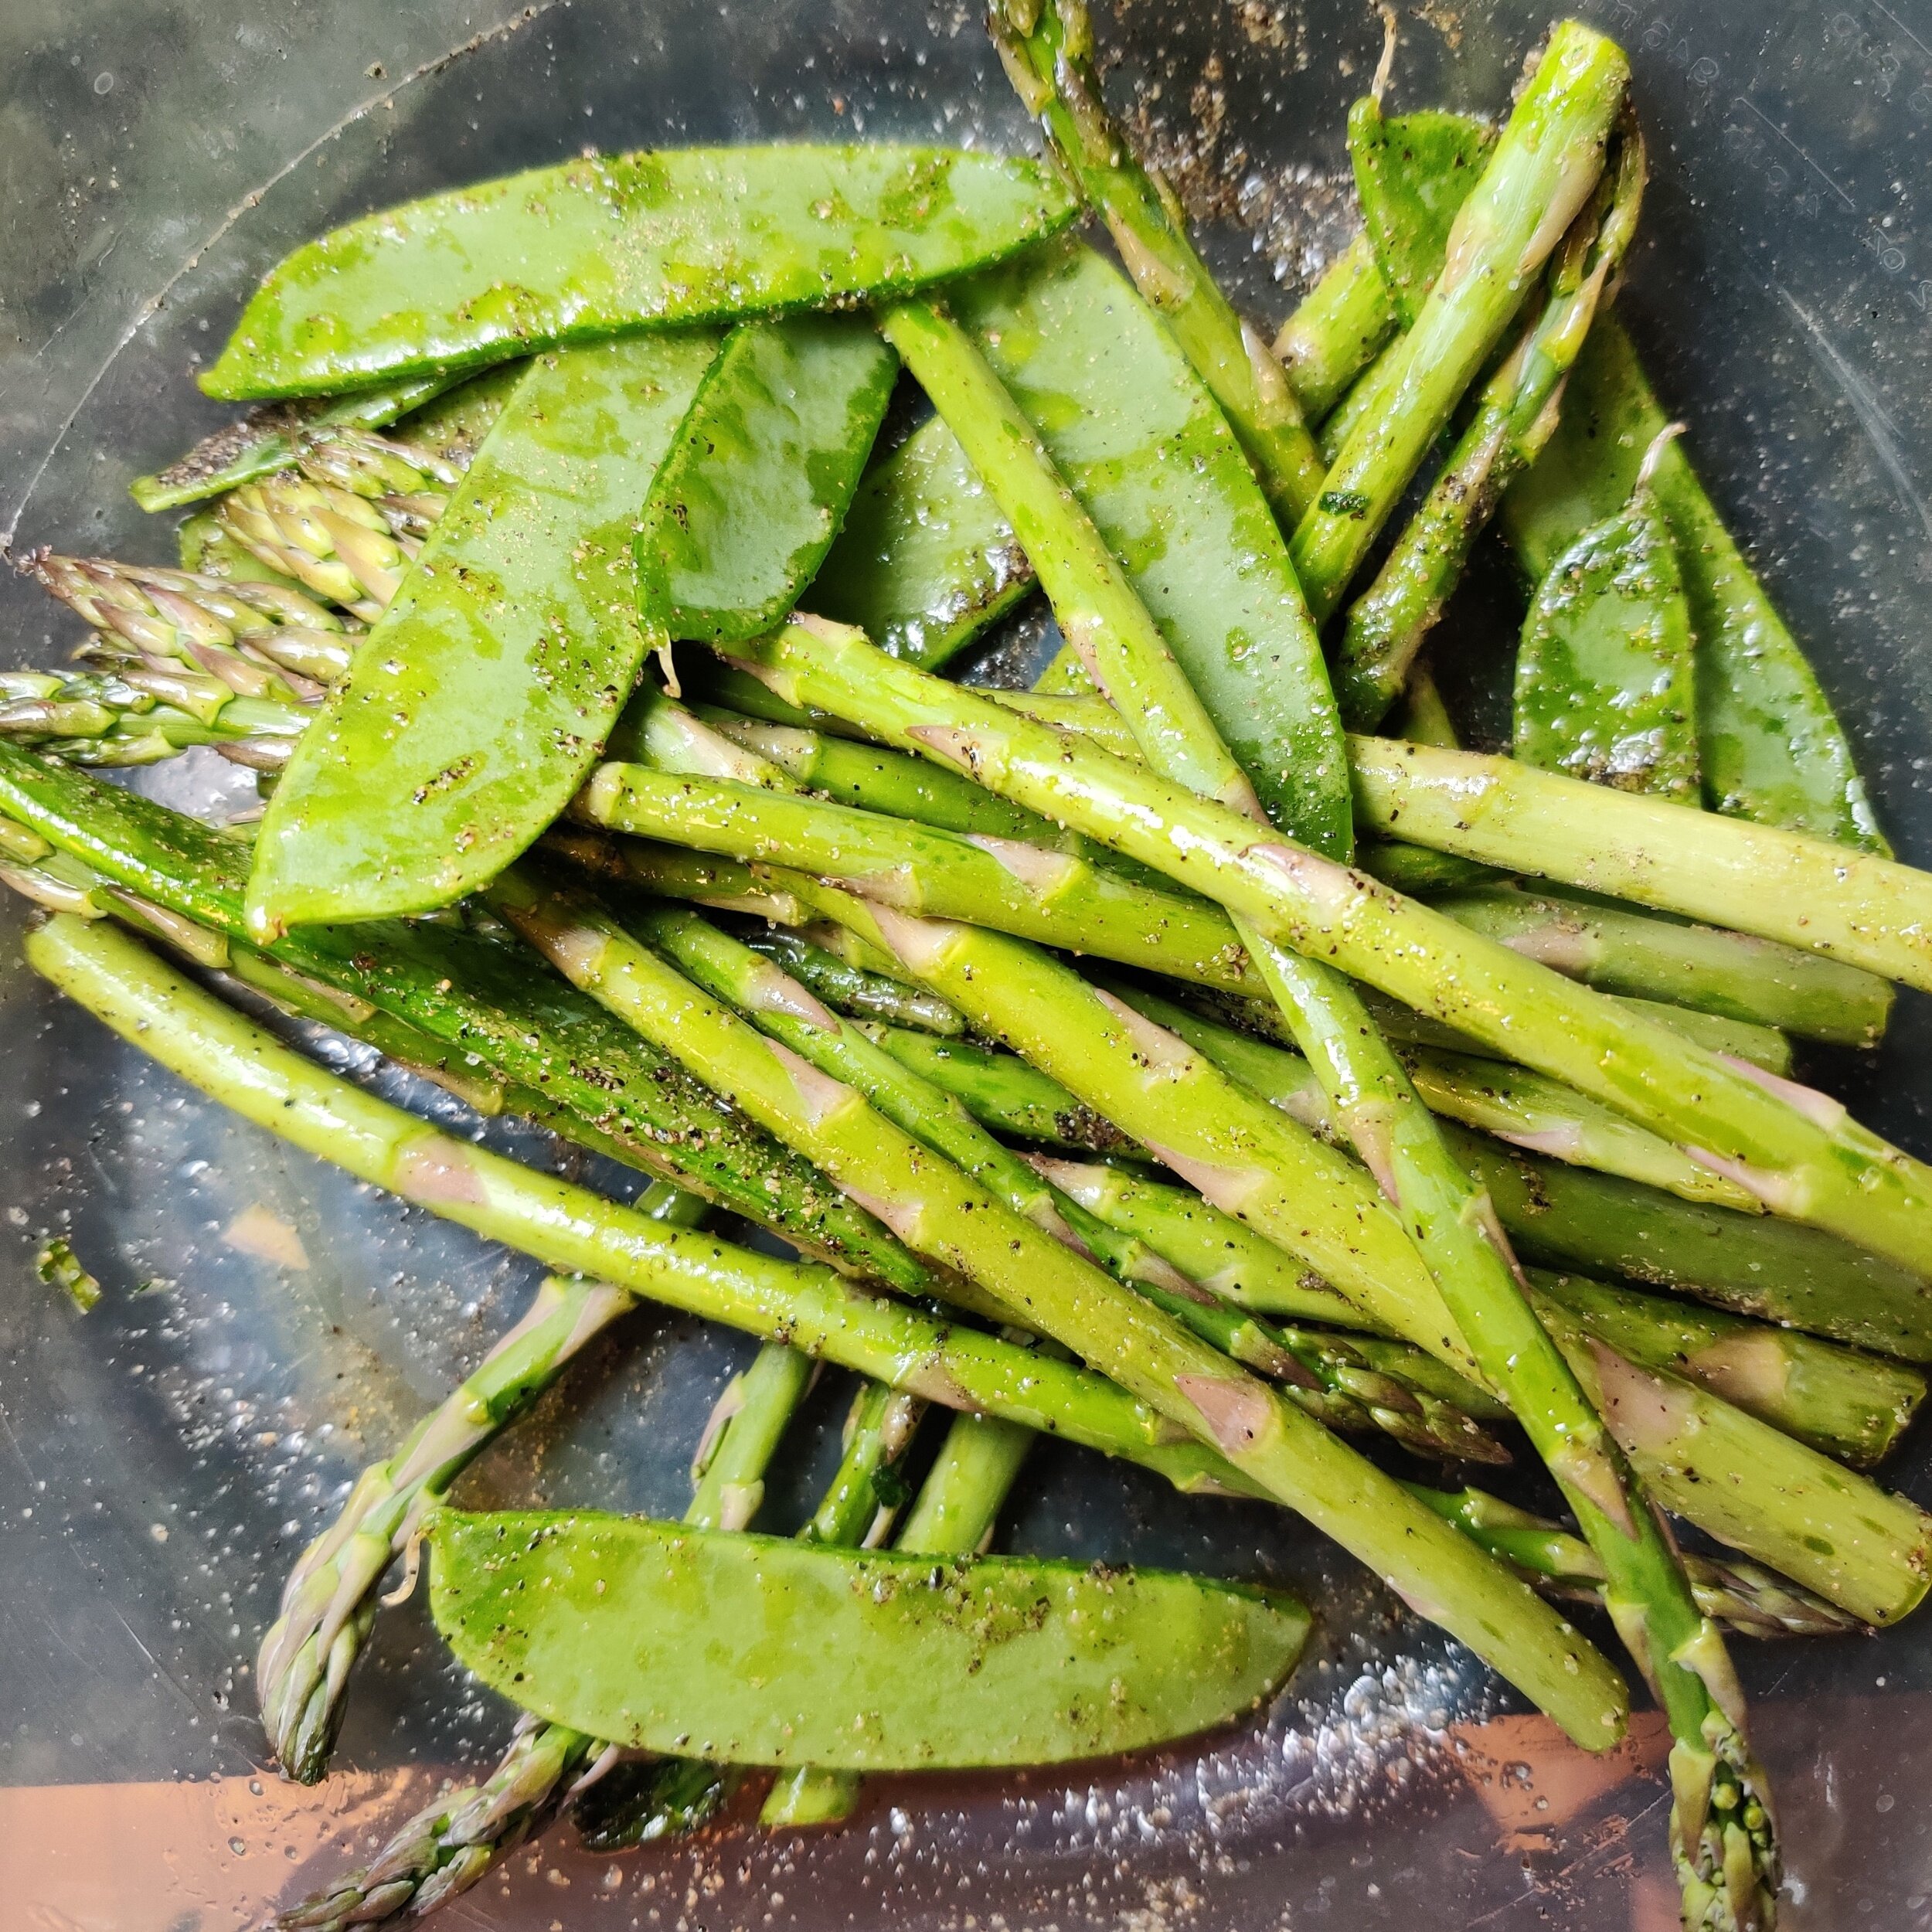
I used asparagus stalks and snap peas for this recipe, both of which offer texture and substance. I combined the (non-dairy) parmesan cheese mixed with the tofu ricotta, fresh herbs, and seasoning for the cheesy filling.
Before adding it to the pie crust plate, season to taste to make sure it’s good before baking!
Ingredients
1 pie crust, thawed in the fridge
1 handful snap peas
1/3 cup ricotta cheese (I used a vegan brand)
1/3 cup parmesan cheese, grated finely
About 20 stalks of green asparagus (woody, thick part cut off)
1/4 cup fresh parsley, finely chopped
1/4 cup fresh tarragon leaves, finely chopped + extra for topping and garnish
1 tablespoon fresh garlic, minced
1 teaspoon lemon juice
2 tablespoons biltong seasoning (optional - I used Freddy Hirsch Biltong Spice)
1 spring onion, finely chopped - mostly the green part)
1 teaspoon black pepper
1 teaspoon salt
2 tablespoons olive oil
Pinch of hot chilli flakes
2 tablespoons crumbled blue cheese
1 tablespoon parmesan cheese, grated
1 egg + 1 teaspoon water
Sesame seeds


Instructions
Take your pie crust out of the fridge to get it to room temperature, this should take about 20 minutes.
Get a medium-sized bowl, and mix the parmesan cheese, ricotta, tarragon, fresh garlic, parsley, olive oil, biltong seasoning, salt, dried thyme, black pepper, lemon juice, and garlic powder until evenly incorporated. Season to taste!
Spread the mixture over the unrolled pie crust gently with a spoon, making sure not to 'overfill' the inside and leaving at least a 1/2 inch border.
In a large bowl, toss the asparagus and snap peas in a little olive oil, salt and pepper. Lay the stalks over the cheese mix, followed by the snap peas, some additional tarragon leaves, the blue cheese and some parmesan cheese to garnish.
Fold the border edges over to make an open-faced frame, making sure both ends of the asparagus are tucked in or not visible.
Brush with the pie crust edges with the egg wash and sprinkle the sesame seeds on top.
Bake at 400F for 35-40 minutes on a parchment-lined baking tray, then remove from the oven.
Allow for the bubbling to stop and set the galette aside to cool for about 10 minutes. Garnish with additional tarragon leaves and scallions.


Maque Choux (Creamy Corn and Green Pepper)
If you're a sucker for creamed corn, you'll like this recipe. It's a great side or even a standalone meal. The dish comes out of Louisiana, with history and origins rooted in Native American food and culture and French influence.
If you are looking for anything corn related, I have several other recipes that can speak to your soul, so check them out!
Maque Choux is a mix of corn kernels, and bell peppers sautéed, sometimes with the addition of celery and tomato. Many people use bacon fat to add a smokey flavour, but that can also overpower the natural flavour and subtly of the vegetables, especially when they are fresh. The addition of cream is another way to add a richness factor to the dish. In this case, I used coconut cream to make is plant-based and add a slightly different flavour dimension. I also add a little bit of vegan cheese to make it extra creamy.
Like most of the dishes I post, you can customize accordingly!
Ingredients
3-5 fresh corn cobs, kernels sliced off
1/2 teaspoon sugar
1 teaspoon red chili flakes
1/2 teaspoon smoked paprika
3/4 cup coconut cream (or heavy cream)
2-3 scallions, chopped
1 tablespoon garlic, minced
1 large stick celery, diced
2 tablespoons butter
1/4 cup fresh parsley, chopped
1 1/2 teaspoons salt
1 tablespoon black pepper
1/2 large red onion, diced
1 large green bell pepper, diced
1 tablespoon (vegan) parmesan, grated
1/2 chili pepper, diced
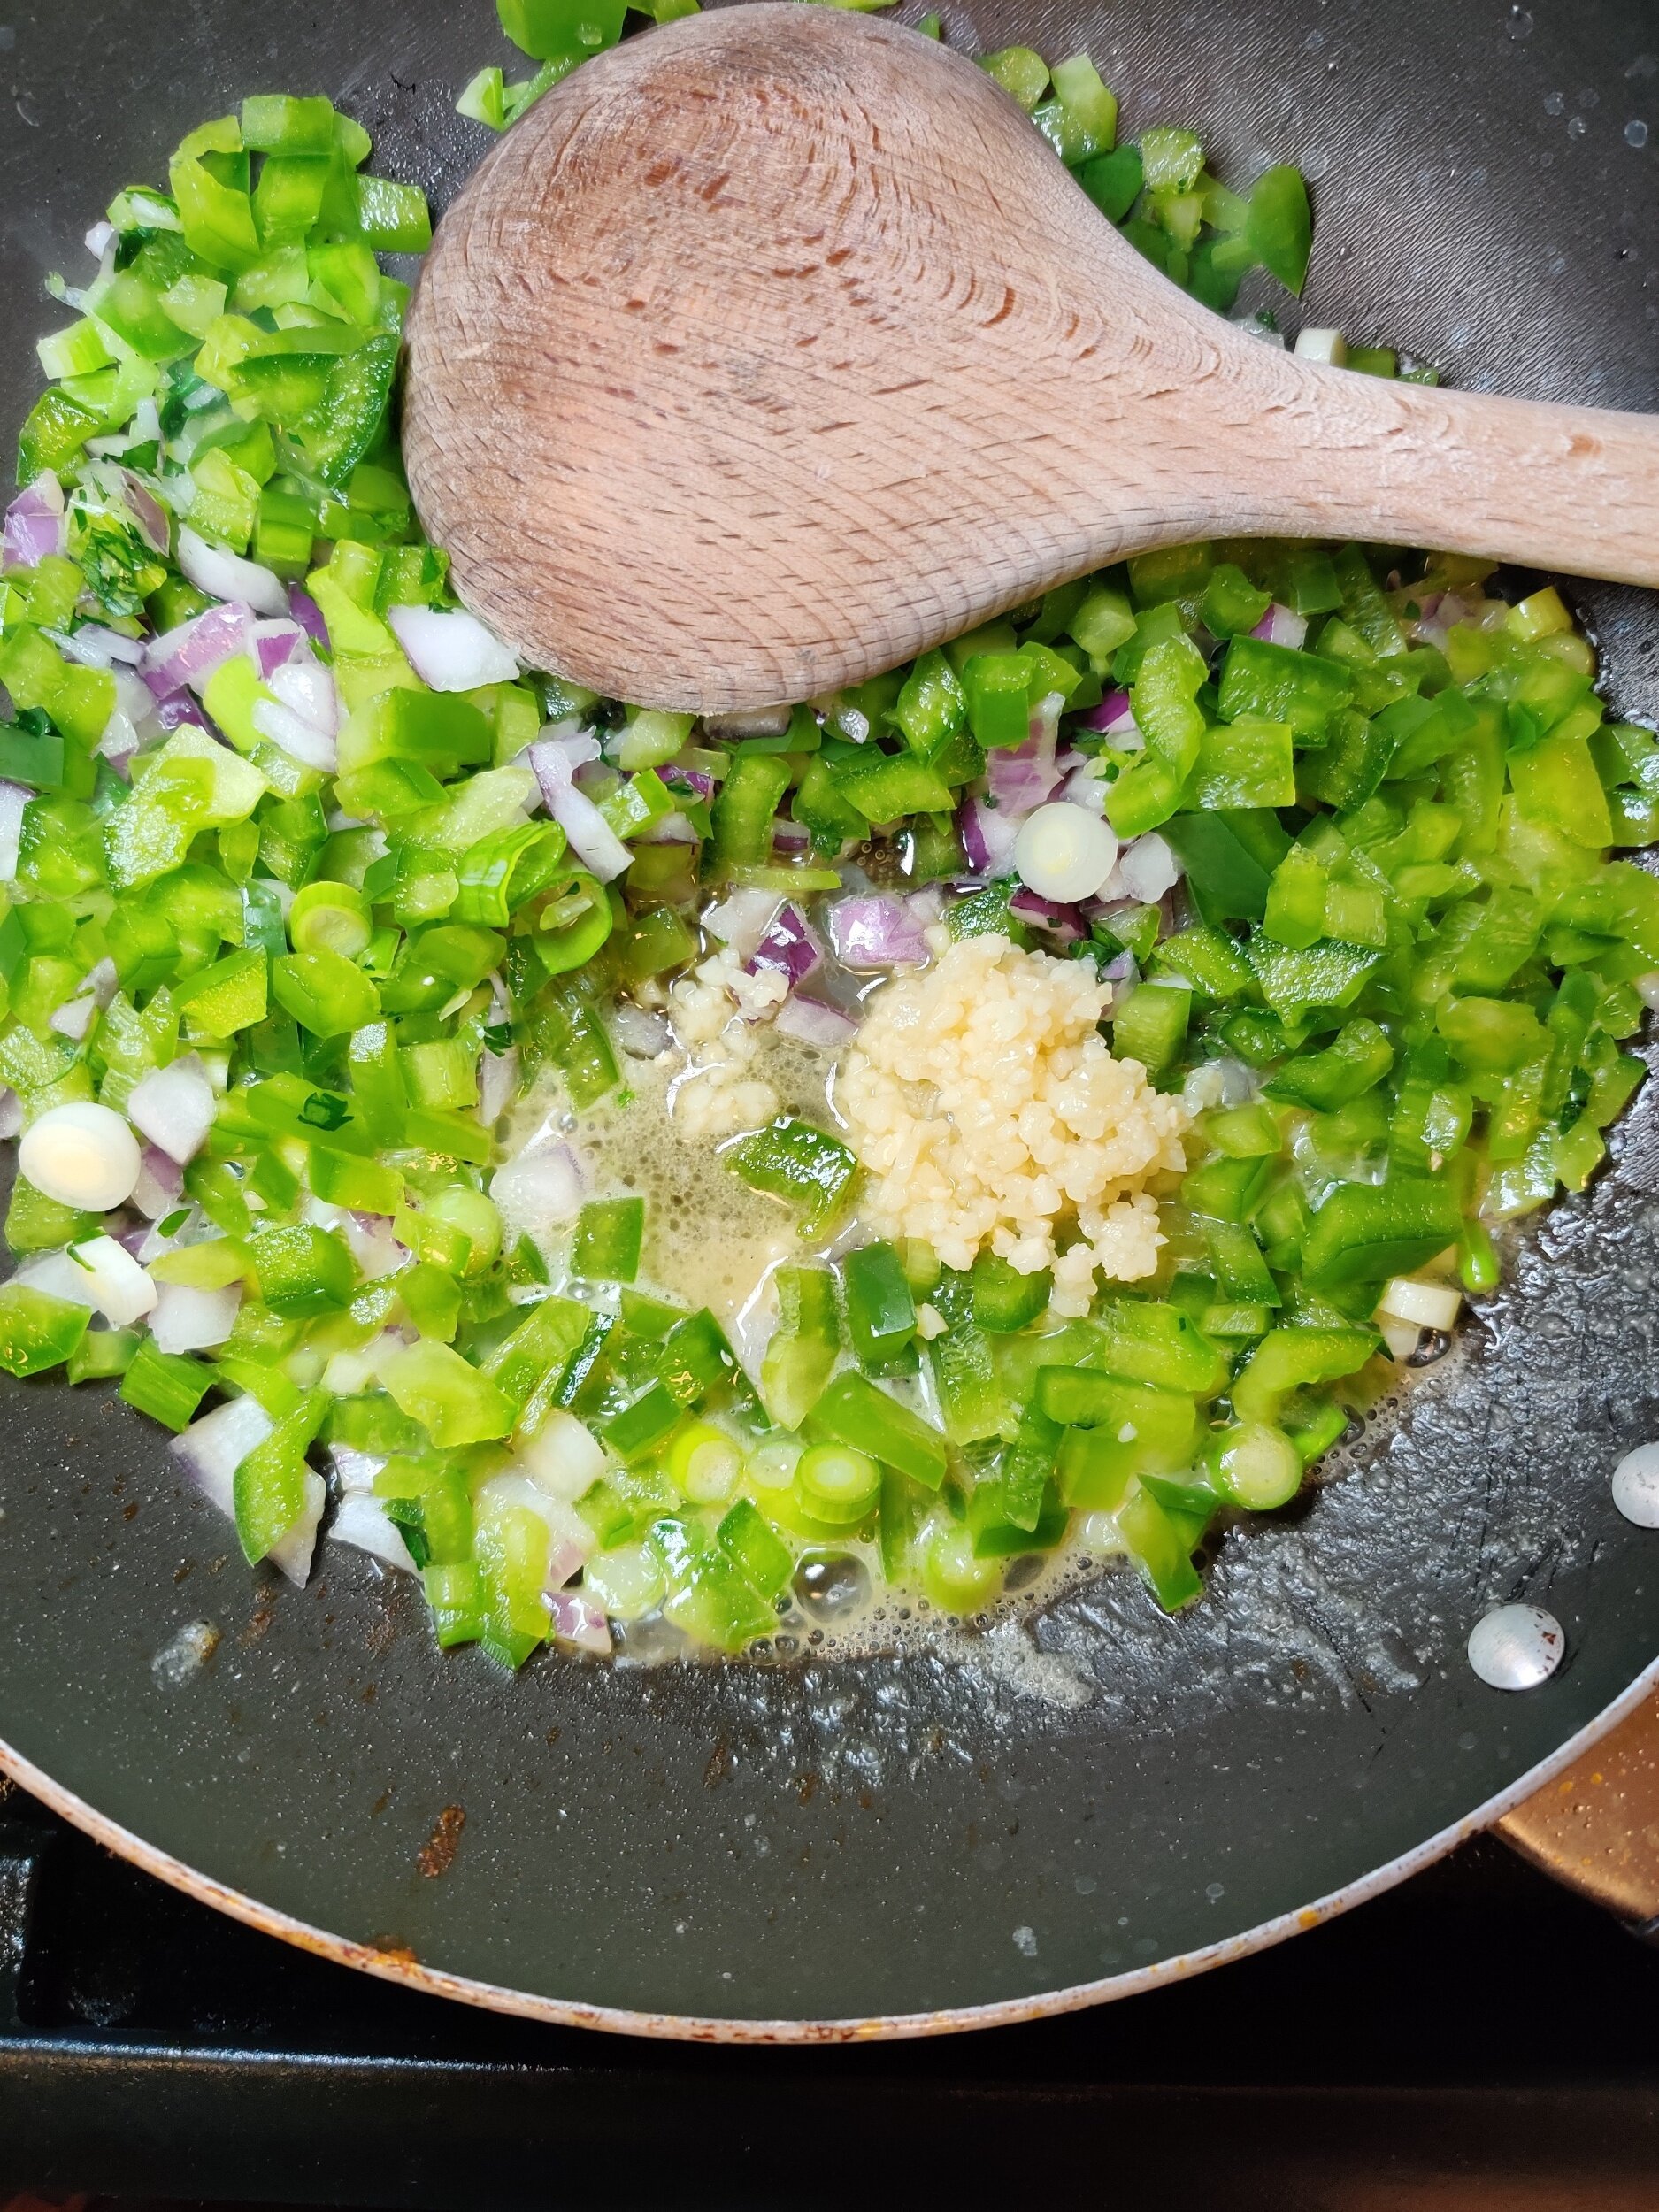
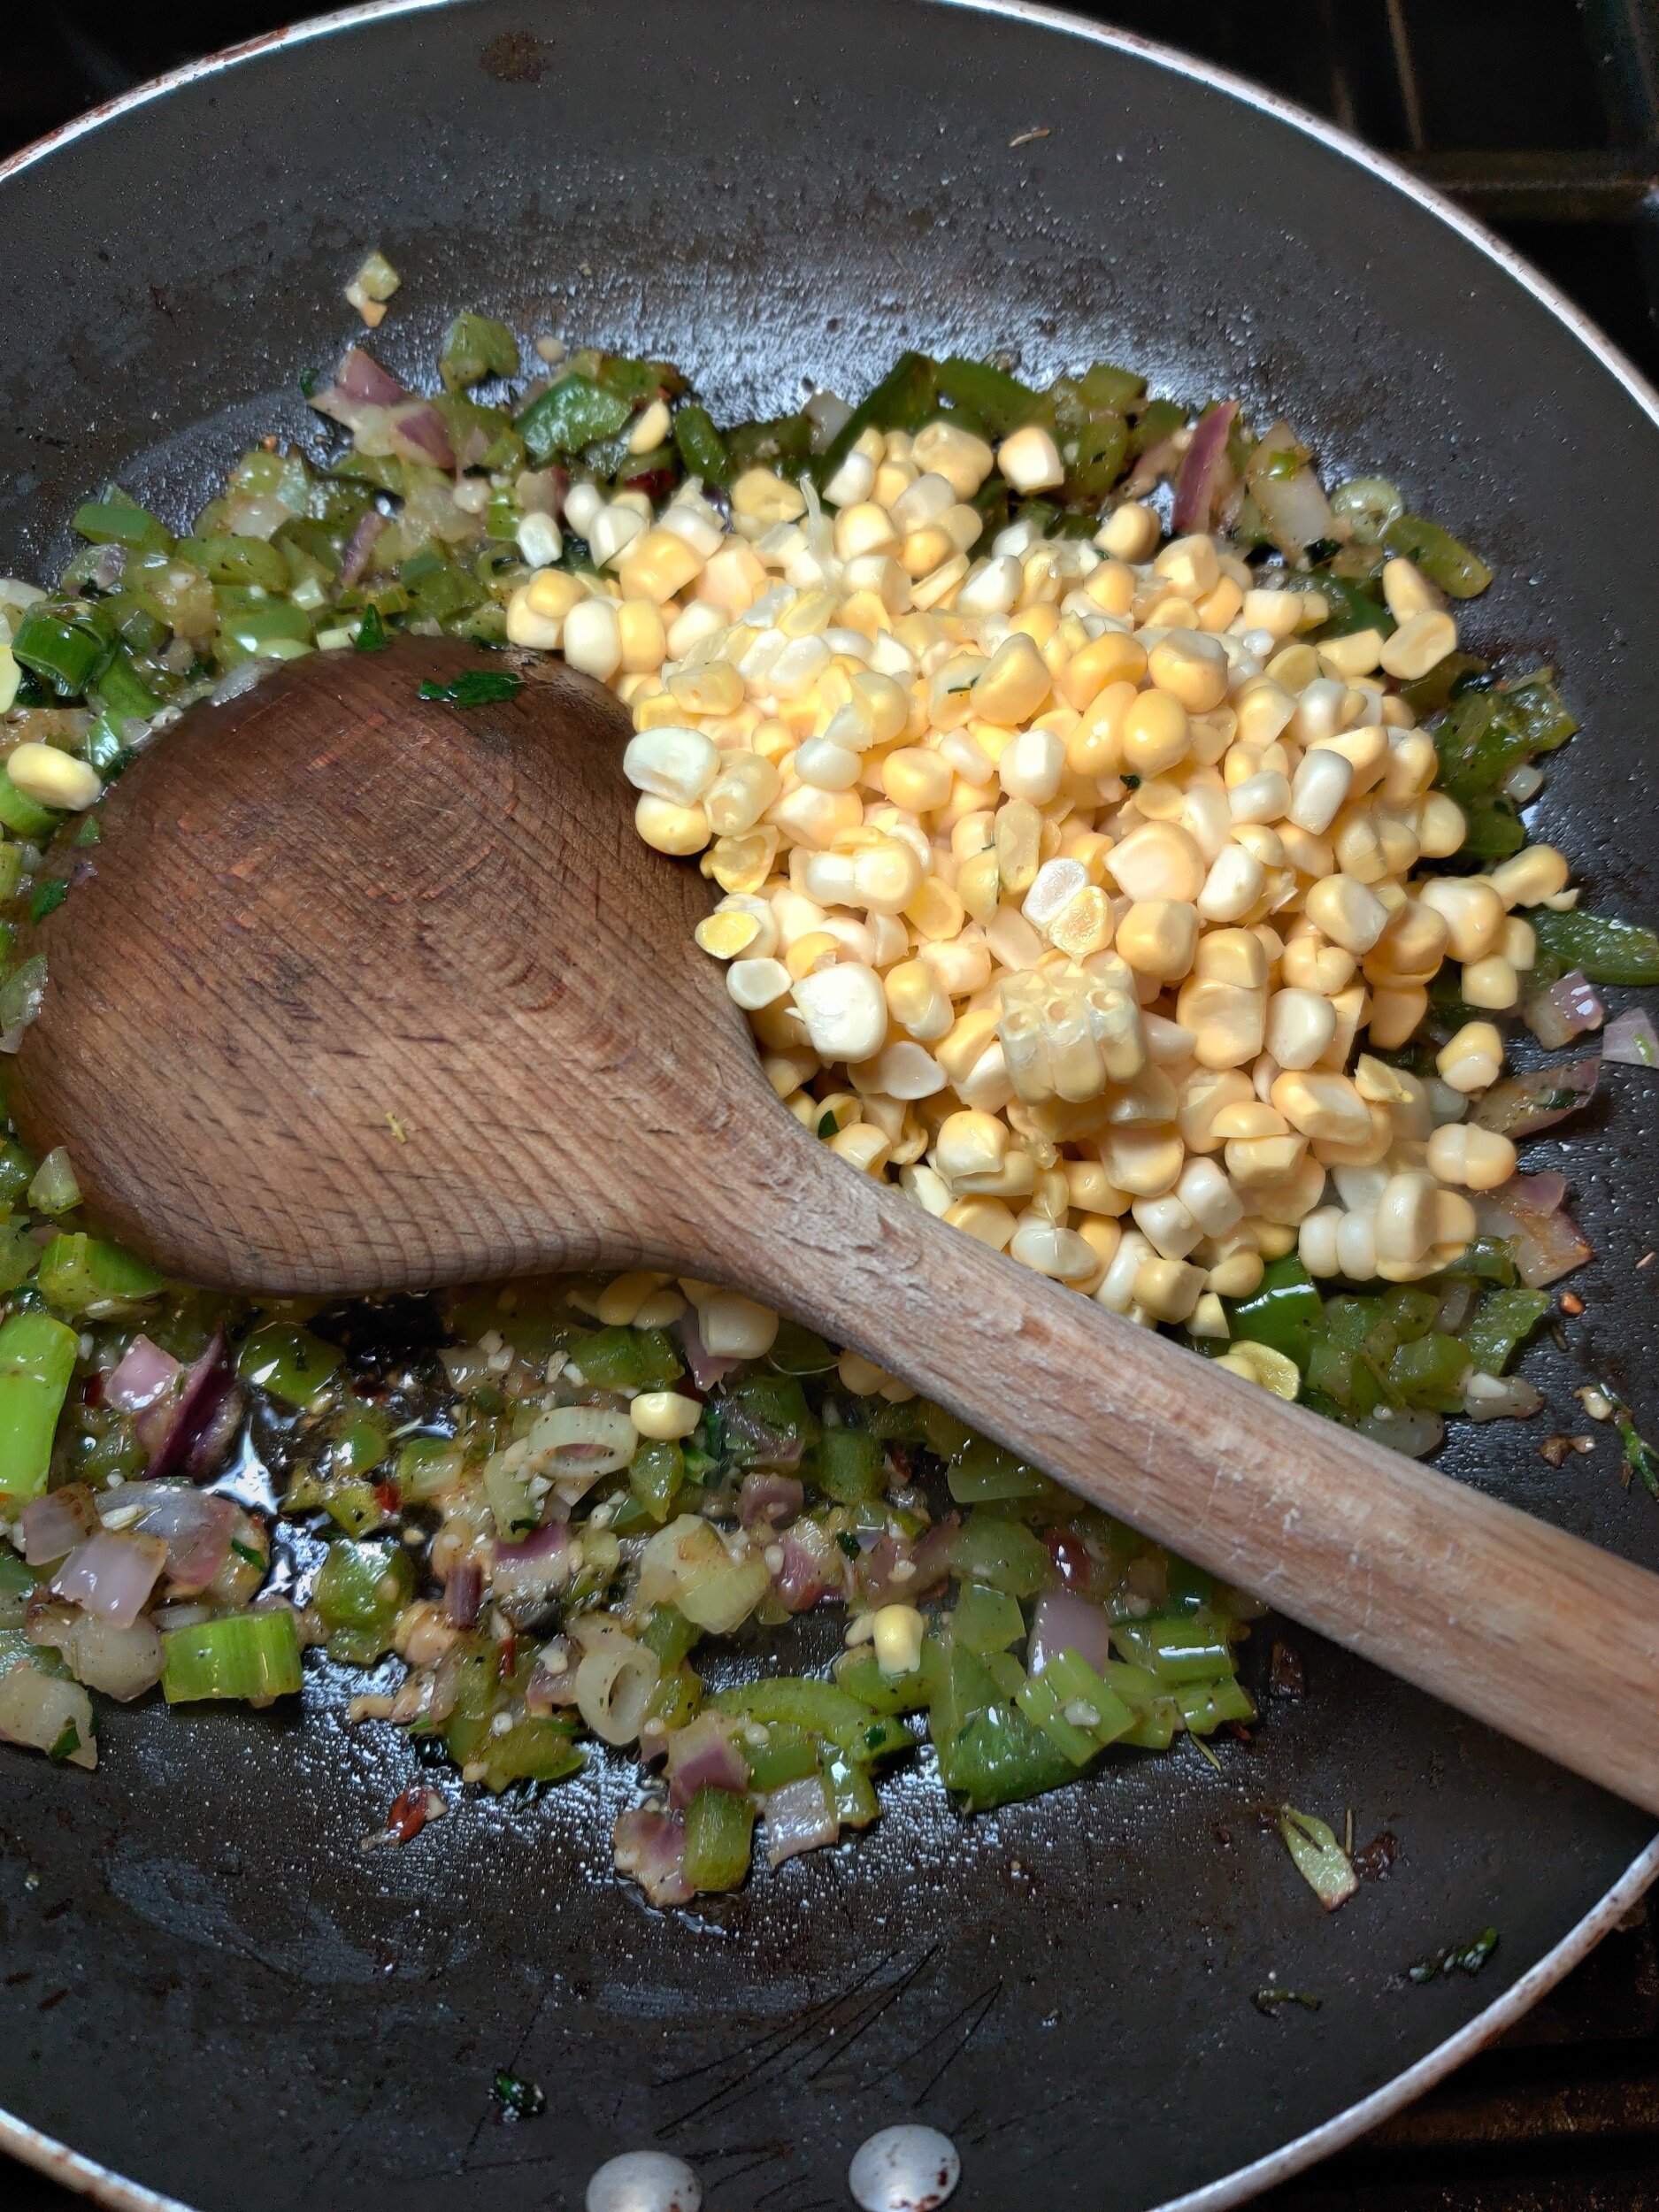
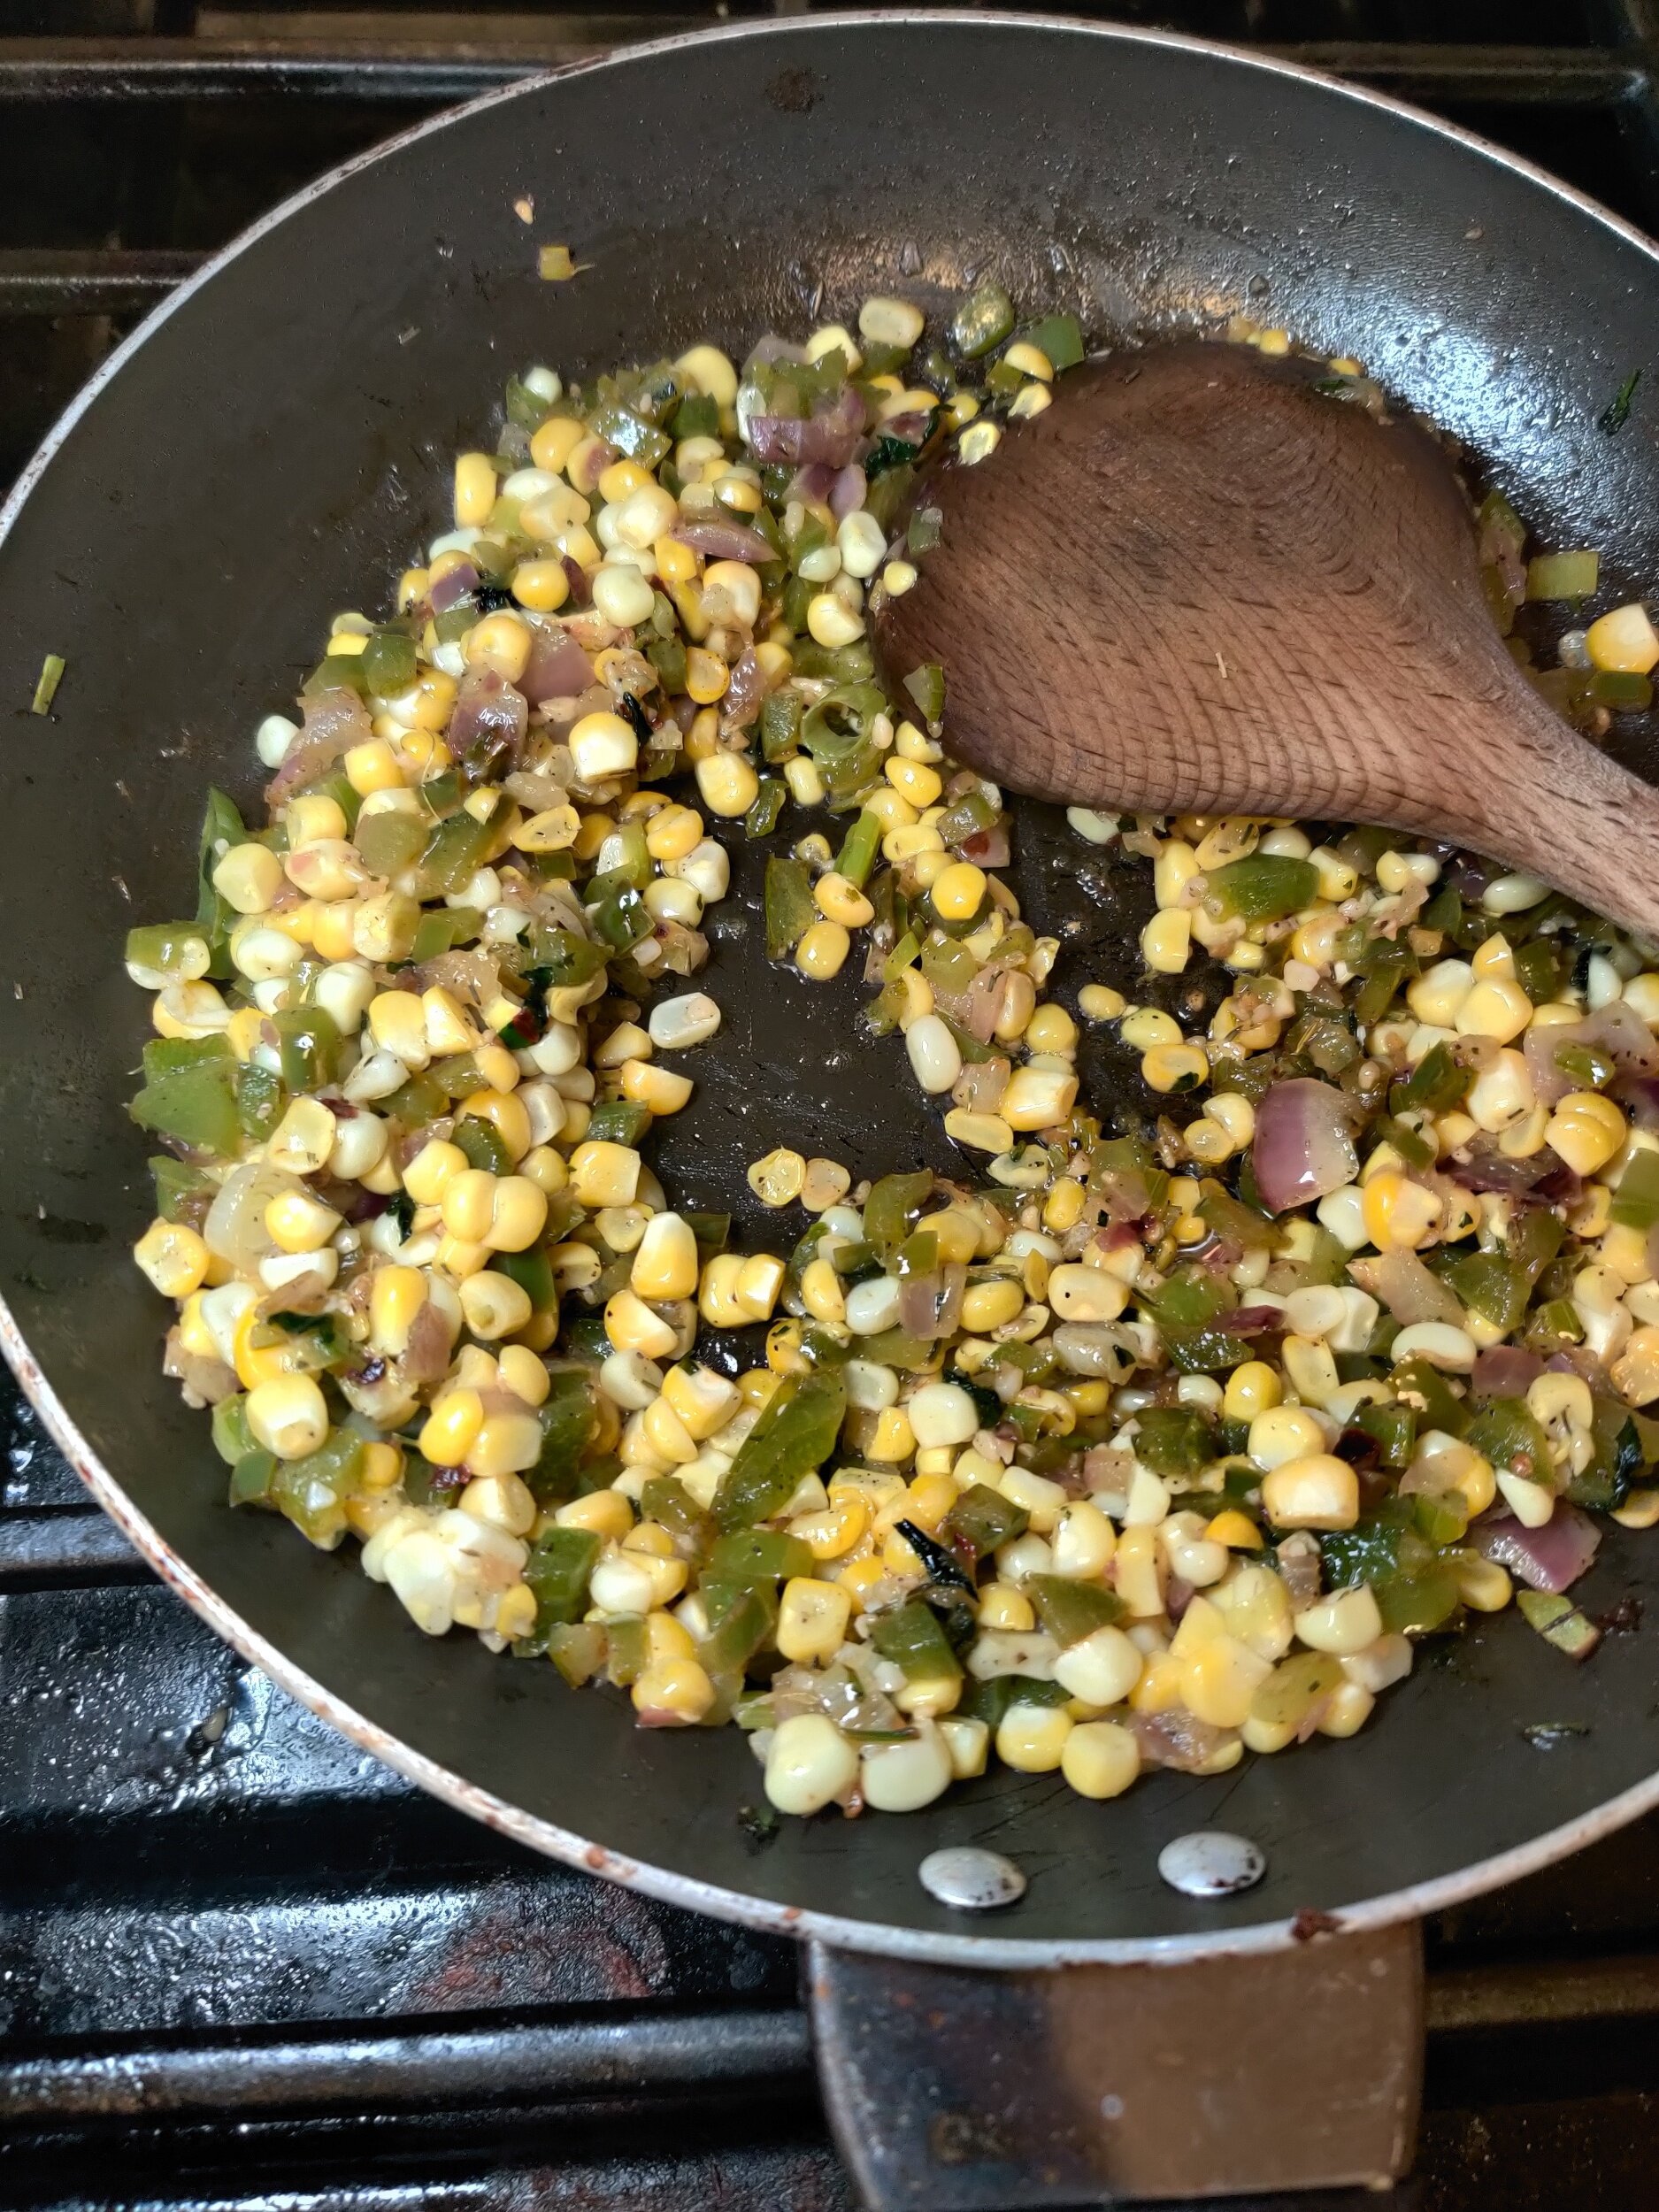
Instructions
Add the red onion to a nonstick saucepan with the melted butter, along with the garlic, chilli, green pepper and celery. Saute for about 5 minutes to sweat out the vegetables.
Add the seasoning and cook for about 2-3 minutes. Follow with the corn and cook until done, another 4-5 minutes.
Gradually add the coconut cream, stirring to thicken the mixture, then simmer for about 3-4 minutes. Add in the parsley and green onion, leave on heat for a final 1-2 minutes before removing from the stovetop. Serve hot!