
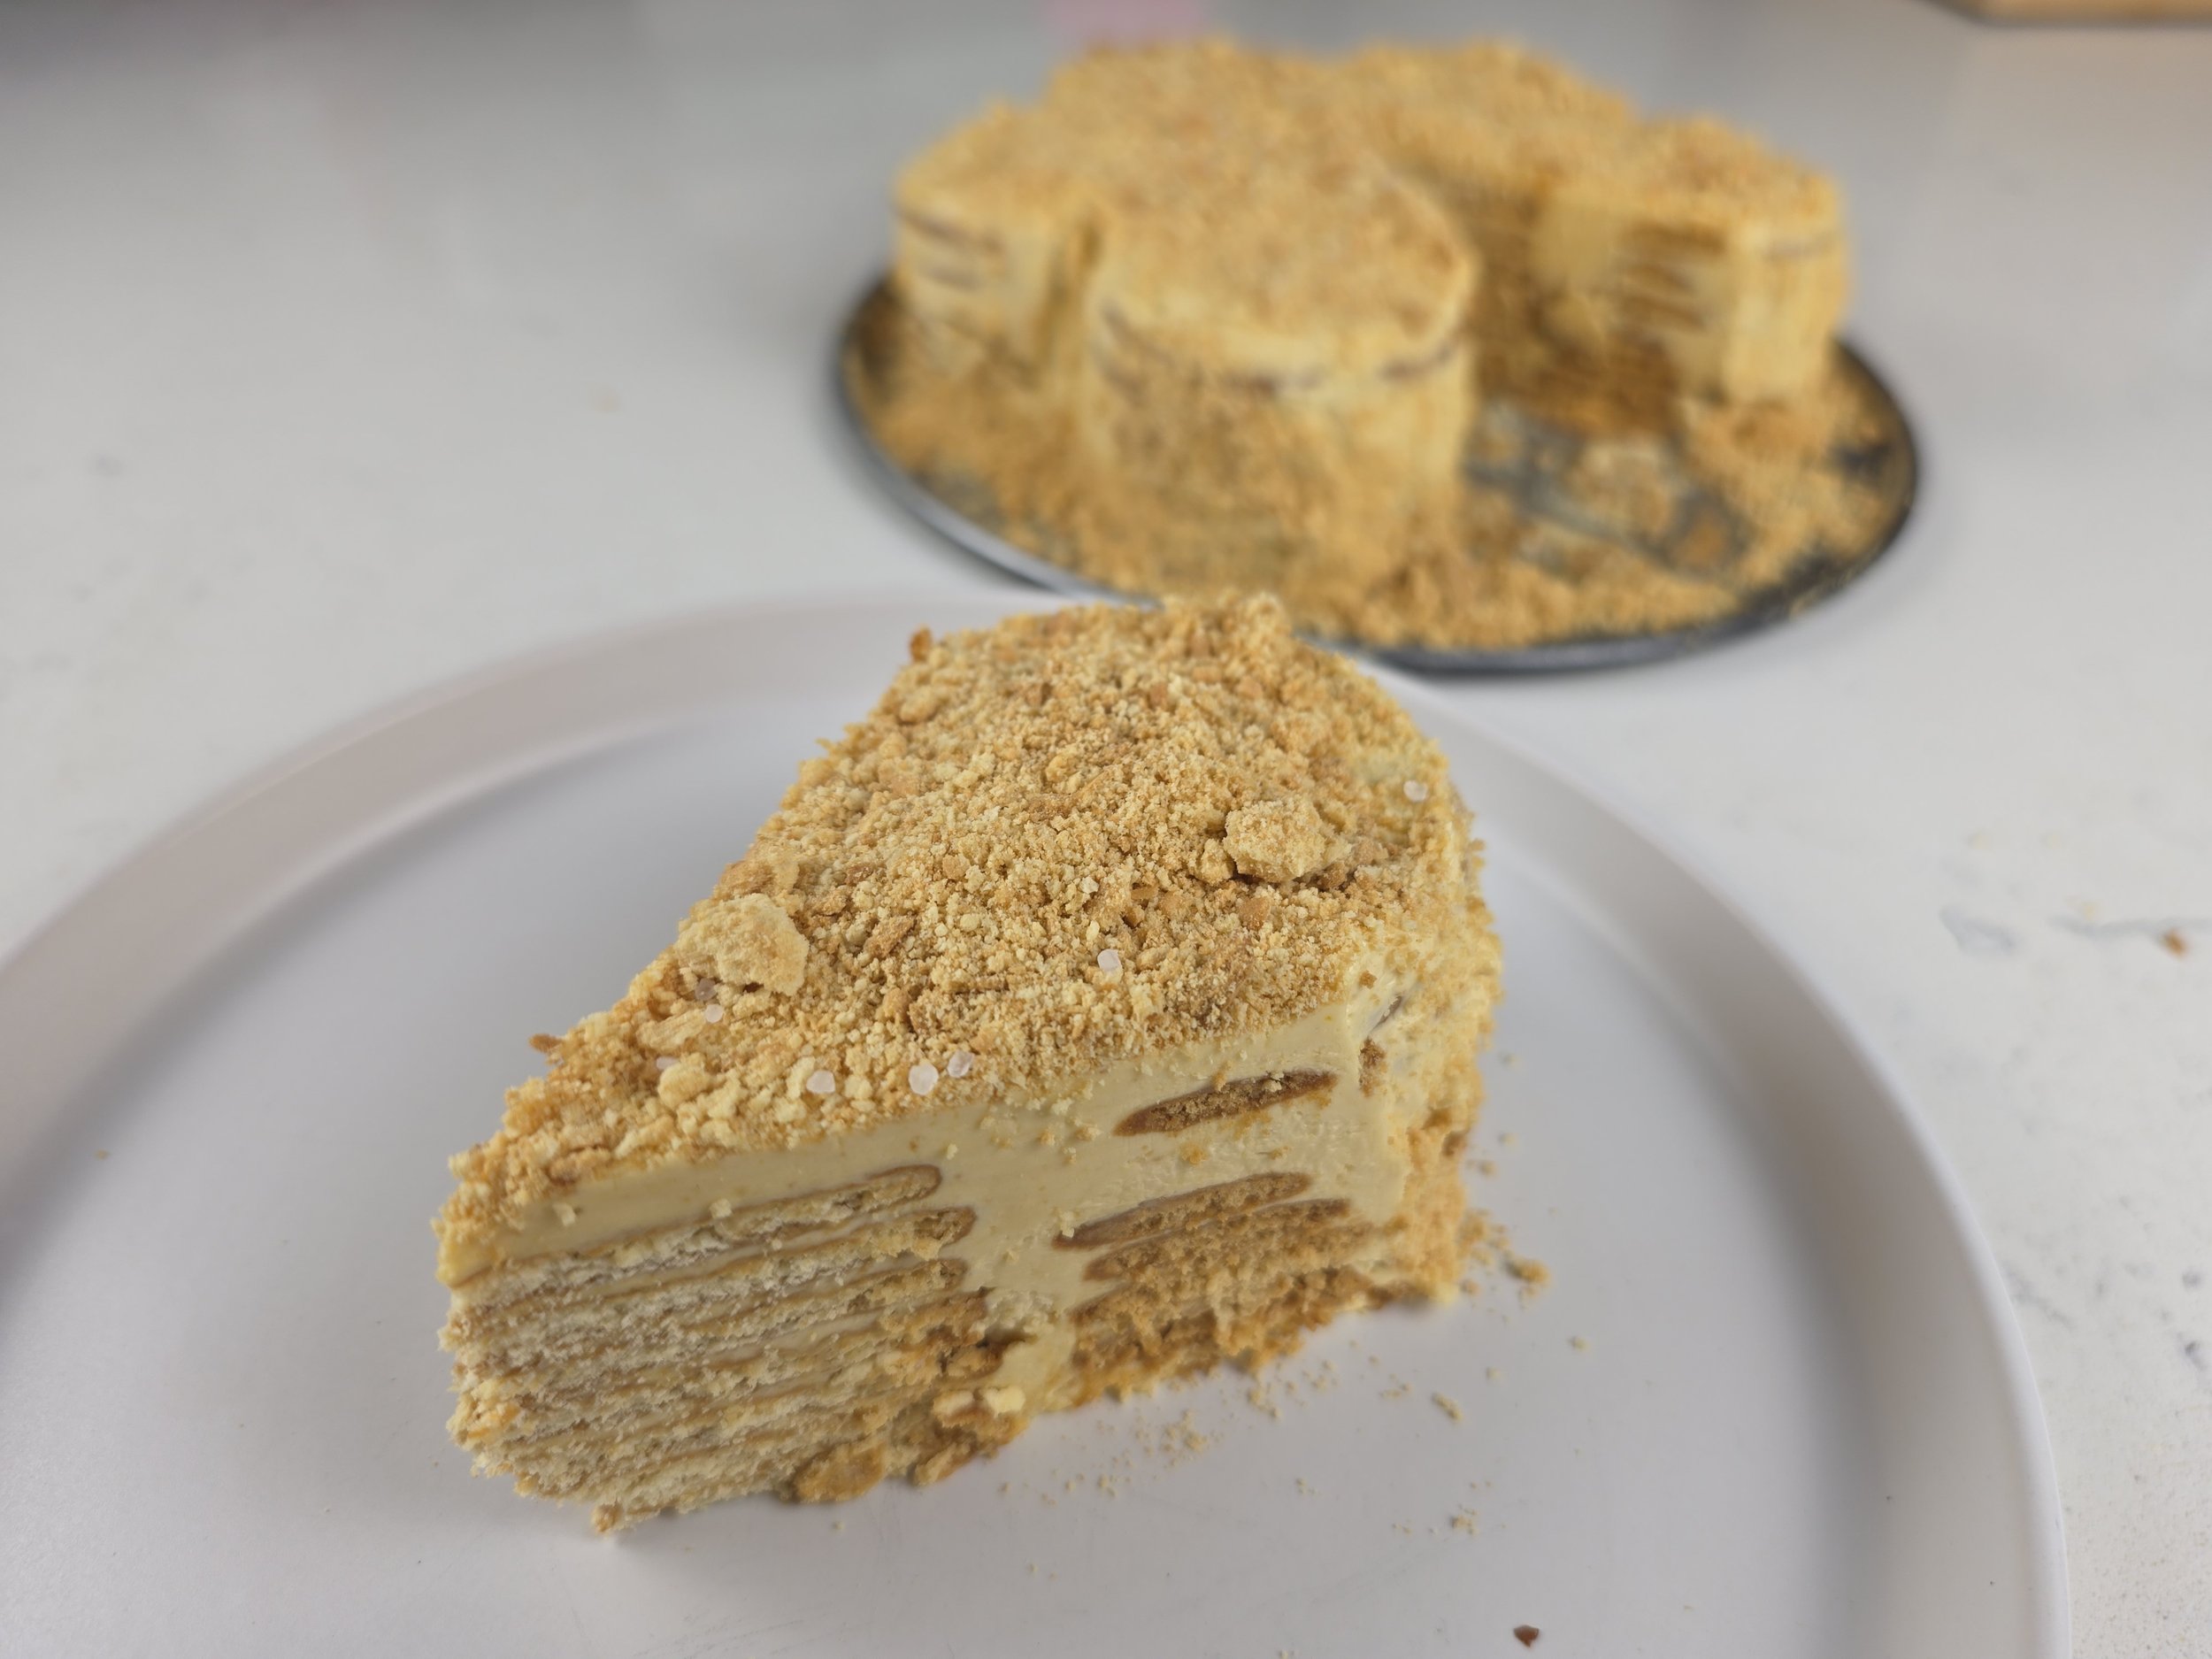
Salted Caramel Bola de Bolacha (Portuguese Biscuit Cake)
A rich Portuguese-inspired biscuit cake made with espresso-dipped Maria biscuits, salted caramel buttercream, and homemade dulce de leche.
Bola de Bolacha is one of my favorite desserts from Portugal, so naturally, I had to try it more than once. During my trips, I tasted three different versions, and each one gave me a completely different impression of this classic Portuguese biscuit cake.
The first was moist, luscious, and creamy without being overwhelming, with a distinctly caramel-forward flavor and a light caramel drizzle. This was by far my favorite. The second had a much stronger coffee flavor that reminded me more of tiramisu than the dessert I had been expecting. It was well-made, but the coffee was definitely the dominant flavor. The third was the least memorable. It was dry and flat, and if I had to identify a flavor, I'd say condensed milk and slightly stale biscuits.
So, quite a range—but between a restaurant, a high-end bakery, and a beach café, perhaps the variety isn't all that surprising.
I decided to take matters into my own hands. After testing and researching different approaches, I landed on my own version, with one priority above everything else: bringing the caramel flavor forward.
My Salted Caramel Bola de Bolacha keeps the recognizable structure of the Portuguese classic—coffee-dipped Maria biscuits layered into a flower-shaped cake—but uses a salted caramel buttercream made with homemade dulce de leche, egg yolks, and butter.
The result is rich, creamy, coffee-infused, and deeply caramel-forward, with just enough salt to balance the sweetness.
This isn't meant to be a traditional Portuguese recipe. It's my interpretation of a dessert I loved discovering in Portugal.

Salted Caramel Bola de Bolacha
A rich, coffee-soaked Portuguese biscuit cake layered with salted caramel buttercream, plain Maria biscuits and caramel Maria biscuits. Inspired by three Bola de Bolacha I tasted in Portugal, this version puts caramel at the center of every bite.
Ingredients
- 1 cup strong brewed coffee
- 1 tbsp granulated sugar
- 8 oz (227 g) unsalted butter, softened
- 7 oz (198 g) dulce de leche (½ cup + 1 tbsp)
- 2 large egg yolks
- 2 tbsp granulated sugar
- ½ tsp vanilla extract
- ¼ tsp course or fine sea salt
- 1½ packets Maria biscuits (approximately 49 biscuits)
- 4-6 additional biscuits, crushed for topping and sides (optional)
Instructions
- Brew 1 cup of strong coffee, then stir in 1 tablespoon sugar while it's still hot.
- Pour the coffee into a shallow bowl and allow it to cool completely.
- Place the 2 egg yolks and 2 tablespoons sugar in a heatproof bowl.
- Set the bowl over a saucepan of gently simmering water, making sure the bottom of the bowl does not touch the water. Whisk continuously until the mixture reaches 160°F (71°C). Remove from the heat and continue whisking for about 1 minute.
- Allow the egg mixture to cool to room temperature.
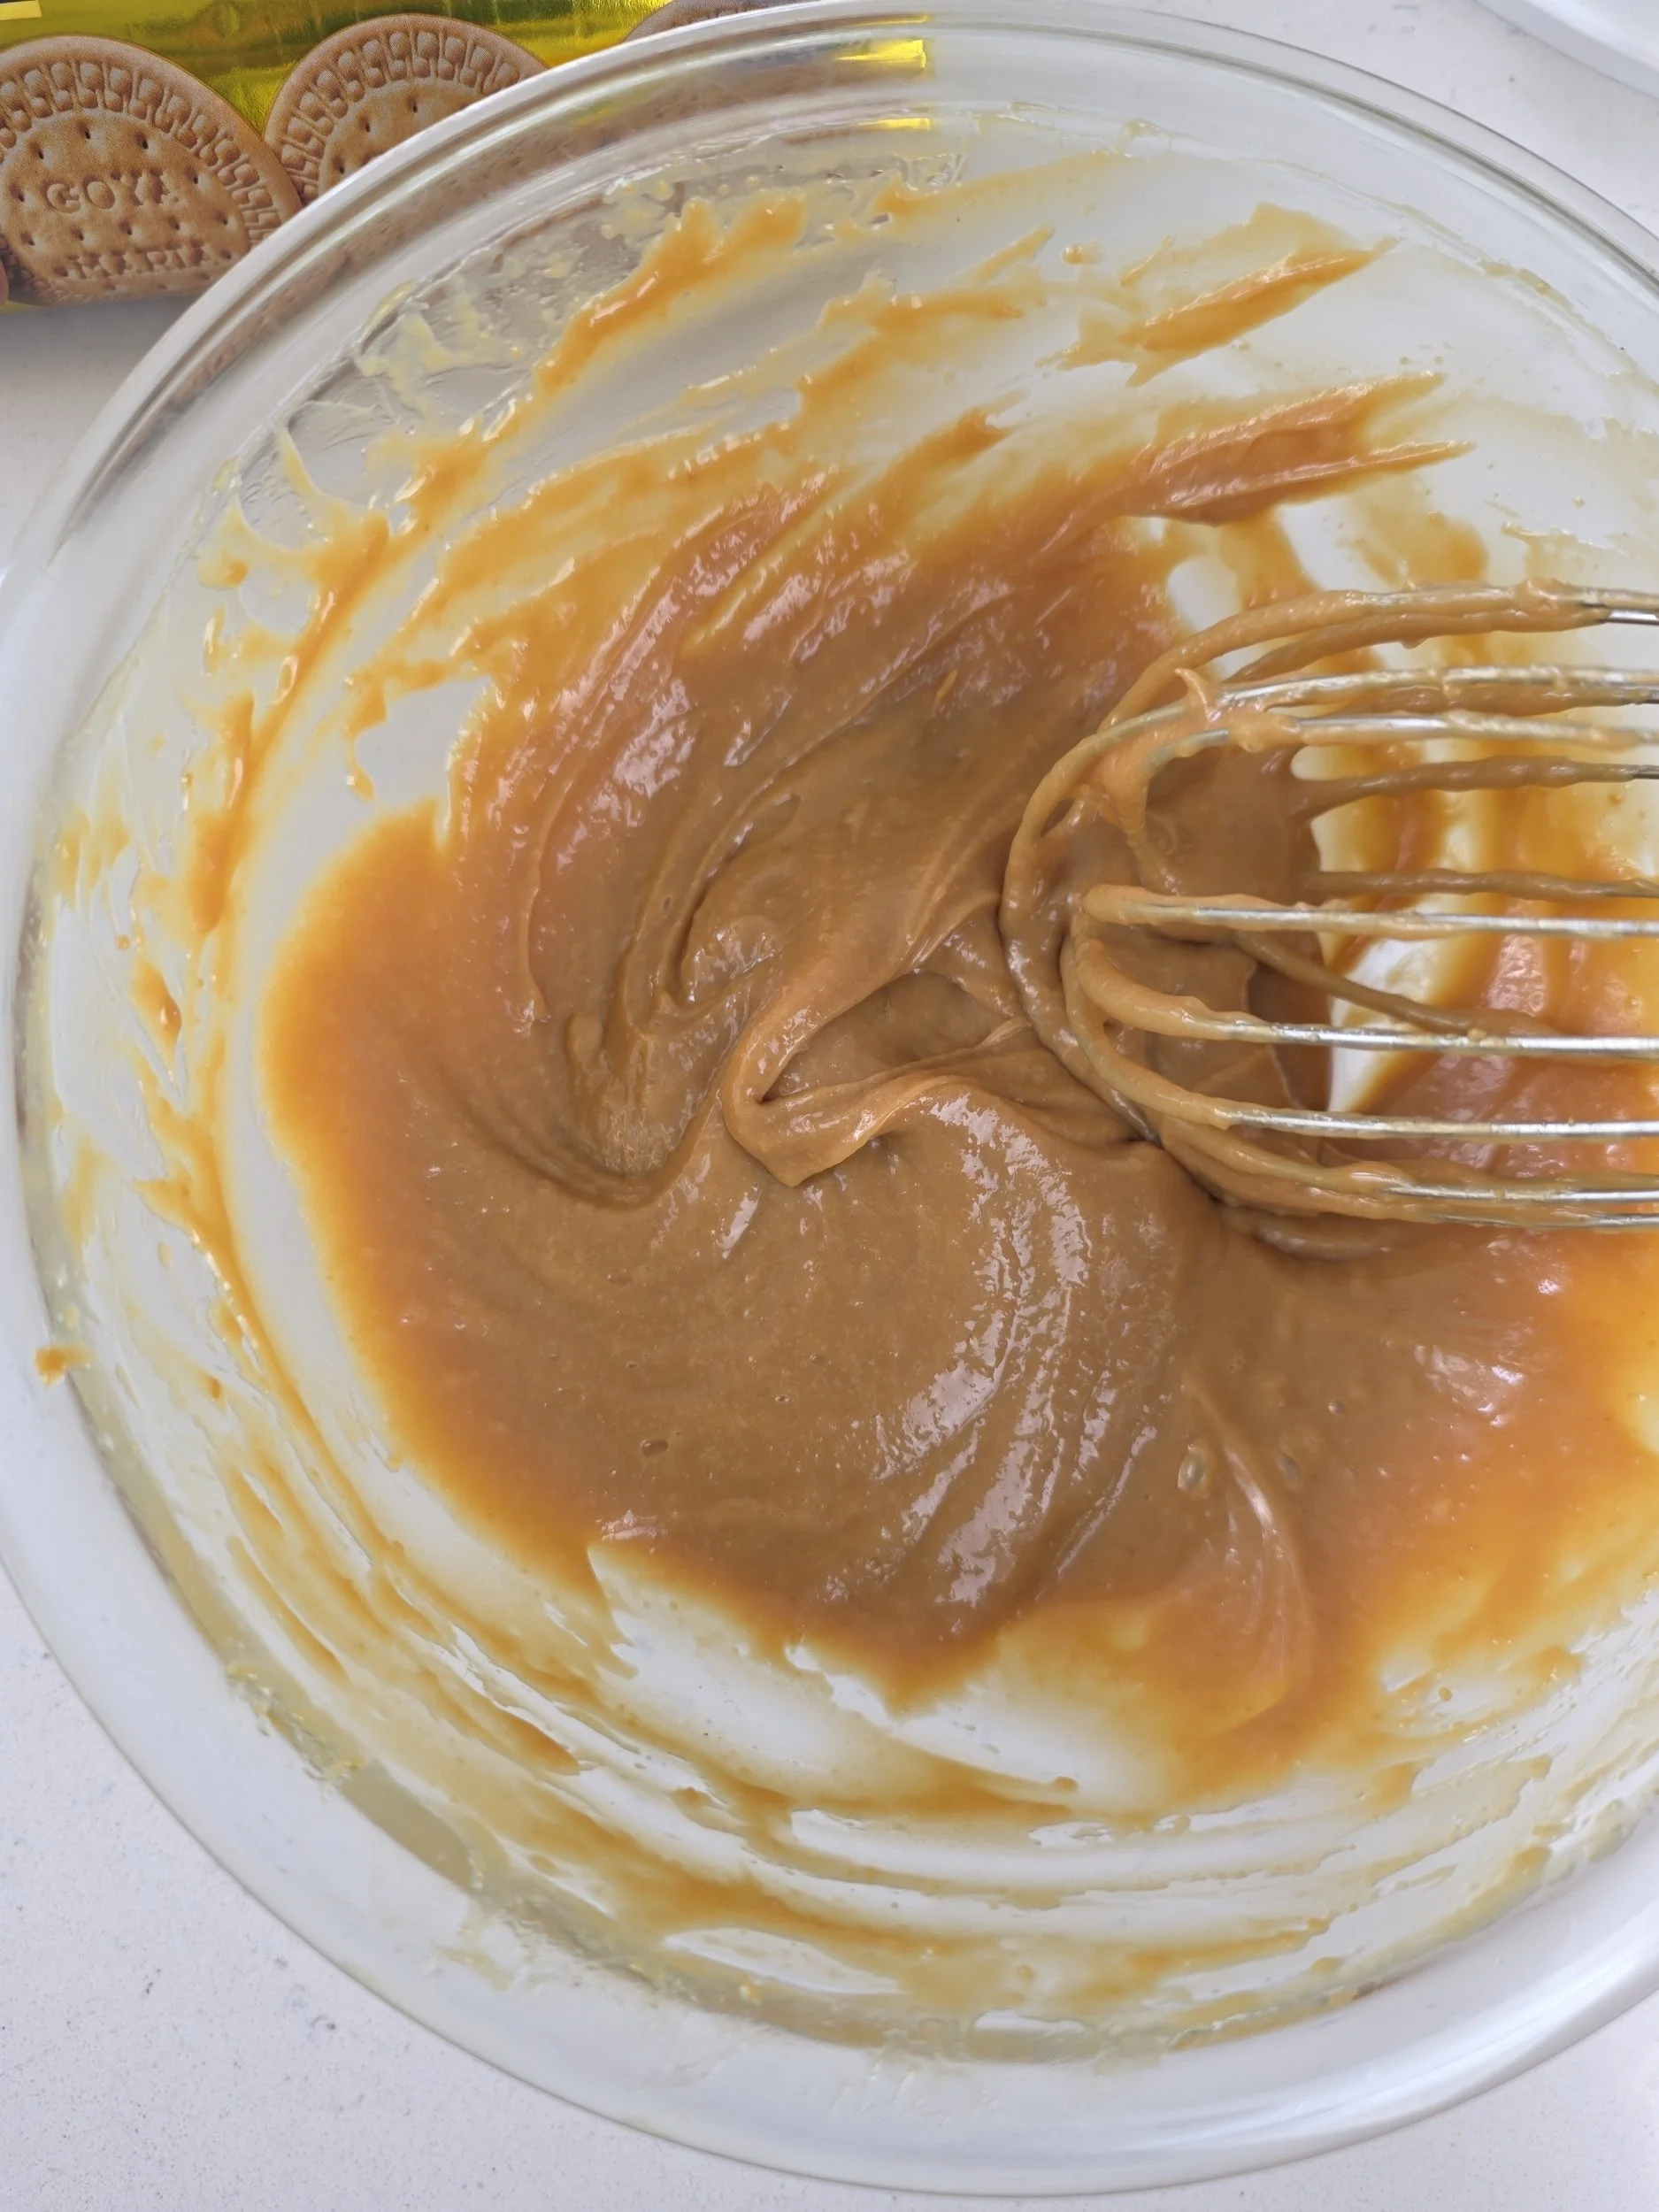
- Place the 7 oz dulce de leche in a bowl. Add the ½ teaspoon vanilla and ¼ teaspoon salt. Stir with a spatula until smooth.
- Add the cooled egg-yolk mixture and stir with a spatula until completely incorporated.
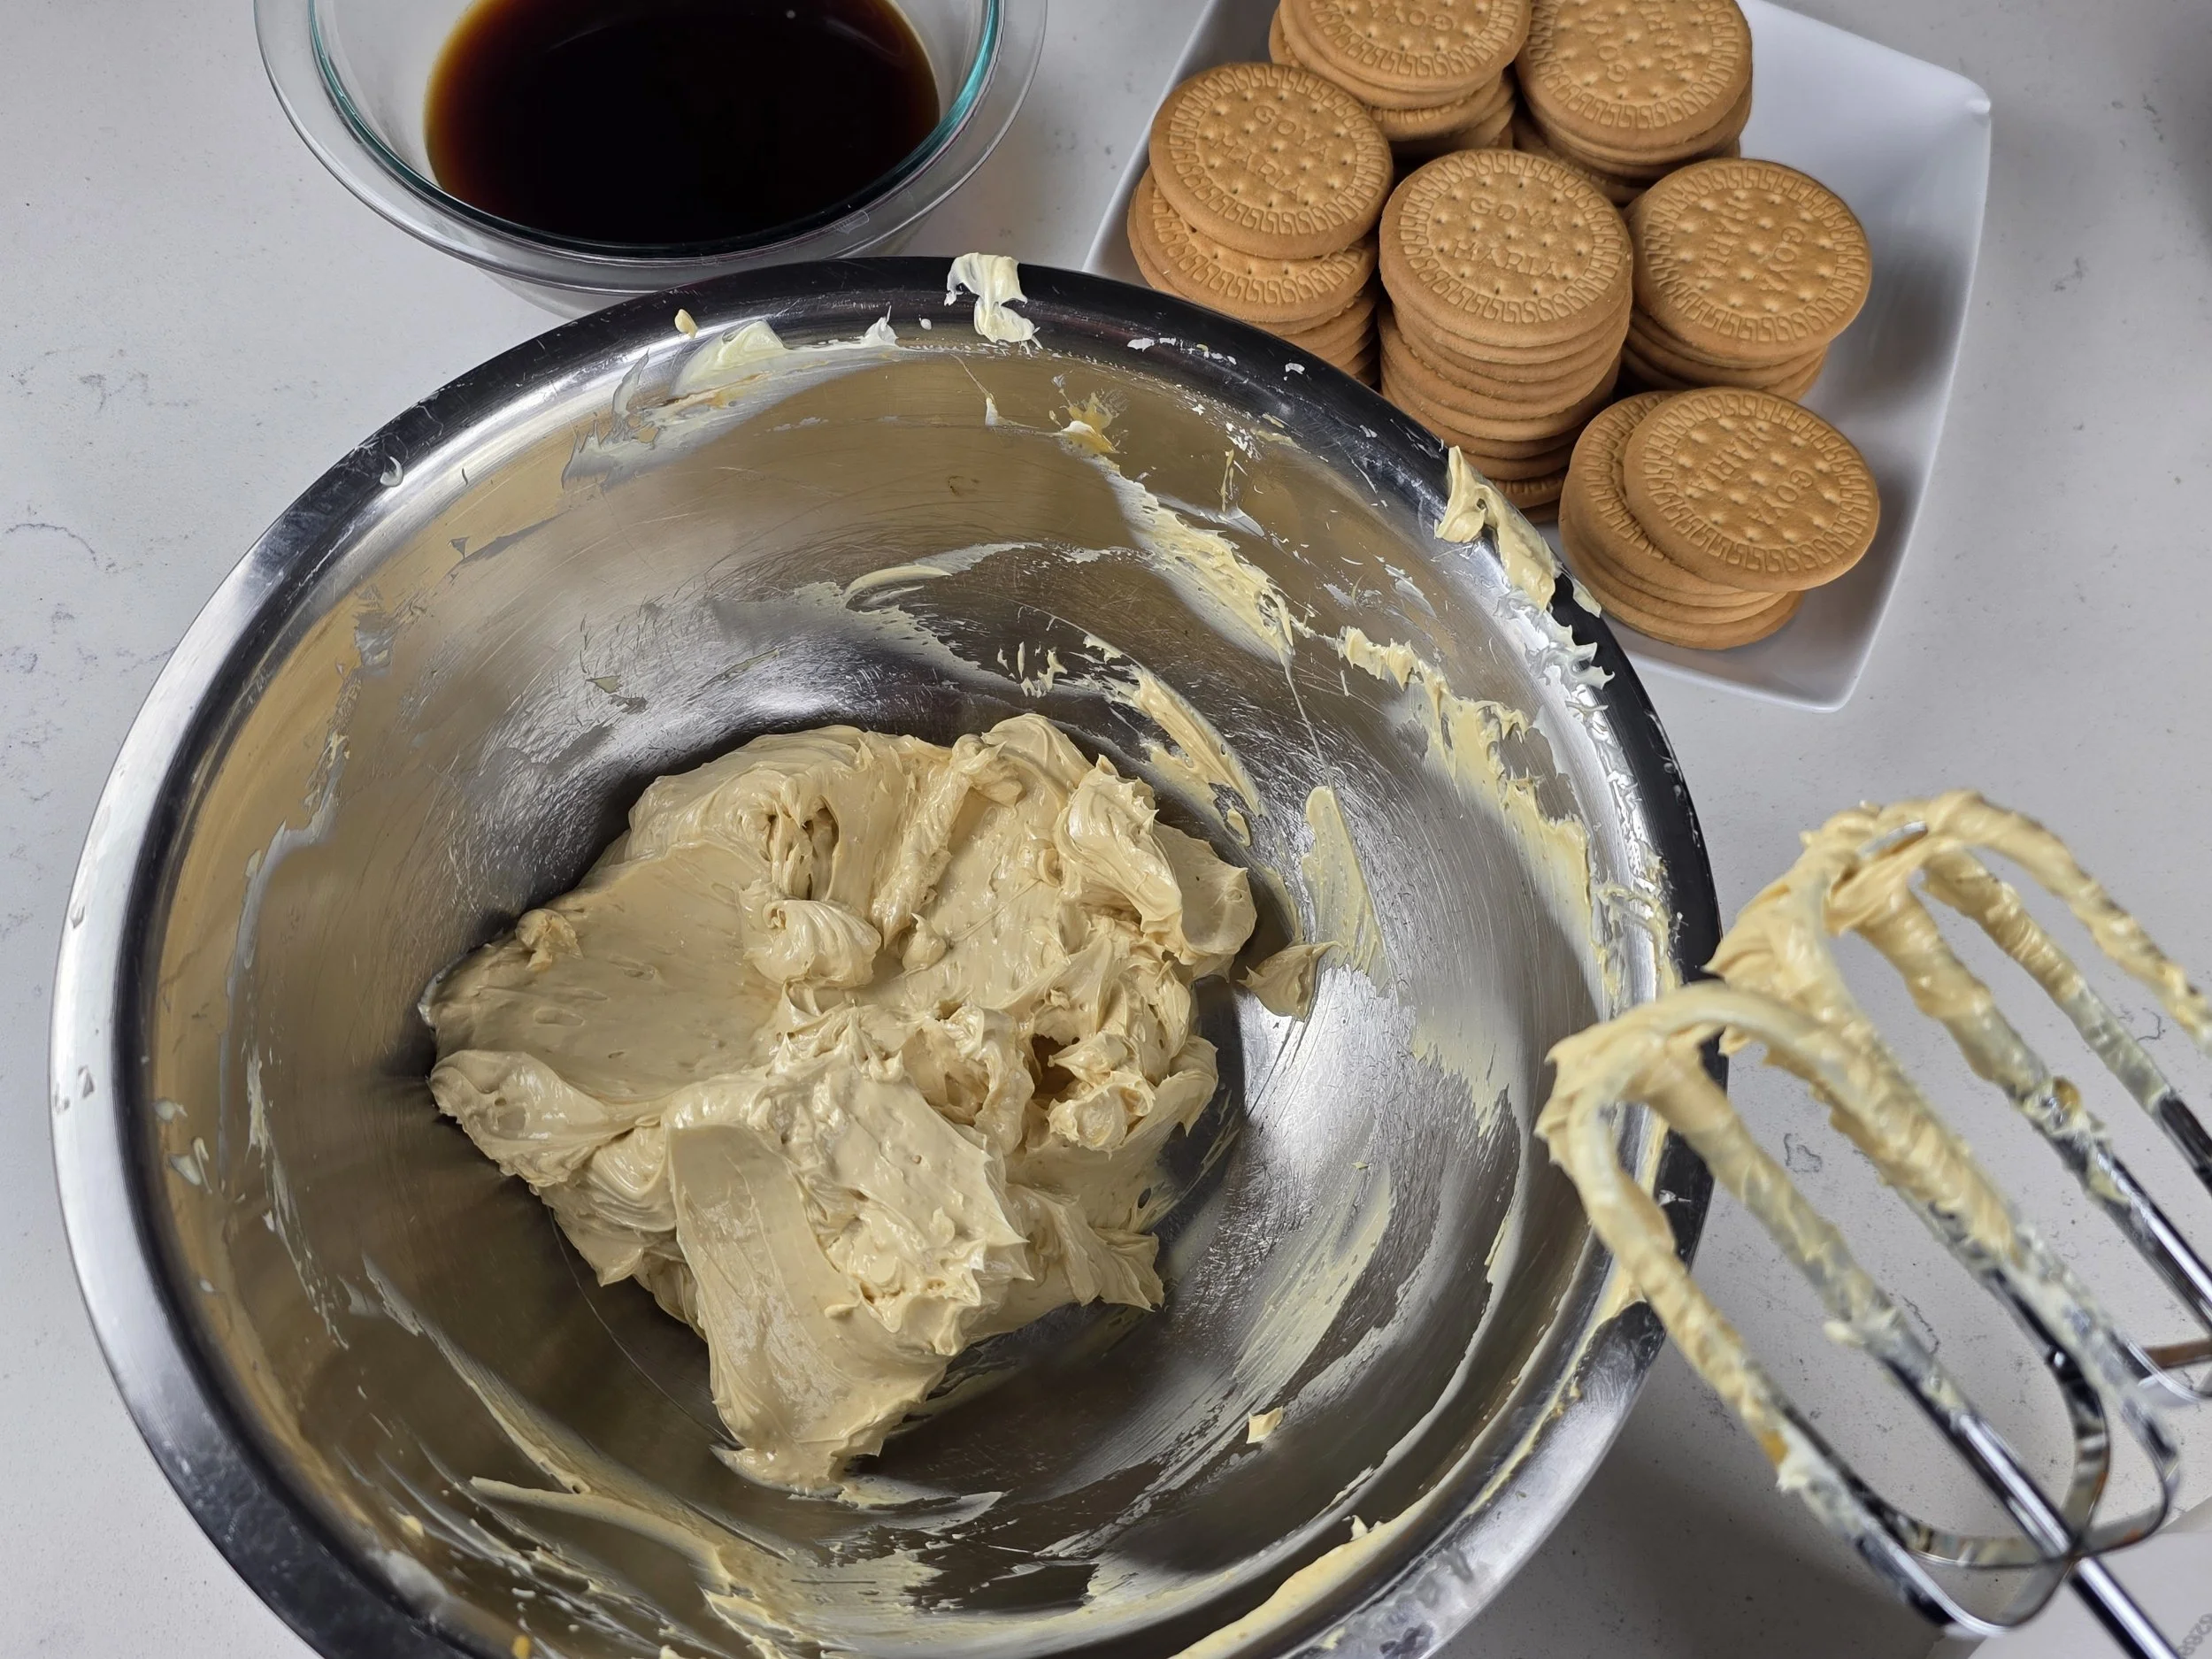
- Place the softened butter in a mixing bowl. Beat with an electric mixer for 3–4 minutes, until light and creamy.
- Gradually add the dulce de leche mixture, about 3 tablespoons at a time, beating after each addition for about 15 seconds, or just until incorporated.
- Continue until all of the caramel mixture has been incorporated and the buttercream is smooth and spreadable. If the buttercream is too soft to spread cleanly, refrigerate it for 15–20 minutes before assembling.
- Place a springform pan or removable-bottom cake pan on a flat tray.
- Spread about 1 tablespoon of buttercream in the center of the base to help hold the first biscuits in place.
- Quickly dip one Maria biscuit at a time into the cooled coffee. Do not soak.
- Arrange 7 biscuits in a flower pattern: 1 in the center with 6 surrounding it. Spread a thin, even layer of buttercream over the biscuits.
- Repeat with another 7 biscuits, alternating between plain and caramel Maria biscuits. Continue until you have 7 biscuit layers.
- Spread the remaining buttercream over the top, then sprinkle the crushed biscuits over the top and sides.
- Cover and refrigerate for at least 4 hours, preferably overnight. The biscuits will soften as they absorb the coffee and the buttercream will firm as it chills.
- Remove the cake from the refrigerator and allow it to sit at room temperature for approximately 5–10 minutes before slicing.
- Release the sides of the springform pan and keep the cake on its removable base for serving.
Notes
- Eggs: If using regular (non-pasteurized) eggs, cook the egg yolks and sugar to 160°F (71°C) as directed. If using pasteurized eggs, you can skip this cooking step and use the yolks according to the manufacturer's guidance.
- Dulce de leche: Store-bought dulce de leche works perfectly. If you can't find it, you can make your own by slowly cooking sweetened condensed milk until thick and caramelized.
- Maria biscuits: Traditional Bola de Bolacha uses Maria biscuits. I use a combination of plain and caramel Maria biscuits for extra caramel flavor. If caramel Maria biscuits aren't available, use plain Maria biscuits throughout.
- Storage: Keep the finished cake covered and refrigerated for up to 4 days. The biscuits will continue to soften as it rests.
- Freezing: The assembled cake can be frozen for up to 1 month. Wrap it tightly before freezing. Thaw overnight in the refrigerator before serving, then allow it to sit at room temperature for 5–10 minutes before slicing.
- Serving: For the cleanest slices, make the cake at least 4 hours ahead; overnight is even better. Let it sit at room temperature for 5–10 minutes before serving.
Nutrition Facts
Calories
465Fat (grams)
28 gSat. Fat (grams)
17 gCarbs (grams)
42 gFiber (grams)
1 gSugar (grams)
29 gProtein (grams)
5 gSodium (milligrams)
220 mgI am not a certified nutritionist and any nutritional information on dontmissmyplate.com should only be used as a general guideline.
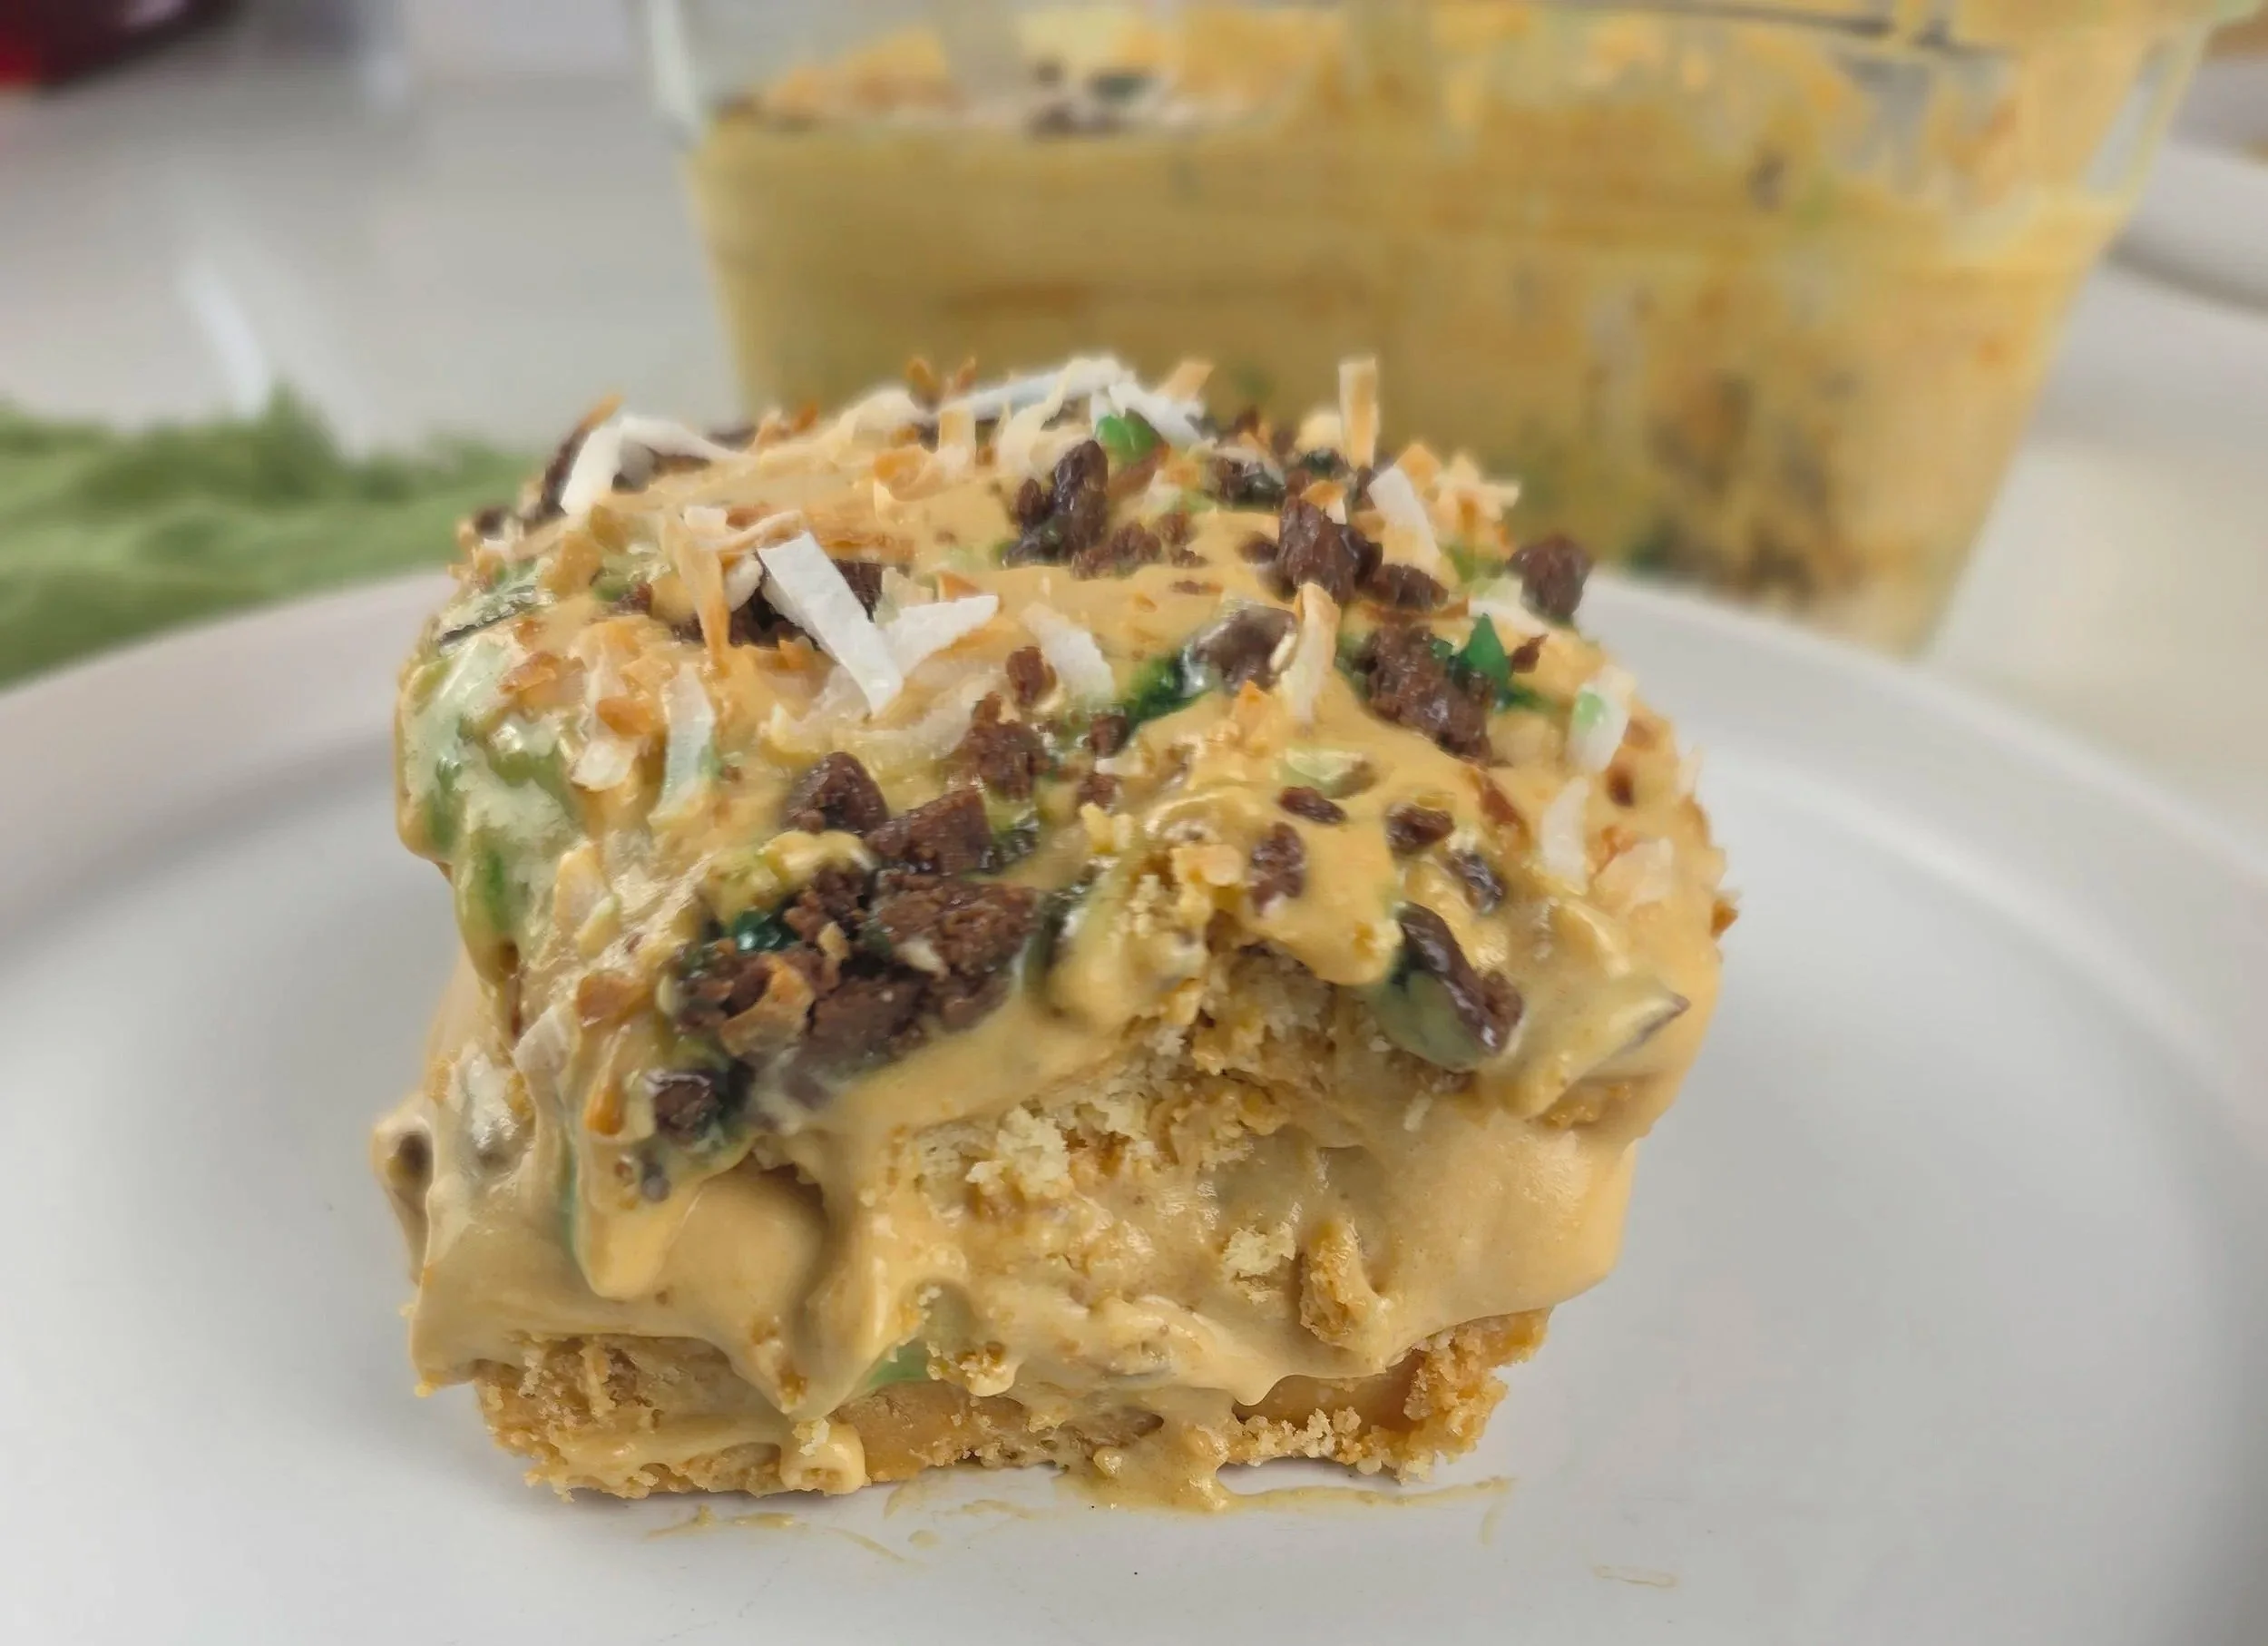
Peppermint Crisp Tart with Coconut
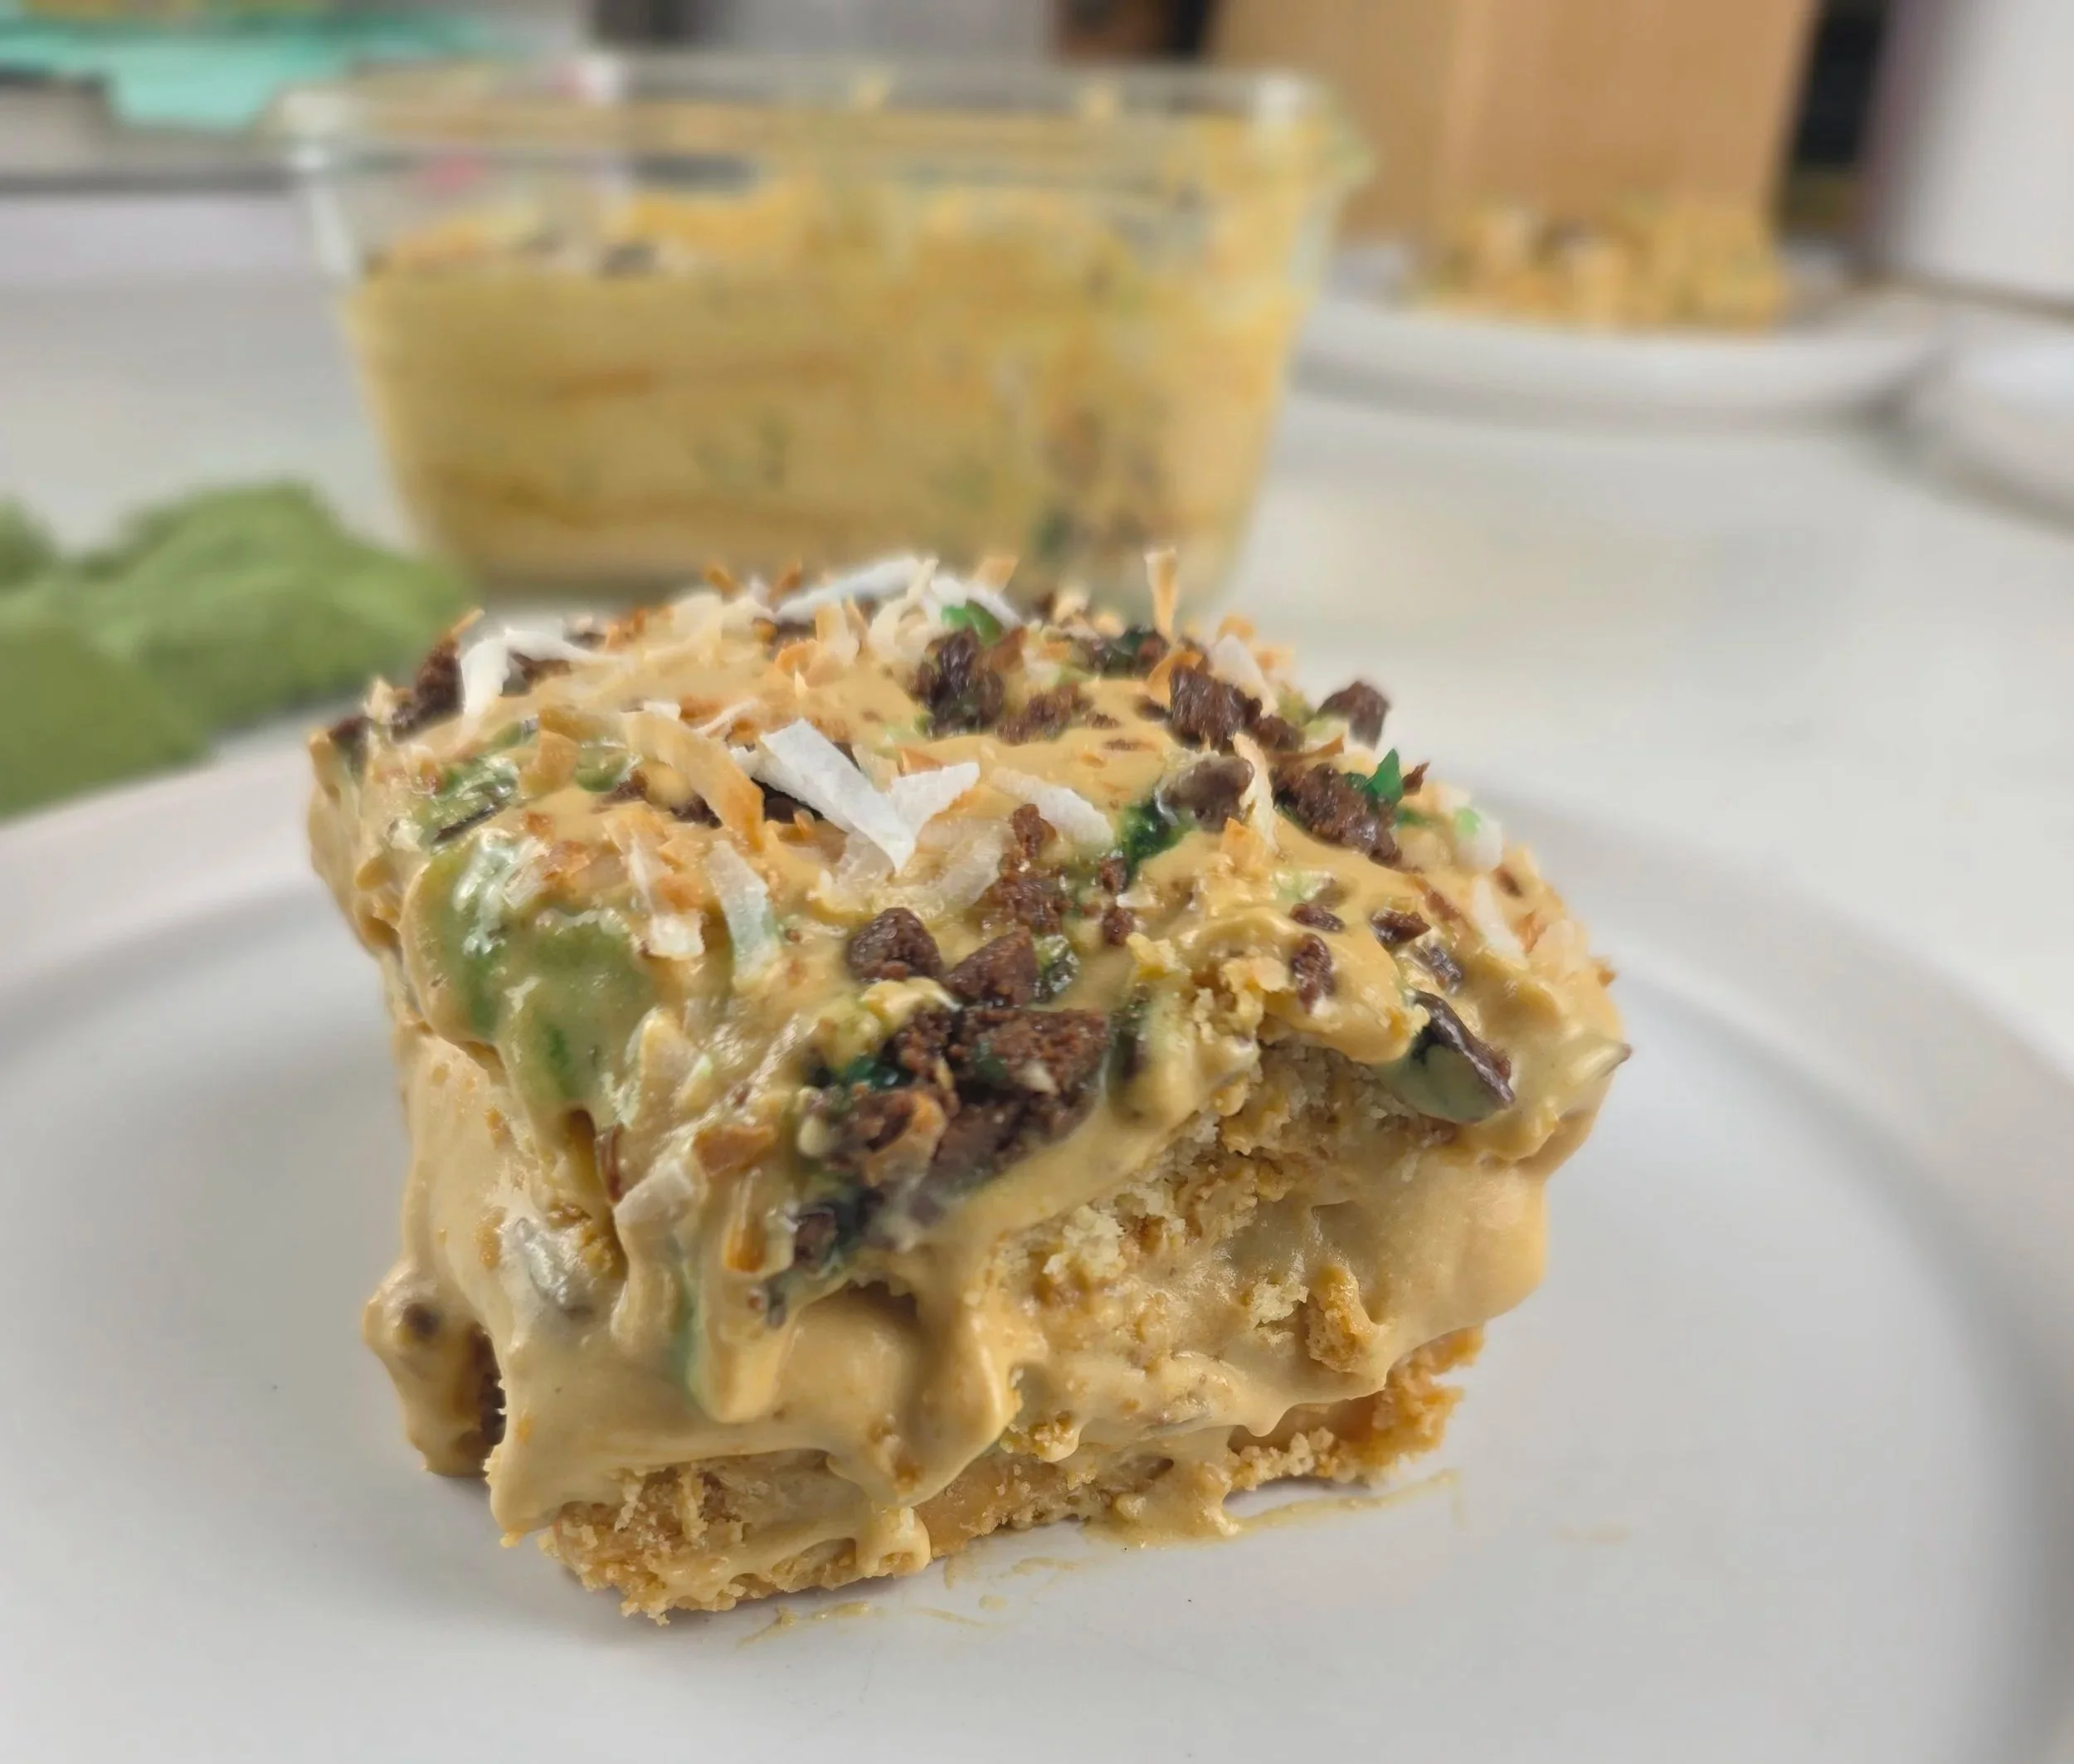
A no-bake South African classic of Tennis biscuits, whipped cream, and caramel, topped with Peppermint Crisp chocolate. My version adds coconut throughout for a tropical twist, no oven needed, just fridge time.
If you didn't grow up in Southern Africa, there's a good chance you've never heard of Peppermint Crisp Tart, but it's one of the most beloved desserts in the country, the kind of thing that shows up at every family gathering, Christmas, and braai. It's a no-bake tart built from layers of crushed Tennis biscuits, whipped cream, and a caramel sauce, all finished with grated Peppermint Crisp, a chocolate bar that's equal parts sweet and crunchy. The biscuits soften just enough in the fridge to turn almost cake-like, while the caramel and cream stay rich and smooth underneath.
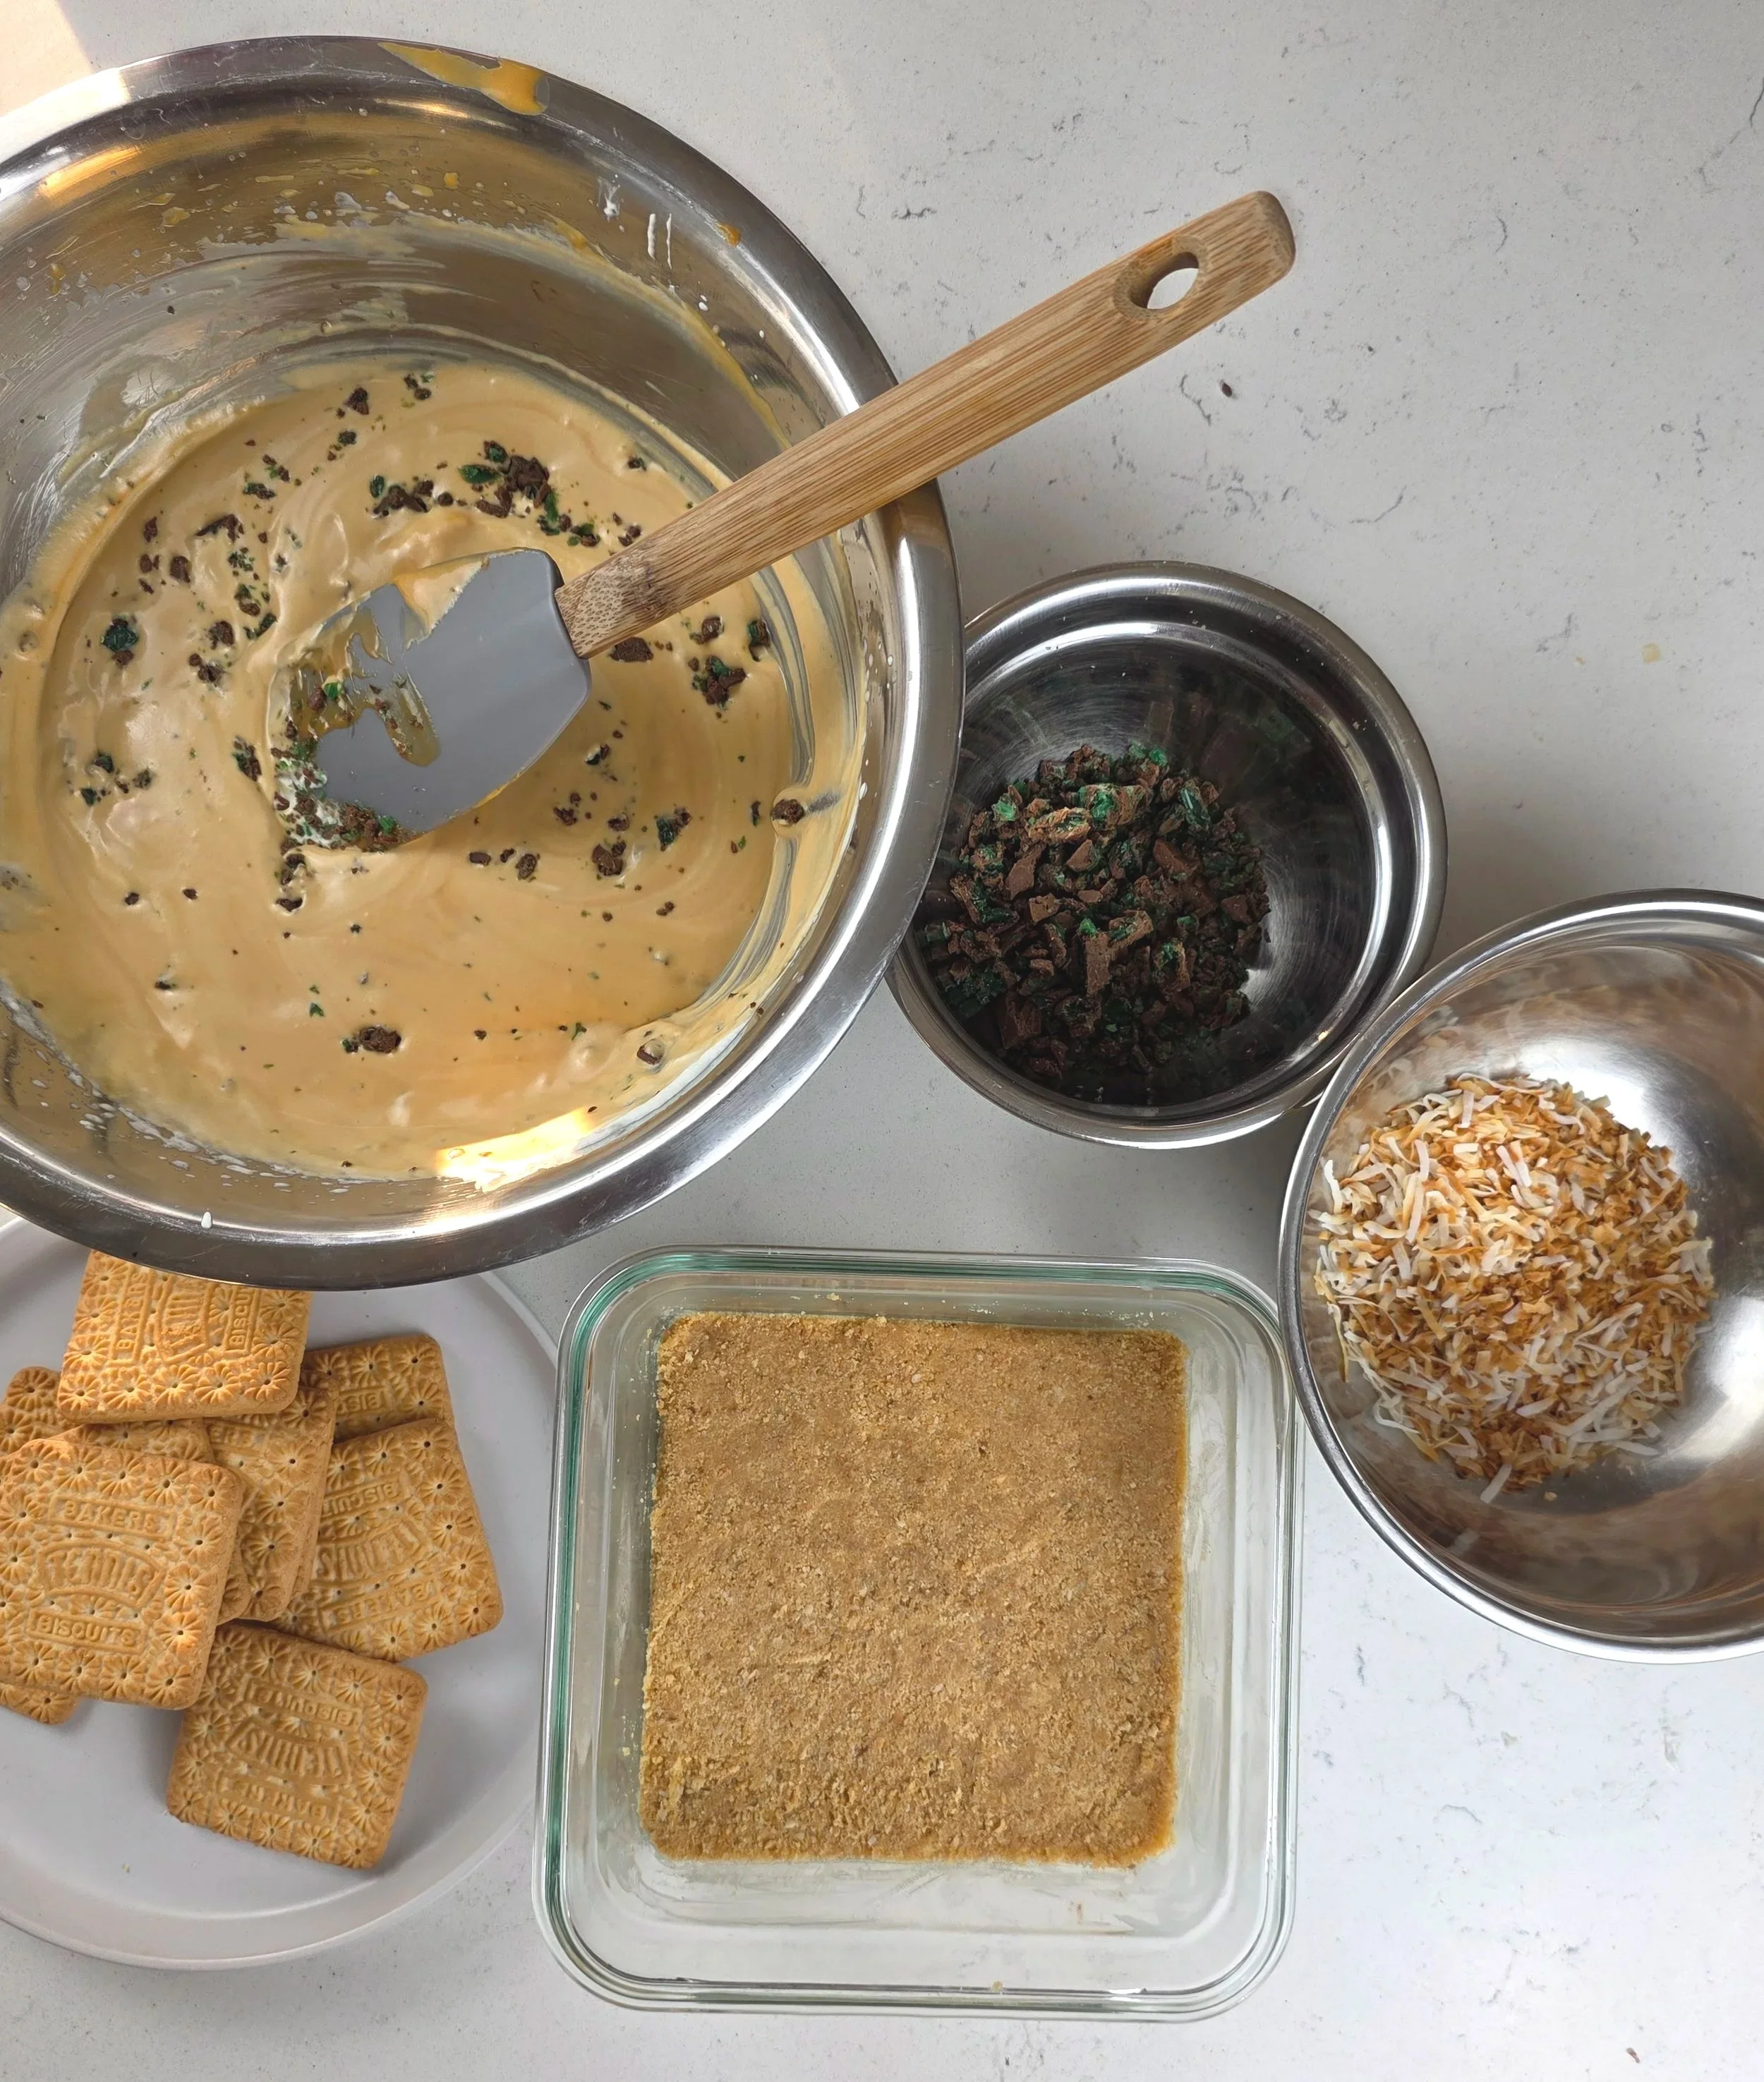
For my version, I wanted to keep everything that makes the original so good while putting my own spin on it. I folded coconut cream into the caramel layer, topped it all with toasted coconut, and turned the Tennis biscuits into a buttery coconut crumb crust instead of the usual straight biscuit layer. It's still unmistakably Peppermint Crisp Tart at heart, but there's a subtle coconut flavor running through every layer now.
It's creamy, minty, rich with caramel, and about as easy as dessert gets, no oven required. Honestly that's part of the charm of this one. You assemble it, slide it into the fridge, and let time do the rest of the work for you.

Peppermint Crisp Tart with Coconut
A no-bake South African classic of Tennis biscuits, whipped cream, and coconut caramel, topped with toasted coconut and grated Peppermint Crisp chocolate. No oven needed, just fridge time to set.
Ingredients
- 16-18 Tennis biscuits
- 4-6 tbsp unsalted butter, melted
- 3 tbsp unsweetened coconut flakes
- 7 oz (198 g) dulce de leche or Caramel Treat
- ¼ cup (60 ml) coconut cream, chilled
- 1 cup (240 ml) cold heavy whipping cream
- 2 tbsp granulated sugar
- ½ tsp vanilla extract
- Pinch of salt
- 2 Peppermint Crisp bars, chopped
- About ½ Peppermint Crisp bar, finely chopped
- 1-2 tbsp toasted coconut flakes
Instructions
- First make the crust. Add the Tennis biscuits and coconut flakes to a food processor and pulse into fine crumbs. Add the melted butter gradually, pulsing after each addition, until the crumbs resemble wet sand and hold together firmly when pressed. You may not need all 6 tablespoons. You can also transfer the crumbs to a bowl before adding the butter and mix with a spatula instead.
- Press the crumb mixture firmly and evenly into the bottom of a 6 × 6-inch dish in a layer about ⅓ inch thick, substantial enough to hold together when cut but not so thick it's hard to cut through. Cover and chill while preparing the filling.
- In a bowl, combine the dulce de leche, coconut cream, vanilla and salt. Stir with a spatula until completely smooth.
- In a separate bowl, beat the cold heavy cream and granulated sugar until medium-stiff peaks form. Do not overwhip!
- Fold about one-third of the whipped cream into the caramel mixture to loosen it. Then gently fold the loosened caramel mixture into the remaining whipped cream until smooth and fluffy.
- Chop 2 Peppermint Crisp bars, reserving approximately ½ bar for the topping. Gently fold the remaining chopped Peppermint Crisp into the filling. Spread half of the filling over the chilled biscuit crust.
- Arrange a single layer of whole Tennis biscuits over the filling, breaking them as necessary to fit. Spread the remaining filling over the biscuits and smooth the top.
- Sprinkle with the reserved chopped Peppermint Crisp and toasted coconut flakes.
- Cover and refrigerate for at least 4 hours, preferably overnight, until thoroughly chilled and set. Serve chilled.
Notes
- Chocolate: If Nestlé Peppermint Crisp isn't available, substitute an equivalent amount of peppermint chocolate, such as peppermint Aero.
- Dulce de leche: Traditional South African Peppermint Crisp Tart uses Nestlé Caramel Treat. Dulce de leche works as a readily available U.S. substitute, either works in this recipe.
- Tennis Biscuits: Tennis biscuits are the classic South African coconut biscuits traditionally used in this tart. If unavailable in the U.S., substitute Voortman Coconut Cookies or another thin, crisp coconut biscuit. Leibniz Butter Biscuits or a similar crisp tea biscuit also work, though the coconut flavor will be less pronounced.
- Coconut Cream: Use canned coconut cream. It's mixed directly into the caramel and doesn't need to be whipped.
- Crust Note: For the best texture, press the biscuit mixture into a firm, even layer about ⅓ inch thick. You want a substantial crust that holds together when cut but isn't so thick that it becomes difficult to cut through.
Nutrition Facts
Calories
690Fat (grams)
41 gSat. Fat (grams)
27 gCarbs (grams)
52 gSugar (grams)
37 gProtein (grams)
6 gSodium (milligrams)
167 mgI am not a certified nutritionist and any nutritional information on dontmissmyplate.com should only be used as a general guideline.