
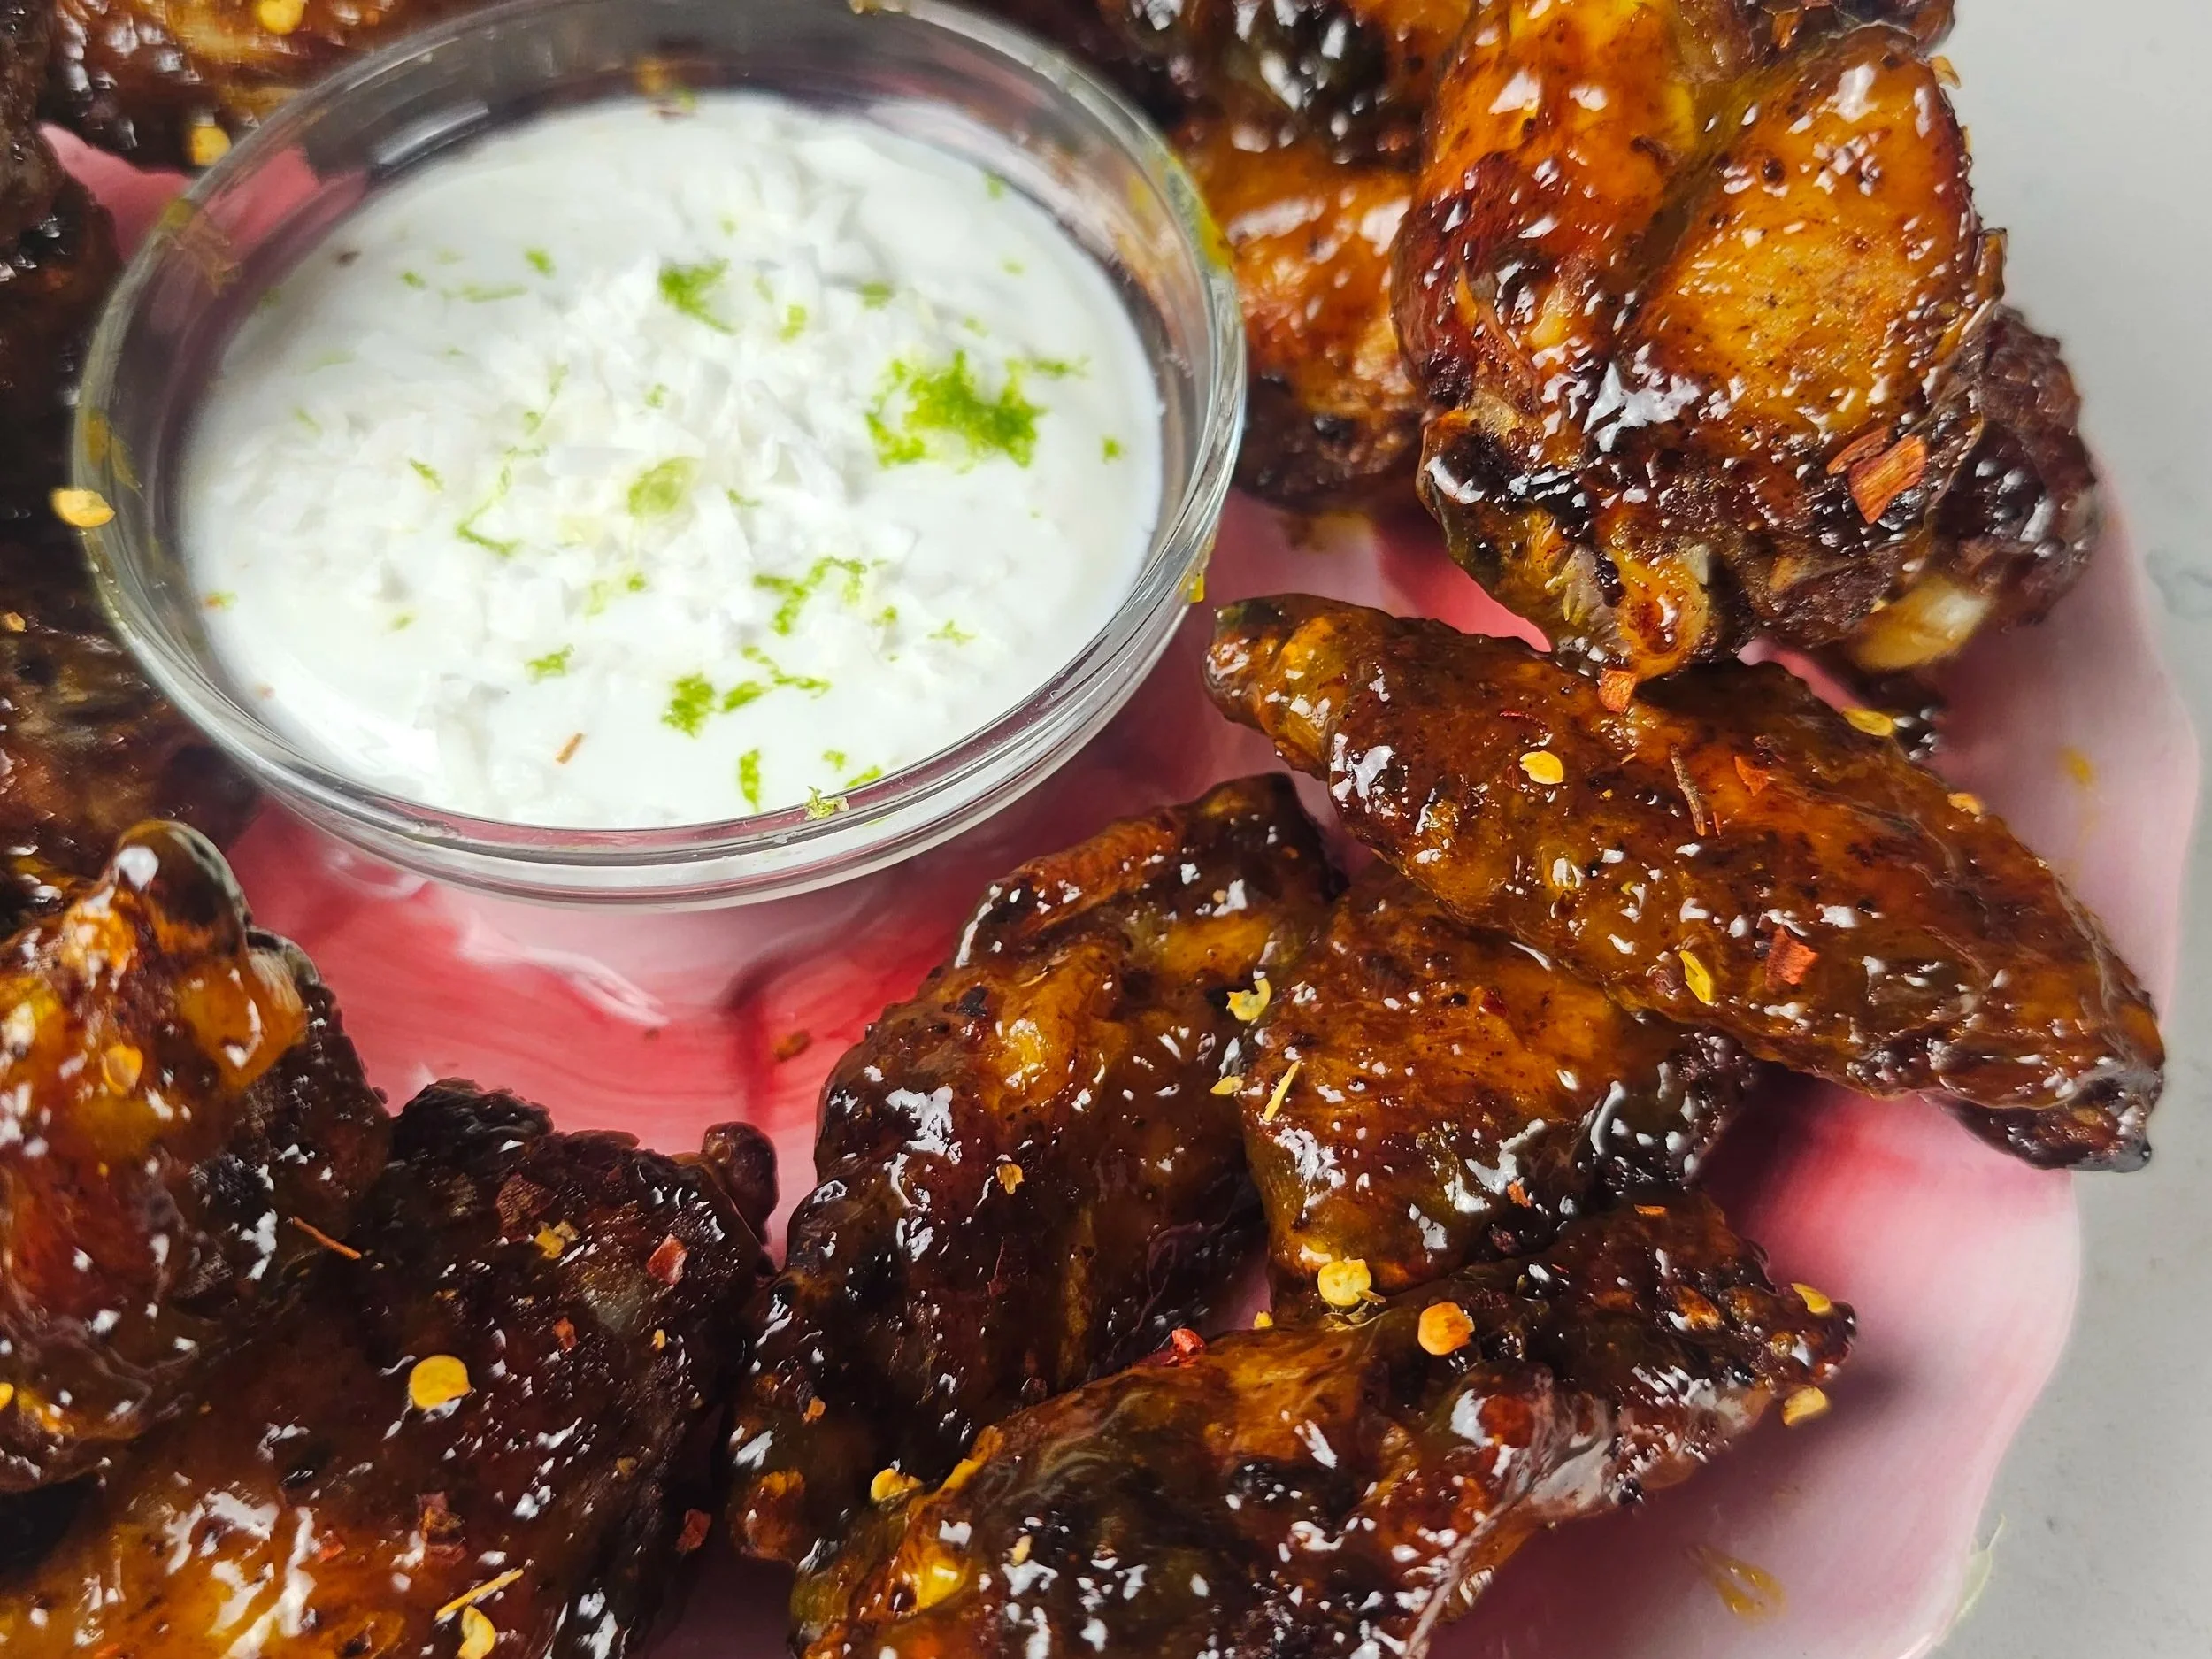
Passion Fruit-Glazed Chicken Wings
These passion fruit glazed chicken wings are crispy, sticky, and bursting with tropical flavour, made using an air fryer for convenience and finished with a glossy, caramelised glaze that clings to every bite. Passion fruit is widely used across East African cuisine and other tropical food cultures for its naturally sharp acidity, floral sweetness, and ability to cut through rich, fatty meats like chicken wings. When reduced into a glaze, it becomes intensely aromatic, balancing tartness with sweetness in a way that feels both refreshing and deeply savoury.
This recipe highlights how tropical fruit glazes can transform everyday chicken wings into something vibrant and elevated. Passion fruit is especially effective because of its high acidity and fragrant seed pulp, but it can also be interchanged with other tropical fruits like pineapple or mango for different sweetness profiles, or even adjusted with a touch of citrus such as lime to enhance brightness. The key is balance — the glaze should never be overly sharp or overly sweet, but reduced until it lightly coats the wings in a sticky, glossy layer.
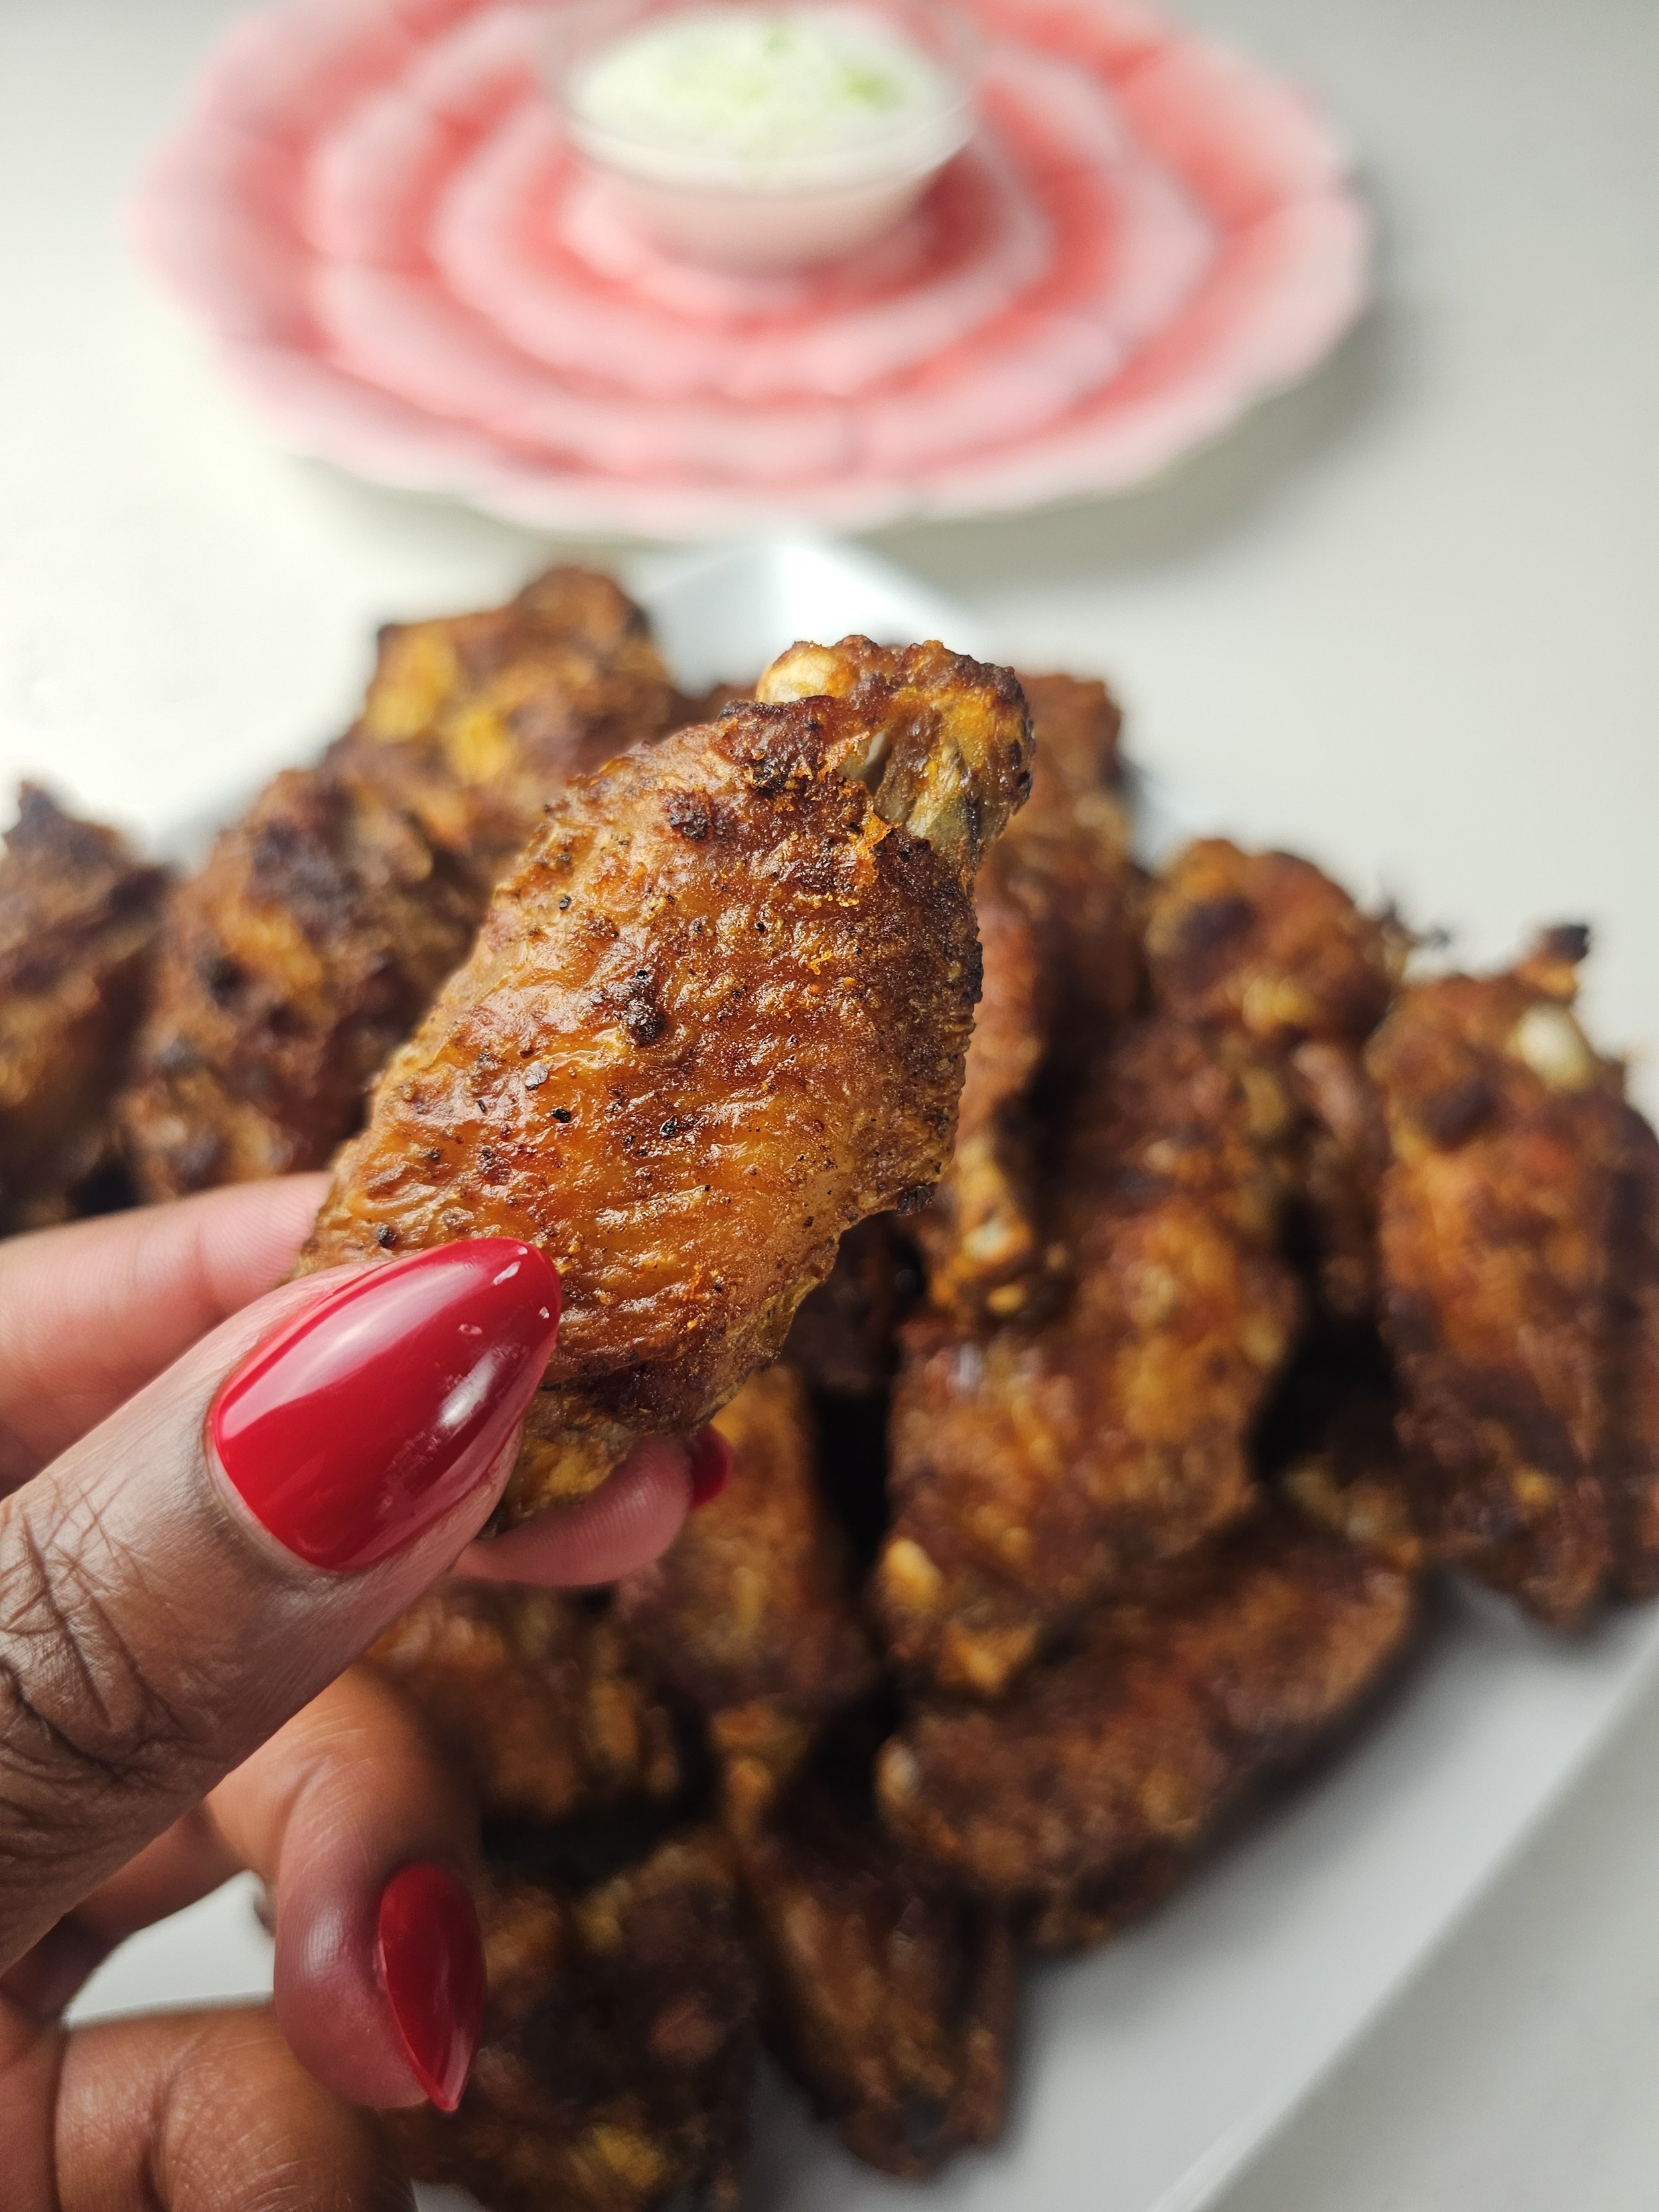
The wings themselves are seasoned with a simple chicken spice blend and other seasonings and air fried for about 20 minutes until golden, crispy on the outside, and juicy inside. Unlike deep frying, the air fryer creates a clean crisp texture while still allowing the skin to render and caramelize when coated in glaze.
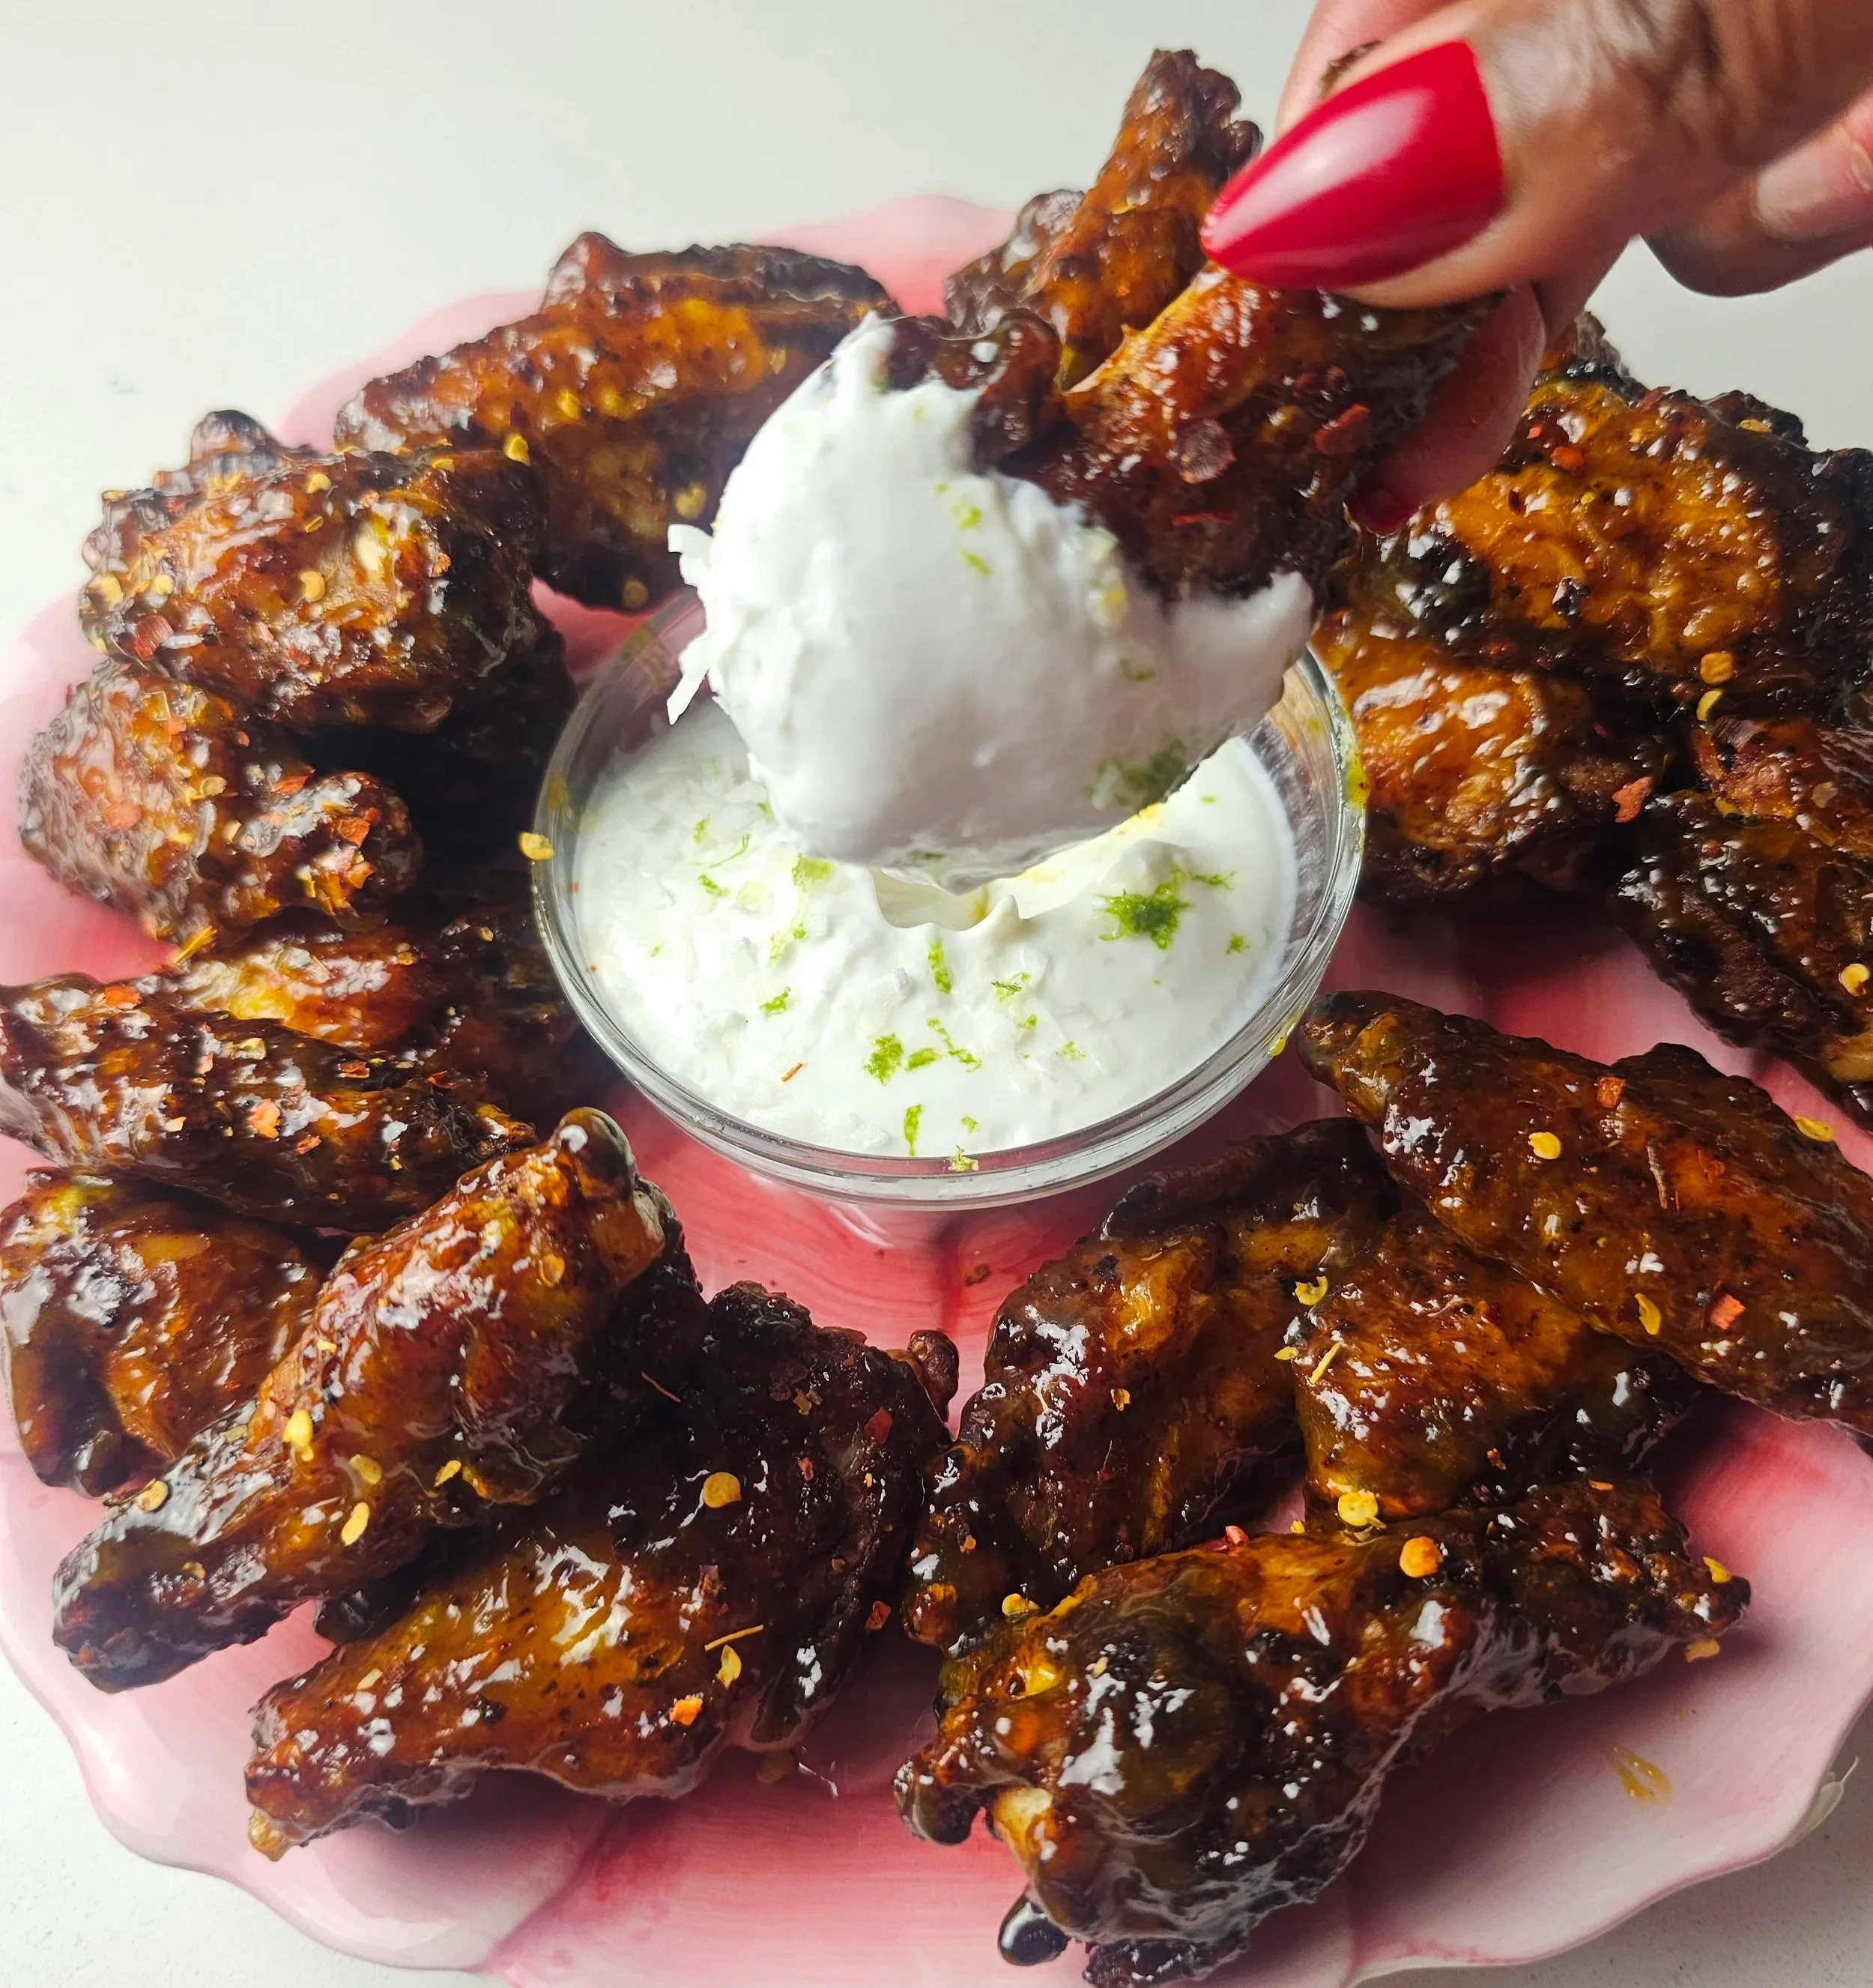
These wings are perfect for game nights, casual weekend cooking, summer gatherings, or when you want a fast but flavour-packed meal with a tropical twist. Served with a coconut lime Greek yogurt dip, they deliver contrast: spicy, sweet, tangy wings paired with a cool, creamy finish.

Passion Fruit-Glazed Chicken Wings
Passion fruit glazed chicken wings cooked in the air fryer until crisp and golden, then coated in a glossy tropical glaze made from reduced passion fruit pulp, water, sugar, honey, and lime. These wings balance acidity and sweetness while keeping the wings juicy inside and crisp outside. Serve with a coconut lime yogurt dip for cooling contrast.
Ingredients
- 3 lbs chicken wings (drums and flats)
- 2 tbsp oil
- 2 tsp salt
- 1½ tsp black pepper
- 1½ tsp smoked paprika
- 1½ tsp onion powder
- 1½ tsp garlic powder
- ½ tsp ground ginger
- 1 tbsp chicken spice seasoning (I used Robertson's)
- ¾ cup frozen passion fruit pulp (thawed) - optional swaps: mango or pineapple can be used for a sweeter, less acidic glaze profile.
- ¼ cup water
- 2 tbsp honey
- Pinch of salt
- Lime juice (optional to balance)
- Chili flakes (optional)
- ¼ cup granulated sugar (start point, add more to balance)
- ½ cup Greek yogurt
- 1–2 tbsp coconut unsweetened flakes
- Zest of ½ lime
- Juice of ½ lime
- Pinch of salt
Instructions
- In a large bowl, add the oil and seasonings with the chicken and marinate for at least 30 minutes in the fridge.
- Preheat air fryer and cook at 200°C / 400°F for 18–20 minutes, and shake or flip halfway through. Wings should be crisp, golden, fully cooked, but still juicy inside. You may need to do this in batches of 2-3 depending on the side of your air fryer.
- To make the glaze while the chicken cooks, add the passion fruit pulp, water, sugar, honey and salt to a saucepan. Heat over medium-low heat until gently simmering. Stir occasionally and simmer 5–8 minutes.
- IMPORTANT: Watch the texture - you want it glossy, slightly thickened and still pourable (NOT jam). Then adjust - If it’s too tart / sharp → add 1 tbsp sugar, stir, simmer 1–2 min → repeat if needed (don’t jump big amounts). If it’s too sweet → add ½ tsp lime juice max.
- Toss wings in warm glaze in a large bowl and plate. You can also air fry 2–3 min after glazing to set coating.
- For the dip, mix yogurt, lime, and salt. Top with coconut flakes.
- Adjust seasoning and chill or serve immediately
Notes
- 18–20 minutes is ideal for juicy air fryer wings (20 min = best balance, longer if you want crispier, up to 25)
- Passion fruit glaze should be reduced but still pourable. not jam. Keep tasting and adjusting until you reach your desired balance and tossing with the wings. Glaze works best when balanced with sweetness and lime dilution.
- Wings do not need to be hot before glazing.
- Air fryer finish after glazing improves gloss and photo quality.
- 3 lbs serves 4–6 people depending on appetite
Nutrition Facts
Calories
490Fat (grams)
30 gCarbs (grams)
16 gProtein (grams)
32 gI am not a certified nutritionist and any nutritional information on dontmissmyplate.com should only be used as a general guideline.
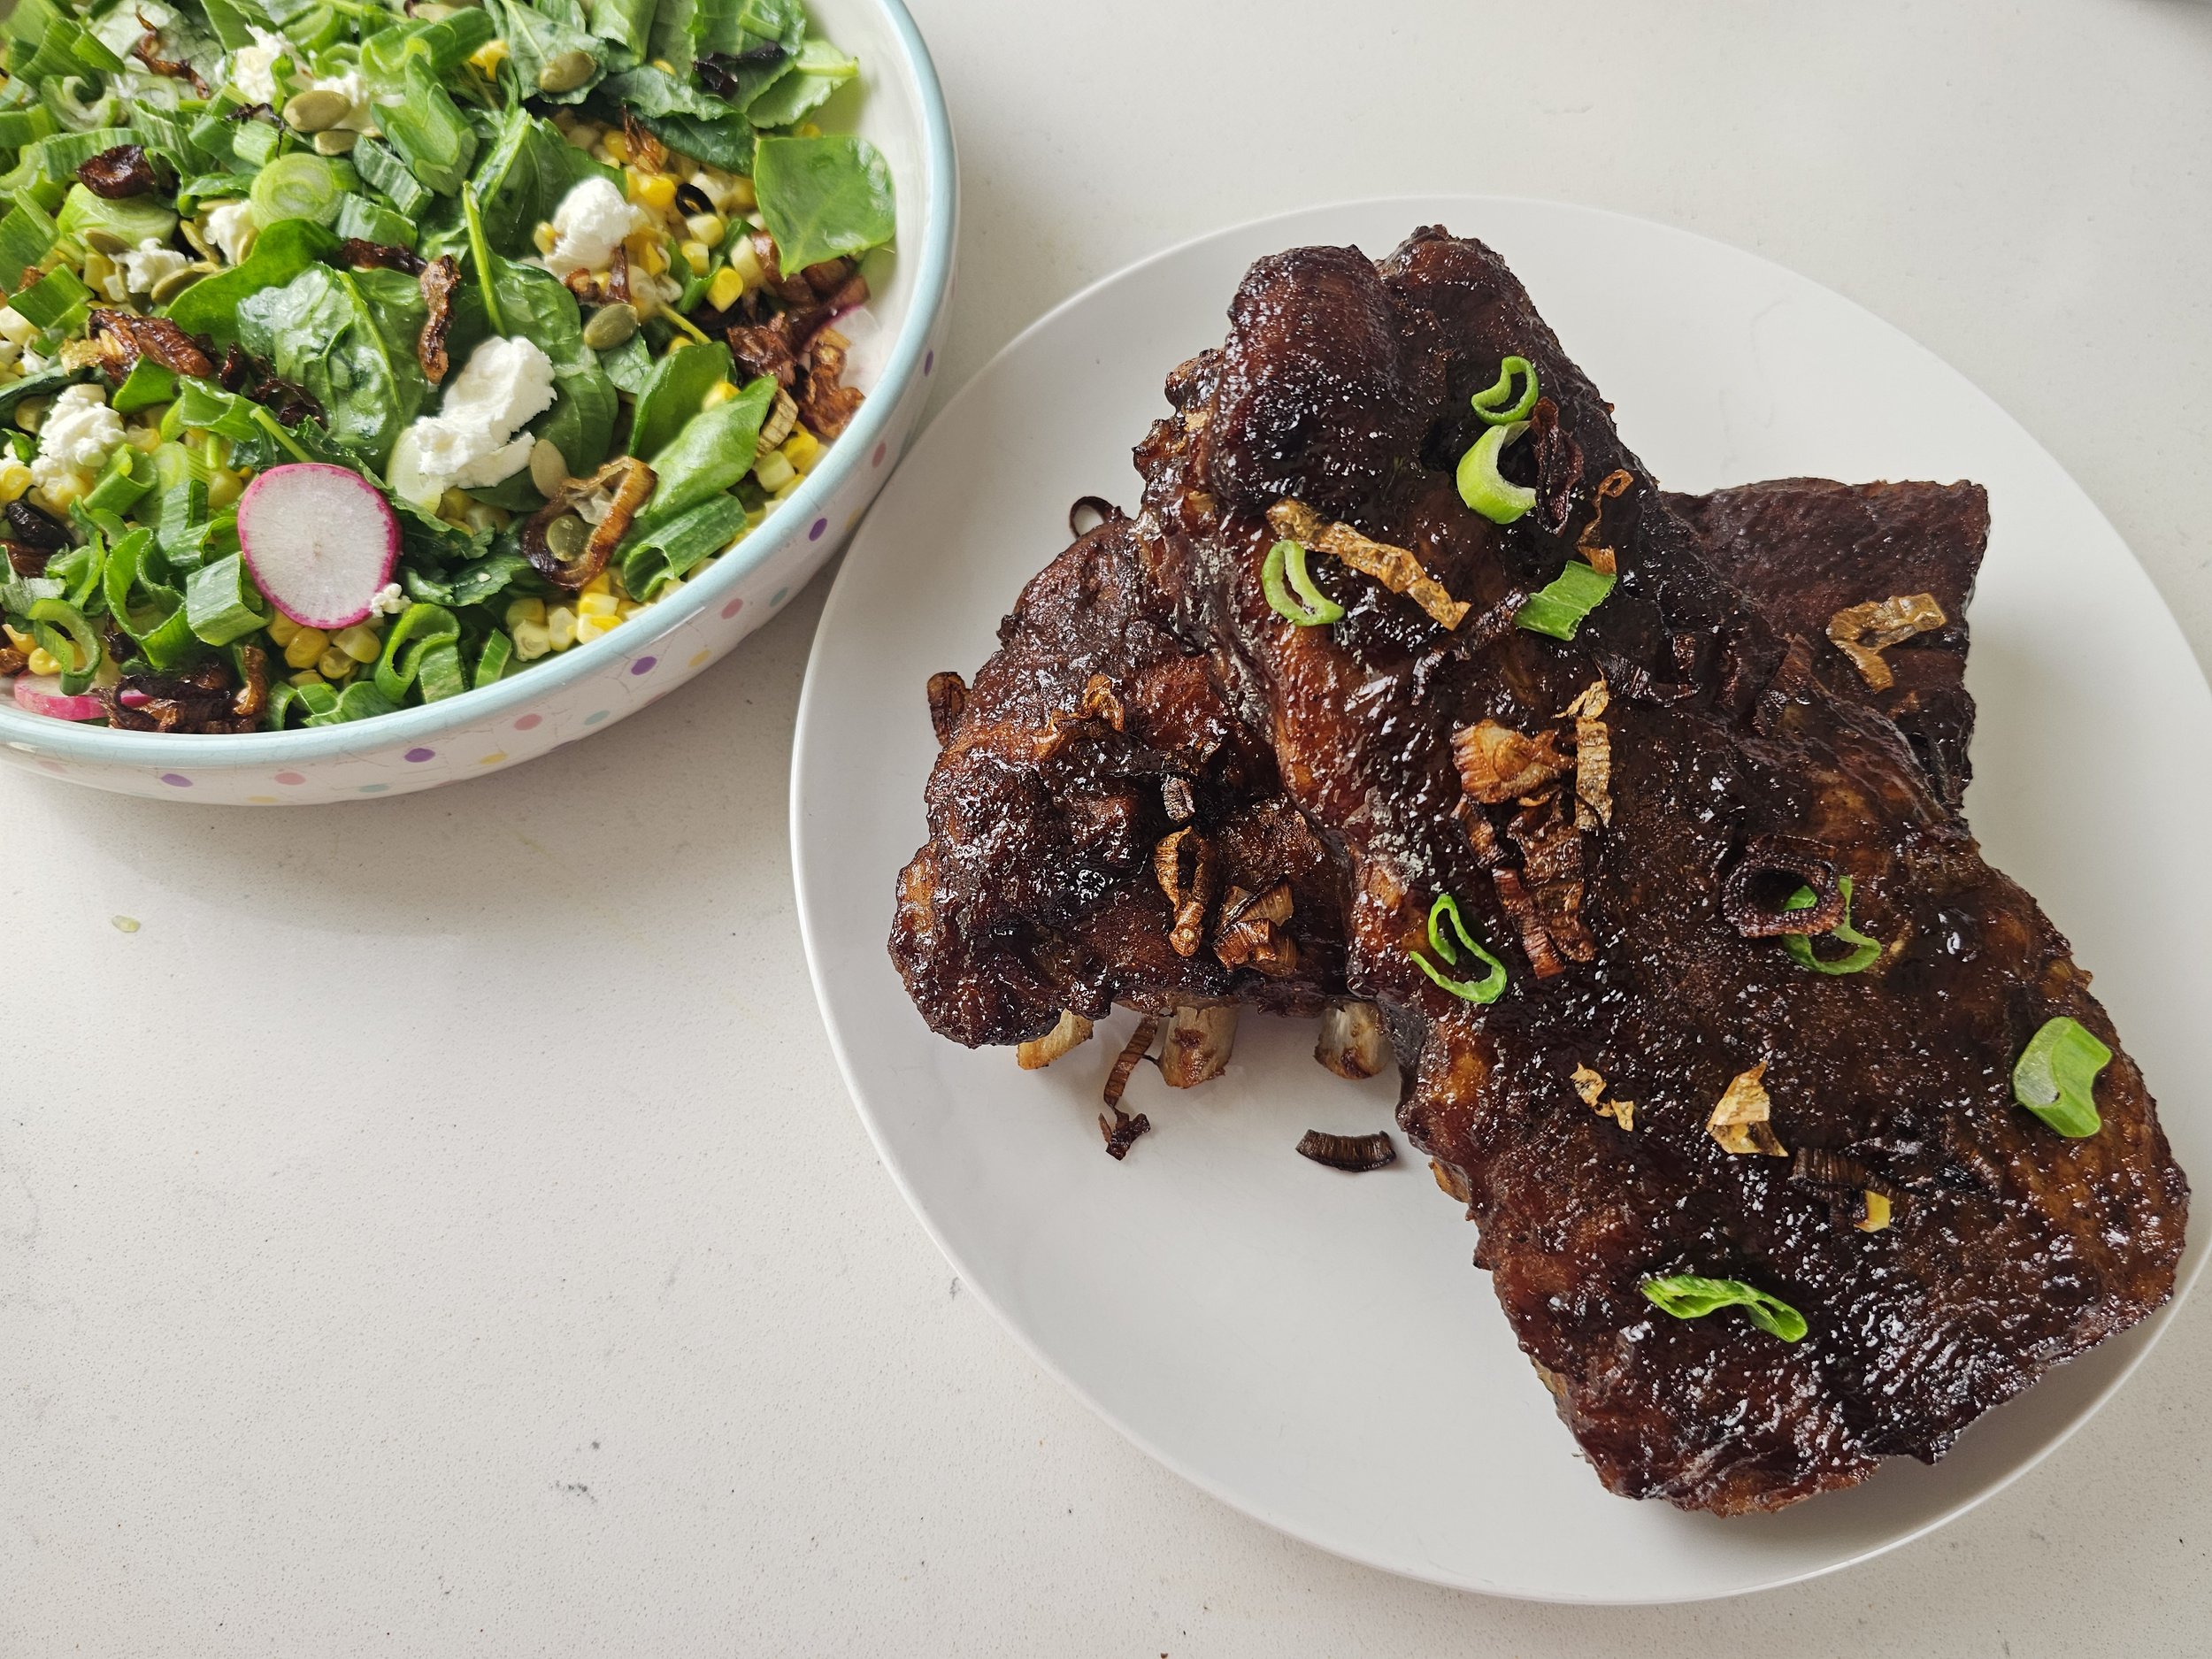
Tamarind-Glazed Baby Back Pork Ribs
Let’s talk about ribs.
I’ve always had a serious weakness for them. There is something about that sticky, smoky, sweet and savory bite that just hits differently. My first real memory of ribs was at a place called Spur, tucked inside a Holiday Inn in Harare, and I remember being completely obsessed. That was the moment I understood why ribs have such universal appeal. They are messy, rich, comforting, and a little indulgent in the best way.
For this recipe, I wanted to bring that same cookout energy into summer with a twist that reflects how I cook now. Simple, bold, and built for real home kitchens.
One of the key elements here is tamarind, a classic ingredient used across East African cooking and many other global cuisines. It has that deep tangy sweetness that works beautifully in savory dishes, which is exactly why it pairs so well with ribs. That sweet and sour balance cuts through the richness of the meat and creates a sticky glaze you cannot stop going back for. If you are not into sweet and sour, a classic BBQ sauce will also work.
I keep the ribs straightforward with simple seasoning, oven baking, and a high heat finish until caramelized. Nothing complicated. The focus is flavor, texture, and accessibility so it can be recreated easily at home.
The farmers’ market influence is in the side dish, not the ribs. A corn salad made with seasonal corn, radish, goat cheese, pumpkin seeds, and spring onions. I use the spring onions two ways, fresh for brightness and fried for crunch, adding contrast and texture without overcomplicating the plate.
In the end, it comes together as a dish that feels like summer. Sweet heat from the glaze, freshness from the salad, richness from the ribs, and crunch in every bite.
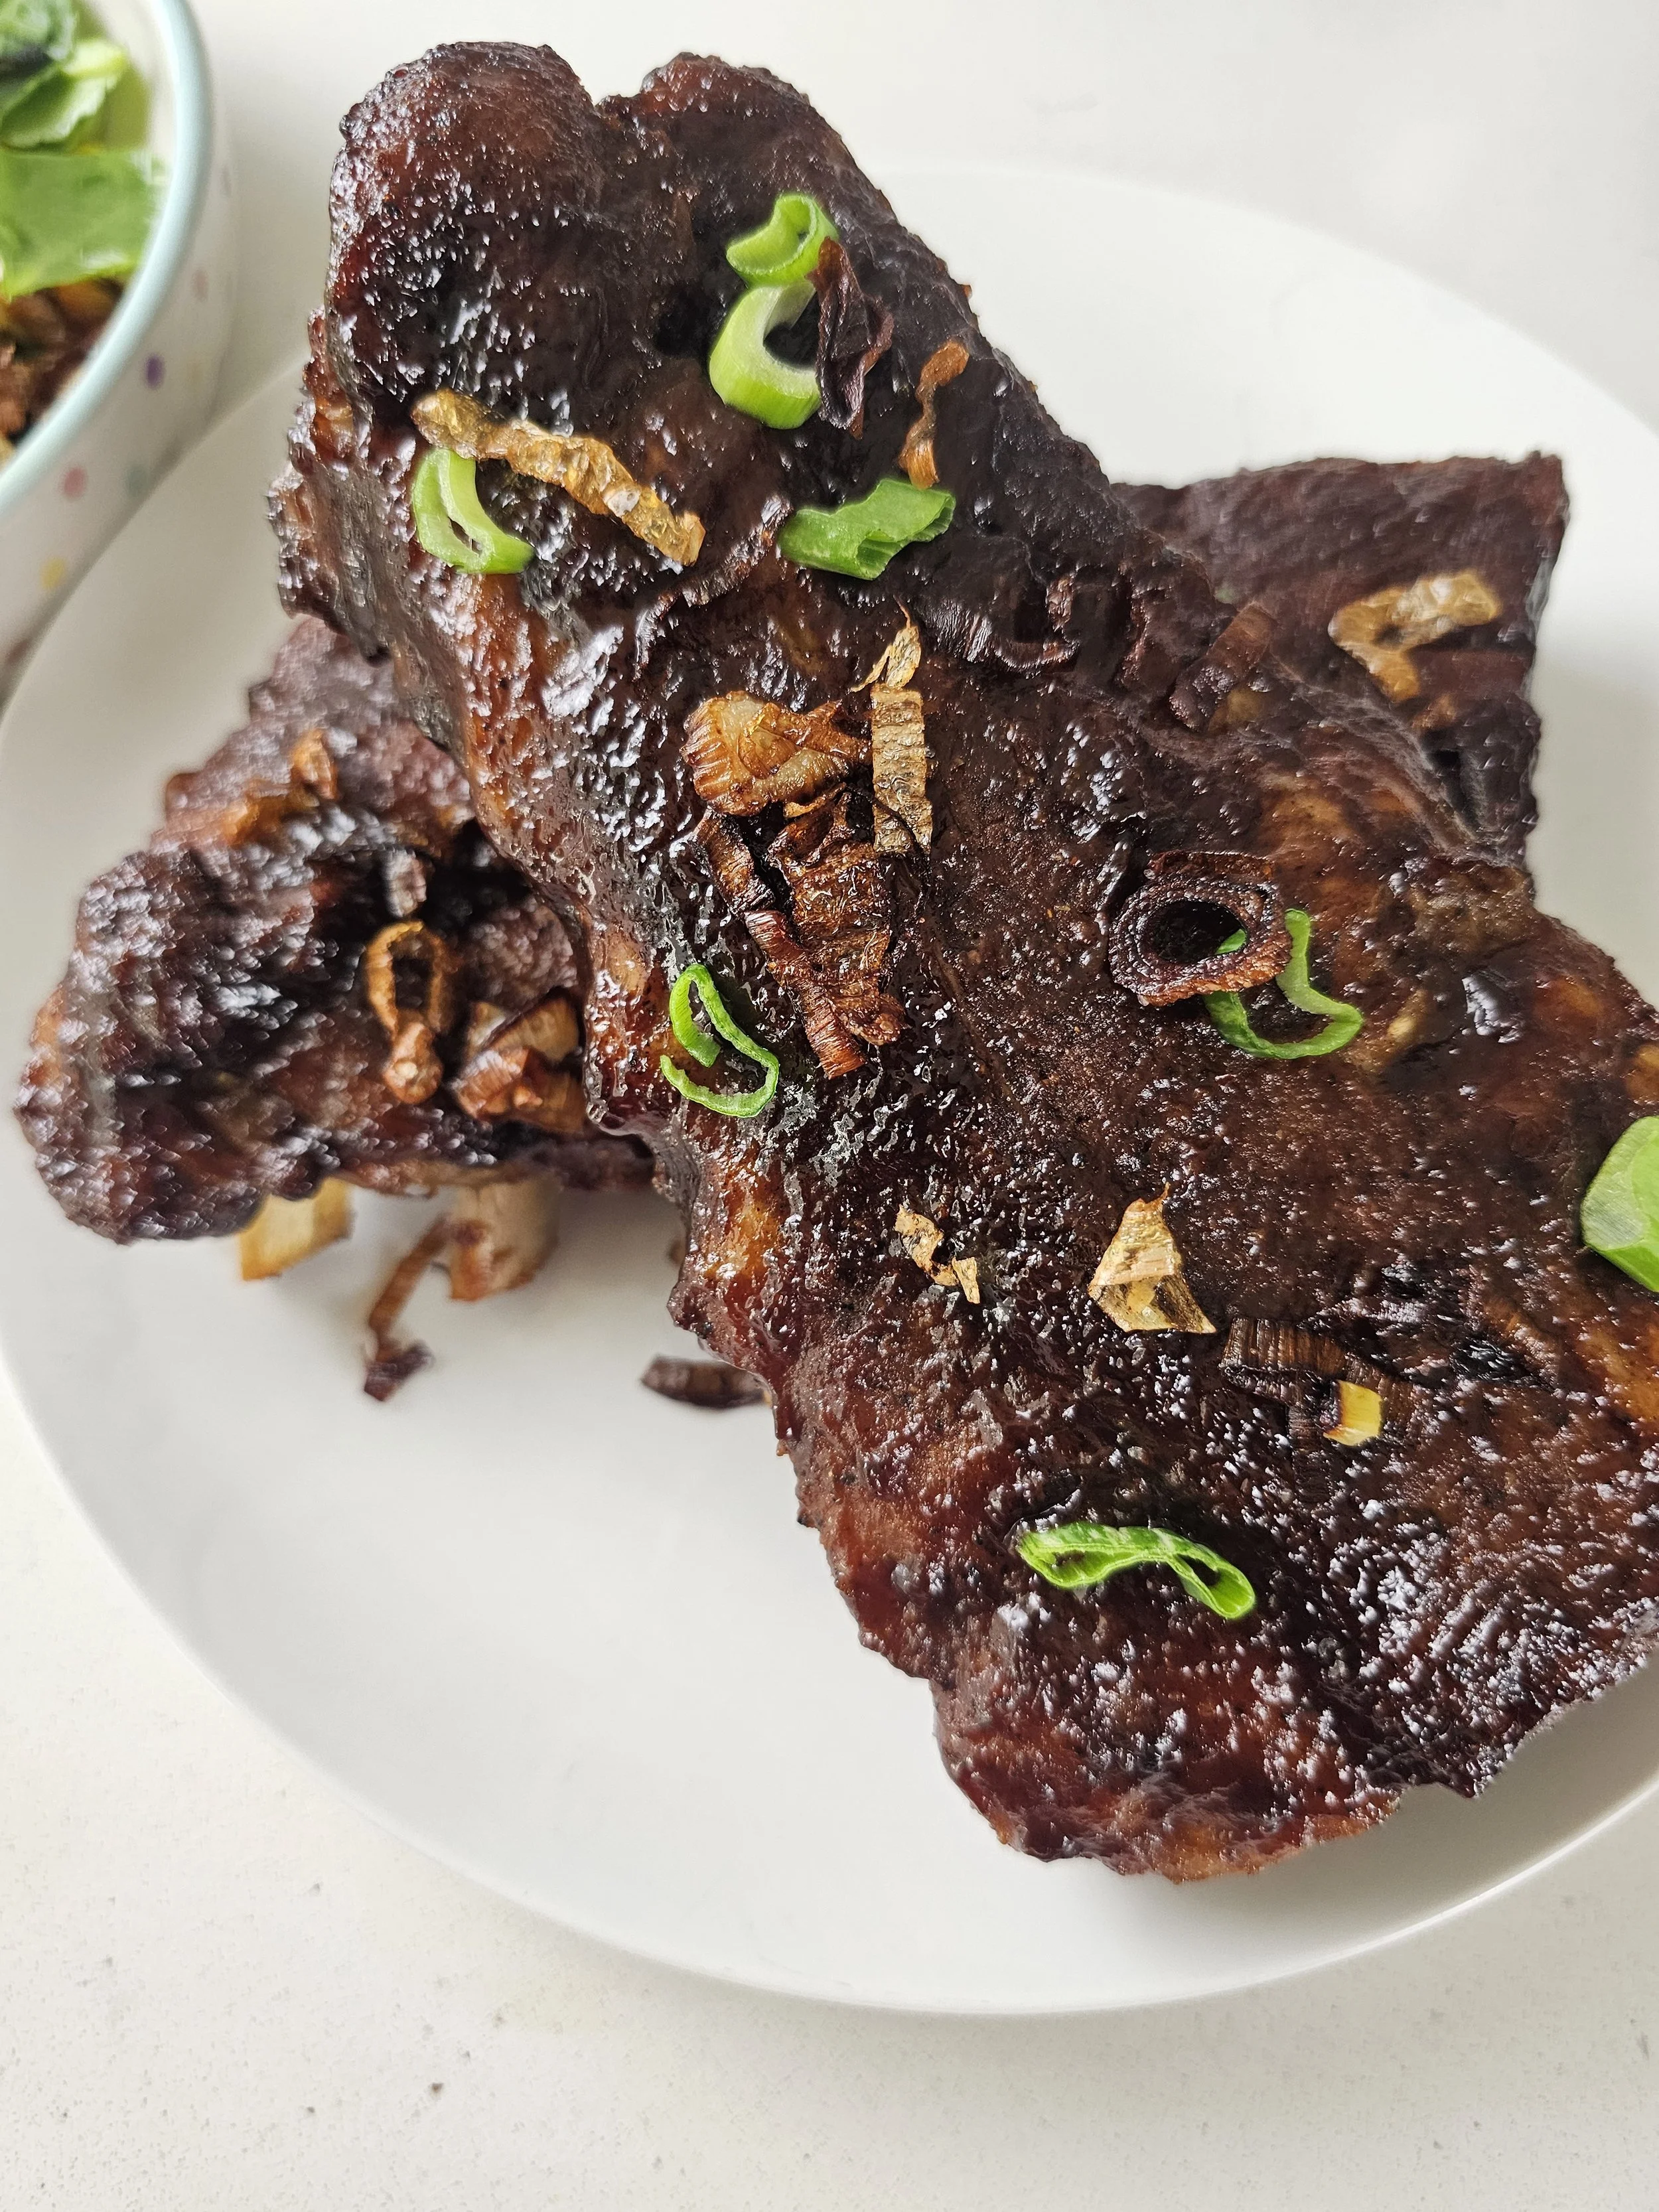
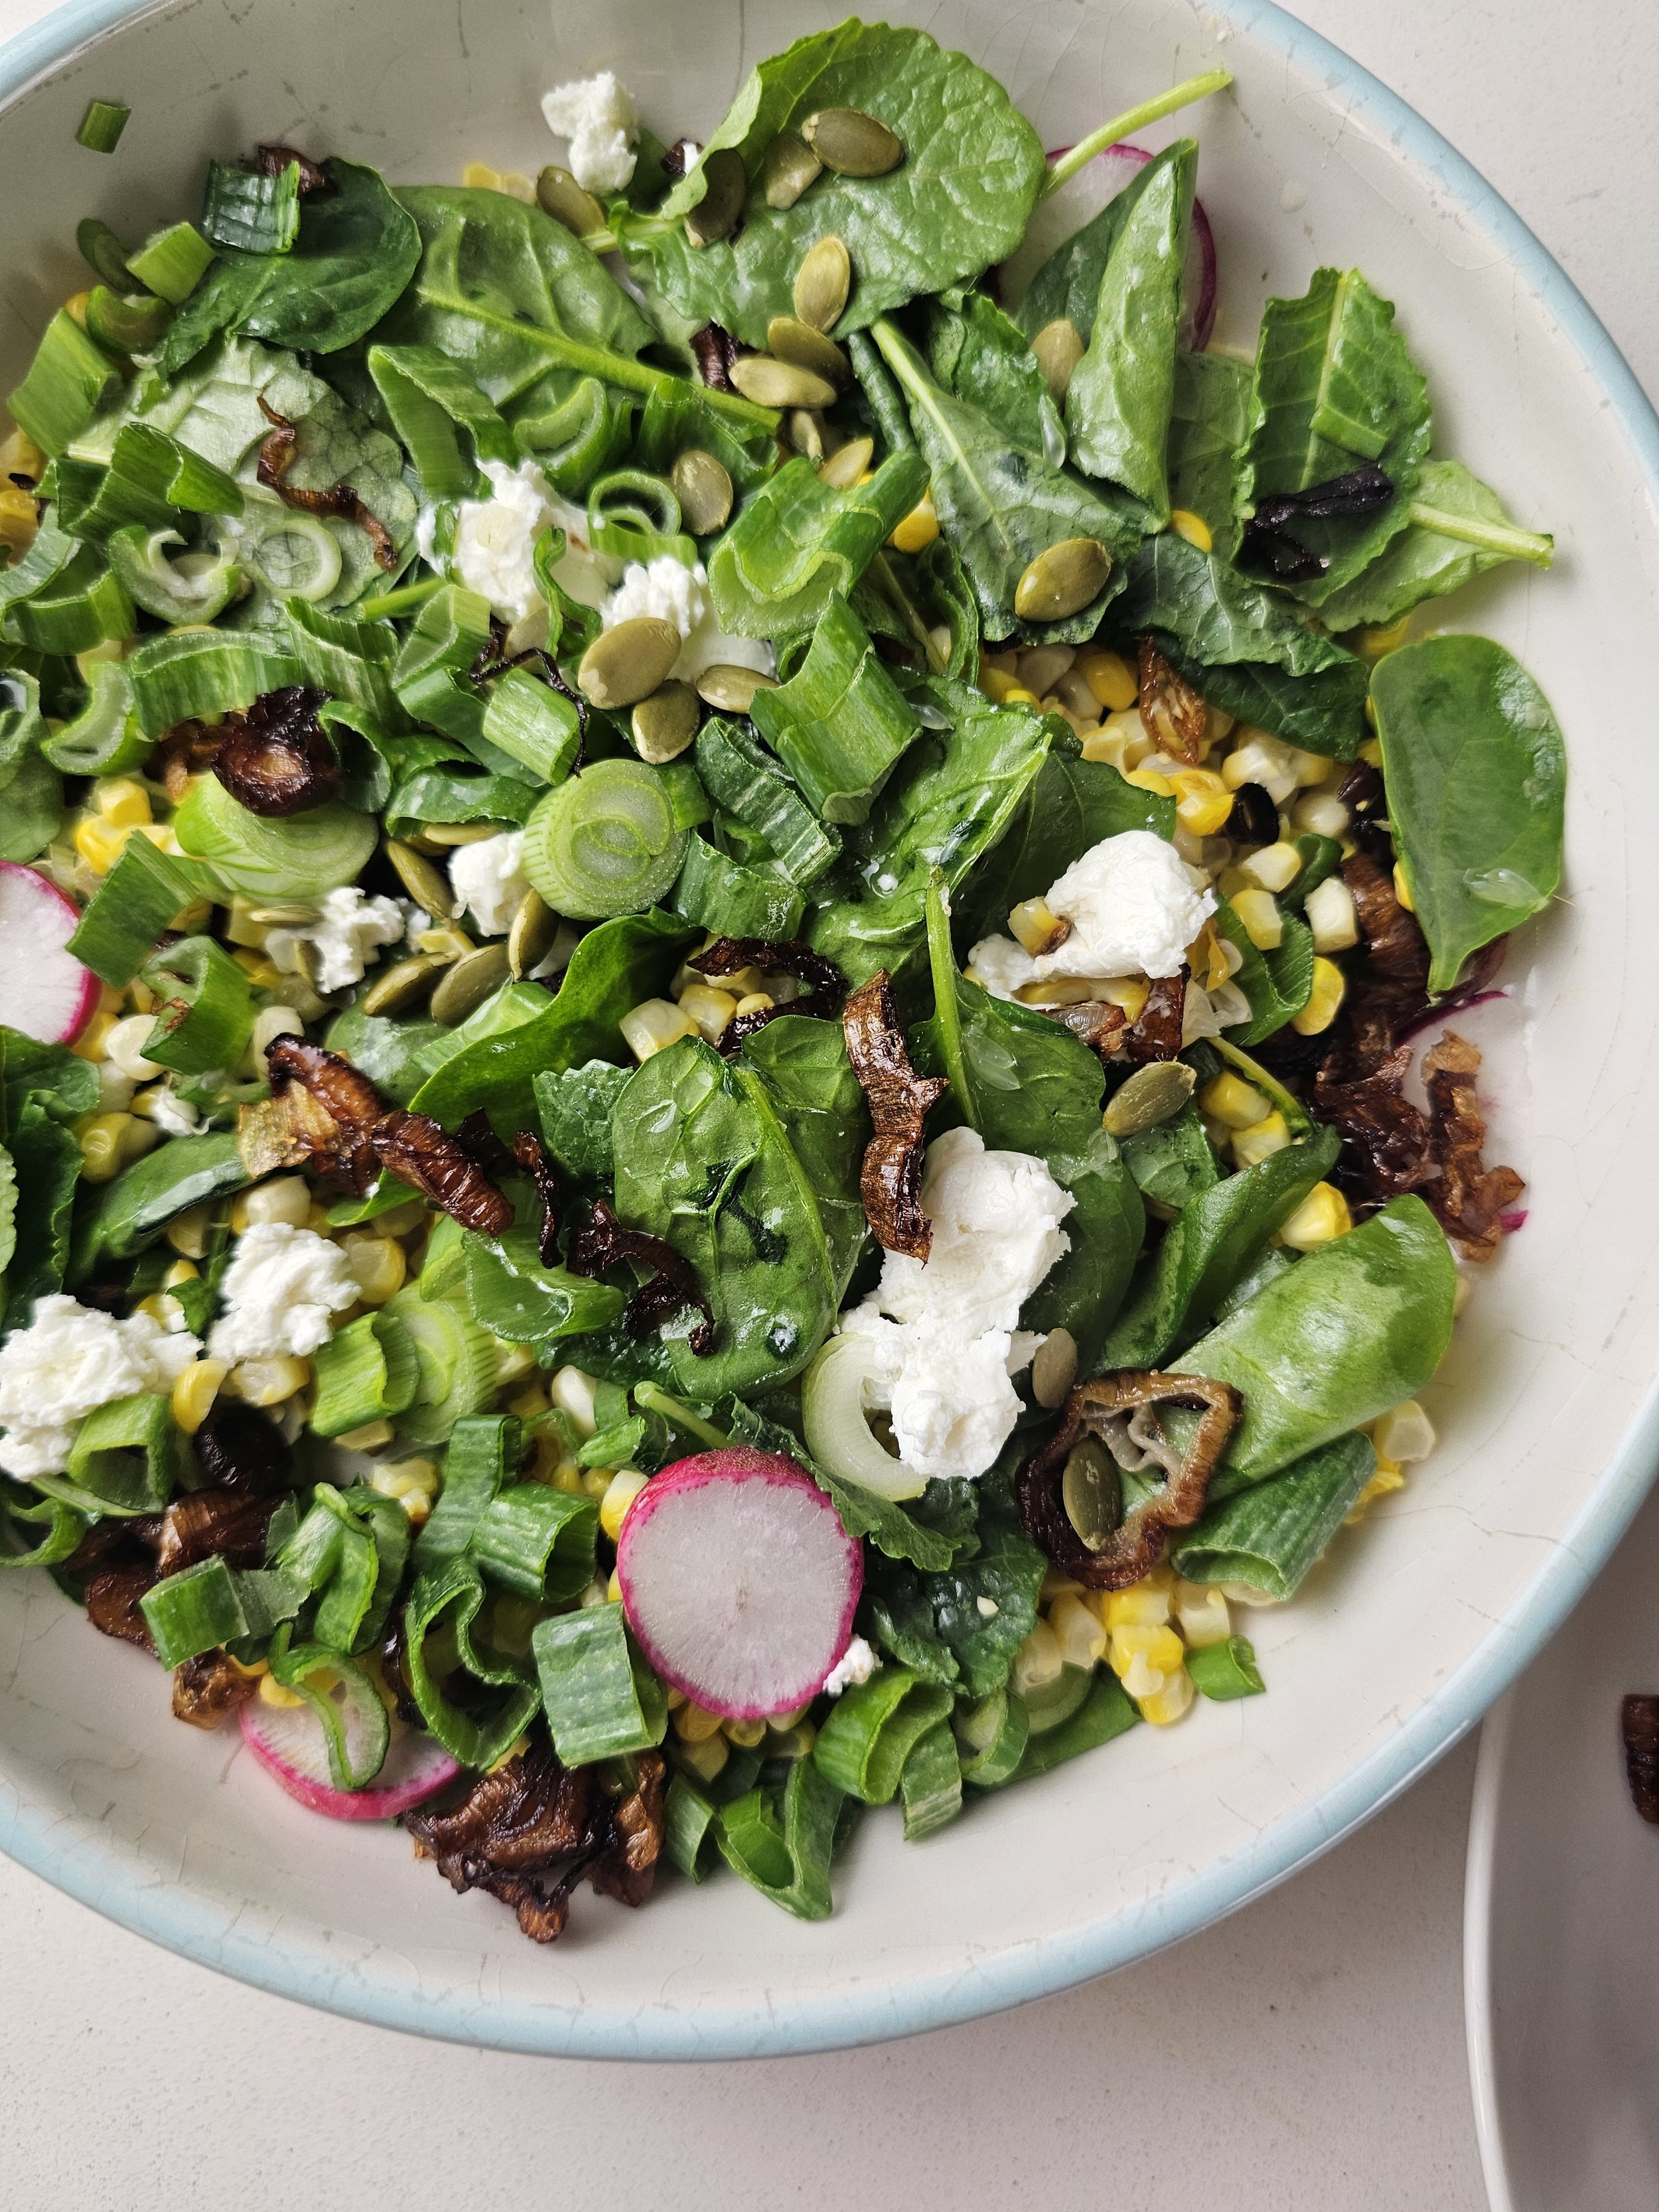

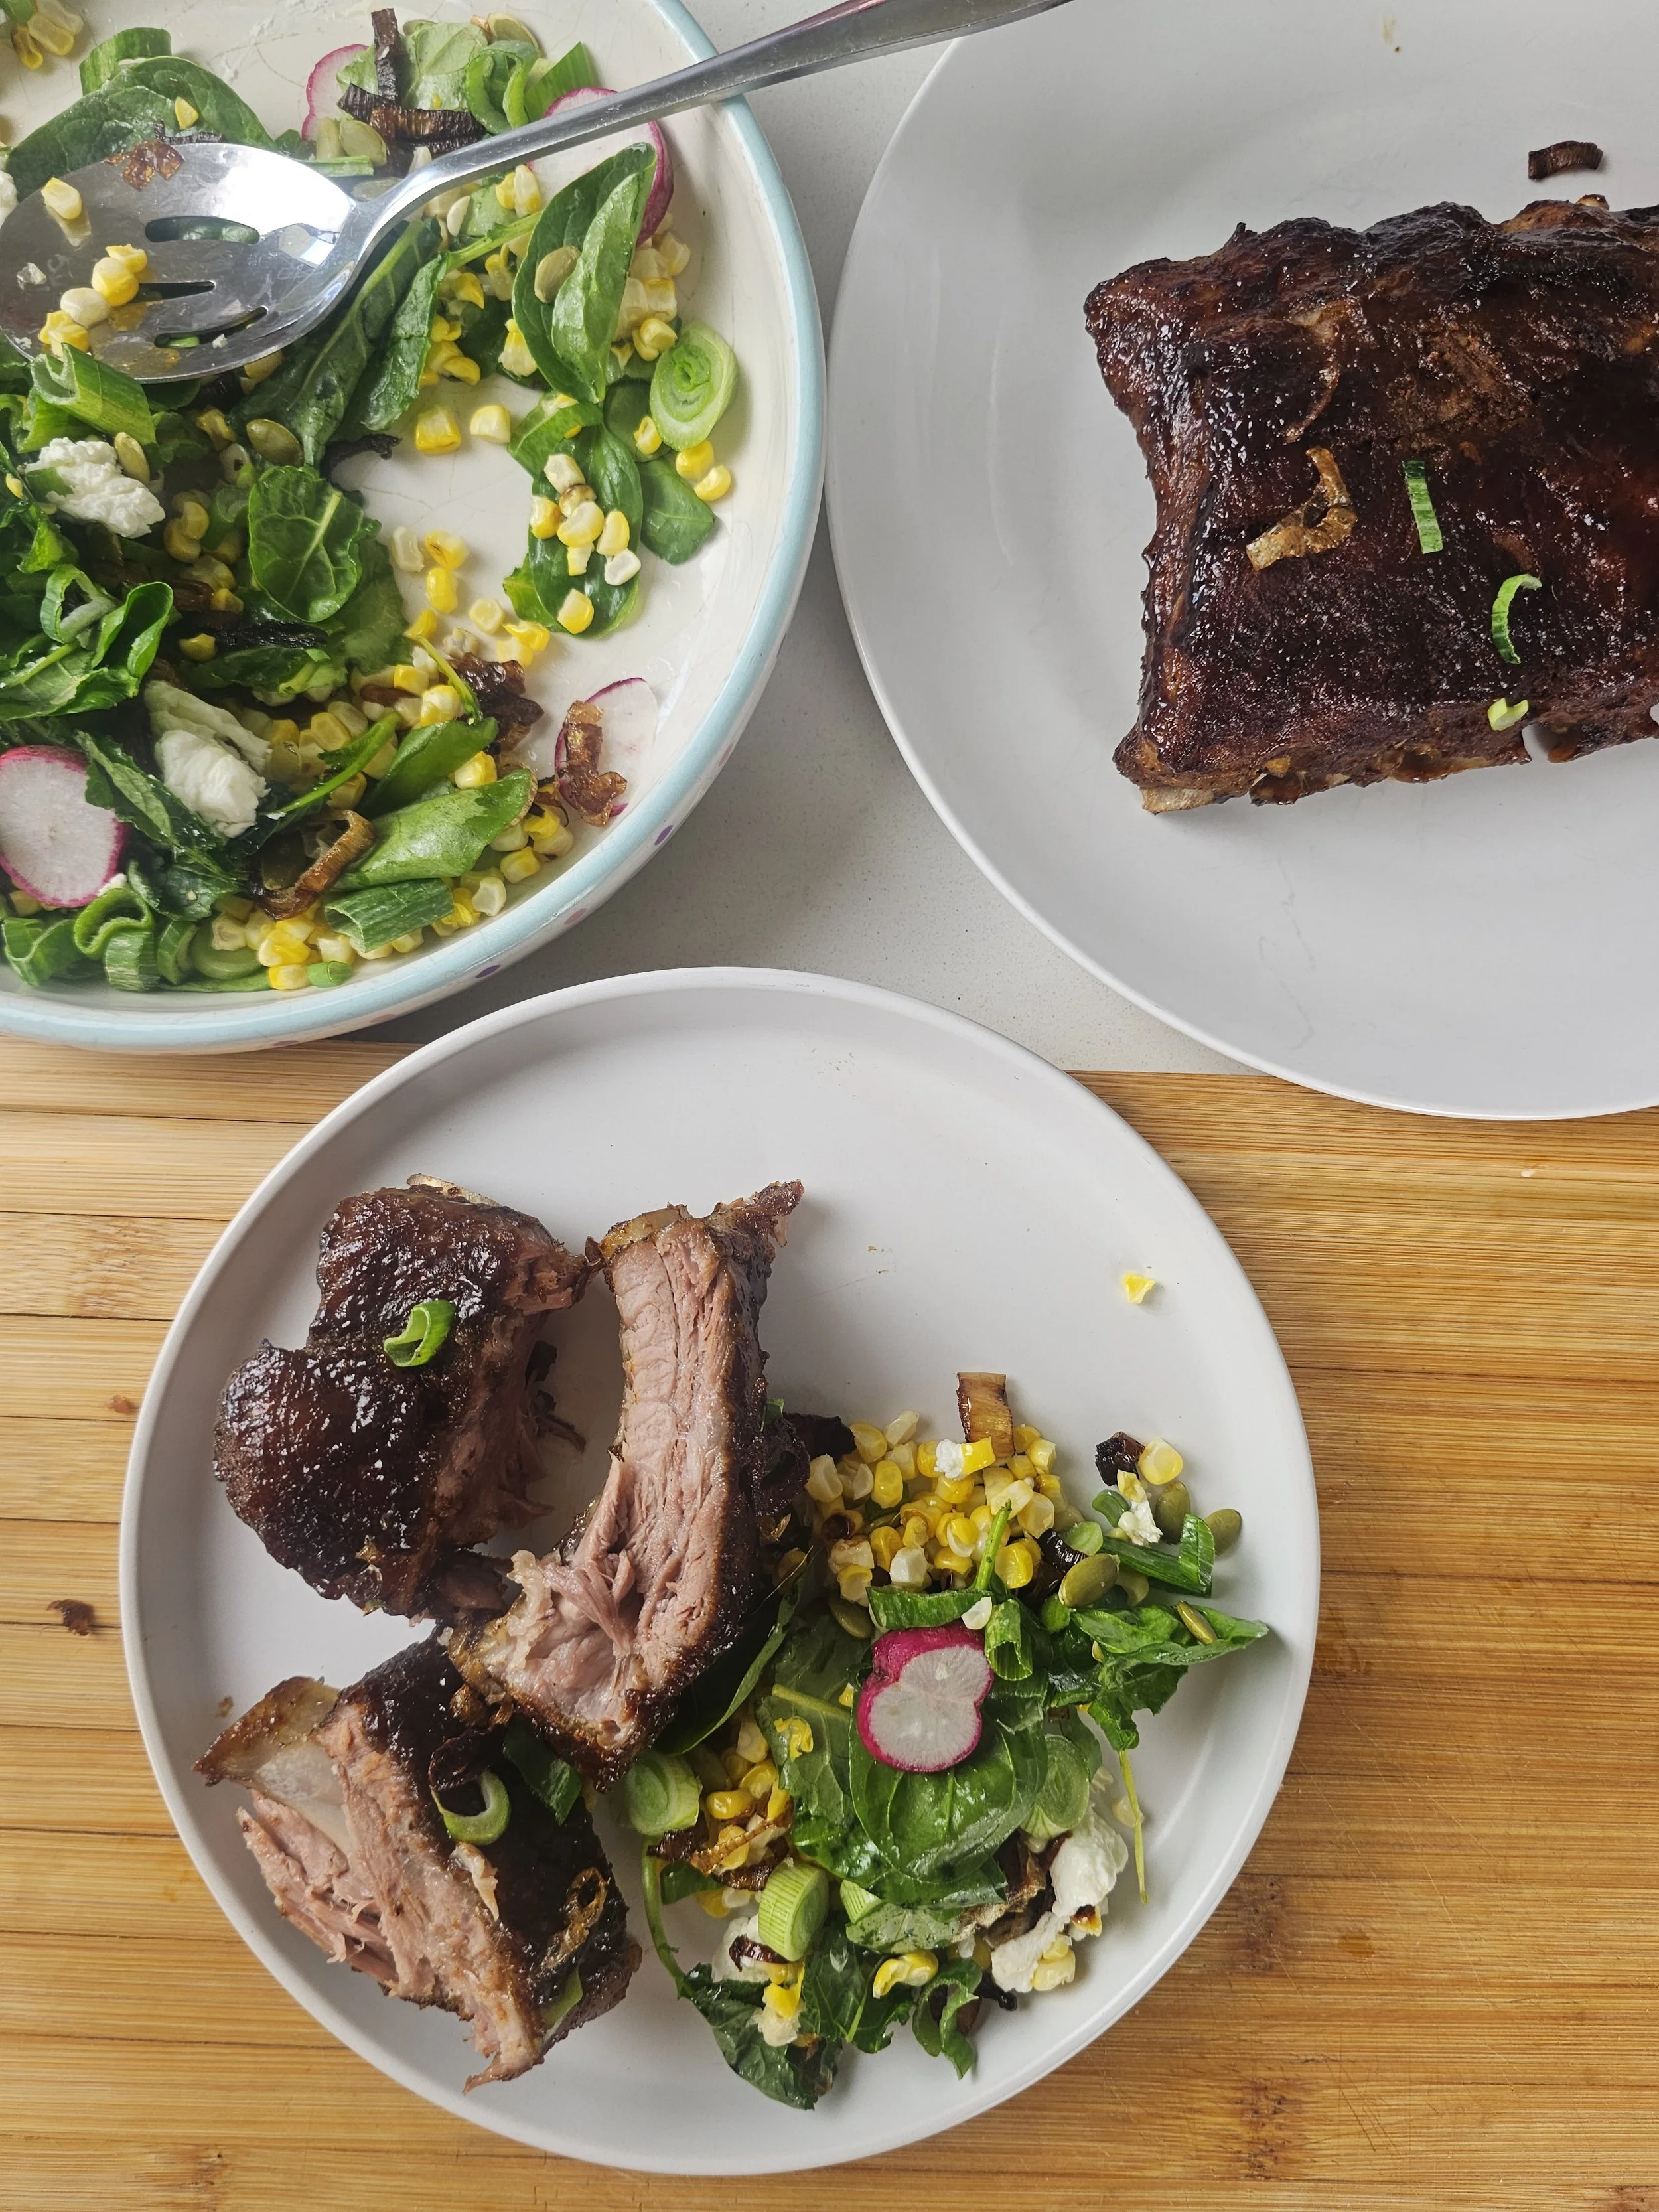
Tamarind-Glazed Baby Back Pork Ribs
Tender baby back ribs baked in the oven, then coated in a glossy tamarind glaze with a bright sweet-sour depth and gentle smokiness. Served with a fresh seasonal corn salad with goat cheese, crisp radish, and spring onions, it brings easy summer cookout vibes with a subtle East African-inspired twist.
Ingredients
- 1 rack baby back pork ribs
- 1½ tsp seasoned salt
- 1 tsp black pepper
- 1 tbsp BBQ seasoning (I used Robertson's)
- 1 tsp smoked paprika
- 1 tsp garlic powder
- 3 tbsp tamarind concentrate
- 3 tbsp brown sugar
- 2 tbsp soy sauce
- Juice of ½–1 lime (adjust to taste)
- 1–2 tsp water (or more, if needed for looseness)
- 2-3 corn cobs (charred or grilled on grill plate)
- 1–2 tbsp olive oil (your chili olive oil works)
- 1 cup salad greens (spring and spinach mix)
- 1–2 tsp white balsamic vinegar
- 2-3 small radish (thin sliced)
- Pumpkin seeds
- Goat cheese (crumbled)
- 1 bunch spring onions (with large bulbs, to be fried and used fresh)
- Salt and pepper to taste
Instructions
- Set oven to Oven: 300°F (150°C)
- season ribs and rub every surface, nook and cranny.
- Wrap ribs tightly in foil and palce on a bakign tray.
- Bake for 2 to 2½ hours.
- while that bakes, make the tamarind glaze. just mix iall the infgrindeitns together, heat on medium ubtil it gently. bubbles, then reuce to lwo for 5-88 mnutes ubtil thciiken, or rather a hioney consitincy. use water to help if needed and taste and adjsut as neeed.
- then rpepr your salad, on a grill plate grill the corn until soften with black rbwon spots, rotinaint got about 10-15 min utes. tey to keep the heat steayd for even cooking. mix aeveryhing then nd hold off on dressing until ready to serve.
- once the ribs are done, uncover and brus with th glaze. set oven to broil at 500F/xxC for 2-5 mon tues, deopneding on your oven snd th epsoiton of the bakign tray. make sure you keep an eye you dont want it to burn!
- Serve immedialey with salad.
I am not a certified nutritionist and any nutritional information on dontmissmyplate.com should only be used as a general guideline.
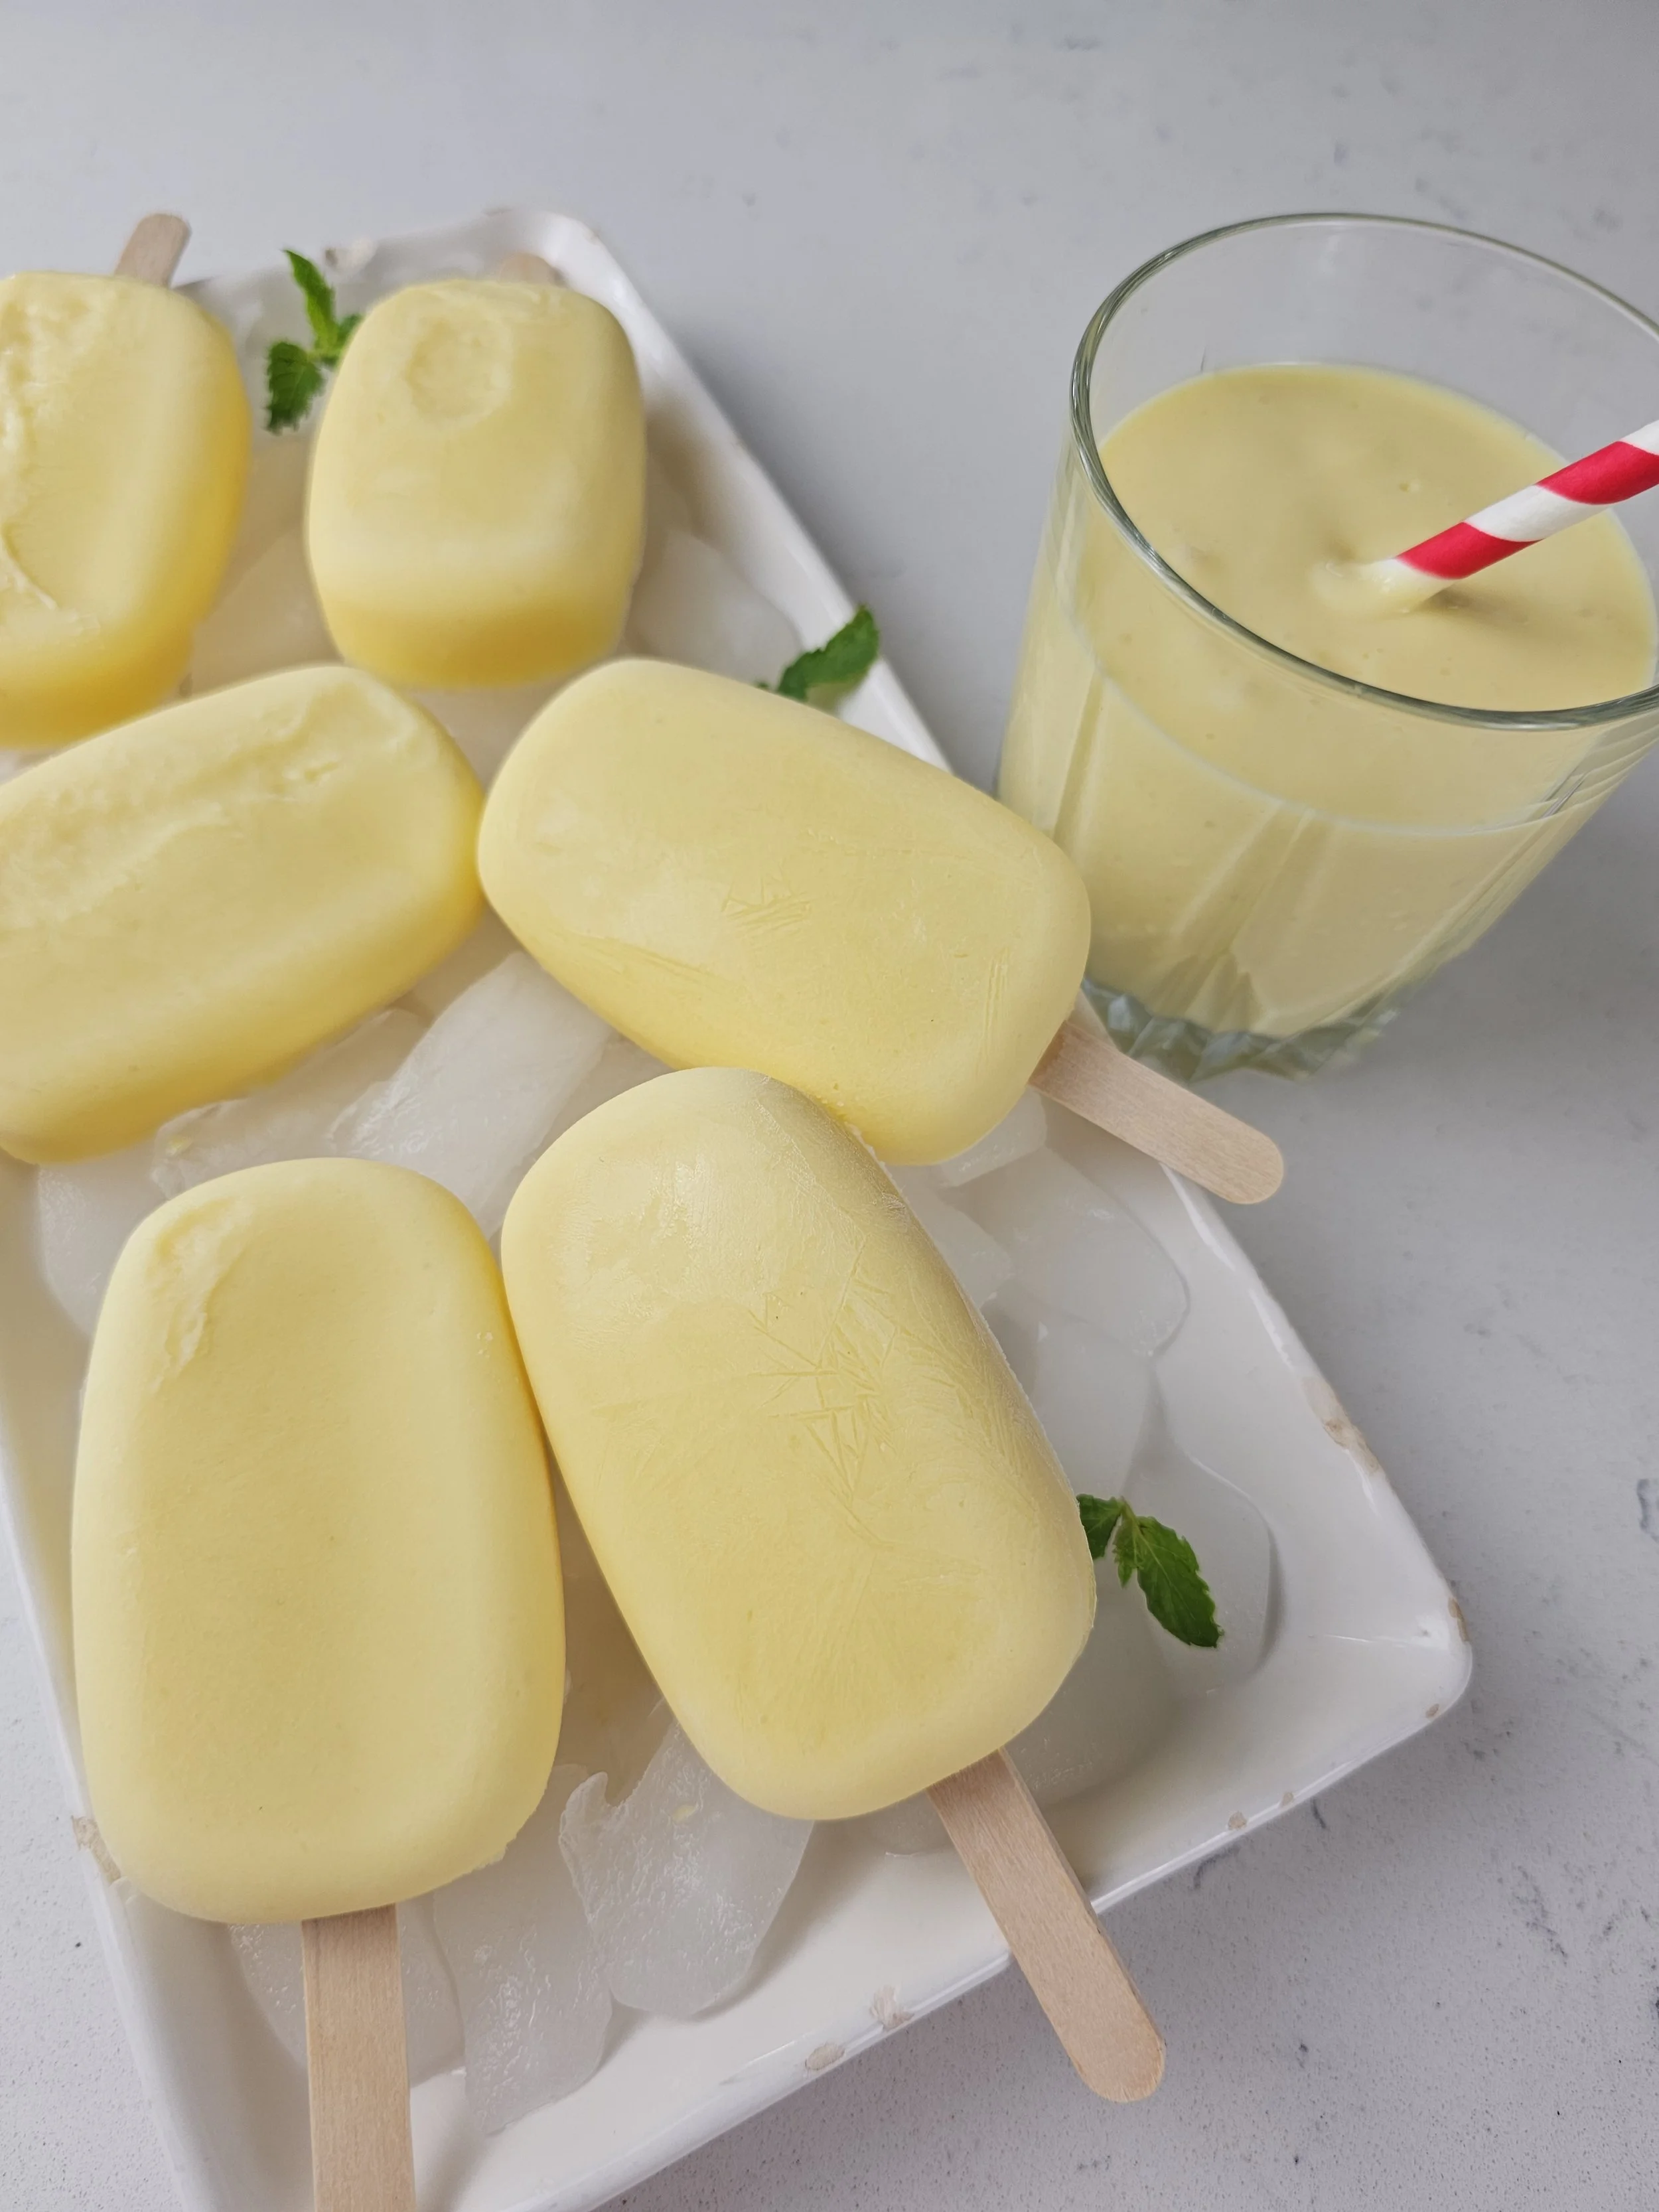
Mango Ginger Cream Ice Lollies (Popsicles)
Some recipe ideas come from childhood memories, others come from travel. This one started with a mango ginger milkshake at Nairobi Street Kitchen.
The combination immediately stood out to me. Mango and ginger aren't unusual ingredients on their own, but together they create something special: the sweetness of ripe mango balanced by the warmth and gentle bite of fresh ginger.
Across East Africa, ginger appears in drinks and desserts in ways that often differ from what many people are familiar with elsewhere. Seeing how ingredients are used differently from one country to another is one of my favorite parts of exploring food cultures.
After trying the milkshake, I couldn't stop thinking about how well those flavors would work as a frozen dessert. The creaminess of the drink already felt halfway between a milkshake and ice cream, making it a natural candidate for an ice lolly.
These Mango Ginger Ice Lollies transform that inspiration into a refreshing summer treat. Made with real mango, fresh ginger infusion, cream, and ice cream, they're fruity, creamy, and just spicy enough to keep you coming back for another bite.
Whether you're looking for a unique frozen dessert or simply want a new way to enjoy mango season, these ice lollies capture the flavor combination that inspired them in Nairobi.
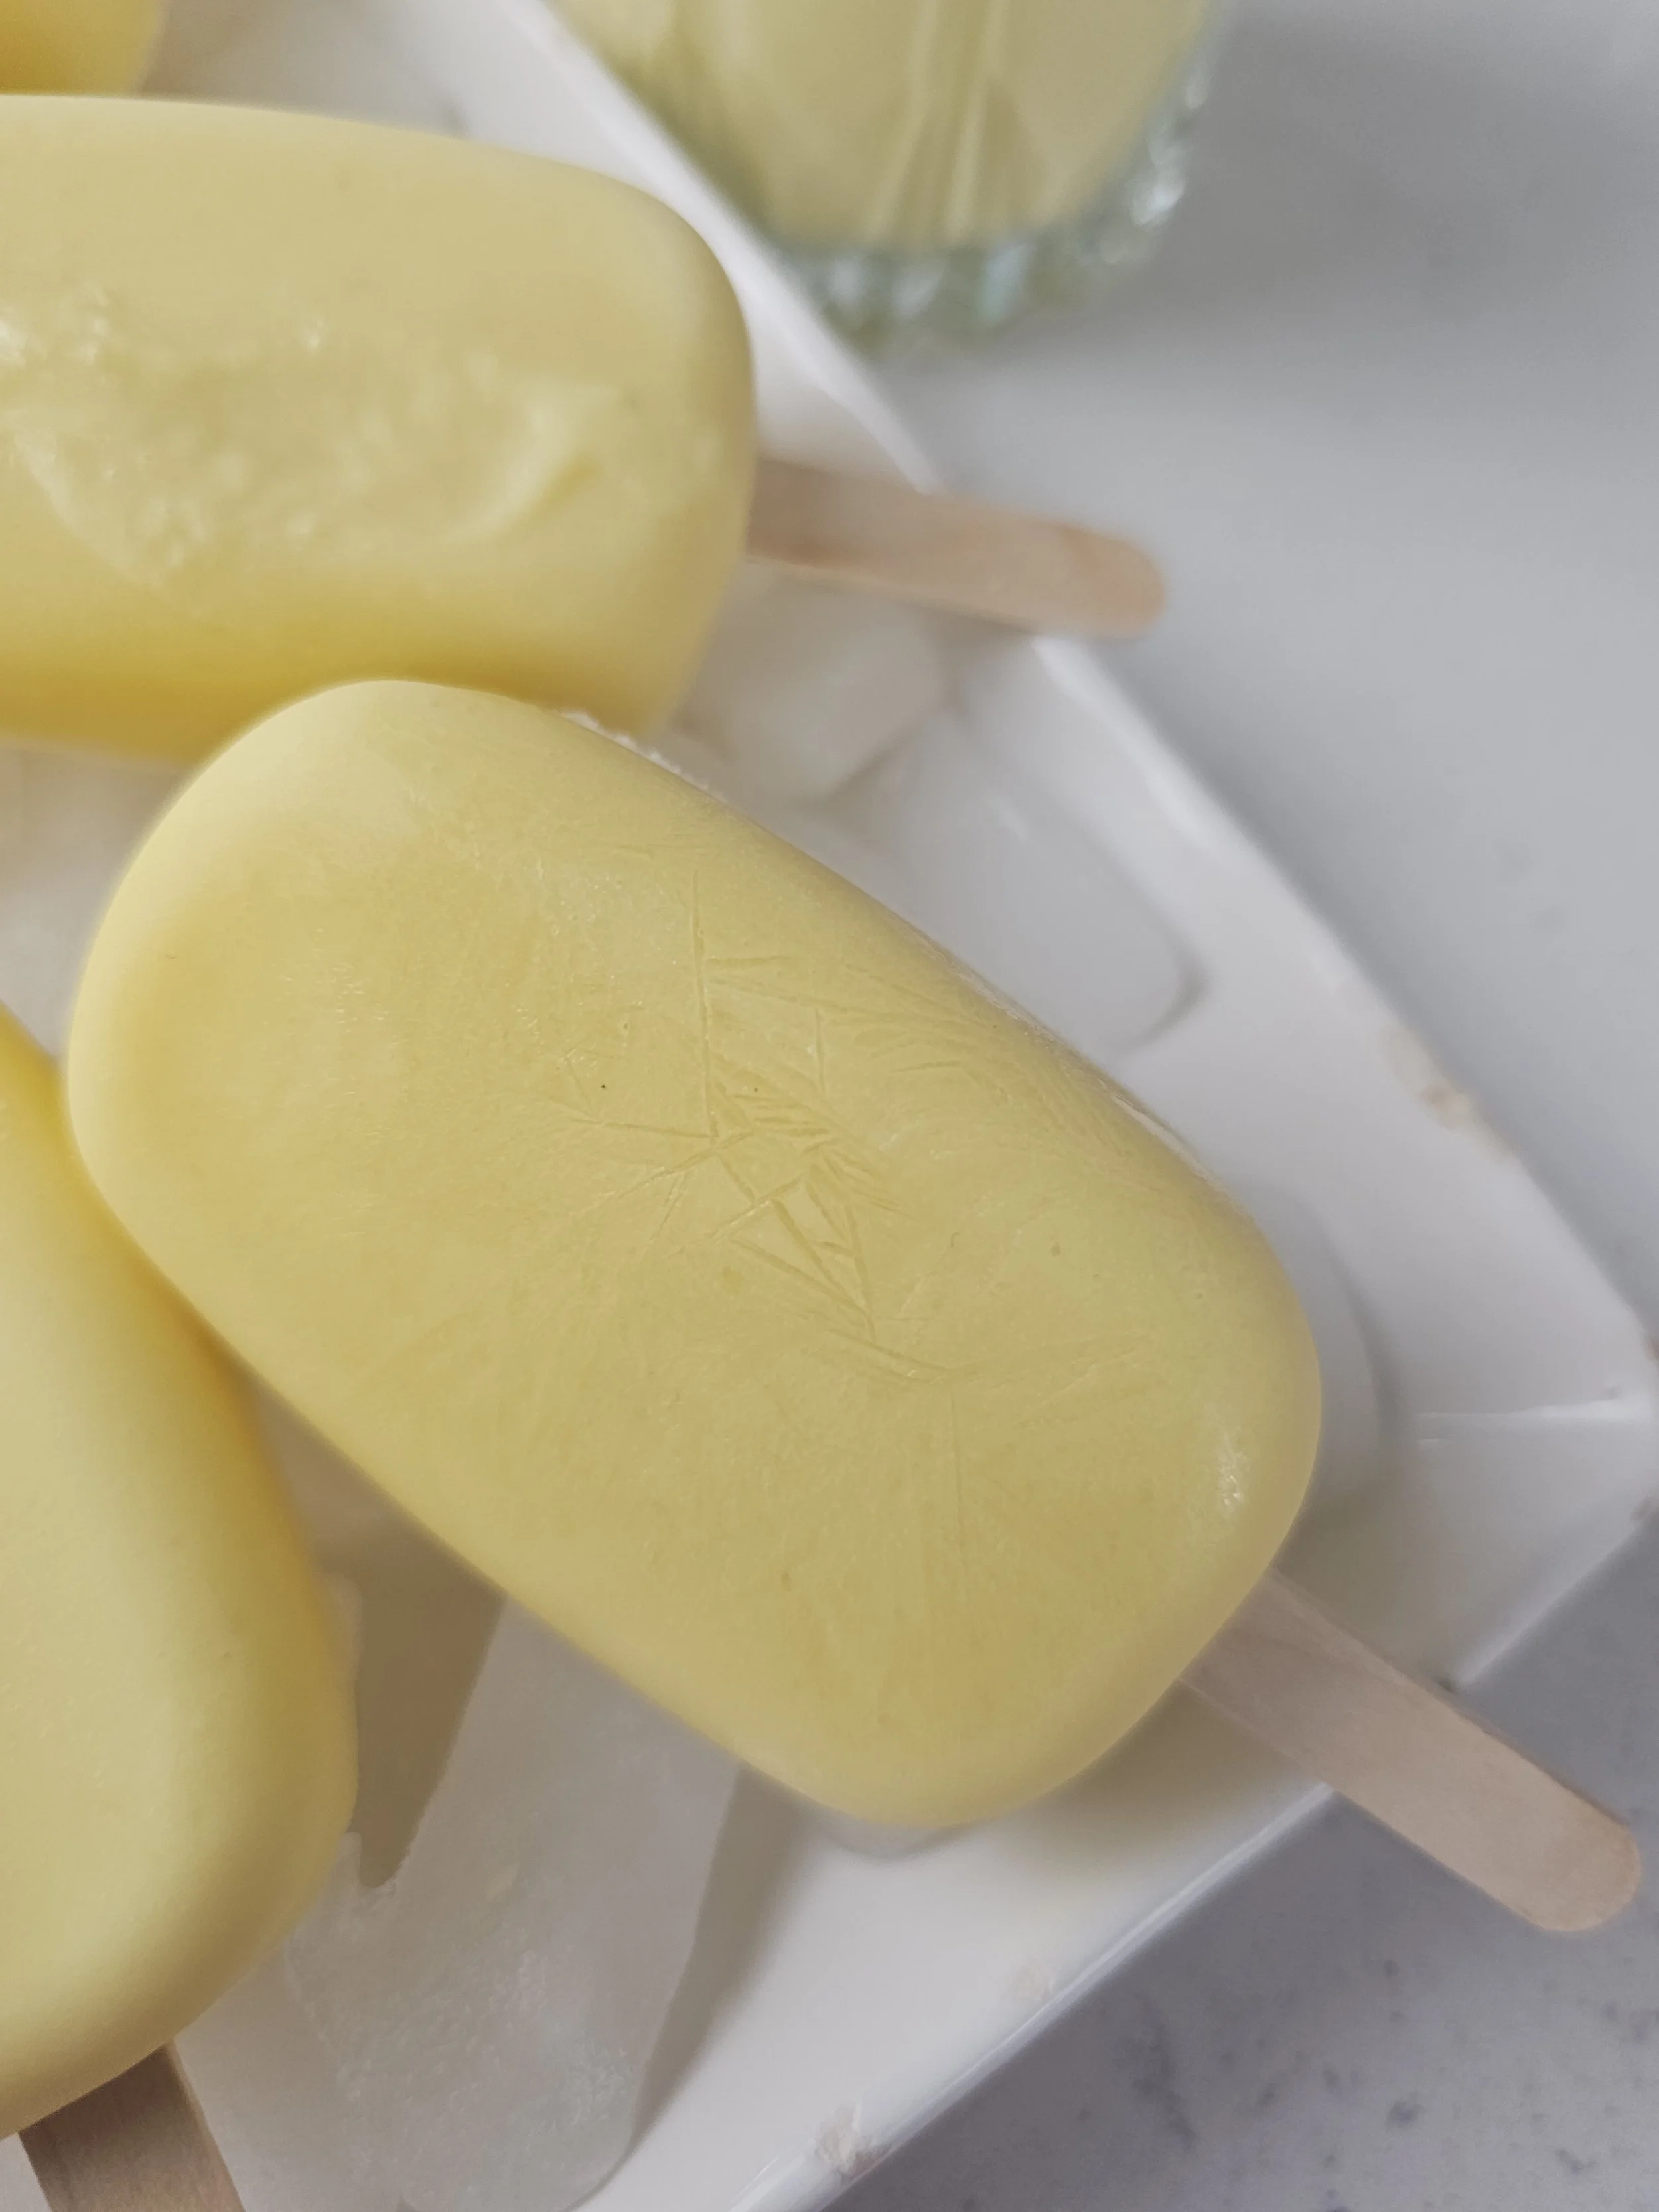

Mango Ginger Ice Lollies
A creamy mango and ginger ice lolly inspired by a memorable milkshake in Nairobi. Sweet mango, fresh ginger, cream, and ice cream come together in this refreshing frozen dessert.
Ingredients
- 2 tbsp freshly grated ginger
- ¼ cup water
- 2½ cups frozen mango chunks
- 1 cup vanilla ice cream
- 3 tbsp heavy cream (for blending and added creaminess if needed)
- Juice of ½ lime
- Pinch of salt
- 2–4 tbsp ginger infusion, to taste
Instructions
- Step 1: Make the Ginger Infusion
- 1. Combine the grated ginger and water in a small bowl.
- 2. Let sit for 10–15 minutes.
- 3. Strain through a fine mesh sieve, pressing gently to extract as much liquid as possible.
- 4. Discard the solids and reserve the ginger liquid.
- Step 2: Blend the Ice Lolly Base
- 1. Add the frozen mango, vanilla ice cream, heavy cream, lime juice, salt, and 3 tablespoons of ginger infusion to a blender.
- 2. Blend until smooth.
- 3. If the mixture is too thick, add milk one tablespoon at a time until thick but pourable.
- 4. Taste and add additional ginger infusion if desired. The ginger flavour should be slightly stronger than you want in the finished ice lolly, as freezing will mellow it.
- Step 3: Fill the Moulds
- 1. Pour the mixture evenly into 6 ice lolly moulds.
- 2. Leave a little space at the top for expansion.
- 3. Insert sticks or lids.
- Step 4: Freeze
- 1. Freeze for 6–8 hours or overnight until completely solid.
- Step 5: Serve
- 1. Briefly run the outside of the moulds under warm water for 2–3 seconds.
- 2. Gently release the ice lollies.
- 3. Serve immediately.
Notes
- The sweetness of the final ice lollies will depend on the ripeness of the mango and the brand of ice cream used.
- Lime juice brightens the flavour and helps balance the richness of the cream and ice cream.
- The pinch of salt enhances both the mango and ginger flavours without making the ice lollies taste salty.
- For a stronger ginger kick, increase the ginger infusion gradually and taste as you go.
Nutrition Facts
Calories
120Fat (grams)
5 gCarbs (grams)
18 gFiber (grams)
1.5 gSugar (grams)
15 gProtein (grams)
2 gI am not a certified nutritionist and any nutritional information on dontmissmyplate.com should only be used as a general guideline.
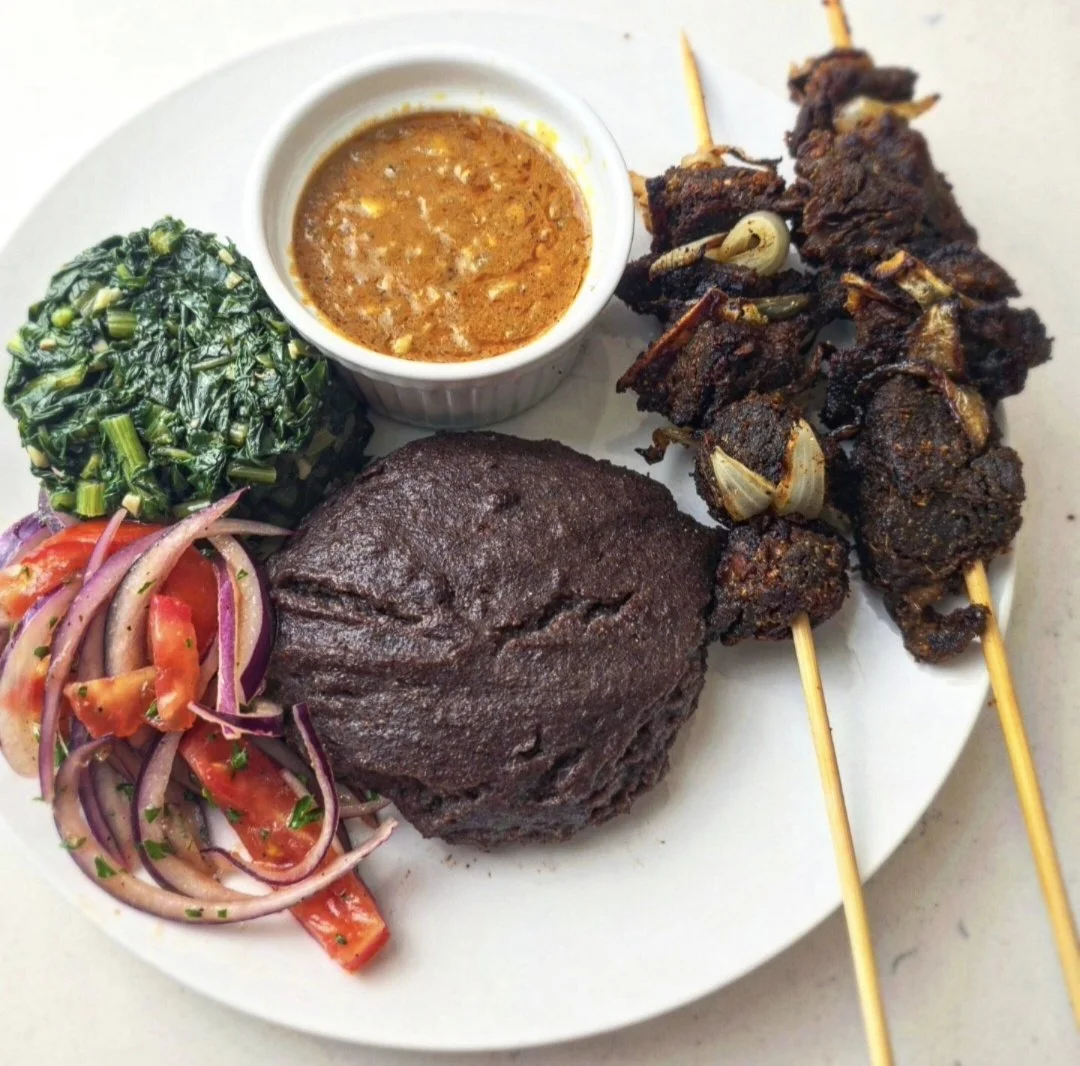
Goat “Kebab Style” With Coconut Curry Sauce
This goat kebab-style dish is inspired by the bold, communal flavors of East African cooking, where grilled meats, fresh salads, sautéed greens, and rich sauces come together on a single plate. Traditionally, dishes like nyama choma are cooked over open flames and served simply with onions, greens, and starches such as ugali, a thick, grain-based porridge.
This version brings those flavors into a more accessible, home-friendly format by using an air fryer, making it easier to recreate without sacrificing depth or character. The goat is first parboiled for tenderness, then marinated and cooked at high heat to achieve caramelized edges. It’s paired with a coconut curry sauce for richness, fresh kachumbari (a simple tomato-onion salad) for brightness, and sautéed greens for balance. The result is a complete, layered meal that feels both rooted in tradition and adaptable for everyday cooking.
This dish was also inspired by a trip to Nairobi, where I immersed myself in the local food culture and tried to experience as much as possible. I was struck by the similarities between Kenyan and Zimbabwean cuisine, which I found especially intriguing. The two countries share a number of culinary connections shaped by overlapping histories. Ugali in Kenya, for example, is very similar to sadza in Zimbabwe. In this recipe, I’ve used finger millet (zyiyo in Zimbabwe), which is also popular in Kenya (ugali wa wimbi).
I also made it in honour of my father, who was a massive ‘mbudzi’ (goat both in Swahili and Shona) fan and loved learning about travel and culture.
For greens, a variety of options can be used (everything from collard greens and spinach to pumpkin leaves) another shared thread between the cuisines, although I wanted somehting on the bitter side to balance the sweetness from the coconut sauce so when with dandelion greens. The fresh salad adds balance, acidity, and crunch, while the coconut sauce brings richness to complement the crispy goat. Coconut, in particular, reflects Kenya’s coastal influences and long history of trade, introducing spices and tropical elements that are less common in Zimbabwean cuisine.

Goat “Kebab Style” With Coconut Sauce
Tender, crispy marinated goat chunks, parboiled for tenderness and finished in the air fryer or grill, then served with grilled onions, coconut curry sauce, and classic East African-inspired sides.
Ingredients
- 2 lbs goat chunks
- 4 garlic cloves
- 1 medium onion, cut into wedges
- 2 bay leaves
- 1 tbsp fresh ginger, grated
- 1 tbsp vinegar
- 1 tsp salt
- 2 lbs goat, parboiled, drained, and dried
- 3 tbsp olive oil
- 2–3 garlic cloves, minced
- 2 medium onions, cut into wedges (reserve some for grilling)
- 2 bay leaves
- 2 tbsp fresh ginger, grated
- 1 tbsp vinegar
- 2 tsp cumin
- 2 tsp coriander
- 1 tsp onion powder
- 1 tsp paprika
- 1 tsp curry powder
- 1 tsp salt
- 1 tsp black pepper
- 1 tsp pilau masala (optional)
- 1 yellow onion, chopped
- 2 garlic cloves, minced
- 1 chili pepper, minced
- 2 tbsp fresh ginger, grated
- 1 tbsp curry powder
- 1 tbsp paprika
- 1 can coconut milk
- 2 tbsp tomato paste
- 1 tbsp tomato sauce
- 1-2 tbsp Worcestershire sauce
- 1 tsp chicken bouillon paste (optional)
- Salt and pepper, to taste
- 2 tomatoes, sliced
- ½ large red onion, sliced
- Juice of 1 lime
- Olive oil
- Fresh parsley
- Salt, to taste
- 1 bunch dandelion greens (or pumpkin leaves if available)
- 2–3 garlic cloves, minced
- Cooking oil
- Salt and pepper, to taste
- All-purpose seasoning (optional)
- 1 tsp chicken bouillon paste
- Lemon juice
- 2-3 cups dry finger millet flour
- 2-3 cups boiling water
- 1 cup cold water
- Salt,Goat & Coconut Sauce to taste
- All-purpose seasoning (optional)
Instructions
- Parboil the goat with the garlic, onion, bay leaves, ginger, vinegar, and salt for about 30 minutes, or until slightly tender. Drain and discard the aromatics, then pat the goat dry and let it sit for 5–10 minutes before transferring to a bowl.
- Mix the marinade ingredients with the goat until evenly coated. Cover and refrigerate for at least 6–8 hours, preferably overnight.
- Remove the goat from the fridge about 20 minutes before cooking to allow it to come closer to room temperature for more even cooking.
- Cook the goat in an air fryer, indoor grill, or grill-air fryer combo at 400°F / 200°C for about 15 minutes, turning halfway through. The edges should be crisp and caramelized while the inside stays tender.
- Add the onion wedges during the last 7–8 minutes of cooking so they soften and char slightly while still retaining some bite.
- For the coconut sauce, sauté the onion and garlic until fragrant and translucent. Add the ginger and chili pepper and cook for another 2–3 minutes.
- Stir in the bouillon paste, tomato paste, salt, paprika, curry powder, and black pepper, cooking for about 1 minute until fragrant. Add the coconut milk, tomato sauce, and Worcestershire sauce, then simmer gently for 10–15 minutes until slightly thickened.
- Skewer the goat chunks with the grilled onions if desired, then serve with the coconut sauce.
- Kachumbari: Combine the tomatoes and red onion with lime juice, olive oil, parsley, and salt to taste.
- Dandelion Greens: Sauté the garlic in oil until fragrant, then add the greens and cook until wilted and tender. Season with salt, pepper, bouillon paste, and a squeeze of lemon juice.
- Finger Millet Sadza/Ugali: Bring water and salt to a simmer, then gradually whisk in about ½ cup of the finger millet flour until a thick paste forms, ensuring lumps do not develop and removing any if needed.
- Gradually add more boiling water as needed until you reach the desired quantity and consistency of sadza/ugali. Reduce the heat to low and cook for about 20 minutes.
- Once cooked through, add the remaining flour and use a wooden spoon to fold and stir until smooth and thick. Turn off the heat, cover with a lid, and let it rest for 5 minutes before serving.
- Serve everything together while warm.
Notes
- Goat is parboiled first to ensure tenderness.
- Sauce should be simmered, not aggressively boiled. You may nitice fat coming to the surgace once it begins to cool, just skim that off the top.
- Serve sauce on the side to preserve texture and don;t straing is to keep it more tranditnoal.
Nutrition Facts
Calories
520Fat (grams)
32 gCarbs (grams)
18 gProtein (grams)
35 gI am not a certified nutritionist and any nutritional information on dontmissmyplate.com should only be used as a general guideline.
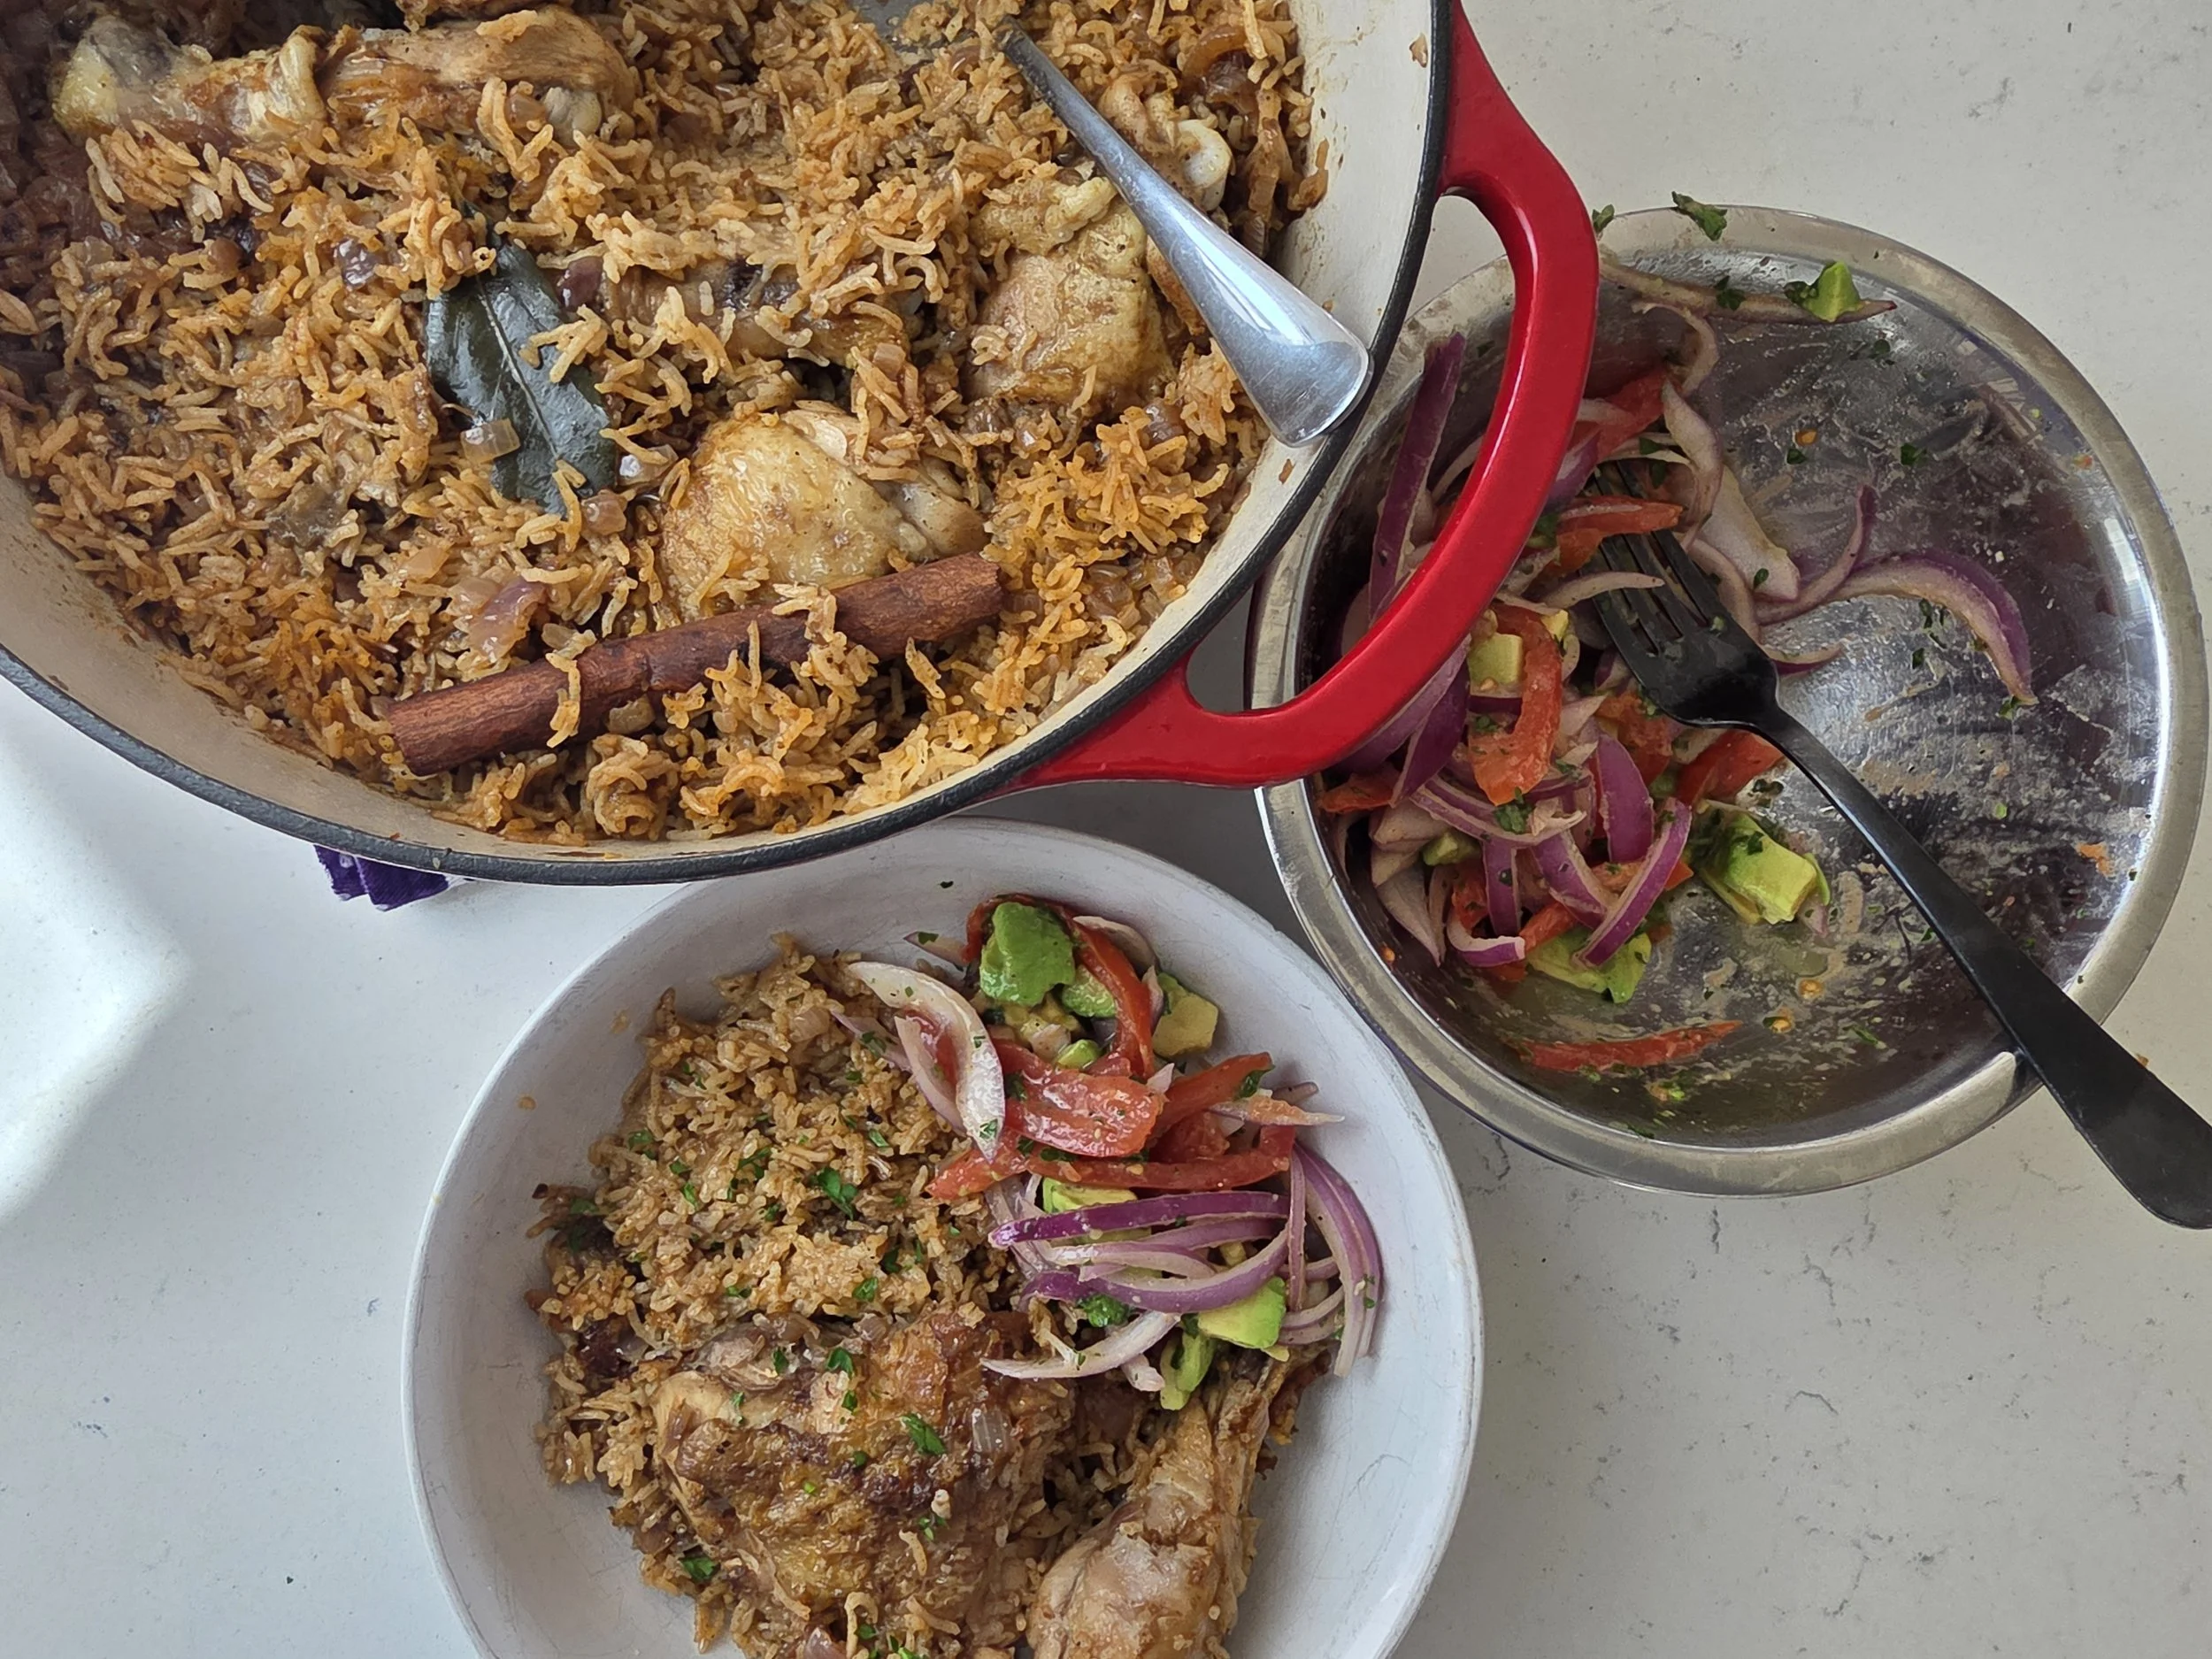
One-Pot Chicken Pilau (Zanzibar-Style East African Rice)
Pilau is more than just a rice dish, it’s a reflection of centuries of trade, culture, and shared culinary traditions. With roots linked to Persian and Indian cooking, pilau traveled along ancient trade routes to East Africa, where it became a staple in places like Kenya, Zanzibar, and Uganda. Across these regions, the common thread is a love for deeply spiced, one-pot rice dishes that bring people together for both everyday meals and celebrations.
In Zanzibar, famously known as the “Spice Island”, this connection is especially strong. The island’s history as a hub for cloves, cinnamon, cardamom, and other spices is reflected in the bold, aromatic character of pilau itself.
This version brings those flavors into a practical, weeknight-friendly format. Fragrant basmati rice is layered with caramelized onions, garlic, ginger, and a warming blend of cumin, cardamom, black pepper, cinnamon, and bay leaf. Bone-in chicken cooks directly with the rice, allowing every grain to absorb the rich, spiced broth.
I first experienced pilau in Zanzibar during a cooking class at a beachfront hotel, where the scent of spices filled the air and the ocean sat just steps away. This recipe is inspired by that moment—simple, comforting, and deeply flavorful.
Whether for a weeknight dinner or a potluck gathering, this one-pot chicken pilau is a go-to.
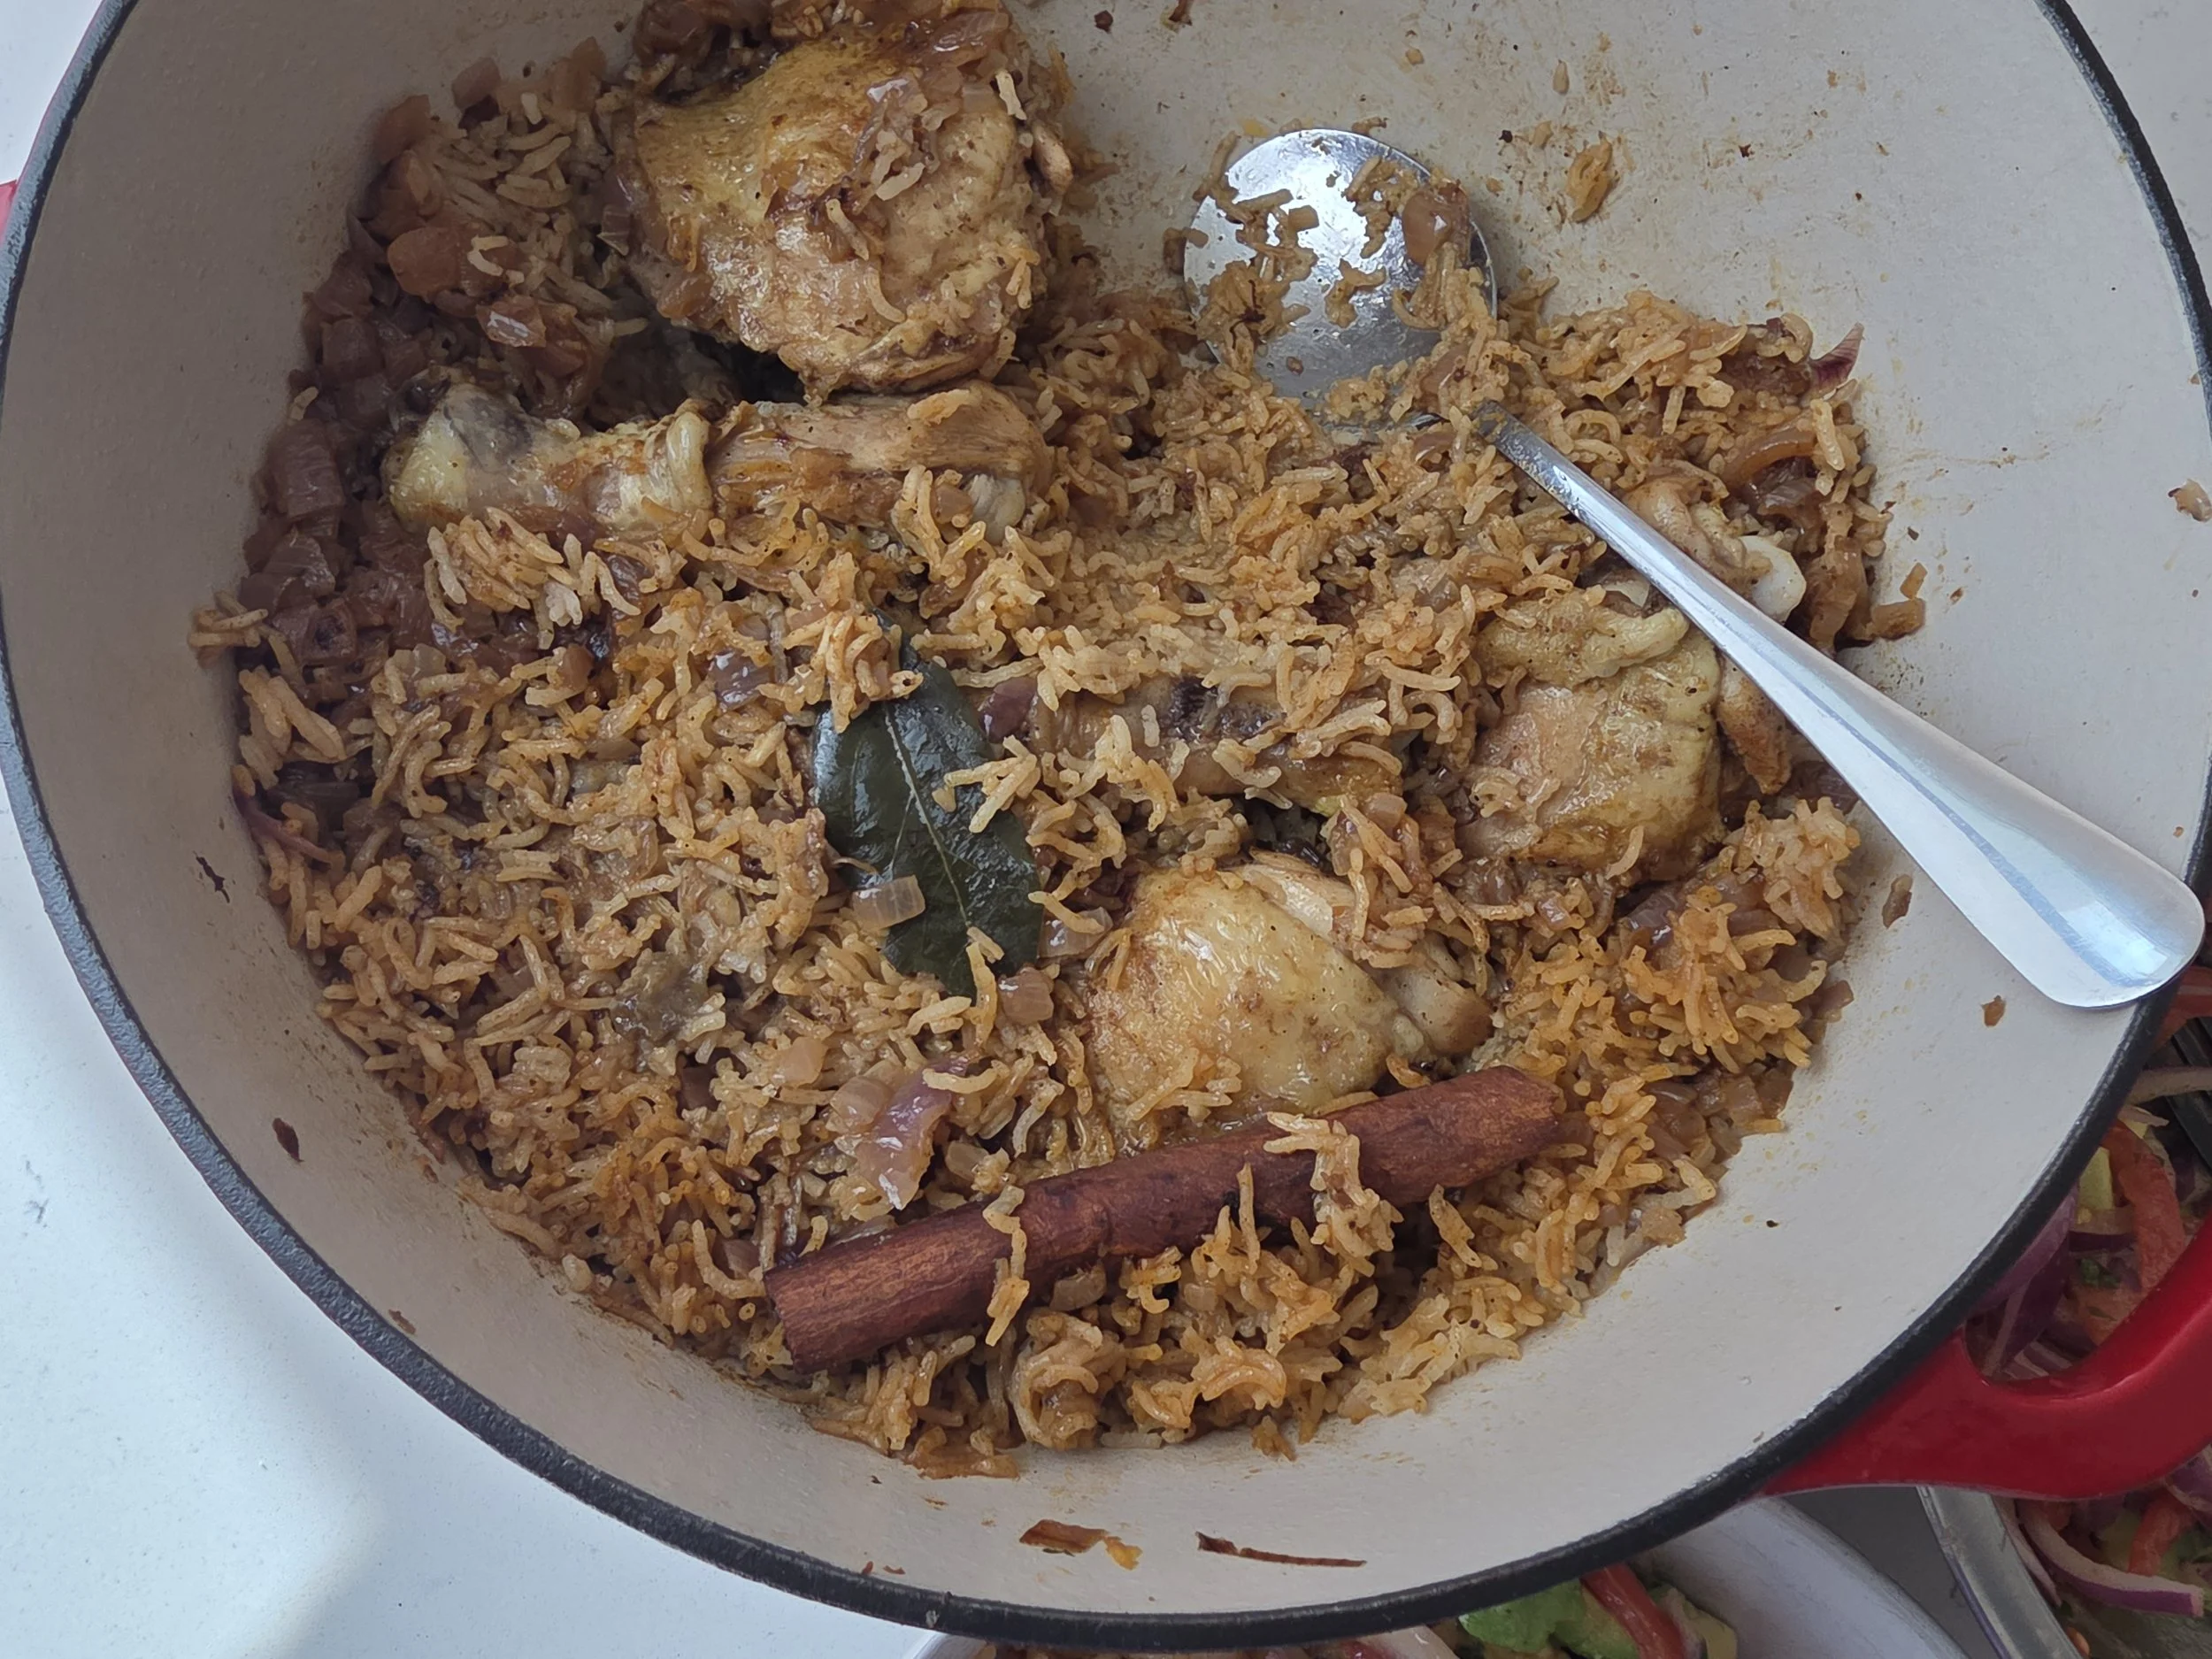
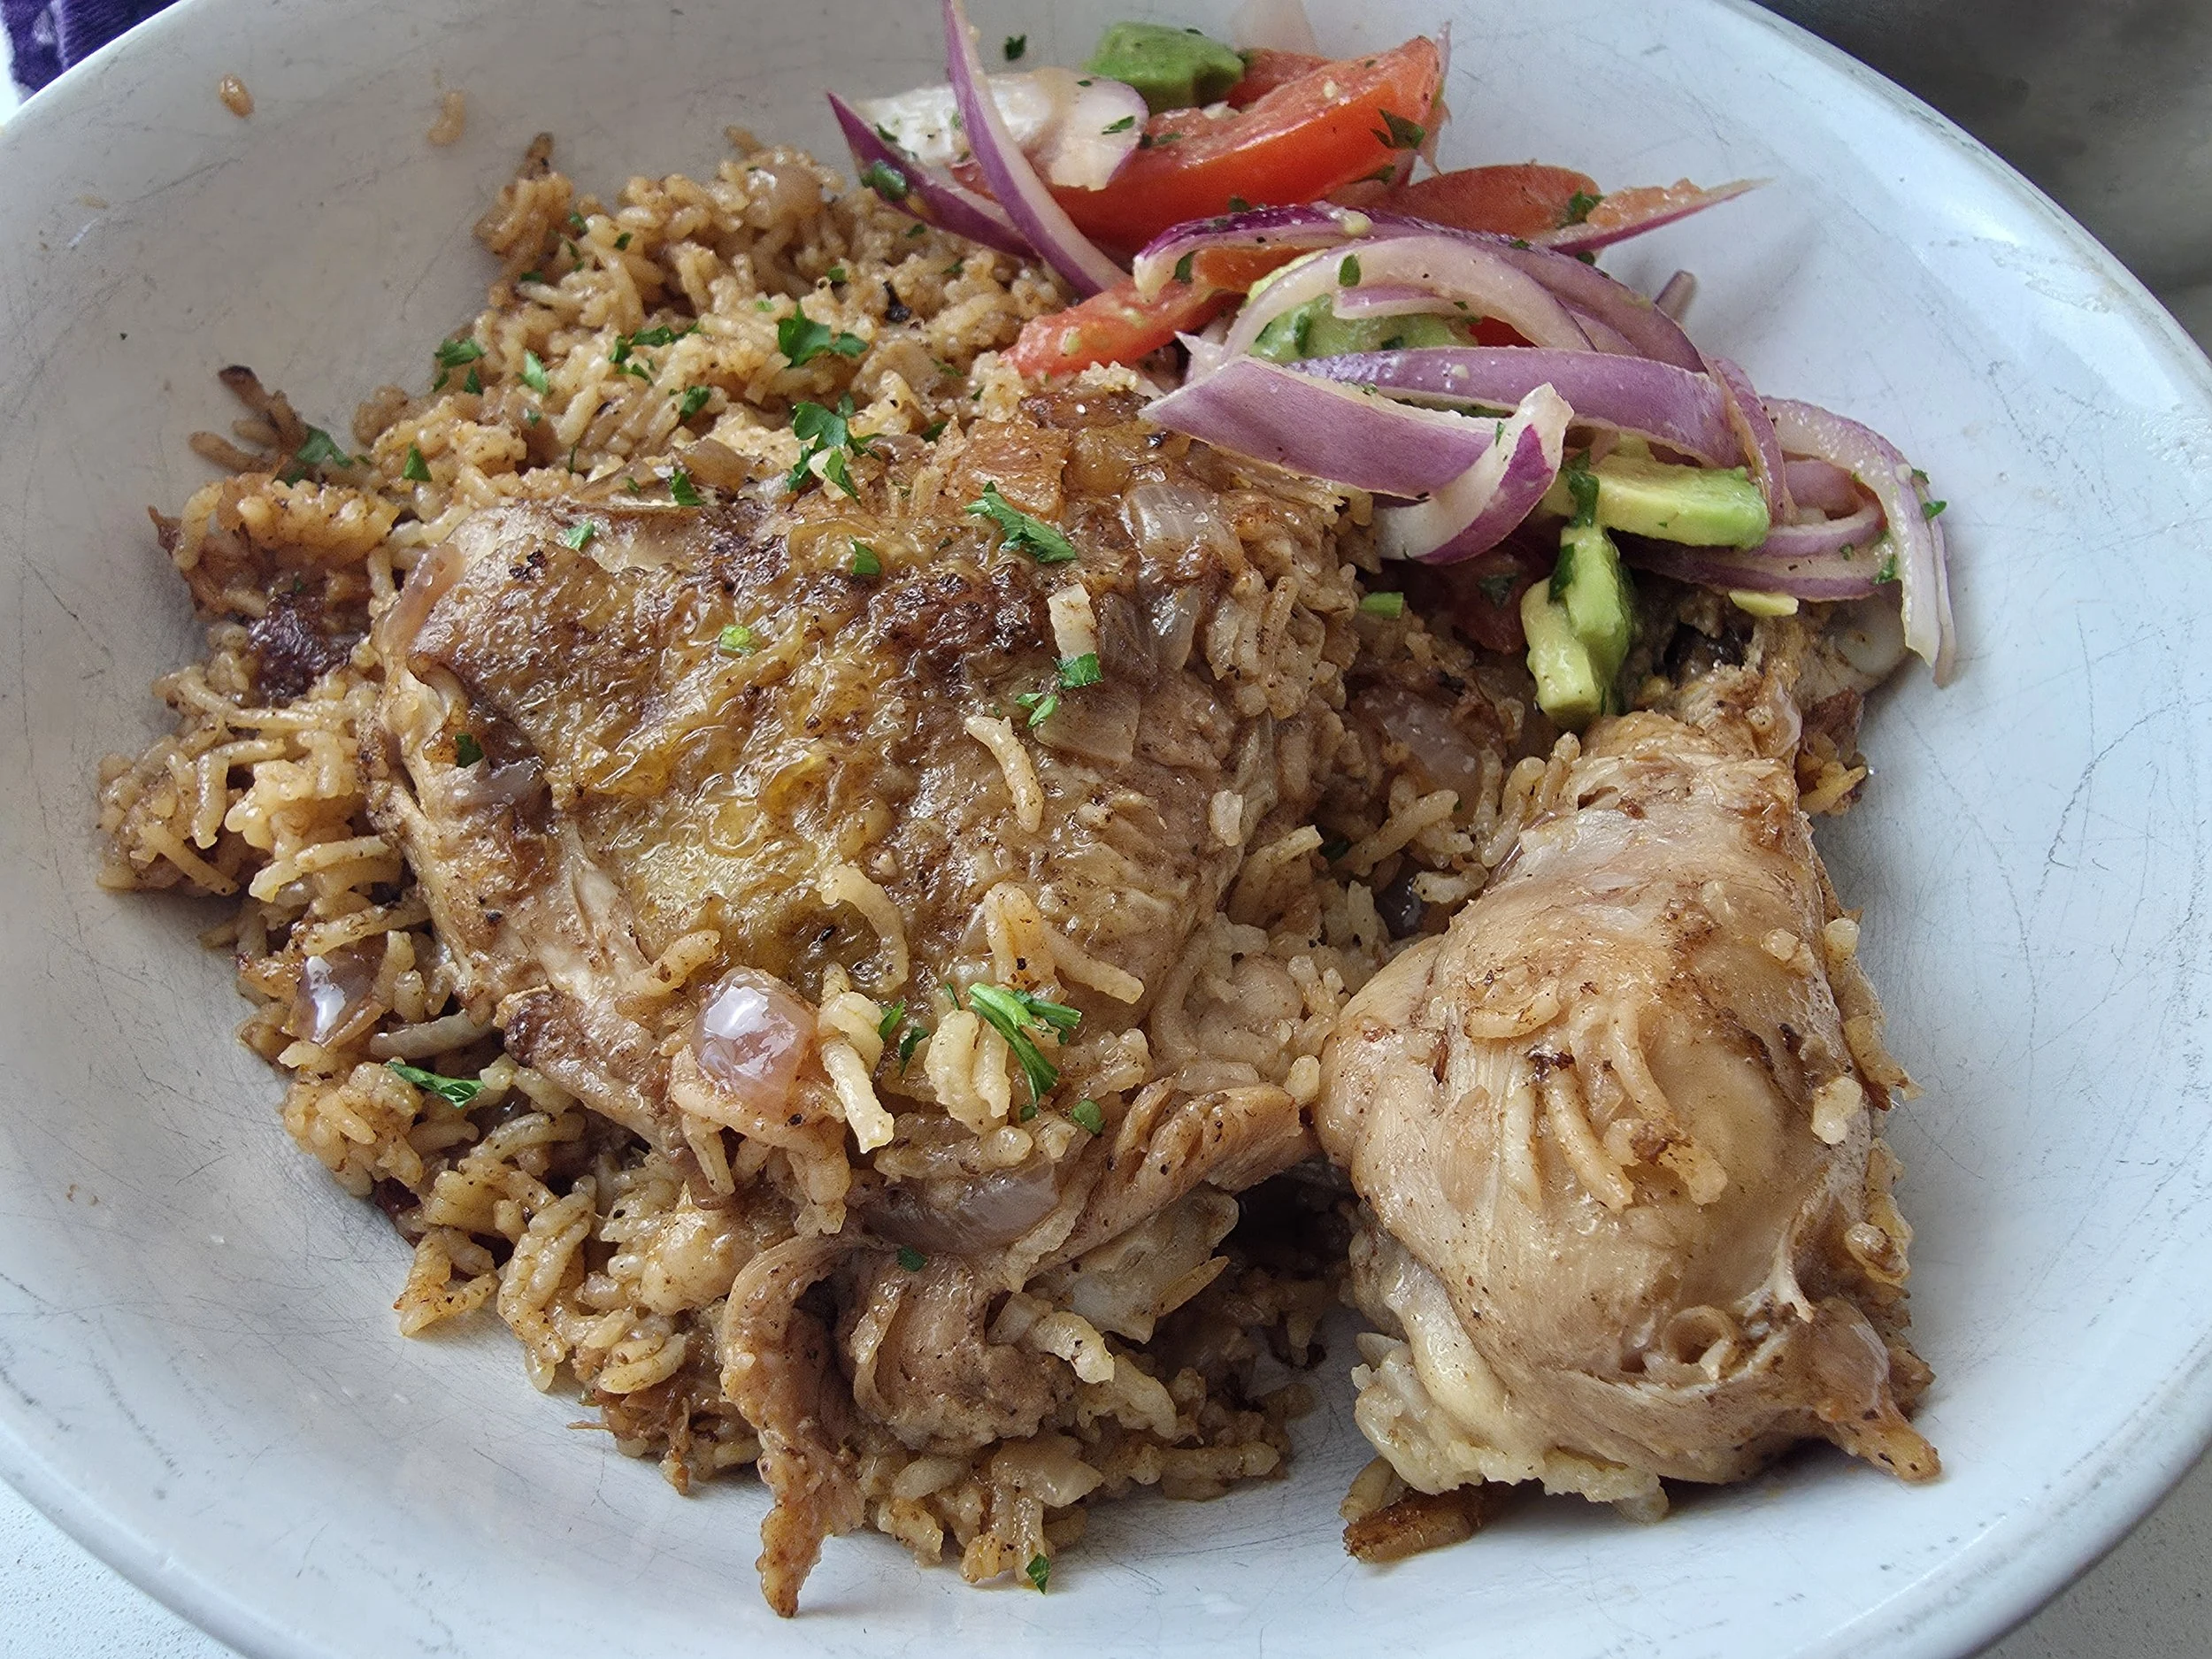

Zanzibar-Style One-Pot Chicken Pilau
A fragrant East African-inspired chicken pilau featuring spiced rice, caramelized onions, and tender bone-in chicken, all cooked in one pot for a rich and comforting meal.
Ingredients
- 4 bone-in, skin-on chicken thighs
- 4 chicken drumsticks
- 2 tbsp chicken spice
- 2 cups basmati rice, rinsed
- 2 large red onions, thinly sliced
- 2 tbsp ginger-garlic paste (or 2 tsp each minced)
- 2 tbsp tomato paste
- 1 tbsp Royco Usavi Mix (chicken)
- 1 tsp cumin
- 1 tsp ground cardamom
- ¼ tsp ground cloves
- 1 tsp black pepper
- 1 cinnamon stick
- 2 bay leaves
- 3 cups water
- 2 tsp bouillon paste
- ½–1 Knorr chicken bouillon cube, to taste
- 3 tbsp ghee or cooking oil
- Salt and lemon, to taste
- Optional: 1 tbsp Worcestershire sauce, for deglazing
- Optional: Lemon wedge and parsley to garnish and serve
Instructions
- Pat the chicken dry, lightly coat with oil, and season with chicken spice, salt, and pepper. Let sit for at least 5 minutes.
- Heat at least 2 tbsp ghee or oil in a large pot or Dutch oven over medium-high heat. Brown chicken 2–3 minutes per side, then remove and set aside.
- In the same pot, sauté onions until soft (2–3 minutes), or longer for a golden color and deeper flavor. Add ginger-garlic paste, Royco Usavi Mix, bouillon paste, and pilau spices. Stir 30–60 seconds until fragrant and cook an additional minute to activate the aromatics.
- Stir in tomato paste and optionally the Worcestershire sauce to lift flavors from the bottom of the pot.
- Stir in the rinsed rice, coating it evenly in the spice mixture for about 1 minute.
- Pour in the water and mix in the bouillon cube. Add cinnamon stick and bay leaves, then nestle chicken pieces on top of the rice. Bring to a gentle boil, then reduce heat to low, cover, and simmer for 20 minutes.
- Check your pot. If you notice pooling, slightly open the lid and cook an additional 5–10 minutes.
- Squeeze fresh lemon over the rice and chicken and adjust salt to taste.
- Gently fluff the rice, garnish with parsley and serve with a mixed salad (kachumbari with avocado).
Notes
- Rice texture: A quick rinse is enough, no soaking needed. Keep the lid closed during simmering to retain steam for fluffy rice.
- Chicken skin: Browning adds flavor; optional but recommended!
- Leftovers: Store in an airtight container in the fridge for up to 3 days; reheat gently.
Nutrition Facts
Calories
500Fat (grams)
17 gCarbs (grams)
50 gFiber (grams)
3 gProtein (grams)
28 gI am not a certified nutritionist and any nutritional information on dontmissmyplate.com should only be used as a general guideline.

Coconut Eggplant and Lentil Masala Curry
A cozy, plant-based curry with creamy lentils, tender eggplant, and fragrant coconut—served with spiced rice.
Hearty, fragrant, and deeply satisfying, this Eggplant and Lentil Coconut Curry is comfort in a bowl. Slow-cooked eggplant melts into a spiced lentil base, infused with ginger, garlic, and creamy coconut milk for a rich, velvety finish. Served with fluffy aromatic rice—steamed with warming spices like cardamom, cinnamon, or bay leaf—it’s a nourishing, plant-based dish that’s as cozy as it is flavorful. Whether you're looking for a weeknight dinner or a meatless showstopper for guests, this curry brings warmth and depth to any table.
Cooking eggplant is all about unlocking its rich, silky texture and ability to soak up flavor. When properly cooked, eggplant transforms from firm and spongy to tender and luscious, making it perfect for curries, stews, and roasts. Salting it beforehand can help reduce any bitterness and improve its ability to brown, while slow cooking allows it to absorb spices and sauces deeply. Whether roasted, sautéed, or simmered, eggplant acts like a sponge for bold aromatics—especially in dishes like coconut curries where it adds both body and depth.
General Tips for Cooking Eggplant
Salt First (Optional but Helpful):
Lightly salt sliced or cubed eggplant and let it sit for 20–30 minutes. This draws out excess moisture and any bitterness, helping it cook more evenly and brown better.Don’t Undercook It:
Eggplant should be fully tender when done—undercooked eggplant can be spongy or rubbery. Cook it until it’s soft and creamy inside.Use Enough Oil (or Bake/Roast):
Eggplant absorbs oil quickly, so don’t be afraid to use a bit more when pan-frying or roasting. Alternatively, brush with oil and bake at a high temperature for a healthier option.Pair with Bold Flavors:
Eggplant soaks up spices and sauces beautifully. It works especially well with garlic, ginger, curry spices, tomatoes, and coconut milk.Roast or Grill for Extra Depth:
Roasting or grilling brings out eggplant’s natural sweetness and gives it a smoky, rich flavor—perfect for dips, salads, or hearty stews.
A rich, spiced plant-based curry inspired by East African flavors, with tender eggplant, hearty lentils, and creamy coconut milk.
Combining lentils and eggplant creates a beautiful balance of texture and depth—soft, creamy eggplant melds with hearty lentils to form a rich, comforting base that’s both nourishing and satisfying. This pairing is common in many African and Indian-influenced dishes, especially in East African coastal cooking, where flavors are bold, layered, and full of warmth.
In East African cuisine, particularly along the Swahili coast, the use of spices like cumin, coriander, turmeric, and cloves is deeply rooted in centuries of trade with India and the Arabian Peninsula. Coconut milk is another hallmark of the region’s cooking, adding creaminess and a subtle sweetness that tempers the heat of spices while enriching the overall dish. When combined, lentils, eggplant, aromatic spices, and coconut create a dish that’s deeply flavorful, comforting, and rooted in tradition—perfect for sharing and savoring.


Coconut Eggplant and Lentil Masala Curry
Discover the rich, comforting flavors of lentils and eggplant simmered with creamy coconut milk—a staple in East African coastal cuisine. This nourishing plant-based dish blends hearty lentils with silky eggplant and bold, layered spices for a satisfying vegan meal inspired by African and Indian culinary traditions. Perfect for fans of coconut curry and wholesome comfort food.
Ingredients
- 1 large eggplant, chopped
- 1 small onion, chopped
- 1 teaspoon ground ginger
- 1/2 teaspoon paprika
- 2 teaspoons masala curry powder
- 1 teaspoon oregano
- 1 teaspoon salt (plus 1 teaspoon extra to remove water from eggplant)
- 1 teaspoon chilli flakes
- 1 can coconut, full cream
- 1/2 cup green lentils
- 2 cups chicken broth
- 1 teaspoon black pepper
- 1/4 teaspoon cumin
- 1/2 teaspoon Royco Usavi mix, chicken (optional)
- 2 bay leaves
- 1/2 cup fire-roasted tomatoes, diced
- 3 garlic cloves
- 2 tablespoons ghee
- 2 tablespoons olive oil
- 2 tablespoons sesame seed oil
- 1 tablespoon soy sauce
- 1 tablespoon red wine vinegar
- 1 teaspoon fish sauce
- 1 teaspoon rice vinegar
- 2 tablespoons + 1/2 cup fresh cilantro, roughly chopped (optional)
- 1/3 cup silvered almonds (optional)
Instructions
- Slice the eggplant in half and sprinkle with 1 teaspoon salt to draw out excess moisture. Let sit, then pat dry when ready to prepare.
- Peel and mince the garlic cloves. Roughly chop your washed parsley.
- In a separate bowl, combine your spices: ginger, masala curry powder, paprika, oregano, salt, pepper, chili flakes, and any other spices.
- Chop the eggplant into bite-sized pieces and sauté with the sesame oil until softened and golden brown. Remove from the pan and set aside.
- In the same pot, melt ghee over medium heat. Sauté the onion and garlic for 2–3 minutes, or until the onions are translucent. Add the spice mix and stir to bloom the flavors for about 1 minute (add a bit more ghee or the olive oil if needed.
- Deglaze the pot with soy sauce. Add the tomato, red wine vinegar, and lentils. Stir and cook for 1–2 minutes, then pour in the broth to cover and bring to a boil. Reduce heat and simmer for about 15 minutes, or until the lentils are softened.
- Add the eggplant back to the pot, followed by the coconut milk, bay leaves and 2 tablespoons parsley. Simmer for another 10 minutes.
- Finish with a splash of fish sauce and rice vinegar. Season to taste. Remove from heat and let sit for 2–3 minutes.
- Serve topped with extra parsley, sliced almonds, and a scoop of aromatic rice.
Nutrition Facts
Calories
378Fat (grams)
24.9 gCarbs (grams)
27.5 gFiber (grams)
12.6 gSugar (grams)
8.8 gProtein (grams)
10.2 gI am not a certified nutritionist and any nutritional information on dontmissmyplate.com should only be used as a general guideline.