

Coconut Eggplant and Lentil Masala Curry
A cozy, plant-based curry with creamy lentils, tender eggplant, and fragrant coconut—served with spiced rice.
Hearty, fragrant, and deeply satisfying, this Eggplant and Lentil Coconut Curry is comfort in a bowl. Slow-cooked eggplant melts into a spiced lentil base, infused with ginger, garlic, and creamy coconut milk for a rich, velvety finish. Served with fluffy aromatic rice—steamed with warming spices like cardamom, cinnamon, or bay leaf—it’s a nourishing, plant-based dish that’s as cozy as it is flavorful. Whether you're looking for a weeknight dinner or a meatless showstopper for guests, this curry brings warmth and depth to any table.
Cooking eggplant is all about unlocking its rich, silky texture and ability to soak up flavor. When properly cooked, eggplant transforms from firm and spongy to tender and luscious, making it perfect for curries, stews, and roasts. Salting it beforehand can help reduce any bitterness and improve its ability to brown, while slow cooking allows it to absorb spices and sauces deeply. Whether roasted, sautéed, or simmered, eggplant acts like a sponge for bold aromatics—especially in dishes like coconut curries where it adds both body and depth.
General Tips for Cooking Eggplant
Salt First (Optional but Helpful):
Lightly salt sliced or cubed eggplant and let it sit for 20–30 minutes. This draws out excess moisture and any bitterness, helping it cook more evenly and brown better.Don’t Undercook It:
Eggplant should be fully tender when done—undercooked eggplant can be spongy or rubbery. Cook it until it’s soft and creamy inside.Use Enough Oil (or Bake/Roast):
Eggplant absorbs oil quickly, so don’t be afraid to use a bit more when pan-frying or roasting. Alternatively, brush with oil and bake at a high temperature for a healthier option.Pair with Bold Flavors:
Eggplant soaks up spices and sauces beautifully. It works especially well with garlic, ginger, curry spices, tomatoes, and coconut milk.Roast or Grill for Extra Depth:
Roasting or grilling brings out eggplant’s natural sweetness and gives it a smoky, rich flavor—perfect for dips, salads, or hearty stews.
A rich, spiced plant-based curry inspired by East African flavors, with tender eggplant, hearty lentils, and creamy coconut milk.
Combining lentils and eggplant creates a beautiful balance of texture and depth—soft, creamy eggplant melds with hearty lentils to form a rich, comforting base that’s both nourishing and satisfying. This pairing is common in many African and Indian-influenced dishes, especially in East African coastal cooking, where flavors are bold, layered, and full of warmth.
In East African cuisine, particularly along the Swahili coast, the use of spices like cumin, coriander, turmeric, and cloves is deeply rooted in centuries of trade with India and the Arabian Peninsula. Coconut milk is another hallmark of the region’s cooking, adding creaminess and a subtle sweetness that tempers the heat of spices while enriching the overall dish. When combined, lentils, eggplant, aromatic spices, and coconut create a dish that’s deeply flavorful, comforting, and rooted in tradition—perfect for sharing and savoring.


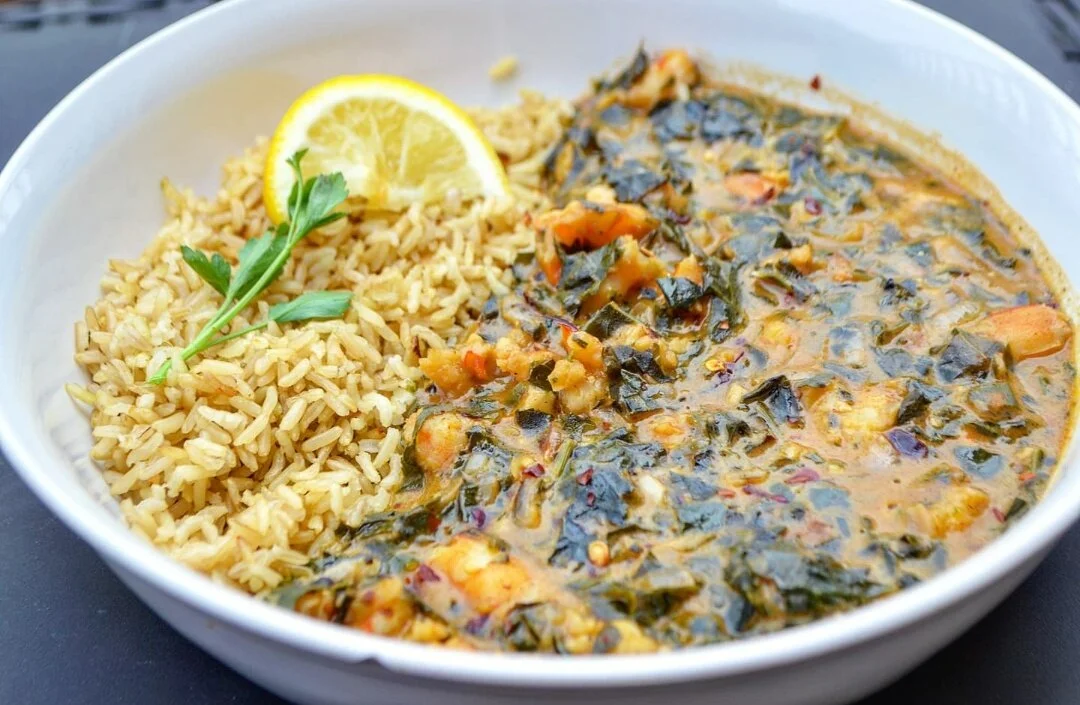
Coconut Eggplant and Lentil Masala Curry
Discover the rich, comforting flavors of lentils and eggplant simmered with creamy coconut milk—a staple in East African coastal cuisine. This nourishing plant-based dish blends hearty lentils with silky eggplant and bold, layered spices for a satisfying vegan meal inspired by African and Indian culinary traditions. Perfect for fans of coconut curry and wholesome comfort food.
Ingredients
- 1 large eggplant, chopped
- 1 small onion, chopped
- 1 teaspoon ground ginger
- 1/2 teaspoon paprika
- 2 teaspoons masala curry powder
- 1 teaspoon oregano
- 1 teaspoon salt (plus 1 teaspoon extra to remove water from eggplant)
- 1 teaspoon chilli flakes
- 1 can coconut, full cream
- 1/2 cup green lentils
- 2 cups chicken broth
- 1 teaspoon black pepper
- 1/4 teaspoon cumin
- 1/2 teaspoon Royco Usavi mix, chicken (optional)
- 2 bay leaves
- 1/2 cup fire-roasted tomatoes, diced
- 3 garlic cloves
- 2 tablespoons ghee
- 2 tablespoons olive oil
- 2 tablespoons sesame seed oil
- 1 tablespoon soy sauce
- 1 tablespoon red wine vinegar
- 1 teaspoon fish sauce
- 1 teaspoon rice vinegar
- 2 tablespoons + 1/2 cup fresh cilantro, roughly chopped (optional)
- 1/3 cup silvered almonds (optional)
Instructions
- Slice the eggplant in half and sprinkle with 1 teaspoon salt to draw out excess moisture. Let sit, then pat dry when ready to prepare.
- Peel and mince the garlic cloves. Roughly chop your washed parsley.
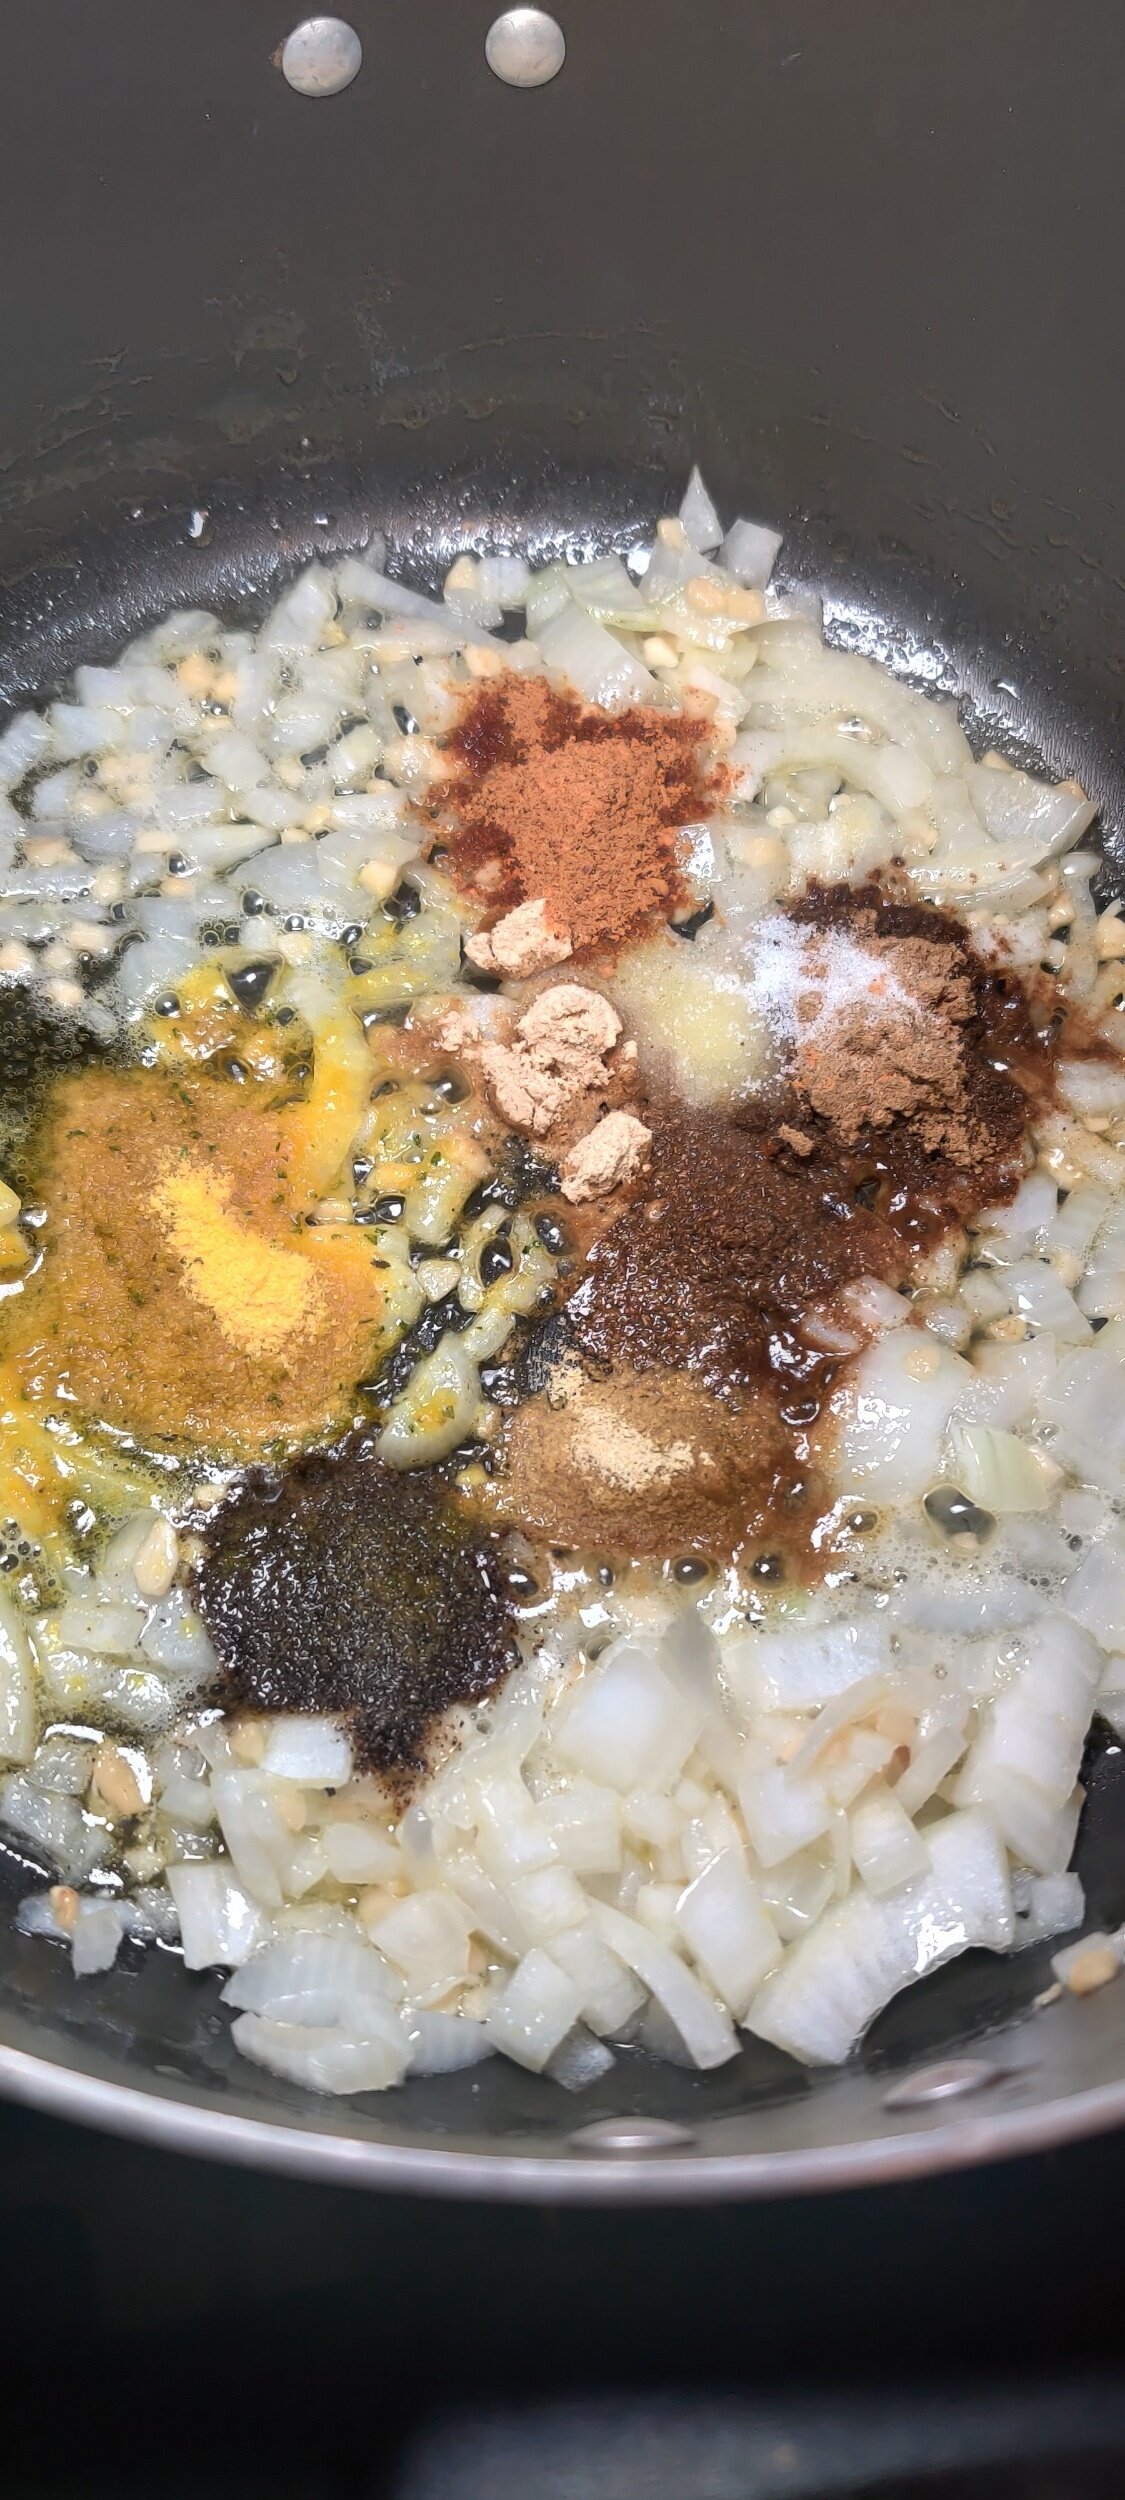
- In a separate bowl, combine your spices: ginger, masala curry powder, paprika, oregano, salt, pepper, chili flakes, and any other spices.
- Chop the eggplant into bite-sized pieces and sauté with the sesame oil until softened and golden brown. Remove from the pan and set aside.
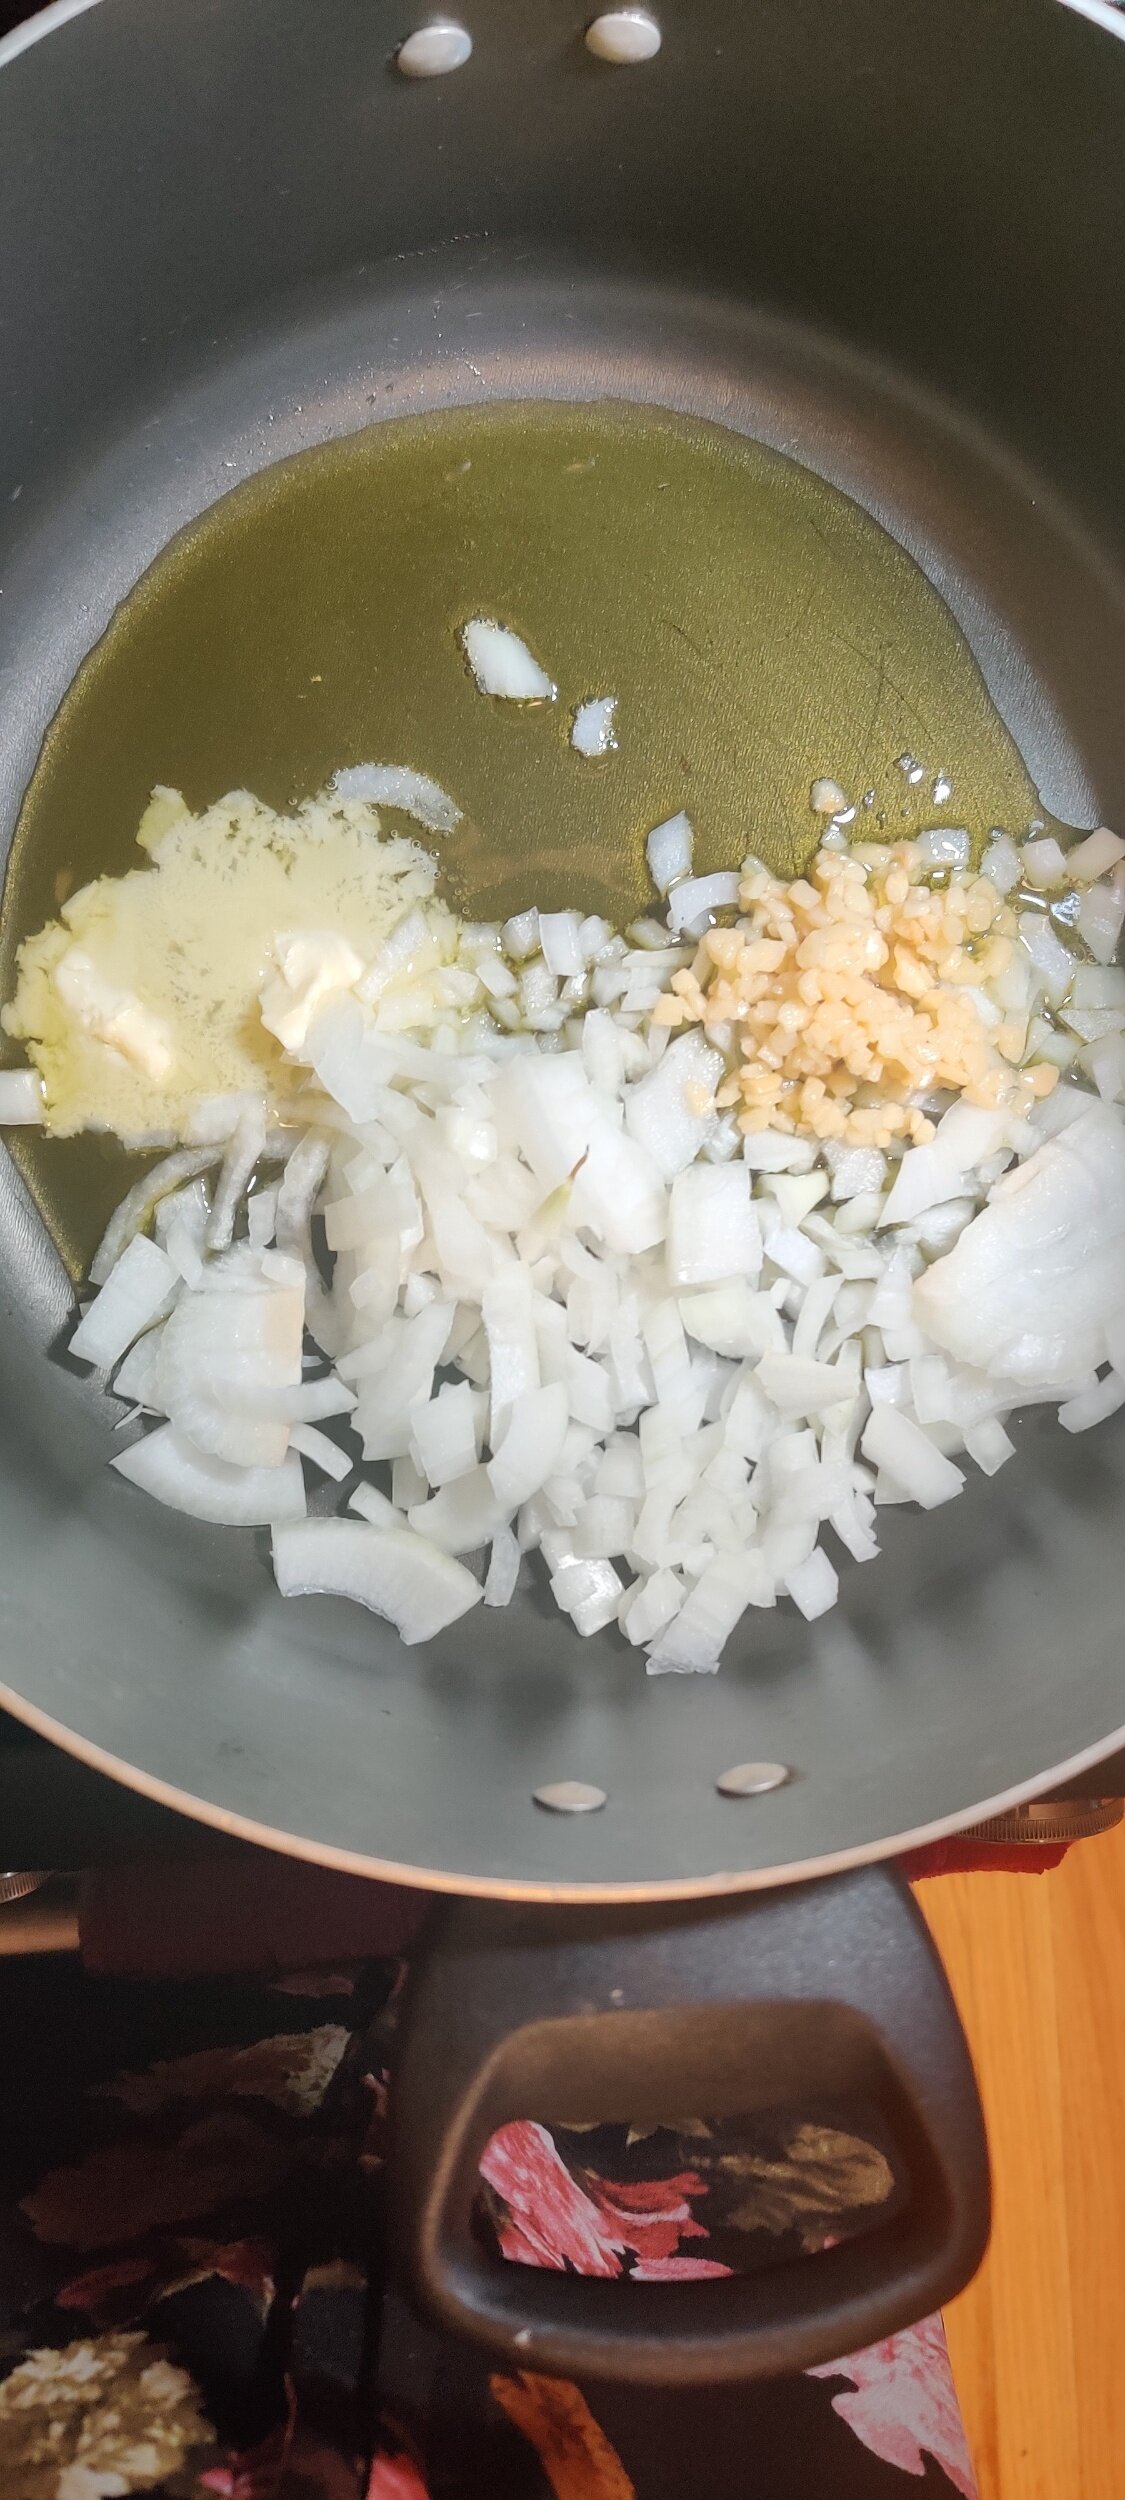
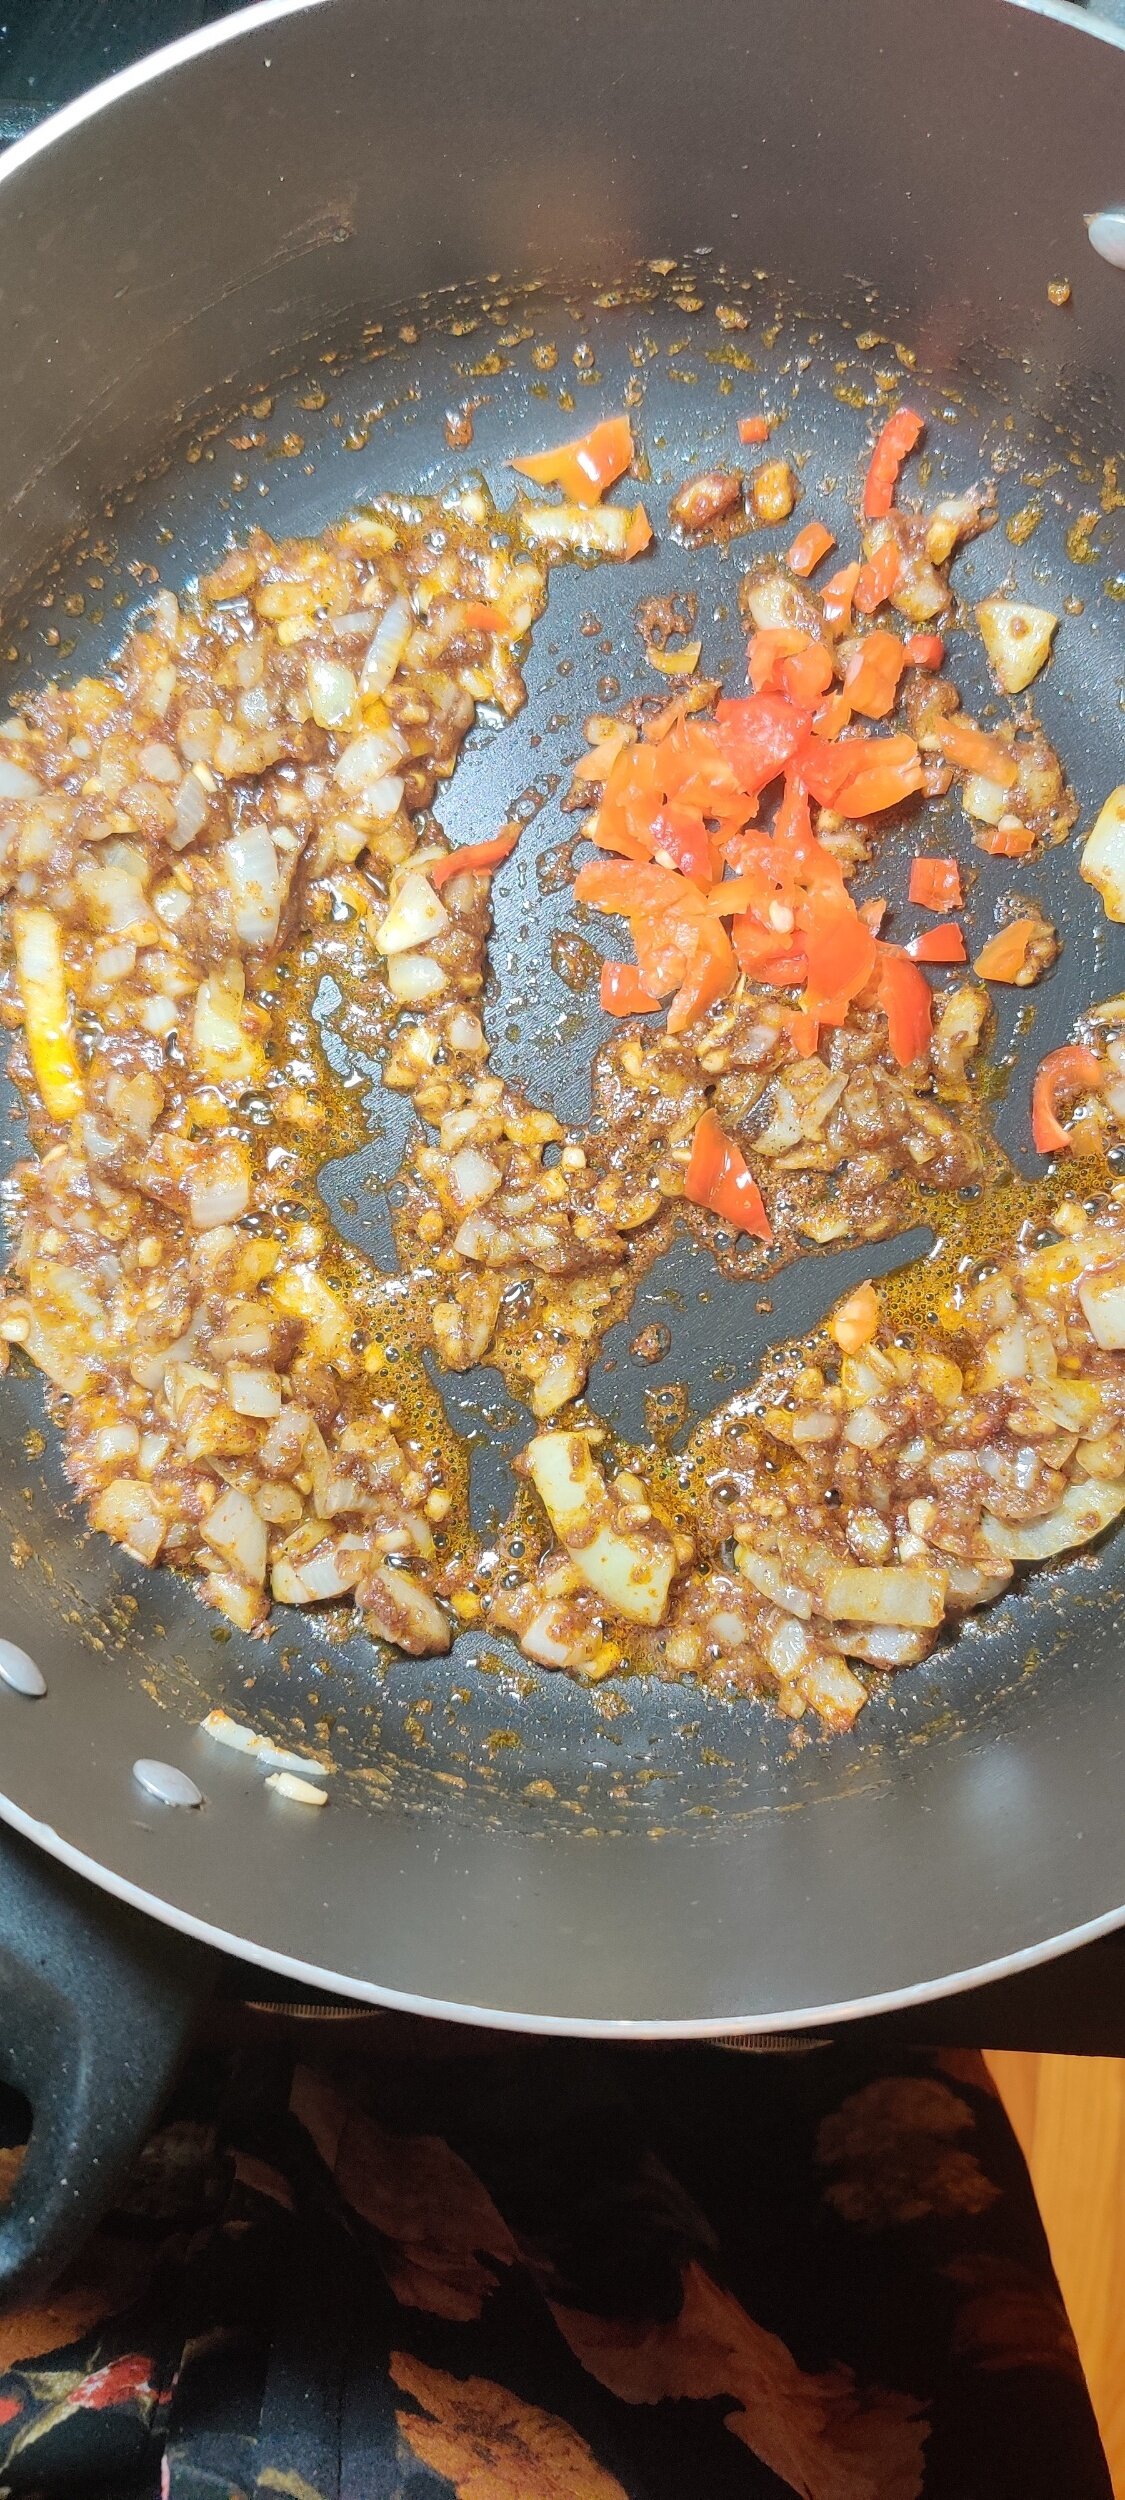
- In the same pot, melt ghee over medium heat. Sauté the onion and garlic for 2–3 minutes, or until the onions are translucent. Add the spice mix and stir to bloom the flavors for about 1 minute (add a bit more ghee or the olive oil if needed.
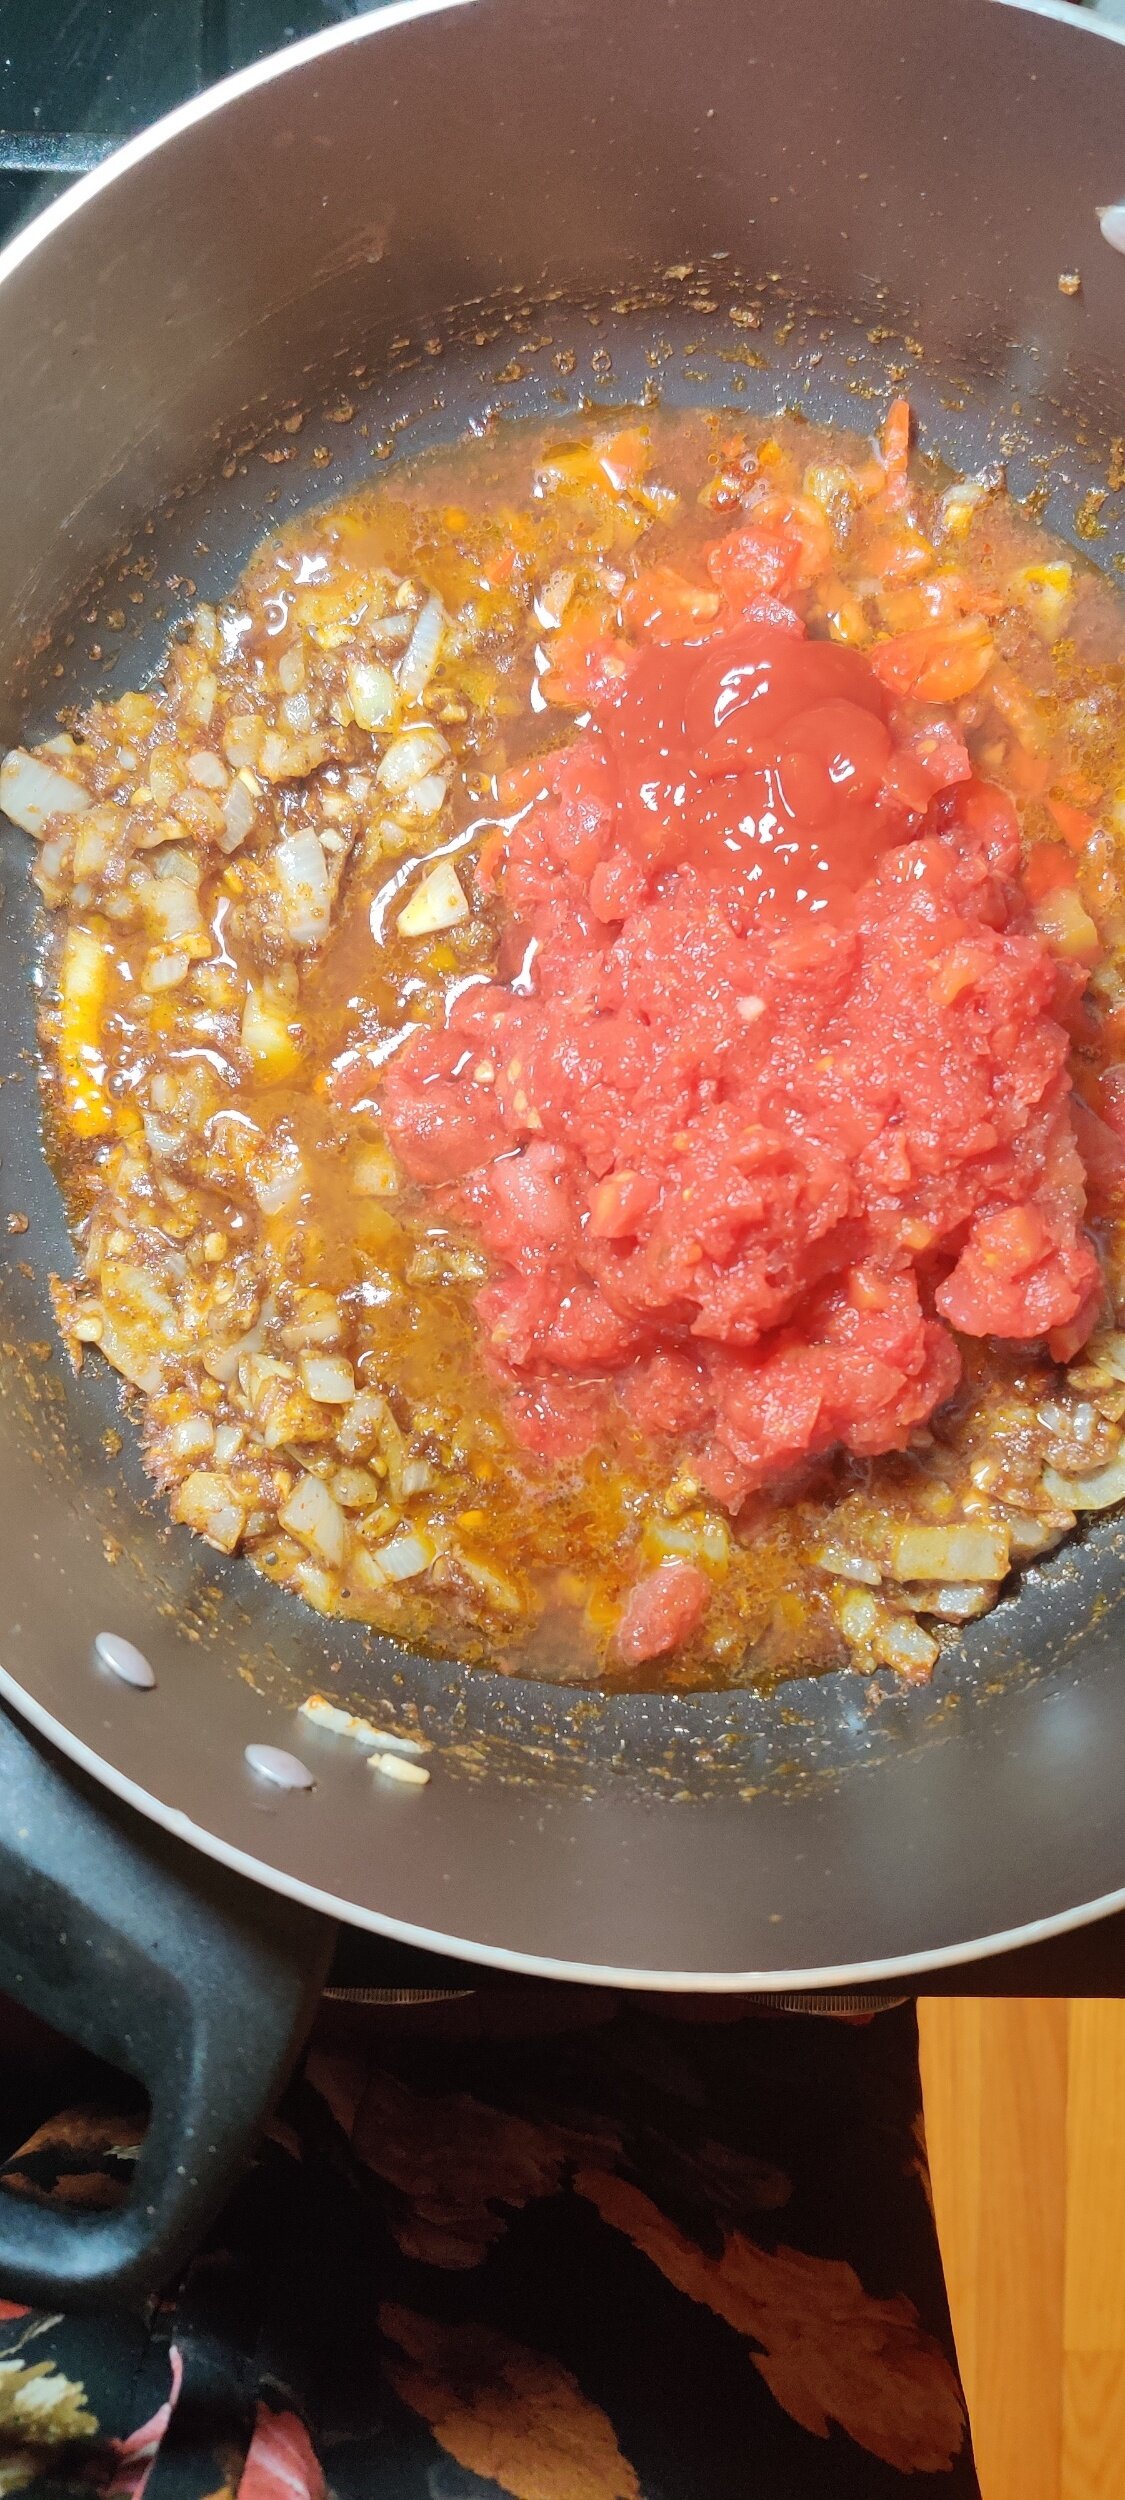
- Deglaze the pot with soy sauce. Add the tomato, red wine vinegar, and lentils. Stir and cook for 1–2 minutes, then pour in the broth to cover and bring to a boil. Reduce heat and simmer for about 15 minutes, or until the lentils are softened.
- Add the eggplant back to the pot, followed by the coconut milk, bay leaves and 2 tablespoons parsley. Simmer for another 10 minutes.
- Finish with a splash of fish sauce and rice vinegar. Season to taste. Remove from heat and let sit for 2–3 minutes.
- Serve topped with extra parsley, sliced almonds, and a scoop of aromatic rice.
Nutrition Facts
Calories
378Fat (grams)
24.9 gCarbs (grams)
27.5 gFiber (grams)
12.6 gSugar (grams)
8.8 gProtein (grams)
10.2 gI am not a certified nutritionist and any nutritional information on dontmissmyplate.com should only be used as a general guideline.

Creamy Coconut Cornbread Ice Cream (No Churn)
Who isn't down for eating ice cream regardless of the season? As Summer ends and makes way for the Fall, flavours change, and various fruits and vegetables will take the stage, from pumpkins and sweet potatoes to corn and apples, pears and figs. When people think about corn (or maize, or mealie cobs), ice cream probably doesn't come to mind--although some of the more experimental producers, companies like Van Leeuwen and Jeni's may have made that the case.
But what if you want to make some corn ice cream in your own at home? Better yet, still decadent, possibly dairy-free, and without an ice cream maker.
Be sure to explore the website for other sweet recipes, the no churn ice cream recipes listed below which you can use with dairy or alterative milk products to make.
Nature's Charm produces two main ingredients (linked below) you need for your ice cream base - whipped cream (to help add air to the mixture, especially since you won't be getting the smooth, light texture that typically comes from the churning motion of an ice cream maker) and condensed milk (which supplies the sugar and fat content). I am a fan of their quality, organic products and recommend trying them. They even make condensed oat milk! Even if you don't have specific dietary requirements and restrictions, check out some of my favourite gluten-free and vegan baking items here.
If you are in need of some quality loaf pans, for ice cream, bread, or whatever else, try these!

These Nordic Ware Aluminum Loaf Pans (Set of 2) , 1.5-pound pans can do it all—and then some with oven-safe aplomb. They’re made of pure cast aluminum reinforced with steel, so they’ll heat up in a flash and bake extra-evenly time after time. Even more: They’ve got galvanized steel rims to prevent warping, and they’ll never rust either.
Have you ever used coconut milk products as your base?
How to Make Non-Dairy No-Churn Ice Cream
This website has several recipes that do not require an ice cream maker. There is no need to purchase an overpriced machine; you have total control over what goes into your easy, homemade sweet treat.
As previously noted, an integral part of making ice cream is the churning process or adding air into the mixture, which you can achieve using a hand mixer (in addition to the whipped cream). There is also no need for eggs or to cook the main ingredients. You can substitute the coconut products with another alternative or dairy milk with this recipe. One thing to note is that using products with less fat or sugar could impact the creaminess factor and how hard the ice cream turns out. This is because fat doesn't freeze, and sugar helps keep ice cream softer in texture (by preventing some of the water from turning into ice, but it works both ways, so there's no need to overdo it!)
You can substitute the coconut products with another alternative or dairy milk with this recipe.
Why is My No Churn Ice Cream hard?
Yep, I had asked myself this question before and even tried homemade ice cream recipes a few times before getting it right, especially when switching to low-fat and reduced-sugar products. The main potential drawback or challenge with no-churn ice cream is the consistency and texture not meeting expectations. You will likely need to leave it out longer once it is frozen.
Be sure to do two things during the process:
Mix your ingredients well, but don't beat to the point of separating or depleting your whipped cream.
Make sure the container is airtight when you freeze the ice cream.
These are not the only factors; for example, cling wrap helps prevent water particles from crystalizing on top of the ice cream. You can add alcohol to the base mixture, which does not freeze, ensuring you whip your cream adequately. There are also natural additives known as 'stabilizers' like guar gum or thickeners like tapioca flour (used in gelato), and keeping all your ingredients and the freezer cold!
")
Creamy Coconut Cornbread Ice Cream (No Churn)
Ingredients
- 1 can (14-ounces) coconut condensed milk
- 1 can (15-ounces) coconut whipped cream
- 1 can (8.5-ounces) creamed corn
- 1 box gluten-free cornbread (I used Bob's Red Mill Mix)
- 1 tablespoon pure vanilla extract or paste
- 1 teaspoon lemon juice
- 1/2 teaspoon lemon zest
- 1/2 teaspoon salt
- Pinch of cinnamon
Instructions
- Follow the instructions for the cornbread premix: bake, cool and crumble the desired amount into pieces, set aside.
- Combine the condensed milk, creamed corn, and vanilla, whisking until well incorporated in a large bowl.
- Add the (chilled overnight) whipped coconut cream to another separate bowl and beat for about three minutes on high speed and/or until stiff peaks form. Watch for curdling or separation in the coconut mix; you will want to mix sparingly, or else the ice cream may have an undesirable texture.
- Using a large spoon or whisk, fold the whipped cream into the corn mixture, starting with two or three initial portions--this will help ensure you don't deflate the whipped air.
- Fold in the crumbled cornbread pieces, then pour the mixture into a loaf pan or ice cream container. You can also swirl in any extra creamed corn and condensed milk mixture.
- Cover with cling film, laying it directly on the ice cream's surface, then place in the freezer overnight or for at least four hours.
- When ready to serve, leave the ice cream at room temperature for about 10 minutes, then enjoy it in cups or cones!
I am not a certified nutritionist and any nutritional information on dontmissmyplate.com should only be used as a general guideline.

Coconut and Blueberry No-Churn Ice Cream
Springtime (or summer), Easter, whatever the occasion, do you need any excuse to have some ice cream? Better yet, homemade when you know what ingredients go into it. When blueberries are in season, there is no excuse not to use them! As it turns out, they also pair well with a refreshing flavour, lemon! The coconut adds another dimension. You don't need an ice cream maker to enjoy ice cream. If you are interested in some other ideas, check out this Bourbon Peach Crumble Ice Cream or this Double Chocolate Hazelnut and Aero Mint Ice Cream with Shortbread.
The thing about homemade anything is the quality of the ingredients will have a significant bearing on the result. In this case especially, with so few in the mix, that matters!
Blueberries: The fresher, the better! Try to get organic and free of pesticides or any other additives.
Sugar: If you can get a less refined product, try to get organic cane sugar. You'll get the right amount of sweetness without any unwanted extras.
Heavy cream: as with any dairy product, you'll want to go with a quality brand and the other organic ingredients.
Condensed milk: whether you choose to go with the coconut milk version of cow's milk, quality brand and organic!
How does no-churn ice cream work?
When I first learned about this process, I was excited about the possibilities. We don't all invest in an ice cream machine and can get super creative with flavours. Quite honestly, it may seem like a luxury in some cases. Hand mixer? You'll likely have one for soups, etc. The machine whips the cream into a light, airy consistency. You can achieve the same thing with an electric hand mixer. You whip the cream in two stages, first into light peaks, then heavy peaks. As for the addition of the condensed milk completes what you will end up with, known as the ice cream base.

Coconut and Blueberry No-Churn Ice Cream
Ingredients
- 2 cups fresh blueberries
- 1/3 cup organic granulated sugar
- 1 tablespoon lemon juice
- 1 teaspoon vanilla extract
- Pinch of salt
- 2 cups heavy cream
- 1 (14-ounce) coconut condensed milk
Instructions
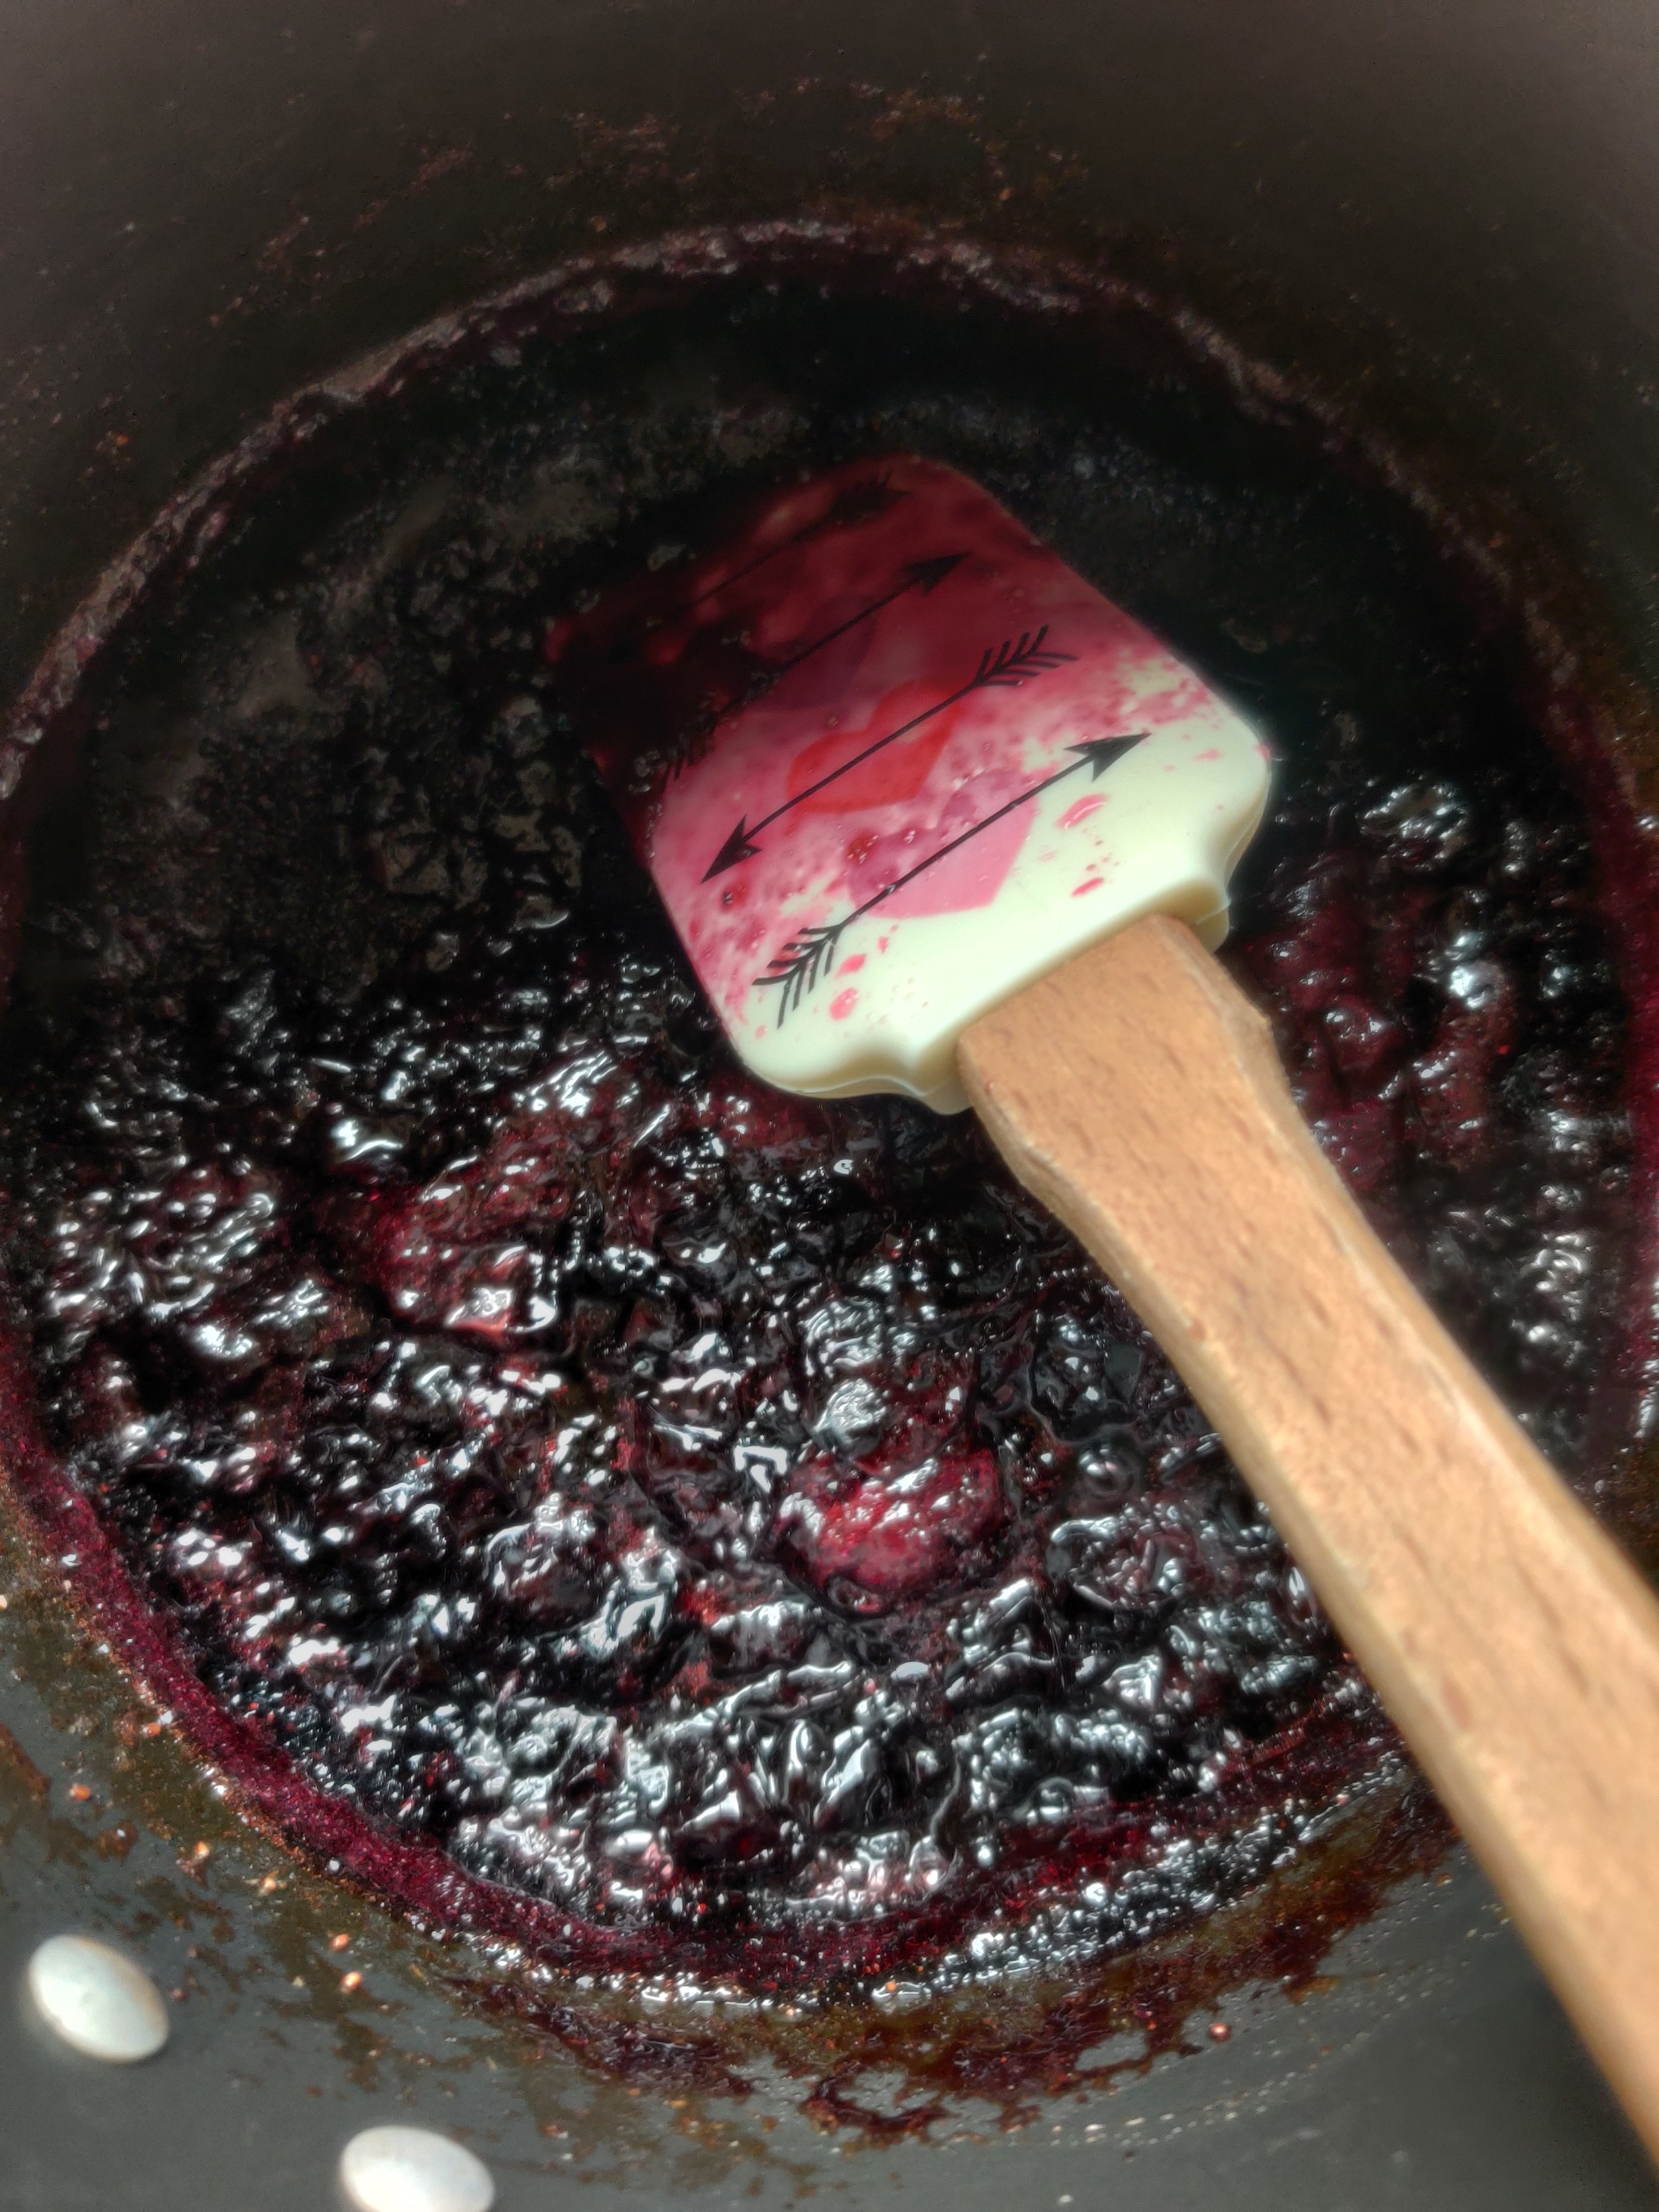
- Heat the sugar and blueberries in a saucepan until the sugar melts over medium heat. Stir frequently, adding the lemon.
- Lower the heat and simmer, crushing with a spatula until the berries bubble into a thick sauce. Take care not to burn the mixture!
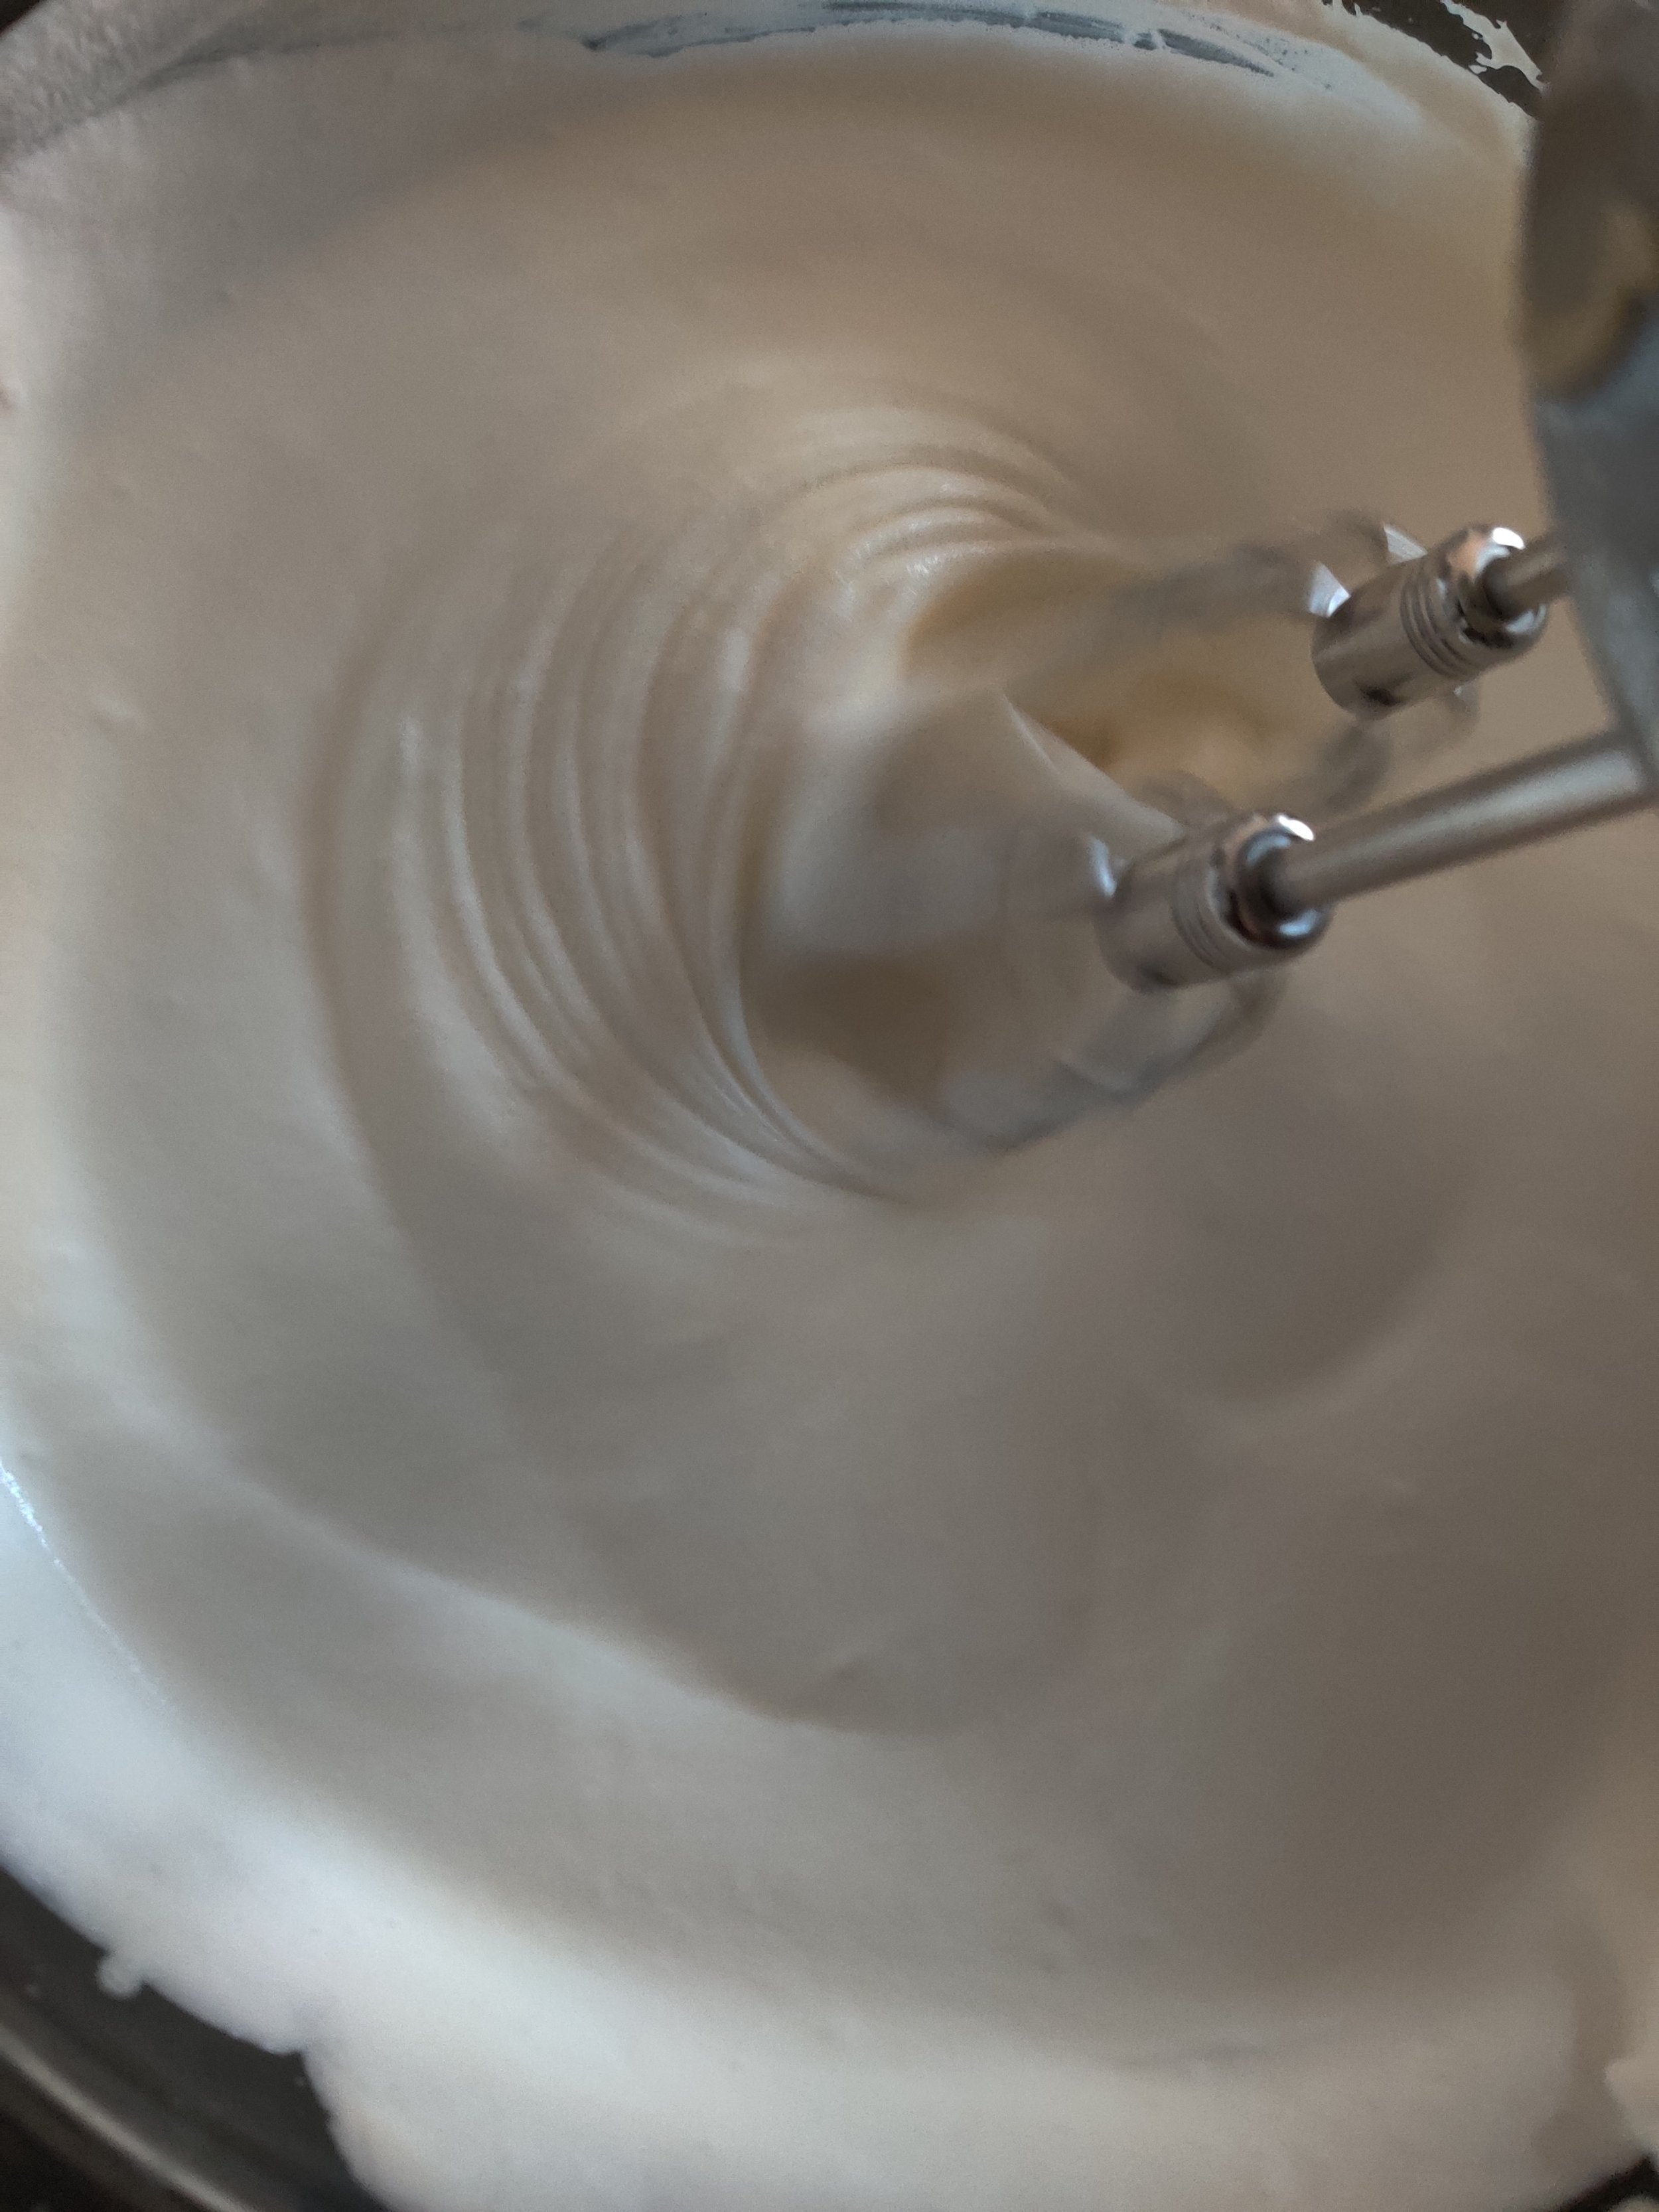
- In a large bowl, use a hand mixer to whisk the heavy cream until soft peaks form, about 4-5 minutes on medium to high speed.
- Add the condensed milk, fold in, and then beat with an electric mixer until stiff peaks form and the mixture looks thick with creamy folds.
- Mix 3/4 cups of the berries into the ice cream base, then pour into a loaf pan.
- Top with the remaining berries, then swirl with a fork. Cover the top with cling wrap and freeze for 6 hours or overnight.
- Leave out for 5 minutes, then serve.
Nutrition Facts
Calories
298Fat (grams)
13.6Carbs (grams)
40.7Sugar (grams)
38.8Protein (grams)
5I am not a certified nutritionist and any nutritional information on dontmissmyplate.com should only be used as a general guideline.


Island Herb Coconut Pan-Seared Salmon
Whether it's for lunch or dinner, salmon works well for any time of the day or almost any occasion. It's also very versatile in regards to how one can prepare it. I typically bake my salmon, marinated and wrapped in foil for 36 minutes at 350F. That is a fail-safe way to get some juicy, flavourful fish. But what if you want it lightly seared? A thin coat of crispy crust fried in butter or olive oil? That's where this recipe comes in!
You cook the salmon in a nonstick pan, add some vegetables, and finish off in coconut milk and a sauce to add your desired flavour profile. In this case, I wanted a Caribbean flare. Or, more specifically, a herb blend with vinegar, onions, garlic, ginger from one of my favorite kitchen product lines Camella's Kitchen, a Trinidadian women-owned business that makes authentic sauces and blends with flavours from the islands. The Island Herb Blend makes for quite the melody with some help from the fish sauce, soy sauce, and Worcester to bring everything together. If still available, you can get the blend as part of the summer grilling kit; that includes the Spicy Mango Chutney, Trini Roasted Garlic, Hot Pepper Sauce, and Pineapple Chow Pepper sauces. I used two sauces to make this Pineapple Chow Black Seabass with Salsa and Goat Chorizo Samosas with Tomato Mango Chutney. Or, try the fall kit, which includes the Island Herb Blend plus some autumn flavours like pumpkin and apple spice, which I've also used to make this Spicy Pumpkin Mushroom Skillet Pot Pie and Spicy Apple Muffins with a Cider Glaze.
In a short space of time, you'll get some delicious flavours that can be absorbed with some rice/grain or enjoyed as is.
Ingredients
2 salmon filets with skin
1/2 cup cononut milk
1 tablespoon fish sauce
1 cup cherry tomatoes
1 teaspoon fresh ginger, grated
1 tablespoon Worchester sauce (optional)
2 tablespoons soy sauce
1/2 large red bell pepper
1/2 yellow onion
1/4 cup spring onion + extra tips for garnish
2 tablespoons butter
2 tablespoons seafood seasoning
1 tablespoon garlic powder
1 tablespoon salt and pepper (steak seasoning)
1 tablespoon dried basil
2 tablespoons fresh cilantro
2 tablespoons Island Herd Blend from Camella’s Kitchen
1 cup bok choy
3/4 cup brown mushrooms
Dried or fresh parsley
Lemon wedges
Add butter to a nonstick pan on medium-high heat and sear the salmon fillets skin side first for 4-5 minutes on each side. For thicker fillets, flip the fish on its sides and sear for about 2 minutes per side. Season the fish with one tablespoon seafood seasoning, salt and pepper, and garlic before flipping over.
While the fish cooks, remove the stems from the bok choy, roll, and chop the leaves into shreds. Chop the green onion, setting aside some tips for garnish.
Remove the fish and set it aside. Add the onion and pepper and sweat for about 2 minutes. Add one tablespoon seafood seasoning, basil, ginger, mushrooms, green onion, tomatoes, and cook for an additional 2 minutes.
Chop the cilantro and add to the pan and cook for another minute, mix well.
Nestle in the salmon, add the bok choy and coconut milk, mix everything around the fish, add the Island Herb Blend, soy sauce, and fish sauce, and make sure all the pan's contents are well combined.
Reduce heat and simmer for 15 minutes, stirring at regular intervals to ensure the sauce doesn't stick to the pan and cooks evenly. You can also check the temperature of the fish (salmon should be 145F to be safe to eat in the thickest part and firm when done).
Season to taste with extra salt, pepper and Worchester sauce if more umami is needed and cook for the appropriate additional time.
Garnish with green onion tips, parsley and lemon. Serve hot with rice or grain of choice.
Matapa (Shrimp and Kale in Coconut Milk and Peanut Butter)
Peanut butter and greens are not an unusual pairing in many parts of Southern Africa and should be embraced everywhere! They are just as delicious as greens with cream, a more widely known dream team when balanced right.
The Mozambican dish Matapa inspired this recipe: cassava leaves cooked in coconut milk with peanuts or cashews and shrimp or crab. I used Tuscan kale, but you can use anything from pumpkin leaves to collard greens and adjust the cooking time.
Coconuts are plentiful in Mozambique, which borders the Indian ocean, and coconut milk, a staple in my pantry, is creamy but not overwhelming. It lends a unique flavour, and in this case, blends well with the sweet and salty peanut butter and the subtle sweetness and texture from the chopped shrimp.
The light and hearty soup stew gets even more delicious overnight, and you can serve it with brown rice, farro, couscous or any other starch or side that will help absorb the tasty juices!
Ingredients
2 pounds cooked shrimp (thaw according to package)
1 large bunch Tuscan kale
Olive oil
1 red onion
4 large garlic cloves
1/4 jalapeno
1/4 cup fresh parsley
1 tablespoon Royco Usavi mix (or you favourite all purpose seasoning)
2 tablespoons peri-peri seasoning
1 cup peanut butter (tempered with 1 cup hot water)
1 packet chicken bouillon powder
2 tablespoons from 1/2 a fresh lemon
1 tablespoon cayenne powder
1 tablespoon black pepper
1 teaspoon salt
1 cup coconut milk
Pepper flakes
Instructions
Remove the stems and chop the kale. Place in boiling water until softened, then remove most of the water. Place in a blender and pulse to shred the greens until they are tiny pieces but not liquid (you can also do it while the leaves are uncooked).
Finely dice and chop the onion, garlic, jalapeno, and parsley and sauté in olive oil until softened for about 3 minutes. Add the Royco Usavi and peri-peri.
In a separate bowl, mix the peanut butter with the boiling water and chicken bouillon. Pour the tempered mixture into the pot, then add the kale. simmer for 5 minutes and mix well.
Add the shrimp, cook for 2-3 minutes, then follow with a squeeze of lemon. Season with salt and pepper to taste, adding extra peanut butter and cayenne if necessary.
Serve hot with brown rice, lemon, chili flakes, and parsley.

Coconut Salmon Chowder
Chowder is a considerable part of New England cuisine. Along the Northeast coast and beyond, from Maine (where I was inspired to make this recipe) to Rhode Island, which makes sense; of course, it's an affordable way to get filled up, and you can customize the soupy stew to be whatever you want it to be. But, most simply, a combination of vegetables and protein in a rich, creamy broth or milk-based mixture thickened with crackers and potatoes. If you are already a chowder fan, I have another version you can check out here with sweet potato and corn.
I used salmon, which is plentiful in our household, to make fish chowder for this version. When I visit Maine, clam chowder was the most prominent, but you can use almost any fish or ocean dweller for traditional seafood chowder.
Even with a creamy broth, there is a danger of chowder falling flat. So how do you prevent it?
Taste, taste, taste.
Make sure you add seasoning and taste constantly. Salt, pepper, fresh and dried herbs, whatever compliments your set of ingredients. In this case, salt and pepper and perhaps a little bit more Old bay should do.
Season the star of the show.
Whatever ingredients you want to highlight in your chowder, make sure it's seasoned! This step can make all the difference. In this case, it's the salmon which I pan-seared and seasoned it with salt, pepper, Old Bay, olive oil, and soy sauce. Even if you use canned salmon, taste and adjust before adding to the chowder.
It pays to use rich stock or broth.
Most importantly, use a good quality broth or stock! This will be a game-changer for your chowder. If possible, use a homemade helping. Consider adding some parmesan cheese when adding the cream or bacon with the carrots and celery for even more flavour. You could also use bouillon cubes as an alternative.
Enjoy this recipe as a starter or side, with some additional crackers or fresh, toasted bread.
Ingredients
2 tablespoons olive oil
2 tablespoons butter
2 tablespoons flour
1 1/2 cups pan-seared/cooked salmon
1 teaspoon salt
1 tablespoon black pepper
1 tablespoon Old Bay seasoning
1 cup chopped carrots
3 garlic, minced
1 cup chopped celery
1 cup chopped onion
1 QT seafood stock or broth
1/2 cup coconut cream
1/2 cup coconut milk
1 cup sweet corn kernels
1/4 cup + 2 tablespoons fresh dill
2 tablespoons cornstarch
4-5 crackers, roughly crushed
1 Russet potato, peeled and diced
Instructions
Prepare your salmon if you don’t have it set aside already.
In a large pot, melt the butter with olive oil. Saute the garlic until fragrant, for about 2 minutes. Bloom the seasoning for about 1 minute, stirring.
Add the onions and cook until transcalent, for about 3 minutes.
Add the carrots, celery, and dill, sweat out for about 4-5 minutes until the vegetables begin to soften. Add extra oil if necessary.
Mix in the diced potato and flour, cook for about 2 minutes. Pour in the stock or broth, coconut cream, and coconut milk. Bring to a boil, then simmer for 20 minutes. Make sure the potatoes are soft to the bite (but not falling apart).
Stir in the salmon, corn, and crackers, heat for about 1-2 minutes before serving hot with crackers or bread. You can add a dollop or splash of cream and fresh dill to garnish.
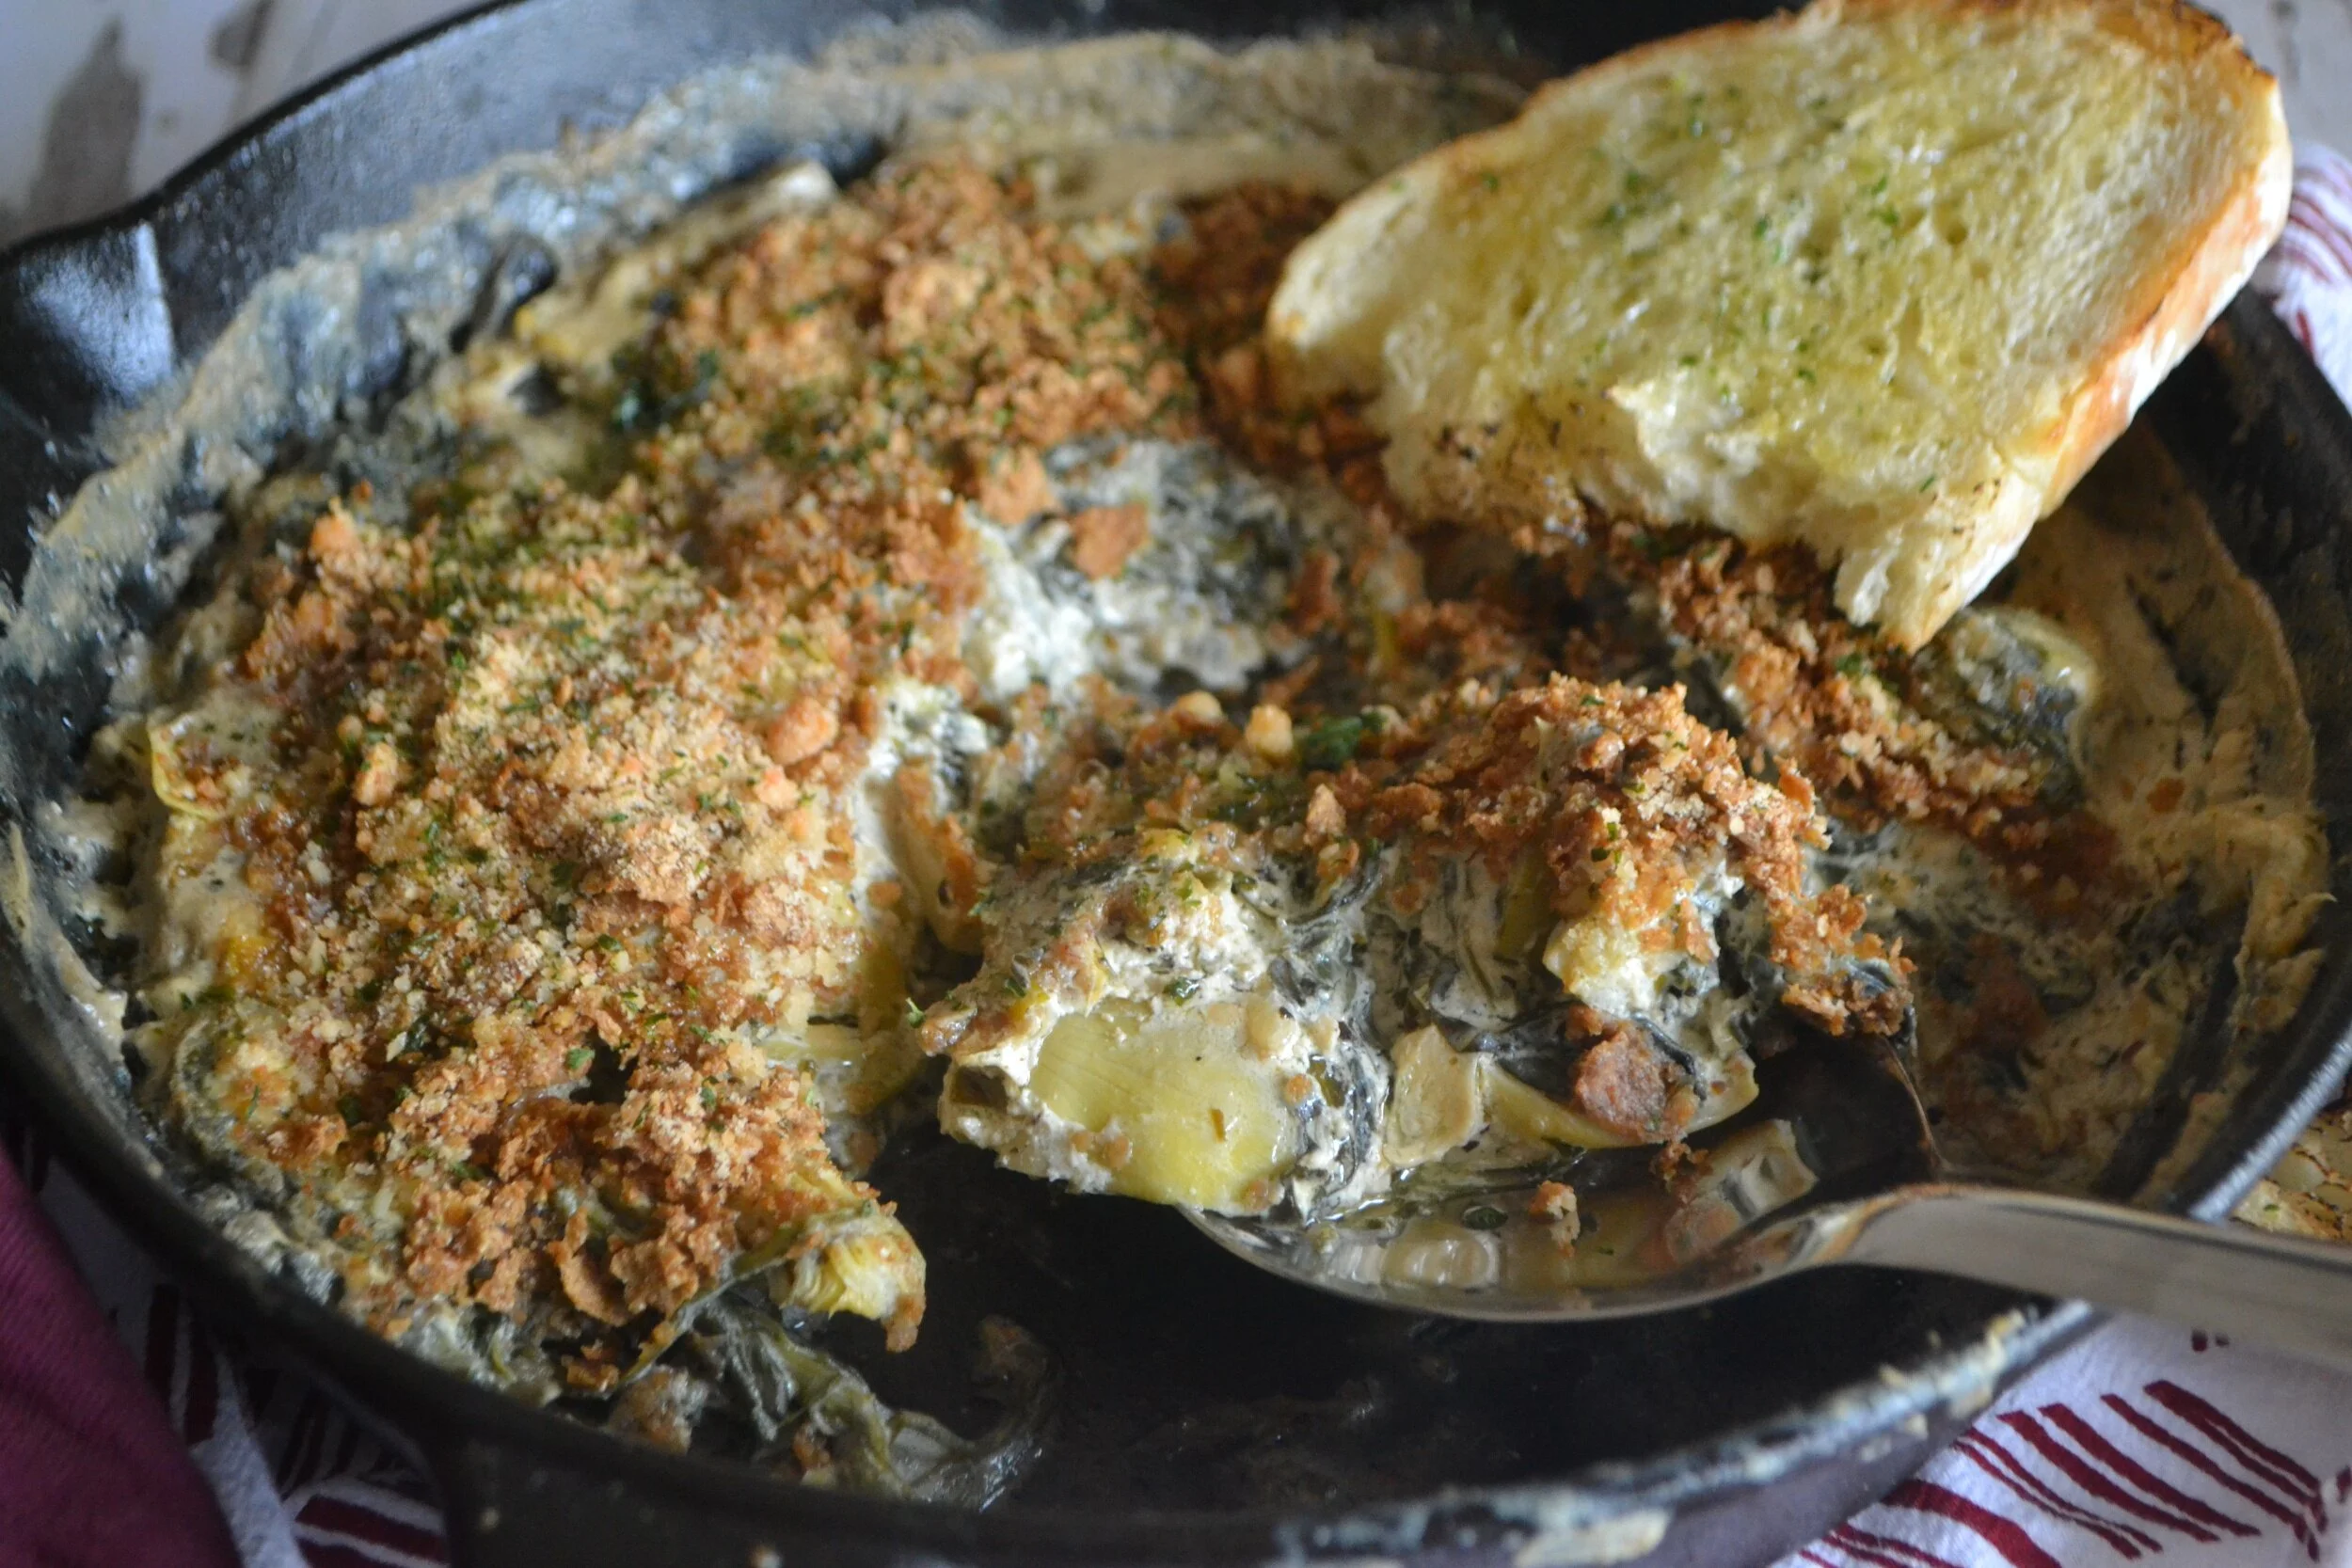
Creamy Coconut Spinach and Artichoke Bake
I love artichoke dip, and spinach dip, and crab dip. When I've ordered an appetizer or snack at the bar, I used to wonder why can't I take this home?
I also love casseroles, which I think many of you would agree is a winter essential, especially come dinner time! This recipe combines the two concepts in a creamy, indulgent bake - probably slightly less fatty than the restaurant version.
What should you eat it with? How about some fresh, toasted, buttery garlic bread? Or a juicy salmon filet with some rice and potatoes on the side? It's delicious either way, hope you enjoy!
Ingredients
2 bags baby spinach
1/4 cup water
1 small can coconut cream
1/3 package (8-ounce) Greek yoghurt cream cheese
1 teaspoon salt
1 tablespoon course black pepper
2 tablespoons butter
2 tablespoons olive oil
2 tablespoons fresh garlic, minced
1 tablespoon garlic powder
1 cup + 2 tablespoons sour cream
1/4 cup parmesan cheese, grated
1/3 cup Bran flakes (pulsed) or breadcrumbs
1 small onion, diced
2 scallions, diced
1 1/2 cans artichokes in brine
1 tablespoon fenugreek powder
1 tablespoon Italian seasoning
1 teaspoon coriander
1 broth sachet


Instructions
Steam your spinach. Pour the water into a large pot with a little salt.
Add the leaves to the pot, and allow the water to start boiling. Close the lid and steam for about 4-5 minutes until the spinach is a bit wilted. Drain by pressing the spinach into a colander, set aside.
In a large skillet, melt the butter with the olive oil. Add the fresh garlic, onion, scallions, broth mix, spices, salt and pepper. Sauté for about 3-4 minutes.
Add the Greek yoghurt cream cheese, sour cream, coconut cream, parmesan cheese, cook for about 2 minutes. Stir in the artichokes and spinach, cook for another 2 minutes.
Add the creamy mixture into a baking dish. Evenly sprinkle the pulsed Bran flakes or breadcrumbs over the mixture, then bake for 25 minutes at 350F.
Serve piping hot side with fish filets or fresh bread!


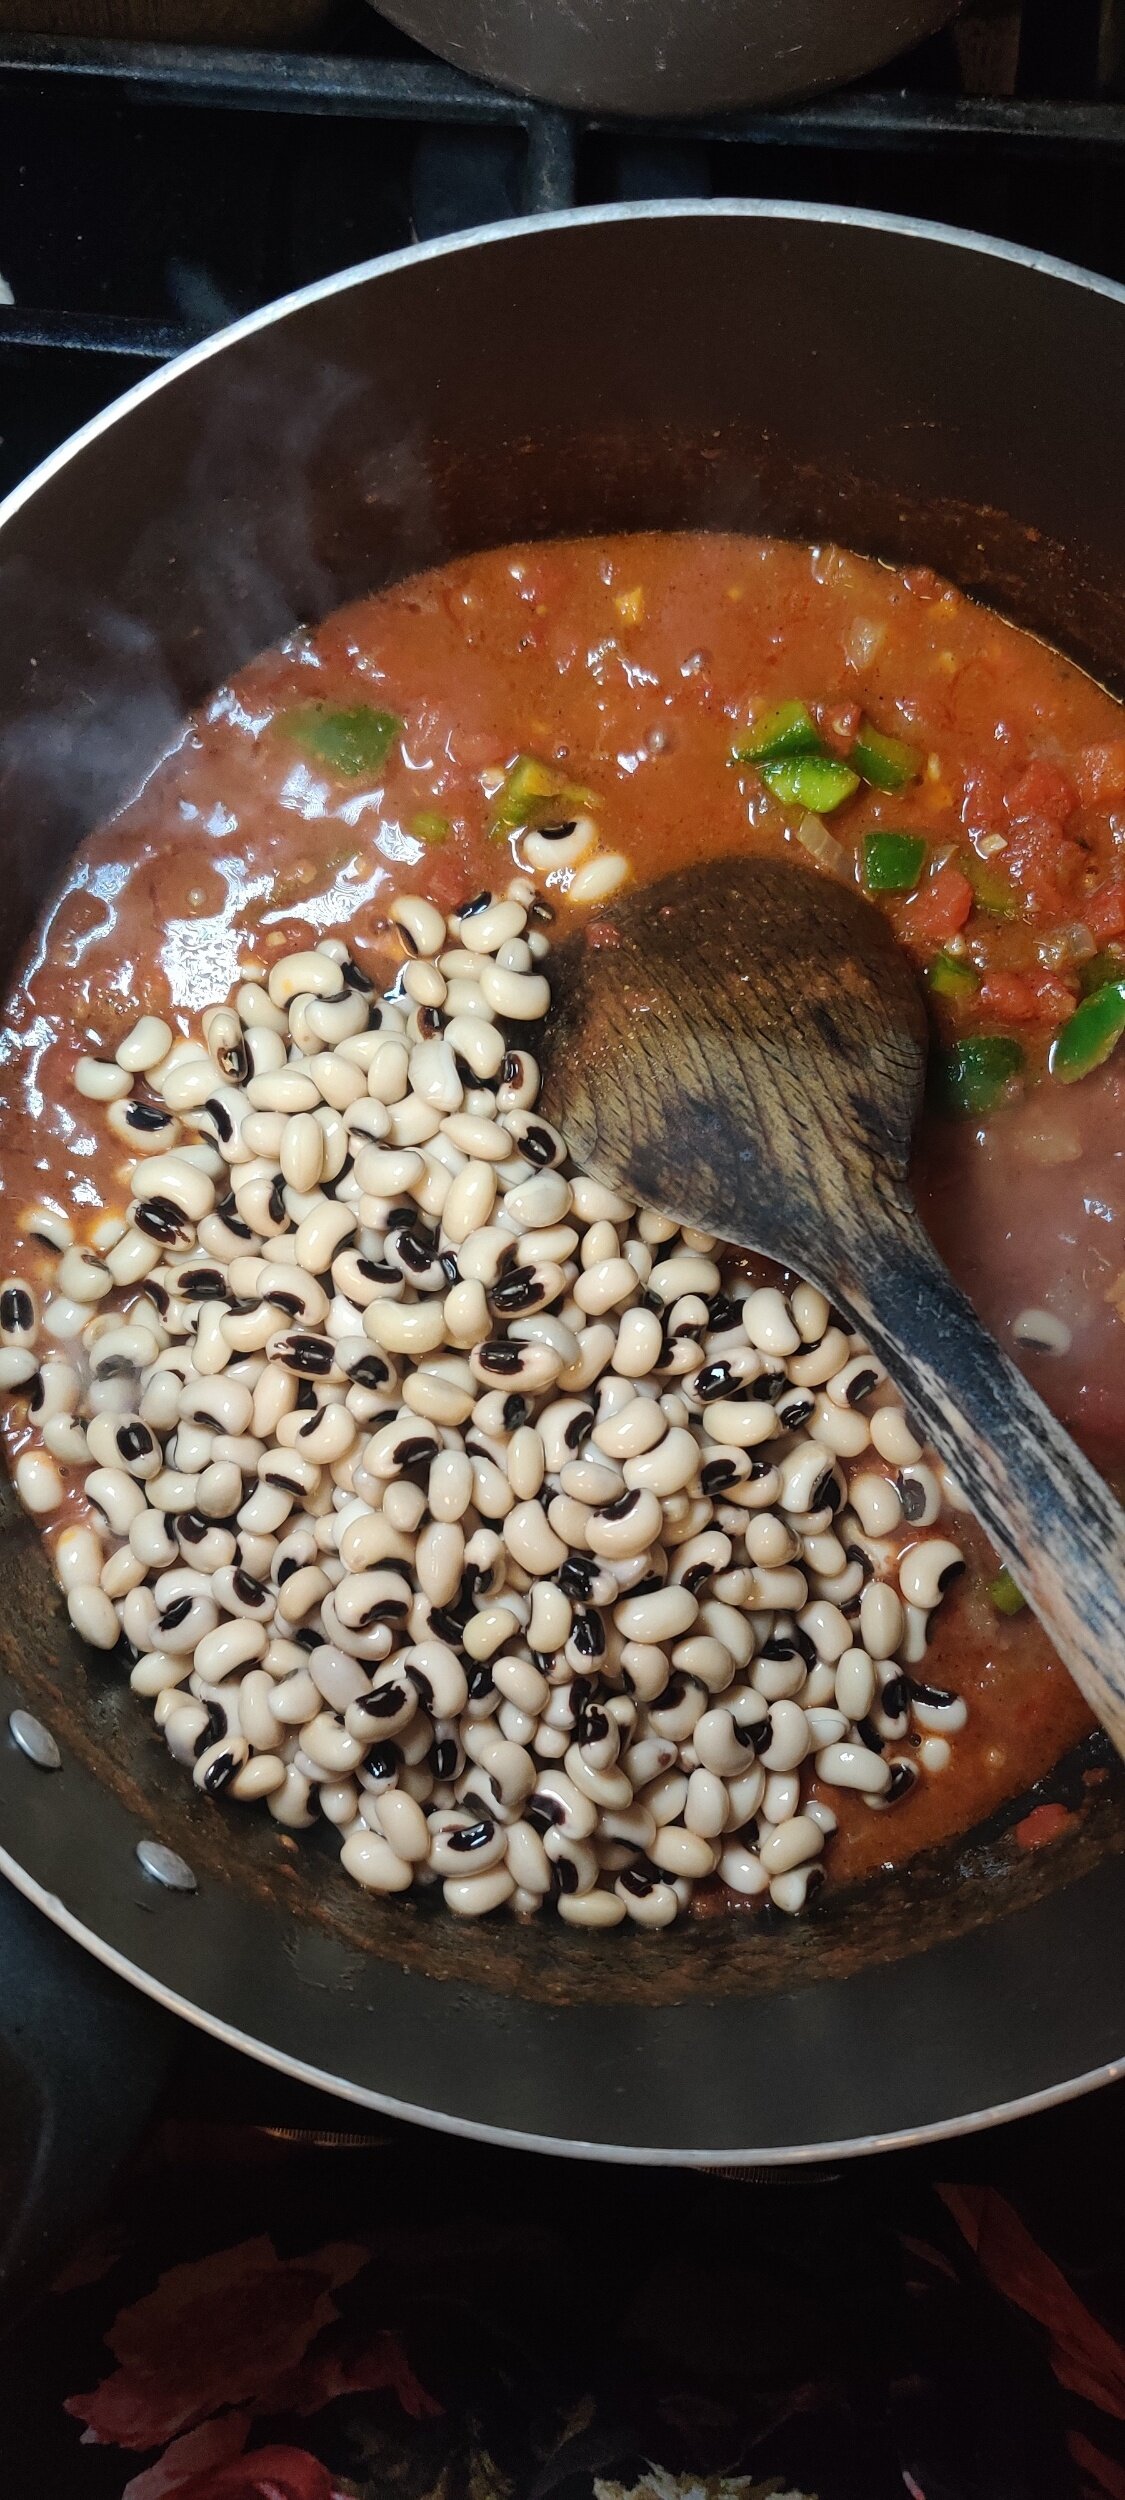
Black-Eyed Peas with Coconut and Tomato
I'm a huge fan of beans, and they are great if you are looking to cut down or eliminate your meat intake. They are filling, nutritious, and high in protein to name a few benefits.
Black-eyed peas - also known as cowpeas - are hearty and delicious. This bean is eaten extensively across West Africa where it's said to have originated and is an important staple in the Caribbean and the American South - where they are considered a lucky charm by some during New Years.
You can do a lot with black-eyed peas as they are quite versatile, check out my black-eyed pea and pinto bean meatloaf recipe for example.
I served this stew with finger millet in the form of sadza, a thick porridge native to Zimbabwe using an ancient grain much healthier than its white corn counterpart. You can find a recipe for it, here.
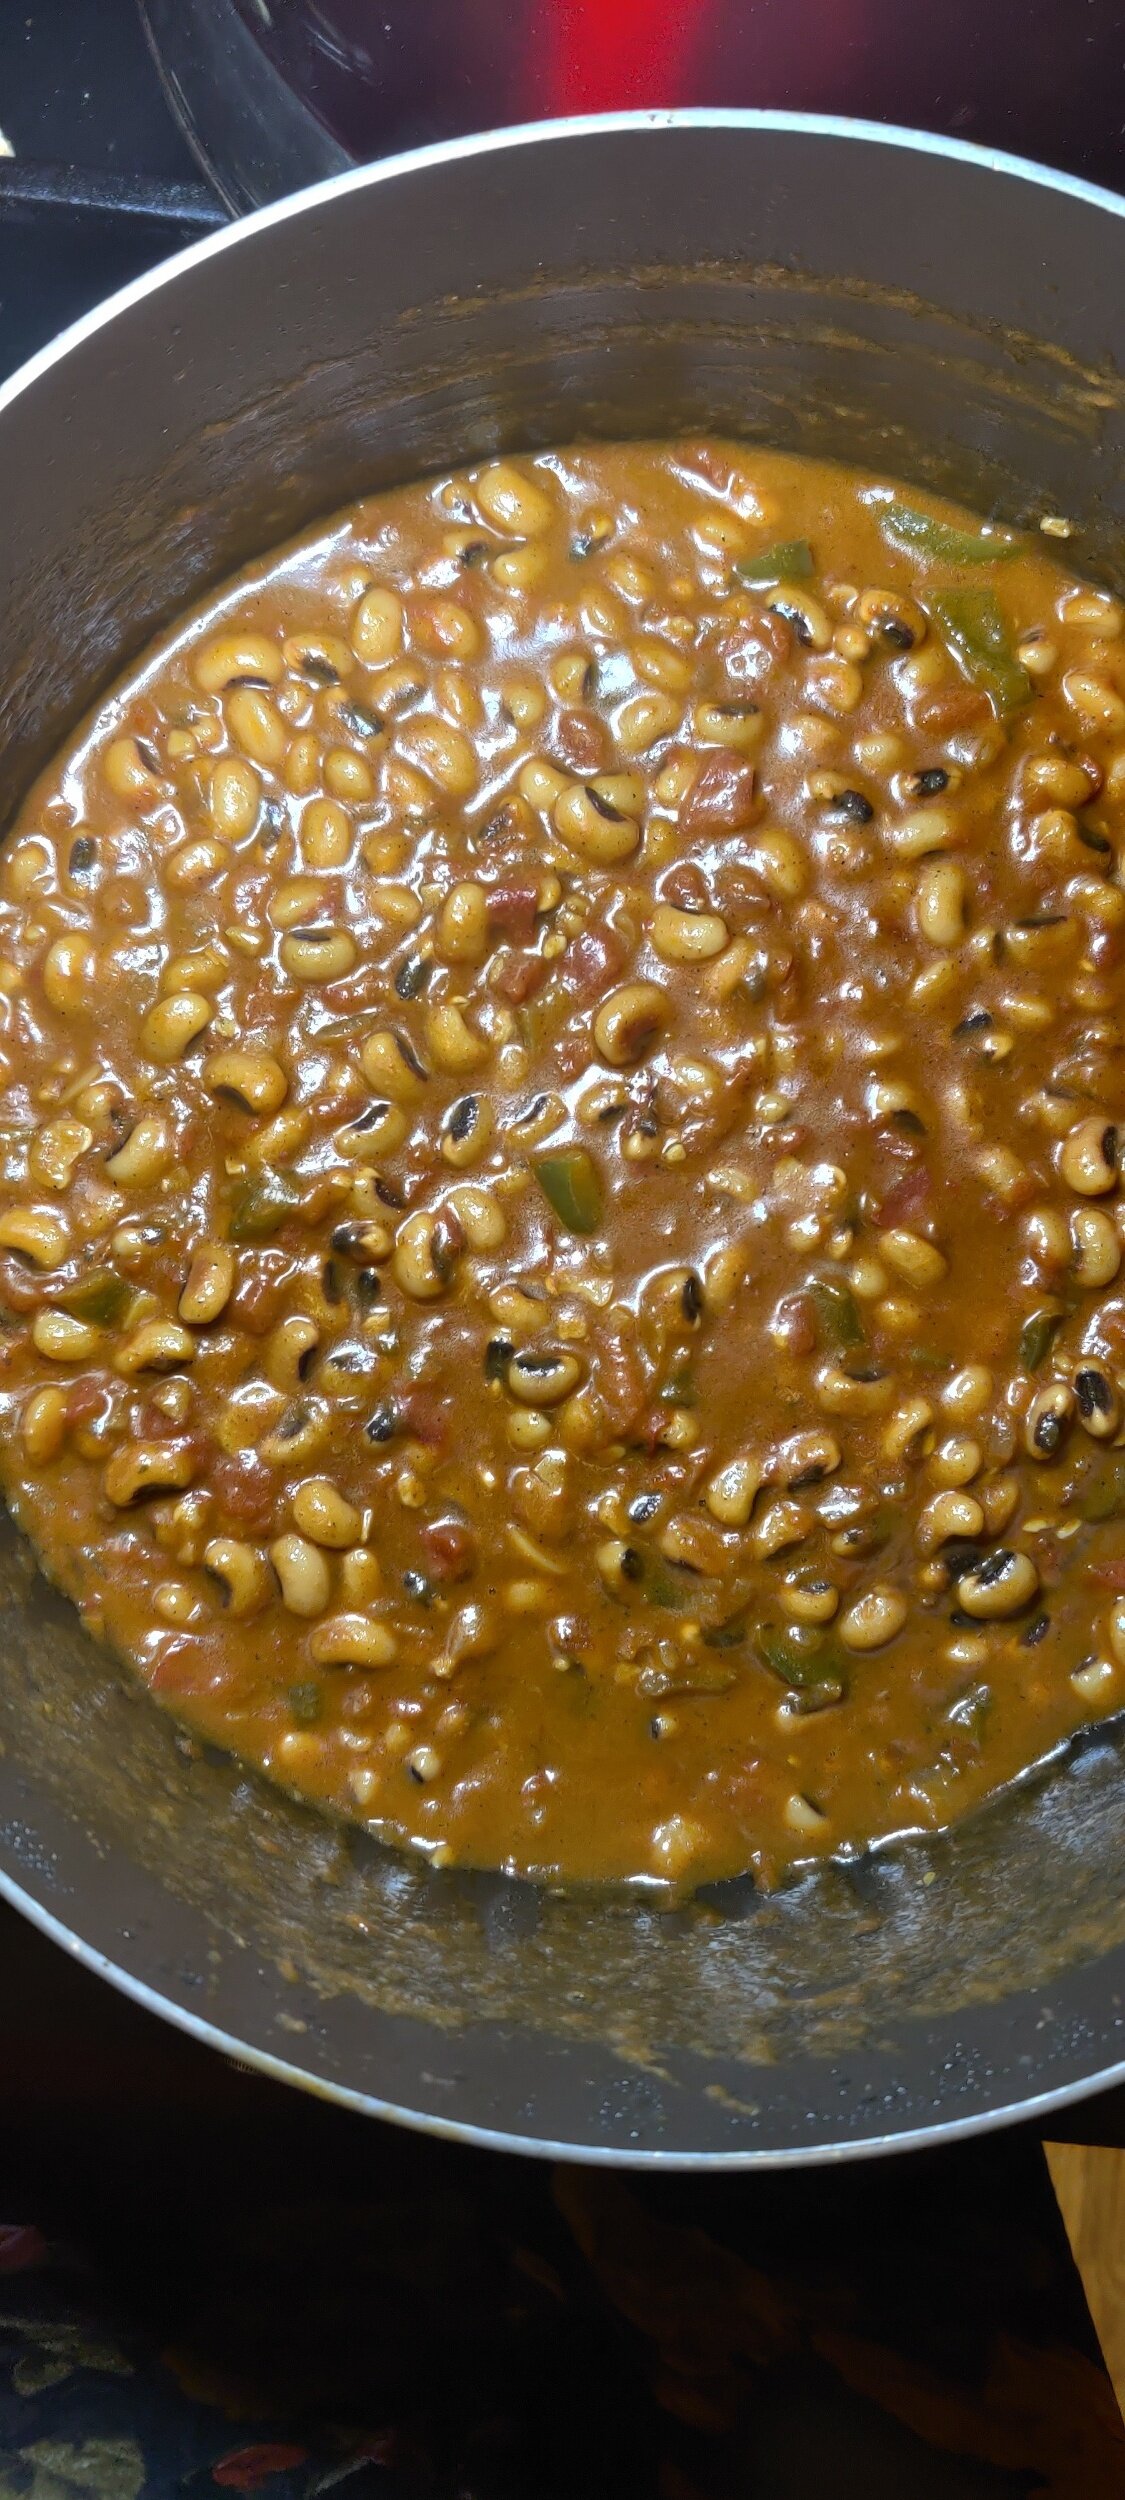
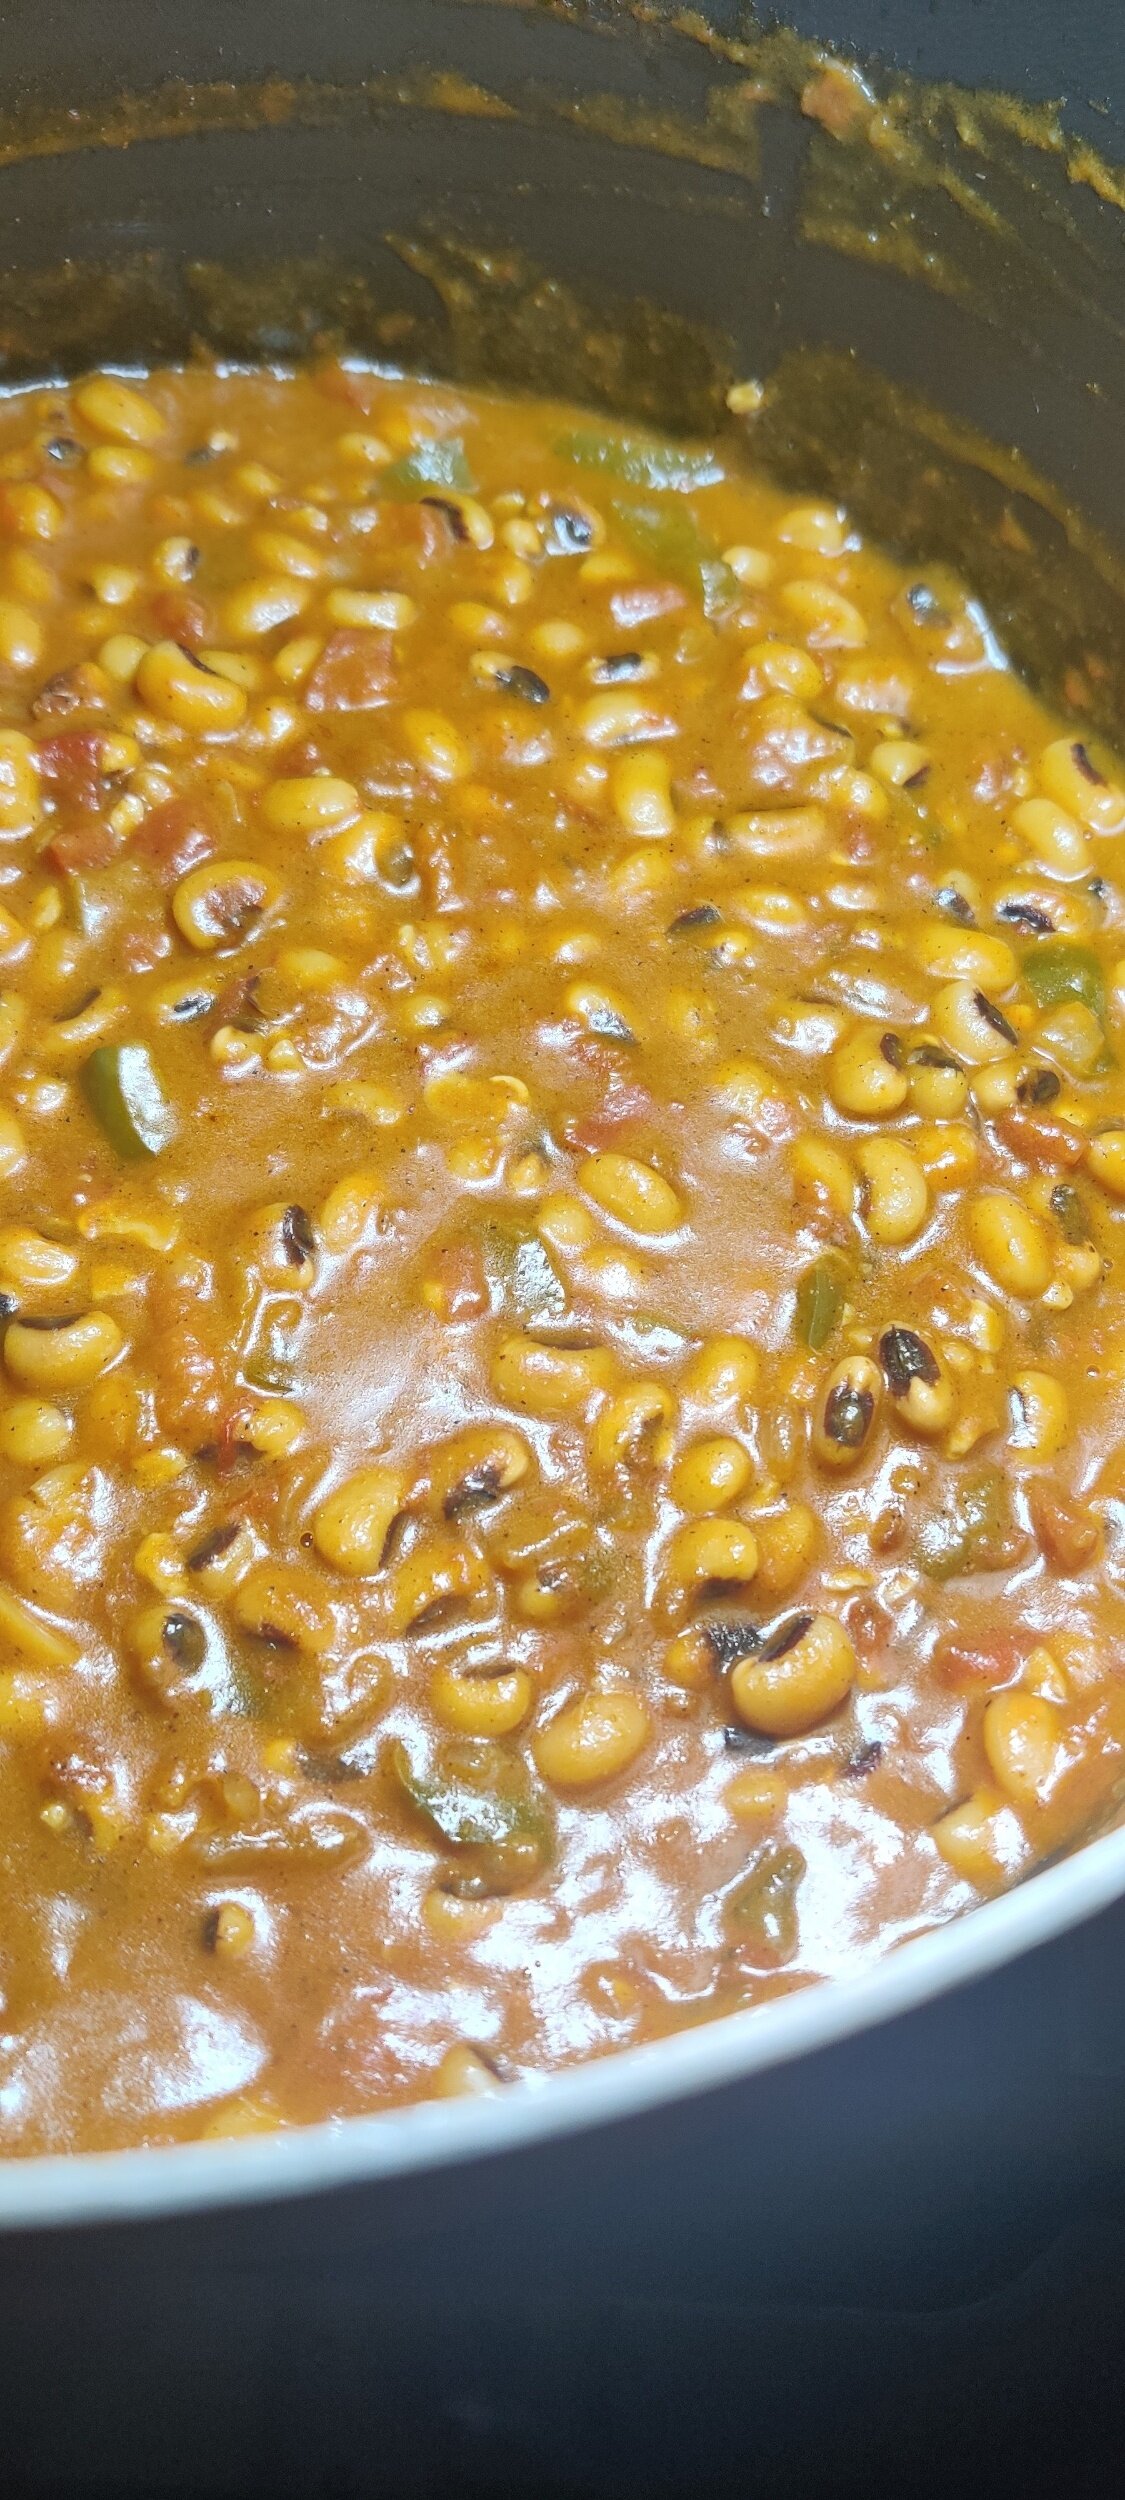
The spices muddled in the coconut milk and tomato makes for a rich stew that can be paired with a variety of vegetables or grilled meats or served as a main dish. You won't regret it!
Ingredients
3 cups dry black-eyed peas (soaked for 24 hours and drained)
1 tablespoon salt
2 tablespoons black pepper
1 tablespoon cumin
1 tablespoon coriander
1 tablespoon ginger
1 can coconut milk
3 beef bouillons
6 cups water
1 teaspoon fenugreek
1 teaspoon paprika
1 tablespoon garlic
1/2 yellow onion, chopped
1 small green pepper, finely chopped
1 cup tomatoes, diced
2 tablespoons tomato sauce/ketchup
2 tablespoons butter
2 tablespoons olive oil
2 tablespoons curry powder

Instructions
In a large pot, saute the onion and garlic in olive oil and butter for 3 minutes until the onion starts to soften.
Add the spices, bouillon cubes, salt and black pepper, cook for another 2 minutes.
Mix in the diced tomatoes and tomato sauce/ketchup, cook for about 5 minutes.
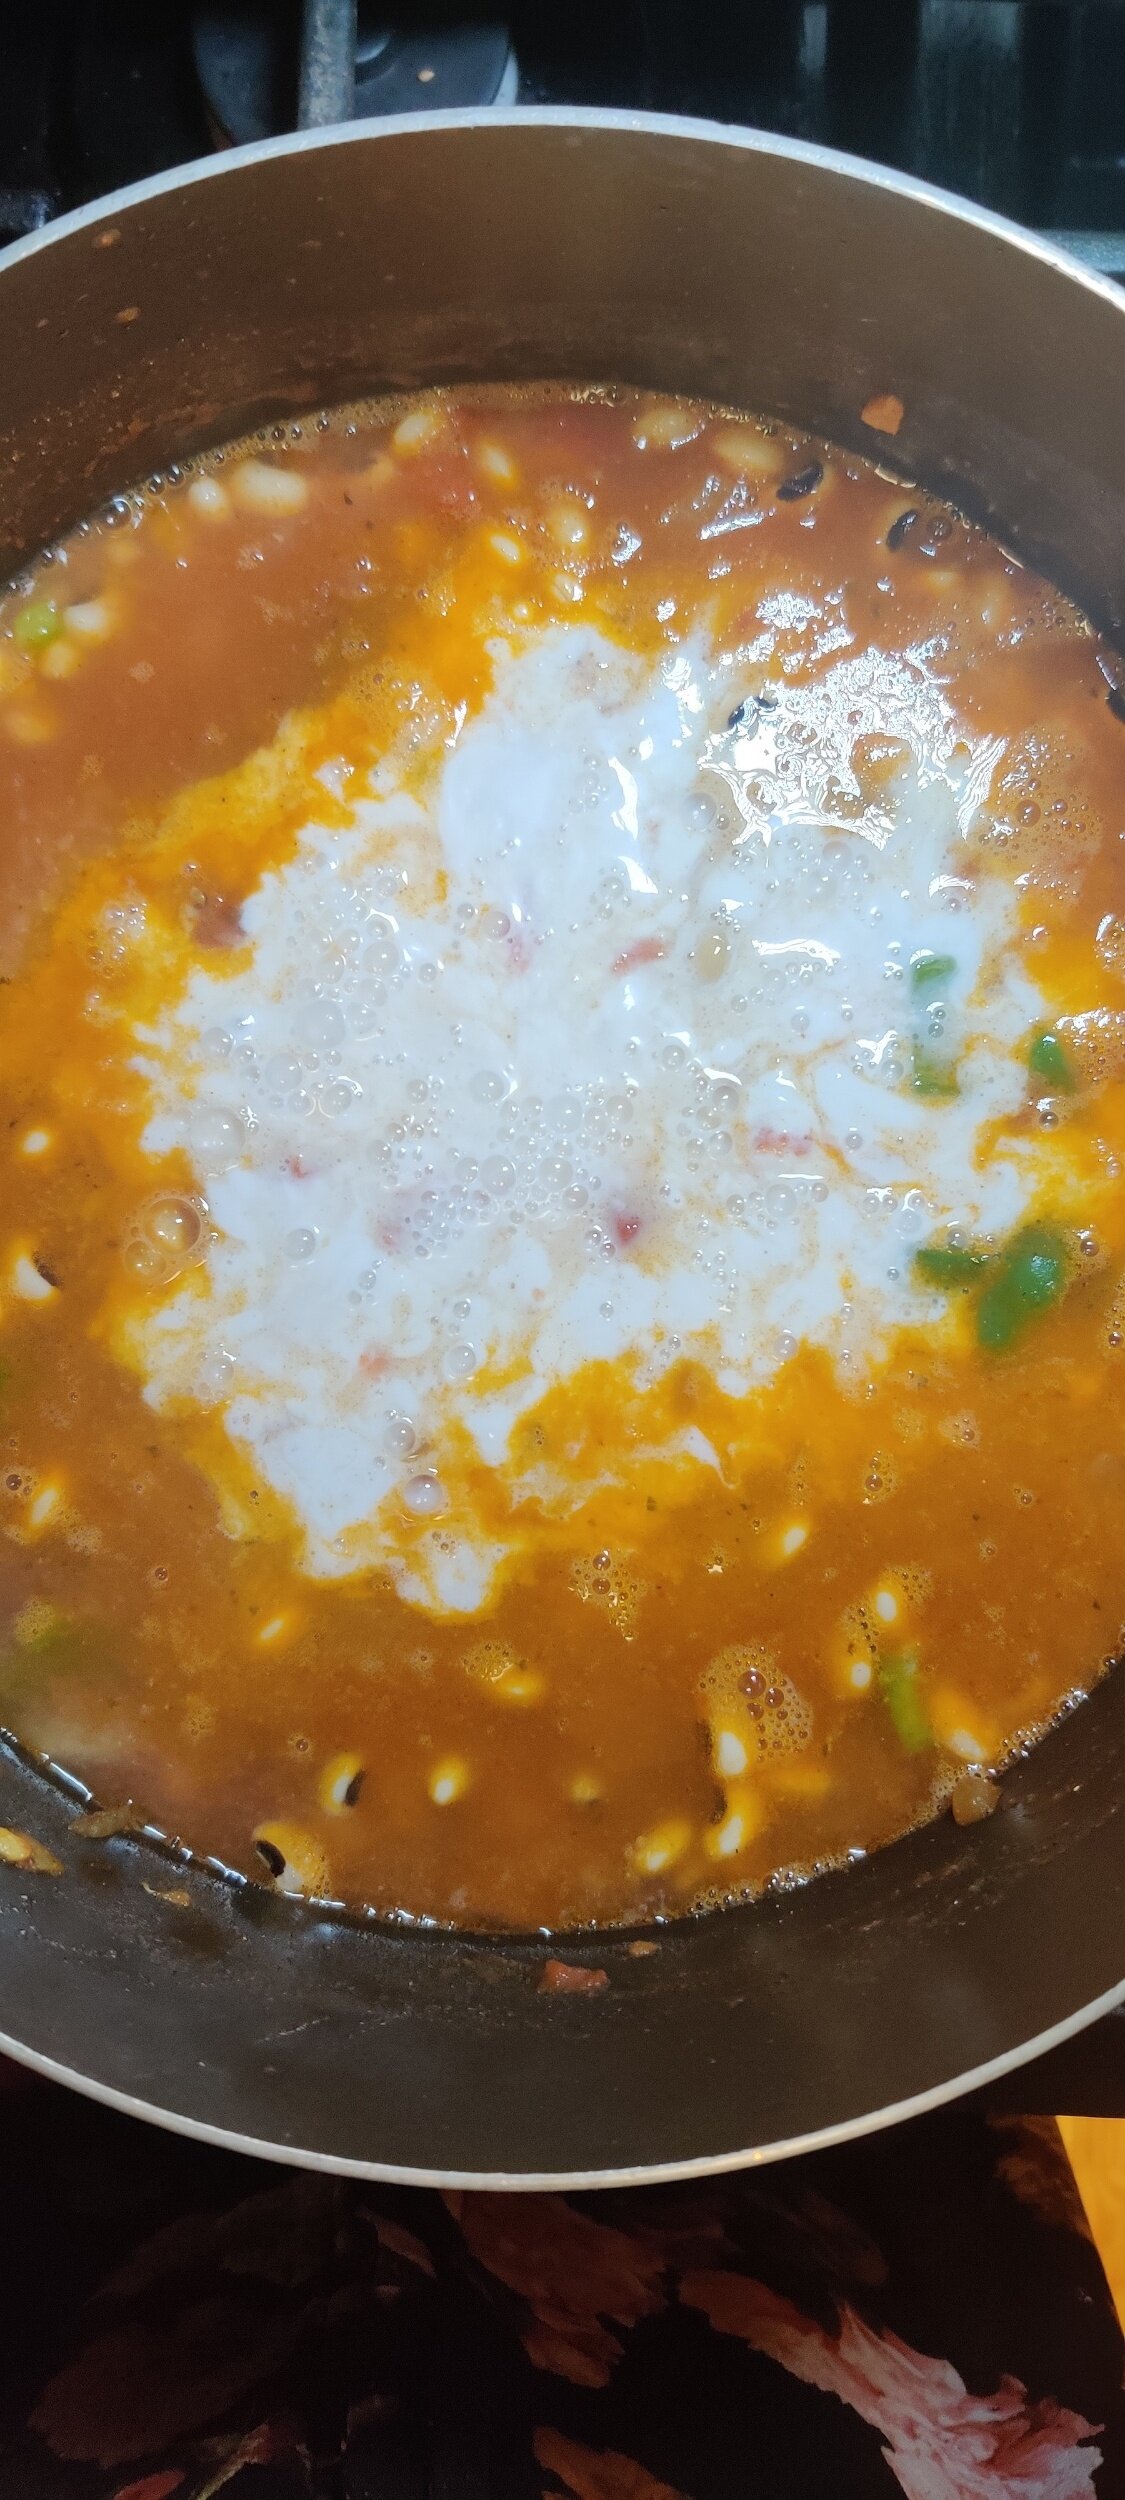
Stir in the green pepper and black-eyed peas, then pour in the water and coconut milk. Season to taste with additional salt and pepper if necessary.
Reduce the temperature and simmer for 35-40 minutes. Check the stew periodically and stir until the black-eyed peas soften and are cooked through. Add more water if needed.
While the beans are cooking, prepare your sadza or whatever starch you want to serve the stew with. All you'll need for that is water and corn/maize/millet meal.
Serve both hot, enough for 4-5.

Coconut Shrimp Po Boys
I love coconut and I think it's safe to say peoole either have a love or hate relationship with it. Not only do I like the taste, but the sheer vertility is just magical. You can use it in various forms in multiple ways - I'm talking coconut milk, oil, flour, water, cream, flakes you name it.
This recipe uses 3 of those forms - flour, cream and flakes to make one of the most famous sandwiches in the American South - the po boy! A delicious yet simple sandwich stuffed with fried shrimp, lettuce, tomato, pickles, and topped with an aioli, what more do you need? You can make them at home easy, with the infusion of some coconut to give a unique flavour. Try it out!
Ingredients
1/2 lb. shrimp, skin and tail removed, deveined
1/4 cup + 1-2 teaspoons old pay seasoning
3 eggs
1 cup coconut flour
2 cups shaved coconut
2 tablespoons coconut cream
1/2 cup mayonnaise (low sodium)
3-5 coco bread pockets/ sub rolls/ whatever bread rolls you have
1 cup lettuce, shredded
Video Tutorial

Instructions
Step 1
Pat your shrimp dry and season with old bay, set aside.
Step 2
Heat some oil to fry you shrimp ( the amount will depend on the size of your pot, use about 1 quart/ 4 cups to start). Watch carefully so it does not burn.
Step 3
While your oil heats up, prepare your shrimp. In 3 separate bowls, line up the coconut flour, the beaten eggs and the coconut flakes. Pat your shrimp dry, then systematically dip them in the flour, eggs, and coconut, set aside. Make sure as much of the surface is covered. ( You can use one hand for the eggs, the other for the flour and flakes to avoid clumping.)
Step 4
Once the oil is ready, get to frying! Do so in batches if necessary you don’t overcrowd the pot. Place the coated shrimp in the hot oil and cook for about 4-5 minutes. When browned, scoop out and place on a paper towel to soak excess oil. Turn off the heat.
Step 5
To prepare your sauce, whisk the mayonnaise and coconut cream. Add in the old bay tasting along the way, then set aside.
Step 6
Now you are ready to assemble your sandwich! Spread your sauce on the bread/roll. Lay on the lettuce, a few tomato slices, and the fried shrimp on top. Drizzle about a tablespoon of the coconut cream sauce on top.
Serve with pickles, fries, a salad, or whatever!
This recipe was developed as part of the Black Foodie Battle contest, a cooking challenge to make coconut a star of the dish. Check out the full episode and other contestants dishes at blackfoodie.co.