

Creamy Roasted Broccoli and Cauliflower Bake
A Comforting, Flavor-Packed Side Dish
If you're looking for a dish that’s equal parts comforting, delicious, and packed with veggies, this Cheesy Roasted Broccoli & Cauliflower Bake is the perfect choice! Roasting brings out the natural sweetness and nuttiness of the vegetables, while a velvet-textured, Bechemal sauce and cheese topping takes it to the next level. Whether you're serving it as a hearty side or enjoying it as a main dish, this bake is a guaranteed crowd-pleaser. Get ready for golden, bubbly cheese, tender roasted veggies, and a dish that’s as easy to make as it is to devour!

Casseroles: The Ultimate Comfort Food
Casseroles have been a staple in home kitchens for generations, loved for their convenience, versatility, and hearty flavors. These one-dish meals are perfect for busy weeknights, potlucks, or holiday gatherings, offering a delicious way to combine proteins, vegetables, starches, and creamy sauces into a warm, baked delight.
While this recipe is a classic cheese and vegetable bake, you can add some lean protein like chicken breast if you like. Cook it separately and fold into the vegetables along with the onions and garlic.
Why People Love Casseroles
Easy to Make: Most casseroles involve minimal prep—just layer the ingredients, pop them in the oven, and let the heat do the work.
One-Dish Wonder: No need for multiple pots and pans; casseroles keep things simple.
Great for Meal Prep: Many casseroles can be made ahead of time, stored in the fridge, and reheated when needed.
Customizable: From cheesy and creamy to light and veggie-packed, casseroles can be adapted to fit any dietary preference.
Tips for a Perfect Casserole
Use the Right Dish: Glass and ceramic baking dishes work best for even cooking.
Don’t Skip the Cheese or Topping: A crispy breadcrumb or cheese topping adds a delicious finishing touch.
Let It Rest: Allow casseroles to cool slightly before serving so they set properly.
Casserole Storage and Reheating
Store leftovers in an airtight container in the fridge for up to 4 days.
Freeze casseroles before or after baking for long-term storage.
Reheat in the oven at 350°F (175°C) for the best texture, or use the microwave for quick servings.
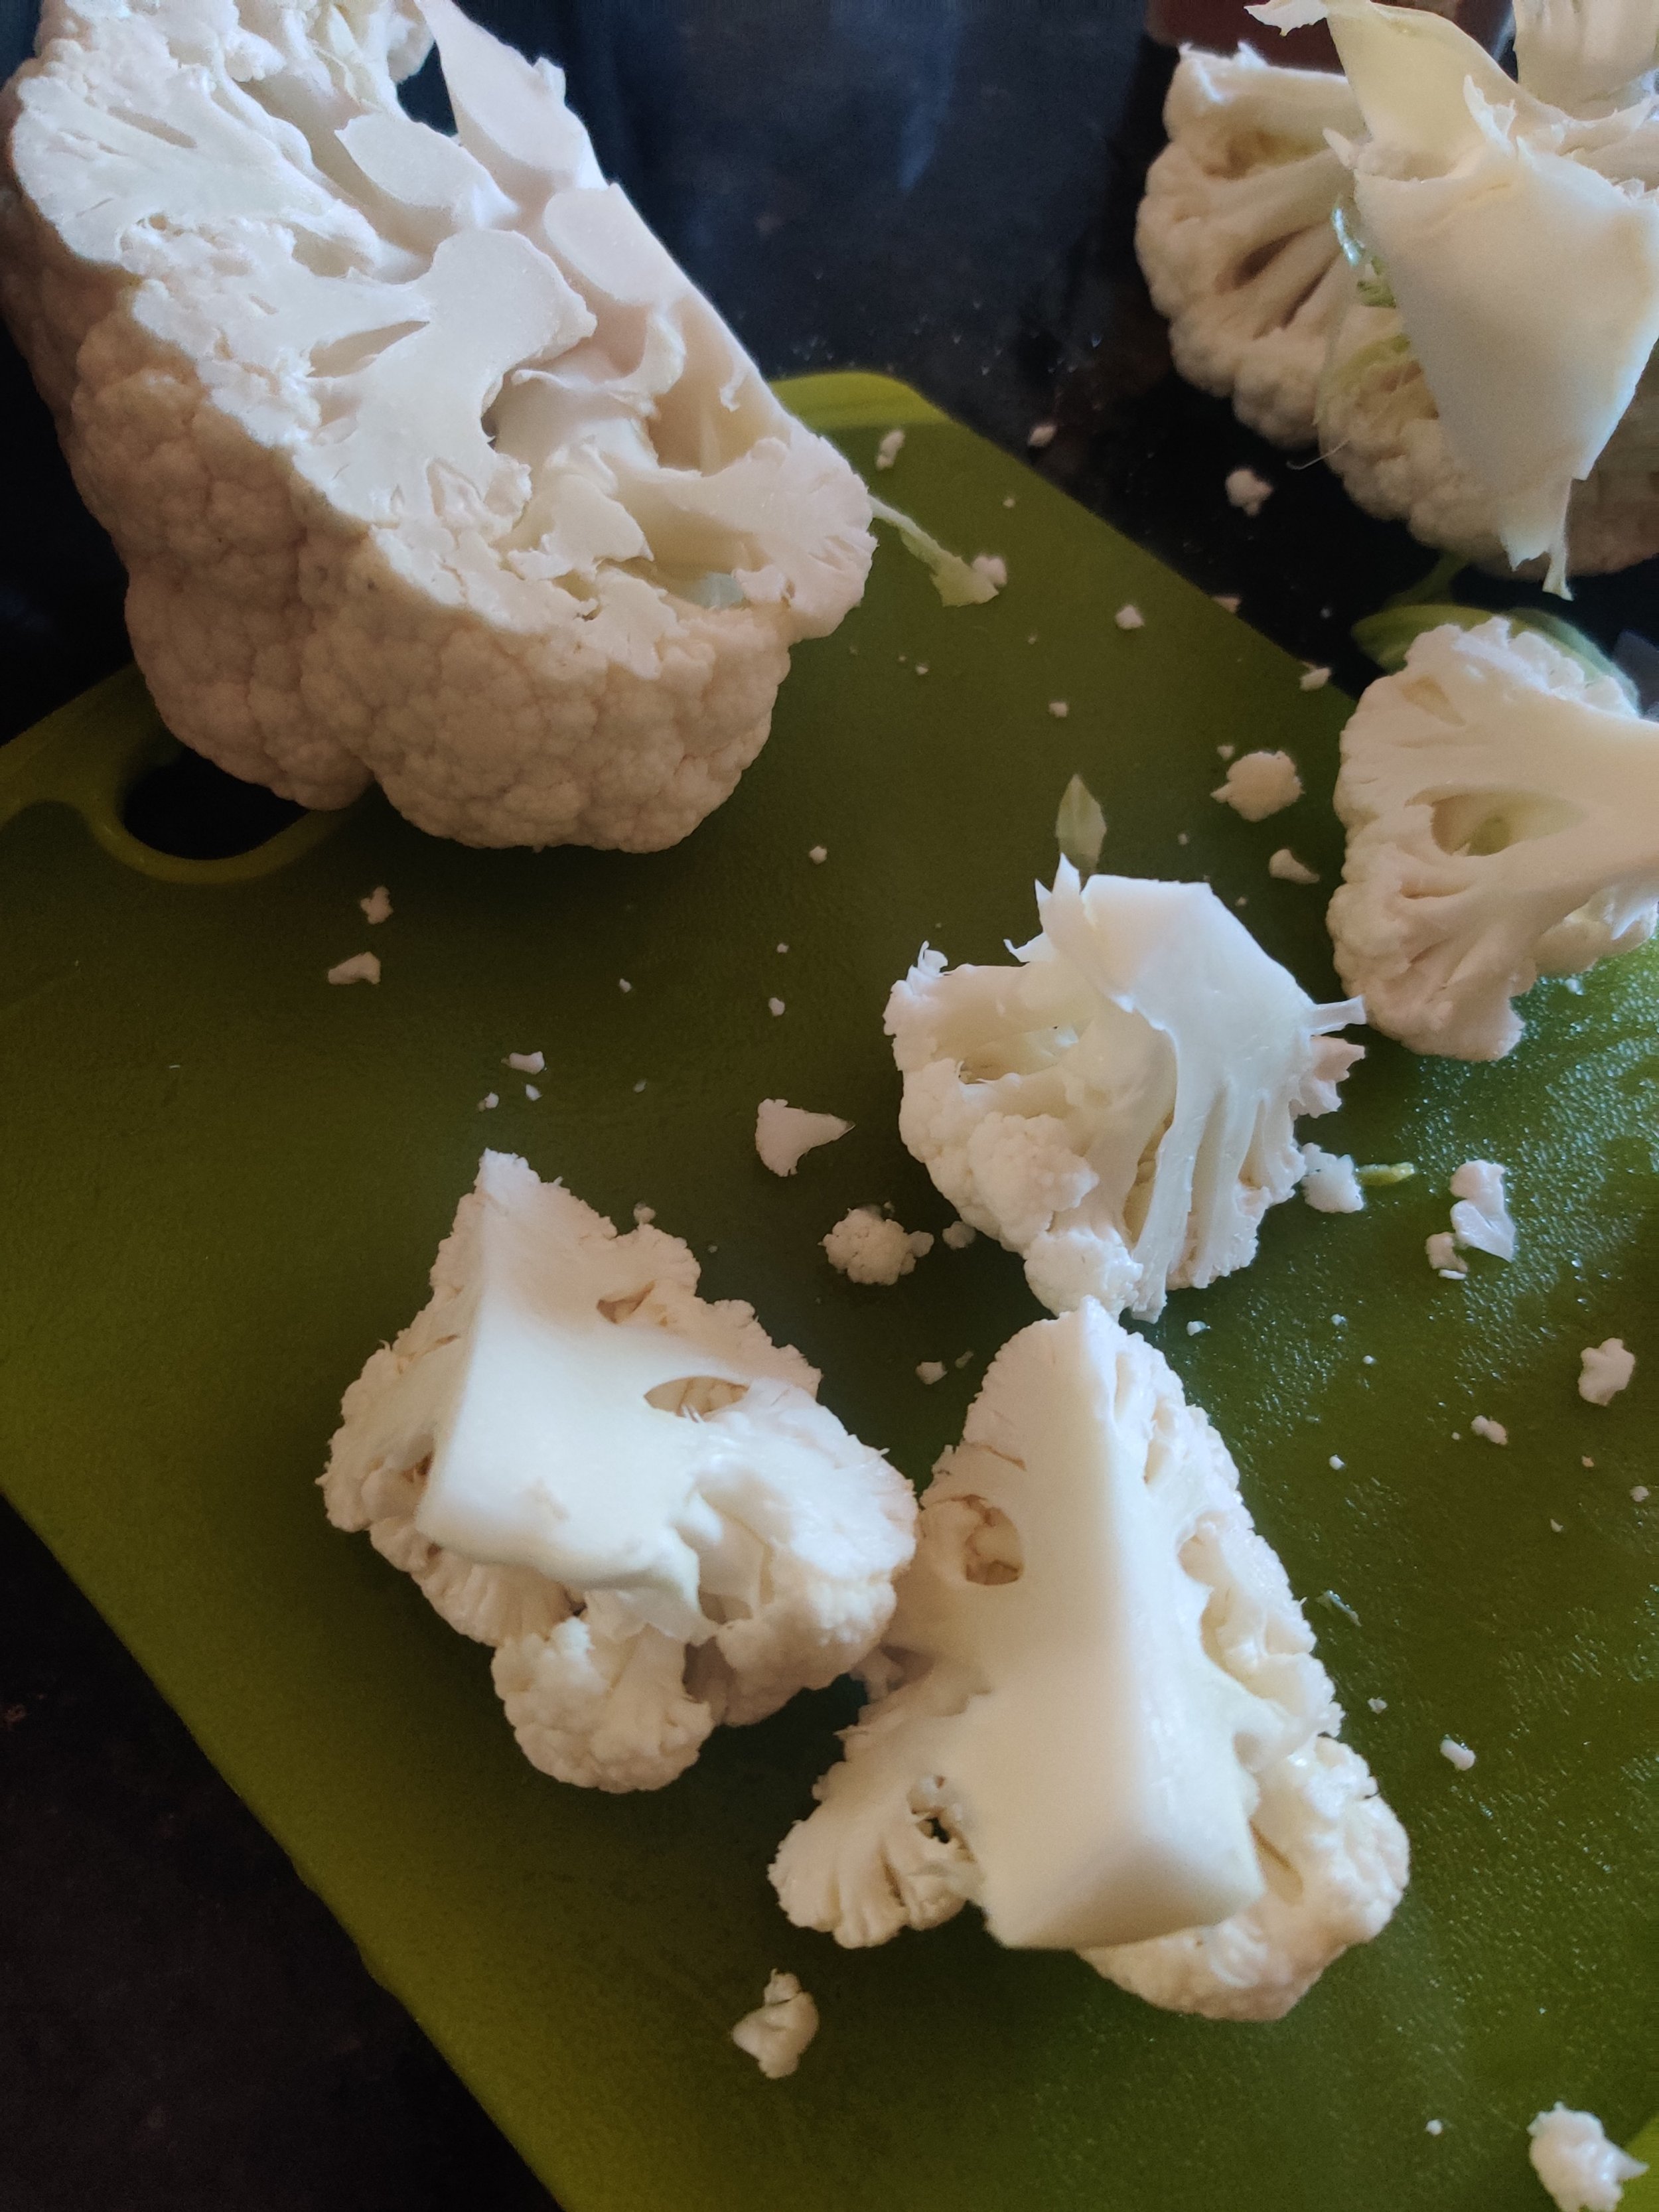
Roasting Cauliflower and Broccoli in the Oven
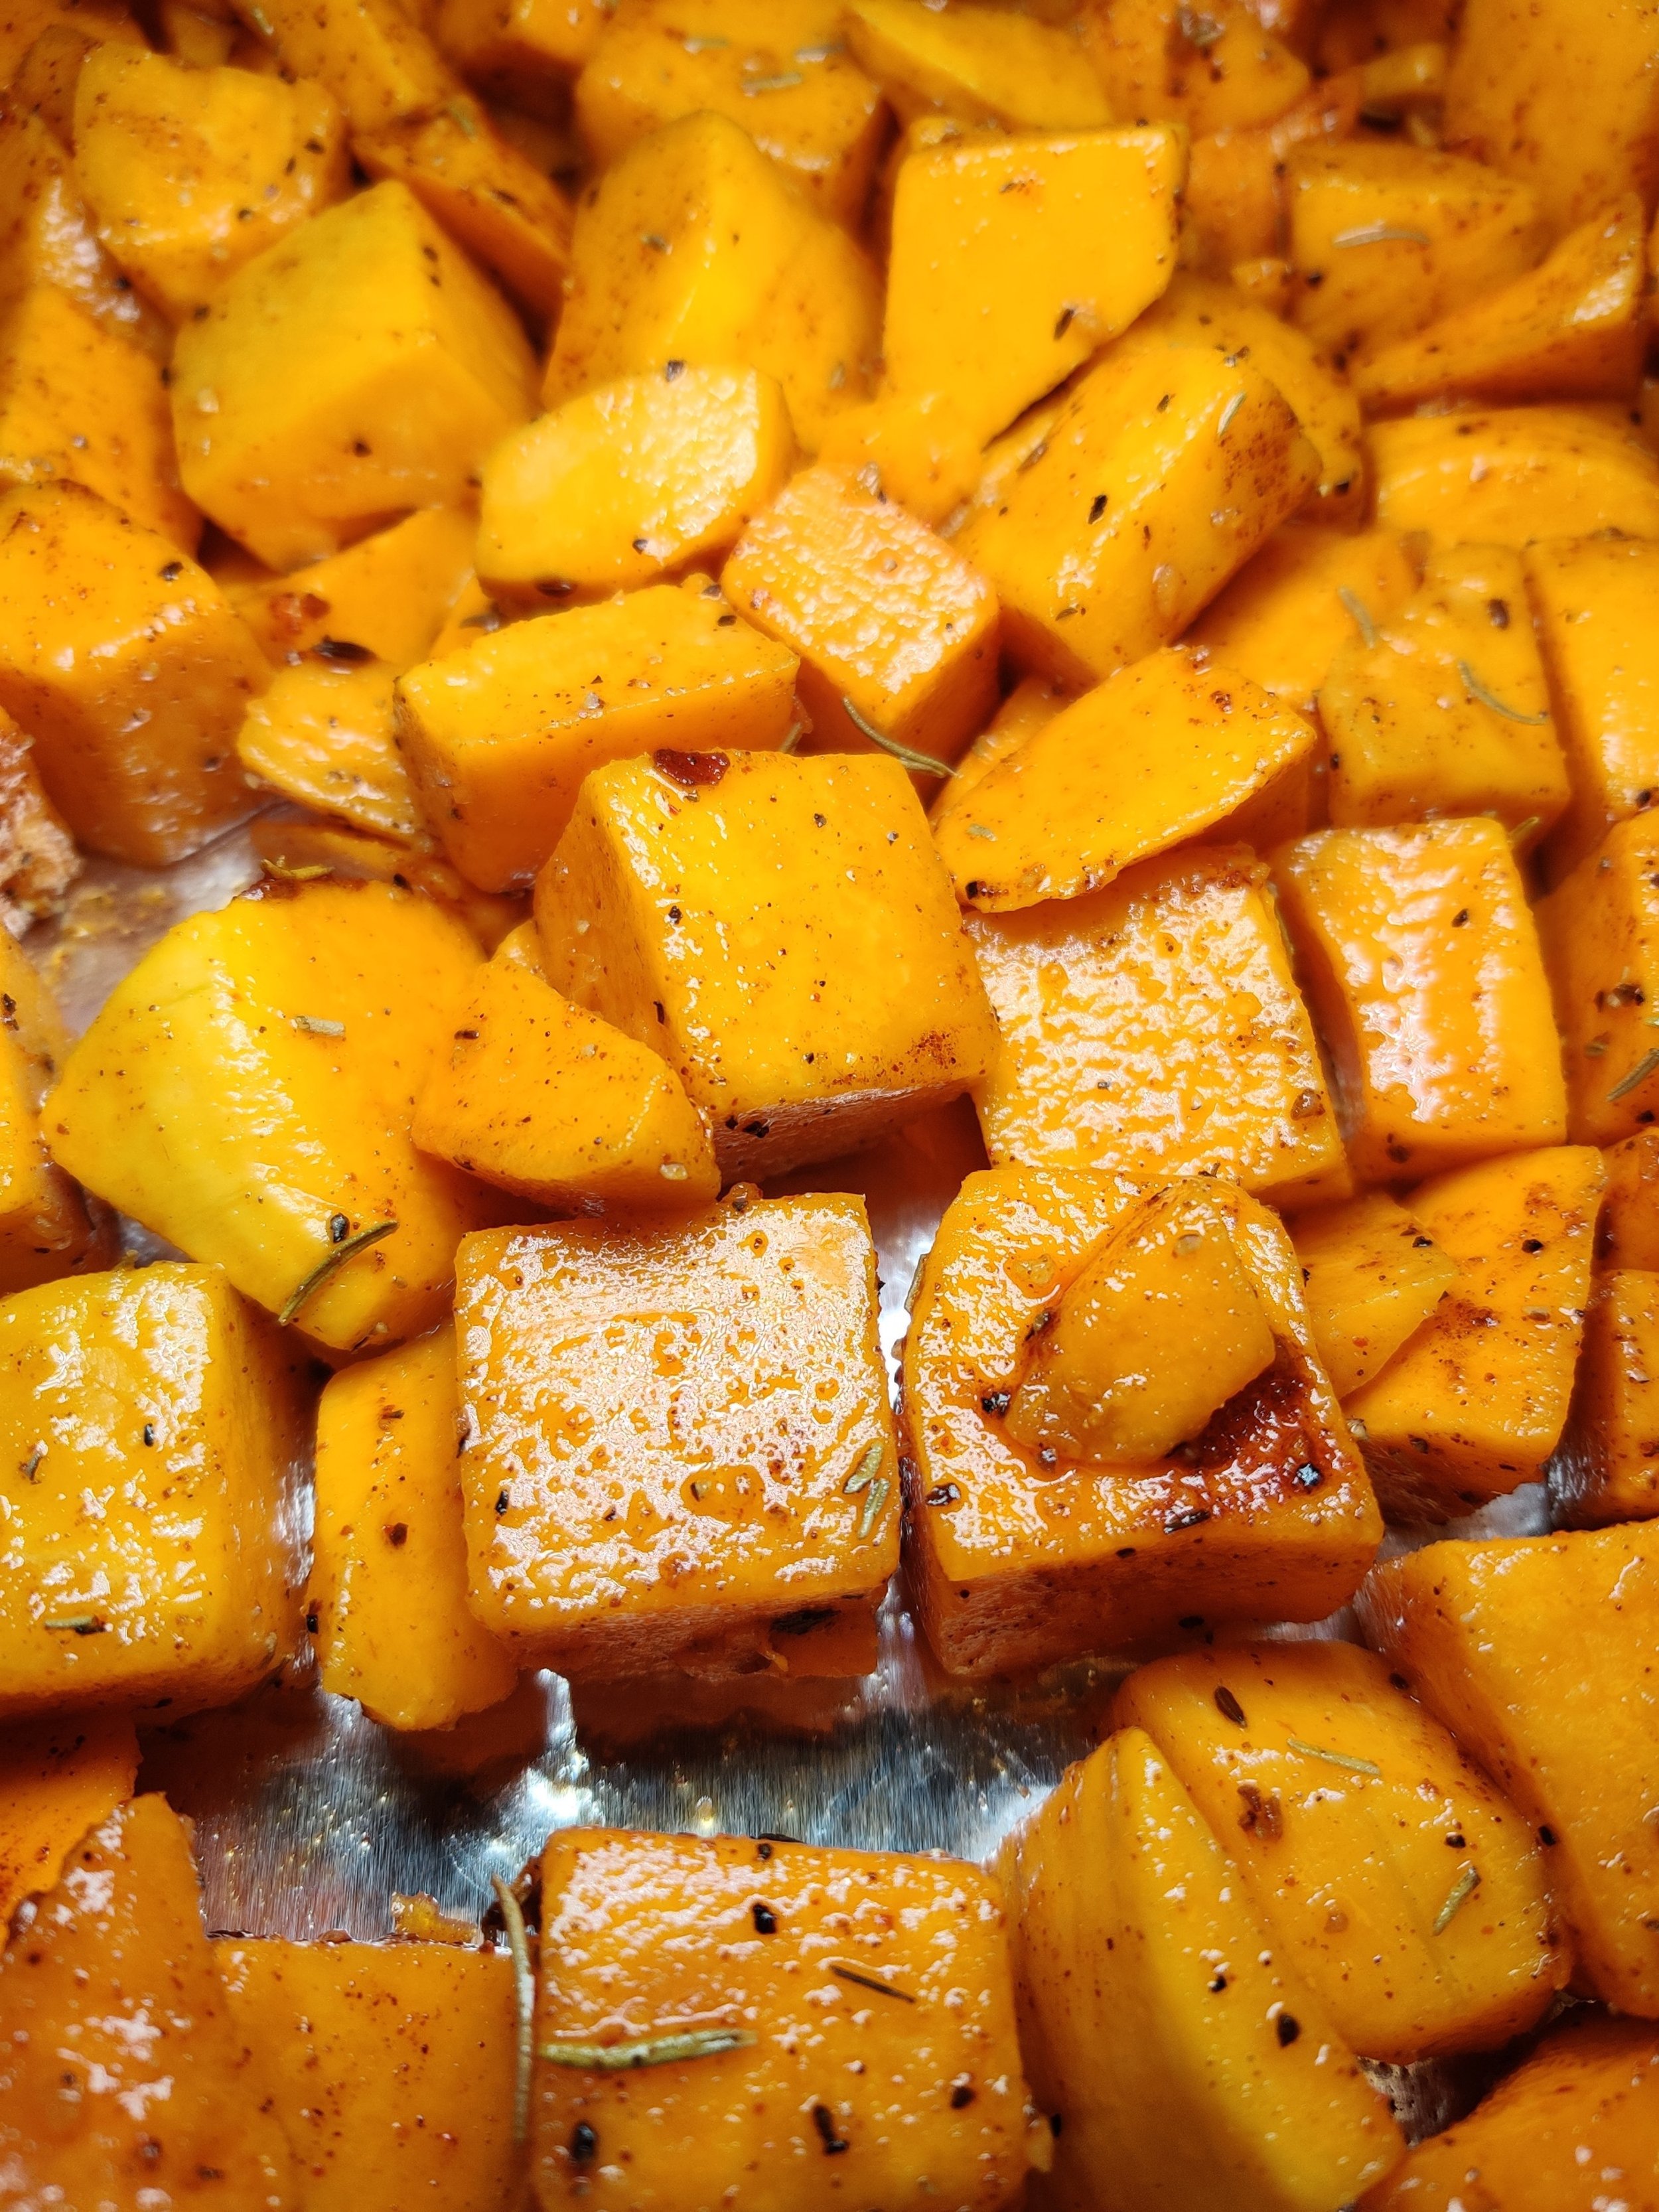
When it comes to adding vegetables to bakes and casseroles, some people prefer to boil or blanch them before baking. In my recipe, I treat the cauliflower and broccoli the same way I do when cooking them to eat on their own—by roasting at 350-400°F for about 15-20 minutes. In my opinion, vegetables taste better this way, and that goes for cruciferous veggies, mushrooms, onions, sweet potatoes—you name it. The dry heat enhances the flavor, improves the texture, and caramelizes the veggies, concentrating their natural sweetness.
Follow these tips to get perfectly roasted veggies every time!
1. Start with Dry Vegetables
After washing, pat the broccoli and cauliflower completely dry with a towel. Excess moisture leads to steaming instead of roasting, preventing that delicious crispiness.
2. Cut Evenly
Chop the florets into similar sizes to ensure even cooking. Smaller pieces will roast faster and get crispier, while larger ones may stay too firm.
3. Use High Heat
Roast at 400-425°F (200-220°C) for the best caramelization. Lower temperatures won’t achieve that golden-brown crispiness.
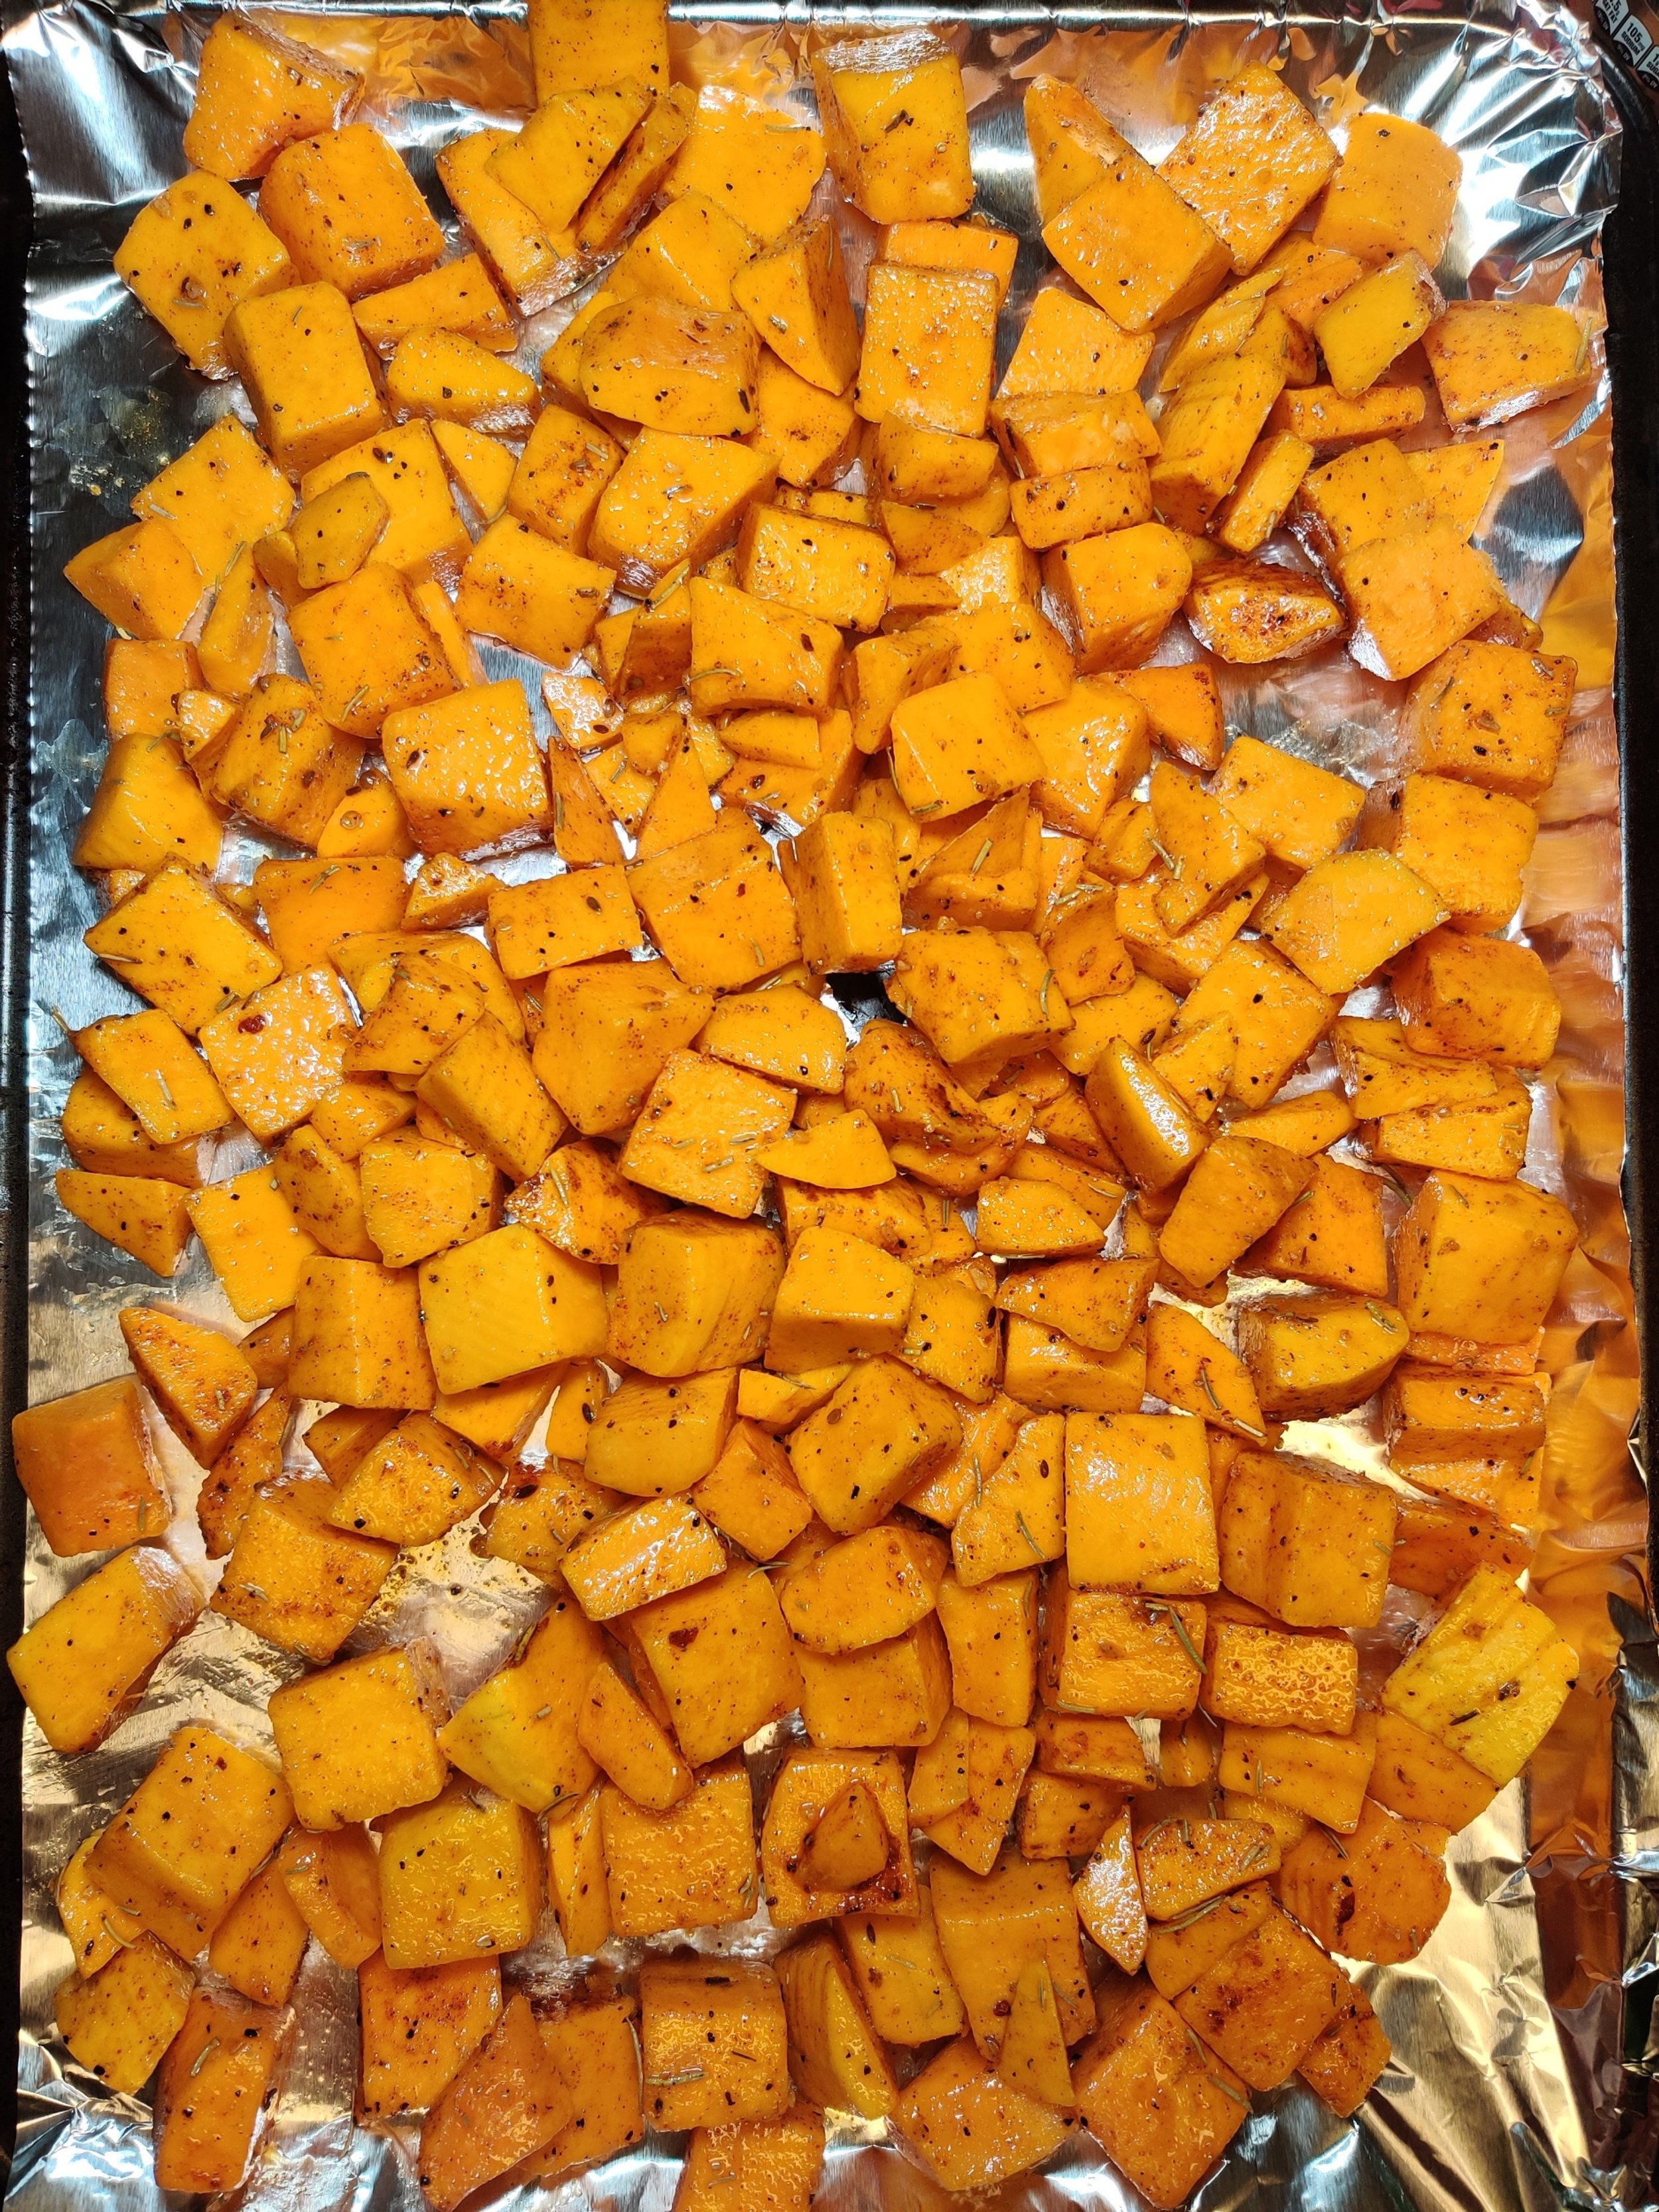
4. Don’t Overcrowd the Pan
Spread the vegetables in a single layer with space between them. Overcrowding leads to steaming instead of roasting, making them soft instead of crispy.
5. Use Enough Oil
Toss the florets with olive oil or avocado oil to coat them evenly. This helps achieve a crispy, golden-brown texture. About 1-2 tablespoons per sheet pan is ideal.
6. Season Well
Salt and pepper are a must, but try adding garlic powder, smoked paprika, chili flakes, or lemon zest for extra flavor.
Parmesan cheese or nutritional yeast sprinkled on before the last few minutes of roasting adds a savory kick.
7. Roast on a Preheated Baking Sheet
For extra crispiness, place the baking sheet in the oven while it preheats, then spread the veggies on the hot pan. This helps them brown faster.
8. Flip Halfway Through
After 15-20 minutes, give them a good stir or flip with a spatula to ensure even browning.
9. Finish with a Flavor Boost
Squeeze fresh lemon juice or drizzle balsamic glaze right before serving for a bright, tangy contrast.
Add crushed nuts or crispy breadcrumbs for extra crunch.
10. Watch for Doneness
Roast for 15-20 minutes, or until the edges are golden brown and crispy. If you like them extra crispy, leave them in for a few more minutes.

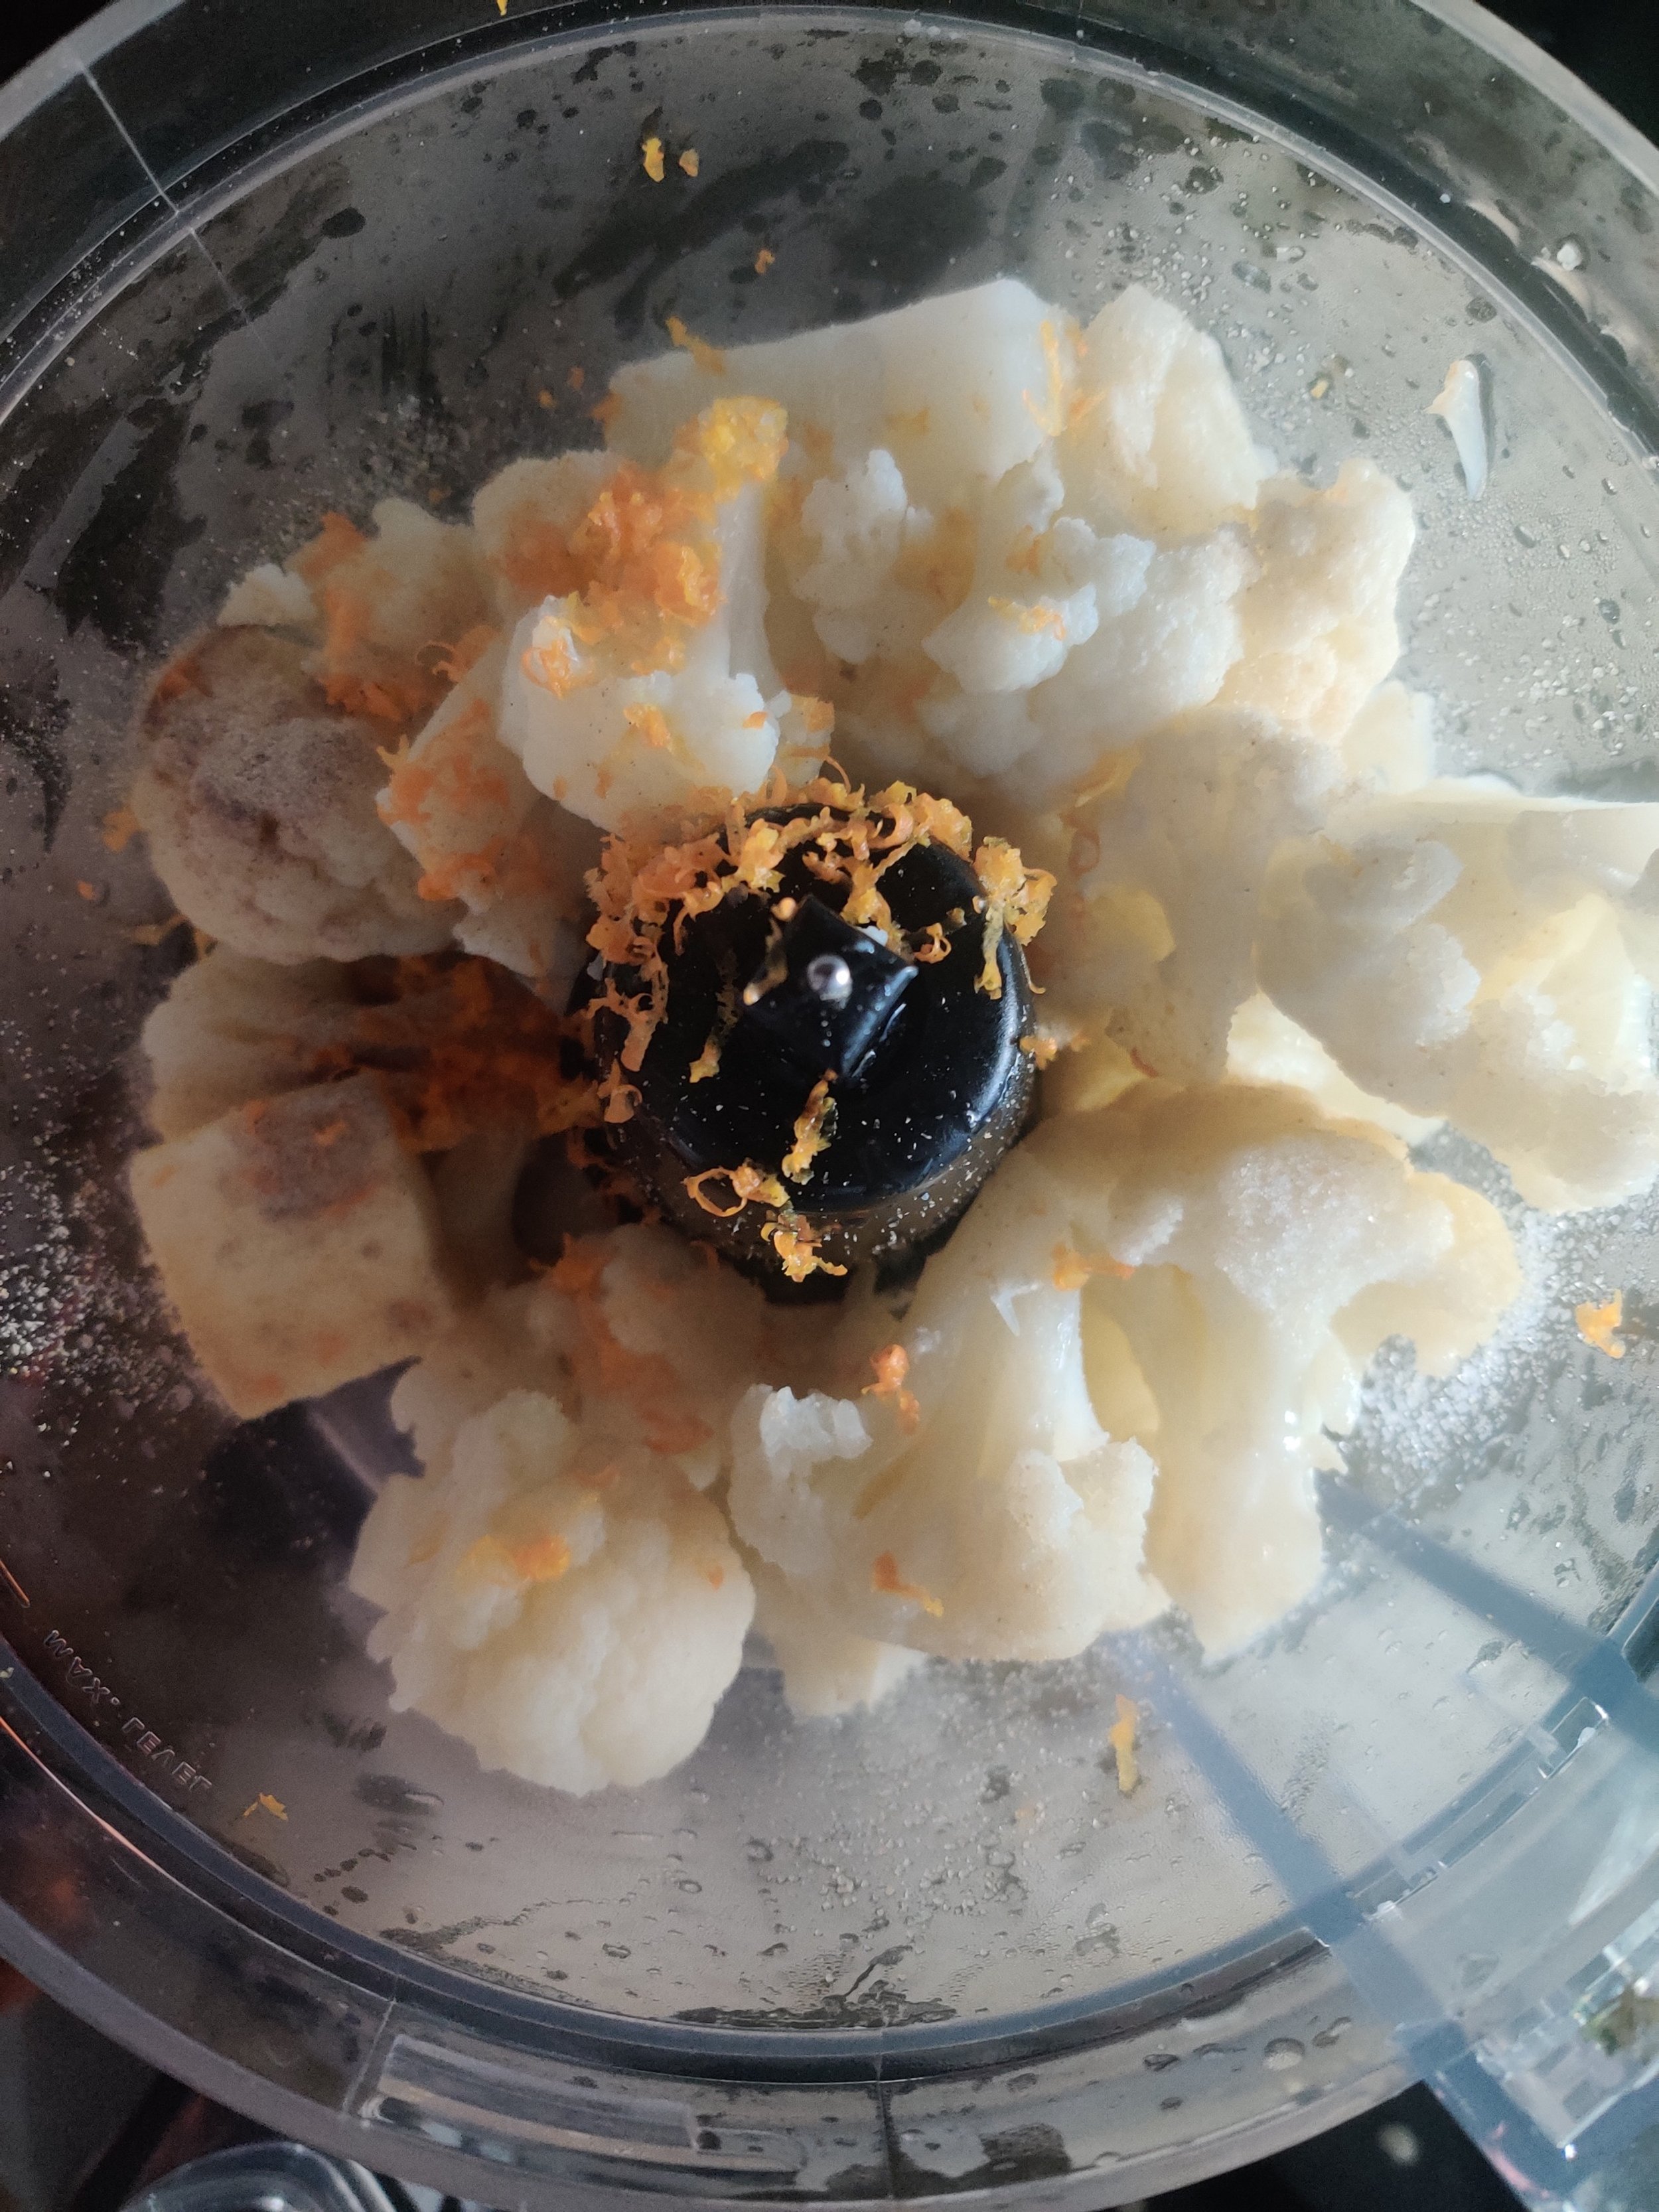
Creamy Roasted Broccoli and Cauliflower Bake
Ingredients
- 32 oz cauliflower florets
- 32 oz broccoli florets
- 1/8 + 1/8 cups olive oil (use more if needed)
- 1 tablespoon garlic powder
- 1 tablespoon onion powder
- 1 teaspoon seasoned salt
- 1 teaspoon cayenne pepper
- 2 garlic cloves, minced
- 1 medium yellow onion, chopped
- 1 1/2 cups grated cheese (I used pepper jack)
- 3 tablespoons grated parmesan cheese (optional)
- 1 tablespoon butter
- 8 oz heavy cream
- 1 chicken bouillon cube + 1 cup water (or 1 cup chicken broth)
- 3 tablespoons flour
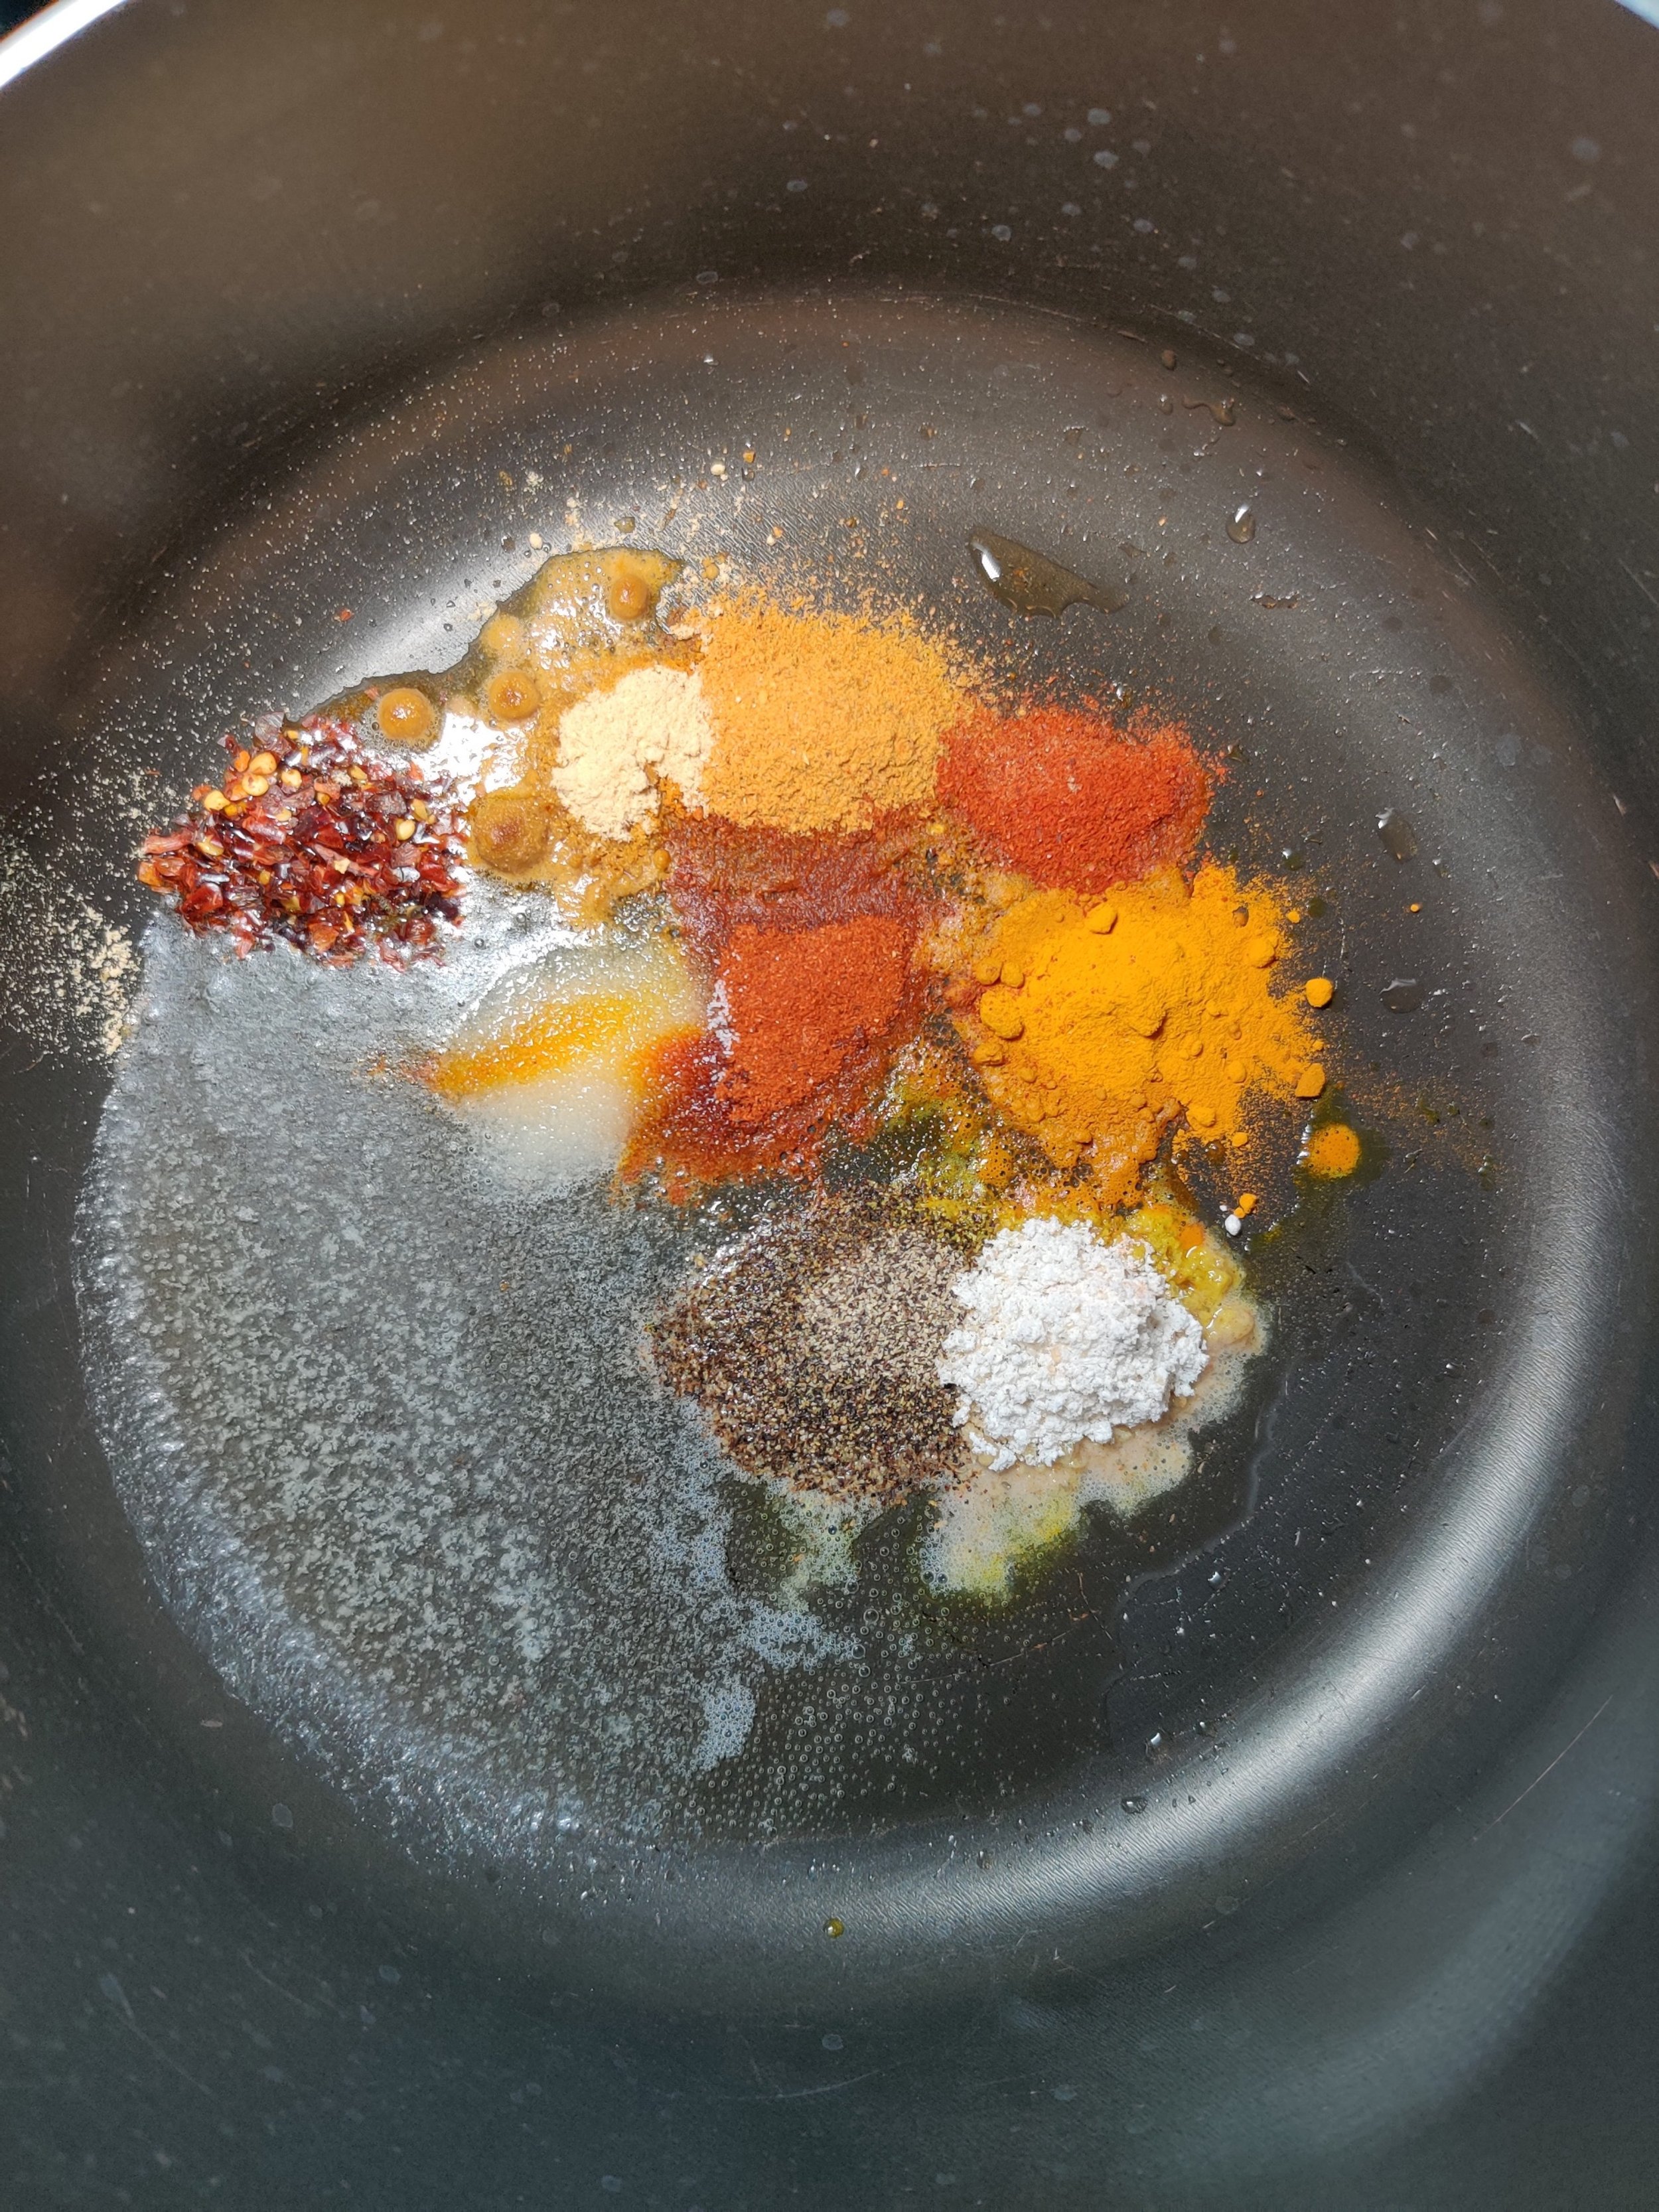
- 1 tablespoon oregano
- 1 teaspoon cayenne pepper
- 1 teaspoon Royco Usavi Mix (or an all-purpose seasoning)
- 1 teaspoon salt (optional)
Instructions
- Trim any undesirable ends from the florets and cut them into uniform pieces if needed.
- Toss the vegetables with oil and season to taste.
- Bake at 350°F for 15-20 minutes, tossing halfway through for even cooking.
- Remove from the oven and let cool slightly.
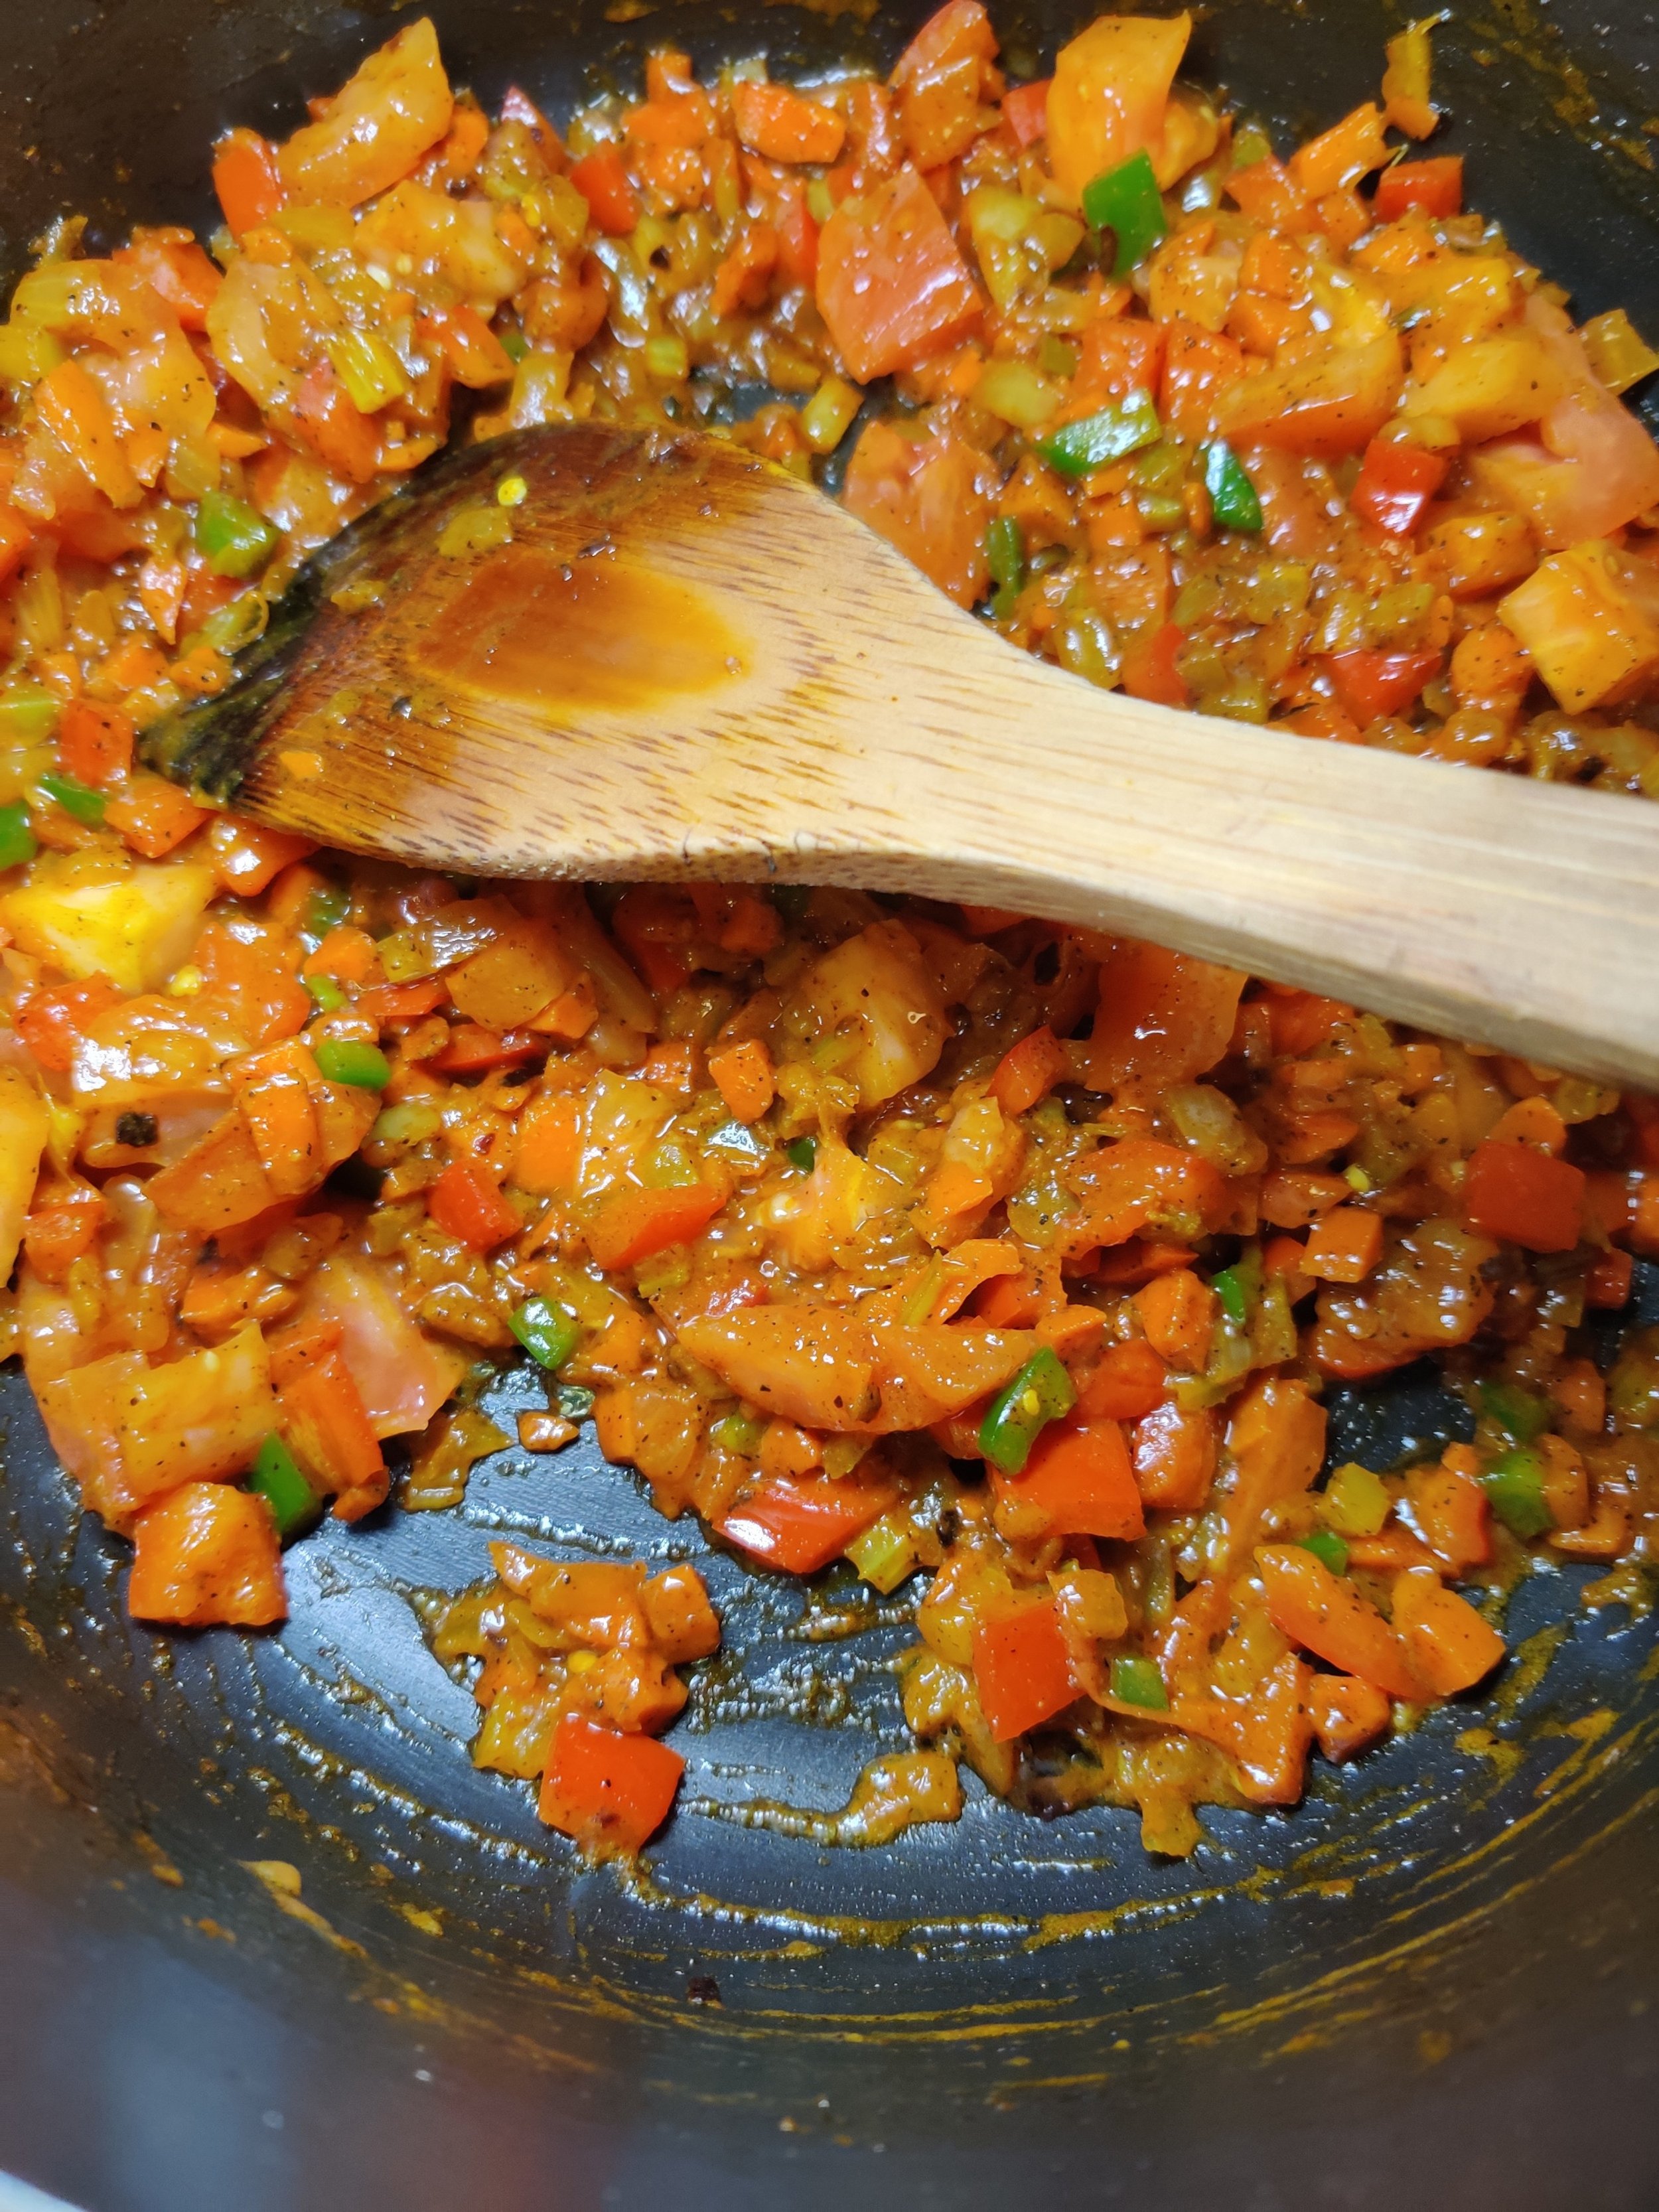
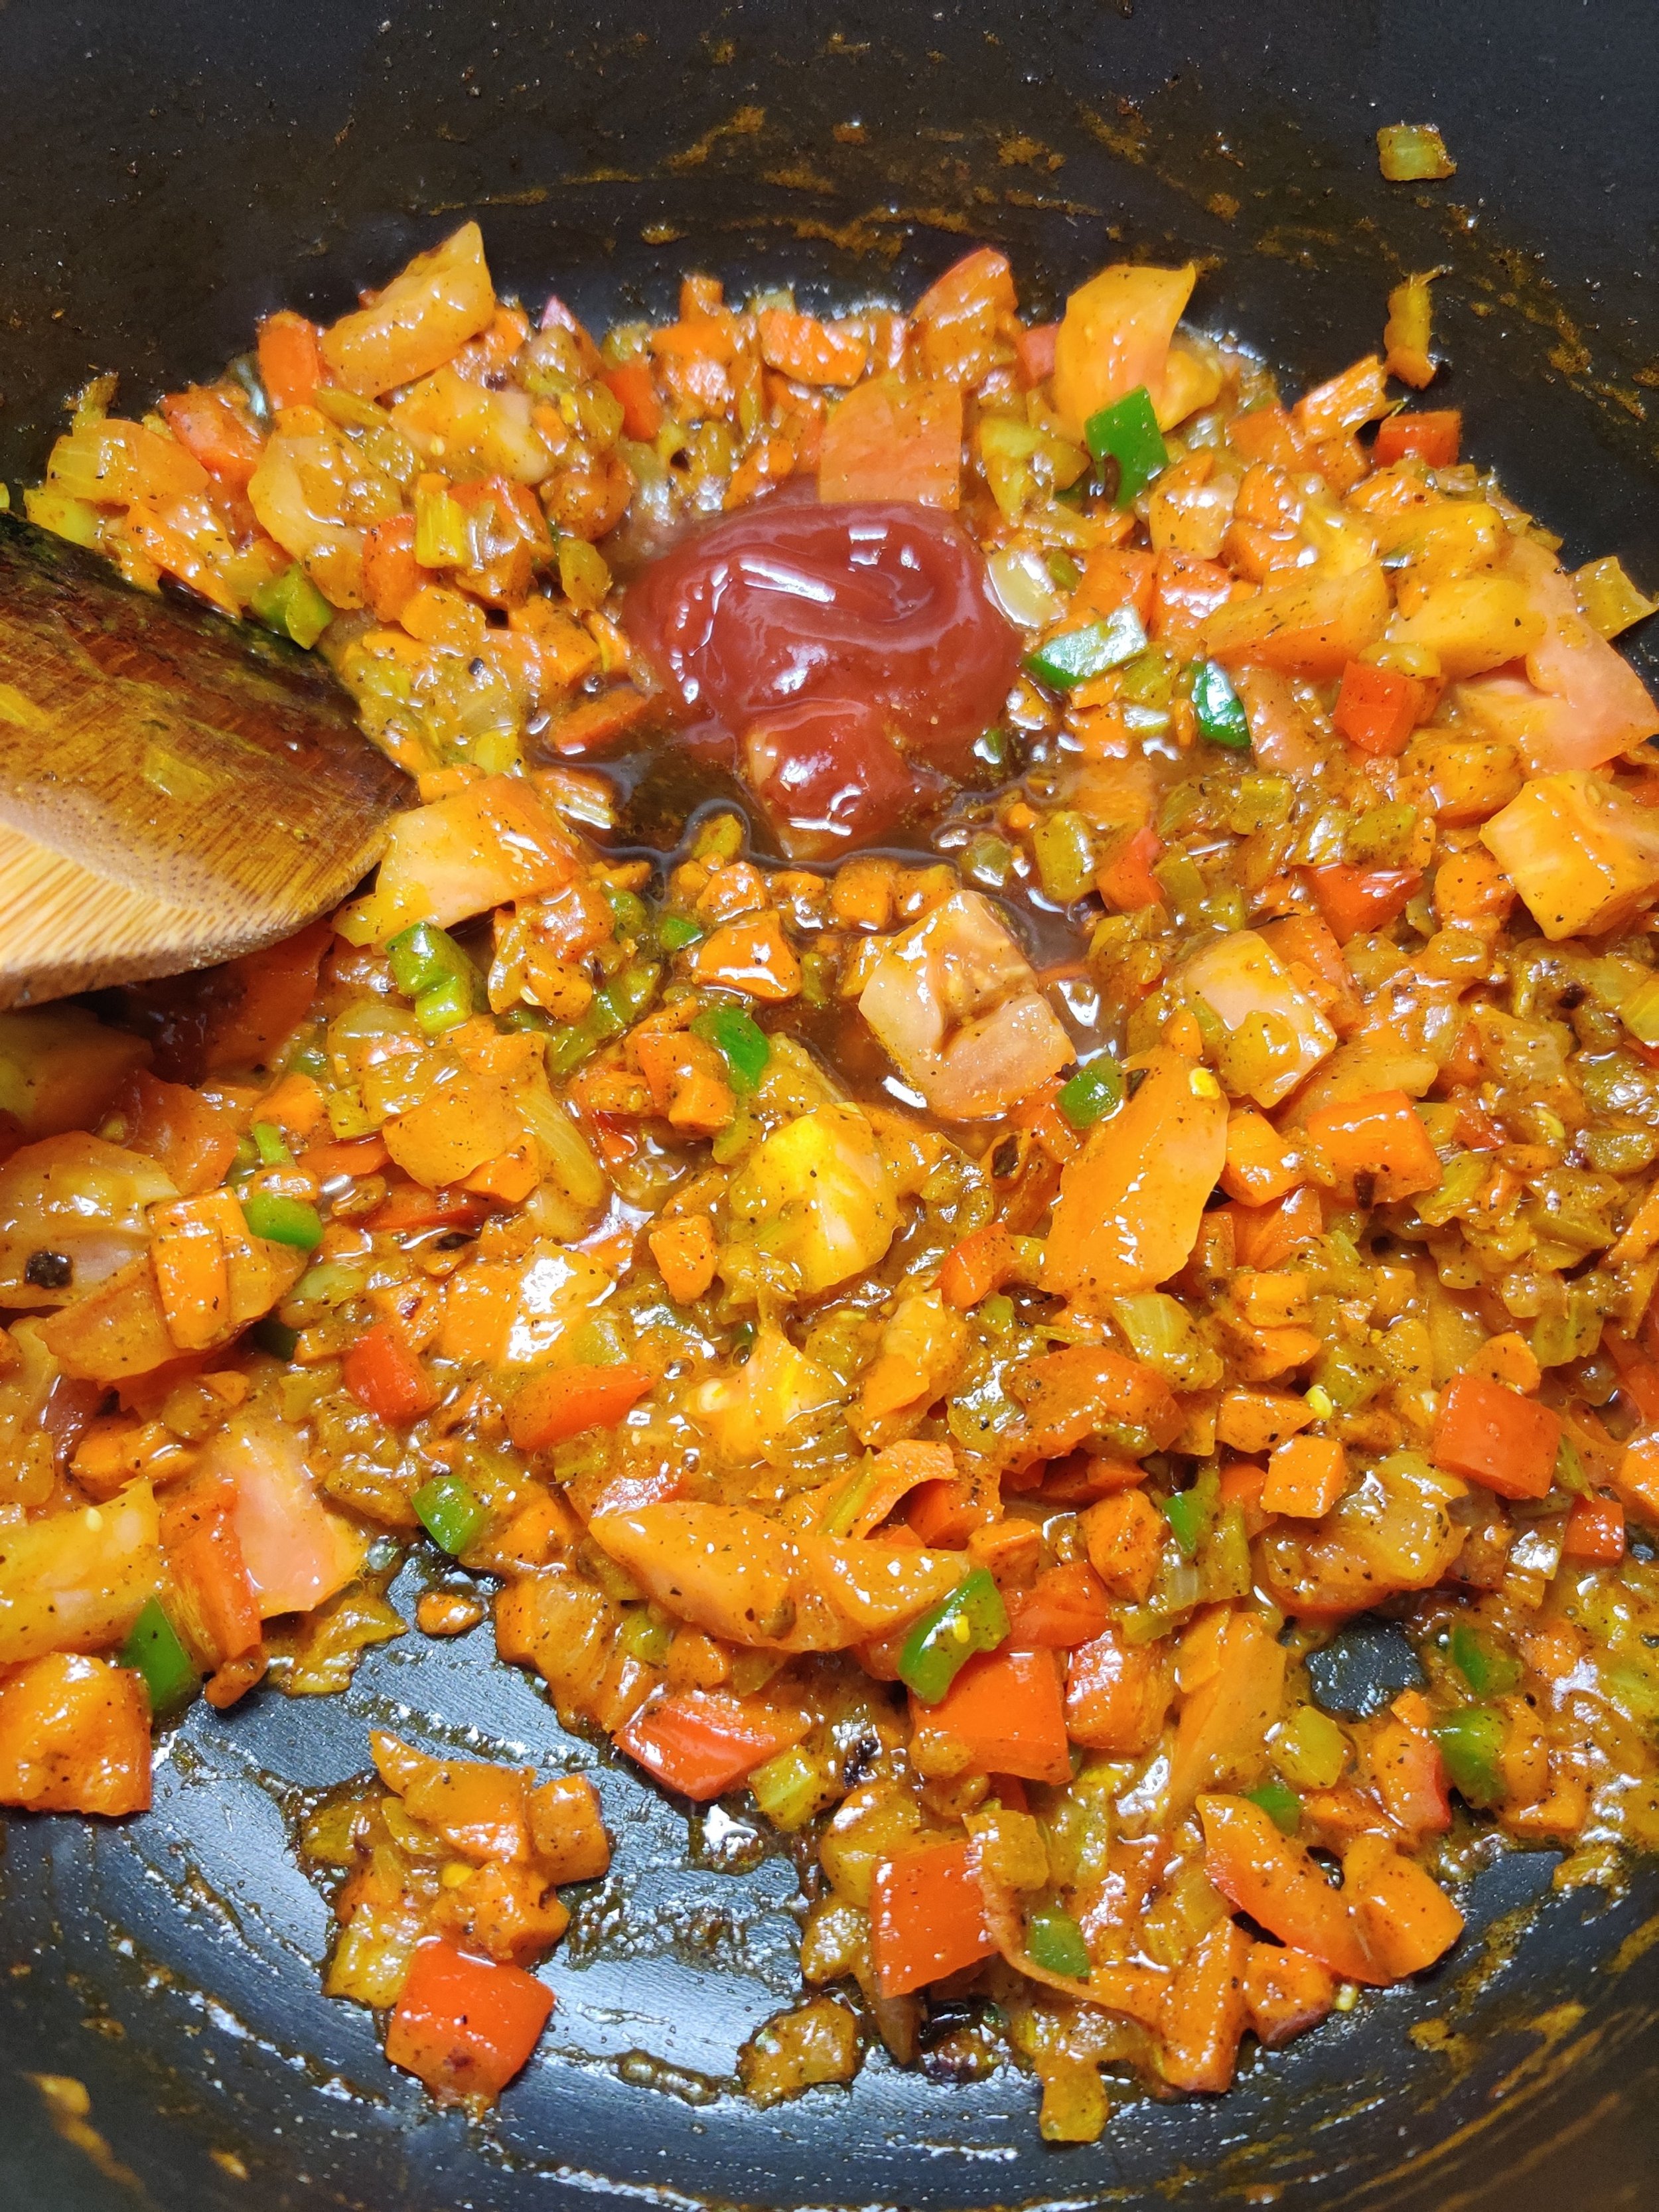
- In a skillet, sauté the chopped onion and garlic until translucent, then mix them into the vegetables in the baking dish.
- Pour the béchamel sauce over the vegetables, mix gently, and top with pepper jack cheese.
- Bake at 350°F for another 15-20 minutes, then broil at 500°F for 3 minutes until the top is golden and crispy. Keep a close eye to prevent burning!
- Finish with a dusting of Parmesan cheese and serve hot once set.
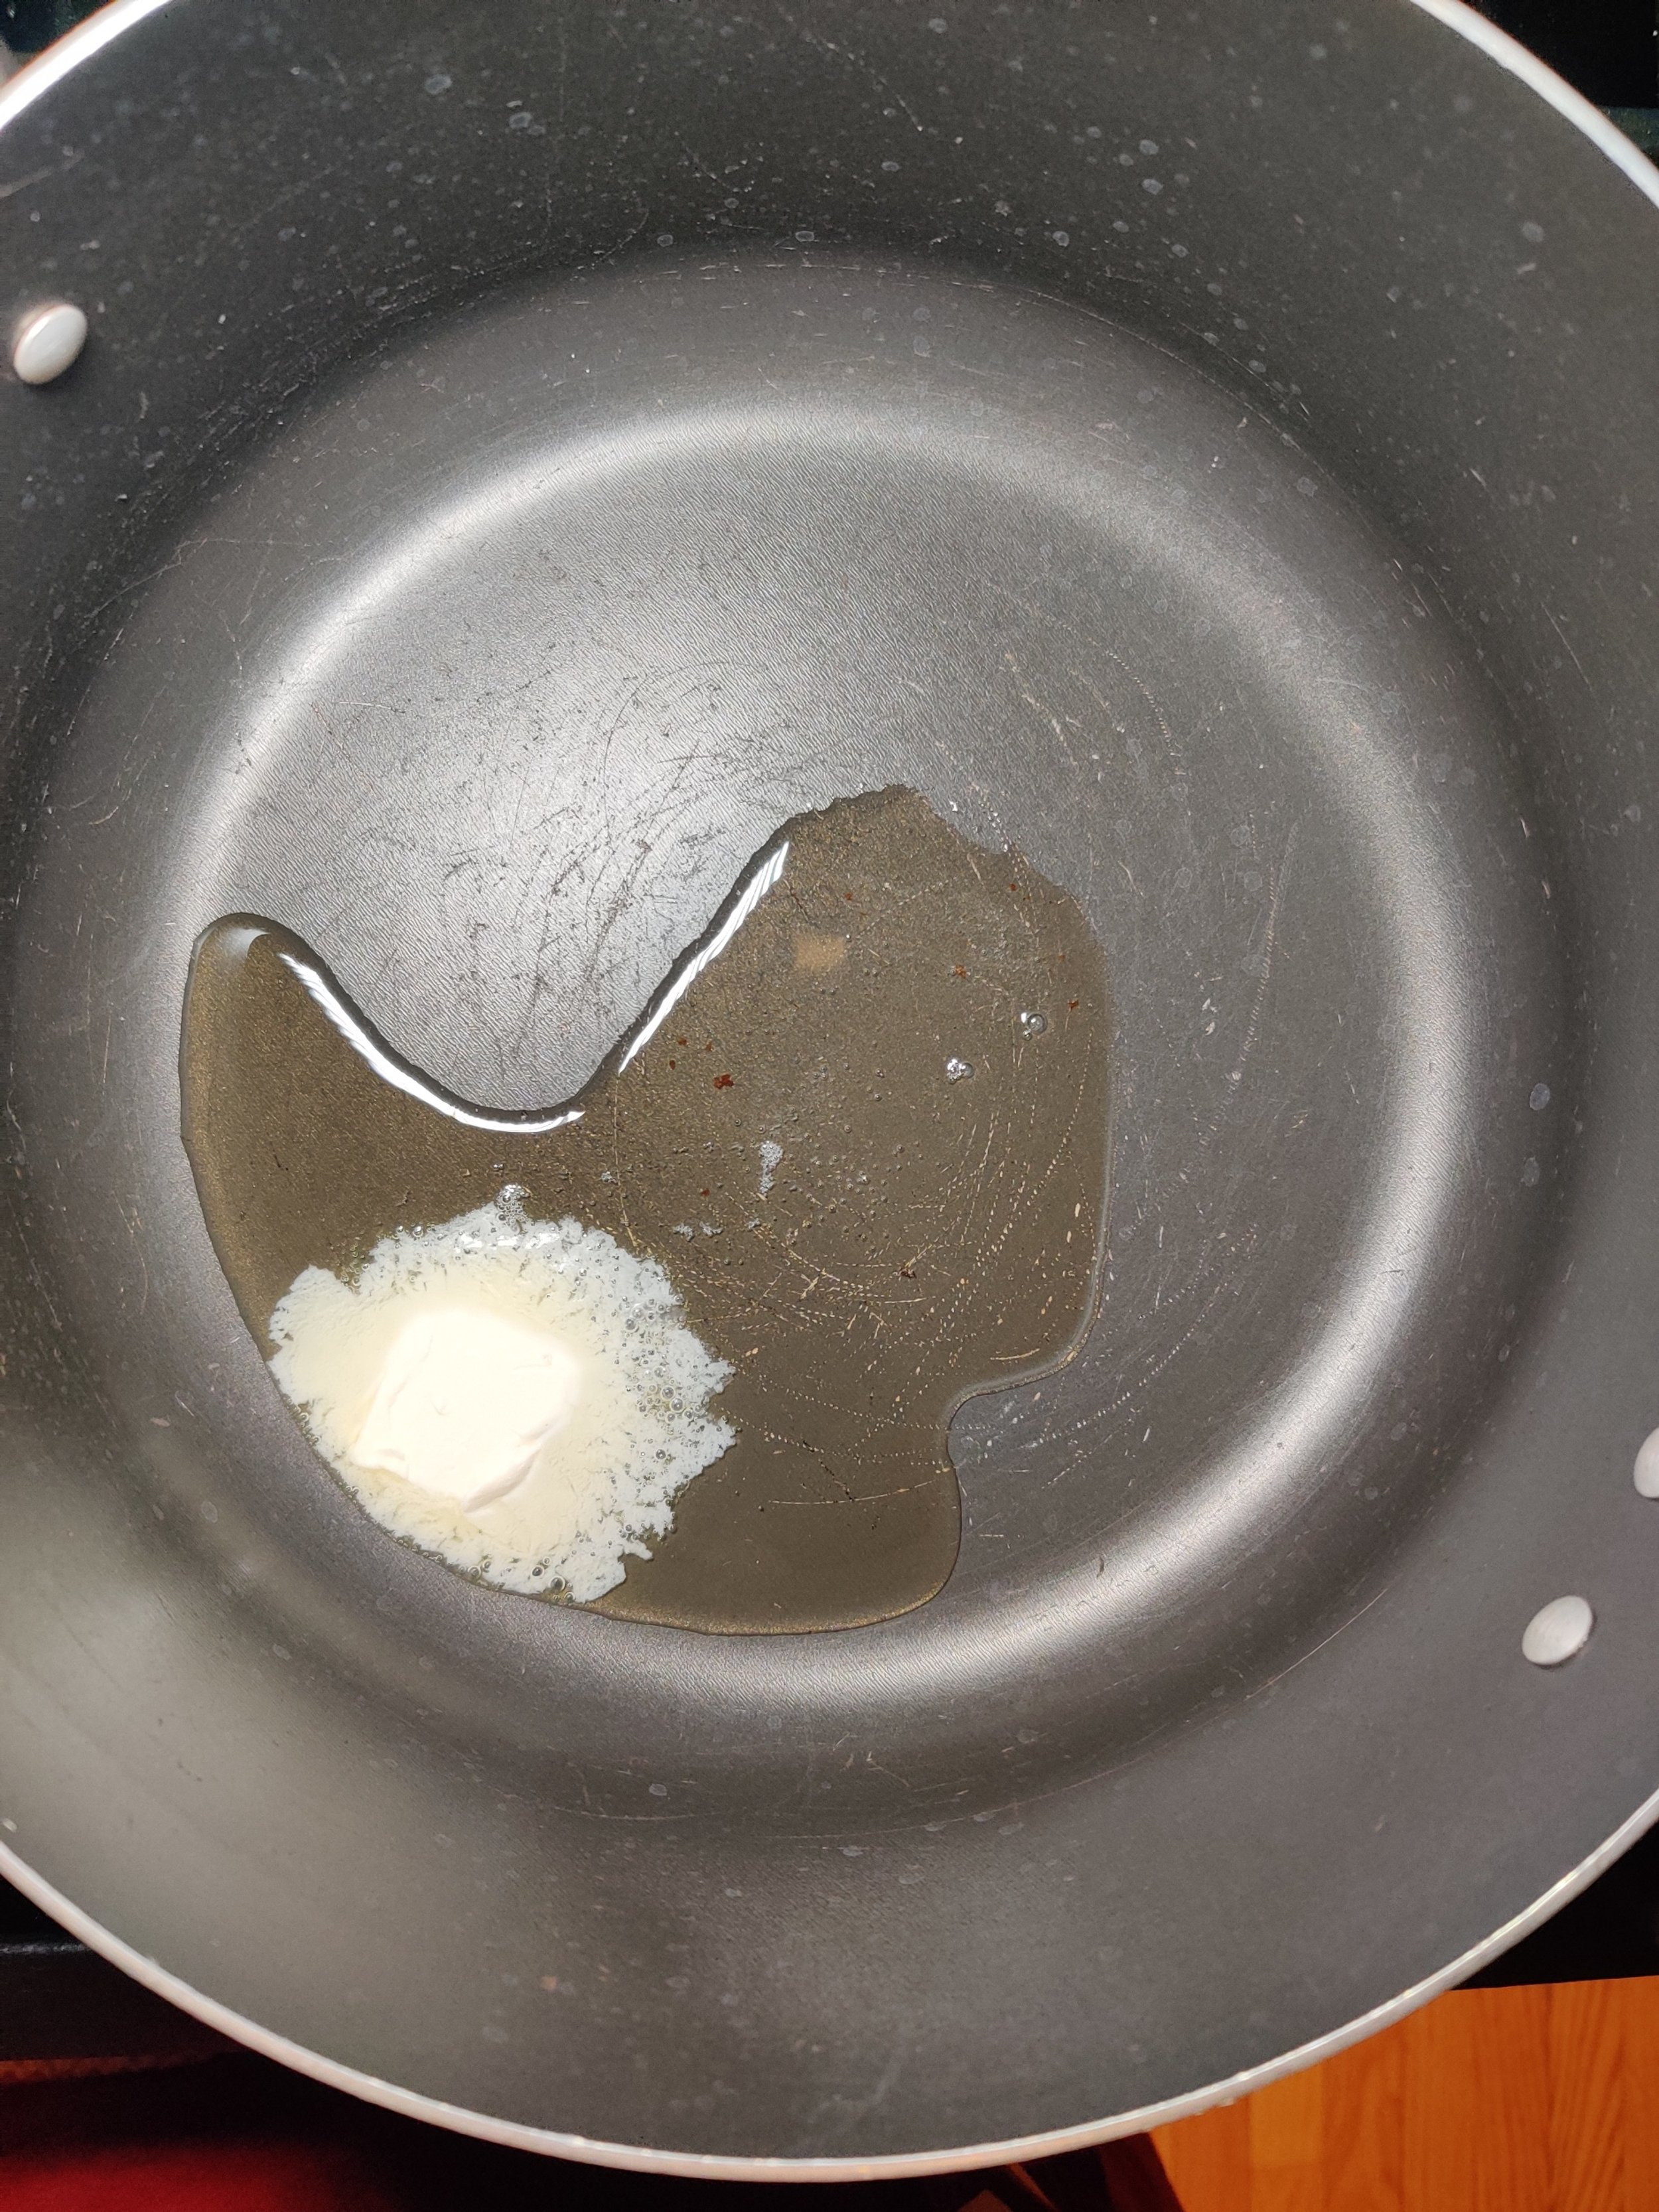
- To make the sauce, melt the butter over medium-low heat, then whisk in the flour to form a smooth paste.
- Crush the bouillon cube and add it along with the water, whisking continuously. Then, pour in the cream.
- Stir until the mixture comes to a gentle boil, ensuring there are no lumps, then add the seasoning.
- Reduce the heat to a simmer and continue stirring until the sauce is thick, smooth, and creamy but still easy to mix.
- Adjust seasoning to taste before removing from the heat.
Nutrition Facts
Calories
830Fat (grams)
57.9 gSat. Fat (grams)
34.2 gCarbs (grams)
57 gFiber (grams)
21.1 gProtein (grams)
34.4 gI am not a certified nutritionist and any nutritional information on dontmissmyplate.com should only be used as a general guideline.

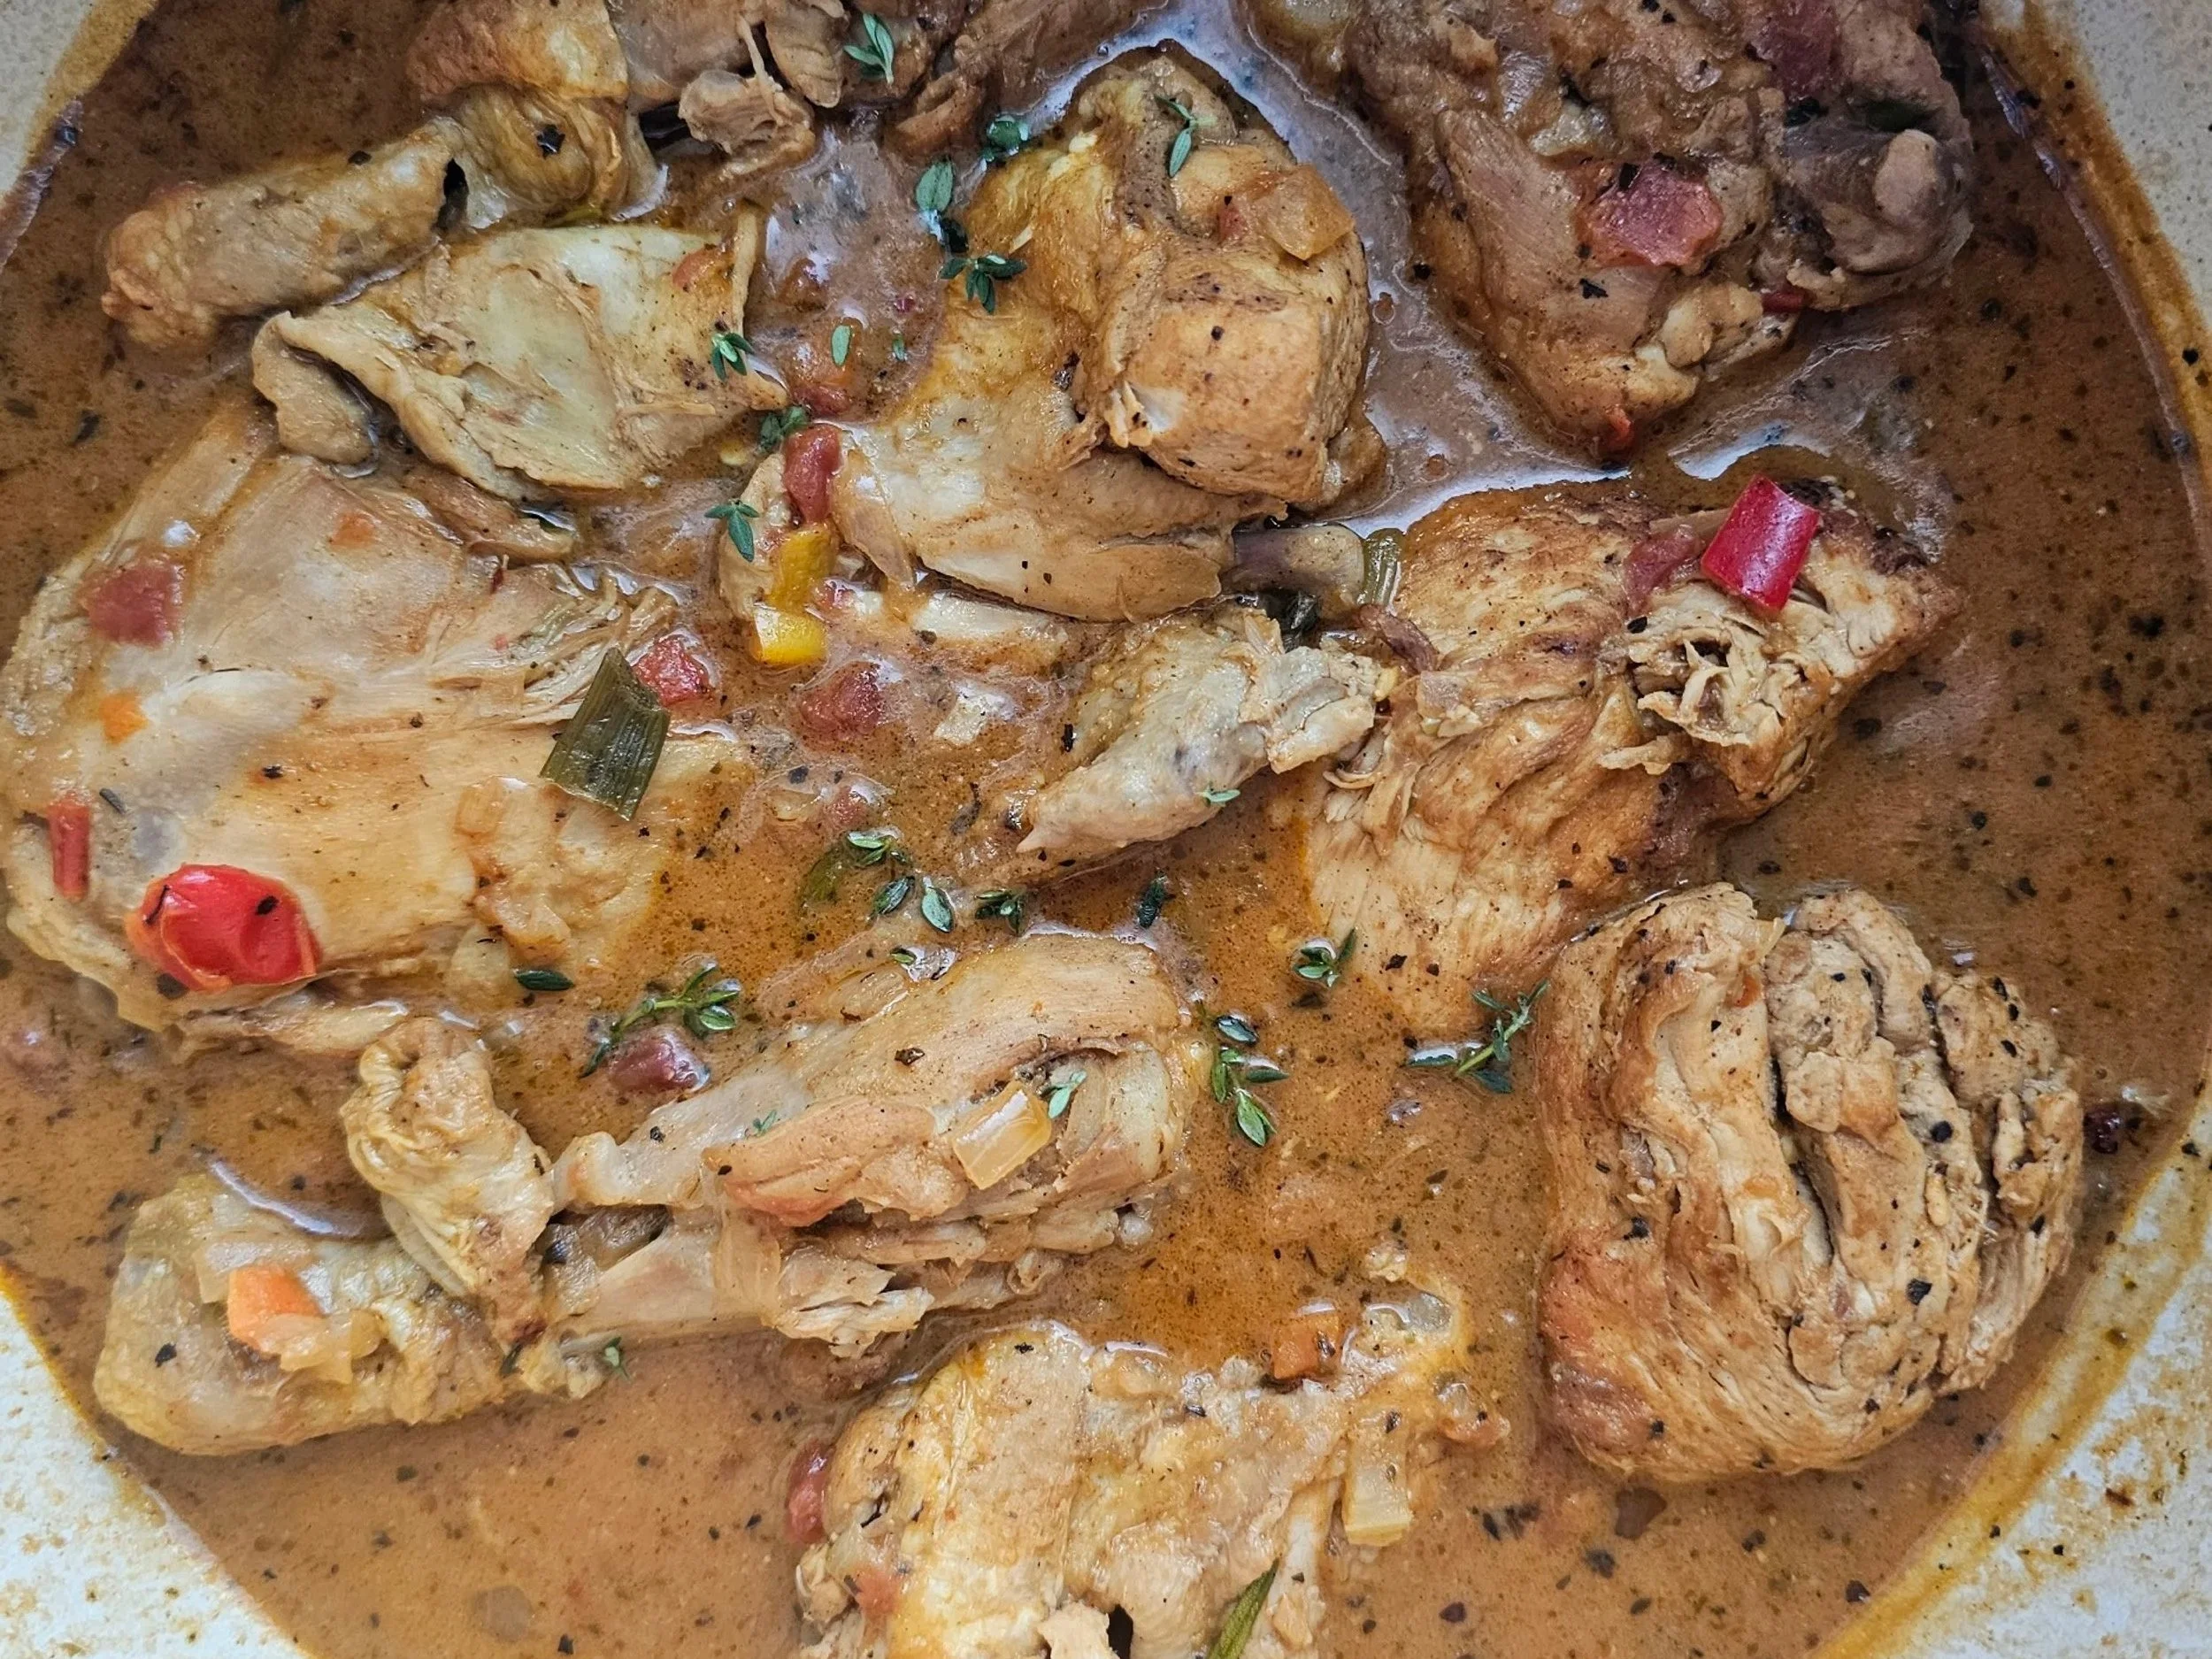
Huku ne Dovi (Zimbabwean Peanut Chicken Stew)
How to Make Chicken Stew at Home
Zimbabwean Peanut Chicken Stew, also known as huku ne dovi, is a rich and hearty dish that brings together tender chicken, creamy peanut butter, fresh vegetables, hot chilies, and aromatic spices. The result is a perfectly balanced blend of savory and nutty flavors. Whether served over rice, sadza (Zimbabwe’s staple maize porridge), or with warm bread, this traditional dish is a true comfort food favorite.
It might seem like an unusual combination, but across several African cultures, this pairing is wholeheartedly embraced as a bold, comforting meal. In my household, we didn’t have it often, but when we did, it was a glorious treat—especially during the colder months.
A Note on Chilies and Peanut Butter
The key to this dish lies in balancing the heat of the chilies with the creamy sweetness of the peanut butter. You’ll want just enough of both to create a harmonious dance of flavors on your taste buds. That interplay is where the magic of this stew truly shines.
Chicken Texture: Crispy or Tender?
When it comes to the texture of the chicken, there are two camps:
Tender and falling off the bone – Juicy chicken pieces that soak up the stew’s flavors.
Crispy and intact – For those who prefer firmer, browned pieces of chicken.
If you belong to the second group, hold off on adding the chicken back to the pot after browning, or roast the pieces separately and add them just before serving. This way, the chicken stays crispy and retains its texture.
Adjusting the Sauce Consistency
The thickness of the sauce can also be tailored to suit your preference:
Thinner Sauce: Ideal for serving over rice—just shy of soup-like, but light enough to soak into the grains.
Thicker Sauce: Perfect for pairing with sadza or bread, as it clings better to each bite. For a thicker consistency, follow the optional instructions to reduce and thicken the sauce once the flavors have melded together.

Need Some Extra Tips for Your Chicken Stew?
1. Choose the Right Cut of Chicken. Bone-in, skin-on chicken pieces (like thighs, drumsticks, or a whole chicken cut into parts) add rich flavor to the stew. Boneless cuts are also fine but may cook faster and lack the depth of flavor bones provide.
2. Brown the Chicken First. Sear the chicken pieces in hot oil until golden brown before adding them to the stew. This step locks in flavor and adds a delicious depth to the dish.
3. Build Flavor with Aromatics. Use a base of onions, garlic, and fresh or dried herbs like thyme, rosemary, or bay leaves. These aromatics infuse the stew with a rich, savory aroma.
4. Don’t Rush the Cooking Process. A good stew takes time. Simmering the chicken slowly allows the flavors to meld and the meat to become tender. Resist the urge to boil, as this can make the meat tough..
5. Season in Layers. Season the chicken, the broth, and the vegetables as you go. This ensures the flavors are well-balanced throughout the dish. Adjust salt and spices as needed during cooking.
6. Use a Flavorful Liquid. Chicken broth, stock, or even a combination of broth and water enhances the stew's richness. You can also add a splash of wine, coconut milk, or tomato puree for added depth, depending on the recipe.
8. Thicken the Stew to Your Liking. For a thicker consistency, use flour or cornstarch as a thickener. You can also mash a few of the potatoes or add a slurry (a mixture of flour or cornstarch with water).
9. Taste and Adjust Seasoning. Before serving, taste the stew and adjust seasoning with salt, pepper, or a squeeze of lemon juice for brightness.
10. Garnish for Extra Flavor. Add fresh herbs like parsley, cilantro, or dill just before serving for a pop of freshness. You can also top the stew with a dollop of sour cream or a drizzle of olive oil for added richness.
11. Let It Rest. Allow the stew to sit for a few minutes off the heat before serving. This helps the flavors settle and intensify.
")
Huku ne Dovi (Spicy Zimbabwean Peanut Chicken Stew)
Zimbabwean Peanut Chicken Stew, or *huku ne dovi*, is a flavorful and comforting dish that combines tender chicken, smooth peanut butter, vibrant vegetables, spicy chilies, and fragrant spices.
Ingredients
- 1/4 cup olive oil
- 1 whole chicken, cleaned and cut into pieces
- 2 tablespoons chicken spice (I used Hind’s)
- 2 green onions
- 1 large hot chilli pepper
- 1/2 large yellow onion
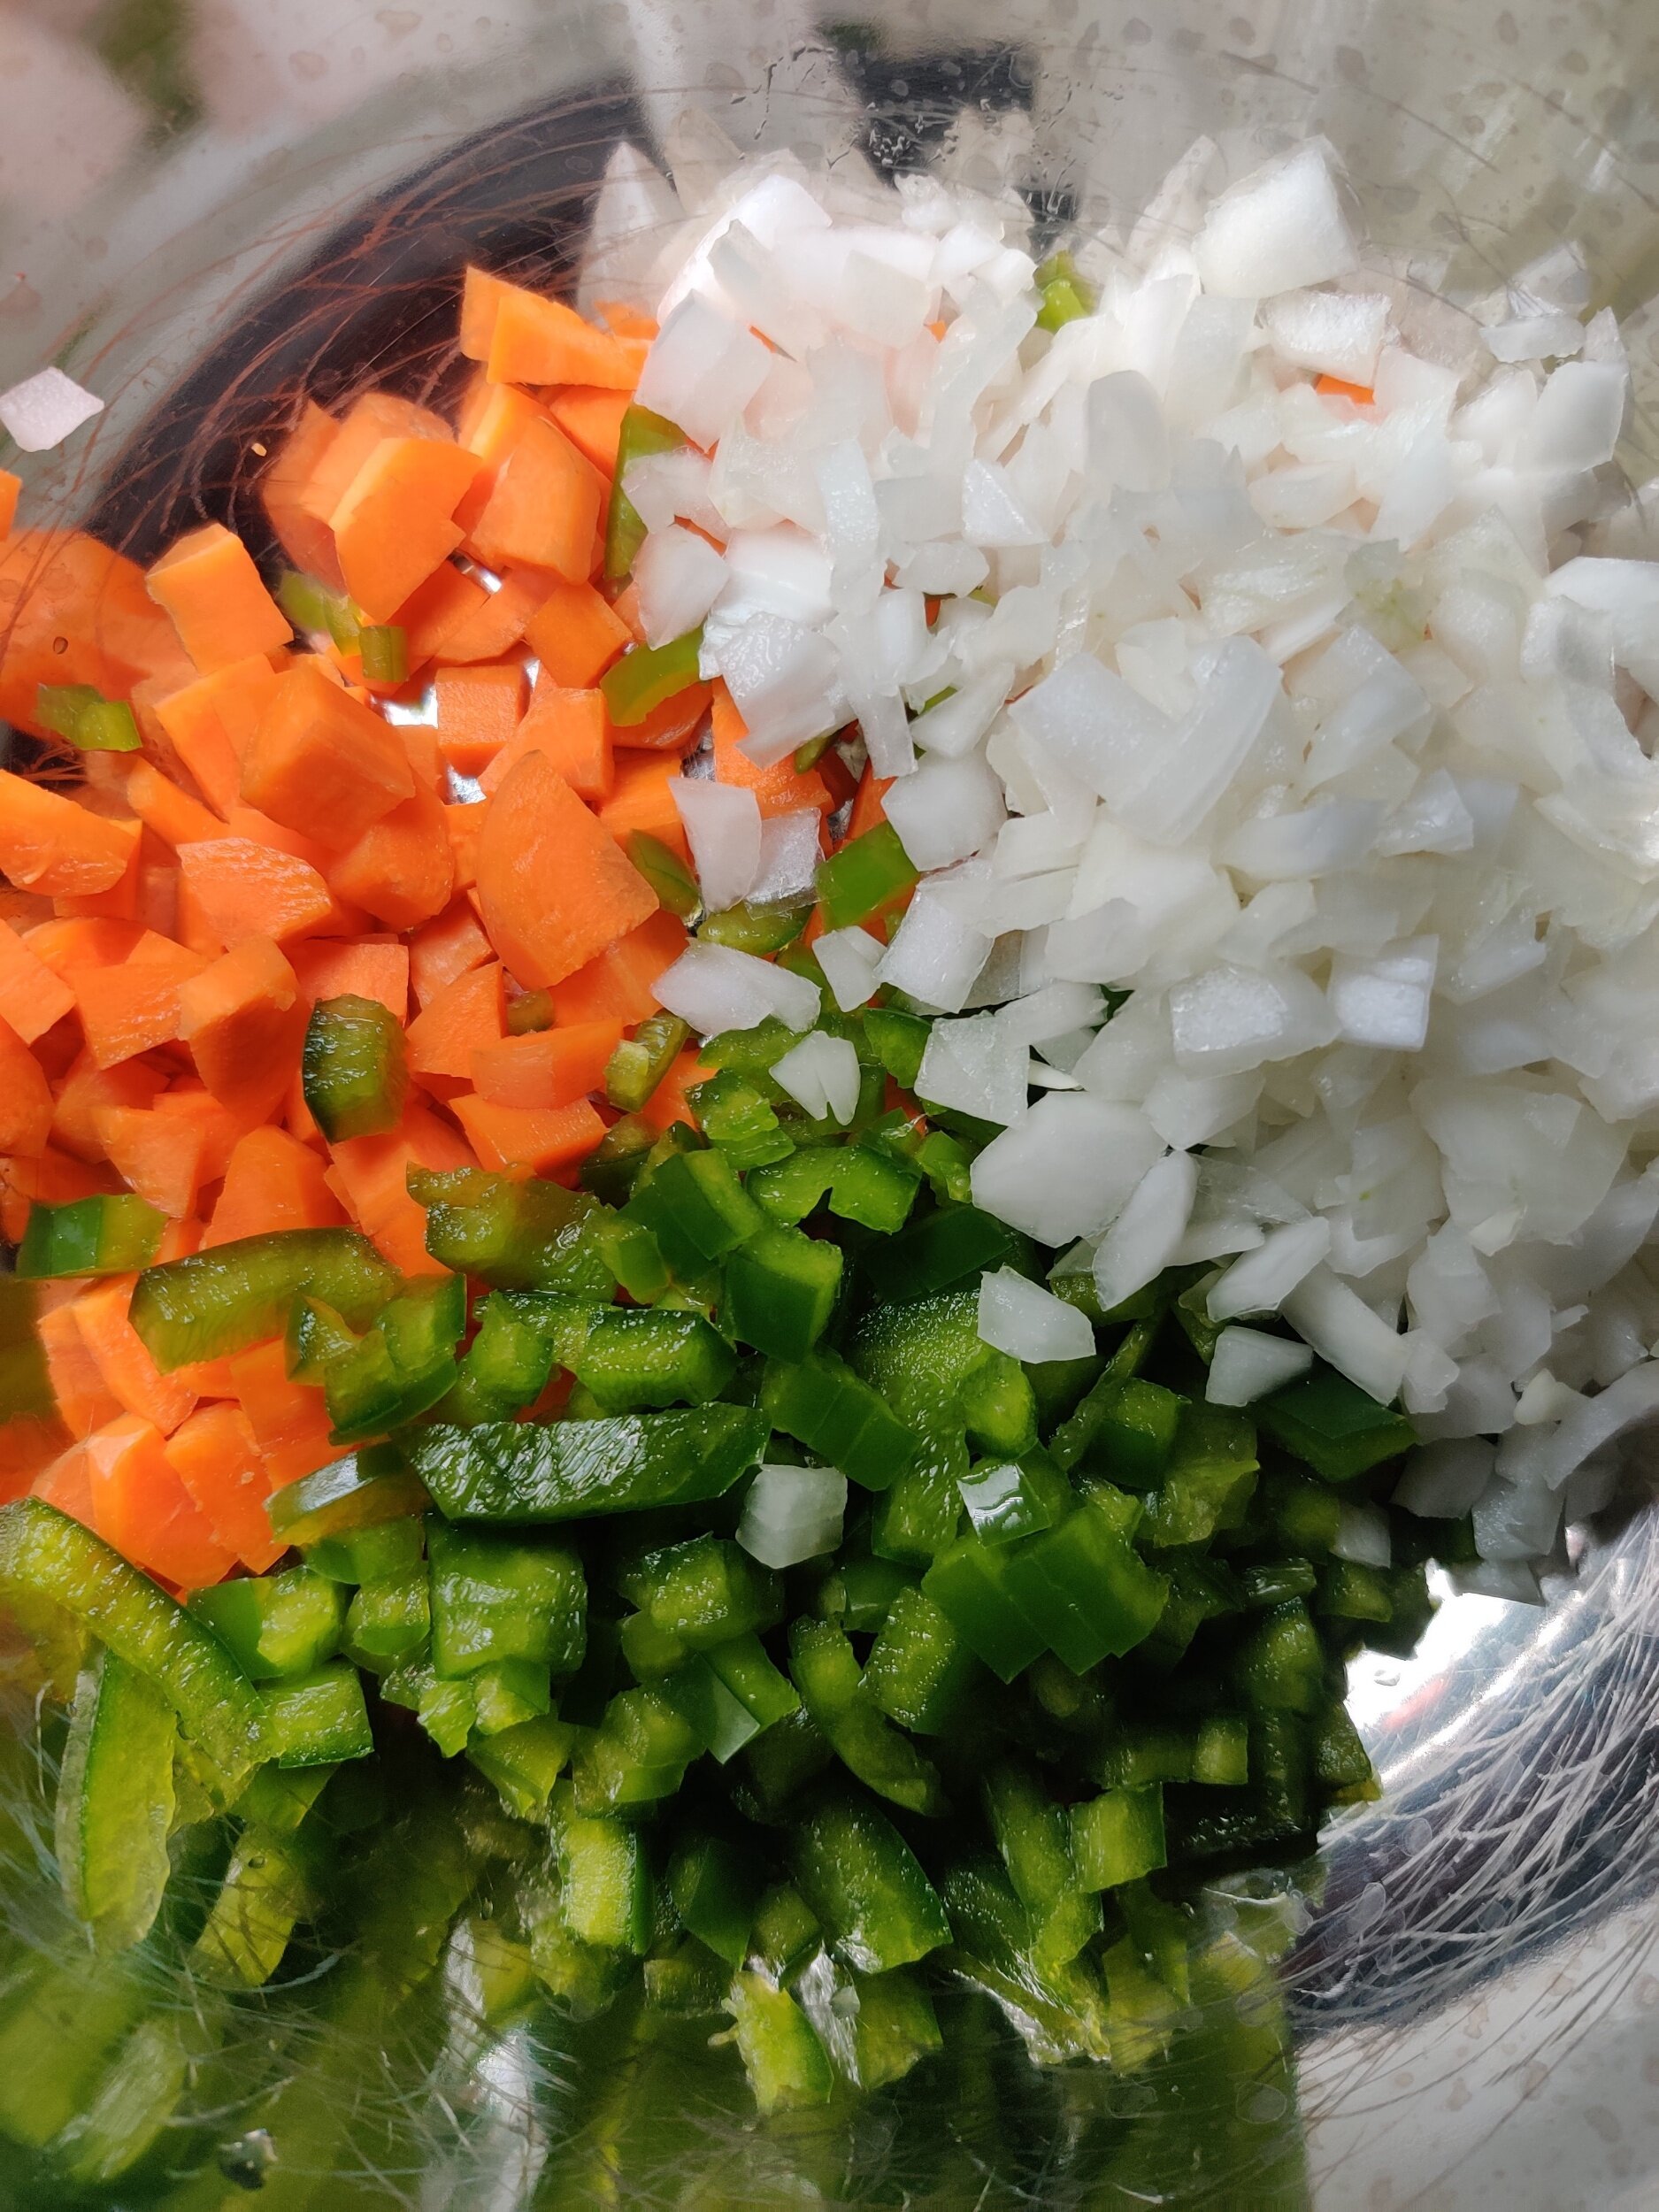
- 1/2 cup mirepoix (chopped onion, carrots and celery)
- 1-2 tablespoons butter
- 1 tablespoon garlic powder
- 1 teaspoon black pepper
- 1 tablespoon paprika
- 1 tablespoon Royco Usavi Mix
- 3 chicken bouillon cubes
- 1/3 cup red wine
- 1 cup diced tomatoes
- 3 sweet bell peppers
- 1/3 cup peanut butter
- 2 tablespoons tomato paste
- 1 teaspoon ginger
- 1 teaspoon cumin
- 1 teaspoon coriander
- 1 teaspoon herb blend (I used basil and thyme)
- 3 cups water
- 3 bay leaves
- 2-3 tablespoons cornstarch or flour (optional)
Instructions
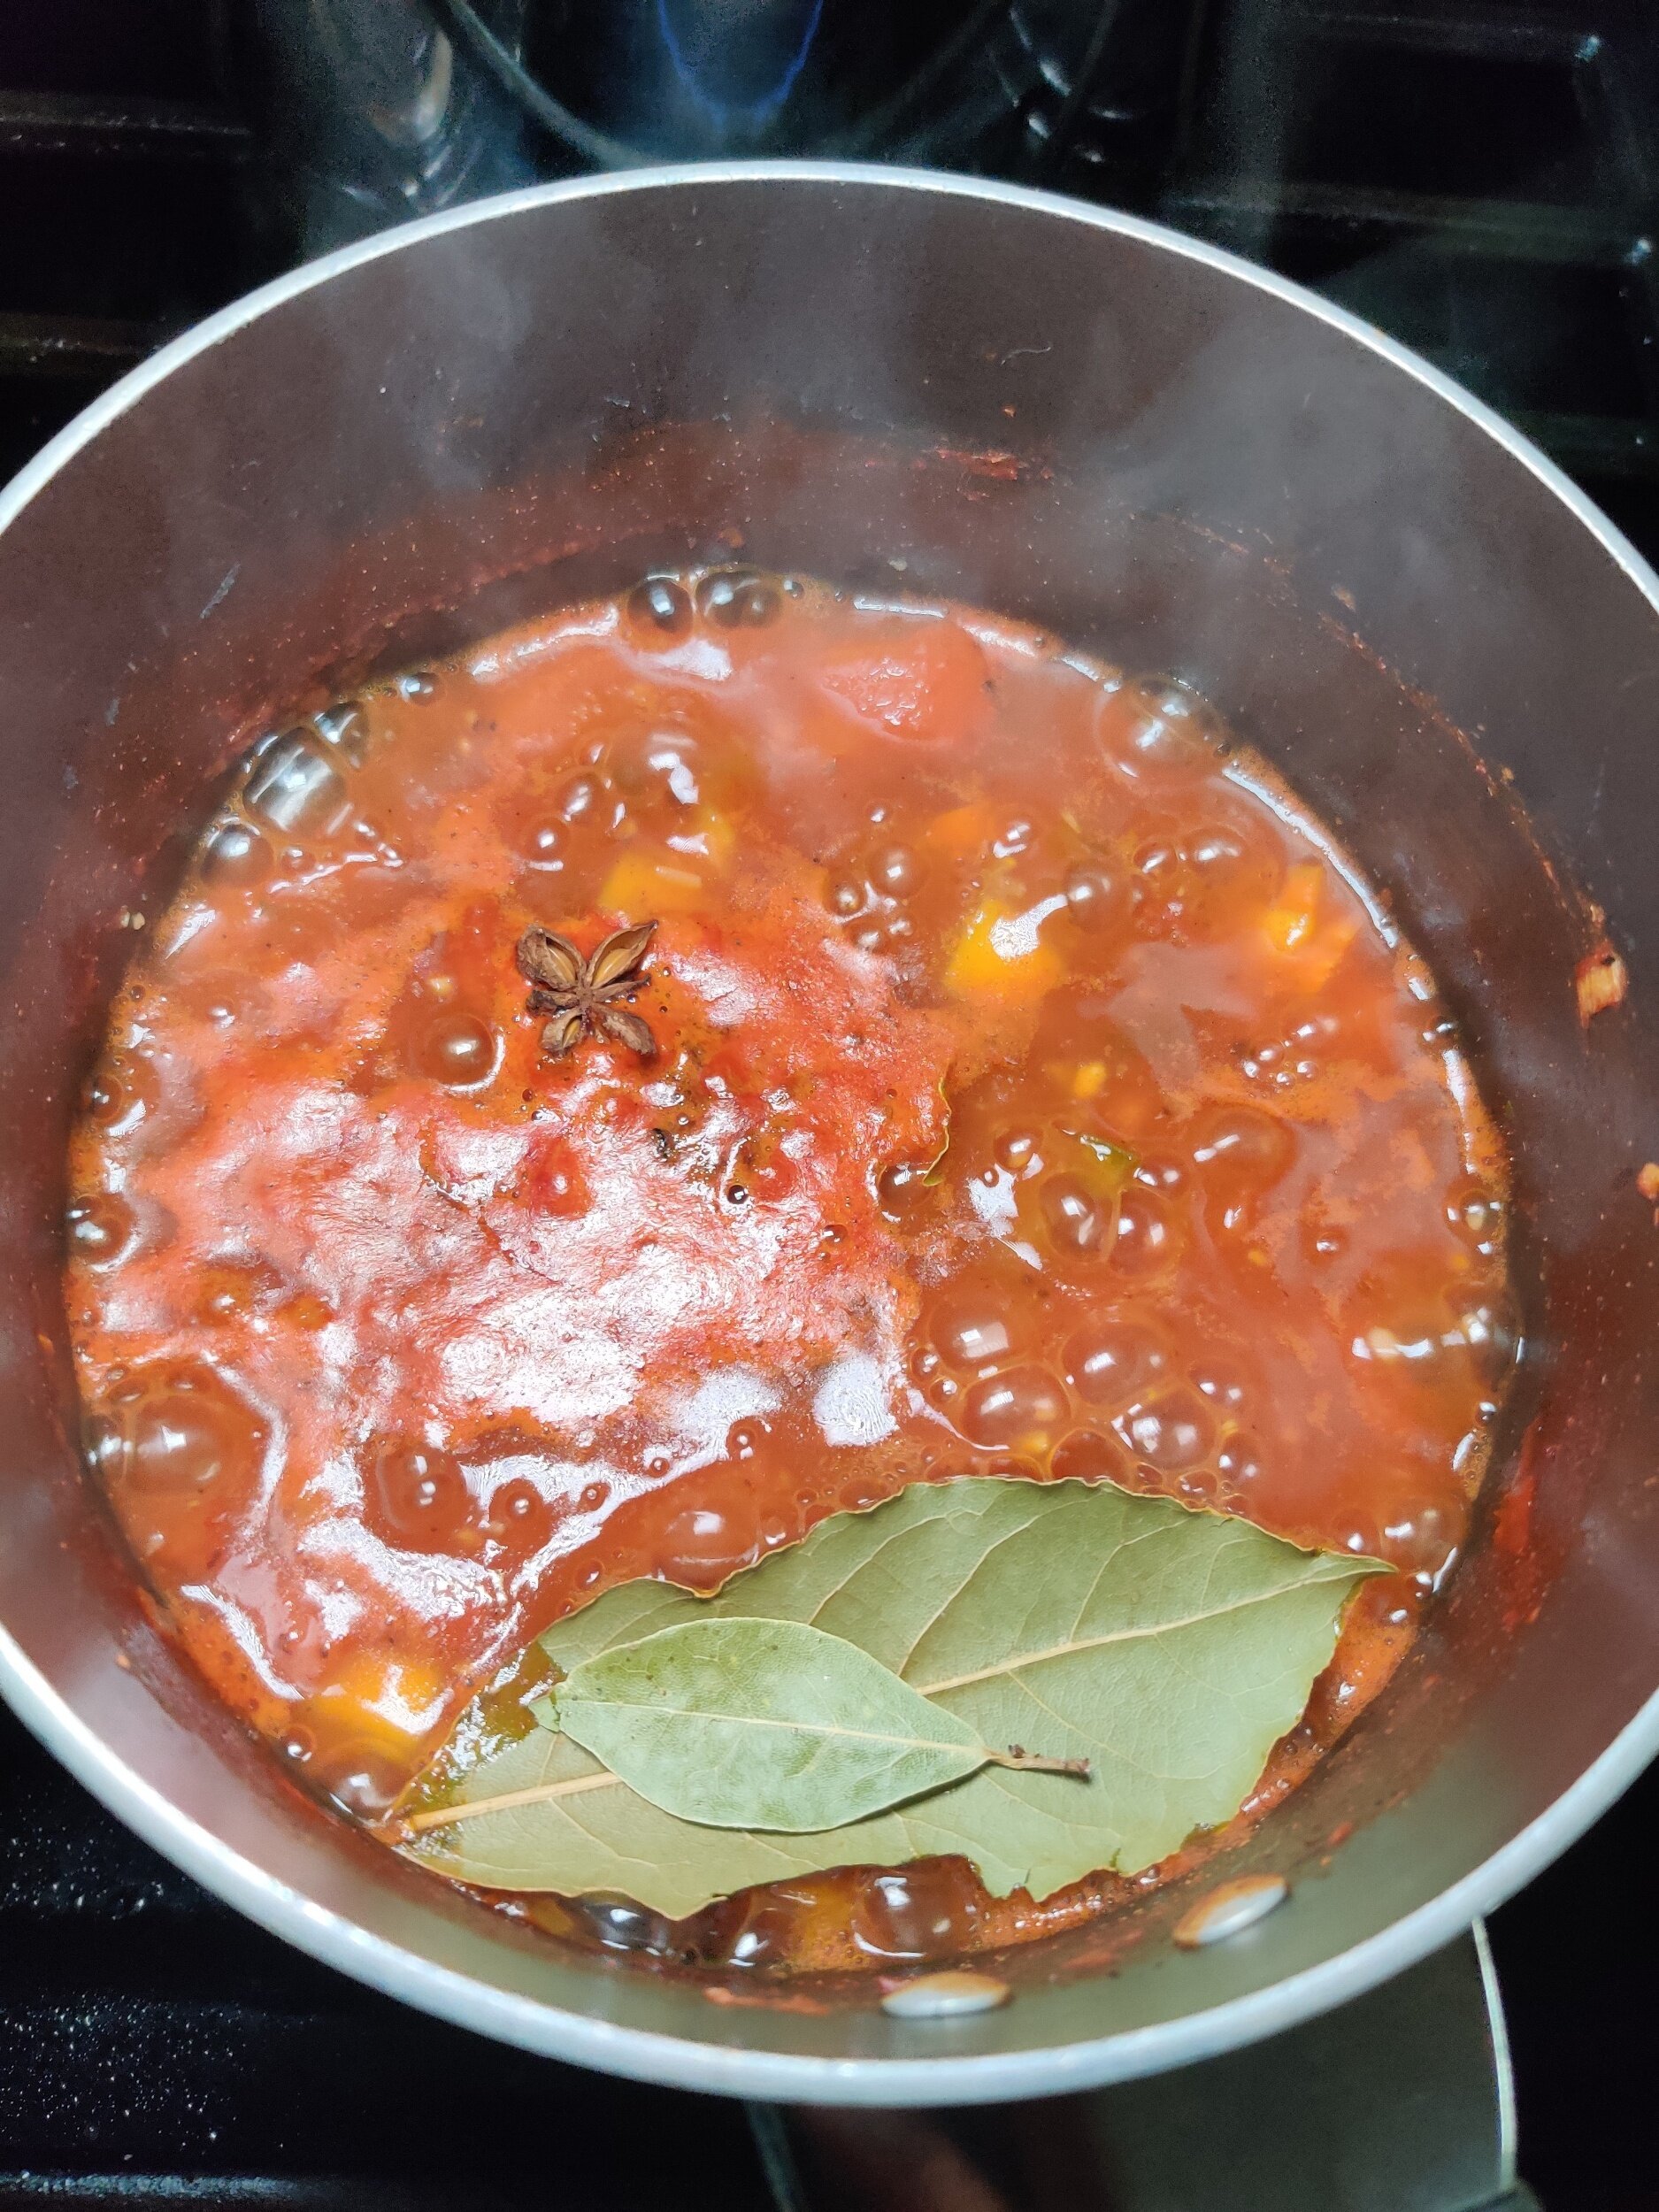
- Season the chicken with all-purpose chicken spice, then brown it in a Dutch oven or non-stick pan over medium to medium-high heat. Once browned, remove the chicken and set it aside.
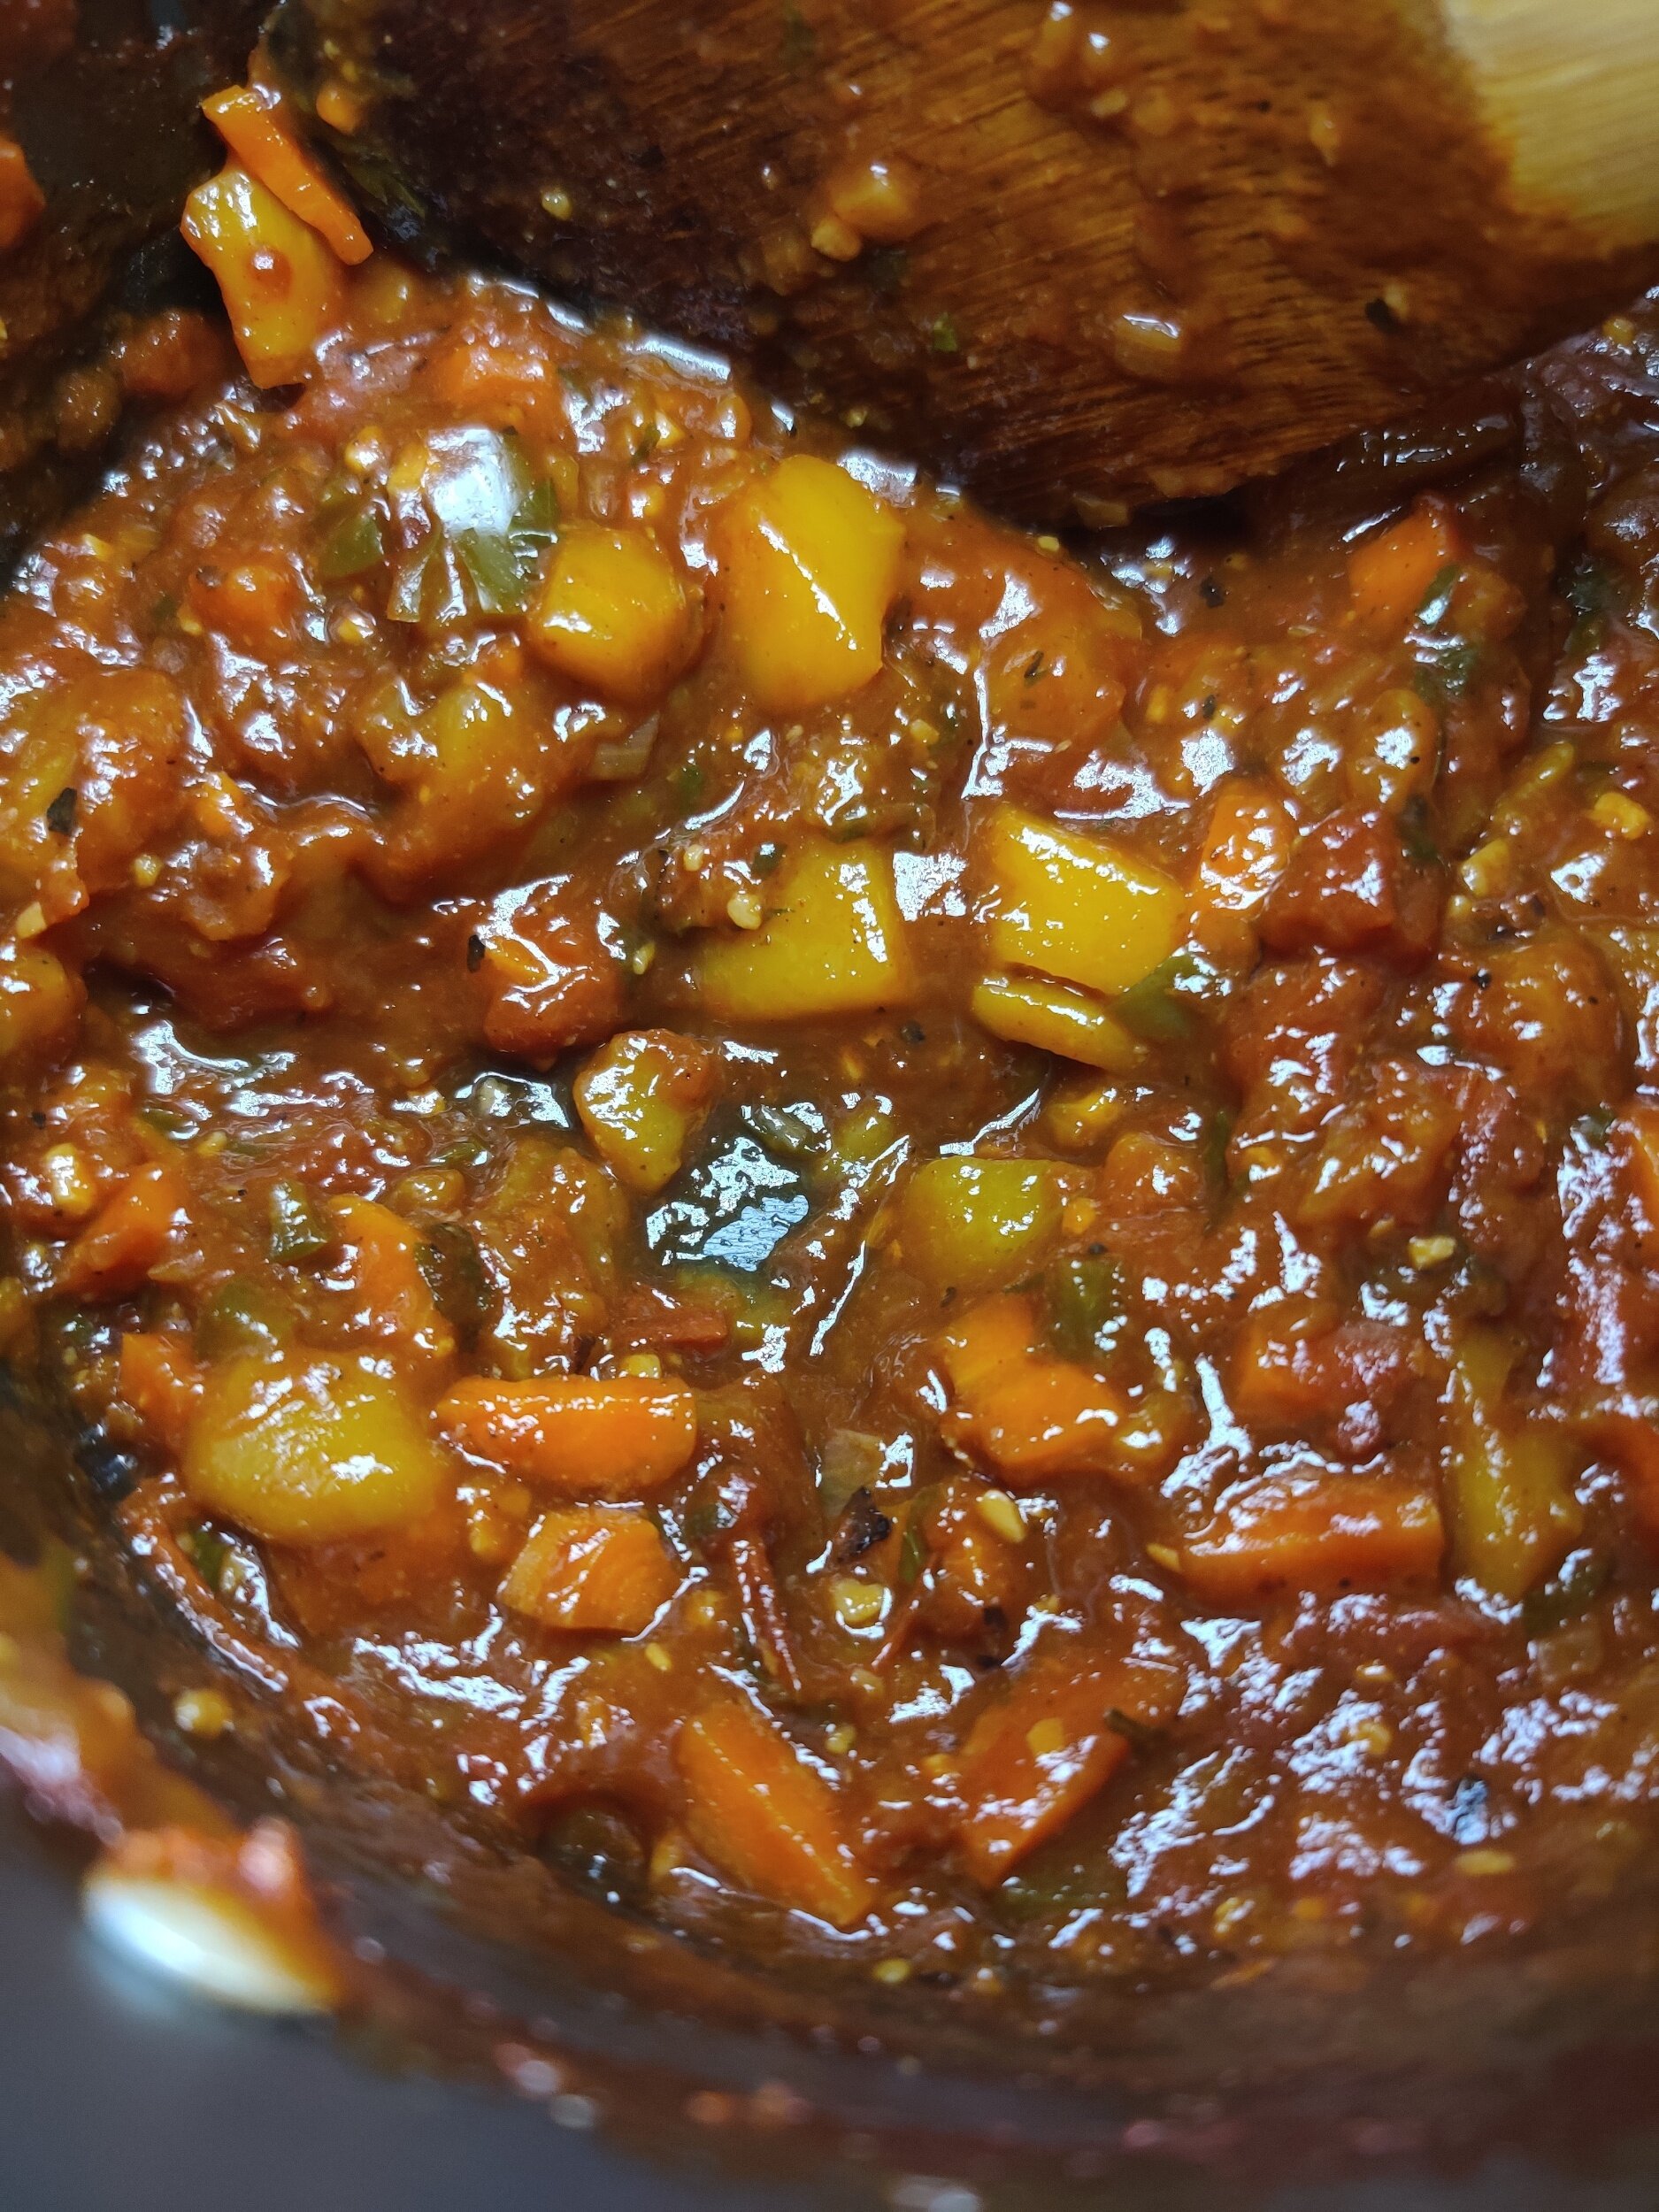
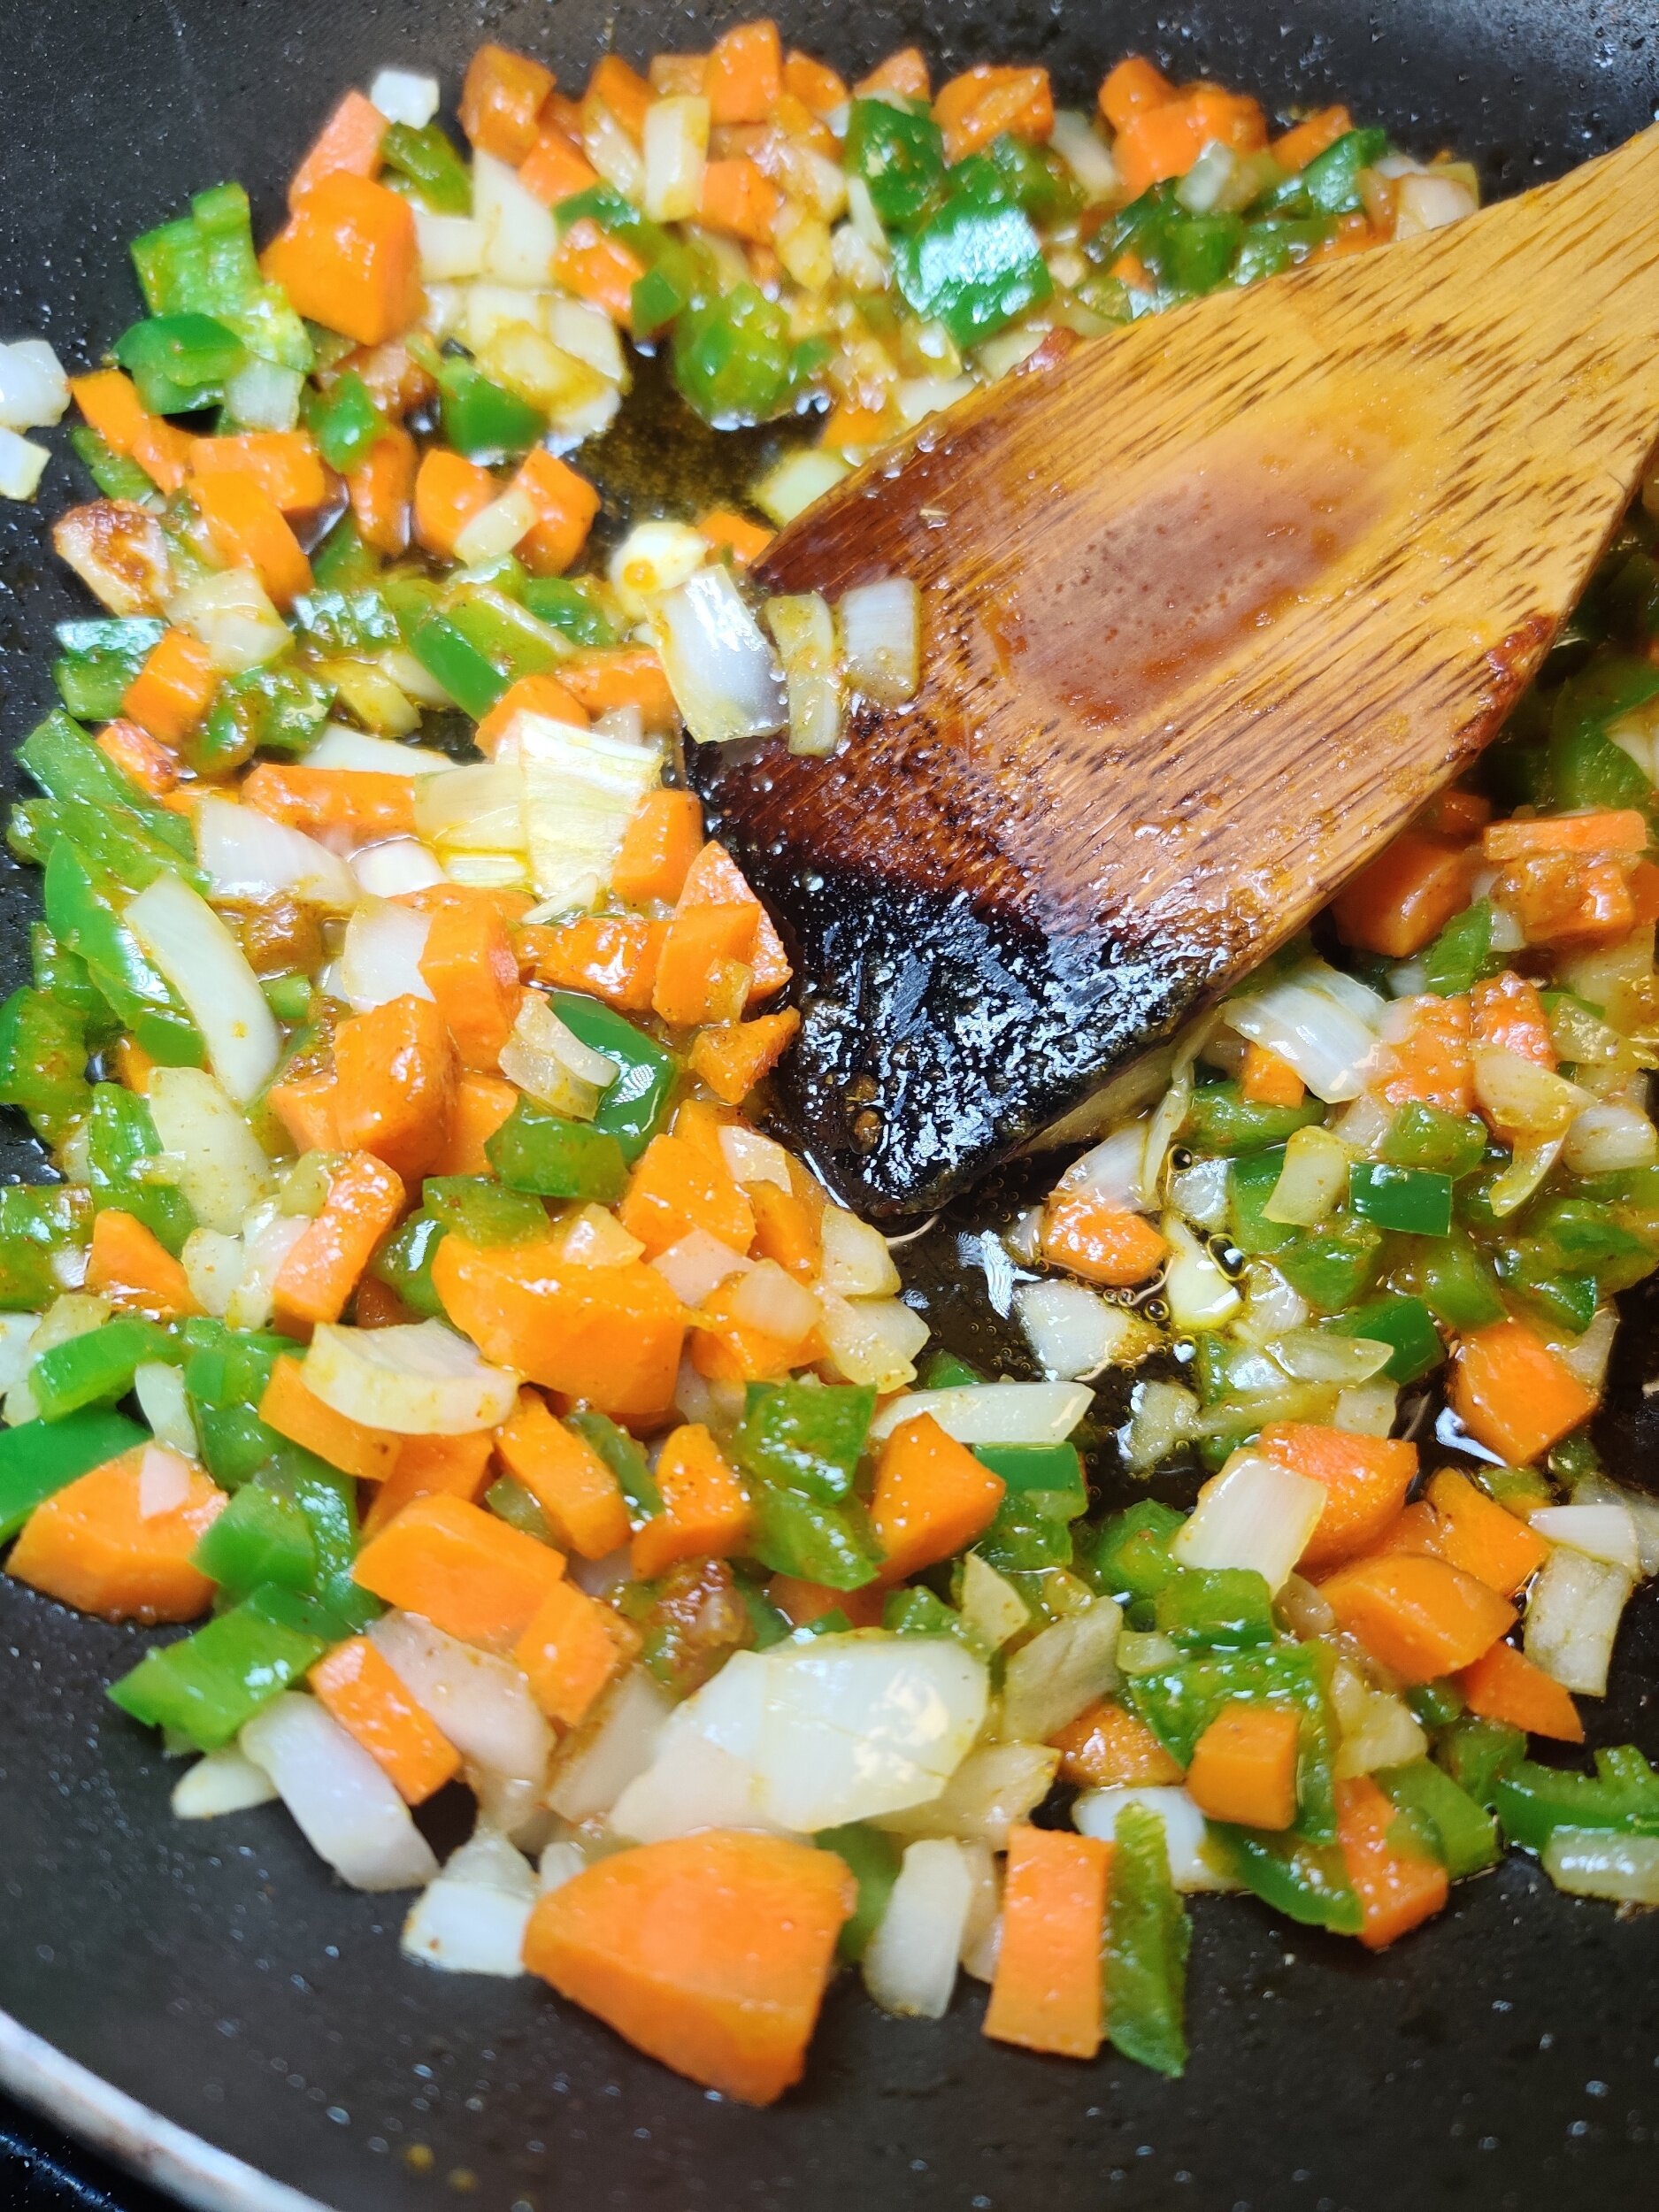
- In the same pot, add the remaining oil and butter. Stir in the mirepoix, onions, bouillon cubes, garlic powder, black pepper, paprika, and Royco Usavi Mix. Sauté for 2-3 minutes until caramelized. Deglaze the pot with the wine, scraping up any browned bits to incorporate all the flavors.
- Next, add the tomatoes, peppers, chili peppers, cumin, ginger, and coriander. Cook for 1-2 minutes to allow the spices to bloom and the vegetables to soften.
- Return the chicken to the pot and pour in the water. Add more water if you prefer a thinner stew or soup-like consistency. Ensure as much of the chicken as possible is submerged to help it cook evenly. Simmer on low heat for 15-20 minutes.
- In a small bowl, mix the peanut butter with some of the hot stew liquid to thin it out. Stir in the tomato paste, then add the mixture to the pot, ensuring it is evenly distributed.
- Add the bay leaves and continue simmering for another 15-20 minutes.
- Optional: After 5-10 minutes, if you don’t want the chicken to fall off the bone, you can remove it and let the stew continue cooking separately to allow the flavors to come together.
- To thicken the sauce: Remove the chicken, then mix 2 tablespoons of cornstarch or flour with hot liquid from the pot to create a smooth slurry. Stir the slurry back into the pot, mixing well to activate the thickening. Continue cooking until the desired consistency is achieved.
- Season to taste, return the chicken to the pot, and serve hot with yellow rice or your preferred starch.
Nutrition Facts
Calories
438Fat (grams)
20.3 gSat. Fat (grams)
4.8 gCarbs (grams)
62.1 gFiber (grams)
18.5 gProtein (grams)
15.6 gI am not a certified nutritionist and any nutritional information on dontmissmyplate.com should only be used as a general guideline.

Baked Snapper with a Quick African Pepper Sauce
At least in its authentic glory, African pepper sauce is commonly served as a condiment, dip or cooking sauce to pair with grilled meats and vegetables or used in stews, giving your dish a perfect balance of heat and depth of flavour. It's most popular in West Africa, but you see other versions of this with other peppers taking centre stage across the Continent. The combination of peppers, herbs, and spices can enhance or top off almost any dish, and it is extremely versatile. I pick this over conventional hot sauce any day because it uses fresh vegetables, and you can make batches to freeze for future use.
This version provides a quick, easy and convenient way to add flavour to your fish. I used red snapper in this recipe, but you can also use halibut, sea bass, bream, tilapia, or any fish with a mild taste that will absorb all the flavours. For the pepper sauce, instead of cooking down and frying the blended vegetables on the stovetop as is typically done, I roasted the vegetables to bring the flavours out before blending them, then used the pepper mix to coat the fish while it baked.
One great thing about this sauce is that you can tailor it to your tastes and tolerance by adding more or fewer tomatoes and peppers. You can also remove the seeds from the hot peppers to take the heat down a notch. I prefer habanero peppers in terms of the heat and flavour, but you can use a range of peppers, from jalapenos to scotch bonnet. In any case, I recommend using the freshest ingredients possible. In addition, especially since peppers are part of the Dirty Dozen, try using organic peppers if you can afford them.

Baked Red Snapper with Quick African Pepper Sauce

Ingredients
- 1 large red snapper
- 1 tablespoon garlic powder
- 2-3 garlic cloves
- 2 lemon slices (optional)
- 1 sprig fresh thyme
- 1 sprig fresh parsley
- 2 teaspoons salt
- 2 teaspoons black pepper
- 2 teaspoon Royco Usavi Mix (optional)
- 2 teaspoons oregano
- 2 teaspoons basil
- 1/2 cup olive oil, and extra for roasting the peppers
- 1 teaspoon salt
- 1/2 teaspoon black pepper
- 1 chicken bouillon cube
- 1/4 cup parsley, stems removed
- 5 large basil leaves
- 1/3 large yellow onion
- 3-4 mini sweet peppers
- 2 small habanero peppers
- 1 1/2 - 2 Roma tomatoes
- 1 inch piece fresh ginger
- Salt and pepper to taste
Instructions
- Place your peppers, onion, tomato, and garlic on a baking sheet with parchment paper—season with salt and pepper to taste.
- Roast the vegetables for 25 minutes at 400F or until roasted to your desired doneness.
- Remove from the oven and allow to cool for 15 minutes, then transfer to a food processor or blender. Add the ginger, parsley, basil, bouillon cube, salt, and pepper. Blend until combined, and a paste forms. Add the olive oil during this process to help smoothen the mixture.
- Set aside while you prepare the fish.
- Make sure your fish is clean, and then pat it dry with paper towels. Add the salt, pepper, garlic, herbs, and optional Royco/all-purpose seasoning.
- Stuff the inside of the fish with the thyme, parsley, lemon and garlic.
- Place the fish inside some foil and place it on a baking tray. Spoon the pepper sauce over both sides of the fish, ensuring it is fully coated.
- Place the fish in the oven and bake at 350F for 30 minutes. After 15-20 minutes, remove the fish, open the foil (without burning yourself with the hot air) and baste the sauce over the fish.
- Leave the foil open and allow the cause to continue cooking. This will help thicken and caramelize the sauce, developing the flavours further.
- Remove from the oven and spoon some sauce into the serving dish, placing the fish on top and adding the rest of the sauce on top. Garnish with fresh parsley and serve!
Notes
- To avoid overcooking the fish, check the internal temperature after 15-20 minutes and use that to determine how much more time you need.
- If you want a thicker sauce, you can place it on the stovetop before covering the fish with it and baking.
- If you get fresh fish from the market, ensure it is cleaned and descaled.
Nutrition Facts
Calories
237Fat (grams)
13.3 gSat. Fat (grams)
1.9 gCarbs (grams)
24.9 gFiber (grams)
6 gProtein (grams)
10.9 gI am not a certified nutritionist and any nutritional information on dontmissmyplate.com should only be used as a general guideline.

Creamy Coconut Cornbread Ice Cream (No Churn)
Who isn't down for eating ice cream regardless of the season? As Summer ends and makes way for the Fall, flavours change, and various fruits and vegetables will take the stage, from pumpkins and sweet potatoes to corn and apples, pears and figs. When people think about corn (or maize, or mealie cobs), ice cream probably doesn't come to mind--although some of the more experimental producers, companies like Van Leeuwen and Jeni's may have made that the case.
But what if you want to make some corn ice cream in your own at home? Better yet, still decadent, possibly dairy-free, and without an ice cream maker.
Be sure to explore the website for other sweet recipes, the no churn ice cream recipes listed below which you can use with dairy or alterative milk products to make.
Nature's Charm produces two main ingredients (linked below) you need for your ice cream base - whipped cream (to help add air to the mixture, especially since you won't be getting the smooth, light texture that typically comes from the churning motion of an ice cream maker) and condensed milk (which supplies the sugar and fat content). I am a fan of their quality, organic products and recommend trying them. They even make condensed oat milk! Even if you don't have specific dietary requirements and restrictions, check out some of my favourite gluten-free and vegan baking items here.
If you are in need of some quality loaf pans, for ice cream, bread, or whatever else, try these!

These Nordic Ware Aluminum Loaf Pans (Set of 2) , 1.5-pound pans can do it all—and then some with oven-safe aplomb. They’re made of pure cast aluminum reinforced with steel, so they’ll heat up in a flash and bake extra-evenly time after time. Even more: They’ve got galvanized steel rims to prevent warping, and they’ll never rust either.
Have you ever used coconut milk products as your base?
How to Make Non-Dairy No-Churn Ice Cream
This website has several recipes that do not require an ice cream maker. There is no need to purchase an overpriced machine; you have total control over what goes into your easy, homemade sweet treat.
As previously noted, an integral part of making ice cream is the churning process or adding air into the mixture, which you can achieve using a hand mixer (in addition to the whipped cream). There is also no need for eggs or to cook the main ingredients. You can substitute the coconut products with another alternative or dairy milk with this recipe. One thing to note is that using products with less fat or sugar could impact the creaminess factor and how hard the ice cream turns out. This is because fat doesn't freeze, and sugar helps keep ice cream softer in texture (by preventing some of the water from turning into ice, but it works both ways, so there's no need to overdo it!)
You can substitute the coconut products with another alternative or dairy milk with this recipe.
Why is My No Churn Ice Cream hard?
Yep, I had asked myself this question before and even tried homemade ice cream recipes a few times before getting it right, especially when switching to low-fat and reduced-sugar products. The main potential drawback or challenge with no-churn ice cream is the consistency and texture not meeting expectations. You will likely need to leave it out longer once it is frozen.
Be sure to do two things during the process:
Mix your ingredients well, but don't beat to the point of separating or depleting your whipped cream.
Make sure the container is airtight when you freeze the ice cream.
These are not the only factors; for example, cling wrap helps prevent water particles from crystalizing on top of the ice cream. You can add alcohol to the base mixture, which does not freeze, ensuring you whip your cream adequately. There are also natural additives known as 'stabilizers' like guar gum or thickeners like tapioca flour (used in gelato), and keeping all your ingredients and the freezer cold!
")
Creamy Coconut Cornbread Ice Cream (No Churn)
Ingredients
- 1 can (14-ounces) coconut condensed milk
- 1 can (15-ounces) coconut whipped cream
- 1 can (8.5-ounces) creamed corn
- 1 box gluten-free cornbread (I used Bob's Red Mill Mix)
- 1 tablespoon pure vanilla extract or paste
- 1 teaspoon lemon juice
- 1/2 teaspoon lemon zest
- 1/2 teaspoon salt
- Pinch of cinnamon
Instructions
- Follow the instructions for the cornbread premix: bake, cool and crumble the desired amount into pieces, set aside.
- Combine the condensed milk, creamed corn, and vanilla, whisking until well incorporated in a large bowl.
- Add the (chilled overnight) whipped coconut cream to another separate bowl and beat for about three minutes on high speed and/or until stiff peaks form. Watch for curdling or separation in the coconut mix; you will want to mix sparingly, or else the ice cream may have an undesirable texture.
- Using a large spoon or whisk, fold the whipped cream into the corn mixture, starting with two or three initial portions--this will help ensure you don't deflate the whipped air.
- Fold in the crumbled cornbread pieces, then pour the mixture into a loaf pan or ice cream container. You can also swirl in any extra creamed corn and condensed milk mixture.
- Cover with cling film, laying it directly on the ice cream's surface, then place in the freezer overnight or for at least four hours.
- When ready to serve, leave the ice cream at room temperature for about 10 minutes, then enjoy it in cups or cones!
I am not a certified nutritionist and any nutritional information on dontmissmyplate.com should only be used as a general guideline.

Sweet Potato and Gingersnap Ice Cream (No-Churn)
Not much screams post-New Year season like gingersnap and sweet potato, at least for this recipe. Those flavours stay with many of us even after the holidays, and with good reason.
When it comes to gingernut - or gingersnap or gingerbread, whatever you want to call it - I love the warm and fuzzy feeling I get from the cinnamon, cloves, brown sugar and molasses medley. It's unparalleled, especially when paired with anything creamy.
I also can't help but love vegetables like sweet potato that can be used for both savoury and sweet dishes; they are highly versatile and have great nutritional value.
No-churn ice cream is a favourite treat of mine, reflected on the website. Recommend you try some of the other recipes as well, including:
How to make homemade ice cream?
Making ice cream at home is not as intimidating as some may believe. It's easy, quick, and perfect for customizing. Sure, without an ice cream maker, it won't come out as smooth and refined, but if you do it right, it will be delicious and creamy, with textures and flavours you can have fun with. If you have a family, make it a contest to see who can make the best-tasting version!
")
Sweet Potato and Gingernut Ice Cream (No-Churn)
Ingredients
- 1 cup (organic) sweet potato puree
- 2 tablespoons butter
- 1 teaspoon molasses
- 1 teaspoon ground cinnamon
- 1 teaspoon brown sugar
- Pinch of ground cloves
- 1/4 teaspoon ground nutmeg
- Pinch of ground ginger
- 1/2 cup gingernut biscuits
- 1 teaspoon vanilla extract
- Pinch of salt
- 2 cups heavy cream
- 1 (14-ounce) condensed milk
Instructions
- In a saucepan over medium-low heat, melt the butter and cook for 1-2 minutes. Add the spices and cook for another minute.
- Add the sweet potato, sugar, and molasses. Heat and stir for another 2-3 minutes until all the ingredients are well mixed.
- Pour the heavy cream into a large bowl, and whisk using an electric hand mixer on medium-high speed until soft peaks form, for about 4-5 minutes.
- Fold in the condensed milk and then beat until stiff peaks form and the mixture thickens with creamy folds.
- Break up the gingernut biscuits and pulse them in a blender or food processor to desired consistency. Mix into the heavy cream bowl along with the cooled sweet potato mixture, leaving some of each for topping —you can swirl with a fork once transferred to a bread loaf tin or ice cream container.
- Seal and cover the ice cream with cling wrap and freeze for at least 6 hours or overnight.
- Serve immediately once softened.
Nutrition Facts
Calories
406Fat (grams)
19.2Carbs (grams)
54.1Protein (grams)
6.4I am not a certified nutritionist and any nutritional information on dontmissmyplate.com should only be used as a general guideline.

Guava Glazed Wings with Air Fryer Sweet Potato Fries
Wings are the perfect snack. They are not heavy; they are both sweet and salty, satisfying most people's taste buds. You can customize the flavour profile via seasoning rub, marinade or sauce to toss in after cooking.
How long should chicken wings cook?
Instead of deep-frying, you can bake wings twice to get the ultimate texture without drying them out. You can put them in the oven with the glaze, but I've found that since this is typically high in sugar, your coating will burn before the wings are cooked through and crisp! Once seasoned, bake for 25 minutes at 425F. Flip them over, then cook at 375F for 15-20 minutes until golden caramelized and crispy.
What do guavas taste like?
Growing up in Zimbabwe, I was fortunate enough to have a guava tree in the garden. Although this fruit is not native to southern Africa, it's now a commonly consumed fruit, enjoyed in the form of juice or eaten as is. Guavas can be hard to come by in the US, but you can typically find the juice, nectar or paste in many grocery stores, which can be reduced to a glaze with honey and soy sauce over the stovetop. I wanted to bring this tropical flavour to life and leverage the sweetness and acidity. To that end, what does guava taste like? I would say a combination of melon and pear, but that depends on your taste buds! Either way, they are delicious.

Guava Glazed Wings with Air Fryer Sweet Potato Fries
Ingredients
- 2 lbs. organic chicken wings
- 1/4 cup canola oil
- 1/4 cup spice for rice
- 4 tablespoons paprika
- 1 tablespoon sesame seeds
- 1 tablespoon dried or fresh parsley
- 2 cans (9.6 ounces) guava nectar
- 2 tablespoons soy sauce
- 1/4 cup honey
- 2 large sweet potatoes
- 2 tablespoons canola oil
- 1 tablespoon dried rosemary
- 2 tablespoons Old Bay seasoning
- 1 tablespoon smoked paprika
- 1 tablespoon cornstarch
- Cooking oil spray
Instructions
- In a large bowl, add the oil and seasoning. Add the chicken and toss; sit for 10-15 minutes. Transfer to a parchment-lined baking tray and bake at 425F for 25 minutes. Don't pile the wings on top of each other! Turn over each wing, and reduce the heat to 350F. Bake again for 15-20 minutes until caramelised and golden.
- While the wings cook, add the nectar to a nonstick saucepan and bring to a boil. Reduce heat to low, then add the honey and soy sauce and simmer, frequently stirring, until it thickens.
- Peel and cut the sweet potatoes into thin rectangular shapes (your choice depending on how you like your fries).
- Toss the sweet potatoes in the cornstarch until evenly coated in another bowl. Drizzle with the oil and toss until evenly coated, then season.
- Line the air fryer with foil, then add the sweet potatoes to the air fryer. Spray with the cooking oil, then cook at 400F for 7 minutes. Toss, then cook for another 7 minutes or until crispy. If you need to, cook the fries in batches.
- Once the wings are done, toss in the guava sauce. Serve hot with the fries and extra sauce, garnish with sesame seeds and parsley.
Nutrition Facts
Calories
592Fat (grams)
25.8Carbs (grams)
44Sugar (grams)
20.6Protein (grams)
48.3I am not a certified nutritionist and any nutritional information on dontmissmyplate.com should only be used as a general guideline.


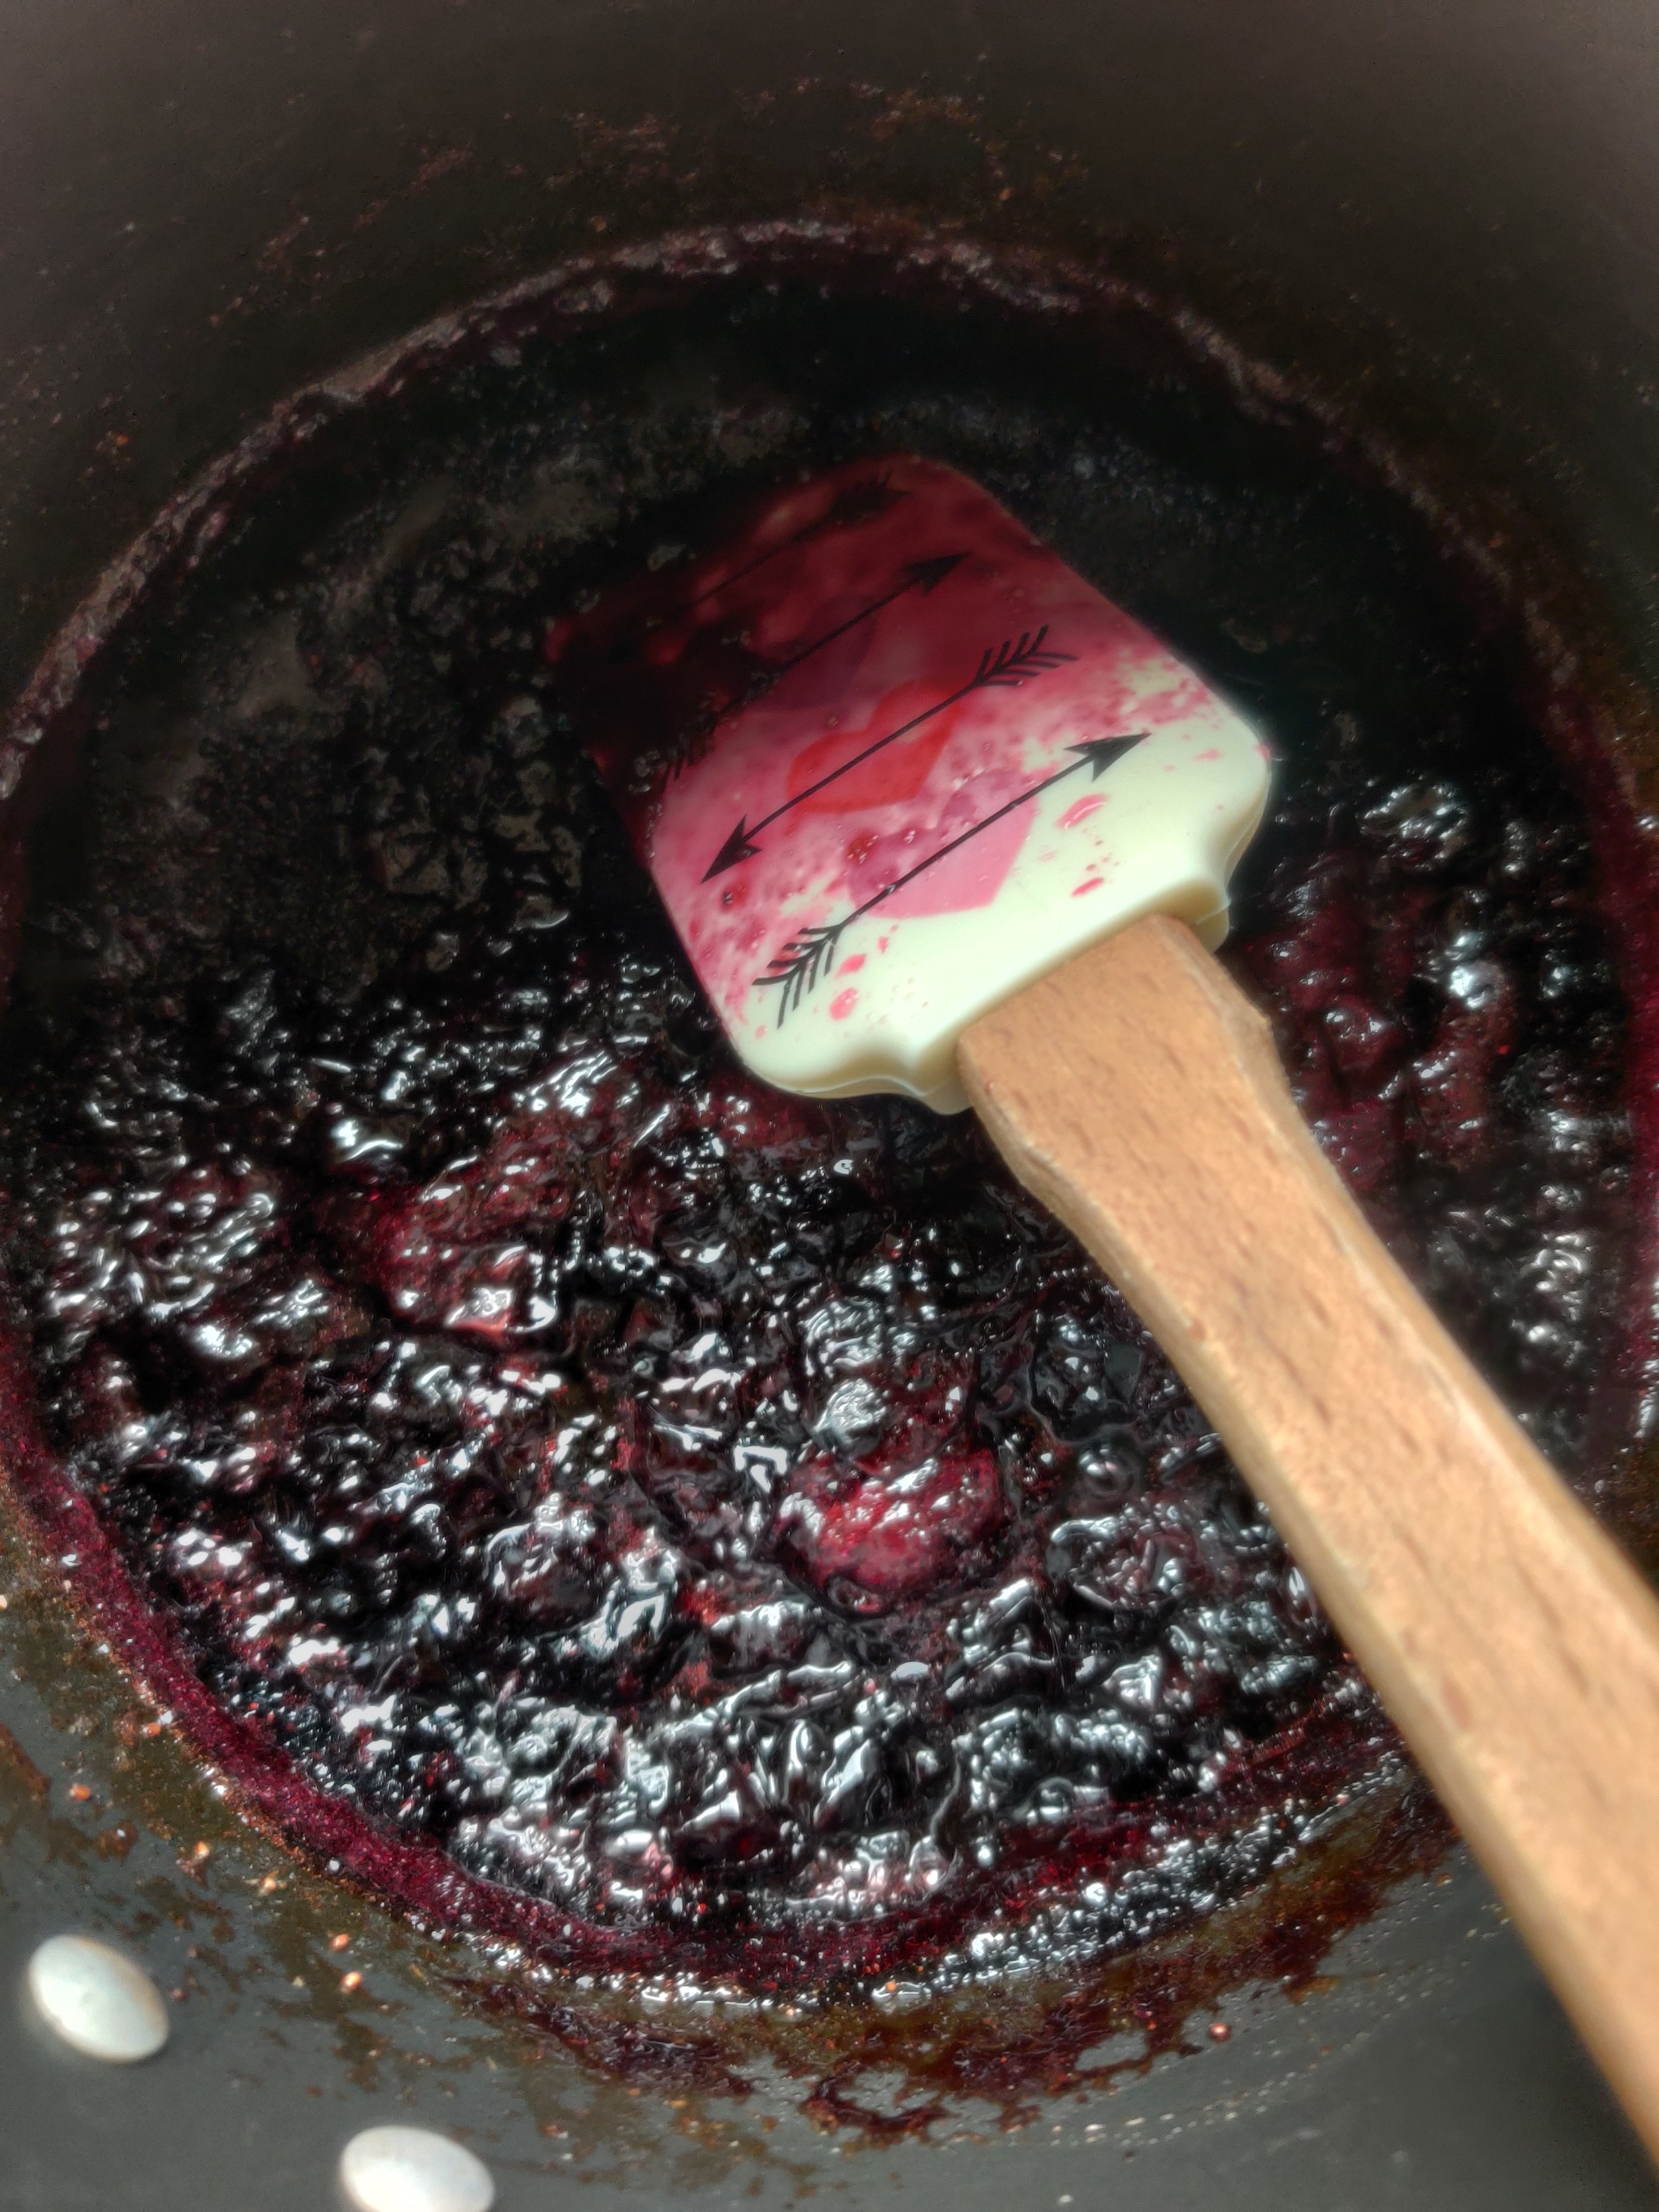
Coconut and Blueberry No-Churn Ice Cream
Springtime (or summer), Easter, whatever the occasion, do you need any excuse to have some ice cream? Better yet, homemade when you know what ingredients go into it. When blueberries are in season, there is no excuse not to use them! As it turns out, they also pair well with a refreshing flavour, lemon! The coconut adds another dimension. You don't need an ice cream maker to enjoy ice cream. If you are interested in some other ideas, check out this Bourbon Peach Crumble Ice Cream or this Double Chocolate Hazelnut and Aero Mint Ice Cream with Shortbread.
The thing about homemade anything is the quality of the ingredients will have a significant bearing on the result. In this case especially, with so few in the mix, that matters!
Blueberries: The fresher, the better! Try to get organic and free of pesticides or any other additives.
Sugar: If you can get a less refined product, try to get organic cane sugar. You'll get the right amount of sweetness without any unwanted extras.
Heavy cream: as with any dairy product, you'll want to go with a quality brand and the other organic ingredients.
Condensed milk: whether you choose to go with the coconut milk version of cow's milk, quality brand and organic!
How does no-churn ice cream work?
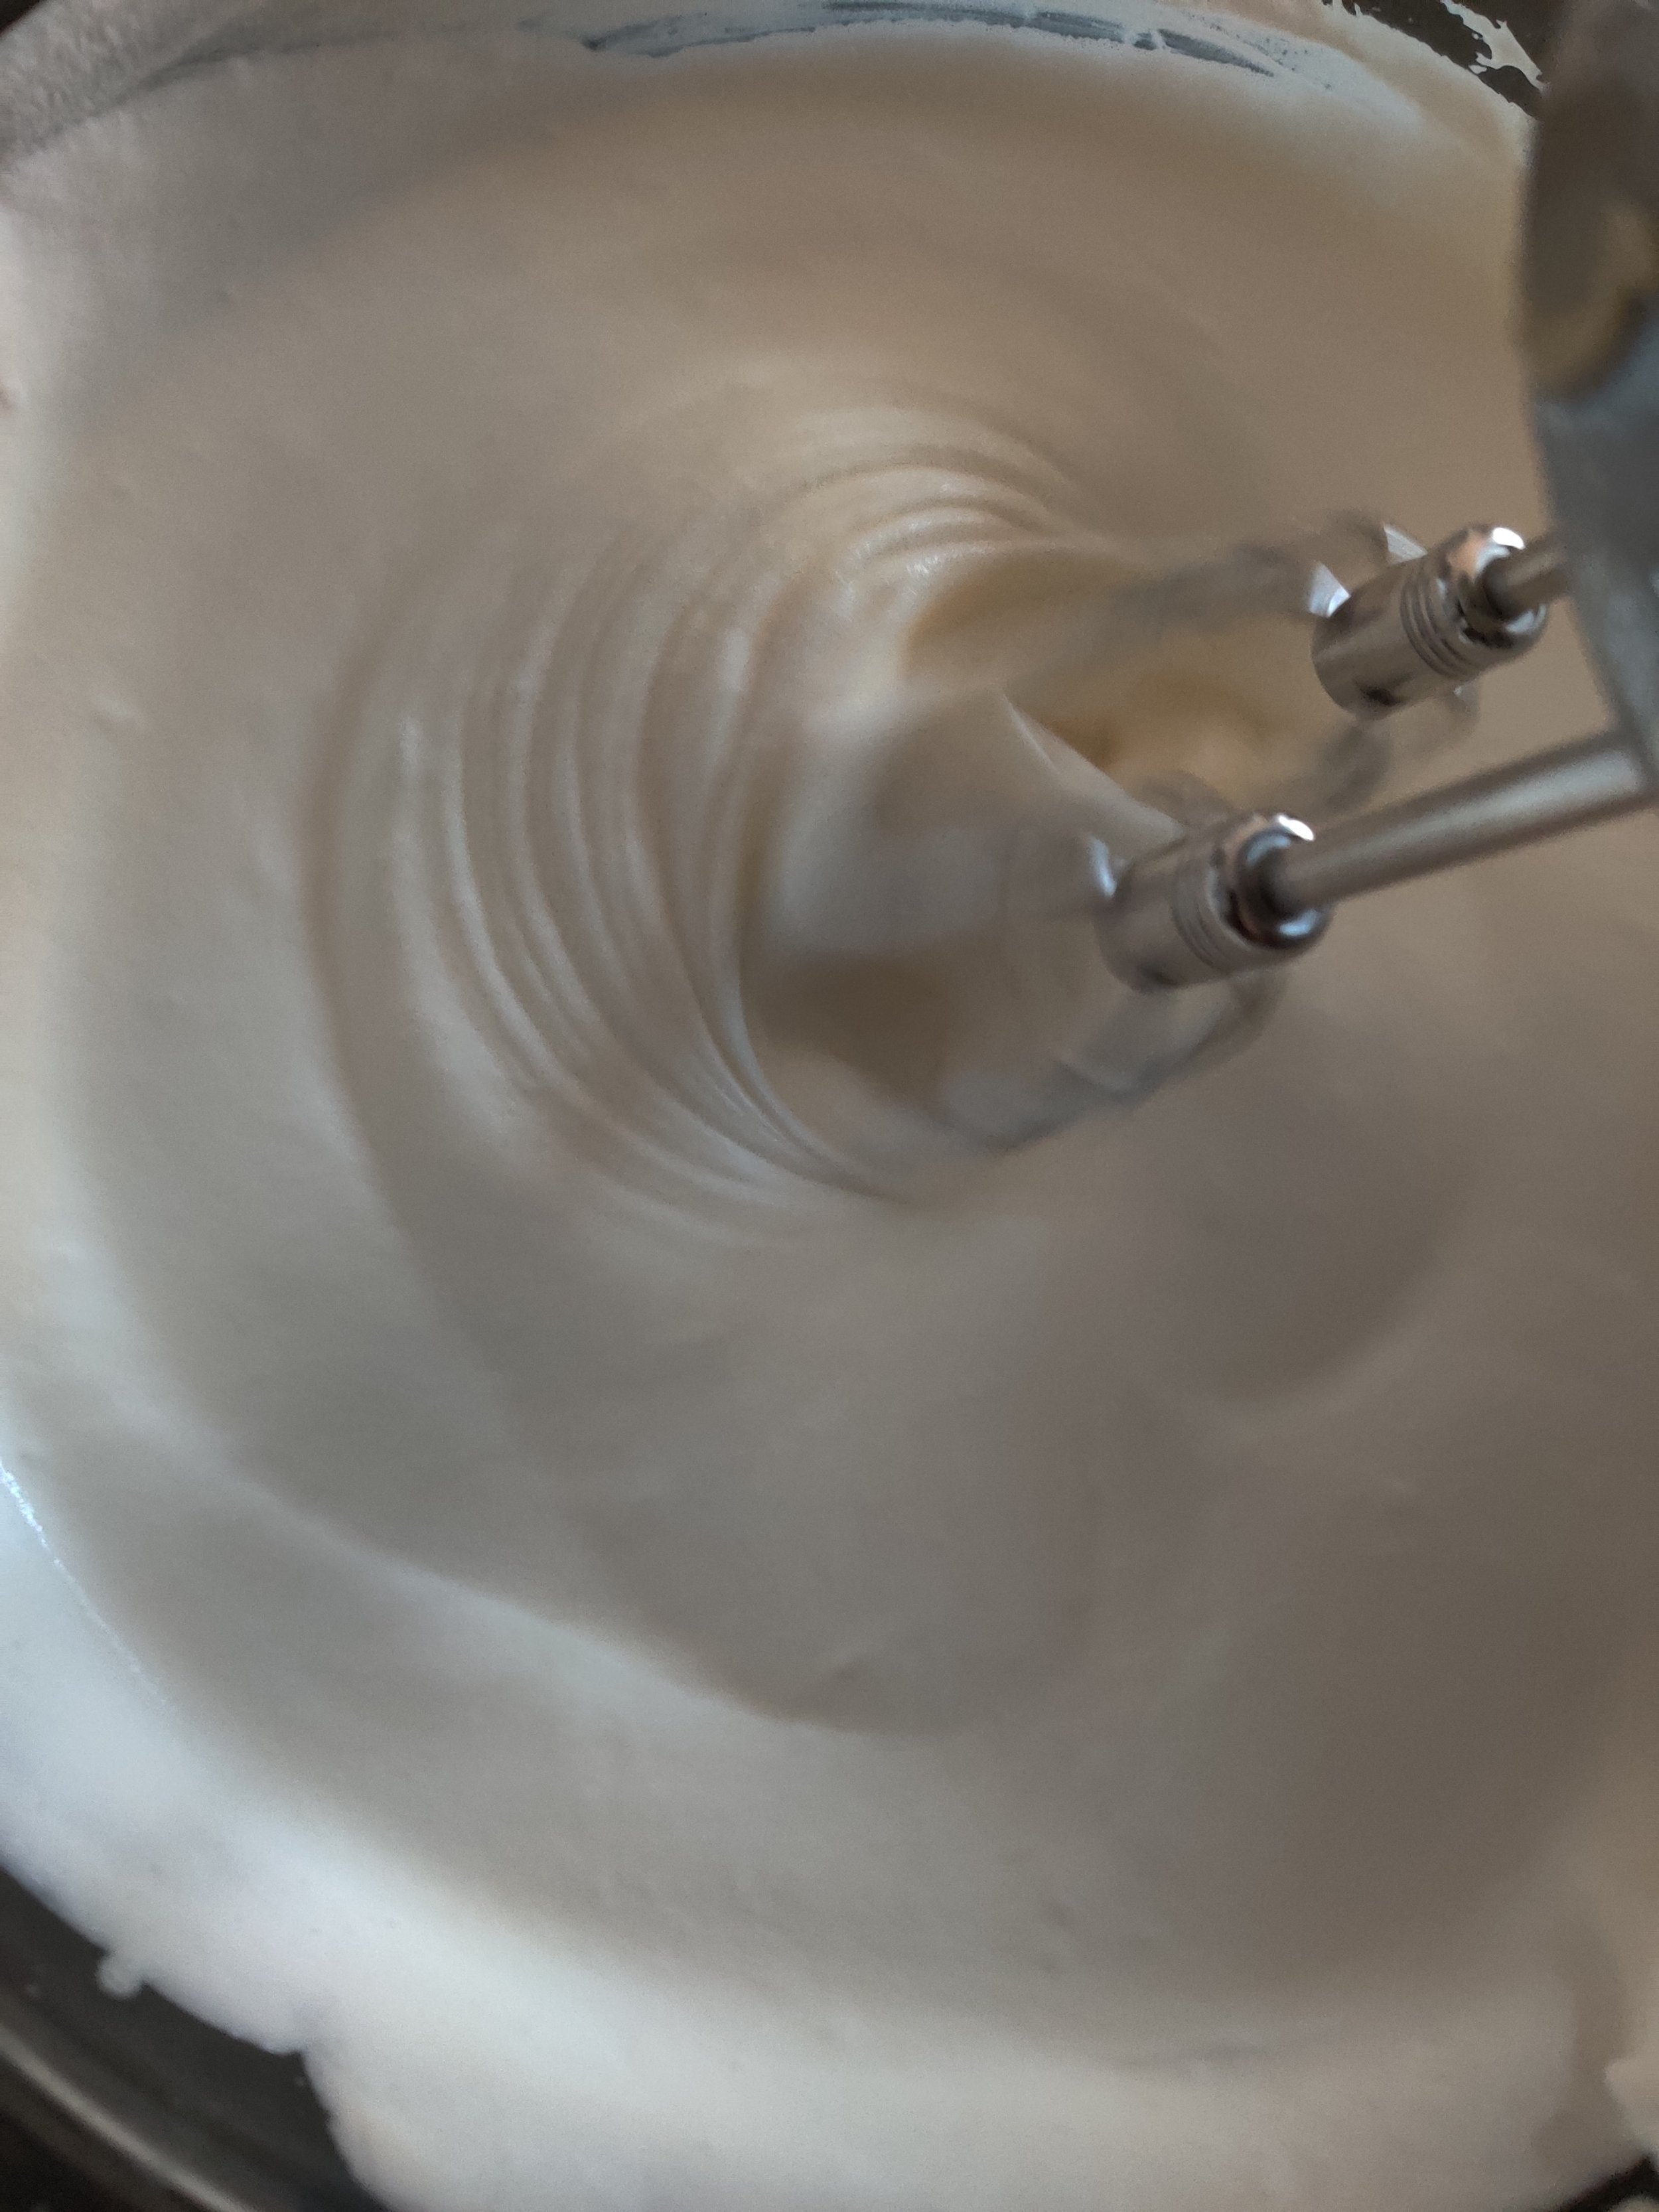
When I first learned about this process, I was excited about the possibilities. We don't all invest in an ice cream machine and can get super creative with flavours. Quite honestly, it may seem like a luxury in some cases. Hand mixer? You'll likely have one for soups, etc. The machine whips the cream into a light, airy consistency. You can achieve the same thing with an electric hand mixer. You whip the cream in two stages, first into light peaks, then heavy peaks. As for the addition of the condensed milk completes what you will end up with, known as the ice cream base.

Coconut and Blueberry No-Churn Ice Cream
Ingredients
- 2 cups fresh blueberries
- 1/3 cup organic granulated sugar
- 1 tablespoon lemon juice
- 1 teaspoon vanilla extract
- Pinch of salt
- 2 cups heavy cream
- 1 (14-ounce) coconut condensed milk
Instructions
- Heat the sugar and blueberries in a saucepan until the sugar melts over medium heat. Stir frequently, adding the lemon.
- Lower the heat and simmer, crushing with a spatula until the berries bubble into a thick sauce. Take care not to burn the mixture!
- In a large bowl, use a hand mixer to whisk the heavy cream until soft peaks form, about 4-5 minutes on medium to high speed.
- Add the condensed milk, fold in, and then beat with an electric mixer until stiff peaks form and the mixture looks thick with creamy folds.
- Mix 3/4 cups of the berries into the ice cream base, then pour into a loaf pan.
- Top with the remaining berries, then swirl with a fork. Cover the top with cling wrap and freeze for 6 hours or overnight.
- Leave out for 5 minutes, then serve.
Nutrition Facts
Calories
298Fat (grams)
13.6Carbs (grams)
40.7Sugar (grams)
38.8Protein (grams)
5I am not a certified nutritionist and any nutritional information on dontmissmyplate.com should only be used as a general guideline.


English Breakfast Toad-In-the-Hole
This is as British as you can get in the morning! English breakfast made regular features for me growing up, especially on Sundays before church service. Toad in the hole? Not so much, or ever! I certainly wish it had. Like a Dutch baby on the outside, you whip up some batter, add meat and/or vegetables in the middle and bake until a puffed batter forms, also known as Yorkshire pudding. If you are looking for some other brunch ideas for the spring (although this dish can be eaten any time of the year), check out these six recipes, including some blueberry and lemon curd French toast, quiche, Easter egg scones, and shakshuka.
Most renditions of the toad-in-the-hole use sausage, although leftover meat, kidneys, and rump steak were used back in the day. The Yorkshire pudding - a mixture of eggs, flour, and milk - was often served as a side with gravy, created when cooks used the drippings from roasting to make the crispy pastry. To make this an ultimate brunch version, I took the concept of the English breakfast - which also has several versions across the UK - and applied it, sans the black pudding, bacon and baked beans! The great thing is this recipe is customizable. The portobello mushrooms, tomato and sausage do the job.
Which sausages should you use for Toad-in-the-Hole?
I used Spicy Jalapeno Chicken Sausage from Alfresco, and the heat added some extra flavour and flair, although hot Italian sausage would be another great option. Chorizo would be tasty, and give it a Spanish spin. Pork, vegan, and turkey sausages would work as well. You'll want to make sure you cook the sausage to the appropriate internal temperature. This will also allow you to crispen the skin before popping the 'toads' into the oven!
Why is it called 'Toad-in-the-Hole?
That's always a great question! Many British have interesting names, like Bangers and Mash and Bubble and Squeak. The origins aren't specific, but it's obvious someone was inspired by toads playing a peek-a-boo game, given the appearance. Interestingly enough, however, some people found the dish to be a little vulgar! Whatever the perceptions and origin, this is a fun dish you can surprise your family and guests at the morning feast.


English Breakfast Toad-In-the-Hole
Ingredients
- 3-4 chicken sausages, precooked
- 1/2 cup flour
- 2 eggs
- 1 teaspoon salt
- 1 teaspoon all-purpose seasoning
- 1/3 cup milk
- 3-4 Portobello mushrooms
- 4 tablespoons broth
- 1 small bunch of tomatoes on a vine
- 1/4 cup spring onions or chives
- 1/2 cup onion gravy
- Salt and pepper
Instructions
- In a large bowl sift the flour. Make a well then add the eggs beaten in a separate bowl first. Whisk while gradually adding the milk until smooth, add the seasoning and teaspoon of salt. Rest covered in the fridge to keep cool.
- Turn oven on to 400F.
- In a large nonstick pan, saute the mushroom, sausage, and tomatoes in olive oil for 3-4 minutes. Season with salt and pepper. Flip the sausages over until the outside is crisp, and remove the tomatoes as soon as they have a light char. Leave the mushrooms in the pan until they begin to soften, add the broth and close the lid for 2-3 minutes.
- Spray a baking pan and place the sausage, tomato and mushrooms. Pour the batter around the ingredients, try to avoid pouring on top.
- Immediately place in the oven and bake for 25 minutes until the batter has puffed. If you want to get the top extra crispy, broil for 1-2 minutes, keeping a close eye.
- Remove from heat, sprinkle with green onions and serve with a side of gravy.
Nutrition Facts
Calories
453Fat (grams)
16.3Carbs (grams)
39Protein (grams)
40.2I am not a certified nutritionist and any nutritional information on dontmissmyplate.com should only be used as a general guideline.

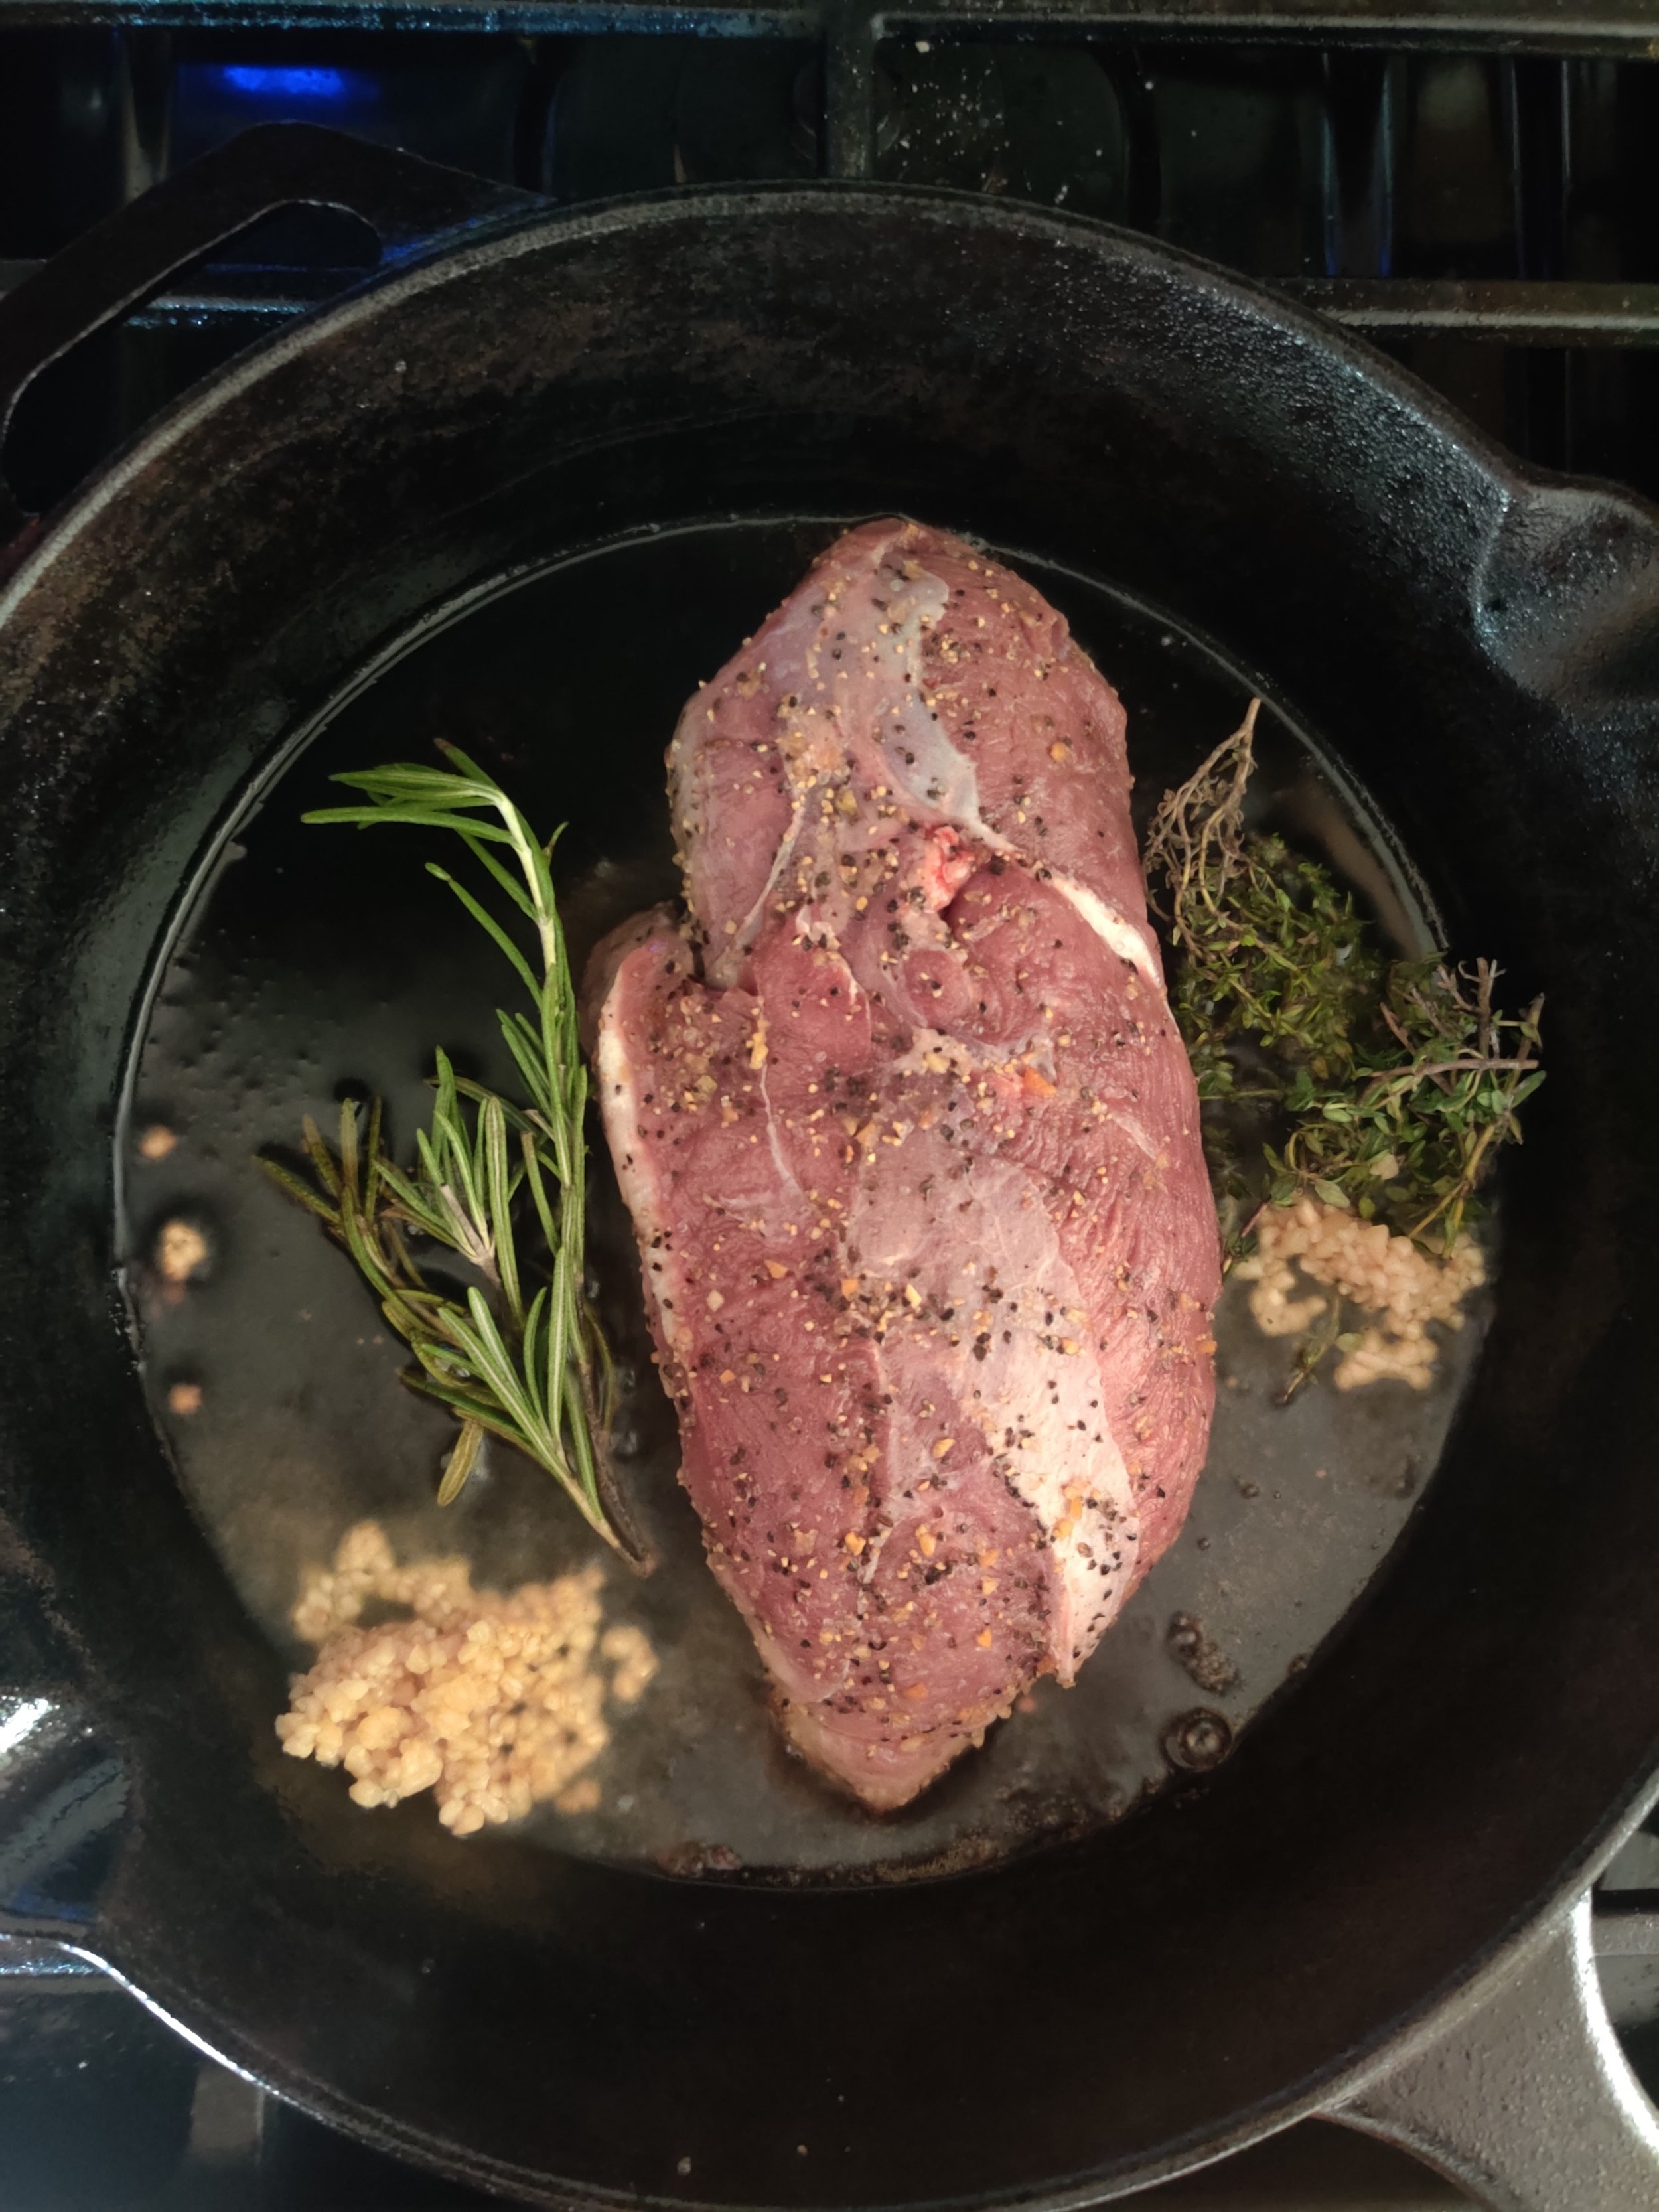
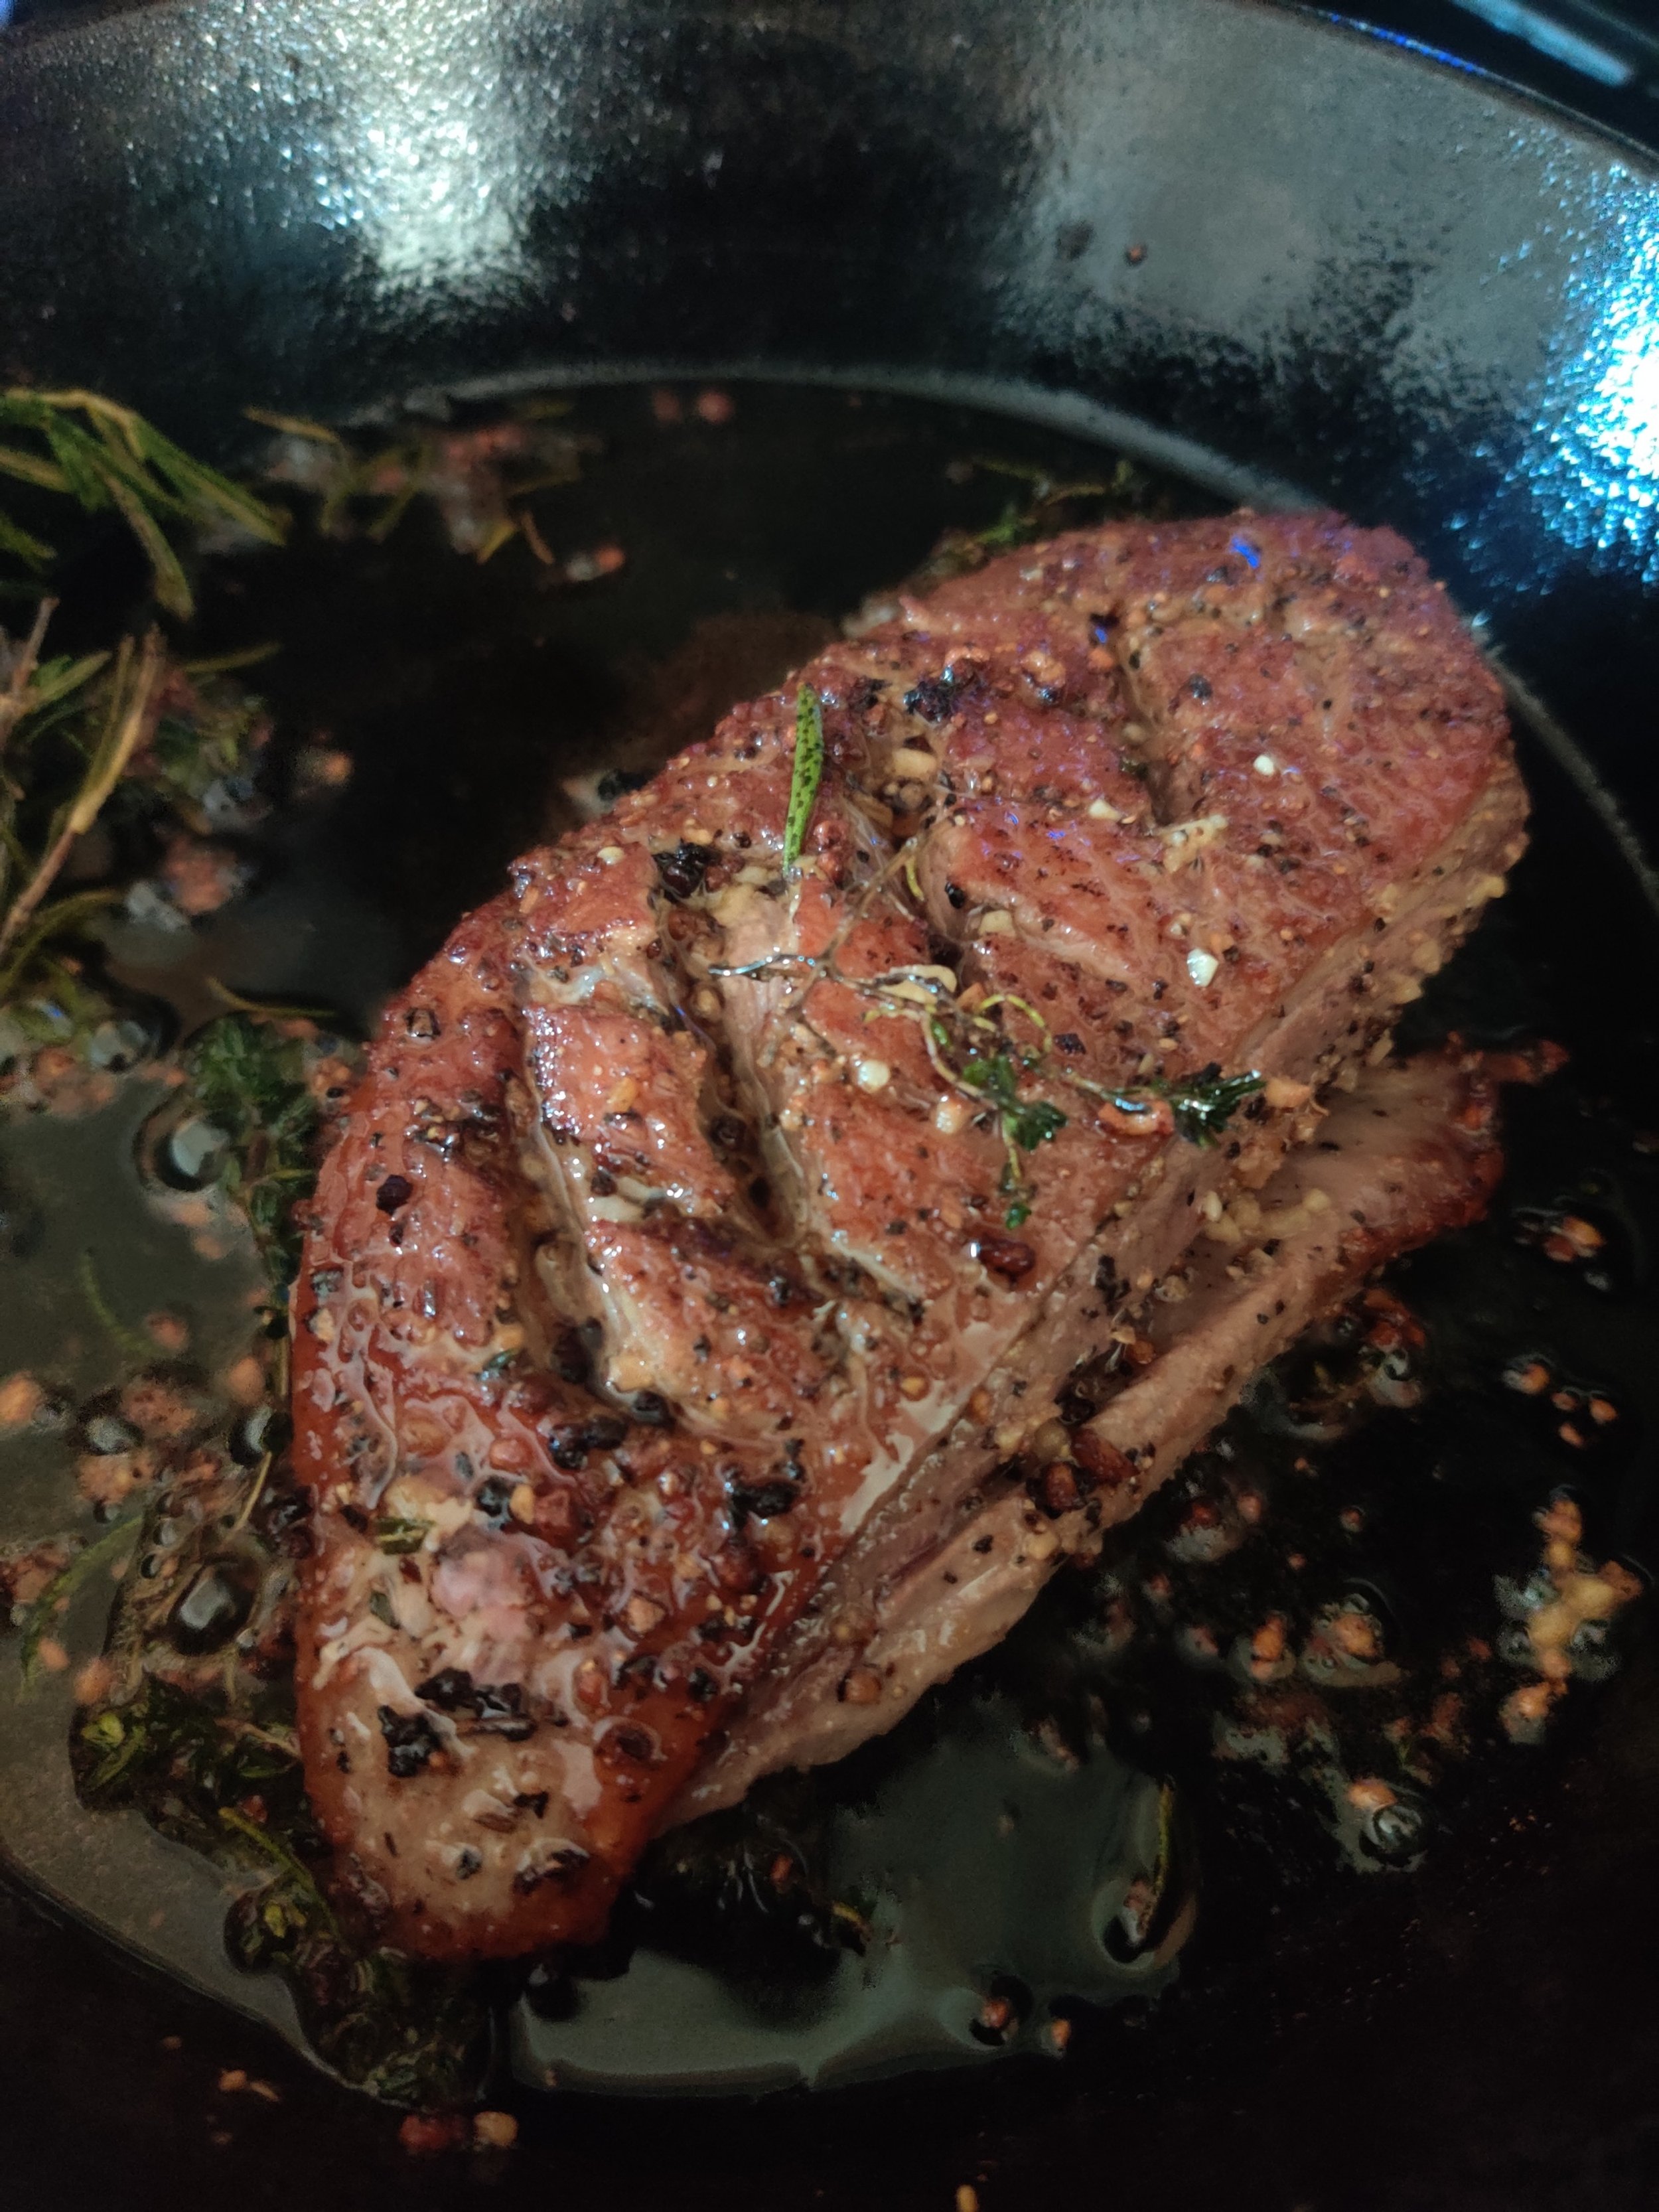
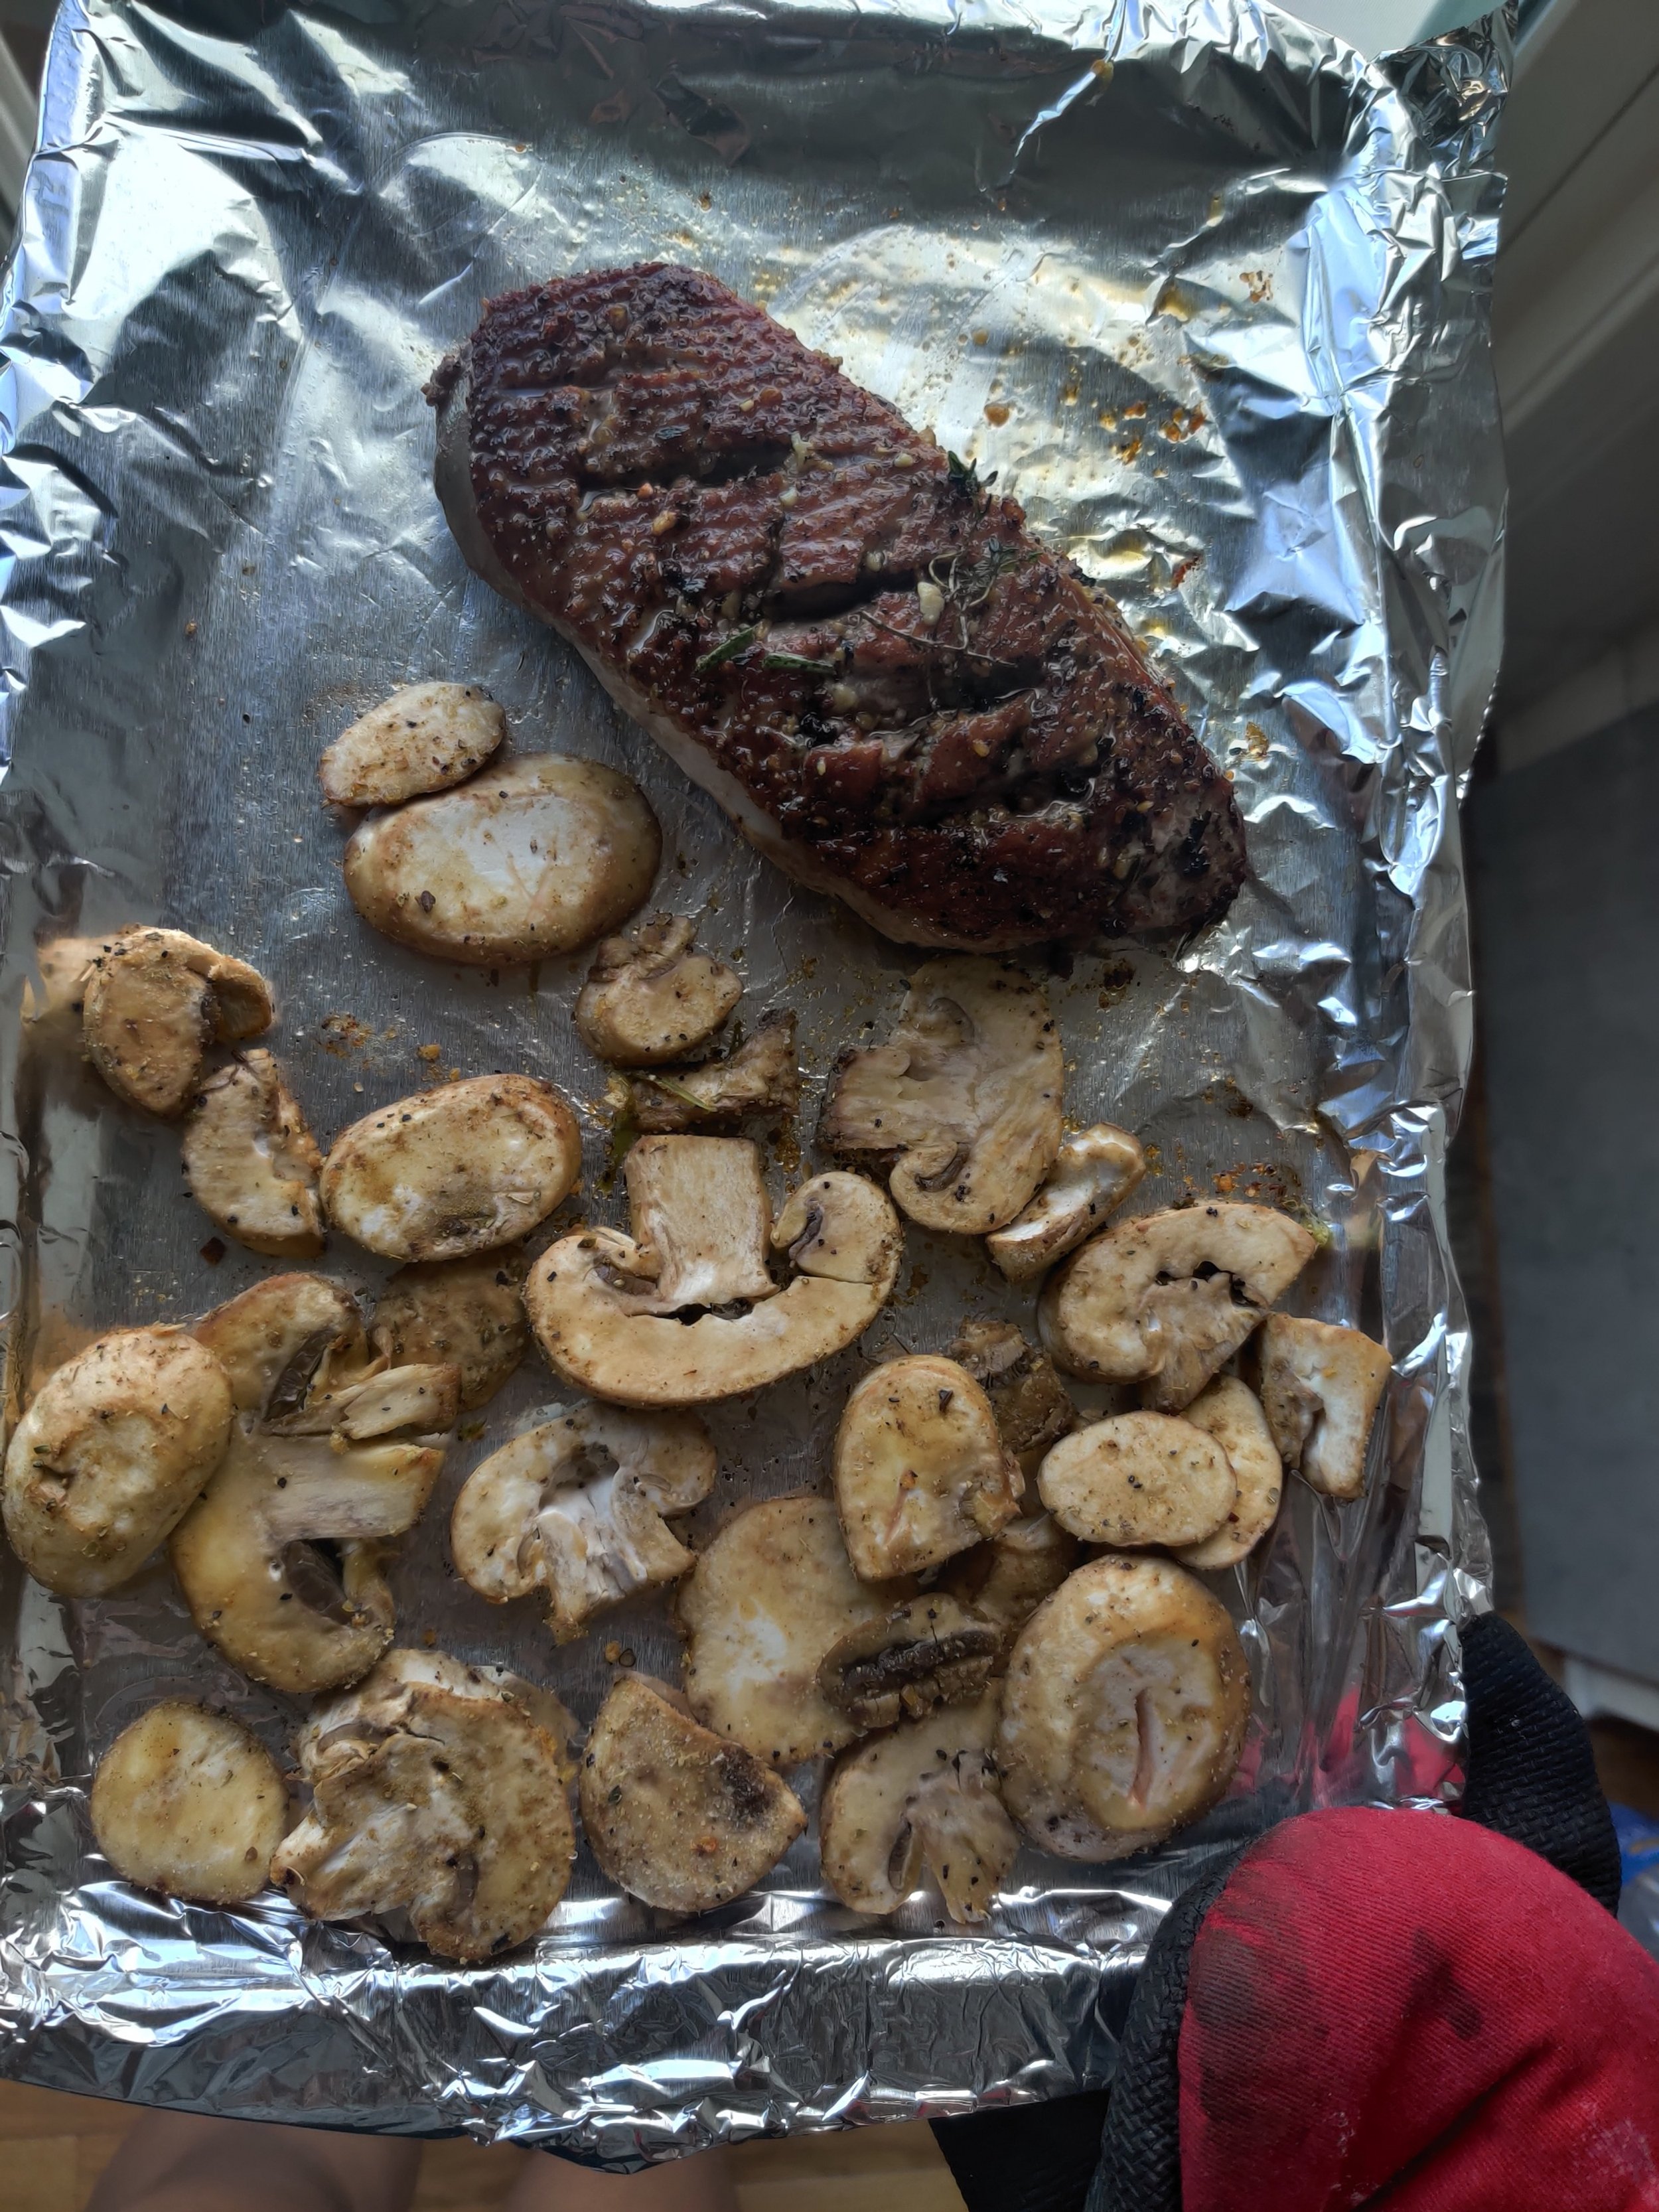
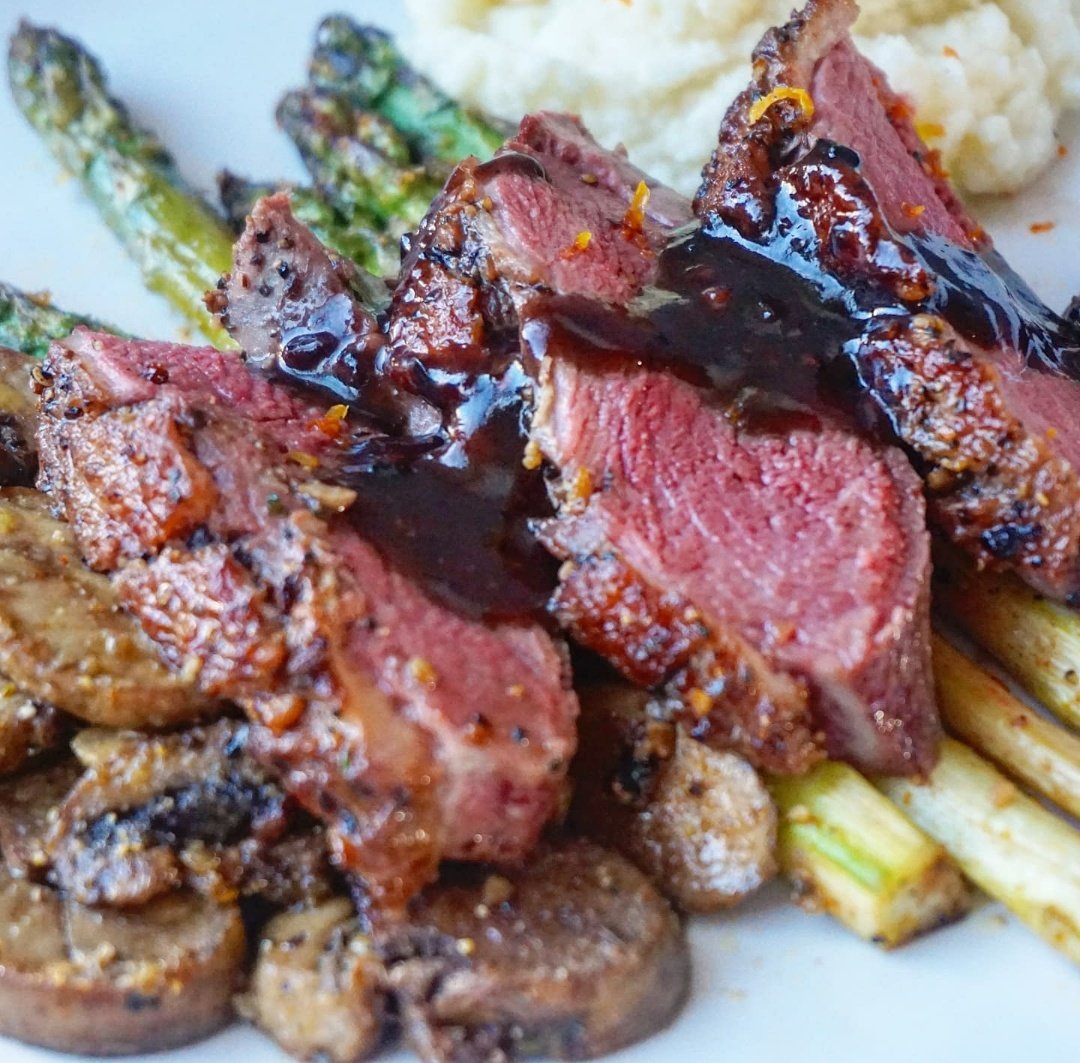
Duck Breast with Mashed Cauliflower, Mushrooms and Asparagus
Duck breast. Easier to handle than a lot of people realize! You cook it the same way you cook steak - sear on high heat, baste with herbs and fat, and get it to your desired internal temperature. Take care not to overcook and dry it out! High in fat, yes, but also protein, and with half the daily iron requirement, it's a fancy break from what you typically eat; you can make a dinner special without leaving the comfort of your home.
Inspired by the French classic dish duck l'orange, use citrus to boost the red wine sauce and the mashed cauliflower to pair with juicy, roasted asparagus and mushrooms.
I would suggest serving this with a glass of light or medium-bodied red wine, such as a quality pinot noir, to balance out the fattiness of the duck and compliment the fruity notes in the sauce.
This recipe makes for a great winter dish that will make you feel fancy and cosy at the same time! The switch from potato to cauliflower relieves much of the guilt, and you'll get to enjoy a low-carb plate of delicious veggies and protein.


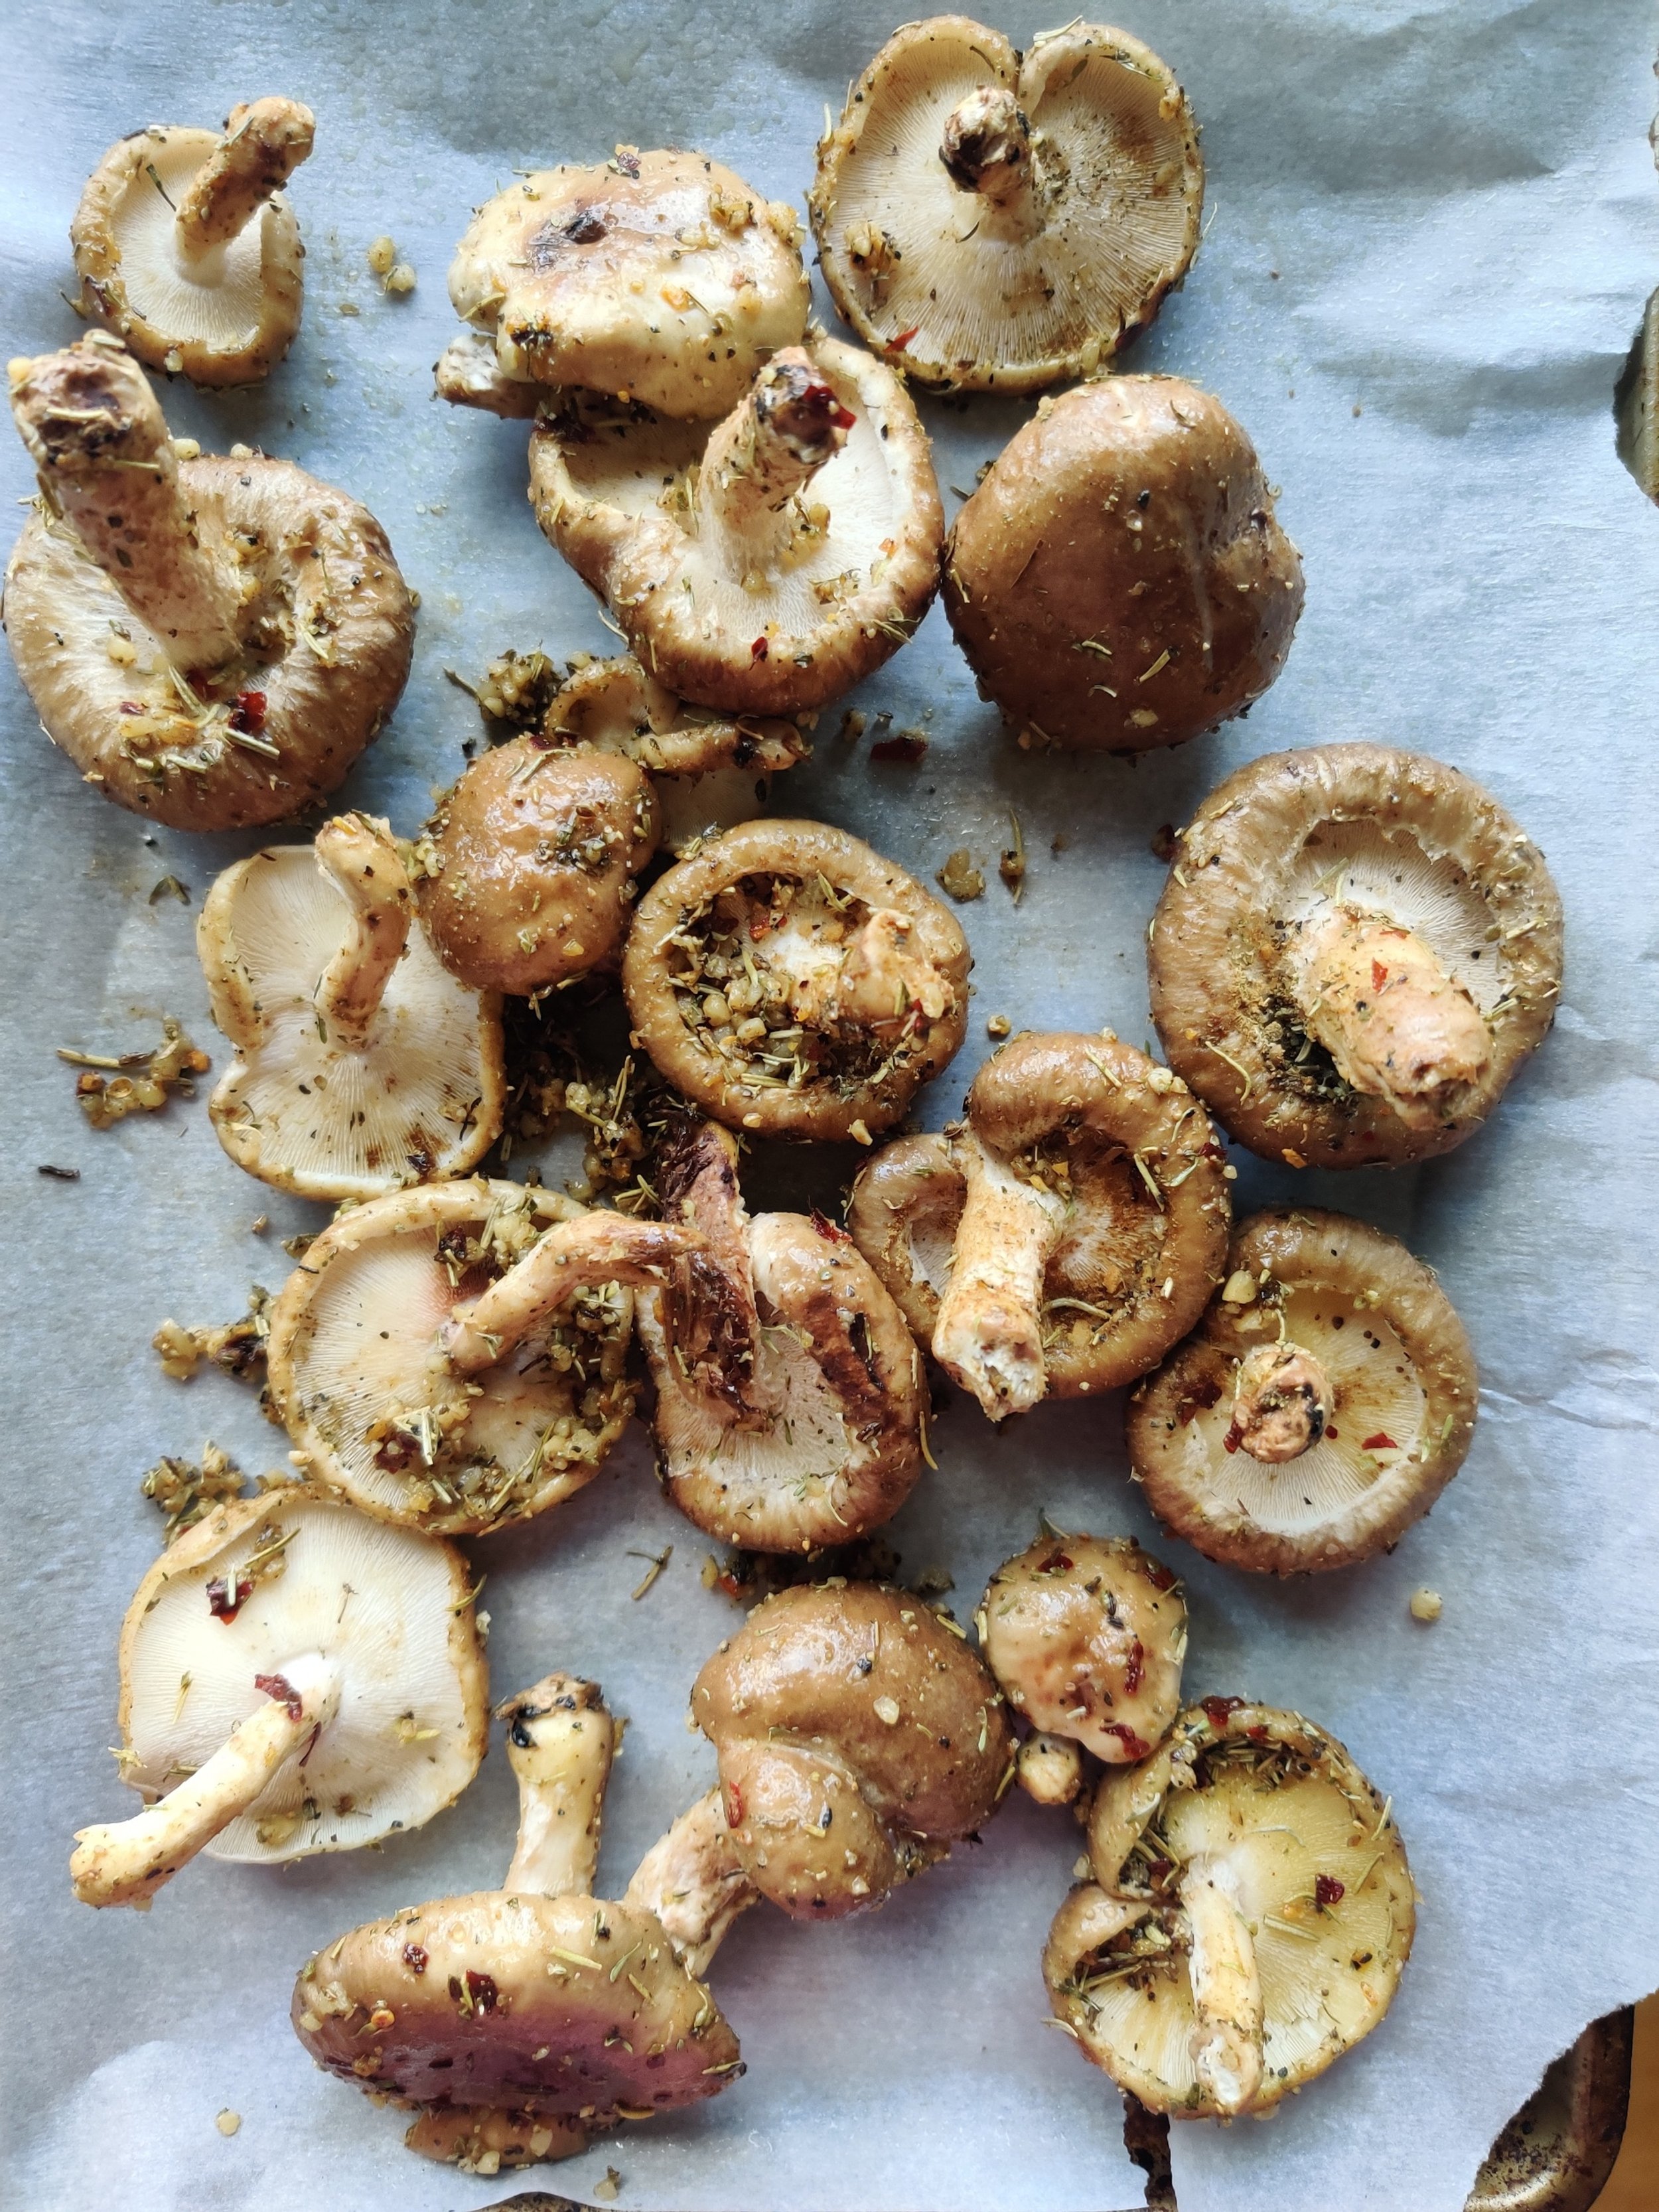
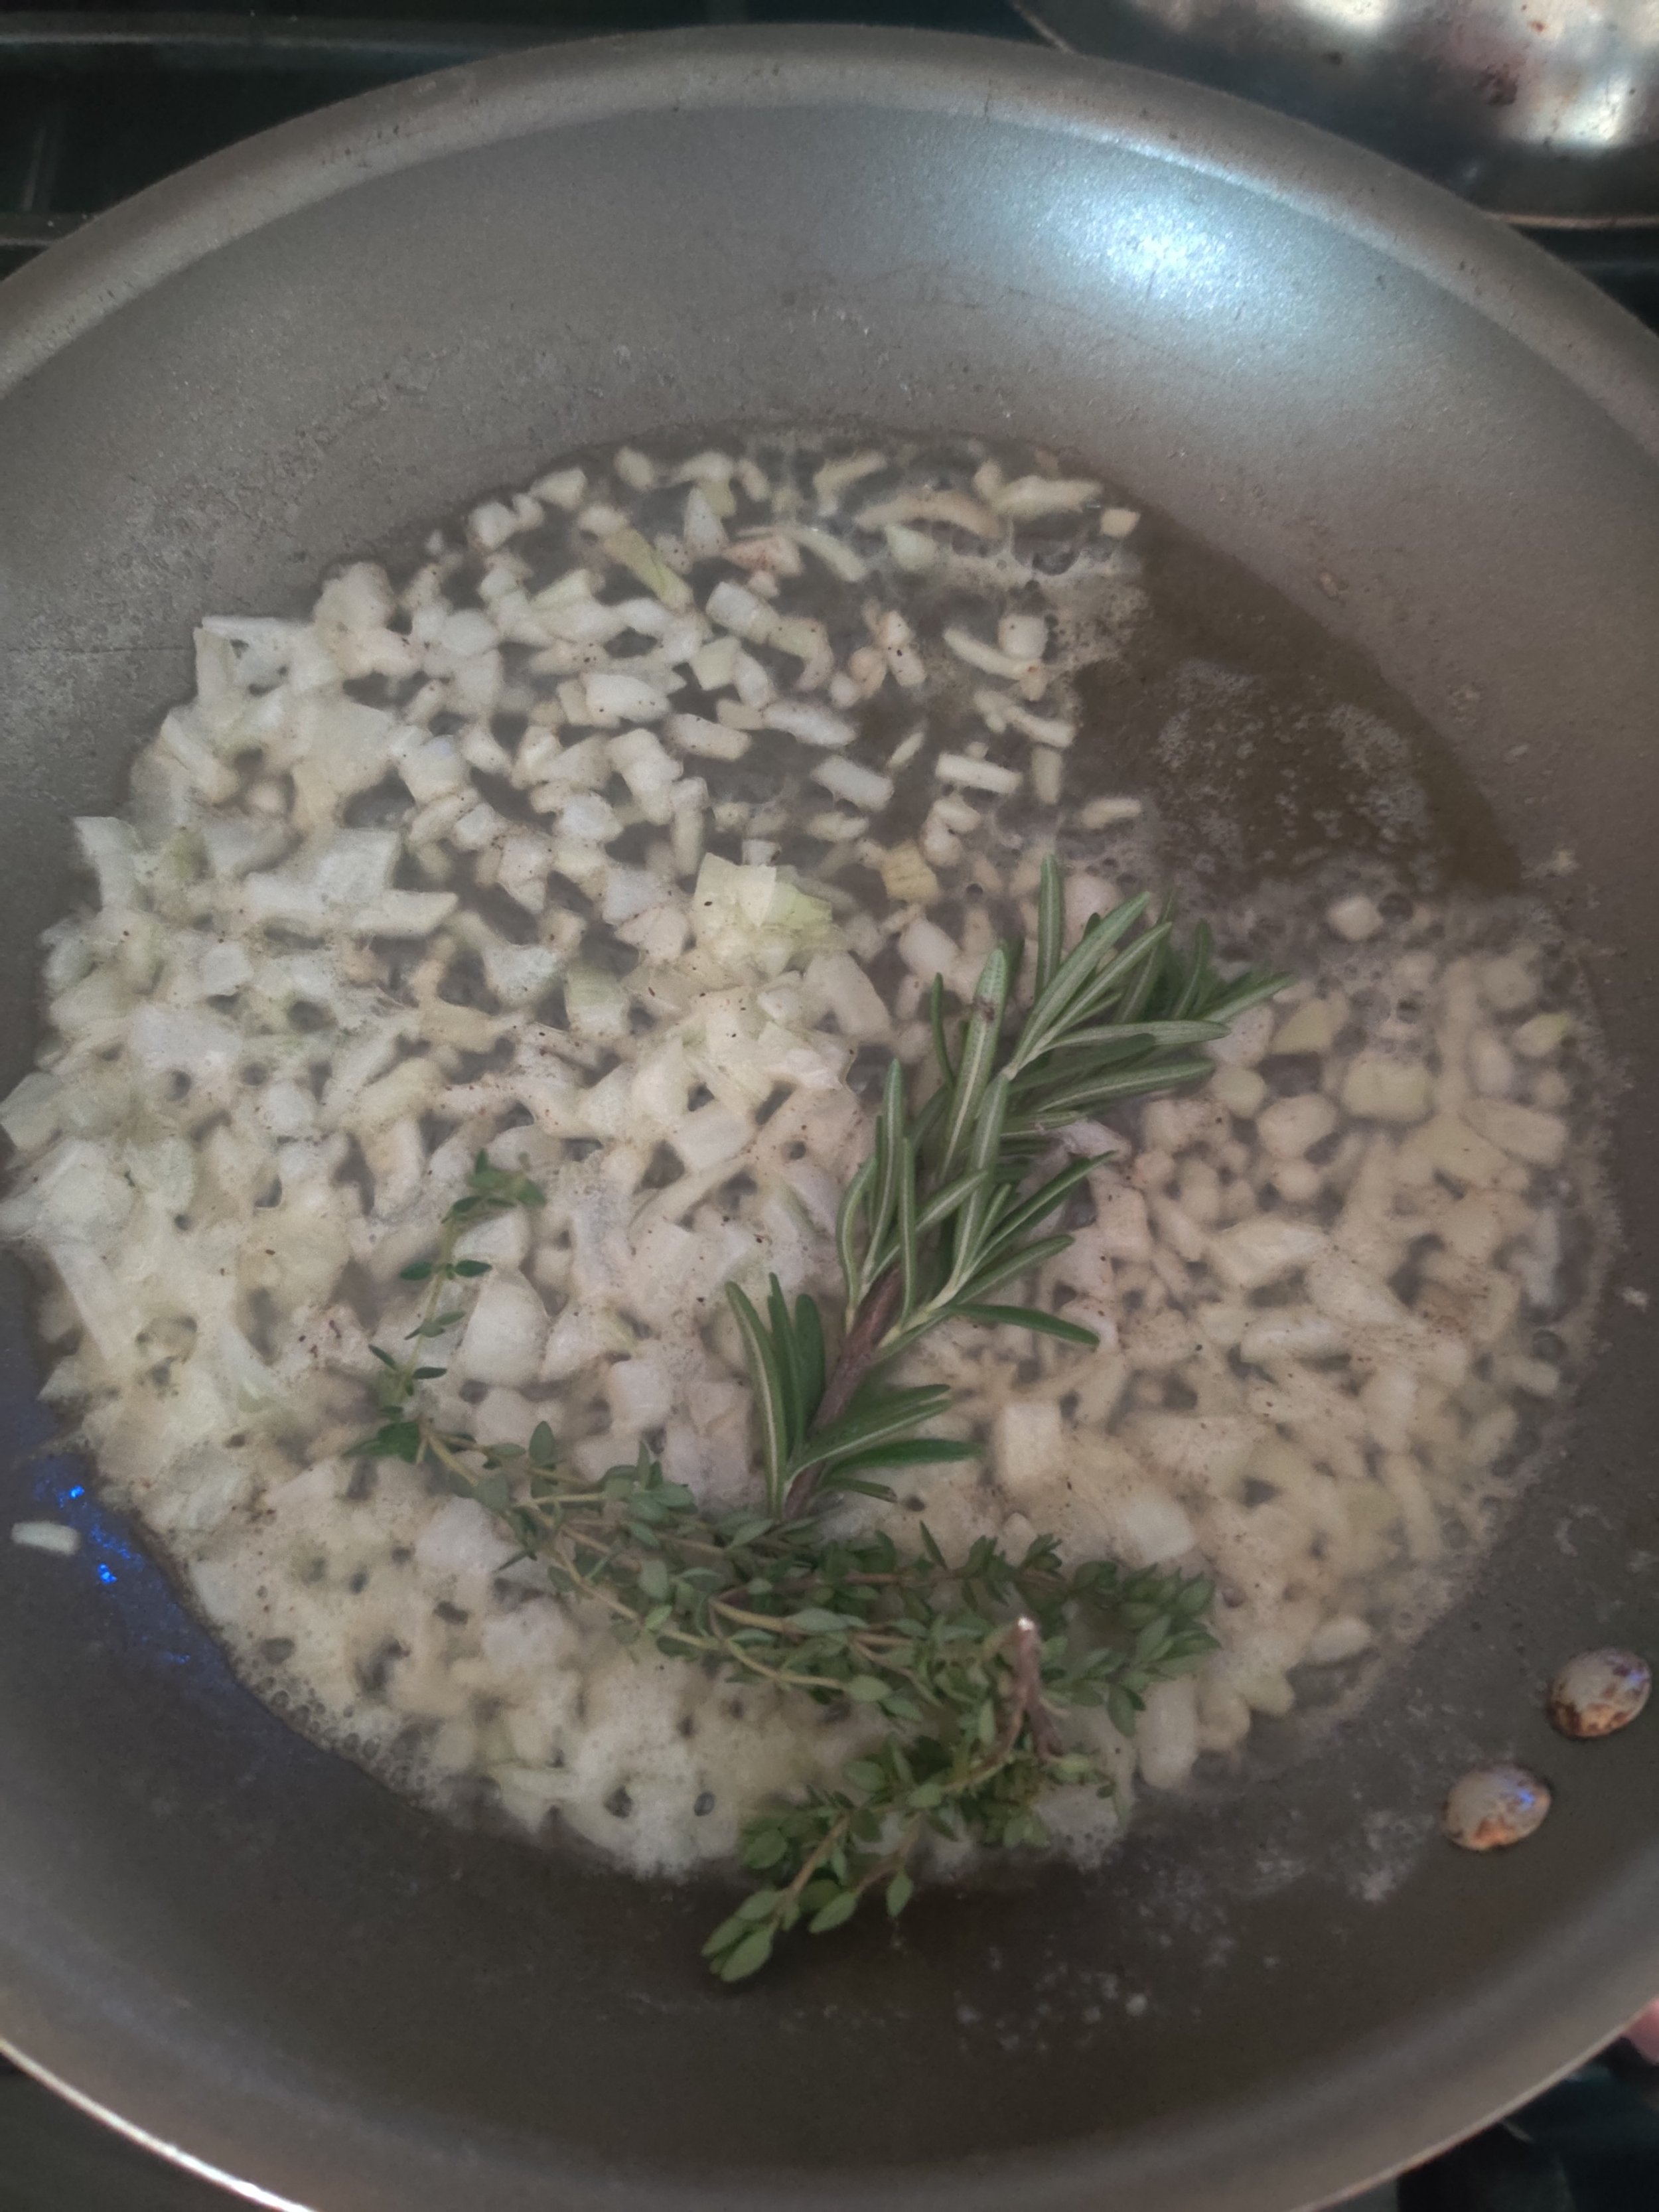
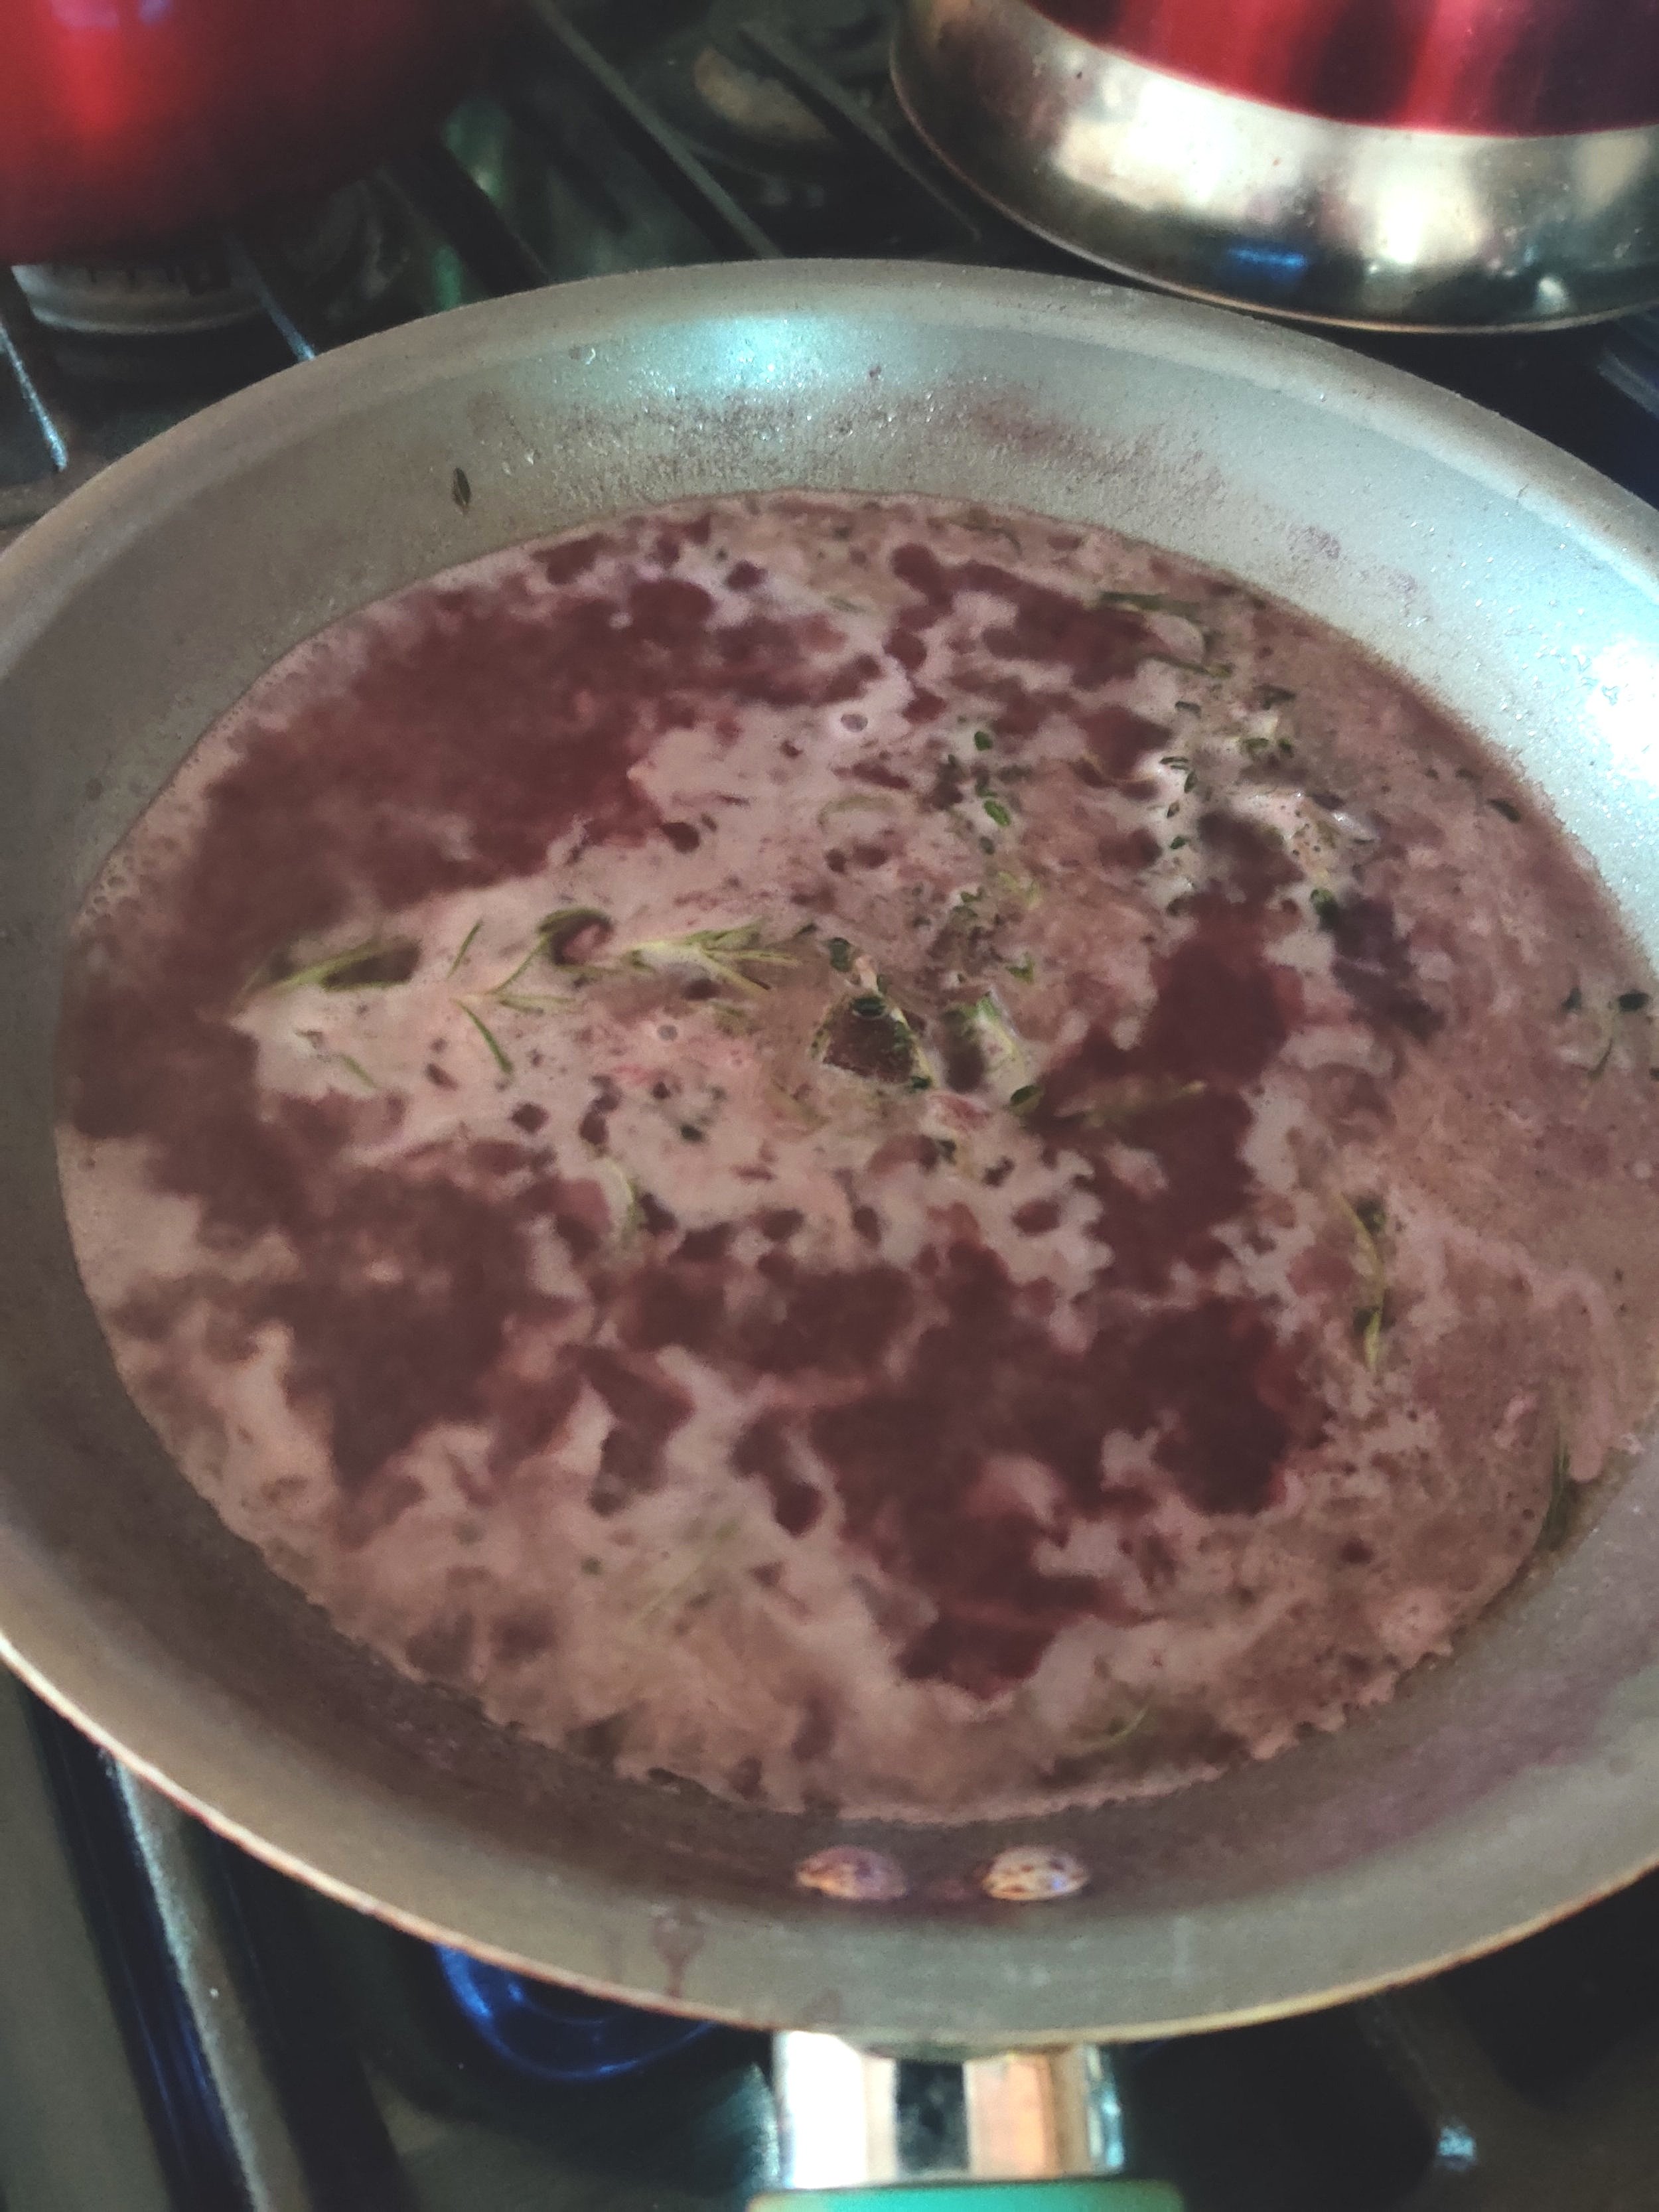
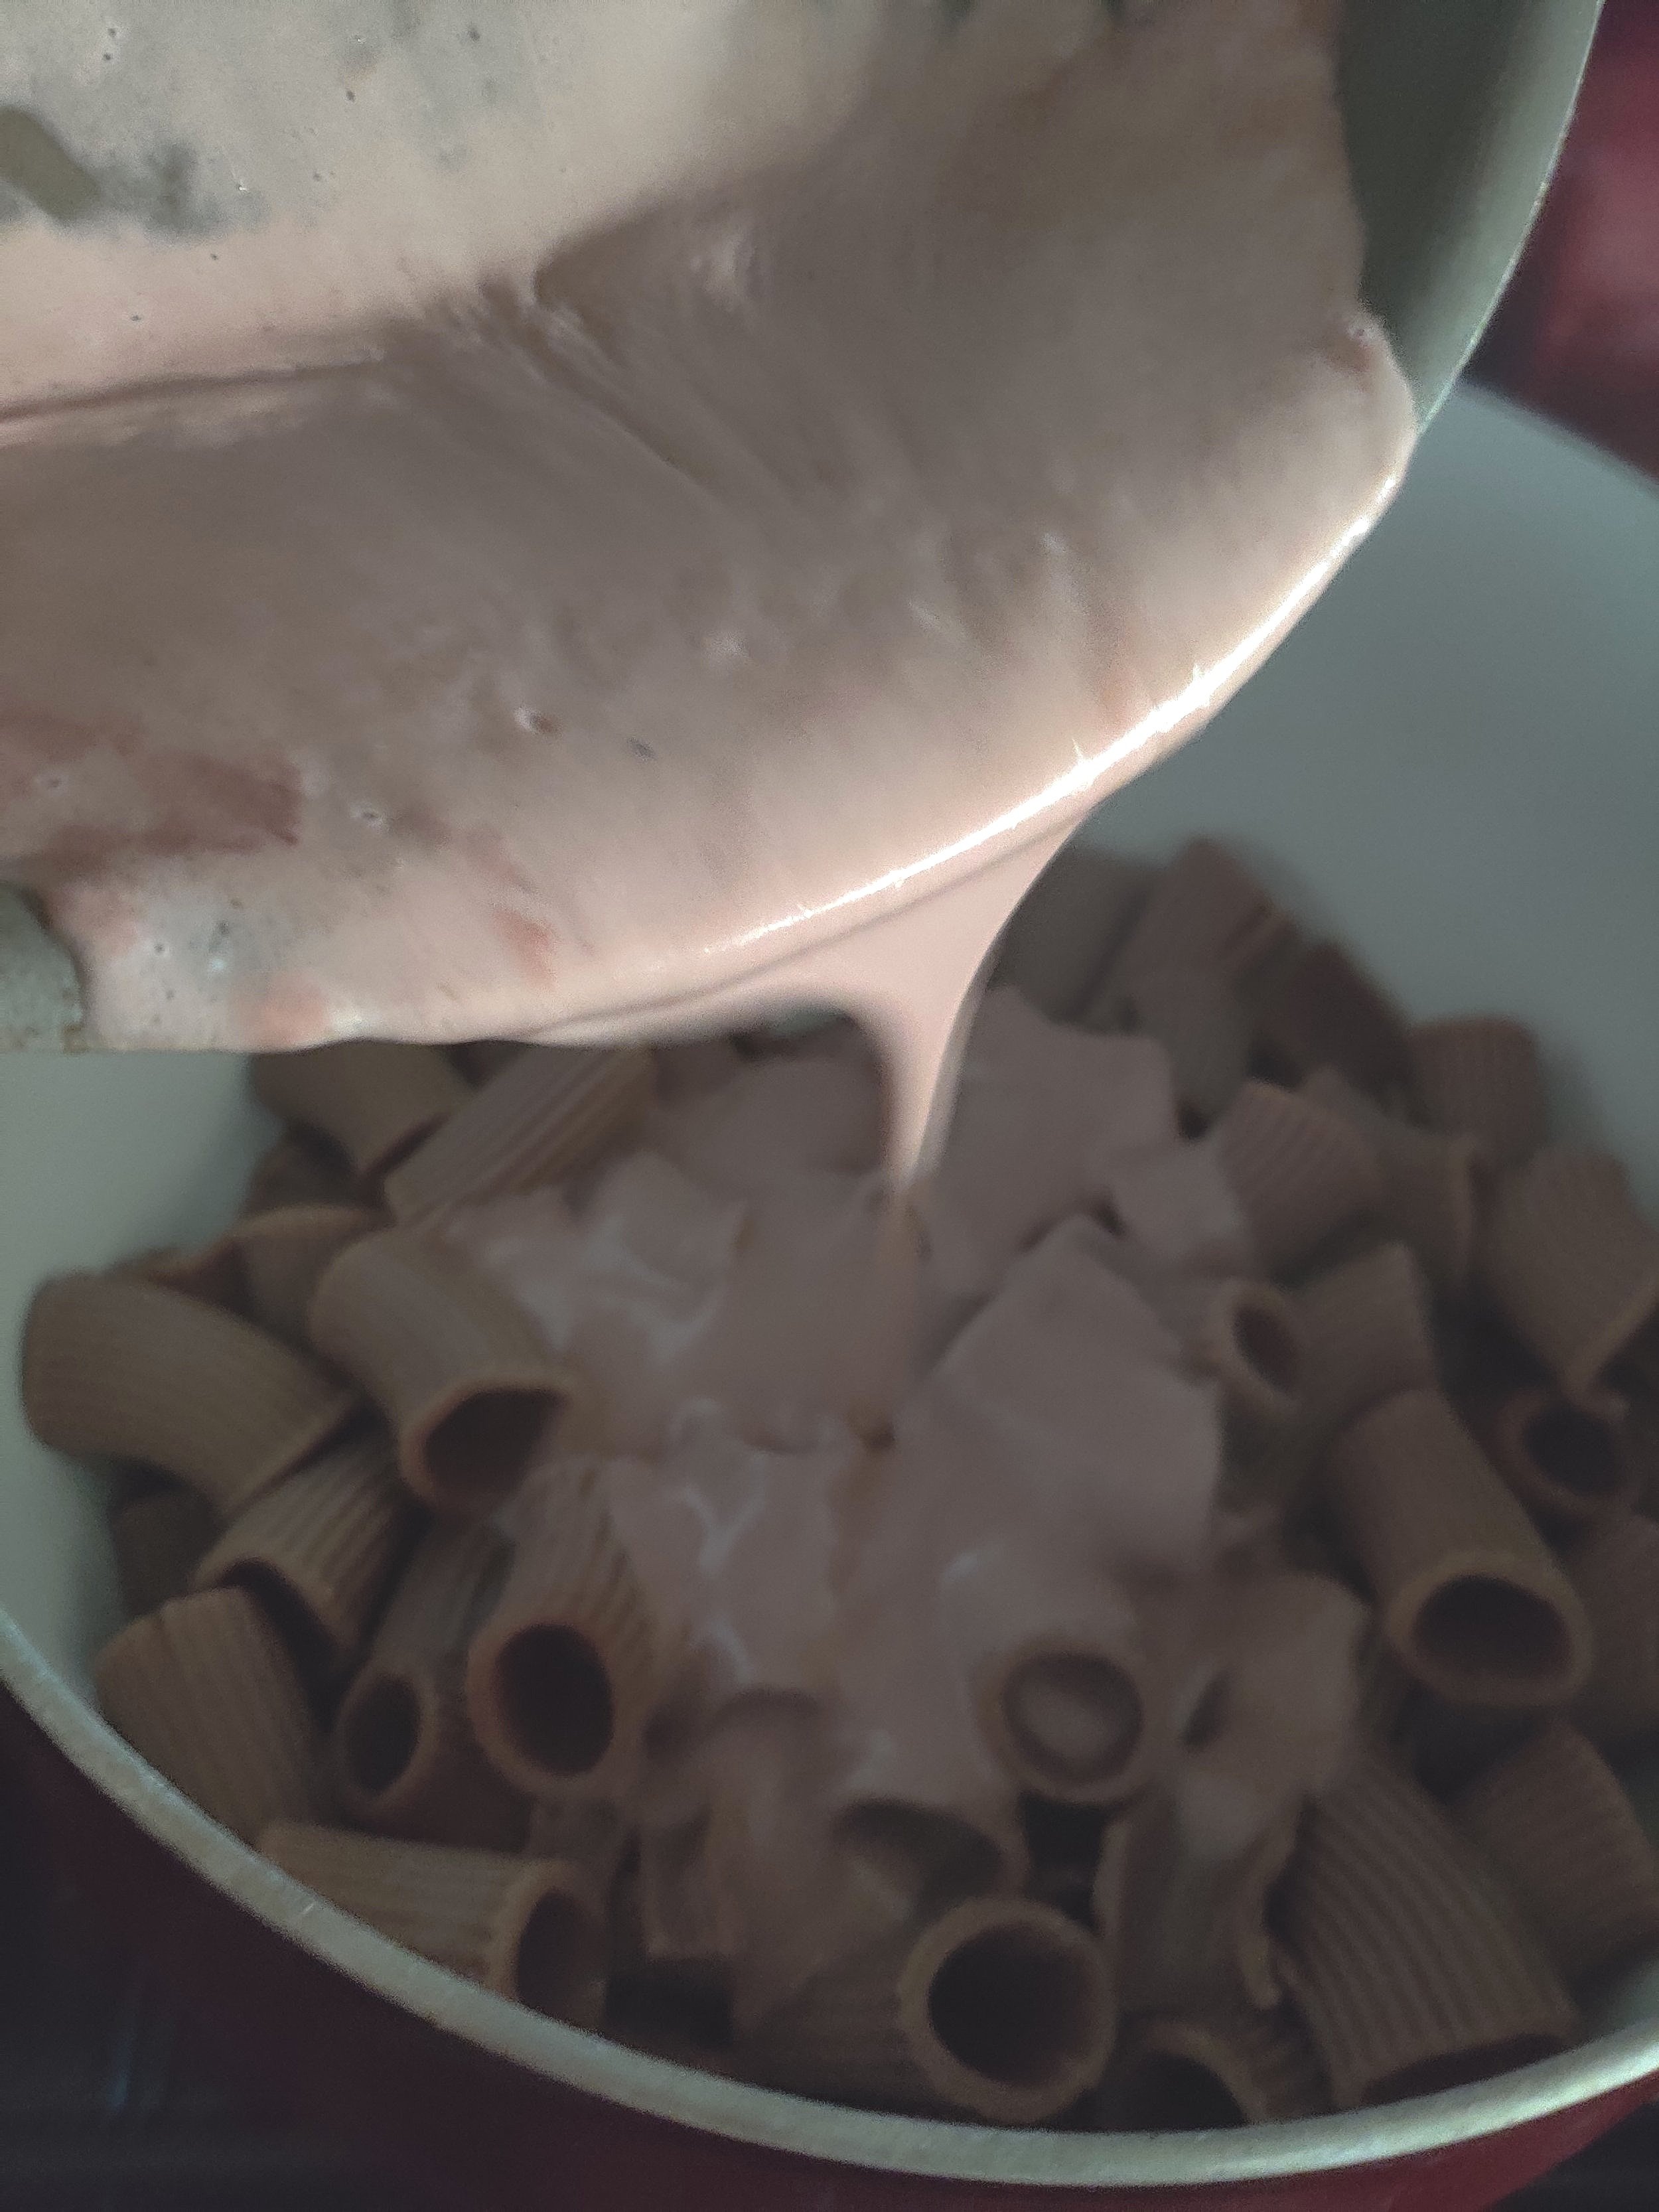
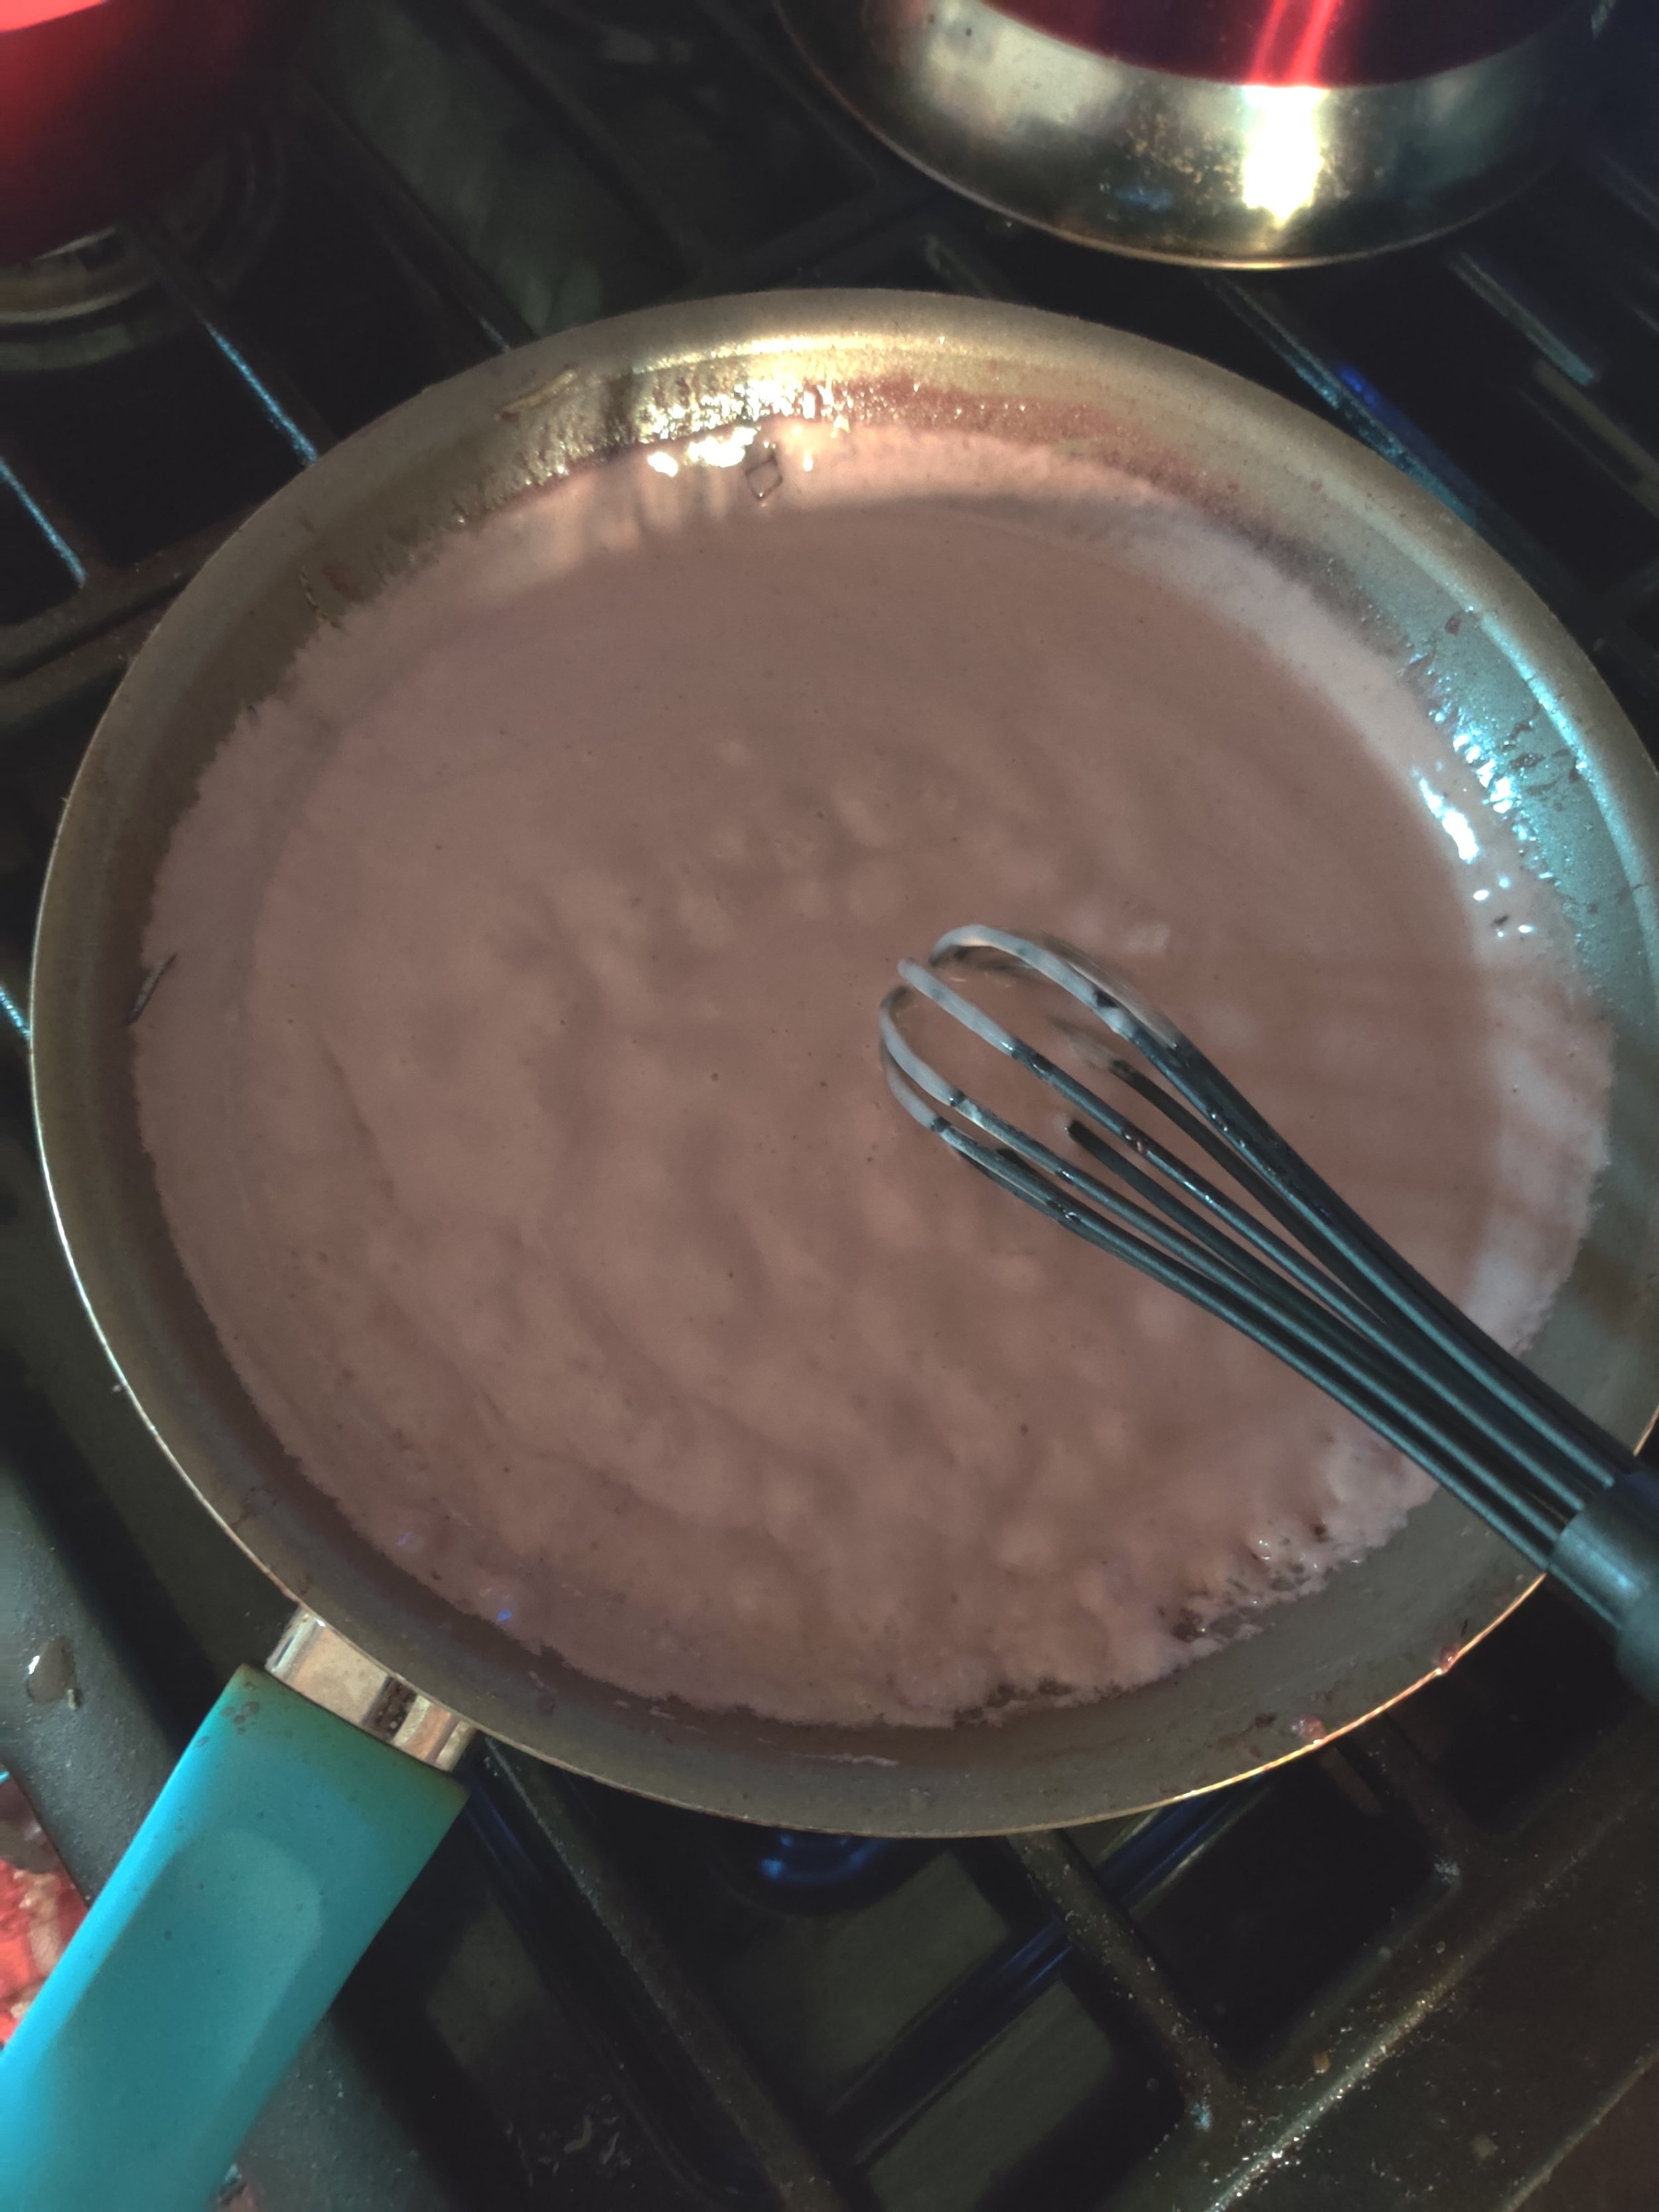
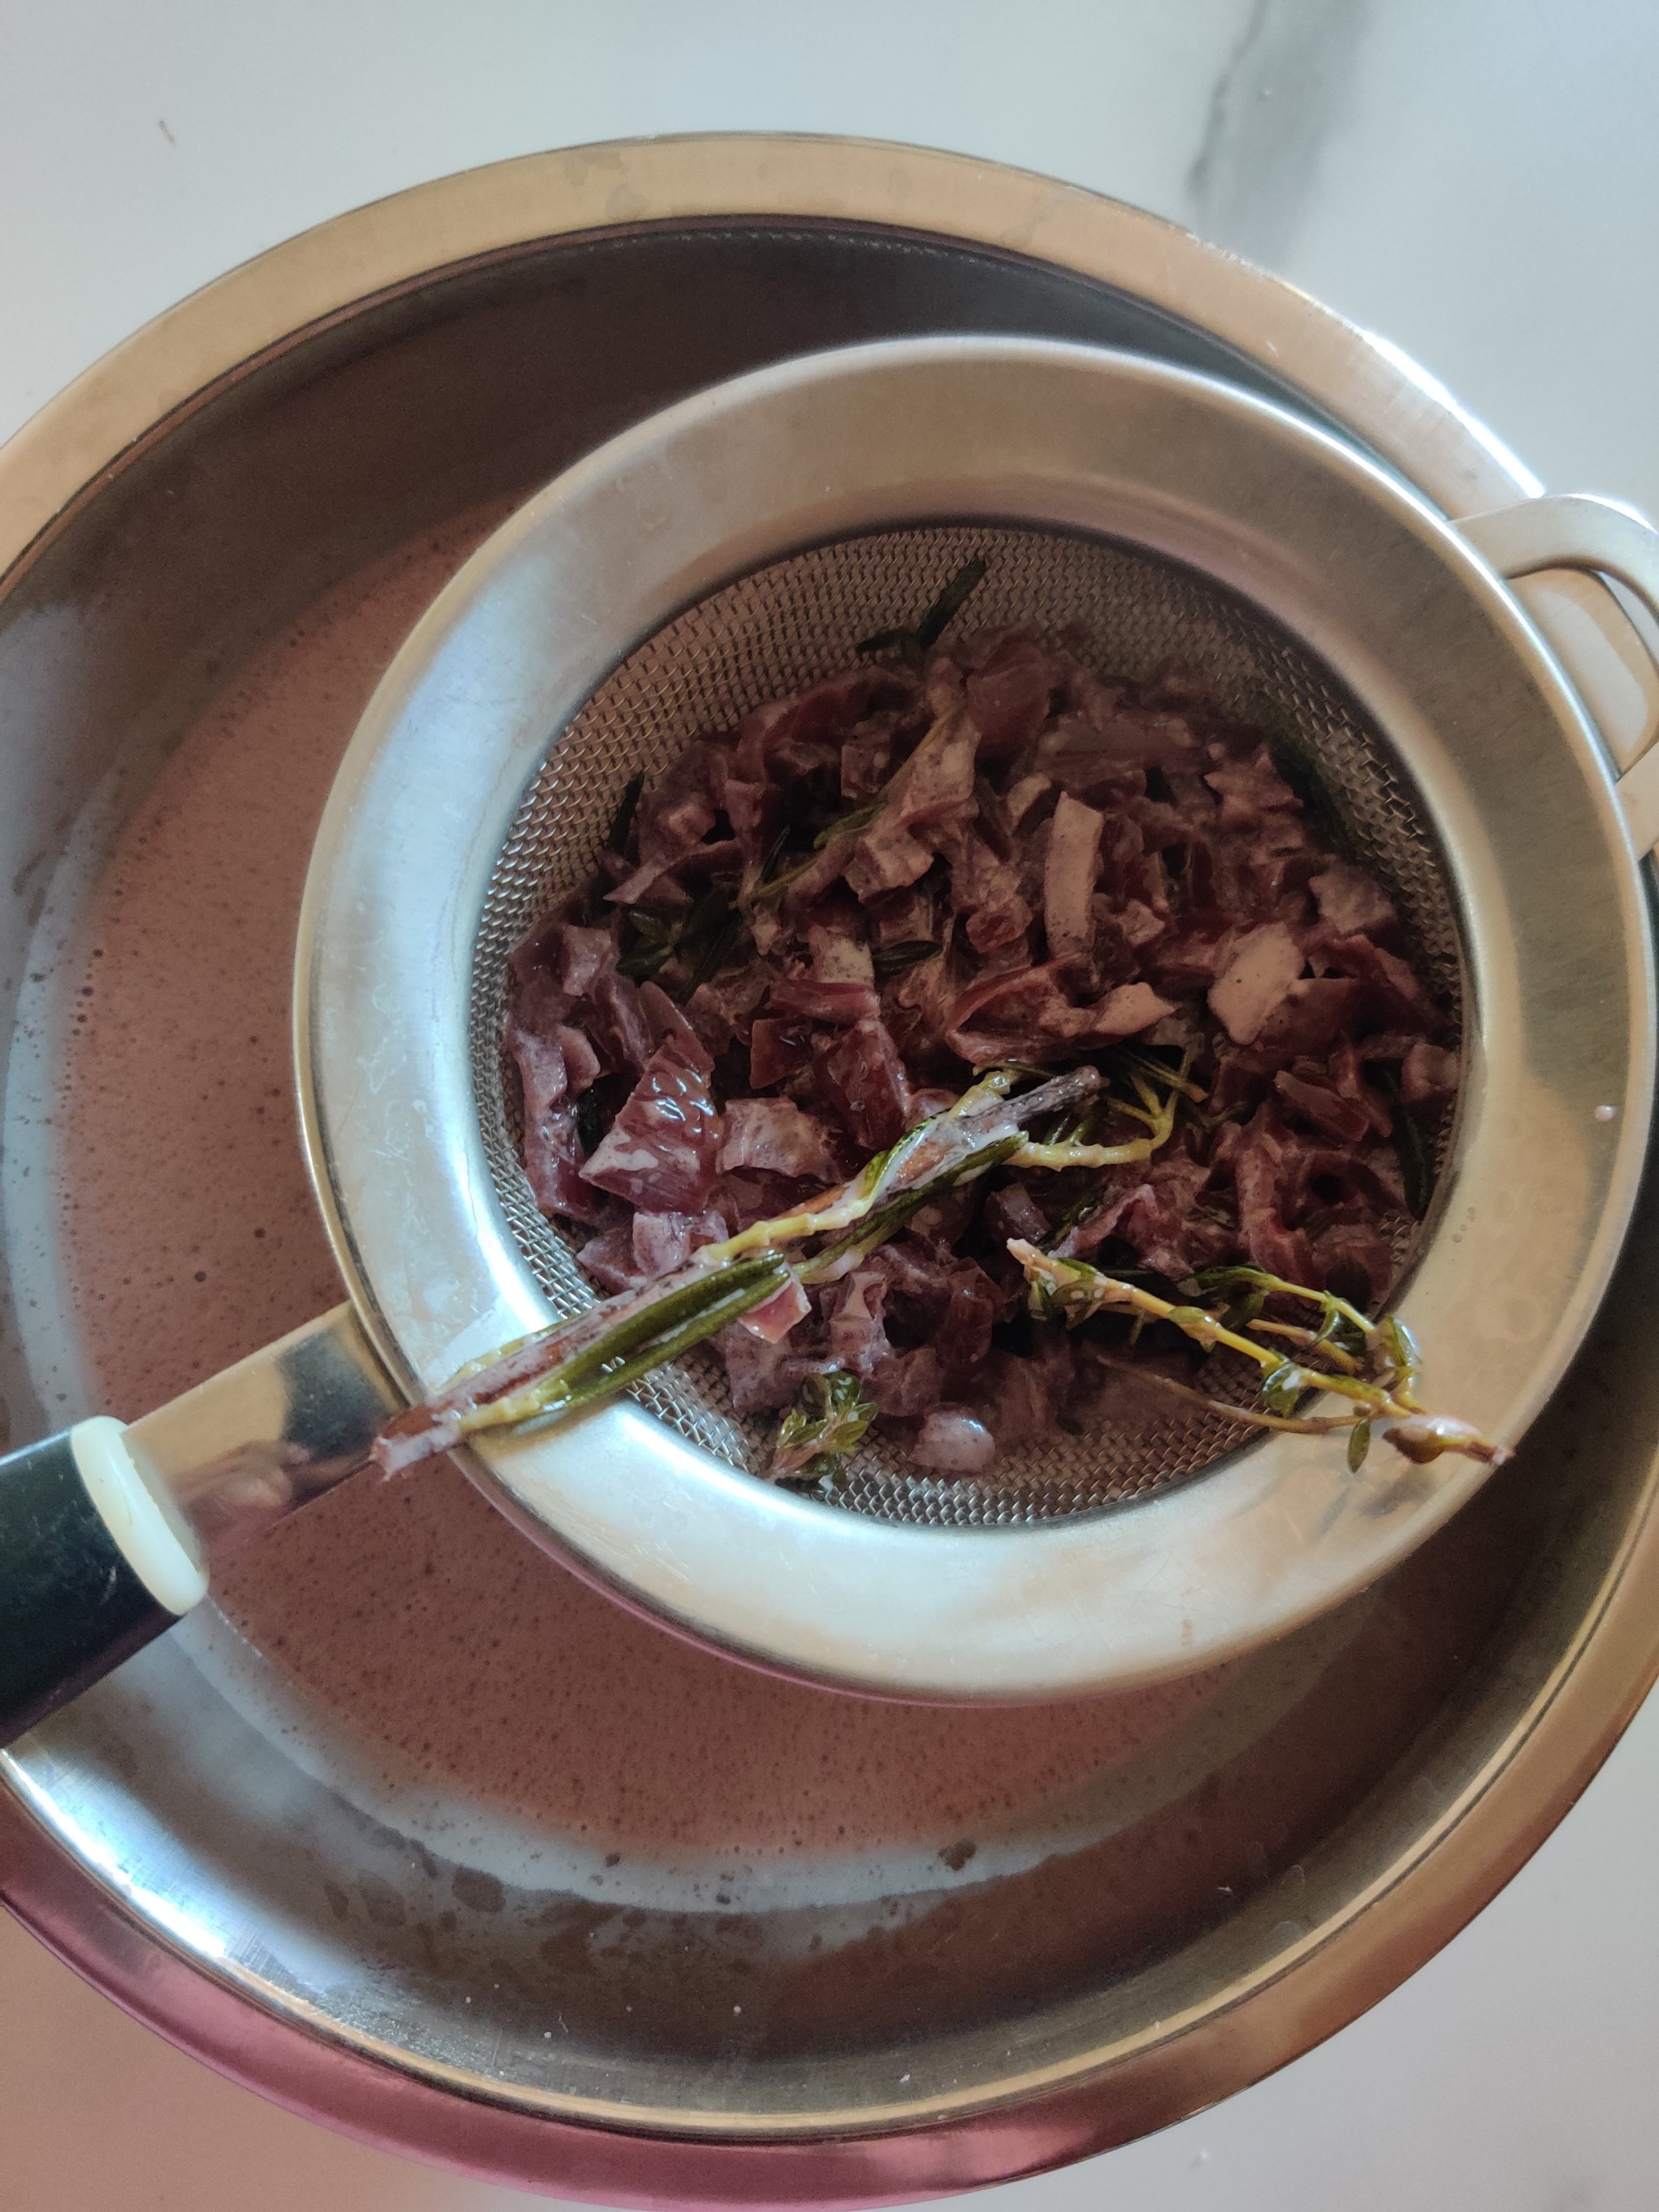
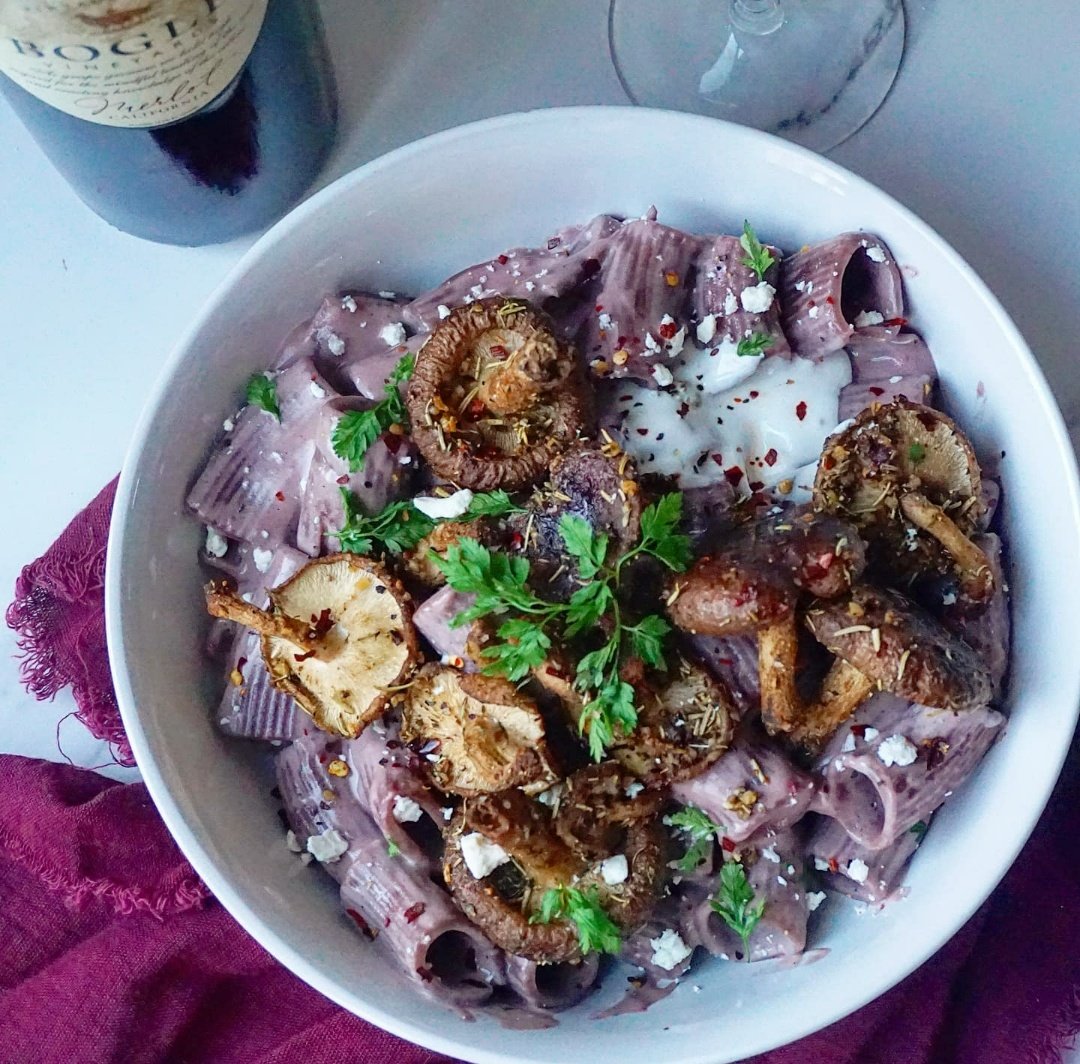
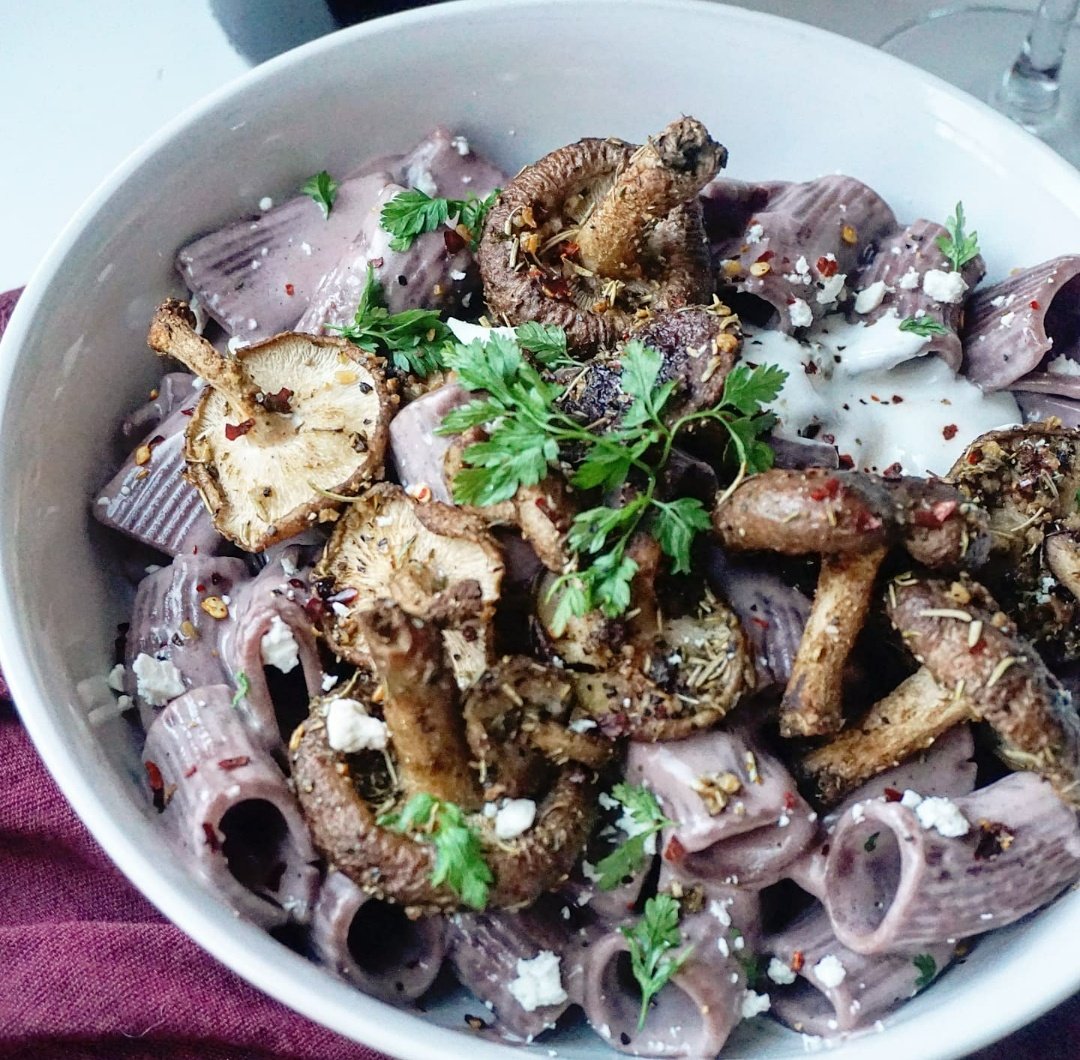
Red Wine Cream Sauce with Rigatoni Pasta and Shiitake Mushrooms
Red wine is my favourite alcoholic beverage, hands down. How ideal that some studies show a glass a day is good for the heart! You can use cooking wine to mimic the taste as an alternative, but I would recommend going for high quality in both cases. It doesn't have to be vintage from the 18th century at $100 a bottle, but something with body and good flavour! I used a merlot from Bogle.
The great thing about pasta is that we can infuse it with many non-traditional ingredients, from greens to starchy fibres to herbs to, well, wine! I used some red wine rigatoni from the Pasta Palette. You should find something similar in a speciality store near you. If not, regular rigatoni will do!
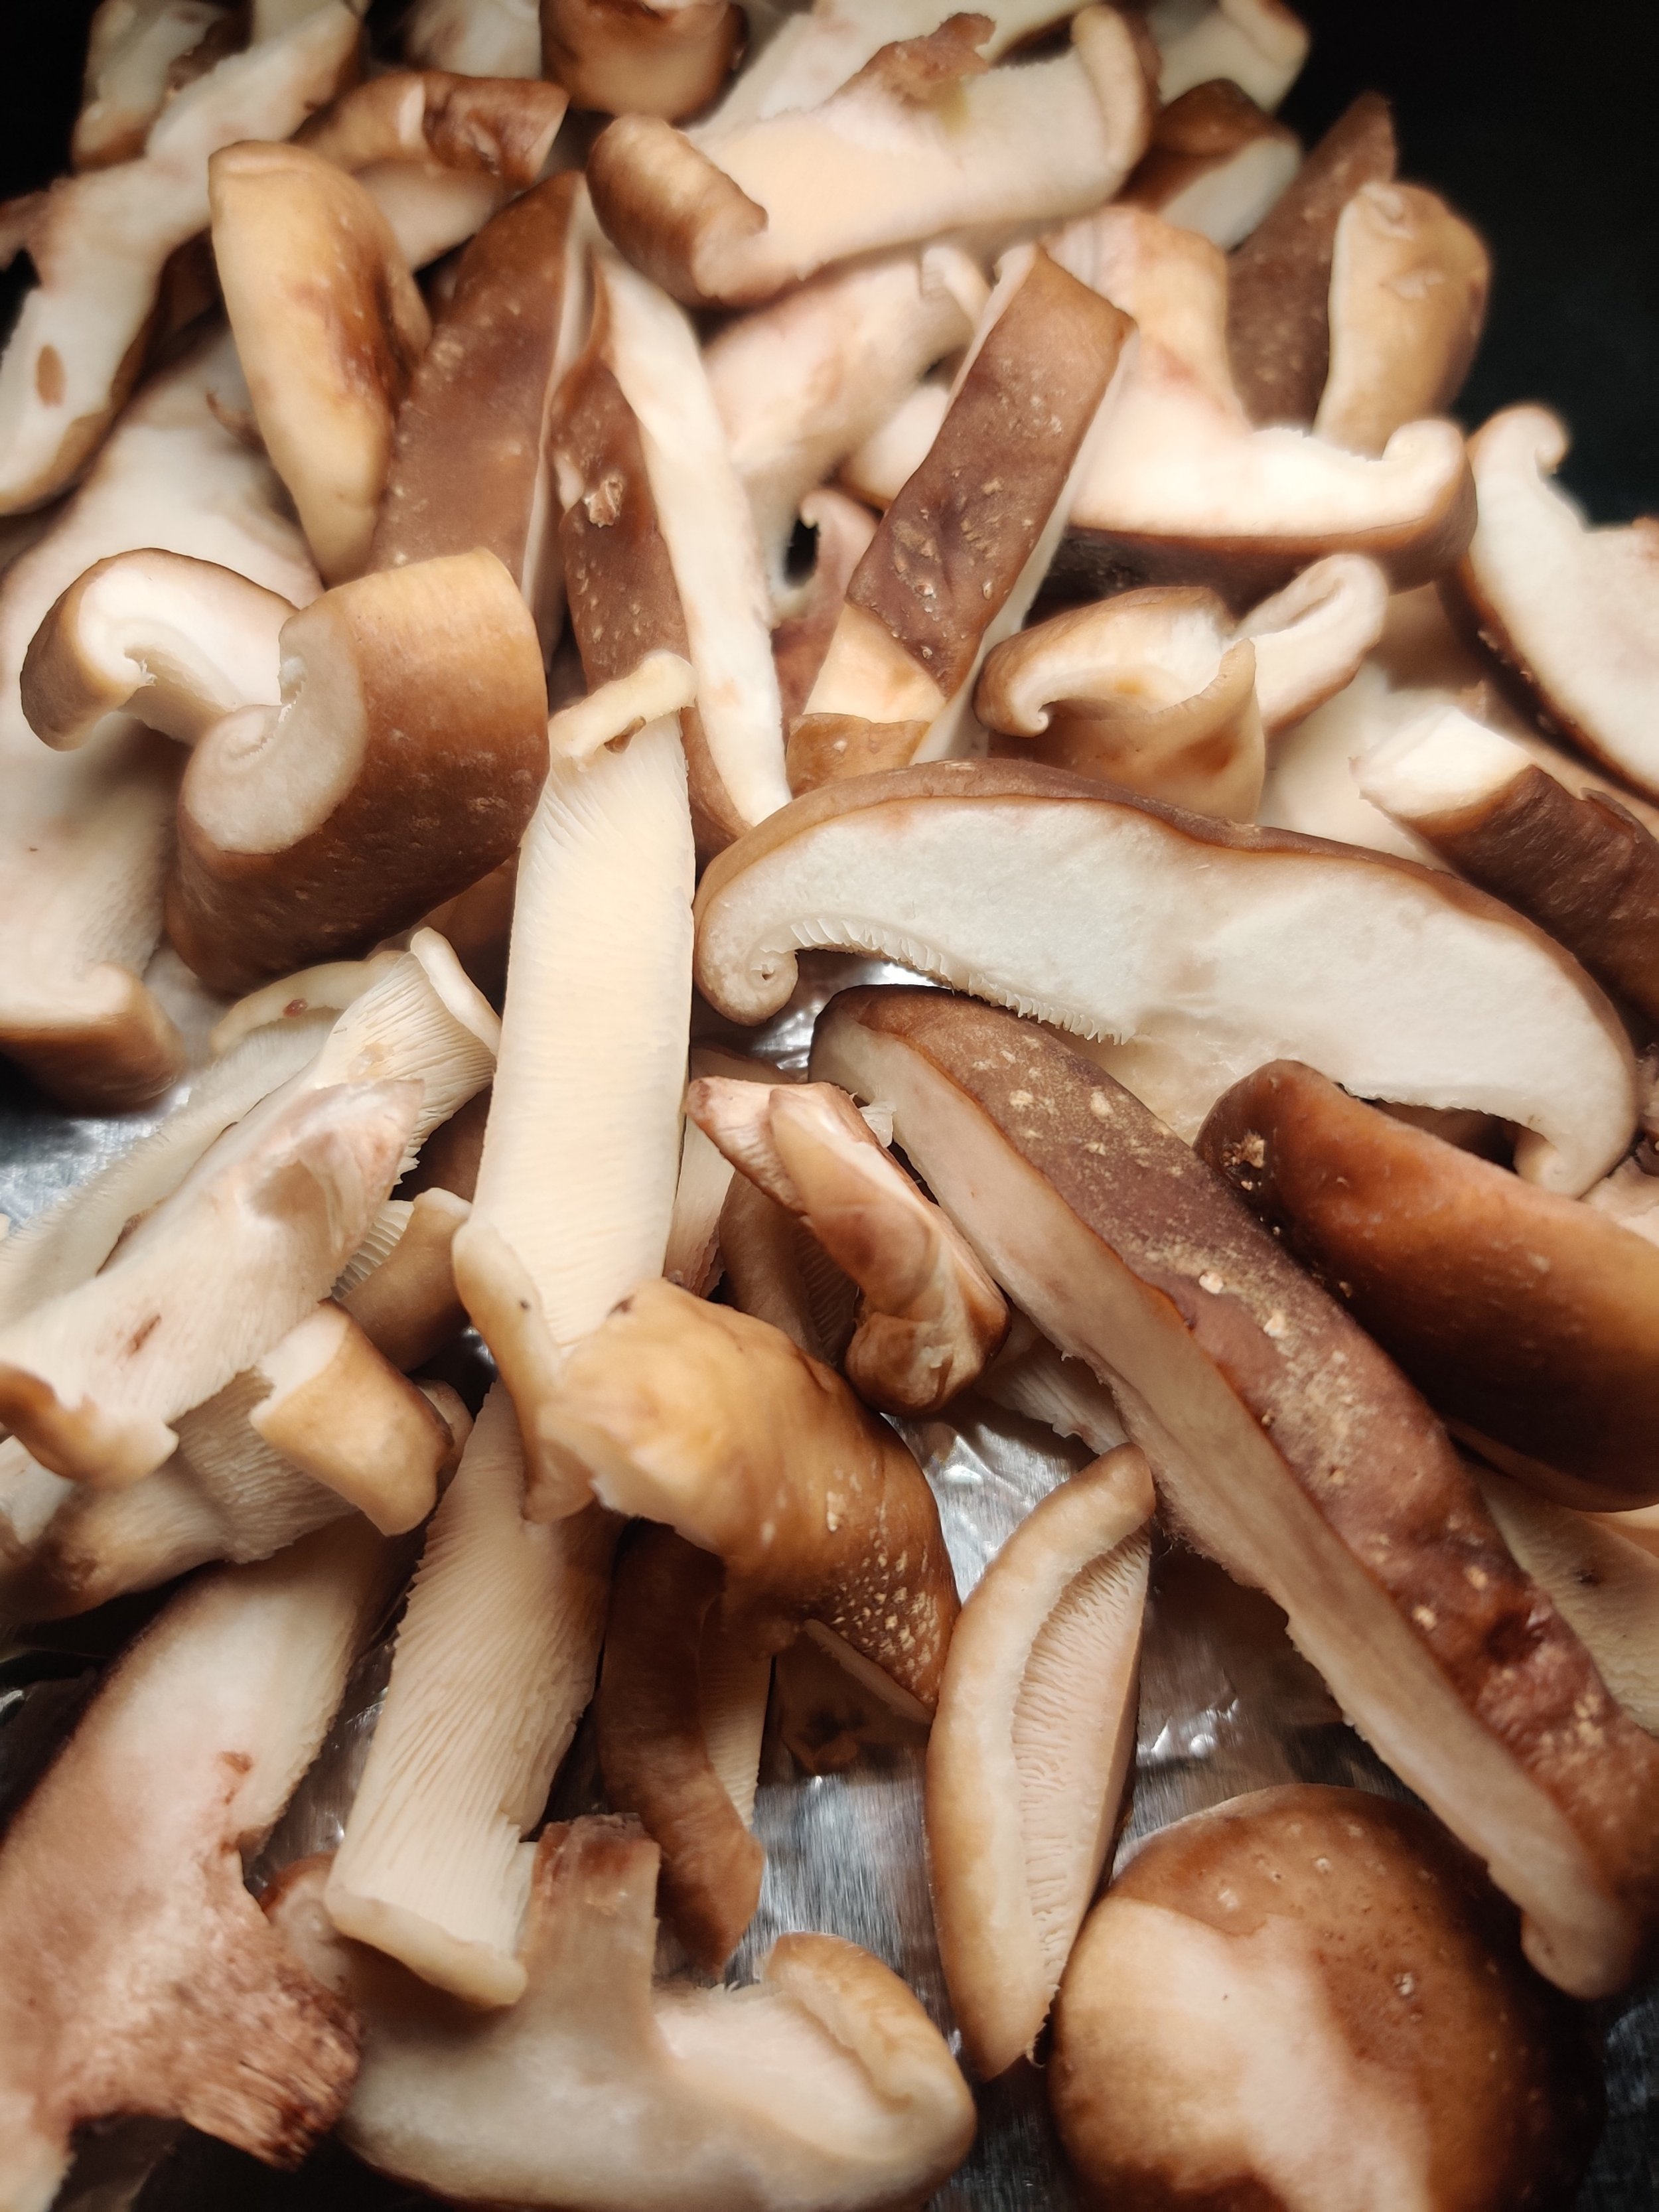
As for the mushrooms, shiitake mushrooms are the way to go! Not only do they add a striking visual component, but the natural umami makes them perfectly balanced and an ideal meat substitute (although braised beef or short rib would compliment this dish just fine).


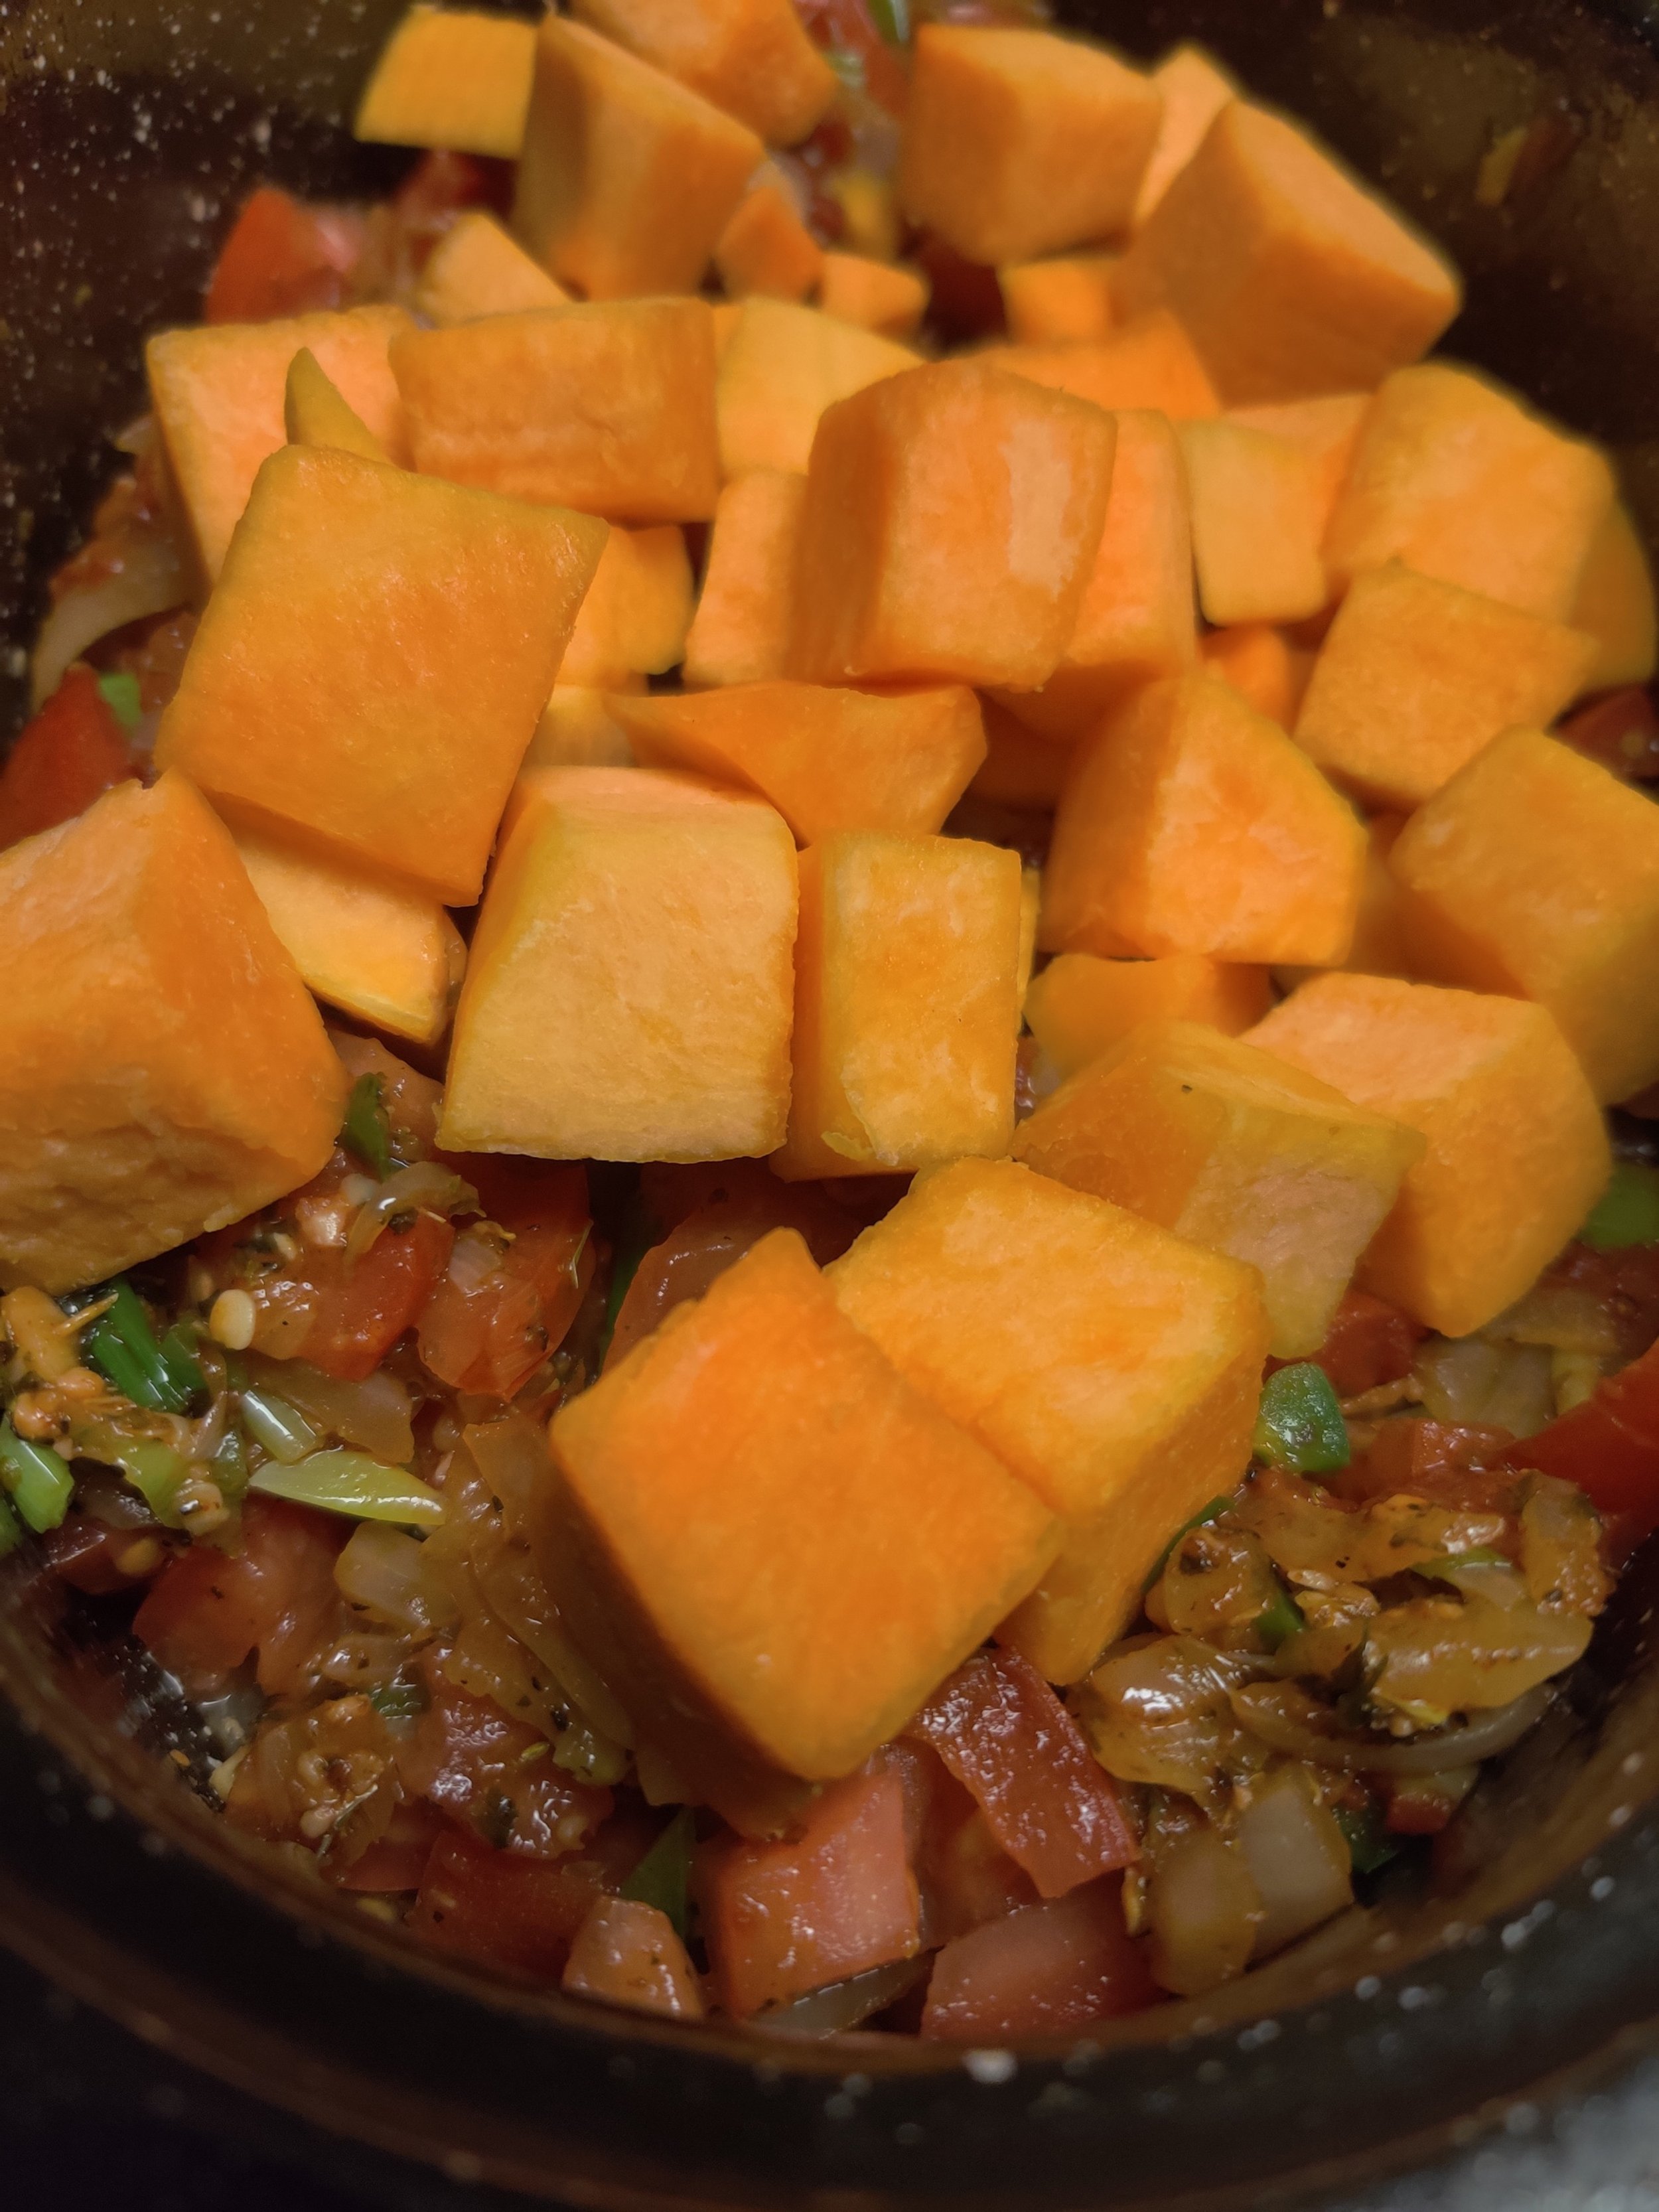
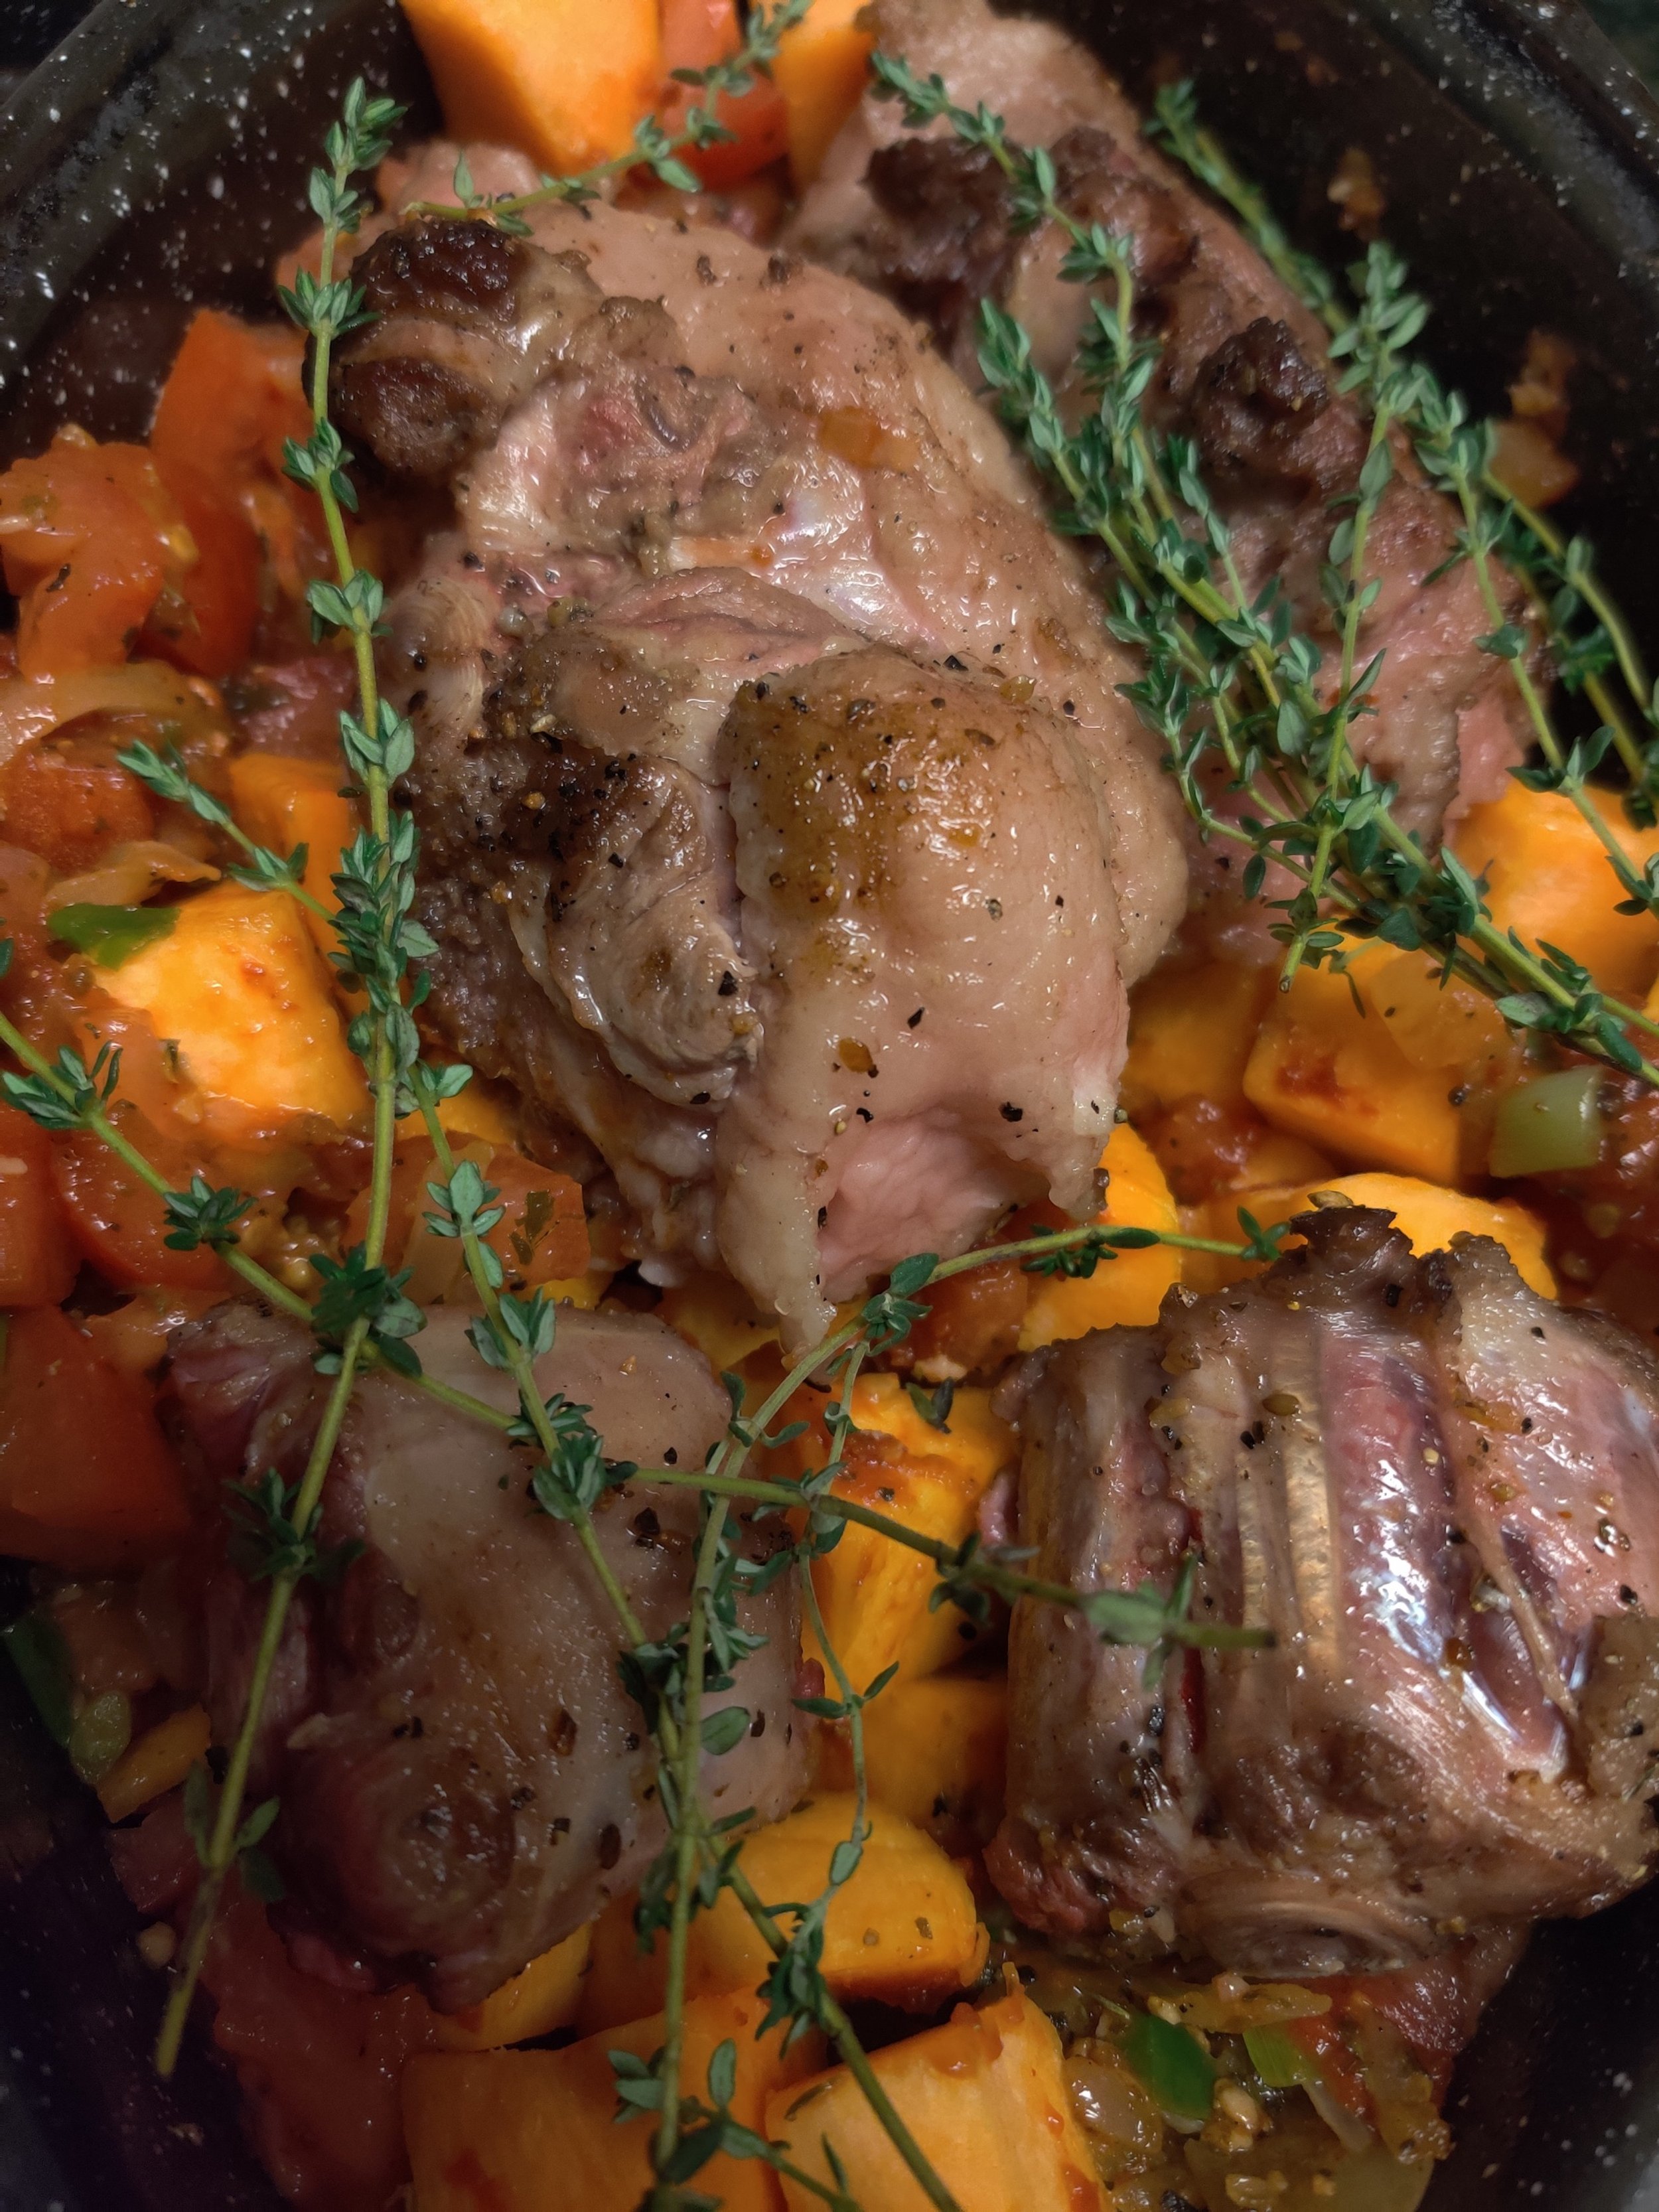
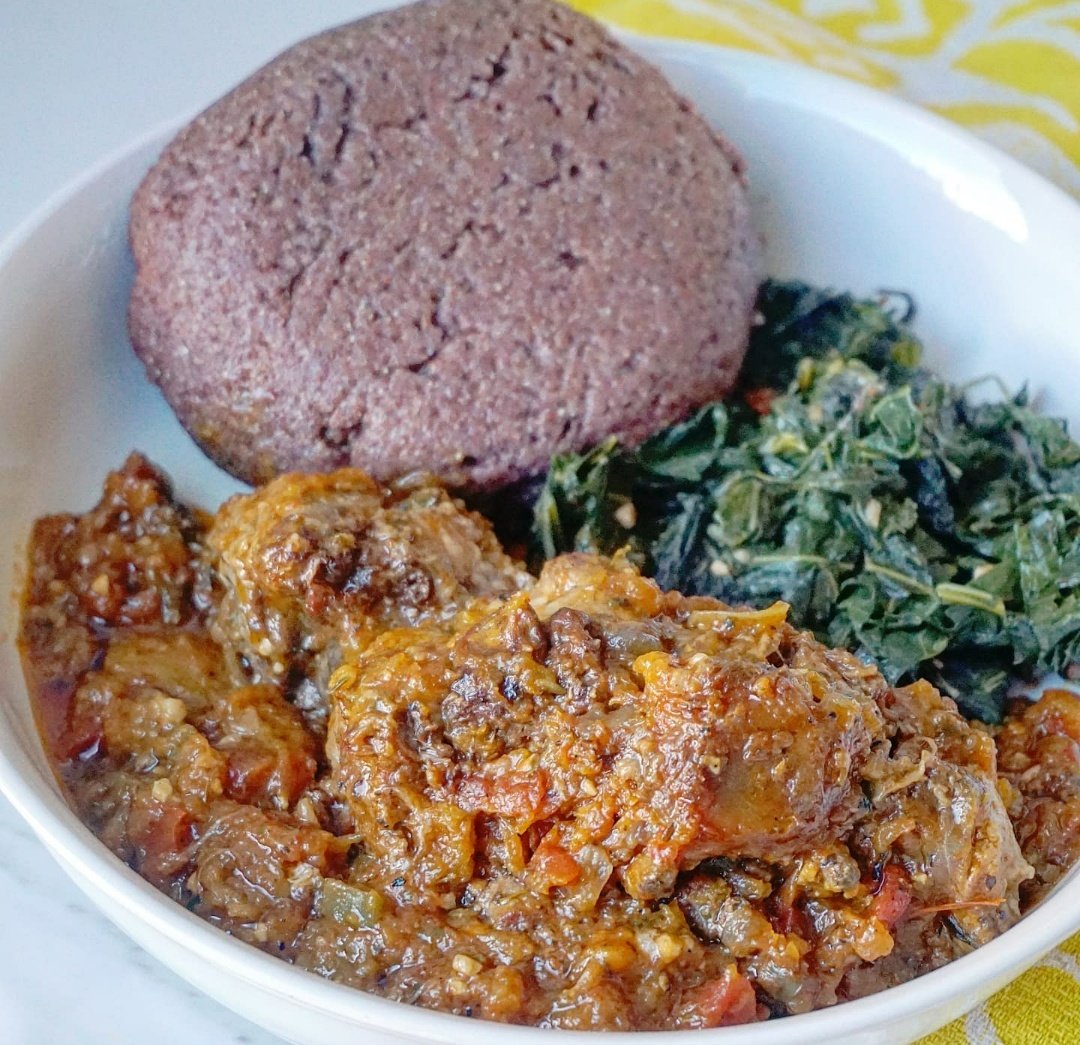
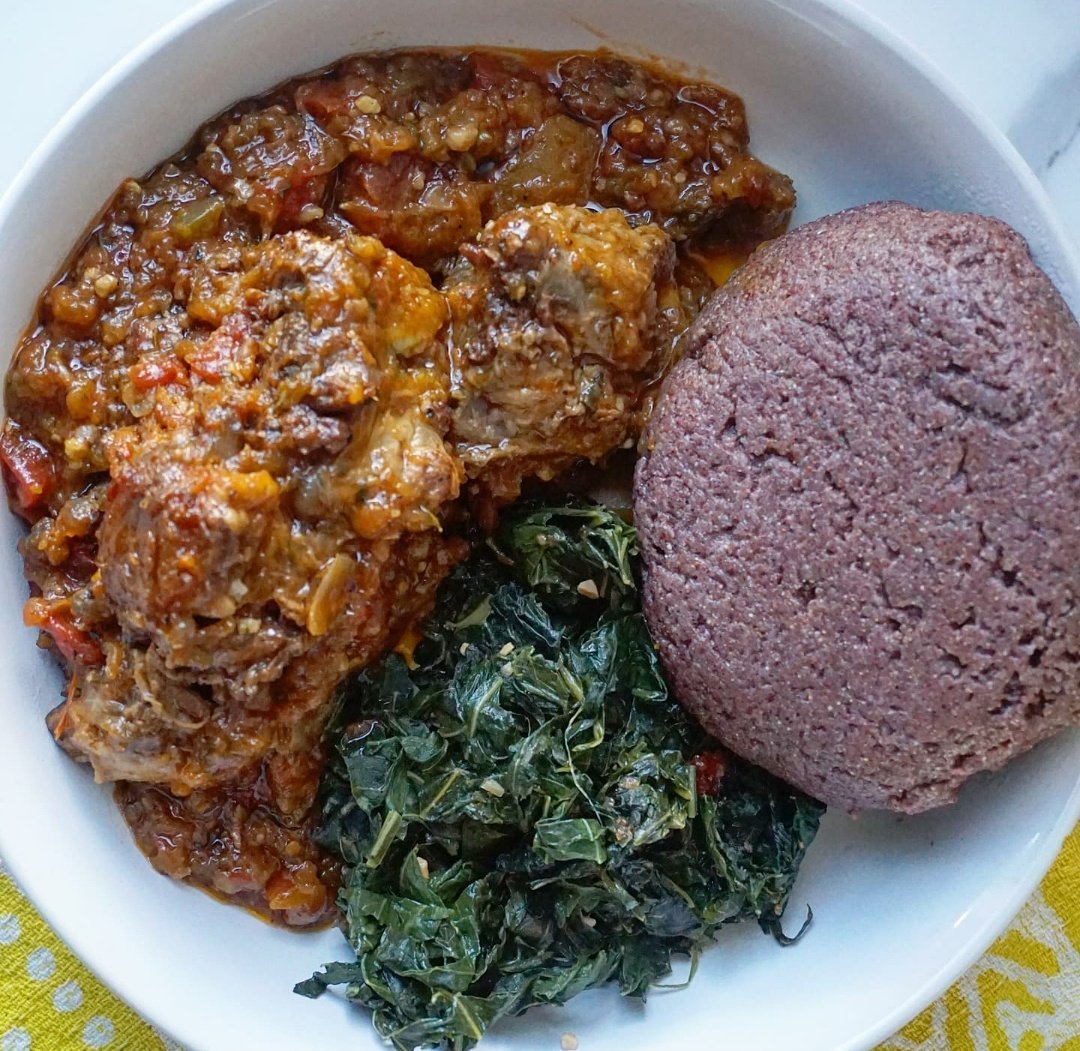
Oxtail and Butternut Stew
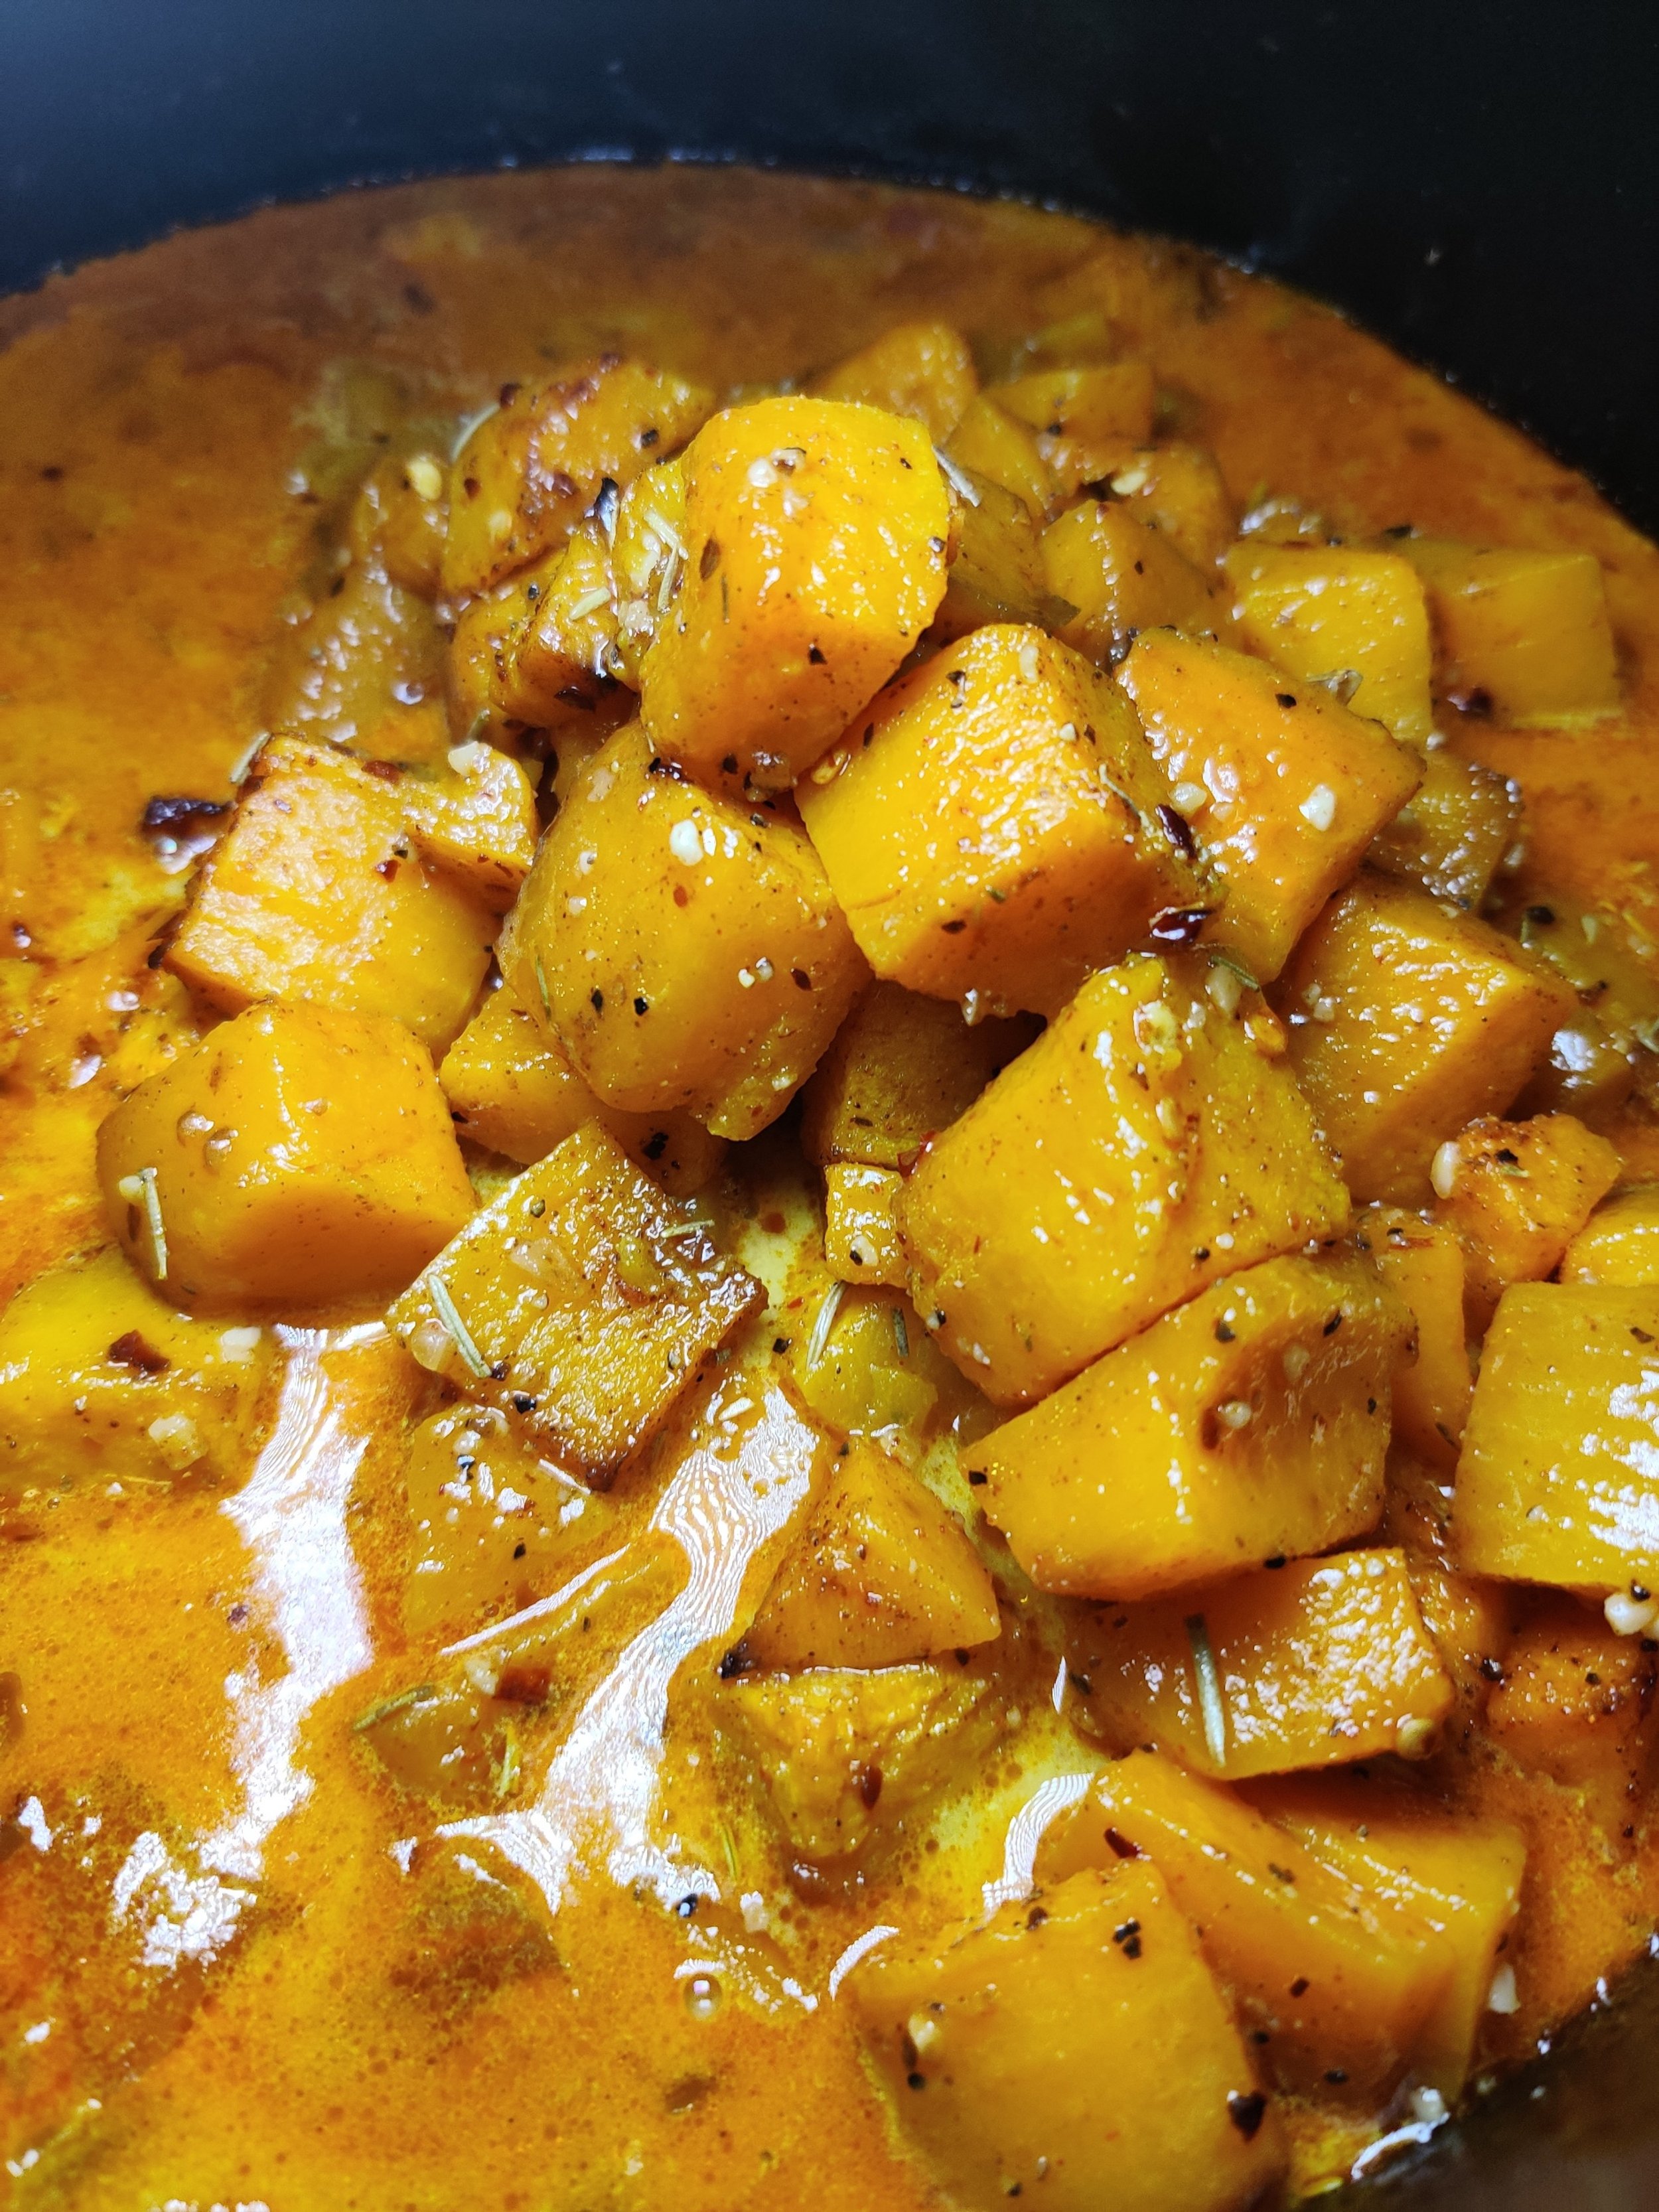
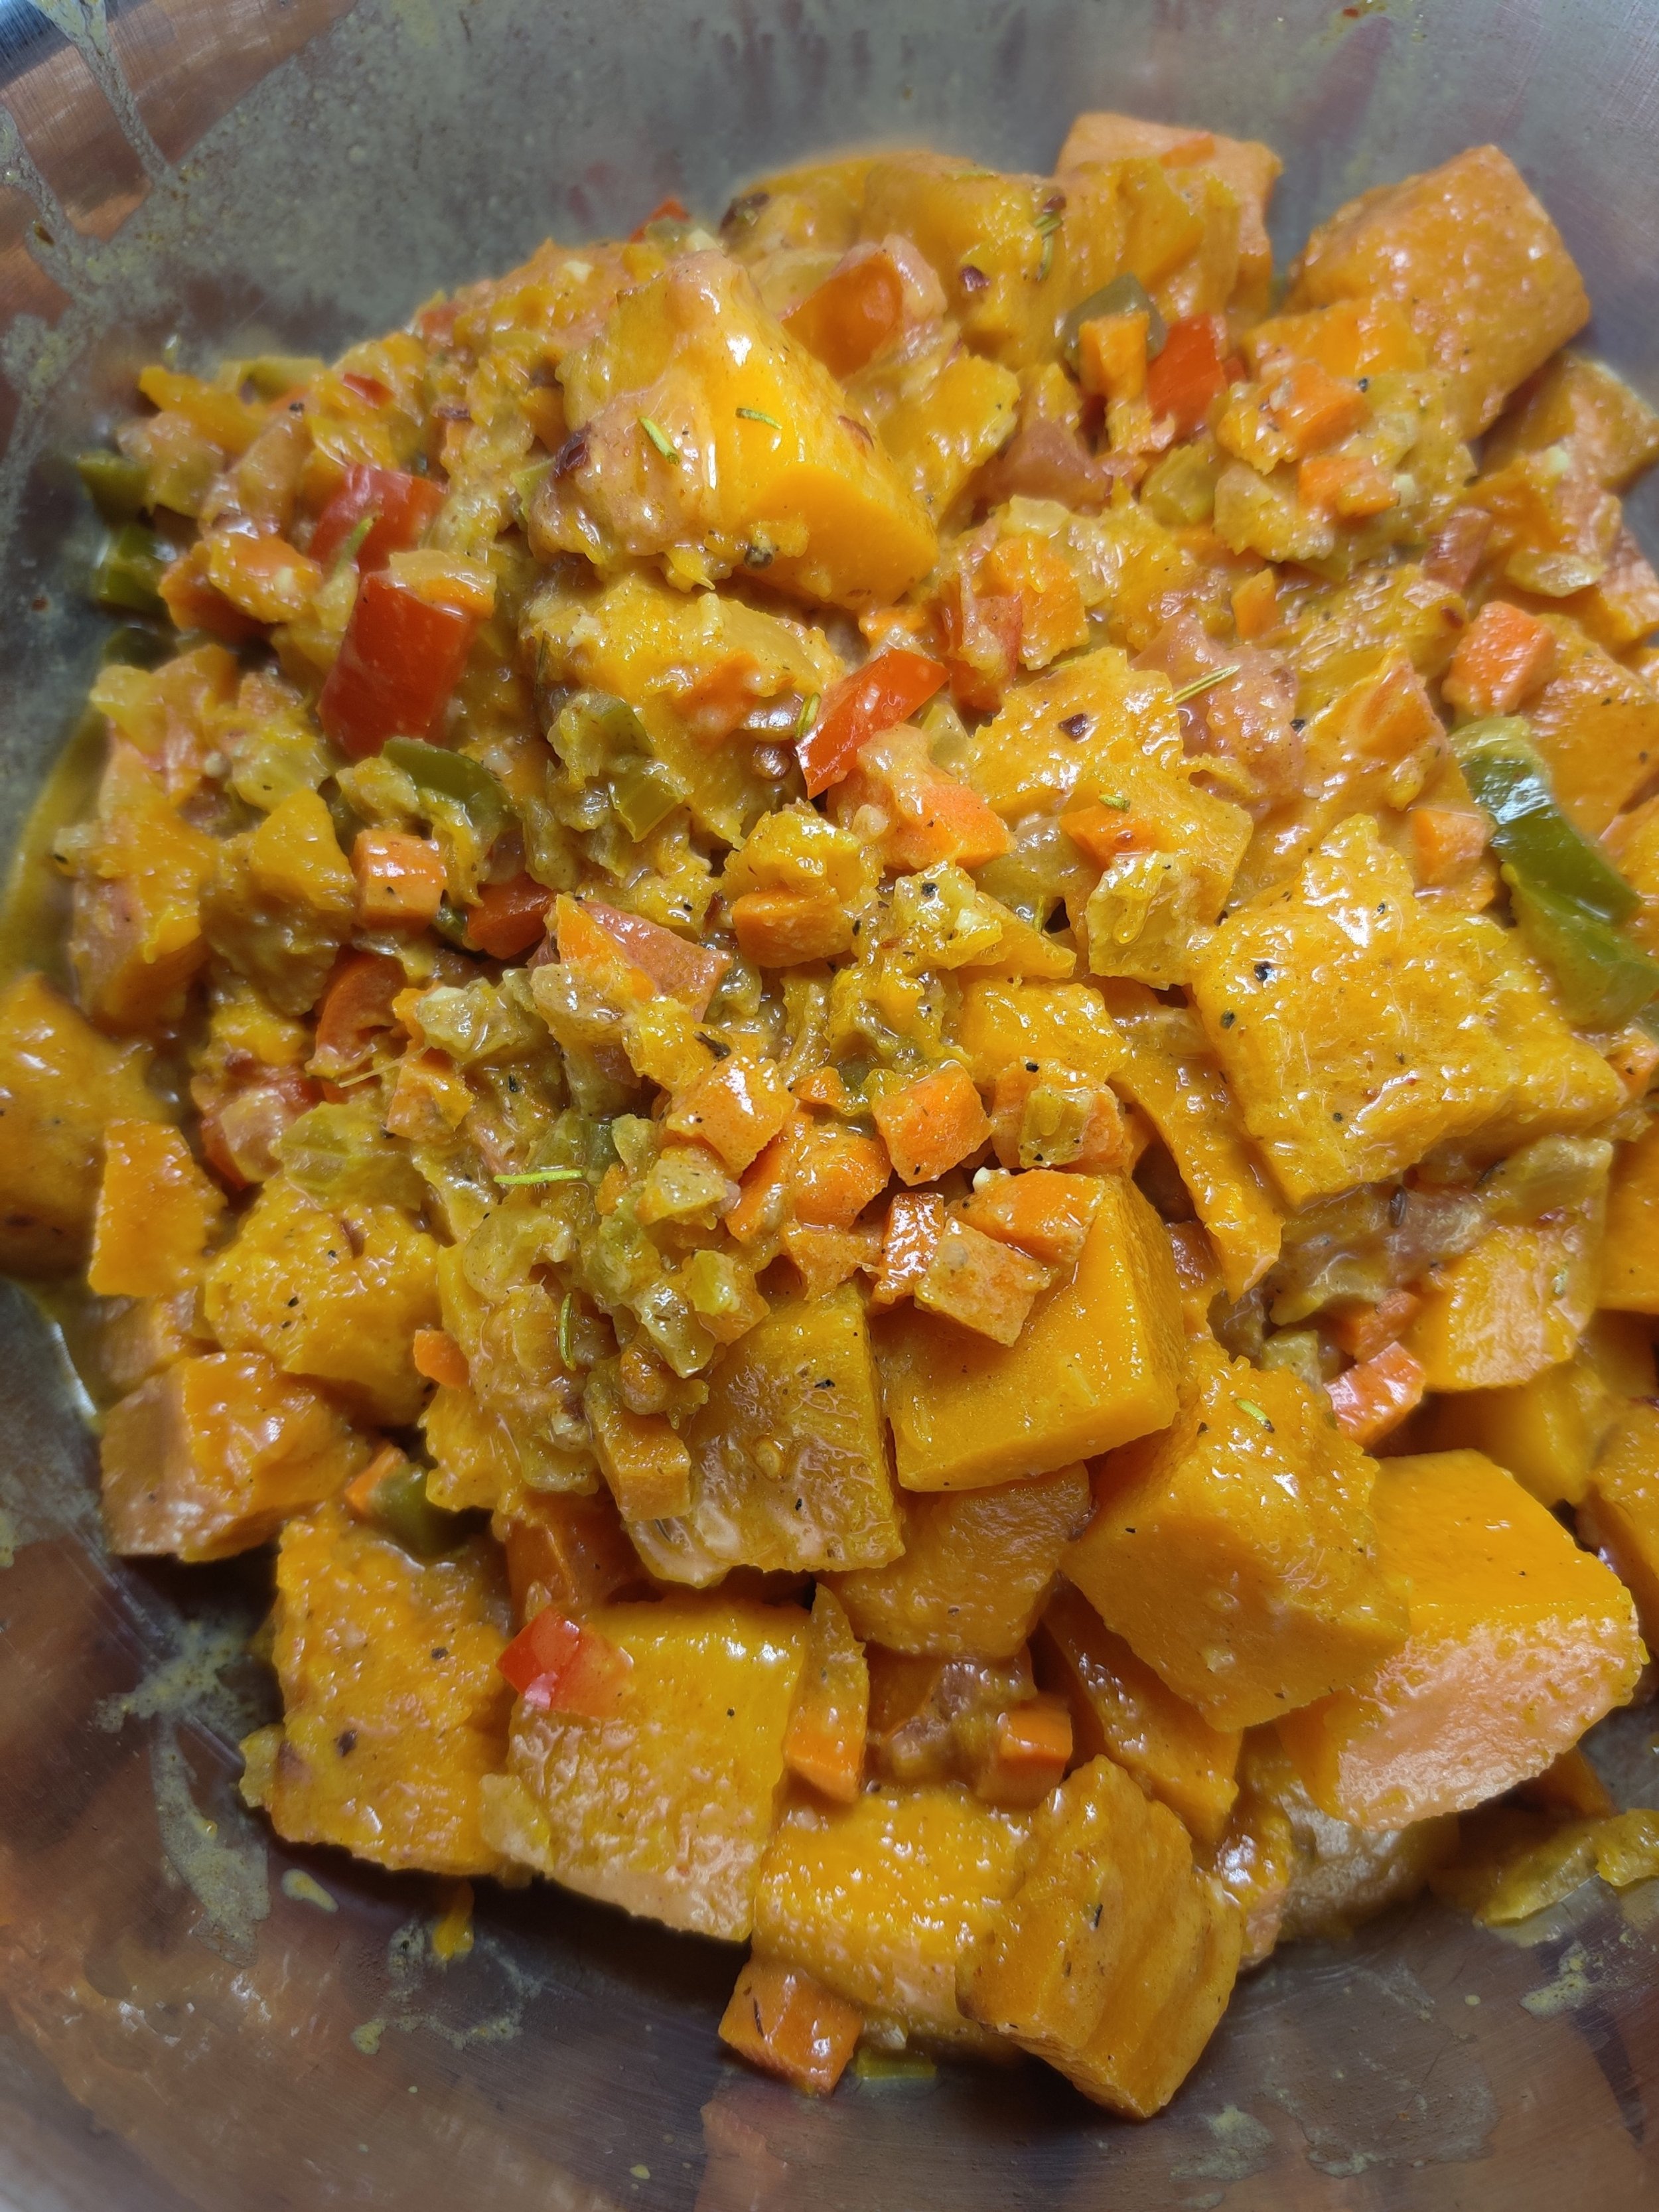
Oxtail. A delicacy set aside for special occasions (at least for me growing up in Zimbabwe). Whenever I saw my mother preparing the bones for the pressure cooker, I would get so excited. Nothing delighted me more than watching every part, from the chopping of the green onions to the constant check-ups and stirs. I've tried oxtail in various cuisines, from Vietnamese oxtail pho to Jamaican jerk oxtail with white beans. I appreciated both, but this simple version of slow cooking the bones with tomatoes and onions many Zimbabwes tend to go for is ideal, in my opinion!
Southern African potjiekos inspired this recipe. Potjiekos are stews left untouched in cast-iron three-legged pots over hot coals, often a mixture of meat, bones and vegetables. With this method in mind and to add some substance, I used butternut.
Oxtail is something to indulge in once in a while, but it's worth it every time. Check out this recipe if you need instructions for the sadza (traditional Zimbabwean starch made of mealie/cornmeal cooked into a soft, thick porridge), although in this case I used finger millet (zviyo).
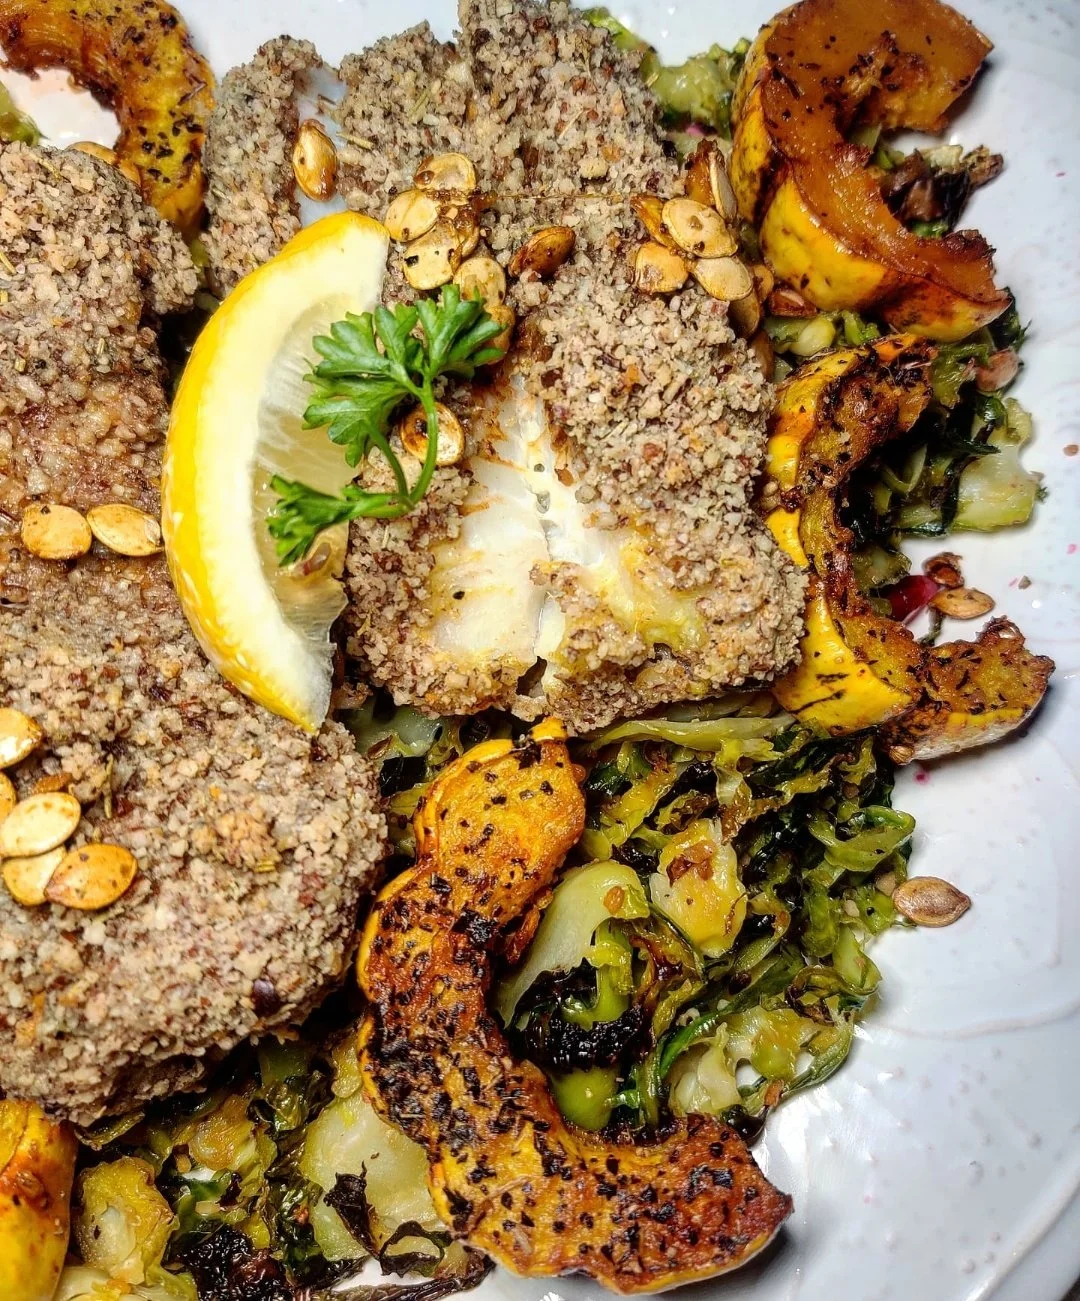
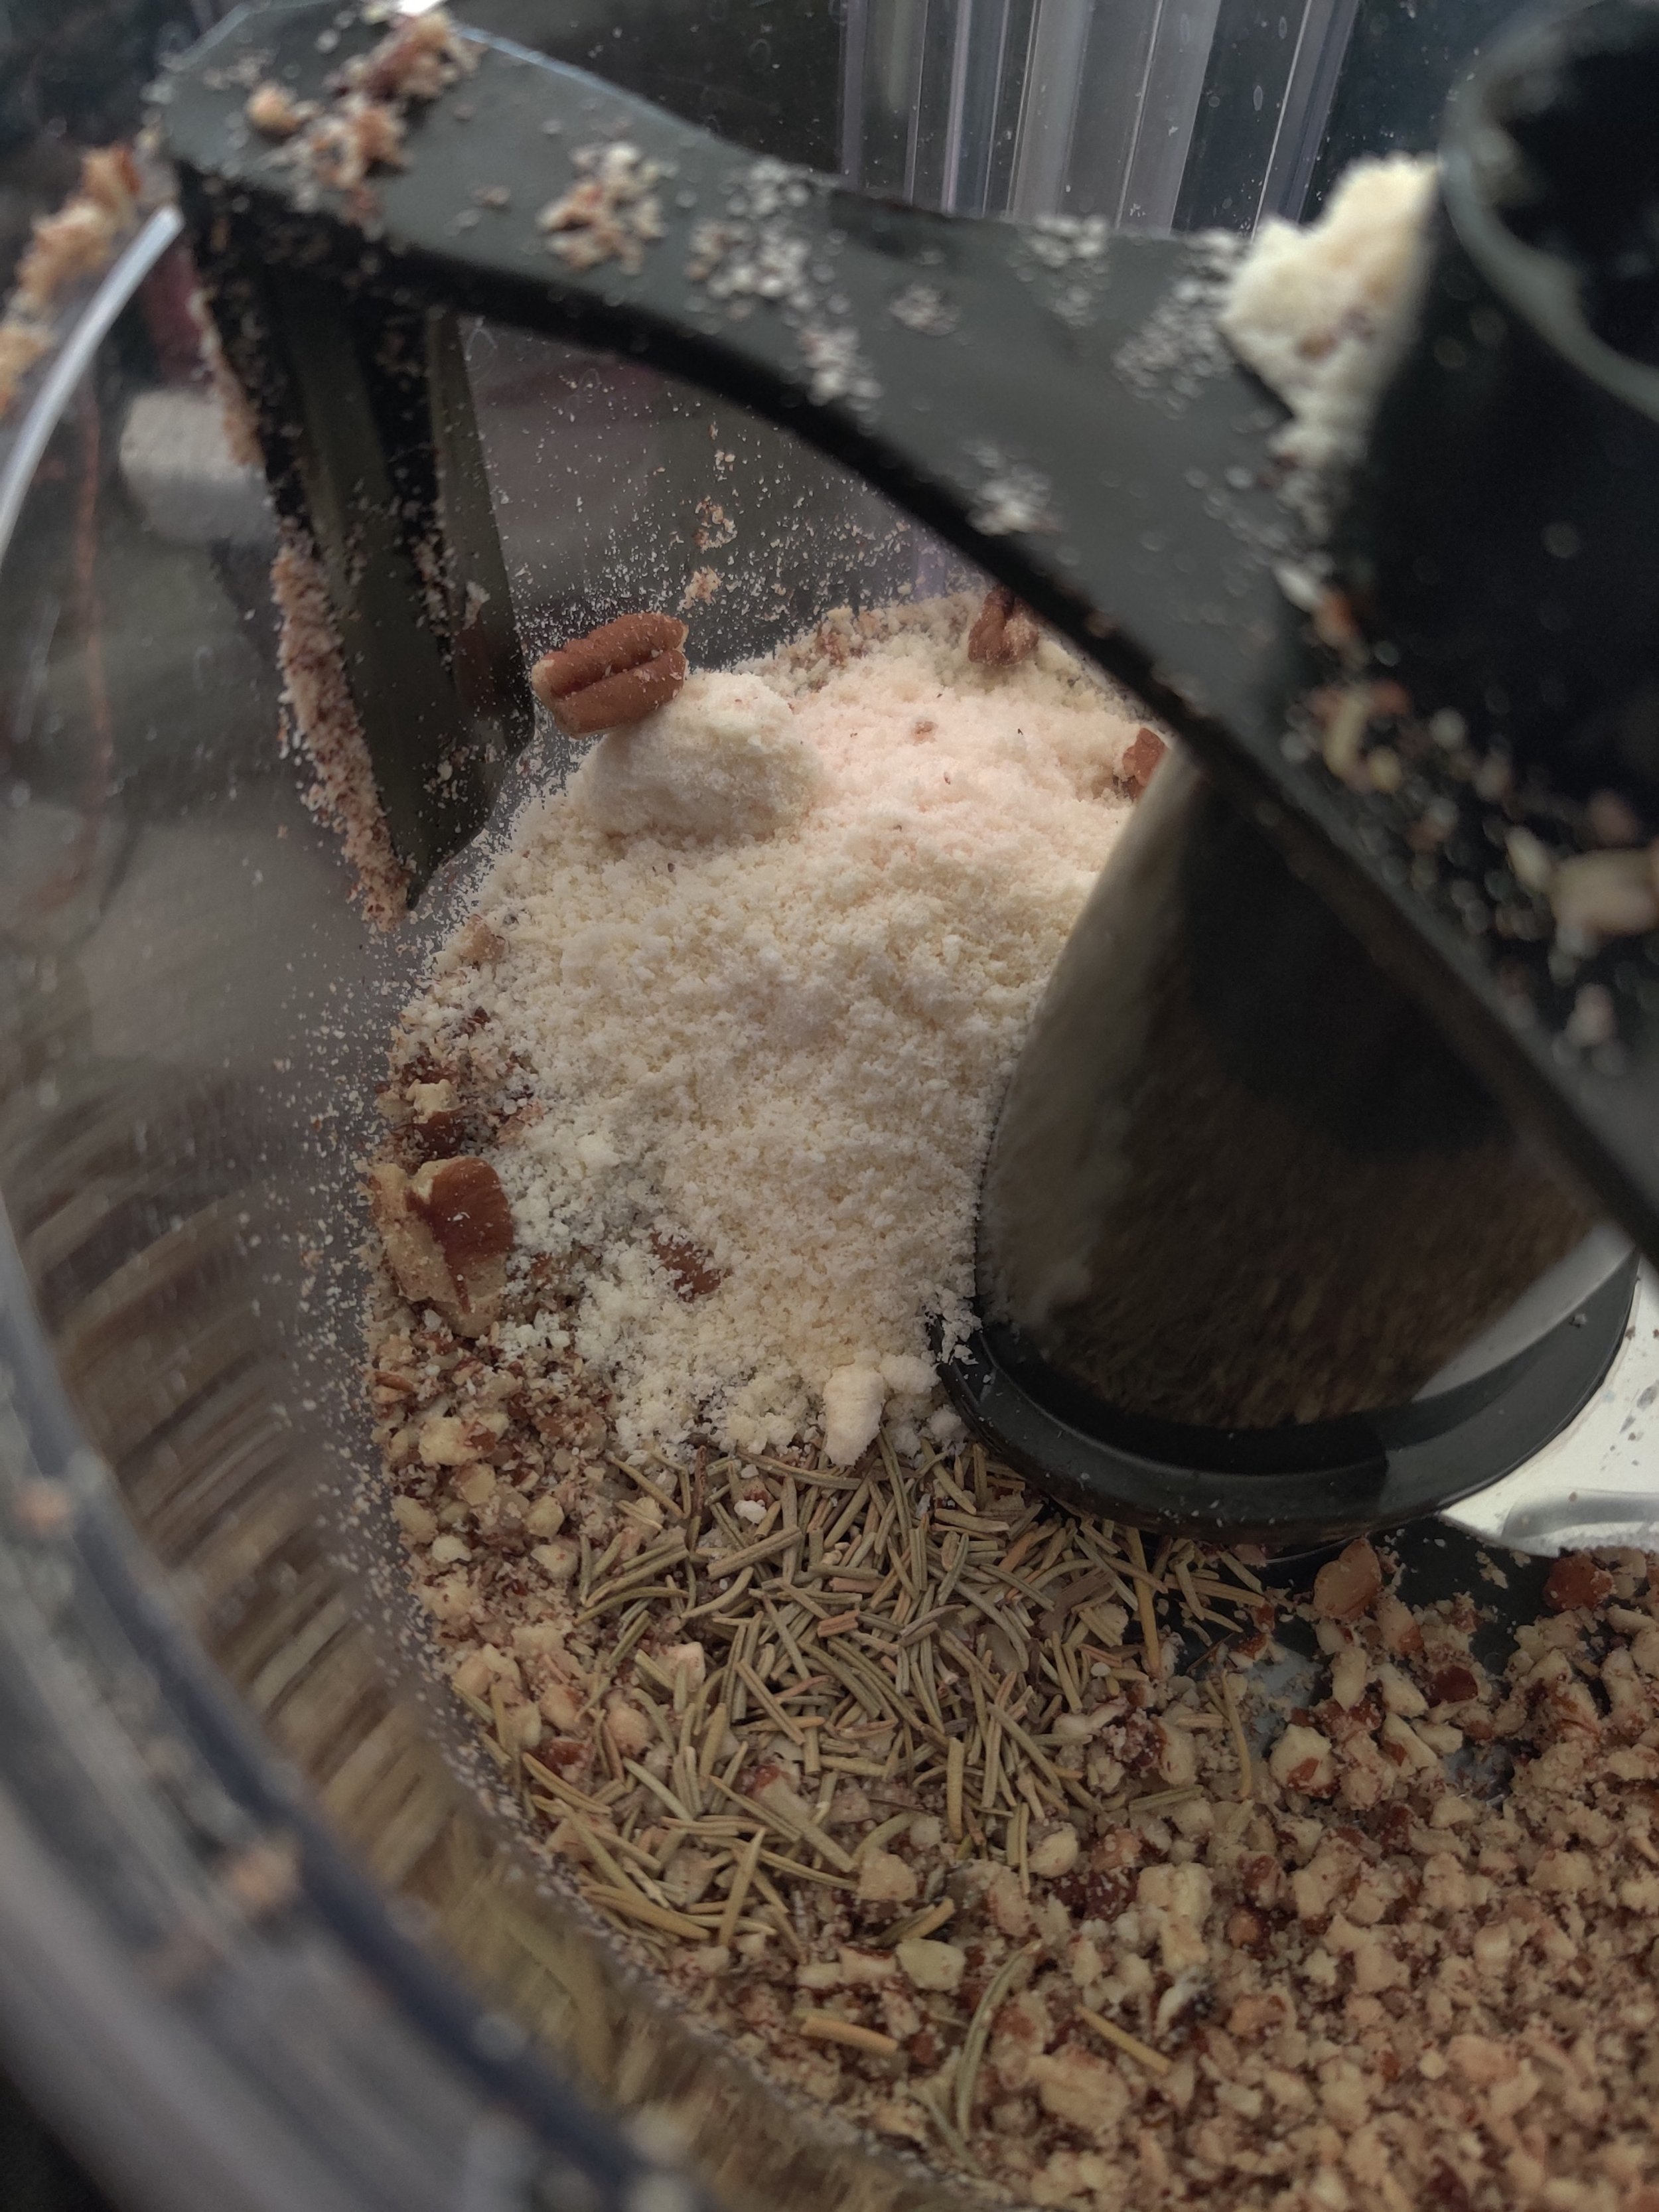
Baked Pecan-Crusted Cod with Brussels Sprouts, Squash and Champagne Vinaigrette
Who doesn't love a juicy piece of crusted fish? Very few people, I would bet! More so when paired with the perfect vinaigrette or sauce. I'm a sucker for seafood, no matter the time of the year it is, and autumn is no exception. As I've done with fish and chips before, putting a seasonal spin on your fillets makes for a great addition to the table! Sitting some juicy fillets on a bed of vegetables makes for an easy and nutritious lunch or dinner solution. The pecan and parmesan crust in this recipe gives the fish some extra body and a nutty flair, and the complimentary champagne vinaigrette brings all the flavours together!
Cod Fish
Use boneless, thick white-fleshed fish fillets like cod. These will absorb flavour and can hold well when baked at high heat (or sauteed to crispen up the crust more). You also don't want fish too oily so that the crust remains a bit more intact!
Pecan Crust
Speaking of crust, what nut screams autumn or the impending holiday season more than pecans? Before or after pecan pie, this is always a great combo if you don't have a nut allergy! Particularly on fish and mingled with grated parmesan for some umami; this will add texture and some mouthwatering mildly sweet and nutty undertones.
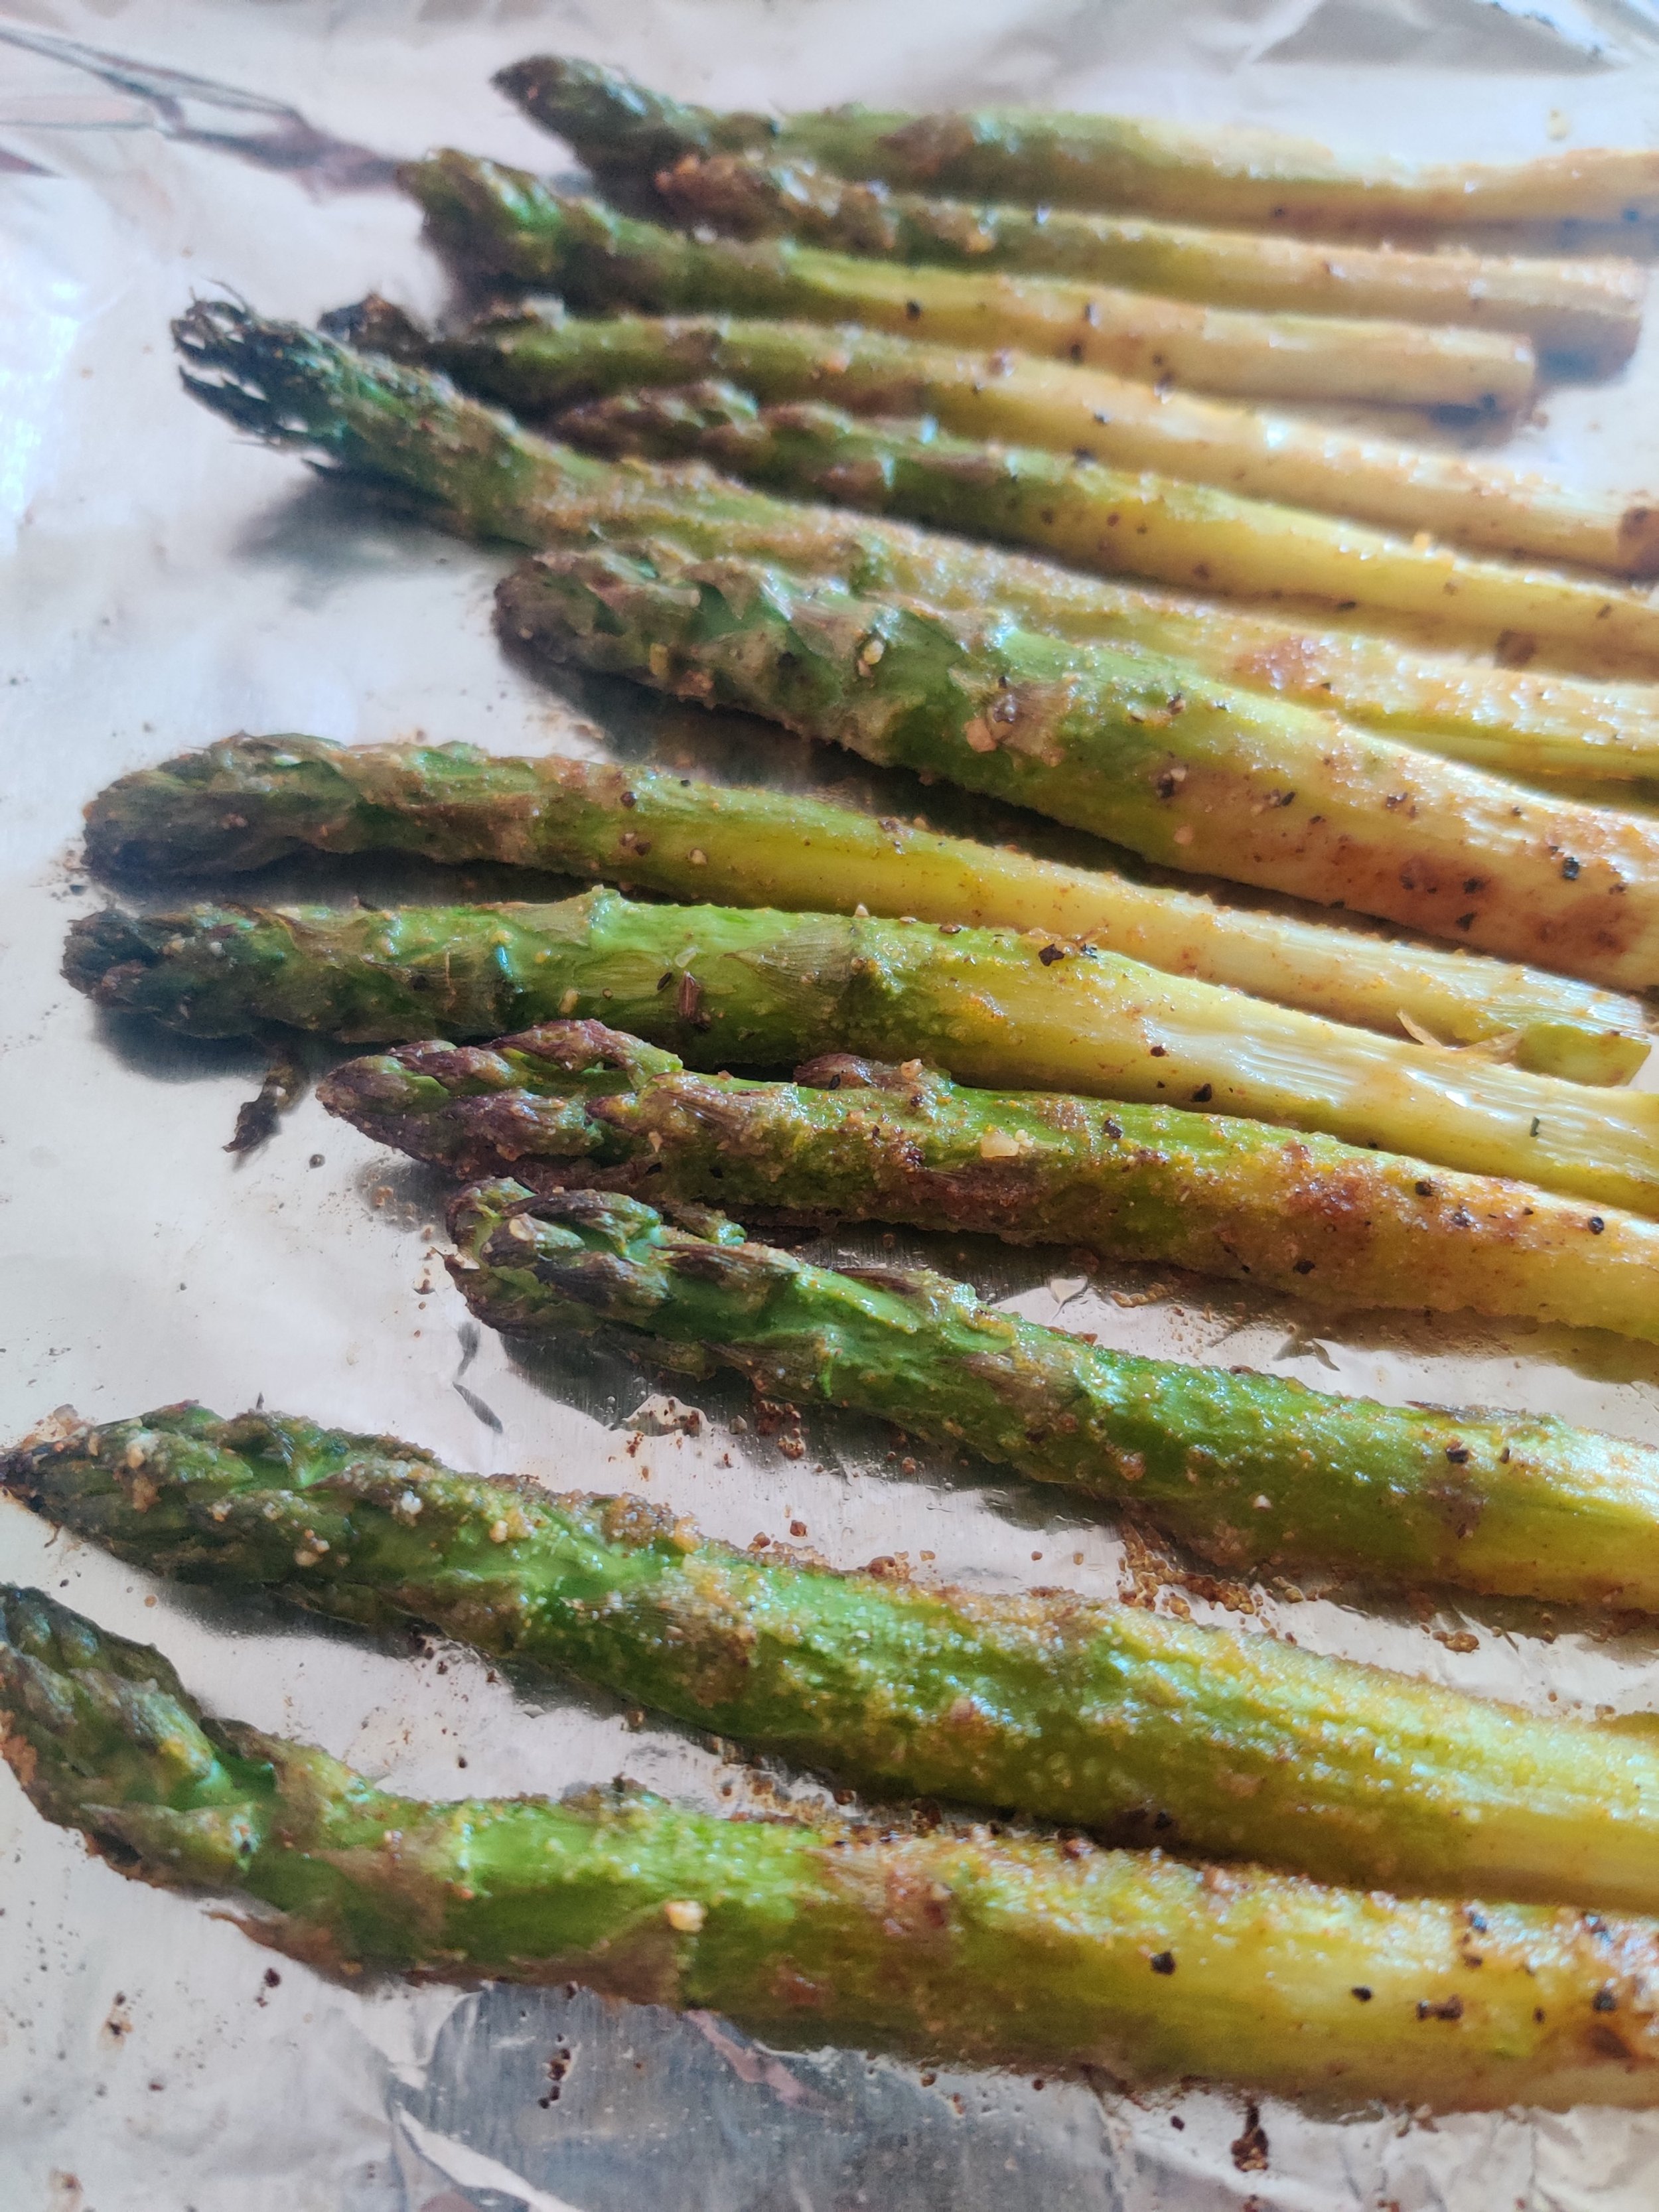
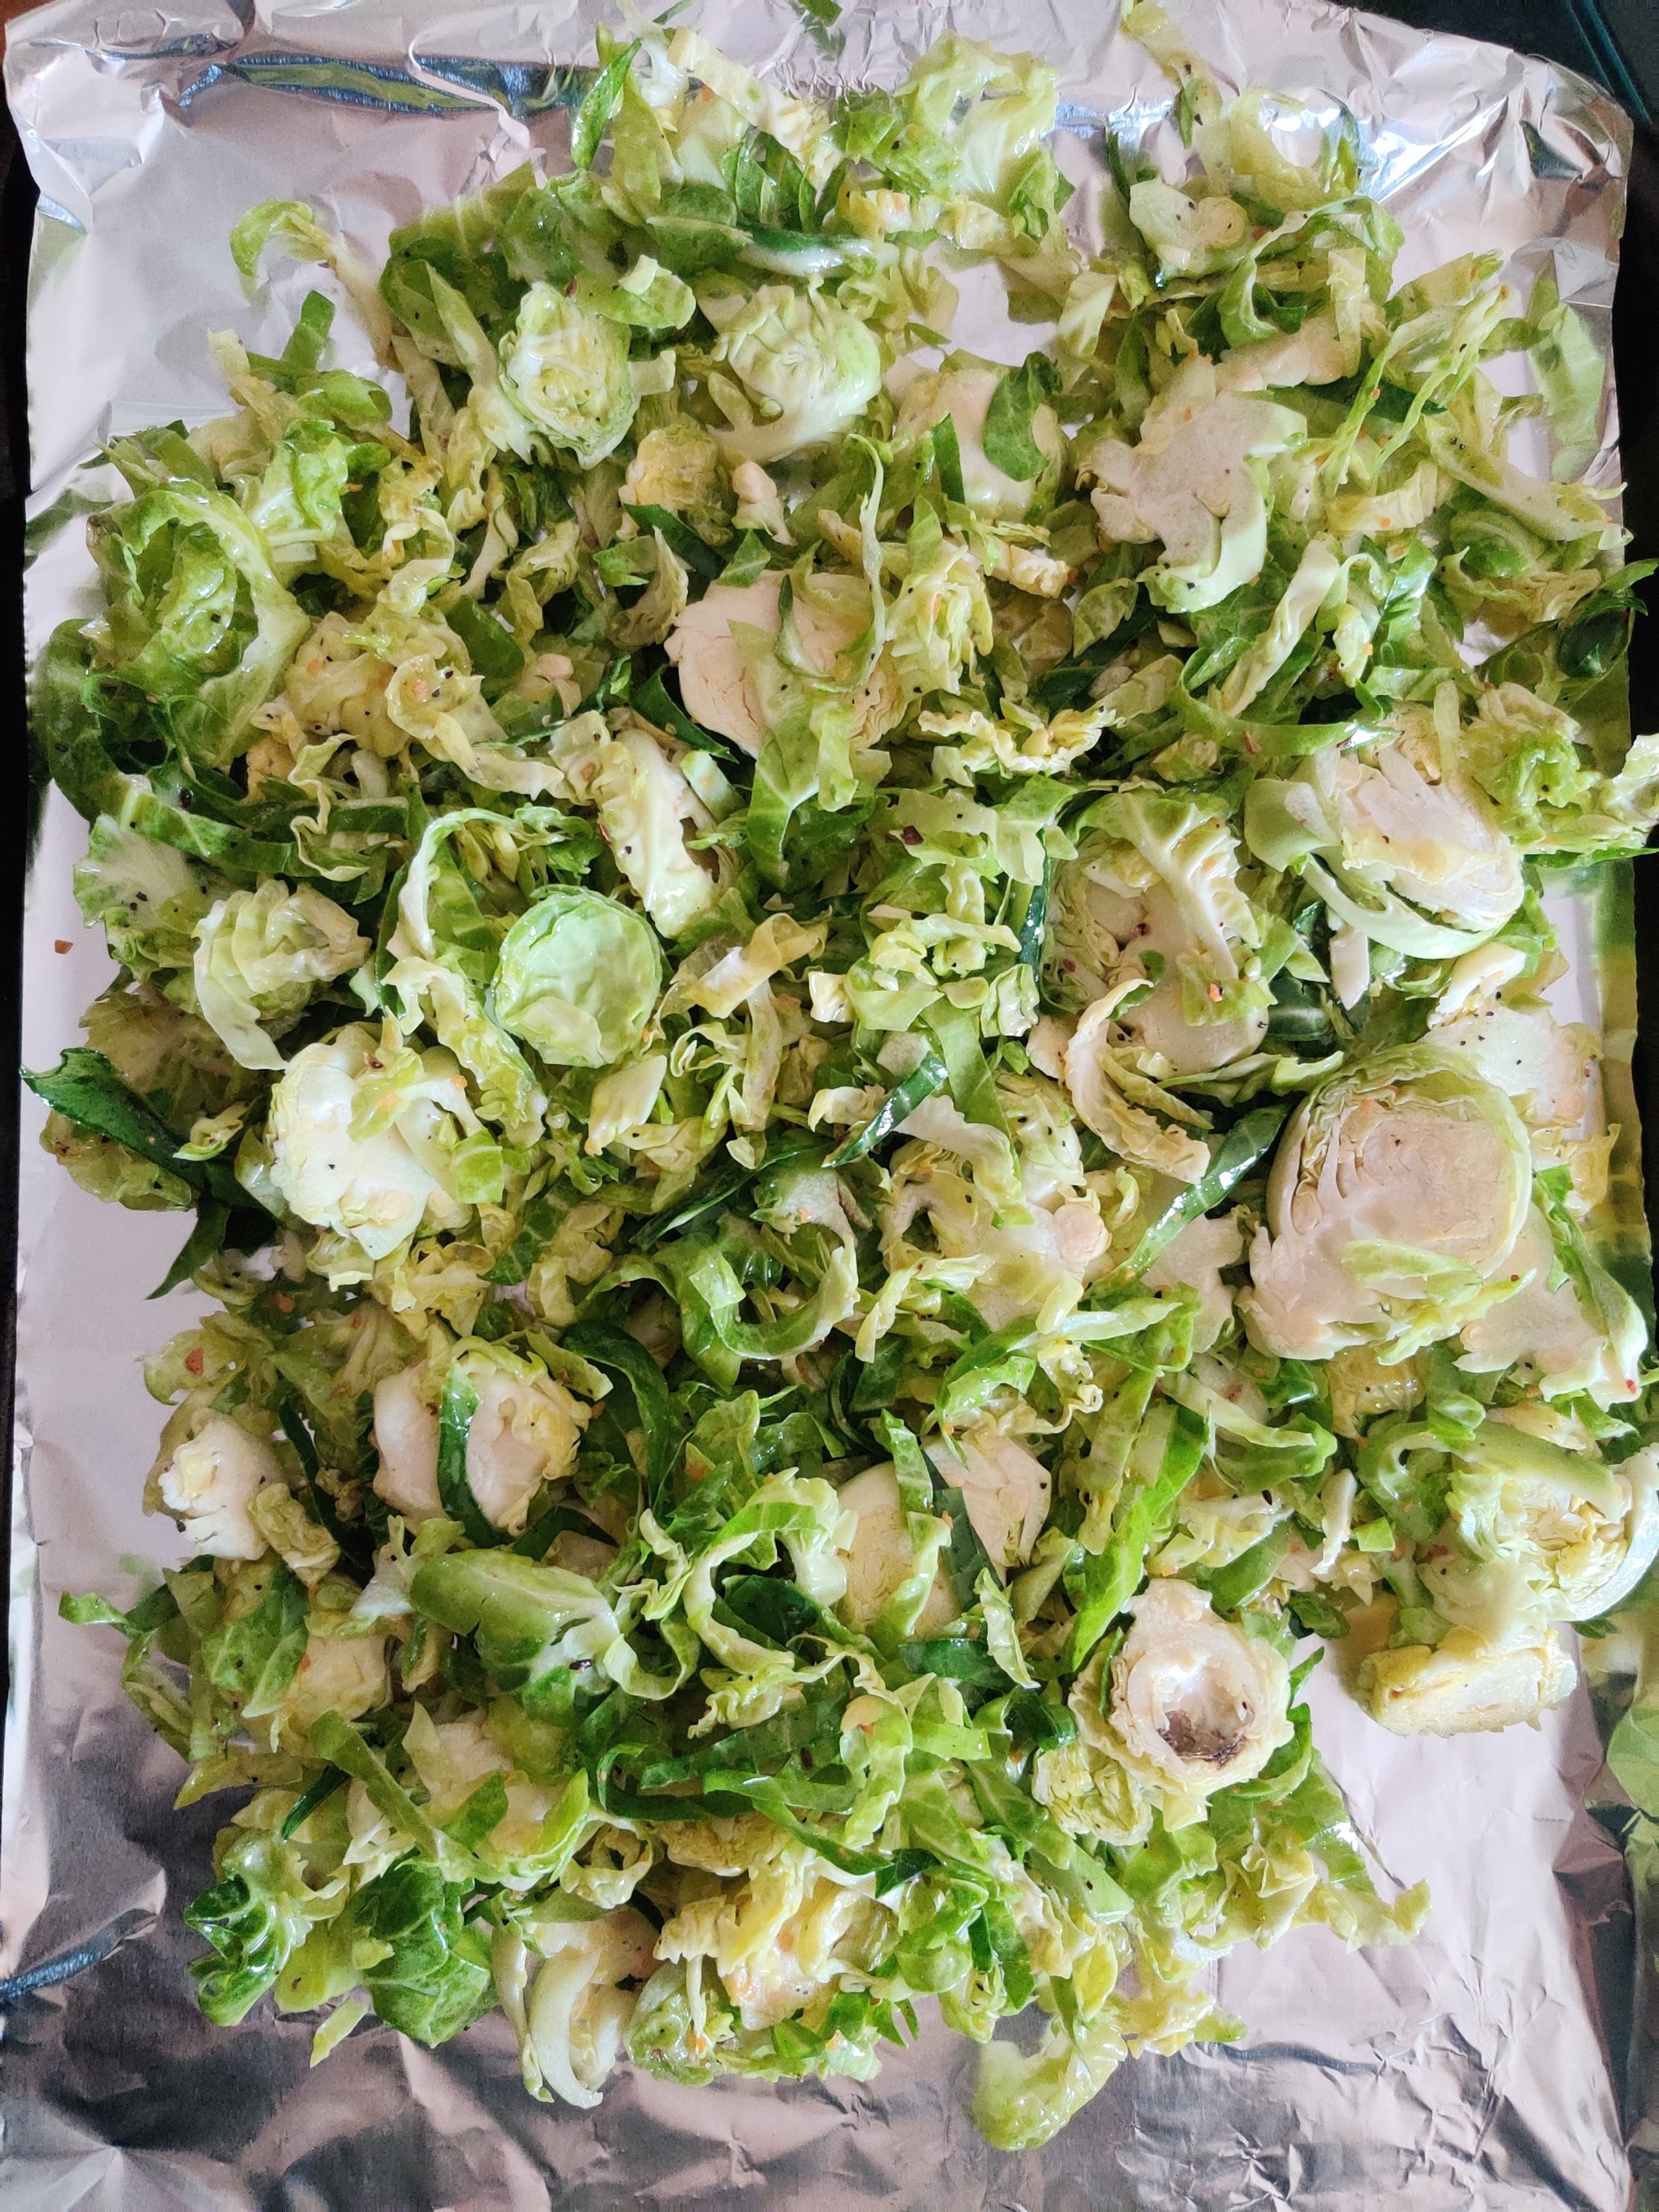
Brussels Sprouts
Another seasonal vegetable towards the end of the year that is more versatile than people realize is Brussels sprouts! Typically roasted with bacon or garnished with candied pecans, simply tossing them in olive oil, salt, black pepper, and garlic powder on a baking sheet works just as well for a salad base. Peppered with a few pomegranate seeds, and you have your greens set. The shaved version will work the best in this case! You can get them store-bought or grate some whole ones yourself.
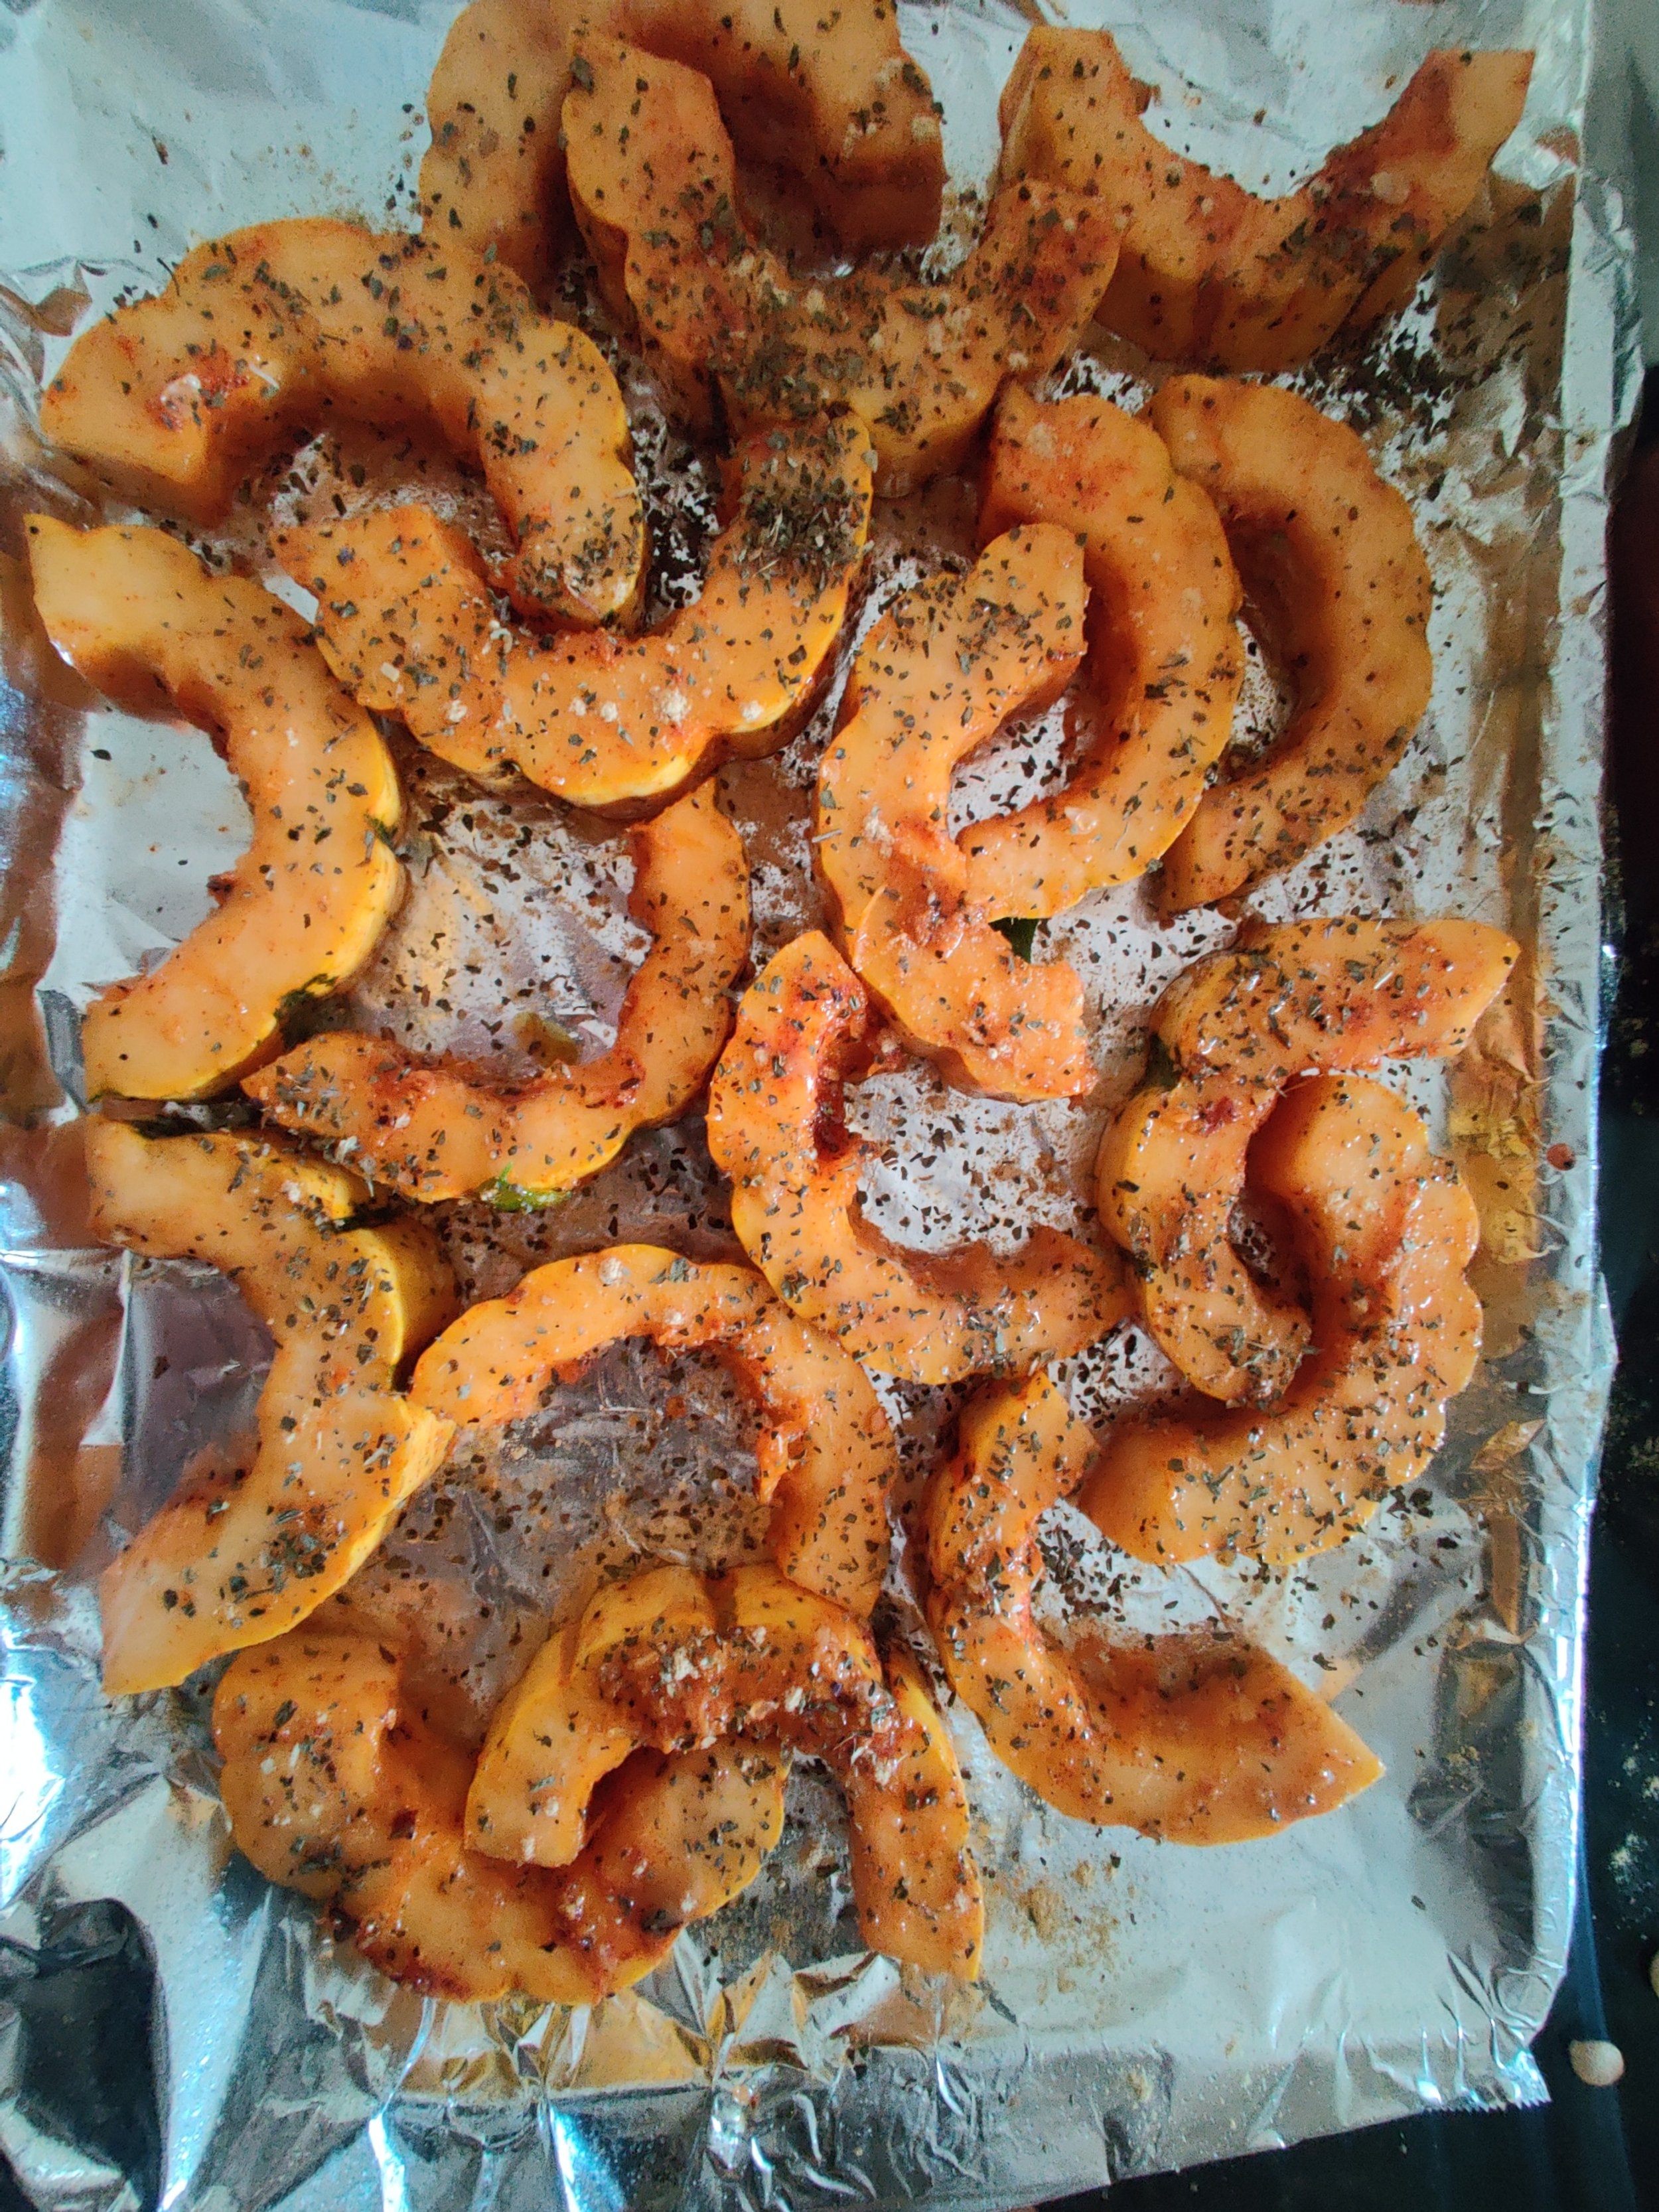
Delicata Squash
If anything screams autumn, it's squash. Roasted with a dusting of smoked paprika, ginger, basil and garlic, some delicata squash will complete the salad and add some substance and nutrients. What does it taste like? It's not called the 'sweet potato of the squash family' for nothing!
Dressing
Last but not least, to tie everything together, as with every good salad and quality piece of fish, I used a (champagne) dressing from Dress It Up. Champagne is not only compatible with fish when drinking, but it works well as a condiment or integrated into the recipe itself. Here, you can find out more about Dress It Up in another recipe I tried using their Sesame Tahini Dressing!

Ingredients
2 cod fillets
1 teaspoon salt
1 tablespoon black pepper
2 tablespoons seafood seasoning
1 egg
1 cup all-purpose flour
1 lemon (optional)
Crust:
1 cup pecans
1/2 cup grated parmesan cheese
2 tablespoons dried rosemary
1 tablespoon coarsely ground steak seasoning (equal parts salt and black pepper)
Salad:
12-ounces shaved Brussels sprouts
1/4 cup olive oil
1 teaspoon salt
1 tablespoon black pepper
1 tablespoon garlic powder
2 tablespoons pomegranate seeds
1 delicata squash, sliced into 1 inch half circles, then halved again
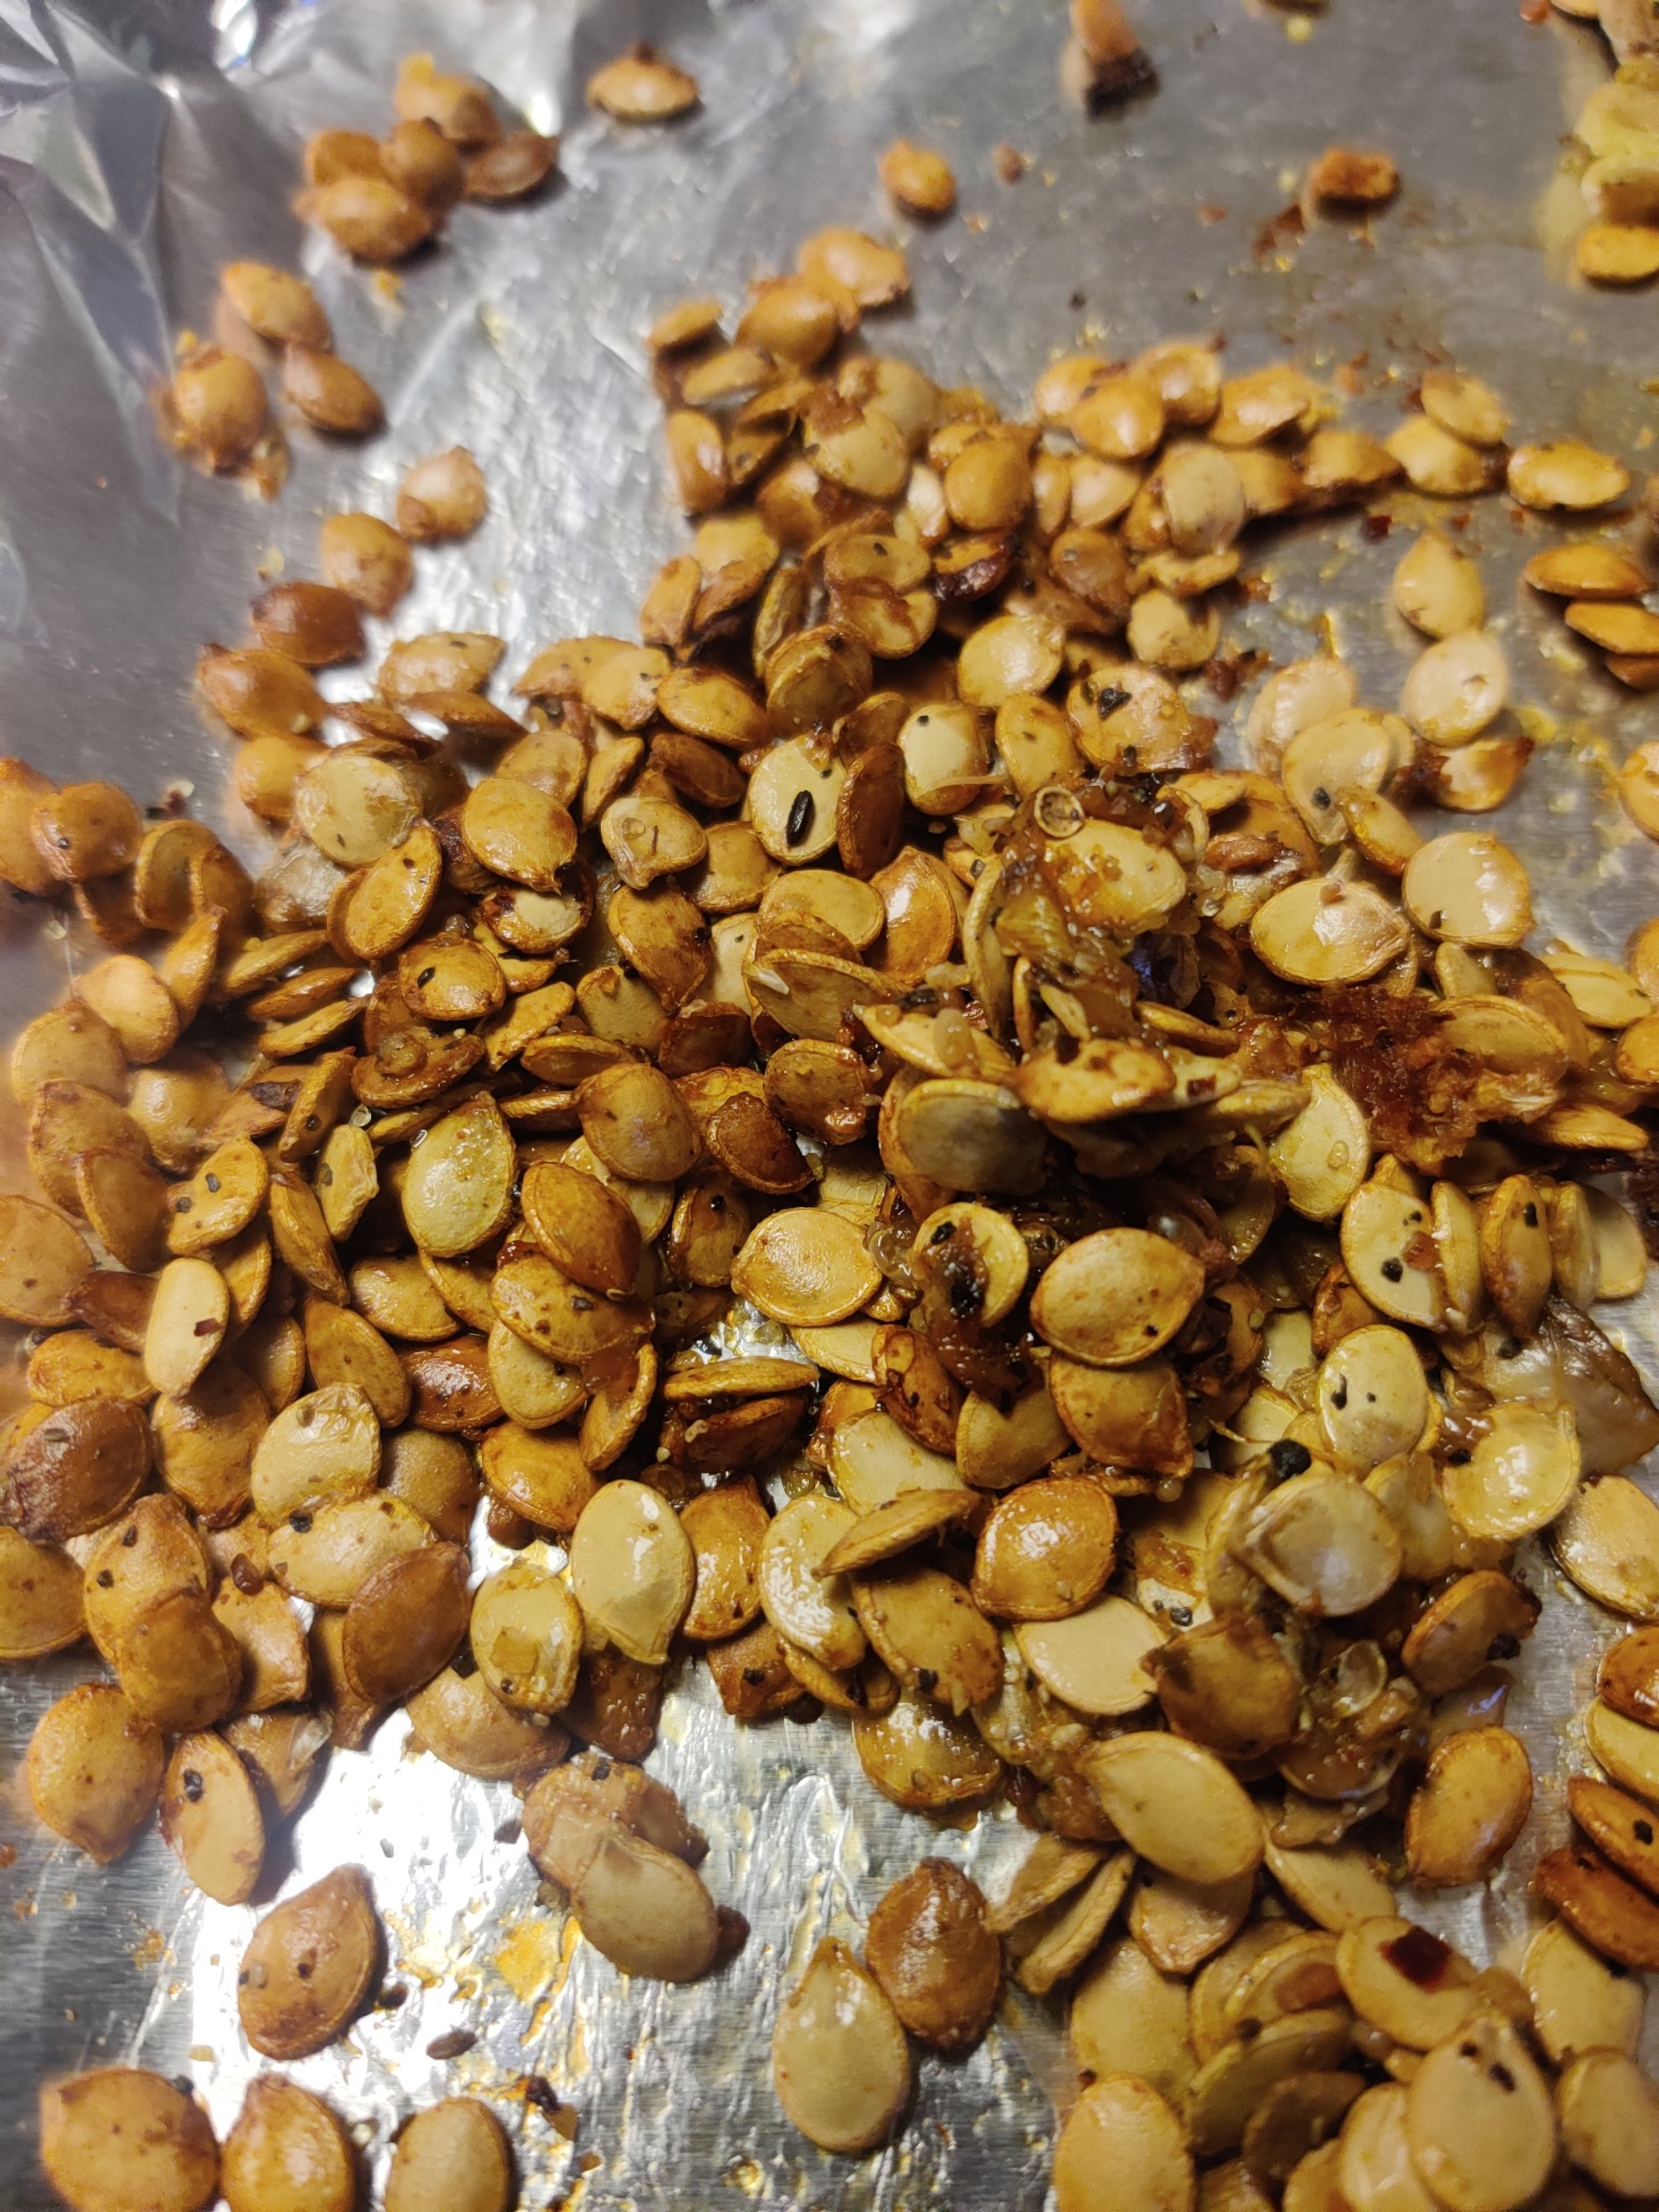
Delicata squash séeds (optional):
1 delicata squash’s worth of seeds
2 tablespoons olive oil
1/2 teaspoon salt
1 teaspoon black pepper
1 tablespoon smoked paprika
1 tablespoon garlic powder
1 tablespoon dried basil
1 teaspoon ginger powder

Instructions
In a large bowl, toss the Brussels sprouts with olive oil and seasoning. In another bowl, repeat the same with the cut-up, deseeded squash. Side by side, move both vegetables to a baking tray lined with parchment paper. Bake at 375F for 15 minutes until fragrant, softened and slightly crispy. You may cook the squash a bit longer than the sprouts if necessary.
While the sprouts and squash bake, prepare the seeds, wash and dry, the oil and season. Place them in the oven at 400F for 12-15 minutes until crispy. You can also use an air fryer and adjust the temperature and time accordingly!
In the meantime, take the fish out of the fridge to bring it closer to room temperature.
In a food processor, pulse the pecans, salt, pepper, and parmesan cheese until mostly fine (though you can leave it on the coarser side if you prefer). Set aside in a shallow container.
Season the fish with salt, pepper and seafood seasoning. Prepare two other shallow dishes with the egg (beaten) and the flour for dredging. Take turns and dip each fish in the egg, then the flour, then the pecan crust. You can coat the entire fillet or only the top and bottom of each piece.
In a skillet, melt the butter on medium-low heat. Cook the fillets on both sides until browned, about 4 minutes each. Carefully transfer with a spatula to the oven on a parchment-lined baking tray at 350F for 15-20 minutes, cooking until the fish's internal temperature is at least 180F. You can also skip to the baking once the fish is crusted.
In a large bowl, place the salad. Arrange the squash on top and sprinkle with pomegranate seeds and delicate seeds on top. Place the baked fish fillets on top and serve warm with the champagne vinaigrette.

Homemade Falafel Salad with Sesame Tahini Dressing
I love chickpeas in every shape and form, but falafel makes the top of the list! Most people wait to enjoy falafels at the store, but they are pretty simple to make in the comfort of your own home. All you need are dried chickpeas, fresh herbs and some spices. A food processor for appliances will make this a lot easier. I used this one from Hamilton Beach.

I'm not going to assume everyone reading this knows what falafel is or where it originated! As a Southern African, I was introduced as a young adult on the streets of New York, from one of the many mouthwatering Halal trucks parked on the side of the road or one of the shawarma stores littered throughout Lower Manhattan. Falafel balls are deep-fried fritters that came out of the Middle-East, and can also be made using fava or broad beans. They can be eaten as they are, on top of a salad or bed of vegetables, but typically stuffed in a pita or flatbread pocket.
Served with what you may ask? Tahini-based sauces, derived from sesame seeds.
This small women-owned business makes natural vinaigrettes and dressings. Their Sesame Tahini is not only one of my favourites but goes perfectly with my homemade version of falafel; I recommend giving it a try; it will give a lot of other dishes a toasty tang. It has two awards for a reason: a 2018 Good Food Award and a 2018 SOFI Award! No junk, just delicious flavour to compliment the food! This recipe calls for a condiment you can find at your local grocery store or online at dressitupdressing.com.

Ingredients
2 cups dried and (soaked overnight) chickpeas--don't use canned!
1/2 teaspoon baking soda (to help soften the chickpeas)
1/2 cup fresh dill
1 cup fresh parsley
6 fresh garlic cloves
1/2 medium yellow onion
1 tablespoon salt
1 tablespoon black pepper
1 teaspoon cayenne
1/2 jalapeno
2 tablespoons toasted sriracha sesame seeds
1/2 teaspoon ground cardamom
1 tablespoon smoked paprika
1/2 teaspoon baking powder
1/2 teaspoon fenugreek powder
1 tablespoon cumin
1 tablespoon coriander
Peanut oil for frying
Salad:
1/2 bag arugula
1 cup purple cabbage, shredded
1/2 cup cherry tomatoes
1/2 large seedless cucumber
Sesame oil
2-4 scoops roasted red pepper hummus
1-2 avocadoes
Sriracha mayo
Wasabi sauce
Sesame tahini vinaigrette


Instructions
You'll need to start this recipe the day before to soften the pulses. Soak the dried chickpeas by submerging them in water with baking soda. Drain when ready to use.
Combine the chickpeas, dill, parsley, garlic, onion, sesame seeds, jalapeno, spices, salt, and pepper in a bowl. Transfer to a food processor, then pulse or blend ib high until thick paste forms.
Heat the oil in a frying pot—mix in the baking powder then cook the falafel in batches at 350F until brown and crunchy. Use a cookie dough scooper for uniform balls. To freeze the remaining dough, allow scoops to harden, then transfer to a zip lock bag for up to 3 months.
In a large serving bowl for the salad, combine the cabbage and arugula, drizzle lightly with sesame oil and toss. Slice and overlay the tomatoes, avocado, hummus, and falafel, then drizzle with the sesame tahini dressing and a bit of sriracha drizzle. Serve!
The recipe makes about 24 falafel balls; salad serves 3-4. Freeze the falafel dough once scooped into balls to fry another time.


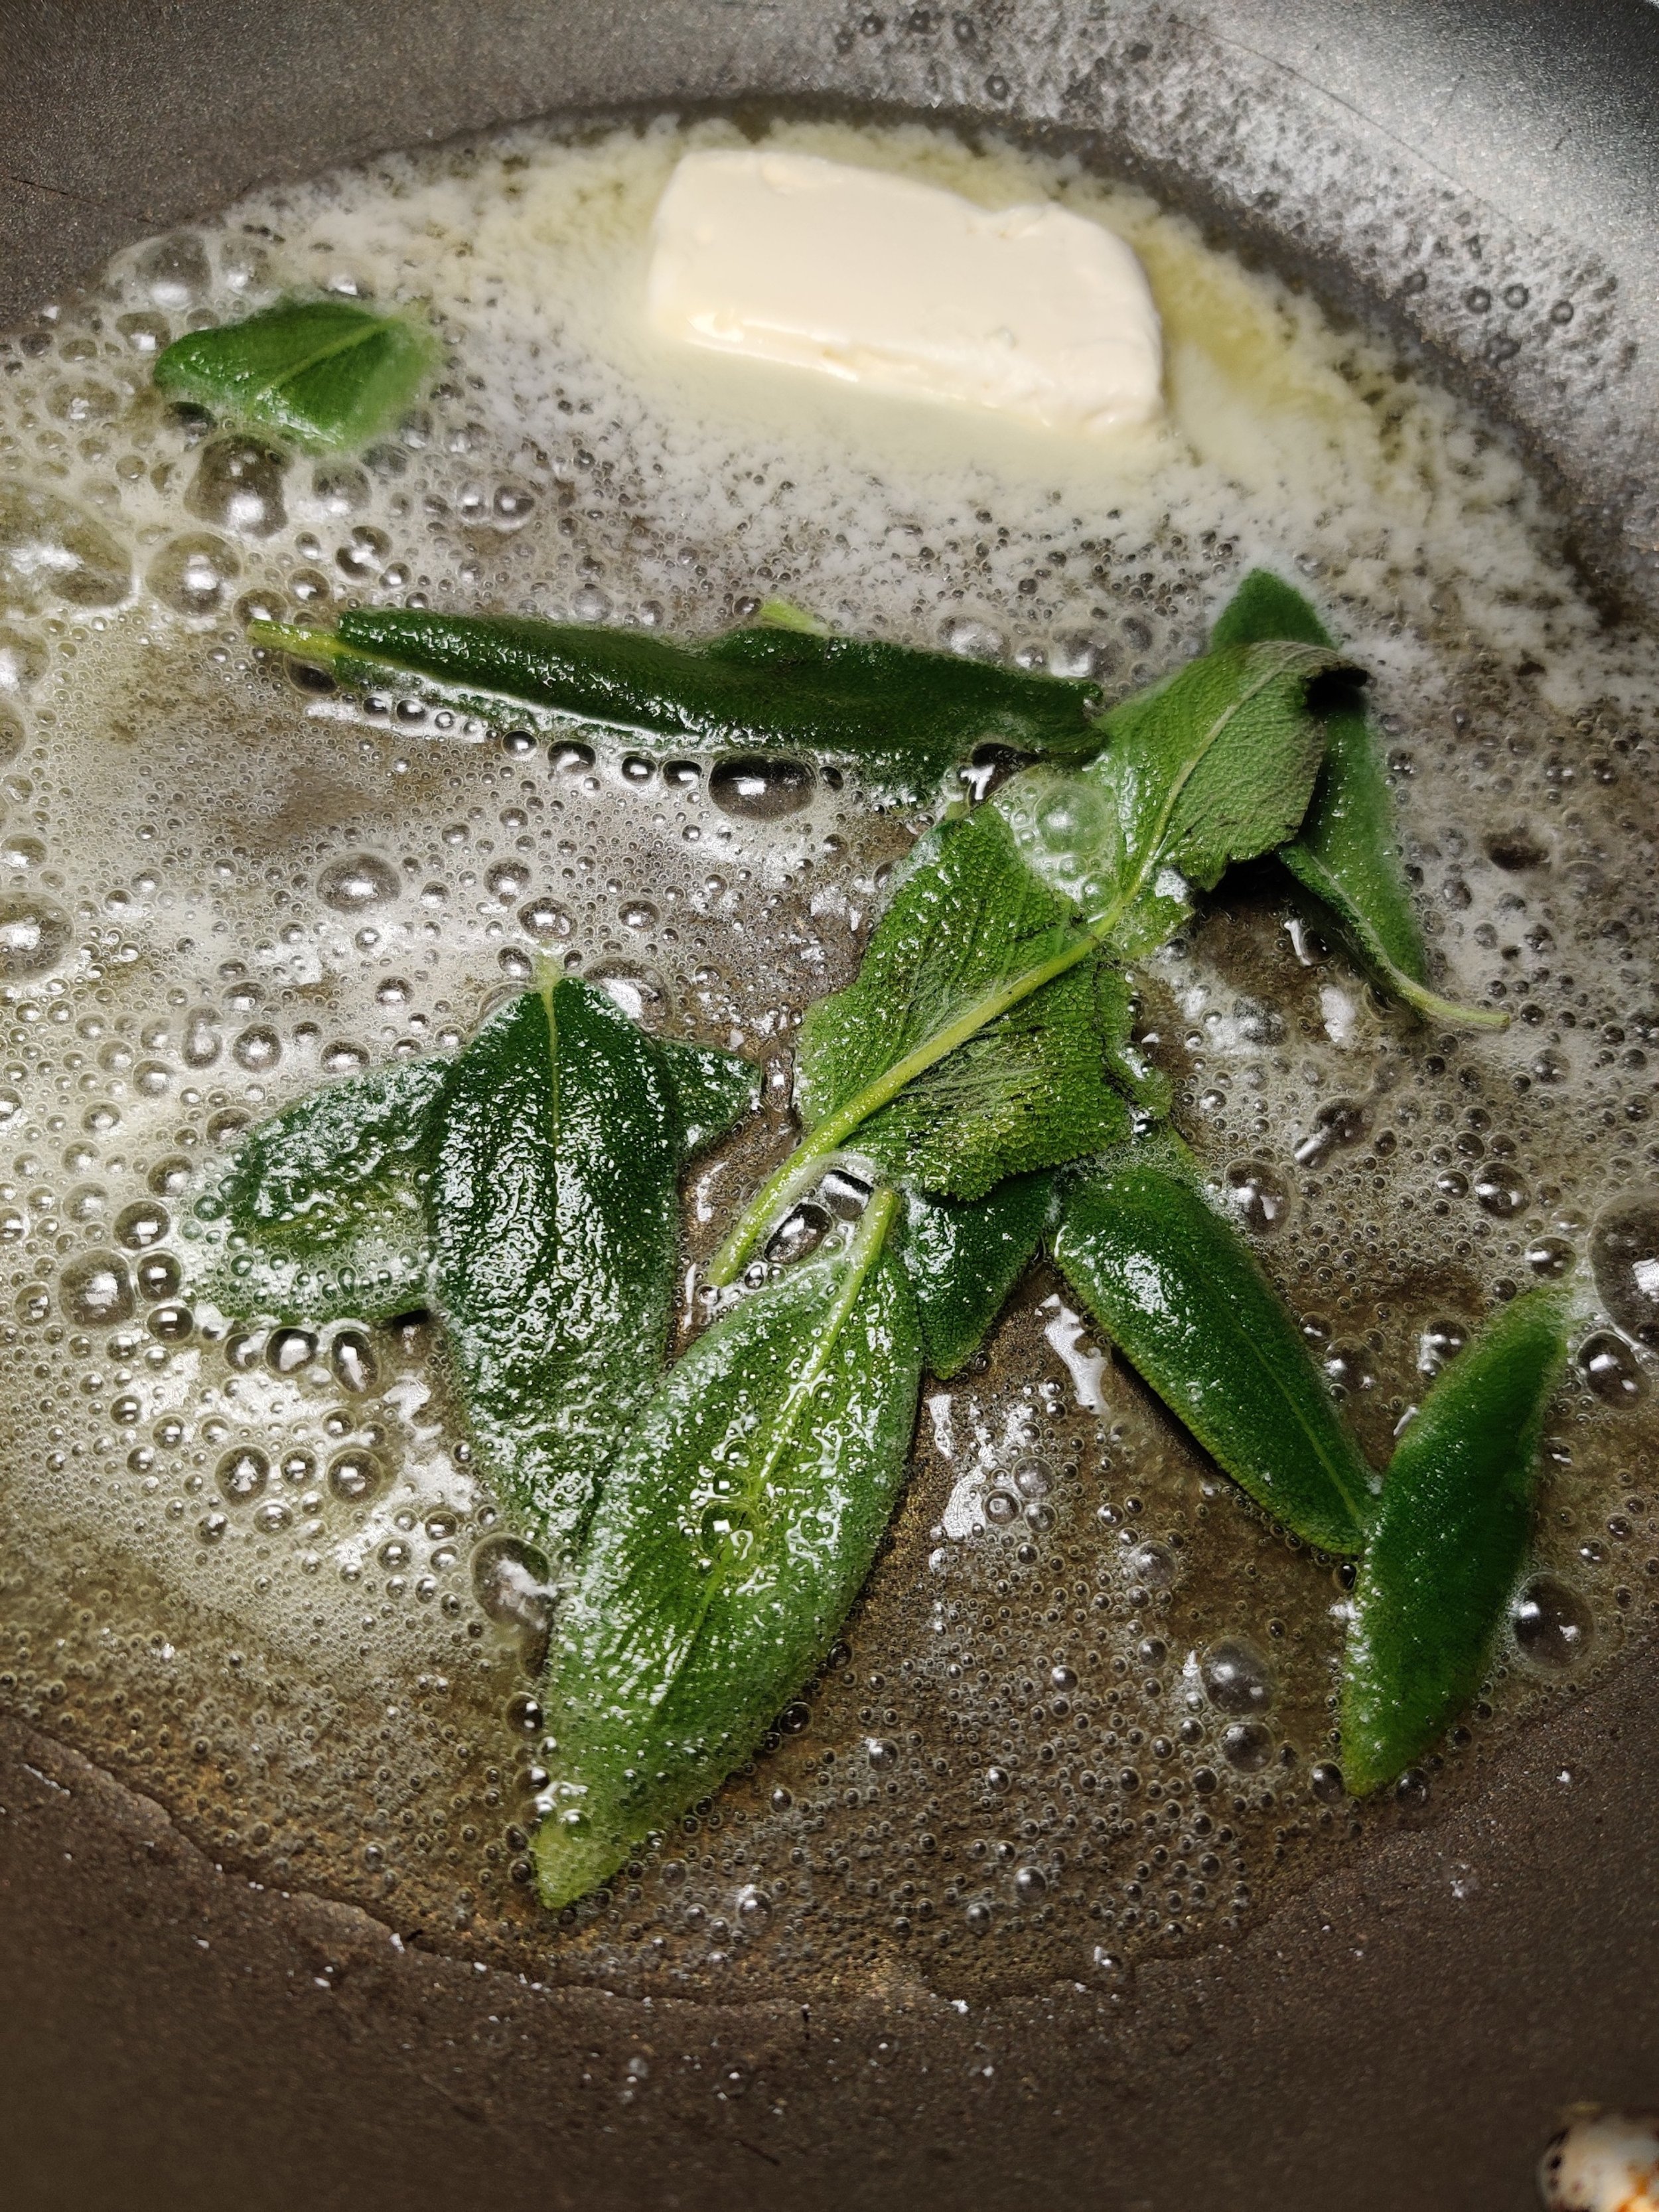
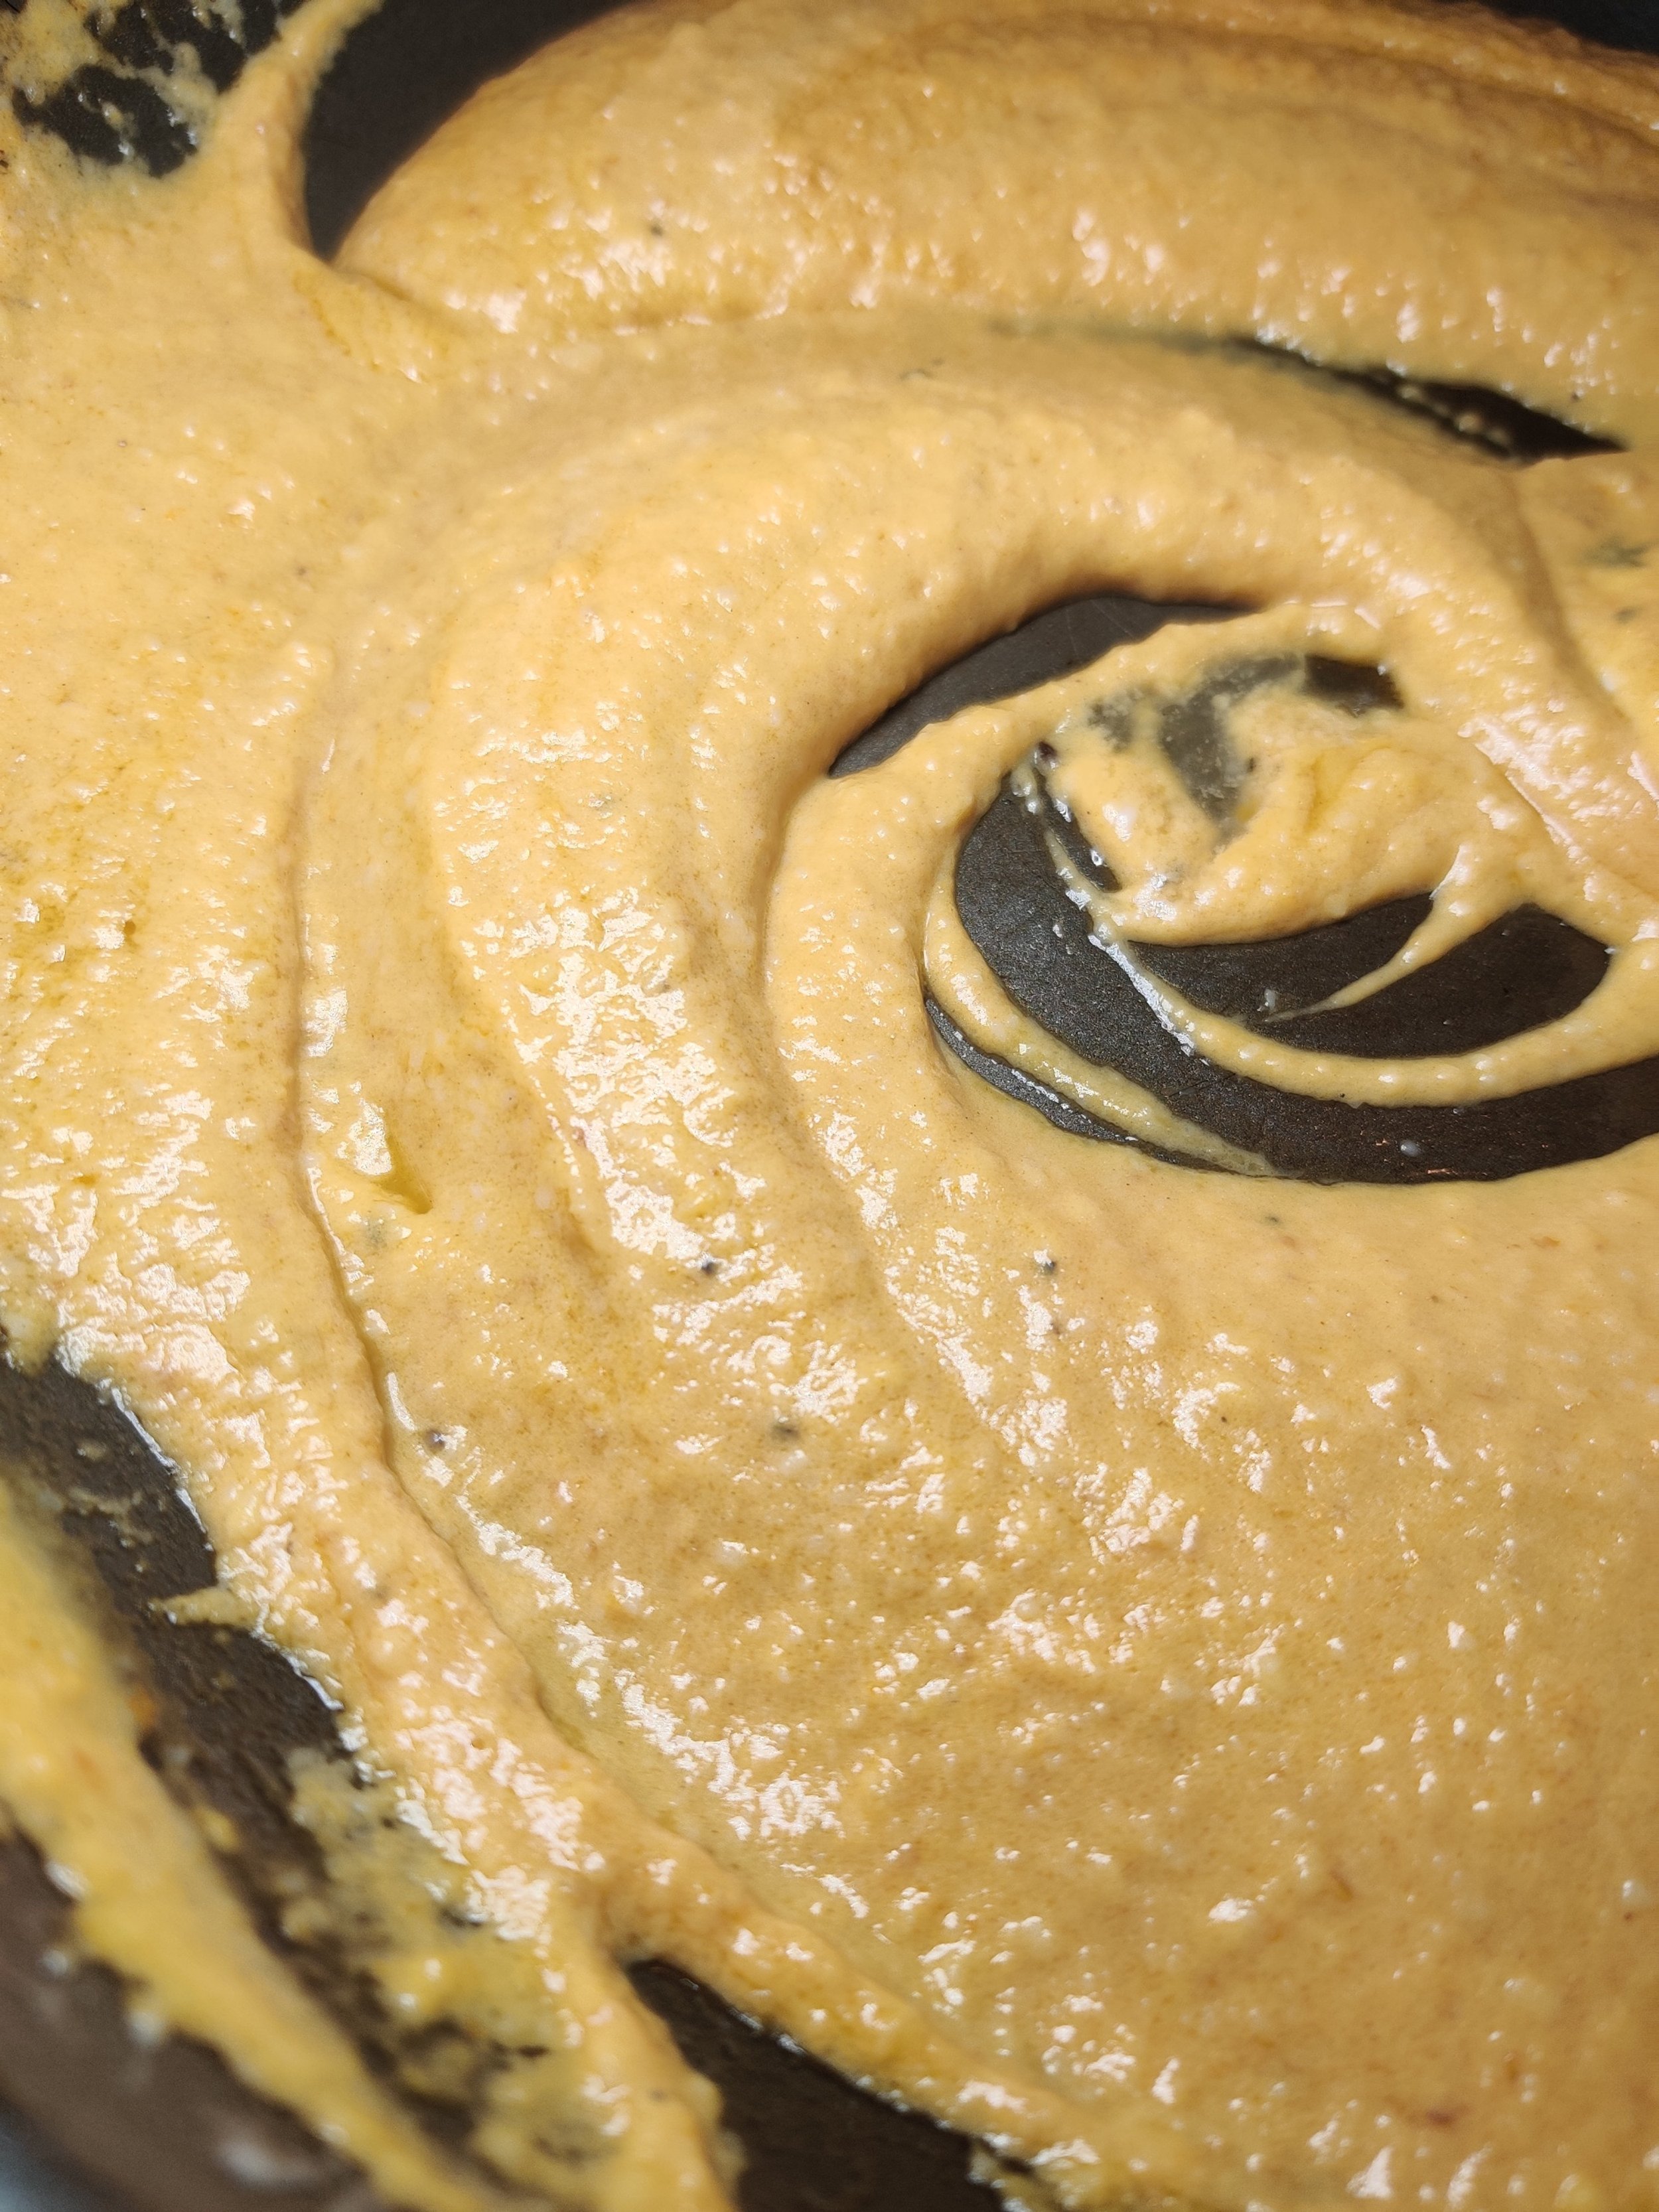
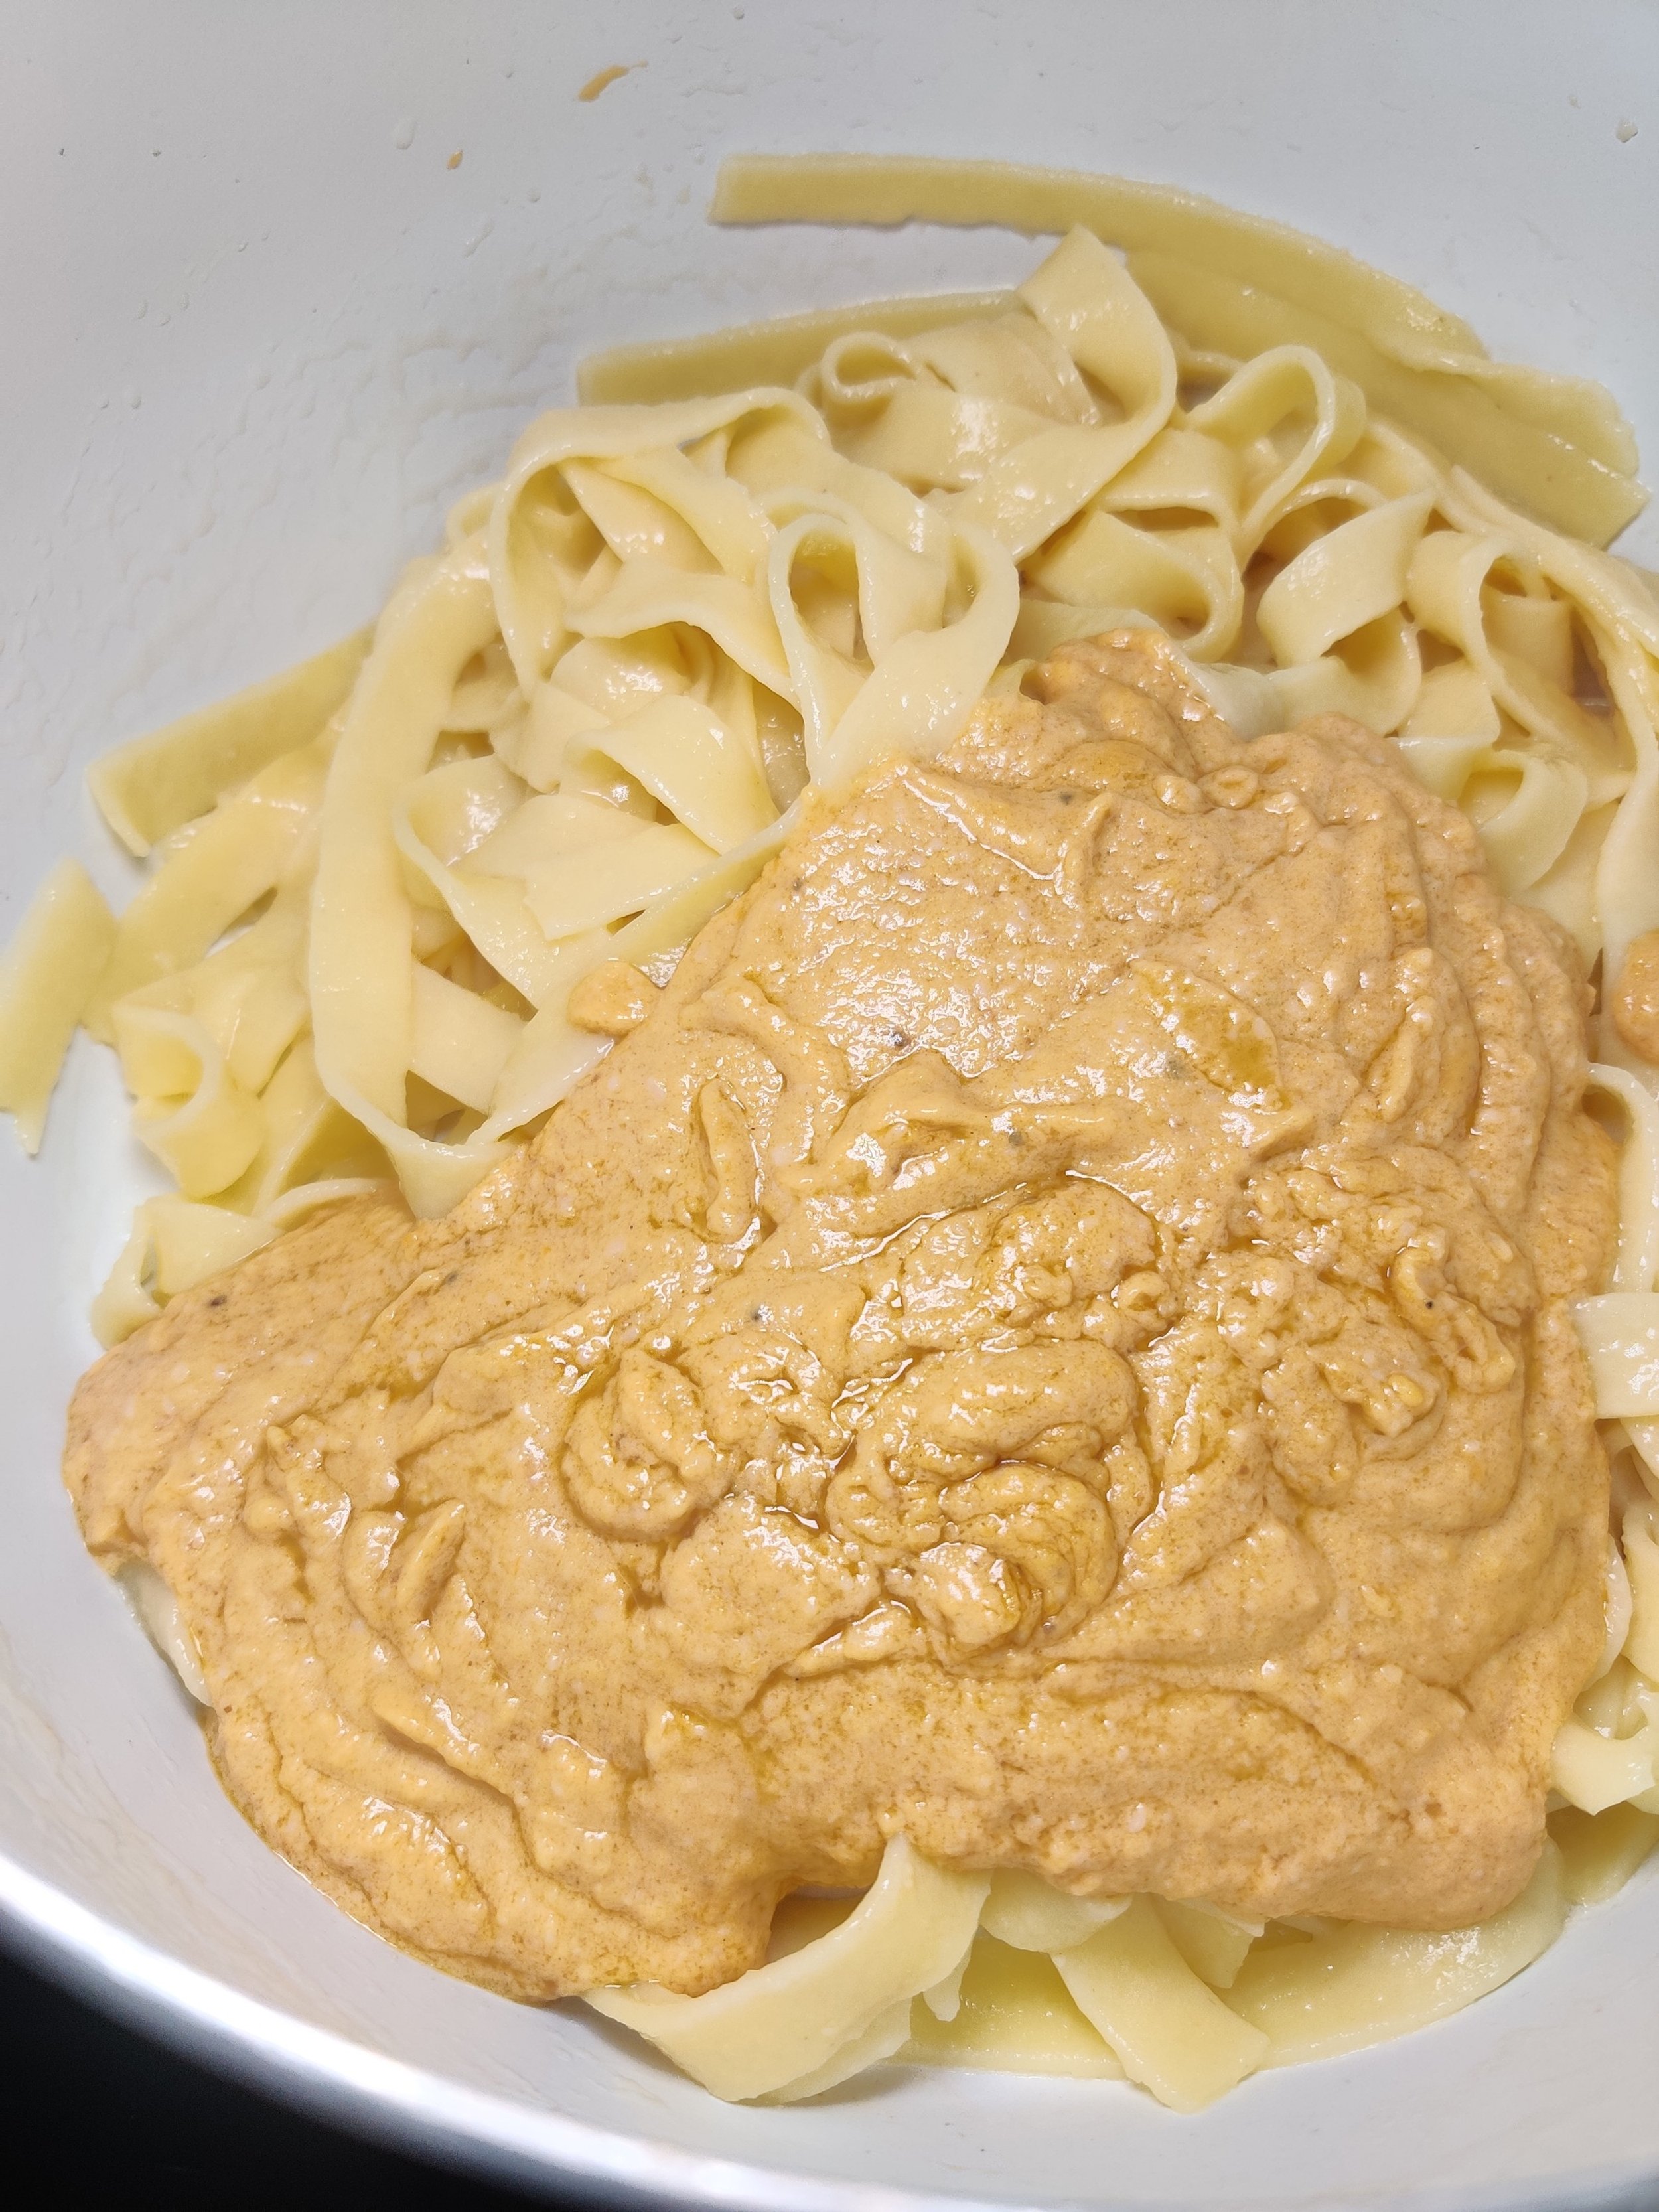
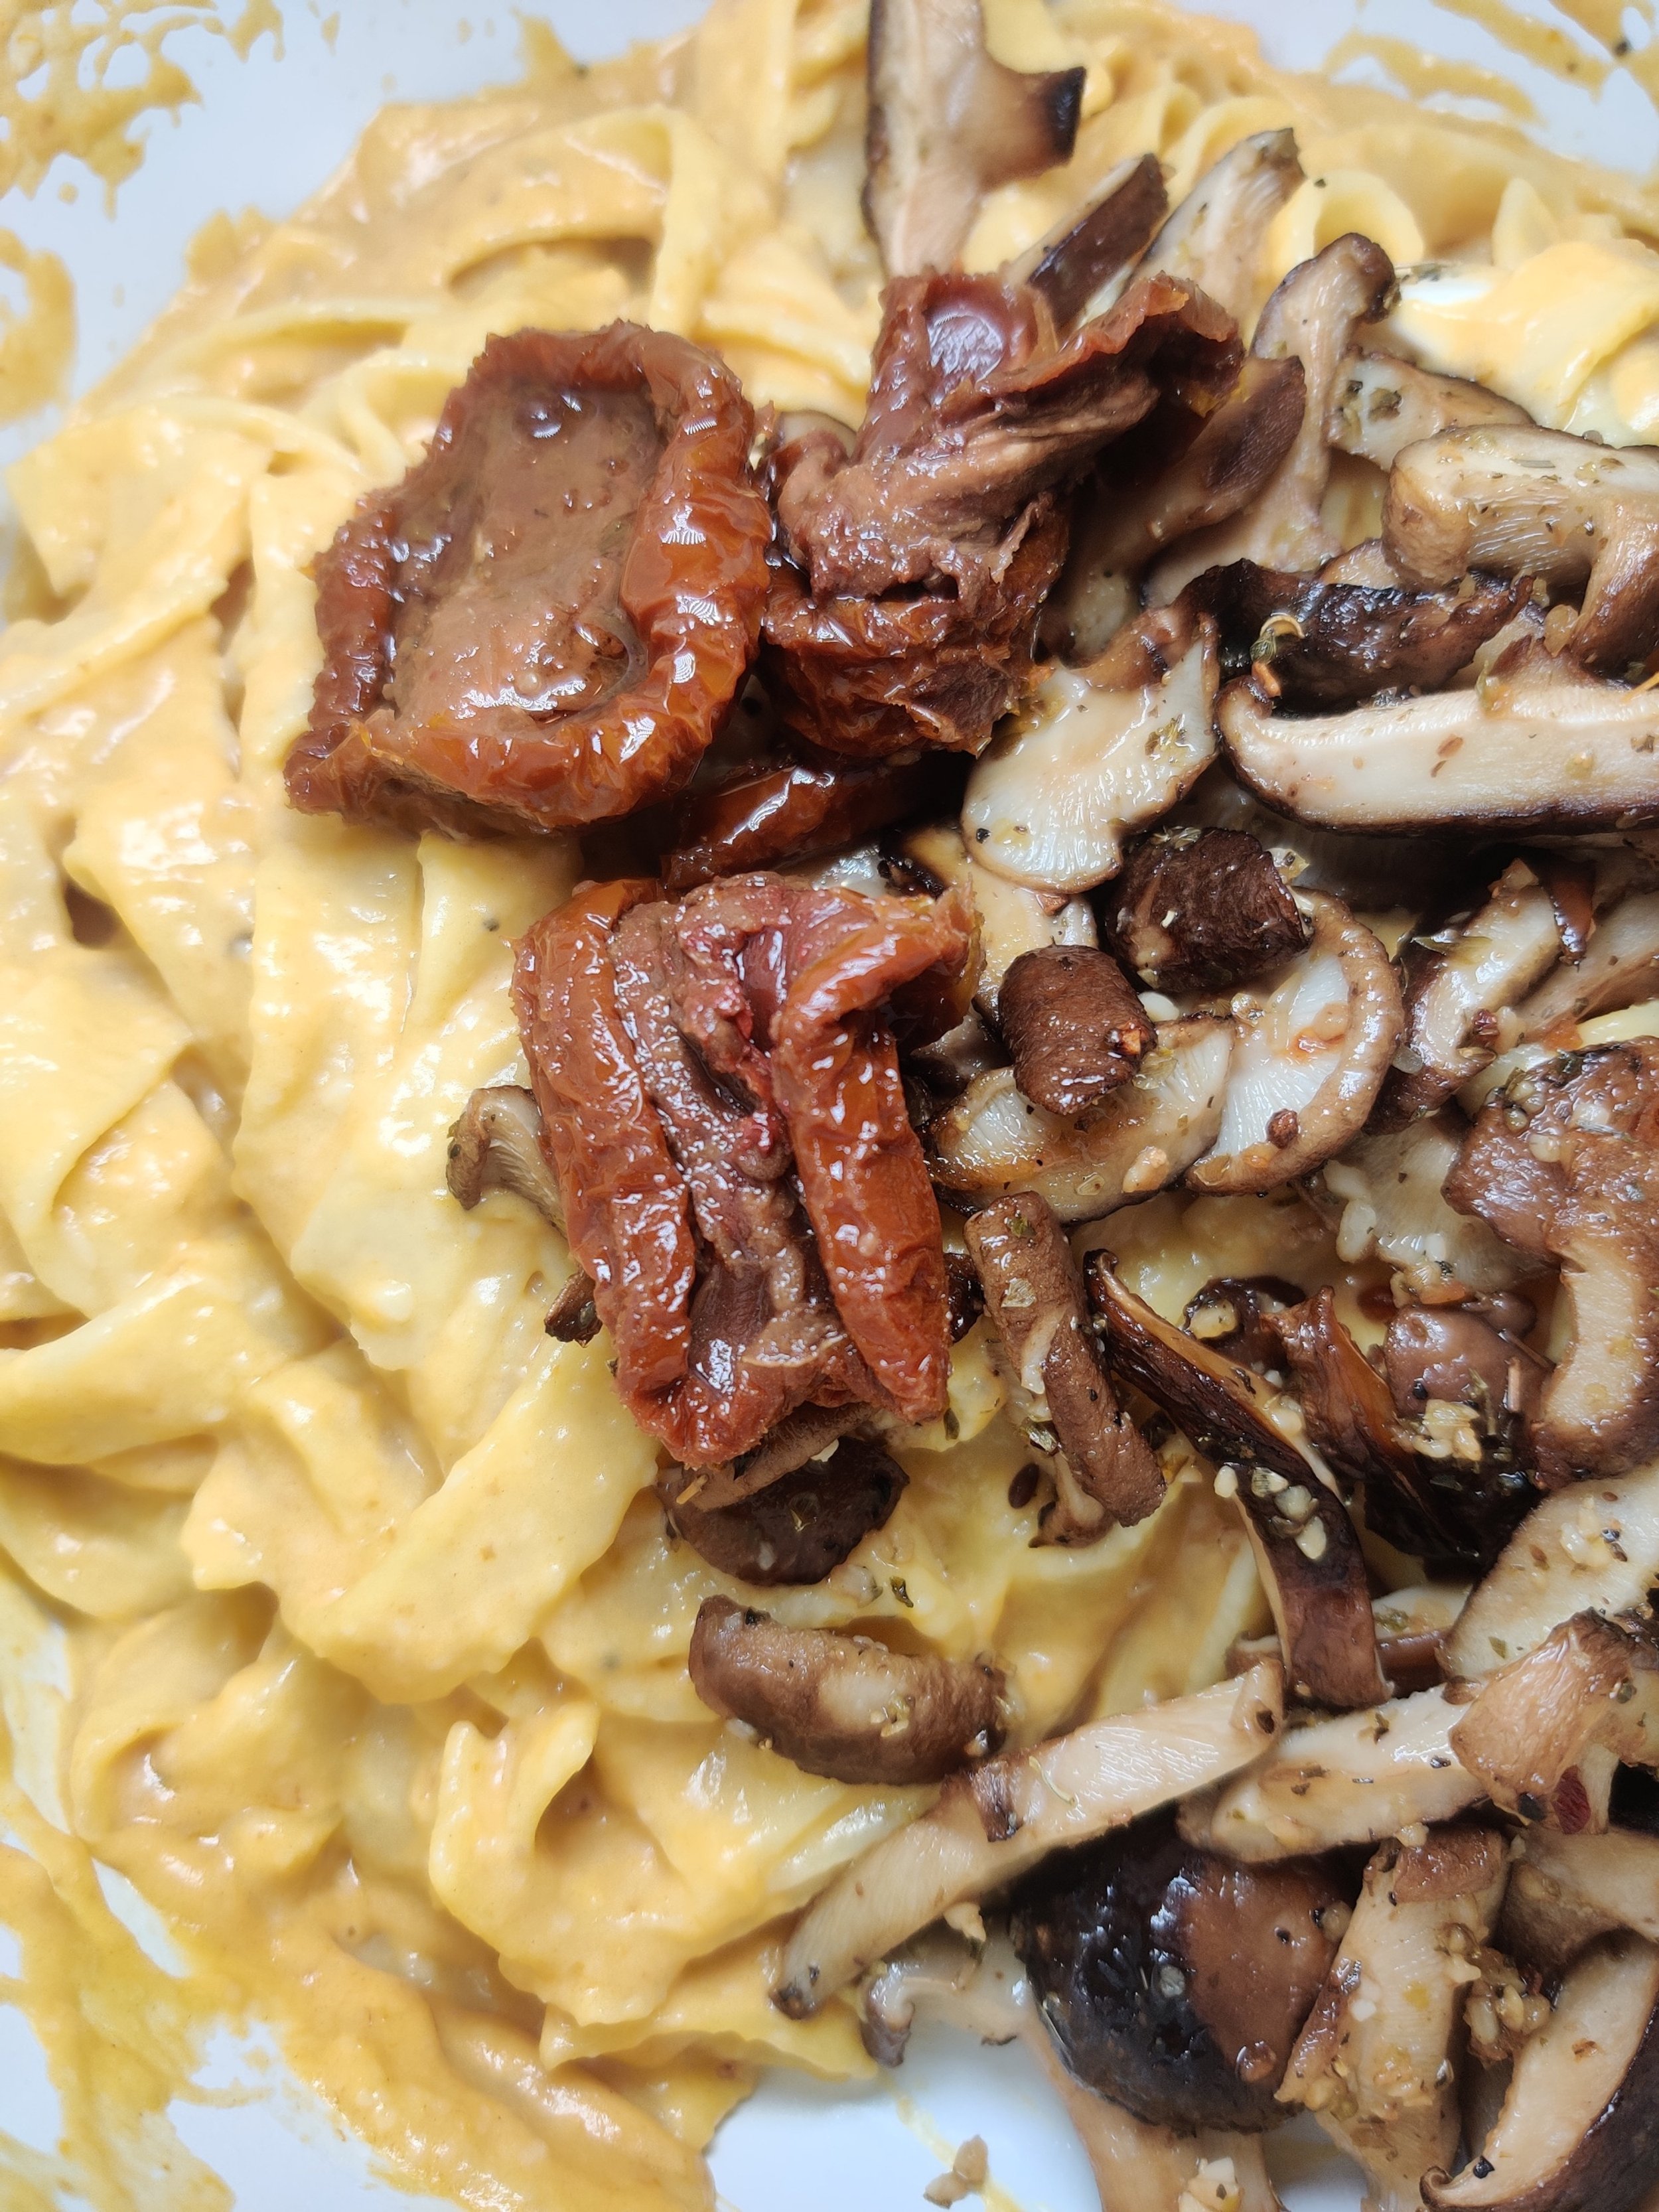
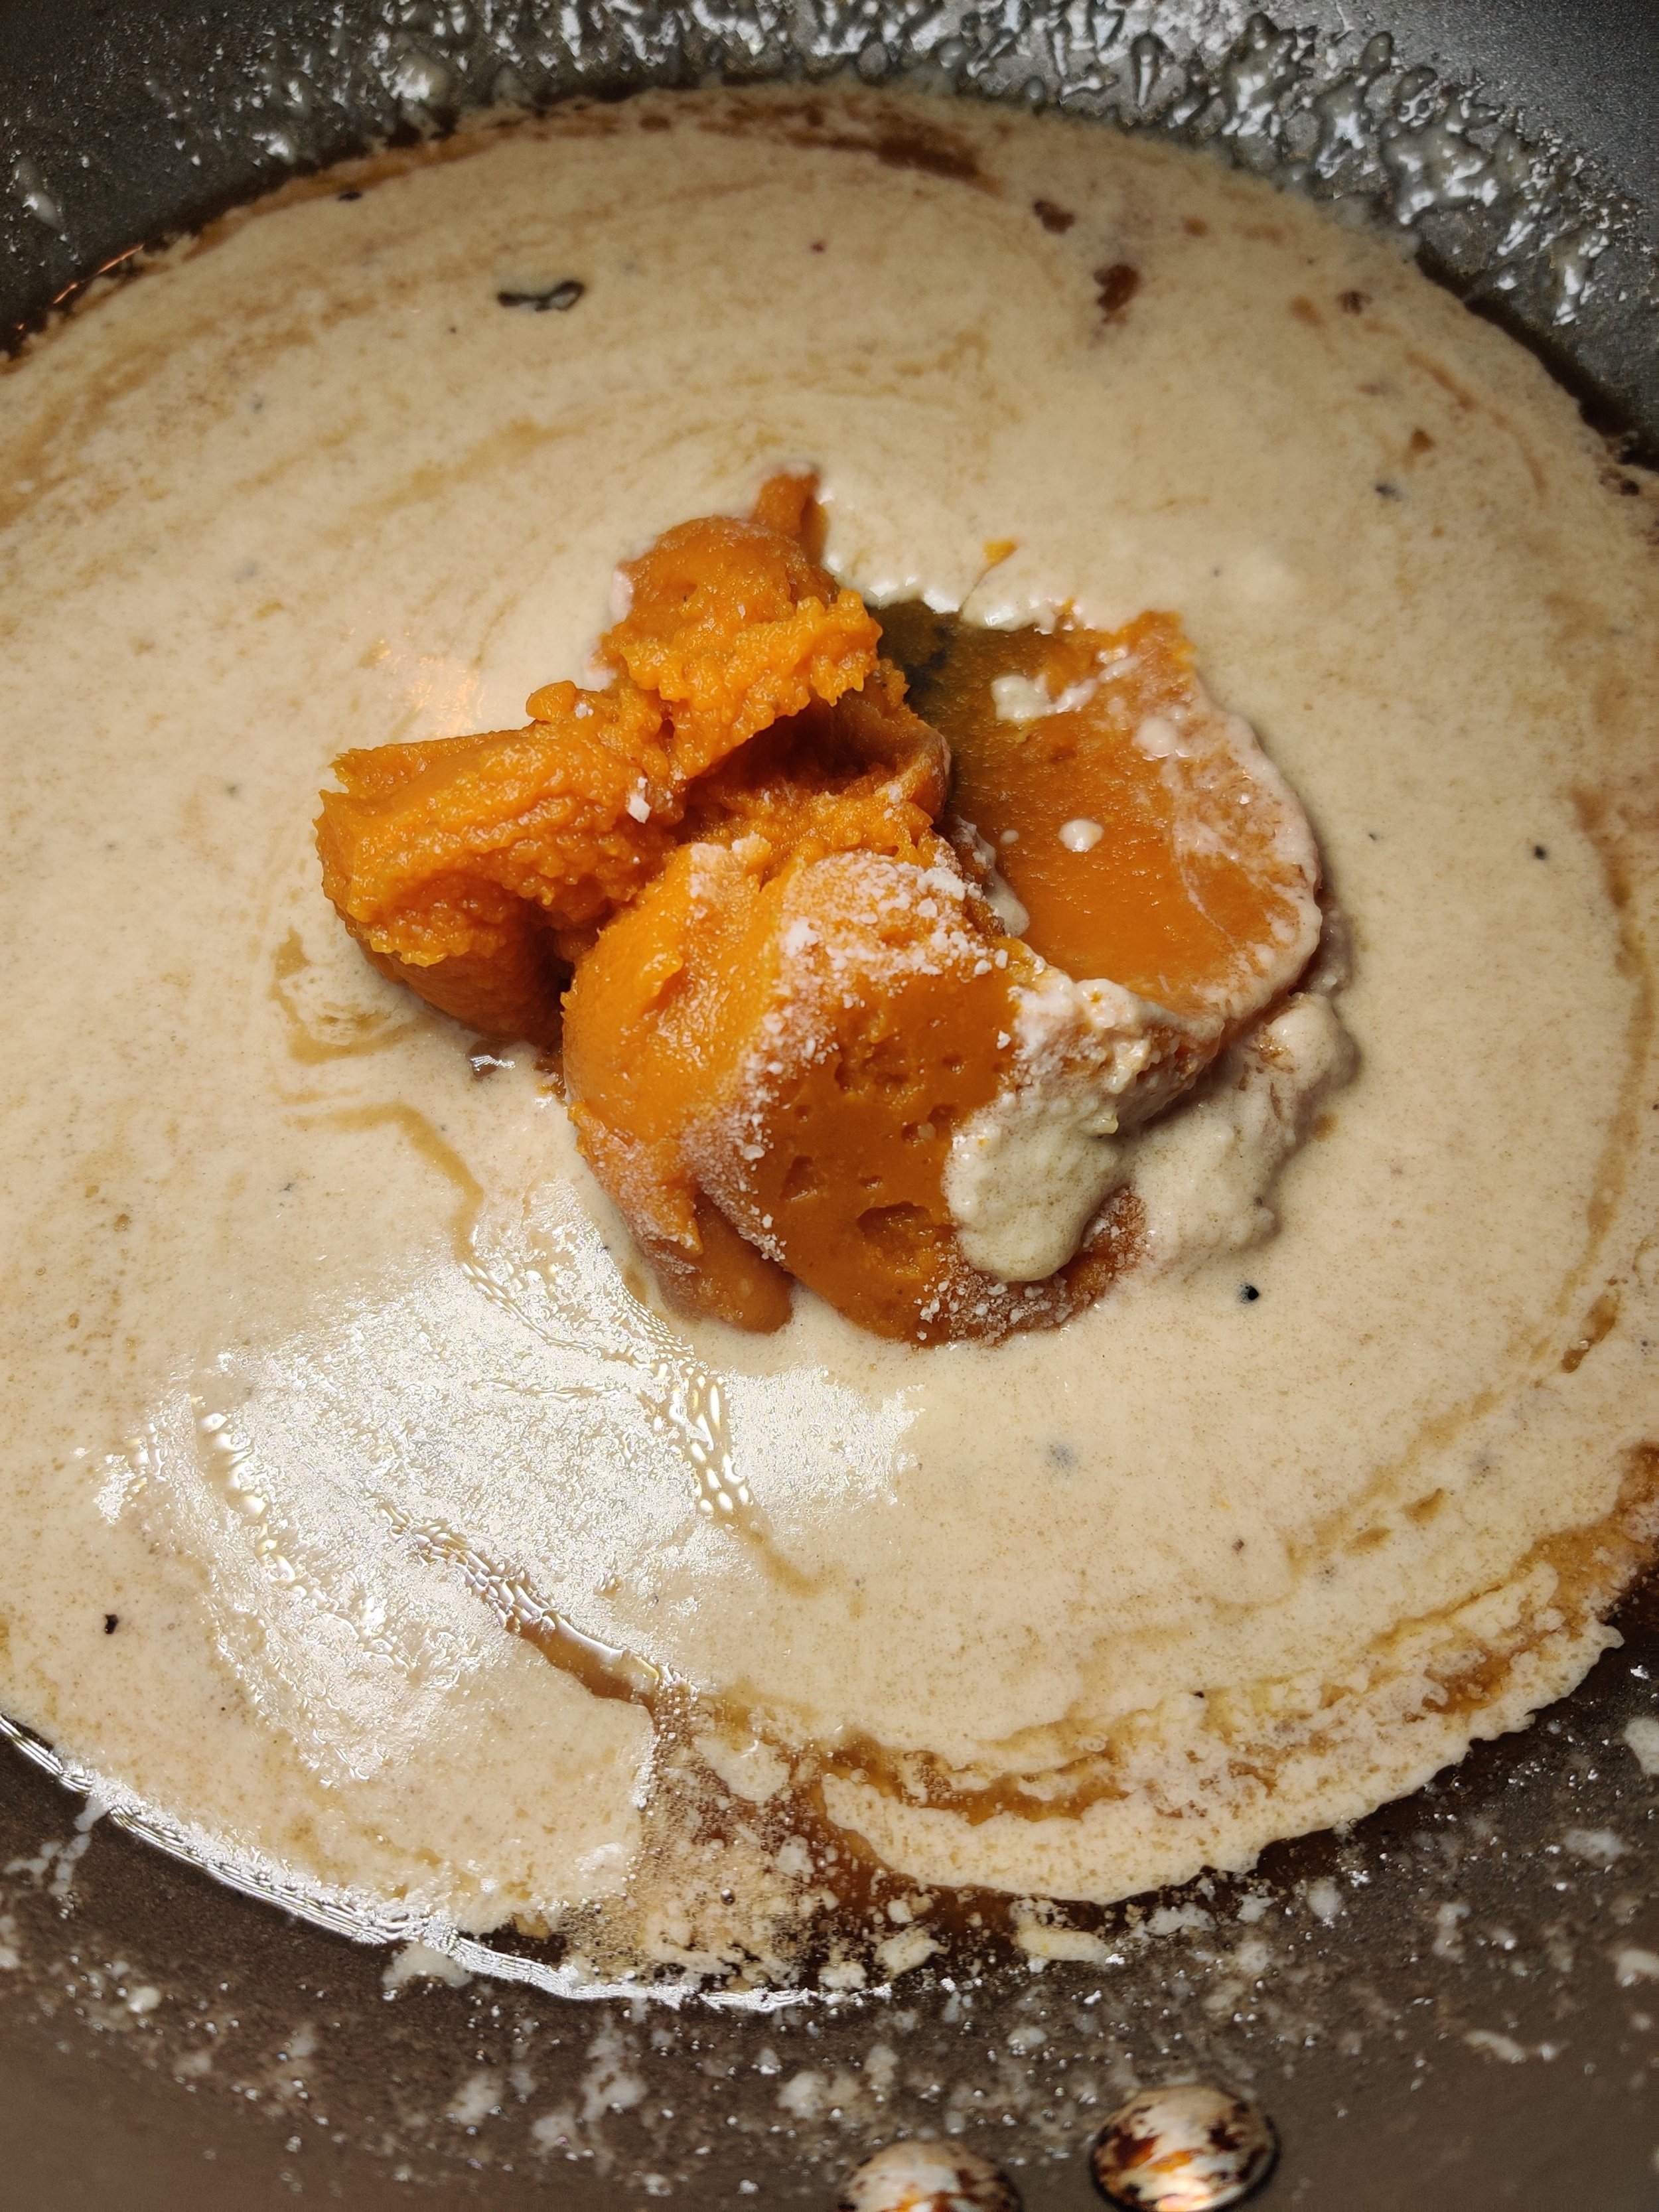
Pumpkin Alfredo and Roasted Mushrooms with Sage Butter
Who doesn’t want a bowl of flavorful pasta swimming in a homemade sauce?
Depending on the season and the star ingredient, you can get quite experimental to make a rich alfredo to coat your pasta. The only thing you need to add is seasoning and parmesan cheese and adjust to your liking! This recipe uses pureed pumpkin, which lends itself well to the sauce, but you could also use sweet potato, squash, etc.
To enhance the flavour, lightly fry the sage leaves to extract the earthy, peppery taste in butter before combining with the cream, pumpkin and parmesan.
Ingredients
14-ounces pumpkin puree
3/4 cups heavy cream
1/2 cup parmesan cheese
1 teaspoon salt
1 tablespoon cracked black pepper
1 tablespoon garlic powder
1 stick butter
9-ounces tagliatelle pasta
Bunch of fresh sage leaves
Sundried tomatoes (optional)
4-ounces shiitake mushrooms
1/4 cup olive oil
1 teaspoon salt
1 tablespoon cracked black pepper
2 tablespoons olive oil
1 tablespoon minced garlic
1 tablespoon dried thyme
1 tablespoon onion powder
Instructions
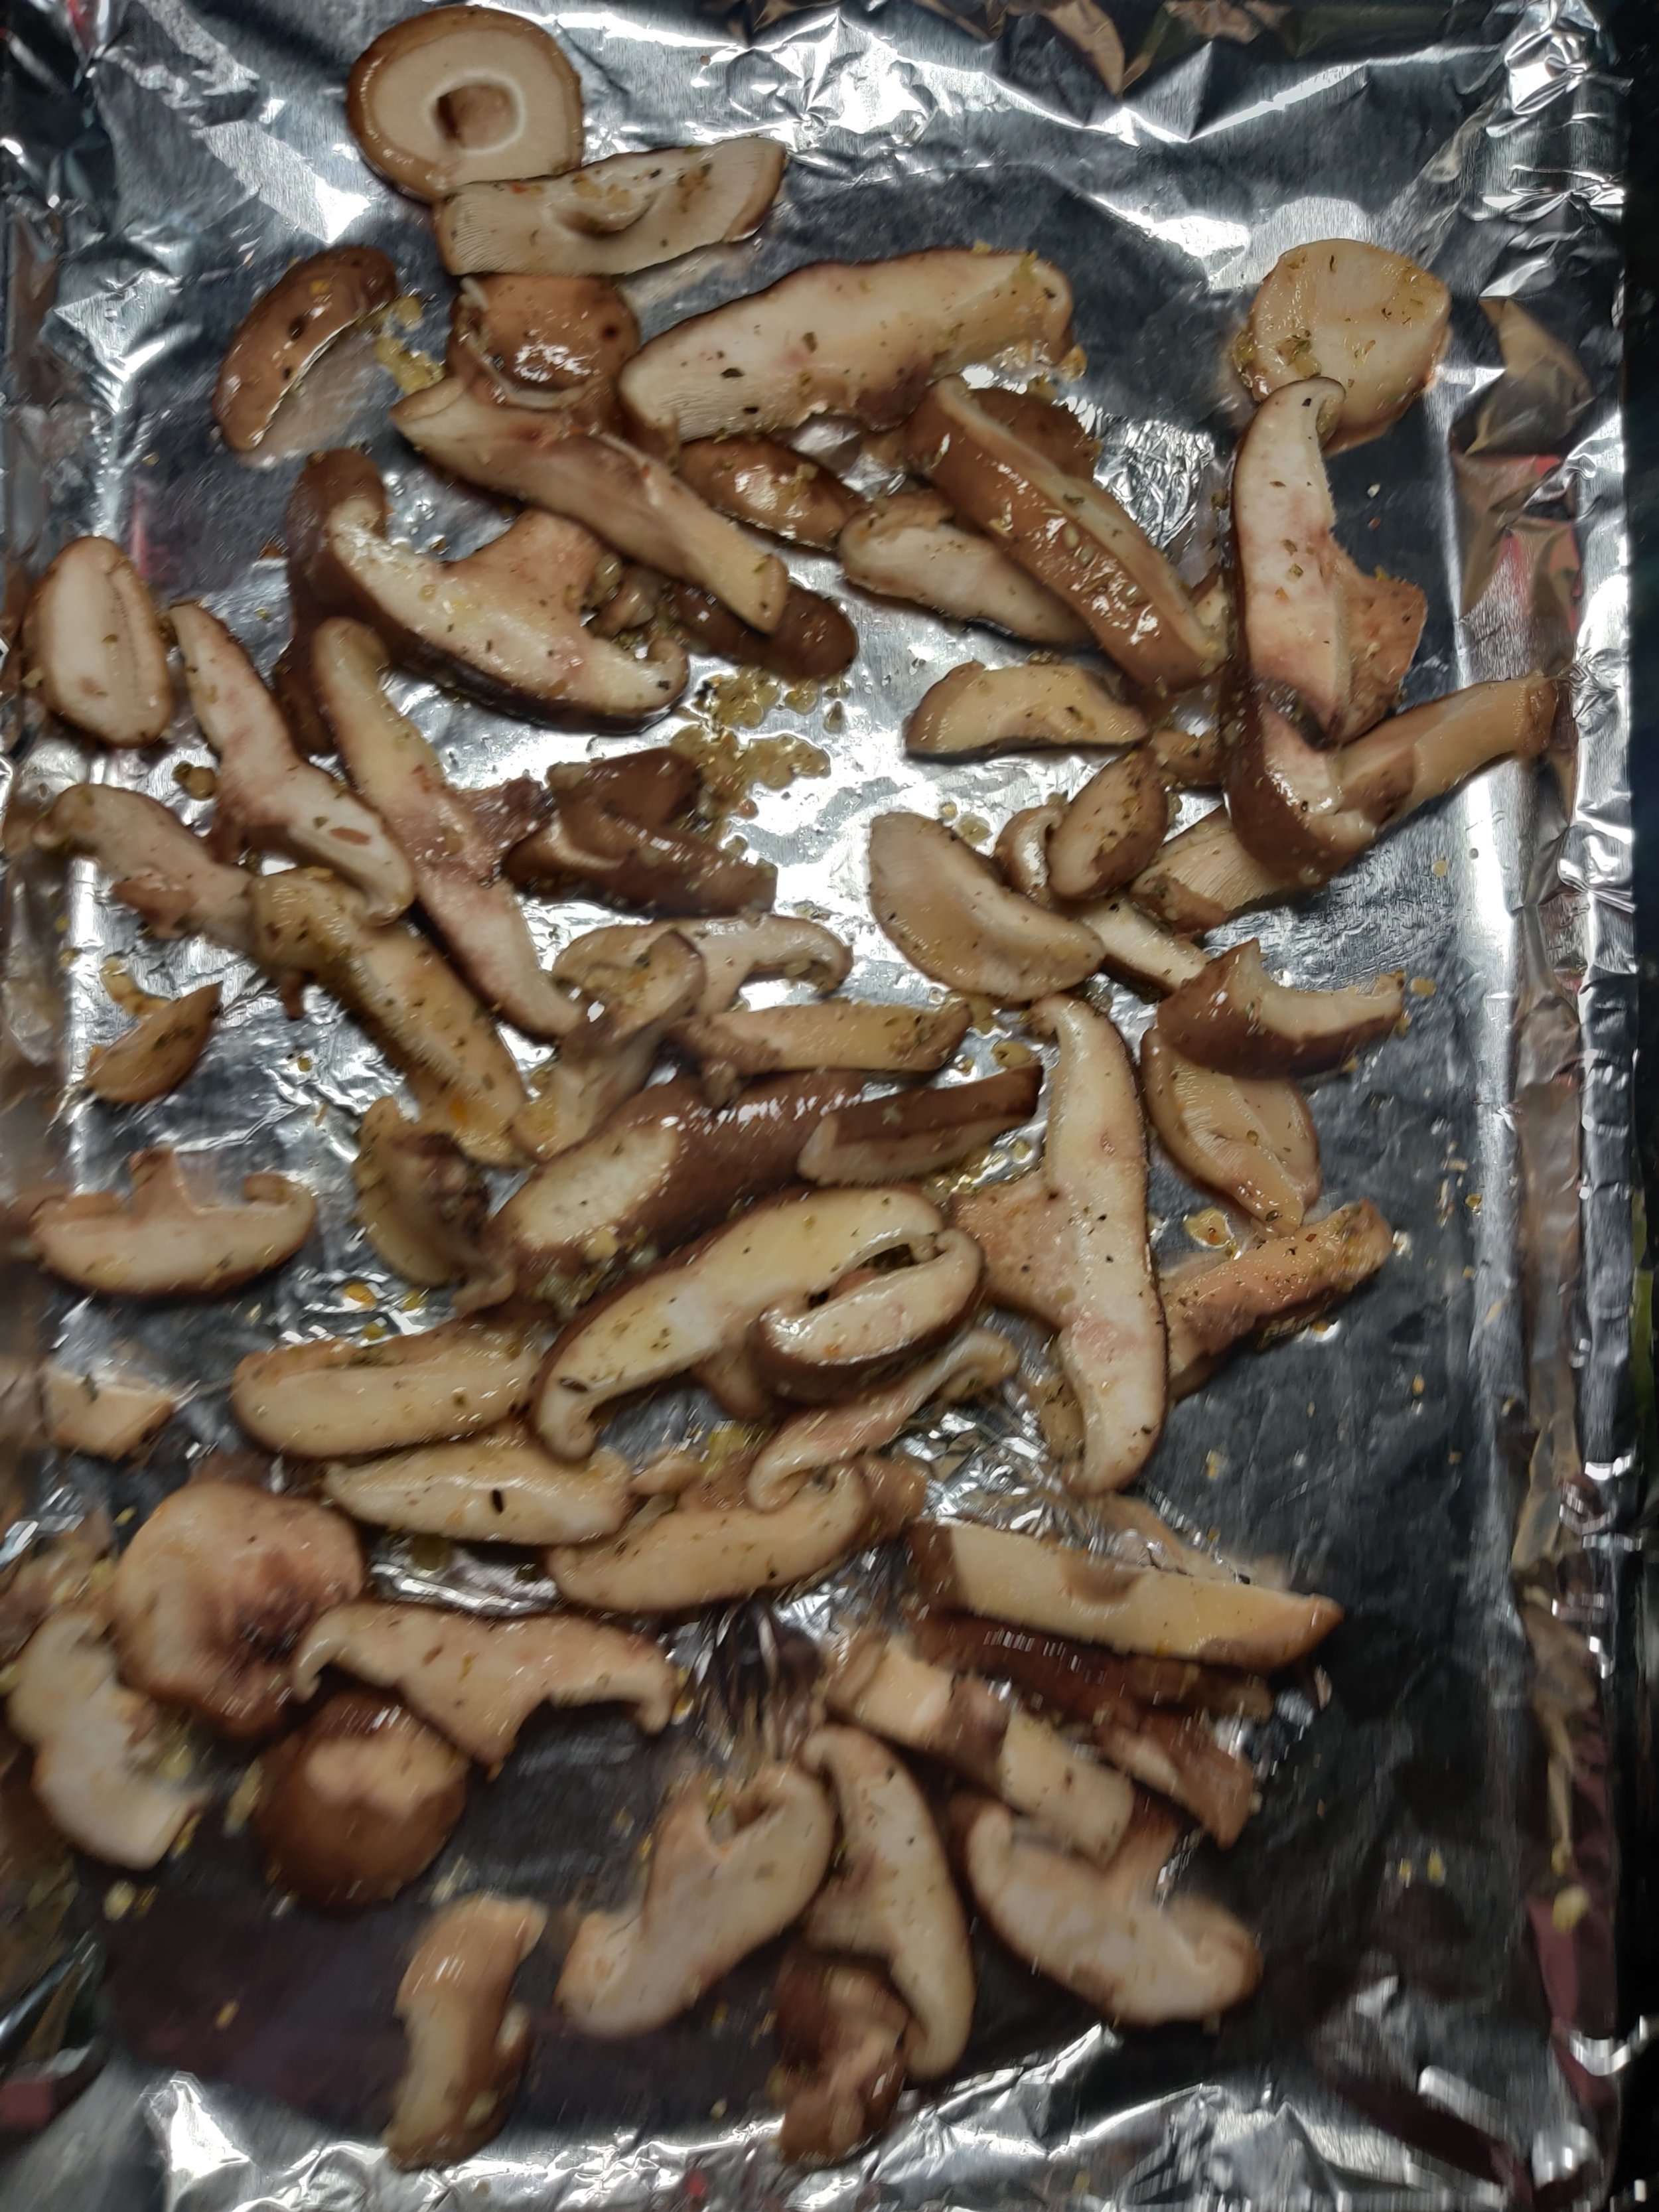
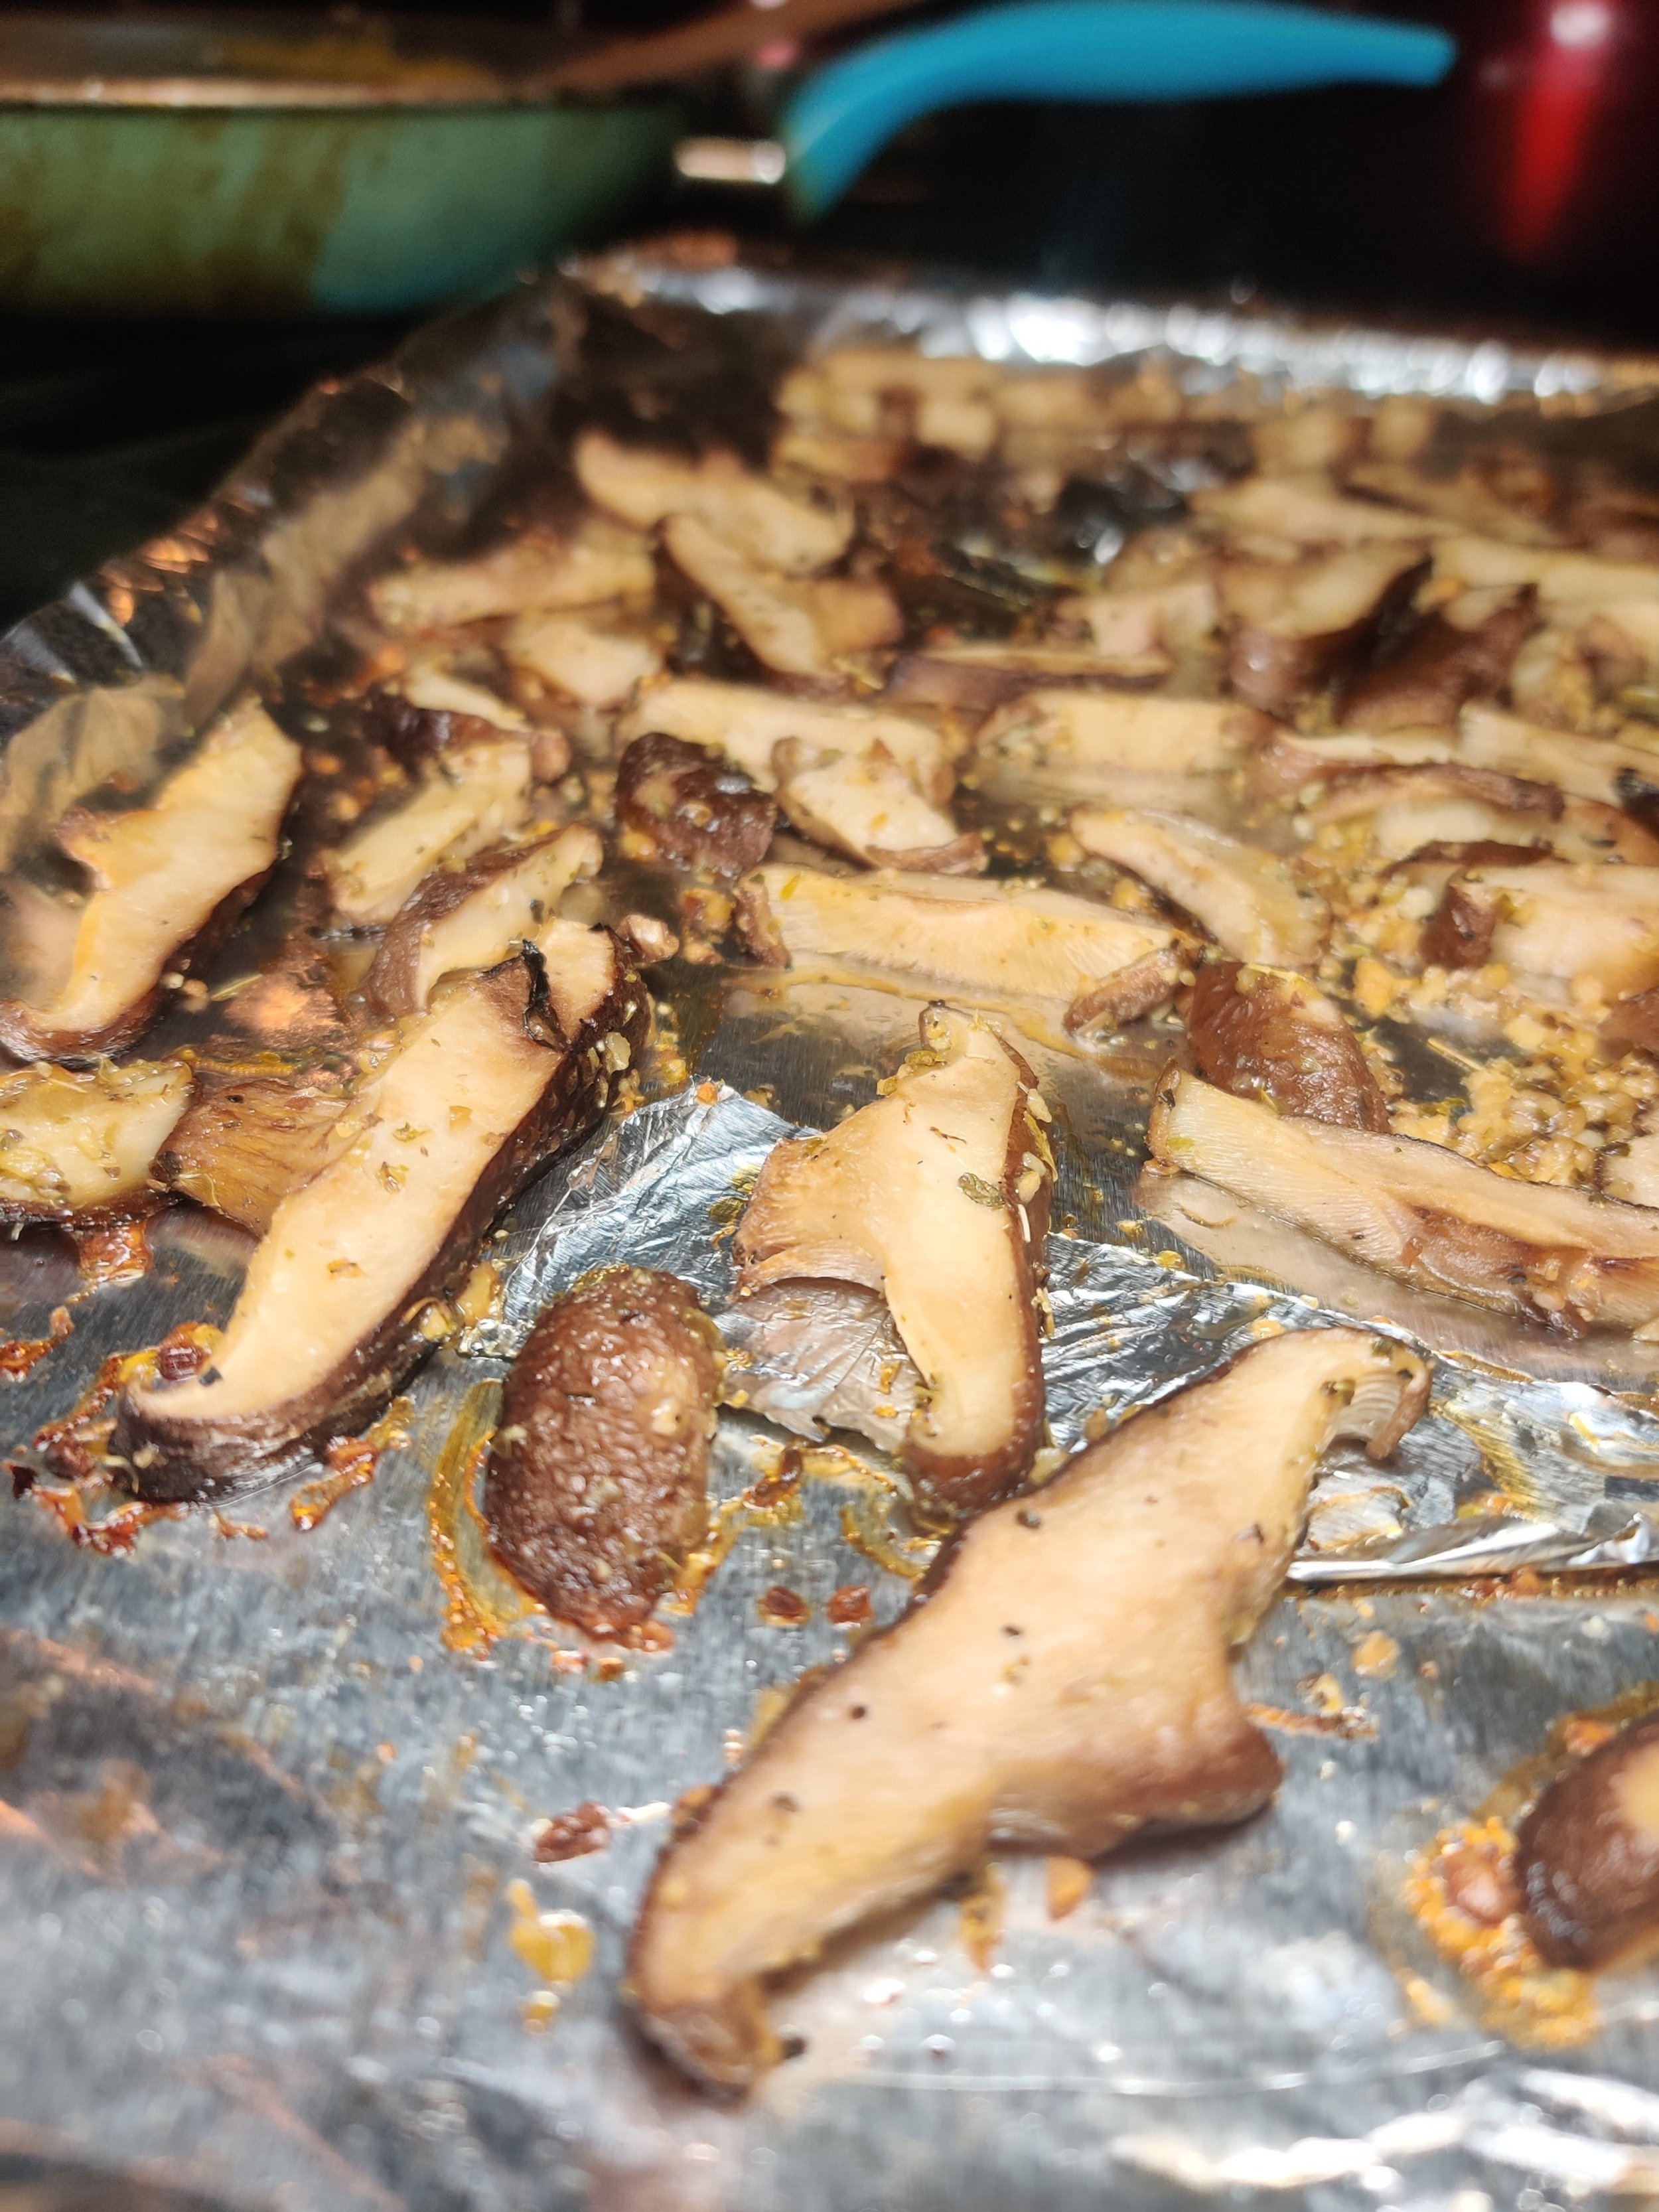
Place the mushrooms on a baking tray with parchment paper after coating and seasoning with fresh garlic, olive oil, salt, pepper, thyme, and onion powder. Bake at 400F for 12-15 minutes until crispy; observe to ensure they don't burn, remove from heat.
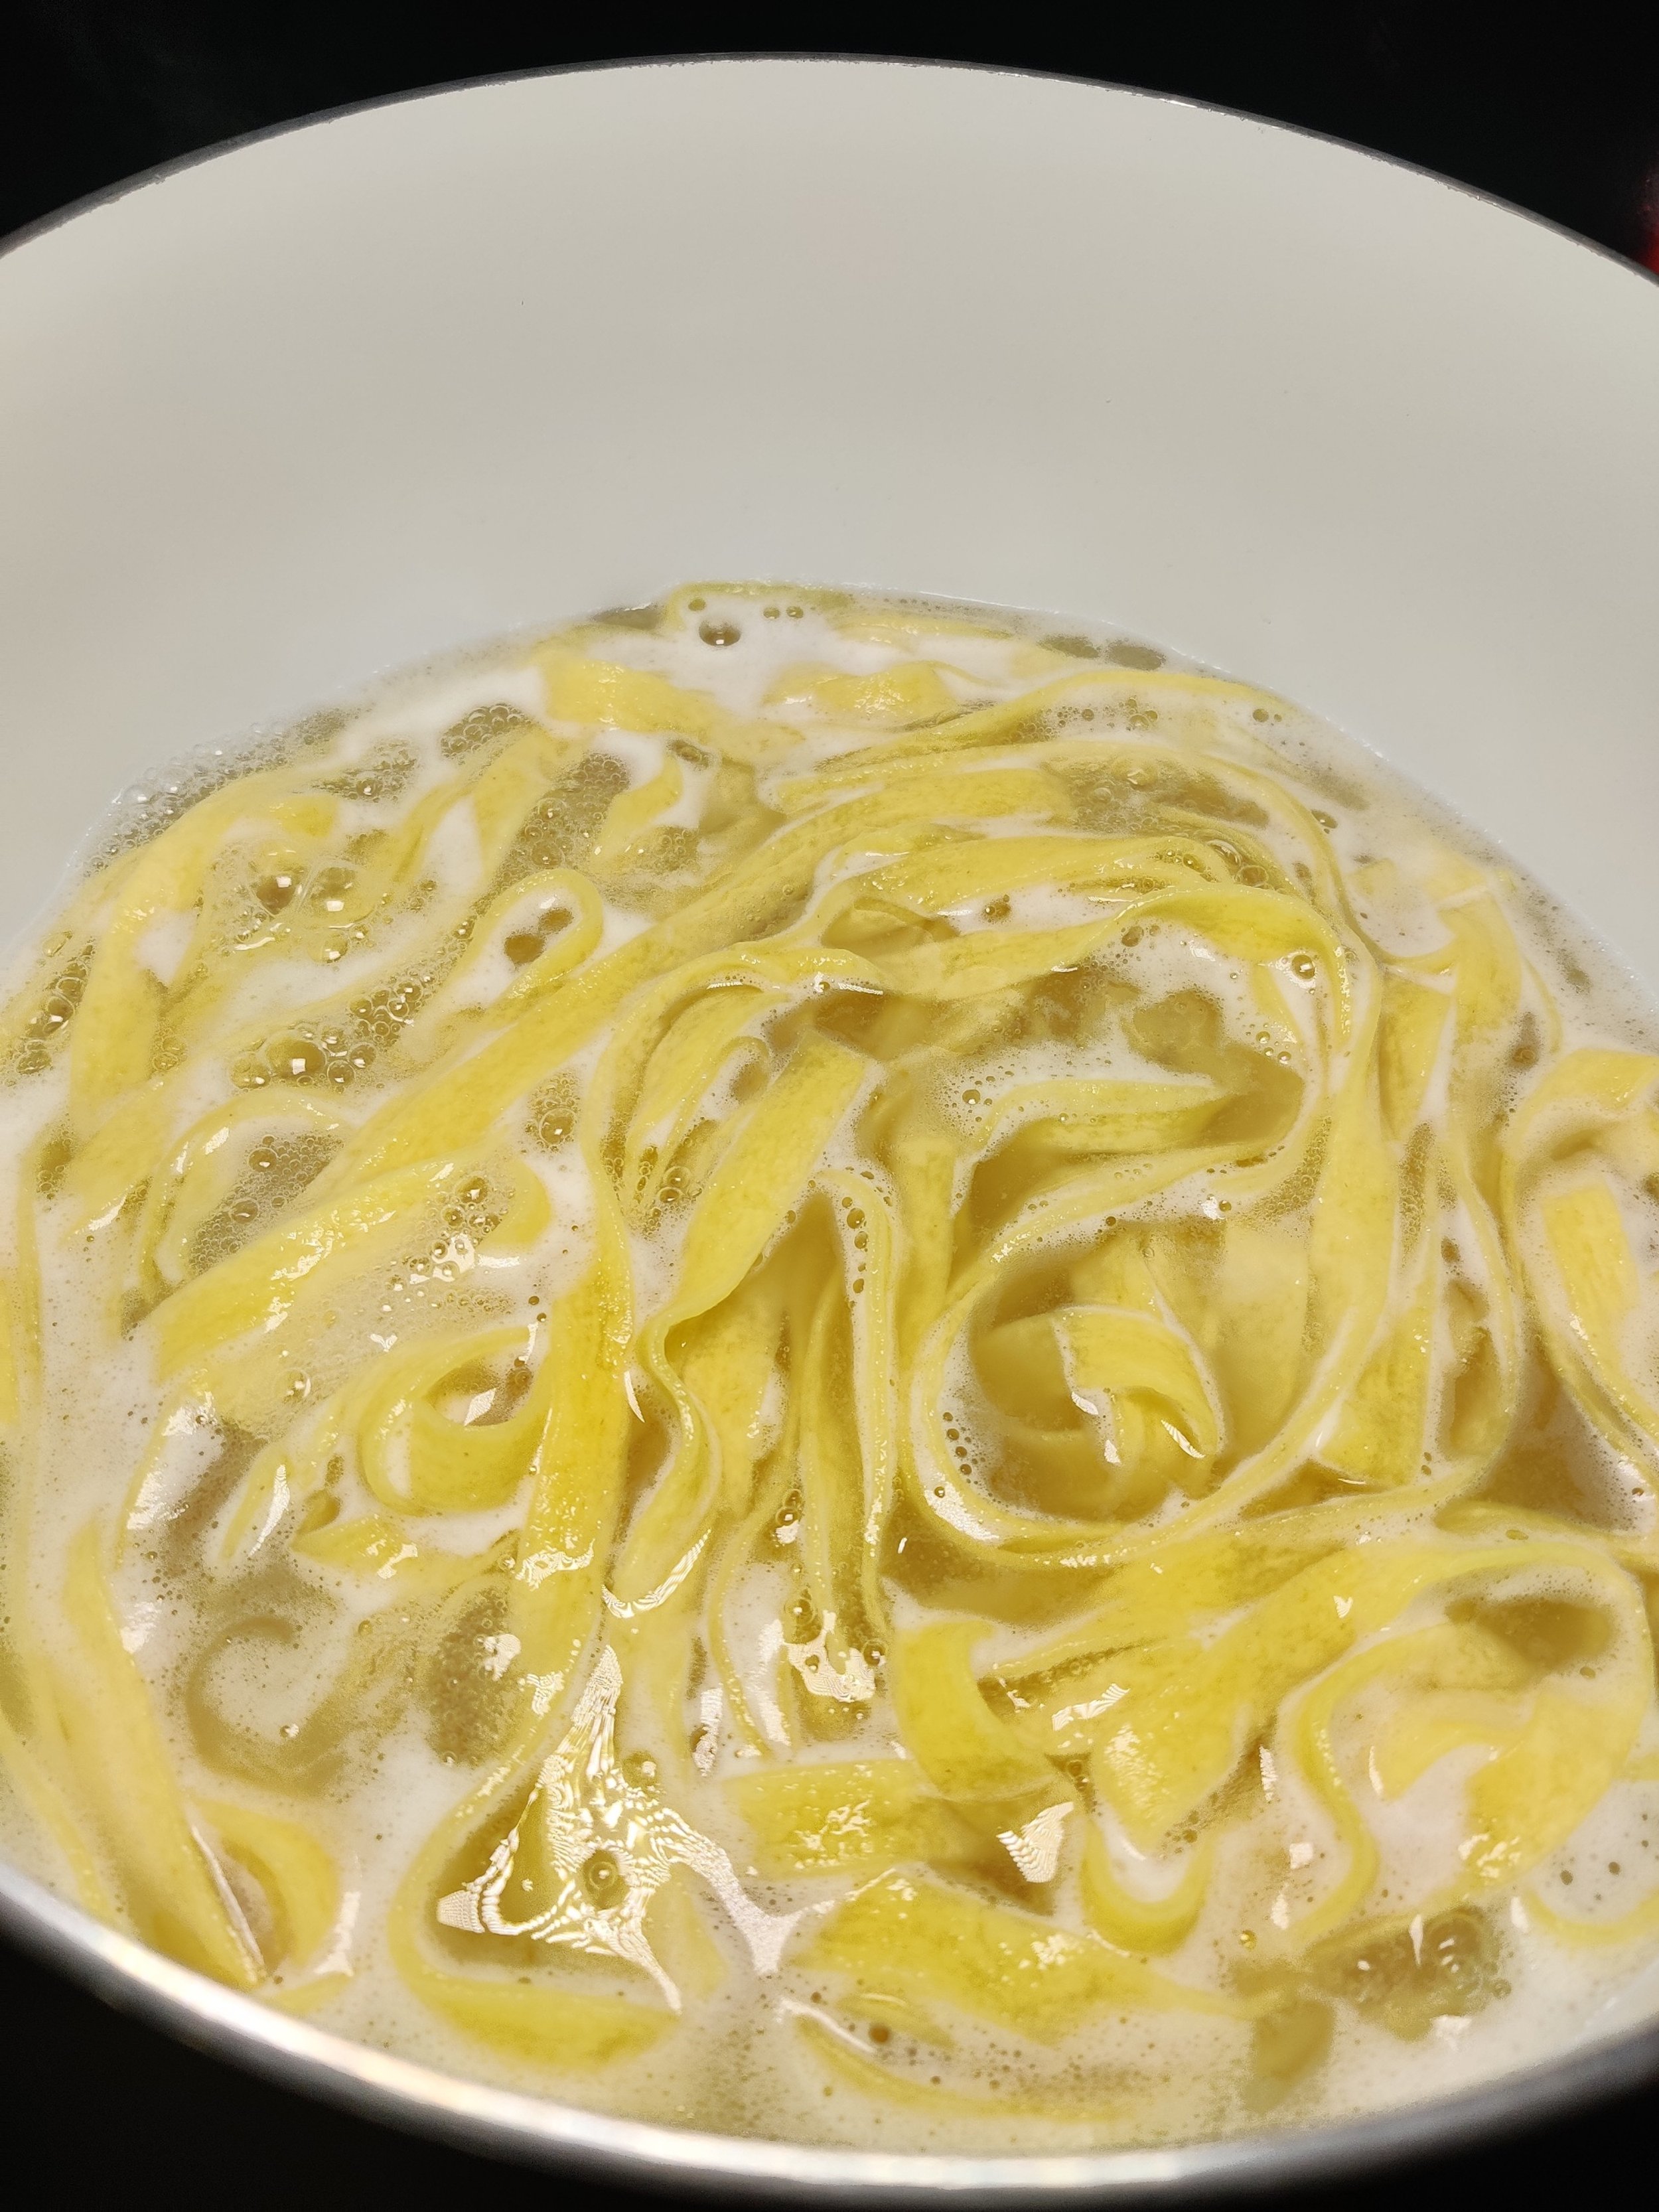
Prepare the pasta as directed by the package instructions, drain and set aside.
Add the butter to a large nonstick and melt, then add several sage leaves.
Cook on medium heat until leaves are lightly fried, and the butter has turned a goldish colour, but don't burn, or else it will have a bitter taste!
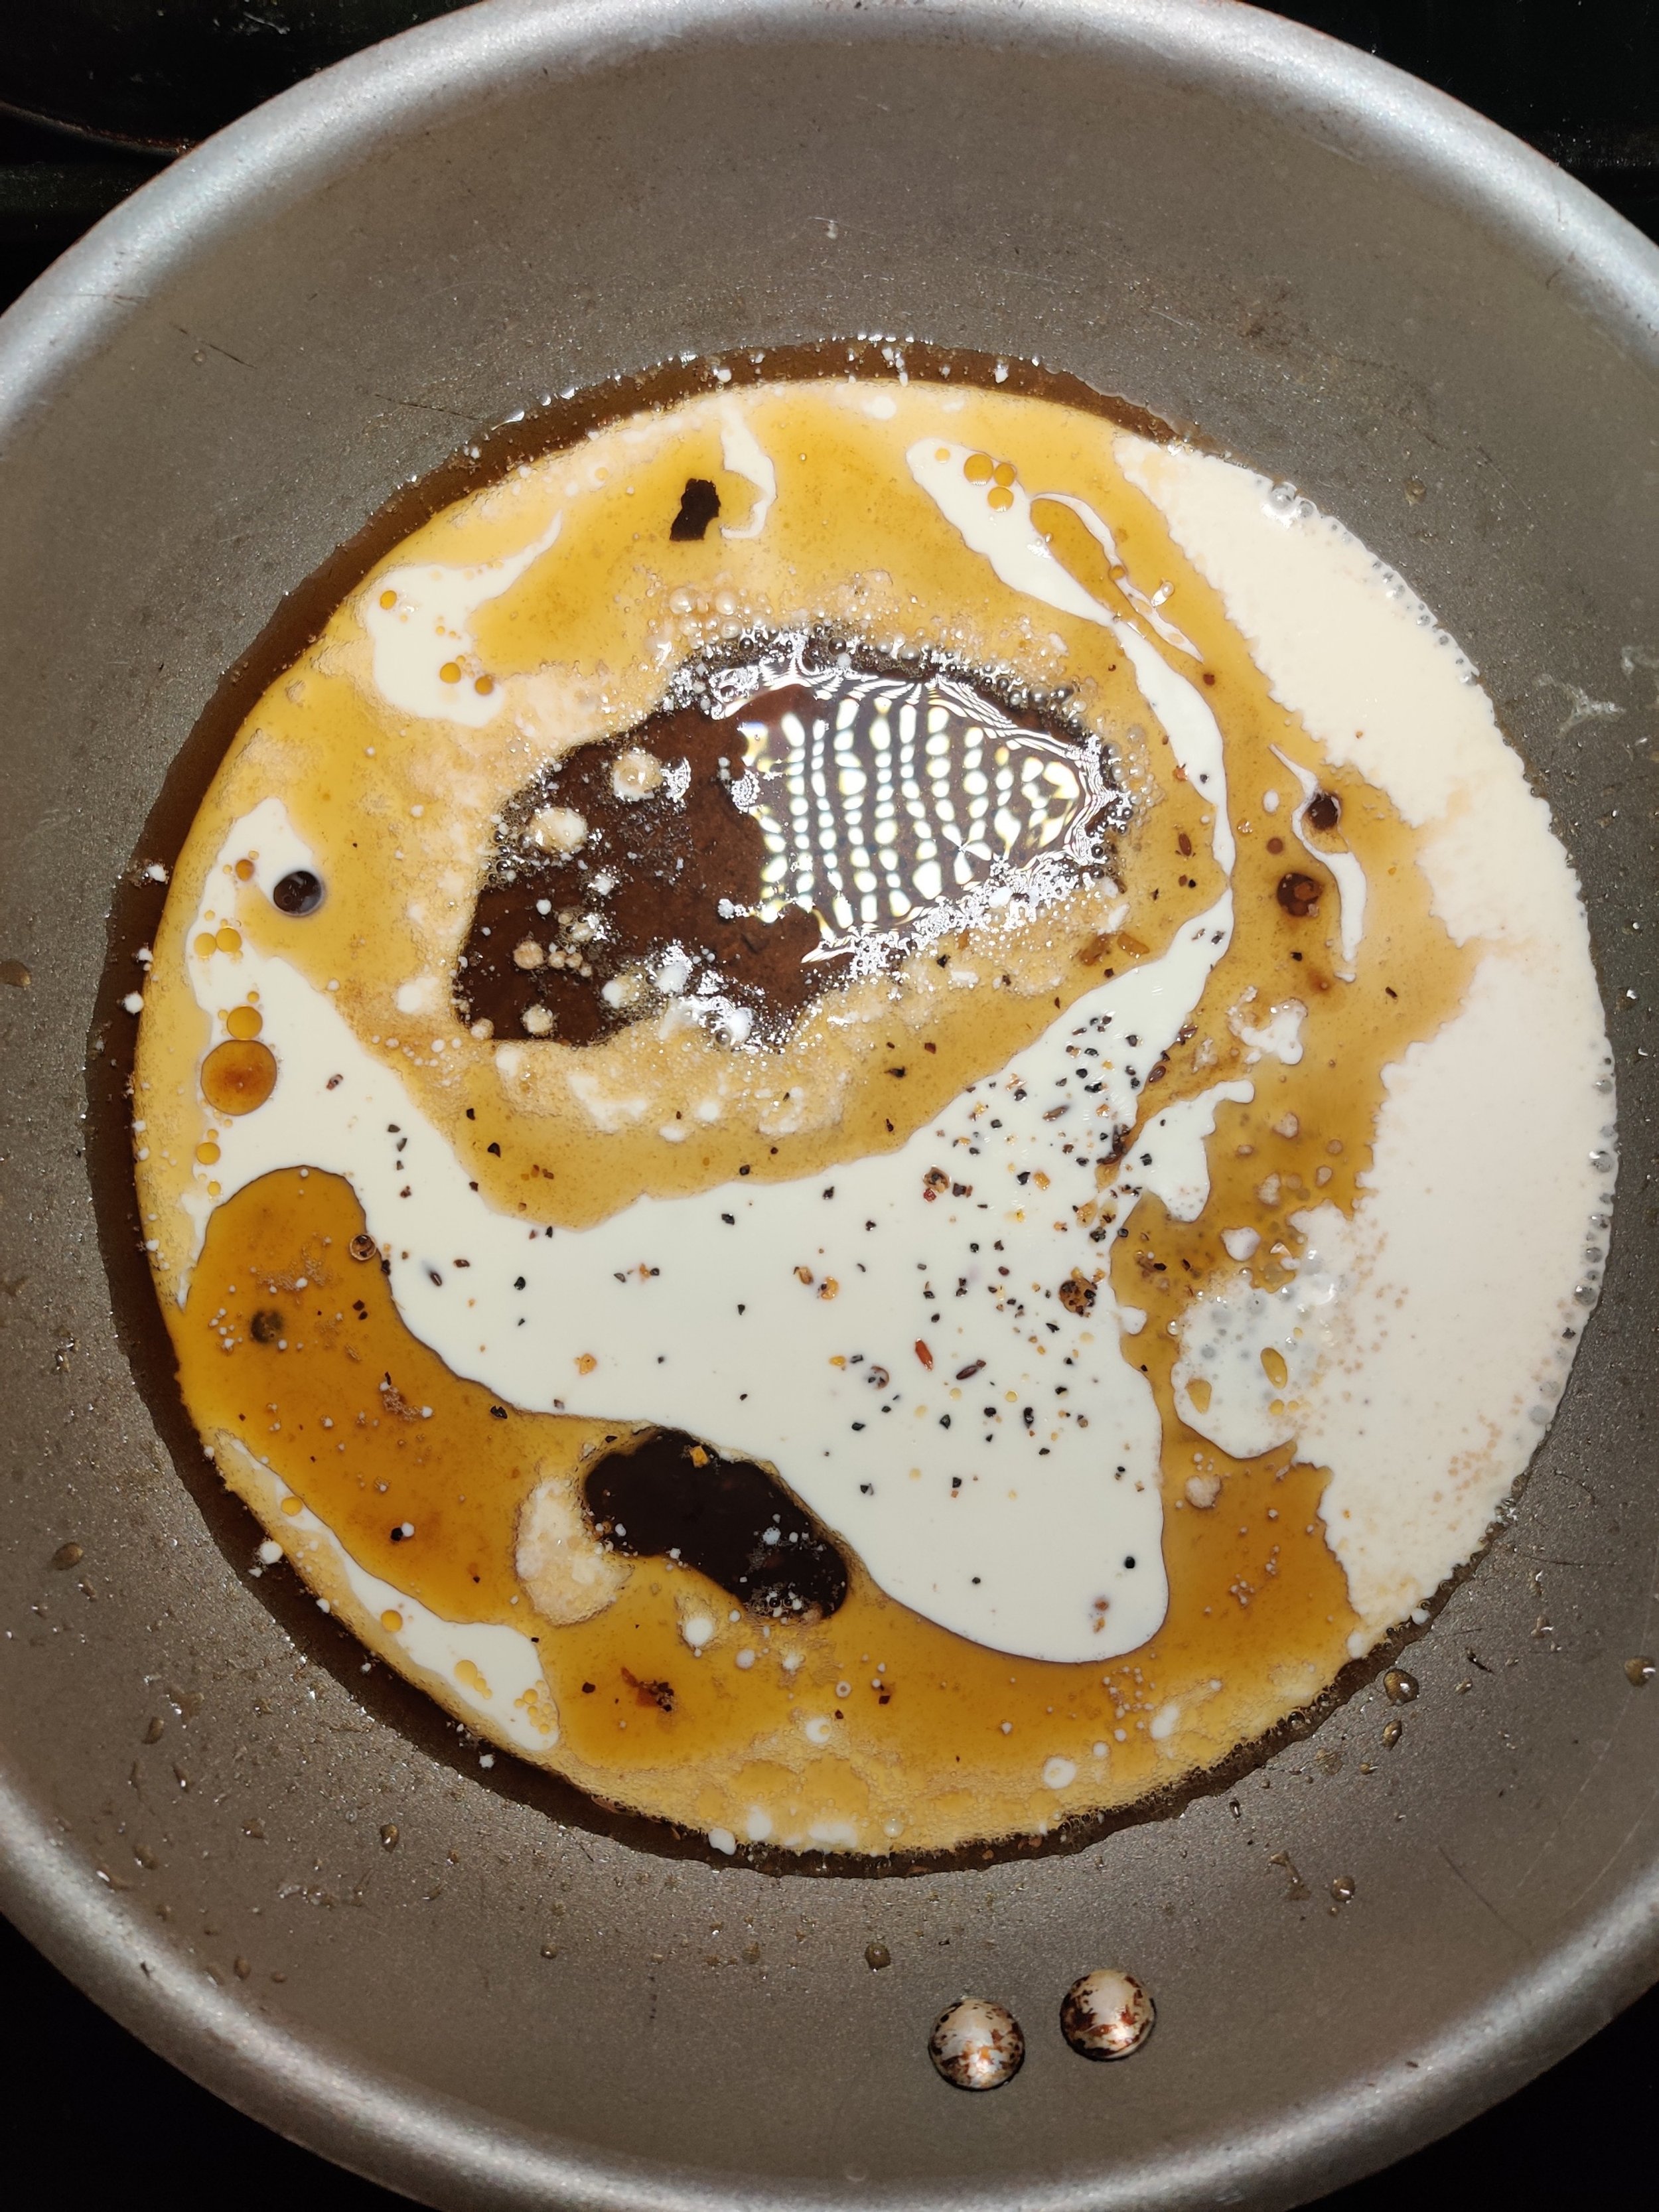
Remove the leaves, add the cream and pumpkin, and reduce heat to simmer for about 1-2 minutes, mixing the sauce is combined. Add the parmesan and seasoning and stir until smooth, adjusting as needed, adding a bit more cream if desired.
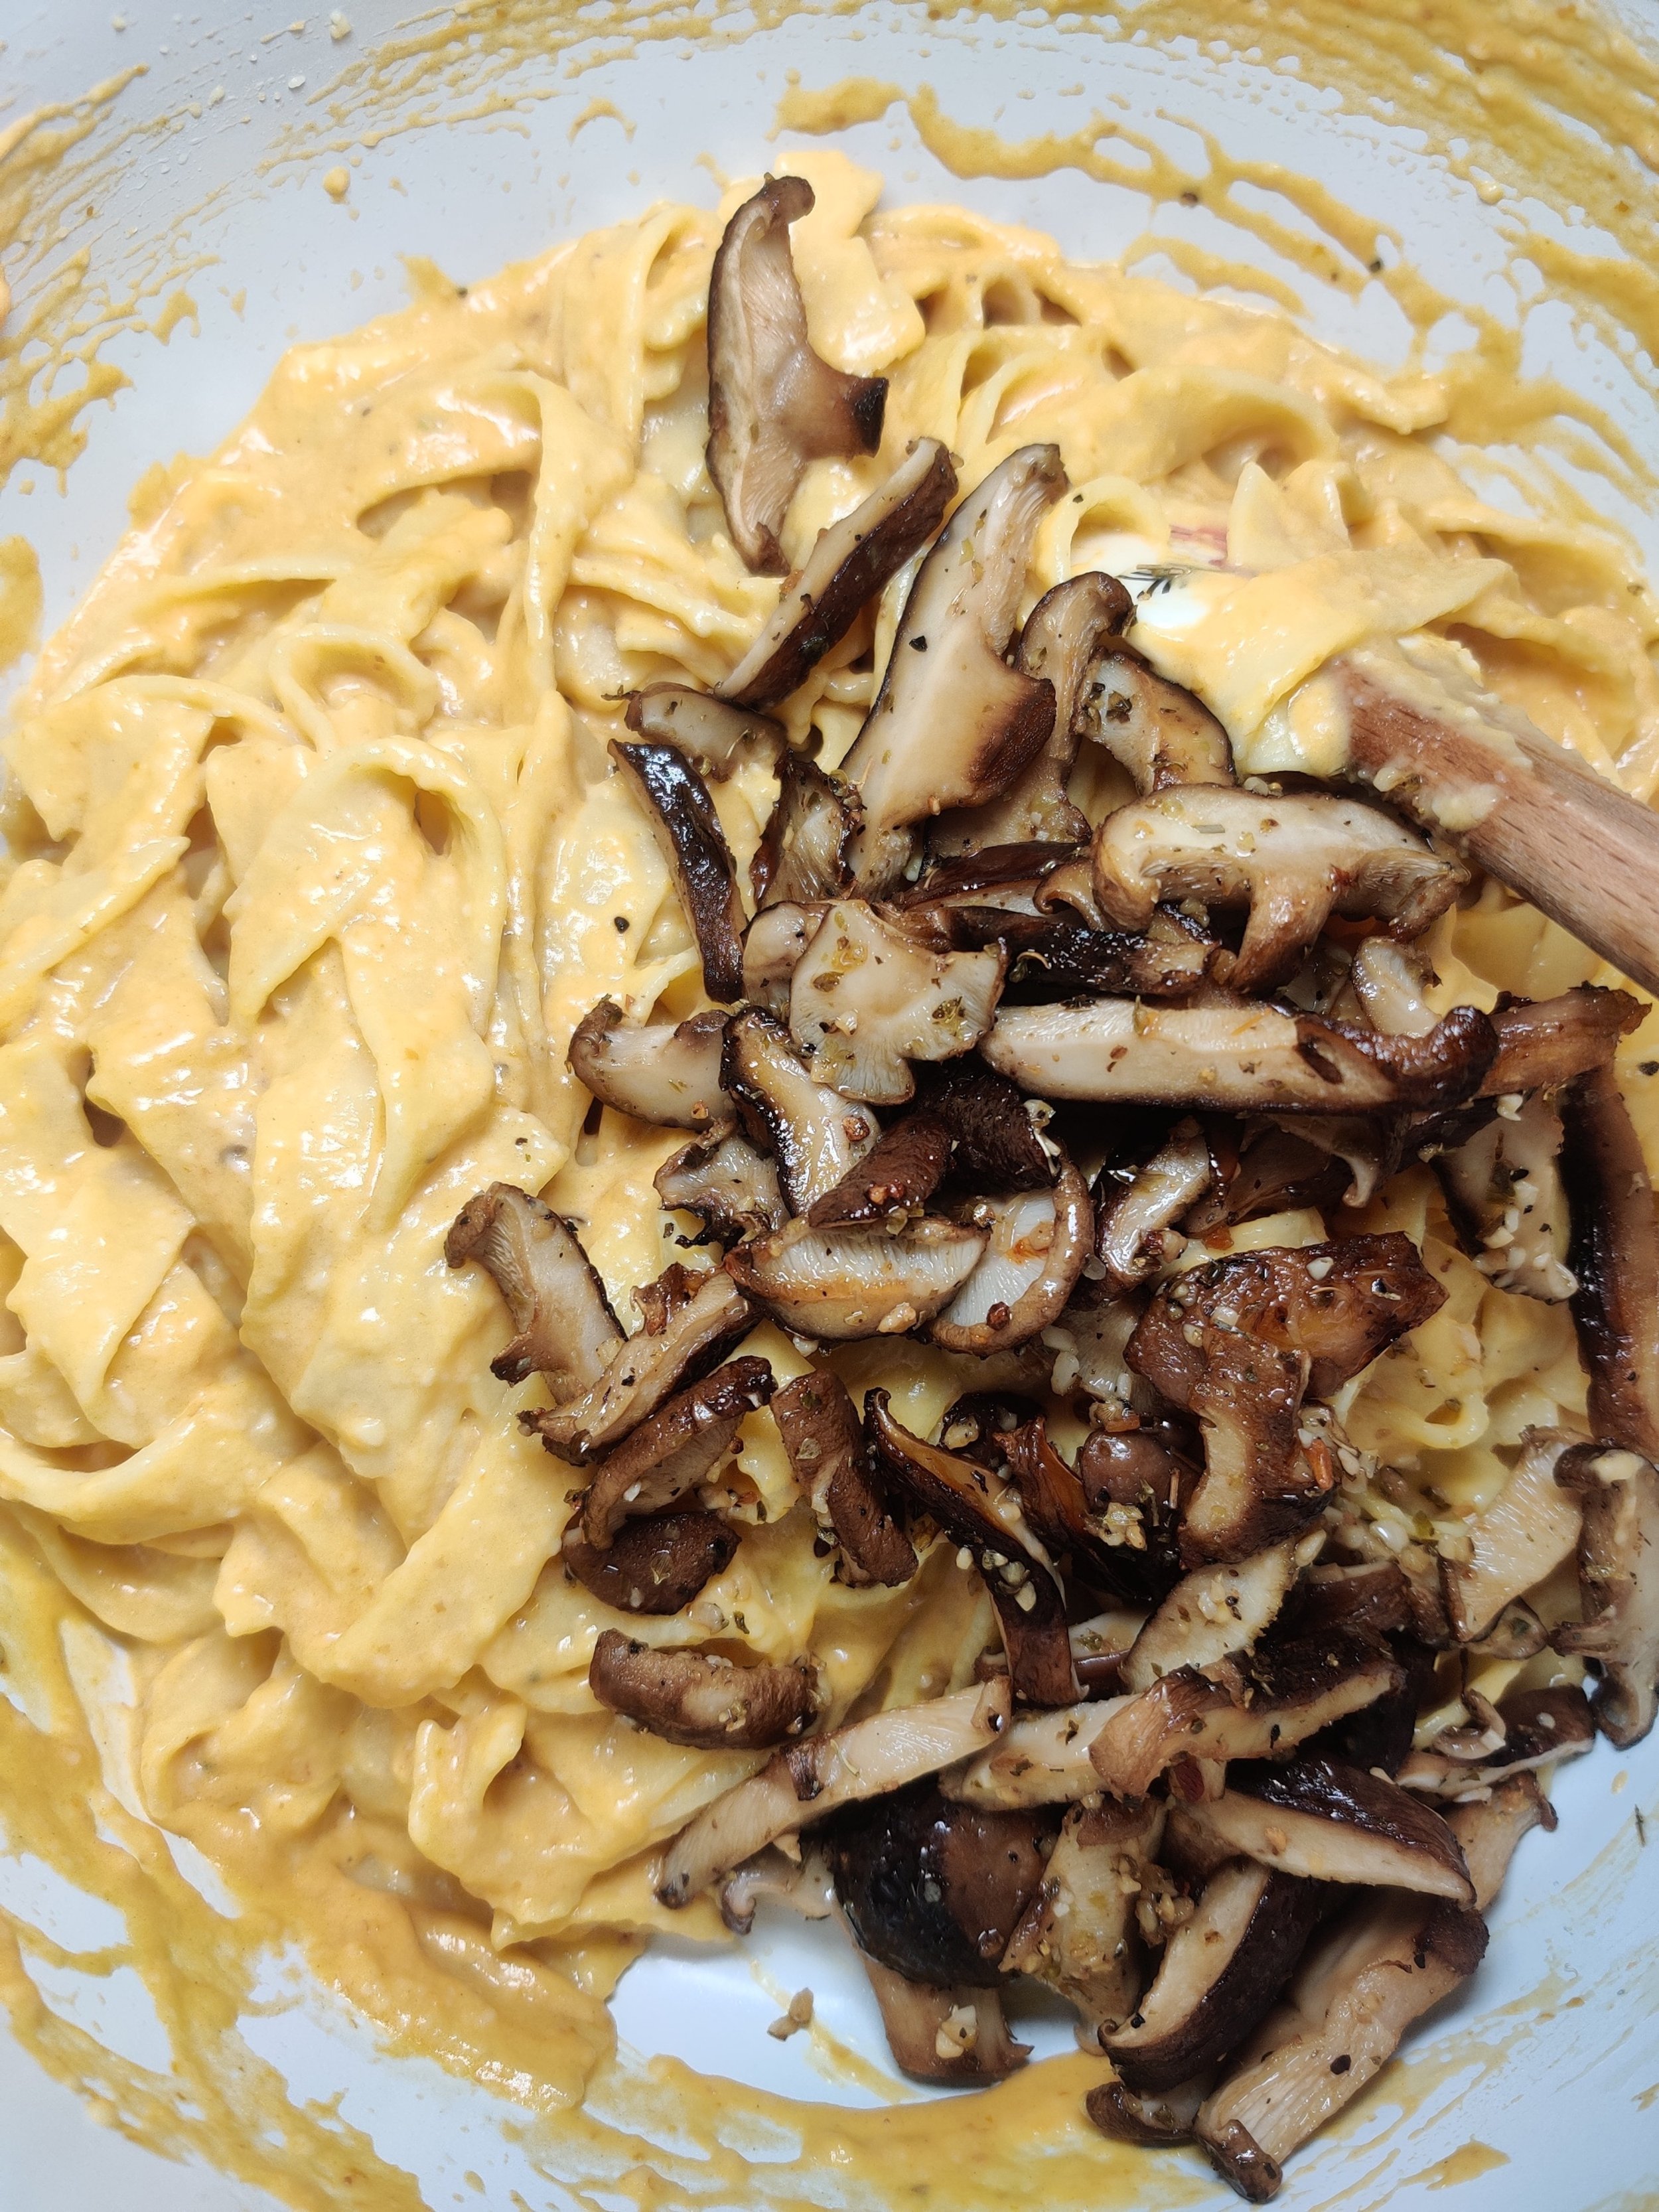
Pour the alfredo sauce in with the drained pasta, followed by the roasted mushrooms, sun-dried tomatoes, and crispy sage leaves as garnish. Dust with extra parmesan cheese and serve hot.
Serves 2.


Spicy Roasted Butternut and Peanut Soup
When the weather gets chilly, all you need is a hot bowl of soup. This recipe will give you something rich, creamy, smooth, and flavorful, thanks to the spices and, of course, the texture of the peanut butter.
Yes, butternut (or pumpkin and other members of the squash family) goes well with the nutty condiment. In Zimbabwe, it's a common practice to combine the two, whether it's the flesh of the vegetable or the leaves (muboora or pumpkin leaves cooked with peanut butter and chilies, for instance, is quite popular--the peanut butter serving as a substitute protein from meat and well, to enjoy!).
The trick to get the silky texture if you desire is to use a good quality blender, and to be patient; you'll get there! This soups is super easy and will impress anyone you make it for.
Ingredients
Spicy Roasted Butternut:
48-ounces chopped butternut
1 tablespoon chili flakes
1 tablespoon garlic powder
1 tablespoon steak seasoning (mixture of ground salt and black pepper)
1 teaspoon dried rosemary
1 tablespoon cayenne powder
1 tablespoon smoked paprika
1/4 cup olive oil
8-ounces mirepoix (mix of 2 parts onion, 1 part carrots and 1 part celery)
1 red bell pepper, diced
1 jalapeno, diced
1 teaspoon salt
1 tablespoon black pepper
1 teaspoon cayenne powder
1 tablespoon curry powder
1 teaspoon Royco Usavi (optional)
1 teaspoon smoked paprika
1 tablespoon garlic powder
1 teaspoon ginger powder or fresh, grated ginger
2 1/2 cups broth (add more as needed)
1 2 tablespoons butter
12 tablespoons bacon fat (optional)
2 tablespoons tomato sauce
1/4 cup Worchester sauce
1/2 cup heavy cream
1/3 cup peanut butter
Cilantro
Peanuts


Instructions
Toss the diced butternut in the olive oil, spices and rosemary, and bake at 400F for 12-15 minutes on parchment paper and a baking tray. The butternut should be fully cooked and caramelized on the outside. Remove from oven and set aside, including a few pieces to garnish.
Heat the butter and bacon fat in a large pot, and bloom the spices (cook for about 1-2 minutes on medium-high heat to bring out the flavour).
Add the mirepoix and sauté for 3-4 minutes until fragrant, then add the Worchester sauce and tomato sauce, cook for another 1-2 minutes.
Add the broth and 1/2 of the heavy cream, stir and simmer on low heat for 10 minutes. Mix until peanut butter is fully incorporated. Stir in the butternut and cook for another 5 minutes, then remove from heat. Take out a 1/2 cup and use the hot broth to temper and smoothen the peanut butter before adding it to the pot.
Using a mesh spoon, remove the solids and add them to the blender. Cover the lid and blend the solids until smooth. Season to taste, mixing until you have your desired texture. Control this by using the remaining broth and cream to thin it out.
Return to heat and simmer for 1 minute, season to taste and ensure the cream is incorporated and there are no large chunks of butternut, then serve. Garnish with roasted butternut, peanuts and cilantro.


Burrata, Melon, and Prosciutto Galette
What's not to love about this combo? Fruit and cured meat is an ancient pairing meant to help boost the immune system. With the addition of burrata and arugula, melon and prosciutto are some of the most well-known Italian antipasti out there, and that's not a shock! I'm a sucker for the sweetness from the melon, saltiness from the prosciutto, creaminess from the burrata, freshness, and slightly bitter notes from the arugula put together.
How about baking all these ingredients together? Explore the website for sweet and savoury recipes, which use the galette, a perfect vehicle to combine what you love and experiment. All you need is some pastry dough, either store-bought or homemade and some egg wash. Save the arugula to top at the end; this changes the characteristics a bit but leaves what we love about the combo intact.
Enjoy a slice for lunch or dinner or as a warm, tasty appetizer before the main meal. Many restaurants have embraced the approach in the form of a pizza; why not create the experience in your own home?
Ingredients
1 pie pastry dough, thawed
4-5 slices of prosciutto
1/2 cup arugula
1 burrata
3/4 cup melon
1/4 teaspoon black pepper
1/8 teaspoon salt
1 teaspoon steak seasoning
1 teaspoon date syrup
1 teaspoon olive oil
1 egg (for egg wash)
Hot honey
Red chili flakes
Instructions
Roll out the thawed pastry dough.
Remove the melon flesh from the skin and slice it into thin, flat pieces. Toss in a bowl with salt, pepper, date syrup and olive oil.
Lay the melon pieces in the middle of the dough. Leave about an inch of the outside to fold over part of the filling.
Place the cured meat and cheese broken up evenly over the melon. For the prosciutto, you can bunch it up or lay the pieces flat.
Fold the pastry sides all the way around, tucking in or folding any corners that stick out.
Beat the egg, then use a basting brush to coat the edge of the galette, then garnish with steak seasoning.
Bake the galette for 20-2r minutes at 350F; the contents will be bubbling hot.
Remove from heat, then top with the arugula and a drizzle of hot honey and chili flakes. Serve warm.

Island Herb Coconut Pan-Seared Salmon
Whether it's for lunch or dinner, salmon works well for any time of the day or almost any occasion. It's also very versatile in regards to how one can prepare it. I typically bake my salmon, marinated and wrapped in foil for 36 minutes at 350F. That is a fail-safe way to get some juicy, flavourful fish. But what if you want it lightly seared? A thin coat of crispy crust fried in butter or olive oil? That's where this recipe comes in!
You cook the salmon in a nonstick pan, add some vegetables, and finish off in coconut milk and a sauce to add your desired flavour profile. In this case, I wanted a Caribbean flare. Or, more specifically, a herb blend with vinegar, onions, garlic, ginger from one of my favorite kitchen product lines Camella's Kitchen, a Trinidadian women-owned business that makes authentic sauces and blends with flavours from the islands. The Island Herb Blend makes for quite the melody with some help from the fish sauce, soy sauce, and Worcester to bring everything together. If still available, you can get the blend as part of the summer grilling kit; that includes the Spicy Mango Chutney, Trini Roasted Garlic, Hot Pepper Sauce, and Pineapple Chow Pepper sauces. I used two sauces to make this Pineapple Chow Black Seabass with Salsa and Goat Chorizo Samosas with Tomato Mango Chutney. Or, try the fall kit, which includes the Island Herb Blend plus some autumn flavours like pumpkin and apple spice, which I've also used to make this Spicy Pumpkin Mushroom Skillet Pot Pie and Spicy Apple Muffins with a Cider Glaze.
In a short space of time, you'll get some delicious flavours that can be absorbed with some rice/grain or enjoyed as is.
Ingredients
2 salmon filets with skin
1/2 cup cononut milk
1 tablespoon fish sauce
1 cup cherry tomatoes
1 teaspoon fresh ginger, grated
1 tablespoon Worchester sauce (optional)
2 tablespoons soy sauce
1/2 large red bell pepper
1/2 yellow onion
1/4 cup spring onion + extra tips for garnish
2 tablespoons butter
2 tablespoons seafood seasoning
1 tablespoon garlic powder
1 tablespoon salt and pepper (steak seasoning)
1 tablespoon dried basil
2 tablespoons fresh cilantro
2 tablespoons Island Herd Blend from Camella’s Kitchen
1 cup bok choy
3/4 cup brown mushrooms
Dried or fresh parsley
Lemon wedges
Add butter to a nonstick pan on medium-high heat and sear the salmon fillets skin side first for 4-5 minutes on each side. For thicker fillets, flip the fish on its sides and sear for about 2 minutes per side. Season the fish with one tablespoon seafood seasoning, salt and pepper, and garlic before flipping over.
While the fish cooks, remove the stems from the bok choy, roll, and chop the leaves into shreds. Chop the green onion, setting aside some tips for garnish.
Remove the fish and set it aside. Add the onion and pepper and sweat for about 2 minutes. Add one tablespoon seafood seasoning, basil, ginger, mushrooms, green onion, tomatoes, and cook for an additional 2 minutes.
Chop the cilantro and add to the pan and cook for another minute, mix well.
Nestle in the salmon, add the bok choy and coconut milk, mix everything around the fish, add the Island Herb Blend, soy sauce, and fish sauce, and make sure all the pan's contents are well combined.
Reduce heat and simmer for 15 minutes, stirring at regular intervals to ensure the sauce doesn't stick to the pan and cooks evenly. You can also check the temperature of the fish (salmon should be 145F to be safe to eat in the thickest part and firm when done).
Season to taste with extra salt, pepper and Worchester sauce if more umami is needed and cook for the appropriate additional time.
Garnish with green onion tips, parsley and lemon. Serve hot with rice or grain of choice.
Matapa (Shrimp and Kale in Coconut Milk and Peanut Butter)
Peanut butter and greens are not an unusual pairing in many parts of Southern Africa and should be embraced everywhere! They are just as delicious as greens with cream, a more widely known dream team when balanced right.
The Mozambican dish Matapa inspired this recipe: cassava leaves cooked in coconut milk with peanuts or cashews and shrimp or crab. I used Tuscan kale, but you can use anything from pumpkin leaves to collard greens and adjust the cooking time.
Coconuts are plentiful in Mozambique, which borders the Indian ocean, and coconut milk, a staple in my pantry, is creamy but not overwhelming. It lends a unique flavour, and in this case, blends well with the sweet and salty peanut butter and the subtle sweetness and texture from the chopped shrimp.
The light and hearty soup stew gets even more delicious overnight, and you can serve it with brown rice, farro, couscous or any other starch or side that will help absorb the tasty juices!
Ingredients
2 pounds cooked shrimp (thaw according to package)
1 large bunch Tuscan kale
Olive oil
1 red onion
4 large garlic cloves
1/4 jalapeno
1/4 cup fresh parsley
1 tablespoon Royco Usavi mix (or you favourite all purpose seasoning)
2 tablespoons peri-peri seasoning
1 cup peanut butter (tempered with 1 cup hot water)
1 packet chicken bouillon powder
2 tablespoons from 1/2 a fresh lemon
1 tablespoon cayenne powder
1 tablespoon black pepper
1 teaspoon salt
1 cup coconut milk
Pepper flakes
Instructions
Remove the stems and chop the kale. Place in boiling water until softened, then remove most of the water. Place in a blender and pulse to shred the greens until they are tiny pieces but not liquid (you can also do it while the leaves are uncooked).
Finely dice and chop the onion, garlic, jalapeno, and parsley and sauté in olive oil until softened for about 3 minutes. Add the Royco Usavi and peri-peri.
In a separate bowl, mix the peanut butter with the boiling water and chicken bouillon. Pour the tempered mixture into the pot, then add the kale. simmer for 5 minutes and mix well.
Add the shrimp, cook for 2-3 minutes, then follow with a squeeze of lemon. Season with salt and pepper to taste, adding extra peanut butter and cayenne if necessary.
Serve hot with brown rice, lemon, chili flakes, and parsley.

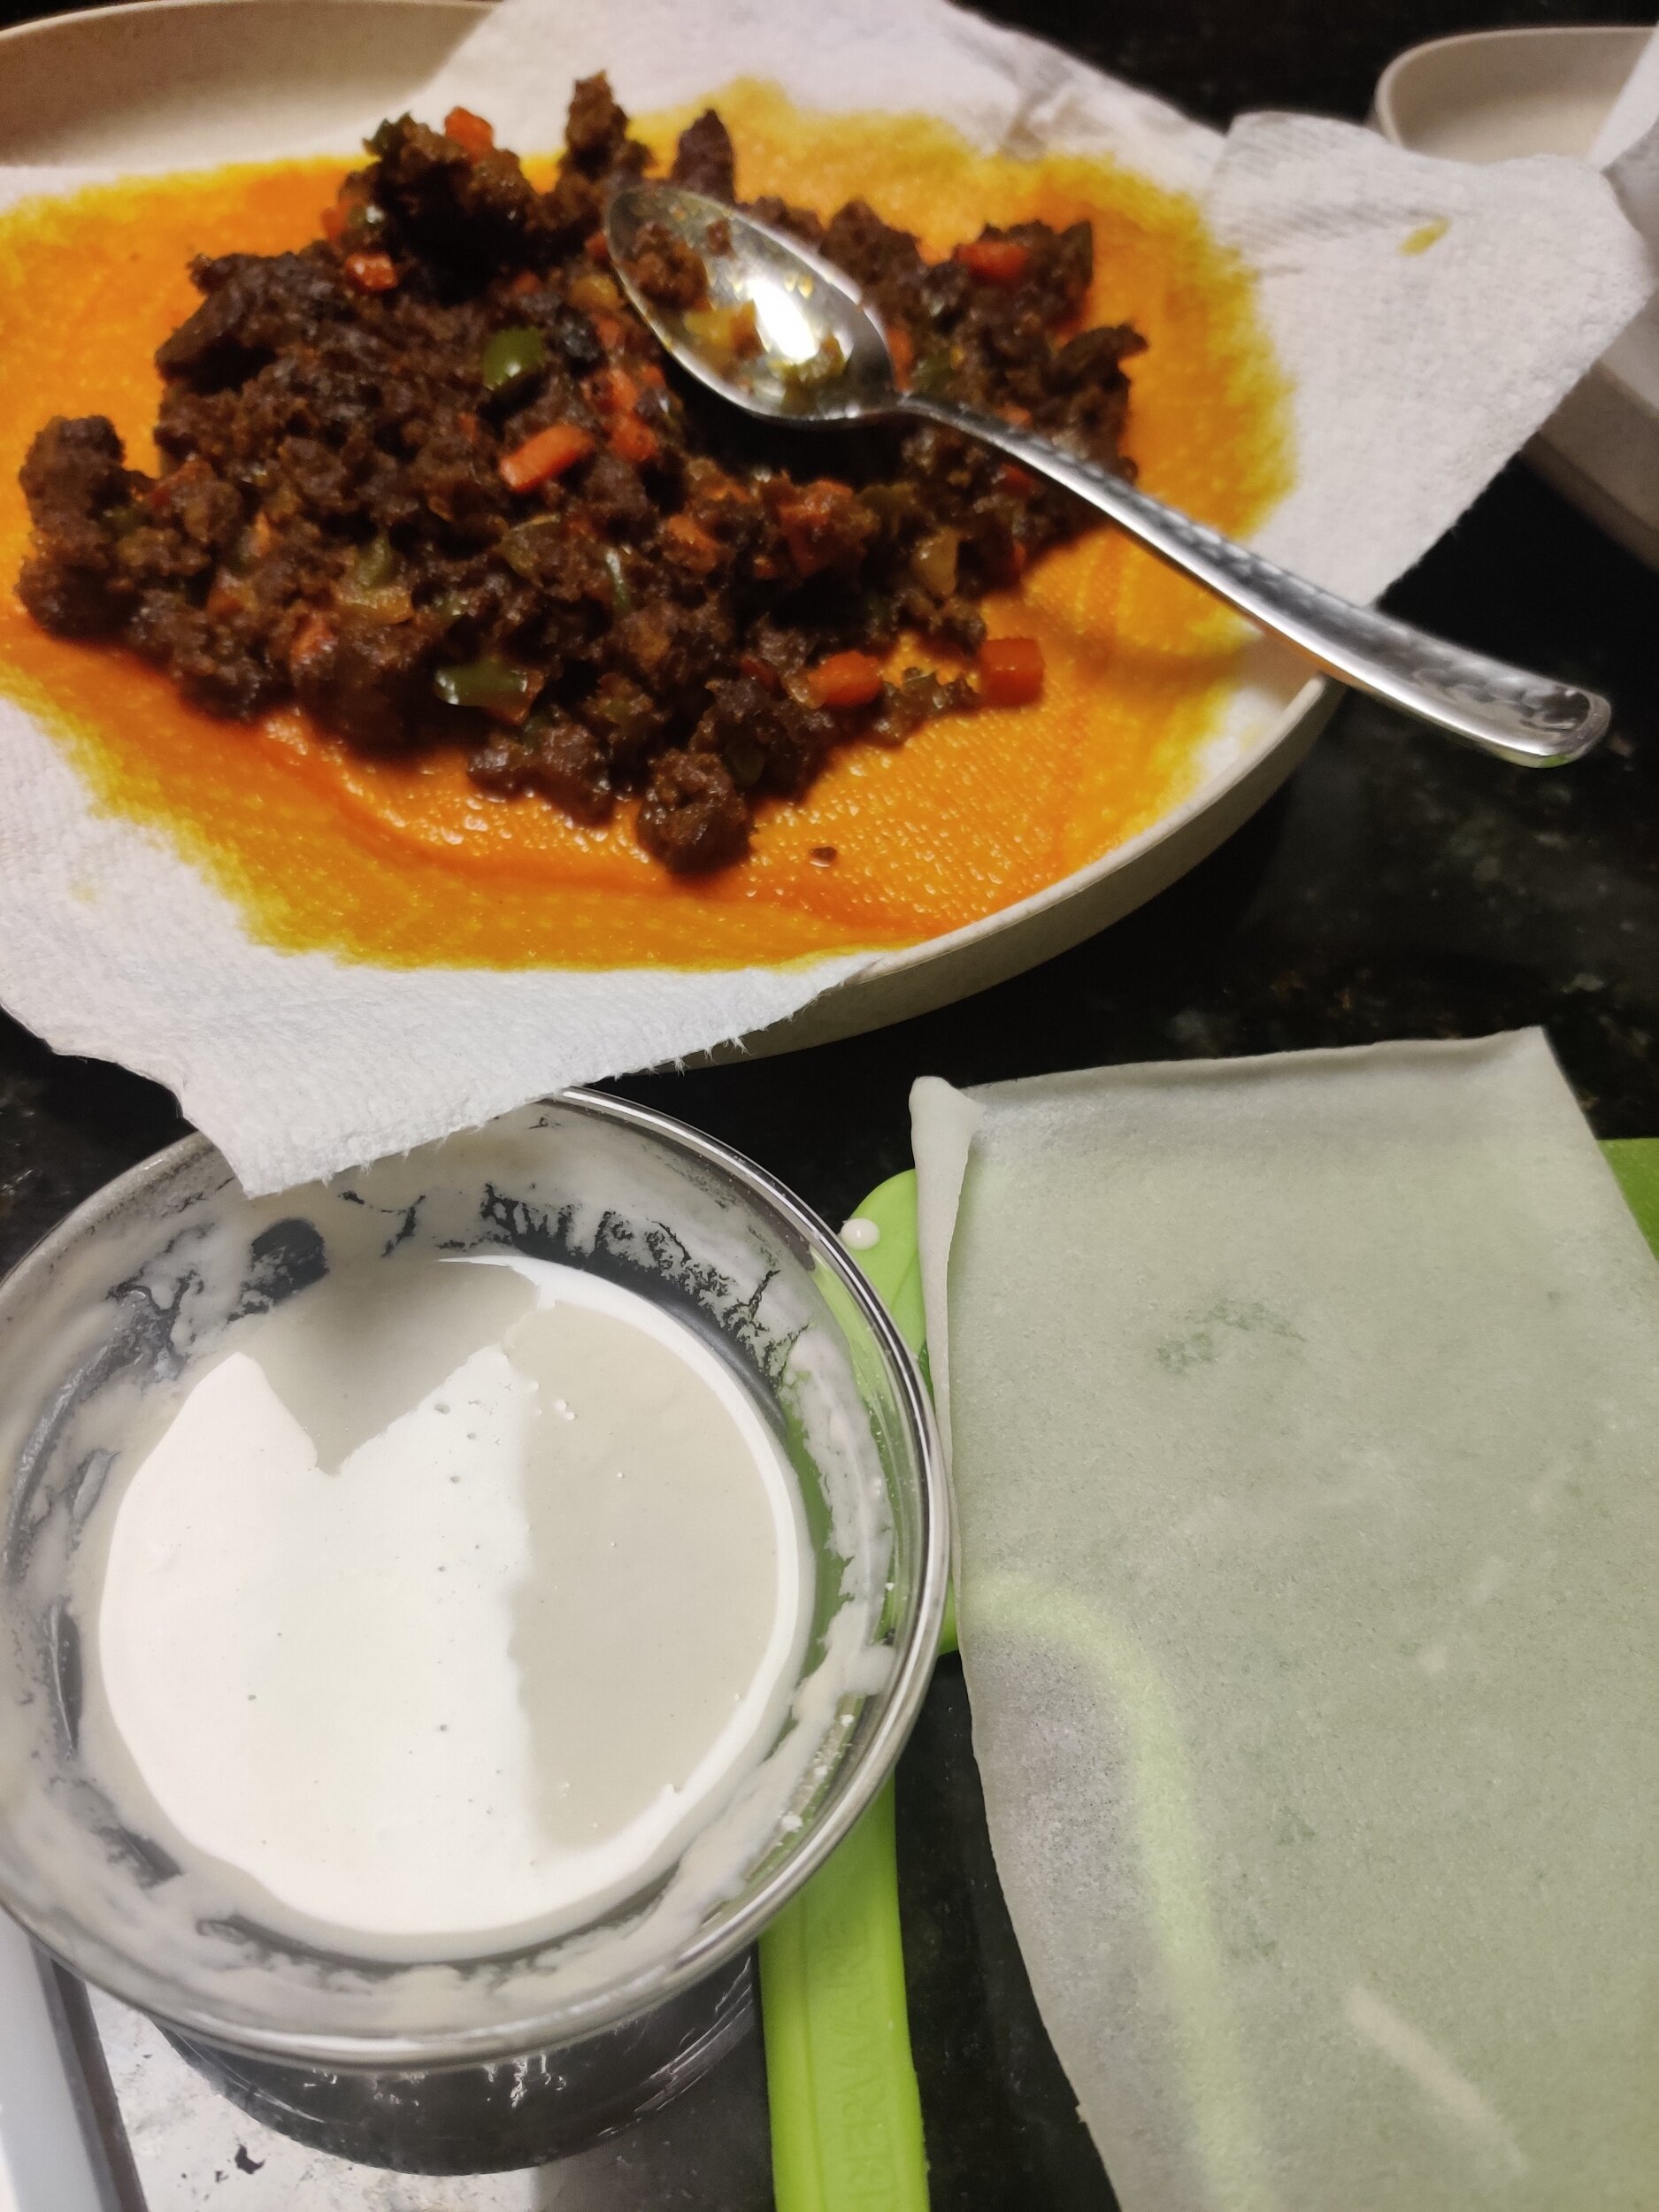
Goat Chorizo Samosas with Tomato Mango Chutney
I love goat meat and grew up eating it frequently. I consider it a somewhat neglected meat, but it is delicious and quite versatile! For those of you who appreciate goat meat or love chorizo, this will be quite a treat. I discovered the chorizo as a local farmers market to my delight and imagined this pairing.
Samosas are curried and/or spiced meat or vegetable-filled pastries wrapped in a thin dough and fried, attributed to South Asia but enjoyed worldwide, including East Africa. A condiment often accompanies them for dipping. In this case, a mango chutney will do the trick, a it is a great balance of sweet and spicy and complements the goat, which is not inherently sweet compared to other meats. The sour cream helps to cool the spiciness. To enhance the mango chutney, I used a spicy mango chutney sauce from Camella’s Kitchen. To view other recipes using their products that boast Caribbean flavours, check out Plantain Stew with Black Beans, Spicy Apple Muffins with a Cider Glaze, and Pineapple Chow Black Seabass Salsa.
Ingredients
Chutney:
1 large mango, diced
1 tablespoon spicy mango chutney sauce (I used Camella’s Kitchen)
1/3 cup roasted tomatoes
1 tablespoon jalapeno, diced with rib and seeds removed
2 tablespoons smoked paprika
1 tablespoon garlic minced
1/2 shallot minced
1 tablespoon tomato paste
1/4 cup carrots, diced
1 tablespoon parsley, chopped
1 tablespoon Royco Usavi mix (or your favourite all-purpose seasoning)
1 tablespoon Worchester sauce
1 tablespoon mirin or cooking wine
1 teaspoon salt
1 tablespoon black pepper
Anise and bay leaves (optional aromatics)
1 cup water
Samosas:
10 samosa sheets. cut into rectangles
1 tablespoon butter
4 sausages goat chorizo, casings removed (or regular chorizo)
1/4 cup white onion, diced
1/8 cup carrots, diced
1/8 cup green bell pepper, diced
1 tablespoon Spice for Rice (optional)
1 teaspoon garlic powder
1 tablespoon Royco Usavi mix (or your favourite all-purpose seasoning)
1 teaspoon tumeric
1 cup broth
1/4 cup water and 2 tablespoons flour (sealing paste)
Vegetable oil
Sour cream


Instructions
Prepare the chutney. Add all the ingredients except the water and aromatics and bring to a boil. Then add the water and aromatics and reduce the heat to simmer for 15 minutes, stirring frequently and seasoning with additional salt and pepper to taste. Remove the bay leaves and anise after 5-7 minutes to avoid overpowering the other flavours. Add more water if necessary but allow the chutney to thicken. Once it's to your liking, remove the chutney from the heat.
For the samosa filling, add the butter to a pan on medium-low heat. Sweat out the onion, carrots and bell pepper for 2 minutes. Add the seasonings and cook for an additional minute.
Mix in the chorizo and cook until browned. Pour in the broth and reduce heat to simmer to finish cooking the goat. Season to taste then remove from the heat to cool.
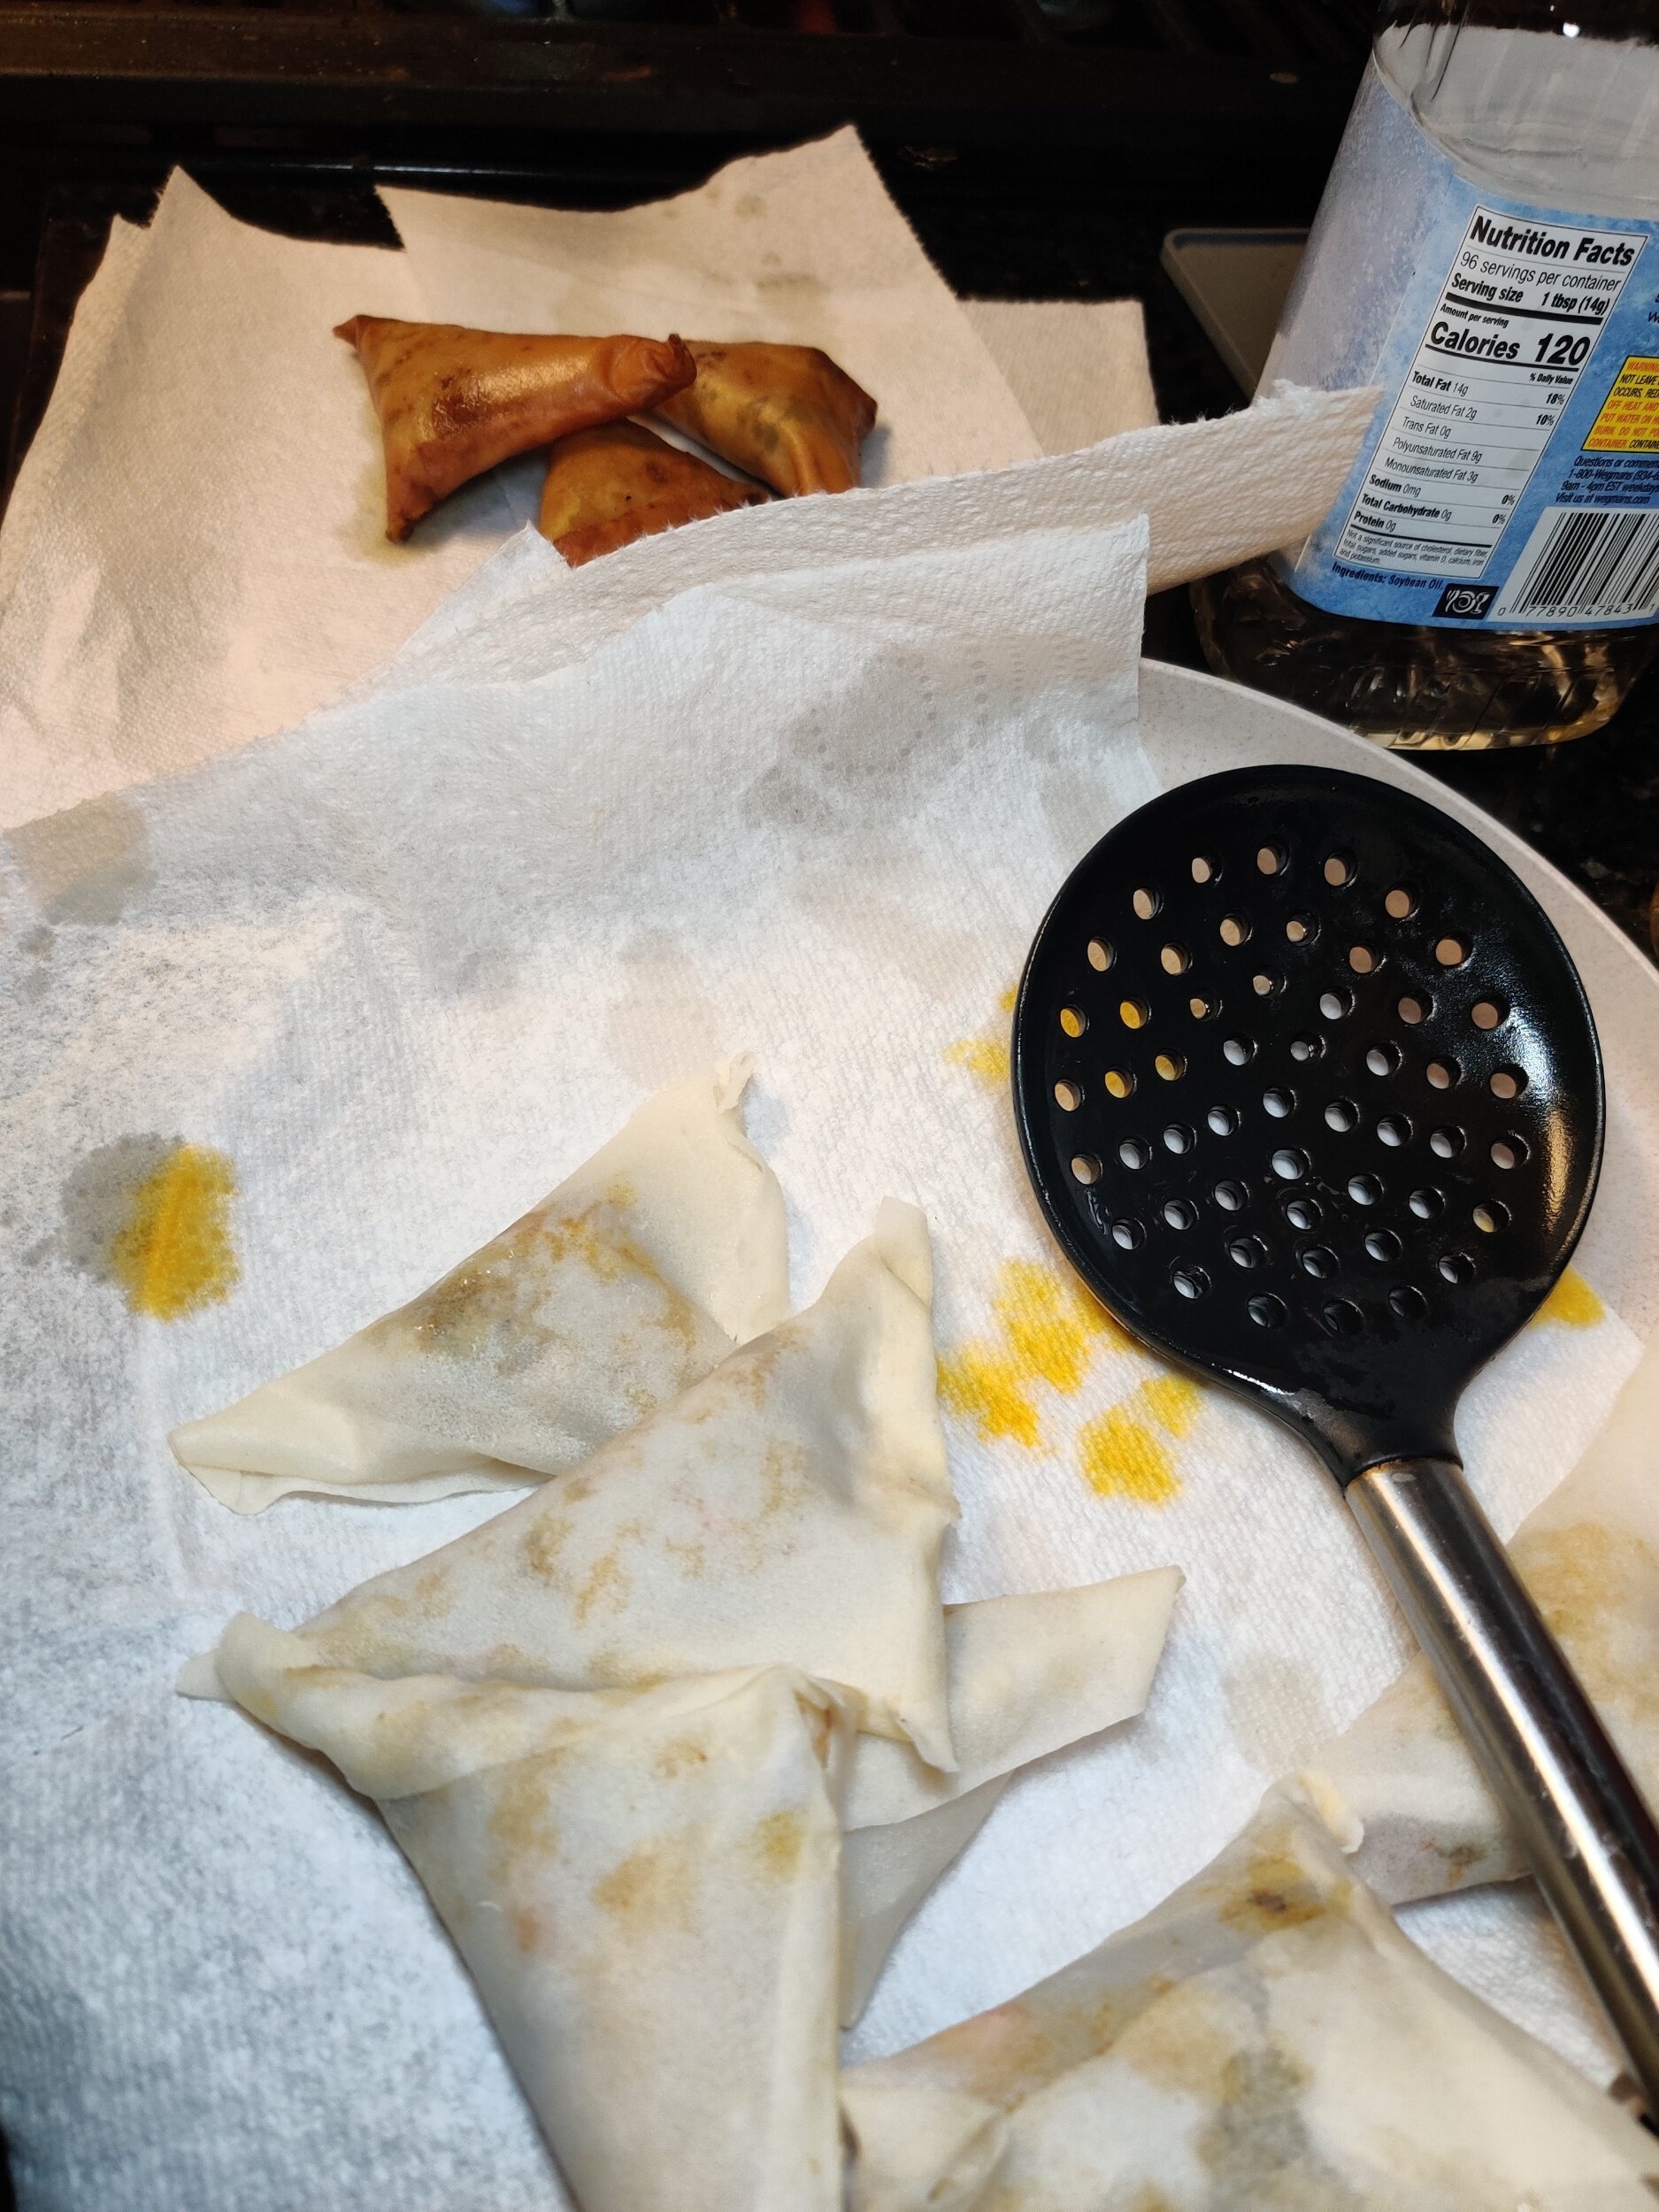
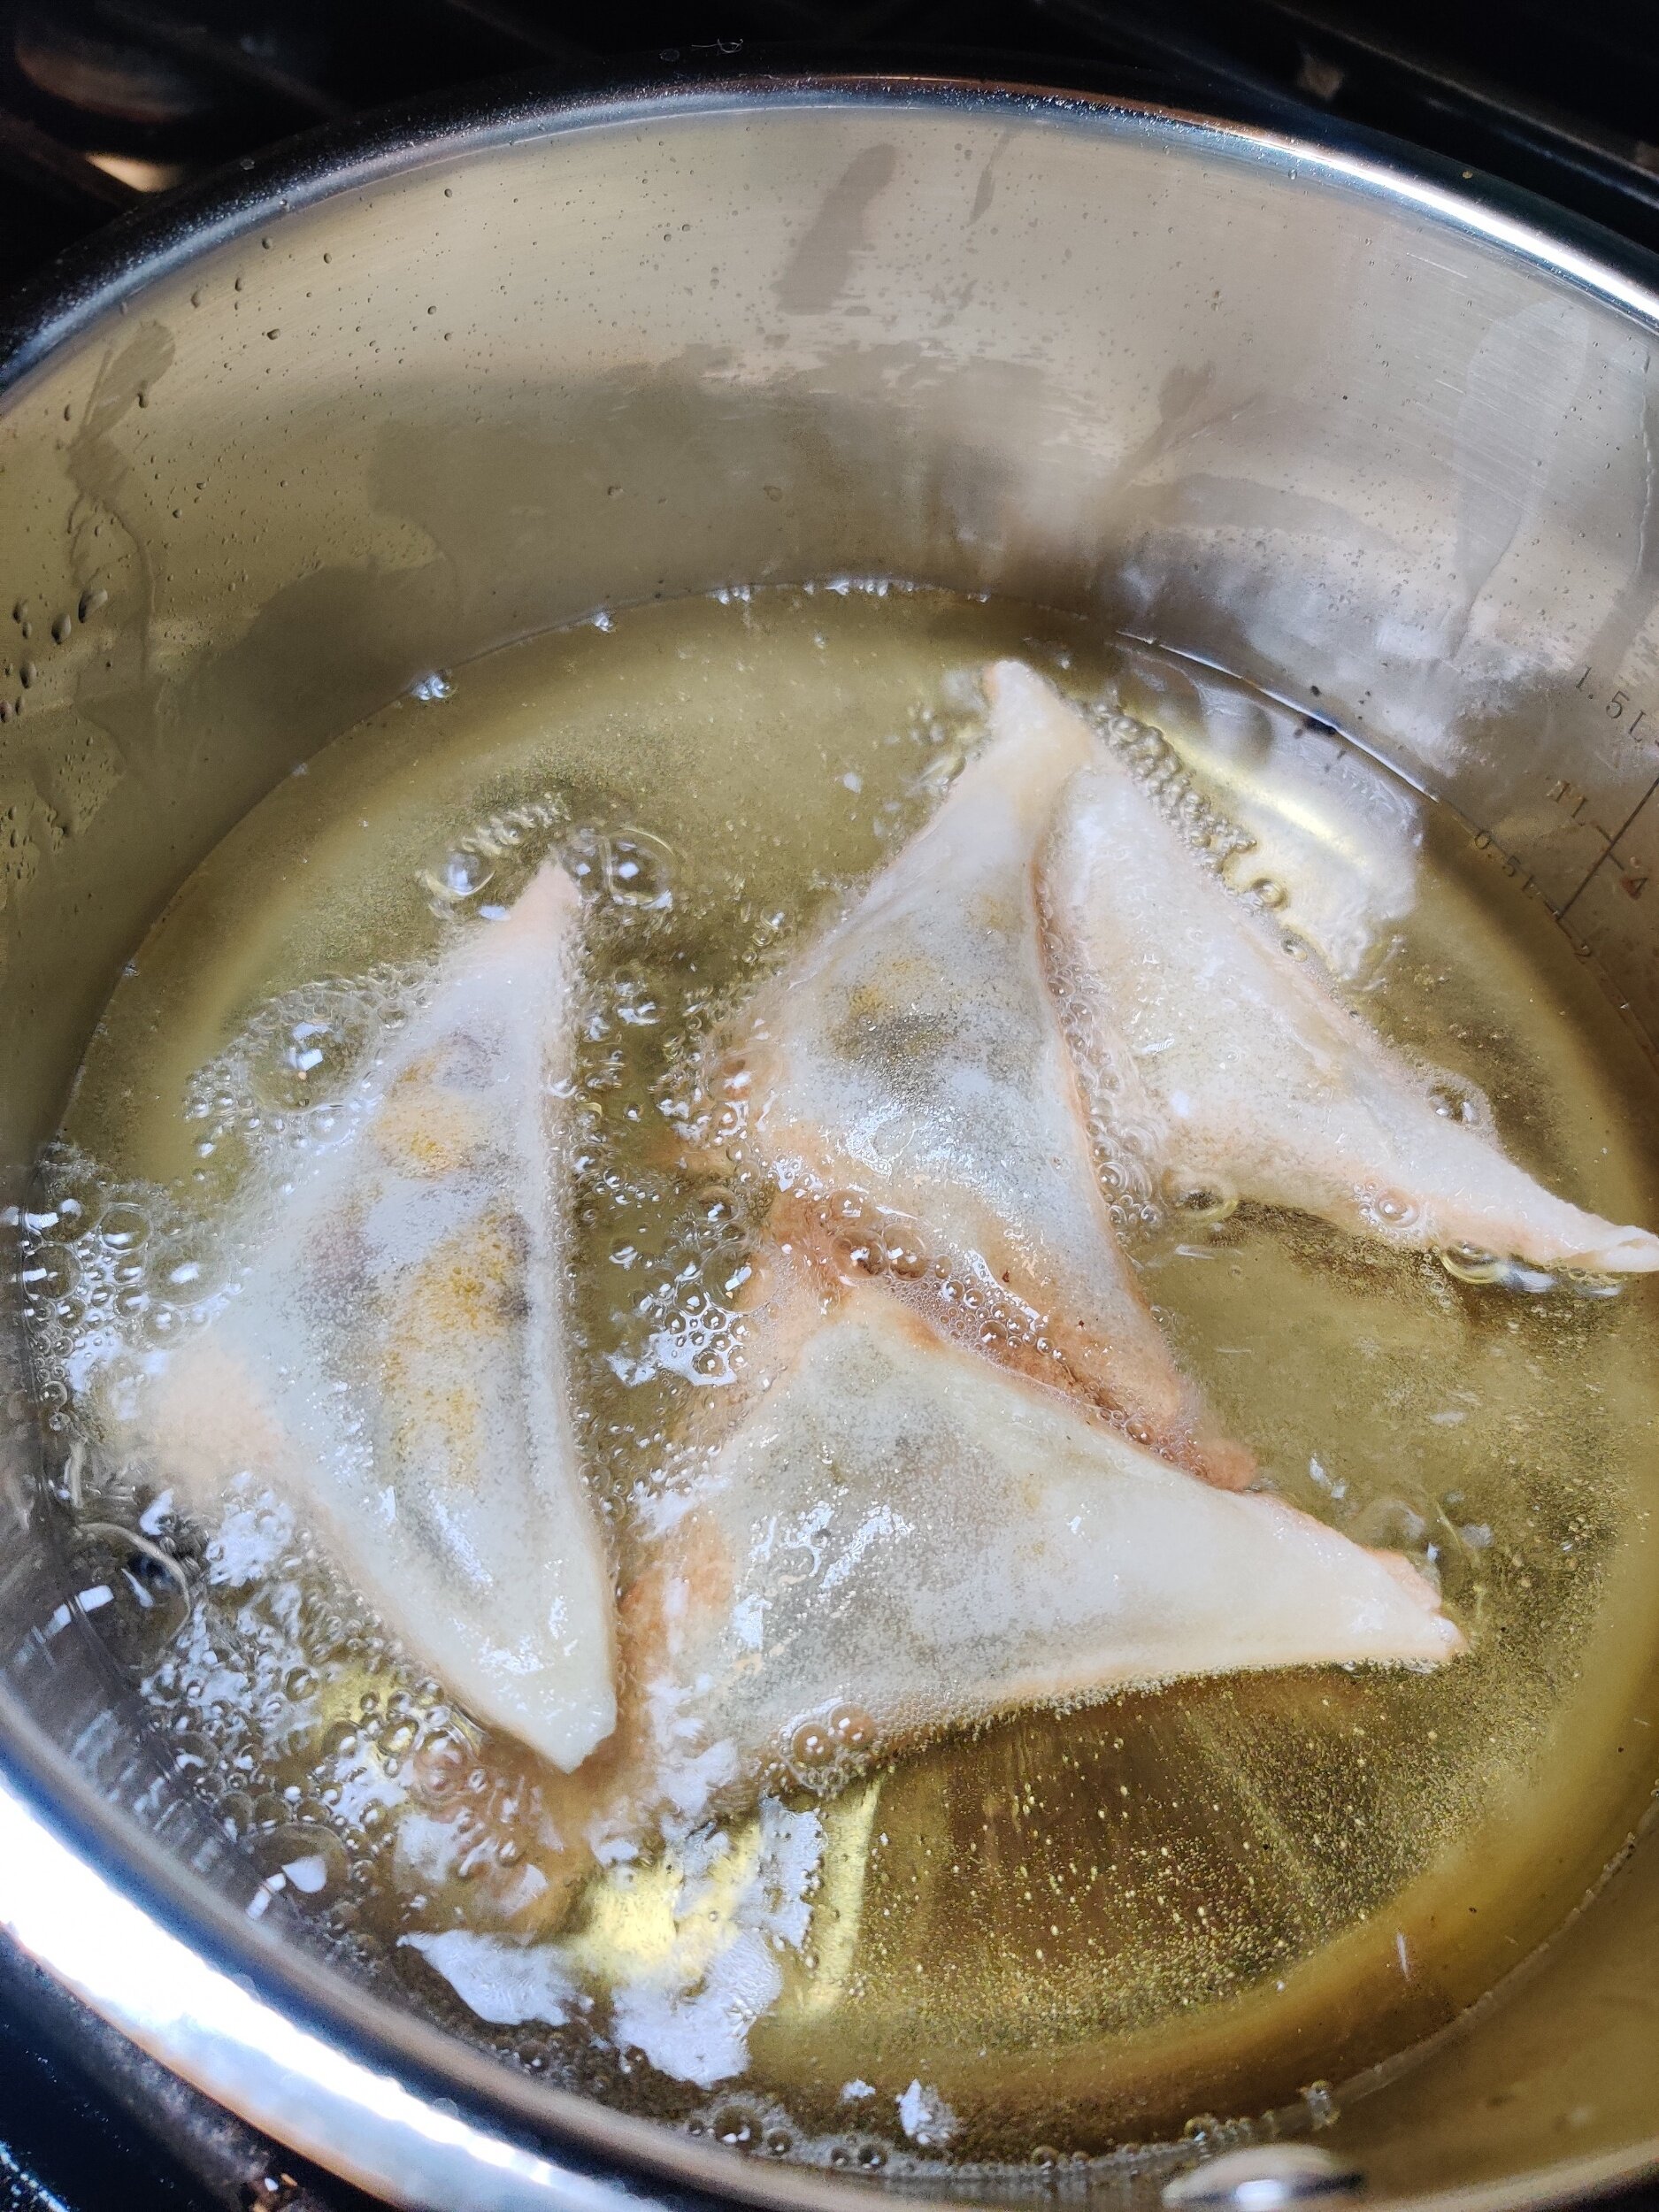
Prepare the samosa sheets according to the package instructions, and ensure they don't dry out. To fill them, fold a bottom corner into a triangle of each samosa sheet, then another triangle to make it a double pocket. Add the filling, sealing the sides with the flour and water mix as needed. Check this video out for clear steps!
Fry the samosas in vegetable oil for one minute per side, then place on paper towels to drain the extra fat. Don't overcrowd the pot to help them cook evenly.
Serve with the mango chutney (cold or room temperature) and sour cream.


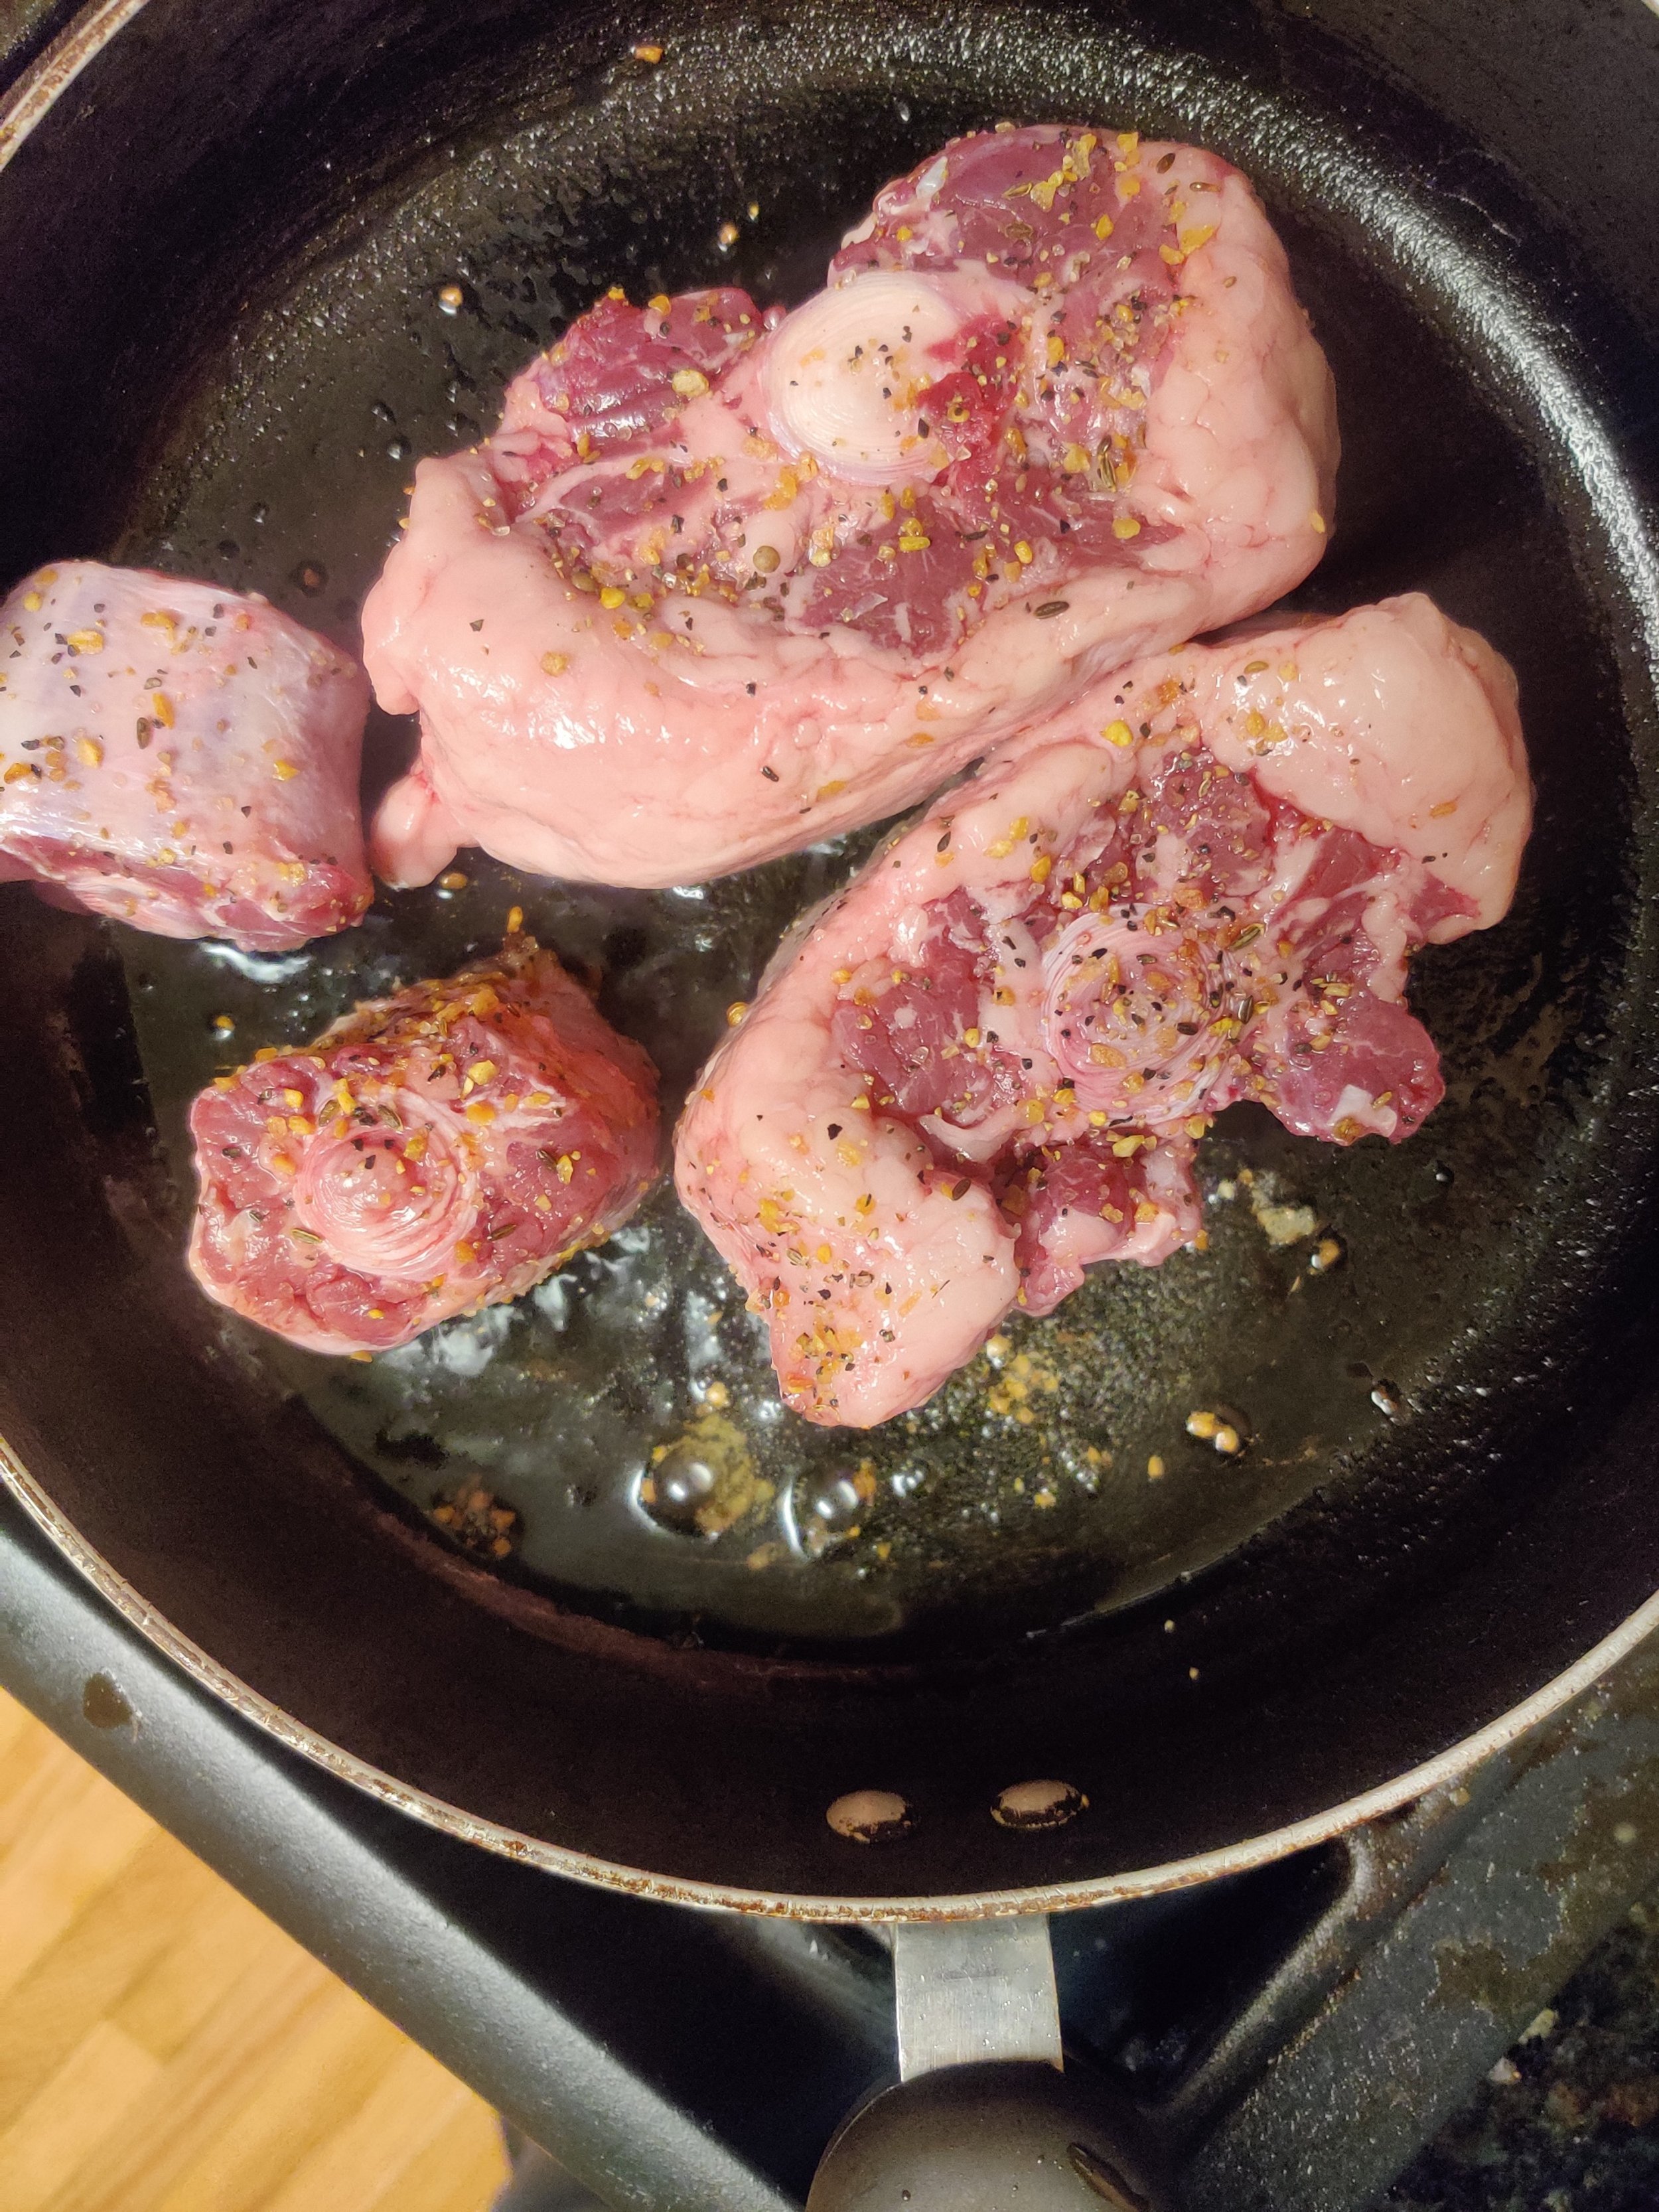
Pork Chops, Purple Peppers, and Peaches with Wine Sauce
John Harris' Peter Piper picked a peck of pickled peppers came to mind when I began writing out this recipe!
After a trip to the farmer's market, I left with some fresh purple peppers, which taste mostly like their green, orange and red cousins; subtle, but a little bitter, which can be a nice contrast in the suitable dish. Given the colour, they could be a great addition to a salad. I also happened to have some peaches from a previous recipe.

To keep pork chops juicy and prevent them from drying out, you want to sear both sides on high heat in a cast iron or non-stick pan to give them a nice colour and crisp, then poach in the wine with the lid to finish. To avoid overcooking the peaches and peppers, you can sauté separately in the same pan the chops are prepared once the remaining poaching liquid is moved to a saucepot to reduce.


Pork Chops, Purple Peppers, and Peaches with Wine Sauce
Ingredients
- 2 large pork chops
- 2 peaches, sliced into segments
- 1 tablespoon steak and chops seasoning (I used Roberston’s)
- 1/3 cup white wine (real wine preferred)
- 2 tablespoons olive oil
- 2 tablespoons butter
- 2 bell peppers, sliced into strips (I used purple, you can also use green)
- Rosemary sprigs
- 4 garlic cloves
- 2 tablespoons butter
- 1 tablespoon shallots, finely chopped (optional)
- 2 tablespoons mirin
- 1 teaspoon red wine vinegar
- 1 teaspoon Worchester sauce
- Salt and pepper to taste
Instructions
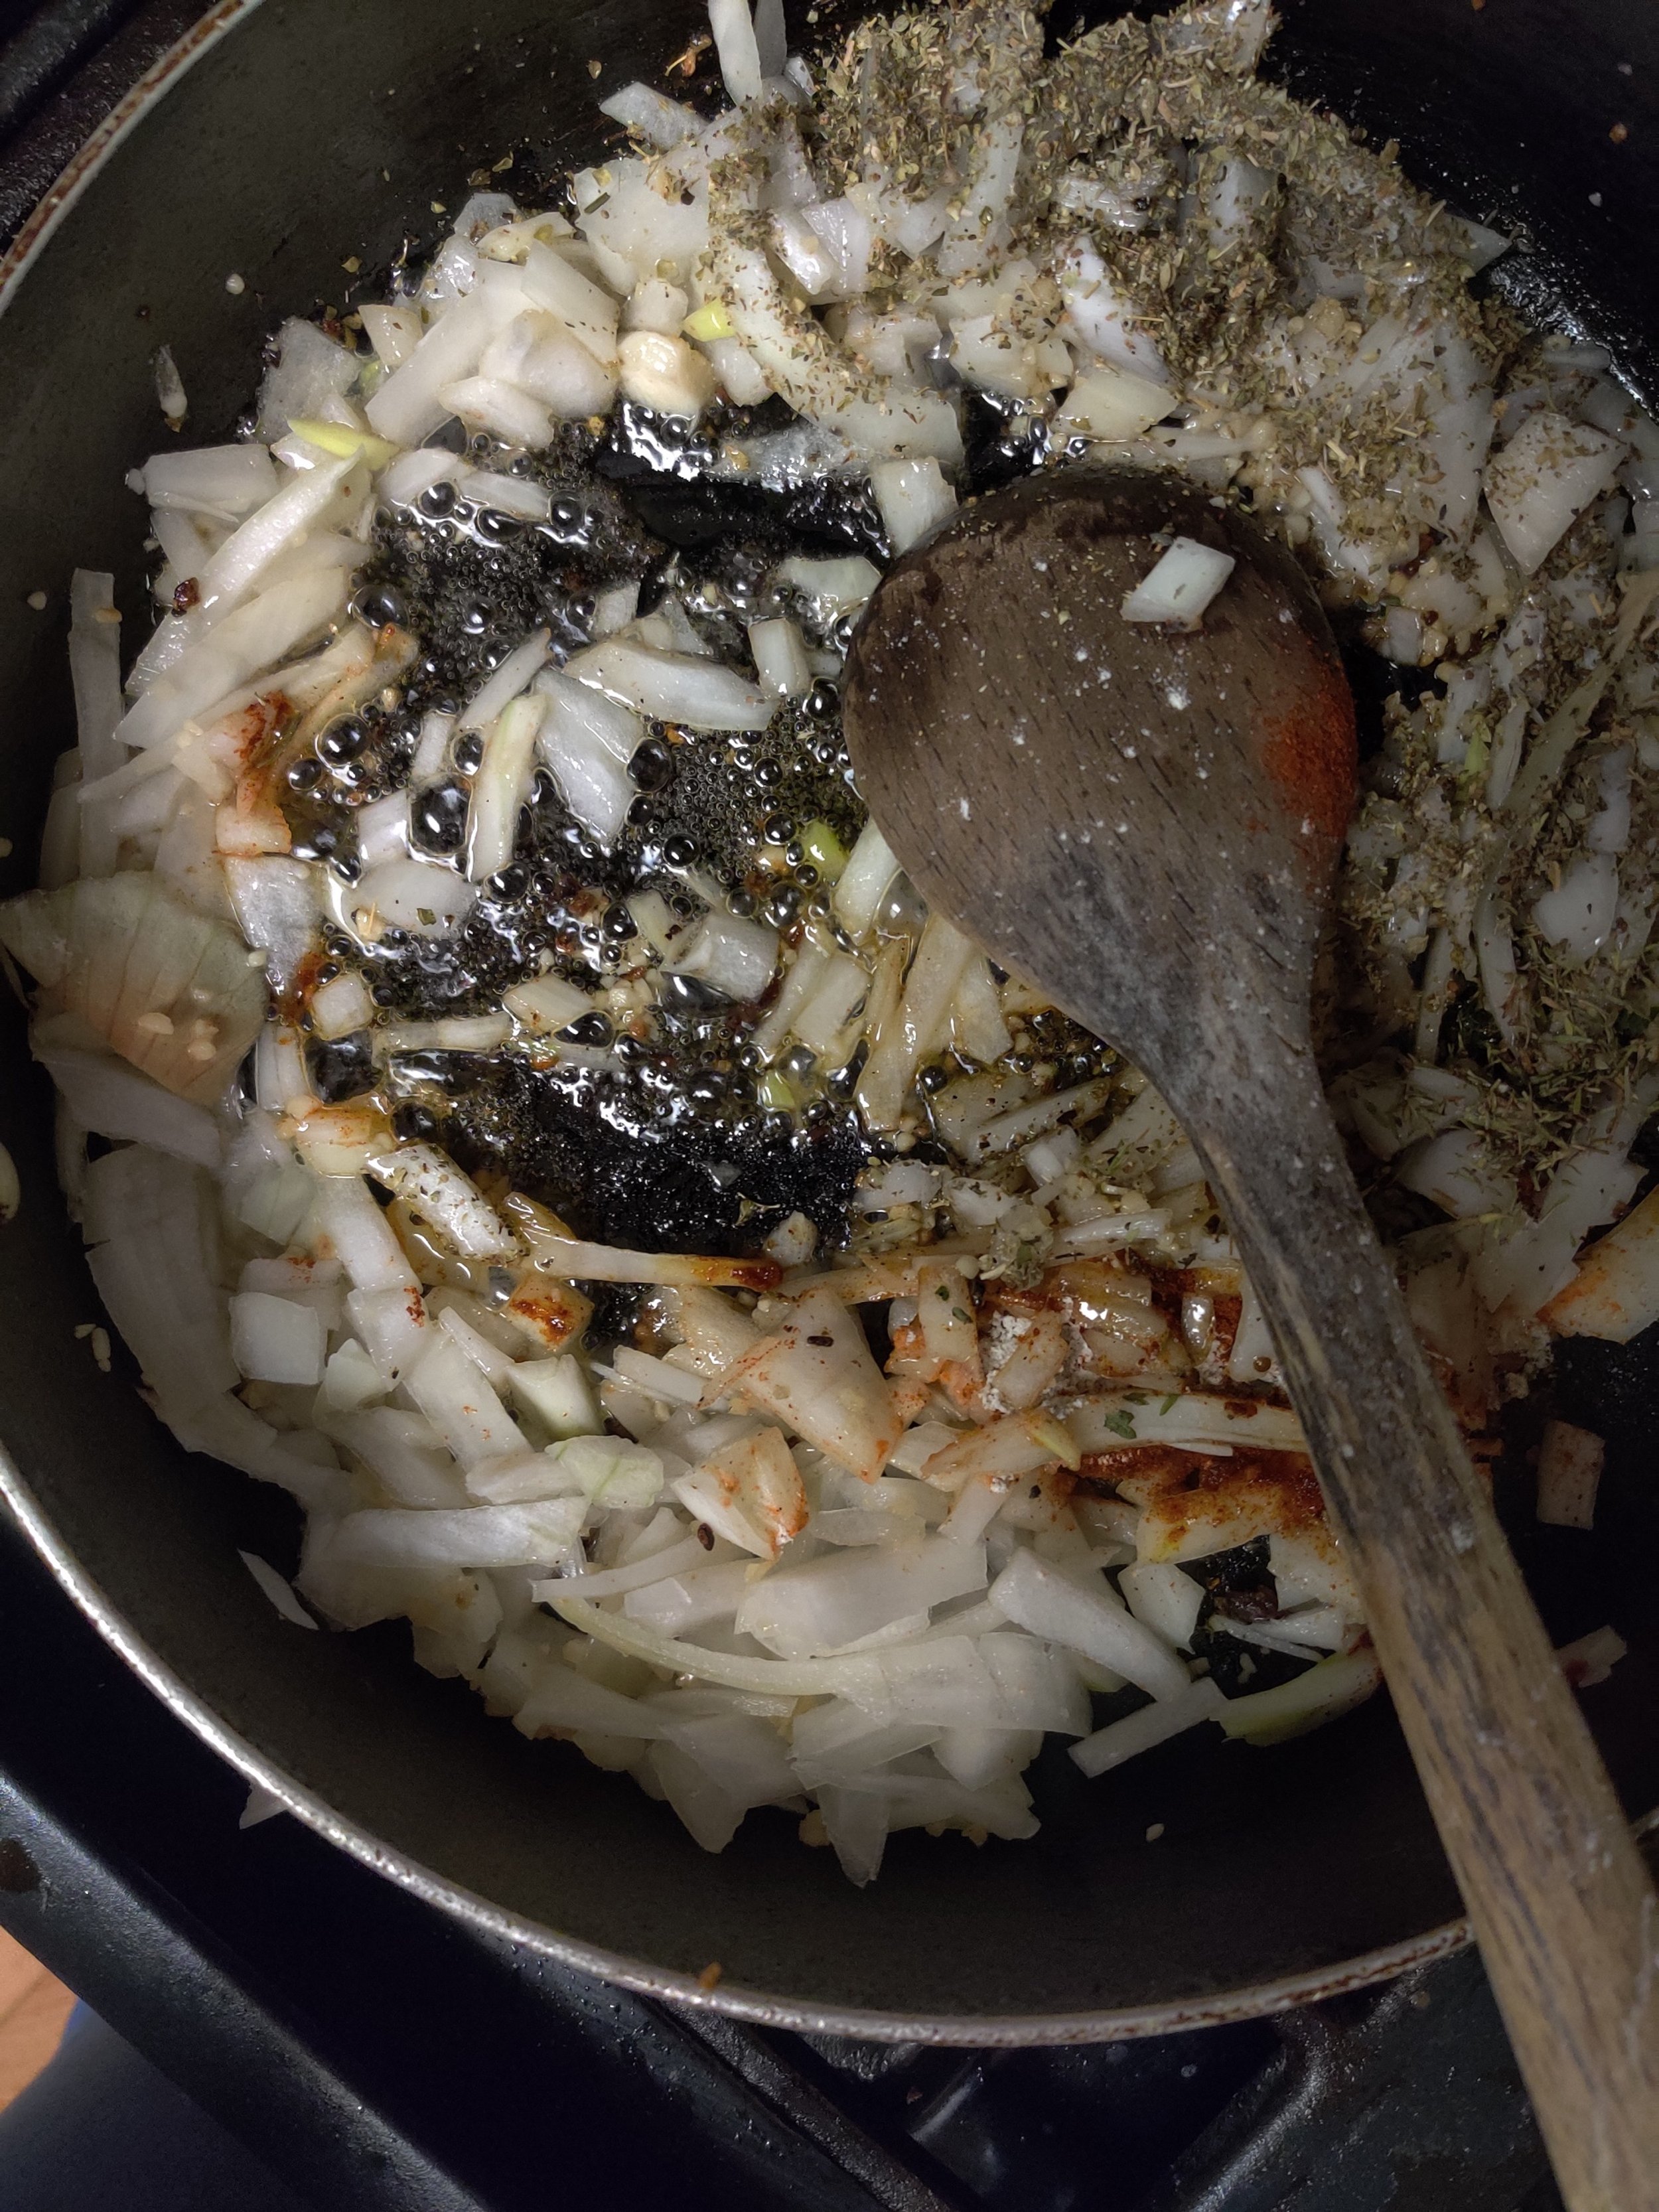
- Pat the pork chops dry. Make small lengthwise slices in the fat to prevent shrinkage—season. Lay them in a cast iron pan once the olive oil and 1 tablespoon of butter are heated. Sear on each side for about 4 minutes until golden brown and crispy. Once flipped to the other side, add the garlic, rosemary and remaining butter.
- Pour in the wine, then cover with a lid on low heat and poach until the thickest parts are 165F. Remove the pork chops from the pan and allow to rest for 10 minutes.
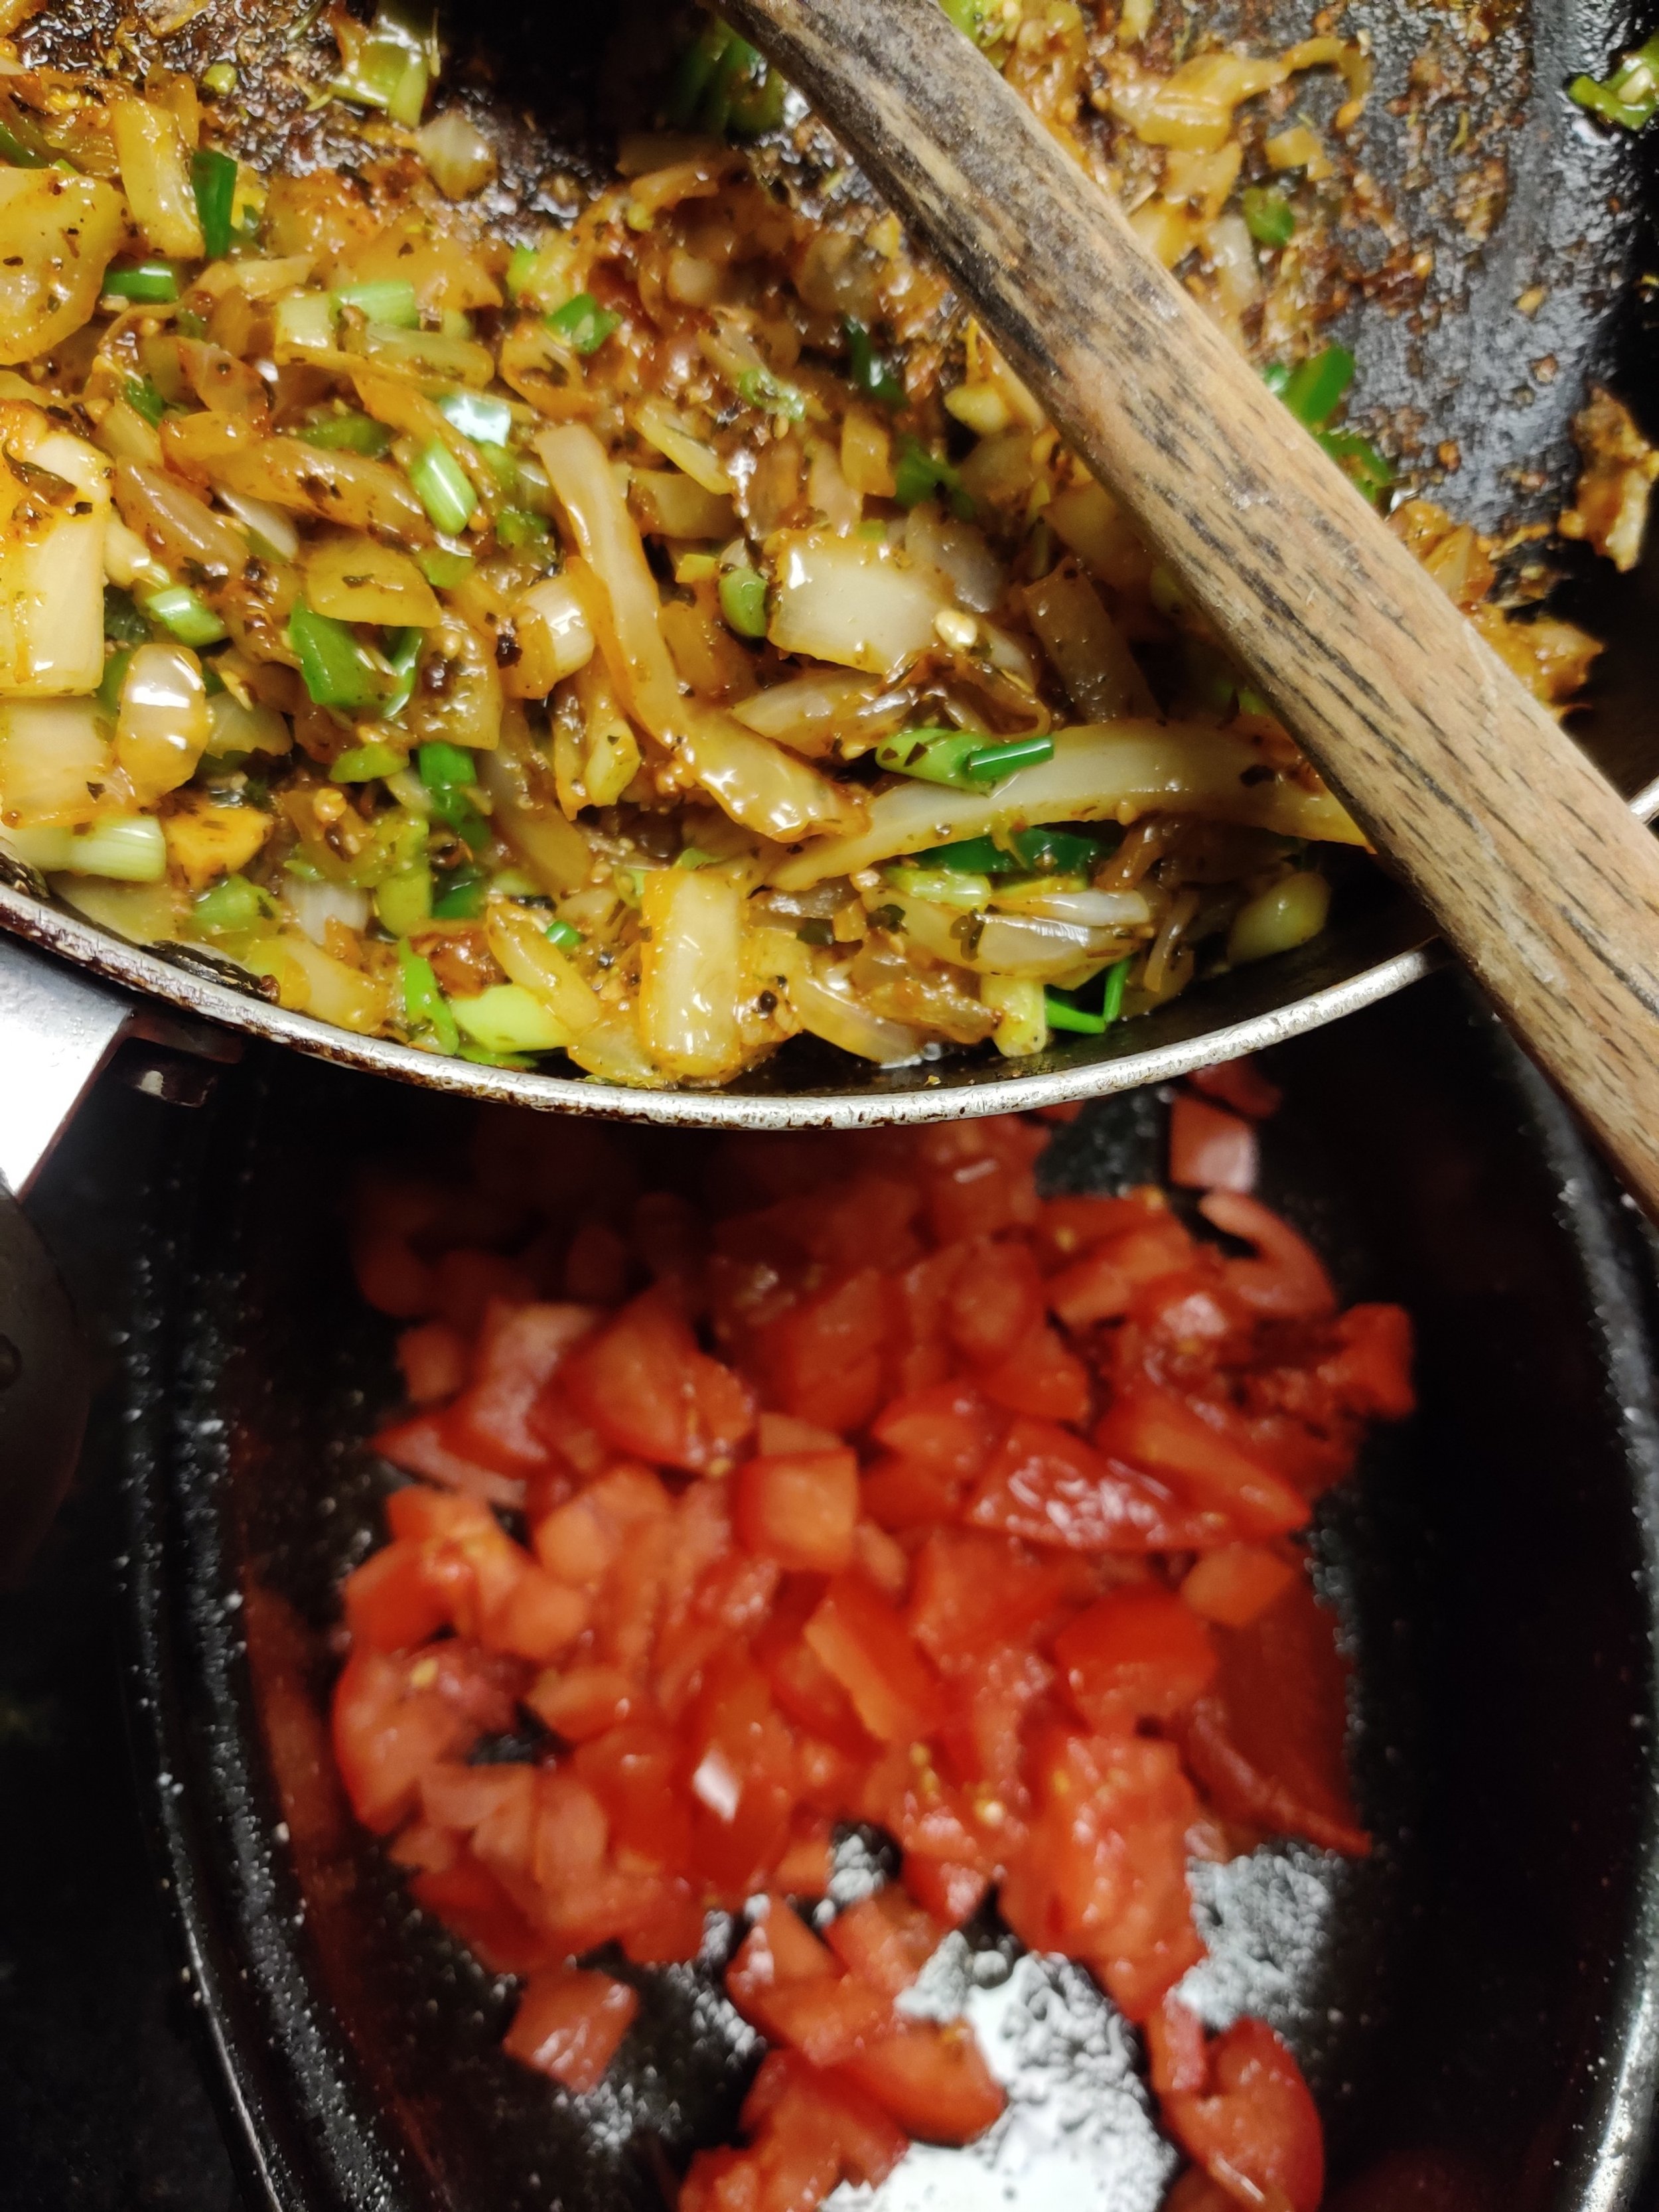
- While the sauce is simmering, saute the peach segments and bell pepper slices, season to taste for about 3 minutes until slightly softened.
- Pour the sauce into a serving cup, return all the ingredients to the skillet, and serve with sides of your choice.
- Remove the rosemary and garlic.
- Transfer the liquid to a small saucepot, and bring the liquid to a boil.
- Add the butter, mirin, vinegar, and Worchester—adjust and season to taste.
- Lower the heat to simmer and reduce the liquid until thickened, and stir occasionally.
- You can also add some shallots with the butter first for additional flavour, but don't burn it to avoid bitter taste.
Nutrition Facts
Calories
749Fat (grams)
57.7Carbs (grams)
34.4Sugar (grams)
24.4Protein (grams)
21.4I am not a certified nutritionist and any nutritional information on dontmissmyplate.com should only be used as a general guideline.