
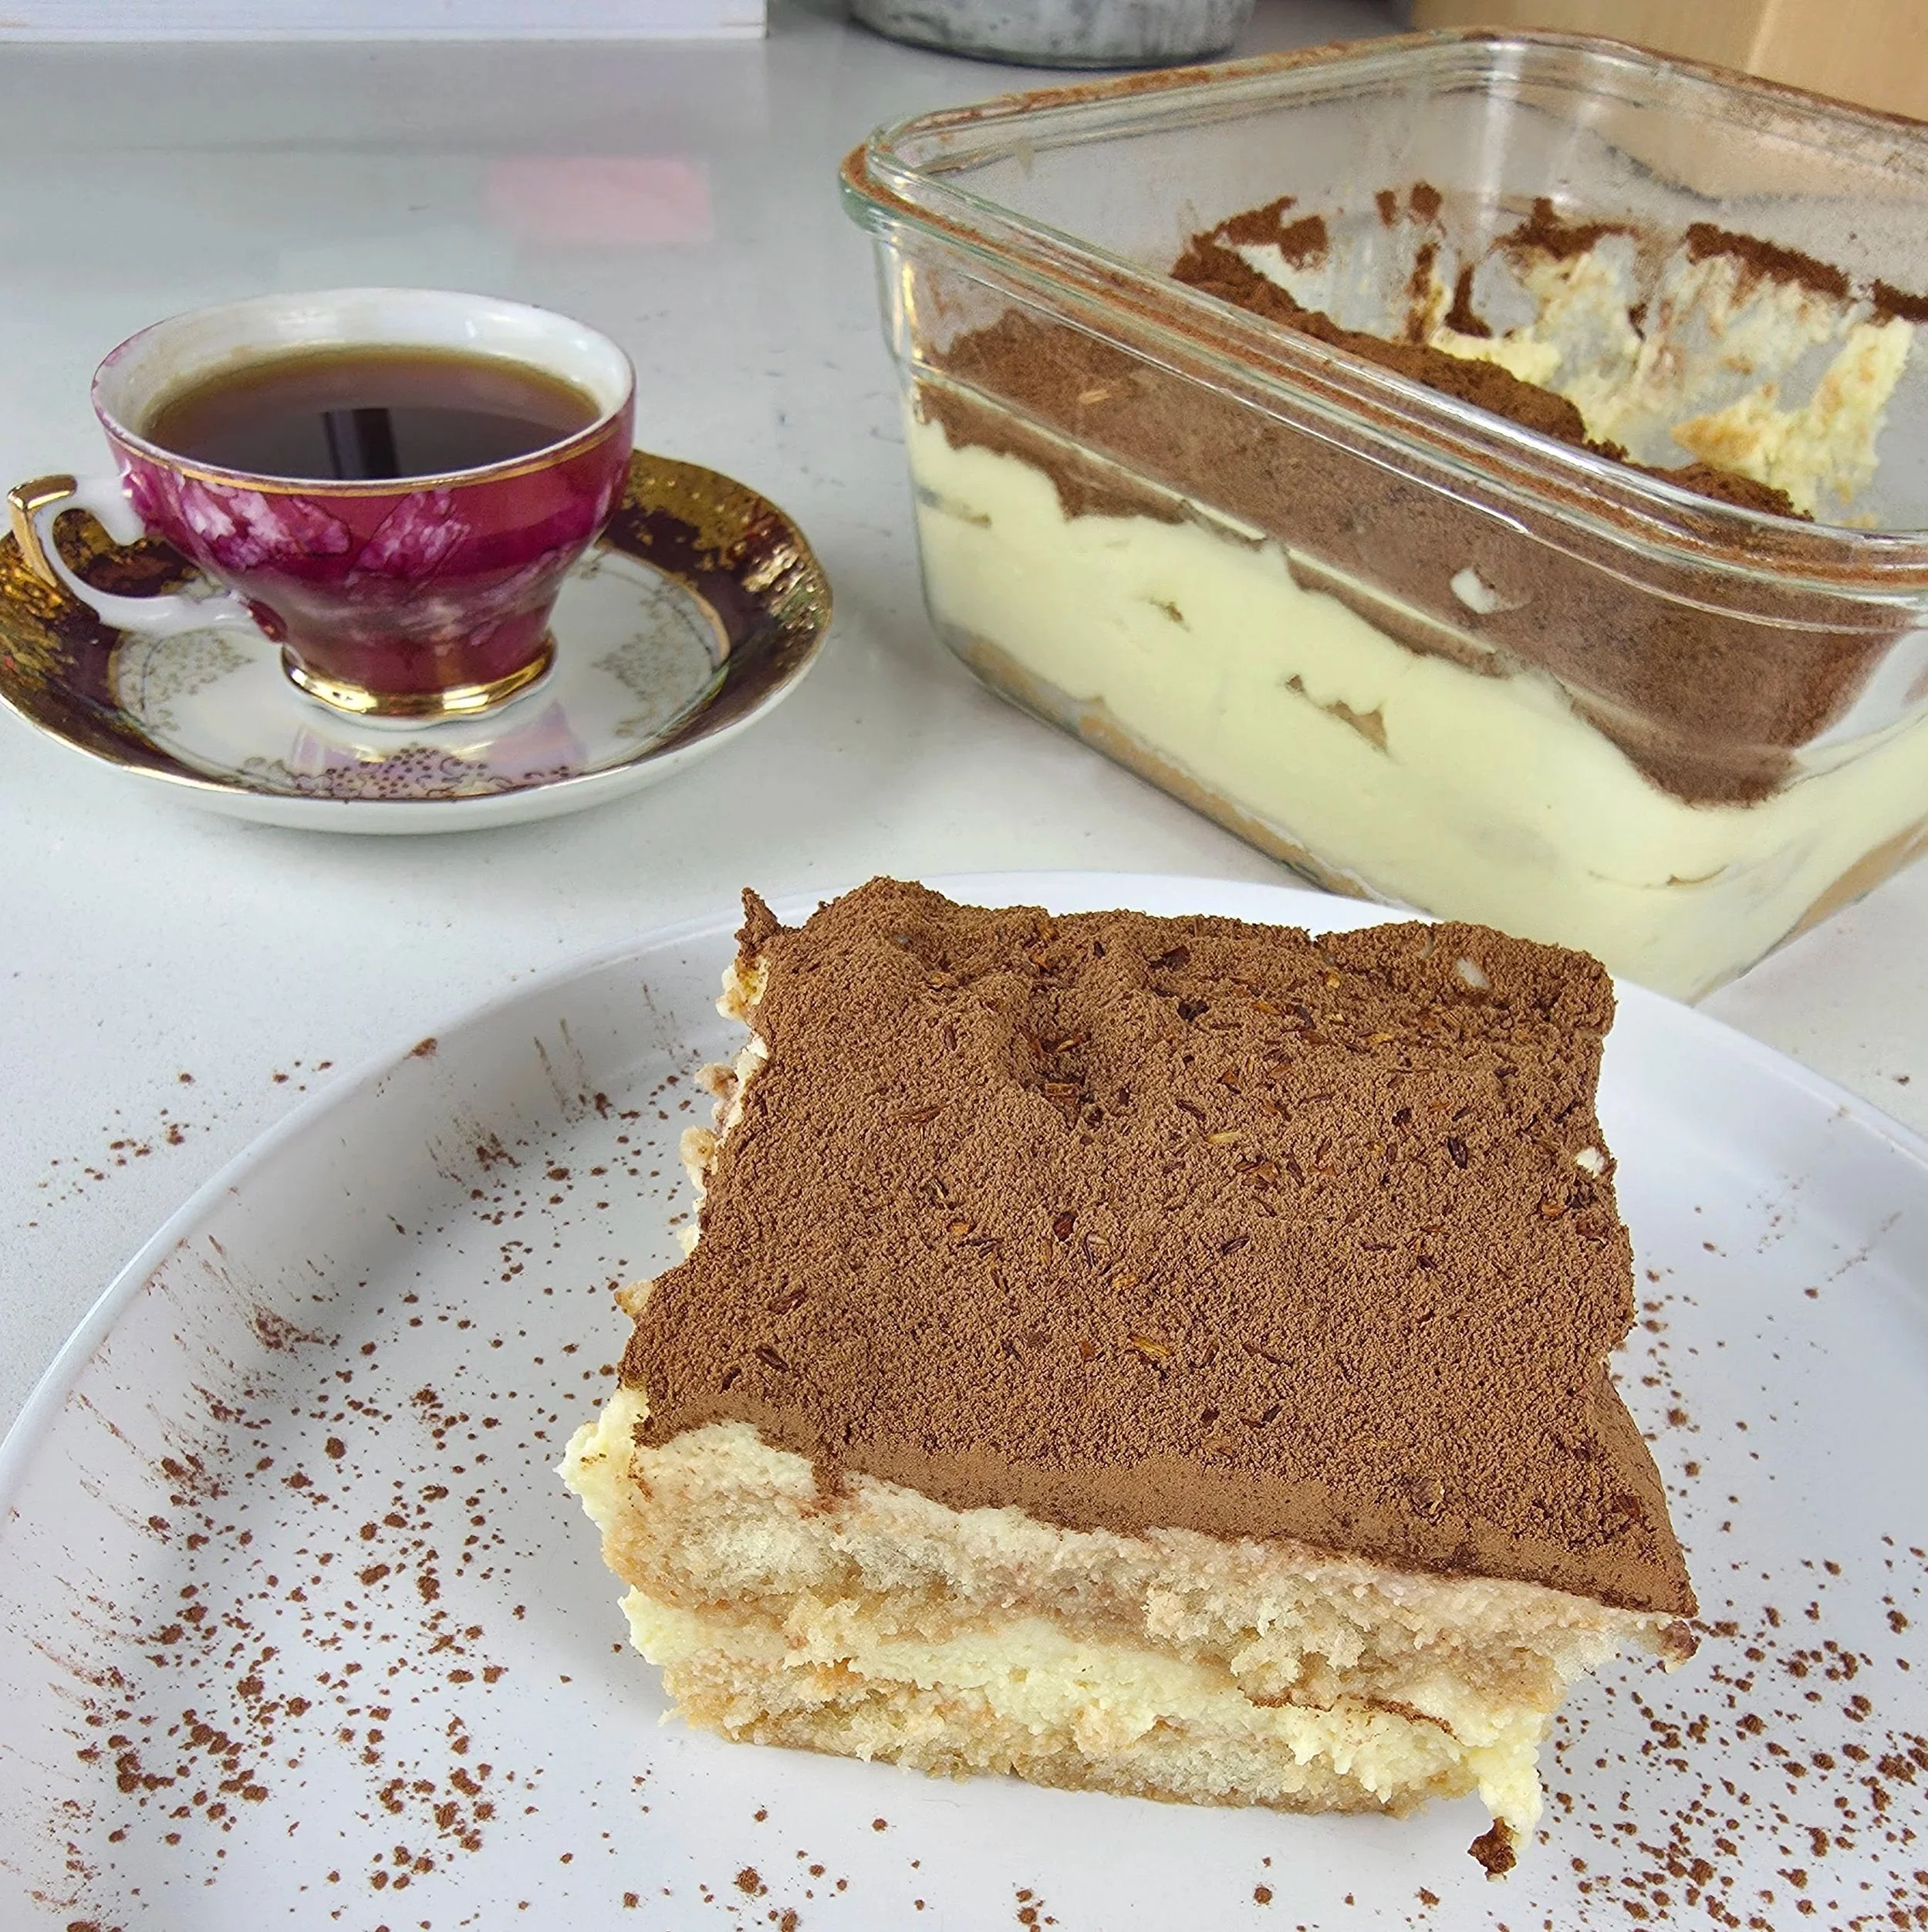
Rooibos Tiramisu
A Southern African-inspired take on Italian tiramisu, this Rooibos Tiramisu replaces the traditional coffee soak with strong rooibos tea, masala wine and vanilla for a creamy, aromatic dessert that's perfect for tea lovers.
Tiramisu is one of those desserts that doesn't really need an introduction. Creamy mascarpone, delicate ladyfingers, cocoa and that unmistakable coffee-soaked bite make it a classic for a reason. But what happens when you're a tea lover who wants to experience tiramisu without making coffee the star?
I first fell in love with making tiramisu during a cooking class in Italy, where I had the chance to make the classic version from scratch. There's something special about preparing a dish in the place where it originated—or at least, in the country that made it famous around the world. Working with mascarpone, egg yolks, sugar and those delicate Italian ladyfingers gave me a much better appreciation for why the dessert works so well. But when I started thinking about putting my own spin on it, I didn't want to simply swap one ingredient for another and call it a new recipe. I wanted the twist to actually make sense, and for me, that meant rooibos.
Rooibos is naturally caffeine-free, with a mellow, nutty, earthy sweetness and subtle notes that can lean toward vanilla, honey and even cocoa depending on the blend. It also happens to be one of those ingredients that immediately brings a South African connection to a dessert that is otherwise unmistakably Italian.
Instead of soaking the ladyfingers in coffee, they're dipped in a strong rooibos infusion, finished with a little marsala wine and vanilla. The result isn't supposed to taste like coffee tiramisu with tea substituted for the coffee. The goal is something different: a tiramisu where rooibos has its own identity.
I also wanted to keep the dessert approachable for people who simply aren't coffee drinkers. If you love tea, don't drink caffeine, or just want something unexpected for dessert, this version gives you the creamy, cocoa-dusted experience of tiramisu while taking it in a completely different direction.
The mascarpone cream remains rich and airy, while the rooibos brings warmth and depth. A small amount of espresso powder in the cocoa topping is there only to deepen the chocolate notes—not to turn the dessert back into a coffee tiramisu.
It's a little bit Italy, a little bit Southern Africa, and very much my kind of fusion.
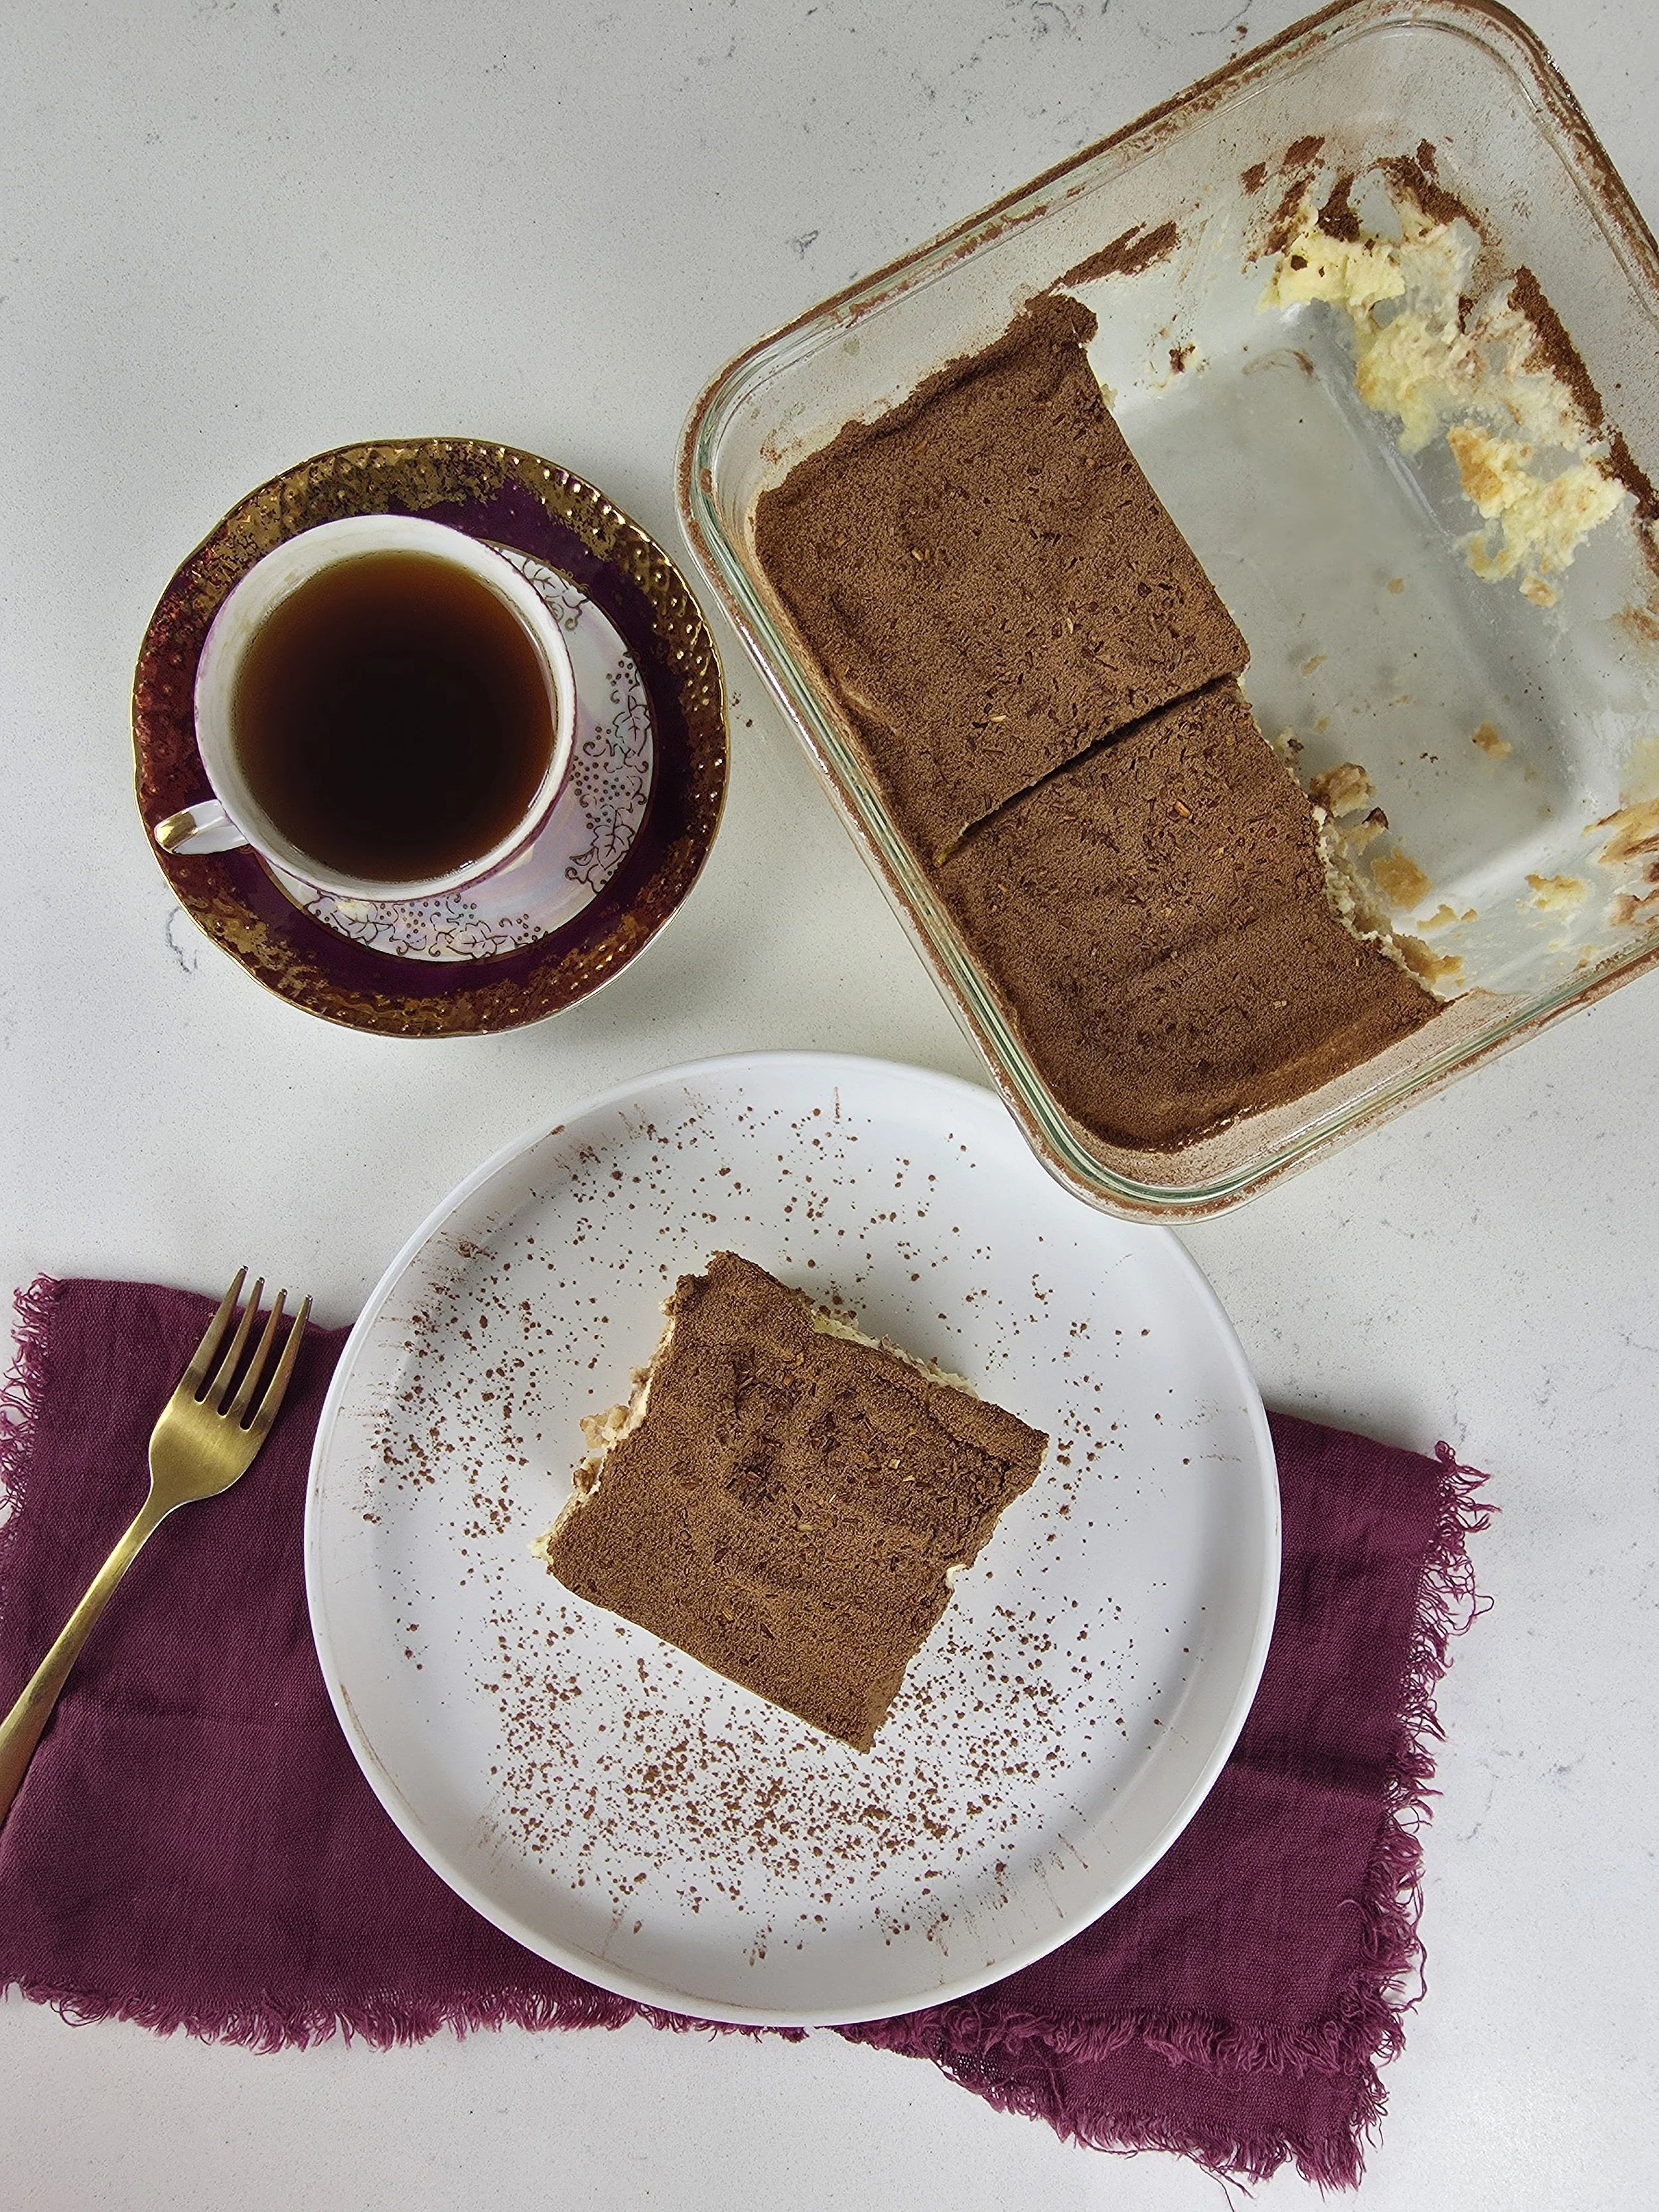
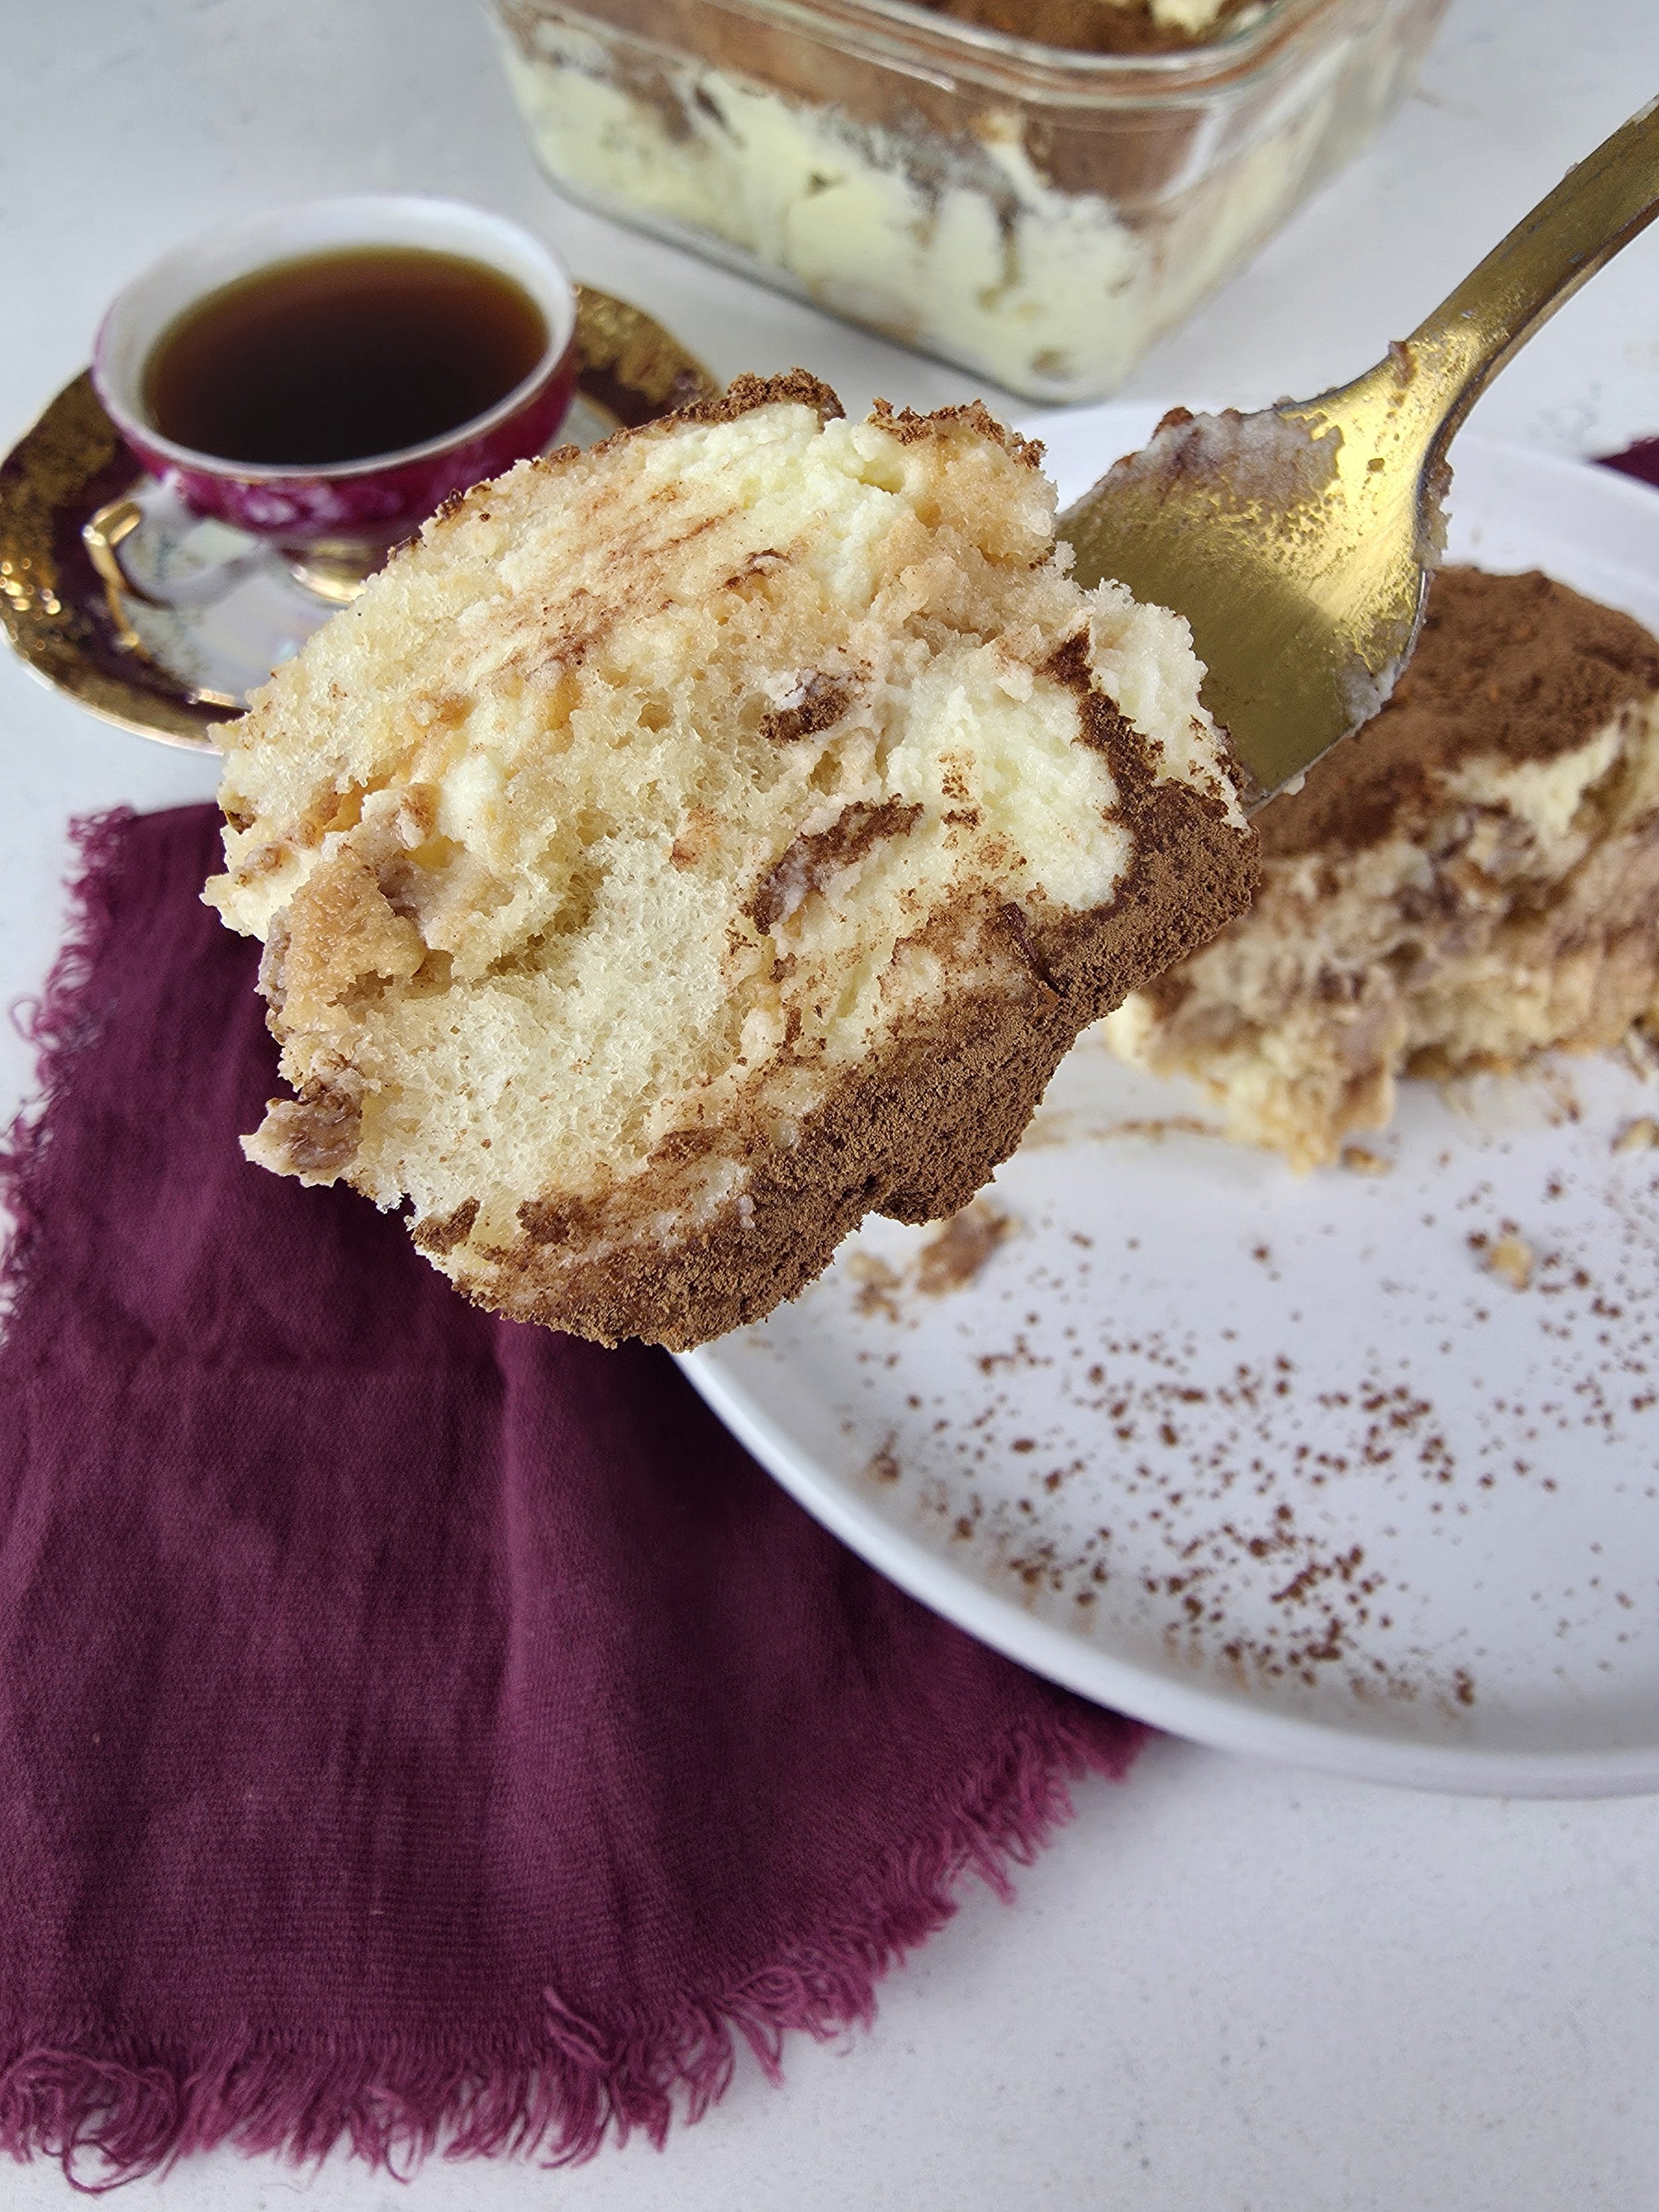

Rooibos Tiramisu
A Southern African-inspired twist on classic Italian tiramisu, made with bold rooibos tea, masala wine, mascarpone and a cocoa-espresso finish.
Ingredients
- 1 cup water
- 2 teaspoons loose-leaf rooibos
- 1 tablespoon granulated sugar
- 2 tablespoons masala wine
- ½ teaspoon vanilla extract
- 2 large egg yolks
- ¼ cup (50g) granulated sugar
- 1 tablespoon masala wine
- 8 ounces (225g) mascarpone, slightly softened
- ⅔ cup (160ml) heavy whipping cream, cold
- ½ teaspoon vanilla extract
- Pinch of salt
- 12–14 Savoiardi ladyfingers
- Topping
- 1 tablespoon unsweetened cocoa powder
- ¼ teaspoon espresso powder
- Optional: a tiny pinch of very finely crushed rooibos leaves for visual garnish
Instructions
- Bring 1 cup of water to a boil. Add the rooibos and steep for 8–12 minutes, or until very strong. If needed, add a little more water and additional loose-leaf rooibos to account for evaporation and maintain enough liquid for dipping the ladyfingers. Remove the tea bags or strain the loose tea once the rooibos is ready. You can prepare the remaining components while the tea steeps.
- While the tea is still hot, stir in the sugar until dissolved. Allow the tea to cool to warm or room temperature, then stir in the masala wine and vanilla. Set aside.
- In a heatproof bowl, whisk together the egg yolks, sugar, and 1 tablespoon of masala wine. Place the bowl over a saucepan of gently simmering water, making sure the bottom of the bowl does not touch the water. Whisk constantly until the mixture reaches 160°F. Remove from the heat and let cool for about 5 minutes.
- Transfer the cooked yolk mixture to a large bowl. Add the mascarpone, vanilla, and salt, and whisk until smooth.
- In a separate bowl, whip the cold heavy cream to medium-stiff peaks. Gently fold half of the whipped cream into the mascarpone mixture, then fold in the remaining cream just until combined. Do not overmix.
- Pour the rooibos soak into a shallow dish. Dip each ladyfinger very briefly, about 1 second per side, until moistened but not saturated.
- Arrange the dipped ladyfingers in a single layer across the bottom of a 6 × 6-inch dish, breaking them as needed to fit. Spread half of the mascarpone cream evenly over the ladyfingers. Add a second layer of dipped ladyfingers, followed by the remaining mascarpone cream. Smooth the top.
- Combine the cocoa powder and espresso powder, then sift the mixture evenly over the tiramisu. If desired, finish with a tiny pinch of finely crushed rooibos leaves for visual contrast.
- Cover and refrigerate for at least 4 hours, preferably overnight. Serve chilled.
Notes
- Strong rooibos matters. The tea should taste more concentrated than a normal cup because the mascarpone and ladyfingers will mellow it.
- Don't oversoak the ladyfingers. A very quick dip keeps the tiramisu structured rather than soggy.
- The espresso powder is subtle. It deepens the cocoa flavor without turning this into coffee tiramisu.
- Masala wine: The small amount adds warmth and spice without overpowering the rooibos.
- Egg safety: The yolk mixture is heated to 160°F before being incorporated into the cream.
Nutrition Facts
Calories
580Fat (grams)
37 gSat. Fat (grams)
22 gCarbs (grams)
56 gSugar (grams)
29 gProtein (grams)
9 gI am not a certified nutritionist and any nutritional information on dontmissmyplate.com should only be used as a general guideline.
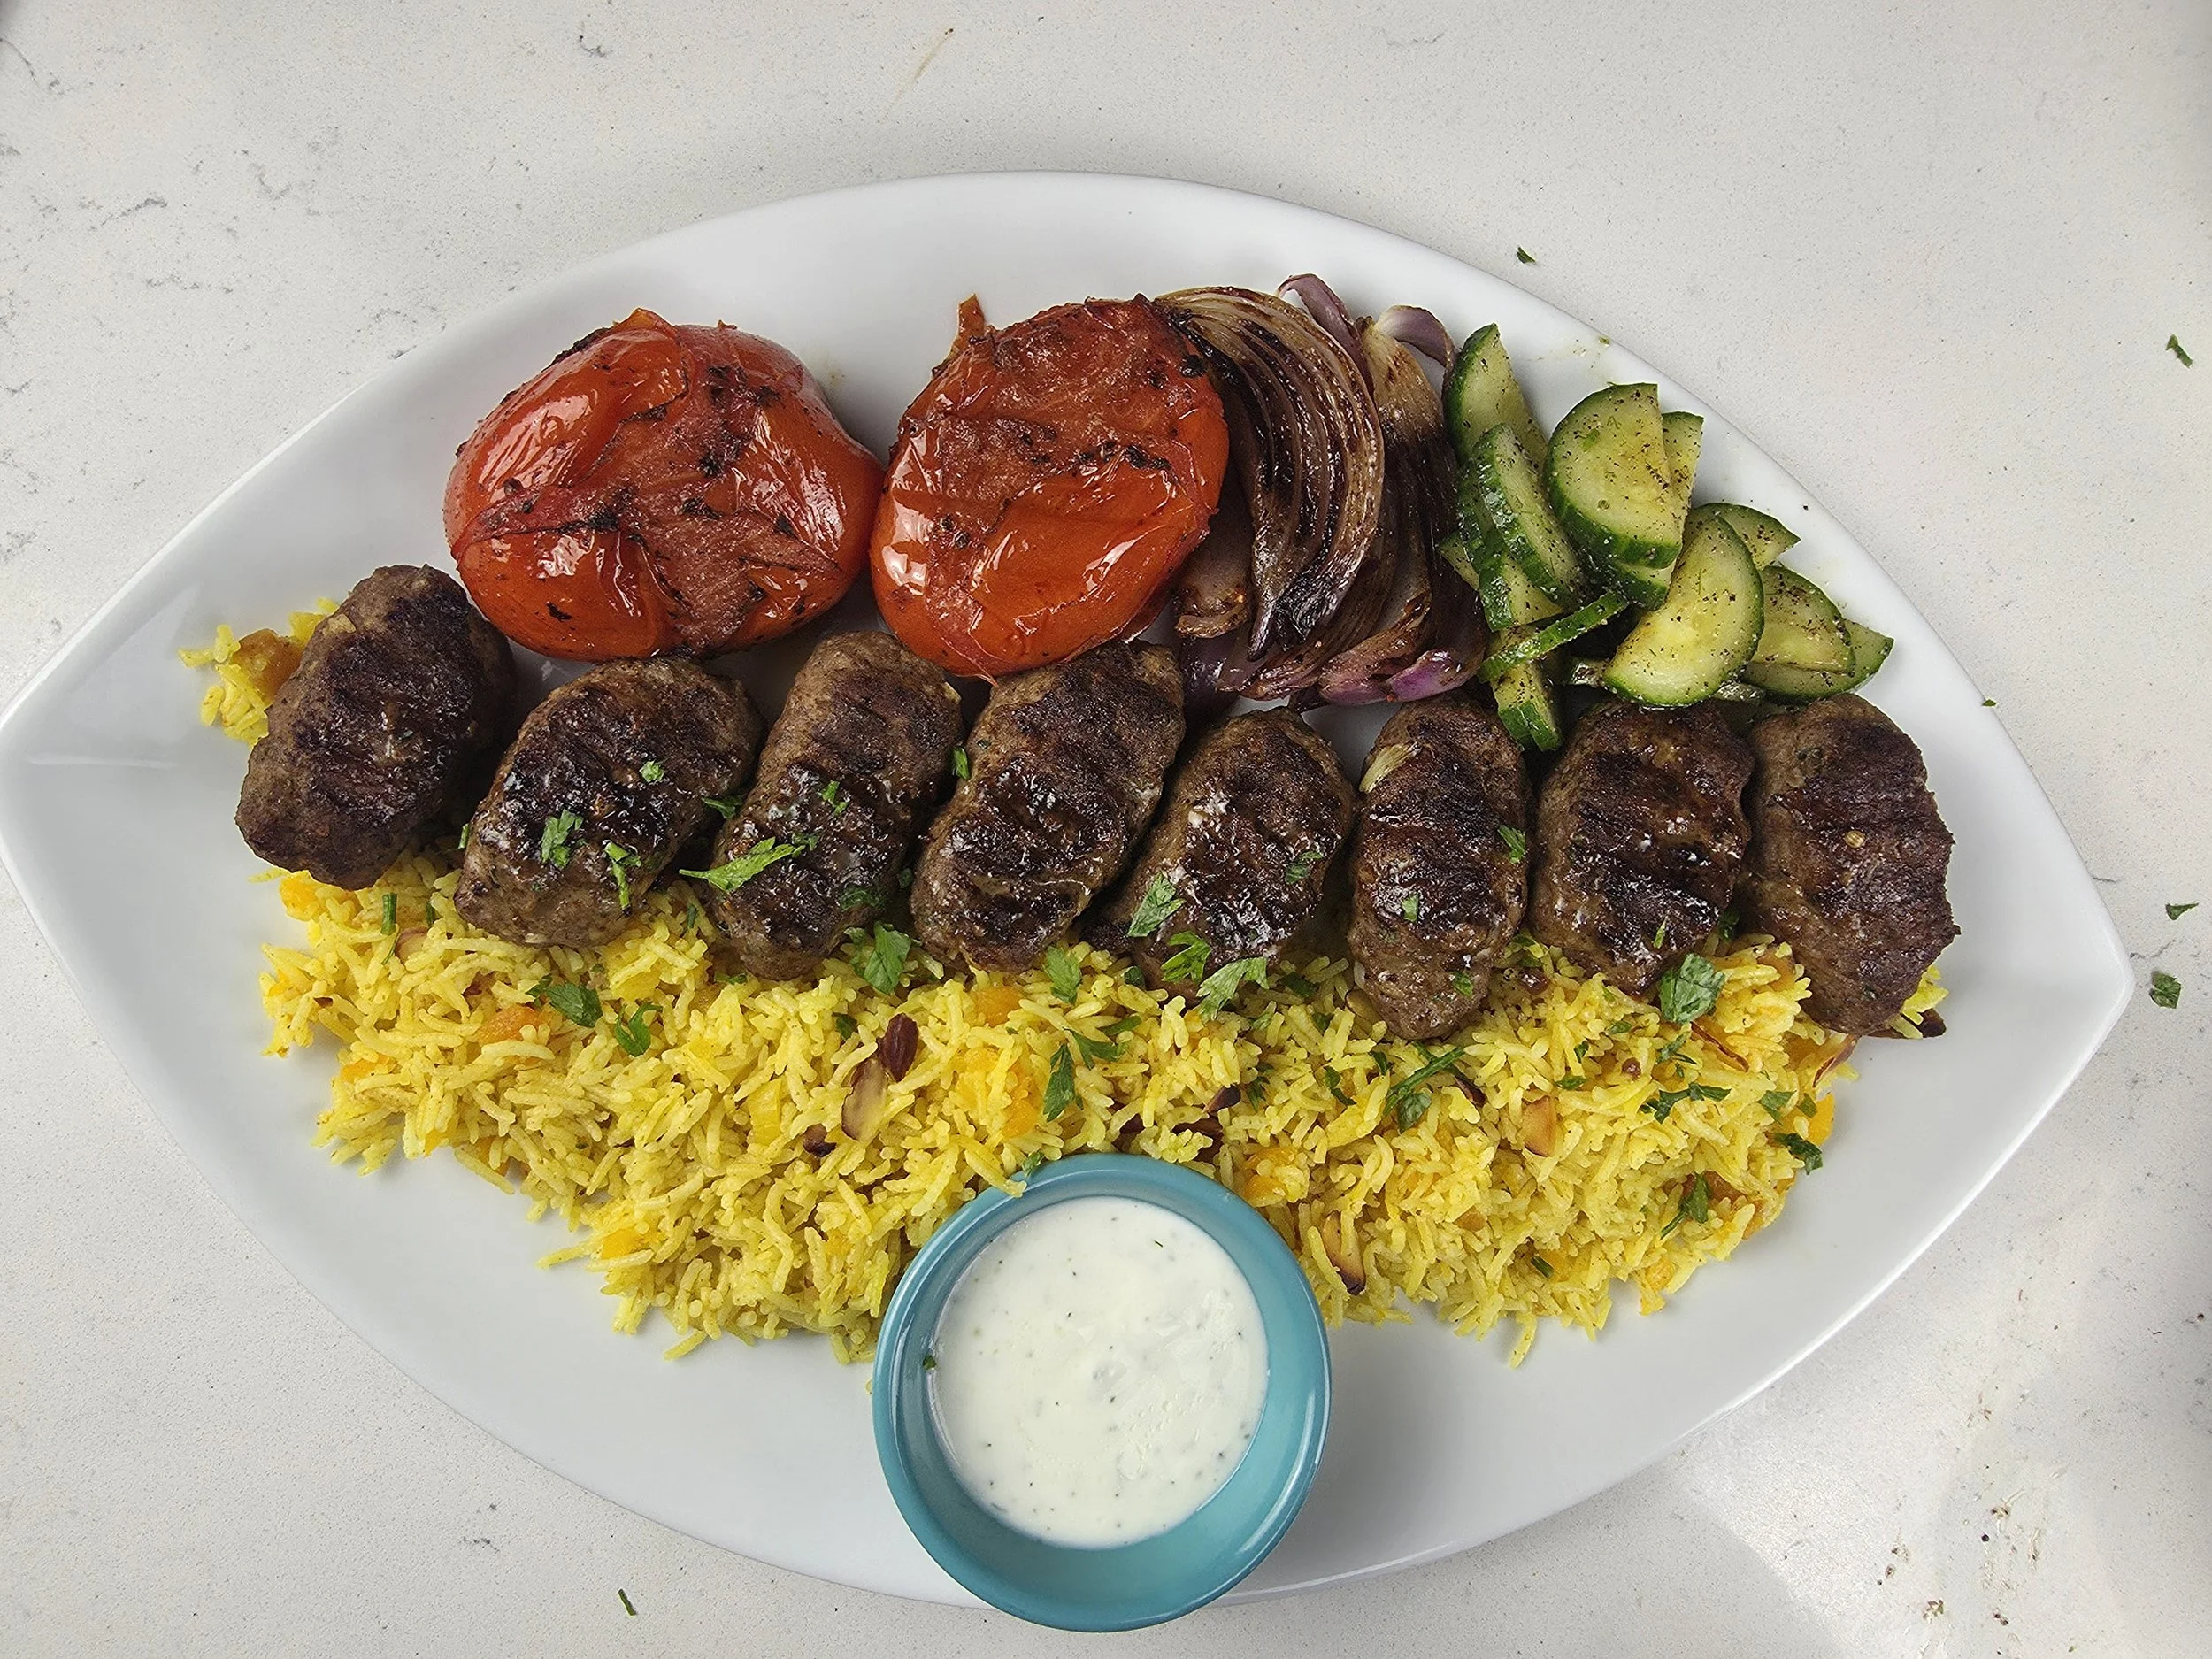
Lamb Kofta with Cape Malay Rice
Tender, warmly spiced lamb kofta served with fragrant Cape Malay rice, cool dill yogurt, fresh cucumber salad, and smoky grilled tomatoes and onions. This flavorful, satisfying meal brings together bold, savory, fresh, and fragrant flavors in one generous plate without turning dinner into an all-day cooking project.ences from different places that have all become part of my story.
A recent lunch at Lapis, an Afghan restaurant in Washington, DC, sent me down an unexpected path. As I enjoyed a platter of grilled meats, fragrant rice, yogurt, and vegetables, I found myself convinced those flavors reminded me of meals a former colleague had introduced me to years ago. But the longer I sat with that thought, the more another memory surfaced.
Years before, my dad had taken me to a Lebanese restaurant in Harare, Zimbabwe. I still remember opening the takeaway container to find grilled meat, fluffy rice, charred tomatoes and onions, and wondering how something so simple could taste so incredibly good. It's funny how food memories work. You don't always realize they've stayed with you until something years later brings them rushing back.
This recipe isn't meant to recreate that Lebanese meal exactly. Instead, it's a reflection of my own journey through food and the cultures that have shaped the way I cook today. The lamb kofta is inspired by that childhood memory, while the fragrant Cape Malay rice brings in another part of Southern Africa's rich culinary heritage. Served with cool dill yogurt, a fresh cucumber salad, blistered tomatoes, and charred red onion, it's a meal that brings together influences from different places that have all become part of my story.
If you've followed me for a while, you'll know that's what I love most about cooking. Recipes are never just about ingredients. They're about the people, places, and memories attached to them. Whether you're discovering Cape Malay flavors for the first time or simply looking for a new way to enjoy lamb kofta, I hope this recipe inspires you to create a few new memories around your own table and perhaps reflect on the food memories that have shaped your own journey, too.
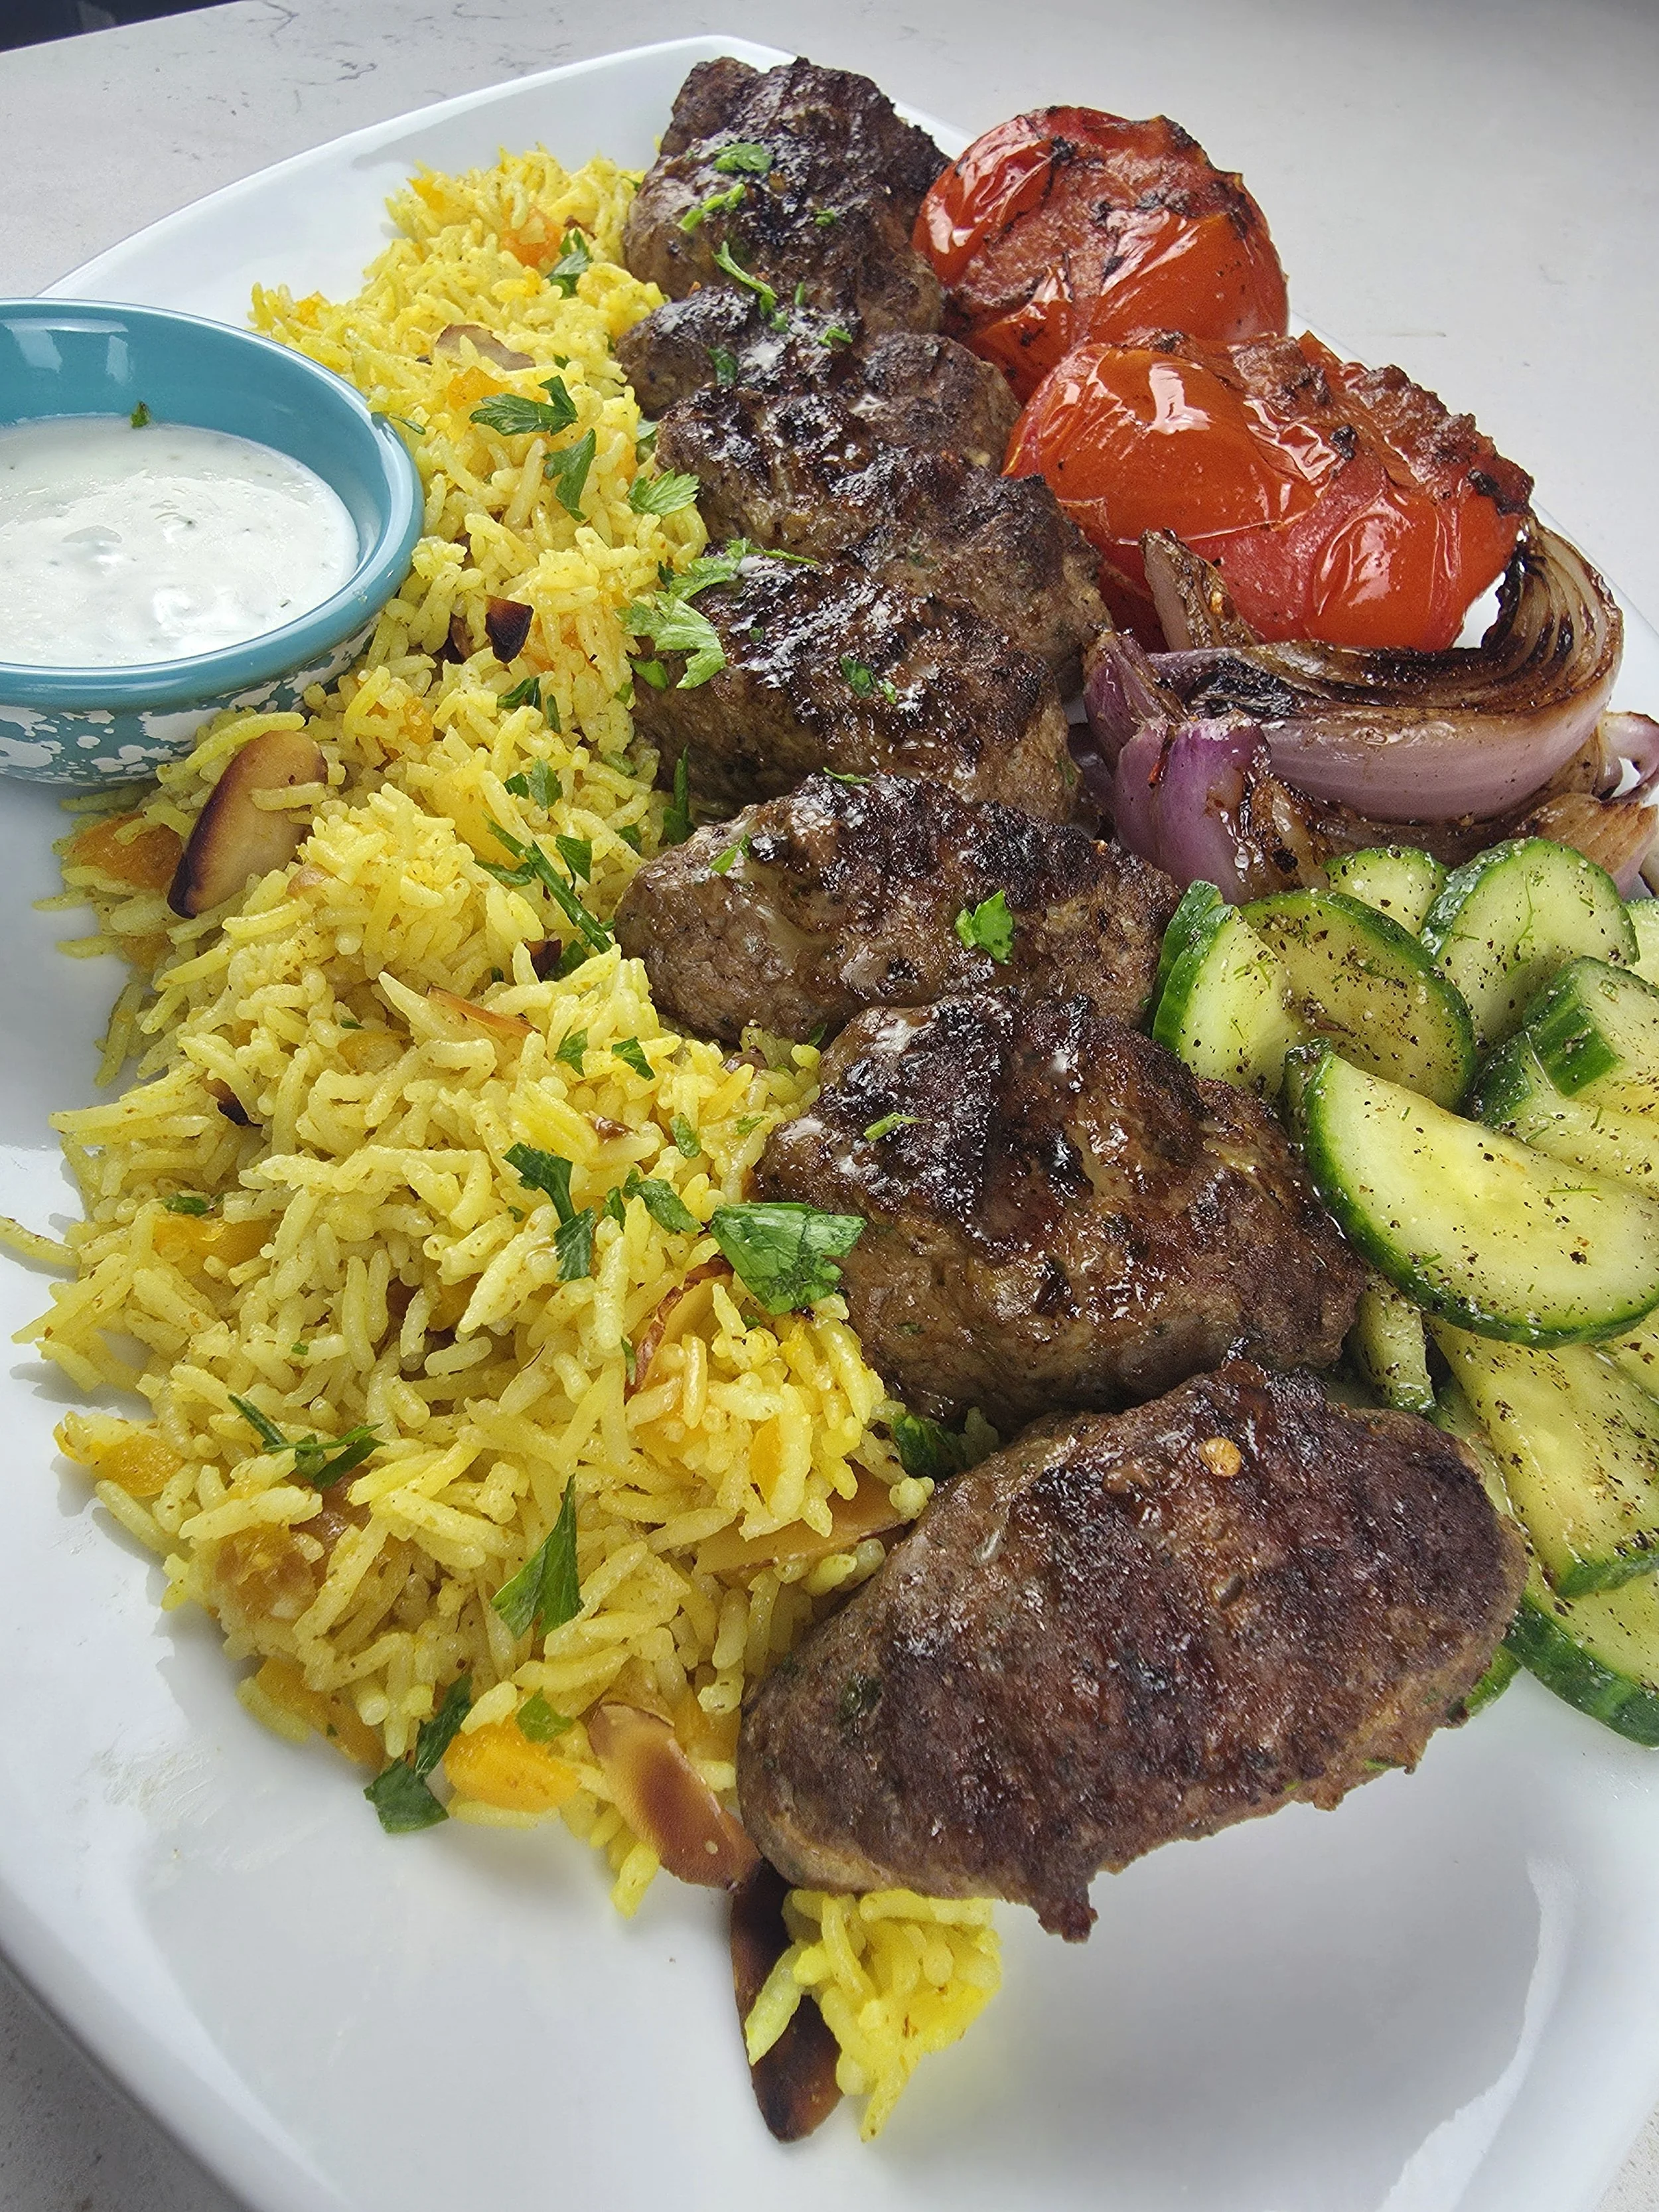

Lamb Kafta with Cape Malay Rice
Juicy lamb kofta served over fragrant Cape Malay rice with creamy dill yogurt, blistered Roma tomatoes, charred red onion, and a fresh cucumber salad. An easy Middle Eastern-inspired dinner with a Southern African twist.
Ingredients
- 1 lb (450 g) ground lamb
- 2 cloves garlic, minced
- ¼ large onion, very finely grated
- 2 tbsp chopped parsley
- 1 tsp ground cumin
- 1 tsp smoked paprika
- ½ tsp ground coriander
- ½ tsp black pepper
- ½ tsp curry powder
- 1 tsp braai seasoning
- 1 tsp salt
- 1 tbsp ghee or high-heat cooking oil
- 1 cup basmati rice, rinsed
- 1¾ cups cold water
- 1½ tsp chicken bouillon paste
- 1 tbsp butter
- 1 tsp curry powder
- 2 green cardamom pods, lightly crushed
- 1 small cinnamon stick
- ¼ cup chopped dried apricots
- 2 bay leaves
- 2 tbsp toasted sliced almonds
- Juice of ½ lemon
- Salt, to taste
- ¾ cup Greek yogurt
- 1-2 tbsp chopped fresh dill
- 1 small garlic clove, grated
- 1 tsp lemon juice
- 1 tsp olive oil
- Salt and pepper to taste
- 2 large Roma tomatoes
- 1 large red onion, cut into wedges
- 1 tbsp olive oil
- Salt
- Black pepper
- 1 large English cucumber, sliced into half-moons
- 1 tbsp chopped fresh dill
- 1 tbsp extra virgin olive oil
- Juice of ½ lemon (or 1–2 tbsp, to taste)
- Freshly ground black pepper, to taste
- Salt, to taste
Instructions
- In a large bowl, combine the ground lamb, garlic, grated onion, parsley, cumin, smoked paprika, coriander, curry powder, braai seasoning, salt, black pepper, and ghee. Mix gently until just combined, being careful not to overwork the meat. Cover and refrigerate for 1–2 hours.
- About 30 minutes before cooking, remove the lamb from the refrigerator. Divide the mixture into 8 equal portions and shape each into a thick oval log, about the size of a small sausage.
- Rinse the basmati rice under cold water until the water runs mostly clear. Melt the butter in a medium saucepan over medium heat. Add the curry powder, cinnamon stick, bay leaves, and lightly crushed cardamom pods. Cook for about 30 seconds, stirring constantly, until fragrant.
- Add the rice and stir for 1–2 minutes to lightly toast the grains. Stir in the chicken bouillon paste, then pour in the water and mix until dissolved. Bring to a boil, stir once, then add the chopped dried apricots.
- Reduce the heat to low, cover, and cook according to your basmati rice package instructions (typically 12–15 minutes), or until the liquid has been absorbed.
- While the rice cooks, prepare the accompaniments. In a small bowl, stir together the Greek yogurt, dill, garlic, lemon juice, olive oil, salt, and pepper until smooth.
- In a separate bowl, toss together the cucumber, dill, olive oil, lemon juice, salt, and a generous amount of freshly ground black pepper. Set both aside until ready to serve.
- Once the rice has finished cooking, remove it from the heat and let it rest, covered, for 10 minutes.
- Meanwhile, heat a grill pan over medium-high heat. Lightly oil the pan if needed, then sear the koftas for 2–3 minutes per side, until well browned with distinct grill marks.
- Transfer the seared koftas to a parchment-lined baking tray and bake in a 375°F (190°C) oven for 8 minutes, or until cooked through.
- While the koftas are baking, use the same grill pan to cook the vegetables. Brush the Roma tomatoes and onion wedges with olive oil and season with salt and pepper. Grill the onion wedges until lightly charred and tender, then remove them from the pan. Add the whole Roma tomatoes and cook until blistered on all sides. Remove the pan from the heat, cover with a lid, and allow the tomatoes to steam for a few minutes until softened. Transfer the tomatoes to the plate with the onions.
- Remove the koftas from the oven and let them rest for 5 minutes, spooning the pan juices over the top before serving. While they rest, discard the cinnamon stick, bay leaves, and cardamom pods from the rice. Fluff the rice with a fork, then fold in the toasted almonds, a generous squeeze of fresh lemon juice, and season with salt to taste.
- Arrange the Cape Malay rice on a serving platter and nestle the lamb koftas alongside. Add the grilled tomatoes, onion wedges, cucumber salad, and dill yogurt. Finish with an extra squeeze of fresh lemon and serve immediately.
Notes
- Marinating the lamb for 2 hours develops deeper flavor, but even 30 minutes helps.
- Let the lamb sit at room temperature for about 30 minutes before cooking so it cooks more evenly.
- Koftas naturally shrink as the fat renders—this is completely normal.
- Resist overcooking. Searing first, then finishing in the oven keeps them juicy.
- Basting the koftas with their own juices before serving adds extra moisture and flavor.
- Whole Roma tomatoes will blister before softening. Covering the pan off the heat helps finish cooking them without burning.
- Lemon added at the end brightens the rice and ties the whole dish together.
- If preparing ahead, the yogurt can be made a day in advance.
Nutrition Facts
Calories
650Fat (grams)
39 gCarbs (grams)
42 gFiber (grams)
5 gSugar (grams)
10 gProtein (grams)
33 gI am not a certified nutritionist and any nutritional information on dontmissmyplate.com should only be used as a general guideline.
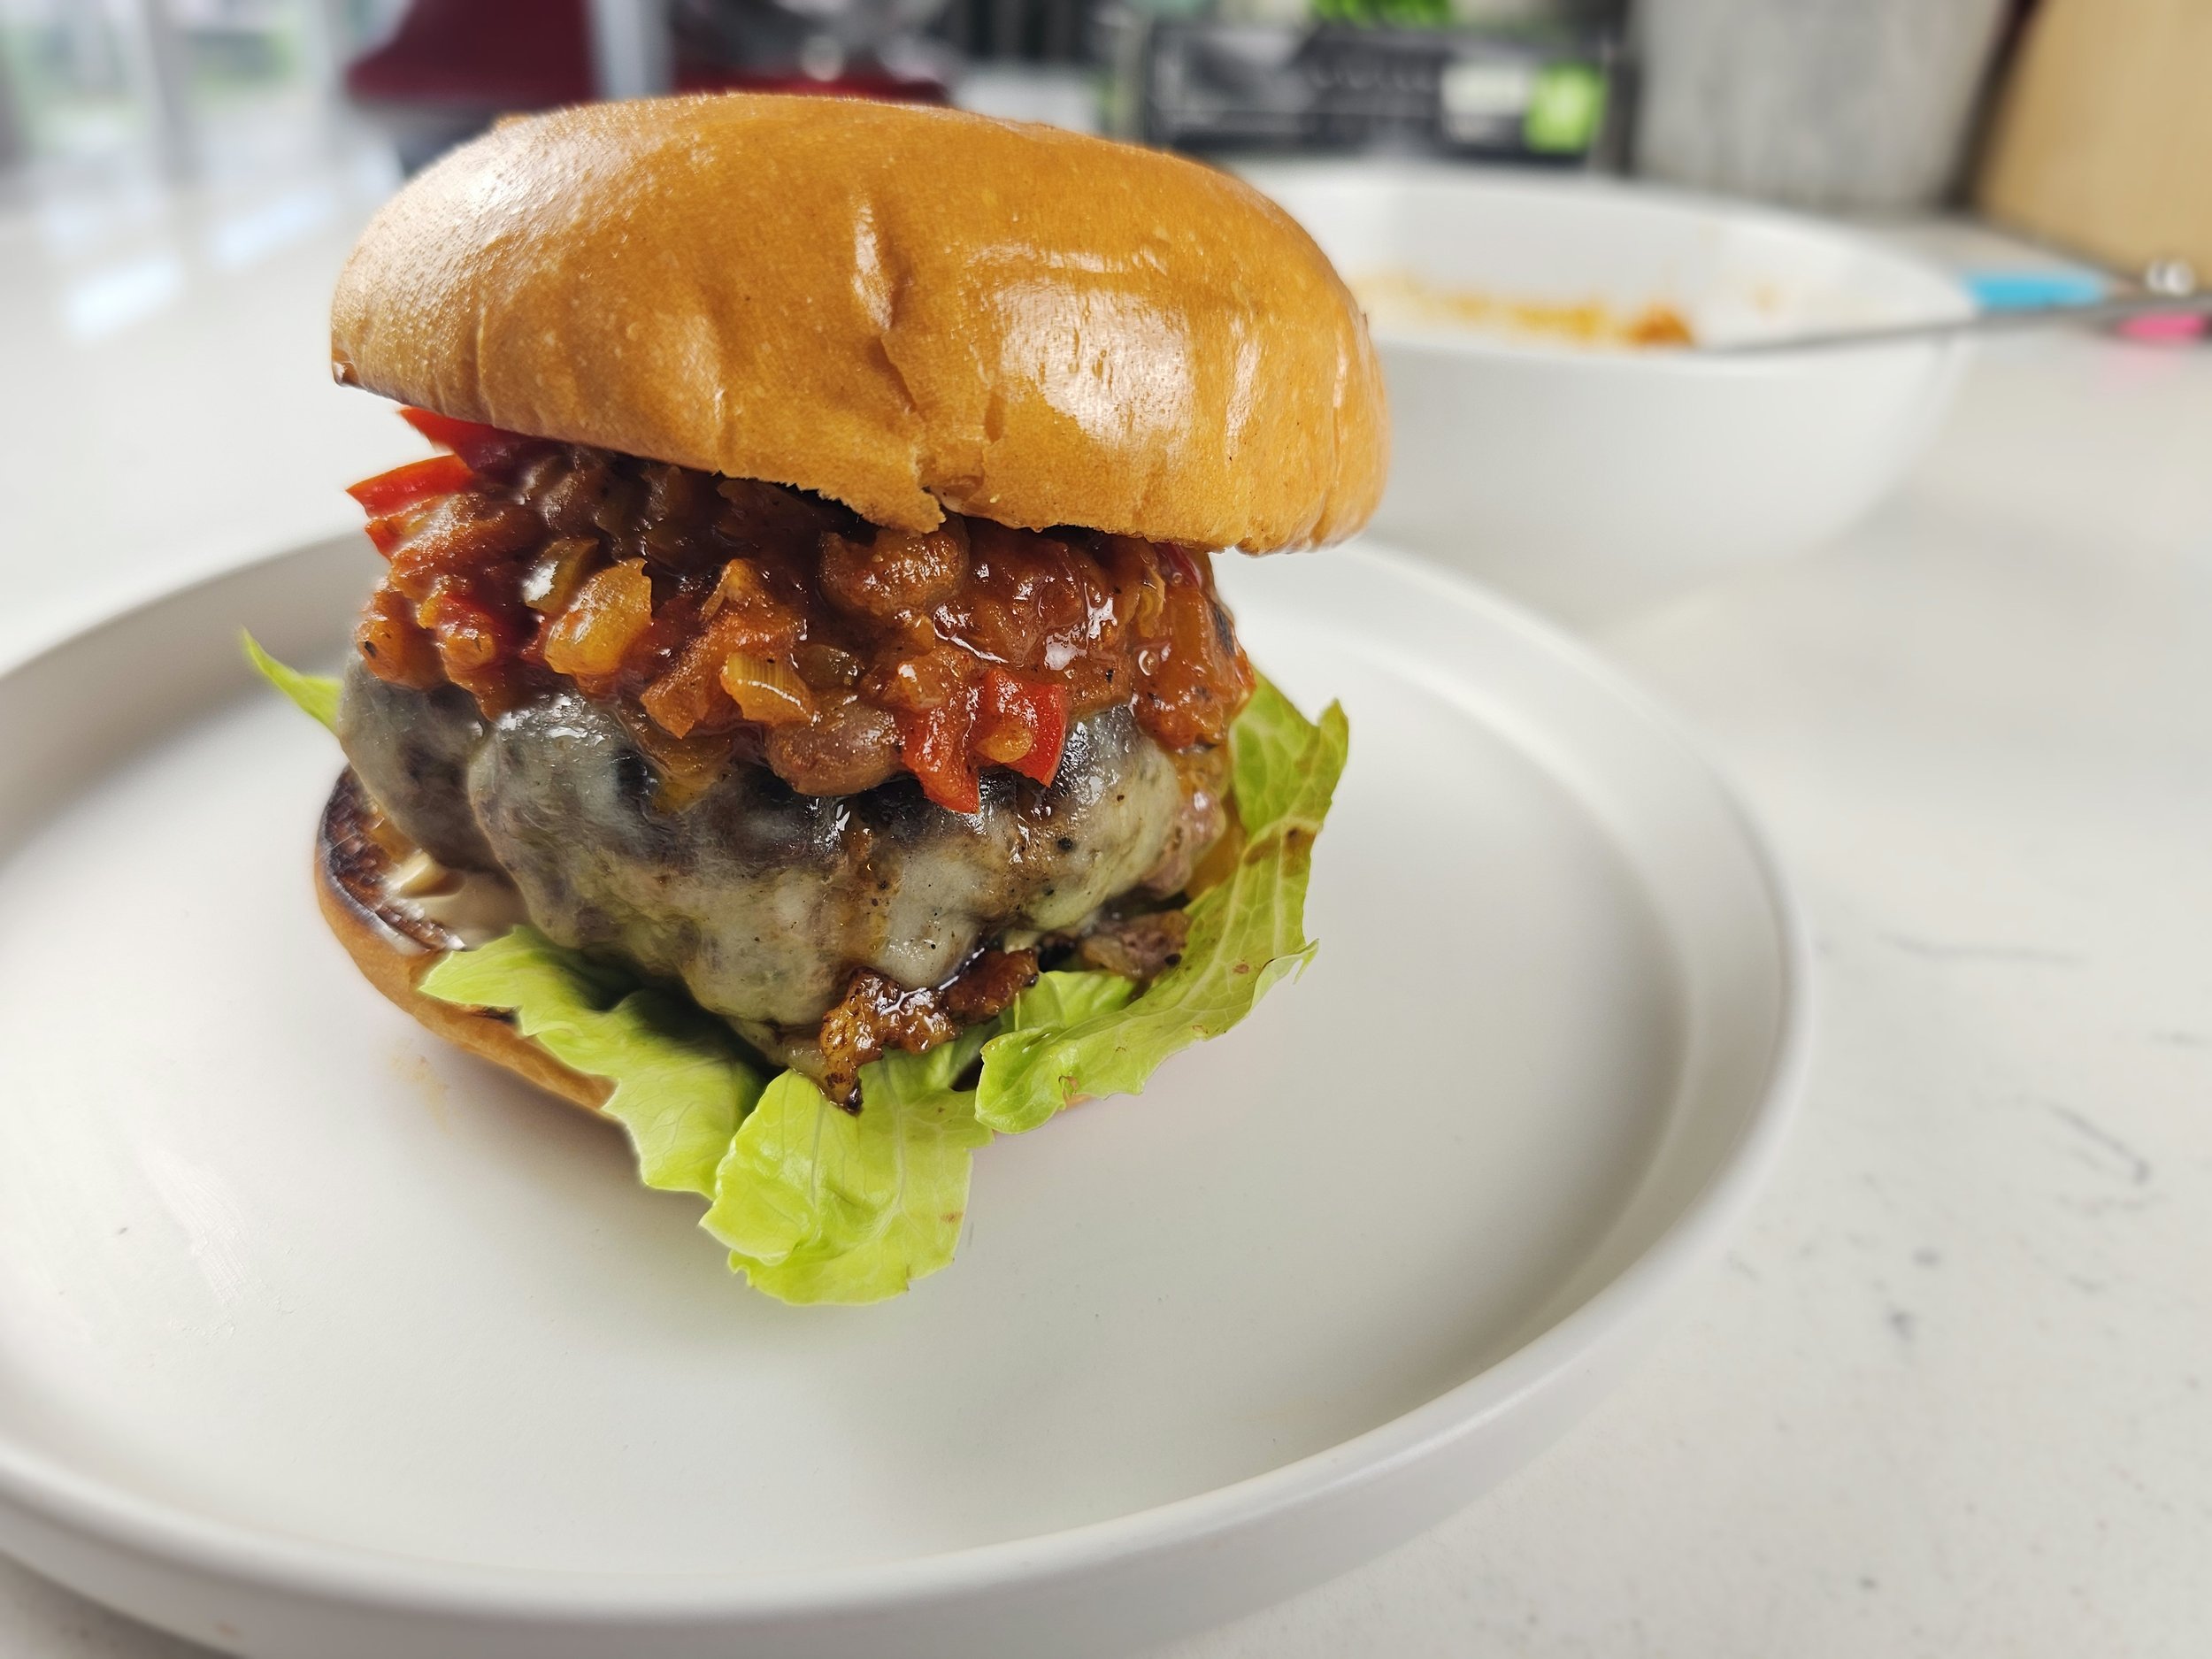
Boerewors-Inspired Burger with Chakalaka
This Boerewors-Inspired Burger with Chakalaka started with a simple question: What would happen if I took everything I love about traditional boerewors and turned it into a cheeseburger?
Boerewors is one of Southern Africa's most iconic sausages, enjoyed across countries including South Africa and Zimbabwe. Traditionally made with beef, pork, toasted coriander, black pepper, warm spices, and a touch of vinegar, it's known for a flavor that's bold, aromatic, and instantly recognizable. Instead of stuffing those flavors into a sausage casing, I wanted to see how they'd translate into a thick, juicy burger.
After several rounds of testing, I landed on a blend of beef and pork that stays tender and juicy while letting the boerewors-inspired seasoning shine. Toasted coriander and freshly cracked black pepper provide the familiar aroma, while allspice, garlic, cloves, nutmeg, and a splash of red wine vinegar add depth without overwhelming the meat.
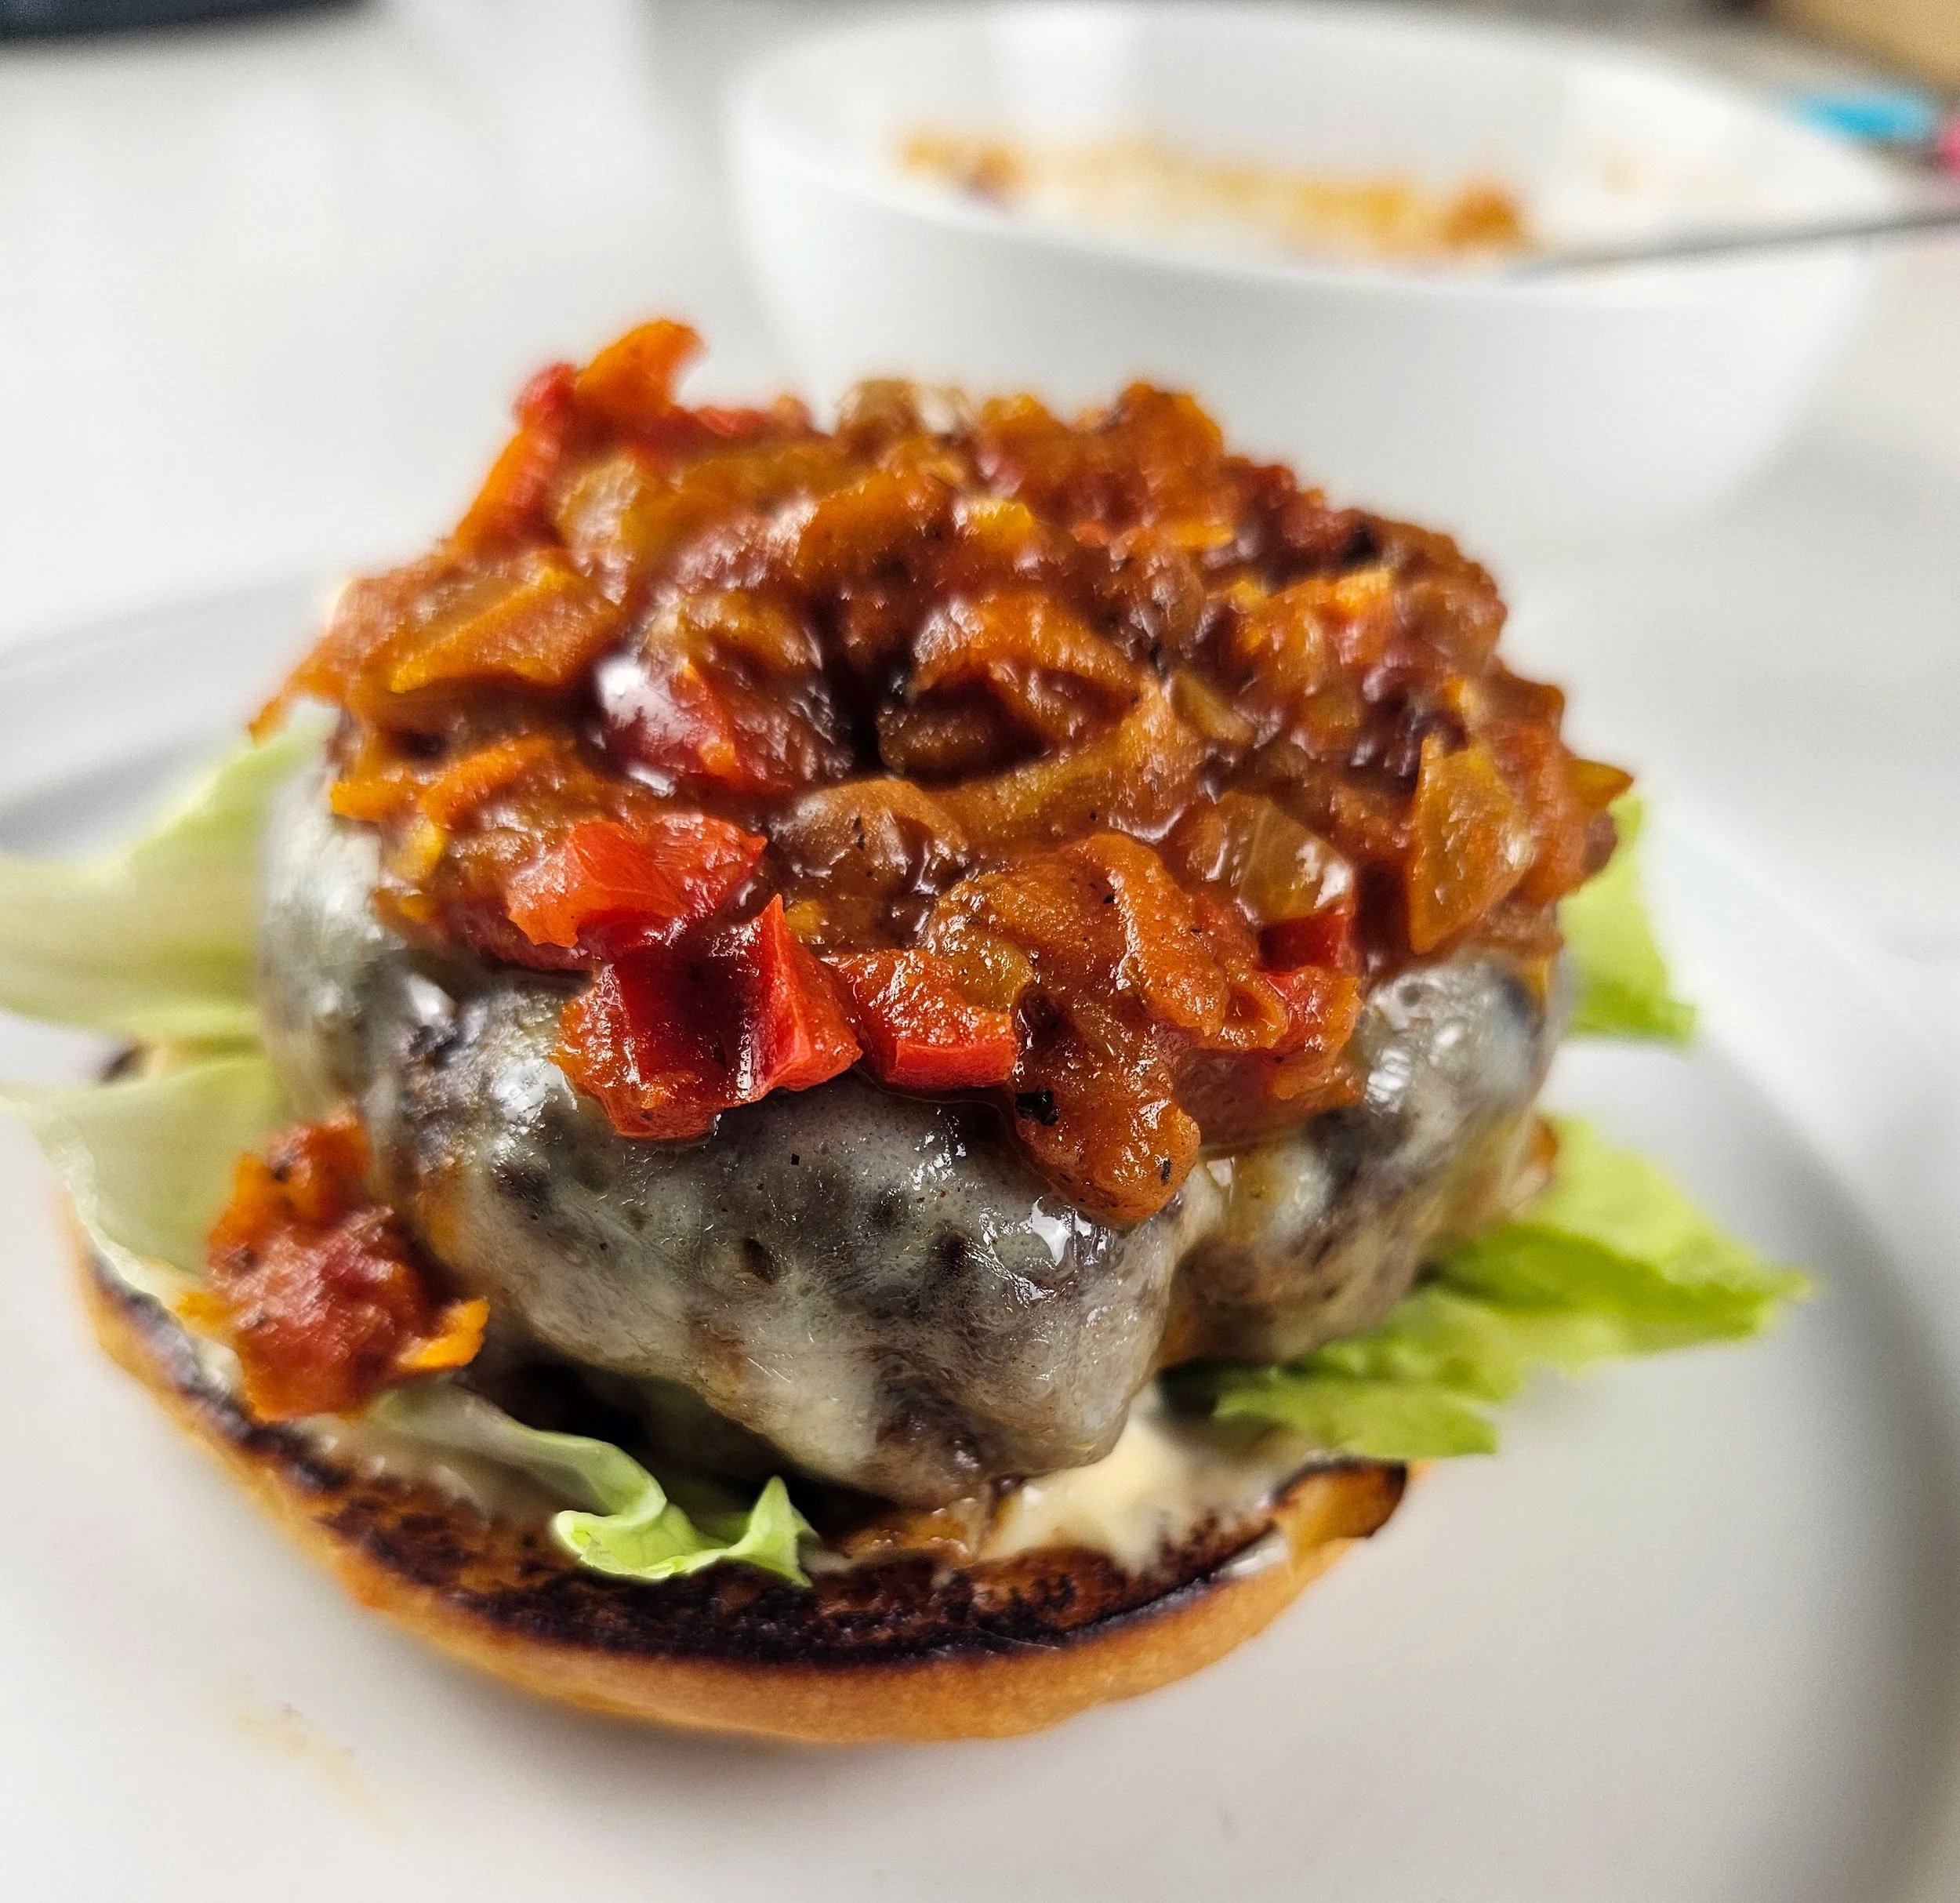
Once the burger was where I wanted it, the toppings became the next challenge. Rich, well-seasoned beef needs something bright to balance it, and chakalaka does exactly that. This classic vegetable relish brings sweetness, acidity, gentle heat, and plenty of texture. Add melted cheese, crisp lettuce, spicy mayo, and a toasted brioche bun, and every bite feels balanced instead of heavy.
This recipe is also a little personal. Chakalaka featured in one of my television cooking challenges (100 Cooks), and while developing this burger I kept wondering how I'd approach that challenge today. Burgers have always been one of my favorite things to cook because they're won or lost in the details. A good meat blend, thoughtful seasoning, a proper crust, perfectly melted cheese, and toppings that complement the patty all matter.
The finished burger feels familiar if you've grown up eating boerewors, but it's just as enjoyable if these flavors are completely new to you. My goal wasn't to recreate the sausage—it was to capture its character in a different form. I hope it gives you a delicious introduction to one of Southern Africa's most iconic flavor combinations.

Boerewors-Inspired Burger with Chakalaka
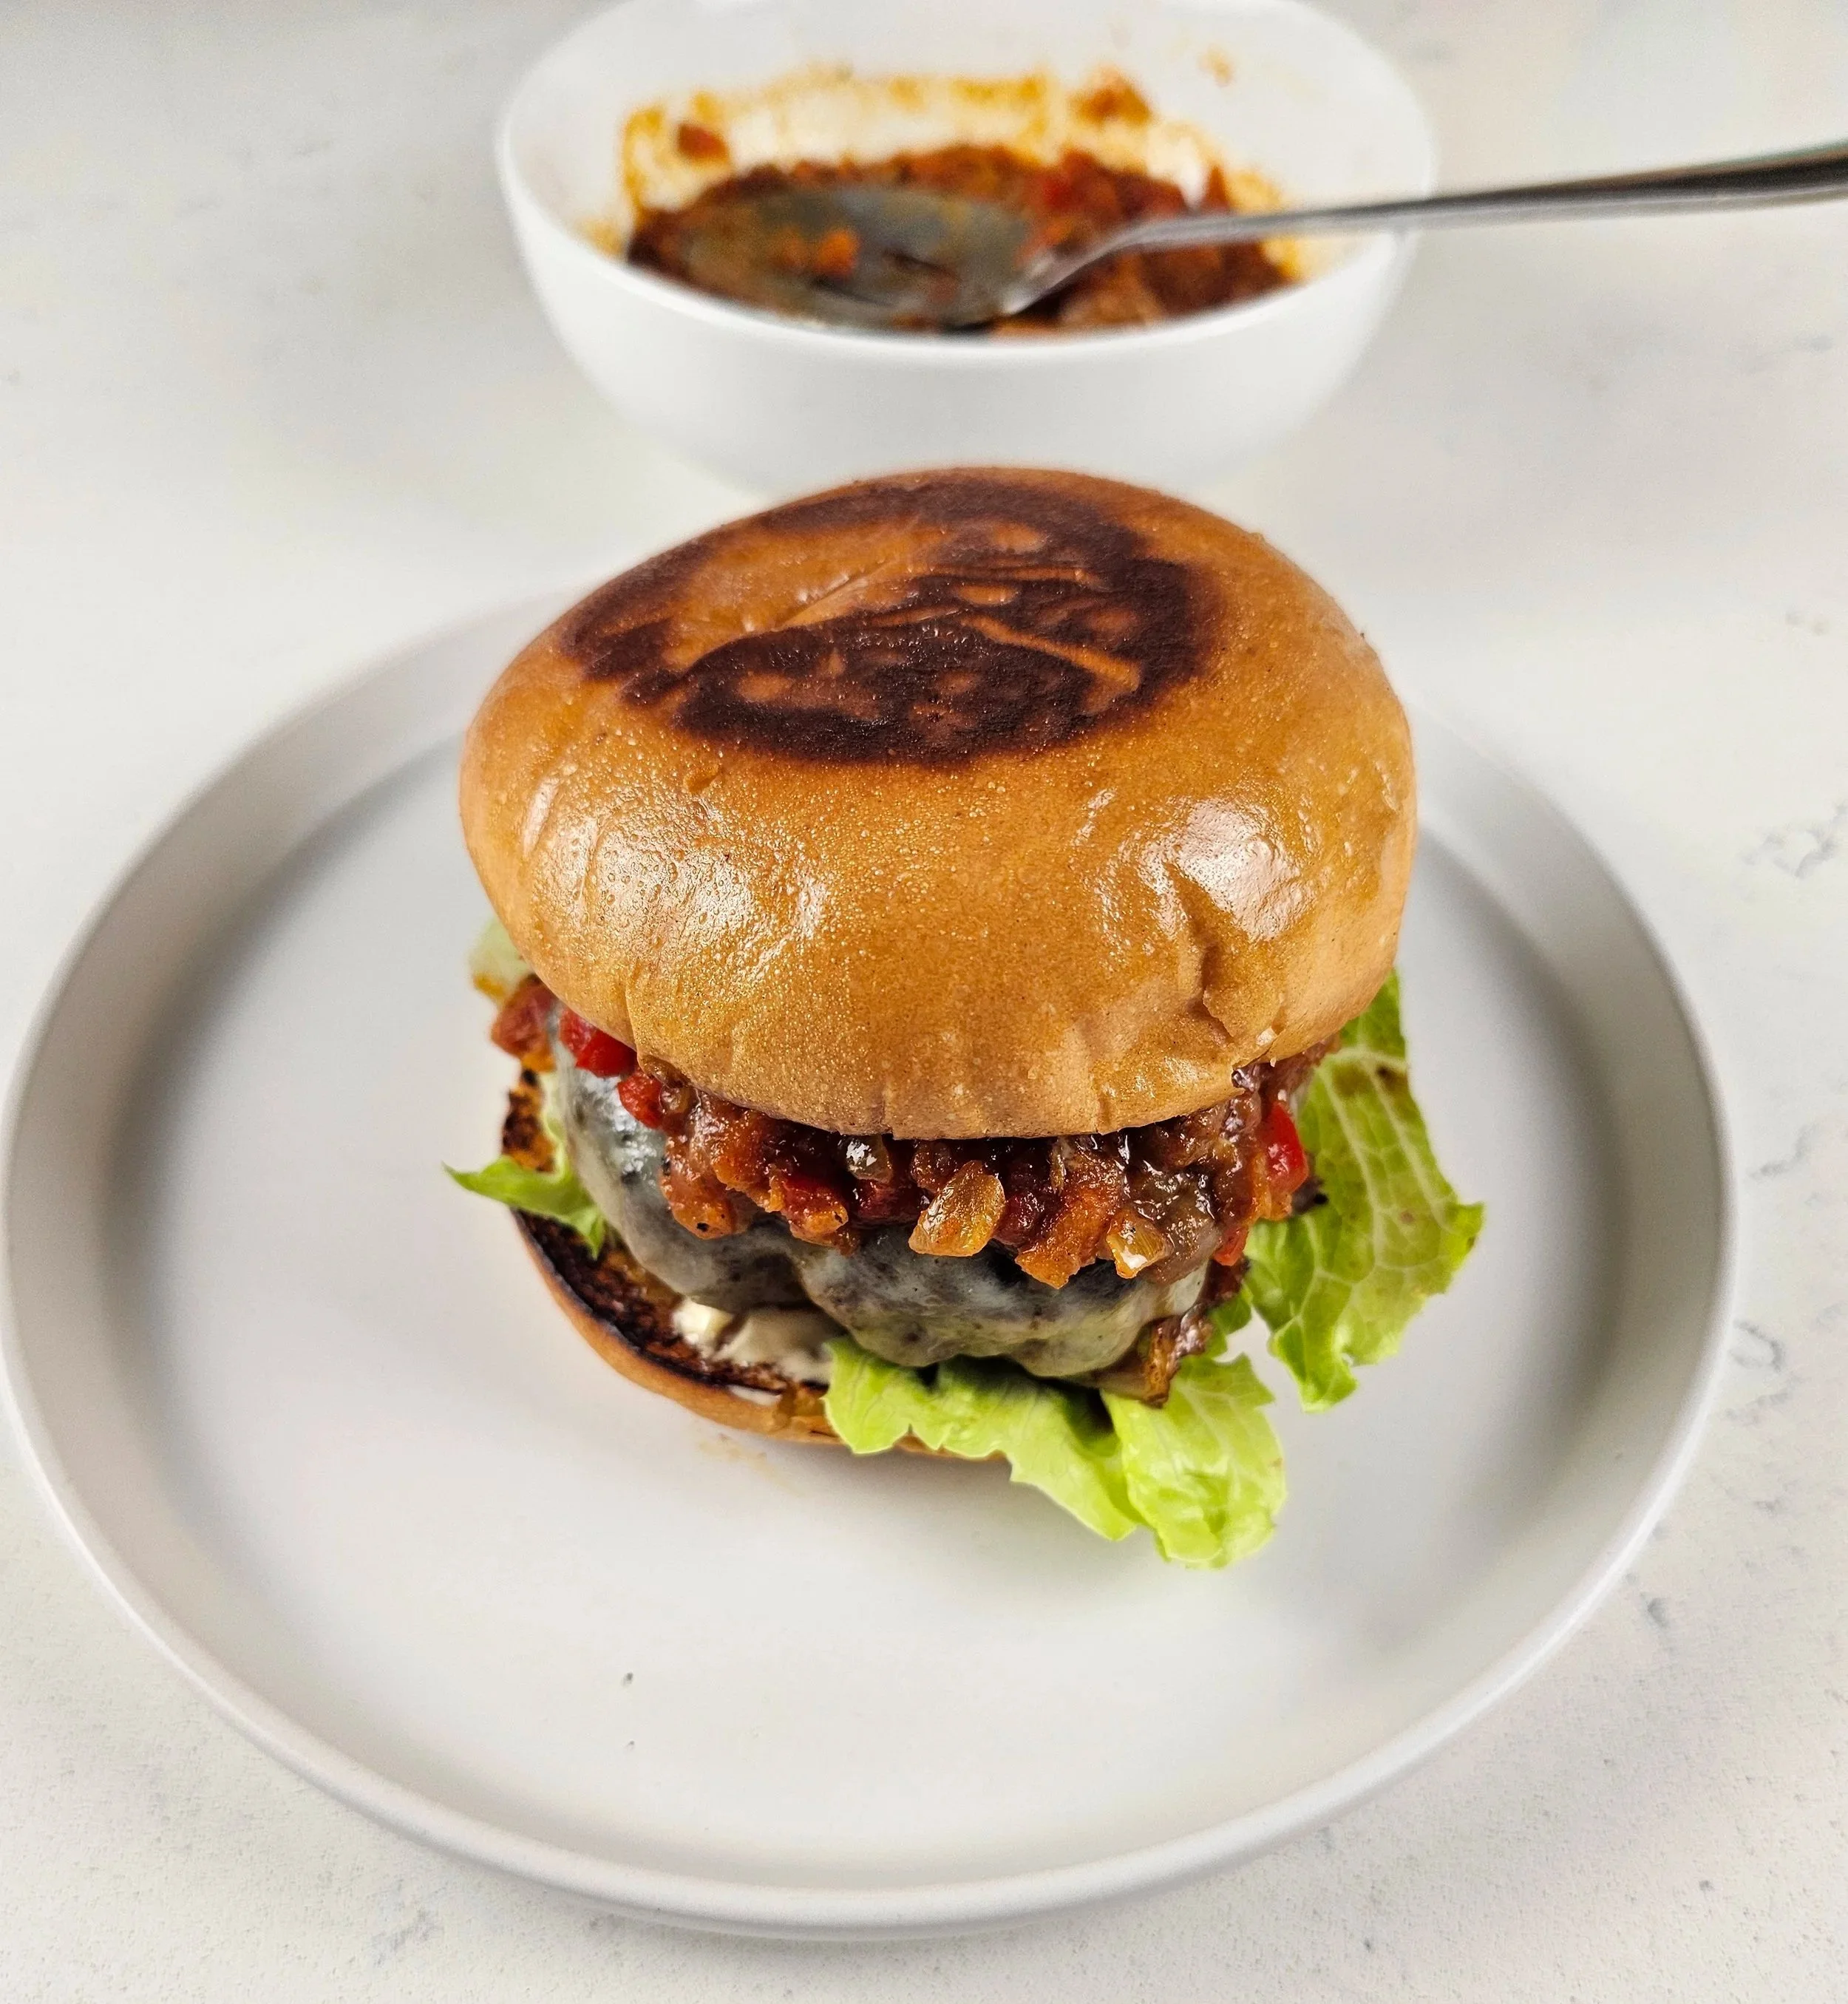
Inspired by the bold flavors of traditional boerewors sausage, this juicy burger combines ground beef and pork with toasted coriander, black pepper, warm spices, and a splash of red wine vinegar. Topped with homemade chakalaka, melted provolone or American cheese, crisp lettuce, and served on a toasted brioche bun, it's a hearty Southern African-inspired burger packed with flavor.
Ingredients
- 10.4 oz ground beef
- 4 oz ground pork
- 3 tsp boerewors seasoning mix
- 1¼ tsp red wine vinegar
- 2 tsp salt
- 1 tsp whole black peppercorns
- 2 tbsp whole coriander seeds
- ½ tsp whole allspice berries
- 1 tsp smoked paprika
- 1 tsp garlic powder
- ⅛ tsp ground cloves
- ⅛ tsp ground nutmeg
- 1 tbsp neutral oil
- ½ onion, diced
- 1 carrot, grated
- 1 bell pepper, diced
- 2 cloves garlic, minced
- 1 tsp curry powder
- ½ tsp smoked paprika
- ½ tsp ground cumin
- ½ tsp chili flakes (optional)
- ½ can diced tomatoes
- Salt and pepper, to taste
- 2 brioche buns, toasted
- 2 slices provolone or American cheese
- Lettuce
- 2–4 tbsp chakalaka
- Spicy mayo (2 tbsp mayonnaise + 1–2 tsp hot sauce)
Instructions
- 1. Prepare the seasoning
- Toast the coriander seeds, peppercorns, and allspice until fragrant. Crush them and combine with the remaining spices. Store the extra seasoning in an airtight jar.
- 2. Make the patties
- In a bowl, combine:
- 10.4 oz beef
- 4 oz pork
- 3 tsp boerewors seasoning
- 1¼ tsp red wine vinegar
- Mix gently until just combined.
- Divide into two equal patties (about 7.2 oz each).
- Shape each patty ½–1 inch wider than your brioche buns and make a shallow thumb indent in the center.
- ---
- 3. Make the chakalaka
- Heat the oil over medium heat. Cook the onion until softened. Add the carrot, bell pepper, and garlic. Stir in the spices, then the tomatoes. Simmer until thick and well combined. Season to taste.
- ---
- 4. Cook the burgers
- 1. Heat a cast-iron skillet over medium-high for about 5 minutes.
- 2. Add a small amount of ghee.
- 3. Place the burgers in the pan and cook 4 minutes without moving them.
- 4. Flip the burgers and reduce the heat to medium.
- 5. Cook for another 3½–4 minutes, checking the internal temperature.
- 6. Add the cheese during the last minute.
- 7. Add 1–2 teaspoons water to an empty part of the skillet and immediately cover with a lid for 30–60 seconds to melt the cheese.
- 8. Cook until the burgers reach 160–165°F (71–74°C).
- 9. Rest for 3 minutes.
- ---
- 5. Toast the buns
- Toast the brioche buns in a little butter or ghee until golden.
- ---
- 6. Assemble
- Bottom bun
- Spicy mayo
- Lettuce
- Burger with melted cheese
- Spoonful of chakalaka
- Top bun
Notes
- This recipe was developed using 7.2 oz patties, which provided the best balance of juiciness, burger-to-bun ratio, and presentation.
- Shape the patties wider than the buns to account for shrinkage during cooking. You can also press your thumb gently in the center to create a dimple in each to help this.
- Mix the meat gently to maintain a tender texture.
- Toasting the whole spices before grinding makes a noticeable difference in flavor.
- If your chakalaka is too loose, simmer it uncovered for a few extra minutes before serving.
I am not a certified nutritionist and any nutritional information on dontmissmyplate.com should only be used as a general guideline.

Malawi Shandy Ice Lollies (Popsicles)
The Malawi Shandy is one of those drinks that instantly takes me back to Zimbabwe.
I remember drinking it on houseboat holidays in Kariba and during trips to Victoria Falls—two destinations known for sunshine, adventure, and escaping everyday life. In both places, an ice-cold Malawi Shandy always seemed to taste better in the heat. Bright, citrusy, and finished with a few dashes of bitters, it was the kind of drink that felt synonymous with holidays, road trips, and long afternoons spent outdoors.
For most of my life, I never questioned the name. It wasn't until recently that I learned the word "shandy" likely traces its roots to the British shandygaff, a drink traditionally made by mixing beer with lemonade or ginger beer. Over time, however, the drink evolved into something distinctly Southern African. Today, Malawi Shandy is enjoyed far beyond Malawi itself and can be found throughout the region, where it is typically served as a refreshing non-alcoholic drink, though some people add vodka or rum for a simple cocktail.
Part of what makes Malawi Shandy so memorable is its appearance. The combination of citrus and bitters creates a beautiful amber-red gradient that is instantly recognizable to many Southern Africans. For some, it's a nostalgic reminder of family gatherings, holidays, and summer afternoons. For me, it's one of those flavors that immediately transports me back to some of Zimbabwe's most memorable warm-weather destinations.
For this recipe, I wanted to preserve both the flavor and the visual identity of the original by transforming it into an ice lolly. The result captures everything I love about Malawi Shandy: bright citrus, gentle spice, bittersweet complexity, and the sunset-like gradient that made me fall in love with the drink in the first place.
More than just a frozen treat, these ice lollies are a tribute to one of Southern Africa's most beloved warm-weather drinks and the memories attached to it.



Malawi Shandy Ice Lollies (Popsicles)
These Malawi Shandy Ice Lollies transform one of Southern Africa's most beloved citrus drinks into a refreshing frozen treat. Made with fresh orange juice, lemon, ginger ale, Sprite, and Angostura bitters, they capture the bright, bittersweet flavor and signature amber-red gradient of the original drink.
Ingredients
- 1 cup (240ml) freshly squeezed orange juice (about 4 oranges)
- 1 cup (240ml) Sprite
- ½ cup (120ml) ginger ale
- Juice of ½ lemon
- 2 tsp Angostura bitters
- 2 tsp prepared citrus base mixture
Instructions
- In a jug or bowl, combine the orange juice, Sprite, ginger ale, and lemon juice. Stir gently to combine, taking care not to remove too much carbonation.
- Pour the mixture into six ice lolly moulds, filling each mould approximately 90% full.
- Transfer the moulds to the freezer and chill for 35–45 minutes, or until the edges begin to freeze while the centre remains slushy.
- In a small bowl, combine the Angostura bitters with 2 teaspoons of the citrus base. Stir until evenly mixed.
- Remove the moulds from the freezer. Carefully pour approximately 1 teaspoon of the bitters mixture into each mould over the semi-frozen base. Do not stir or swirl! Allow the bitters mixture to settle naturally.
- Gently insert the mould lids or sticks without pressing down aggressively.
- Return the moulds to the freezer and freeze for 6–8 hours or overnight.
- To release the ice lollies, briefly run the outside of the mould under warm water for 2–3 seconds before gently pulling.
Notes
- Freshly squeezed orange juice produces the brightest flavour and colour.
- Do not over-stir after adding the bitters mixture, as this will disrupt the natural gradient effect.
- Each ice lolly will develop a slightly different pattern, making every one unique.
- For an adult version, serve alongside a Malawi Shandy spiked with vodka or rum.
- If using larger moulds, freezing times may increase.
- Store in an airtight container or in the moulds for up to 2 months. For best flavour and texture, enjoy within 3 weeks.
Serving Suggestion:
<span>• Garnish with orange slices and maraschino cherries.</span><br><span>• Serve alongside a chilled Malawi Shandy.</span><br><span>• Perfect for summer gatherings, braais, picnics, and poolside entertaining.</span><br><span>• Pair with tropical fruit platters or citrus-forward desserts.</span>
Nutrition Facts
Calories
45Carbs (grams)
11 gFiber (grams)
.2 gSugar (grams)
9 gProtein (grams)
.3 gI am not a certified nutritionist and any nutritional information on dontmissmyplate.com should only be used as a general guideline.
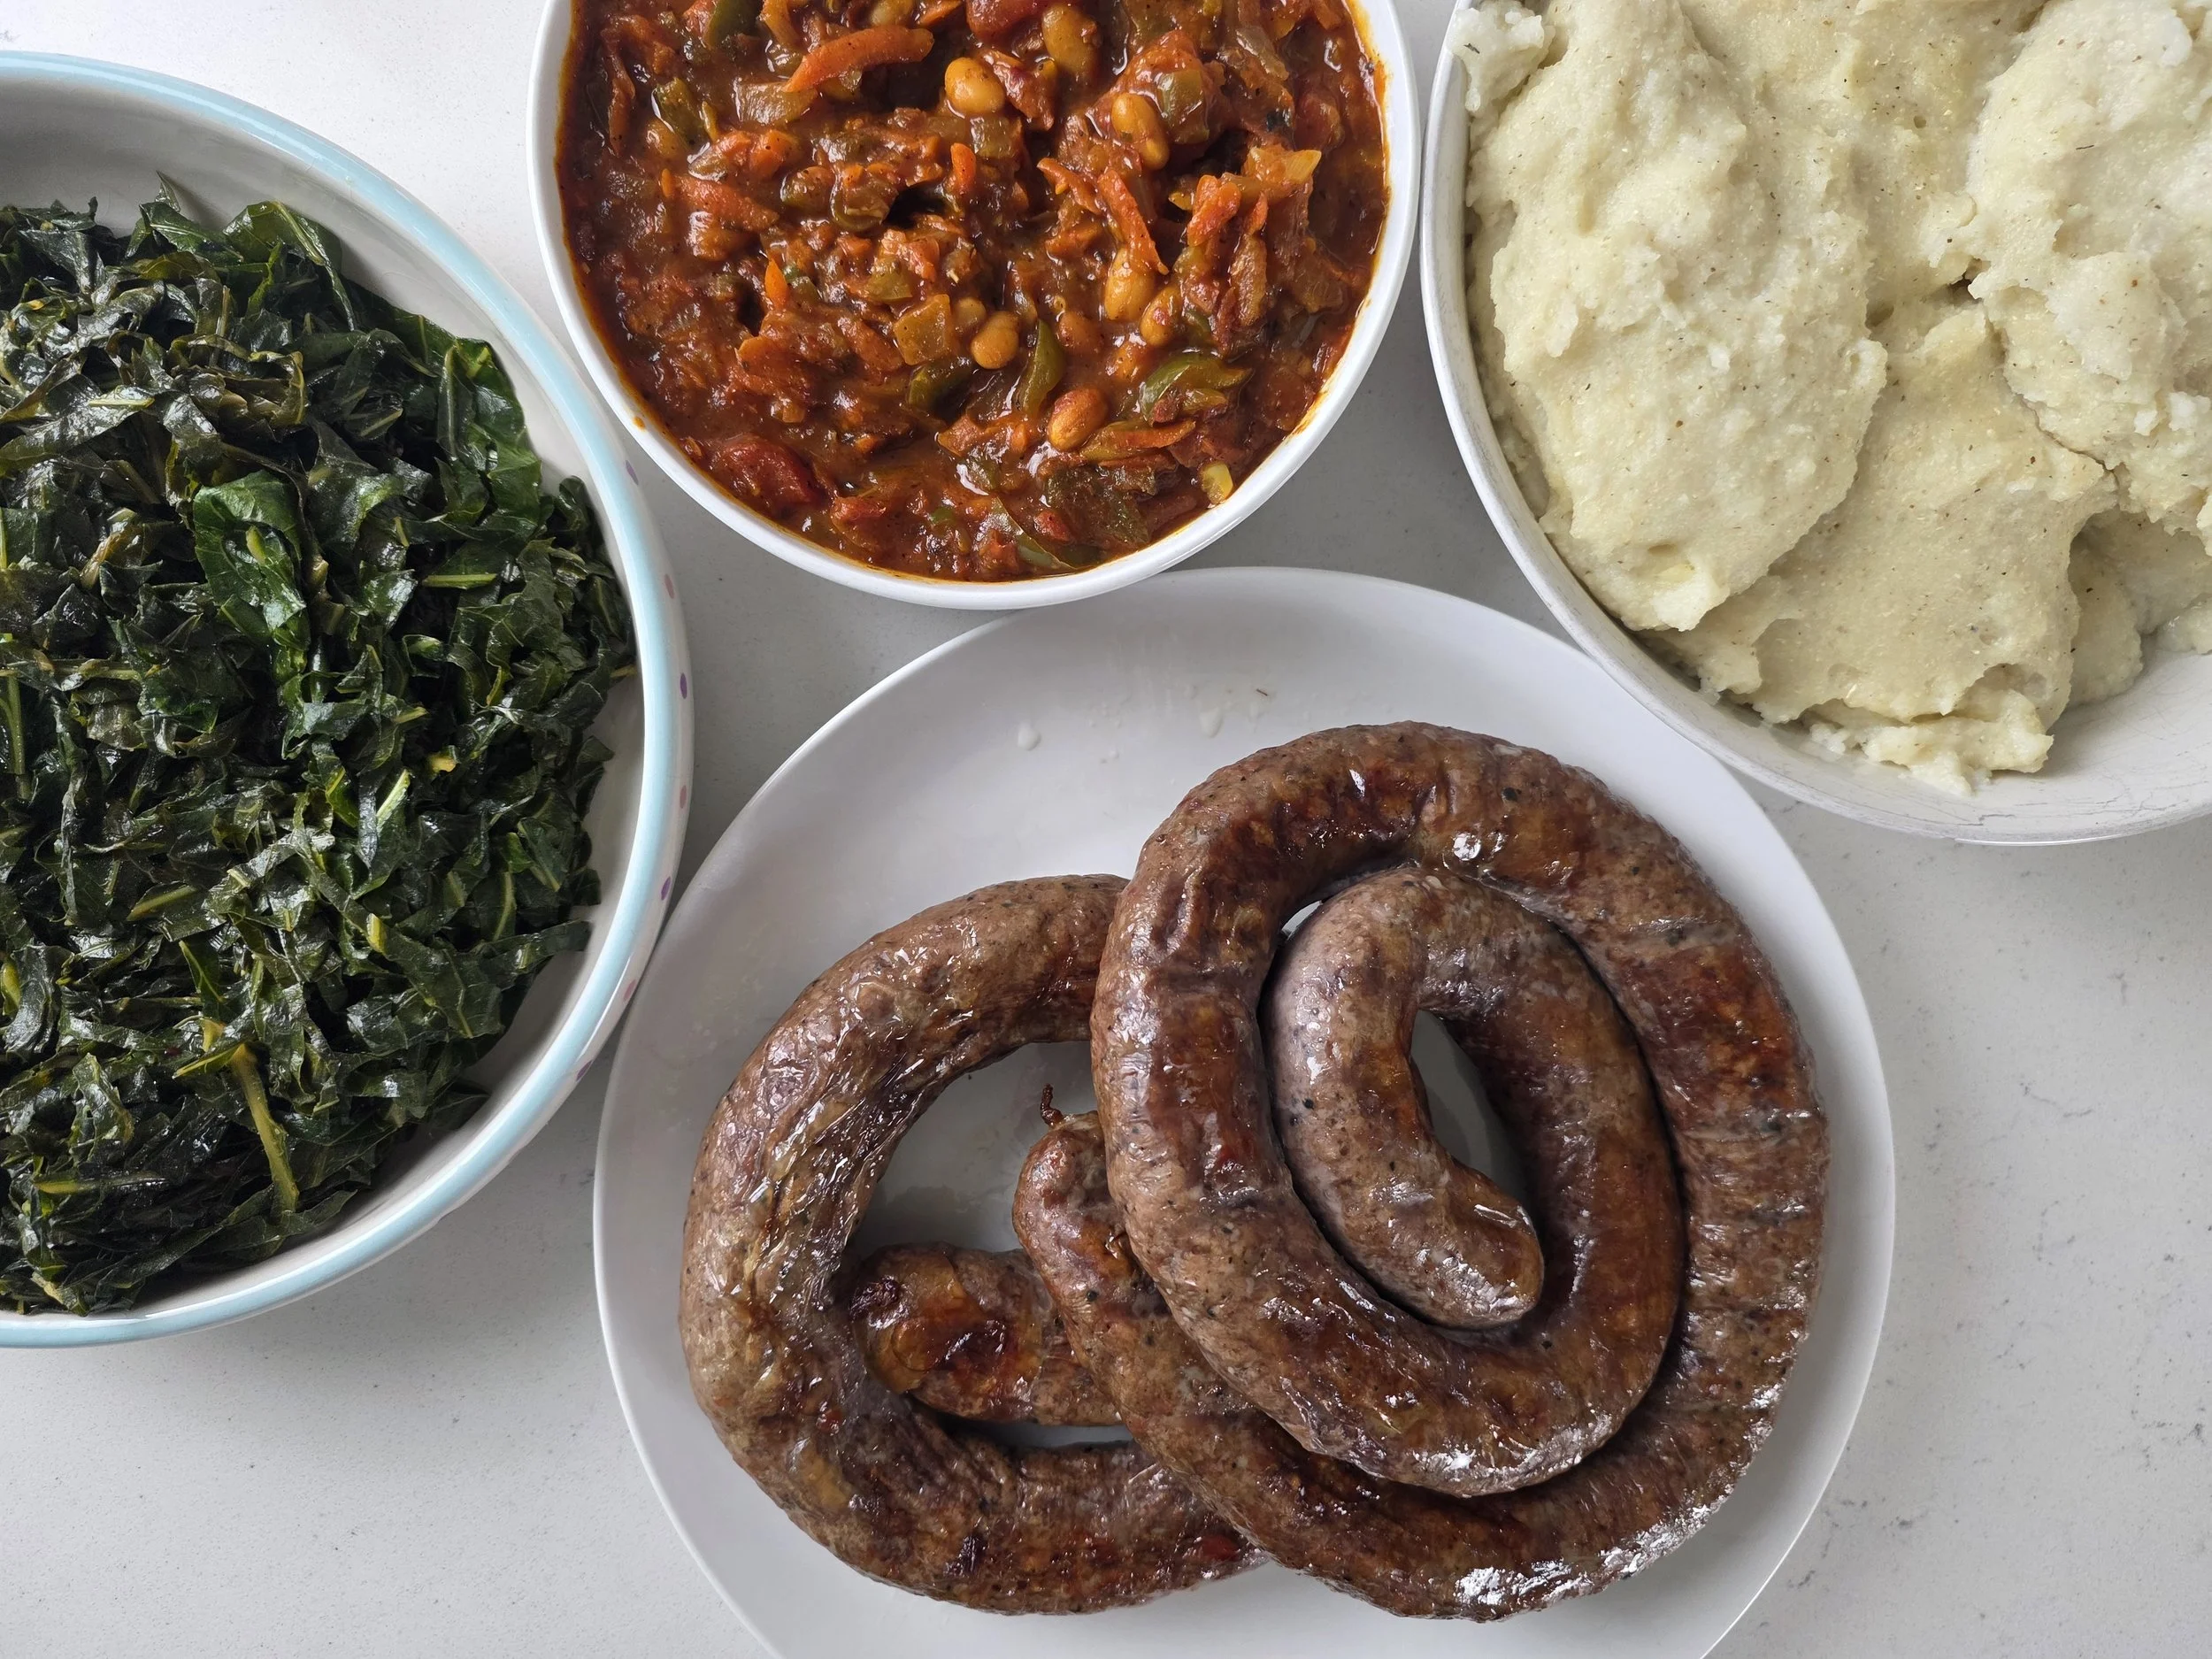
Braai-Style Homemade Boerewors Sausage with Cherry Plum
This is Part 3 of my braai-inspired series, and the final plate brings everything full circle with one of the most iconic elements of Southern African food culture: boerewors.
After exploring peri-peri chicken in Part 1 and BBQ- and curry-spiced lamb in Part 2, this final installment shifts focus to the centerpiece of many braai gatherings: sausage. In many Southern African homes, boerewors is not just another protein on the grill; it is often the anchor around which everything else is built. From the fire itself to the sides and conversations shared around the table, it holds a central place in the braai experience.
Traditional boerewors is typically made with a higher fat content (often around a 70/30 lean-to-fat ratio), which is key to its signature juiciness and flavour when grilled over open heat. That balance of fat is what gives it its distinctive texture and keeps it from drying out during the braai process.
For this final plate, I also followed through on the community vote, which leaned heavily toward sausage over fish. That result raised an interesting reflection on how different proteins fit into braai culture. While fish certainly plays an important role in some coastal traditions and regions, sausage remains one of the most recognizable and widely enjoyed staples of everyday braai cooking.
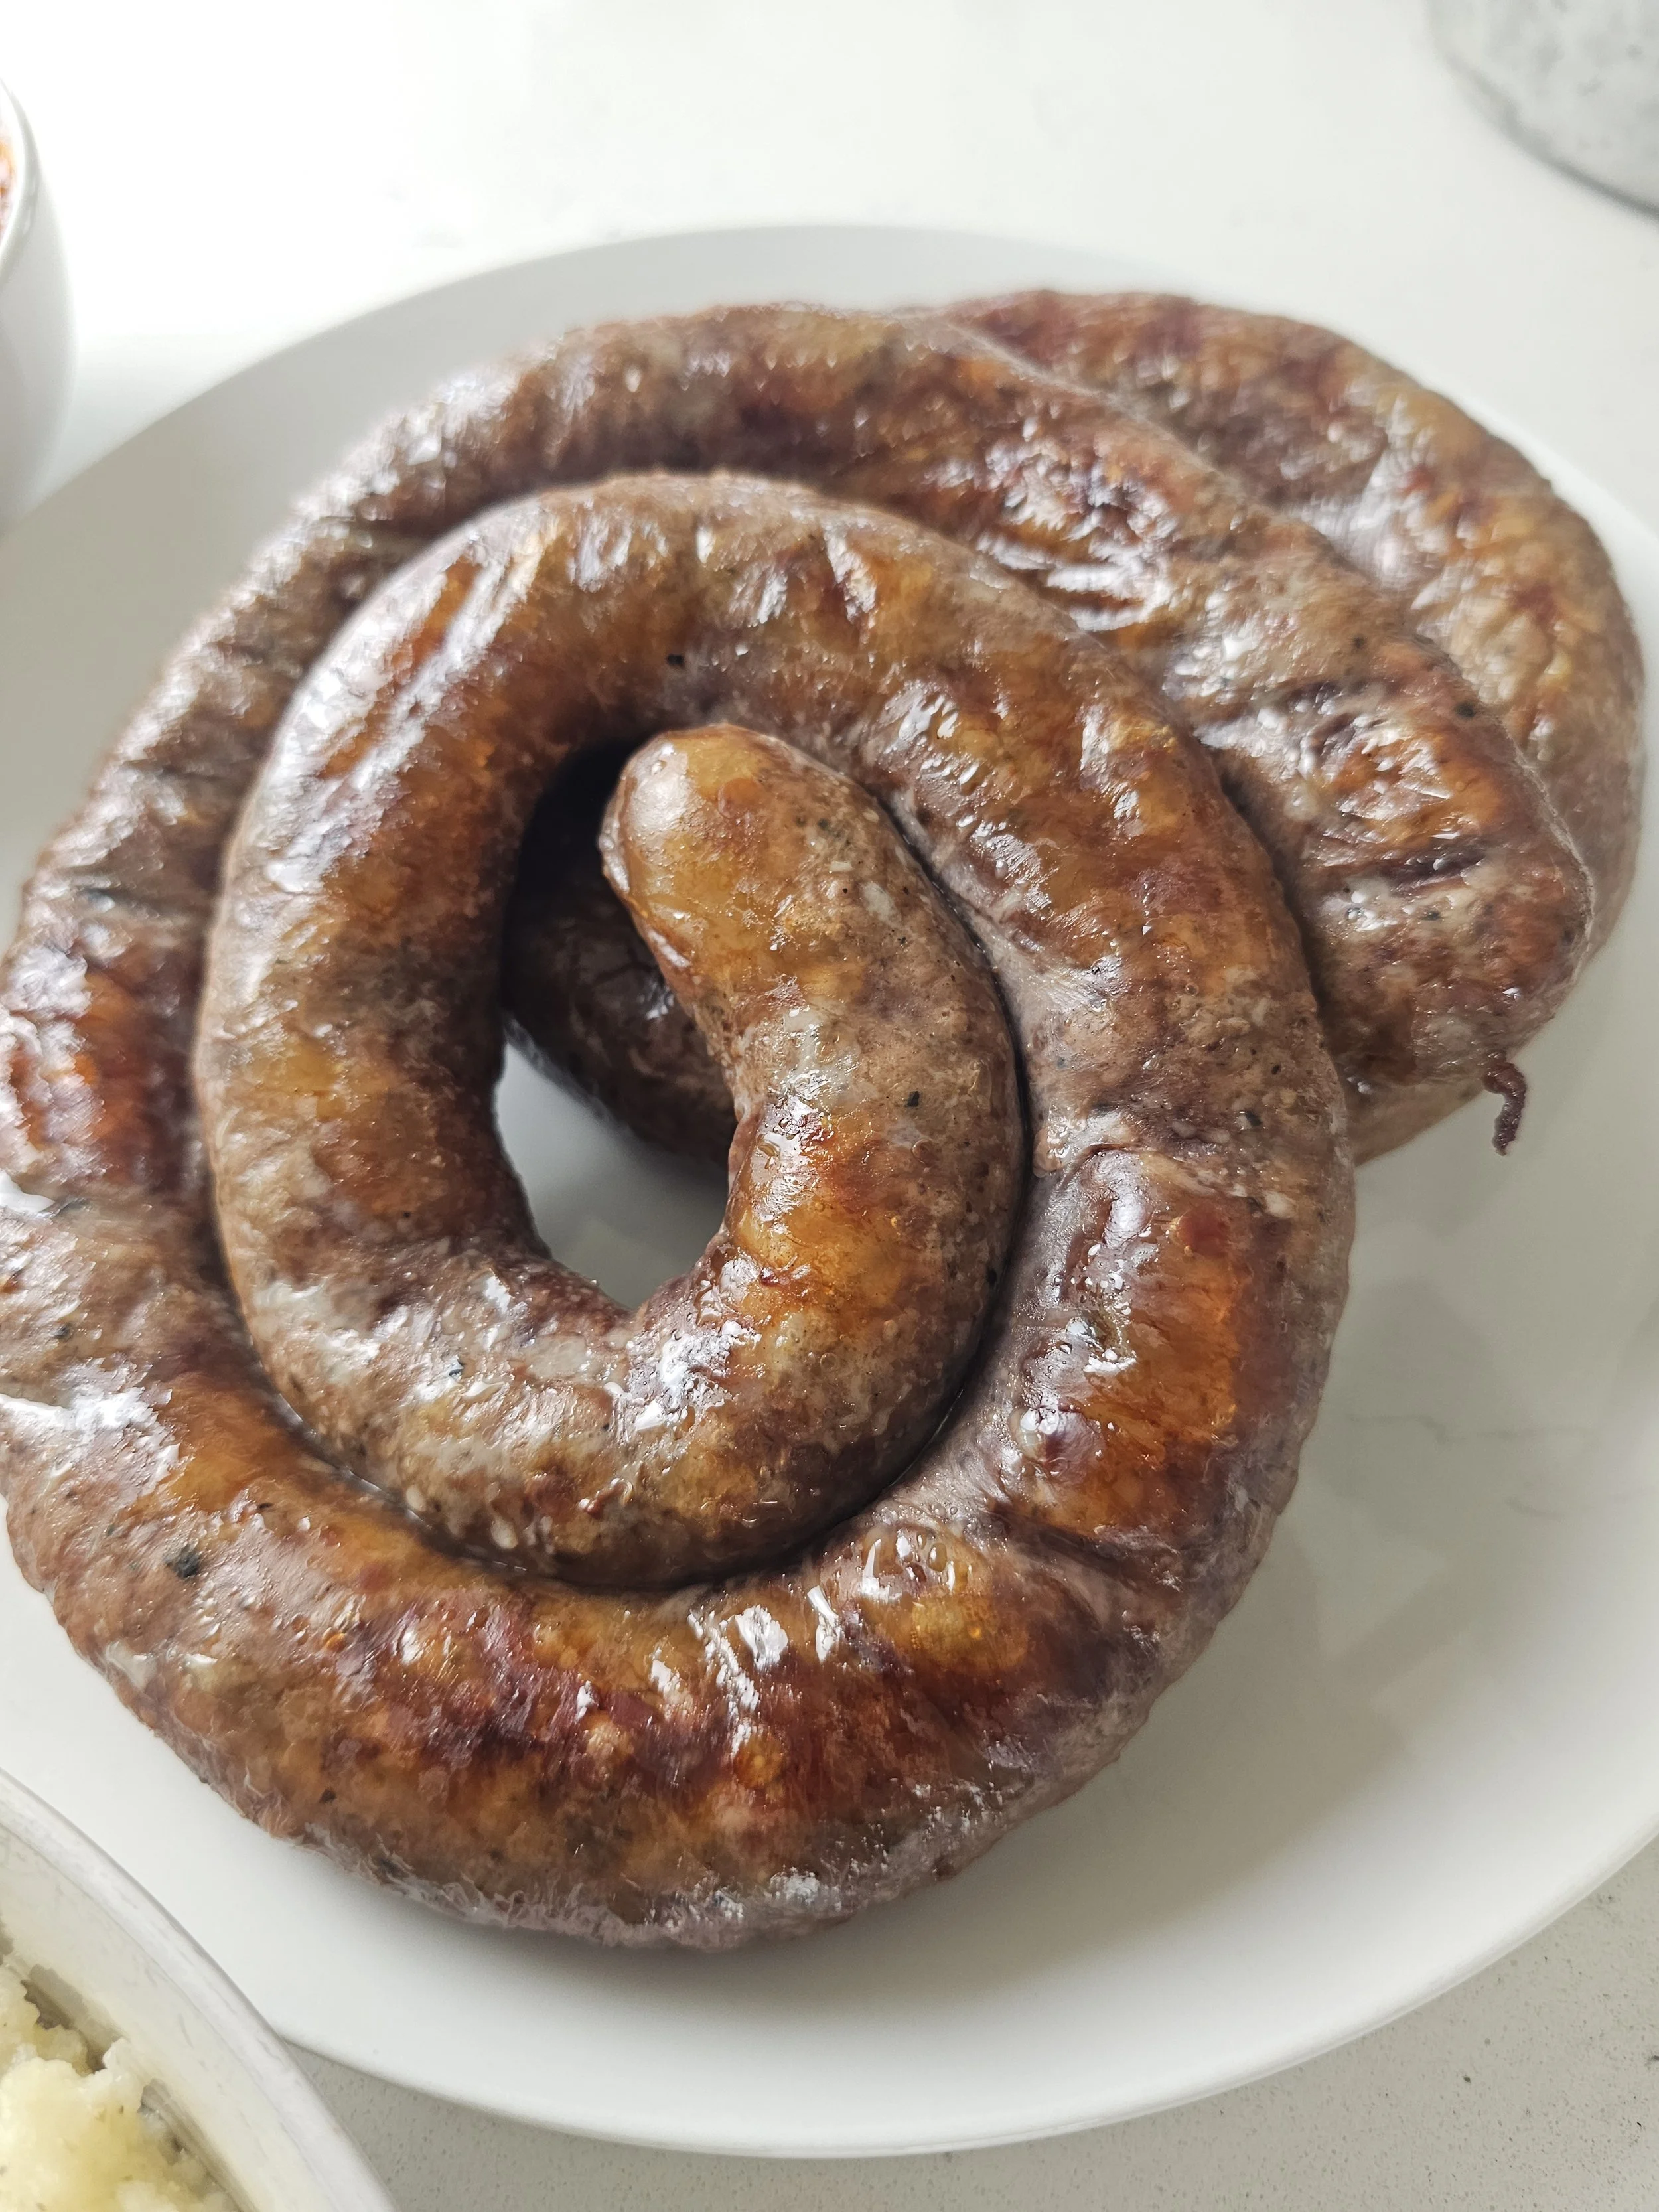
Rather than overcomplicating the process, I kept this recipe grounded and accessible. The sausage is made using seasoned ground meat, which can easily be prepared at home and stuffed into casings for full control over flavour and texture. It also serves as a practical introduction for anyone interested in trying homemade boerewors without needing specialized cuts or advanced butchery skills. I used a sausage-stuffing attachment for a KitchenAid mixer, though standalone sausage stuffers work just as well.
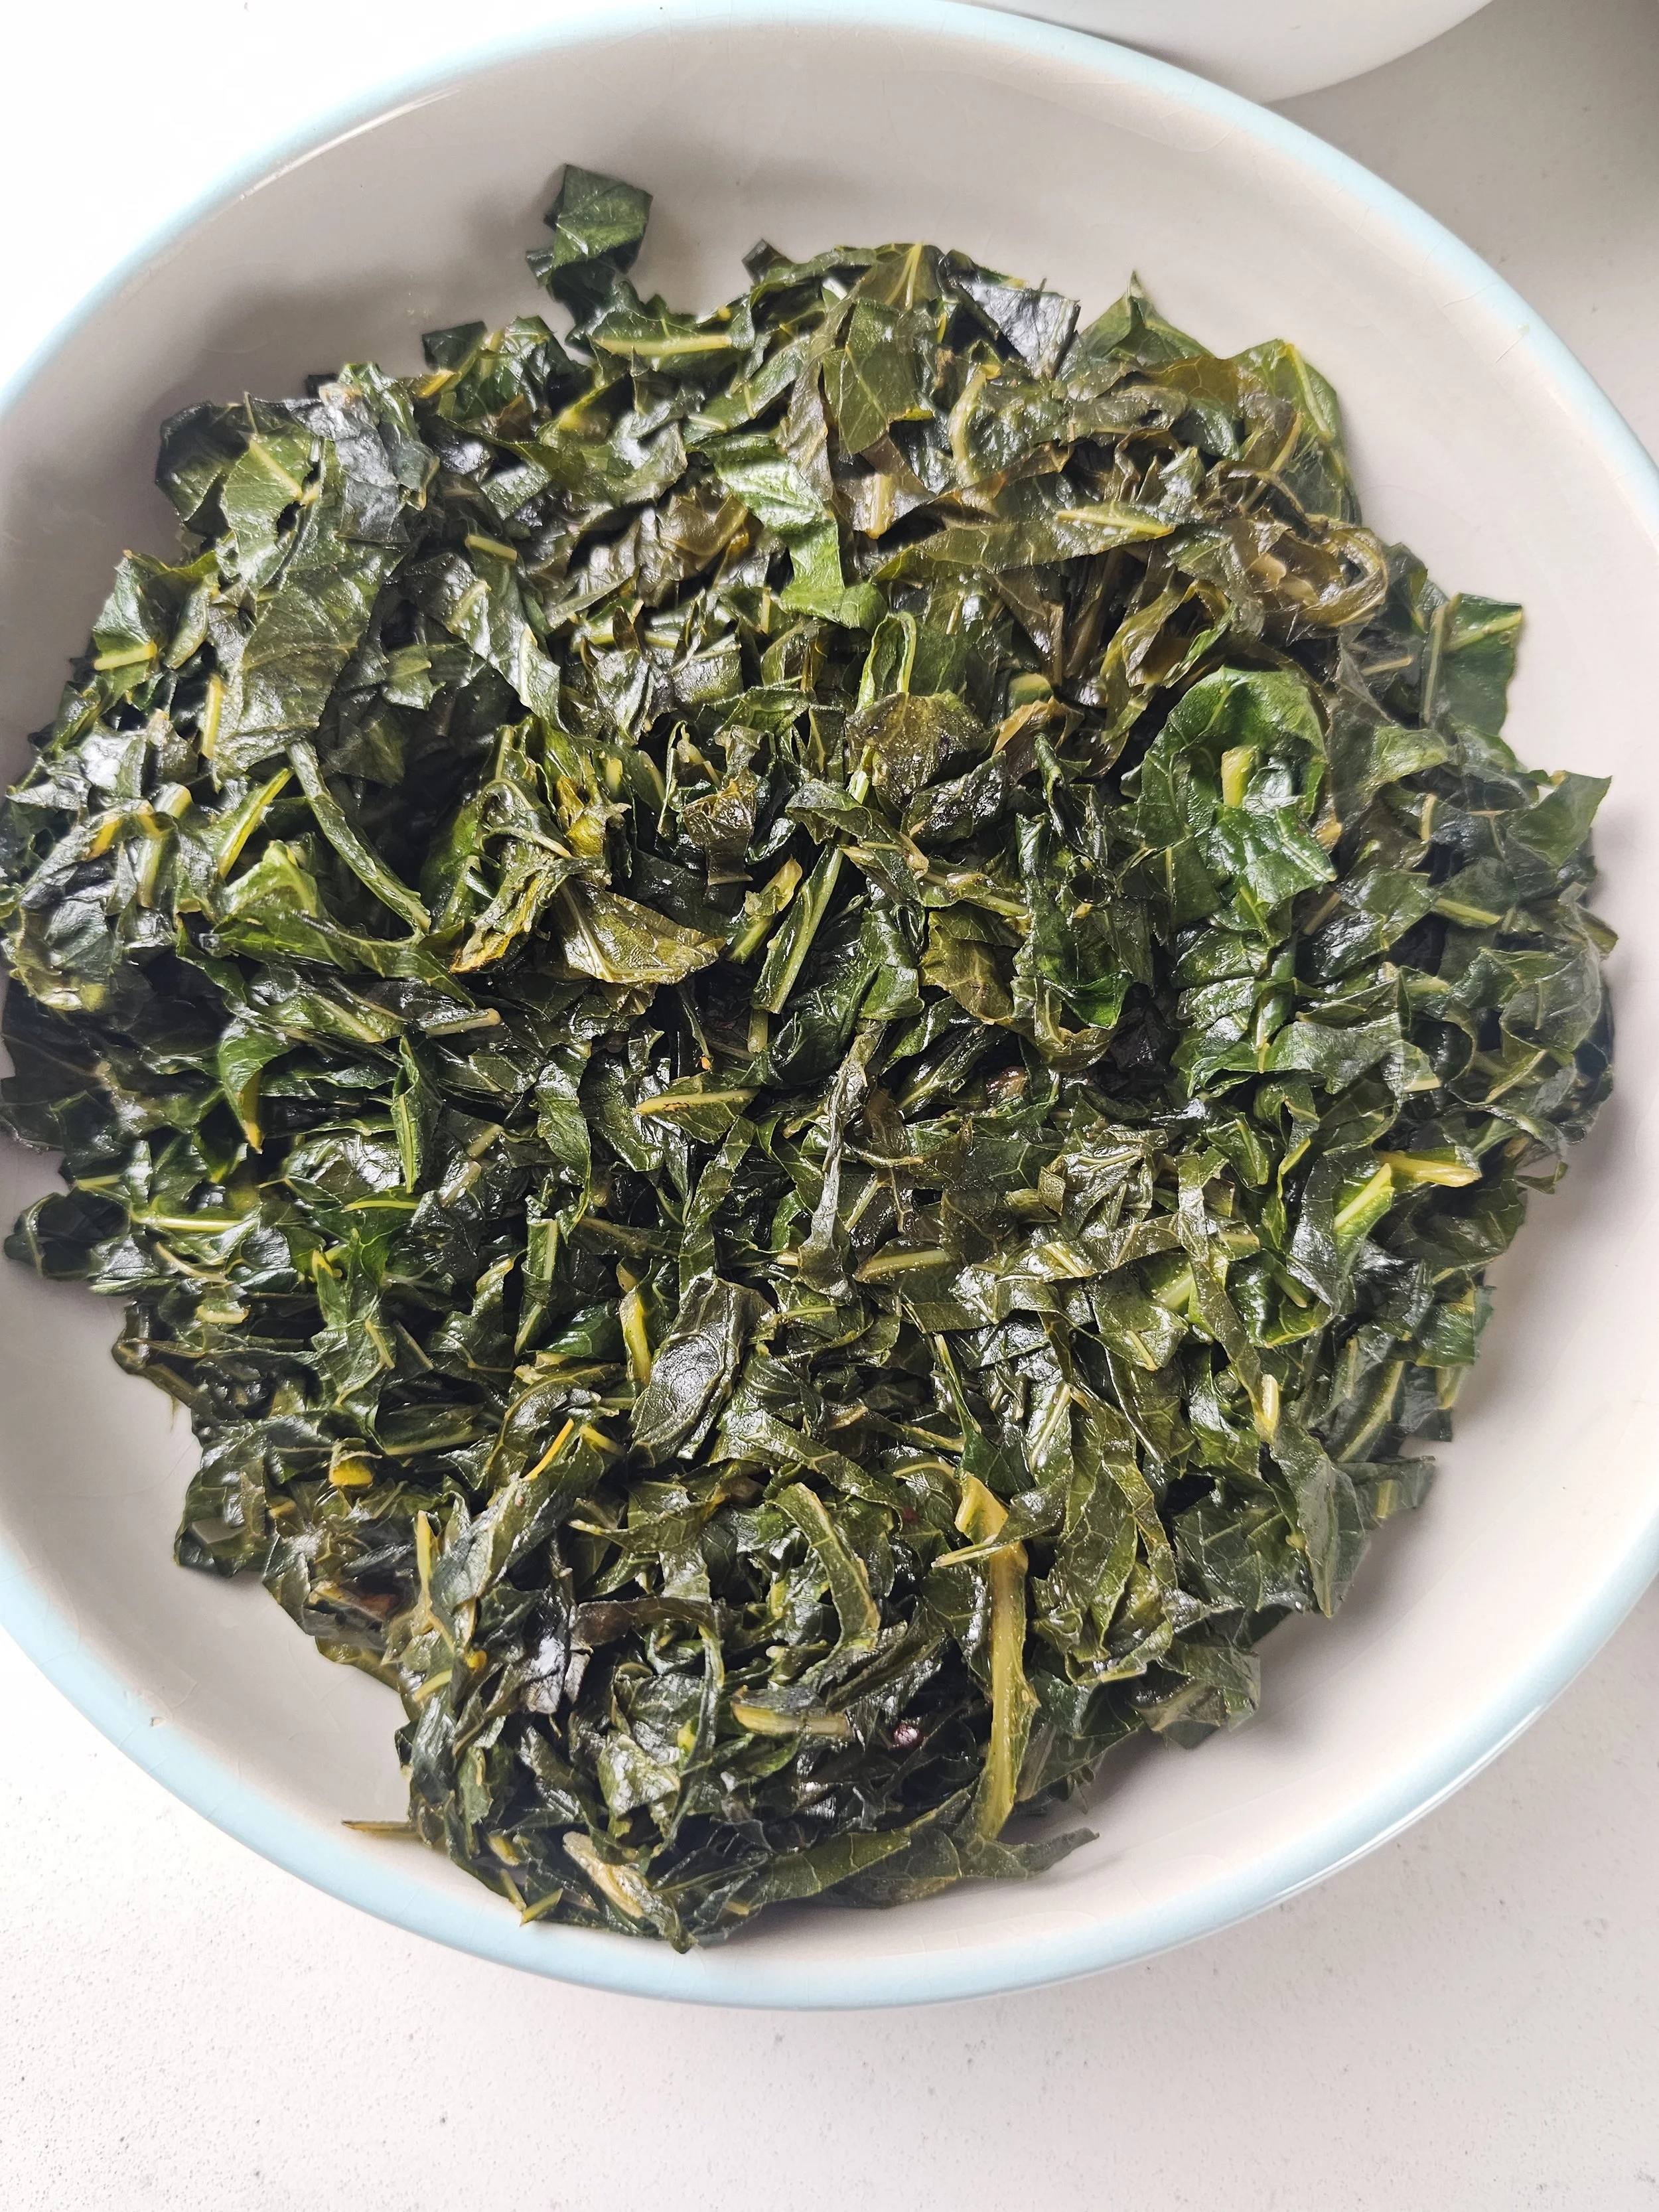
The plate is completed with classic sides: pap/sadza, chakalaka, and collard greens. These are not simply additions to the meal; they create balance. Pap/sadza provides the foundation, chakalaka brings heat and spice, and the greens add freshness and contrast. Together, they complete the structure of a proper braai plate.
To close the series, I paired the meal with a cherry plum drink, another choice inspired by the community vote. Throughout this series, drinks have played a subtle but important role in reflecting how braai culture extends beyond food alone. The drink adds brightness and balance, complementing the plate rather than competing with it.
This final recipe is less about complexity and more about completeness: a full braai experience that brings together fire, food, sides, and shared culture on one plate.
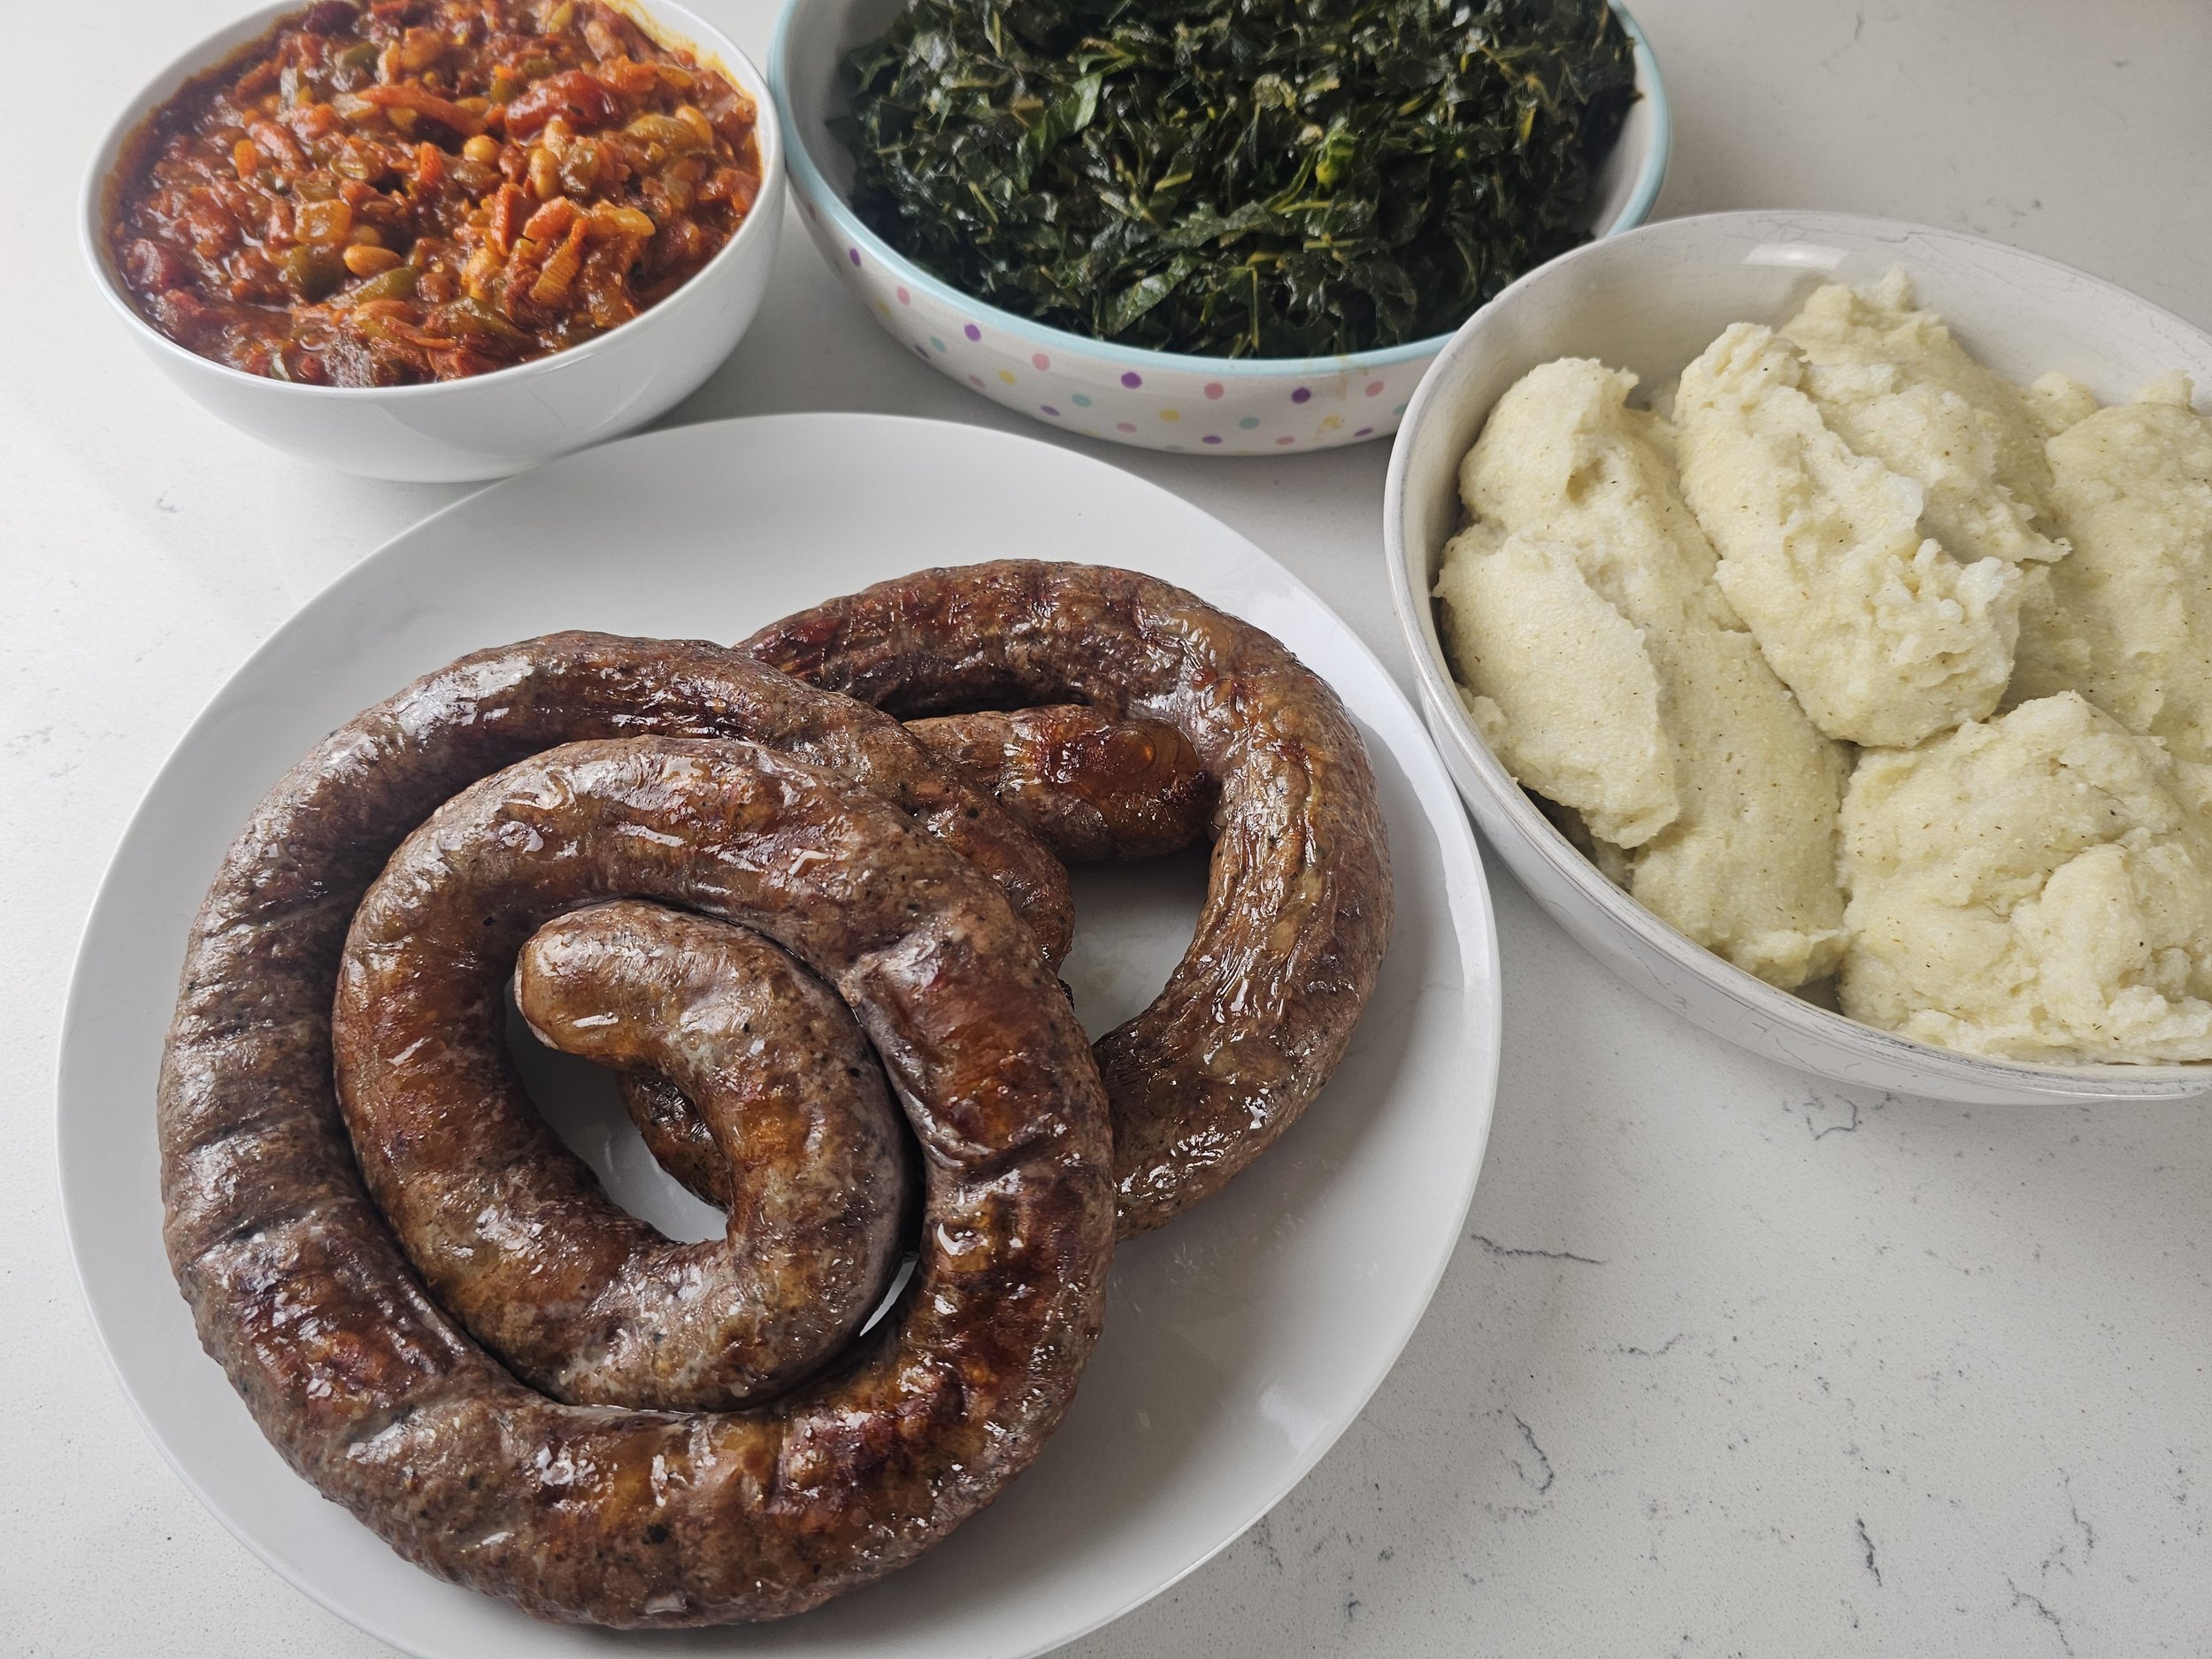

Braai-Style Boerewors Sausage with Pap, Chakalaka, and Collard Greens
A traditional boerewors-style sausage made from seasoned ground meat, stuffed and grilled for a classic Southern African braai plate. Served with soft pap, rich chakalaka (vegetable relish), and collard greens, and paired with a refreshing cherry plum drink.
Ingredients
- 2.4 lb ground beef (not too lean)
- 1 lb ground pork
- 2 tsp salt
- 1 tsp whole black peppercorns
- 2 tbsp whole coriander seeds
- 1/2 tsp whole allspice berries
- 1 tsp smoked paprika
- 1 tsp garlic powder
- 1/8 tsp ground cloves
- 1/8 tsp ground nutmeg
- 1 tbsp red wine vinegar
- 1 packet sausage casings (standard pack; amount used will vary depending on stuffing size for 3.4 lb meat)
- 2 cups maize meal
- 3 cups hot water (add gradually)
- 1 to 1½ cups cold water
- 1 tsp salt
- 1 tbsp butter
- 1 onion, chopped
- 2–3 carrots, grated
- 1 chilli pepper, minced (optional)
- 2–3 garlic cloves, minced
- 1 inch ginger, grated (optional)
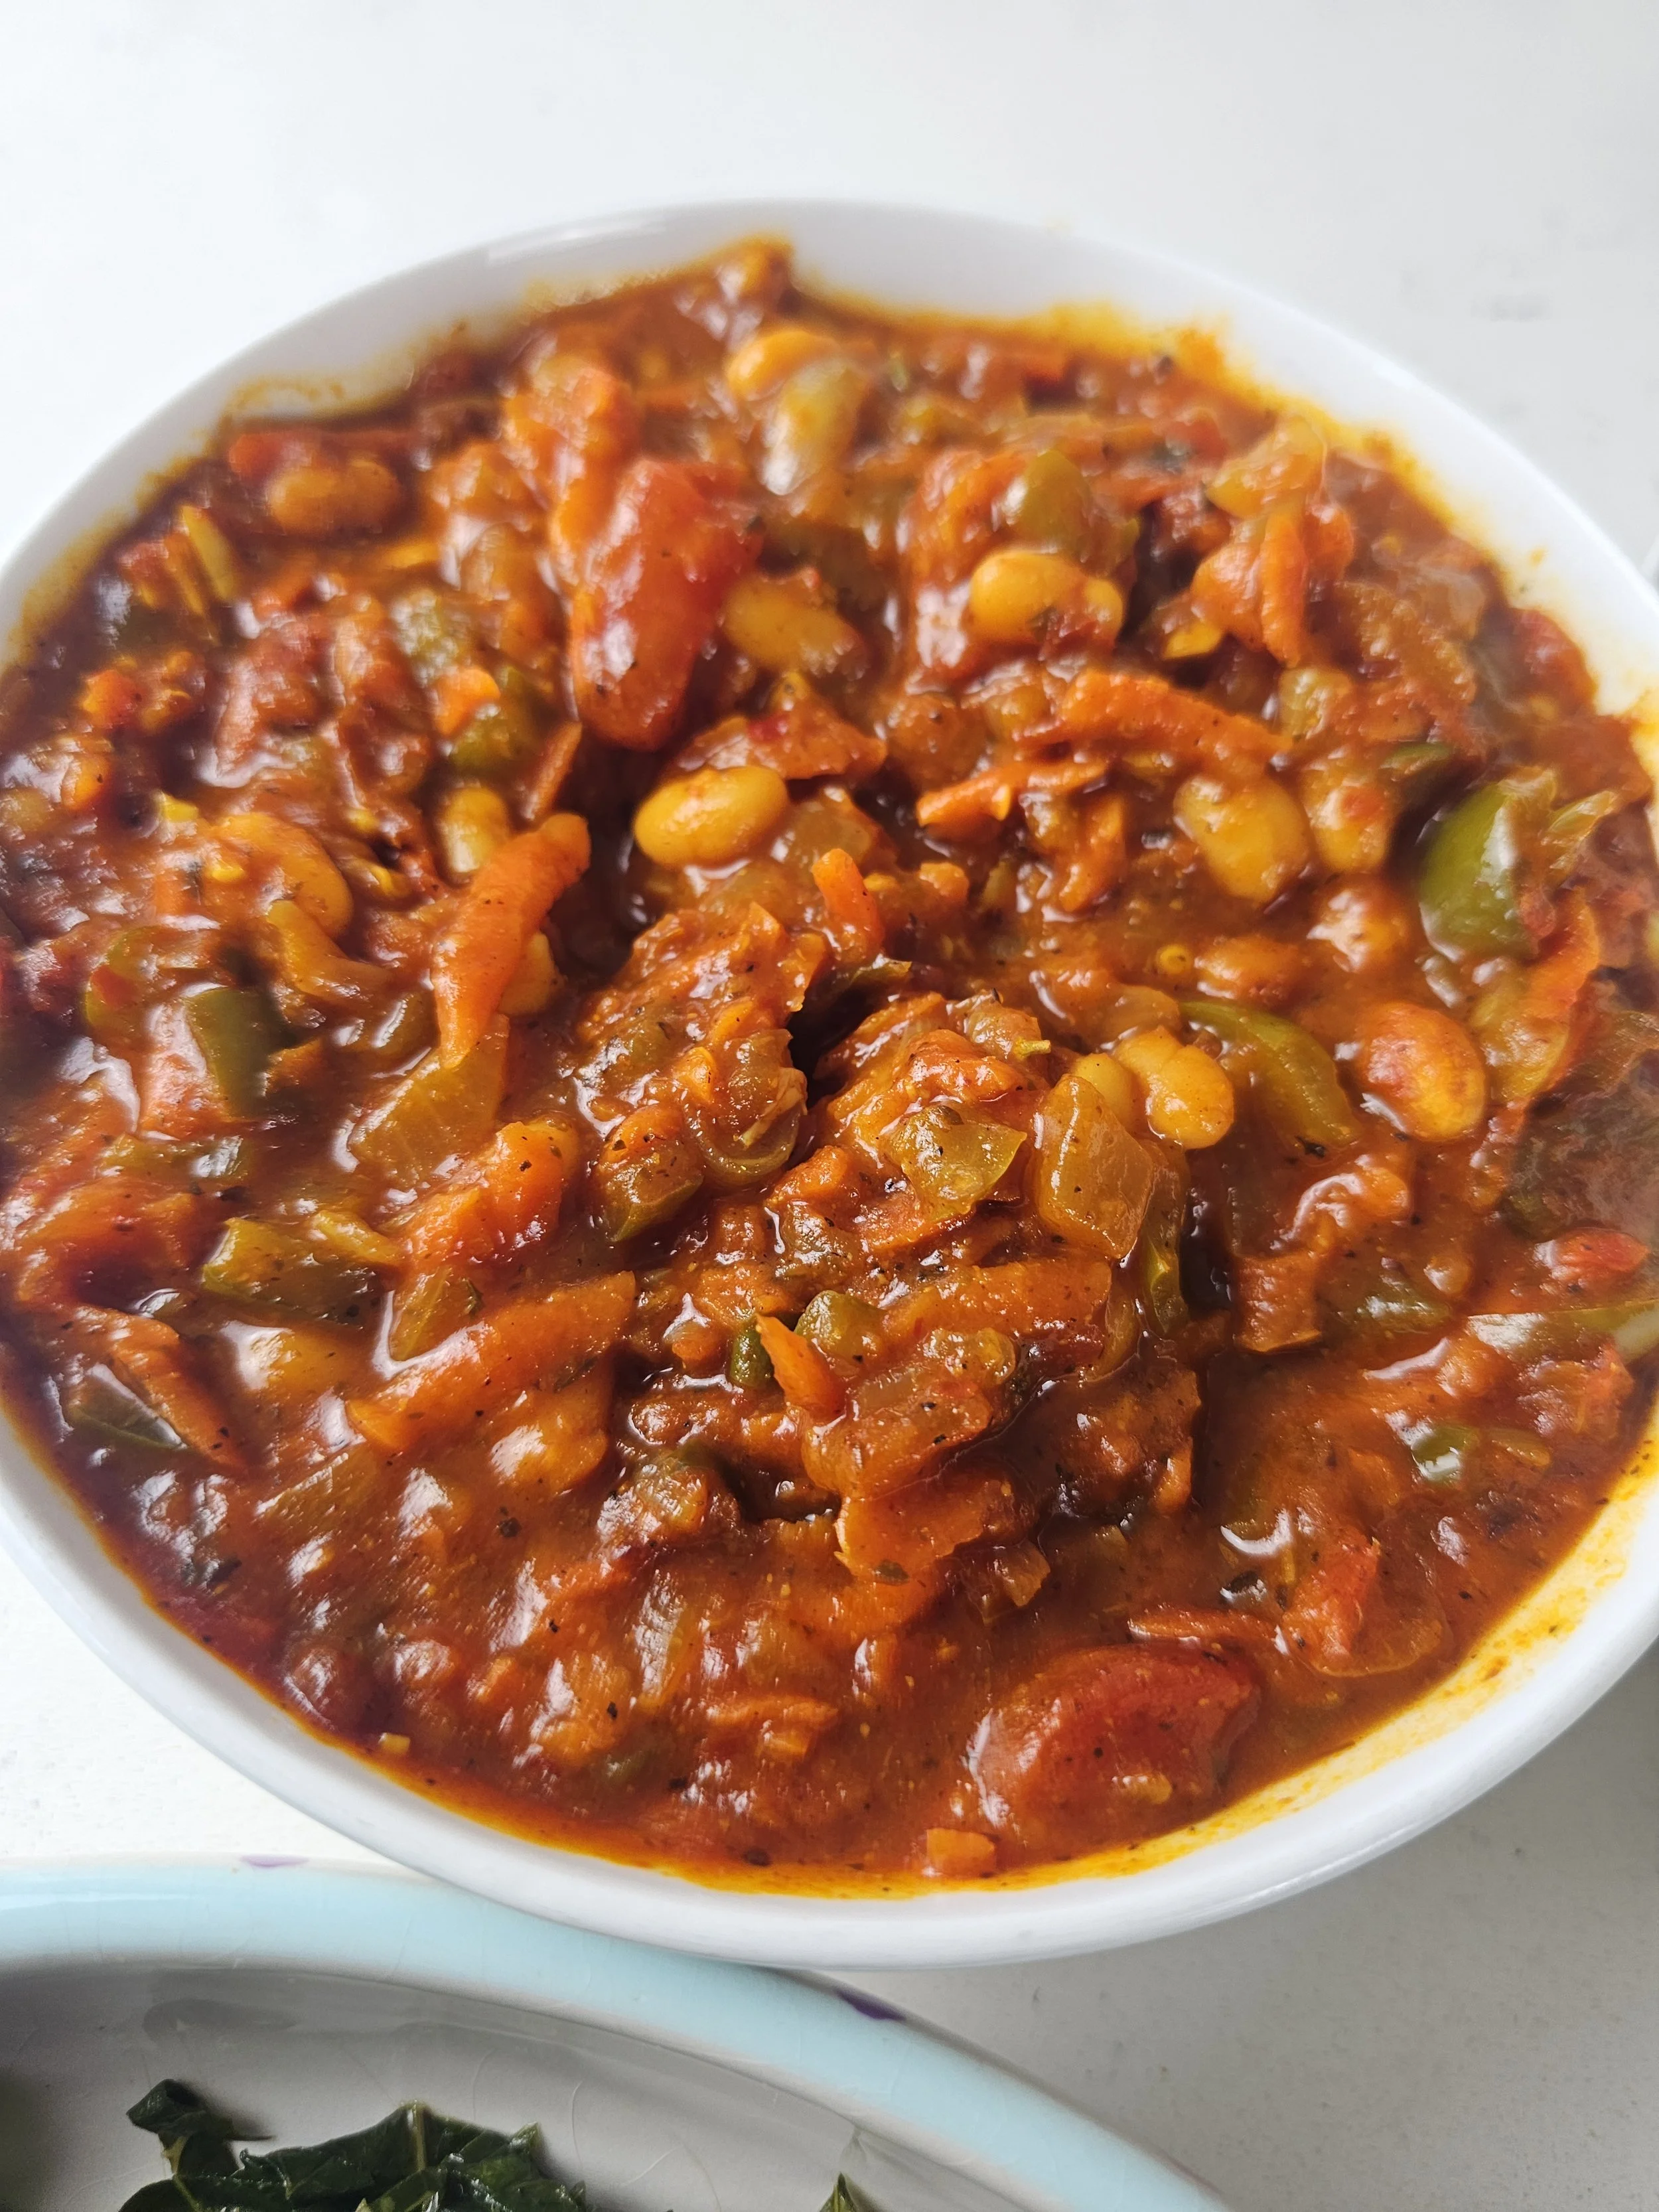
- 1/2 cup roasted tomatoes, diced
- 1/2 green bell pepper, chopped
- 1/2 cup baked beans
- 1 tbsp curry powder
- 1 tsp coriander spice
- 1 tsp smoked paprika
- 1 tbsp tomato paste
- 2 tbsp cooking oil
- 1 cup water
- 2 tbsp Worcestershire sauce
- Salt and pepper to taste
- 4–5 cups collard greens
- 2 tbsp oil or butter
- 1 tbsp garlic powder
- Salt to taste
- Splash of water or stock
- Splash of vinegar
Instructions
- Toast coriander seeds, peppercorns, and allspice berries until fragrant, then crush.
- Mix spices with ground beef, pork, salt, paprika, garlic powder, cloves, nutmeg, and vinegar until just combined.
- Let the mixture rest for 20–30 minutes before stuffing.
- Stuff into casings, then loosely cover and refrigerate for 1–12 hours (overnight recommended).
- Before cooking, remove from fridge for 10–15 minutes.
- Grill over medium heat or bake at 325°F (160°C) for about 30 minutes, turning halfway, until browned and cooked through. Do not pierce sausages while cooking.
- Mix maize meal with cold water to form a smooth paste.
- Gradually add hot water while stirring to avoid lumps.
- Cook on low heat for about 15 minutes, stirring occasionally.
- Add more maize meal if needed to adjust thickness.
- Beat with a wooden spoon until smooth, then cover and let rest.
- Heat oil in a pan.
- Sauté onion, carrot, green pepper, chilli, garlic, and ginger until soft.
- Add curry powder, coriander, and smoked paprika and cook briefly.
- Add roasted tomatoes, tomato paste, baked beans, and water.
- Simmer 10–15 minutes until thick.
- Stir in Worcestershire sauce at the end and season.
- Sauté greens in oil or butter until wilted.
- Add a splash of water or stock, cover, and simmer until tender.
- Finish with salt and vinegar
Notes
- Always wash sausage casings properly according to packet instructions before use.
- Resting the sausage mixture before stuffing improves texture and handling.
- Do not cook sausages on high heat; low to medium heat prevents splitting.
- Pap texture can be adjusted by adding more maize meal or water depending on preference.
- Stuffing sausages takes practice; small tears or uneven lengths are normal for first attempts.
Nutrition Facts
Calories
650Fat (grams)
40 gCarbs (grams)
55 gProtein (grams)
30 gI am not a certified nutritionist and any nutritional information on dontmissmyplate.com should only be used as a general guideline.

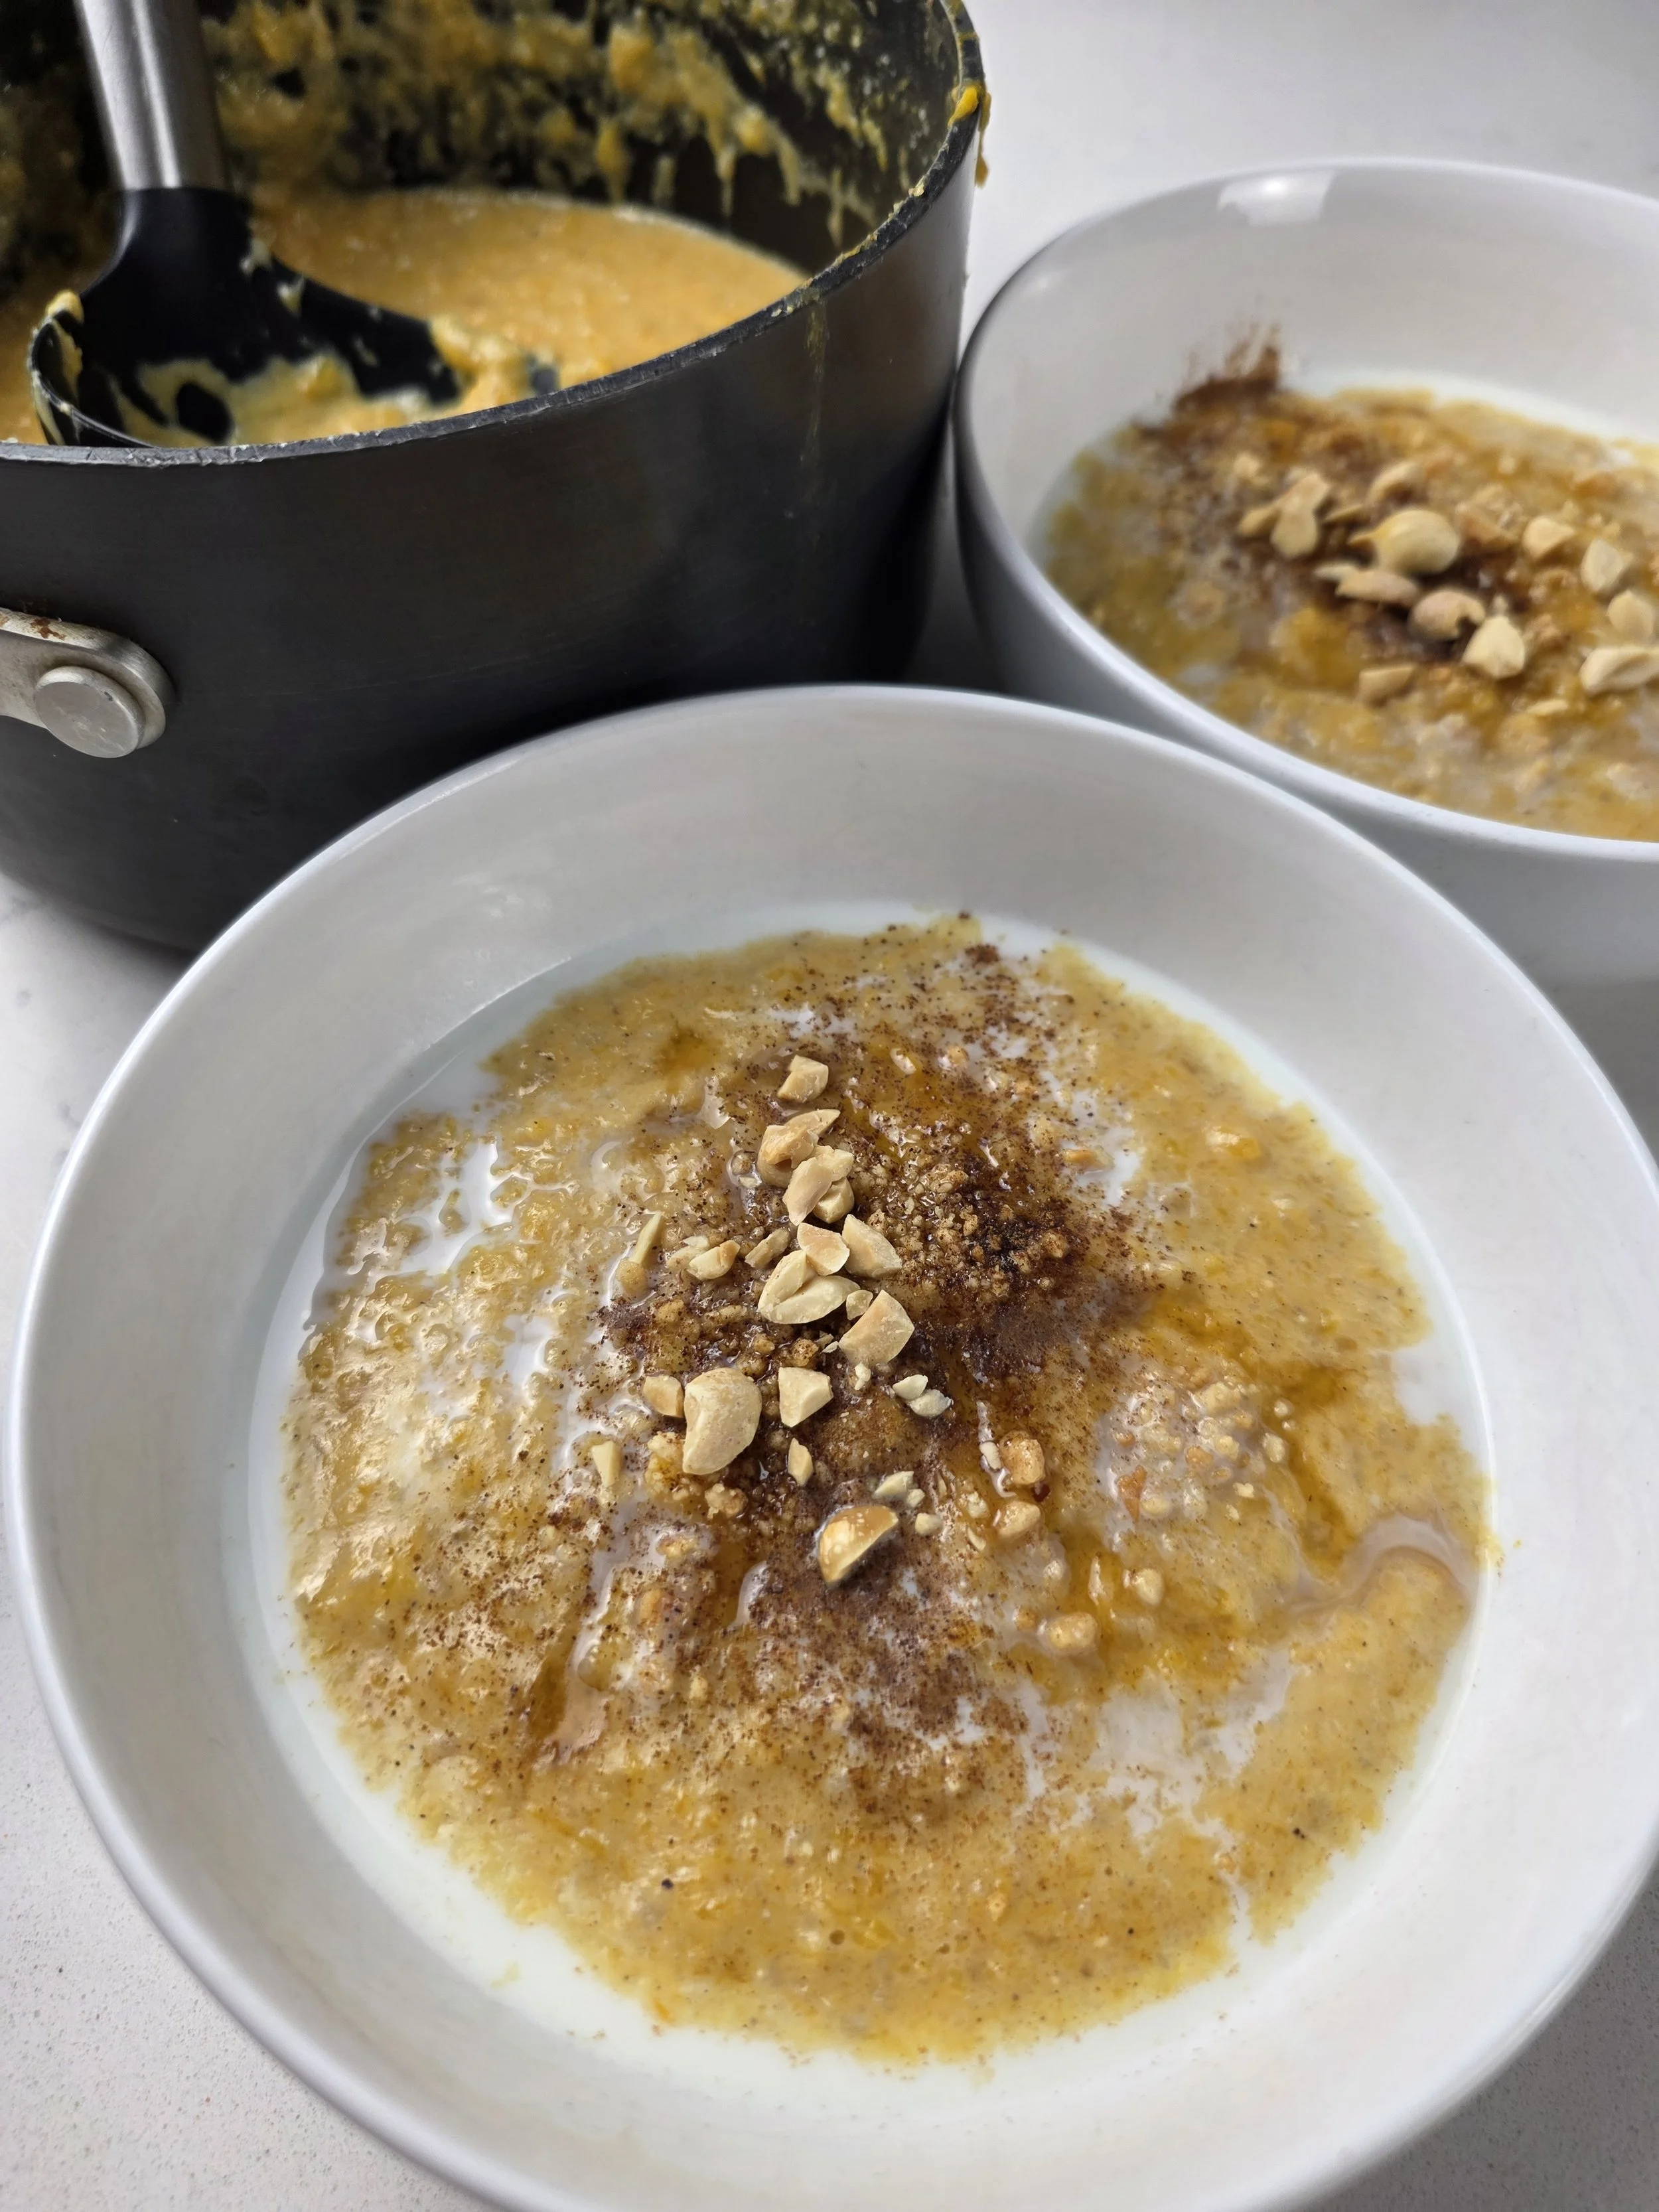
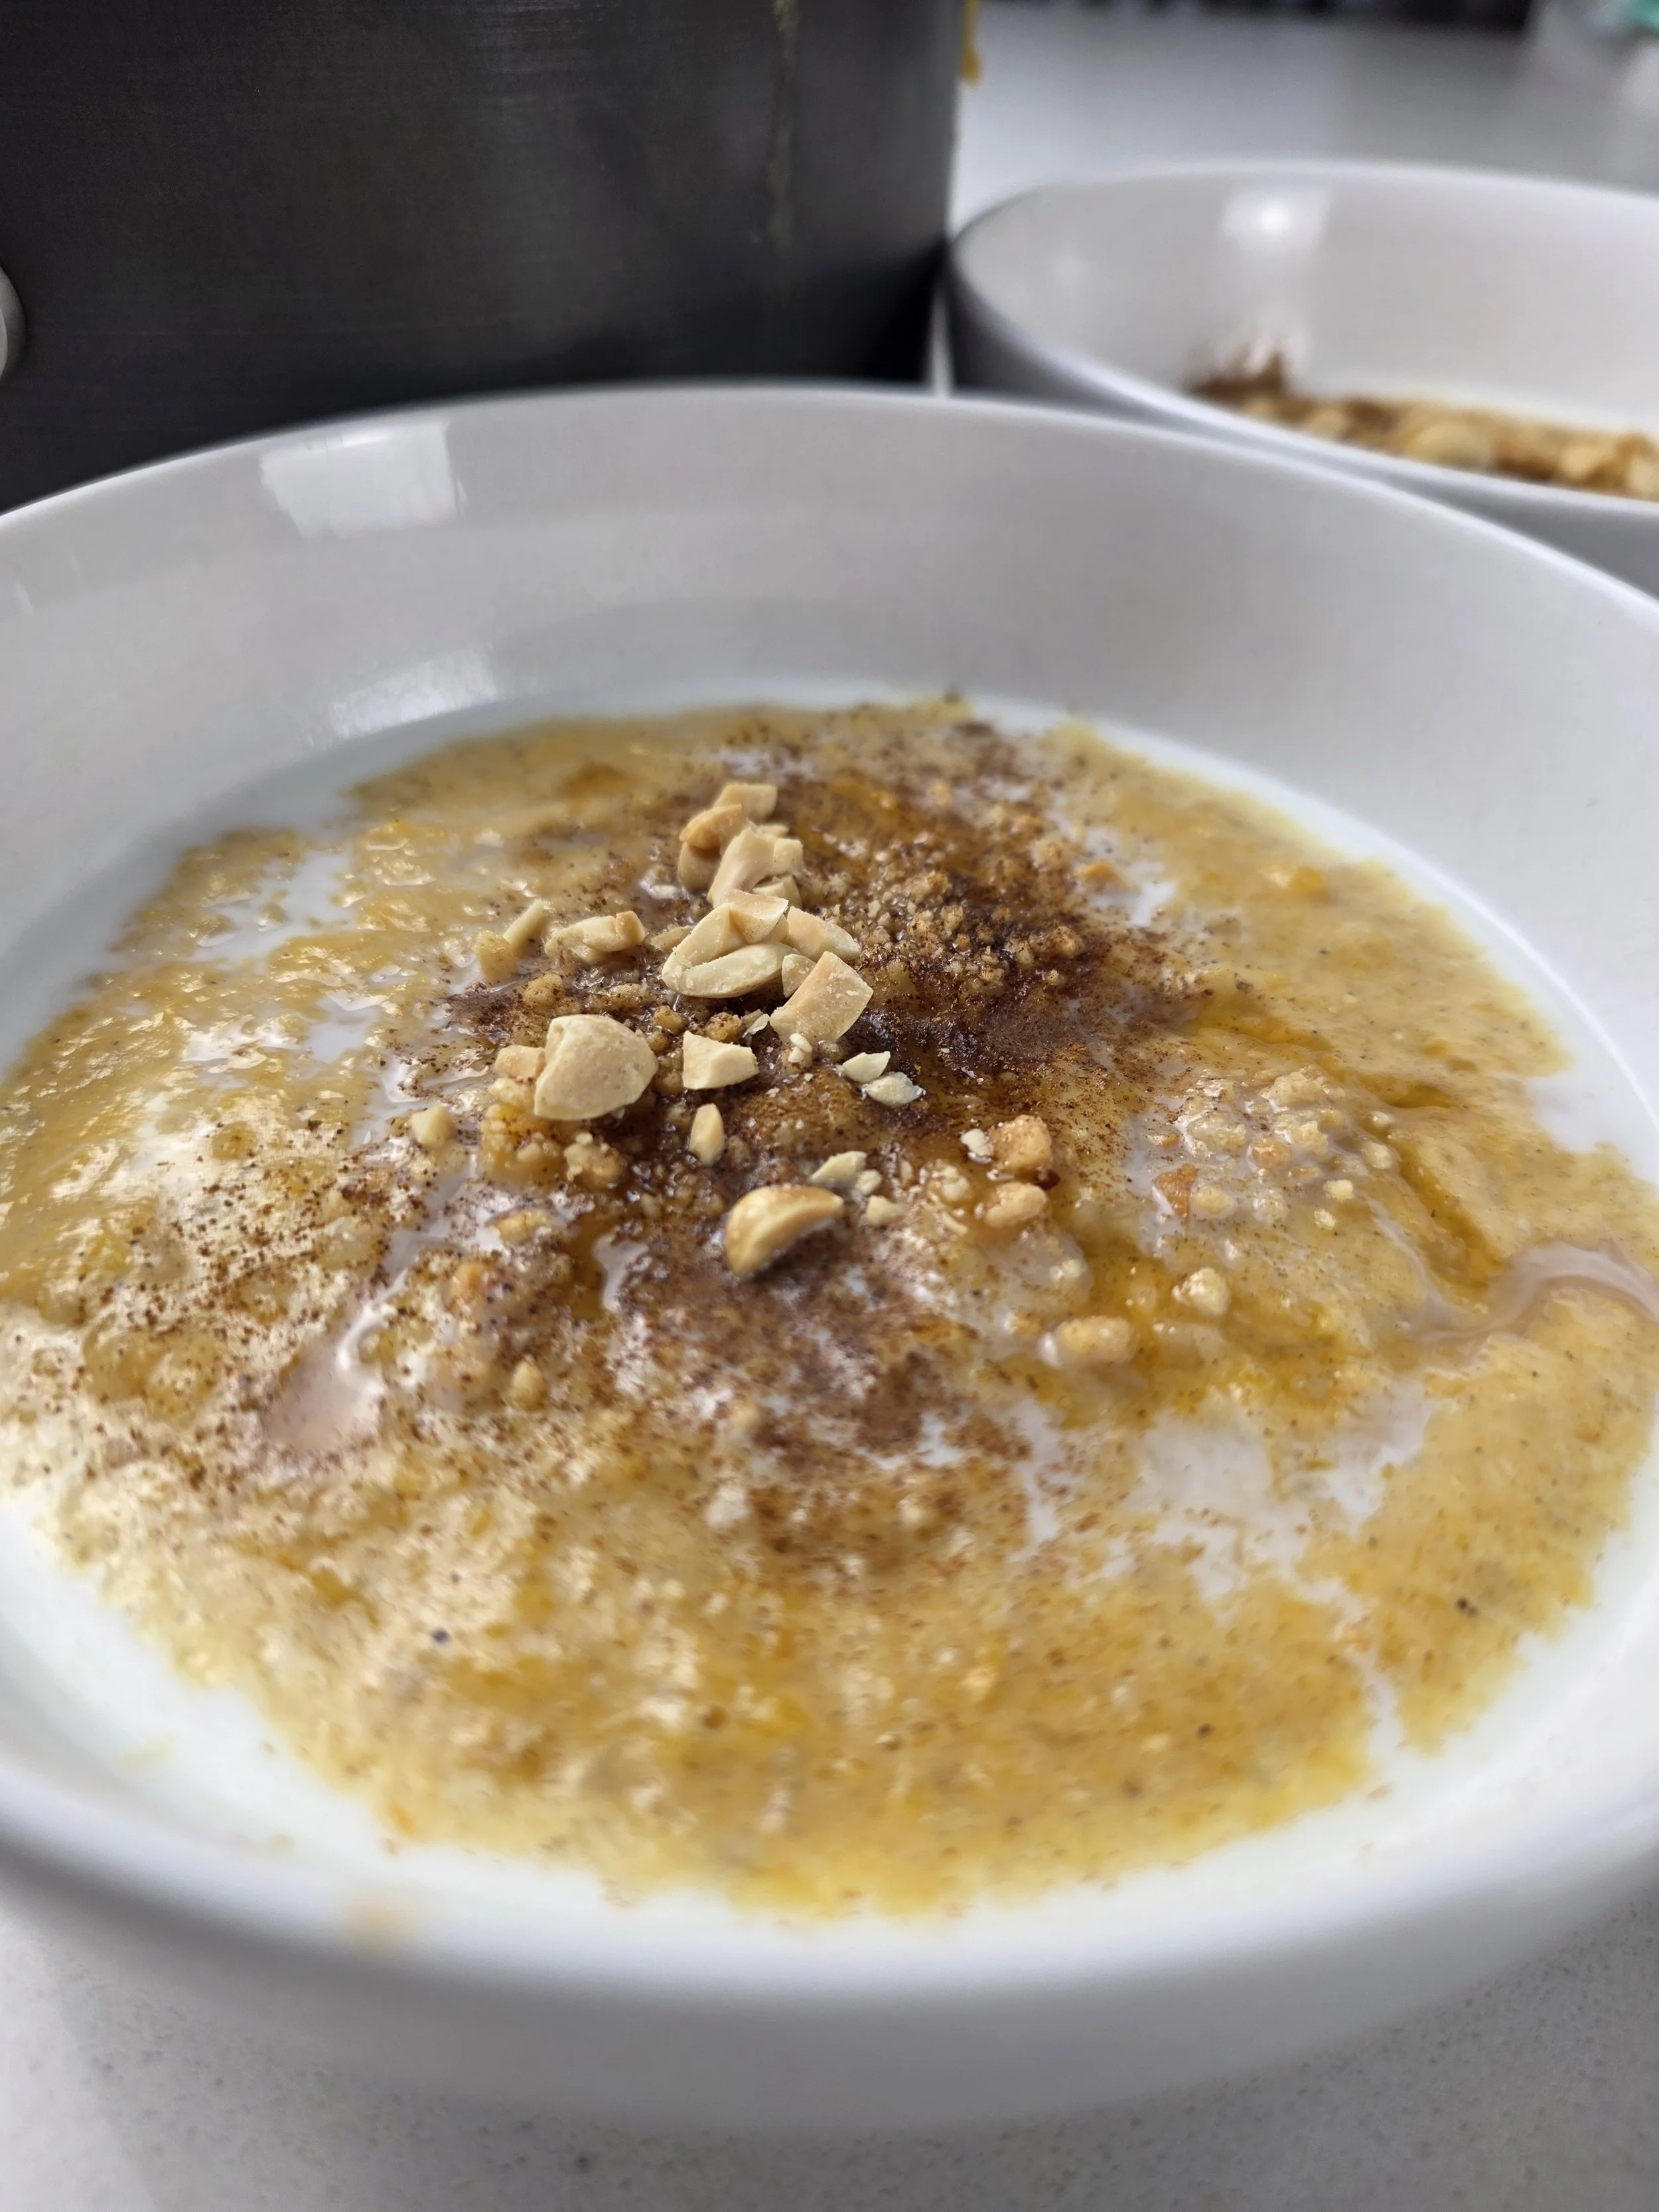
Pumpkin Peanut Wheat Porridge (Nhopi)
Inspired by Zimbabwean Nhopi and Kenyan Uji wa Ngano
There is something deeply comforting about warm porridge cultures across Africa. Whether it is maize-based, millet-based, sorghum-based, or wheat-based, many of us grew up with some version of a hot, nourishing bowl that anchored mornings, cold days, illness recovery, or simple moments of comfort.
During my recent trip to Kenya, I tried uji wa ngano, a creamy wheat porridge often served with plenty of hot milk. It immediately reminded me of the porridges I grew up eating in Zimbabwe. One of the most popular versions, alongside maize meal porridge served with butter or peanut butter, is nhopi — a pumpkin and peanut butter porridge, sometimes thickened with maize meal. Rich, lightly spiced, earthy, and deeply nostalgic, it remains a beloved comfort food across generations.
That experience made me curious about how these traditions could speak to each other.
This recipe became a fusion of both ideas. Instead of using pumpkin as the main base like traditional nhopi, I used creamy wheat as the foundation and allowed roasted butternut and peanut butter to layer warmth, sweetness, richness, and familiarity into the porridge.
The bulgur wheat adds texture and grain bite similar to Kenyan wheat porridge, while the cream of wheat and powdered milk helps create a smoother, creamier consistency. Cardamom, brown sugar and cinnamon bring warmth that ties the dish together beautifully.
The final result sits somewhere between the two traditions: creamy, comforting, lightly spiced, and deeply filling. It is the kind of breakfast that feels both grounding and exploratory at the same time.


Pumpkin Peanut Wheat Porridge
A creamy wheat porridge with roasted butternut, peanut butter, and warm spices inspired by Zimbabwean and Kenyan breakfast traditions (nhopi and uji wa Ngano).
Ingredients
- ½ cup bulgur wheat
- ⅓ cup cream of wheat
- 2½ cups water
- 3–5 cups milk (adjust as needed)
- 2 to 2½ cups roasted butternut, mashed
- 2 tbsp peanut butter
- 2 tbsp brown sugar or honey (adjust to taste)
- ½ tsp cardamom
- ½ tsp cinnamon
- ½ tsp salt
Instructions
- Heat the water in a medium or large pot over medium-high heat. Add the bulgur wheat, reduce the heat to medium-low, and simmer for 10–12 minutes, or until softened.
- Stir in the Cream of Wheat and whisk continuously for about 3 minutes. If the mixture thickens too quickly, gradually add water, 1/4 cup at a time, until smooth.
- Add the cinnamon, cardamom, salt, and roasted butternut squash. Whisk well, adding a little milk as needed to create a smoother texture.
- Next, stir in the powdered milk for extra richness and creaminess. Add the brown sugar and peanut butter, then continue adding milk until the porridge reaches your desired consistency, simmering gently over low heat. Adjust seasoning to taste if needed.
- Serve warm with optional toppings such as crushed peanuts, honey, and a sprinkle of cinnamon.
Notes
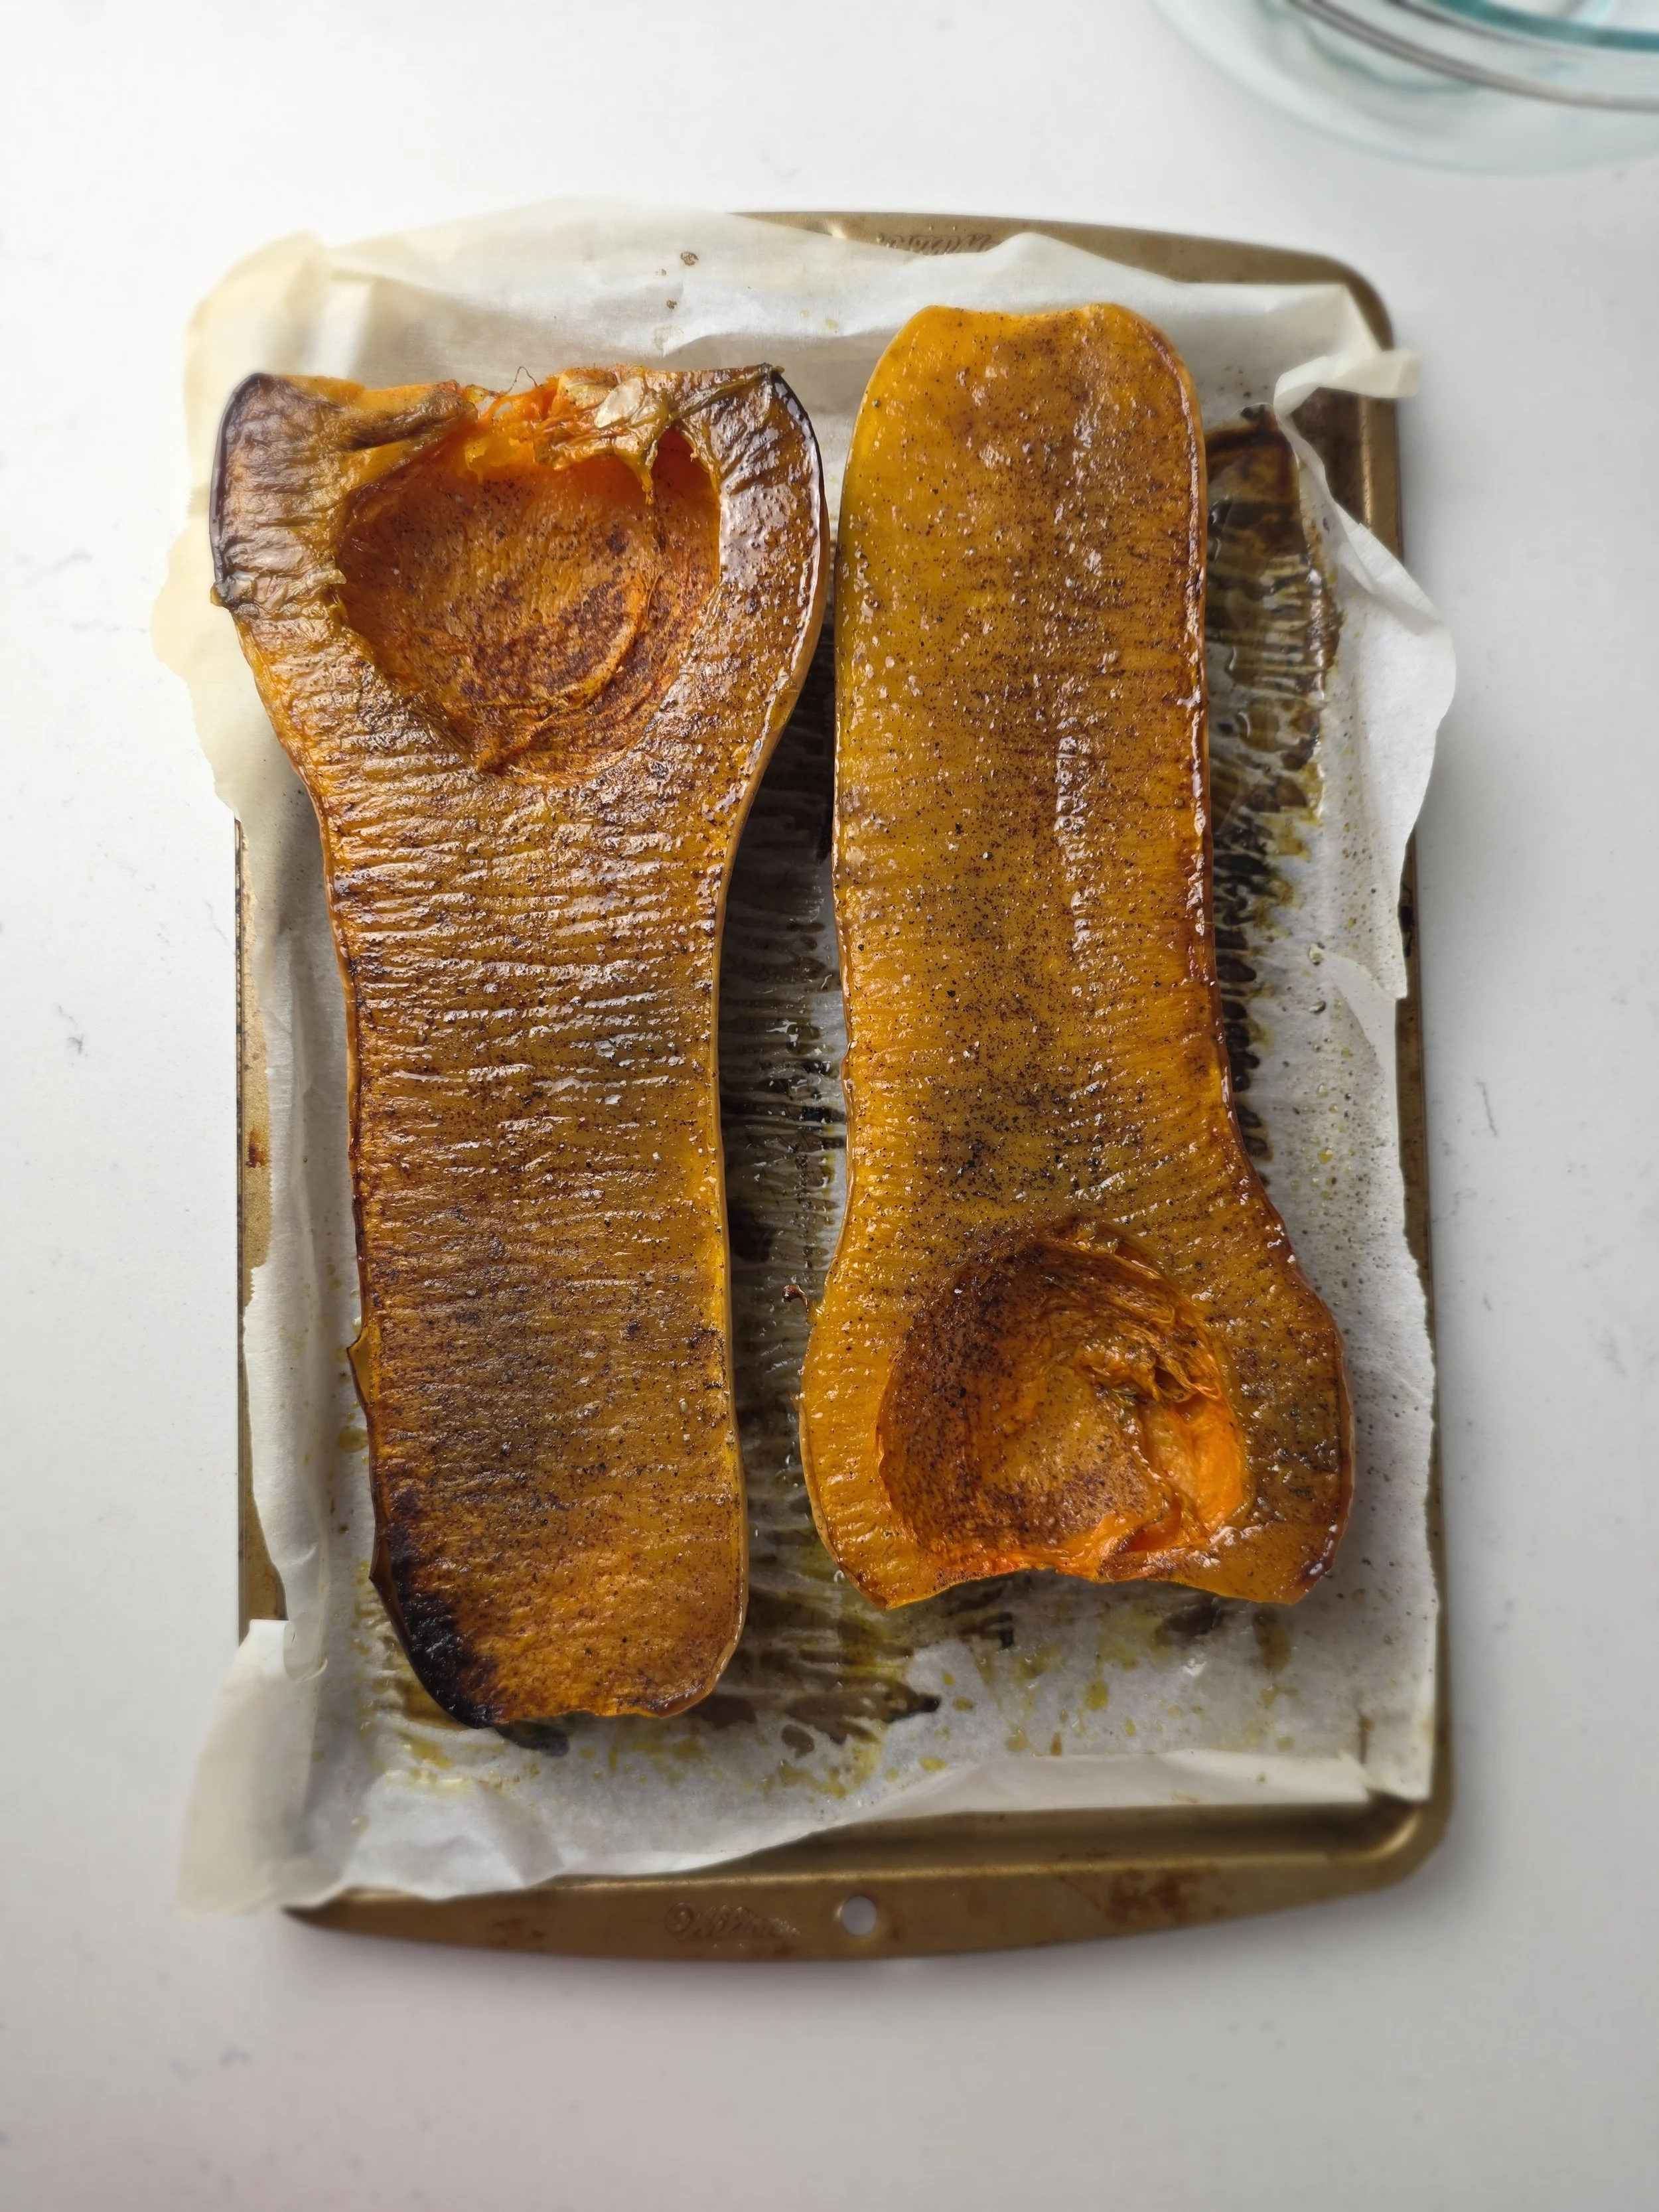
For the butternut squash, you can roast it beforehand for deeper flavor. Brush the squash with olive oil, then season with cinnamon, salt, and optionally a little brown sugar.
Place it cut-side down on a parchment-lined baking sheet and roast in a 400°F / 200°C oven for about 40 minutes, or until the flesh is soft enough to pierce easily with a fork.
Once all the ingredients are combined, adjust the consistency toward the end of the cooking process using milk as needed.
For a thicker, more nhopi-style texture:
- Use more butternut squash
- Use less milk
- Simmer longer for a denser consistency
For a looser Kenyan-style wheat porridge:
- Add more milk
- Use slightly less butternut squash
- Keep the texture smooth and pourable
Nutrition Facts
Calories
320Fat (grams)
13 gCarbs (grams)
42 gFiber (grams)
6 gSugar (grams)
9 gProtein (grams)
9 gI am not a certified nutritionist and any nutritional information on dontmissmyplate.com should only be used as a general guideline.
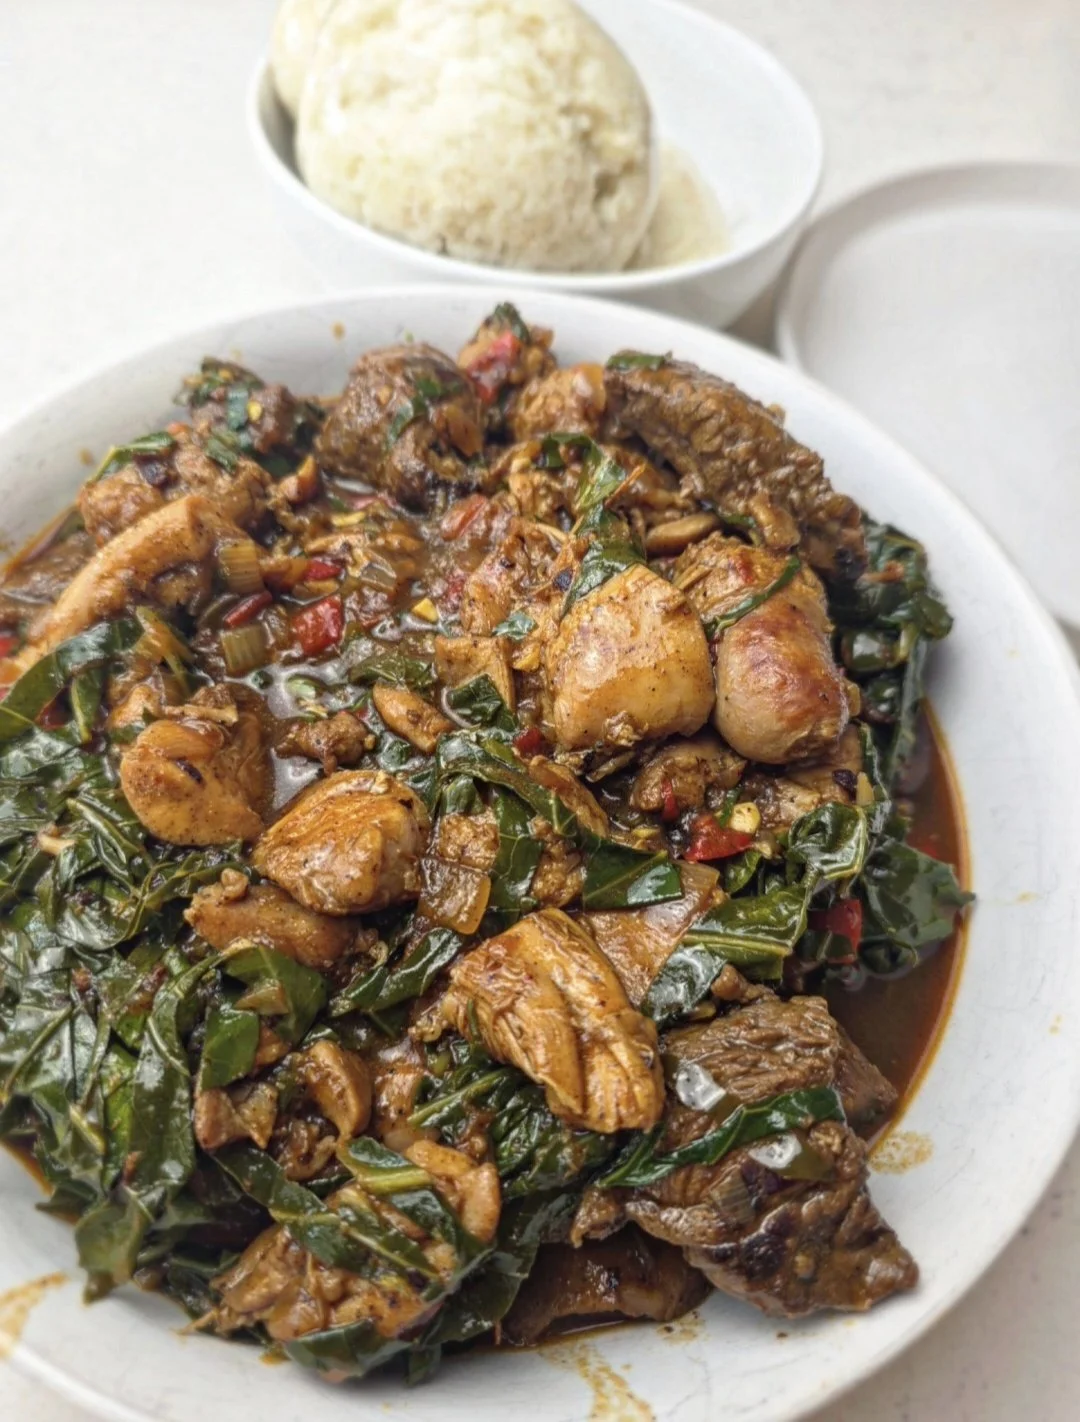
Zimbabwean Gango (Meat Medley and Greens)
Gango is a deeply comforting and richly layered Zimbabwean dish that brings together multiple meats, cooked in a savory onion and tomato base (also known as muto) with tender greens. Traditionally made with a combination of beef, chicken, and sausage, it’s the kind of meal that feels abundant, hearty, and deeply satisfying. It’s not an everyday dish for many households! Gango is often reserved for weekends, gatherings, or moments when you want to cook something special and filling. On the other hand, it is also a resourceful dish, a way to use different cuts of meat and turn them into something rich, comforting and full of flavour.
In Zimbabwe, meat has historically been a luxury for many families, particularly in the rural areas, which is why dishes like gango feel so intentional. Instead of relying on heavy seasoning, the flavor often comes from the quality of the meat itself, combined with simple aromatics like onion, garlic, and tomato, and sometimes peppers. When done right, the result is a dish that tastes full, balanced, and naturally rich without needing much intervention.
This version uses sirloin beef chunks, chicken thighs, and sausage, finished with collard greens for a slight bitterness that balances the richness. It’s best served with sadza (traditional cormeal side), rice, or any starch that can soak up the sauce. For those who enjoy heat, a chili sauce or a fresh chili relish works beautifully on the side.
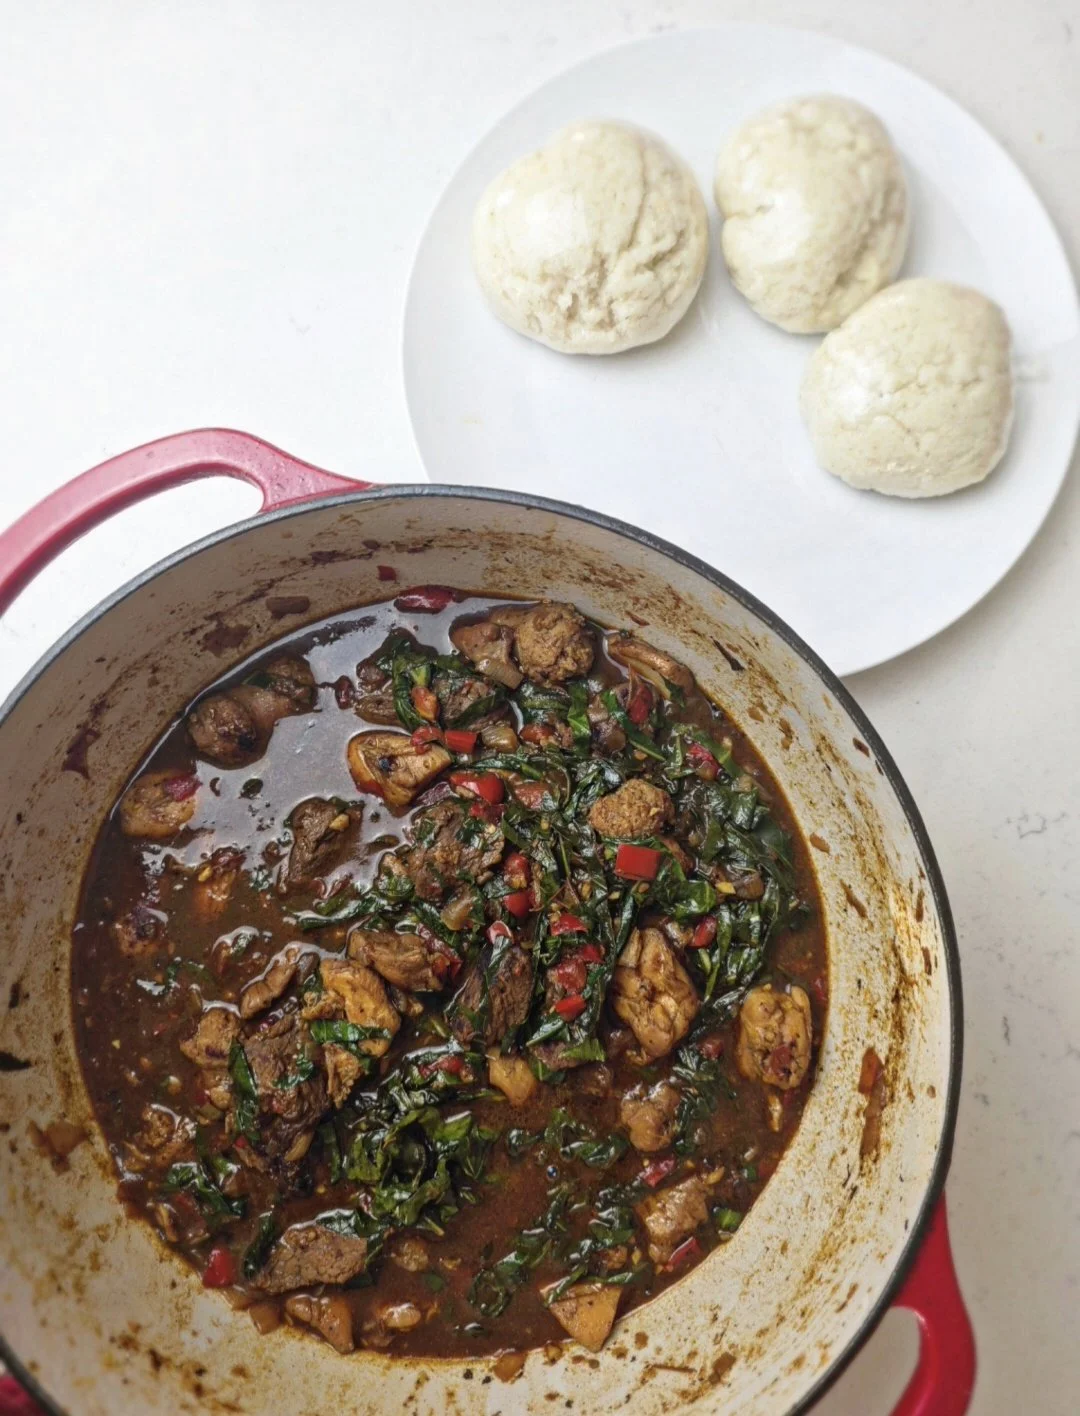
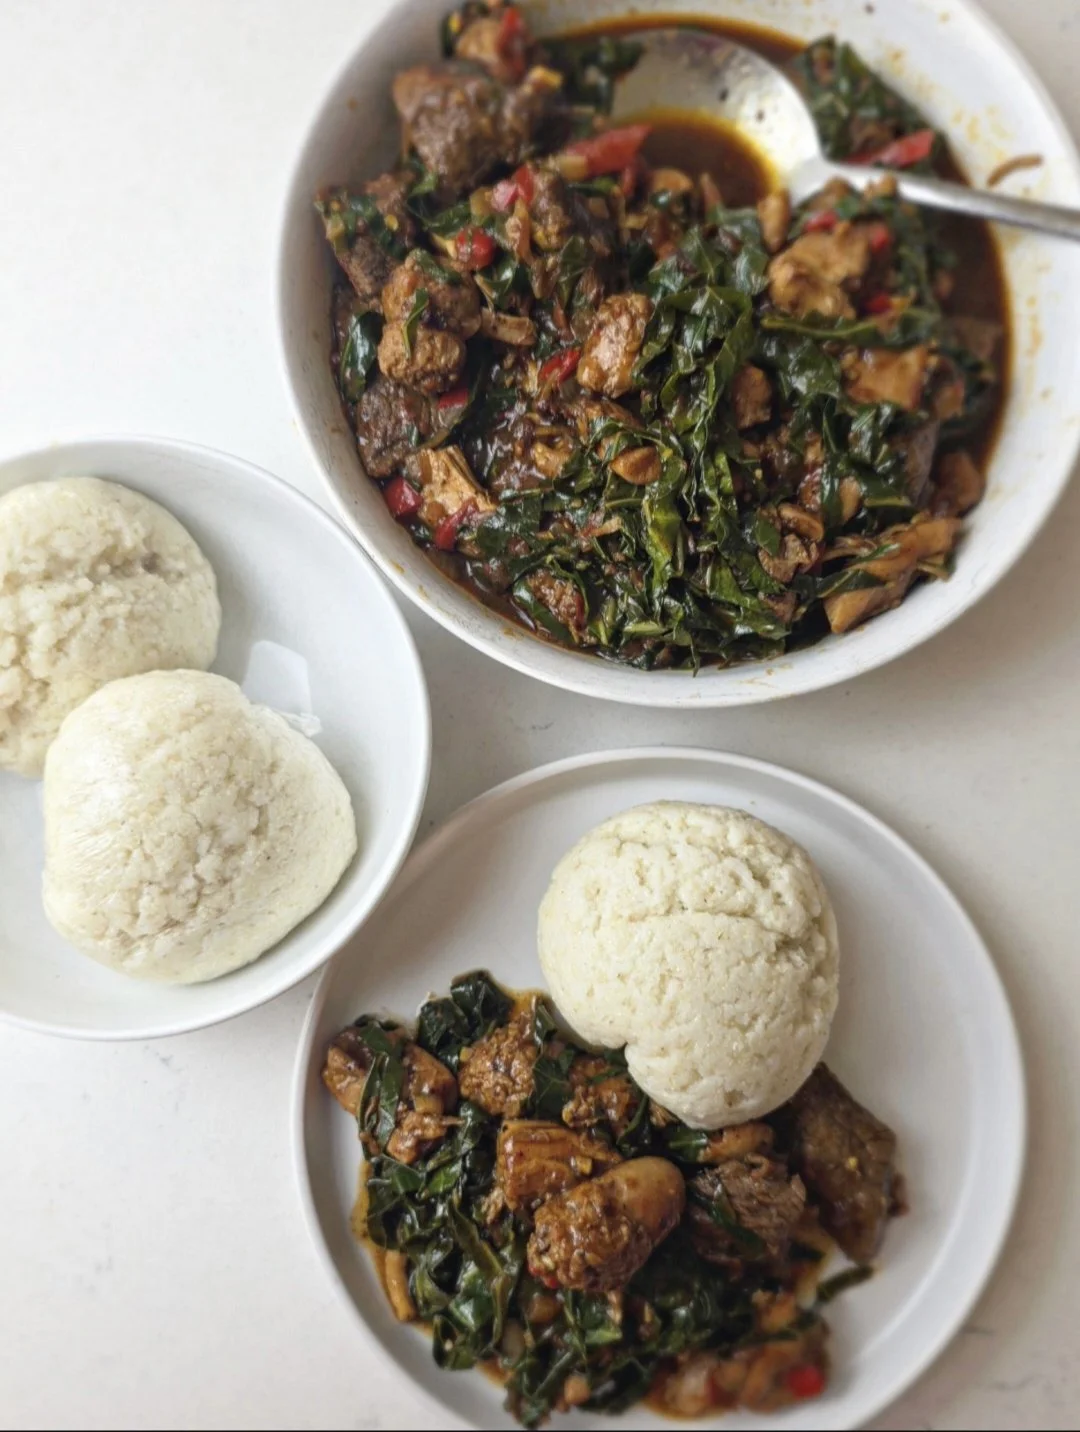
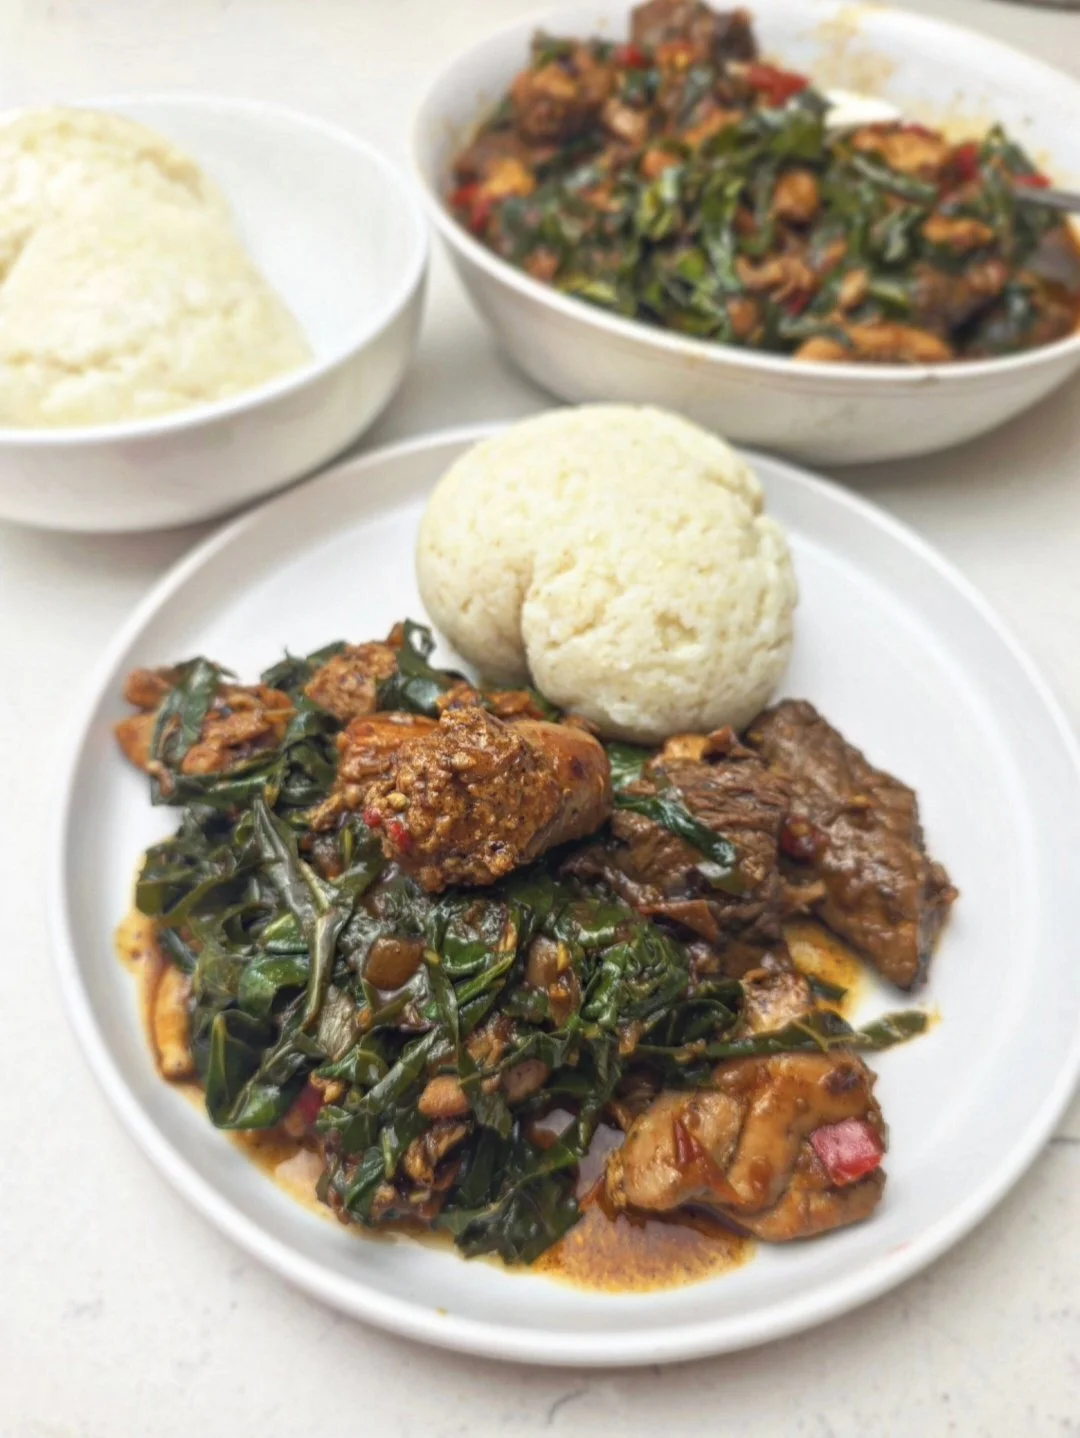

Zimbabwean Gango (Meat Medley with Greens)
A hearty Zimbabwean-style gango made with beef, chicken, sausage, and collard greens, simmered in a rich onion and tomato base. A comforting, special-occasion dish perfect with sadza or rice.
Ingredients
- 1–1.25 lbs chuck or sirloin beef (cut into chunks)
- 4 chicken thighs, skinless and boneless, chopped
- 2 sausages (boerwoers, bratwurst or similar), sliced
- 1 large onion, sliced
- 4 garlic cloves, minced
- 4 Roma tomatoes, chopped
- 2 tbsp tomato paste
- 1 red bell pepper, diced (optional)
- 1 chilli pepper, chopped (optional)
- 1 bunch collard greens, chopped
- 1 - 1 1/2 cups stock (or water + one 10g boullion cube)
- 1 beef stock cube (optional)
- 1 tsp curry powder
- 1 tsp paprika
- 1 tsp black pepper
- 2 tsp salt
- 1 tbsp Royco Usavi mix beef flavour (optional)
Instructions
- In a Dutch oven, sear the beef, chicken, and sausage in batches. Remove and set aside.
- In the same pot, cook onion and garlic until softened (3 min). Add the bell and chilli peppers, cook for 2-3 min.
- Add tomatoes and tomato paste. Cook until thick, glossy and slightly reduced (5 min).
- Add the stock cube, curry powder and spices. Cook 30–60 seconds and adjust as needed to taste.
- Return all meats to the pot. Add stock (do not fully submerge, you are not making a stew).
- Bring to a gentle simmer, cover slightly, and cook 30 minutes, removing the lid completely to reduce the liquid in the last 10 minutes.
- Stir in collard greens and cook for another 10–15 minutes until tender,
- Adjust seasoning again and reduce to desired consistency.
Notes
- Meat quality matters: If using supermarket beef, consider marinating lightly with salt, pepper, garlic and other spices beforehand.
- Stock matters: If flavor feels flat, use stronger stock or add a second cube sparingly.
- Don’t rush the reduction as flavor develops as liquid reduces.
- Best with sadza or rice.
Nutrition Facts
Calories
550Fat (grams)
35 gProtein (grams)
40 gI am not a certified nutritionist and any nutritional information on dontmissmyplate.com should only be used as a general guideline.