
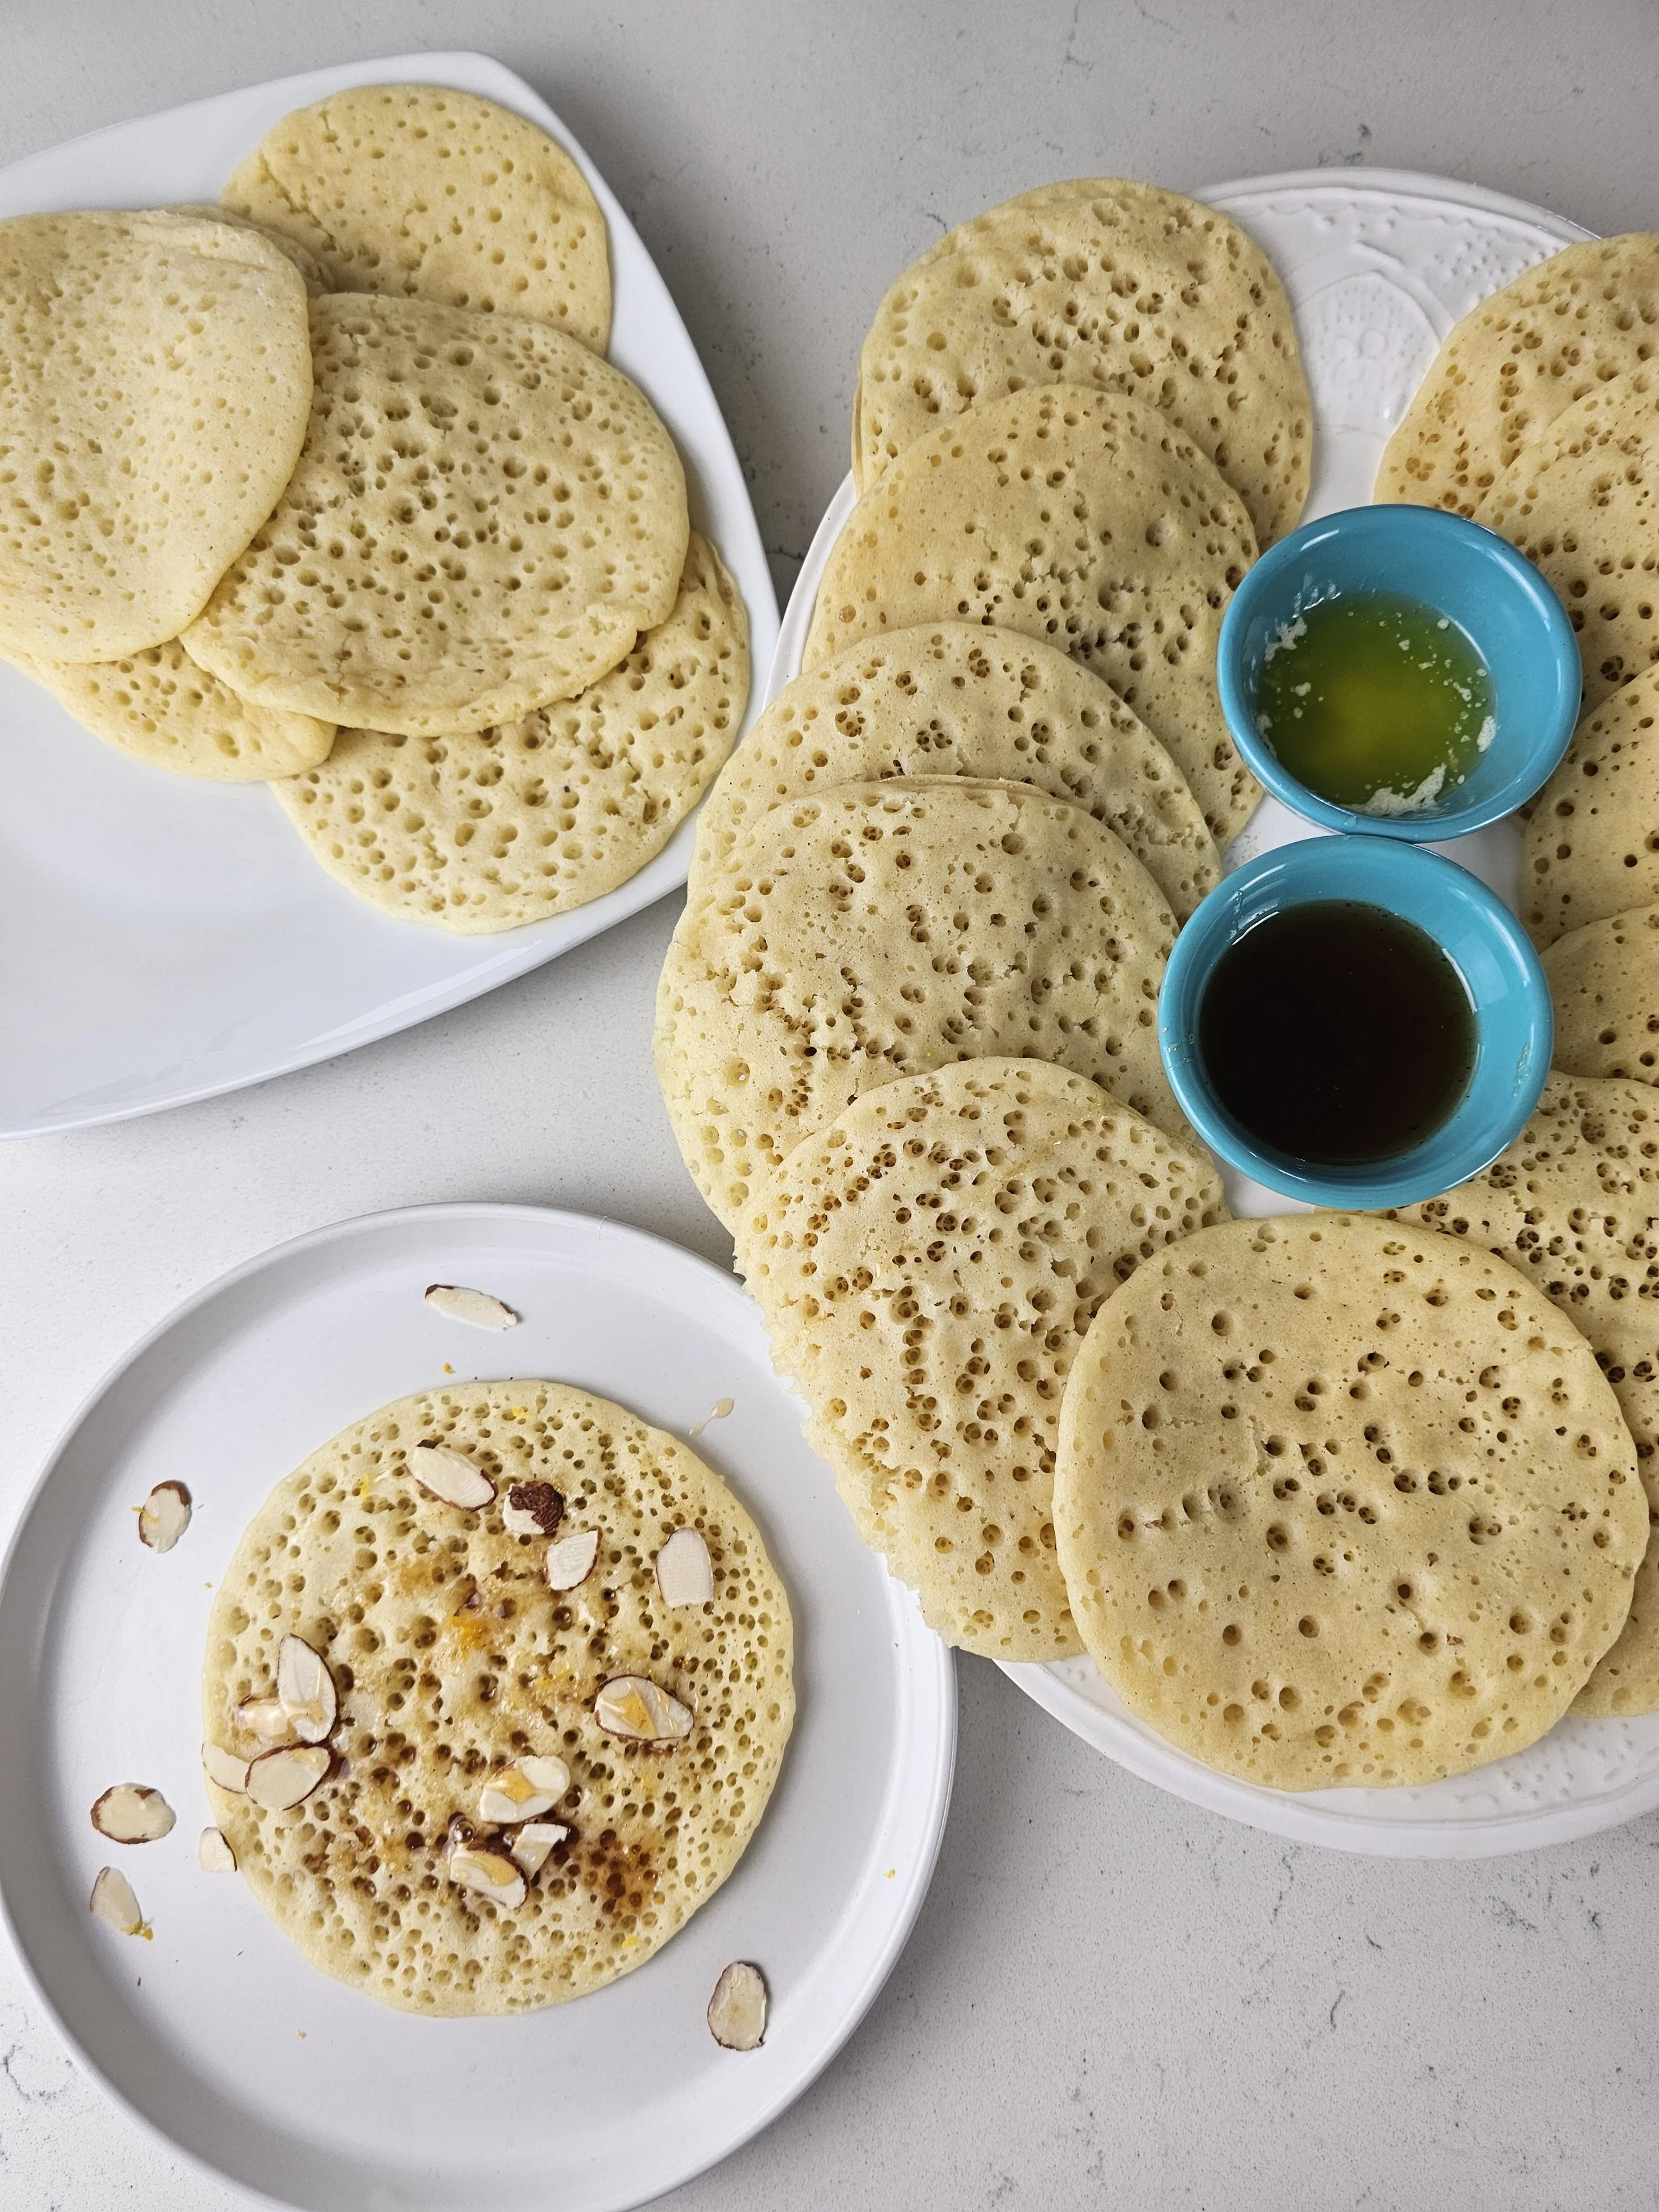
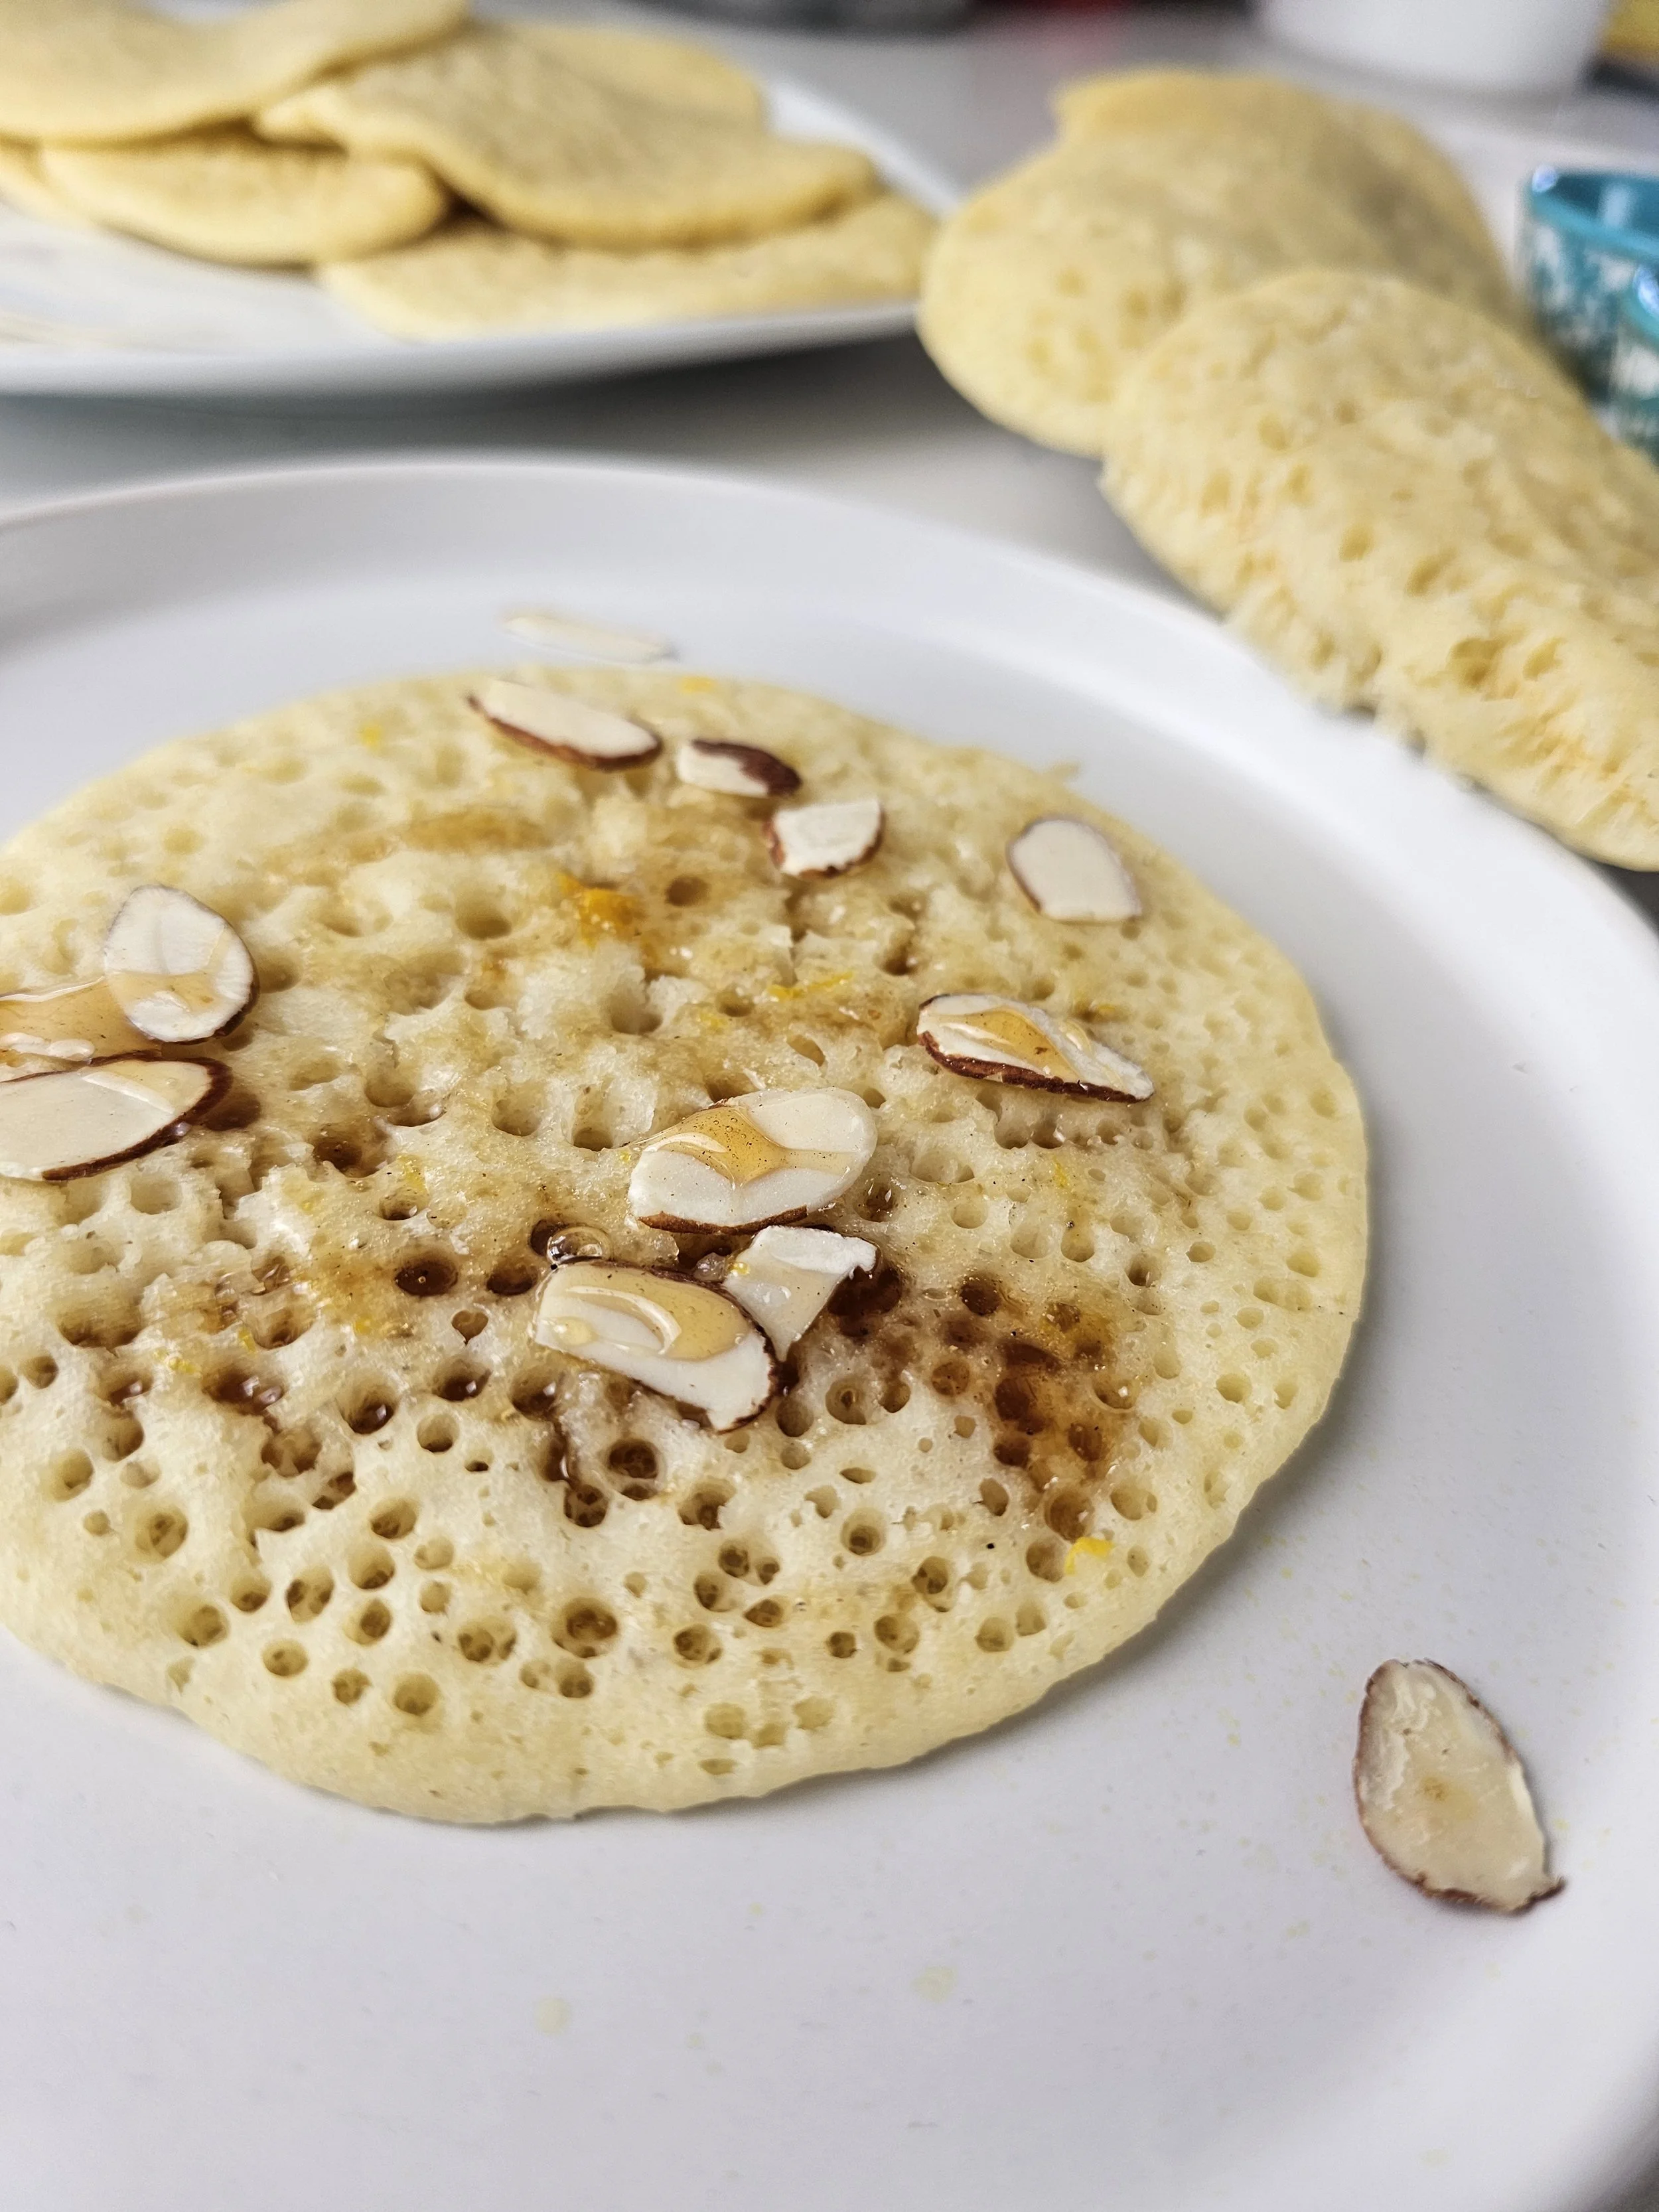
Baghrir (Thousand-Hole Moroccan Pancakes) – with Orange-Chai Honey Syrup
Baghrir are one of the most distinctive traditional breakfast foods in Moroccan and broader North African cuisine. Often called “thousand-hole pancakes,” they are instantly recognizable by their porous, sponge-like surface that forms as the batter cooks. These tiny holes are not just visually striking, they are functional, allowing the pancakes to absorb honey, melted butter, or syrup in a way few other flatbreads can. That is part of what made them so exciting for me to discover years ago because the pancakes can be completely transformed through different syrups and toppings in a way that regular pancakes simply cannot.
Unlike Western-style pancakes, Baghrir are made from a yeast-leavened semolina batter that is blended until completely smooth and then left to rest until light and airy. They are cooked on only one side, typically in a dry nonstick pan, which encourages the characteristic holes to form across the surface as steam rises through the batter. The result is a soft, tender pancake with a delicate structure specifically designed to soak up flavor.
Baghrir exist within a much larger North African breakfast tradition centered around bread-like and yeast-risen foods. In Morocco, mornings often revolve around shared plates of flatbreads such as msemen, harcha, and other semolina-based preparations. These are commonly served with honey, butter, olive oil, jams, or syrups alongside mint tea or coffee. Rather than being a quick individual meal, breakfast is often a slower, communal experience where breads and spreads are placed at the center of the table to be shared.
This recipe offers a modern take on the traditional preparation by pairing the pancakes with a lightly spiced orange and chai-infused honey syrup. The combination highlights both the North African foundation of the dish and a contemporary flavor profile that complements Baghrir’s naturally soft, absorbent texture.
I also like to garnish mine with nuts, usually pistachios or almonds, and experiment with different teas to flavor the honey syrup, most often rooibos or chai.
Looking for a more modern or alternative variation? I also created a Baghrir-inspired Pistachio and Orange Pancake recipe.

Baghrir (Moroccan Thousand-Hole Pancakes)
Light, spongy semolina pancakes with signature honeycomb holes, traditionally served warm with honey syrup with tea flavour.
Ingredients
- 2 cups fine semolina
- 1/2 cup all-purpose flour
- 1 tsp active dry yeast
- 1 tsp sugar
- 1/2 tsp salt
- 3 cups lukewarm water
- Serving of melted butter
- 1/2 cup wild honey
- 3 tbsp water
- Zest of 1/2 orange
- 1 tbsp orange juice
- 1/4 tsp tea chai spice
- Pinch of salt
- 1/4 tsp almond extract (added off heat)
Instructions
- Combine semolina, flour, yeast, sugar, salt, and warm water in a larg bowl. Use an immersion blender on medium to comnbines for 30 seconds then conitnue mixing at medium-high speed until the mixture is completely smooth and free of lumps.
- Cover the batter with a clean kitchn cloth and let it rest at room temperature for at least 30 minutes, until it becomes frothy and slightly airy.
- Before cooking, stir the batter gently. The texture should be thin and pourable, similar to heavy cream.
- Heat a nonstick pan over medium heat. Do not add oil or butter!
- Pour about 1/4 cup of batter into the pan and allow it to spread naturally into a circle. Cook on one side only.
- The pancake is ready when bubbles form across the entire surface and the top looks dry and set, usually after 1.5 to 3 minutes. Do not flip.
- Repeat with remaining batter, stirring occasionally.
- In a small pot, combine honey, water, orange zest, orange juice, masala chai spice, and salt. Warm over low heat for 2 to 3 minutes. Do not boil vigorously.
- Remove from heat and stir in almond extract.
- Pour warm syrup over the pancakes while they are still warm, or set aside with melted butter for serving immediately. Top with sliced almonds if desired.
Notes
- Baghrir is cooked only on one side to preserve its signature porous surface.
- First pancakes are often the most visually perfect.
- A dry nonstick pan is essential for proper hole formation, as well as resting time for the batter.
- These pancakes are best eaten fresh but can be reheated or frozen once cooked.
- Traditional Moroccan breakfasts often pair Baghrir with honey, butter, olive oil, or preserved jams, alongside mint tea or coffee.
Nutrition Facts
Calories
240Fat (grams)
3 gCarbs (grams)
42 gFiber (grams)
3 gSugar (grams)
15 gProtein (grams)
6 gI am not a certified nutritionist and any nutritional information on dontmissmyplate.com should only be used as a general guideline.
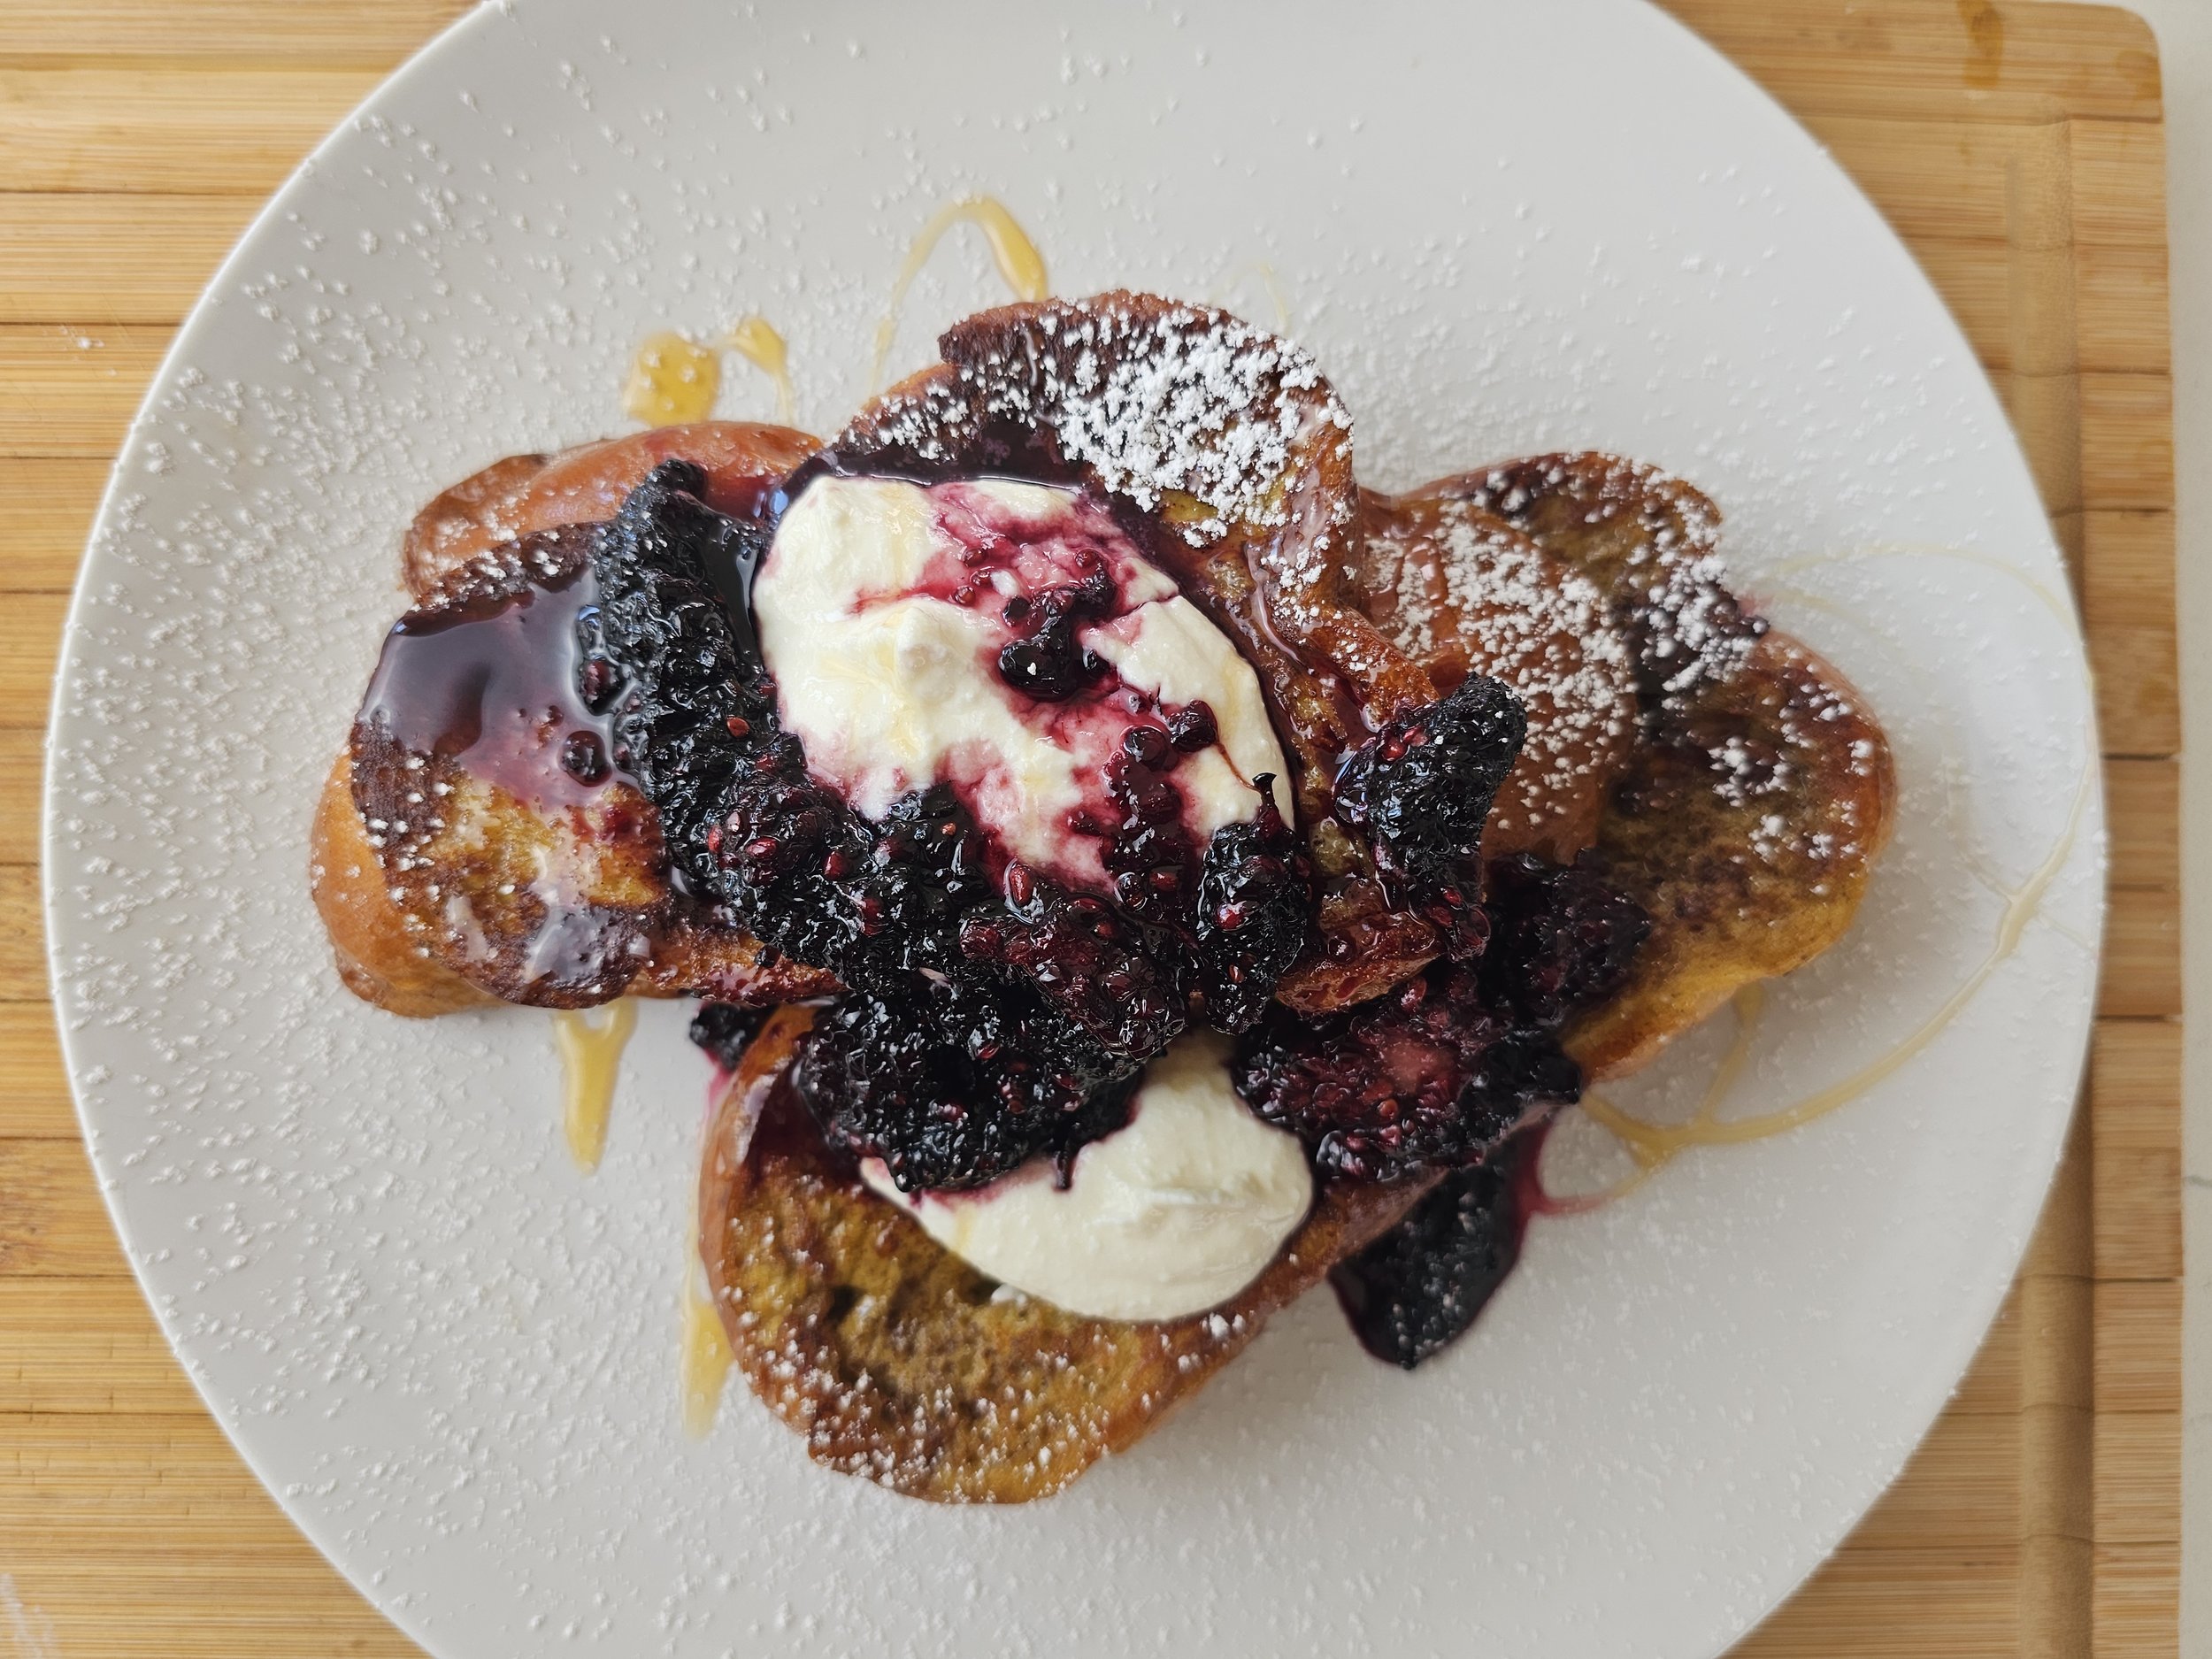
Amarula French Toast with Mulberry Compote
This Amarula French toast is a rich, layered brunch dish made with thick-cut challah bread soaked in a silky custard of eggs, cream, and Amarula liqueur. It is pan-cooked until golden, then finished with whipped ricotta and a warm blackberry compote.
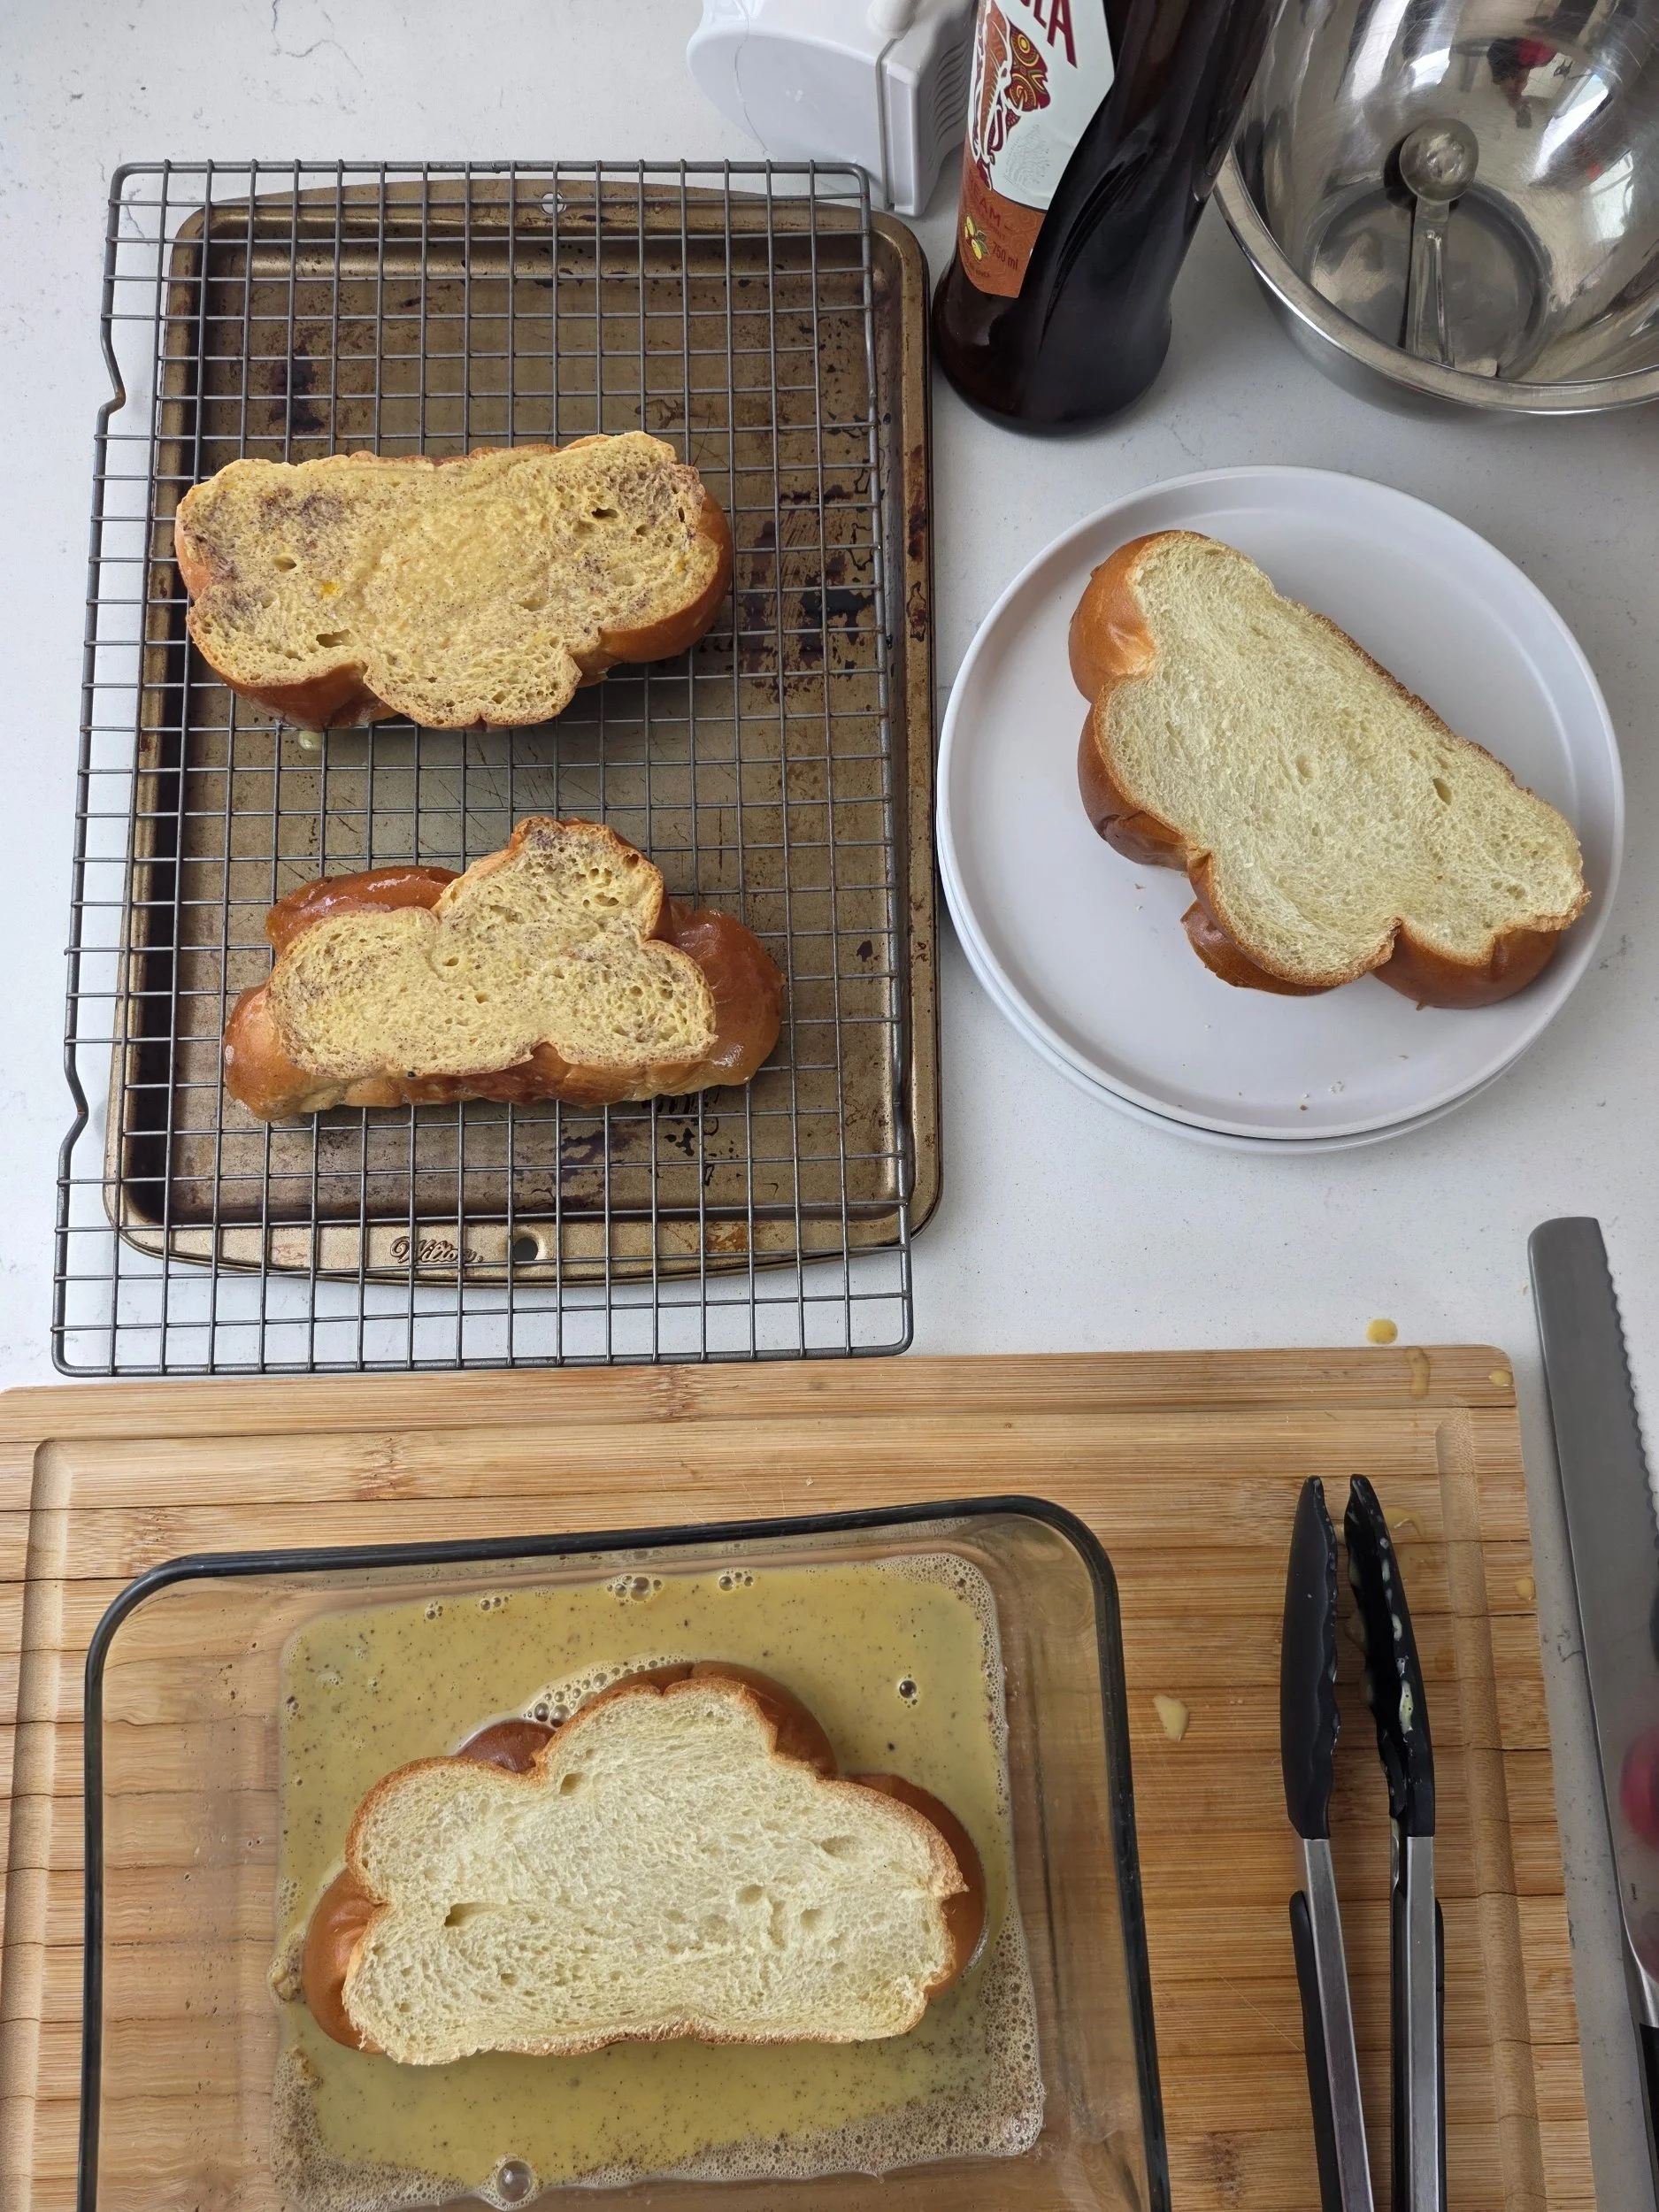
I use challah instead of brioche because its structure holds more custard without collapsing. This gives you that ideal contrast of a soft, almost pudding-like interior and a crisp, caramelized exterior when cooked in a hot pan or cast iron skillet.
The custard itself is intentionally richer than traditional French toast. Instead of milk, I use extra egg yolks and heavy cream. The yolks deepen the color and create a silkier texture, while the cream adds body, richness, and a custard-like finish once it hits the heat.
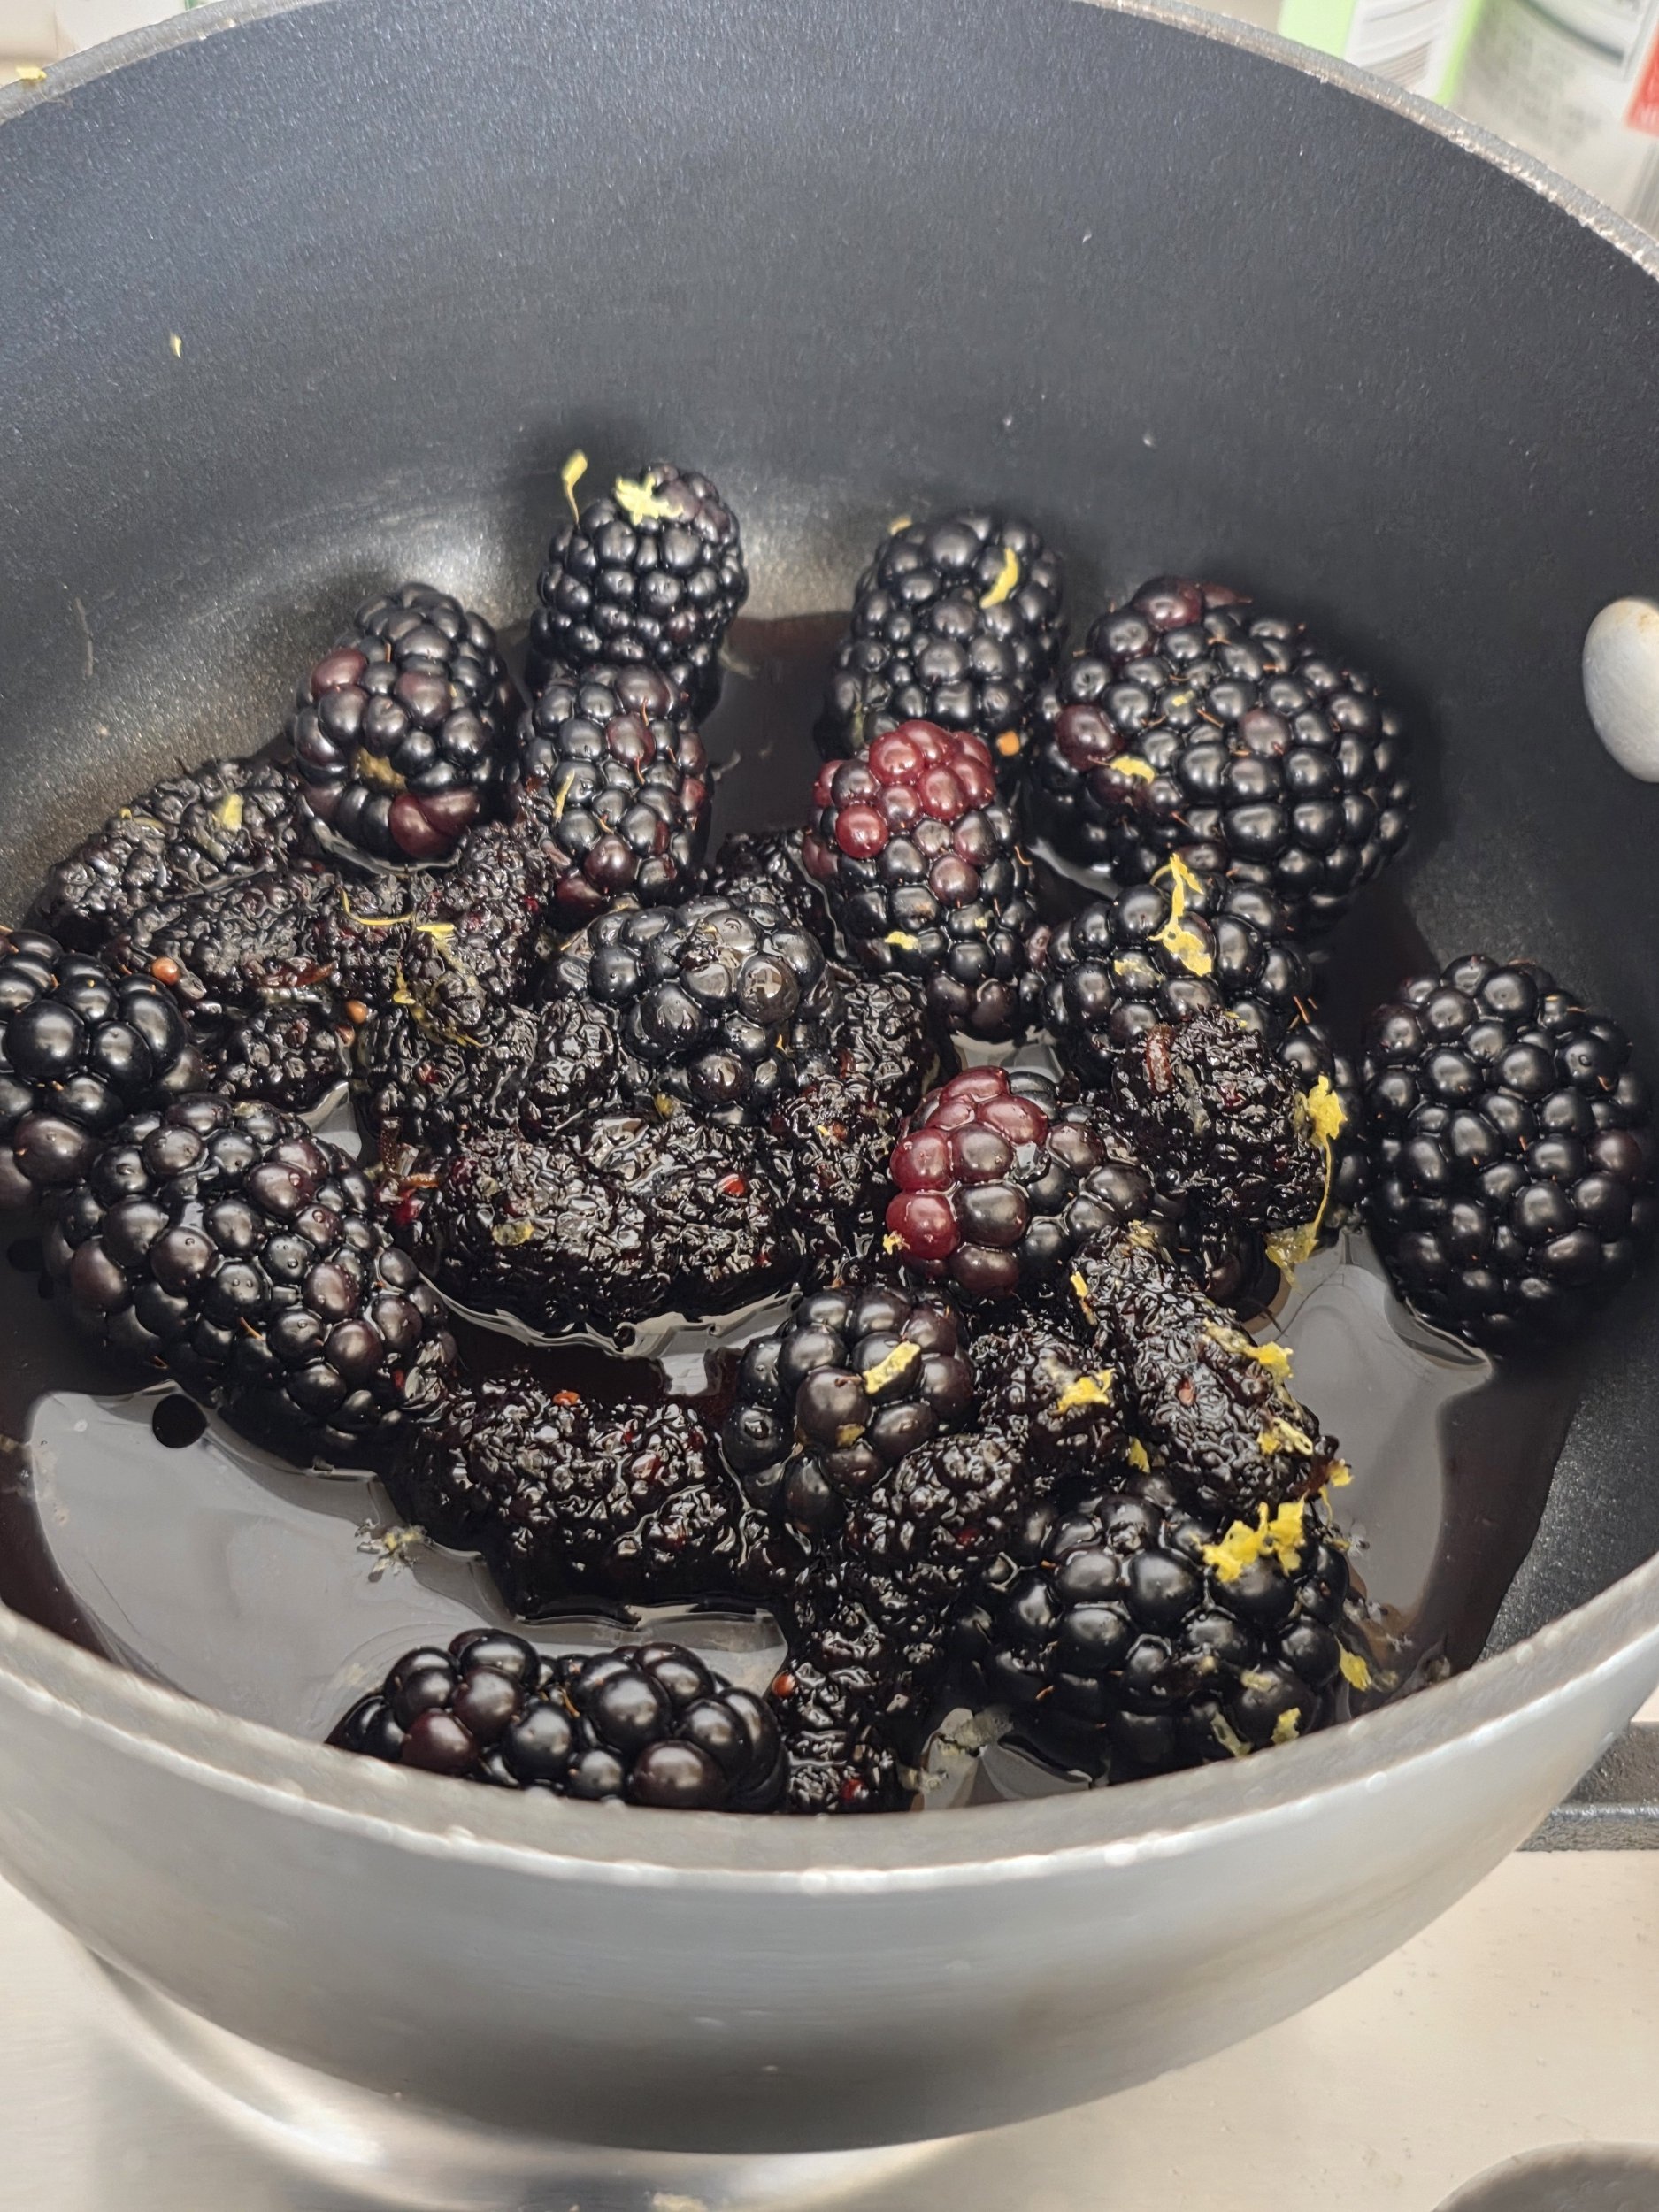
The fruit element is inspired by memory and substitution. I grew up eating mulberries in Zimbabwe, often picked fresh from home trees. In the United States, fresh mulberries are difficult to find, so blackberries take their place. That said, I found some mulberry preserves which helps maintain the intended flavour and adds sweetness, enforcing the intended tartness and depth, making them a natural and respectful alternative while still carrying the spirit of the original inspiration.
To finish, the dish is topped with whipped ricotta, lemon zest, and a light touch of Amarula. The ricotta adds coolness and balance, while the liqueur brings warmth, aroma, and a subtle complexity that ties everything together.
The result is simple ingredients transformed into a layered brunch dish that feels nostalgic, indulgent, and intentional in every bite.

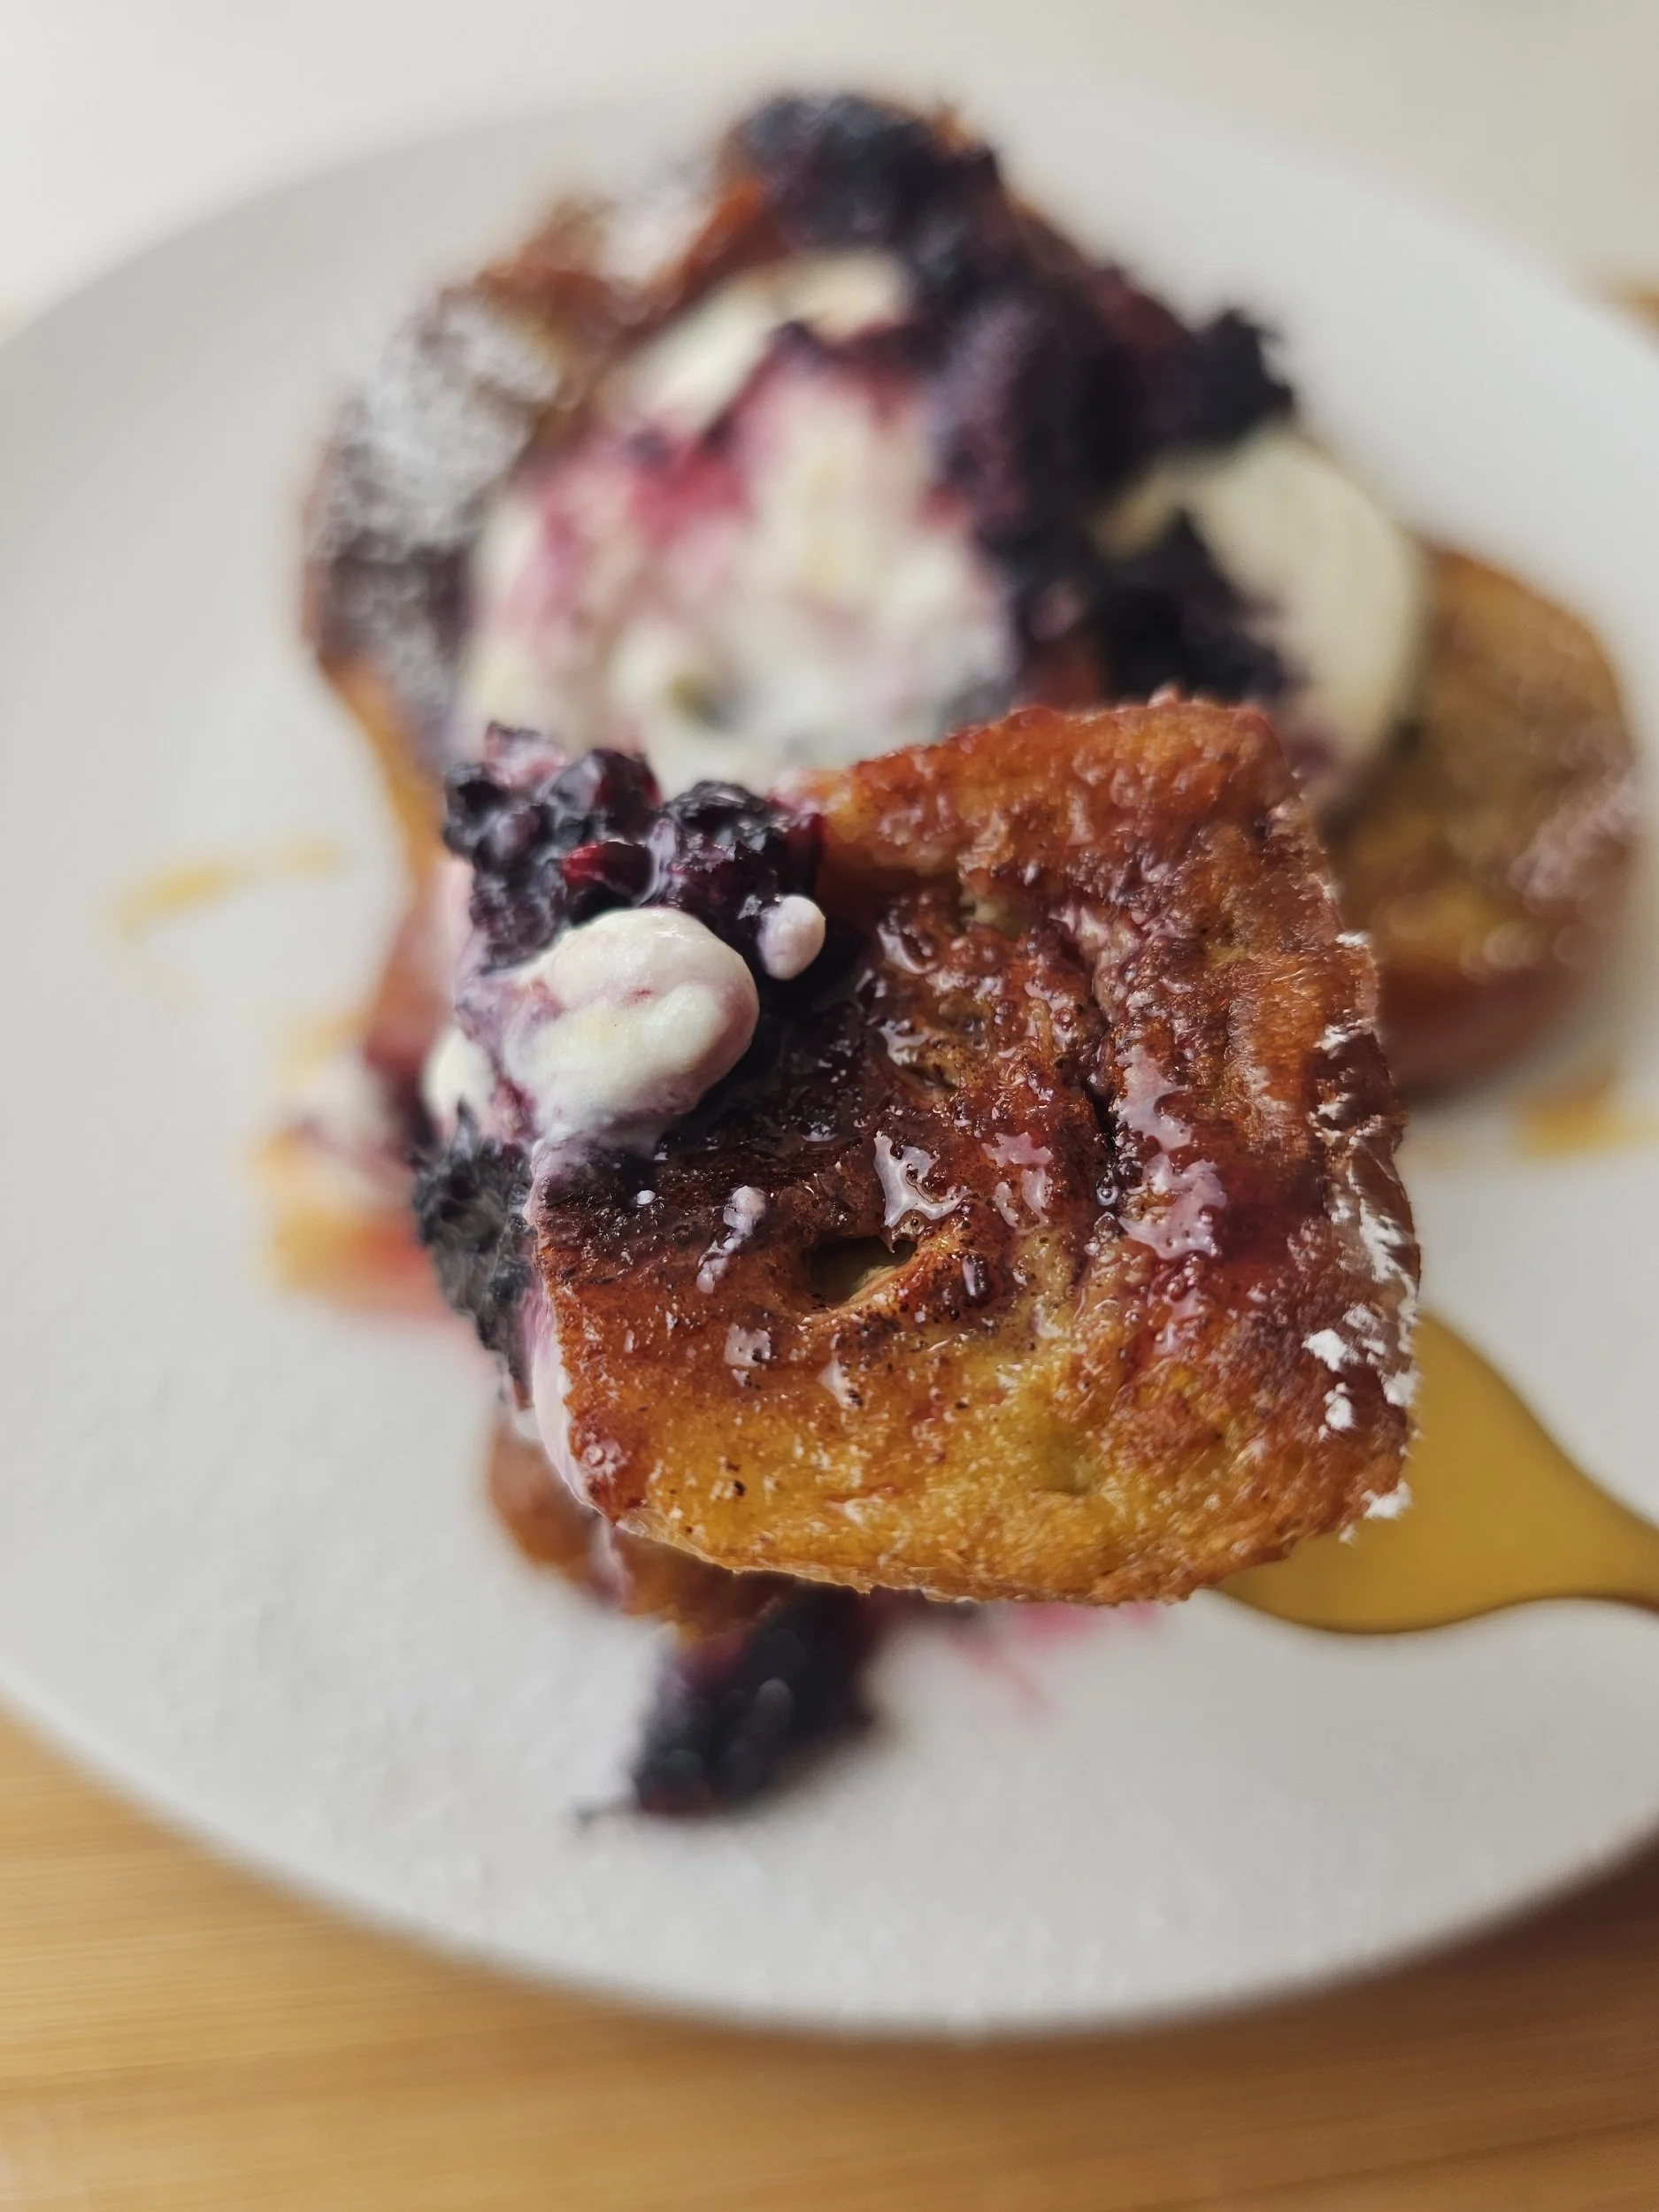
Amarula French Toast with Mulberry Compote
French toast made with thick-cut challah soaked in a rich custard of eggs, cream, and Amarula liqueur, then pan-fried until golden and crisp on the outside while soft and custardy inside. Served with whipped ricotta and a blackberry compote layered with mulberry jam for a rich, tangy-sweet finish.
Ingredients
- 4 slices challah bread (about ¾–1 inch thick)
- 2 large eggs + 1 egg yolk
- ⅓ cup whole milk
- 3 tbsp Amarula (about 1 shot)
- ½ tsp lemon zest
- ⅛ tsp ground cardamom
- ¼ tsp ground cinnamon
- ⅛ tsp ground nutmeg
- 1 tsp vanilla (or ¼ tsp almond extract)
- Pinch of salt
- 2 tbsp bacon fat + 1 tbsp butter (for frying, as needed per batch)
- Honey and icing sugar (optional for garnish)
- ½ cup fresh blackberries
- 2 tbsp mulberry jam or preserves
- 1–2 tbsp water (to loosen)
- Pinch of salt
- ½ tsp lemon zest
- ½ cup ricotta
- 1 tsp honey
- 1 tsp Amarula
- Pinch of salt
- 1 tsp lemon zest
Instructions
- Whisk together the eggs, milk, Amarula, lemon zest, vanilla/almond extract, spices, and salt until fully combined and silky to form the custard.
- Dip each slice of challah into the custard, allowing it to soak briefly, about 25–30 seconds per side, so it absorbs without falling apart.
- Heat a cast iron pan over medium heat and cook the soaked bread until golden brown on both sides and set in the center.
- In a small pot, simmer blackberries, mulberry jam, and a splash of water over low-medium heat until the mixture breaks down and becomes glossy and thick. You can press some of the whole berries down.
- Whip the ricotta with honey, a small splash of Amarula, and a pinch of salt until light, smooth, and creamy. Fold in the lemon zest.
- To assemble, layer the French toast first, then add the whipped ricotta, and finish with a generous spoon of the berry compote.
- Garnish with honey and icing sugar and enjoy.
Notes
- Thick-cut slices are important to maintain structure while achieving a soft, custardy interior.
- The combination of cream and egg yolk creates a richer, silkier custard than milk alone.
- Amarula adds flavor depth and slight sweetness, so additional sugar is not necessary in the custard.
- Challah absorbs custard well, so soak each slice for about 30 seconds per side for a rich, custardy interior without losing structure. For a deeper soak and softer texture, you can extend slightly, but handle carefully when transferring to the pan.
- If using thinner slices or shorter soak times, you may have leftover custard.
- Cook over medium heat to ensure the outside caramelizes while the inside sets properly without burning.
- Bacon fat adds depth and flavor, but butter can be used alone if preferred.
Nutrition Facts
Calories
500Fat (grams)
30 gCarbs (grams)
45 gProtein (grams)
15 gI am not a certified nutritionist and any nutritional information on dontmissmyplate.com should only be used as a general guideline.
Pumpkin Peanut Wheat Porridge (Nhopi)
Inspired by Zimbabwean Nhopi and Kenyan Uji wa Ngano
There is something deeply comforting about warm porridge cultures across Africa. Whether it is maize-based, millet-based, sorghum-based, or wheat-based, many of us grew up with some version of a hot, nourishing bowl that anchored mornings, cold days, illness recovery, or simple moments of comfort.
During my recent trip to Kenya, I tried uji wa ngano, a creamy wheat porridge often served with plenty of hot milk. It immediately reminded me of the porridges I grew up eating in Zimbabwe. One of the most popular versions, alongside maize meal porridge served with butter or peanut butter, is nhopi — a pumpkin and peanut butter porridge, sometimes thickened with maize meal. Rich, lightly spiced, earthy, and deeply nostalgic, it remains a beloved comfort food across generations.
That experience made me curious about how these traditions could speak to each other.
This recipe became a fusion of both ideas. Instead of using pumpkin as the main base like traditional nhopi, I used creamy wheat as the foundation and allowed roasted butternut and peanut butter to layer warmth, sweetness, richness, and familiarity into the porridge.
The bulgur wheat adds texture and grain bite similar to Kenyan wheat porridge, while the cream of wheat and powdered milk helps create a smoother, creamier consistency. Cardamom, brown sugar and cinnamon bring warmth that ties the dish together beautifully.
The final result sits somewhere between the two traditions: creamy, comforting, lightly spiced, and deeply filling. It is the kind of breakfast that feels both grounding and exploratory at the same time.

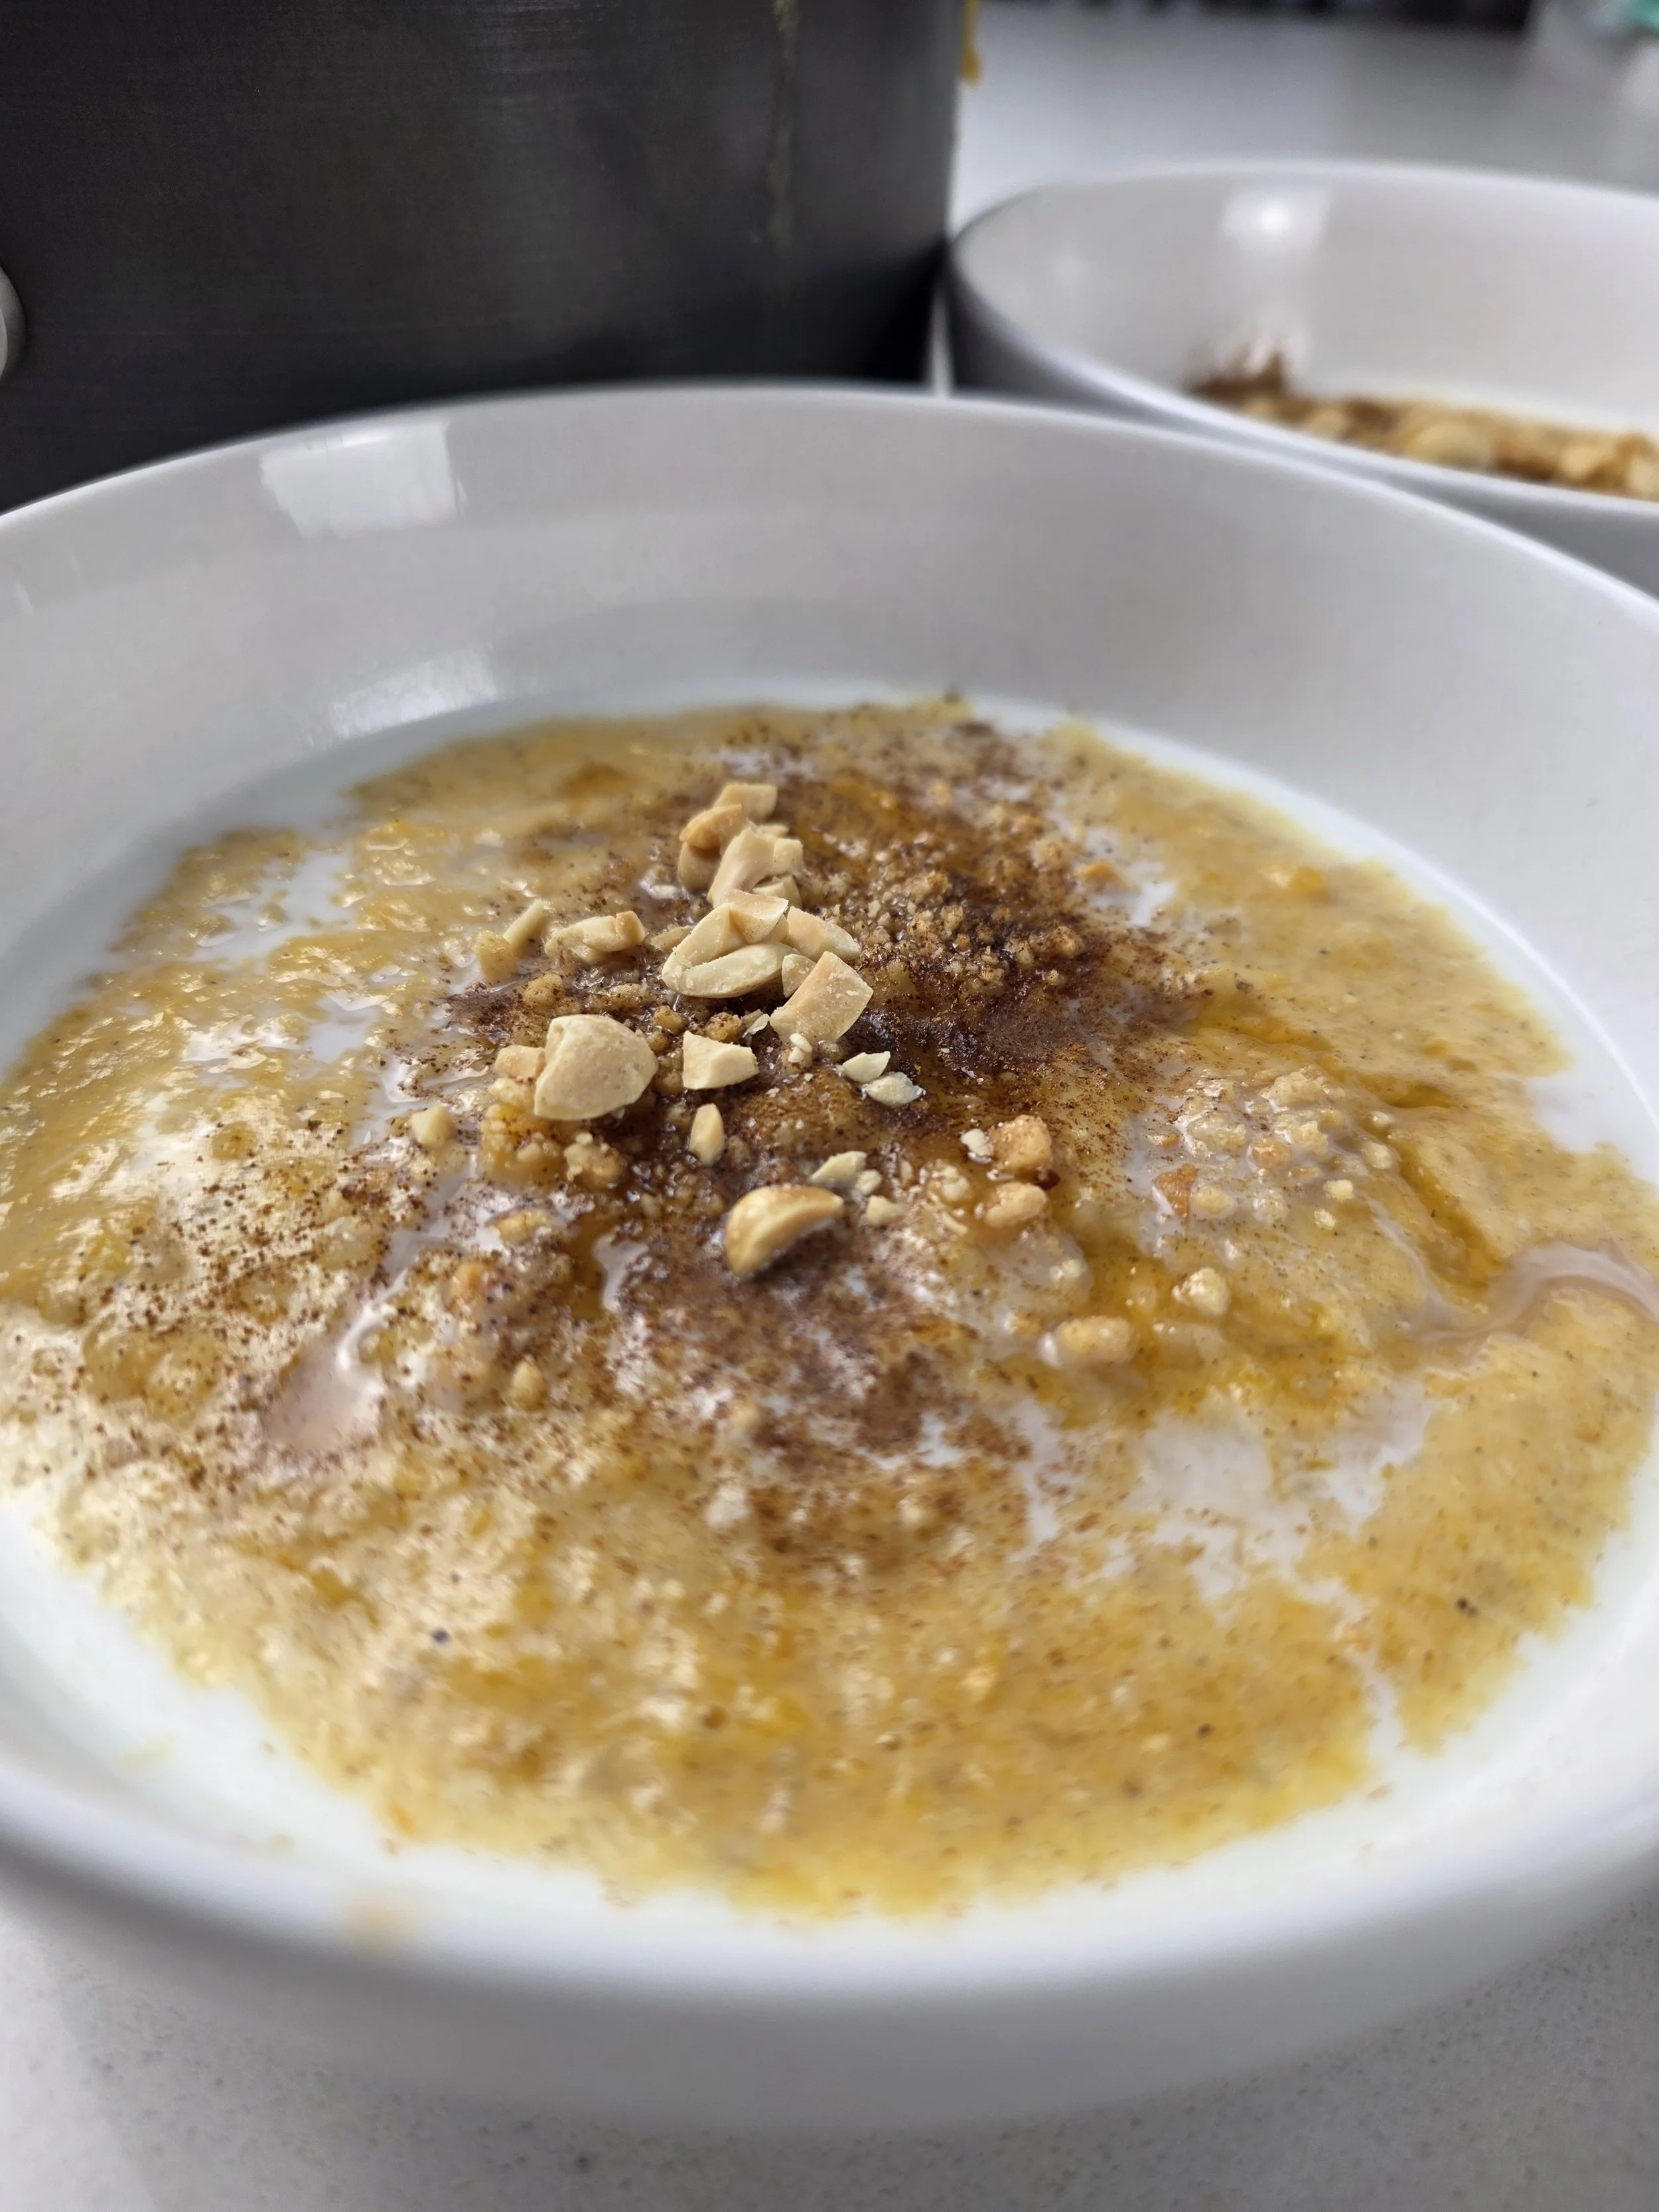

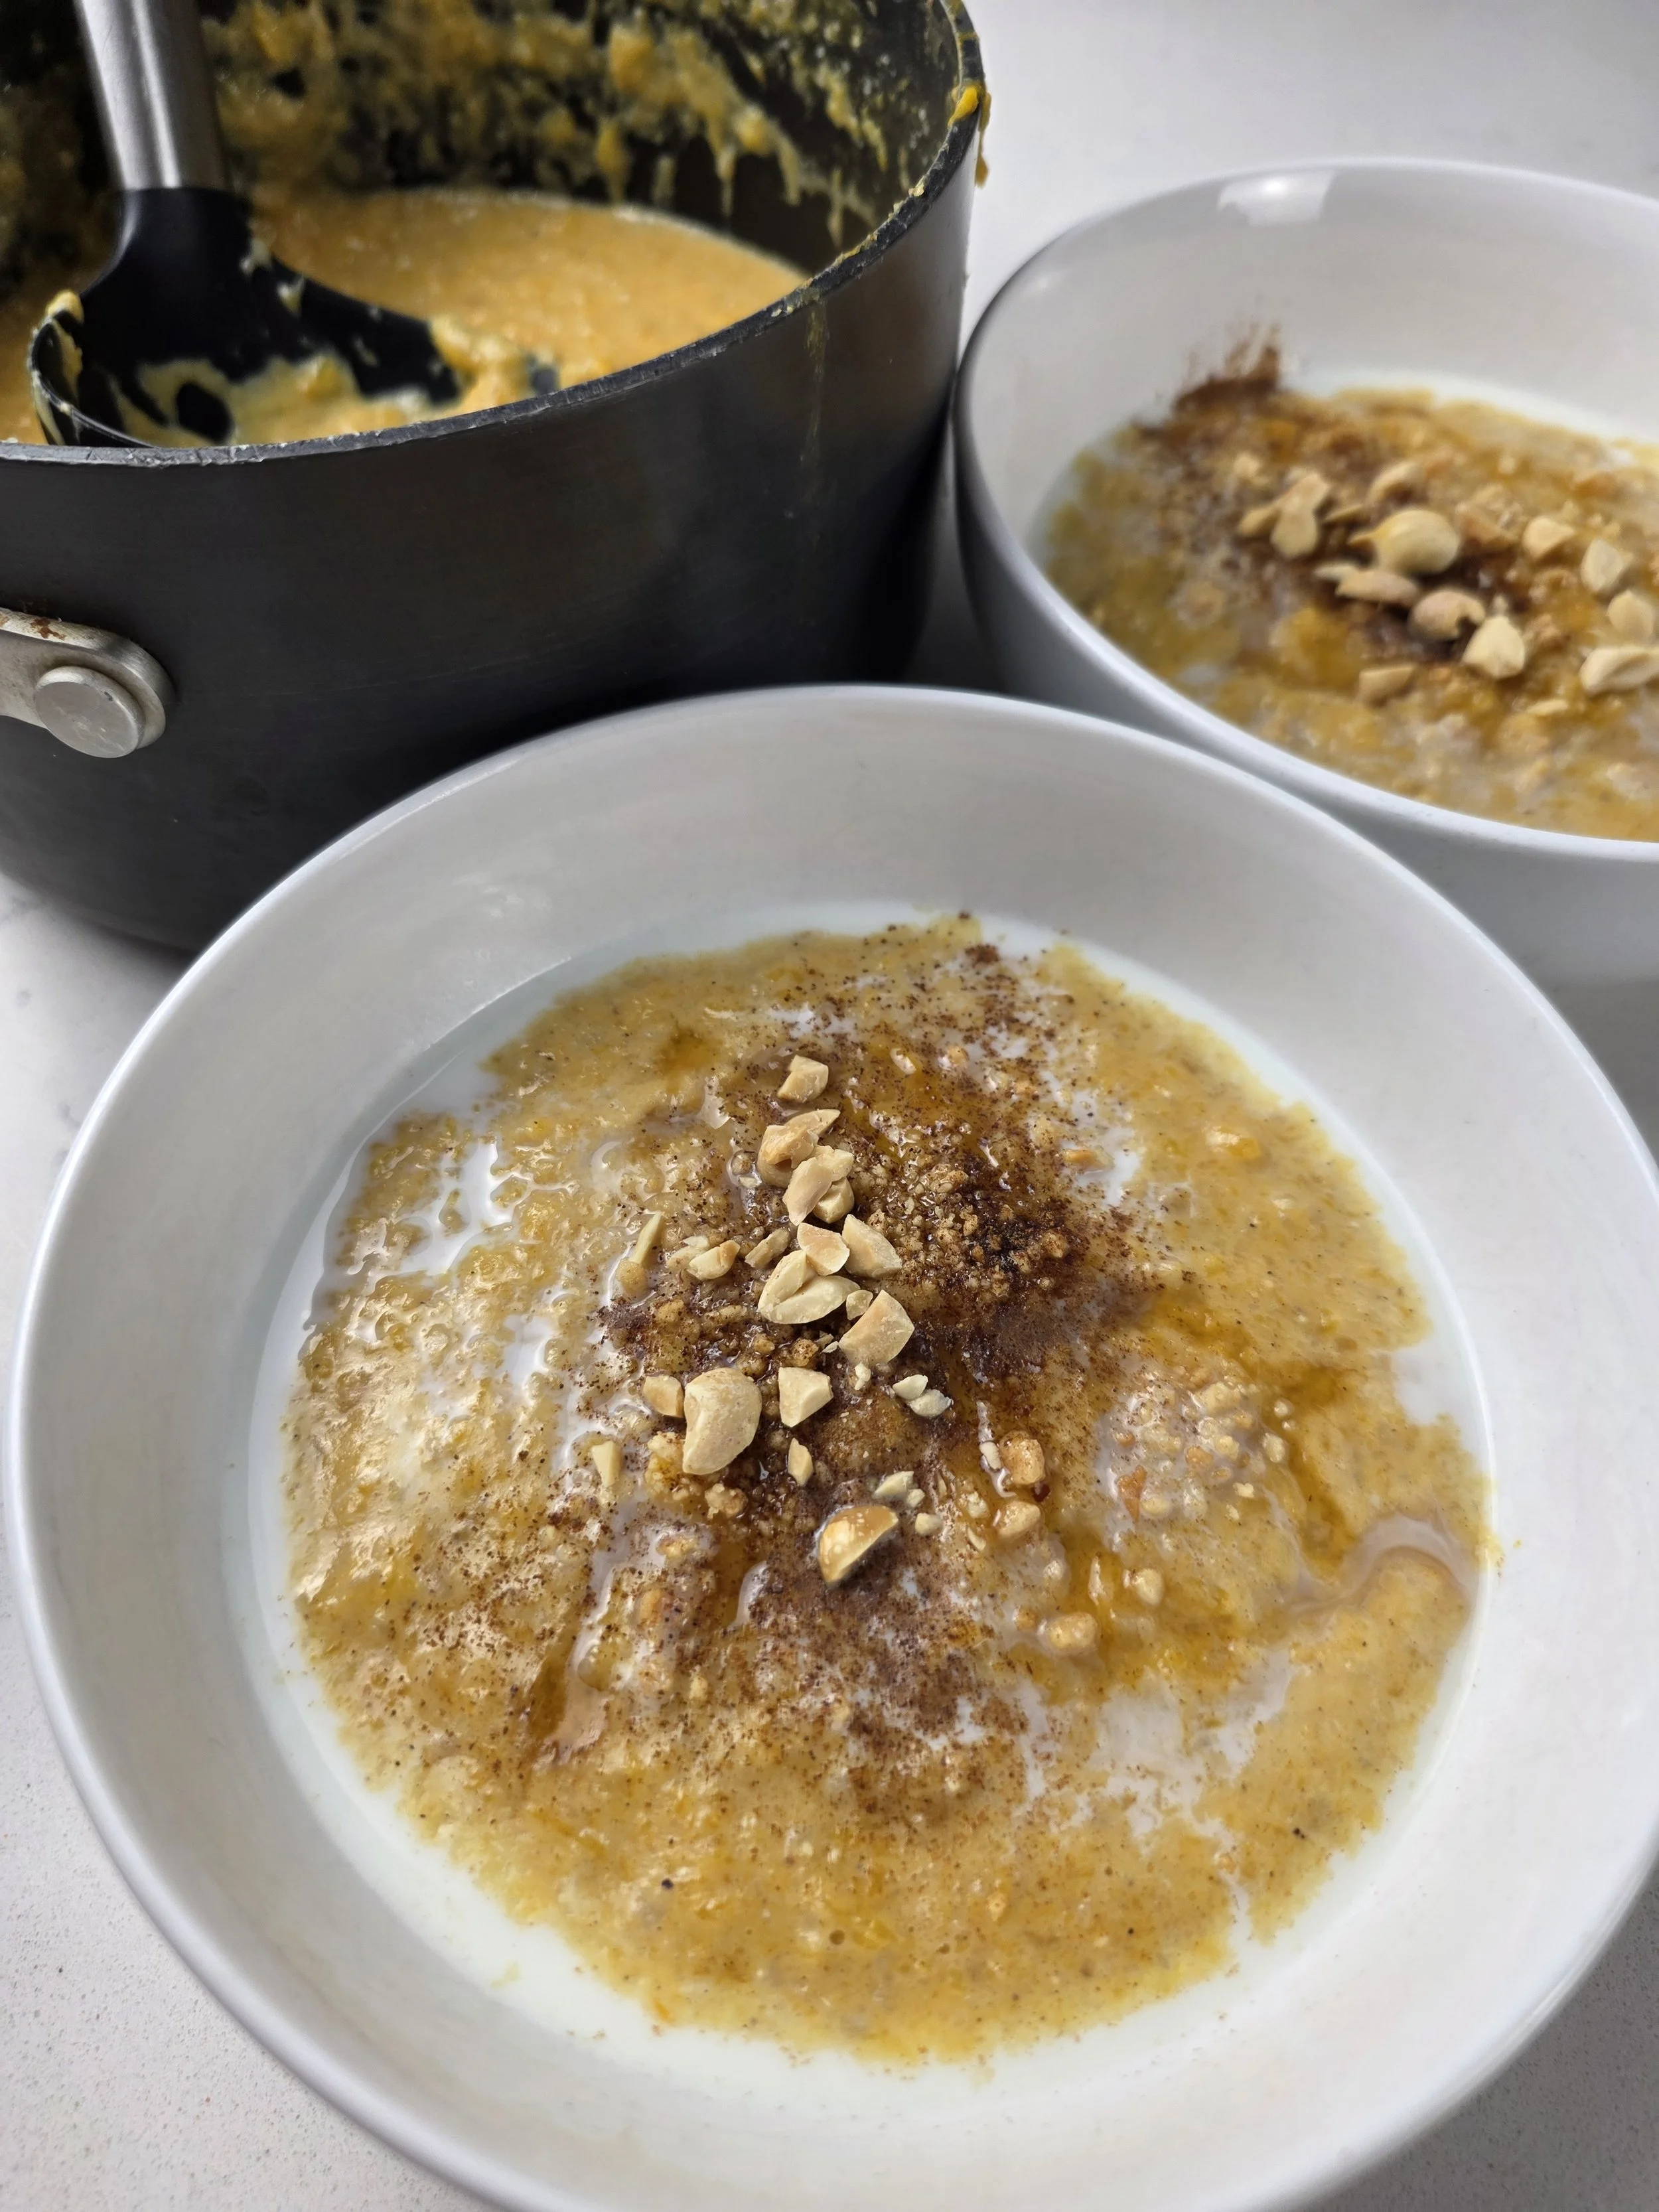
Pumpkin Peanut Wheat Porridge
A creamy wheat porridge with roasted butternut, peanut butter, and warm spices inspired by Zimbabwean and Kenyan breakfast traditions (nhopi and uji wa Ngano).
Ingredients
- ½ cup bulgur wheat
- ⅓ cup cream of wheat
- 2½ cups water
- 3–5 cups milk (adjust as needed)
- 2 to 2½ cups roasted butternut, mashed
- 2 tbsp peanut butter
- 2 tbsp brown sugar or honey (adjust to taste)
- ½ tsp cardamom
- ½ tsp cinnamon
- ½ tsp salt
Instructions
- Heat the water in a medium or large pot over medium-high heat. Add the bulgur wheat, reduce the heat to medium-low, and simmer for 10–12 minutes, or until softened.
- Stir in the Cream of Wheat and whisk continuously for about 3 minutes. If the mixture thickens too quickly, gradually add water, 1/4 cup at a time, until smooth.
- Add the cinnamon, cardamom, salt, and roasted butternut squash. Whisk well, adding a little milk as needed to create a smoother texture.
- Next, stir in the powdered milk for extra richness and creaminess. Add the brown sugar and peanut butter, then continue adding milk until the porridge reaches your desired consistency, simmering gently over low heat. Adjust seasoning to taste if needed.
- Serve warm with optional toppings such as crushed peanuts, honey, and a sprinkle of cinnamon.
Notes
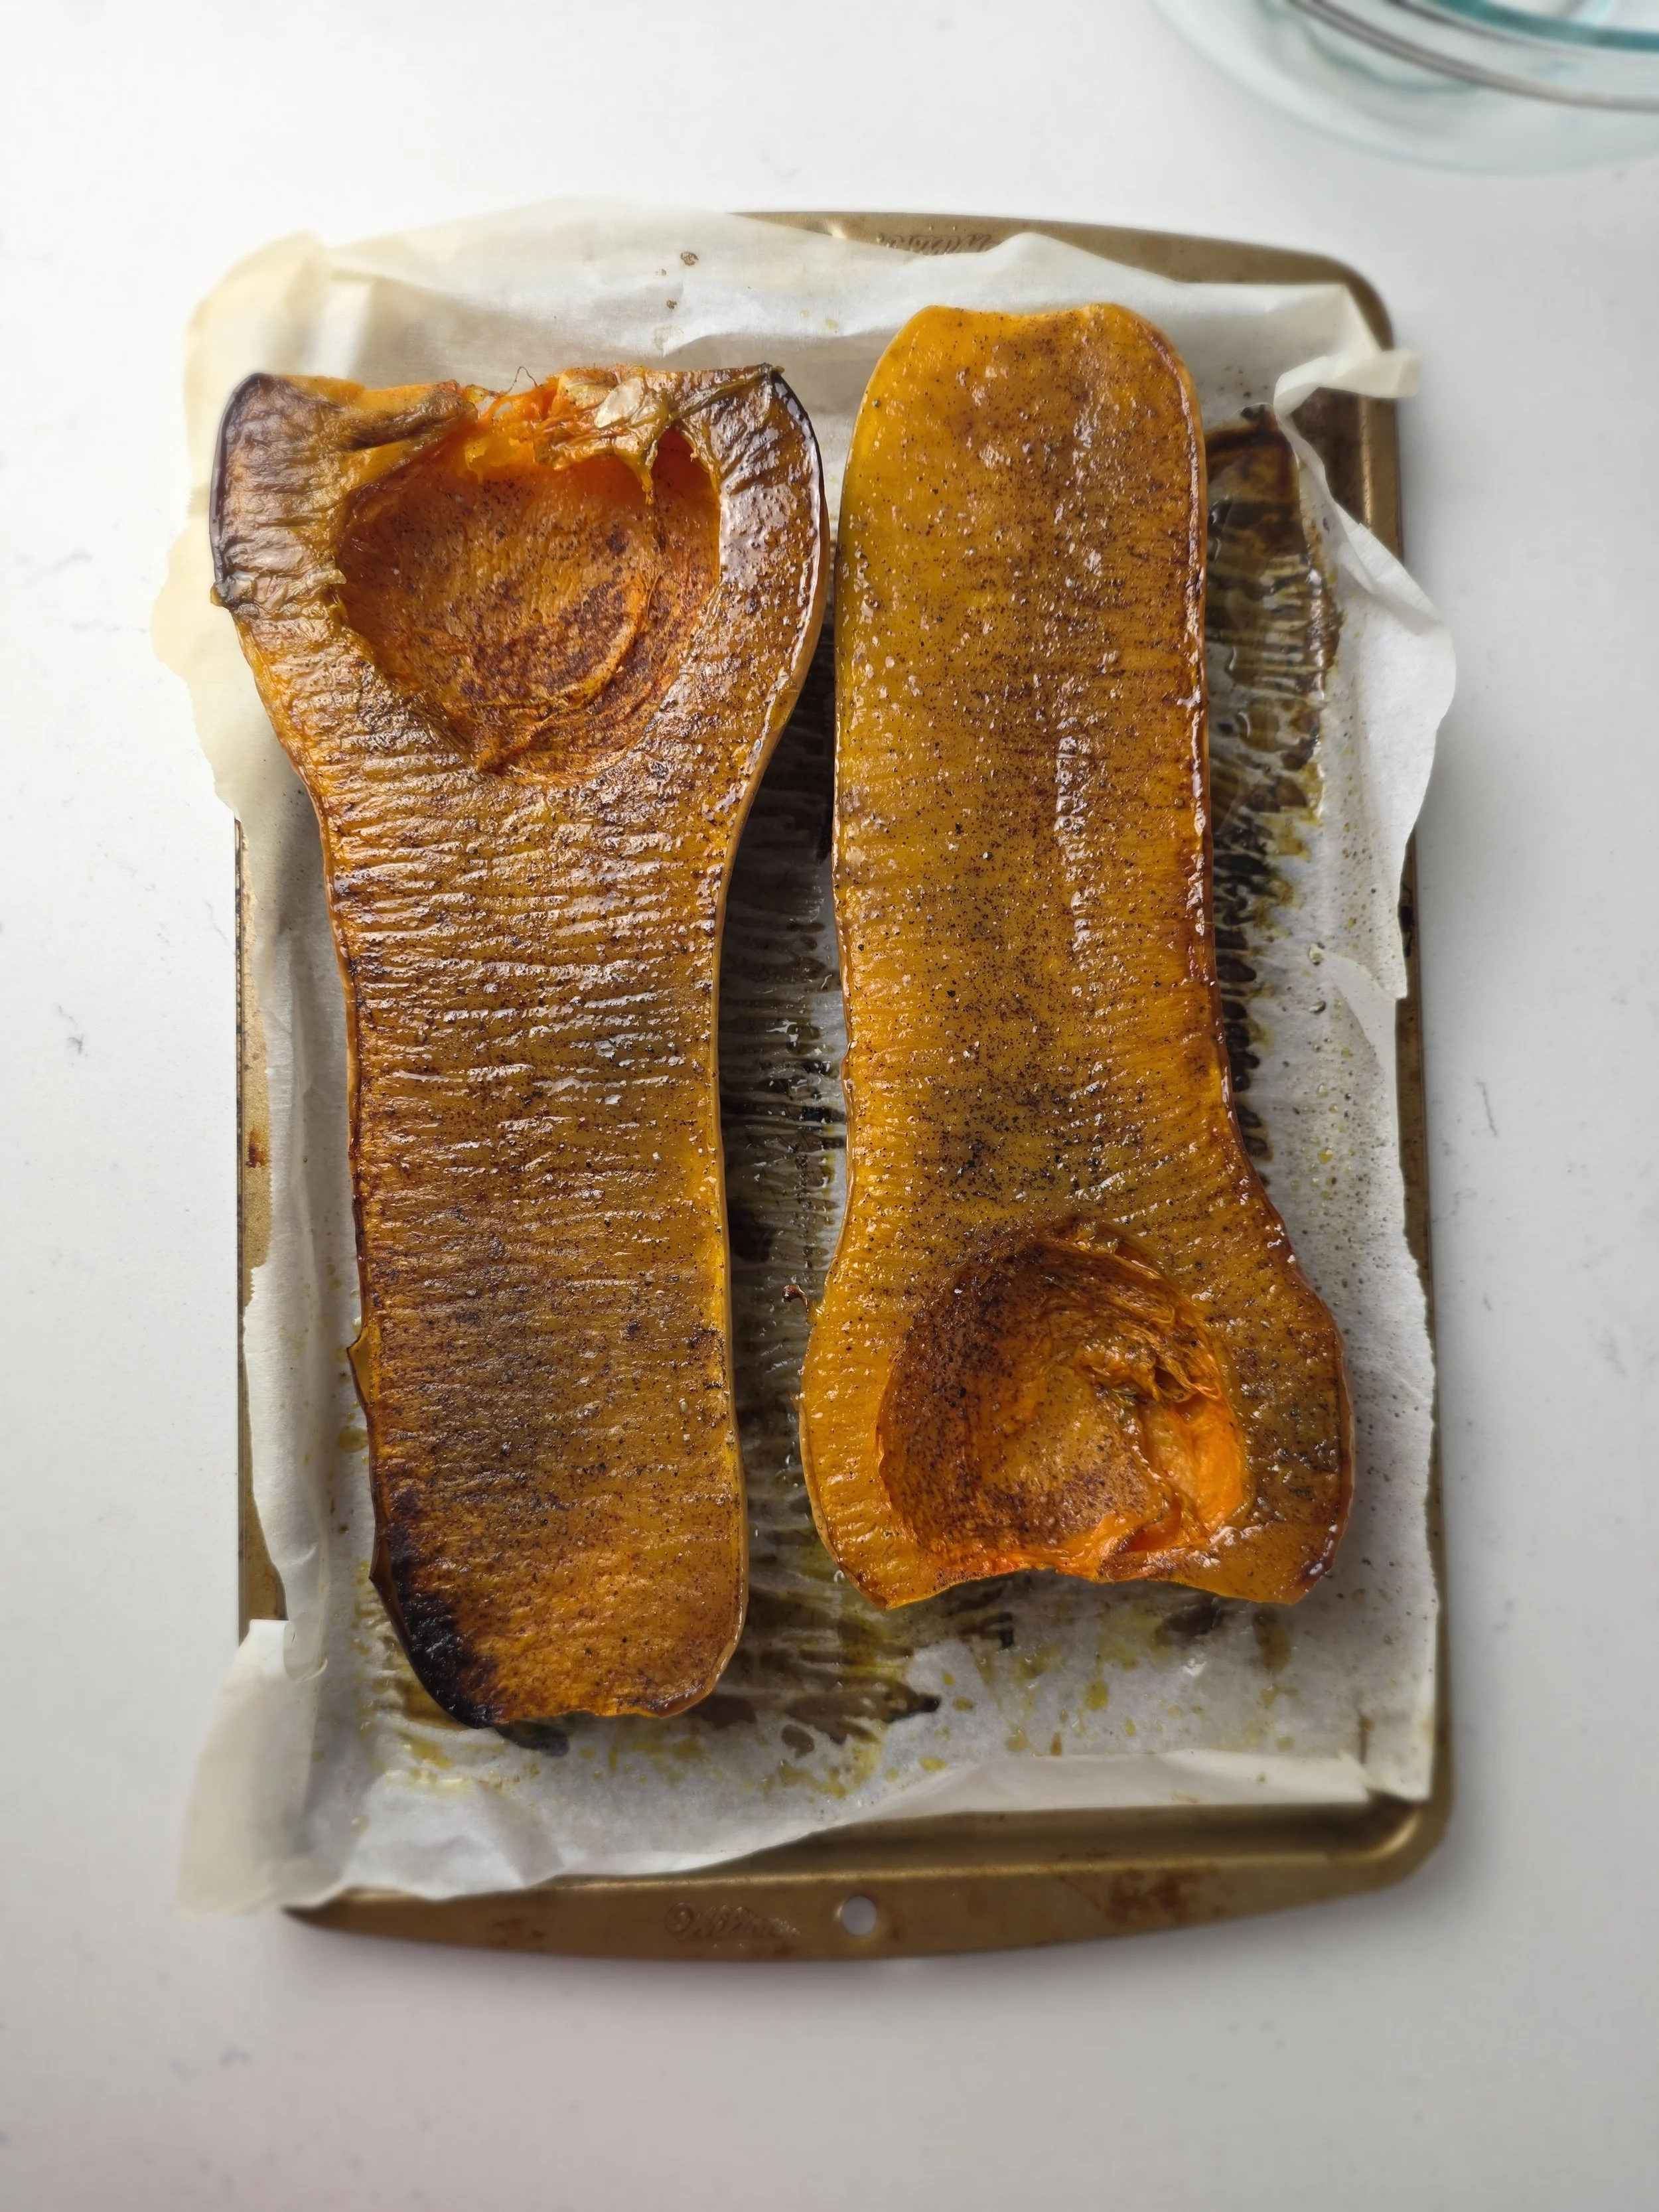
For the butternut squash, you can roast it beforehand for deeper flavor. Brush the squash with olive oil, then season with cinnamon, salt, and optionally a little brown sugar.
Place it cut-side down on a parchment-lined baking sheet and roast in a 400°F / 200°C oven for about 40 minutes, or until the flesh is soft enough to pierce easily with a fork.
Once all the ingredients are combined, adjust the consistency toward the end of the cooking process using milk as needed.
For a thicker, more nhopi-style texture:
- Use more butternut squash
- Use less milk
- Simmer longer for a denser consistency
For a looser Kenyan-style wheat porridge:
- Add more milk
- Use slightly less butternut squash
- Keep the texture smooth and pourable
Nutrition Facts
Calories
320Fat (grams)
13 gCarbs (grams)
42 gFiber (grams)
6 gSugar (grams)
9 gProtein (grams)
9 gI am not a certified nutritionist and any nutritional information on dontmissmyplate.com should only be used as a general guideline.
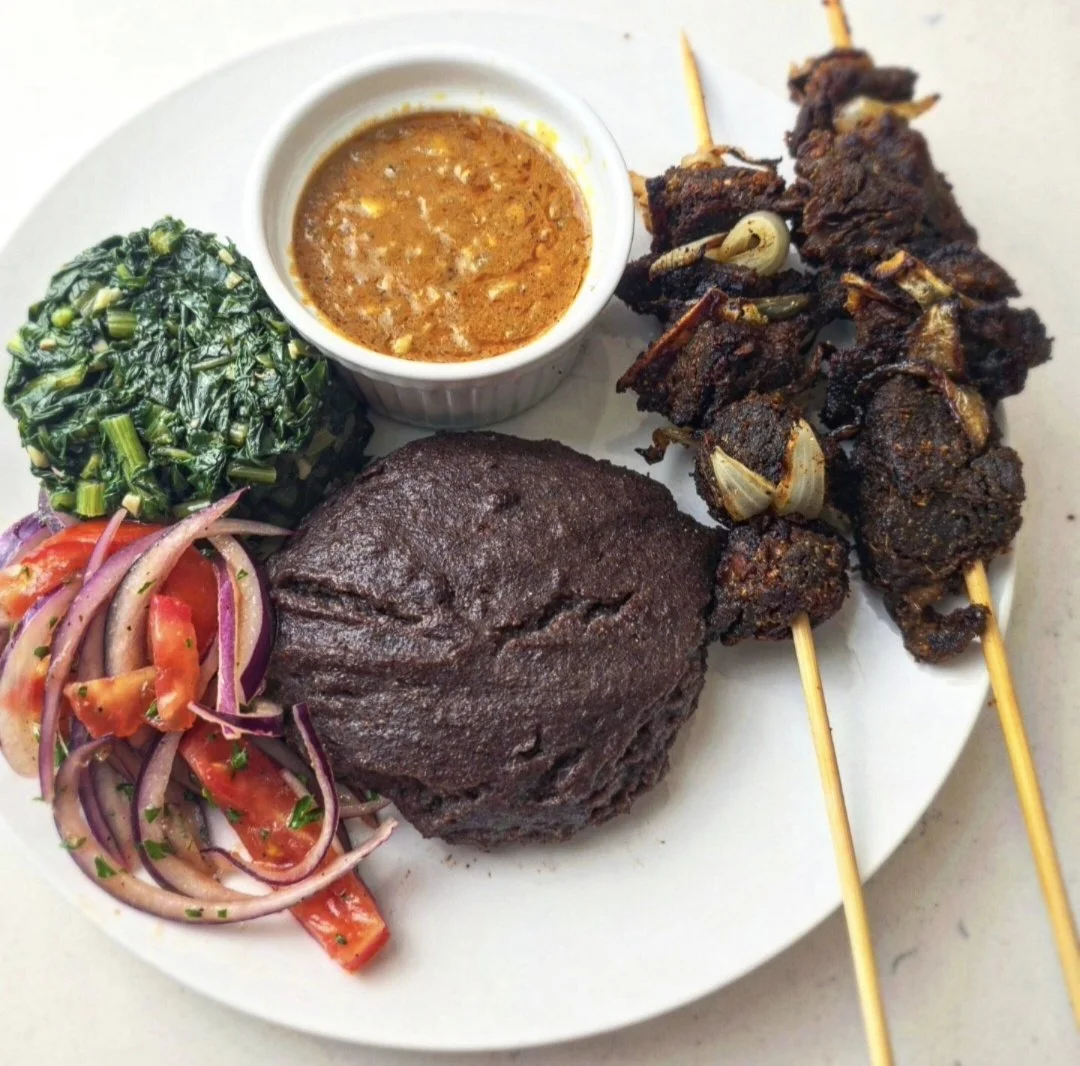
Goat “Kebab Style” With Coconut Curry Sauce
This goat kebab-style dish is inspired by the bold, communal flavors of East African cooking, where grilled meats, fresh salads, sautéed greens, and rich sauces come together on a single plate. Traditionally, dishes like nyama choma are cooked over open flames and served simply with onions, greens, and starches such as ugali, a thick, grain-based porridge.
This version brings those flavors into a more accessible, home-friendly format by using an air fryer, making it easier to recreate without sacrificing depth or character. The goat is first parboiled for tenderness, then marinated and cooked at high heat to achieve caramelized edges. It’s paired with a coconut curry sauce for richness, fresh kachumbari (a simple tomato-onion salad) for brightness, and sautéed greens for balance. The result is a complete, layered meal that feels both rooted in tradition and adaptable for everyday cooking.
This dish was also inspired by a trip to Nairobi, where I immersed myself in the local food culture and tried to experience as much as possible. I was struck by the similarities between Kenyan and Zimbabwean cuisine, which I found especially intriguing. The two countries share a number of culinary connections shaped by overlapping histories. Ugali in Kenya, for example, is very similar to sadza in Zimbabwe. In this recipe, I’ve used finger millet (zyiyo in Zimbabwe), which is also popular in Kenya (ugali wa wimbi).
I also made it in honour of my father, who was a massive ‘mbudzi’ (goat both in Swahili and Shona) fan and loved learning about travel and culture.
For greens, a variety of options can be used (everything from collard greens and spinach to pumpkin leaves) another shared thread between the cuisines, although I wanted somehting on the bitter side to balance the sweetness from the coconut sauce so when with dandelion greens. The fresh salad adds balance, acidity, and crunch, while the coconut sauce brings richness to complement the crispy goat. Coconut, in particular, reflects Kenya’s coastal influences and long history of trade, introducing spices and tropical elements that are less common in Zimbabwean cuisine.

Goat “Kebab Style” With Coconut Sauce
Tender, crispy marinated goat chunks, parboiled for tenderness and finished in the air fryer or grill, then served with grilled onions, coconut curry sauce, and classic East African-inspired sides.
Ingredients
- 2 lbs goat chunks
- 4 garlic cloves
- 1 medium onion, cut into wedges
- 2 bay leaves
- 1 tbsp fresh ginger, grated
- 1 tbsp vinegar
- 1 tsp salt
- 2 lbs goat, parboiled, drained, and dried
- 3 tbsp olive oil
- 2–3 garlic cloves, minced
- 2 medium onions, cut into wedges (reserve some for grilling)
- 2 bay leaves
- 2 tbsp fresh ginger, grated
- 1 tbsp vinegar
- 2 tsp cumin
- 2 tsp coriander
- 1 tsp onion powder
- 1 tsp paprika
- 1 tsp curry powder
- 1 tsp salt
- 1 tsp black pepper
- 1 tsp pilau masala (optional)
- 1 yellow onion, chopped
- 2 garlic cloves, minced
- 1 chili pepper, minced
- 2 tbsp fresh ginger, grated
- 1 tbsp curry powder
- 1 tbsp paprika
- 1 can coconut milk
- 2 tbsp tomato paste
- 1 tbsp tomato sauce
- 1-2 tbsp Worcestershire sauce
- 1 tsp chicken bouillon paste (optional)
- Salt and pepper, to taste
- 2 tomatoes, sliced
- ½ large red onion, sliced
- Juice of 1 lime
- Olive oil
- Fresh parsley
- Salt, to taste
- 1 bunch dandelion greens (or pumpkin leaves if available)
- 2–3 garlic cloves, minced
- Cooking oil
- Salt and pepper, to taste
- All-purpose seasoning (optional)
- 1 tsp chicken bouillon paste
- Lemon juice
- 2-3 cups dry finger millet flour
- 2-3 cups boiling water
- 1 cup cold water
- Salt,Goat & Coconut Sauce to taste
- All-purpose seasoning (optional)
Instructions
- Parboil the goat with the garlic, onion, bay leaves, ginger, vinegar, and salt for about 30 minutes, or until slightly tender. Drain and discard the aromatics, then pat the goat dry and let it sit for 5–10 minutes before transferring to a bowl.
- Mix the marinade ingredients with the goat until evenly coated. Cover and refrigerate for at least 6–8 hours, preferably overnight.
- Remove the goat from the fridge about 20 minutes before cooking to allow it to come closer to room temperature for more even cooking.
- Cook the goat in an air fryer, indoor grill, or grill-air fryer combo at 400°F / 200°C for about 15 minutes, turning halfway through. The edges should be crisp and caramelized while the inside stays tender.
- Add the onion wedges during the last 7–8 minutes of cooking so they soften and char slightly while still retaining some bite.
- For the coconut sauce, sauté the onion and garlic until fragrant and translucent. Add the ginger and chili pepper and cook for another 2–3 minutes.
- Stir in the bouillon paste, tomato paste, salt, paprika, curry powder, and black pepper, cooking for about 1 minute until fragrant. Add the coconut milk, tomato sauce, and Worcestershire sauce, then simmer gently for 10–15 minutes until slightly thickened.
- Skewer the goat chunks with the grilled onions if desired, then serve with the coconut sauce.
- Kachumbari: Combine the tomatoes and red onion with lime juice, olive oil, parsley, and salt to taste.
- Dandelion Greens: Sauté the garlic in oil until fragrant, then add the greens and cook until wilted and tender. Season with salt, pepper, bouillon paste, and a squeeze of lemon juice.
- Finger Millet Sadza/Ugali: Bring water and salt to a simmer, then gradually whisk in about ½ cup of the finger millet flour until a thick paste forms, ensuring lumps do not develop and removing any if needed.
- Gradually add more boiling water as needed until you reach the desired quantity and consistency of sadza/ugali. Reduce the heat to low and cook for about 20 minutes.
- Once cooked through, add the remaining flour and use a wooden spoon to fold and stir until smooth and thick. Turn off the heat, cover with a lid, and let it rest for 5 minutes before serving.
- Serve everything together while warm.
Notes
- Goat is parboiled first to ensure tenderness.
- Sauce should be simmered, not aggressively boiled. You may nitice fat coming to the surgace once it begins to cool, just skim that off the top.
- Serve sauce on the side to preserve texture and don;t straing is to keep it more tranditnoal.
Nutrition Facts
Calories
520Fat (grams)
32 gCarbs (grams)
18 gProtein (grams)
35 gI am not a certified nutritionist and any nutritional information on dontmissmyplate.com should only be used as a general guideline.
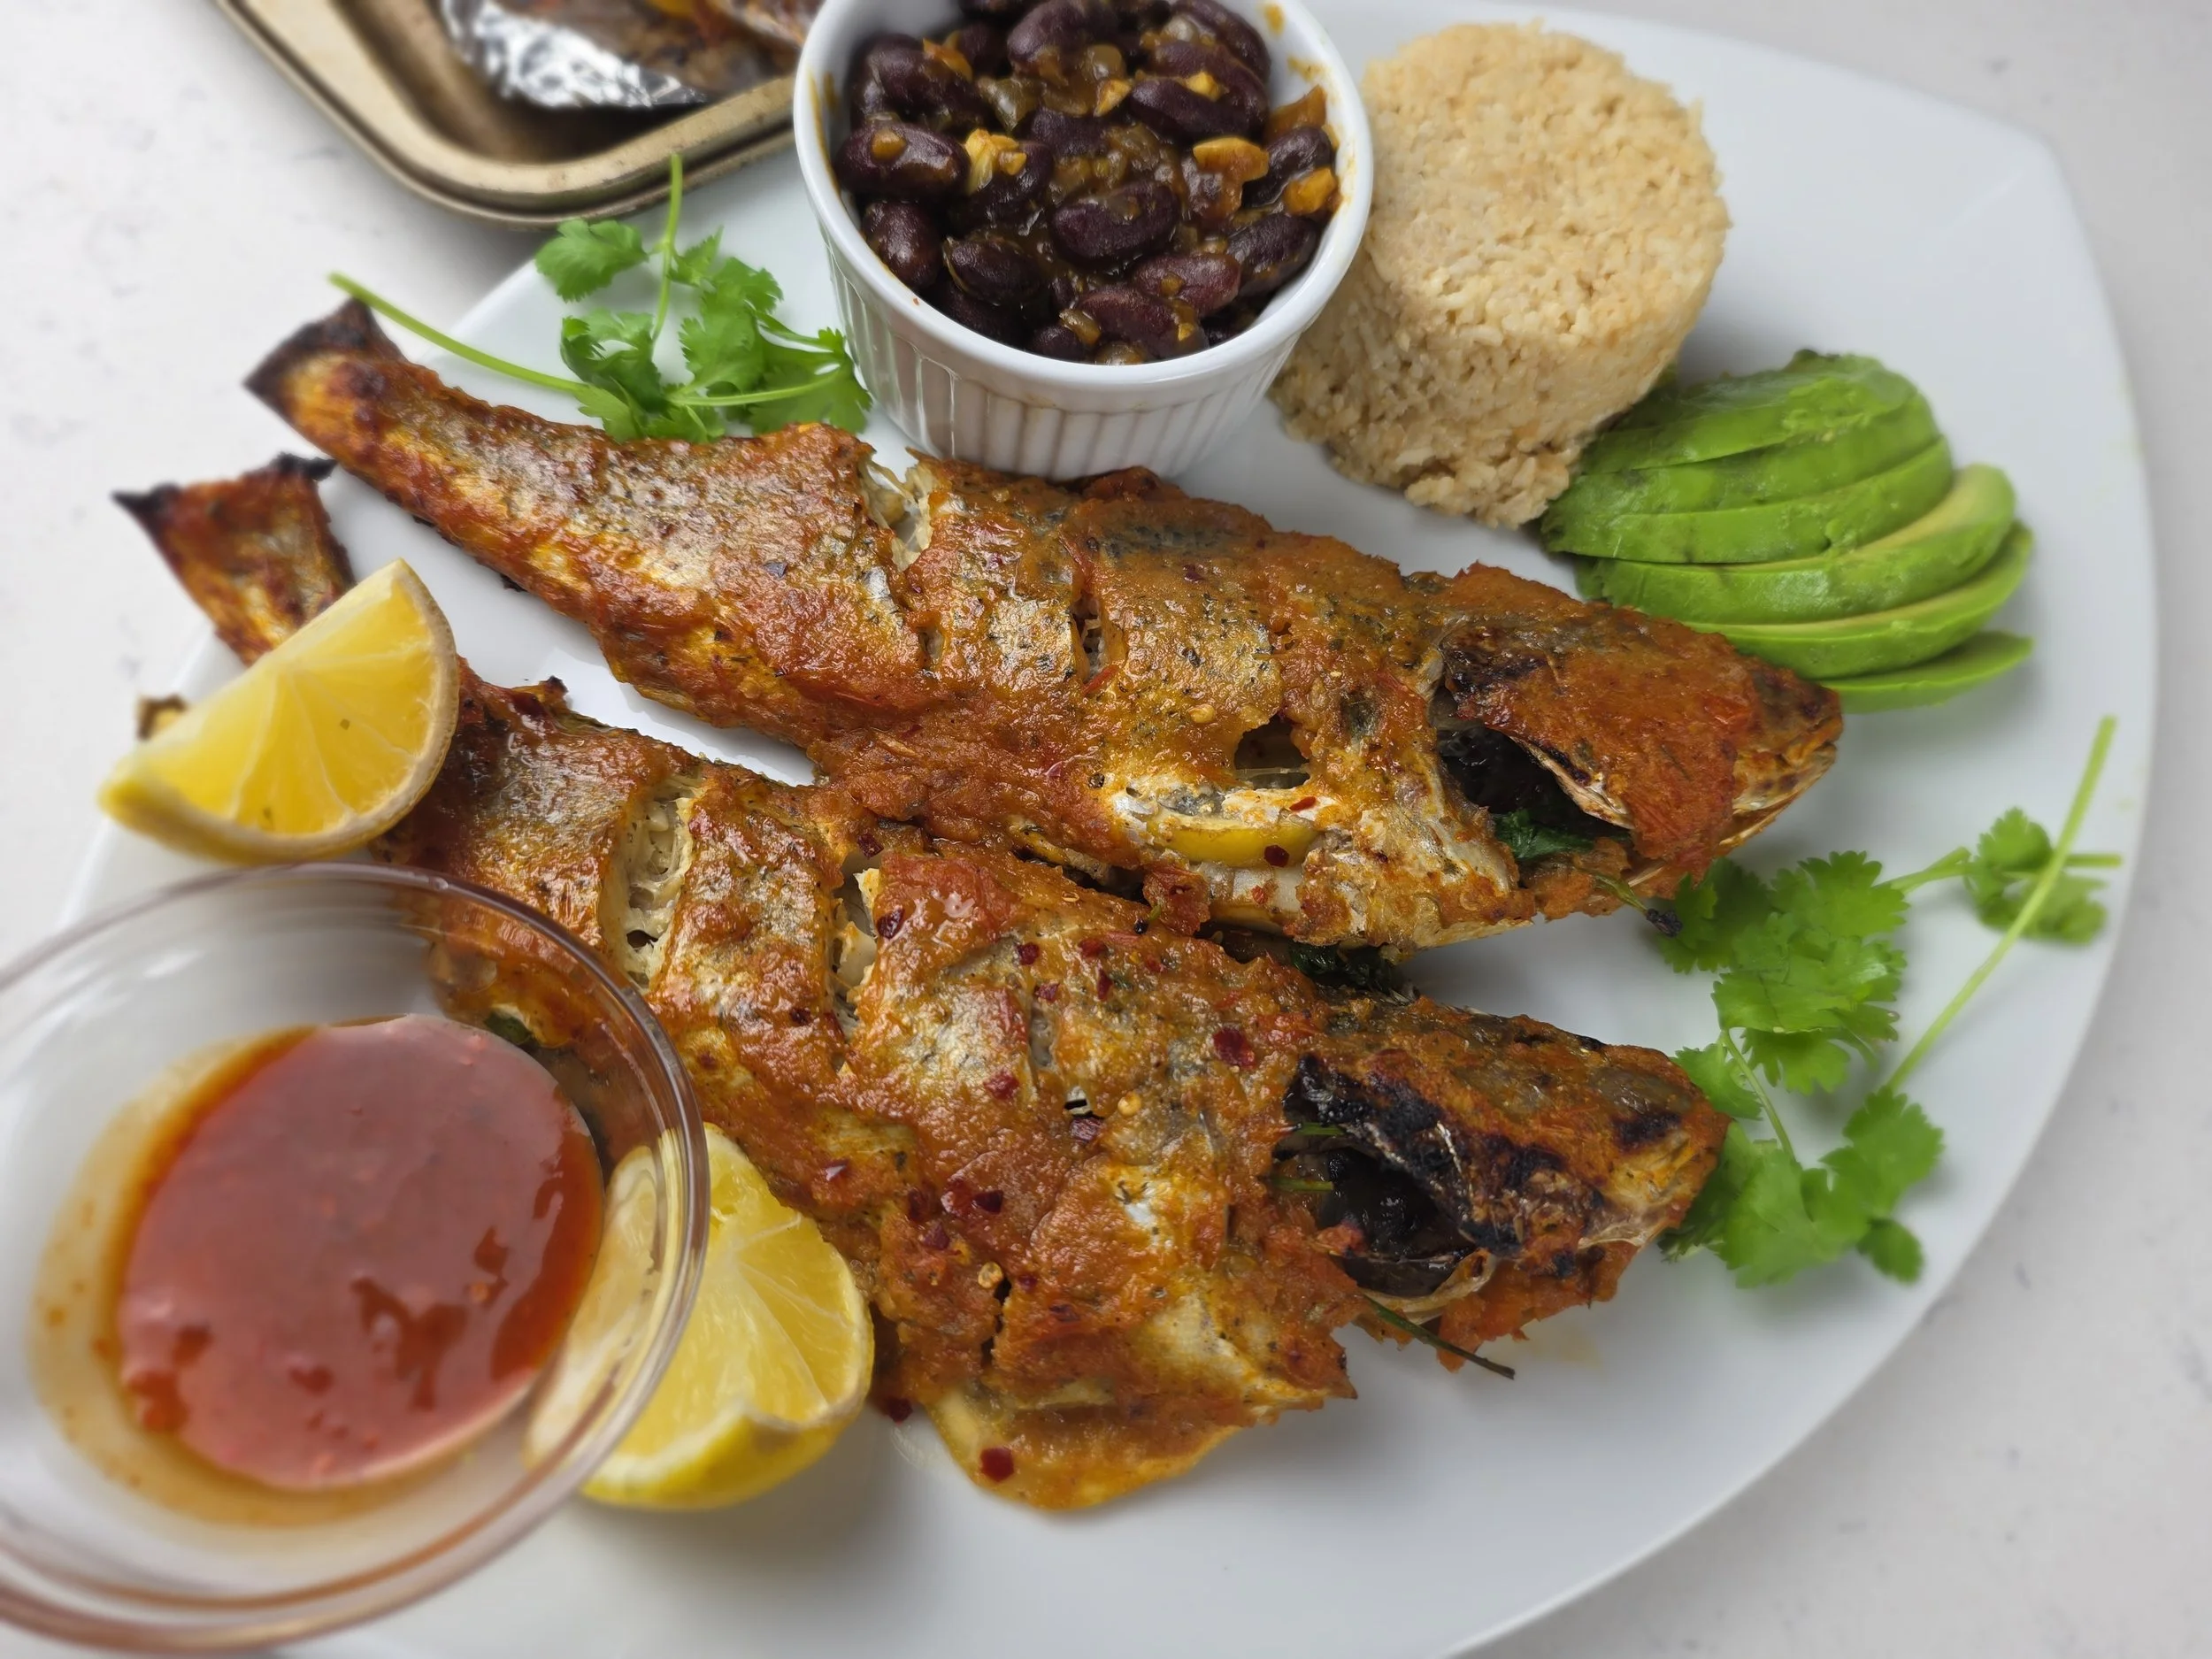
Roasted Croaker Fish with Muto Sauce (Zimbabwean-Style)
Whole fish has always been one of my favorite ways to cook and eat, and if you know my cooking, you know I’m known for it. There’s something about working with the fish in its entirety that feels more connected, more intentional, and ultimately more flavorful.
In Zimbabwe, fish is sometimes overlooked in everyday conversation around food, but it plays a significant role in many communities, especially in areas where access to freshwater lakes makes fish a regular and cherished part of the diet. Whether grilled, fried, or simmered in sauces, fish is a staple that deserves more attention.
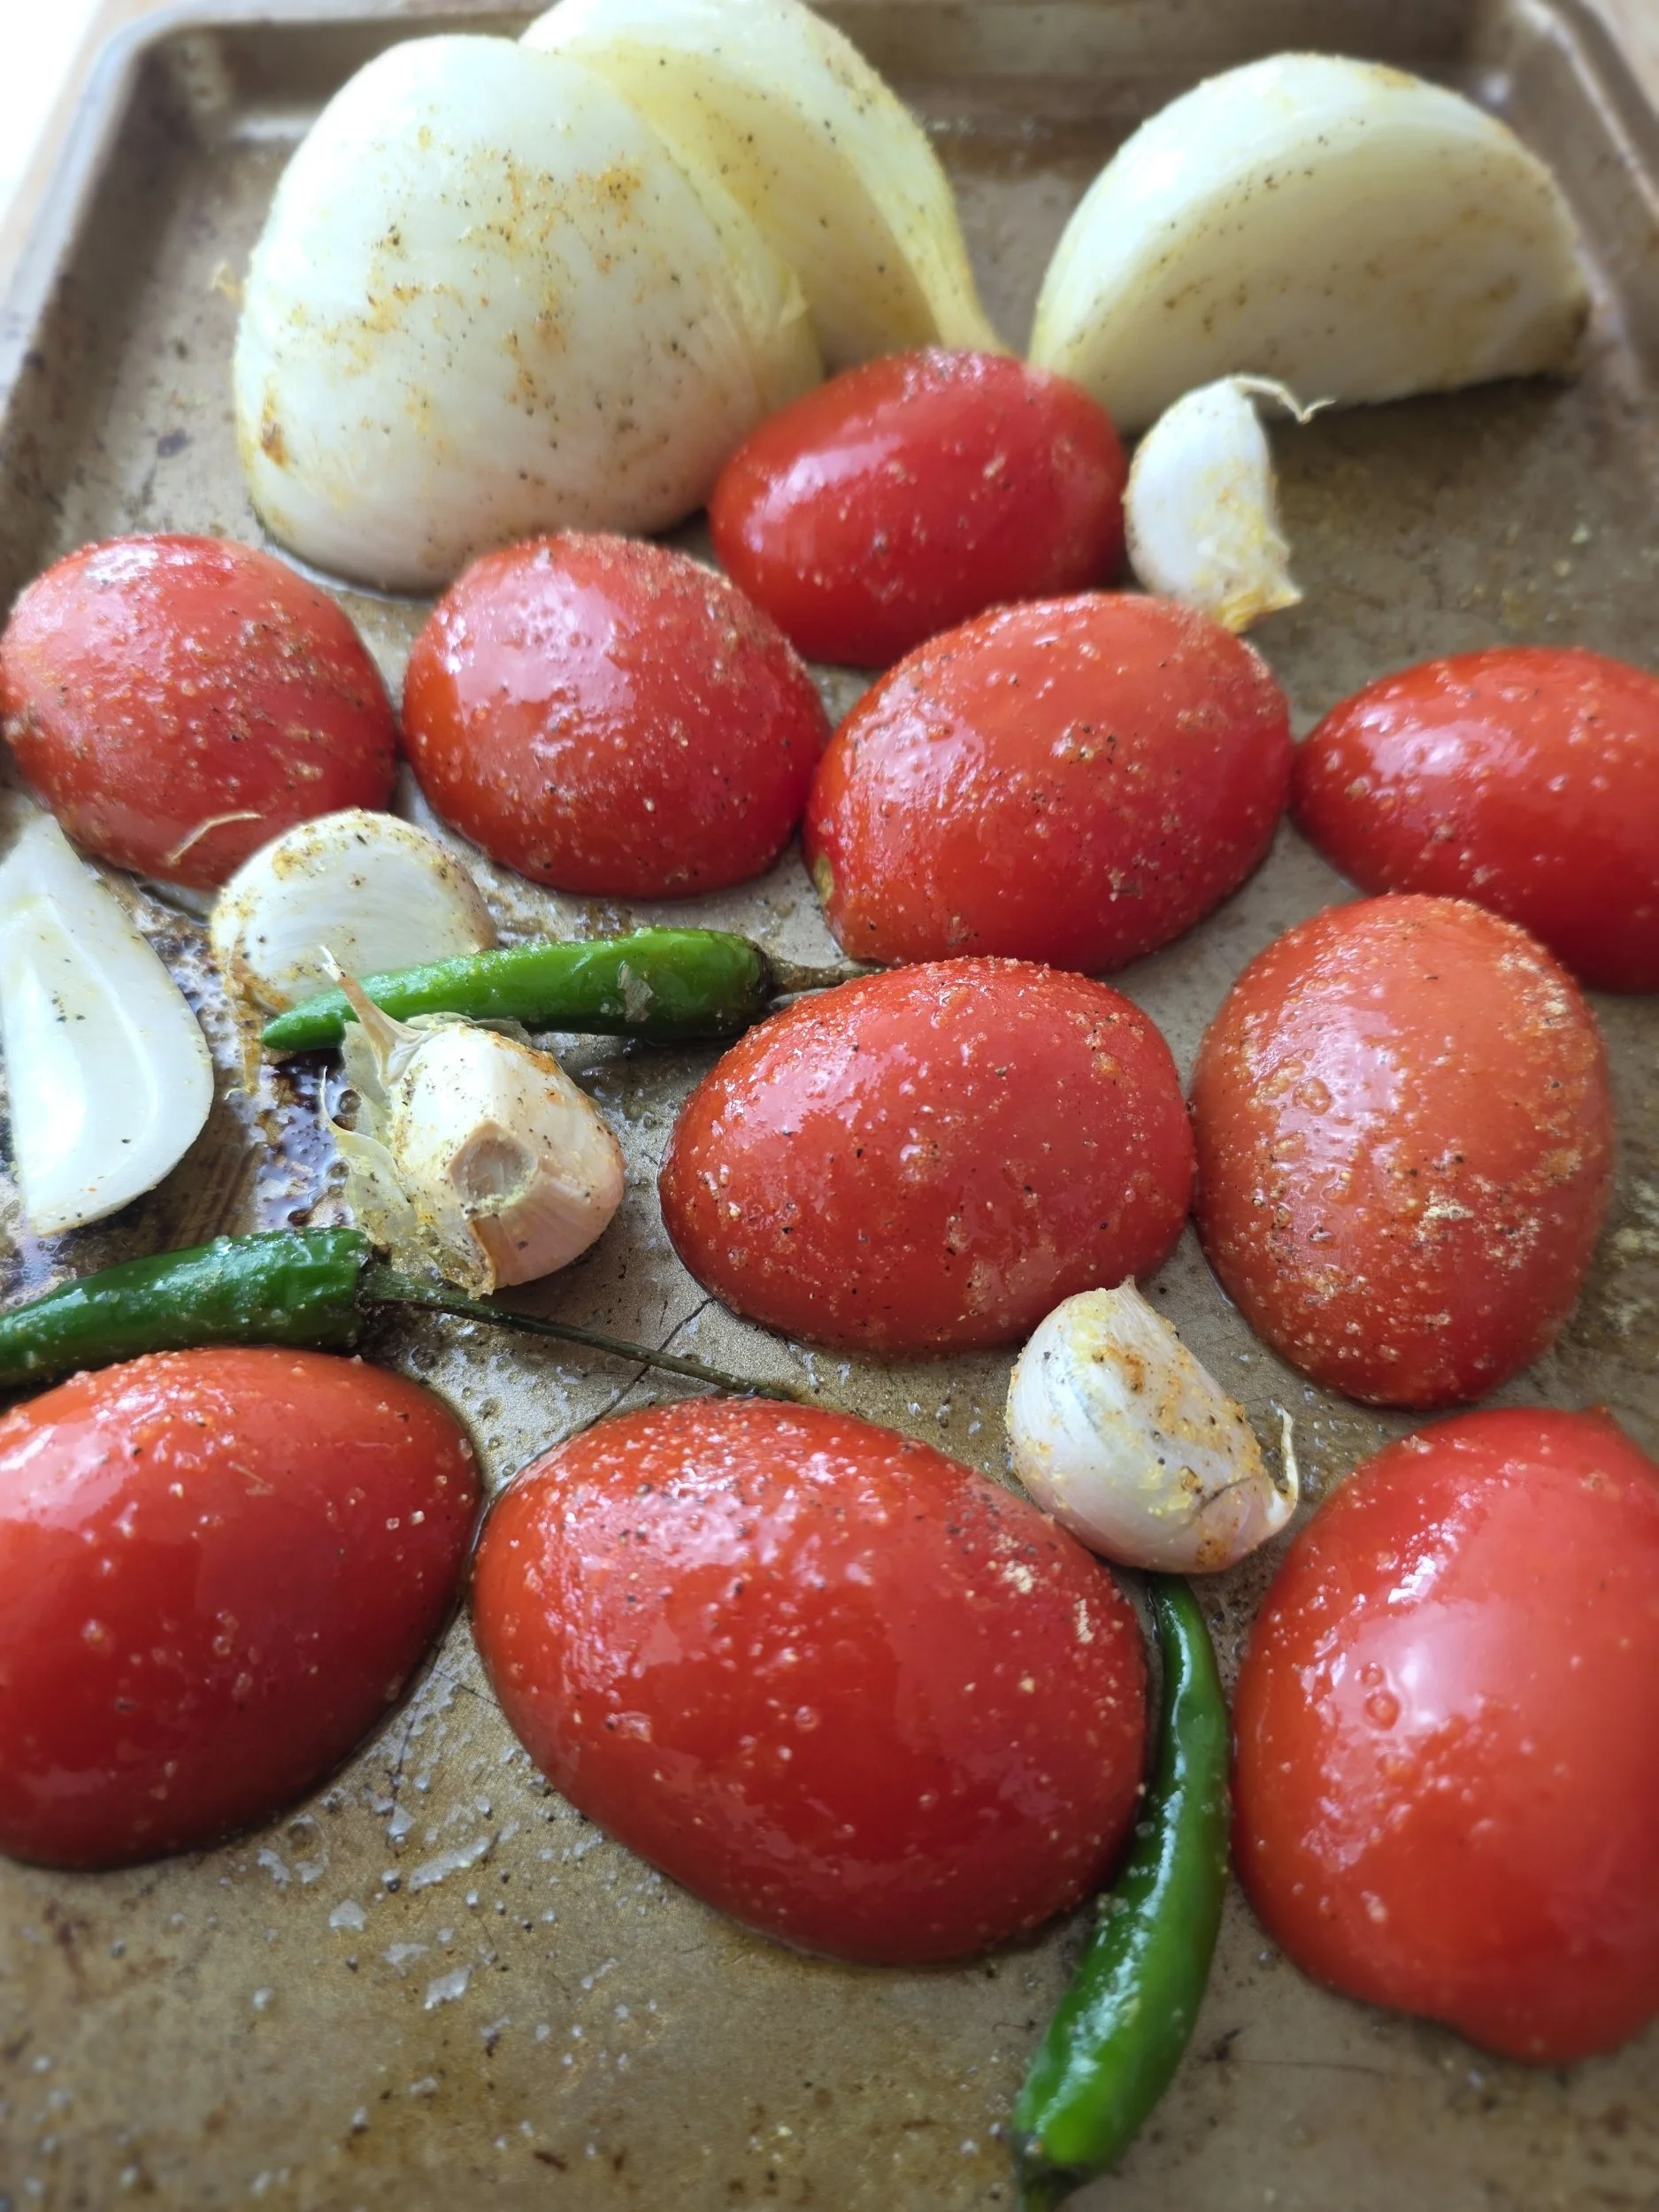
This dish brings that tradition into a slightly more modern, flexible approach. Instead of simply making a standard Zimbabwean tomato-based gravy (muto), where you roast the vegetable and aromatics base (tomatoes, onions, garlic, and chilies) to deepen their flavor, then blend them into what I call a muto-style sauce. It’s perfect for coating fish before finishing it in the oven.
It’s served alongside peanut butter rice and sugar beans, a combination that reflects how Zimbabwean meals often come together: a strong protein, a starch, and something hearty and comforting on the side. The peanut butter rice (also known as mupunga unedovi) adds richness, while the beans bring balance and texture.
More than anything, this dish is about rethinking how we approach familiar flavors. Zimbabwean food doesn’t have to stay in one format, it can evolve and adapt.
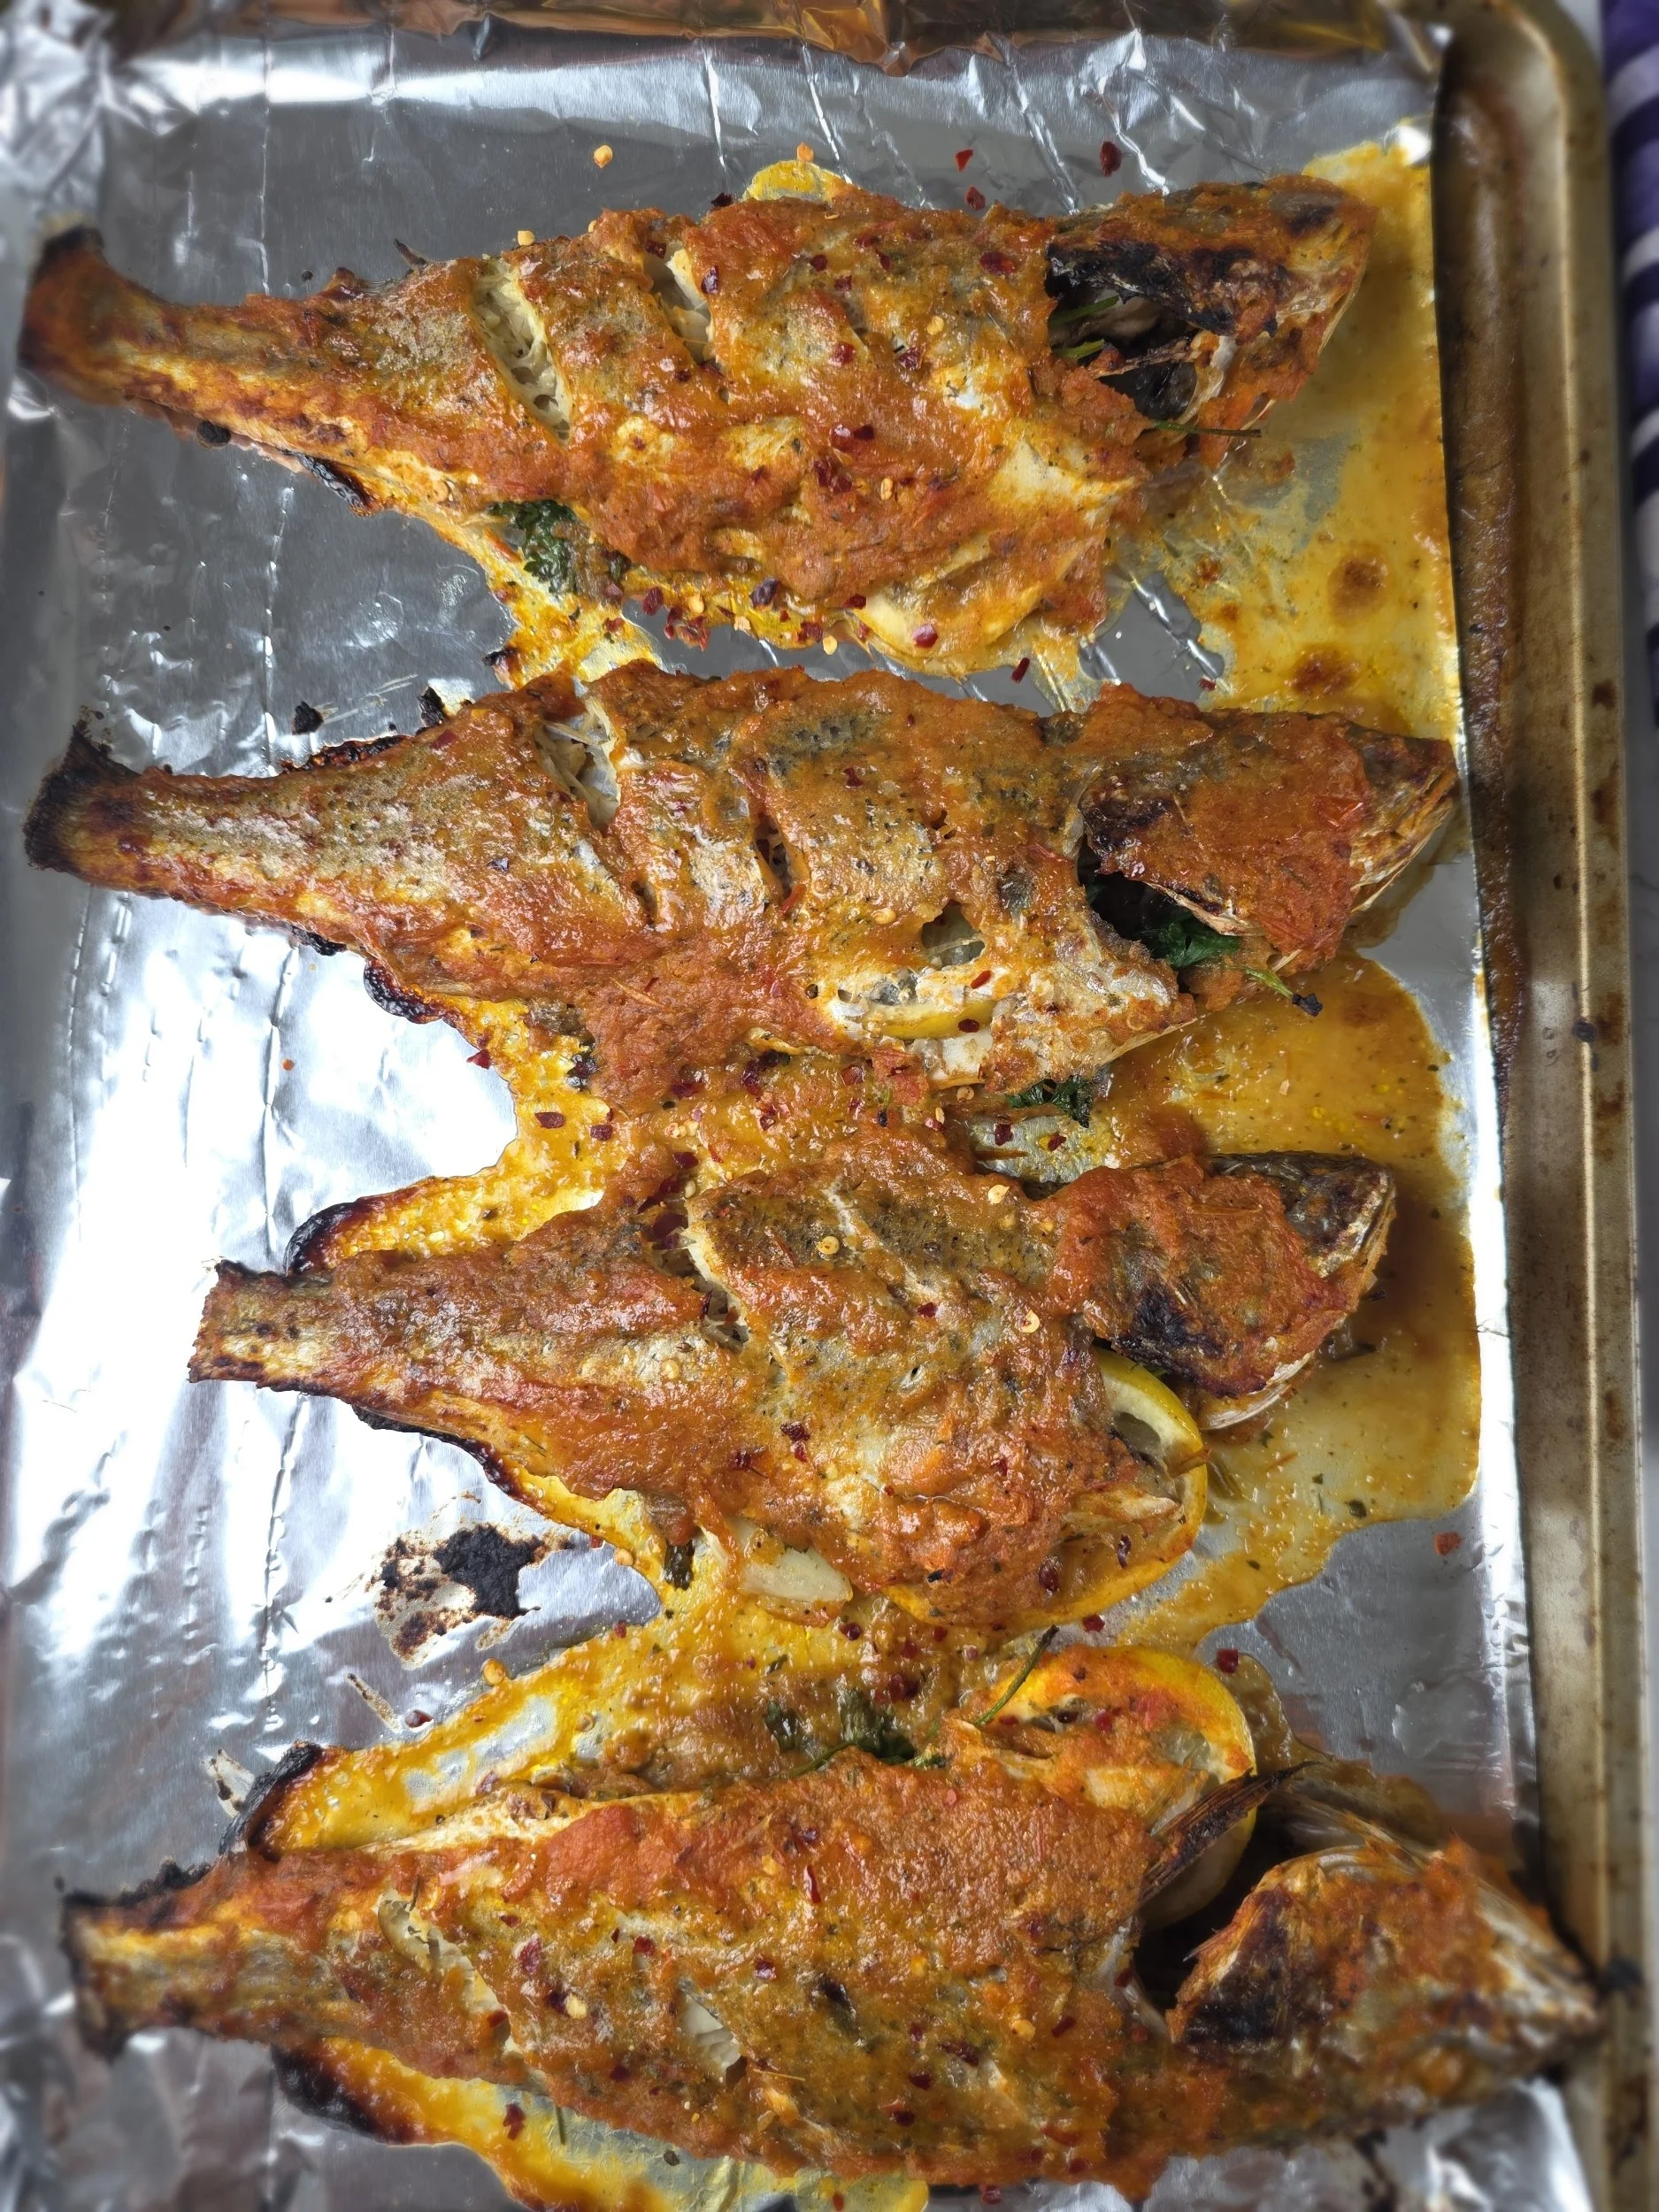
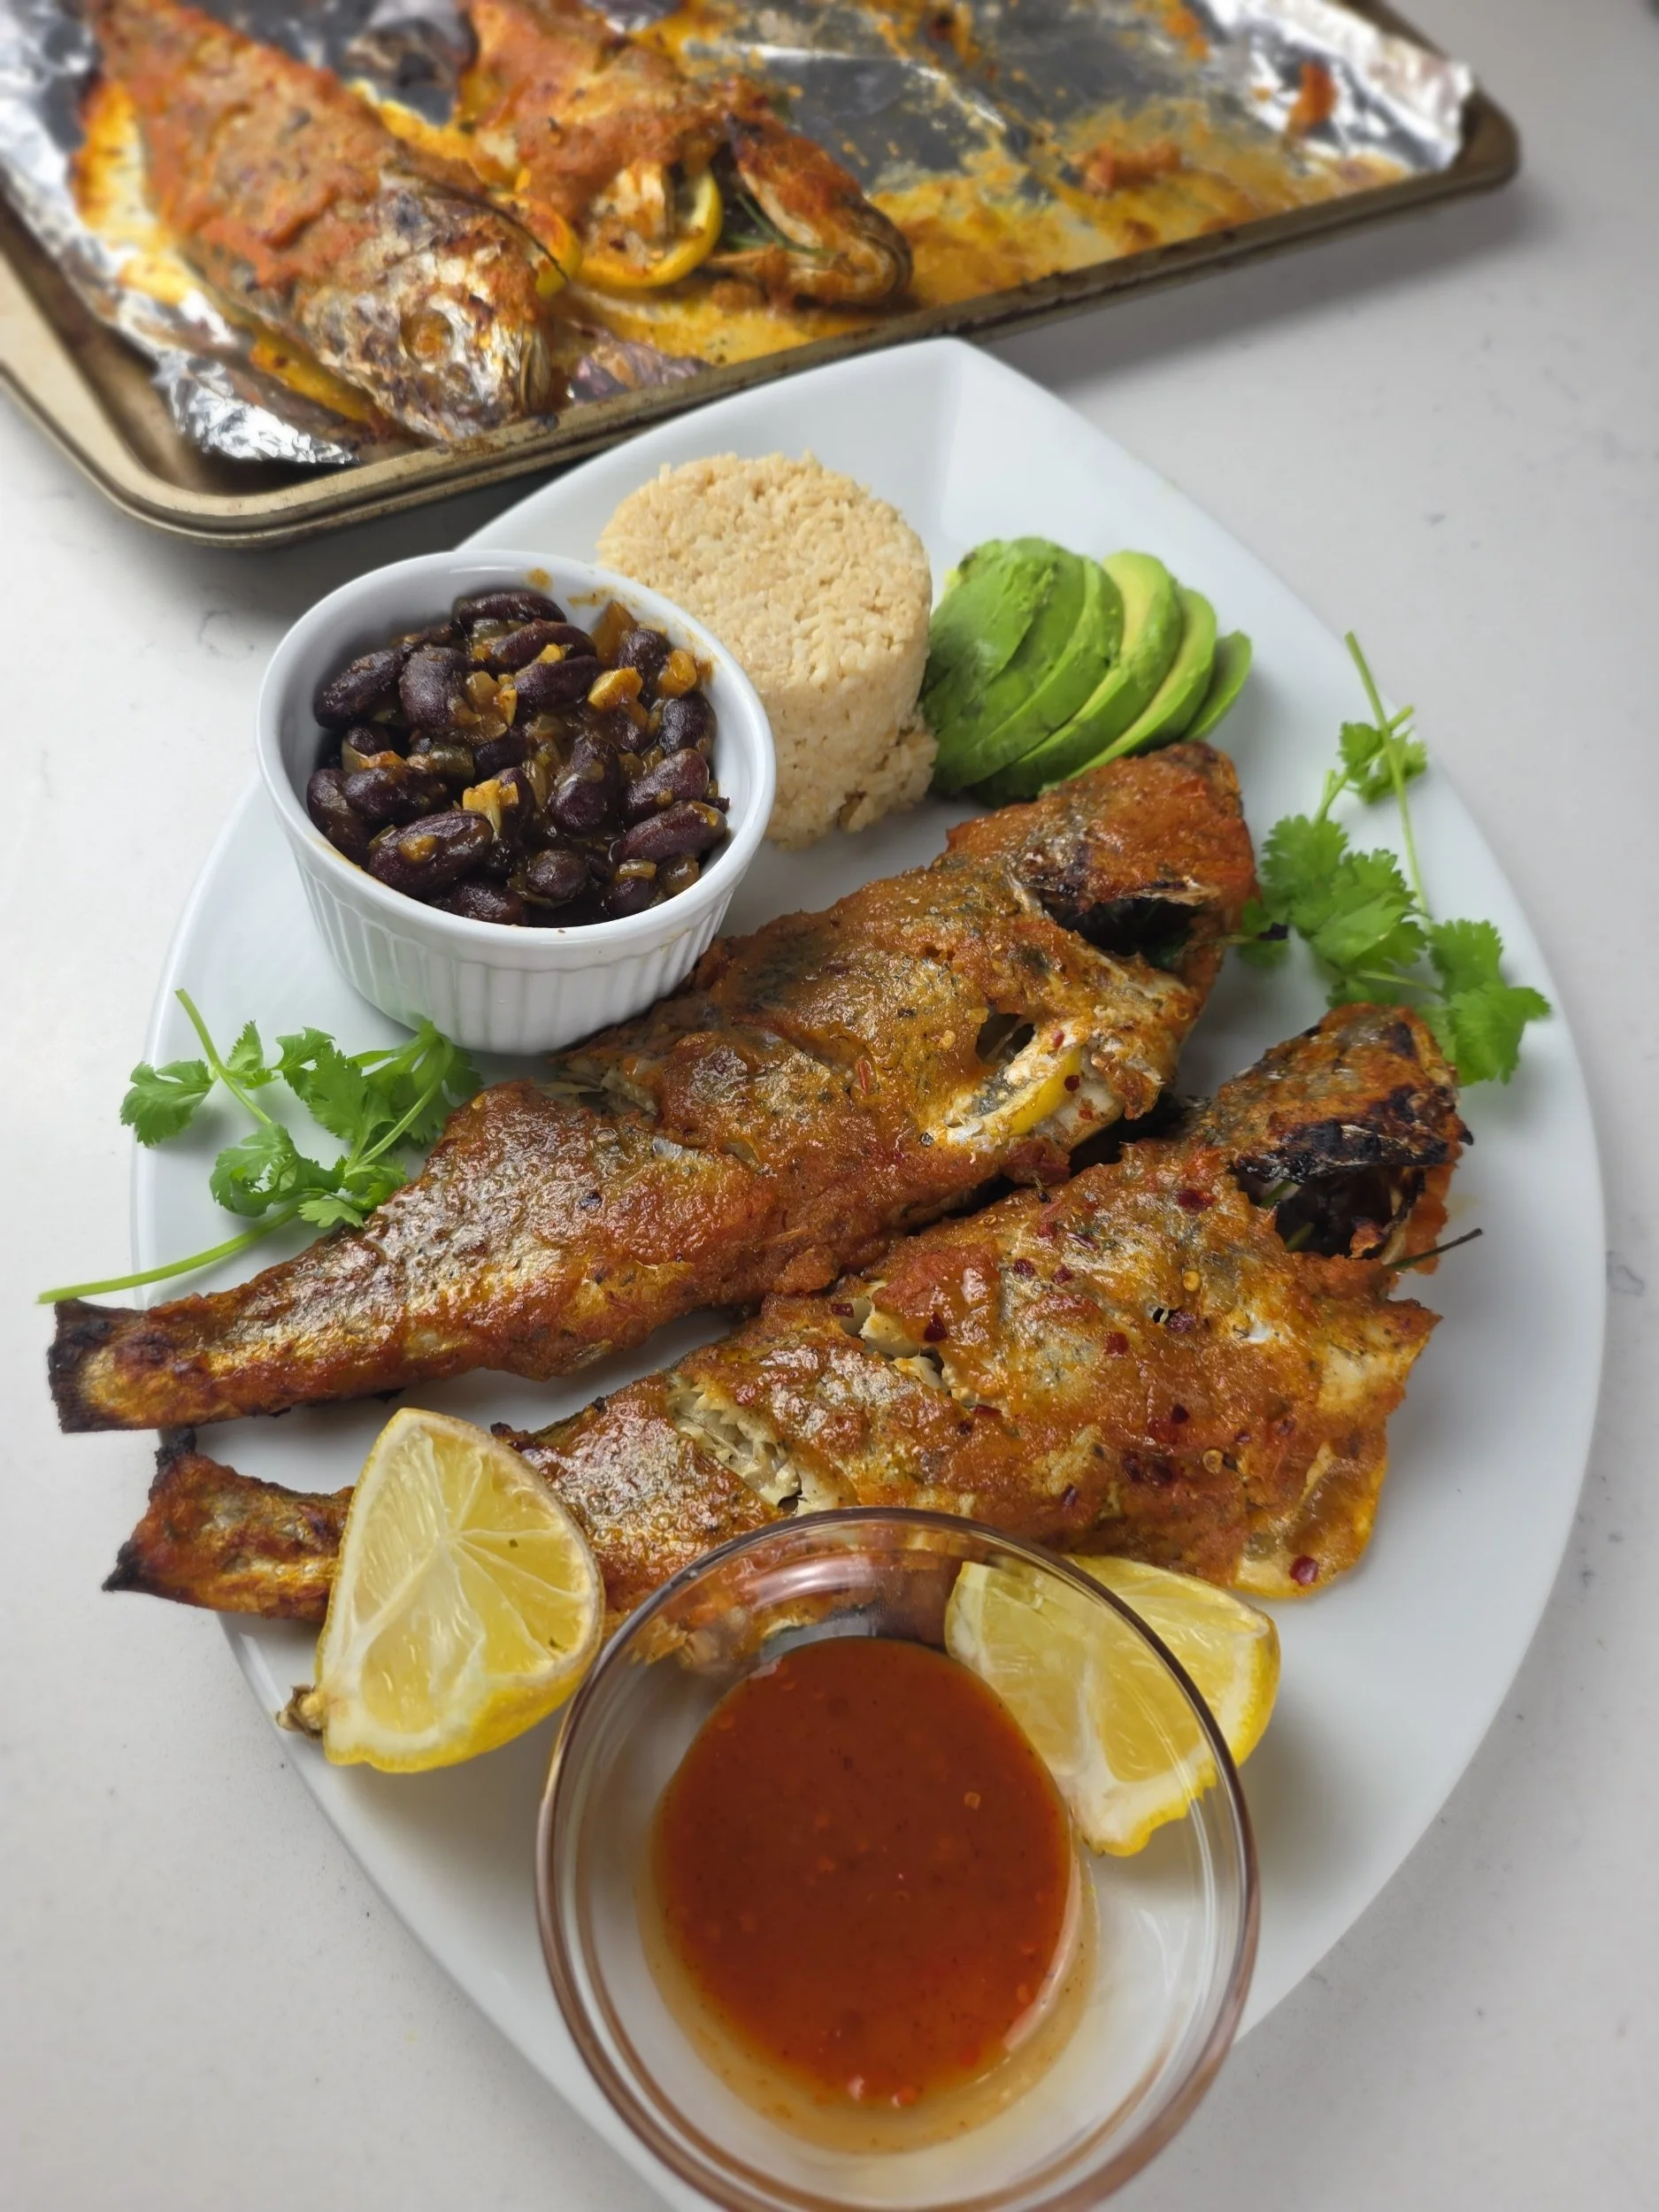

Roasted Croaker Fish with Muto Sauce (Zimbabwean Style)
A flavorful roasted whole fish served with a rich roasted vegetable “muto” sauce, paired with optional peanut butter rice and beans for a hearty Zimbabwean-inspired meal.
Ingredients
- 4 small whole croaker fish (~8 inches each), cleaned
- 2–3 tbsp olive oil
- 2 tbsp fish spice
- 2 tsp paprika
- 2 tsp salt
- 2 tsp black pepper
- 4 garlic cloves, sliced or lightly crushed
- 4 slices lemon + juice of 1 lemon (optional)
- Fresh cilantro or parsley (for garnish)
- Chili flakes (optional)
- 1 large onion, cut into wedges
- 5 Roma tomatoes, halved
- 4 garlic cloves, skin on
- 3–4 hot chilies (Thai or similar)
- 2–3 tbsp oil
- 1 tbsp tomato paste
- 1 tbsp Worcestershire sauce
- 1 tbsp seasoned salt (or to taste)
- 1 tsp black pepper
- Splash of stock or water (for blending)
- 1 cup basmati rice
- 2 tbsp smooth peanut butter
- 4 tbsp hot water
- 2 bay leaves
- 1½ tbsp rice seasoning or stock powder
- 1 tsp salt
- 1½ cups cooked sugar or kidney beans (or 1 can, drained)
- 1/3 onion, chopped
- 1/3 shallot, chopped
- 2 tbsp tomato paste
- 1 hot chili pepper, chopped
- 1 cup chicken stock
- 1–2 tbsp oil
- 1 tsp salt (to taste)
Instructions
- Preheat the oven to 220°C / 425°F.
- Toss the onion, tomatoes, garlic, and chilies with oil and salt, then spread them on a baking tray. Roast for about 25 minutes, flipping half way, until everything is soft.
- Remove the garlic skins, then transfer everything to a blender. Add the tomato paste, Worcestershire sauce, black pepper, and a splash of water. Blend until smooth, or mash for a chunkier texture if preferred. Pour into a pan and simmer for about 10 minutes, adjusting seasoning as needed, then set aside.
- Optional (rice): Cook the rice in salted water with bay leaves and seasoning according to package instructions. Once done, keep it warm. Mix the peanut butter with hot water until smooth, then fold it into the cooked rice until evenly combined.
- Optional (sugar beans): Heat oil in a pan for the beans and sauté the onion and garlic until soft. Add chili, tomato paste, and seasoning, stirring well to combine. Add the beans and stock, then simmer for 5–8 minutes until slightly thickened and flavorful.
- Reduce oven temperature to 200°C / 400°F.
- Pat the fish dry and score both sides. Rub with olive oil, salt, pepper, paprika, and fish spice.
- Stuff each fish with garlic, lemon slices, and herbs, then set aside.
- Place the fish on a baking tray and spoon some of the muto sauce over the top. Cover loosely with foil and bake for 8–10 minutes. Remove the foil and cook for another 5 minutes.
- Brush with more muto sauce, season with chilli flakes, and broil for 2–3 minutes until slightly caramelized.
- Serve with extra sauce and your chosen sides, such as peanut butter rice, beans, avocado, or chili sauce.
Notes
- Roasting the vegetables is essential for deep flavor, don’t skip it.
- Blend for smooth sauce or mash for rustic texture.
- Avoid overcooking the fish; it cooks quickly and can dry out.
- Always mix peanut butter with hot water before adding to rice for smooth consistency.
Nutrition Facts
Calories
500Fat (grams)
25 gCarbs (grams)
40 gProtein (grams)
35 gI am not a certified nutritionist and any nutritional information on dontmissmyplate.com should only be used as a general guideline.
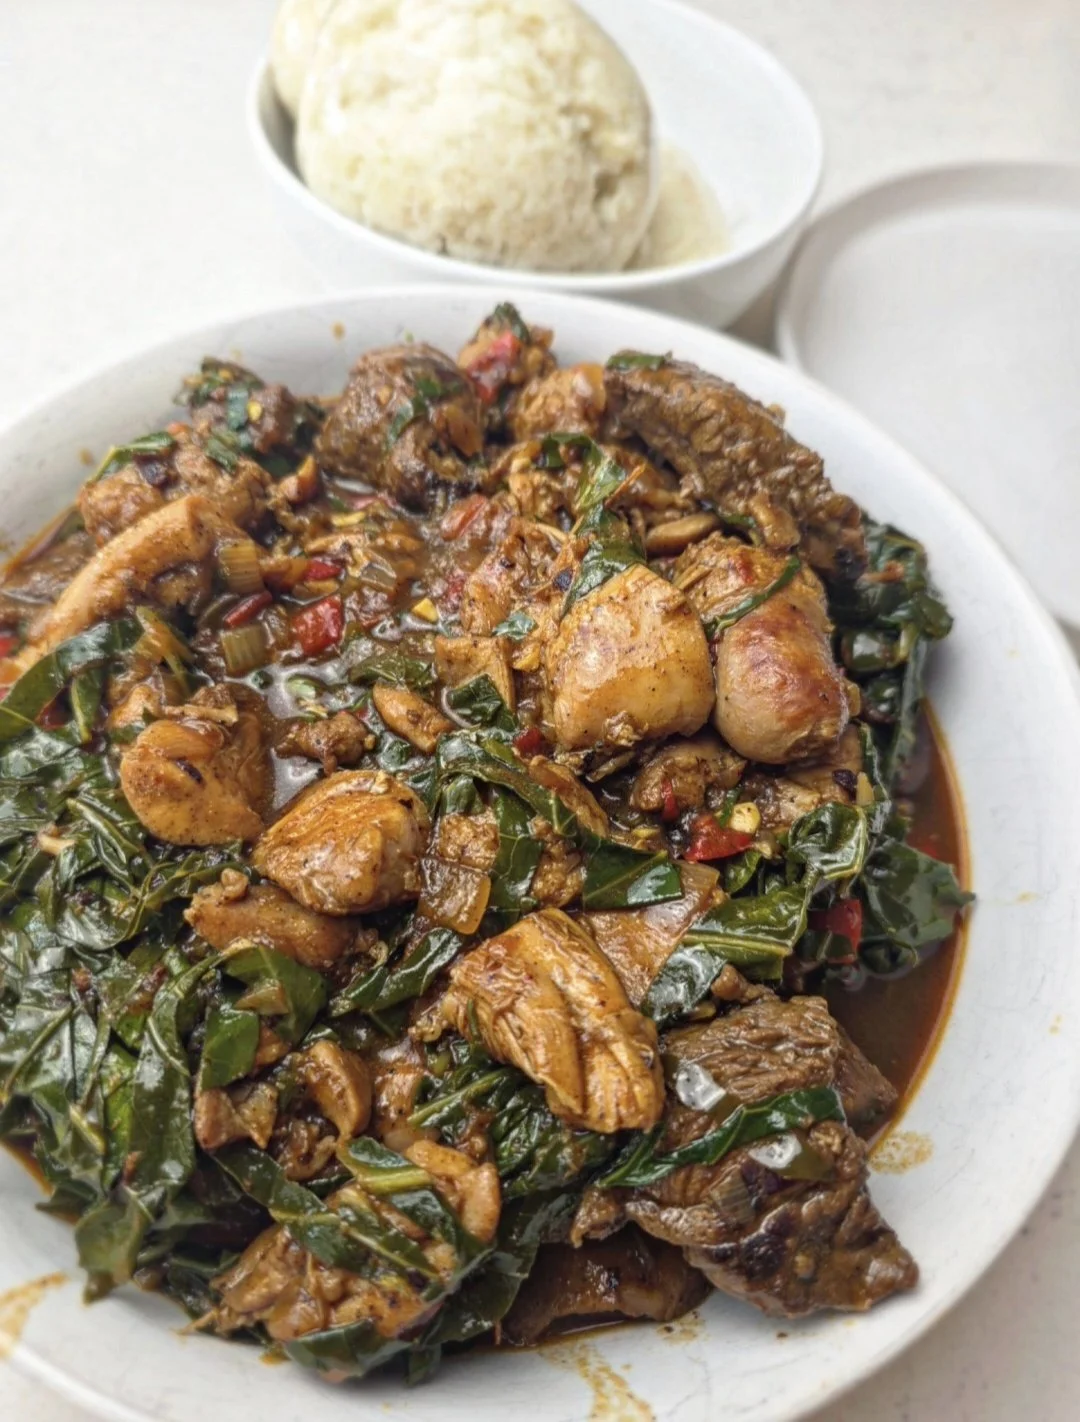
Zimbabwean Gango (Meat Medley and Greens)
Gango is a deeply comforting and richly layered Zimbabwean dish that brings together multiple meats, cooked in a savory onion and tomato base (also known as muto) with tender greens. Traditionally made with a combination of beef, chicken, and sausage, it’s the kind of meal that feels abundant, hearty, and deeply satisfying. It’s not an everyday dish for many households! Gango is often reserved for weekends, gatherings, or moments when you want to cook something special and filling. On the other hand, it is also a resourceful dish, a way to use different cuts of meat and turn them into something rich, comforting and full of flavour.
In Zimbabwe, meat has historically been a luxury for many families, particularly in the rural areas, which is why dishes like gango feel so intentional. Instead of relying on heavy seasoning, the flavor often comes from the quality of the meat itself, combined with simple aromatics like onion, garlic, and tomato, and sometimes peppers. When done right, the result is a dish that tastes full, balanced, and naturally rich without needing much intervention.
This version uses sirloin beef chunks, chicken thighs, and sausage, finished with collard greens for a slight bitterness that balances the richness. It’s best served with sadza (traditional cormeal side), rice, or any starch that can soak up the sauce. For those who enjoy heat, a chili sauce or a fresh chili relish works beautifully on the side.
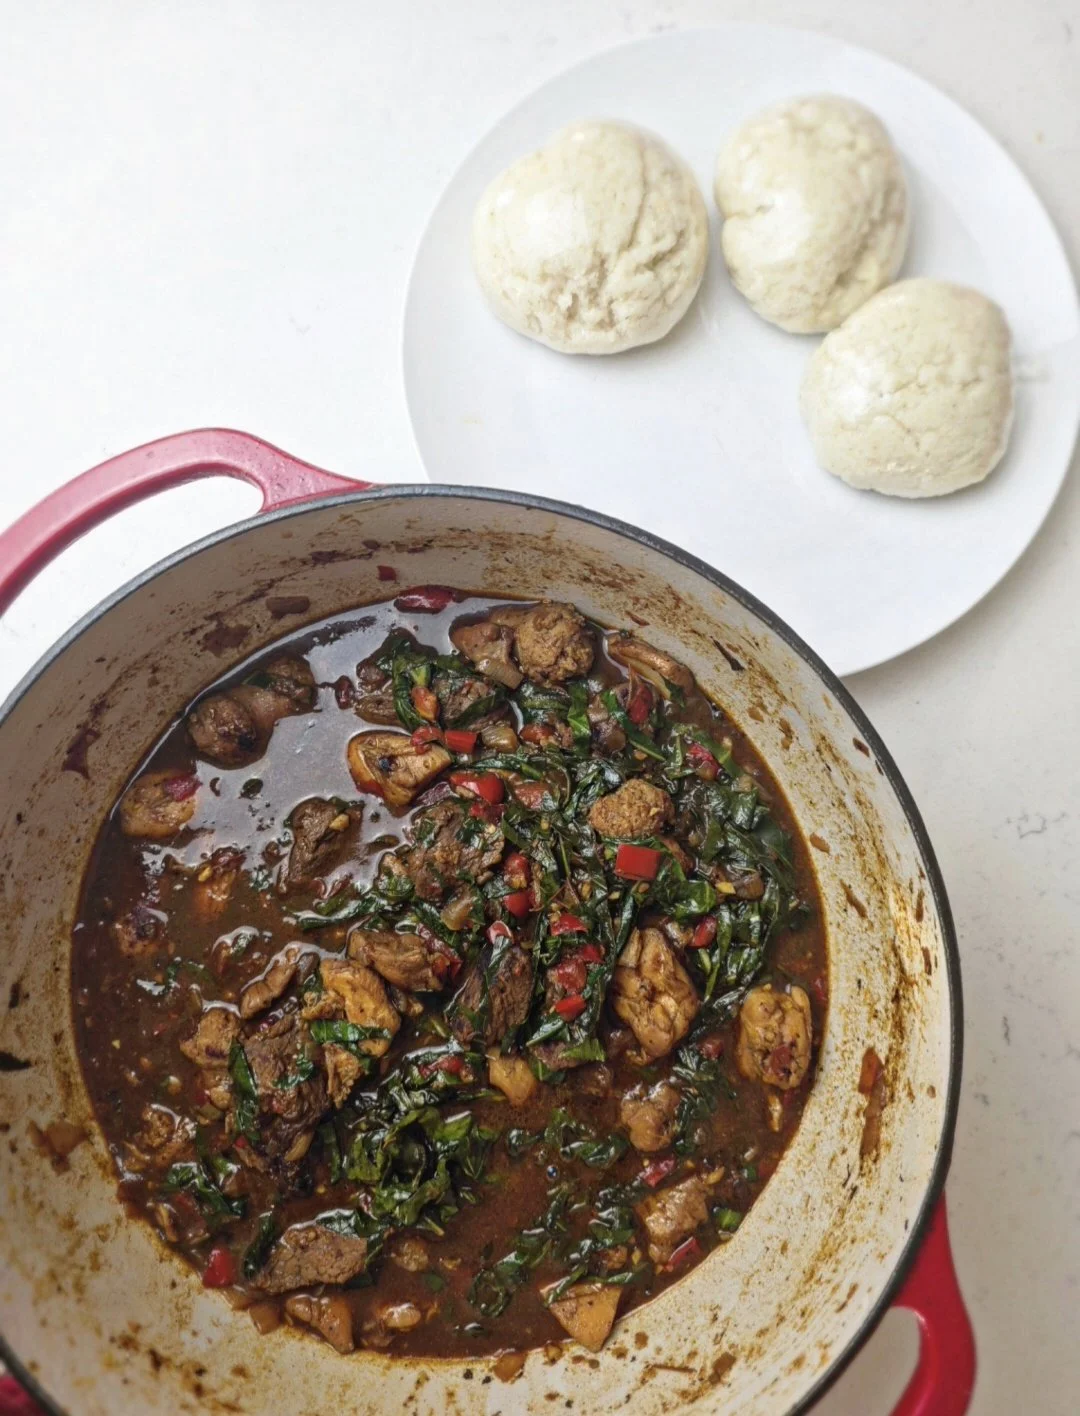
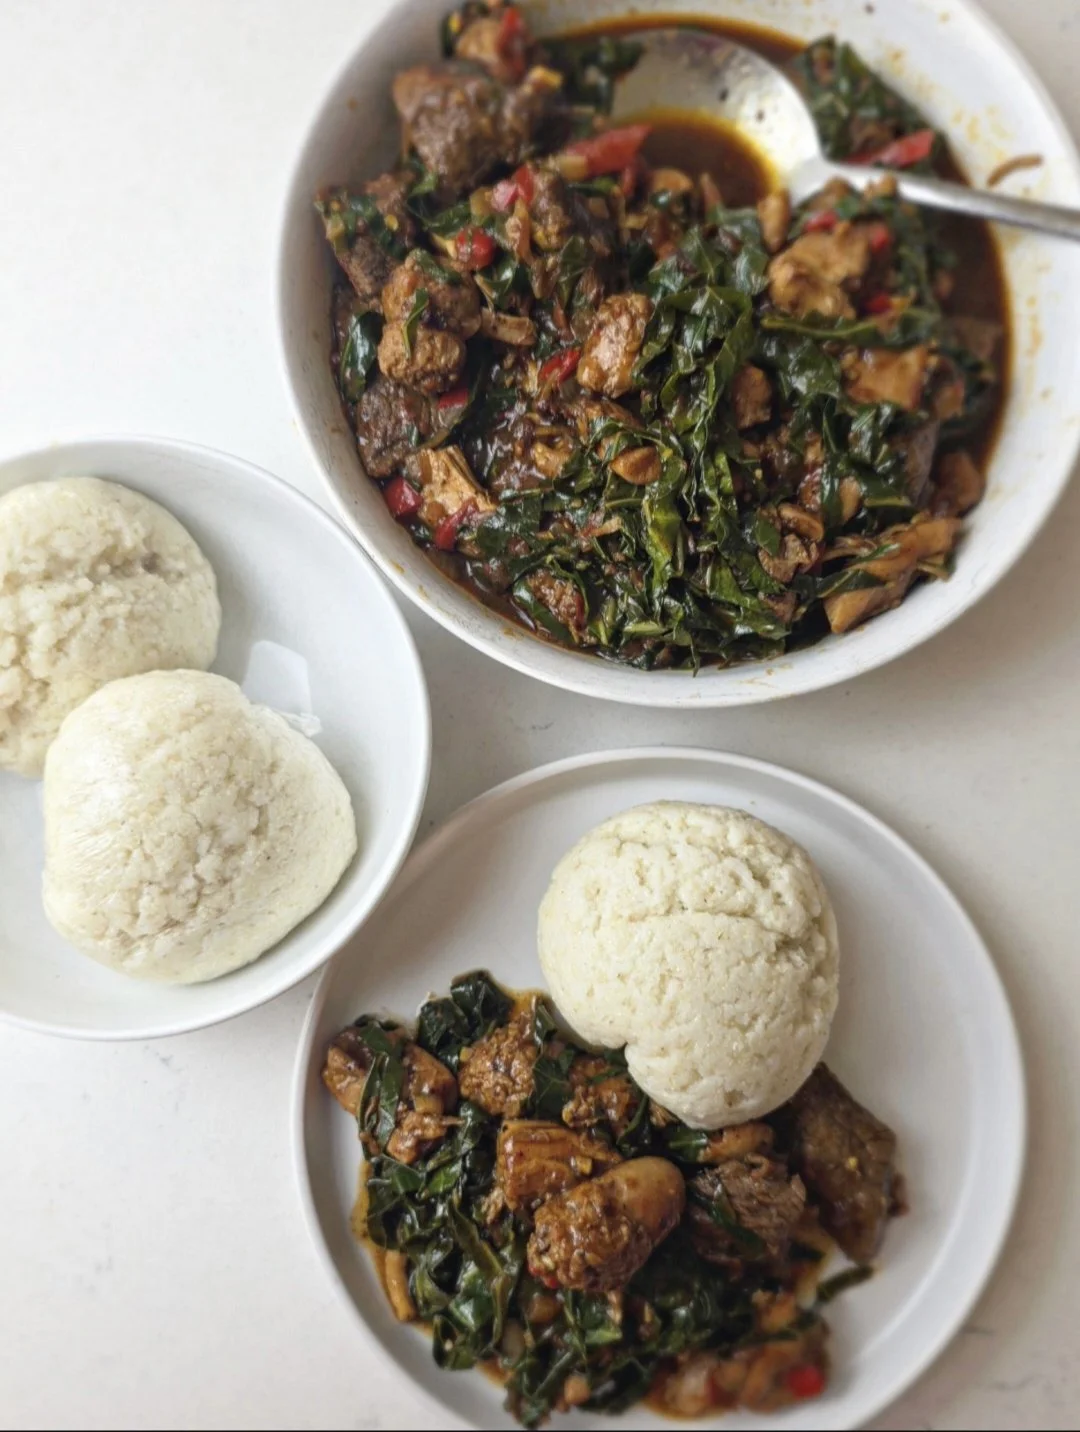
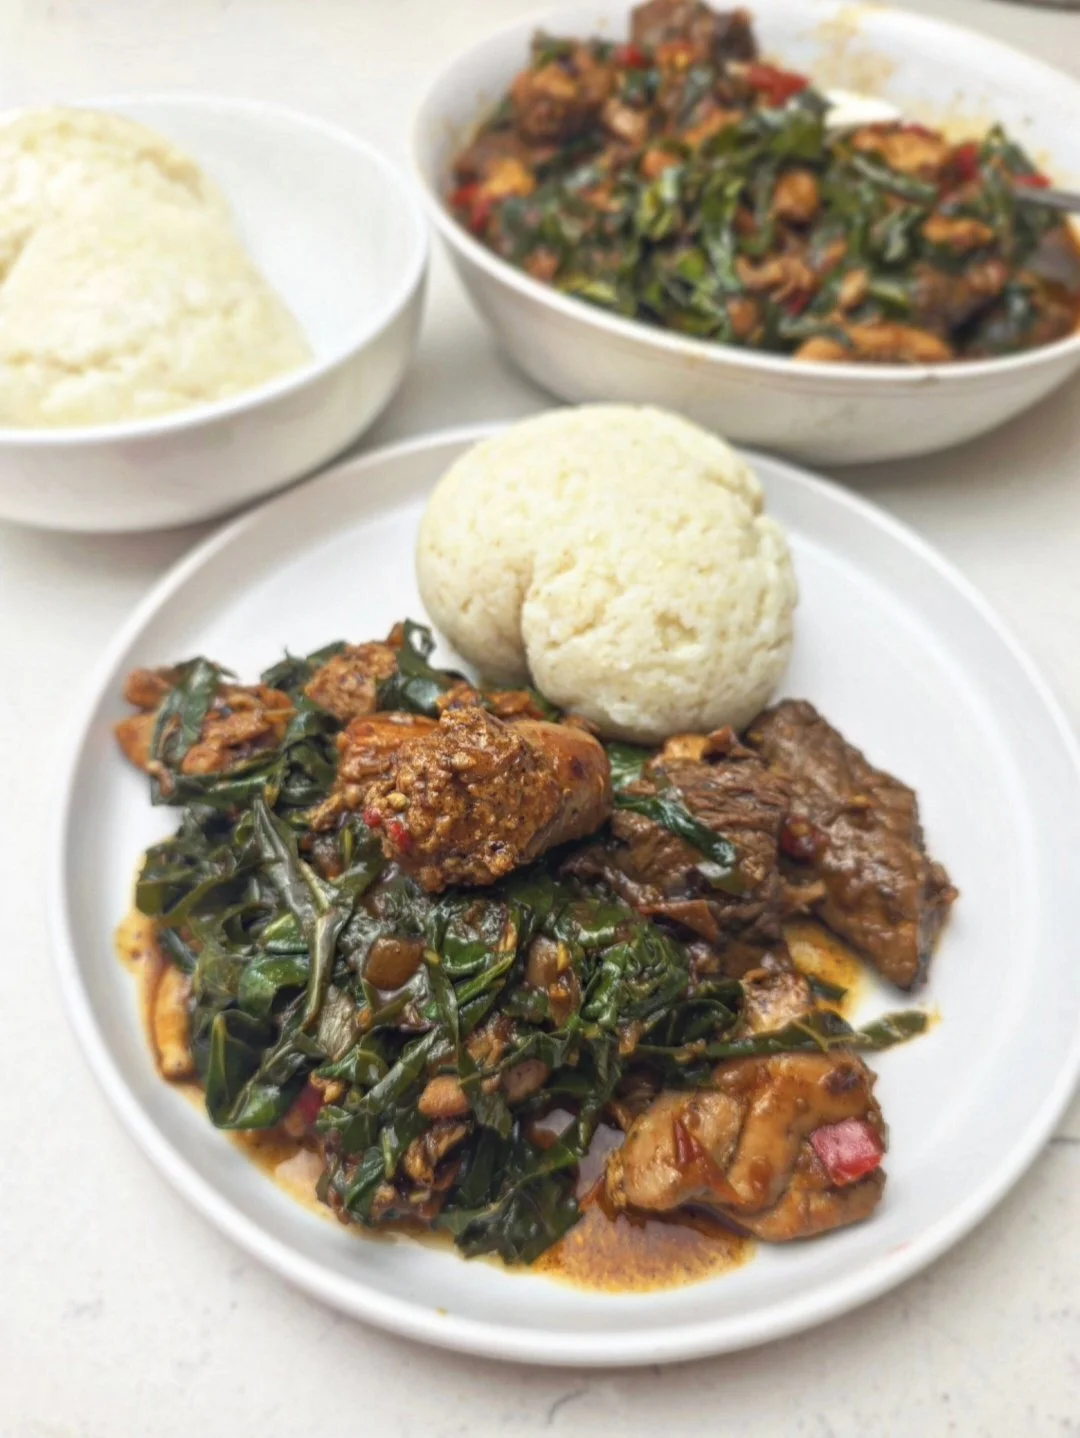

Zimbabwean Gango (Meat Medley with Greens)
A hearty Zimbabwean-style gango made with beef, chicken, sausage, and collard greens, simmered in a rich onion and tomato base. A comforting, special-occasion dish perfect with sadza or rice.
Ingredients
- 1–1.25 lbs chuck or sirloin beef (cut into chunks)
- 4 chicken thighs, skinless and boneless, chopped
- 2 sausages (boerwoers, bratwurst or similar), sliced
- 1 large onion, sliced
- 4 garlic cloves, minced
- 4 Roma tomatoes, chopped
- 2 tbsp tomato paste
- 1 red bell pepper, diced (optional)
- 1 chilli pepper, chopped (optional)
- 1 bunch collard greens, chopped
- 1 - 1 1/2 cups stock (or water + one 10g boullion cube)
- 1 beef stock cube (optional)
- 1 tsp curry powder
- 1 tsp paprika
- 1 tsp black pepper
- 2 tsp salt
- 1 tbsp Royco Usavi mix beef flavour (optional)
Instructions
- In a Dutch oven, sear the beef, chicken, and sausage in batches. Remove and set aside.
- In the same pot, cook onion and garlic until softened (3 min). Add the bell and chilli peppers, cook for 2-3 min.
- Add tomatoes and tomato paste. Cook until thick, glossy and slightly reduced (5 min).
- Add the stock cube, curry powder and spices. Cook 30–60 seconds and adjust as needed to taste.
- Return all meats to the pot. Add stock (do not fully submerge, you are not making a stew).
- Bring to a gentle simmer, cover slightly, and cook 30 minutes, removing the lid completely to reduce the liquid in the last 10 minutes.
- Stir in collard greens and cook for another 10–15 minutes until tender,
- Adjust seasoning again and reduce to desired consistency.
Notes
- Meat quality matters: If using supermarket beef, consider marinating lightly with salt, pepper, garlic and other spices beforehand.
- Stock matters: If flavor feels flat, use stronger stock or add a second cube sparingly.
- Don’t rush the reduction as flavor develops as liquid reduces.
- Best with sadza or rice.
Nutrition Facts
Calories
550Fat (grams)
35 gProtein (grams)
40 gI am not a certified nutritionist and any nutritional information on dontmissmyplate.com should only be used as a general guideline.
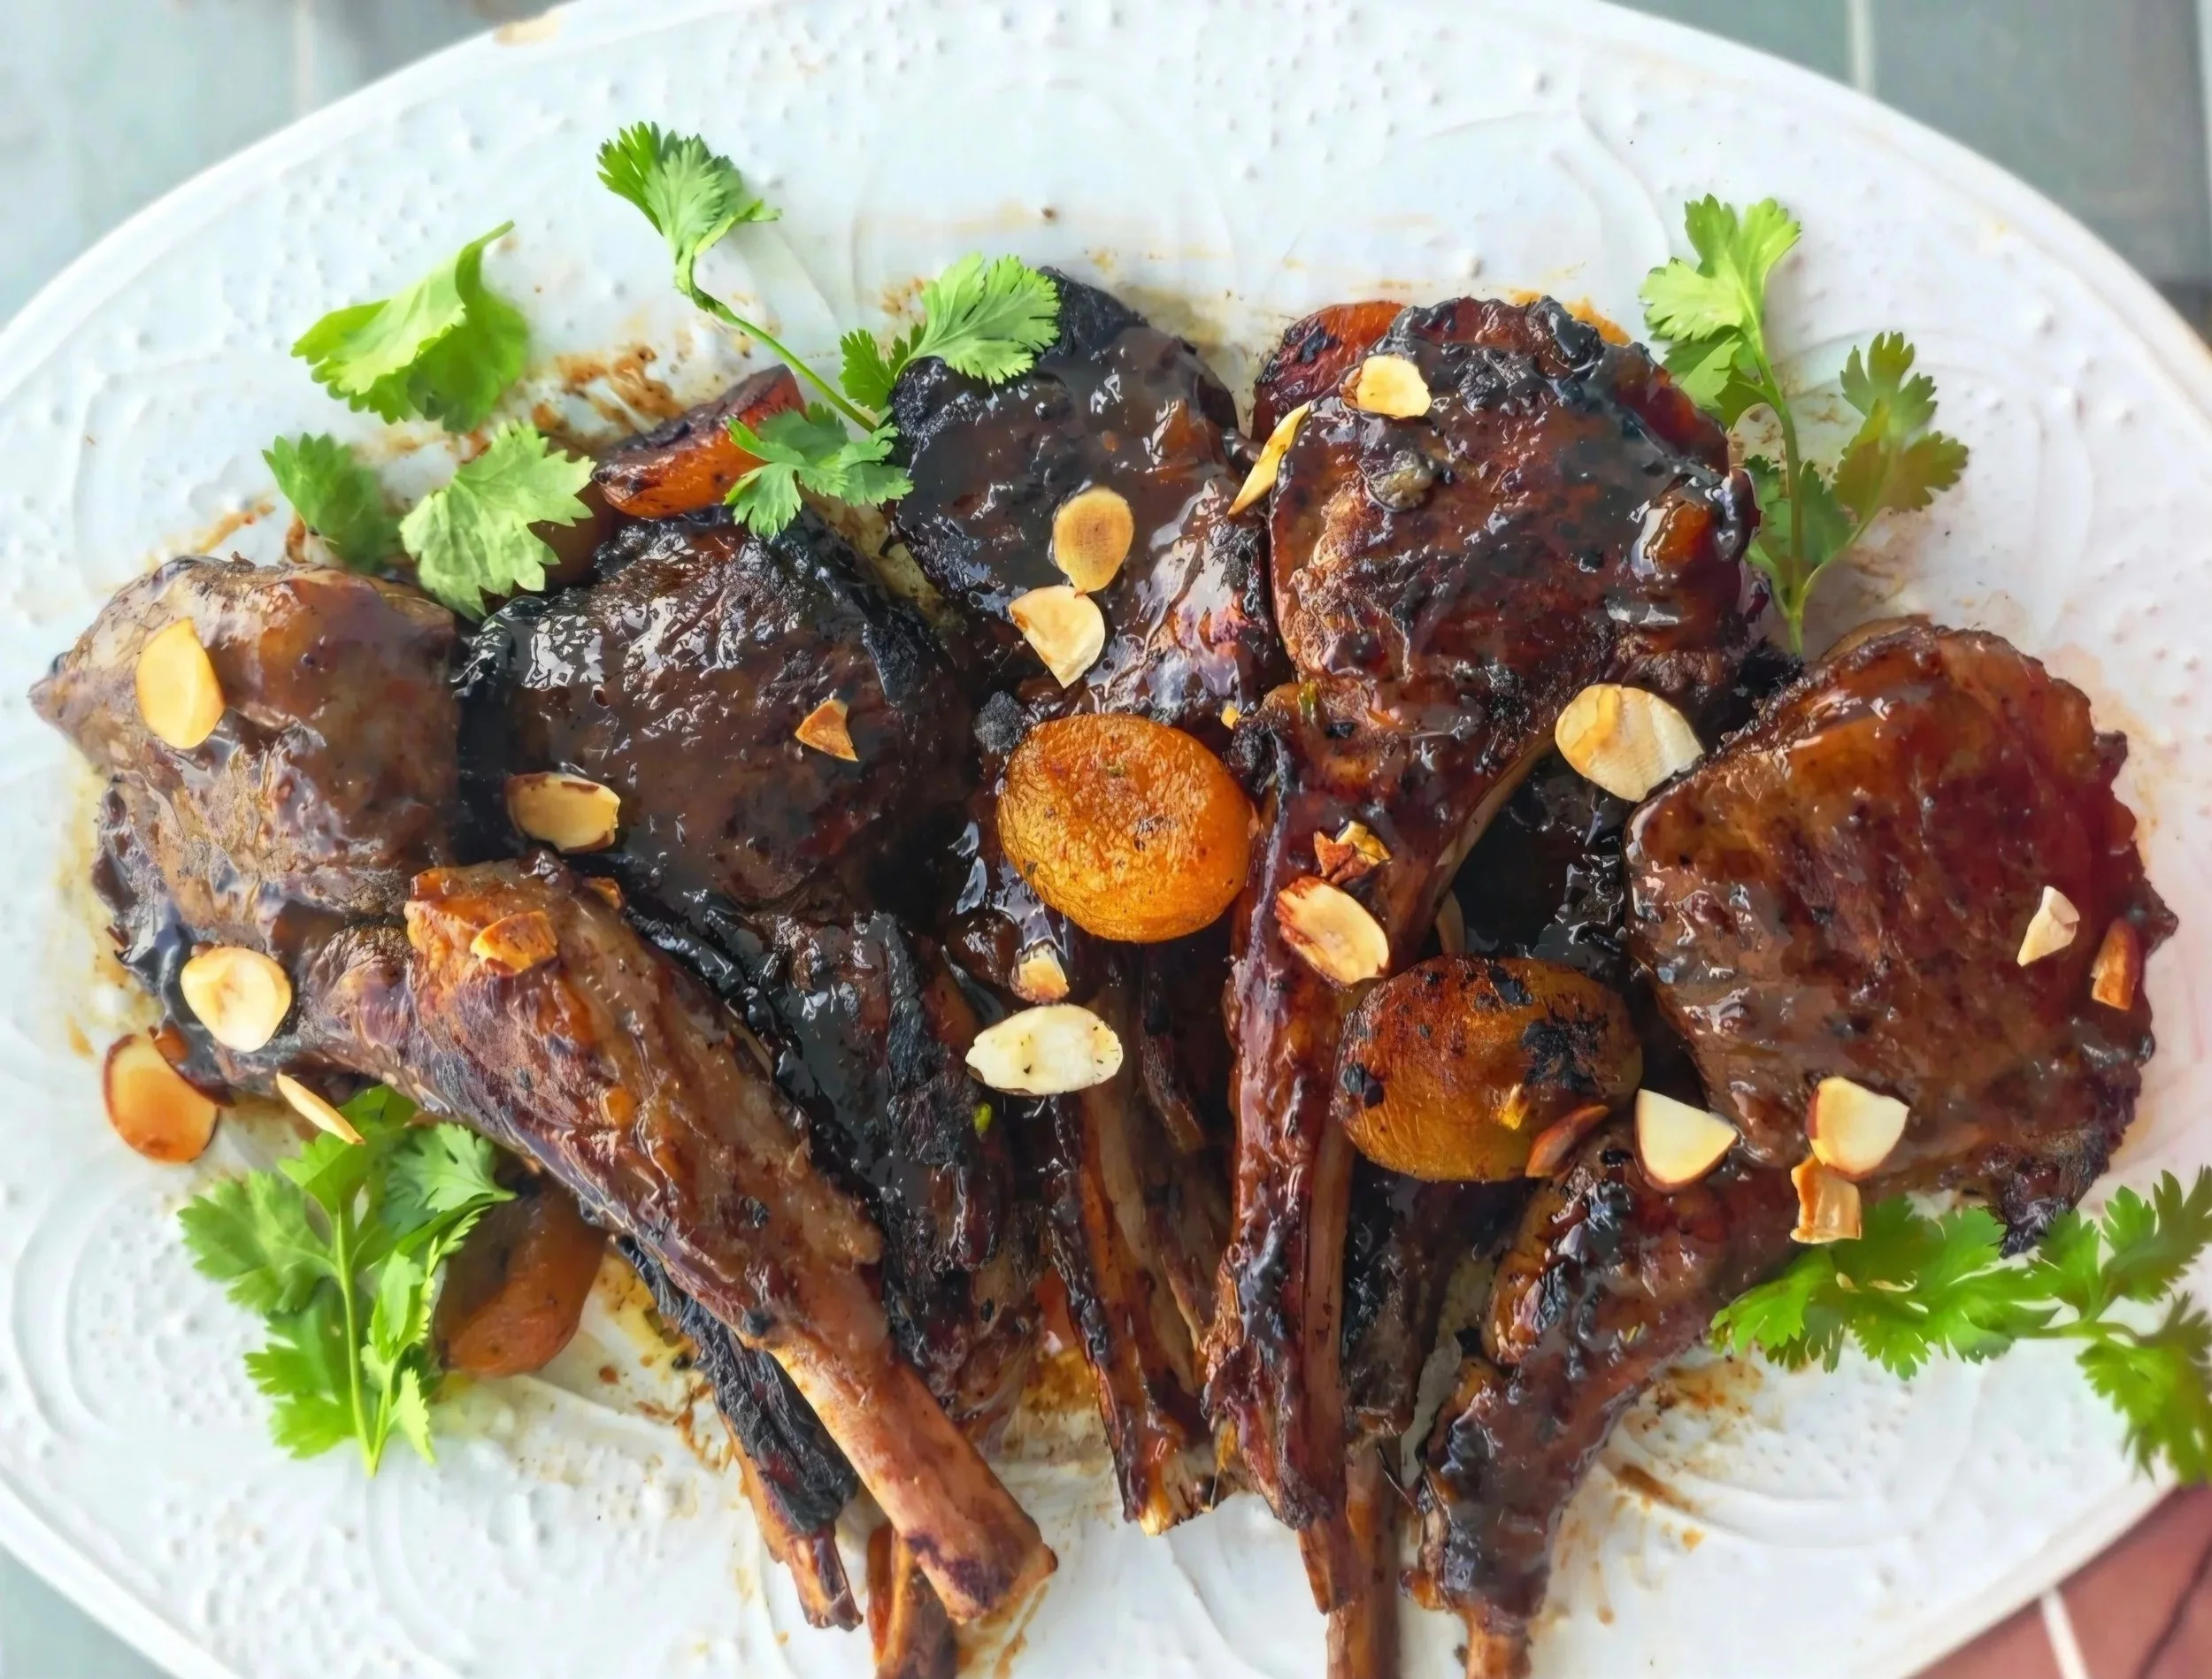
Apricot and Chutney Glazed Lamb Chops
Lamb is a classic choice for Easter and spring cooking, rich, slightly bold in flavor, and especially delicious when paired with sweet, spiced glazes that balance its natural depth.
A lot of lamb consumed globally actually comes from Australia, where sheep outnumber people by a wide margin. Because of this, Australian lamb is widely exported to countries like the United States. It is typically grass-fed, which gives it a more pronounced, slightly earthy and robust flavor compared to grain-fed lamb. That stronger flavor is exactly why lamb works so well with bold marinades and glazes like apricot, chutney, and warm spices. It can stand up to sweetness and acidity without losing its identity.
For this recipe, I took inspiration from sosaties, a traditional South African braai dish where lamb meat is marinated with curry spices, vinegar, and dried or fresh apricots. Whole apricots are often used in the marinade and cooking process, creating a sweet, caramelized finish that pairs beautifully with grilled or roasted meats. Instead of skewers, I used lamb rib chops cut from a rack, marinated them in a similar sweet-spiced profile, and finished them with a glossy apricot and chutney glaze.
Because lamb chops are a premium cut, they are best treated with care. Medium rare to medium, slightly pink in the center, is ideal for keeping them juicy and tender. Overcooking can make them firm and cause them to lose their natural richness, so do not be alarmed by a blush of pink.
When working with a rack of lamb, there is usually a fat cap along the edges. You do not need to fully remove it because this fat helps with flavor, but it is important to render it properly. Searing the chops fat side down briefly helps melt excess fat, and finishing in the oven allows it to cook through evenly without becoming greasy. Any large or excessive fat sections can be lightly trimmed, but a little rendered fat is part of what makes lamb so flavorful.
The result is a sweet, savory, deeply aromatic dish that feels special enough for Easter, but simple enough for any spring gathering or weekend dinner.

Apricot and Chutney Glazed Lamb Chops
Juicy lamb chops marinated in a sweet, tangy, and lightly spiced glaze inspired by South African and Cape Malay flavour profiles. The combination of apricot, chutney, garlic, and warm spices creates a rich balance of sweet, savory, and aromatic notes, finished with a glossy glaze and fresh herbs.
Ingredients
- ~14 lamb chops total (1½ racks + 1 pack of 6 chops)
- 2 tbsp Robertson’s Steak & Chop seasoning (or similar)
- 1½ tsp salt (adjust to taste)
- ¾ tsp black pepper
- 3 tbsp olive oil
- 6–8 whole dried apricots (plus extra if you want more sweetness in the pan)
- 1/2 cup apricot preserves
- 2–3 tbsp chutney
- 1 tbsp Worcestershire sauce
- 2–3 cloves garlic (minced)
- 1 tsp curry powder
- 1/2 tsp paprika
- 1 tbsp vinegar
- 1–2 tbsp olive oil
- Salt & pepper
- Optional: pinch onion powder
- 1/2 cup apricot preserves
- 2 to 3 tbsp chutney (mango or South African-style)
- 1 tbsp Worcestershire sauce (optional, for depth)
- 1 tbsp vinegar (apple cider or white)
- 1 to 2 cloves garlic, finely minced
- 1/2 tsp curry powder
- 1/2 tsp paprika
- Salt, to taste
- Black pepper, to taste
- 1 to 2 tbsp water (only if needed to loosen)
Instructions
- Pat lamb chops dry. Season generously with steak seasoning, salt, pepper, and optional spices. Rub well so it sticks.
- Mix all marinade ingredients until smooth, glossy, and fully combined.
- Coat lamb evenly in marinade. Cover and refrigerate for at least 1 hour (longer = better). Before cooking, let it sit out ~10 minutes.
- Combine glaze ingredients in a small saucepan over low heat. Stir until melted and smooth.
- Simmer 3–6 minutes until slightly thickened and glossy. Keep warm.
- Heat pan over medium to medium-low heat. Sear lamb 2–3 minutes per side until browned and caramelized. Render fat by briefly holding edges with tongs.
- Transfer to oven at 350°F (175°C) for 8–12 minutes, depending on thickness. The target internal temperature is in the medium range, 135–140°F (slightly pink inside).
- Rest meat for 5–10 minutes to lock in juices. Finish and serve, brush generously with warm glaze. Add the roasted apricots and optionally toasted almonds.
- Serve immediately. Store leftovers in an airtight container in the fridge for up to 3–4 days or freeze for up to 2–3 months; reheat gently to keep them juicy.
Notes
- Lamb is best served medium rare to medium with a slight pink center for maximum juiciness and tenderness
- Do not overcook the lamb as it can become firm and lose its natural richness
- Fat on lamb chops adds flavor, so only trim excess thick sections and allow the rest to render during searing
- Let the lamb rest for 5–10 minutes before glazing to help retain juices
- The apricot glaze is strictly a finishing sauce and should be applied after cooking, not during high heat
- Roasted apricots can be cooked alongside the lamb to add natural sweetness and enhance presentation
Nutrition Facts
Calories
600Fat (grams)
42 gCarbs (grams)
17 gFiber (grams)
1 gSugar (grams)
14 gProtein (grams)
40 gI am not a certified nutritionist and any nutritional information on dontmissmyplate.com should only be used as a general guideline.
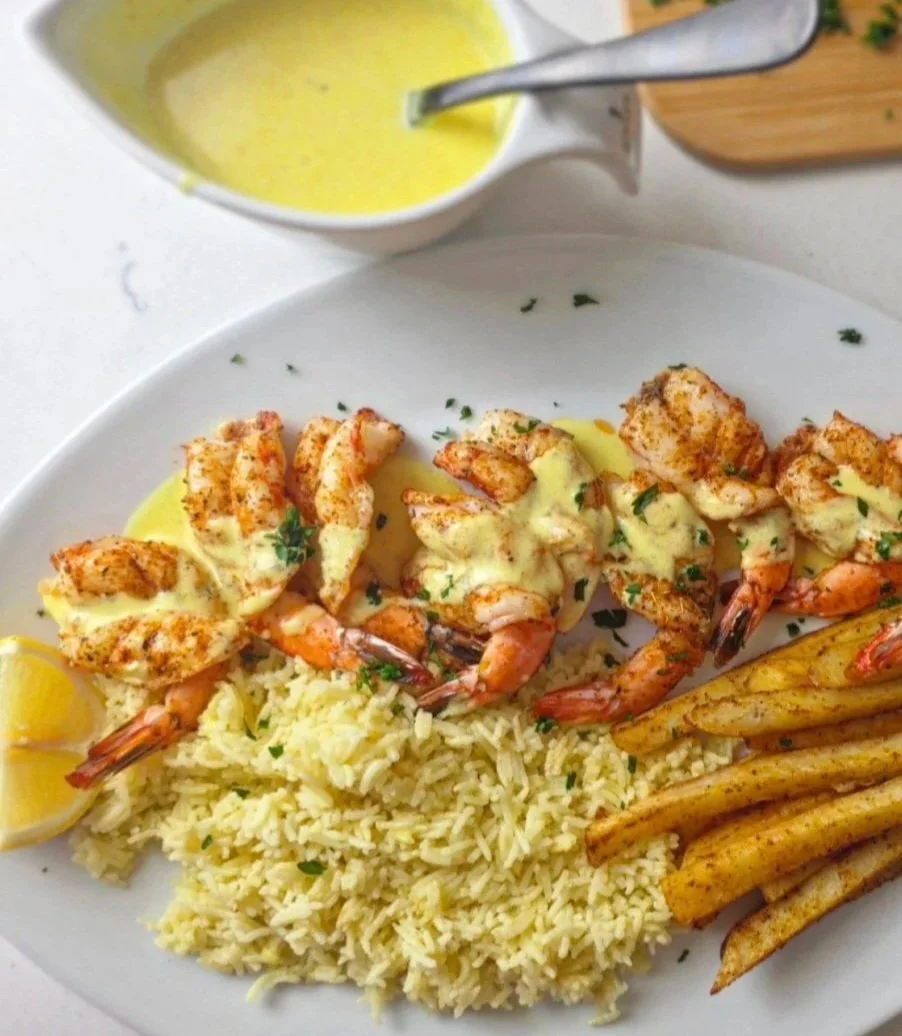
Copy Cat Ocean Basket Shrimp Platter with Lemon Cream Sauce
If you grew up in Southern Africa, or simply love a good seafood platter, you’ll recognize the iconic Ocean Basket experience. The restaurant chain became known for its generous platters of seafood, crispy fries, flagrant rice and most importantly a creamy, indulgent, lemon-forward signature that feel both comforting and celebratory.
This recipe is inspired by that classic, reimagined for a spring-ready table. The lemon cream sauce brings brightness and balance, cutting through the richness with a fresh, zesty lift that pairs beautifully with seafood. It’s a perfect example of how African coastal flavors naturally blend with Mediterranean influences (think citrus, butter, gentle spice, and herbs) creating something vibrant yet familiar. You may also see this combination with Mozambiquean peri-peri prawns.
Beyond flavor, the shrimp is a nutritional powerhouse: high in protein, low in calories, and rich in vitamin B12, selenium, and iodine. Paired with a citrus-forward cream sauce, it becomes a dish that feels indulgent without being heavy, ideal for warmer days and effortless entertaining.
Serve it simply with fries, rice, a crisp salad, or warm crusty bread to soak up the sauce.
For a wine pairing, serve with a chilled Sauvignon Blanc, crisp Chardonnay, or light rosé complements the lemon and enhances the natural sweetness of the shrimp.
Best of all, this dish comes together quickly, making it just as suited for a relaxed weekend lunch as it is for a quick but impressive spring lunch or dinner.
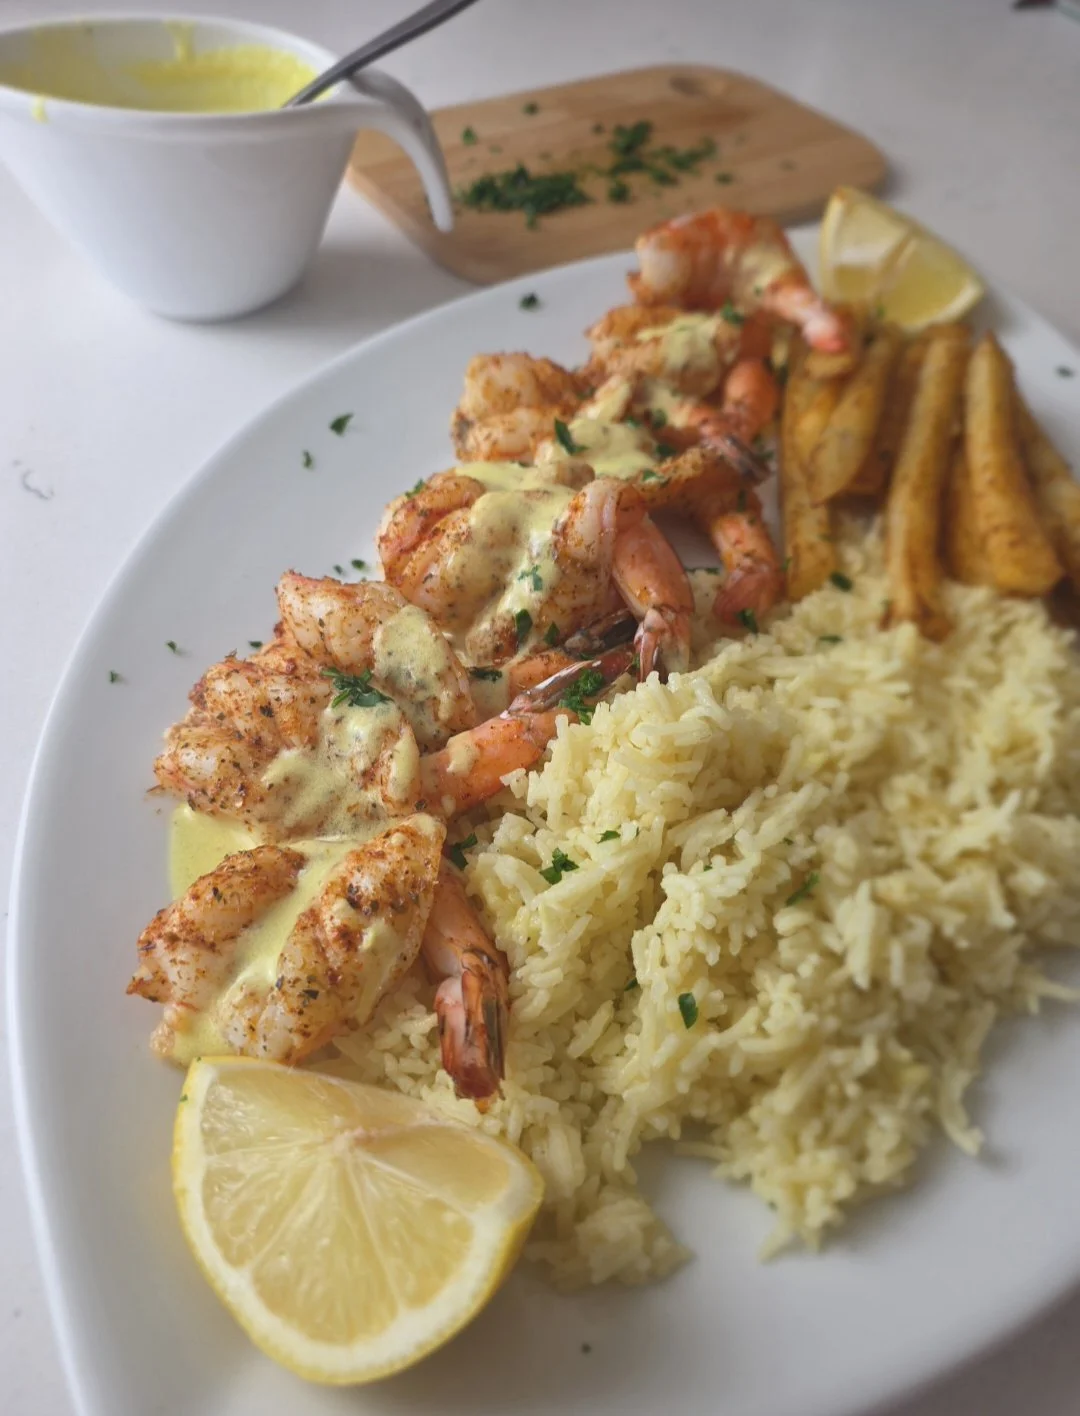

Copycat Ocean Basket Shrimp Platter with Lemon Cream Sauce
A simple, flavorful take on the iconic Ocean Basket shrimp platter. Juicy shrimp in a bright lemon cream sauce—easy enough for weeknights, but layered with flavor for something special.
Ingredients
- 1 lb (450 g) large shrimp, tail-on and deveined
- 2 tbsp olive oil
- 1 tsp Old Bay seasoning or peri-peri seasoning
- 2 tsp lemon juice (divided)
- 1/2 tsp garlic powder
- 1 tbsp smoked paprika
- 1 tbsp oregano
- Lemon wedges, for serving
- 1/2 cup (120 ml) heavy cream
- 5 tbsp unsalted butter
- 1/4 tsp flour
- 1/4 tsp turmeric (for color)
- 1 tsp Robertson’s Spice for Rice
- 1 tsp Aromat all-purpose seasoning
- Juice of 1 lemon (about 2 tbsp)
- 1 tsp lemon zest
- 1 tsp Dijon mustard
- Salt and pepper, to taste
- Chopped parsley, for garnish
Instructions
- Preheat the oven to 400°F (200°C).
- Make the lemon cream sauce: On low heat, melt the butter. Whisk in the flour until fully dissolved. Do not overheat, or the milk solids may separate.
- Turn off the heat, then add the lemon juice and zest, followed by the mustard, seasonings, salt, and pepper. Simmer for 1–2 minutes until slightly thickened. Set aside.
- Prepare the shrimp: Pat the shrimp dry. Peel the shells, keeping the tails on by pinching the tail and gently removing the outer shell. (Reserve shells for seafood stock, if desired.)
- Butterfly the shrimp: Using a sharp knife or kitchen scissors, carefully make an incision along the back of each shrimp. Do not cut all the way through. Gently open and flatten with your fingers to create a butterfly shape.
- Season the shrimp: In a bowl, mix olive oil, lemon juice, garlic powder, and Old Bay (or peri-peri). Brush the mixture evenly over the open side of the shrimp.
- Bake: Arrange shrimp flat-side down on a parchment-lined baking tray. Bake for 8–10 minutes, or until the shrimp reach an internal temperature of 145°F (63°C).
- Serve: Arrange the shrimp on a plate or tray with your chosen sides (like rice or fries). Drizzle with lemon cream sauce, garnish with parsley, and serve with lemon wedges.
Notes
- For deeper flavor, use the full spice blend listed above. You can keep it simple or build layers, it’s up to you.
- For the authentic Ocean Basket experience, serve shrimp over fries and drizzle sauce just before serving.
- Use fresh lemon juice for best flavor.
- Can be doubled for a crowd or adapted with other seafood like calamari, mussels, or fish.
- Optional: add a pinch of chili flakes for a subtle kick.
Nutrition Facts
Calories
320Fat (grams)
22 gCarbs (grams)
9 gProtein (grams)
25 gI am not a certified nutritionist and any nutritional information on dontmissmyplate.com should only be used as a general guideline.
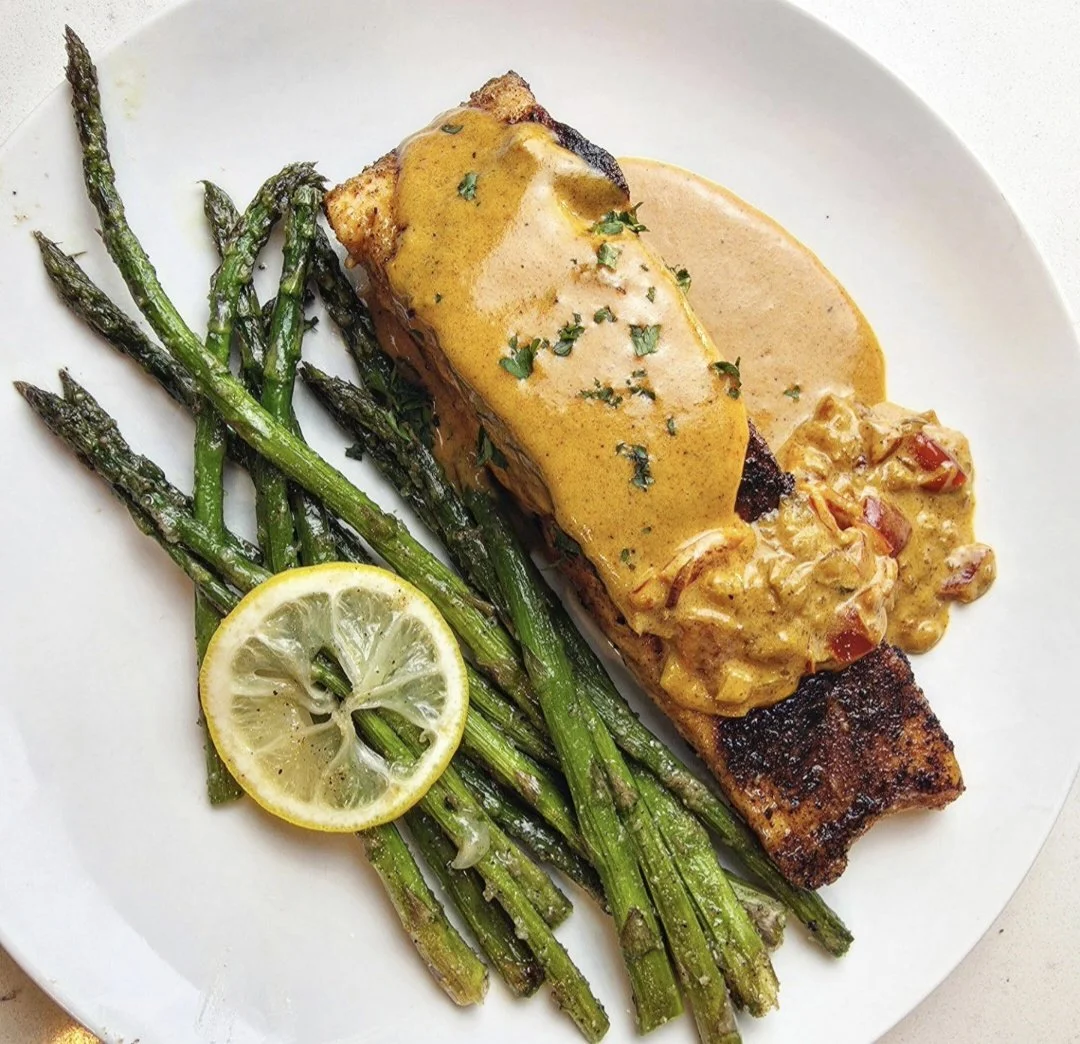
Blackened Salmon with Berbere Cream Sauce (30-Minute Recipe)
Salmon is one of my favorite proteins, in fact I try to eat it at least once a week. It’s rich in omega-3s, packed with protein, vitamins B12 and D, and it’s just plain delicious. For this recipe, I wanted to take a classic weeknight staple and elevate it with a little international flair, blending bold flavors from East Africa and the American South into one gorgeous, flavorful dish.
Blackened salmon is a favorite for a reason: the seared, smoky crust locks in moisture, giving each bite a deep, savory punch. Traditionally, you might see Cajun or Creole seasoning used, but I love swapping in berbere—a complex, aromatic East African spice blend that’s one of my go-to all-purpose seasonings. Berbere adds warmth, heat, and depth that’s a little different from what you find on every other weeknight plate.
If you’re making berbere at home, toast the whole seeds (like coriander, fenugreek, cardamom, and cumin) before grinding with paprika, chili, garlic, and ginger. The result is a fragrant, spicy seasoning that’s fantastic on salmon, roasted veggies, or even in soups. Premade blends work perfectly too, and sourcing from an authentic store is always a bonus.
For the sauce, I lean on a Creole-style cream sauce, which is similar to Cajun but generally a little more balanced and bright thanks to the tomato flavour, onions, bell pepper, and spices. Adding cream turns it into a silky, luxurious accompaniment that pairs beautifully with the bold, spiced salmon. You can keep the sauce rustic, with all the veggies, or strain it smooth for a more elegant finish, the choice is yours.
One of the things I love about this sauce is its versatility. It’s perfect on salmon, but also shines with flounder, shrimp, or any firm-fleshed fish. I served mine here with citrus forward, roasted asparagus for a classic pairing, but this is a dish that adapts beautifully to what’s in season.

Blackened Salmon with Berbere Cream Sauce
Tender, flaky salmon gets a bold East African-inspired kick with a silky berbere cream sauce. Quick, flavorful, and versatile, this dish is perfect for weeknights, entertaining, or seasonal meals.
Ingredients
- 4 salmon fillets
- 4 tsp berbere seasoning (about 1 tsp per fillet, adjust to taste)
- 1 tsp salt (¼ tsp per fillet)
- 1 tsp garlic powder (¼ tsp per fillet)
- 1 tsp onion powder (¼ tsp per fillet)
- Olive oil, for drizzling
- ½ medium red onion, diced
- 1–2 garlic cloves, minced
- 1/3 cup celery, diced
- 1 red bell pepper, diced
- 1 hot chili pepper, minced
- 2 tsp berbere seasoning
- 1 tsp smoked paprika
- 1 tsp black pepper
- 1 tsp seasoned salt
- 1 tsp cayenne pepper (optional, for extra heat)
- 2 tsp chicken bouillon paste
- 1 tbsp tomato paste
- 1 tbsp Worcestershire sauce
- 1 tbsp rice vinegar
- 1 tbsp flour
- 1 tbsp butter
- 1 tbsp sun-dried tomatoes, minced
- 1 cup heavy cream
- 1 cup water
- 1/3 cup grated Parmesan cheese
- Lemon juice, to finish (optional)
- Cooking oil or ghee, for sautéing
Instructions
- Pat the salmon dry. Drizzle lightly with olive oil, then rub with berbere, salt, garlic powder, and onion powder. Set aside to absorb flavors.
- In a pan, sauté the garlic and onion for 1–2 minutes. Add the celery and cook for 1 minute. Stir in the bell pepper and chili; cook for 2 minutes. Add the spices and sauté for 30 seconds to release their aroma, adding oil if needed.
- Stir in the bouillon paste and cook for 30 seconds. Push everything to one side, melt the butter, and mix in the flour to form a roux. Add the sun-dried tomatoes, Worcestershire sauce, and rice vinegar.
- Add the water and cream. Simmer over medium-low heat for about 5 minutes, stirring frequently. Stir in the Parmesan and cook until the sauce thickens. Adjust seasoning with salt and a squeeze of lemon juice if desired.
- Heat a cast-iron pan over medium-high heat (turn on the vent). Once hot and lightly smoking, add oil. Place the salmon skin-side down and sear for 2–4 minutes, depending on thickness. Avoid overcrowding the pan.
- Flip and cook for another 2–3 minutes. Lower heat if needed to prevent burning. For thicker fillets, transfer to a 400°F oven and cook for 3–5 minutes until the internal temperature reaches 145°F. Let rest for 5 minutes.
- Plate the salmon and spoon the sauce over top. Serve as is, or strain part of the sauce for a smoother texture.
Notes
- The berbere is customizable. Adjust the heat level to your taste.You can also substitute with Cajun, Old Bay, or Creole seasoning if needed.
- Serve with asparagus, roasted vegetables, rice, or grits.
- The sauce also works beautifully tossed with pasta like linguine.
Nutrition Facts
Calories
420Fat (grams)
30 gCarbs (grams)
10 gFiber (grams)
3 gSugar (grams)
4 gProtein (grams)
36 gI am not a certified nutritionist and any nutritional information on dontmissmyplate.com should only be used as a general guideline.
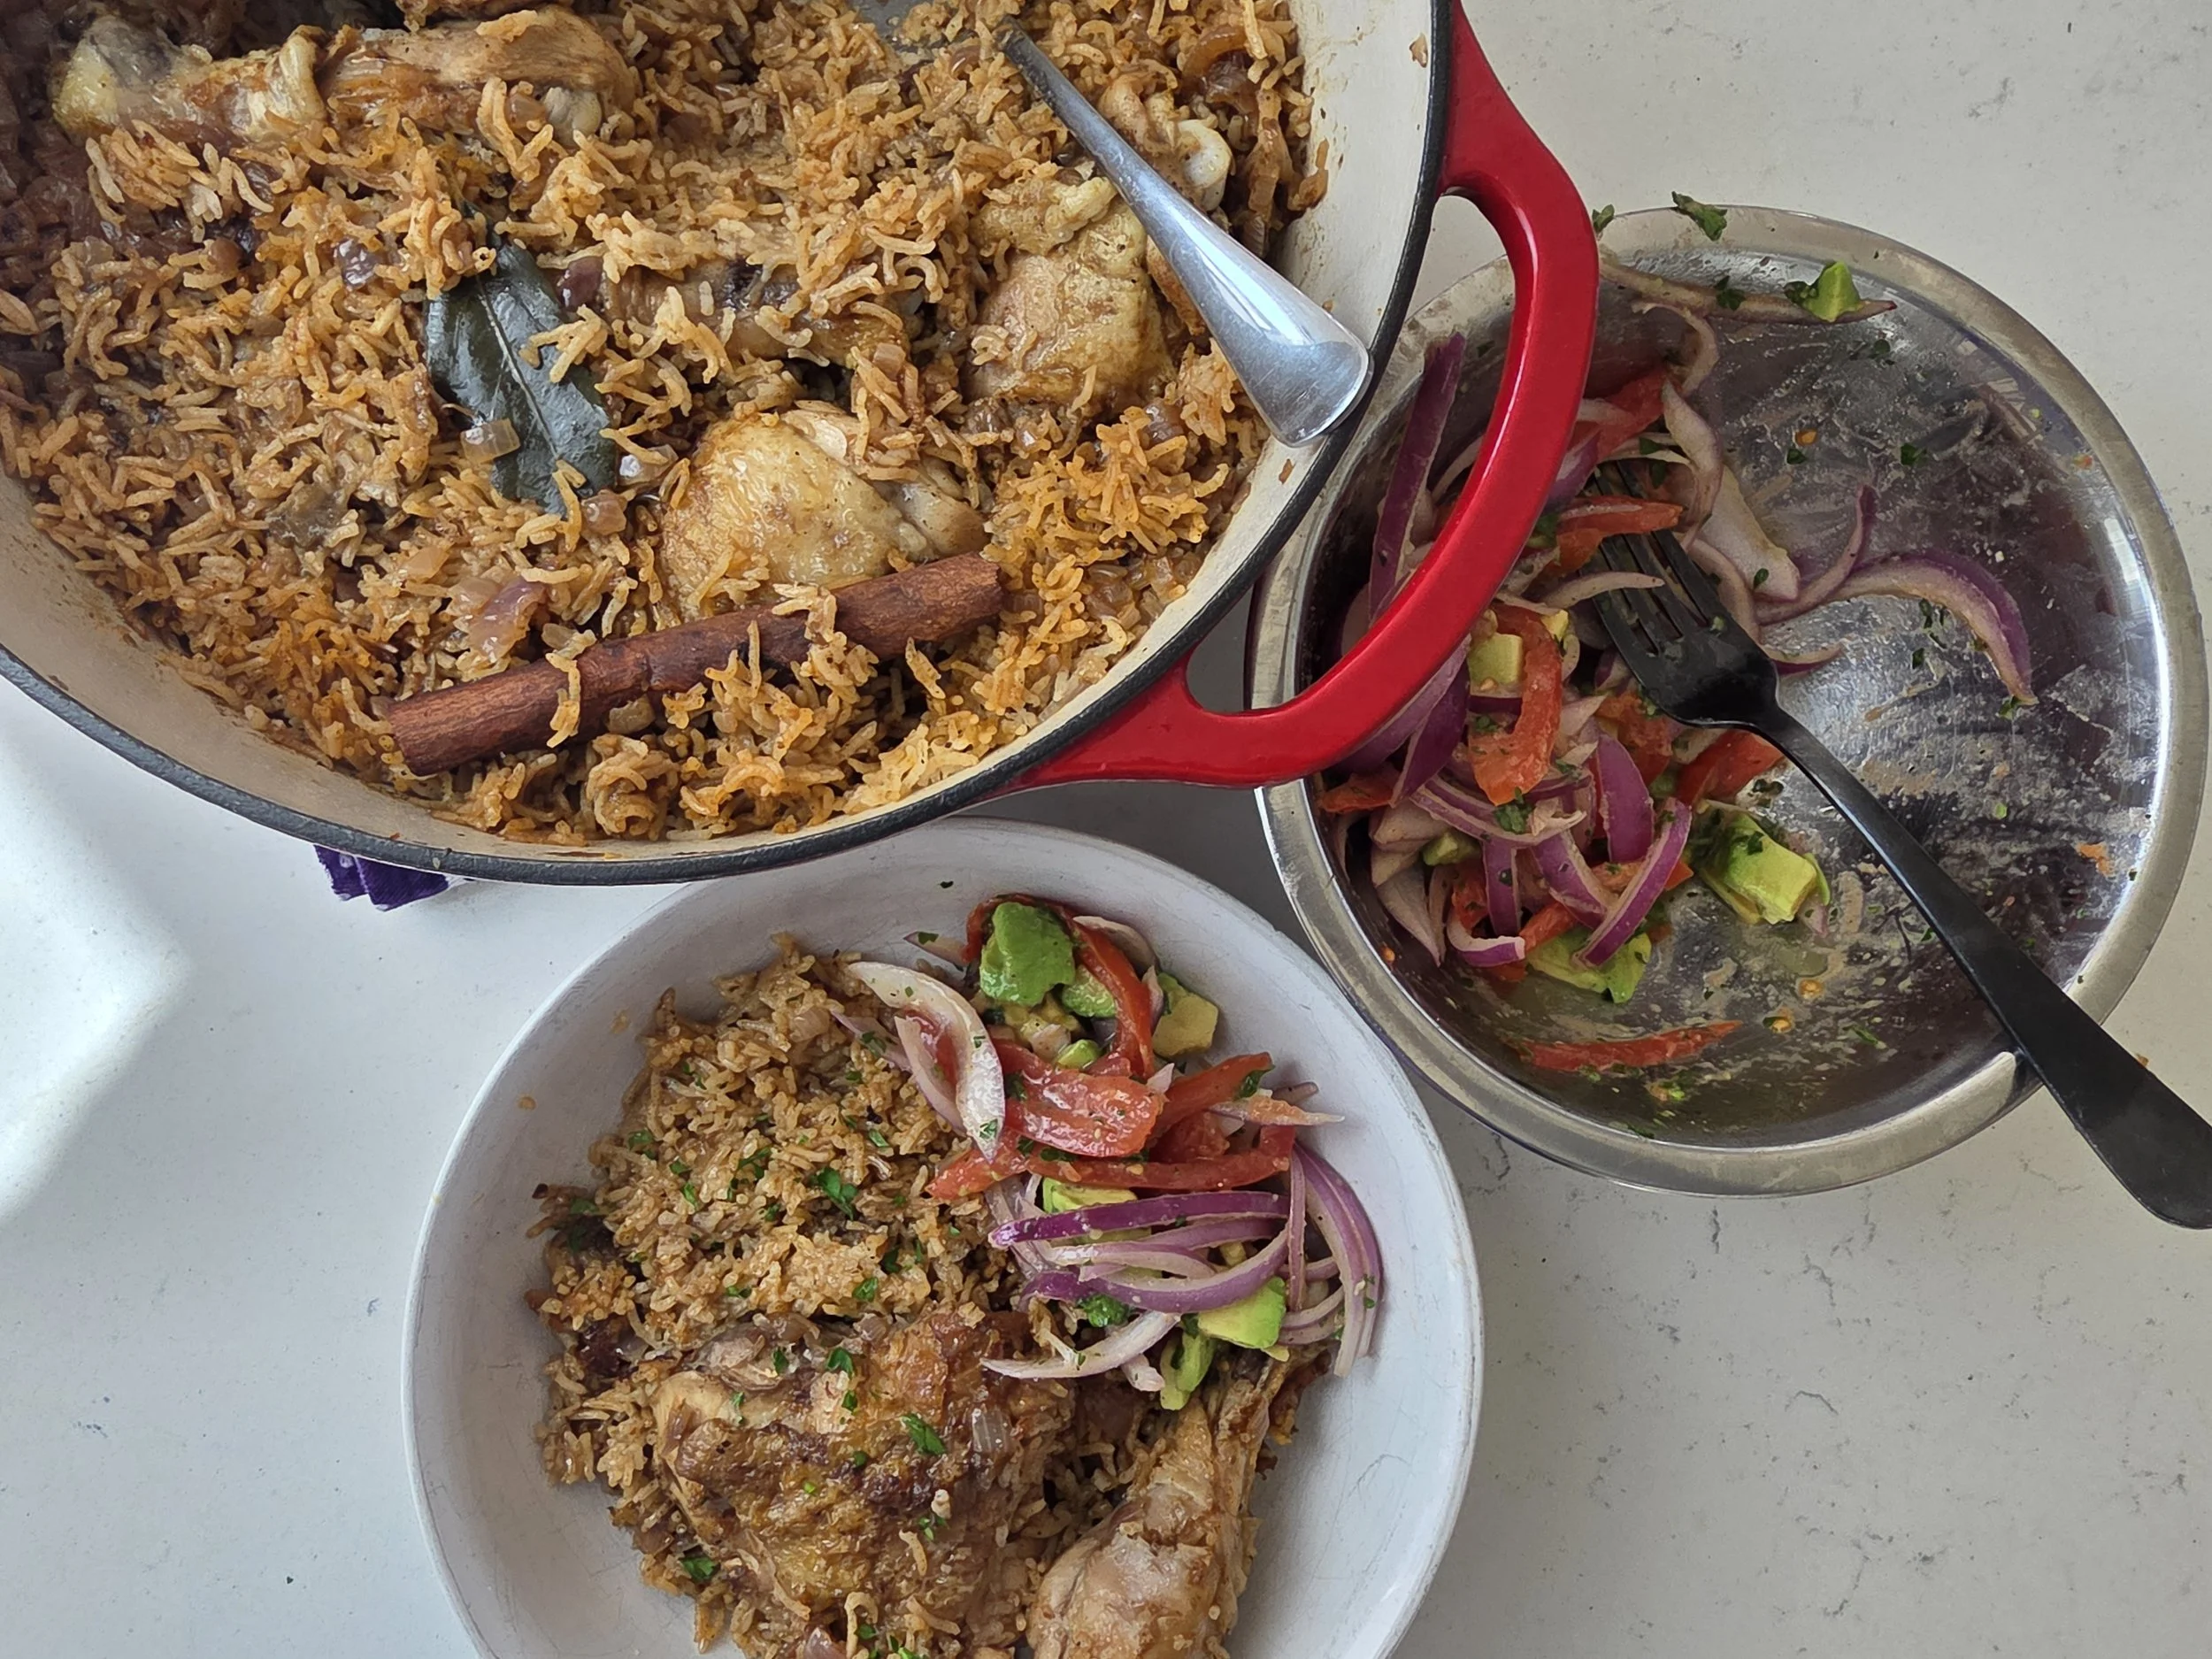
One-Pot Chicken Pilau (Zanzibar-Style East African Rice)
Pilau is more than just a rice dish, it’s a reflection of centuries of trade, culture, and shared culinary traditions. With roots linked to Persian and Indian cooking, pilau traveled along ancient trade routes to East Africa, where it became a staple in places like Kenya, Zanzibar, and Uganda. Across these regions, the common thread is a love for deeply spiced, one-pot rice dishes that bring people together for both everyday meals and celebrations.
In Zanzibar, famously known as the “Spice Island”, this connection is especially strong. The island’s history as a hub for cloves, cinnamon, cardamom, and other spices is reflected in the bold, aromatic character of pilau itself.
This version brings those flavors into a practical, weeknight-friendly format. Fragrant basmati rice is layered with caramelized onions, garlic, ginger, and a warming blend of cumin, cardamom, black pepper, cinnamon, and bay leaf. Bone-in chicken cooks directly with the rice, allowing every grain to absorb the rich, spiced broth.
I first experienced pilau in Zanzibar during a cooking class at a beachfront hotel, where the scent of spices filled the air and the ocean sat just steps away. This recipe is inspired by that moment—simple, comforting, and deeply flavorful.
Whether for a weeknight dinner or a potluck gathering, this one-pot chicken pilau is a go-to.
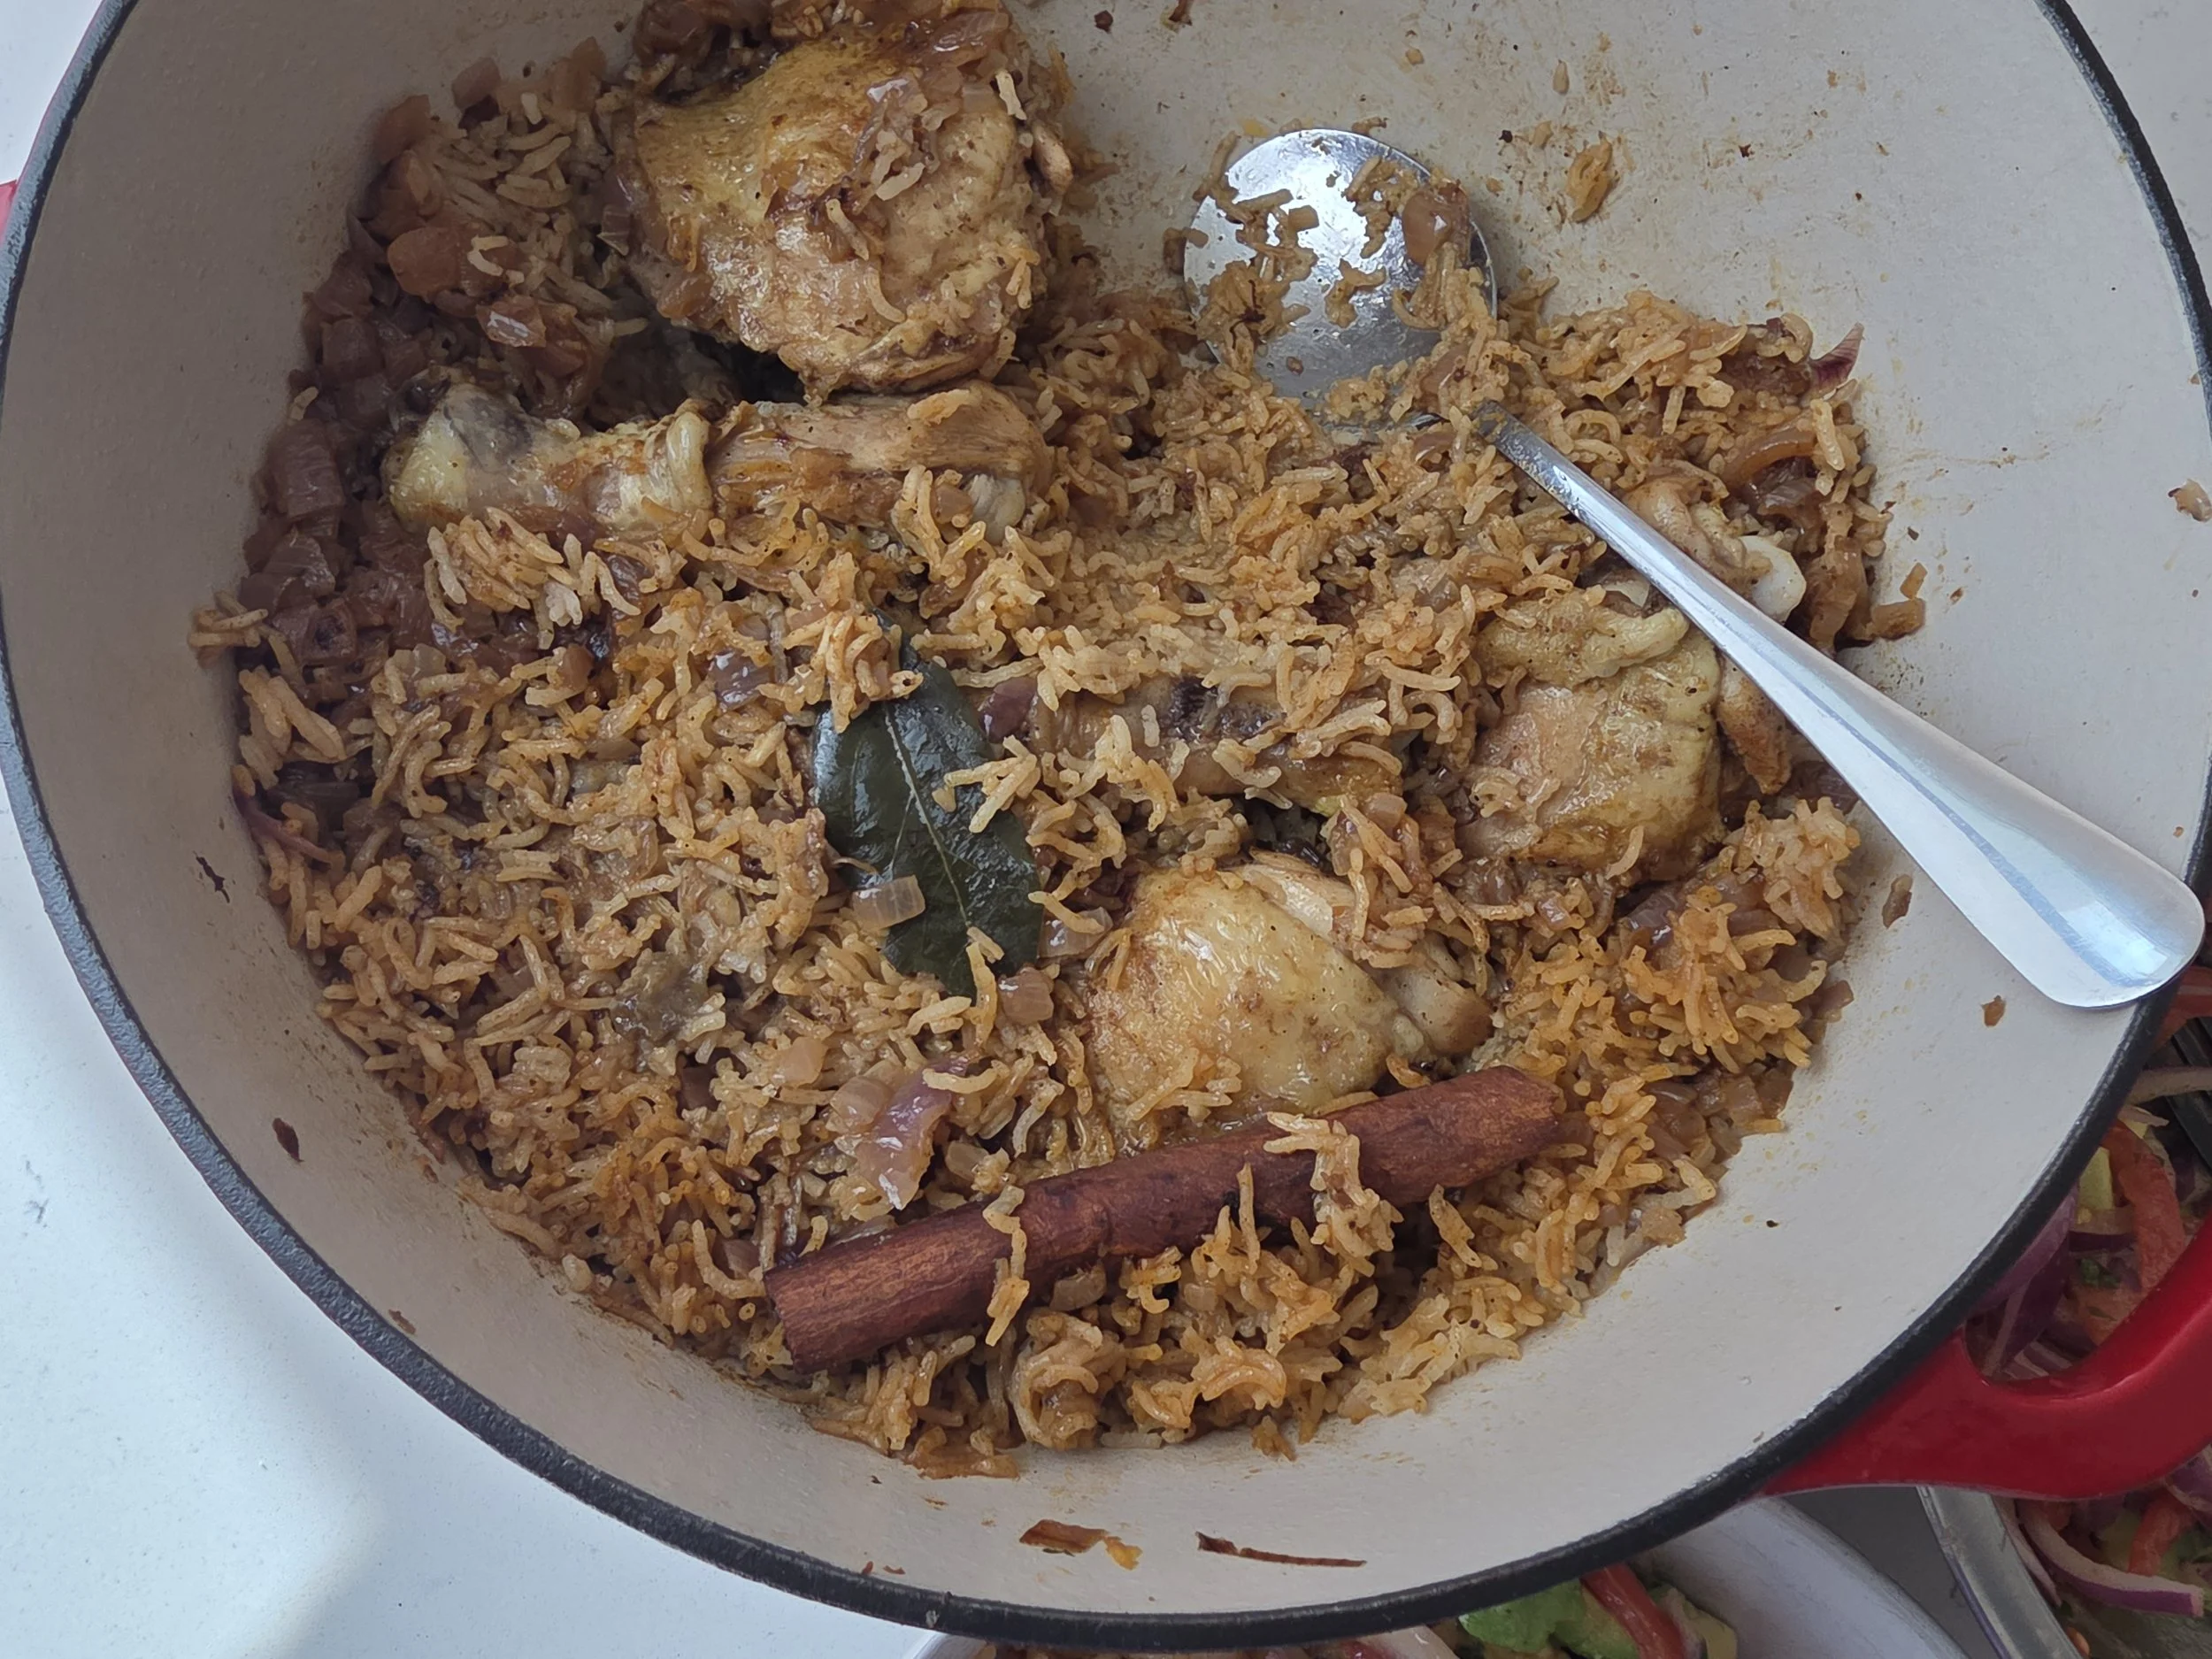
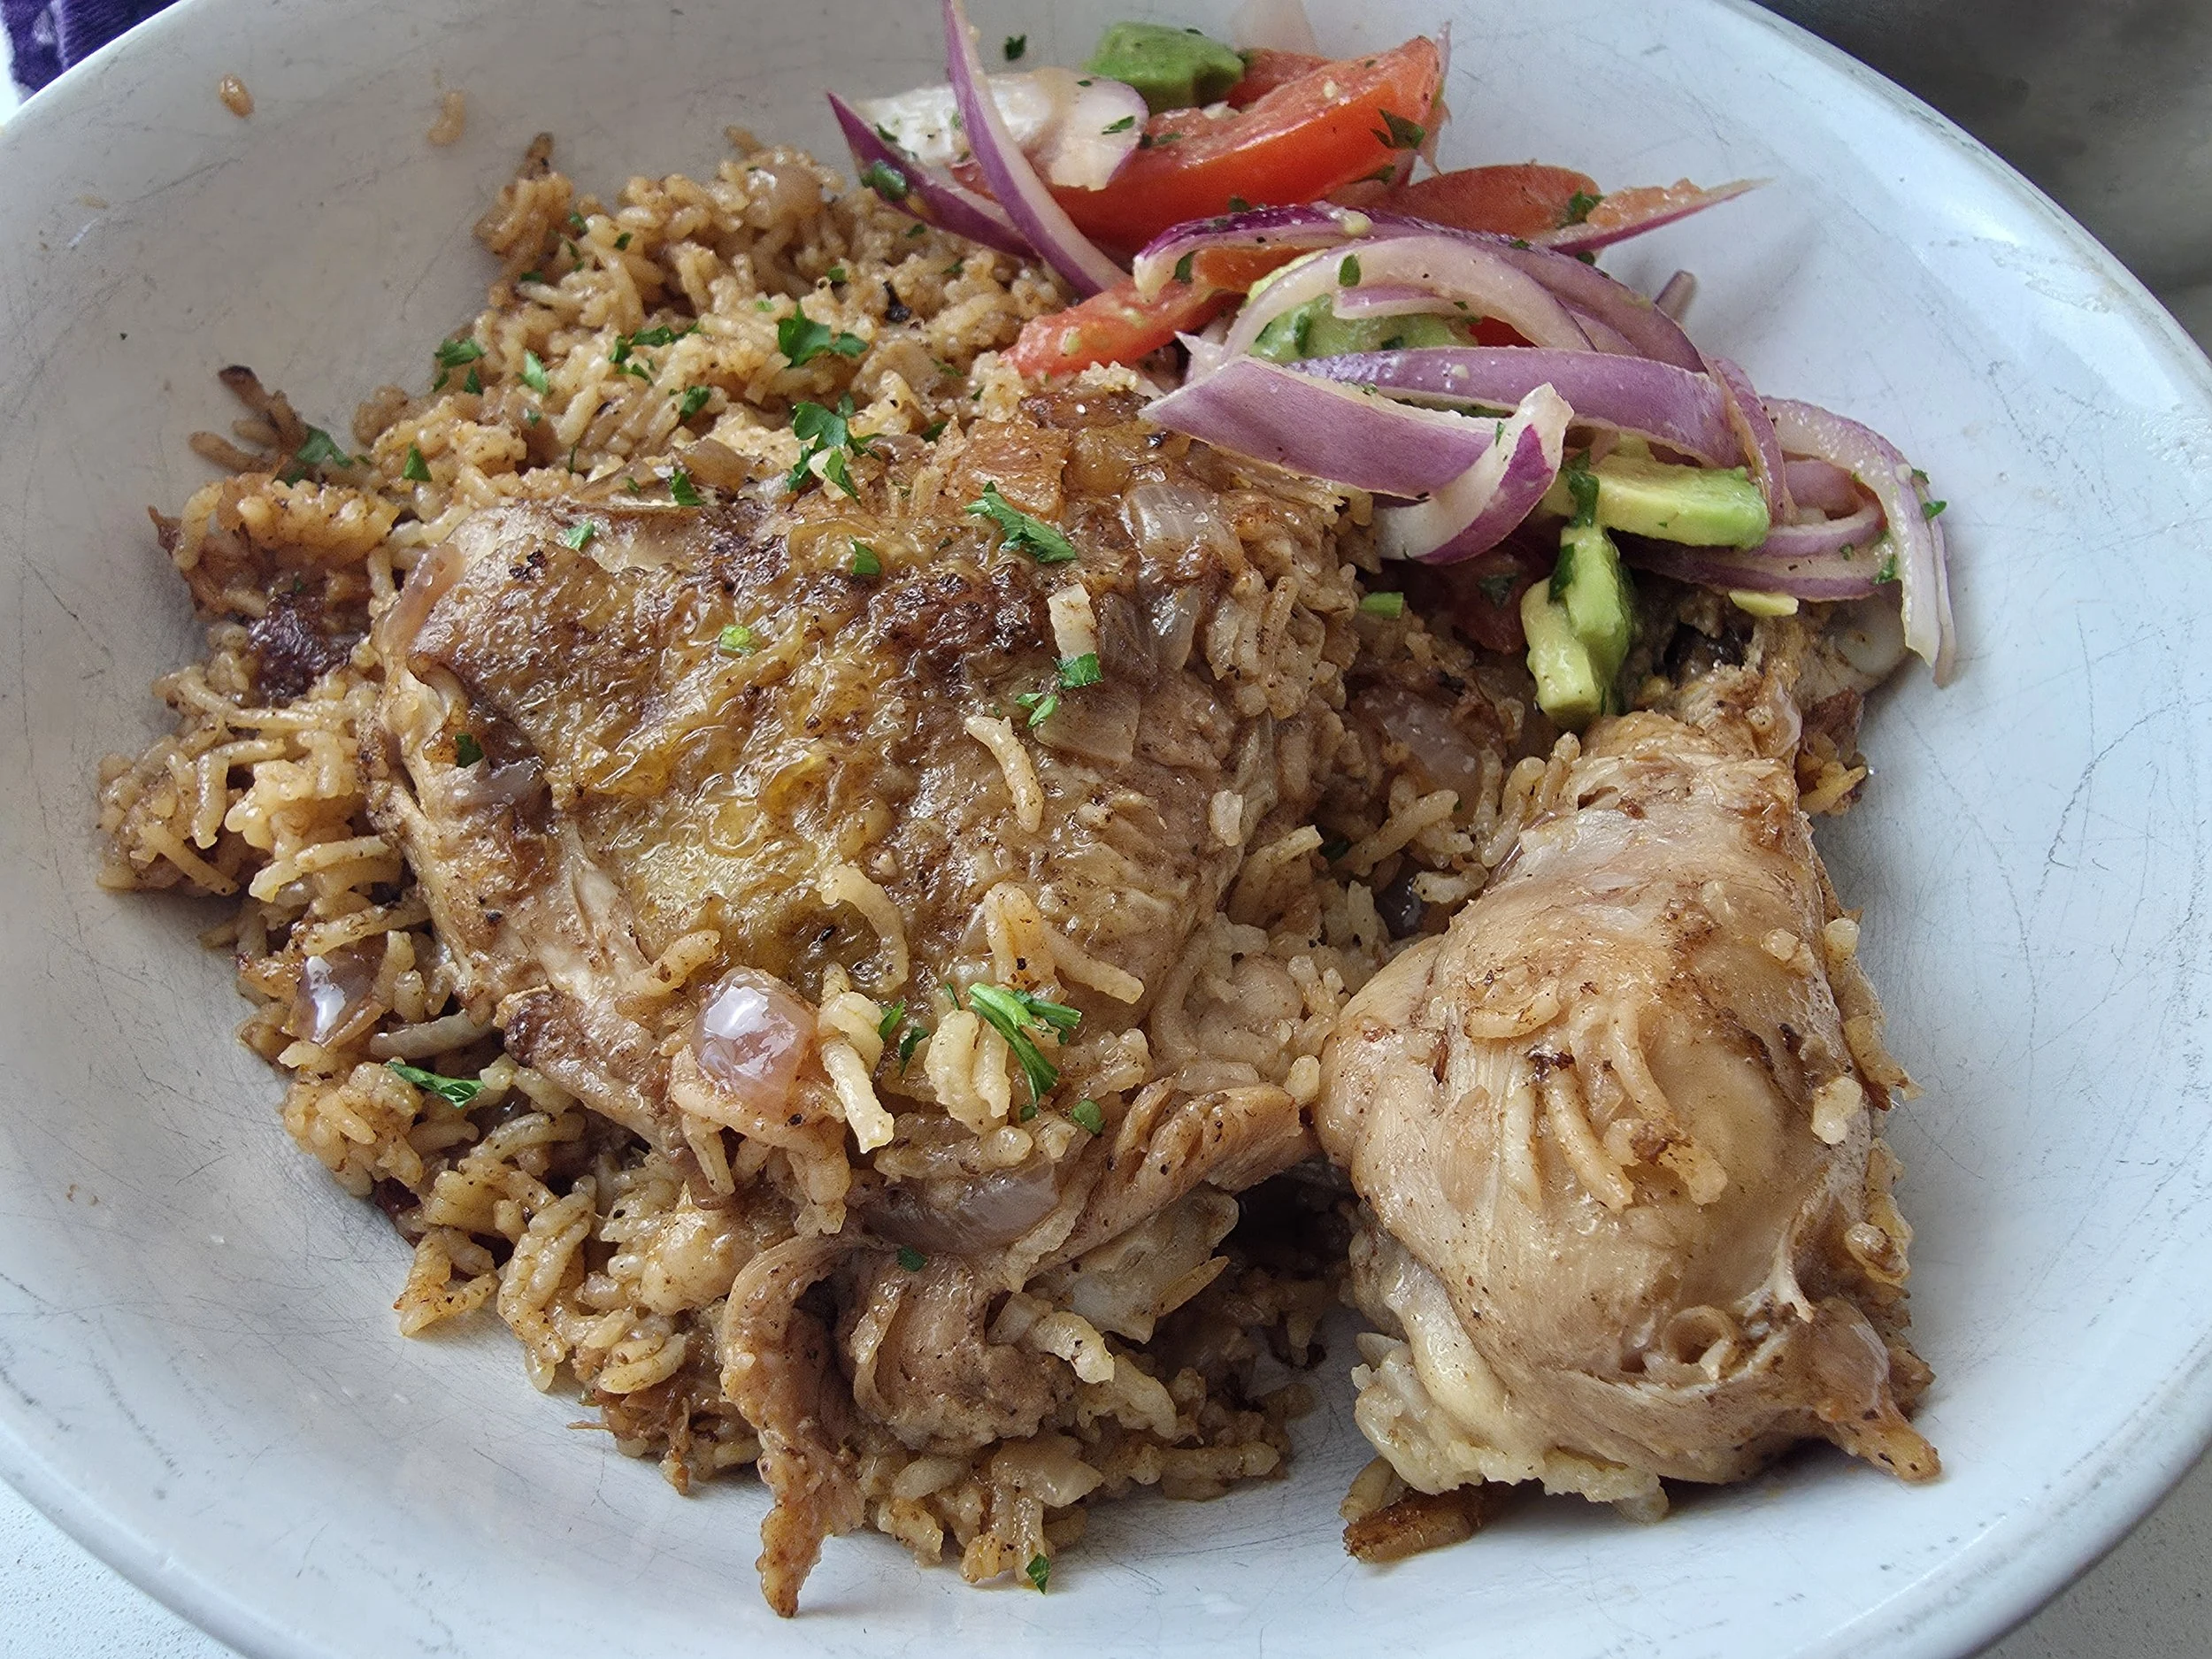

Zanzibar-Style One-Pot Chicken Pilau
A fragrant East African-inspired chicken pilau featuring spiced rice, caramelized onions, and tender bone-in chicken, all cooked in one pot for a rich and comforting meal.
Ingredients
- 4 bone-in, skin-on chicken thighs
- 4 chicken drumsticks
- 2 tbsp chicken spice
- 2 cups basmati rice, rinsed
- 2 large red onions, thinly sliced
- 2 tbsp ginger-garlic paste (or 2 tsp each minced)
- 2 tbsp tomato paste
- 1 tbsp Royco Usavi Mix (chicken)
- 1 tsp cumin
- 1 tsp ground cardamom
- ¼ tsp ground cloves
- 1 tsp black pepper
- 1 cinnamon stick
- 2 bay leaves
- 3 cups water
- 2 tsp bouillon paste
- ½–1 Knorr chicken bouillon cube, to taste
- 3 tbsp ghee or cooking oil
- Salt and lemon, to taste
- Optional: 1 tbsp Worcestershire sauce, for deglazing
- Optional: Lemon wedge and parsley to garnish and serve
Instructions
- Pat the chicken dry, lightly coat with oil, and season with chicken spice, salt, and pepper. Let sit for at least 5 minutes.
- Heat at least 2 tbsp ghee or oil in a large pot or Dutch oven over medium-high heat. Brown chicken 2–3 minutes per side, then remove and set aside.
- In the same pot, sauté onions until soft (2–3 minutes), or longer for a golden color and deeper flavor. Add ginger-garlic paste, Royco Usavi Mix, bouillon paste, and pilau spices. Stir 30–60 seconds until fragrant and cook an additional minute to activate the aromatics.
- Stir in tomato paste and optionally the Worcestershire sauce to lift flavors from the bottom of the pot.
- Stir in the rinsed rice, coating it evenly in the spice mixture for about 1 minute.
- Pour in the water and mix in the bouillon cube. Add cinnamon stick and bay leaves, then nestle chicken pieces on top of the rice. Bring to a gentle boil, then reduce heat to low, cover, and simmer for 20 minutes.
- Check your pot. If you notice pooling, slightly open the lid and cook an additional 5–10 minutes.
- Squeeze fresh lemon over the rice and chicken and adjust salt to taste.
- Gently fluff the rice, garnish with parsley and serve with a mixed salad (kachumbari with avocado).
Notes
- Rice texture: A quick rinse is enough, no soaking needed. Keep the lid closed during simmering to retain steam for fluffy rice.
- Chicken skin: Browning adds flavor; optional but recommended!
- Leftovers: Store in an airtight container in the fridge for up to 3 days; reheat gently.
Nutrition Facts
Calories
500Fat (grams)
17 gCarbs (grams)
50 gFiber (grams)
3 gProtein (grams)
28 gI am not a certified nutritionist and any nutritional information on dontmissmyplate.com should only be used as a general guideline.

Deviled Eggs with Chakalaka
When the weather begins to warm after a harsh winter, nothing kicks off a celebration of the new season like a colorful, flavorful appetizer. Enter Chakalaka Deviled Eggs, a South African twist on a classic seasonal party favorite.
Deviled eggs have long been associated with springtime, symbolizing rebirth and renewal, historically aligned with the end of Lent, when eggs were restricted.
This recipe combines a creamy, tangy yolk filling with the vibrant, spicy flavors of chakalaka, a beloved vegetable relish made from peppers, onions, carrots, and tomatoes, seasoned with curry and warm spices. Chakalaka is traditionally served alongside grilled meats and starchy sides like pap or sadza, making it a familiar and festive flavor profile.
These eggs are perfect for a wide range of events, from braais and cookouts to picnic spreads and upscale cocktail gatherings. They bring a pop of color, a touch of heat, and a playful nod to South African flavors, making them a springtime appetizer that’s as delicious as it is eye-catching.

Deviled Eggs with Chakalaka
Bright, flavorful, and a little spicy, these Chakalaka Deviled Eggs combine creamy yolks with the vibrant South African relish chakalaka. Perfect for spring gatherings, braais, picnics, or cocktail parties, they bring color, heat, and bold flavor to any appetizer spread.
Ingredients
- 1/2 medium onion, diced
- 1/2 large red bell pepper, diced
- 1 large garlic clove, minced
- 1 Thai chili, finely chopped
- 1 medium carrot, diced
- 1/4 cup baked beans in tomato sauce
- 1/4 cup fire-roasted diced tomatoes
- 1/4 tsp cayenne
- 1/2 tsp smoked paprika
- 1 tsp curry powder
- 1/4 tsp Royco Usavi beef seasoning
- 1/4 tsp salt
- 1/4 tsp black pepper
- 1/4 tsp ground coriander
- 1/4 tsp ground ginger
- 1 tsp chicken bouillon concentrate
- 1 cup water
- 1/4 cup ketchup/tomato sauce
- 1 tbsp tomato paste
- 1–2 tbsp Worcestershire sauce
- 1–2 tsp rice vinegar
- 1 tbsp chutney
- Ghee or oil, for cooking
- 6 large eggs
- 3 tbsp mayonnaise
- 1 tsp Dijon mustard
- 1 tsp lemon juice
- 2–3 tbsp prepared chakalaka (from above)
- 2 tbsp plain yogurt or sour cream (optional)
- Salt and pepper, to taste
- Optional garnish: smoked paprika, chopped parsley
Instructions
- Cook the eggs: Place the eggs in a pot and cover with 1 inch of cold water. Bring to a boil, then cover, turn off the heat, and let sit 10 minutes.
- Transfer to an ice bath for 5 minutes, then drain. Place in the fridge.
- Prepare chakalaka: Assemble your spices and chop your vegetables. Heat some ghee or oil in a pan and sauté the onions and garlic until soft. Add spices and bouillon; cook for at least 30 seconds.
- Add the bell pepper and chili pepper then cook 1–2 minutes. Stir in the tomato paste, Worcestershire sauce and ketchup to deglaze.
- Simmer vegetables: Add the carrots, diced tomatoes, baked beans, and water. Simmer for 15 minutes until thickened, stirring occasionally.
- Stir in the chutney, and vinegar, then season to taste. Set aside to cool, then add at least 1/2 cup to a bowl and use an immersion blender to smoothen slightly. Be sure to keep the texture and don't make soup!
- Make filling: Peel and halve the eggs and remove the yolks gently to a bowl.
- Mash the yolks, then mix in the mayonnaise, mustard, lemon juice, yogurt (if using), salt, and pepper. Stir in 2–3 tbsp chakalaka.
- Use an immersion blender to make it smoother if desired, but keep a few chunks for texture.
- Assemble eggs: Spoon or pipe yolk mixture into the egg whites.
- Garnish with smoked paprika, a little reserved chakalaka, and parsley.
- Chill until serving.
Notes
- Storage: These are best fresh! Refrigerate up to 24 hours.
- Yogurt or sour cream is optional. It adds extra creaminess and a subtle tang to the filling, which can mellow the spice from the chakalaka. Omit it if you prefer a firmer, more traditional deviled egg texture.
Nutrition Facts
Calories
82Fat (grams)
6.3 gSat. Fat (grams)
1.2 gCarbs (grams)
2.5 gFiber (grams)
0.7 gProtein (grams)
4.5 gI am not a certified nutritionist and any nutritional information on dontmissmyplate.com should only be used as a general guideline.
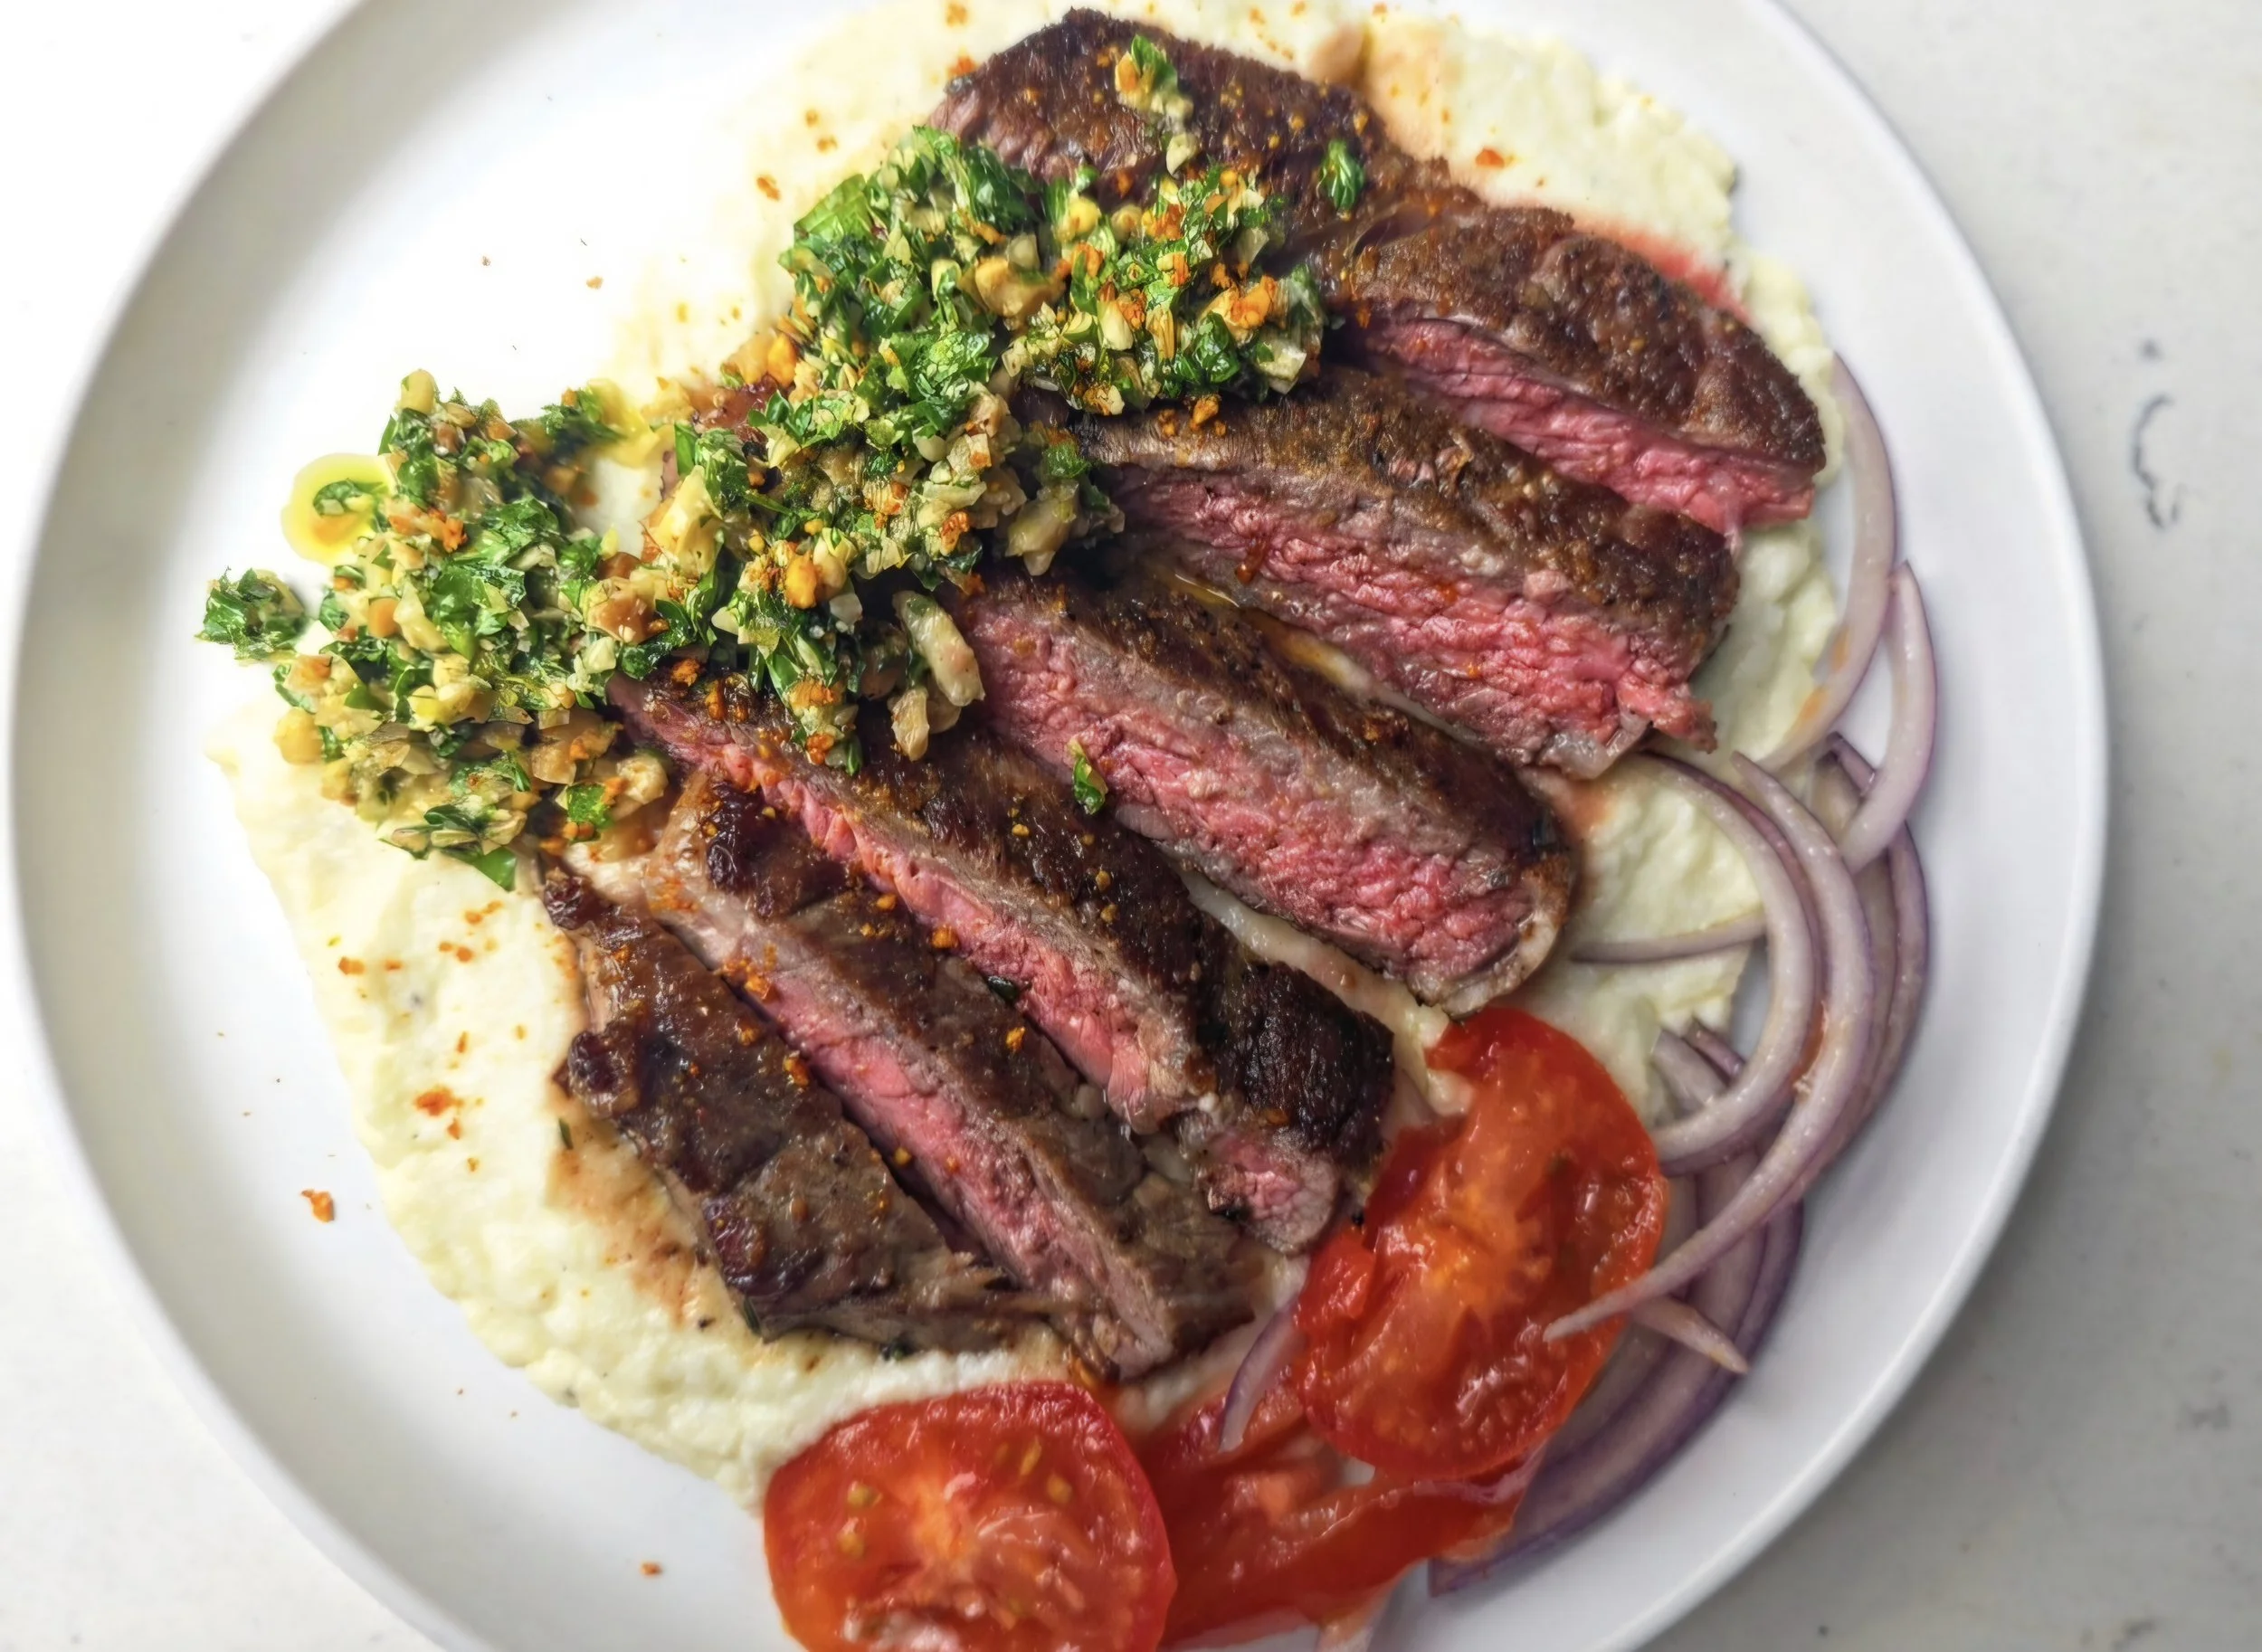
Spicy Suya Steak with Creamy Cauliflower Puree
I’ve traveled to Nigeria twice, and one thing that always stands out is suya, a spicy, nutty grilled meat you’ll find on nearly every street corner, late-night food stall, and even on restaurant menus. In formal dining settings, you’ll see it offered alongside fiery jollof rice, peppered fish, grilled snail, or sweet, flame-kissed plantains, each dish bold, vibrant, and packed with flavor.
Suya is more than just a quick bite; it’s a whole experience, from the smoky aroma of open flames to the bold, layered heat of the spice blend known as yaji.
Yaji is what gives suya its signature character, a deeply flavorful mix of ground peanuts, chili, ginger, garlic, and warming spices. It’s savory, slightly smoky, a little fiery, and unmistakably nutty. In many ways, it echoes the richness of peanut-based stews found across West and Southern Africa, but in a dry rub form that clings beautifully to grilled meat.
This recipe is inspired by those street food moments but reimagined for the home kitchen. It takes the essence of suya and brings it into a more composed, plated dish, pairing a suya-style steak with a fresh peanut gremolata and a silky cauliflower purée. It’s a bit of a fusion, street food meets steakhouse, bold spice meets subtle creaminess.
You can find pre-made suya powder, but I’ll also show you how to make it at home easily so you can bring those flavors into your own kitchen anytime.

Suya Steak with Cauliflower Puree and Peanut Gremolata
Turn any weeknight into steak night with this bold, Nigerian-inspired recipe. Tender steak gets a nutty, spicy suya crust, topped with a bright, crunchy peanut gremolata. Served alongside silky cauliflower purée, it’s a balanced, flavorful dinner that feels indulgent but is quick enough for a weekday.
Ingredients
- 3 tbsp roasted peanuts, finely ground
- 1 tsp smoked paprika
- 1 tsp cayenne pepper (adjust to taste)
- 1 tsp garlic powder
- 1 tsp onion powder
- ½ tsp ground ginger
- 1 small (Maggi) bouillon cube, crushed
- 1/2 tsp salt
- Optional (1/2 tsp black or white pepper)
- 2 thin steaks (~¾-inch thick)
- 4 tbsp neutral (or peanut) oil
- 2 tbsp butter
- 2 garlic cloves, smashed
- 2 thyme sprigs
- Salt and pepper (to rub on steaks before searing)
- 1 small head cauliflower, chopped
- 2 tbsp butter
- 1/3–1/2 cup cream
- 1 bay leaf
- 1 sprig thyme
- Salt and pepper to taste
- Optional for thinning (1/8 cup broth)
- 2 tbsp chopped roasted peanuts
- 1 tbsp fresh parsley, chopped
- 1 tbsp fresh cilantro, chopped
- 1 tsp lemon juice
- Pinch of salt
- Sliced tomato and red onion
- Light squeeze of lemon
- Pinch of salt
Instructions
- First, prepare the suya spice (yaji) mix. Combine ground peanuts, paprika, cayenne, garlic powder, onion powder, ginger, and salt.
- Season the steaks with salt and pepper, then rub the suya spice evenly over them. Place on a wire rack and let sit at room temperature for at least 30 minutes while you prepare everything else. This helps remove excess moisture for a better crust and deeper flavor.
- Chop and boil the cauliflower until tender (about 10 minutes). Drain well to prevent a watery purée.
- In a saucepan, warm the butter, cream, thyme, and bay leaf. Season with salt, pepper, and all-purpose seasoning.
- Remove the aromatics, then blend the cauliflower with the warm cream mixture until silky. For a smoother texture, add a splash of chicken broth if needed. You want it smooth and creamy, not soupy. Set aside and keep warm.
- Prepare the gremolata by mixing chopped peanuts, parsley, cilantro, lemon juice, and salt. Set aside.
- Slice the red onion and tomatoes, toss with lemon juice and salt, and set aside.
- Now cook the steak. Preheat a cast iron skillet over medium-high heat for 3–5 minutes until hot (you may see a little smoke). Add 2 tablespoons of oil per steak.
- If your steak is thin (about ¾ inch), sear the first side for 1 to 1¼ minutes. Flip and sear for at least 30 seconds, then pour off excess oil. Add butter, garlic, and thyme, and baste for about 30 seconds per side.
- Check the internal temperature with a thermometer — 130–132°F for medium. Continue flipping every 30 seconds until cooked to your preference.
- To plate, spoon the cauliflower purée onto a plate. Slice the steak against the grain and place over the purée.
- Top with peanut gremolata and finish with extra yaji seasoning. Serve with the tomato-onion salad on the side.
Nutrition Facts
Calories
450Fat (grams)
30 gCarbs (grams)
10 gFiber (grams)
3 gProtein (grams)
35 gI am not a certified nutritionist and any nutritional information on dontmissmyplate.com should only be used as a general guideline.

Pepper Steak Meat Pies
Meat pies come in all shapes and sizes, but one of my favourites will always be the handheld pepper steak pie. Growing up, these flaky, golden pies were everywhere—filled with rich, peppery beef and perfect as a quick, satisfying snack. Whether grabbed on the go or enjoyed with a cold Fanta or Coca-Cola, they’re a staple across Zimbabwe and much of Southern Africa.
Across the region, meat pies are a true comfort food. Walk into almost any bakery and you’ll find different variations, from beef and onion to curry steak, all wrapped in a buttery crust and baked until golden. This homemade version focuses on the classic pepper steak filling, known for its deep flavour and subtle heat from freshly ground black pepper.
If you’re looking for an easy homemade meat pie recipe with a flaky crust and a rich, savoury filling, this is a great place to start. Inspired by Zimbabwean bakery-style pies, these pepper steak pies are warm, comforting, and full of nostalgic flavour.
Perfect for lunch, snacks, or meal prep, these homemade pepper steak meat pies are a must-try for anyone who loves savoury baking.

Zimbabwean Meat Pies: Pepper Steak
Flaky homemade pepper steak meat pies filled with tender, peppery beef. A classic Southern African savory pie perfect for snacks or meals.
Ingredients
- 1.5 lbs chuck or blade steak, cut into medium bite-sized chunks
- 1 large onion, finely chopped
- 1 tbsp garlic, minced
- 1 tbsp Royco Usavi beef mix (optional)
- 2 tbsp flour
- 2 tsp black pepper (plus extra to finish)
- 1 tsp paprika
- 1/2 tsp chili powder
- 1/2 tsp garam masala
- 1/4 tsp cayenne
- 1 tsp steak seasoning
- 1 tsp salt
- Pinch ground cloves
- 1 tsp dried thyme
- 1 tsp Worcestershire sauce
- 1 tsp tomato paste
- 1/4 cup sherry
- 1/2 cup red wine
- 1 to 1½ cups beef broth (as needed)
- 1 tbsp beef bouillon powder
- 1 tbsp butter
- 2 sheets puff pastry
- 1 egg (for egg wash)
Instructions
- Prepare the beef coating
- In a medium bowl, combine the flour, paprika, cayenne (if using), salt, and black pepper.
- Add the beef chunks and toss well until each piece is evenly coated with the flour mixture.
- Brown the beef
- Heat 2–3 tablespoons of oil in a large, deep pan over medium-high heat.
- Add the beef in a single layer, working in batches to avoid overcrowding.
- Cook each batch until all sides are nicely browned (about 3–4 minutes per batch). Remove browned beef and set aside on a plate.
- Cook the aromatics
- In the same pan, add the chopped onions. Cook over medium heat for 3–4 minutes until soft and lightly golden.
- Add minced garlic and thyme leaves, stirring for about 1 minute until fragrant.
- Deglaze the pan
- Pour in the sherry, scraping up any browned bits from the bottom of the pan.
- Stir in the red wine, tomato paste, and Worcestershire sauce. Let simmer for 2–3 minutes.
- Add broth and return beef
- Pour in the beef broth or bouillon, then return the browned beef to the pan. Stir to combine.
- Braise the beef
- Cover the pan with a lid and reduce the heat to low.
- Simmer gently on the stove at 325–350°F (160–175°C) for 1½ to 2 hours, or place the covered pan in a preheated oven at the same temperature.
- Stir occasionally, and add a little more broth if the sauce becomes too thick before the beef is tender.
- The beef is done when it is fork-tender and the sauce has thickened to a rich consistency.
- Finish the filling
- Remove the pan from heat. Stir in 2 tablespoons of butter and a small pinch of freshly ground black pepper.
- Taste and adjust seasoning if needed.
- Let the filling cool completely before using it to fill your meat pies.
- Cut the pastry
- Roll out your pastry to about ⅛ inch thick.
- Cut into squares (roughly 4–5 inches, depending on desired pie size).
- Add the filling
- Place 1–2 tablespoons of the cooled pepper steak filling in the center of each pastry square.
- Spread slightly, leaving a small border around the edges.
- Top with second layer
- Place a second pastry square or layer over the filling.
- Press the edges together gently, then seal with a fork.
- Pierce the tops a few times with a fork to allow steam to escape.
- Chill before baking
- Place the assembled pies on a baking tray lined with parchment paper.
- Refrigerate for 20–30 minutes. This helps the pastry hold its shape and bake evenly.
- Egg wash and bake
- Brush the tops with beaten egg for a golden finish.
- Bake in a preheated oven at 400°F (200°C) for 20–25 minutes, or until the pastry is puffed and golden brown.
- Serve
- Remove from oven and let cool slightly before serving.
- Perfect warm as a snack, lunch, or part of a Southern African-inspired spread.
Notes
- Use chuck or blade steak only for best tenderness and avoid generic “stew meat” (inconsistent results)
- Proper browning is essential for flavor
- Cook low and slow, this is what makes the meat tender
- Filling should be thick, not watery, before assembling
- Cooling the filling prevents soggy pastry
Nutrition Facts
Calories
320Fat (grams)
18 gCarbs (grams)
18 gI am not a certified nutritionist and any nutritional information on dontmissmyplate.com should only be used as a general guideline.
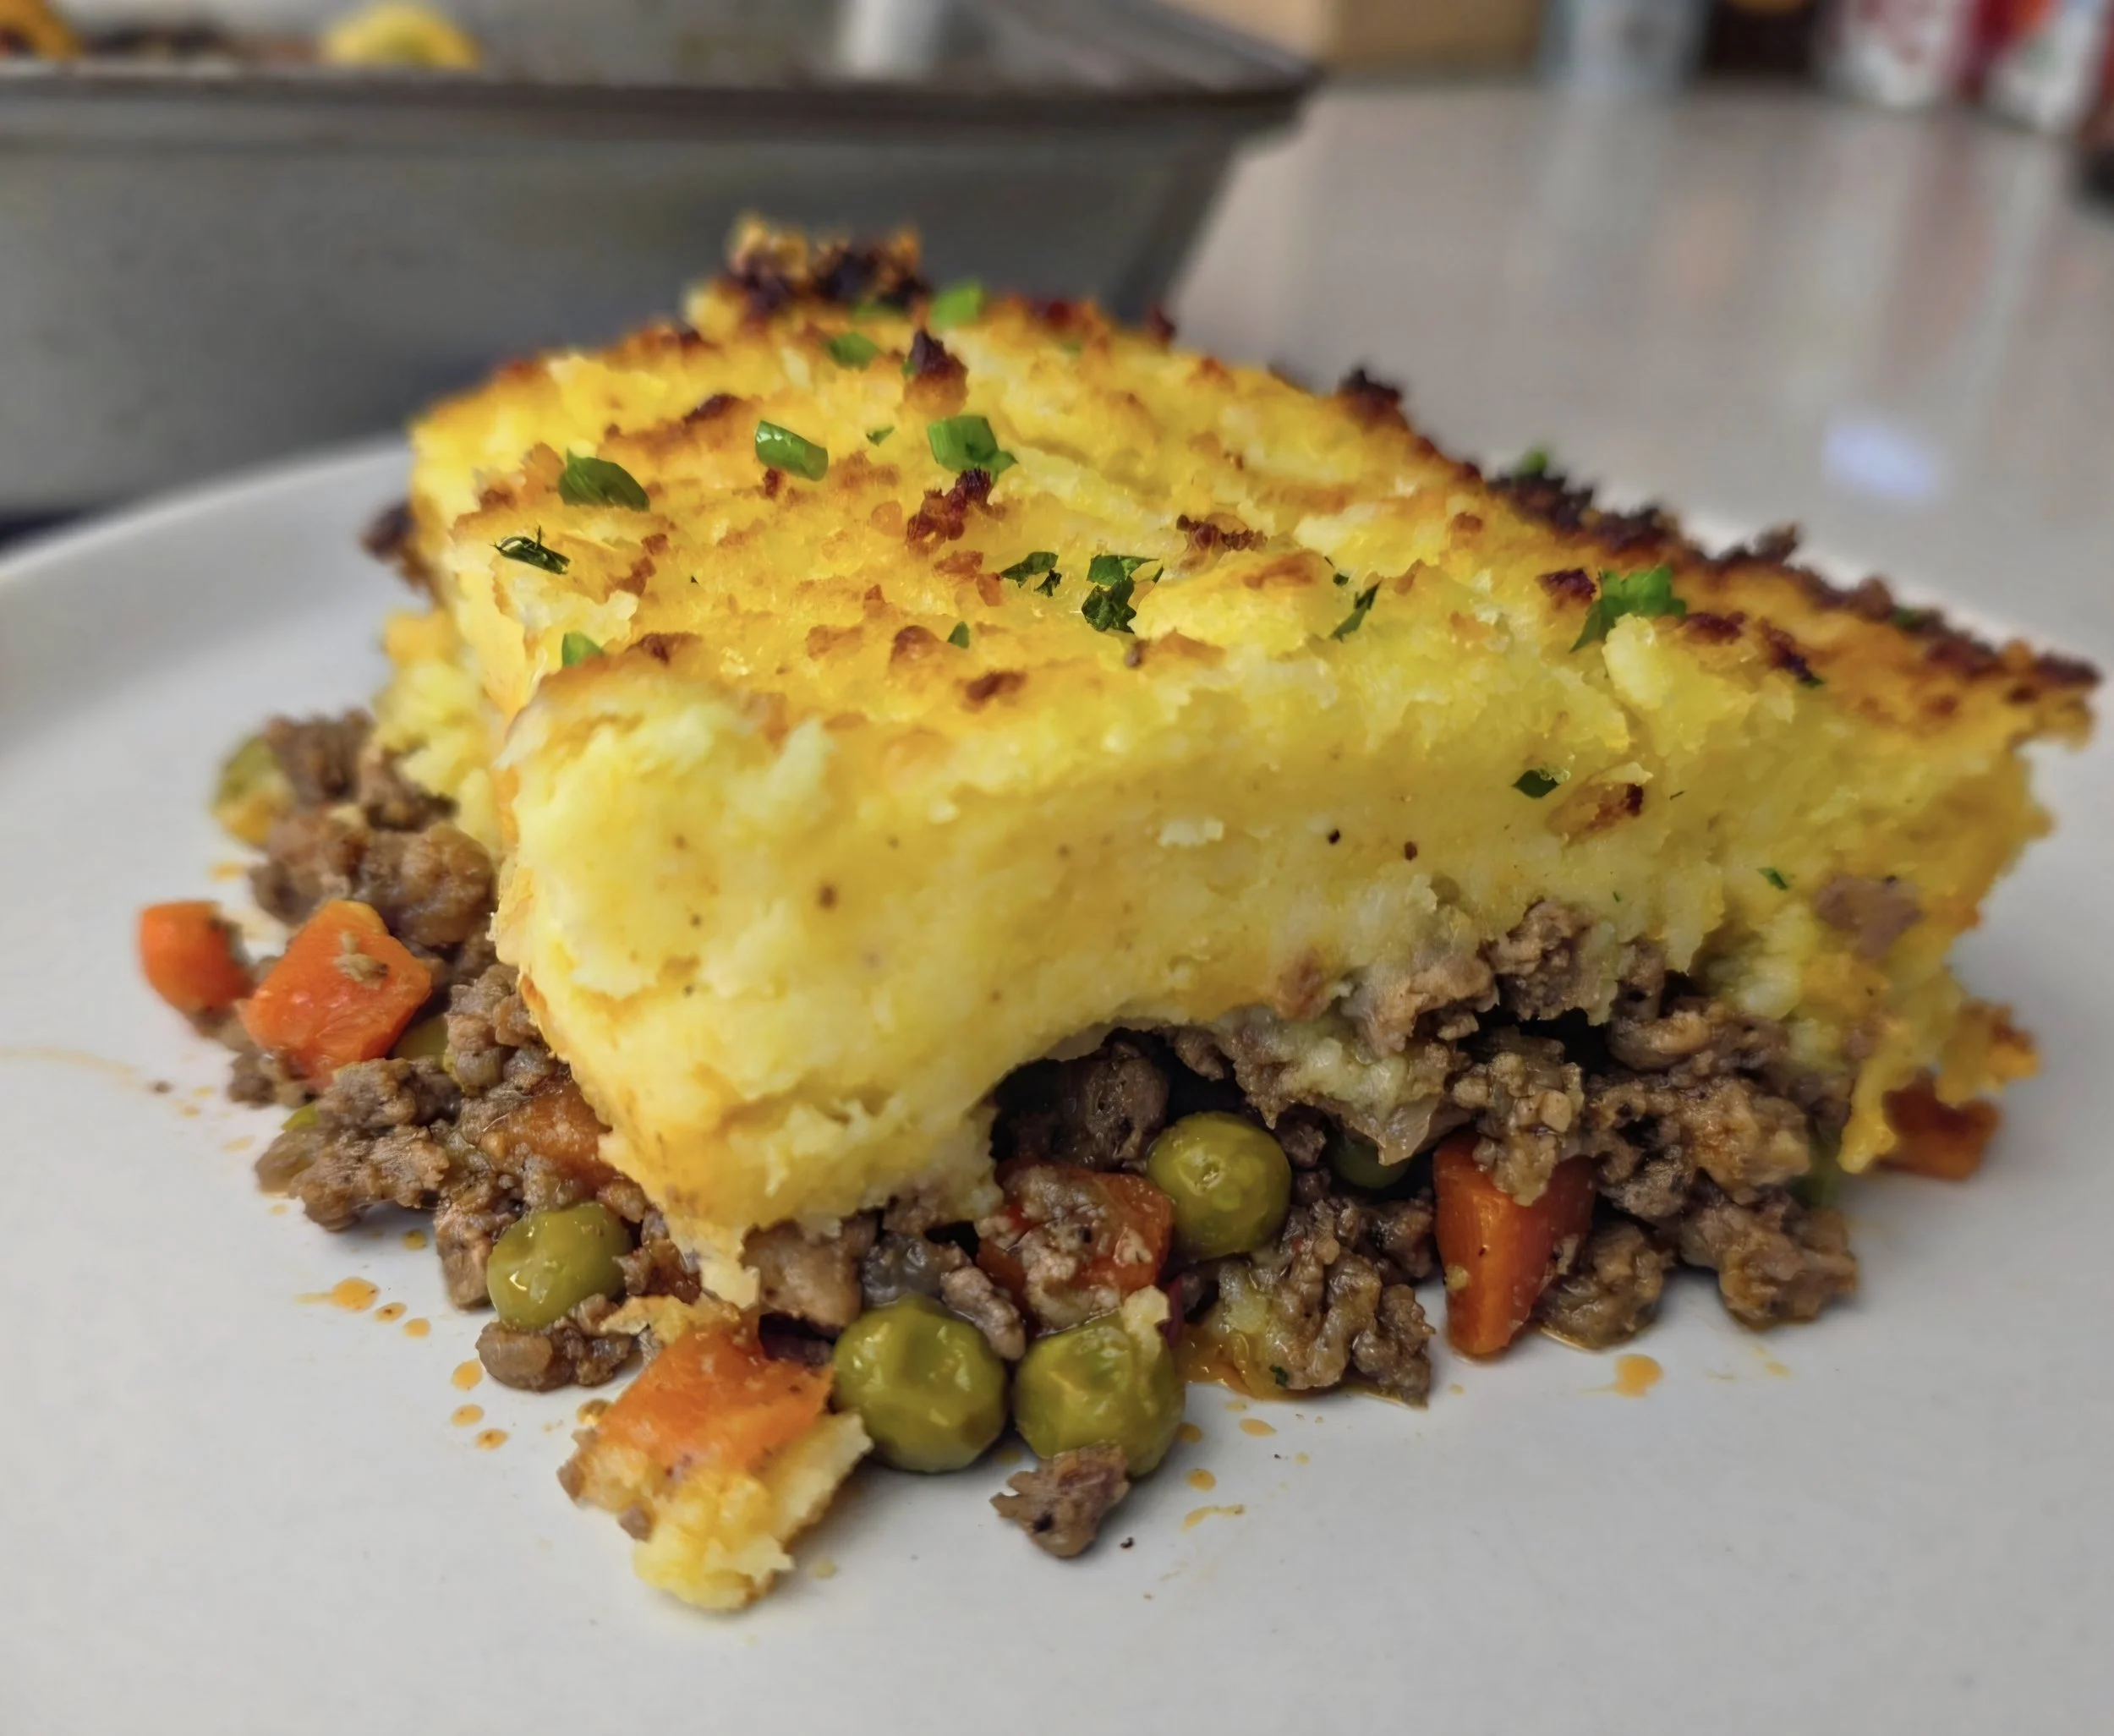
Coriander Shepherd’s Pie with Creamy Mashed Potatoes
Shepherd’s pie is one of those classic comfort foods that feels like home no matter where you grew up. I’ve always loved it in its traditional form, with a rich, savory meat mixture with peas and carrots, topped with creamy, golden mashed potatoes, but I also enjoy giving classics a subtle twist.
Whether you’re here for St. Patrick’s Day or just need a weekend-night comfort dish, I’ve got you covered.
If you grew up in—or have visited—Southern Africa, you’re likely familiar with the braai (barbecue)-flavored sausage, boerewors, beloved for its smoky, aromatic taste. What makes it stand out is the toasted coriander flavor, and it’s remarkable how it dances with beef, pork, vinegar, and other spices, creating a unique signature taste. Why not imprint this flavor on shepherd’s pie to give it personality? It’s something you can do quickly in your kitchen, merging two culinary traditions in a nod to boerewors, without using the sausage directly.
In this version, I toasted coriander seeds, ground them, and added them along with cloves and other warming spices. The result is a meat layer that’s deeply flavorful but subtle enough to let the creamy mashed potato topping shine.
The mashed potatoes, made with buttered potatoes and a ricer, are luxuriously velvety, enriched with cream and fresh thyme, giving that comforting, golden finish that makes shepherd’s pie irresistible. This dish celebrates a classic comfort food while giving it a personal, cultural twist, making it familiar yet distinctly Southern African.
If you want something even more indulgent and creative, try my Oxtail and Sweet Potato Shepherd’s Pie.

Coriander Shepherd’s Pie with Creamy Mashed Potatoes
This Southern African–inspired shepherd’s pie layers beef and pork with toasted coriander seeds, subtle ground coriander, bay leaf, and a savory pan sauce. The mashed butter potatoes are enriched with cream and butter, then broiled for golden, crispy edges.
Ingredients
- 4–5 medium butter potatoes, peeled and cubed
- 2 tablespoons butter
- ½–¾ cup cream (adjust to ensure potatoes are creamy, not dry)
- 2 bay leaves
- ⅛ teaspoon ground nutmeg
- Salt and pepper, to taste
- ¼ cup grated Parmesan
- 1 egg, lightly beaten
- 1 lb ground beef
- 1 lb ground pork
- 1 medium onion, finely chopped
- 3 cloves garlic, minced
- 1 teaspoon whole coriander seeds (toasted and coarsely ground with a spice grinder or pestle and mortar)
- ¼ teaspoon ground coriander
- 1 teaspoon black pepper
- 1 teaspoon seasoned salt (optional)
- 1 bay leaf
- 1 tablespoon tomato paste
- 1½ tablespoons Worcestershire sauce
- 1–2 teaspoons red or white vinegar (white preferred)
- 1 bouillon cube (optional, or 1¼ cups broth if not using cubes)
- 1 cup frozen peas and carrots
- 1 tablespoon ghee, butter, or oil
- Additional salt, to taste
- Fresh parsley, chopped
Instructions
- Toast coriander seeds in a dry skillet over medium heat until fragrant, about 1–2 minutes. Grind coarsely with a spice grinder or pestle and mortar. Set aside.:
- Peel and cube butter potatoes. Bring to a boil in salted water and cook until tender, about 15–20 minutes. Drain and set aside.
- Heat ghee, butter, or oil in a large skillet over medium heat.
- Add onion and garlic and sauté until translucent and fragrant, about 5 minutes.
- Add toasted coriander seeds and ground coriander to bloom the spices, stirring for 30–60 seconds to release aroma.
- If using a bouillon cube, add it now and stir to dissolve. Otherwise, add 1¼ cups broth after.
- Stir in remaining seasonings (bay leaf, black pepper, seasoned salt).
- Add ground beef and pork. Cook until browned, letting the meat absorb the aromatics and spices.
- Stir in Worcestershire sauce, vinegar (white preferred), and tomato paste. Cook for 1–2 minutes.
- Add water or broth if needed for a saucy consistency. Taste and adjust seasoning, this is key to avoid blandness.
- Stir in frozen peas and carrots and mix thoroughly.
- Warm cream gently over low heat until simmering, then reduce heat. Add bay leaf, butter, nutmeg, salt, and pepper. Stir to combine.
- Add Parmesan, then remove bay leaf.
- Pass boiled potatoes through a ricer into a large bowl.
- Pour warm cream mixture over potatoes, folding gently until smooth and creamy. Add more cream if needed to achieve desired consistency.
- Tip: Do not overmix to avoid gluey potatoes.
- Fold in the beaten egg to help the topping set during baking.
- Transfer meat mixture to a baking dish.
- Spoon mashed potatoes over the meat and smooth with a spoon. Create shallow grooves or patterns with a fork for even browning.
- Bake at 400°F (200°C) for 15 minutes, then broil for 3–5 minutes until the top is golden and slightly crisp.
- Remove from oven, sprinkle with chopped parsley, and serve.
Nutrition Facts
Calories
460Fat (grams)
28 gCarbs (grams)
19 gFiber (grams)
3 gProtein (grams)
25 gI am not a certified nutritionist and any nutritional information on dontmissmyplate.com should only be used as a general guideline.
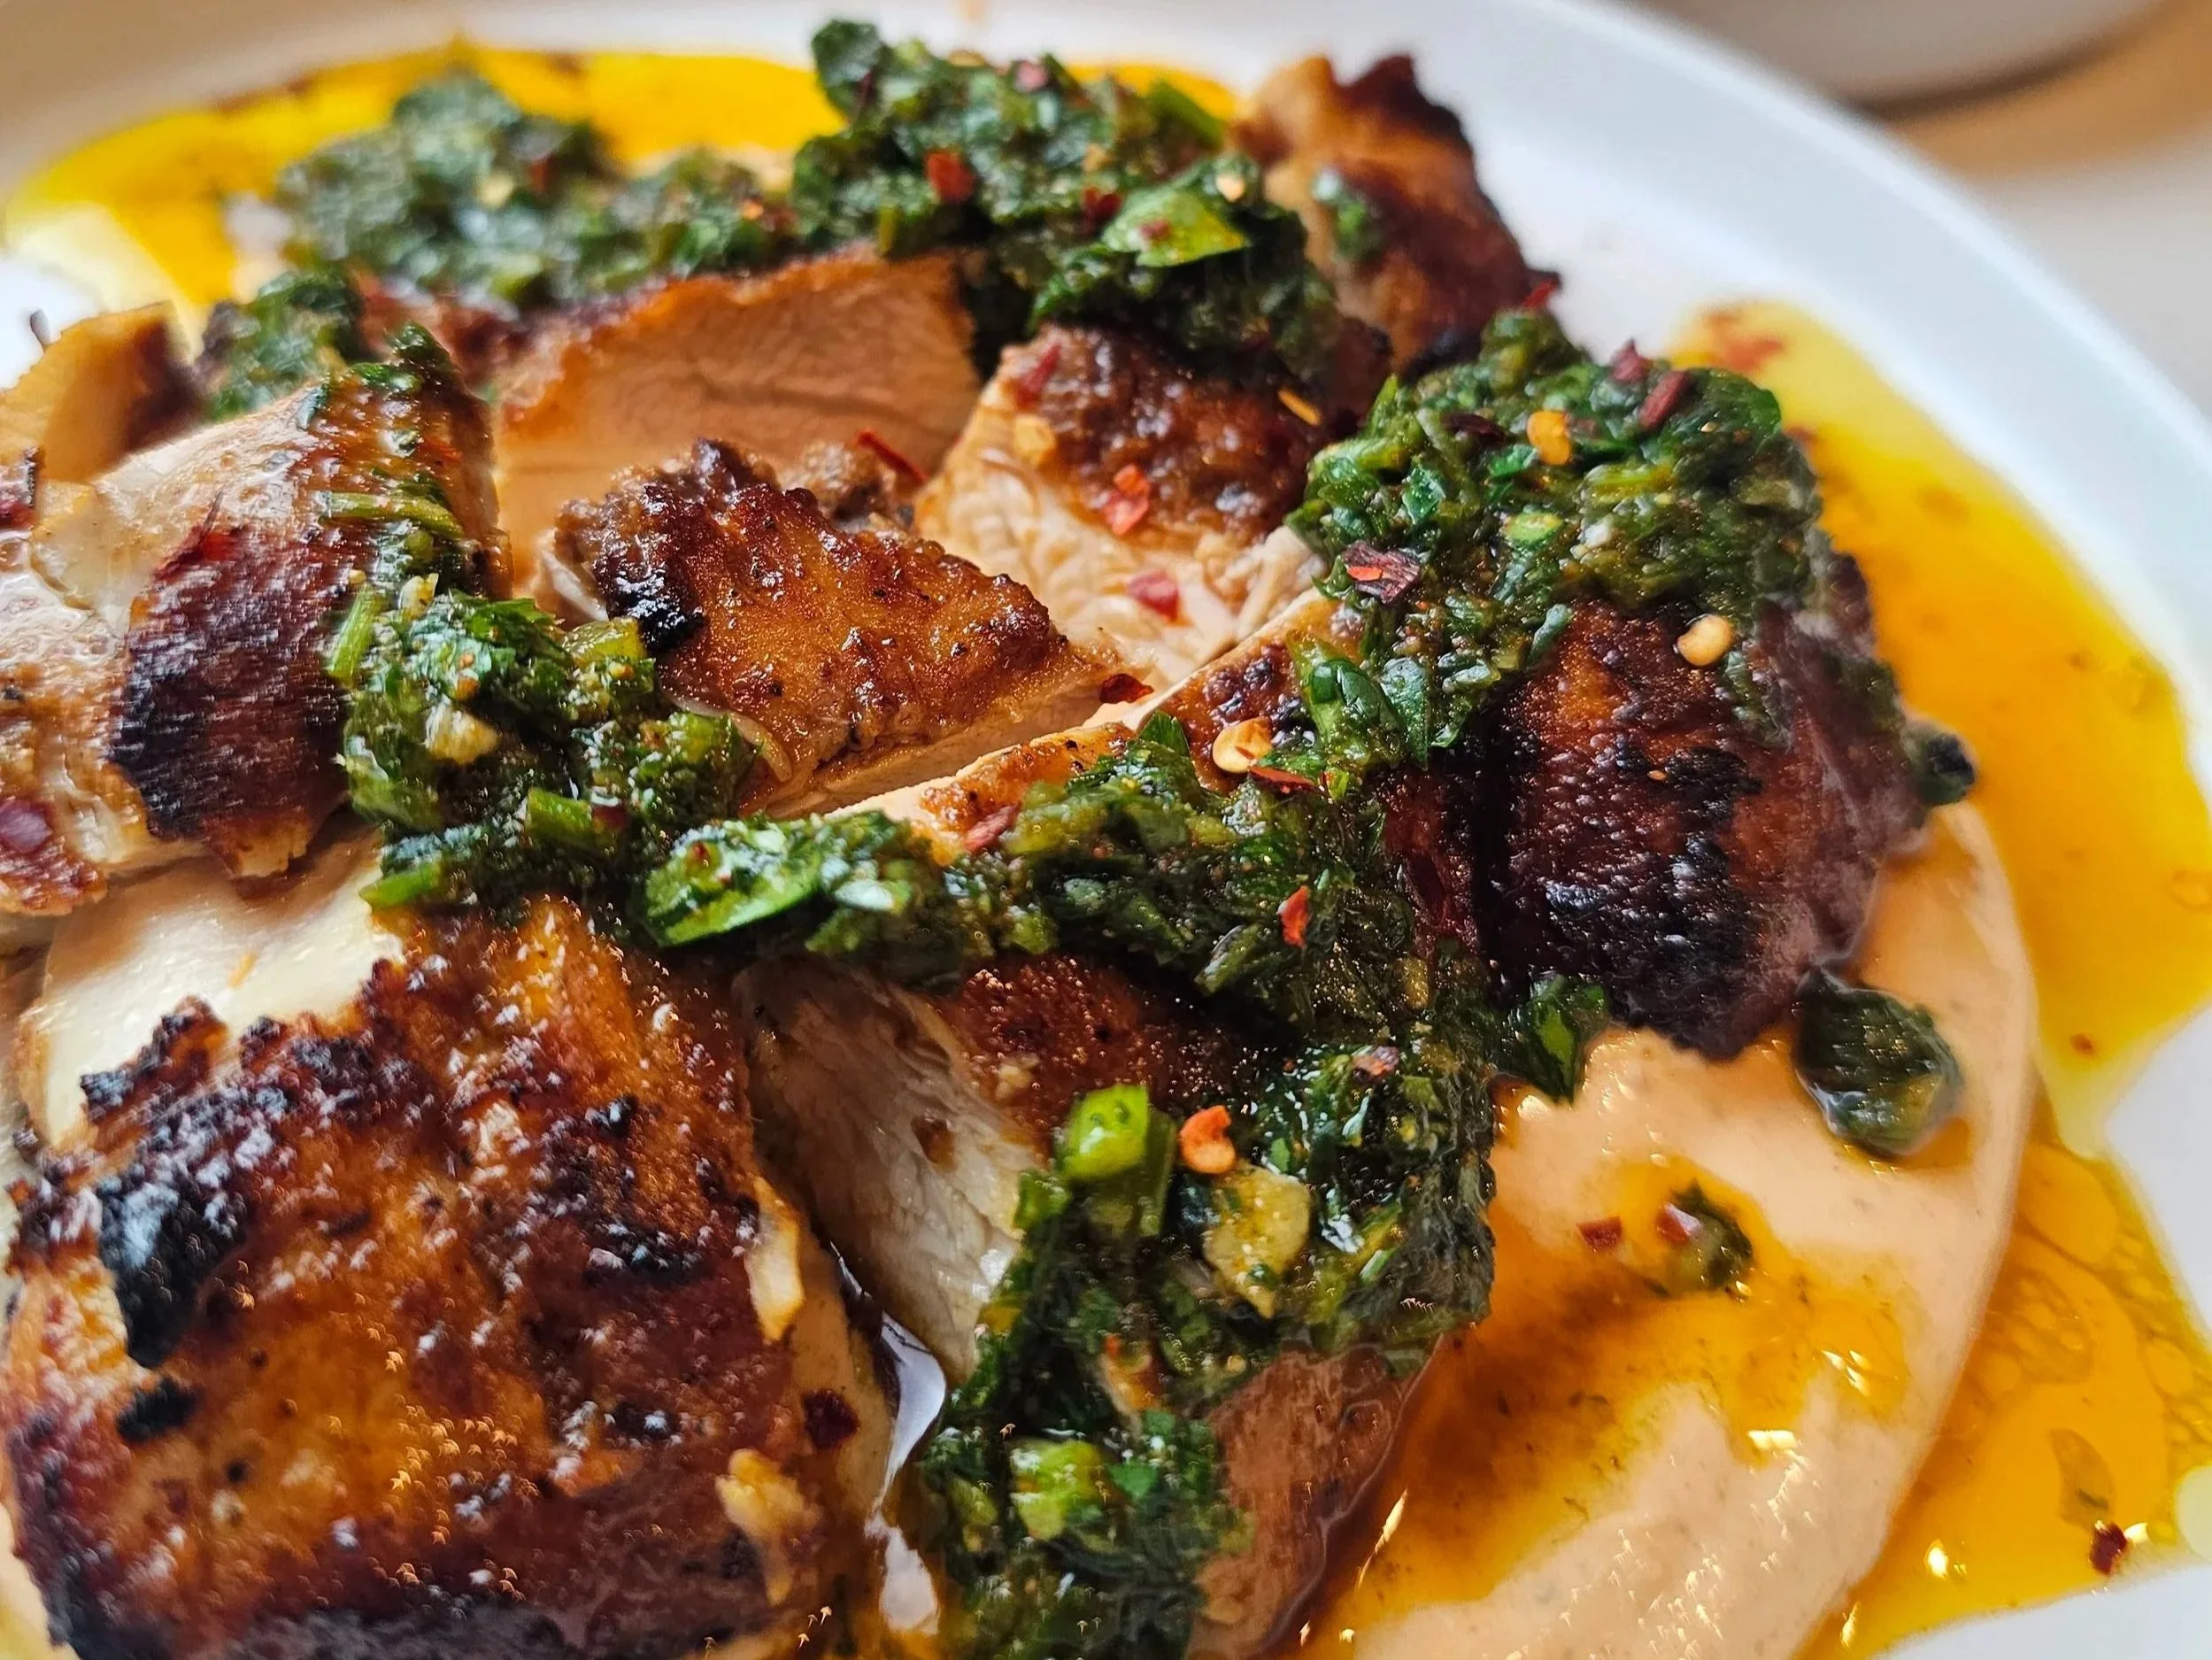
Harissa Chicken with Chermoula Sauce
Some recipes are born in your kitchen. Others follow you home from a restaurant and refuse to leave your mind.
I was inspired to make this after trying an unforgettable appetizer at Cordelia Fishbar on Valentine’s Day in DC. The chicken was extremely succulent, with perfectly crisped with skin-on goodness (breast? thigh? still debating), deeply savory, and served over a harissa-kissed yogurt that tied everything together. It didn’t taste marinated in harissa, but the warmth was there, subtle, layered, intentional.
So naturally, I did what any home cook on a flavor mission would do: I made it my own.
In my version, the chicken is marinated in harissa for bold depth. I used my often-neglected Ninja indoor grill and air fryer, and it delivered that perfect char and gentle smokiness that feels like summer, even when it’s not. And the real star? Chermoula.
If you’ve been following my kitchen journey, you already know: I’ve been championing chermoula for a while now. Think of it as North Africa’s answer to chimichurri—bright, herbaceous, alive. It reflects the Afro-fusion influences and close-to-my-roots flavors that continue shaping my evolution as a home cook. I’ve used it with croaker fish alongside peri peri and harissa, and it never disappoints.
This dish is smoky, herbaceous, creamy, spicy, and fresh all at once. The kind of layered flavor that tastes like you planned ahead—even if you just wanted something impressive for dinner.

Harissa Chicken with Chermoula Sauce
Smoky grilled Harissa Chicken with creamy harissa yogurt and vibrant chermoula. Juicy, bold, and herb-forward, this North African–inspired dish serves 4 and is perfect for weeknight dinners or entertaining.
Ingredients
- 1 cup parsley, finely chopped
- ½ cup cilantro, finely chopped
- 3 garlic cloves, minced
- 1 jalapeño, finely diced
- ½ tsp smoked paprika
- ½ tsp ground coriander
- ½ tsp cumin
- ½ tsp salt
- ¼ tsp black pepper
- 2–4 tbsp olive oil
- 4 large chicken thighs (skinless, bone-in)
- 1.5 tbsp harissa
- 3–4 tbsp olive oil
- ½ tsp garlic powder
- ½ tsp oregano
- ½ tsp cumin
- 1 tsp chicken seasoning
- ½ tsp smoked paprika
- ½ tsp black pepper
- ½ tsp onion powder
- Juice of ½ lemon
- 1 tbsp sesame oil
- 2/3 cup plain Greek yogurt
- Chilli flakes (optional)
Instructions
- Chermoula: Mix parsley, cilantro, garlic, jalapeño, spices, and olive oil. Set aside. Optional: warm slightly before serving.
- Harissa Marinade and Yogurt: In a bowl, combine harissa, olive oil, garlic powder, oregano, chicken seasoning, smoked paprika, black pepper, onion powder, lemon juice, and sesame oil. Reserve 1–2 tbsp and stir into Greek yogurt; refrigerate for yogurt sauce. Coat the chicken in the remaining marinade and refrigerate for at least 1 hour. If you are pressed for time, 30 minutes works, and overnight will give the deepest flavor.
- Grill Chicken: Preheat grill to medium. Pat chicken dry. Grill 7 minutes per side (14 minutes total) until internal temperature reaches 165°F. Rest 5 minutes, then cut into squares.
- Assemble: Spoon harissa yogurt on plates, add grilled chicken, top with chermoula, and sprinkle chili flakes if desired.
Notes
- Pat chicken dry for better char; fresh lemon brightens the dish; chermoula can be extra sauce.
Nutrition Facts
Calories
460Fat (grams)
32 gCarbs (grams)
6 gFiber (grams)
1 gSugar (grams)
2 gProtein (grams)
38 gI am not a certified nutritionist and any nutritional information on dontmissmyplate.com should only be used as a general guideline.

Fluffy Macademia Nut Pancakes with Honey Rooibos Syrup
Some breakfasts tell a story before you even take a bite. Macadamia nuts, known for their rich, buttery texture and creamy crunch, may be native to Australia and famously grown in Hawaii, but today South Africa is one of the world’s largest producers and exporters. Their subtle sweetness and velvety bite instantly elevate a simple pancake.
I’ve loved macadamias for years, especially in white chocolate macadamia cookies (yes, the classic Subway version was a longtime favorite). There’s something about that creamy, slightly soft crunch against sweetness that just works. Bringing that same comfort into pancakes felt natural.
For the syrup, I leaned into rooibos tea, a naturally caffeine-free red tea grown exclusively in South Africa’s Cederberg region. As the world’s leading producer and exporter of rooibos, South Africa has made this smooth, gently honeyed tea a global staple. Its warm, almost vanilla-like notes pair beautifully with honey and citrus.
That’s where the orange zest comes in. Bright citrus cuts through the richness of the nuts and butter, lifting the entire dish so it doesn’t feel heavy. A whipped honey butter adds an airy, creamy finish — lighter than a pat of cold butter and easier to melt into every fluffy layer. The result is balanced: nutty, fragrant, lightly sweet, and vibrant all at once.
Together, creamy macadamias and aromatic rooibos transform everyday pancakes into something globally inspired, nostalgic, and perfect for a slow weekend morning.


Fluffy Macademia Nut Pancakes with Honey Rooibos Syrup
Fluffy macadamia nut pancakes topped with a rich honey-rooibos syrup and whipped honey-butter. Light, nutty, and citrus-kissed, these pancakes are perfect for breakfast, brunch, or a special treat. Easy to make and packed with flavor, they’re a modern twist on classic pancakes with a touch of gourmet flair.
Ingredients
- 1/2 cup butter (1 stick, room temperature)
- 2–3 tbsp honey
- 1 tsp orange zest
- 1–2 drops vanilla extract
- Pinch fo salt
- 1/2 cup honey
- 2-3 tbsp strongly brewed rooibos tea (loose leaf or 2 tea bag)
- 2 tsp orange juice
- Pinch of salt
- 1 1/2 cups all-purpose flour
- 2 tsp baking powder
- 1/2 tsp baking soda
- 1 tbsp sugar
- 1 1/4 cup buttermilk milk
- 1 egg
- 3 tbsp melted butter
- 1/2 tsp vanilla extract
- 1/2 cup macadamia nuts
Instructions
- Whip butter until fluffy with electric mixer.
- Gradually add honey and mix.
- Stir in orange zest and vanilla.
- Chill until ready to serve, then scoop on top of pancakes when serving.
- Warm honey in a small saucepan.
- Stir in rooibos tea until fully dissolved and syrup reaches desired strength. If you want the syrup thicker, use less honey.
- Take off heat and stir in the orange juice and pinch of salt. Set aside.
- In a bowl, whisk together the flour, baking powder, sugar, and salt.
- In another bowl, combine the milk, egg, and melted butter.
- Gently fold the wet ingredients into the dry ingredients until just combined — a few lumps are okay because overmixing can make the pancakes tough. Set the batter aside and prepare the syrup.
- Heat a non-stick pan over medium heat.
- Fold the macadamia nuts into the batter just before cooking to prevent them from sinking to the bottom and to keep them crunchy.
- Scoop ¼–⅓ cup of batter per pancake onto the pan.
- Cook for 2–3 minutes per side, or until bubbles form on the surface and the edges and bottom are golden brown.
- Serve hot with syrup and whipped honey-butter.
Notes
- Macadamia nuts: Lightly toast in a dry pan to enhance flavor if not roasted.
- Pancake batter: Don’t overmix; lumps keep pancakes fluffy.
- Syrup: Adjust rooibos strength to taste; thicker syrup clings better.
- Serving ideas: Great for breakfast, brunch, or weekend treats. Add fresh fruit for extra flair.
Nutrition Facts
Calories
380Fat (grams)
17 gCarbs (grams)
48 gFiber (grams)
2 gProtein (grams)
6 gSugar (grams)
20 gI am not a certified nutritionist and any nutritional information on dontmissmyplate.com should only be used as a general guideline.
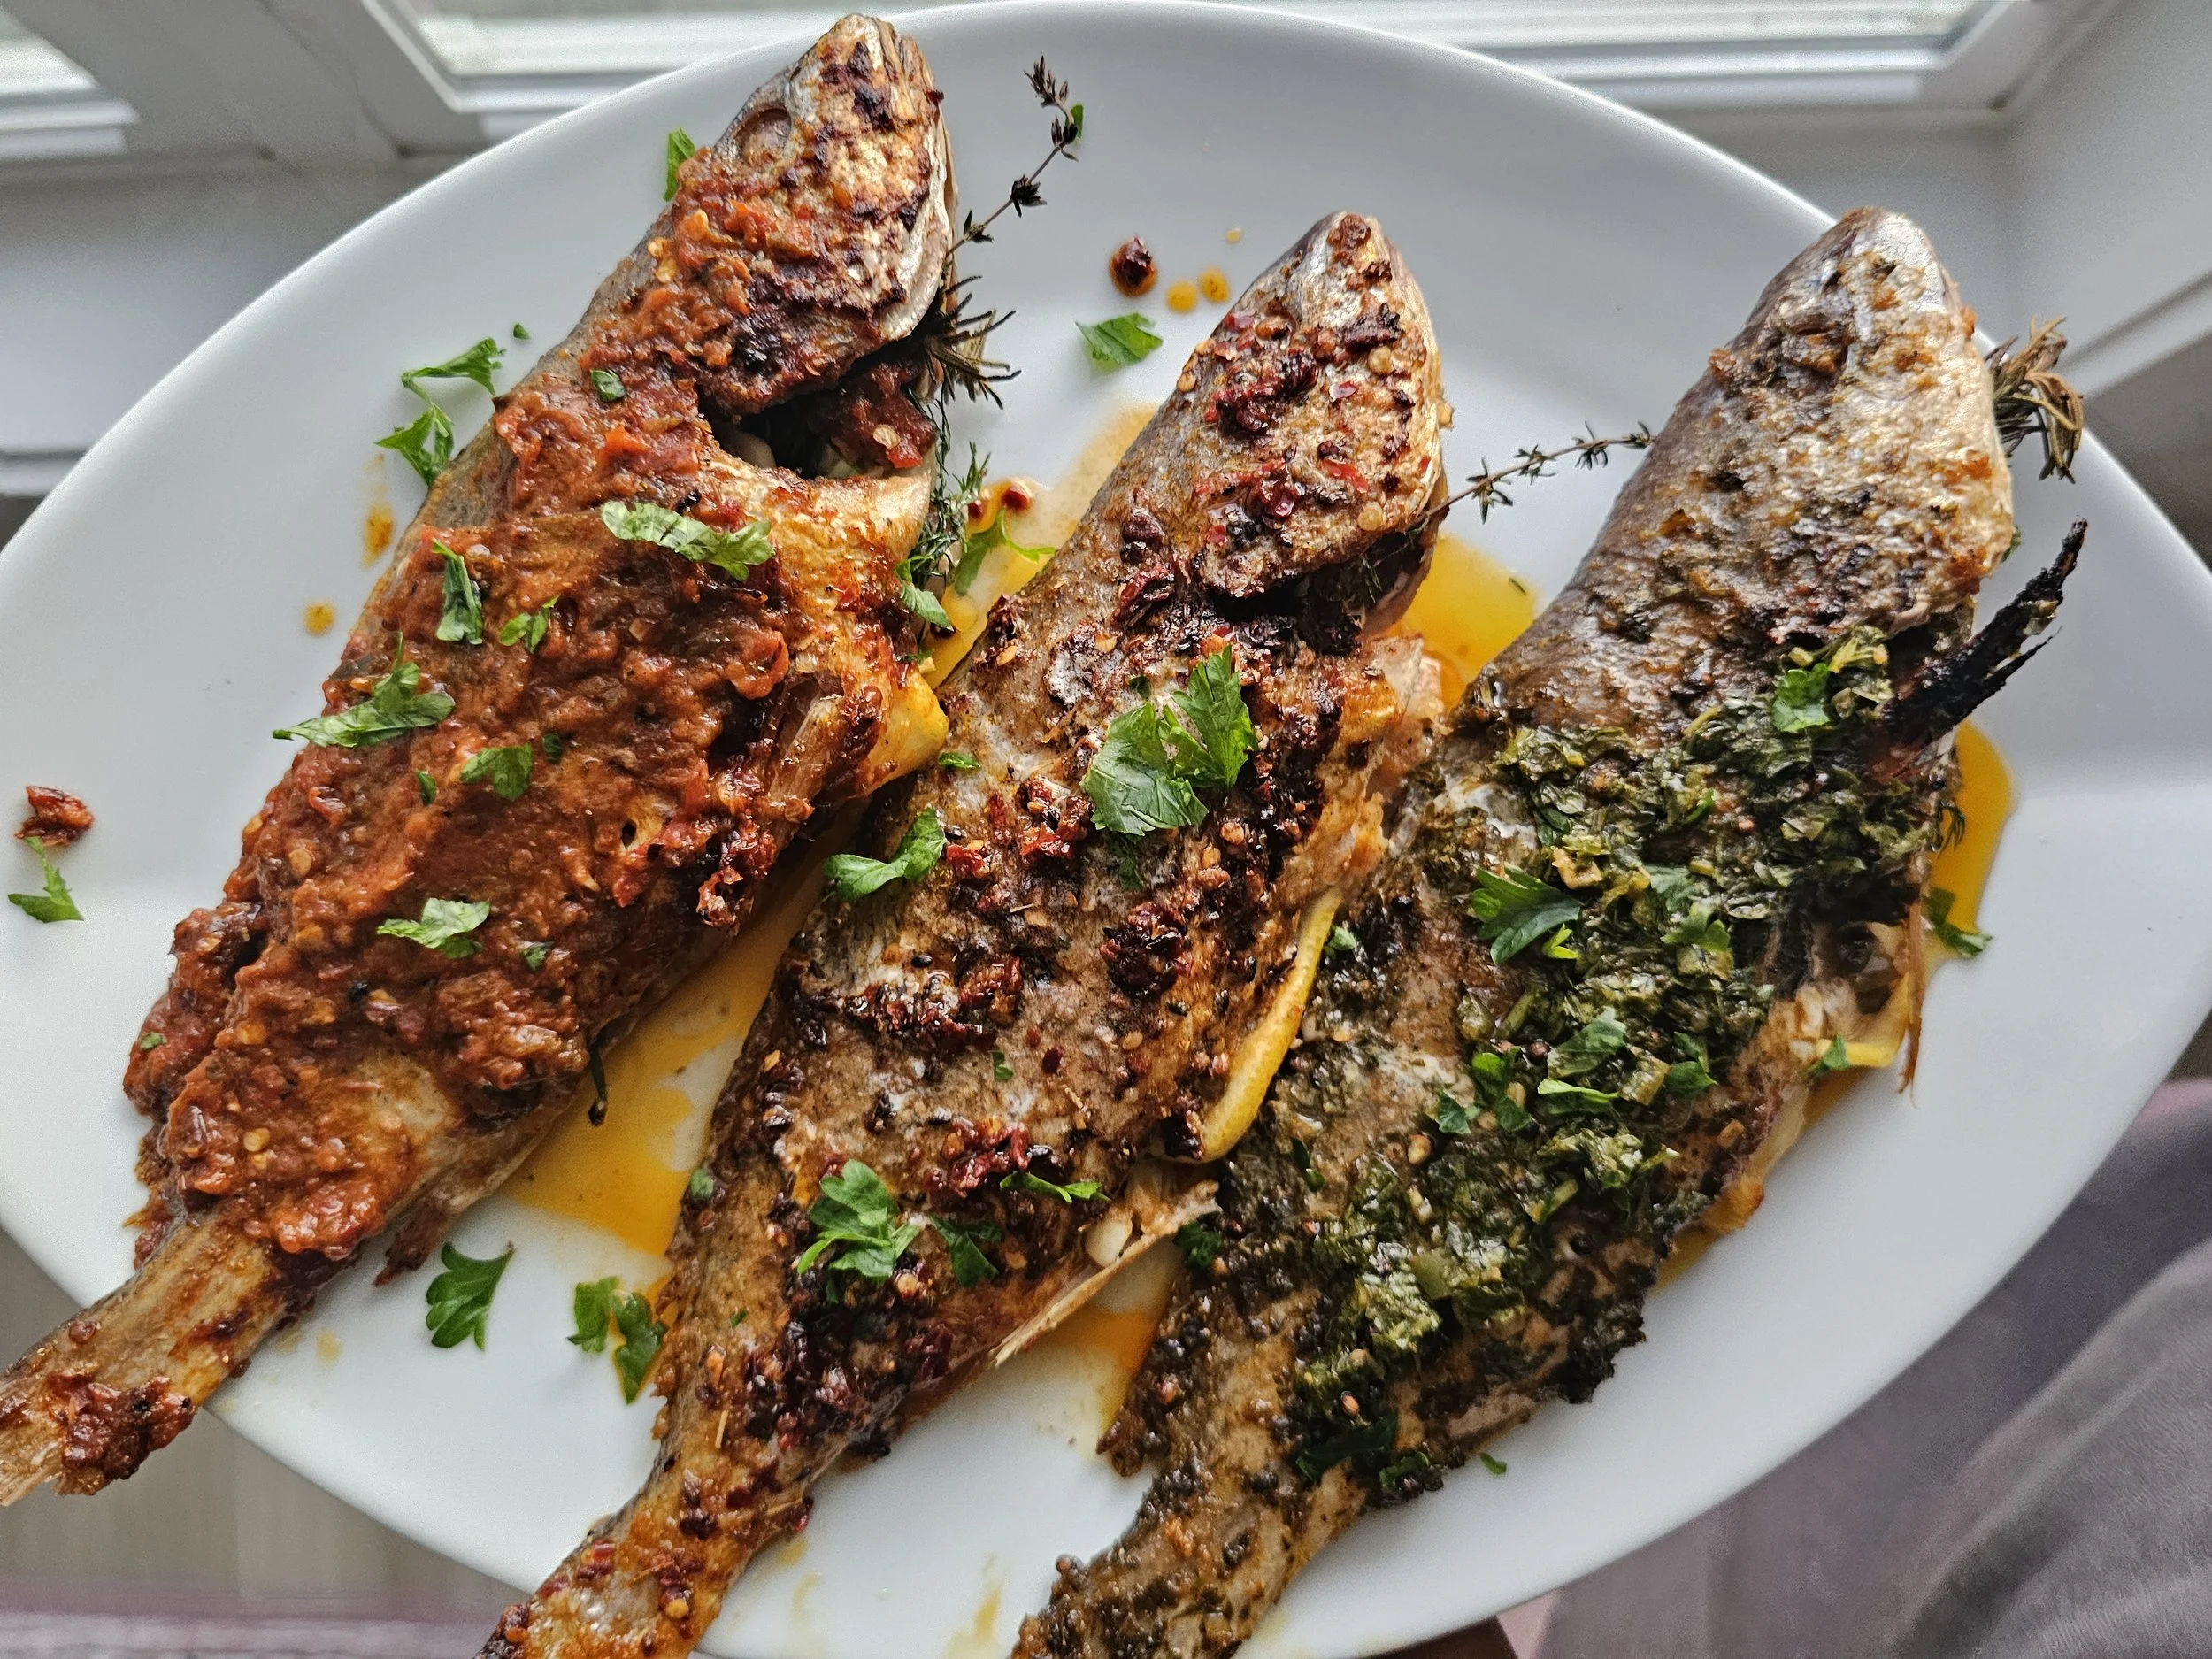
3 Bold Sauces for Quick Fish and Chicken Meals
Tired of the same old dinner routine? It’s time to awaken your taste buds with bold African flavors that transform ordinary fish and chicken into extraordinary meals. Enter Chermoula, Harissa, and Peri Peri — three iconic pan sauces that bring heat, herbs, and zest to your plate.
What These Sauces Do for Your Food
Each sauce isn’t just a topping — it’s a flavor powerhouse that enhances the natural qualities of your fish, chicken, or even vegetables, making every bite a journey.
Chermoula: Fresh, Herbal, and Bright
Chermoula works wonders with delicate proteins like fish, thanks to its fresh herbs and citrus that brighten and complement rather than overpower. When paired with chicken, it adds a vibrant, zesty lift that cuts through the meat’s richness, creating balance and freshness.
On fish: It enhances the ocean-fresh taste while adding an aromatic herbal punch. Think grilled or pan-seared fish with that perfect tangy finish.
On chicken: It adds freshness and complexity, making roast or grilled chicken feel light, fragrant, and irresistibly flavorful.
Harissa: Smoky Heat That Builds Depth
Harissa’s smoky, spicy notes are ideal for heartier proteins like chicken. It adds warmth and complexity, creating a deep, layered flavor that intensifies with cooking. For fish, it’s a bold flavor partner that can stand up to richer, fattier varieties like salmon or mackerel without overwhelming them.
On chicken: Harissa creates a smoky, fiery crust that’s perfect for grilling or roasting — your taste buds will thank you for the kick.
On fish: It adds a punchy spice layer, especially great with oily fish, giving them a fiery upgrade that’s rich and vibrant.
Peri Peri: Tangy, Fiery, and Versatile
Peri Peri’s bright acidity and fiery chilies make it a versatile champion for both fish and chicken. The lemon and vinegar notes cut through fat and protein, making it ideal for grilled or pan-fried dishes.
On chicken: It creates that classic fiery, tangy glaze that caramelizes beautifully on the grill, keeping the meat juicy with a spicy zing.
On fish: Perfect for firm, meaty fish like swordfish or tuna, Peri Peri adds a zesty heat that wakes up every bite without masking the natural flavor.
How to Make These Sauces at Home
Chermoula: Blend fresh cilantro, parsley, garlic, lemon juice, olive oil, cumin, and coriander until smooth.
Harissa: Roast red peppers, chili, and garlic; blend with smoked paprika, cumin, coriander, and olive oil for a smoky paste.
Peri Peri: Mix African bird’s eye chilies (or serranos), garlic, lemon juice, vinegar, olive oil, and herbs into a tangy, spicy sauce.
Why These Sauces Matter
These sauces aren’t just add-ons — they bring life to your dishes. They brighten, spice, or deepen flavors, making even the simplest weeknight meal memorable. Plus, they’re easy to prepare and keep in your fridge for an instant upgrade anytime.
Ready to spice up your fish and chicken dinners?
Try these African-inspired sauces for a quick, bold flavor boost that will have you rethinking what’s possible in your kitchen.
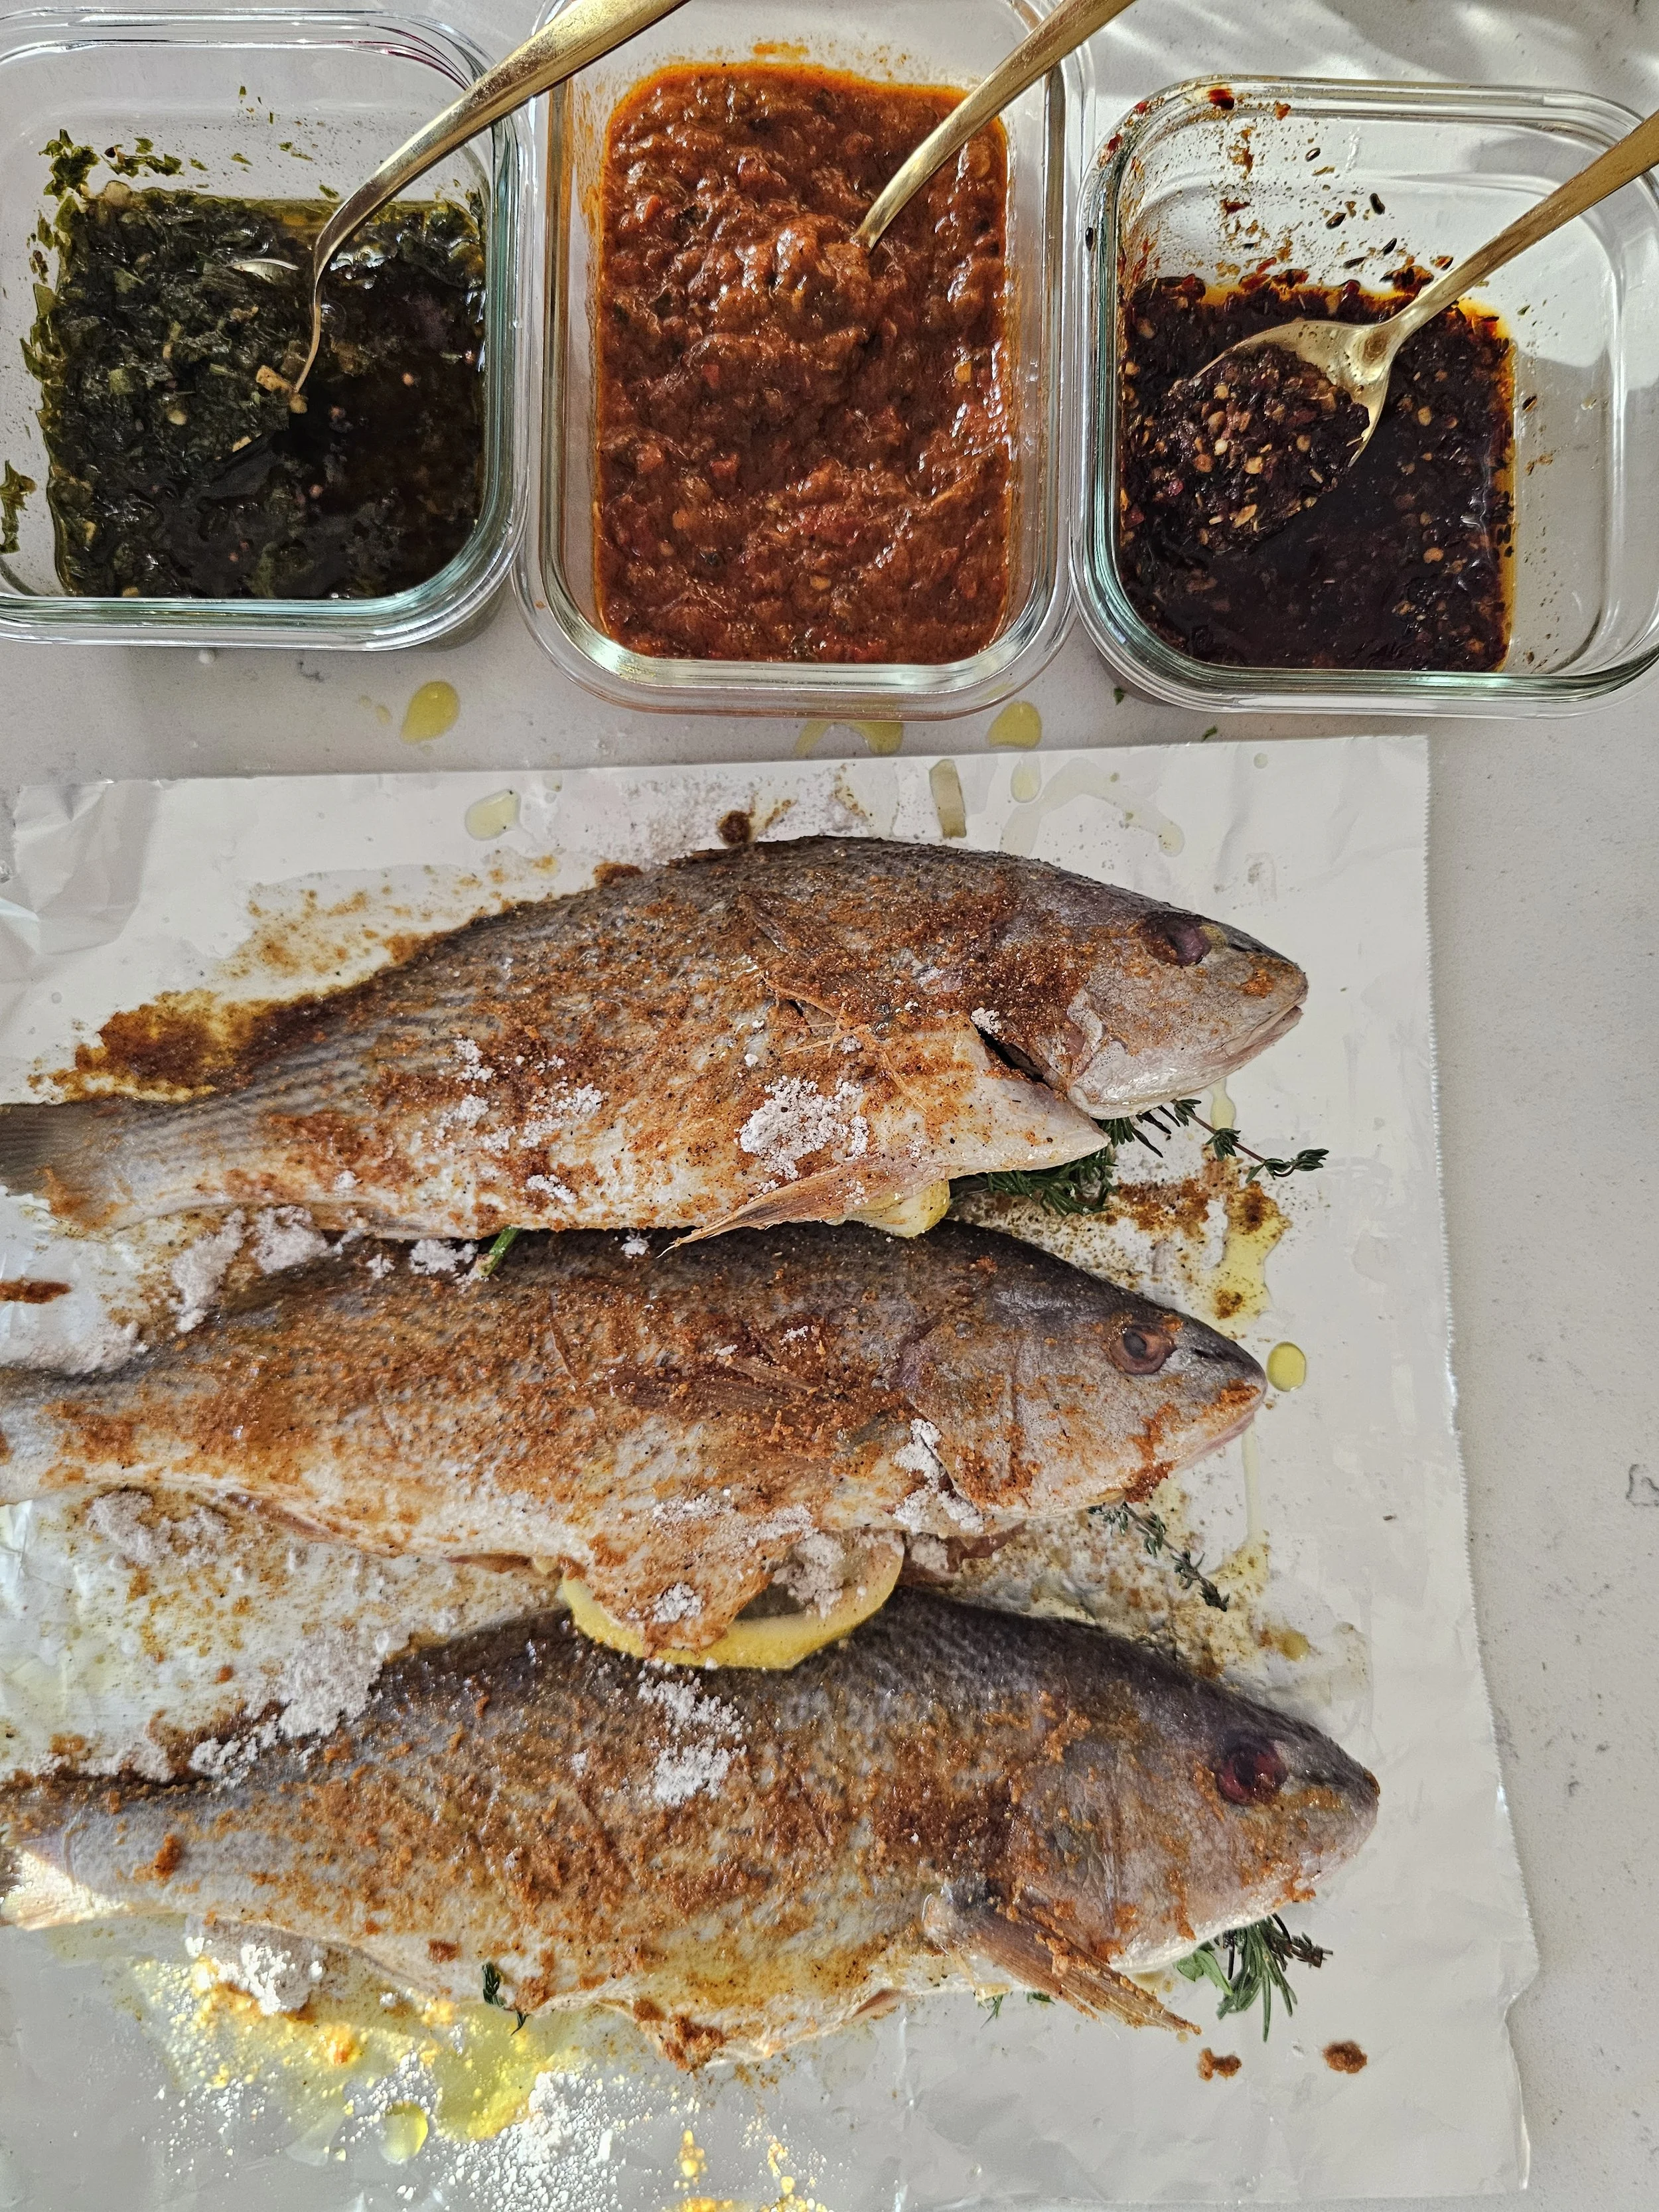
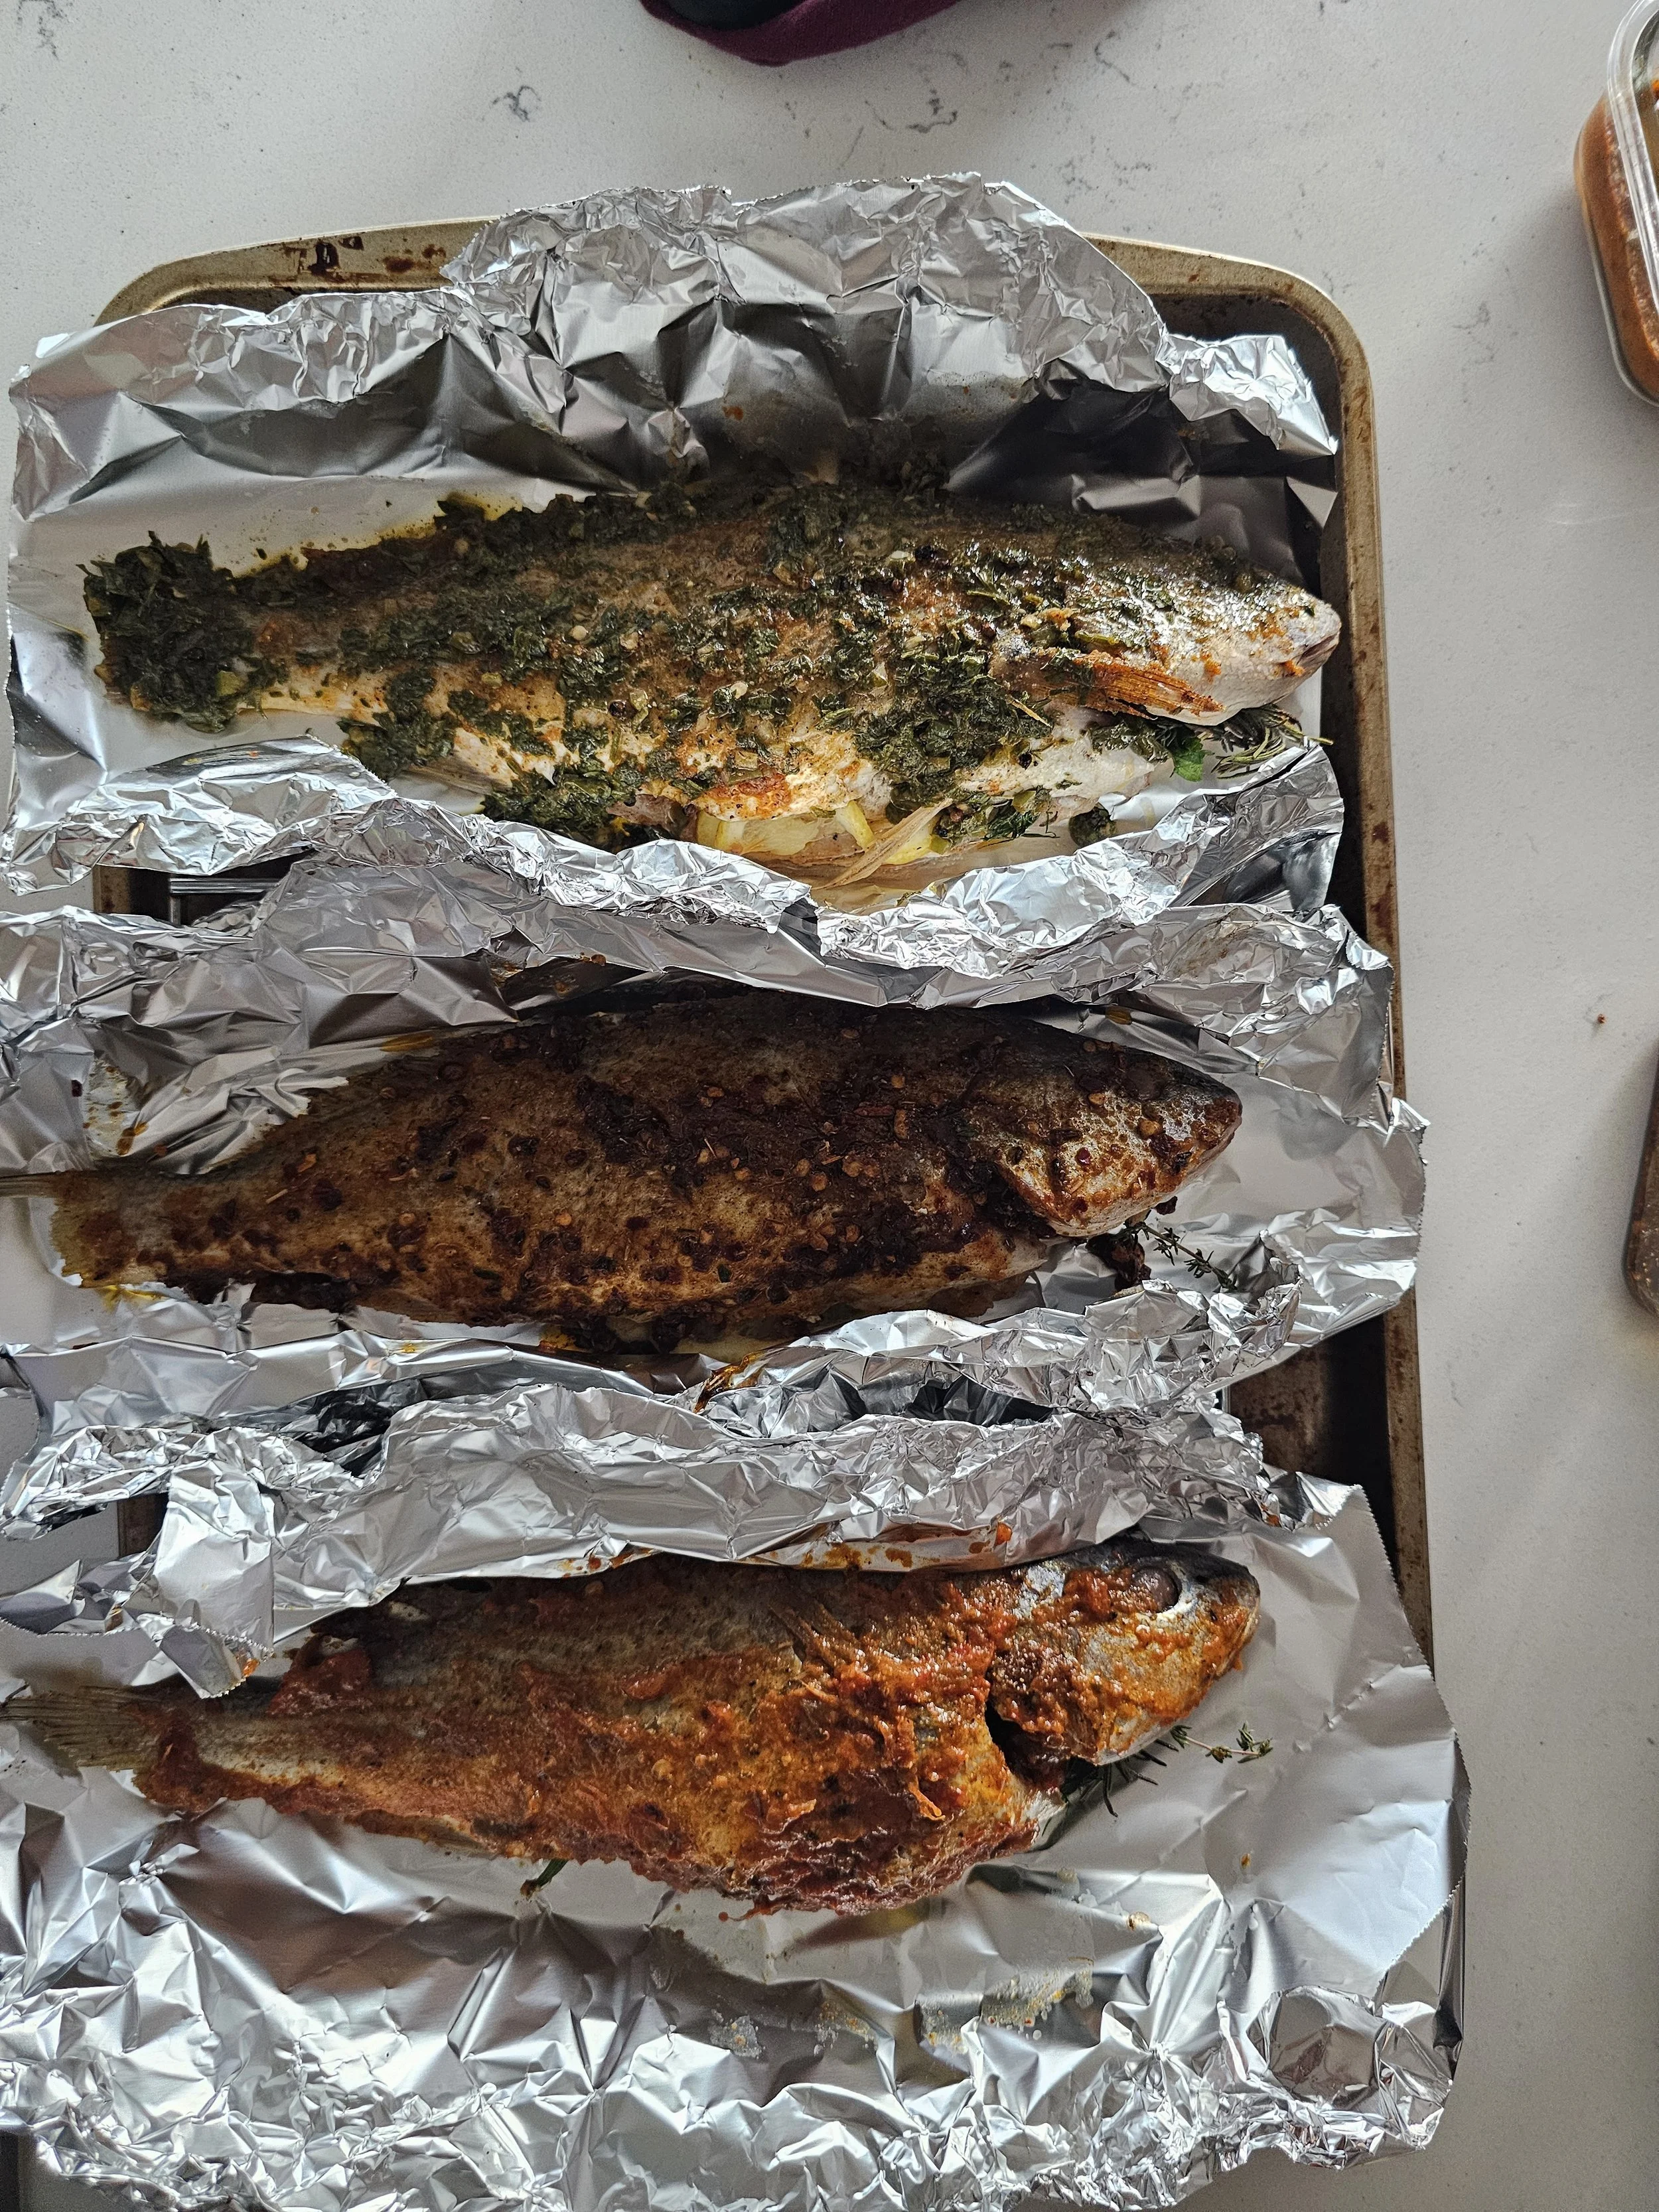

3 Bold Sauces for Quick Fish and Chicken Meals
Juicy, tender croaker fish with a flavorful seasoned crust and three African-inspired sauces—Chermoula, Peri-Peri, and Harissa. Each portion is generous, perfect for a solo dinner with bold flavor and crispy-tender fish.
Ingredients
- 3 small-medium croakers, cleaned
- 3 tsp paprika
- 3 tsp ground coriander
- 1 ½ tsp garlic powder
- 1 ½ tsp black pepper
- 3 tsp herbed salt
- 2–3 tbsp flour (for dusting)
- 2–3 tbsp olive oil
- 1–2 lemon slices
- 2–3 garlic cloves, sliced or lightly crushed
- 2–3 sprigs fresh thyme
- A few sprigs fresh dill
- ½ cup fresh parsley, chopped
- ¼ cup fresh cilantro, chopped
- 1 small jalapeño, finely minced (seeds in for heat, out for mild)
- 1–2 cloves garlic, minced (≈ 1 tsp)
- 1 tsp paprika
- ½ tsp ground cumin
- ½ tsp ground coriander
- 1 tsp honey (adjust to taste)
- ½ tsp salt (adjust to taste)
- 3 tbsp olive oil (≈ ¼ cup)
- Juice of 1 lemon (≈ 3 tbsp)
- 1 cup red bell pepper, sliced (about 1 medium pepper)
- ½ cup onion, sliced (about 1 small onion)
- 3 garlic cloves (you can peel them for smoother blending)
- 1 small red chili or 1 tsp chili flakes
- 1½ tsp smoked paprika
- 3 tbsp olive oil (just under ¼ cup)
- ¾ tsp salt (adjust after blending)
- 1½ tsp red wine vinegar
- ½ tsp dried oregano
- 1½ tsp cumin
- 1½ tsp smoked paprika
- ¾ tsp ground coriander
- 1–2 tbsp chili flakes (¼ cup would be wild — stick to tablespoons unless you’re fearless)
- 2 garlic cloves, minced
- ¼ cup olive oil
- ¾ tsp salt
Instructions
- Mix paprika, coriander, garlic powder, black pepper, and herbed salt. Use part of this mix to season flour.
- Rub each fish with olive oil.
- Sprinkle the dry rub evenly over all fish, then lightly dust with the seasoned flour.
- Stuff each fish with lemon slices, garlic, thyme, and dill.
- Preheat oven to 400°F (200°C). Place fish in foil on a rack over a baking tray. Bake 12–15 mins until just cooked through.
- Chermoula: Mix parsley, cilantro, garlic, paprika, cumin, salt, olive oil, and lemon juice into a loose paste.
- Peri-Peri: Roast onion, pepper, and garlic under broiler ~20 mins until lightly charred. Peel garlic, then blend with smoked paprika, olive oil, salt, chili, vinegar, and oregano into a smooth paste.
- Harissa: Mix cumin, smoked paprika, coriander, chili flakes, garlic, olive oil, and salt into a thick paste.
- Remove from foil. Spoon your chosen sauce over each fish, baste with drippings, and broil 3–5 mins for a lightly caramelized top.
- Serve with extra sauce on the side.
Notes
- The measurements for each sauce are for one fish with an extra portion to serve on the side.
- The dry rub should be enough for all three fish.
- Bake the fish in foil first to keep it juicy, then remove foil before spooning on the sauces.
- Broil briefly after adding sauce to caramelize the top without overcooking.
- Extra sauce can be served on the side if desired.
Nutrition Facts
Calories
250Fat (grams)
10 gCarbs (grams)
3 gFiber (grams)
1 gProtein (grams)
28 gI am not a certified nutritionist and any nutritional information on dontmissmyplate.com should only be used as a general guideline.

Peri-Peri Chicken Livers with Onion Gravy
Chicken livers were one of the first foods that made me feel connected to both comfort and culture. My earliest memories of them go back to childhood, when my mother would cook the livers and giblets from a whole chicken and serve them alongside eggs, toast, baked beans, and a rich onion gravy. It was the kind of breakfast that stayed with you. Hearty, deeply flavorful, and surprisingly comforting.
Years later, I was delighted to find chicken livers on the menu at Nando's. Their peri-peri livers immediately transported me back to my mother's kitchen table. Although the flavors were different, the feeling was the same. There was something familiar about that combination of tender livers, onions, spice, and sauce.
My appreciation for liver deepened even further during a period when I struggled with anemia. What started as a practical way to increase my iron intake quickly became something I genuinely looked forward to eating. Chicken liver is one of the most nutrient-dense foods available, packed with iron, vitamin B12, vitamin A, folate, selenium, and high-quality protein. It's often described as nature's multivitamin, but unlike most healthy foods, it also happens to be incredibly satisfying when prepared well.
That is something many people miss about liver. It often gets a bad reputation from being overcooked. When treated properly, chicken livers are tender, rich, and full of flavor. They absorb spices beautifully and pair particularly well with ingredients like onions, garlic, tomatoes, and chili.
Across Southern Africa, chicken livers are far more than a forgotten ingredient. They're a staple found in home kitchens, roadside eateries, and restaurant menus alike. They're often simmered in richly seasoned sauces and served with bread, pap, or sadza. This tradition eventually found a wider audience through chains like Nando's, whose peri-peri chicken livers introduced many people around the world to a dish that Southern Africans had been enjoying for generations.
This recipe draws inspiration from those flavors. The livers are lightly coated to help them brown beautifully, then cooked with onions, garlic, coriander, and peri-peri seasoning before being finished with a touch of cream. The result is a rich, savory dish with just enough heat and a silky sauce that begs to be spooned over bread, rice, pap, or sadza.
Whether you're already a liver lover or trying to give it a second chance, this is the recipe I'd start with.
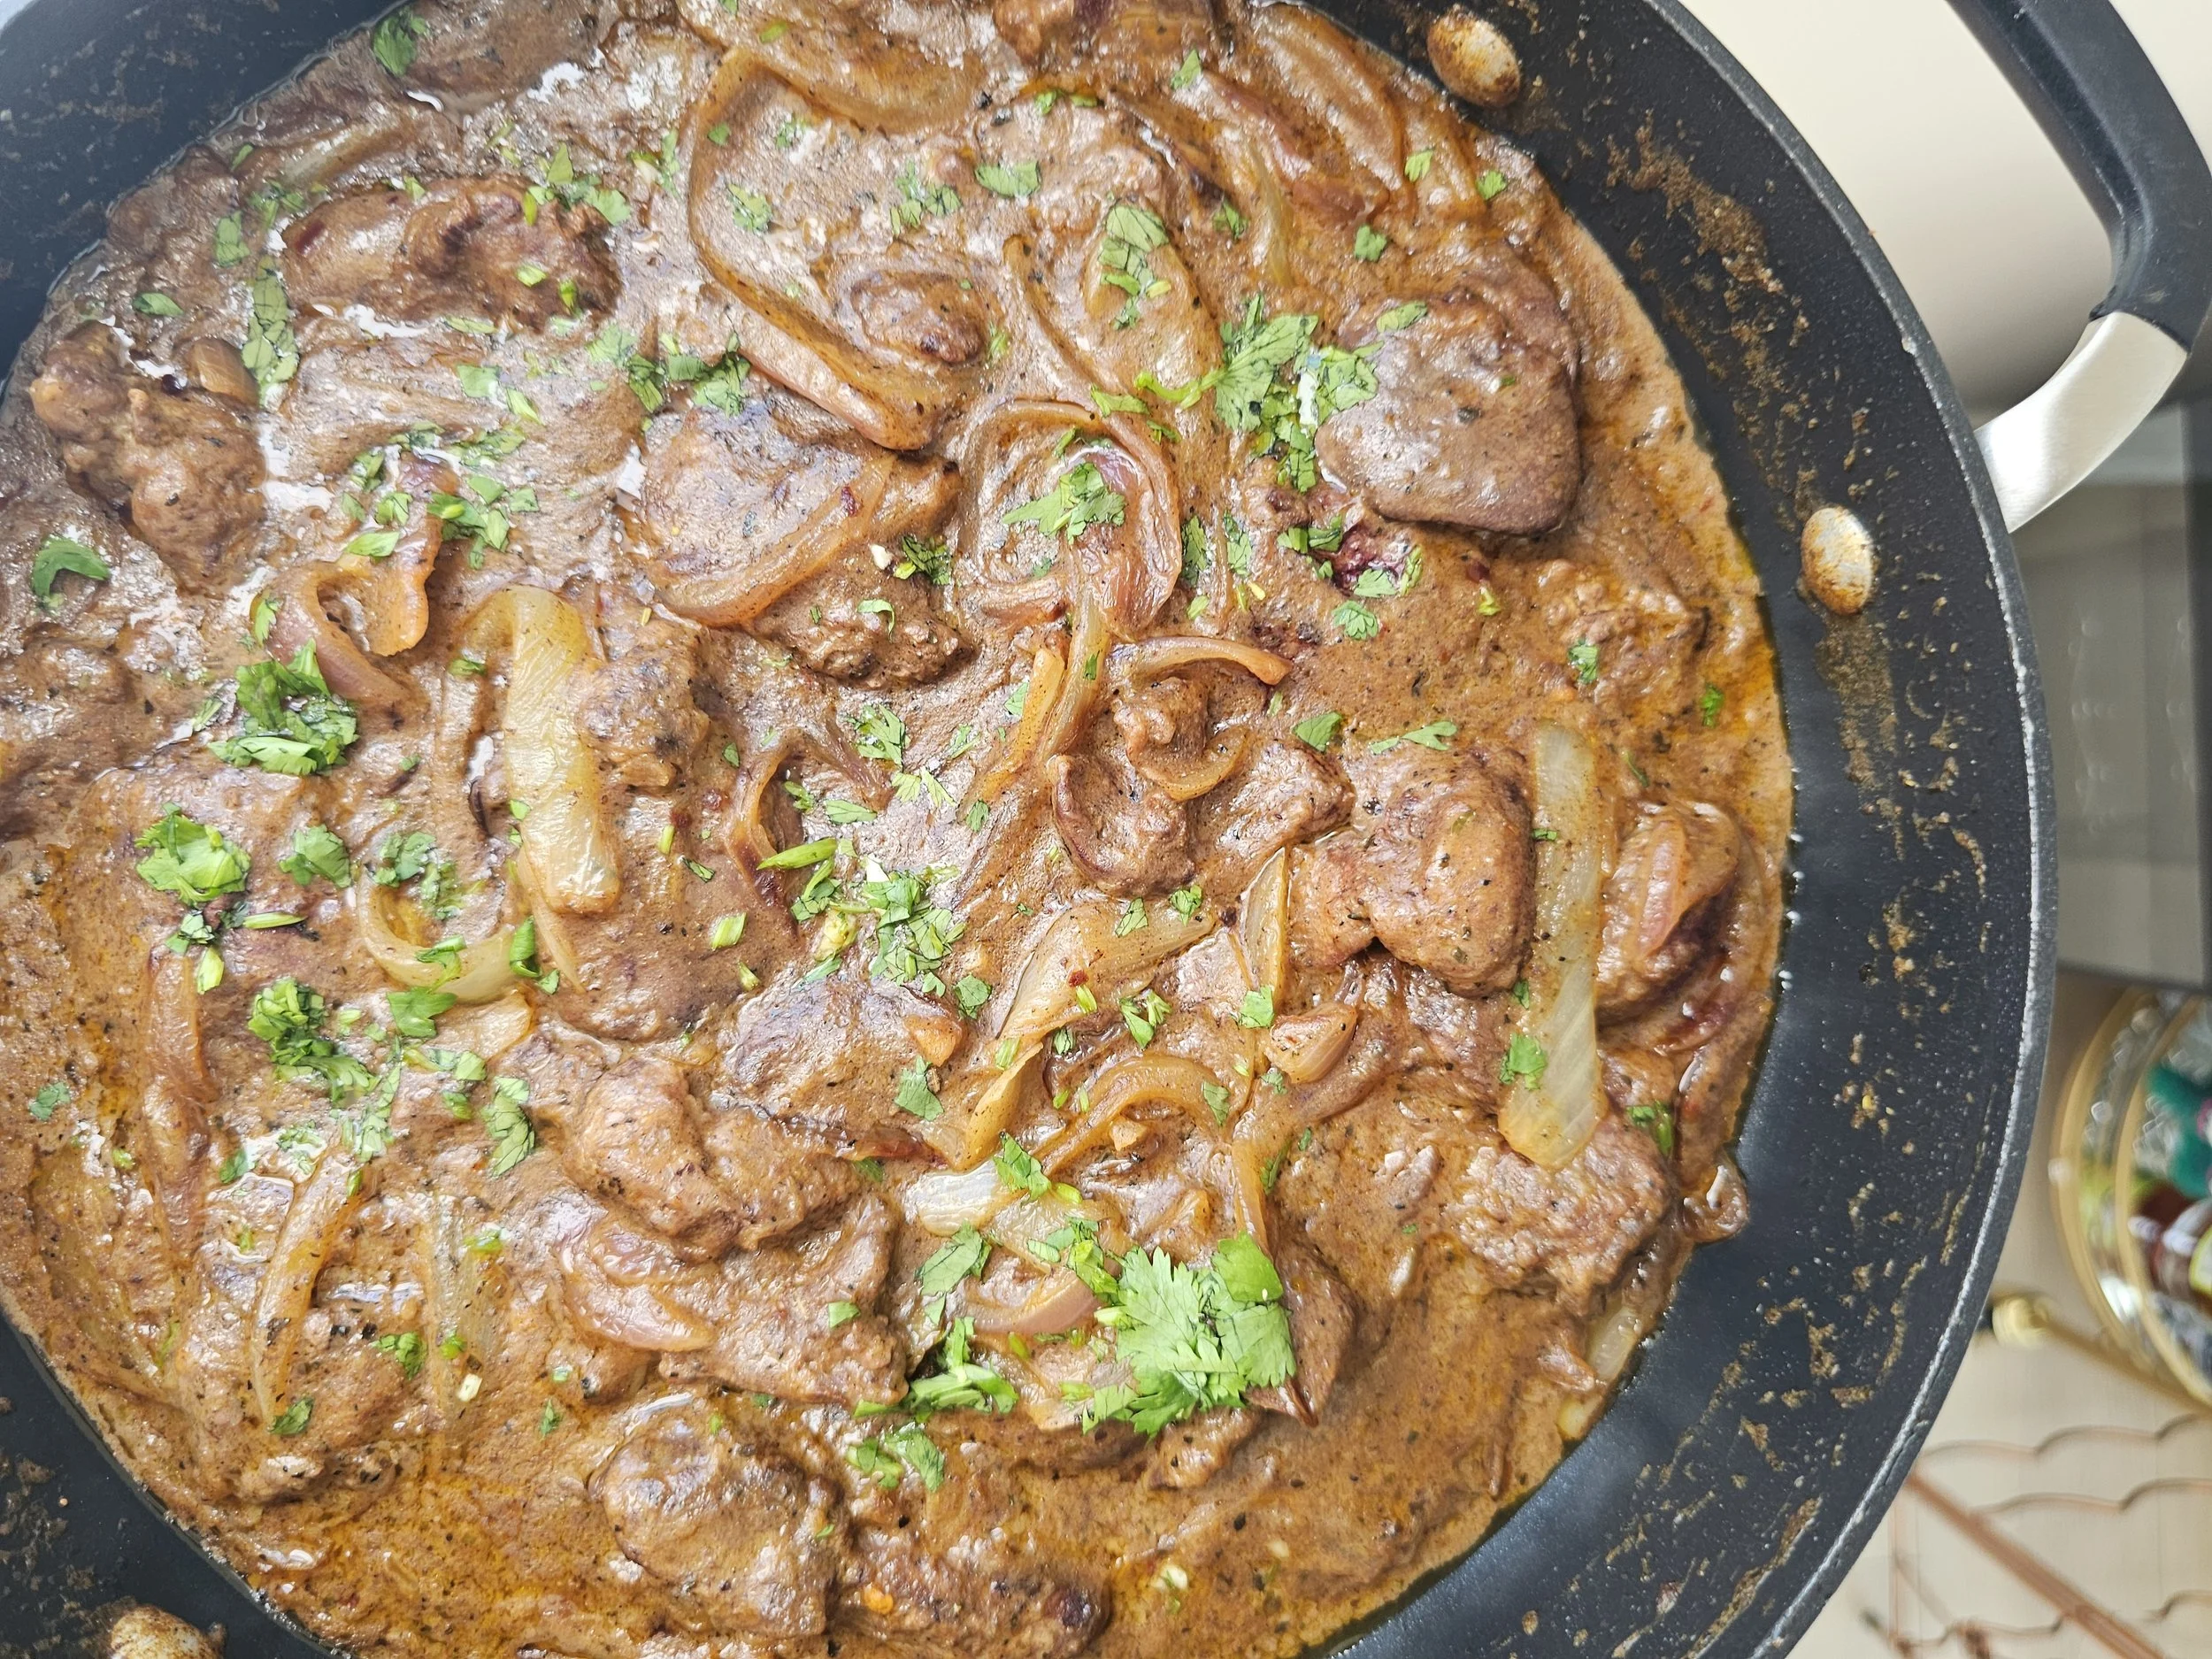
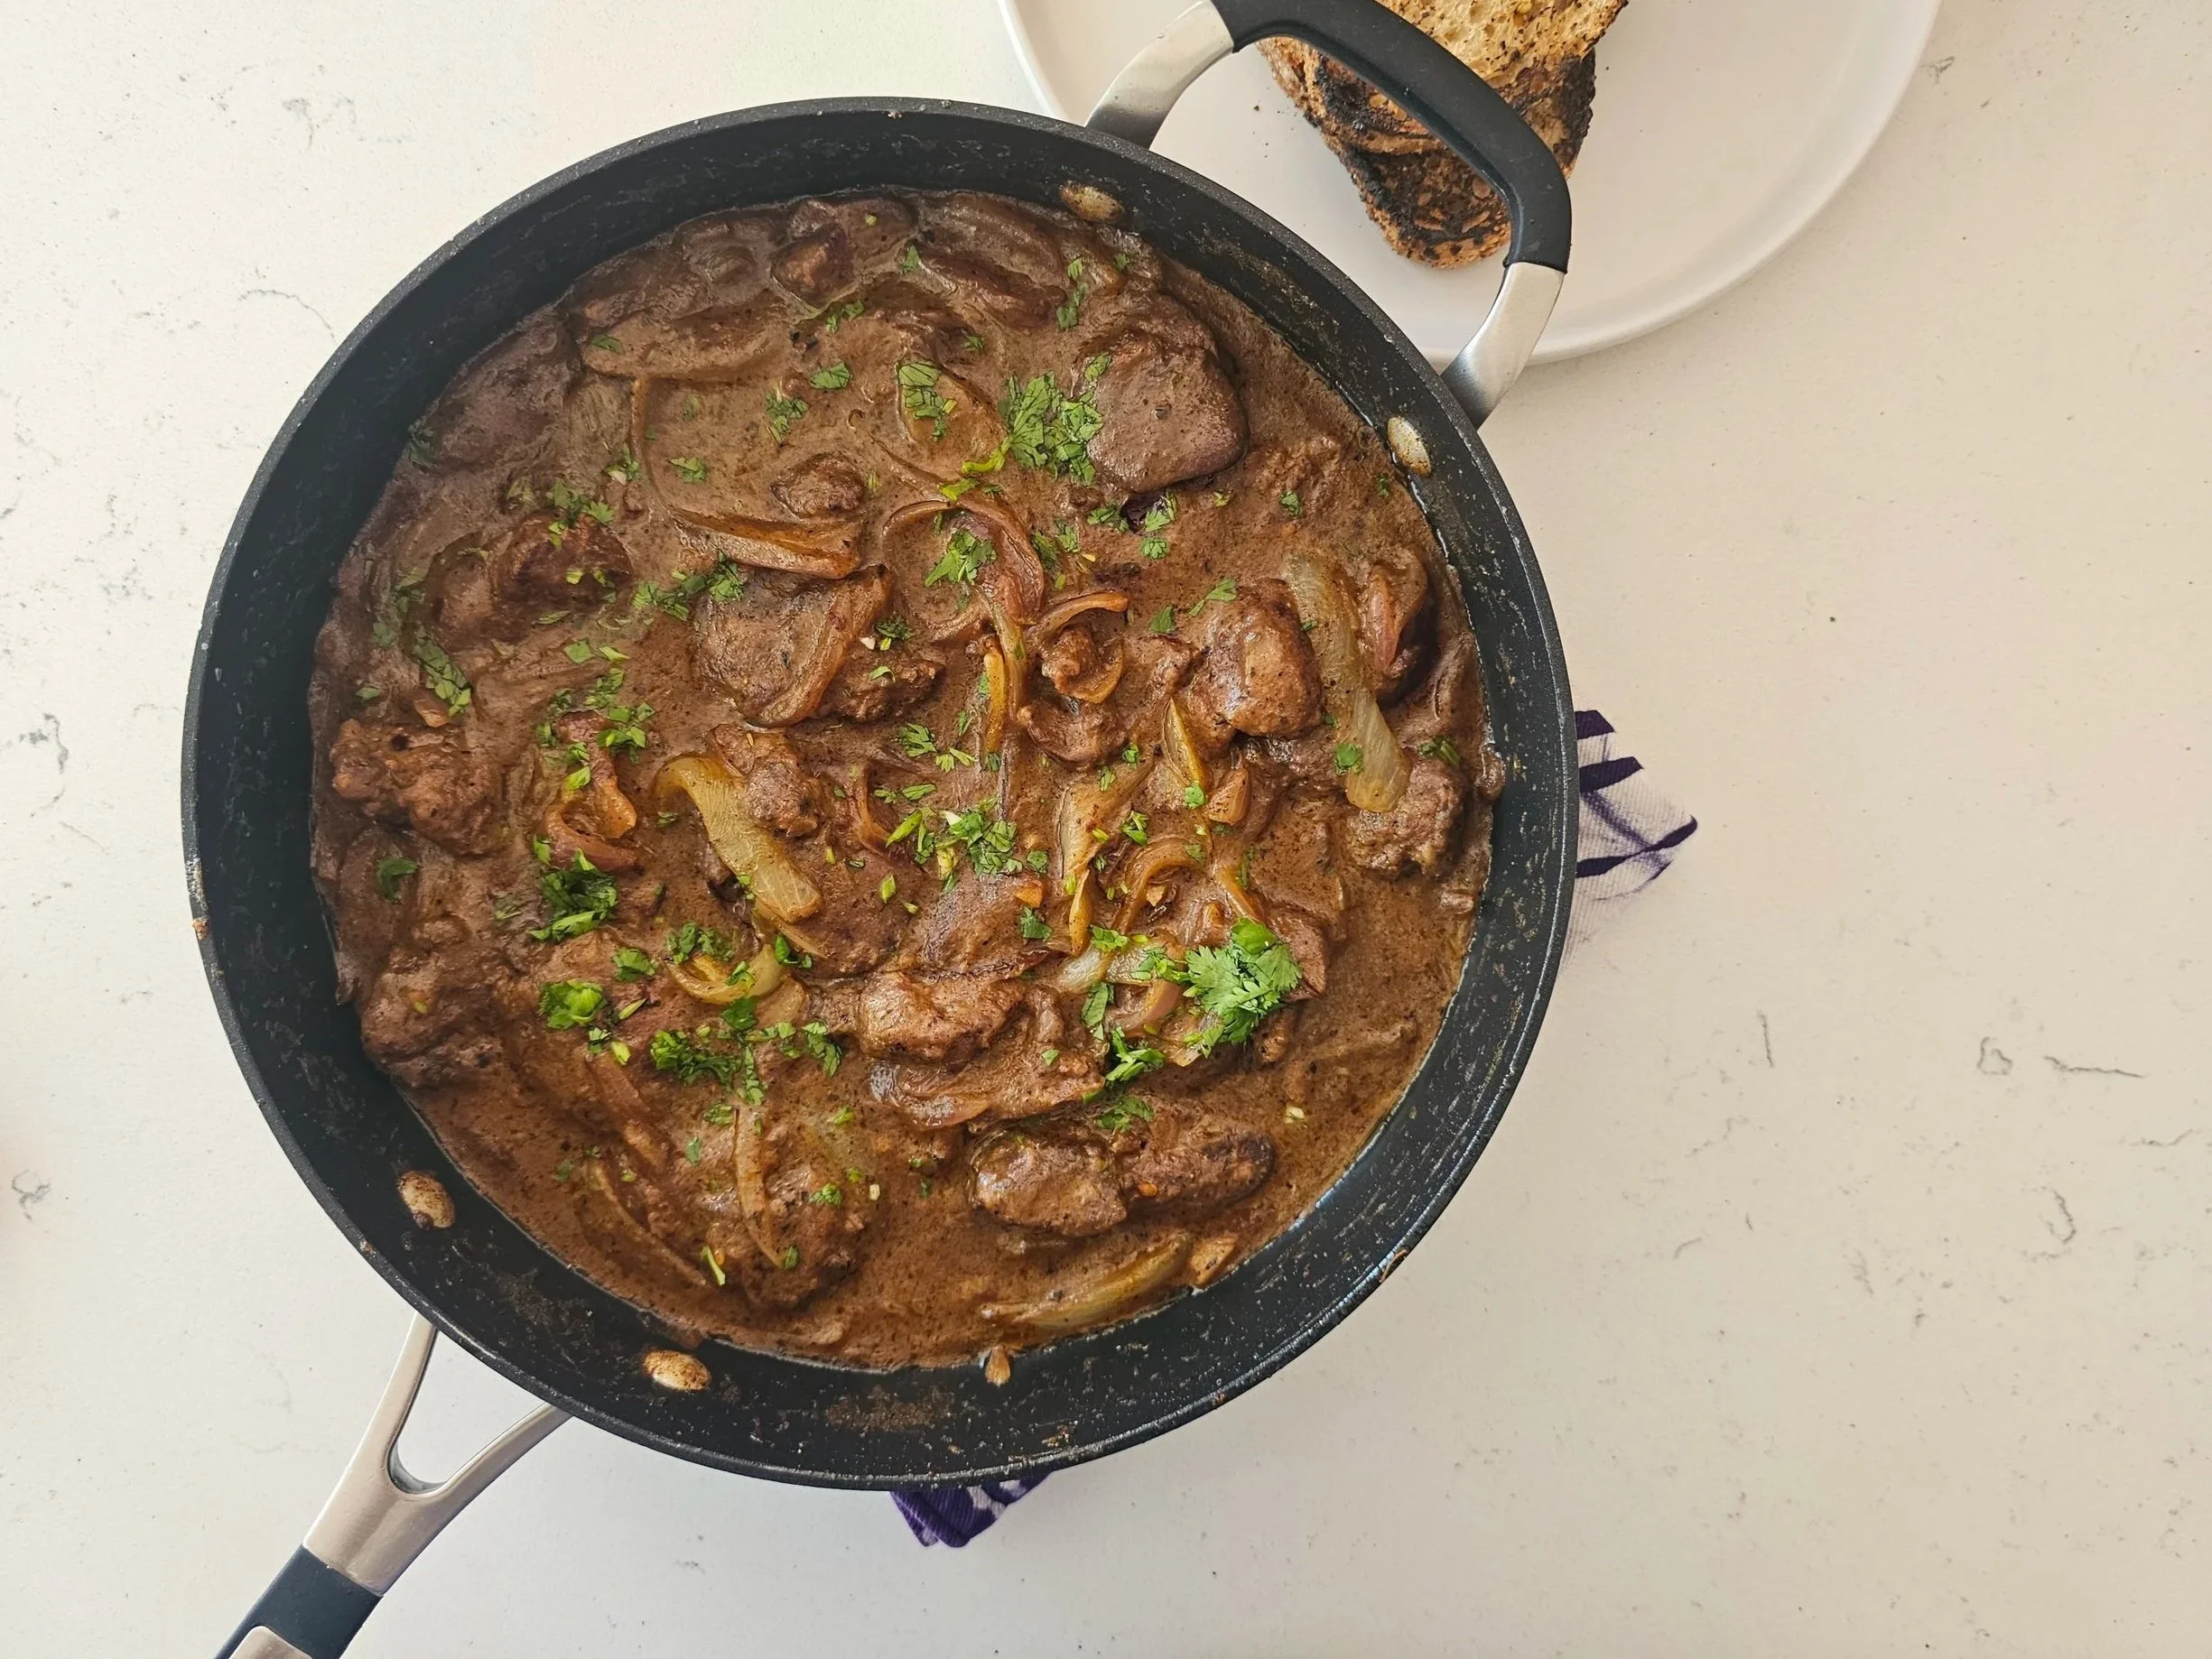

Peri-Peri Chicken Livers with Onion Gravy
Rich, spicy, and comforting, these Peri-Peri Style Chicken Livers in Onion Gravy bring bold Southern African and Portuguese-inspired flavors to your table.
Ingredients
- 510 g (about 1.2 lb) chicken livers, cleaned and patted dry
- ½ medium red onion
- ½ medium yellow onion
- 2–3 garlic cloves, minced
- 2 teaspoons Portuguese or peri-peri chicken spice (I used Robertsons)
- ½ teaspoon garlic powder
- ½ teaspoon onion powder
- ½ teaspoon chilli flakes
- ½ teaspoon black pepper
- ½ teaspoon Italian seasoning
- ½ teaspoon ground coriander
- 1 teaspoon Royco Usavi Mix (or another mild, low-sodium all-purpose seasoning with some thickening)
- ¼ cup + 2 tablespoons flour, seasoned with 1/4 teaspoon of salt, black pepper, and garlic powder each
- ⅔ cup chicken stock
- 4 tablespoons cooking oil
- 3 tablespoons butter
- Salt and black pepper, to taste
- 3 teaspoons powdered milk + ½ cup water (or substitute with cream)
- 1 tablespoon tomato paste
- 1 lemon (use half to clean the livers and the other half to finish once cooked)
- Fresh parsley, for garnish
Instructions
- After soaking the chicken livers briefly in water with a bit of lemon juice, pat them dry with paper towels. Trim away any connective tissue or excess fat.
- Slice the onions into thin wedges and mince the garlic.
- Combine all your dry seasonings (except the all-purpose seasoning) and set aside.
- In a shallow bowl, season ¼ cup of flour with salt, black pepper, and garlic powder. Lightly coat the livers in the seasoned flour and shake off any excess.
- Heat 2 tablespoons of oil and 1 tablespoon of butter in a large, deep pan over medium-low heat.
- Add the red and yellow onions along with the garlic. Cook until golden and lightly caramelized but still slightly crisp.
- Add 1 tablespoon of oil and 1 tablespoon of butter, then stir in the combined spices, letting them bloom for 1–2 minutes.
- Remove the onion mixture from the pan and set aside.
- Add the remaining oil and butter to the pan. Sear the livers for 3–4 minutes per side until browned but not fully cooked through.
- Return the onions to the pan.
- Add the chicken stock, all-purpose seasoning, and tomato paste. Stir to combine and deglaze the pan.
- Simmer gently for 5–7 minutes, or until the livers reach an internal temperature of 160°F (71°C). Avoid overcooking.
- Stir in the powdered-milk-and-water mixture (or cream) and cook for 1–2 more minutes until the sauce thickens slightly.
- Remove from the heat and let the dish rest for 5 minutes.
- Squeeze the juice from the remaining half lemon over the livers and garnish with chopped parsley.
- Serve hot with fresh bread, pap/sadza, or mashed potatoes.
Nutrition Facts
Calories
370Fat (grams)
23.5 gCarbs (grams)
11 gFiber (grams)
1.5 gProtein (grams)
29 gI am not a certified nutritionist and any nutritional information on dontmissmyplate.com should only be used as a general guideline.

Oven-Baked Whole Trout with Herbs and Lemon
I’ve always had a particular love for cooking whole fish. There is something deeply satisfying about preparing it this way, honoring its structure, texture, and natural flavor rather than disguising it. That appreciation began long before the kitchen, through a love of fishing and the quiet patience it requires. Catching fish yourself changes the way you approach it on the plate.
This trout recipe reflects that mindset. It keeps the preparation simple while layering in thoughtful flavor. Fresh dill and parsley add brightness, while berbere, the warm and aromatic East African spice blend, brings depth and gentle heat. With its combination of chilies, garlic, and warming spices, berbere complements fish beautifully by enhancing its richness without overwhelming its delicate flesh. A squeeze of lemon at the end lifts and balances everything.
The method is straightforward. Roast the trout gently, then finish it under the broiler on parchment for a few minutes to crisp the skin while keeping the inside tender and juicy. The result is bold yet balanced, simple yet intentional, and a reminder that whole fish needs very little to feel special.
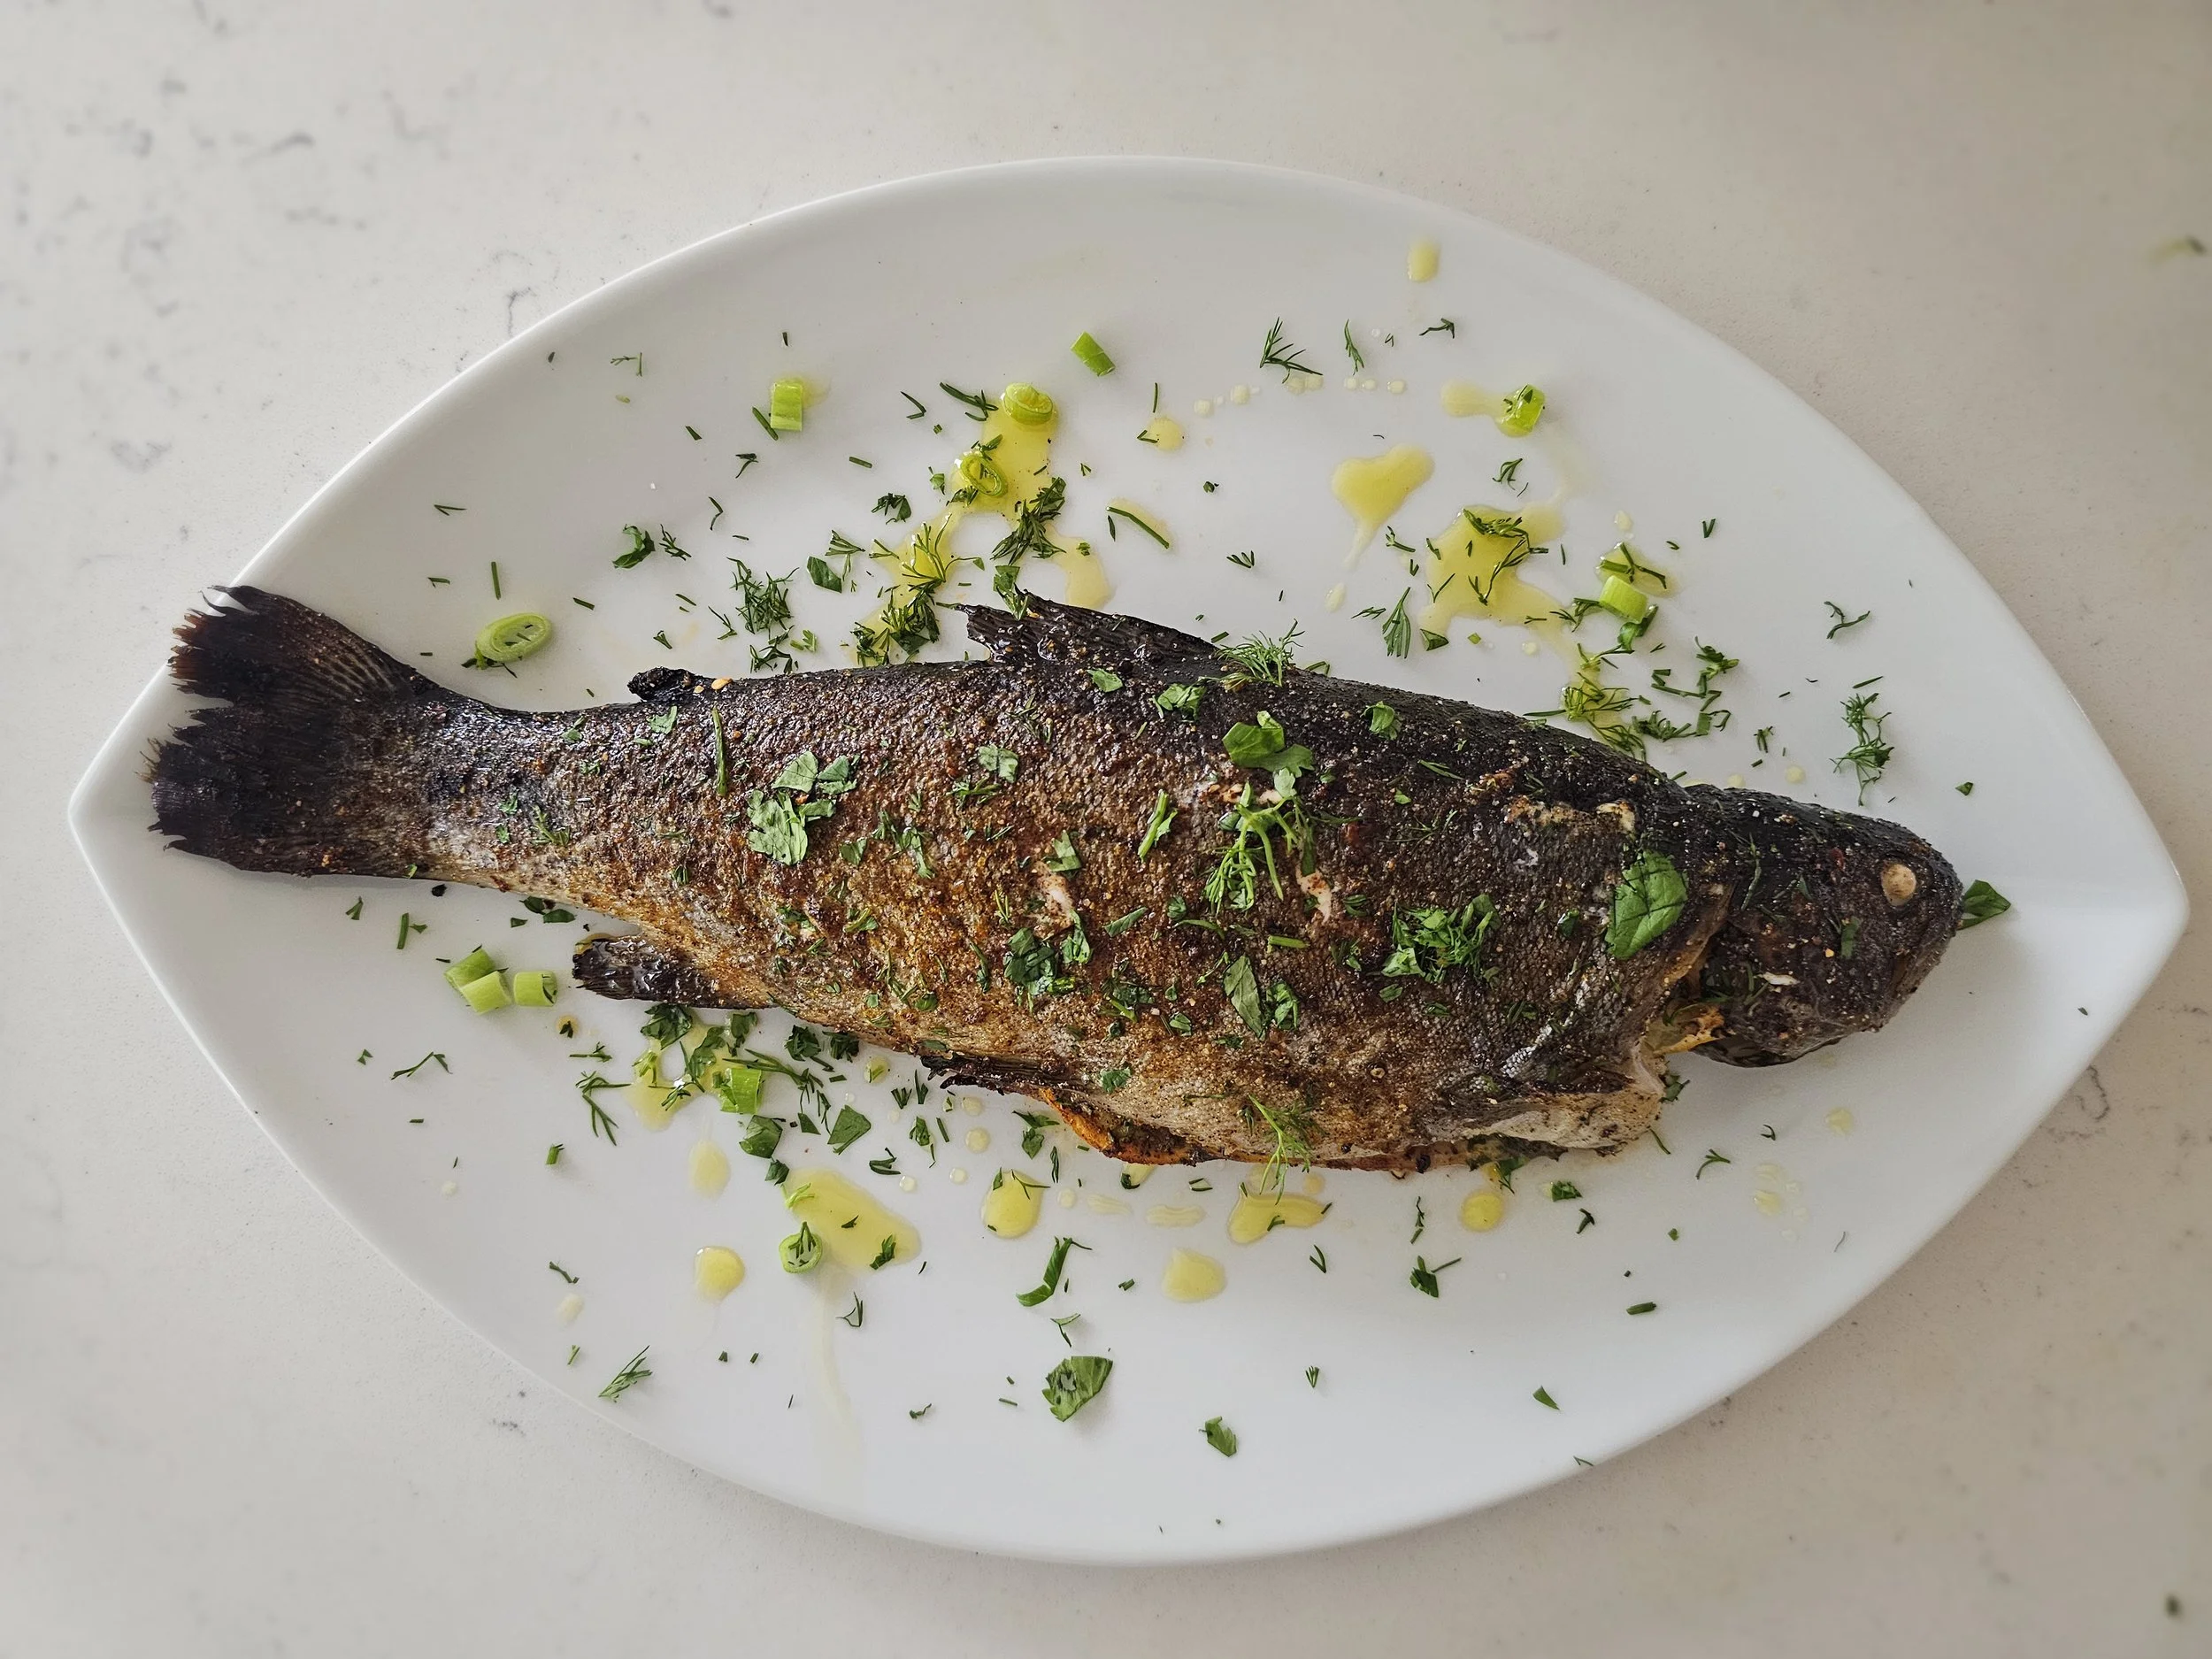
Tips for Perfect Trout:
Freshness is key: Choose trout with bright eyes, firm flesh, and a mild aroma. Fresh fish makes all the difference.
Pat dry thoroughly: Moisture is the enemy of crisp skin. Make sure the trout is well dried before applying your seasoning paste.
Herb and spice paste: Don’t skimp—it infuses flavor into every part of the fish. Rub generously inside the cavity and on the outside.
Watch the broil: Broiling is quick! Keep a close eye to avoid burning while achieving that golden, crispy skin.
Serving Suggestions:
Pair with lightly roasted vegetables like sweet potatoes, bell peppers, or zucchini to complement the spices.
A fresh, tangy salad with avocado, cucumber, and a citrus dressing balances the richness of the trout.
Just before serving, drizzle with a little extra olive oil and a squeeze of lemon for a burst of brightness.
Variations and Fusion Ideas:
Swap trout for other firm, white-fleshed fish like tilapia or bass if needed.
Add chopped chili or smoked paprika for a smoky, spicy kick.
Try a light yogurt drizzle on the side to introduce a creamy element that balances the spices.
This broiled trout is more than a meal, it’s a celebration of fresh ingredients, bold African flavors, and the simple joy of cooking whole fish. (As shown in the video, you can also fillet the fish before serving for a boneless option your family or guests will appreciate.)
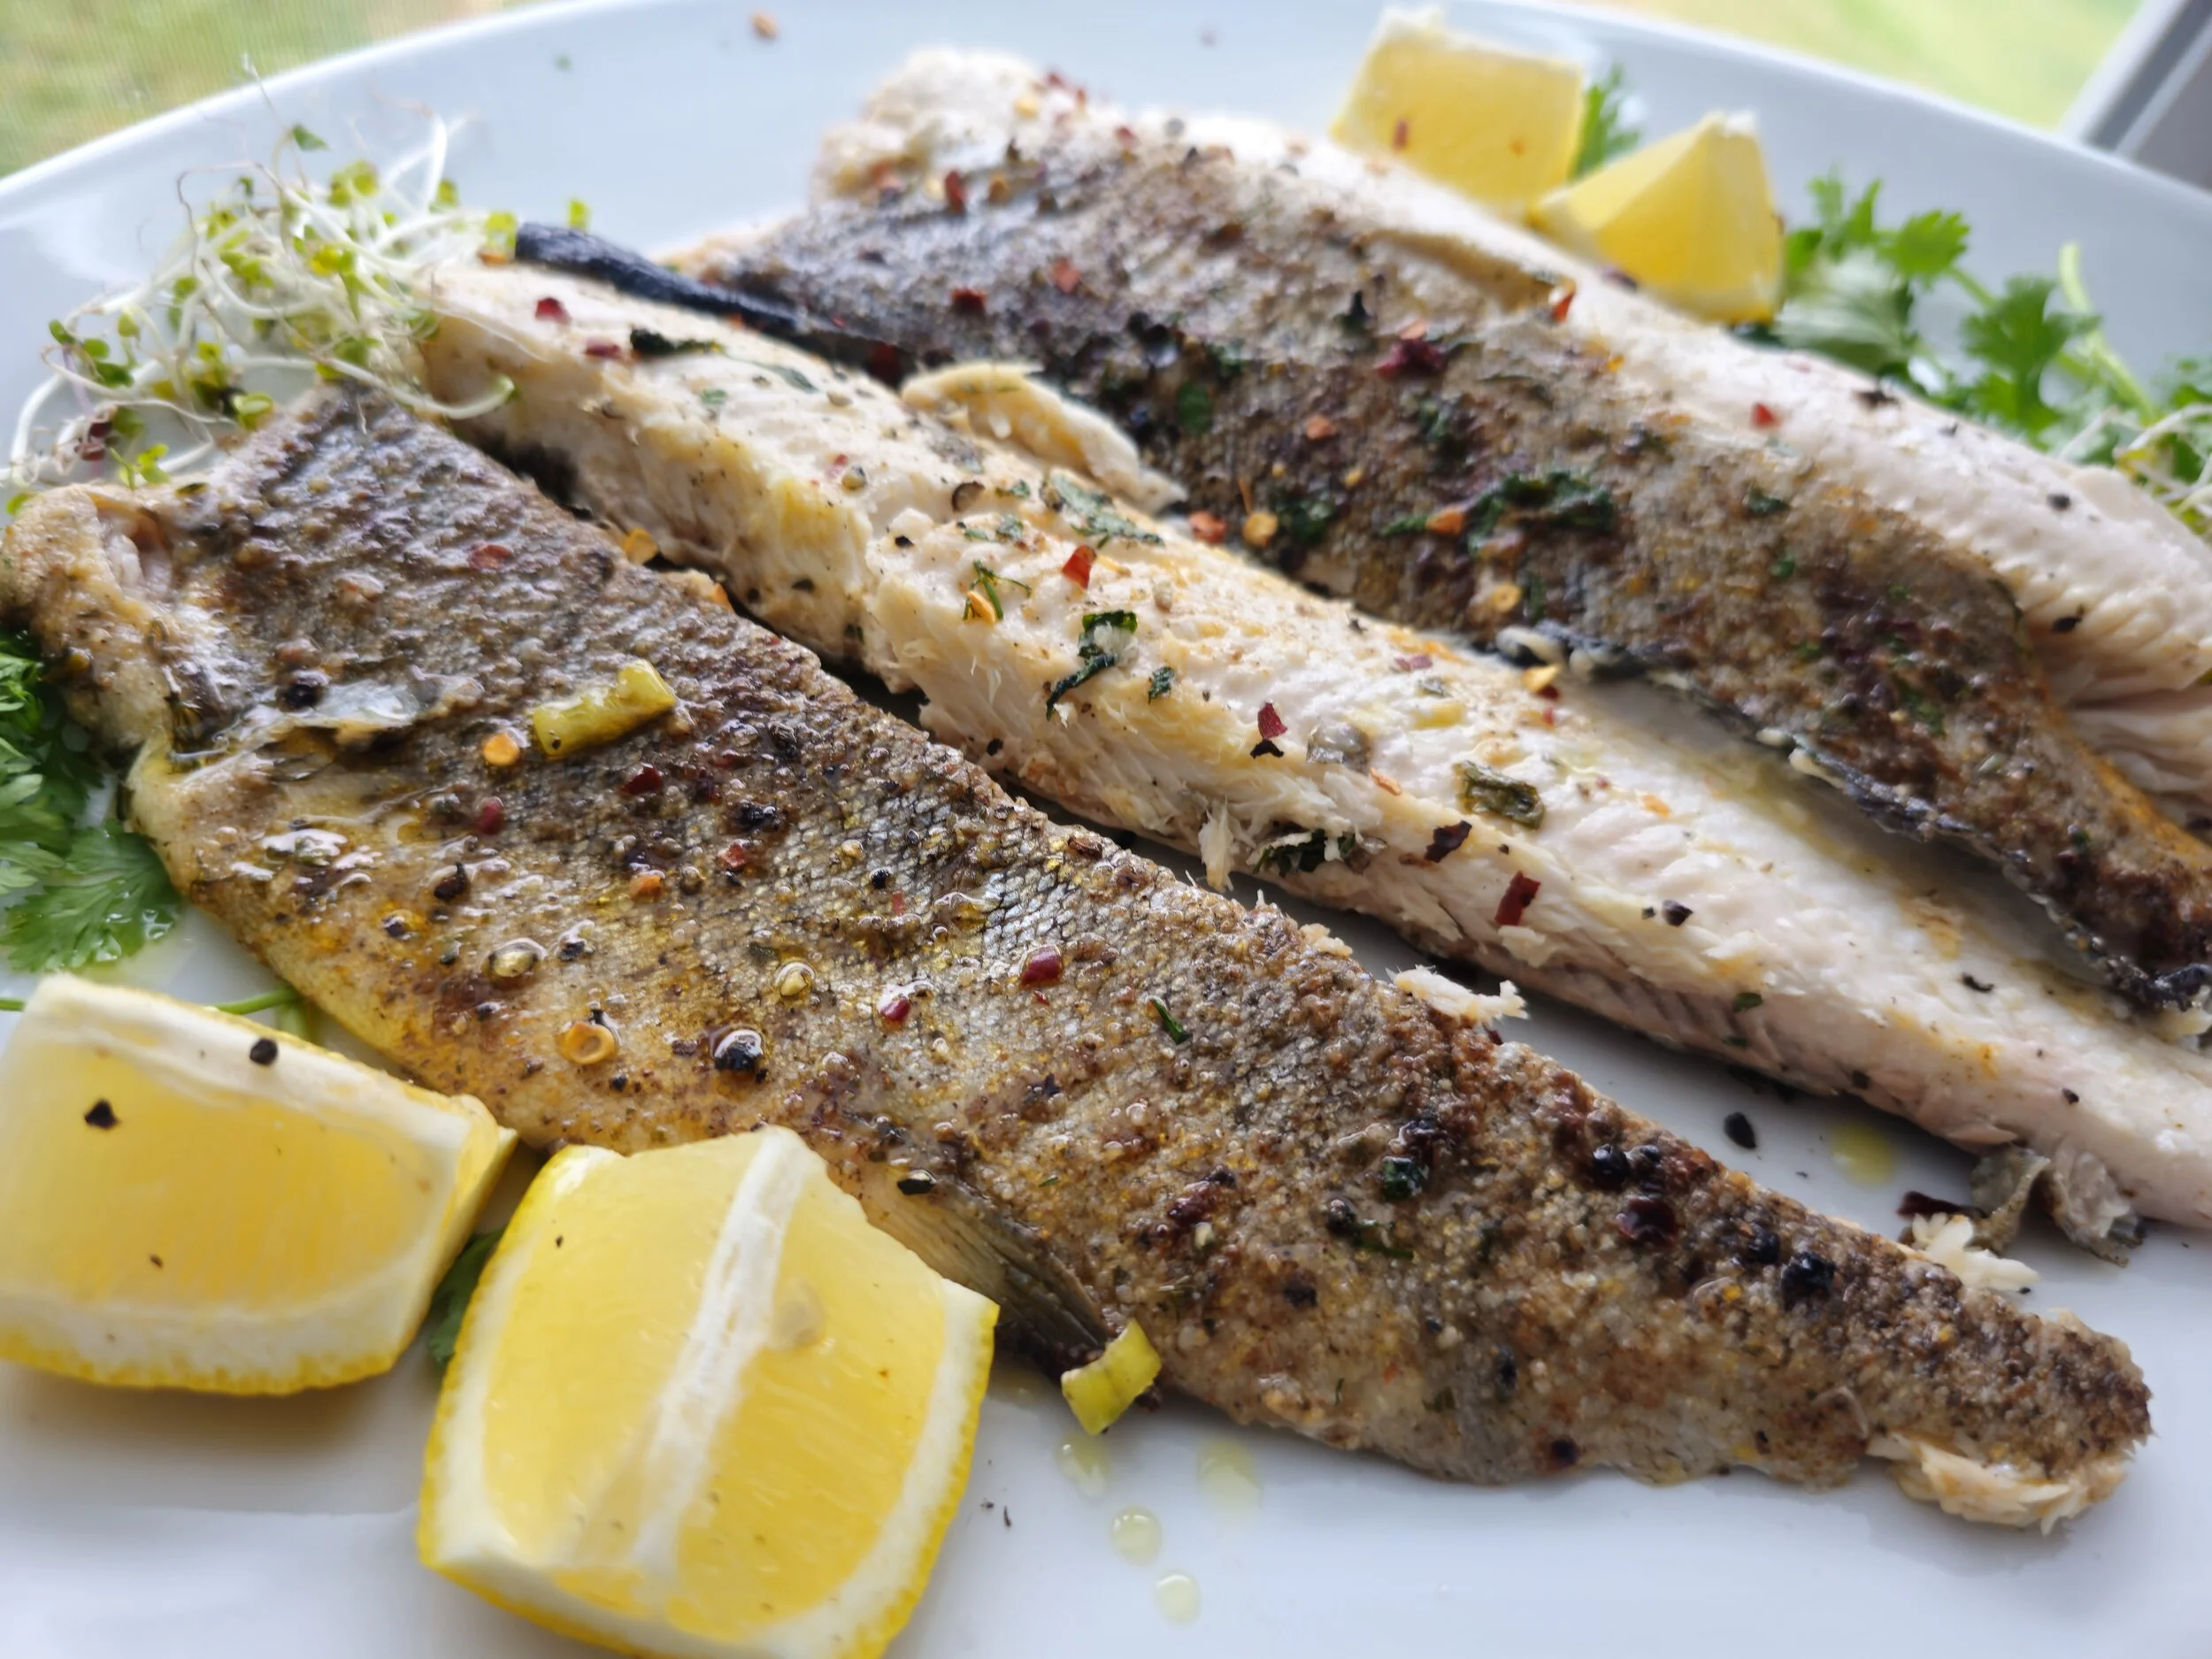
Whether it’s a weeknight dinner or a special occasion, this dish shines in both flavor and presentation. By layering herbs and spices and finishing with a quick broil for that irresistible skin, you’ll create something that’s not only visually stunning but deeply satisfying.

Oven-Baked Whole Trout with Herbs and Lemon
A simple, flavorful oven-baked whole trout recipe with herbs, lemon, and a crisp finish, perfect for weeknight dinners or special occasions.
Ingredients
- 1 whole large trout
- 2 lemons
- 1/3 cup spring onions, chopped
- 1/3 cup fresh dill, chopped
- 1/3 cup fresh parsley, chopped
- 2 garlic cloves, minced
- 2 tablespoons berbere spice
- 2 tablespoons spice for fish
- 1 tablespoon butter
- Salt and black pepper to taste
- Chili flakes (optional)
- Olive oil
Instructions
- Preheat your oven to 200°C (400°F).
- Clean and pat the trout dry. Make a few diagonal slashes on each side.
- In a small bowl, mix spring onions, dill, parsley, garlic, berbere spice, fish spice, salt, black pepper, and a drizzle of olive oil to form a paste.
- Rub the paste all over the trout, including inside the cavity. Slice one lemon and place the slices inside the fish cavity with a small knob of butter.
- Place the trout on parchment-lined baking sheet and cook in the oven until almost done, about 15–20 minutes depending on size.
- Switch the oven to broil and broil the trout for 5 minutes at the end to crisp the skin. Watch closely so it doesn’t burn.
- Serve hot with extra lemon wedges on the side and enjoy the fusion of African flavors with tender, juicy trout and perfectly crisp skin.
I am not a certified nutritionist and any nutritional information on dontmissmyplate.com should only be used as a general guideline.

Stewed Pork Hocks with Sweet Potato (Mazondo)
If delicacies could walk… or rather, trot. Few cuts of meat are as humble yet deeply flavorful as pork hocks. Known for their tough skin, bone, and rich connective tissue, pork hocks have long been transformed by cultures that understand the value of slow cooking. In the American South, ham hocks brought deep, smoky flavor to pots of collard greens and beans, a survival food turned soulful cuisine. In Zimbabwe, they take on a new identity as mazondo, pig’s feet or ankles, revered as a delicacy. Often served in bars, homesteads, and special gatherings, mazondo is slow-cooked with onions, chilies, tomatoes, and spices until it’s meltingly tender.
In this recipe, I brought that tradition into the stew pot, giving the hocks a good sear to lock in flavor, then letting them braise low and slow with bold aromatics, rich seasoning, and an unexpected but powerful addition: sweet potato. While in Zimbabwe sweet potatoes (mbambaira) are typically enjoyed boiled or roasted as a standalone snack or side, they have an untapped potential when added to stews. Here, the sweet potato doesn’t just add subtle, earthy sweetness — it also brings nutrition and natural starch that gently thickens the broth as it cooks down, tying everything together in a rich, velvety texture.
Before cooking, I soak the hocks in red wine vinegar. This isn’t just for cleaning and tenderizing, but also to cut through the richness and add a subtle tang that balances the stew. It's a simple step, but it makes all the difference when working with fatty, collagen-rich cuts.
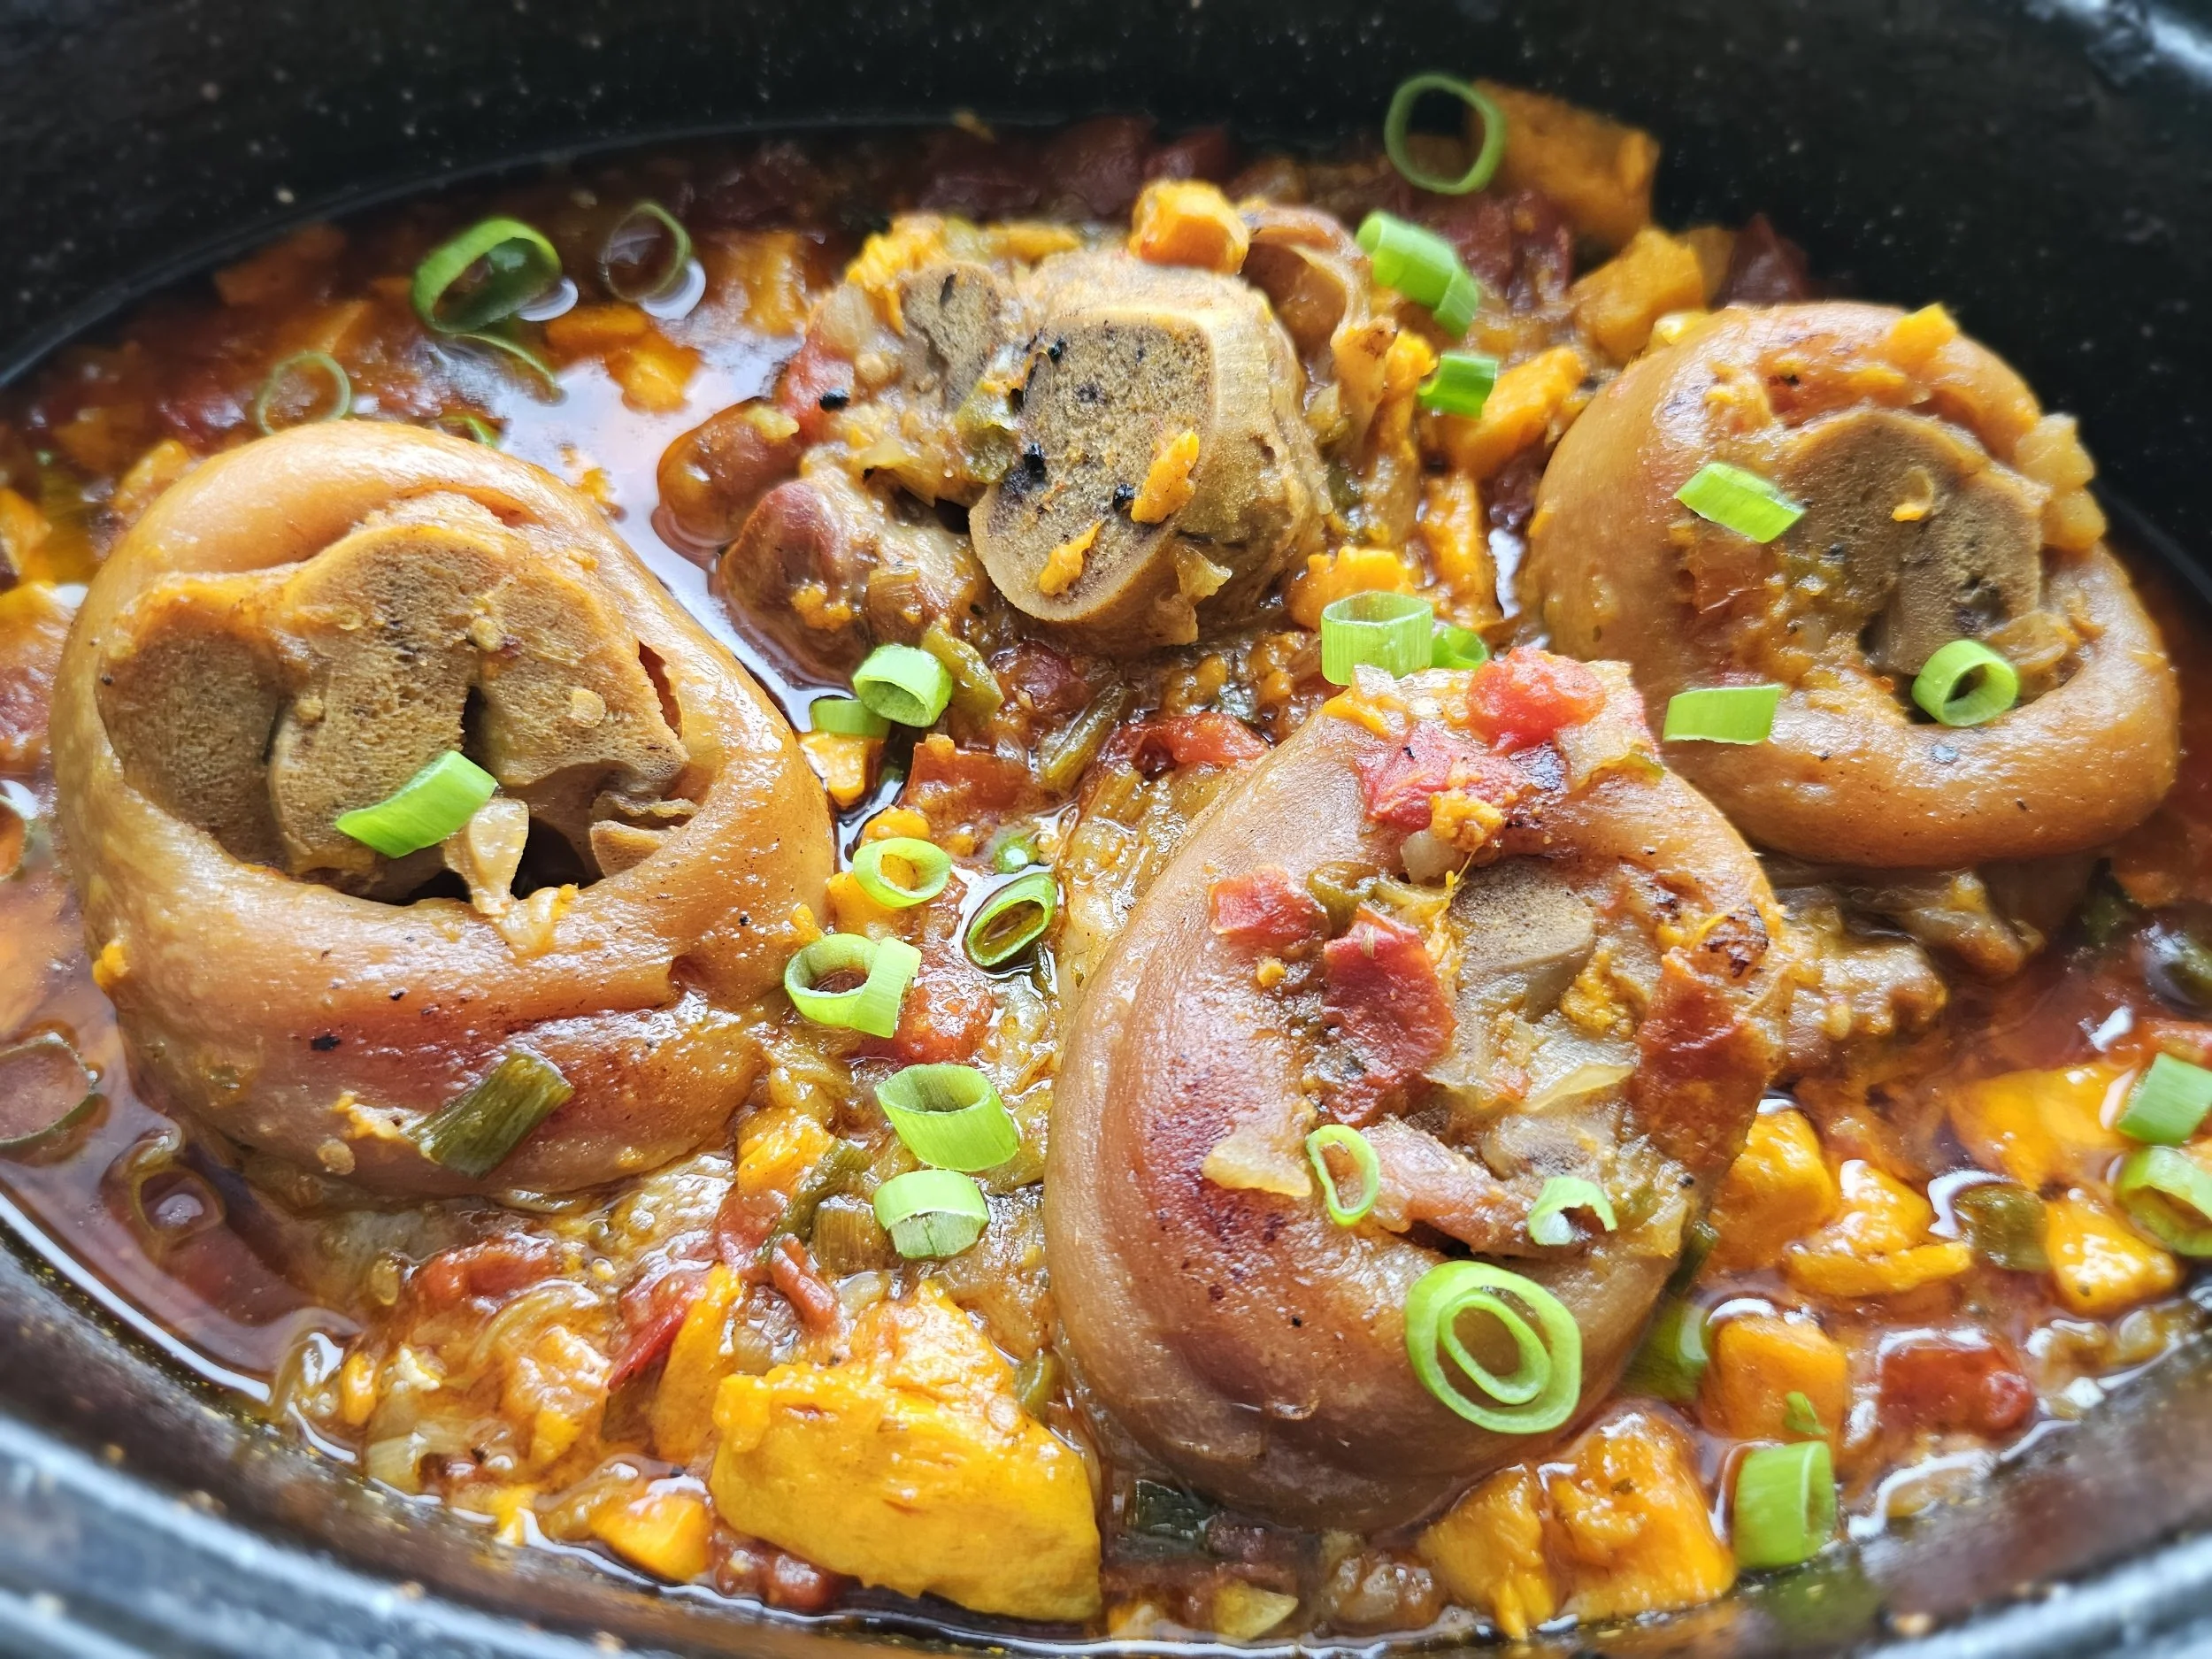
Prep and Cooking Tips for Mazondo
1. Soaking = Better Flavor and Cleaner Broth
Soaking pork hocks in vinegar and water helps clean the meat, neutralize strong odors, and tenderize it slightly. Rinse well after soaking to avoid excess acidity in the stew.
2. Sear for Maximum Flavor
Don’t skip the browning step, it adds deep, caramelized flavor that builds the base of your stew. Let the hocks sear undisturbed for a few minutes per side to get a good crust.
3. Low and Slow is Key
This stew rewards patience. Keep the heat low and let the hocks simmer gently for 2.5 to 3 hours. Rushing will result in chewy meat and thin broth.
4. Sweet Potato Choices Matter
Use a firm, orange-fleshed sweet potato or yam that holds up to long cooking. Softer varieties may break down too much, though that can also be desirable for thickening.
5. Customize the Heat
Adjust the chili to your preference. For mild stew, remove seeds from the chili or use a milder pepper. For more heat, add fresh chili near the end of cooking or include crushed chili flakes.
6. Make it Ahead
Like most stews, this tastes even better the next day. The flavors deepen and the texture improves after resting. Store in the fridge overnight and reheat gently.
7. Serving Suggestions
Traditionally served with sadza in Zimbabwe, but it's also excellent with rice, mashed potatoes, or crusty bread to soak up the broth. Try pairing it with sautéed greens for a full meal.
8. Skim the Fat (or Don’t)
Pork hocks release a good amount of fat. You can skim some off the top during or after cooking, or stir it back in for maximum richness, up to you.
9. Broth Boost
If you have homemade broth, use it! It gives the stew more body and complexity than water and bouillon alone.
10. Leftover Ideas
Leftover stew can be shredded and used in tacos, wraps, or even spooned over pap/sadza for a quick second-day meal.
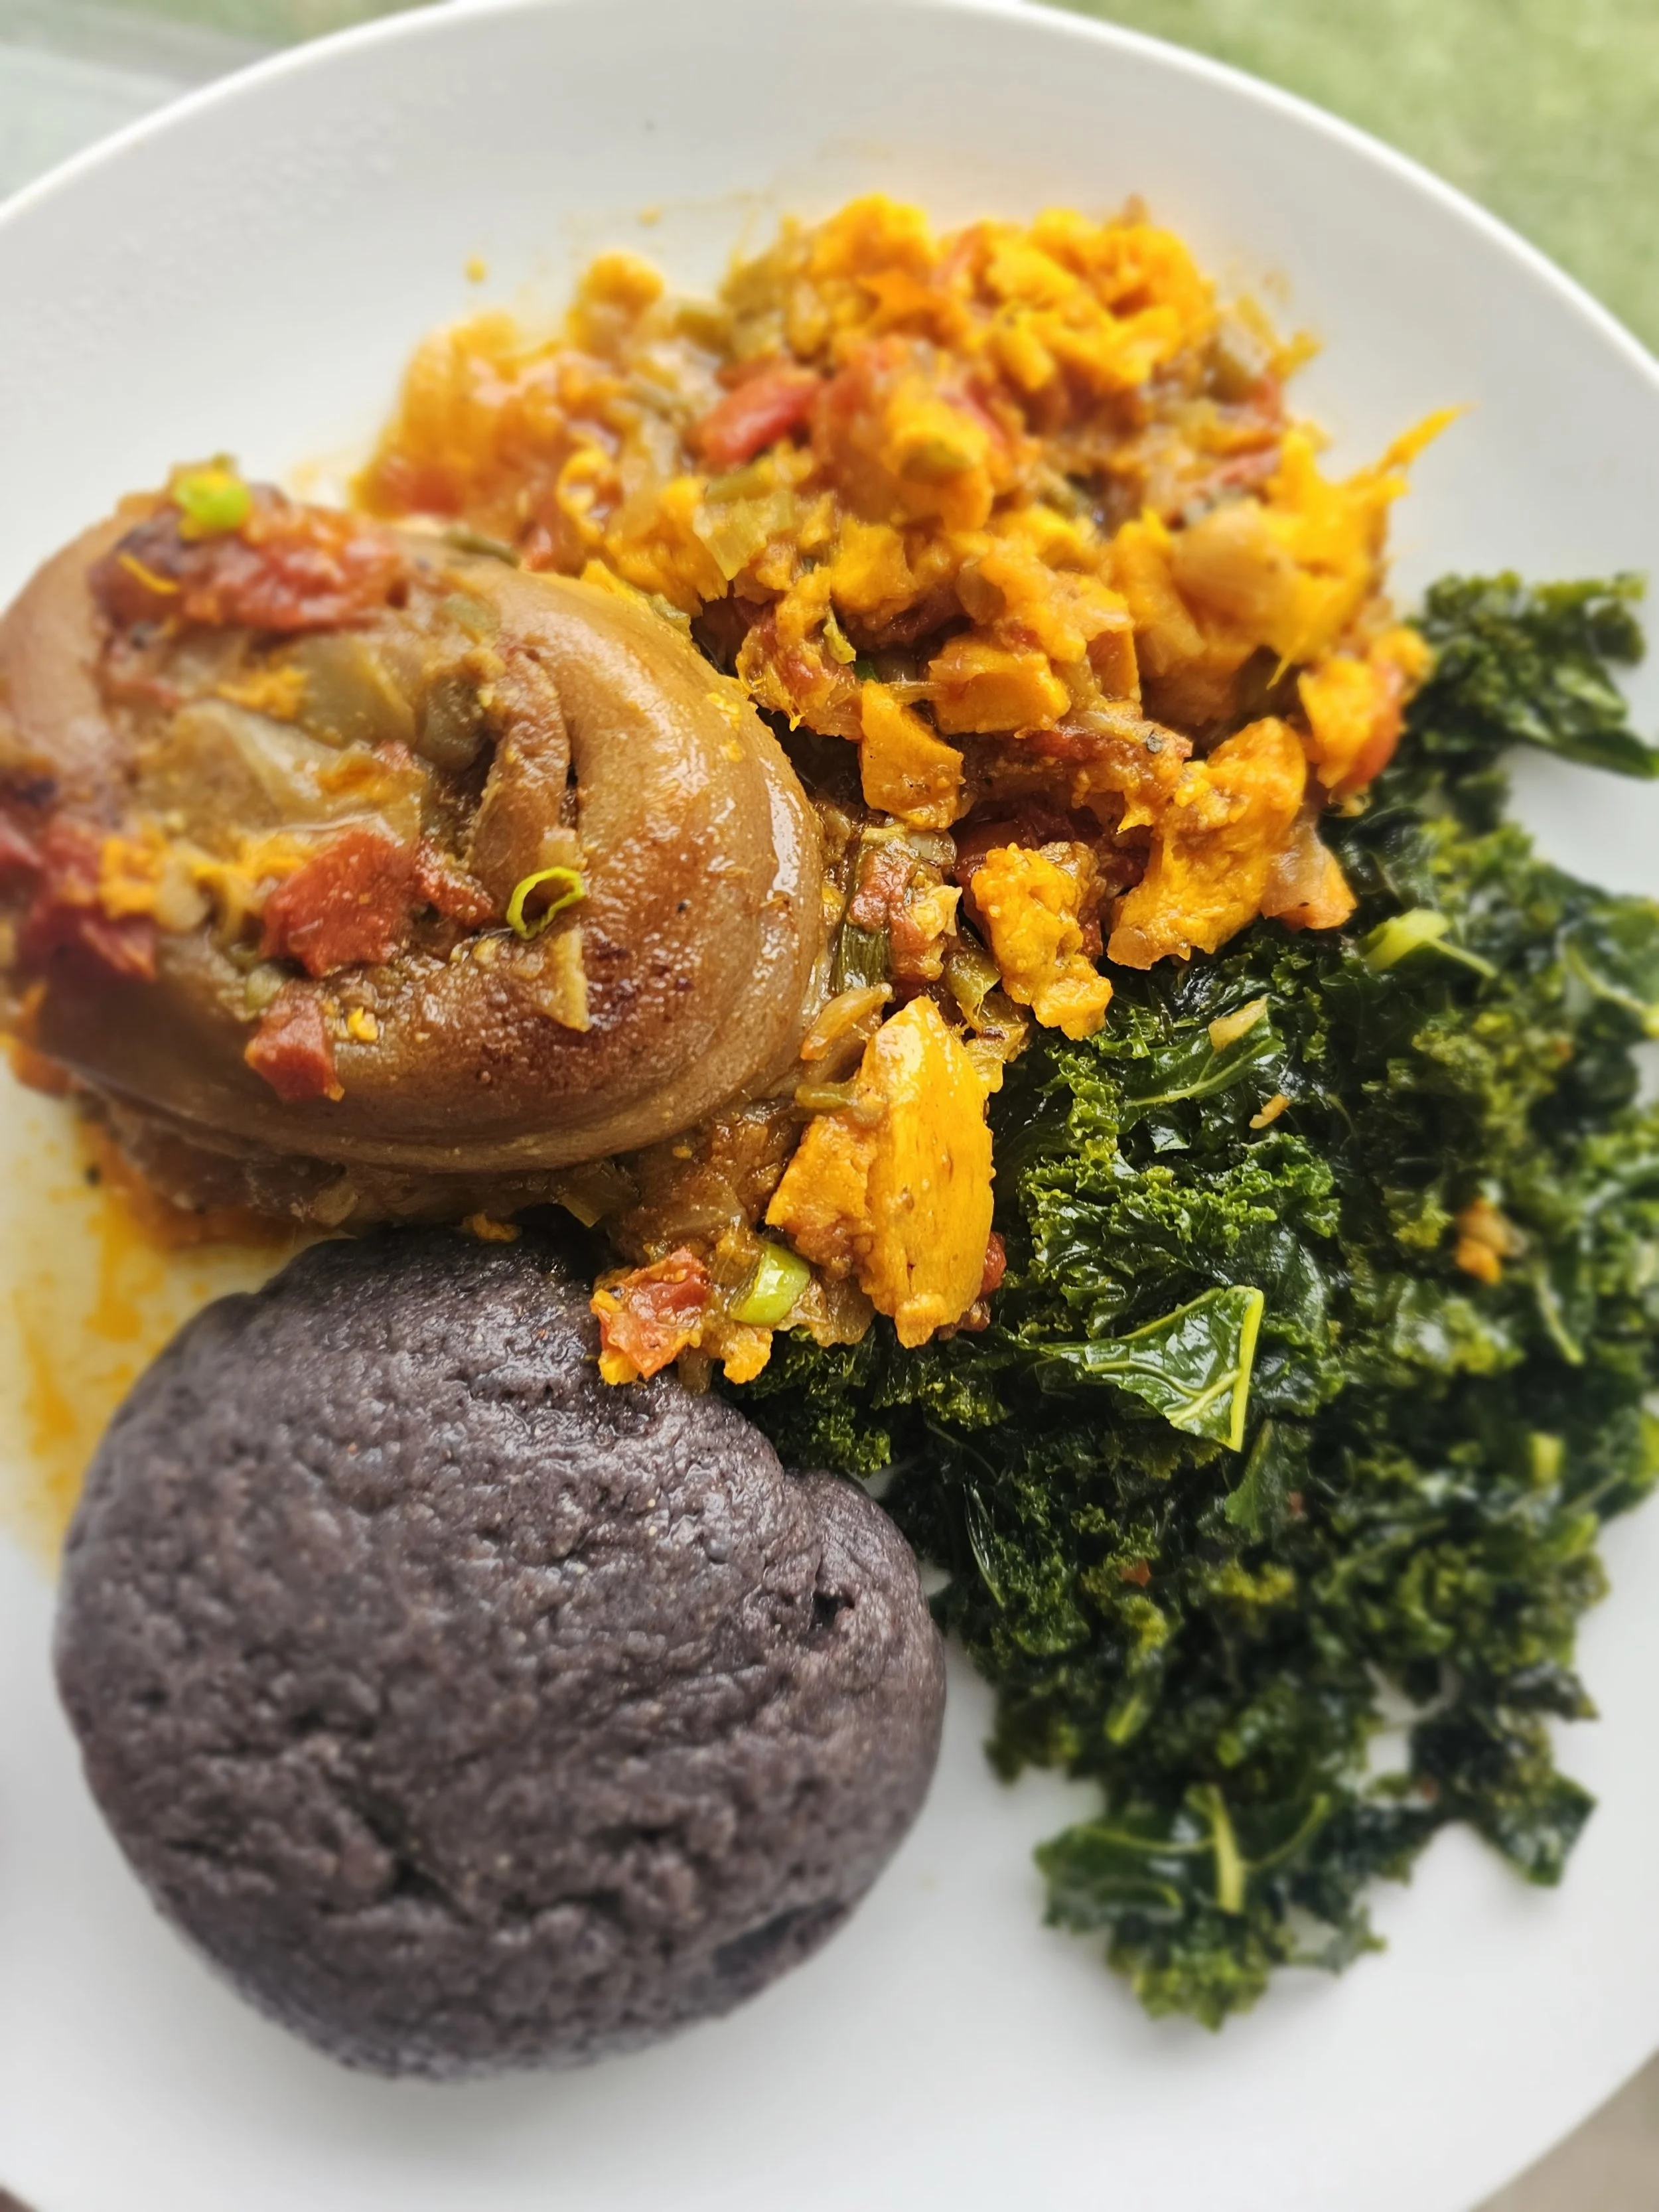
With each spoonful, you're tasting tradition, technique, and transformation. The vinegar, the hocks, the sweet potato, each element speaks to how simple ingredients, handled with care and patience, can deliver deeply rooted, unforgettable flavor.
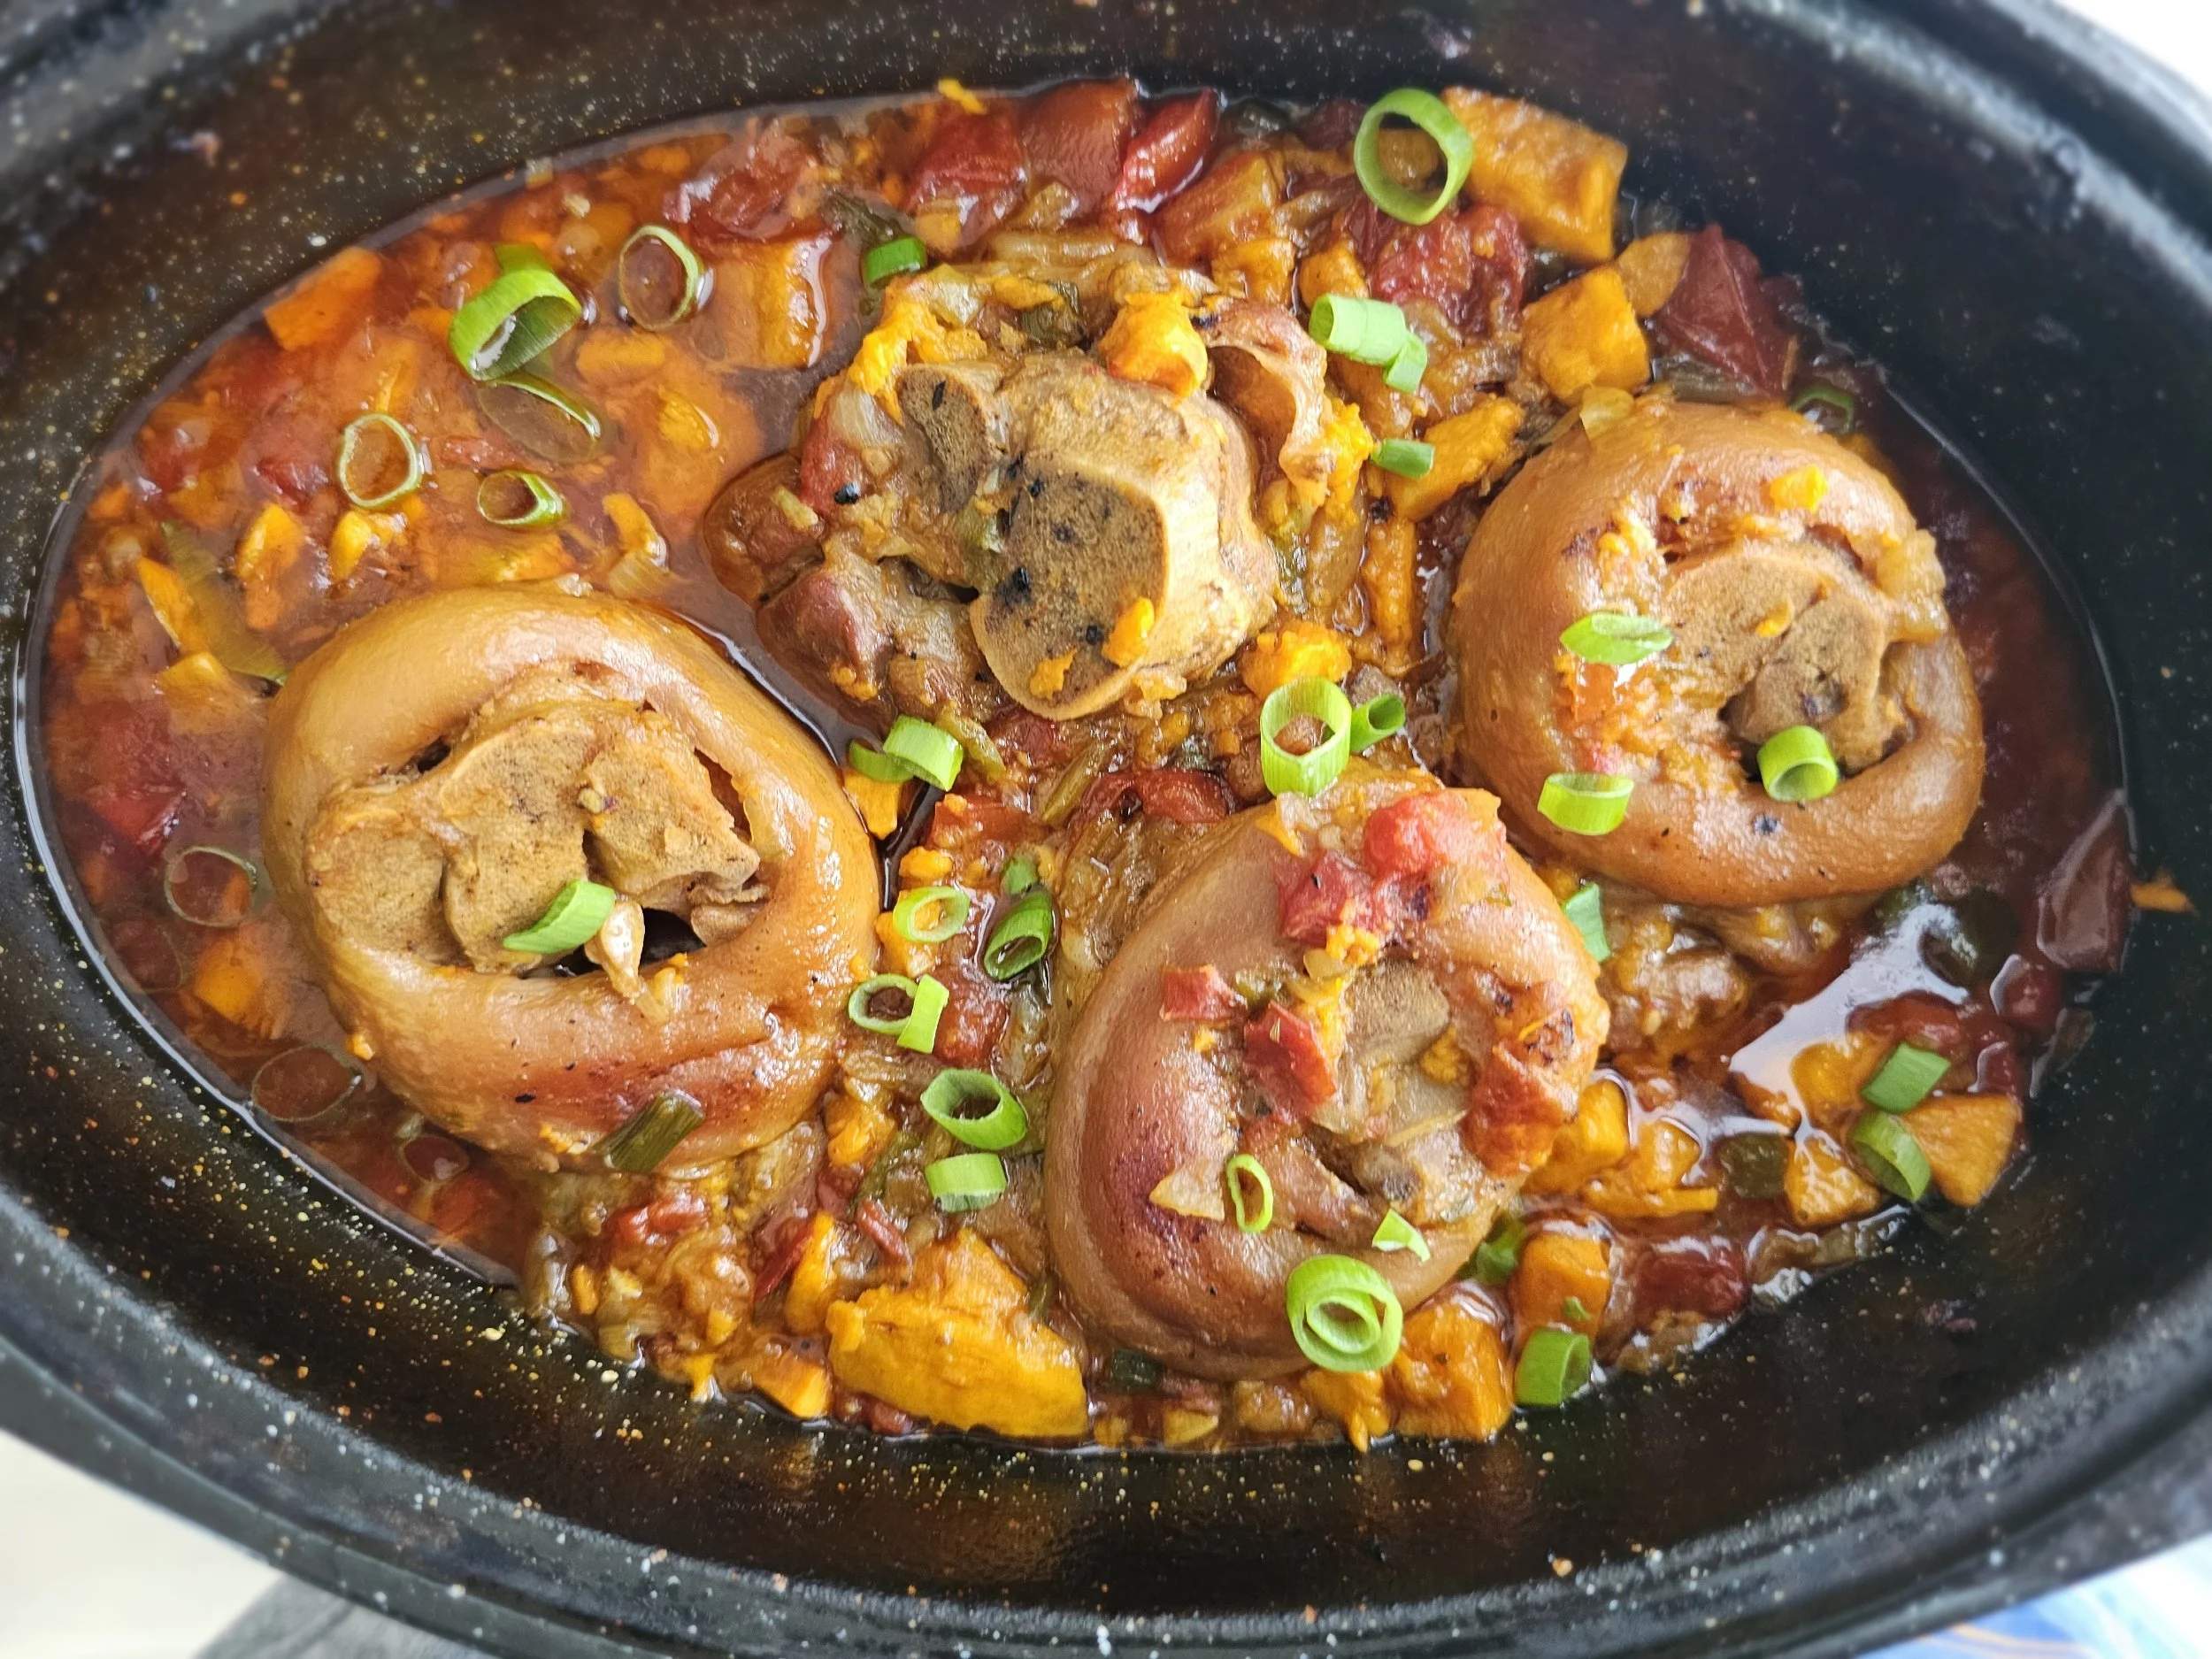
Stewed Pork Hocks with Sweet Potato (Mazondo)
Discover a rich, slow-cooked Pork Hock Stew (Mazondo) with sweet potato, inspired by Zimbabwean flavors and Southern soul food traditions. Tender pork hocks are soaked in vinegar, seared, and simmered with tomatoes, chili, and spices for a hearty, flavorful dish.
Ingredients
- 4 large pork hocks
- 1/3 cup red wine vinegar (for soaking)
- 1 tablespoon salt
- 1 tablespoon black pepper
- 1 large sweet potato or yam, peeled and cubed
- 1 large yellow onion, chopped
- 4 Roma tomatoes, chopped
- 1 chili pepper, finely chopped
- 2 large cloves garlic, minced
- 2 spring onions, sliced
- 2 bouillon cubes + 2 cups water (or homemade broth)
- 1/2 tablespoon Royco Usavi Mix (or your preferred all-purpose seasoning)
- 1/2 tablespoon Shishanyama spice (or BBQ meat rub)
- 2 tablespoons Worcestershire sauce
- 1 teaspoon cumin
- 1 teaspoon paprika
- 1 teaspoon oregano
- Cooking oil (coconut or olive oil)
- 2 tablespoons butter
Instructions
- Rinse the pork hocks under cold water. Place them in a large bowl and soak in red wine vinegar with enough water to cover. Let sit for 10 minutes, then drain and pat dry—very dry, so they brown nicely.
- Season the hocks with salt and pepper. In a large oven-proof pot roast dish or Dutch oven, heat a bit of oil over medium-high heat. Sear the hocks on all sides until golden and well browned. Remove and set aside.
- In the same pot, sauté the onion, garlic, chili, and spring onions until softened and fragrant. Add the Royco Usavi Mix, Shishanyama, and bouillon cubes. Cook for 1–2 minutes to bloom the spices, adding a bit more oil if needed. Stir in the tomatoes and Worcestershire sauce and cook for another 1–2 minutes.
- Add the cubed sweet potatoes, followed by the broth (or water), cumin, paprika, and oregano. Let everything simmer for 3–4 minutes to start developing the base of the stew.
- Transfer the pork hocks to a deep roasting pan or heavy pot. Pour the sweet potato and tomato mixture over the hocks, making sure they’re mostly submerged. The liquid will reduce and become the stew.
- Cover and simmer on low heat at 325°F for 2.5 to 3 hours, until the meat is fall-off-the-bone tender and the sweet potatoes are soft. When checking occasionally during cooking, avoid over-mixing to prevent the sweet potatoes from breaking down into a soup-like consistency.
- If there's more liquid than you'd prefer with about 30 minutes remaining, increase the temperature to 350°F.
- Finish with chopped fresh spring onions. Adjust seasoning with extra salt, pepper, or chili flakes if you like more heat. Serve hot with sadza, rice, or thick bread, and sautéed kale (muriwo) on the side.
I am not a certified nutritionist and any nutritional information on dontmissmyplate.com should only be used as a general guideline.