

Jollof Rice-Stuffed Tomatoes and Mushrooms
If you haven't had jollof rice yet, you're missing out. It's a cornerstone of West African food. Each country that does make it a central aspect of their cuisine have particular methods of preparing the rice. I’m not going to get into the nuances because I’m from Southern Africa and not really in a position to get into the specifics and get it exactly right! I will say though, that some people might say it my rendition is closer to the 'Ghanaian way', due to the spiciness and lack of bay leaf (common in some Nigerian recipes I've seen). I seasoned the tomato stew the rice cooks in to my liking, and the result is pretty delicious.
You can eat the jollop rice as it is, with beans, fish, plantains, or do what I did and stuff some juicy vegetables! Stuffing veggies with rice (and sometimes a protein) is nothing new. It’s usually an easy and delicious meal, and quick if you have precooked your rice.
This method is something fun to do year-round with whatever is in season.
I was going to get brave and try and stuff some grapes leaves and cabbage, but this kept it simple since tomatoes and mushrooms lend themselves well to stuffing/topping, are easy to find and relatively affordable.
Hope you find this as tasty as I did!
Ingredients
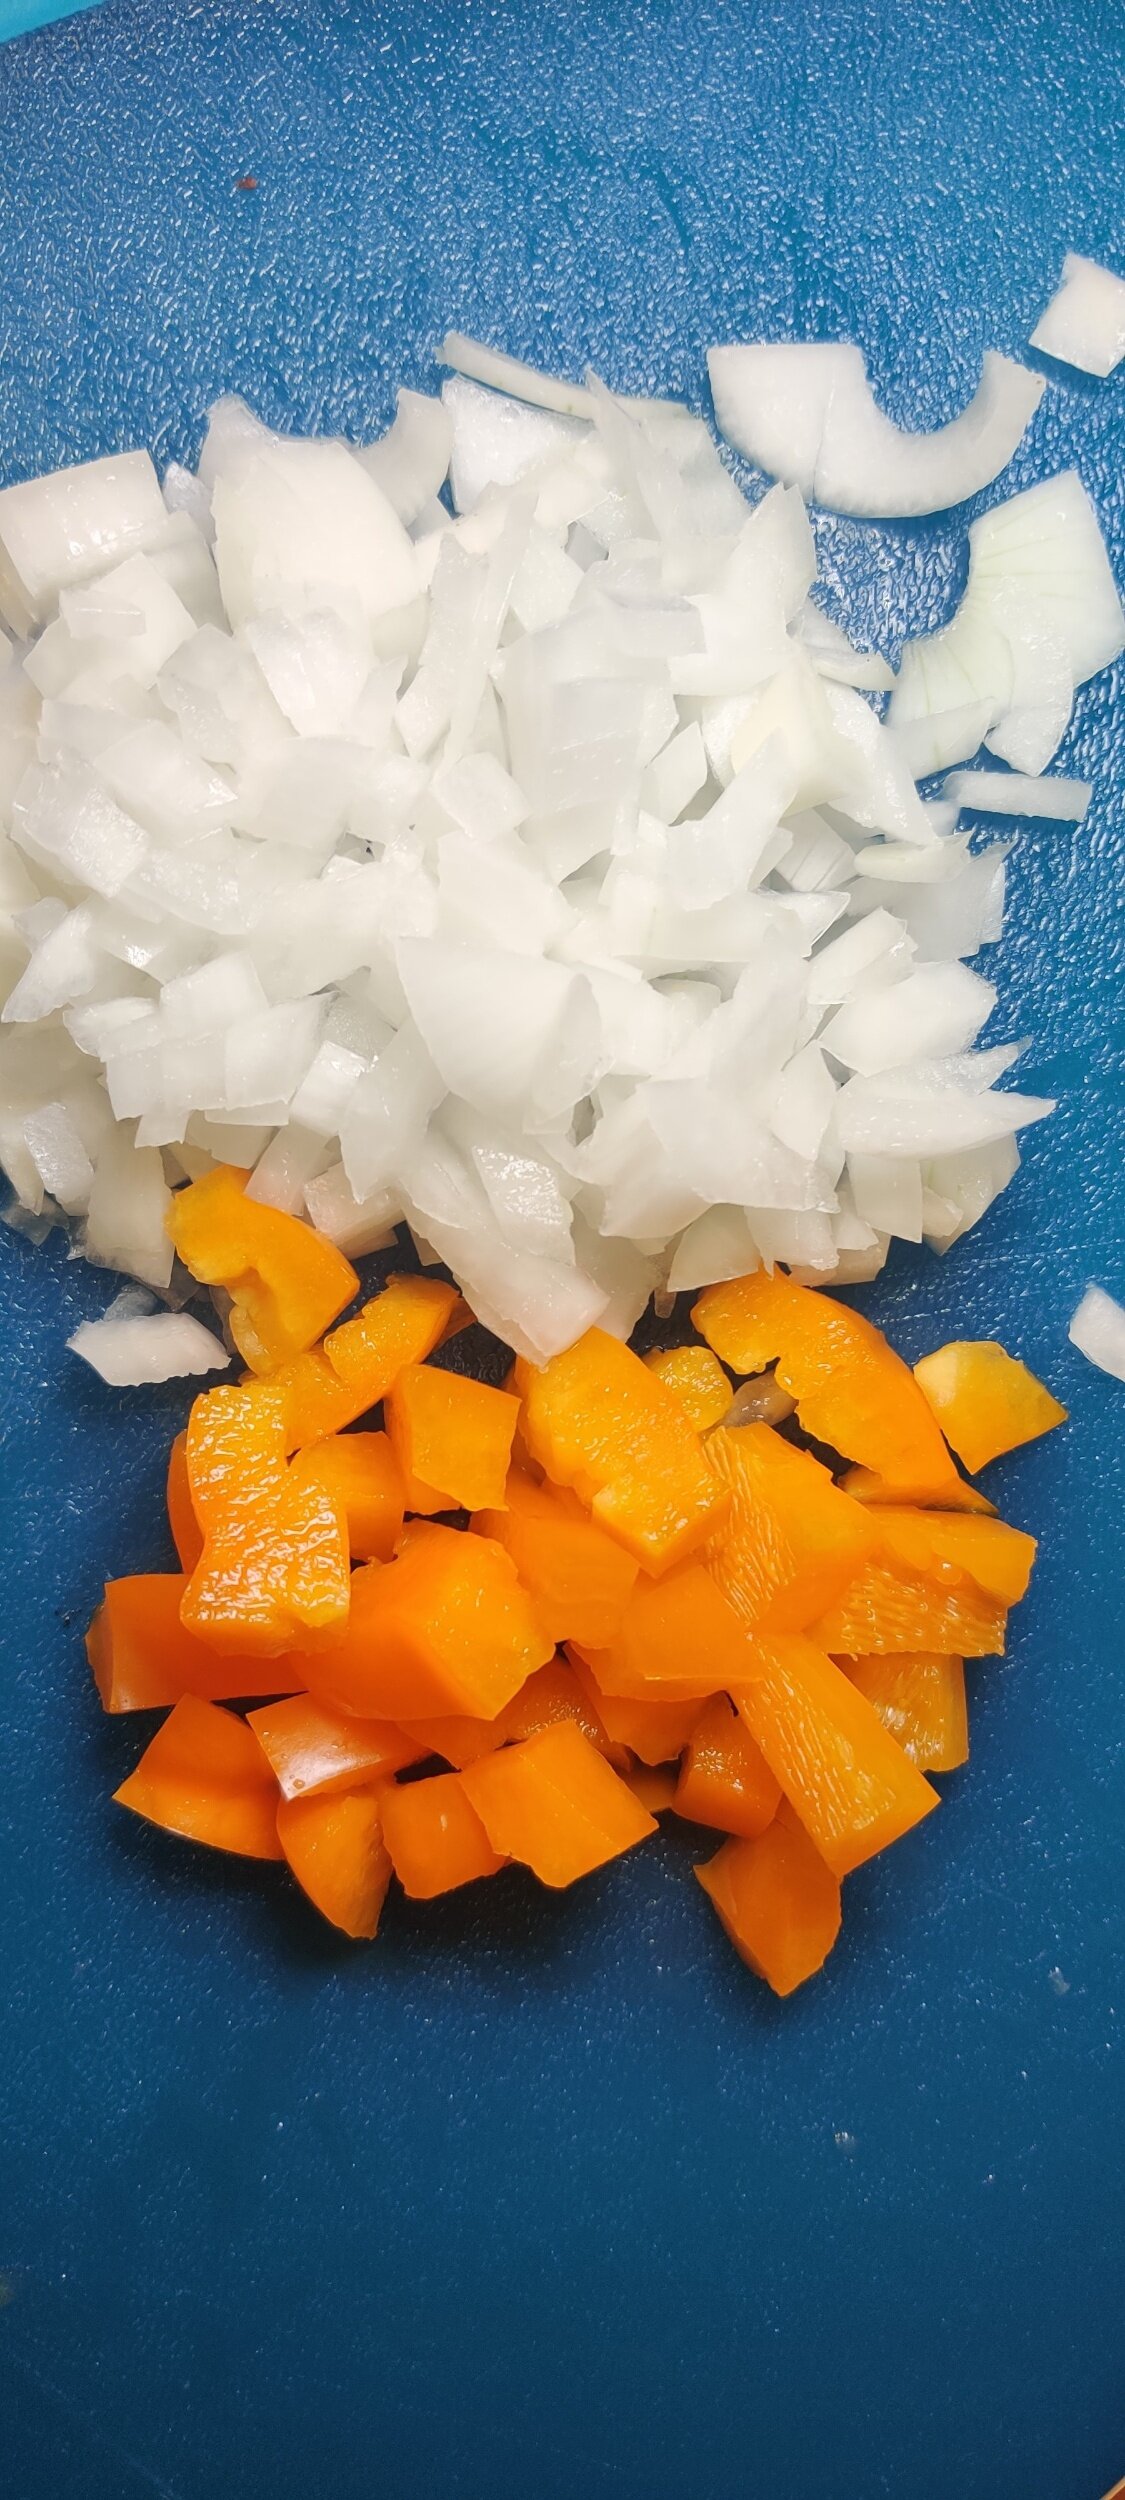
1 large yellow onion, chopped
2 tablespoons olive oil
1 tablespoon garlic, minced
1/4 cup vegetable oil
1 tablespoon butter
1 (14-ounce) can diced tomatoes
1 small habanero pepper, chopped
1 (6-ounce) can tomato paste
2 beef bouillon cubes
1/2 cup frozen peas
1/2 teaspoon cumin
1 tablespoon curry
1 tablespoon paprika
1 teaspoon salt
1 tablespoon black pepper
1 teaspoon garlic and herb blend
1 teaspoon ginger
1/2 teaspoon coriander
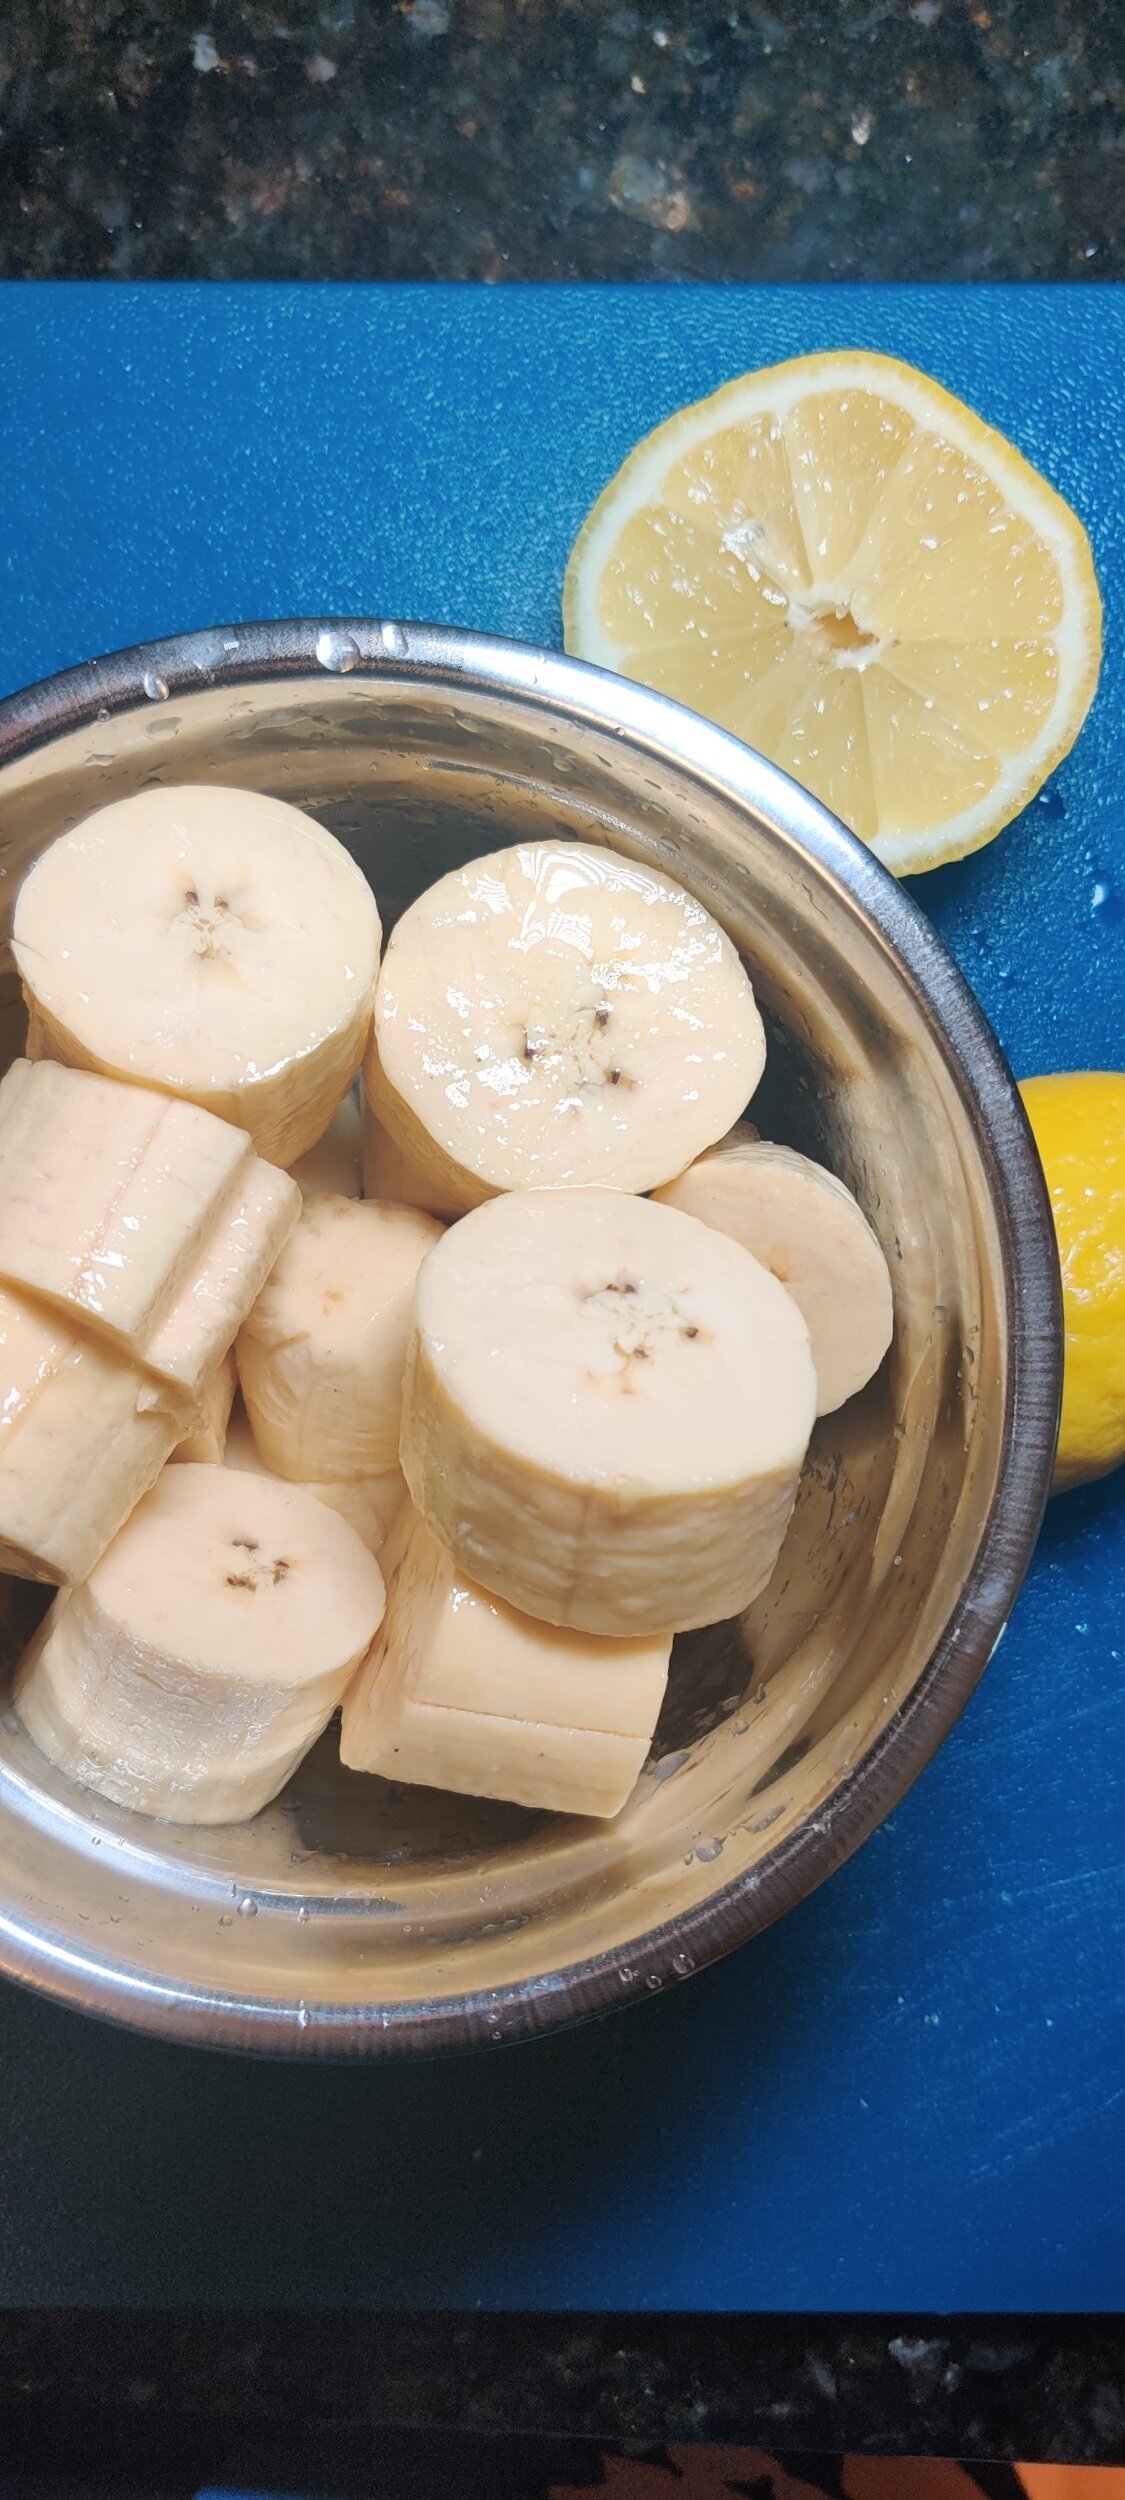
3-4 large tomatoes
Fresh thyme
Garlic powder
Olive oil
3-4 portobello mushrooms


Instructions
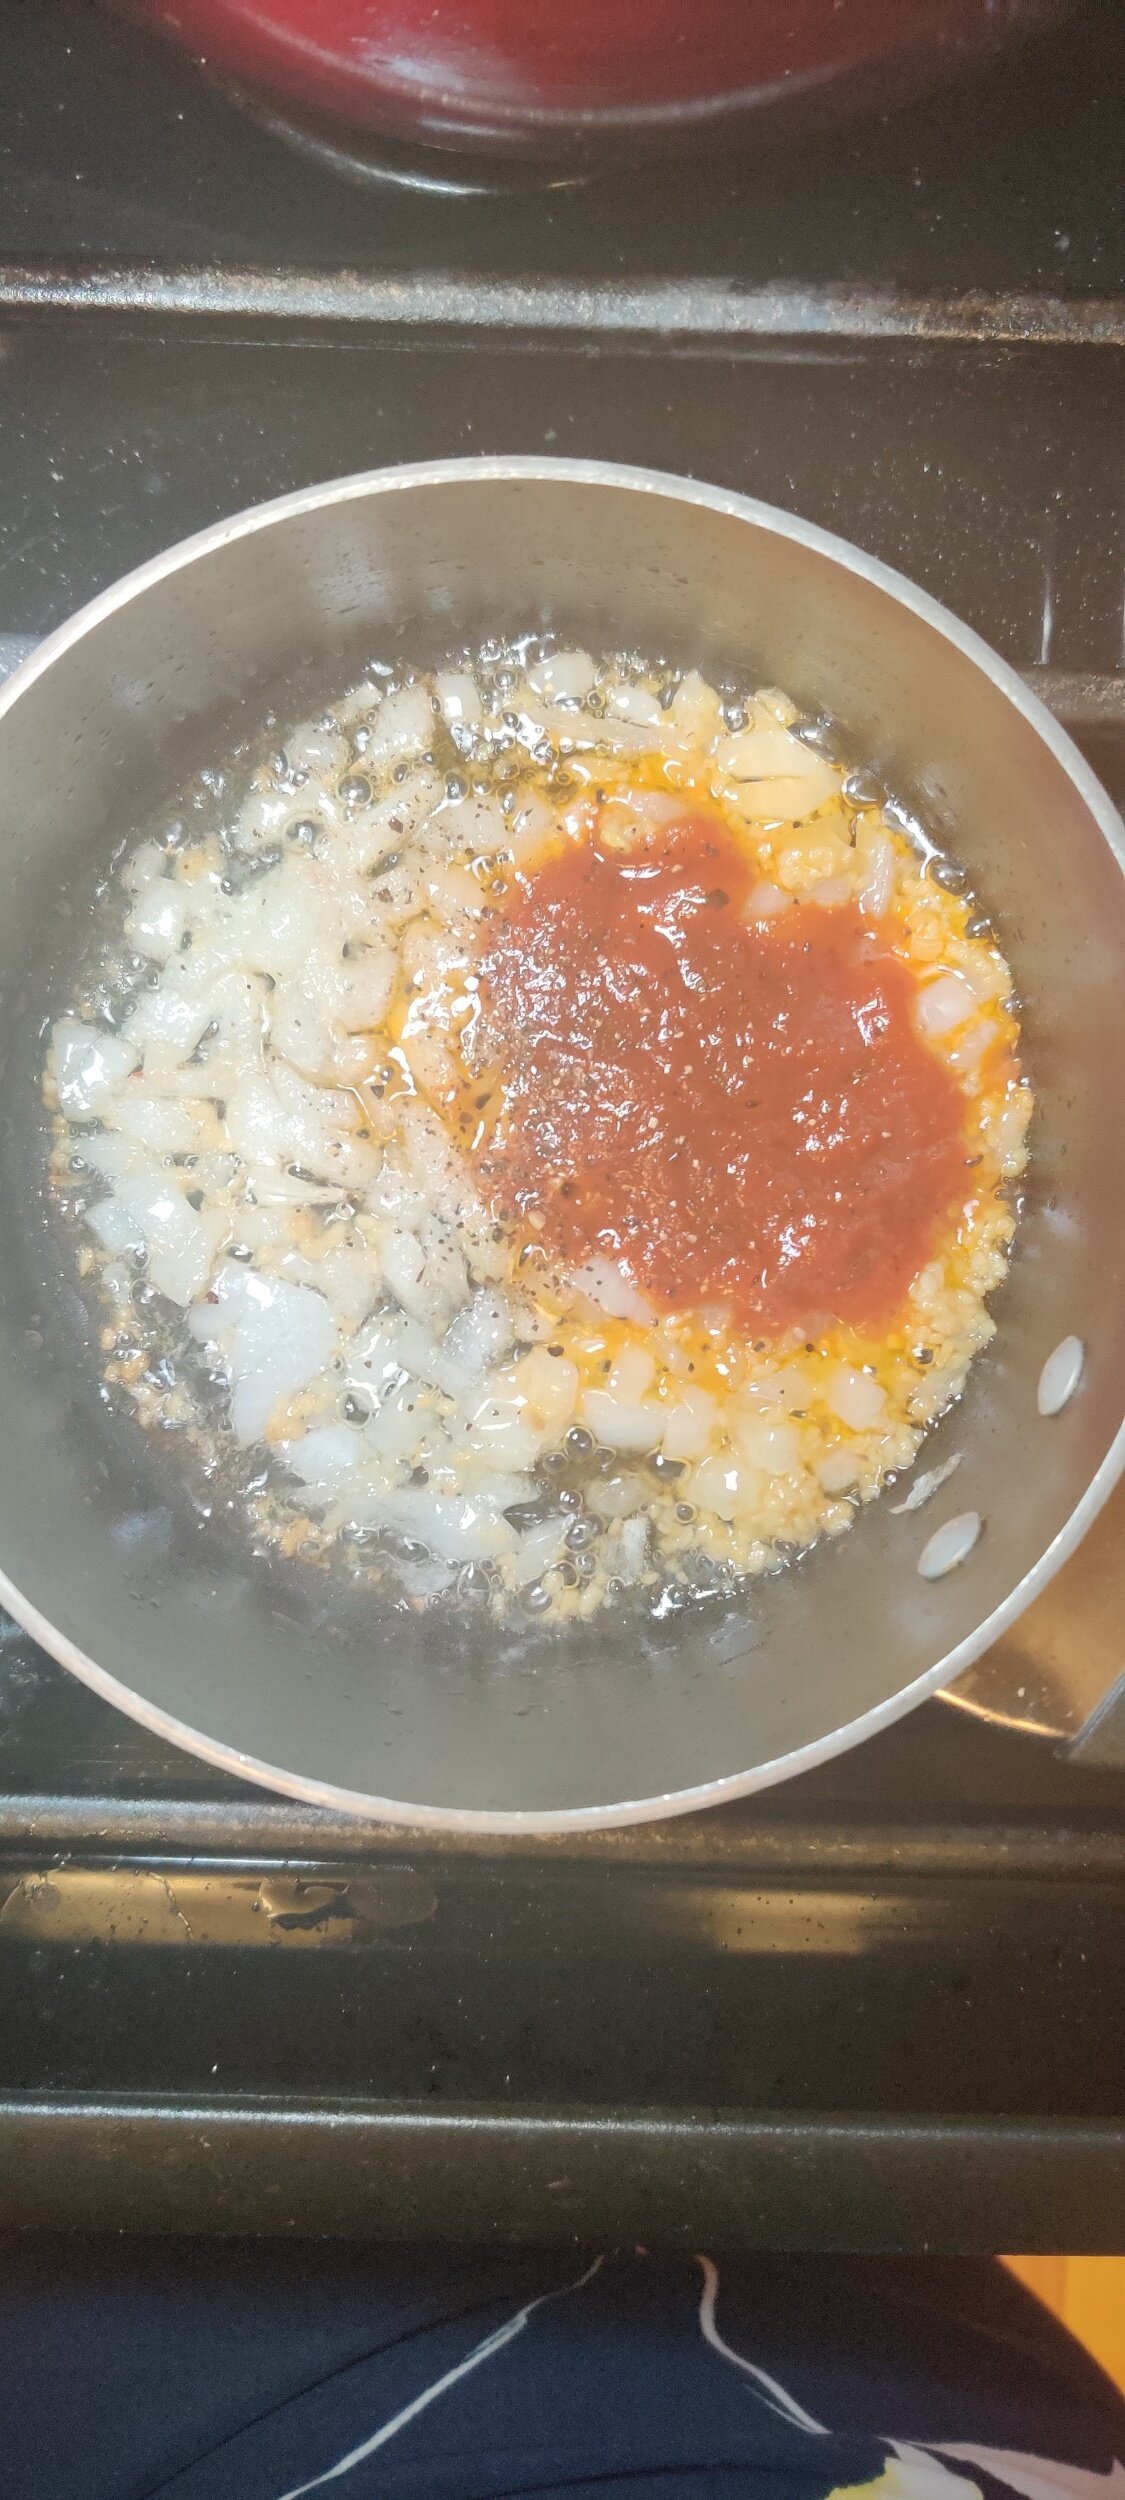
Blend the onion and olive oil into a paste and set aside.
Clean out the blender and repeat this step with the pepper, tomatoes, and tomato paste.
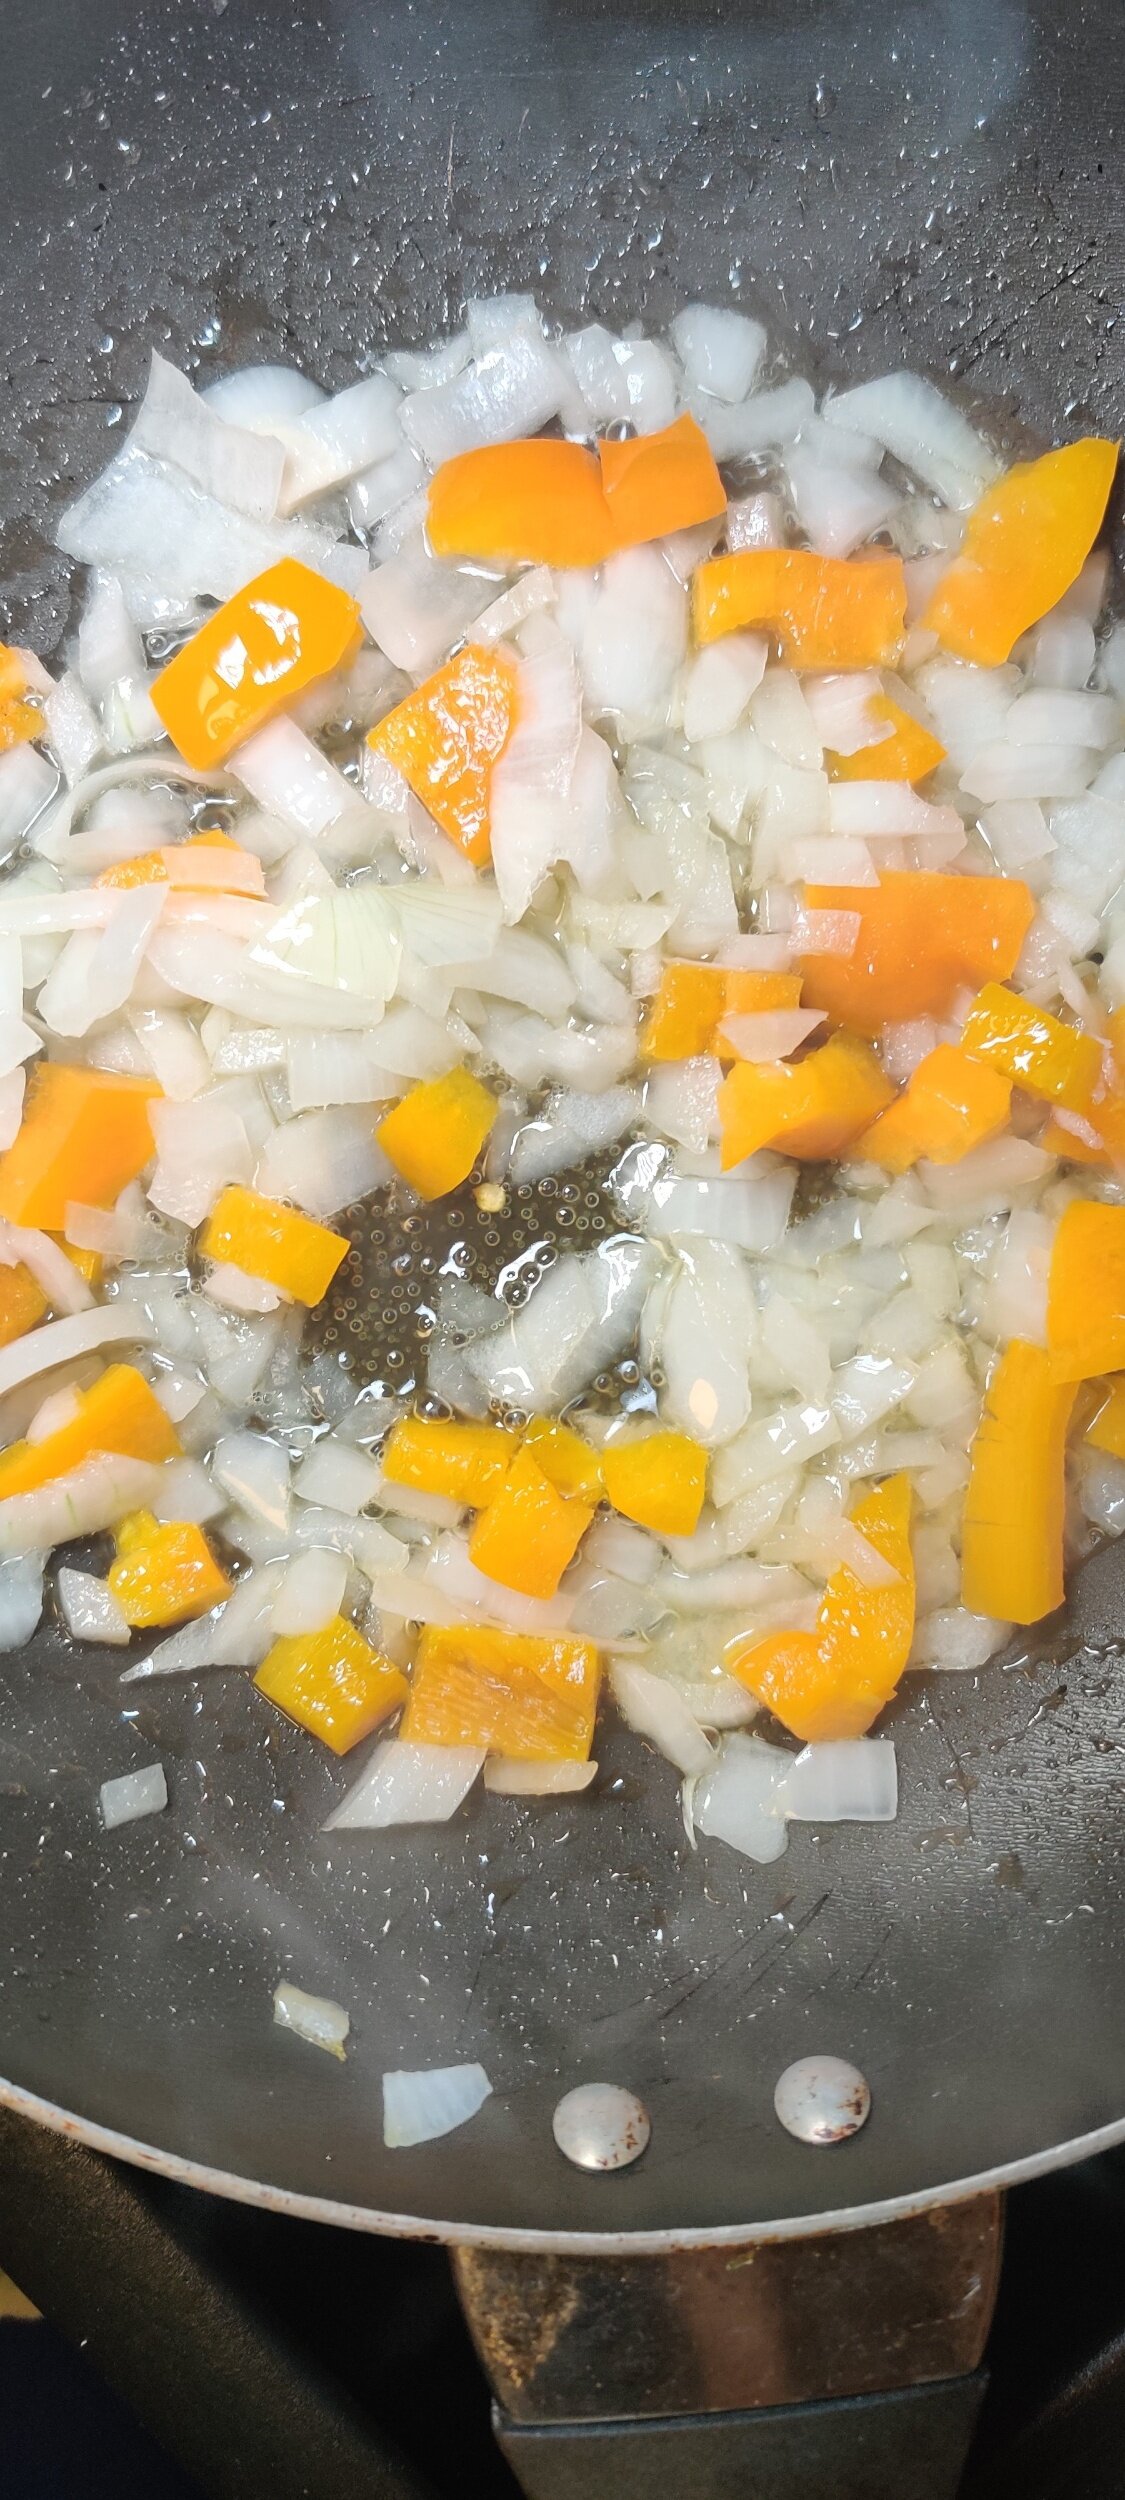
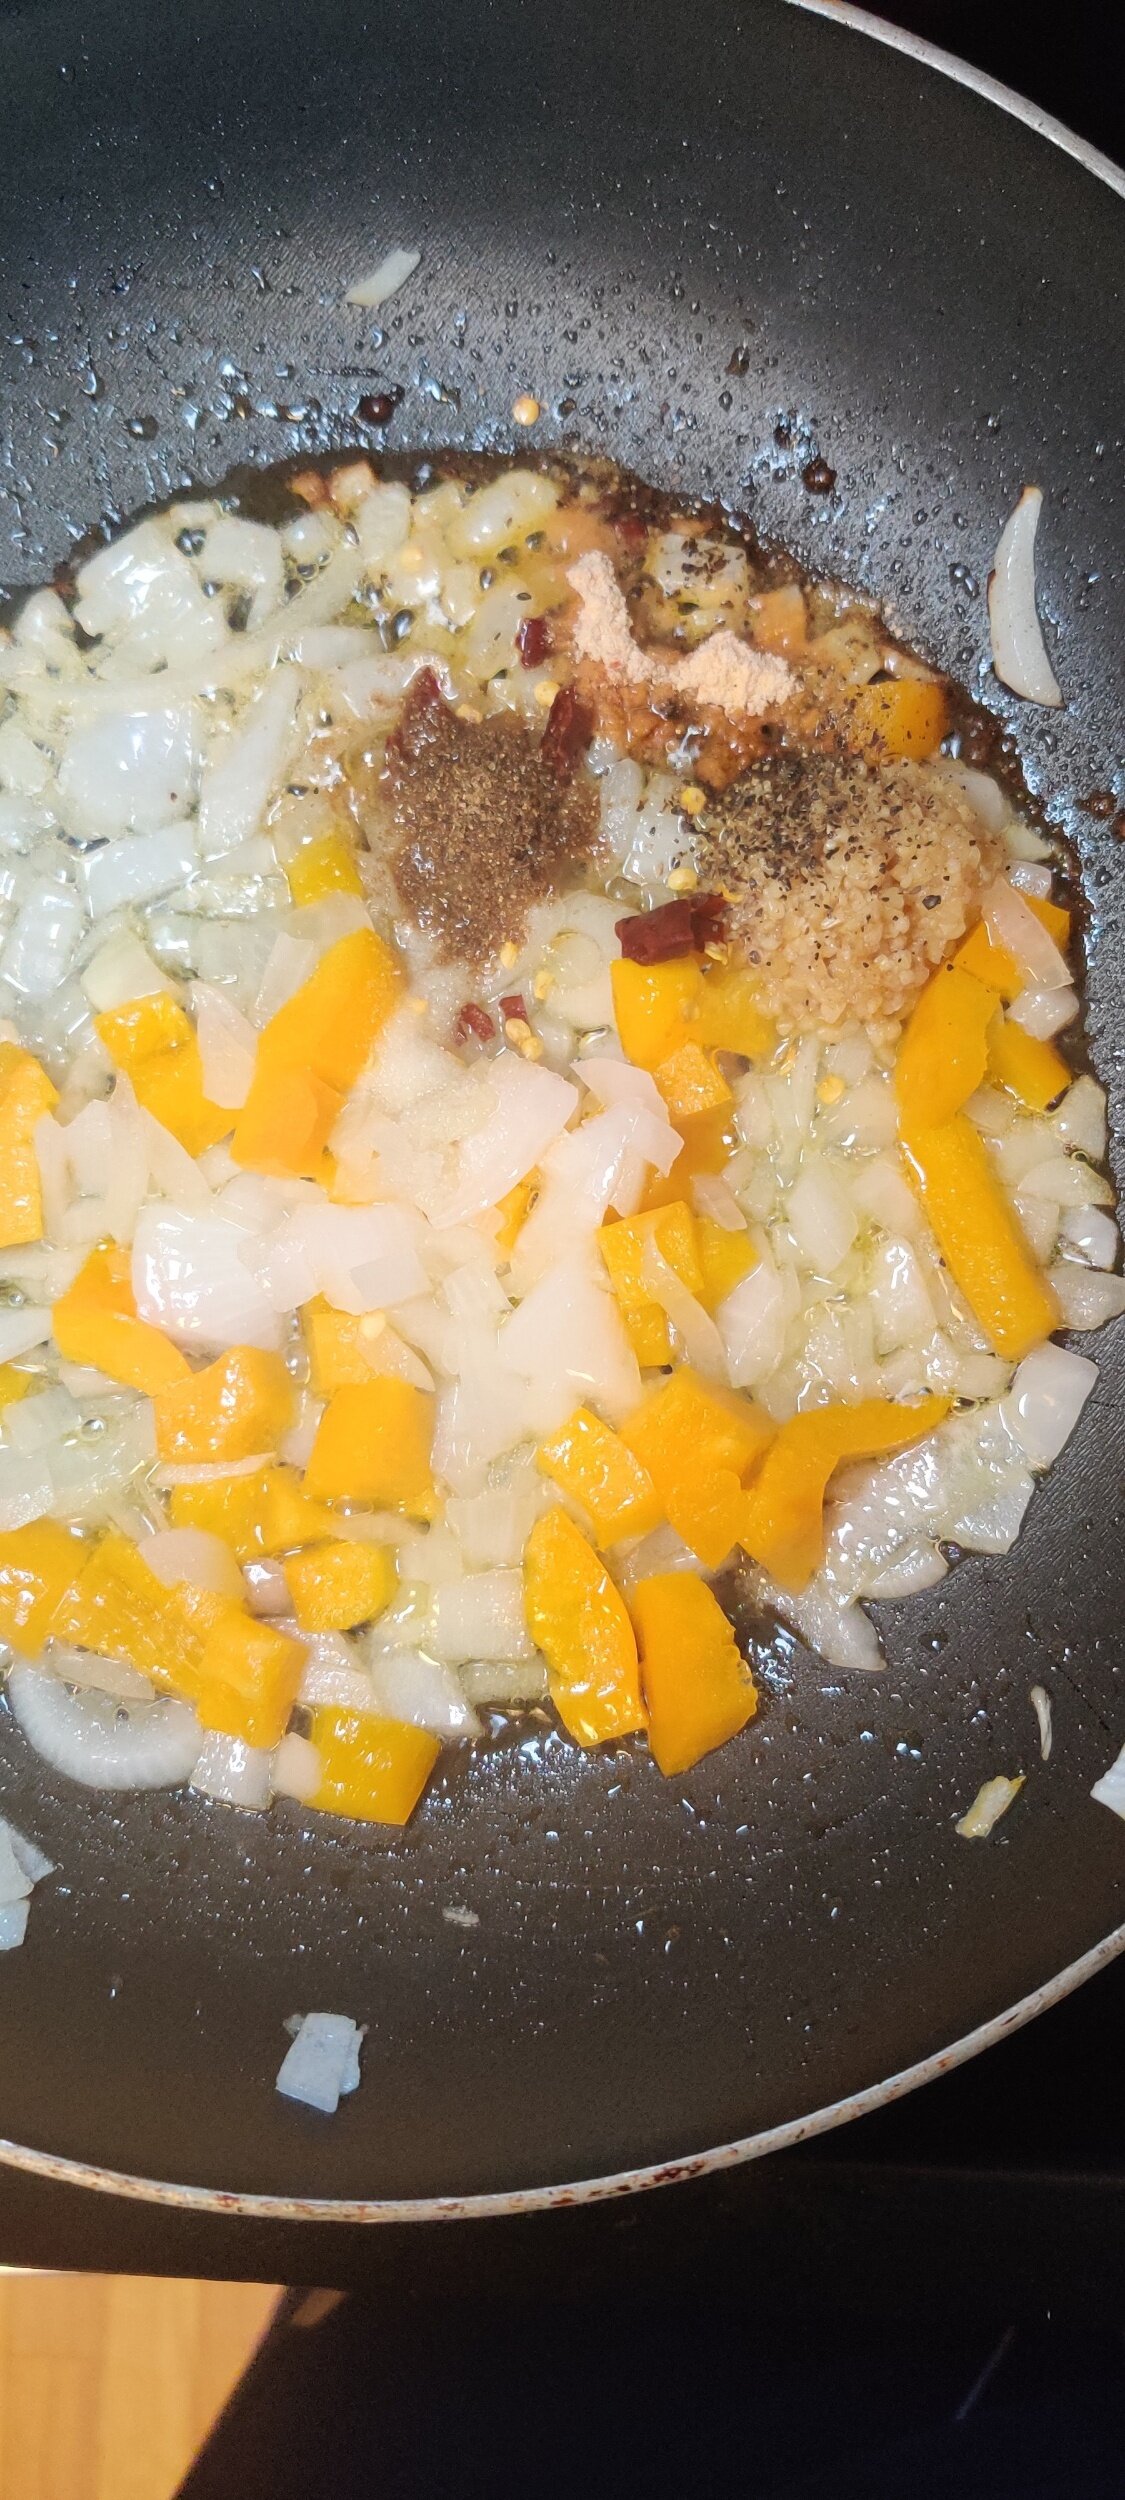
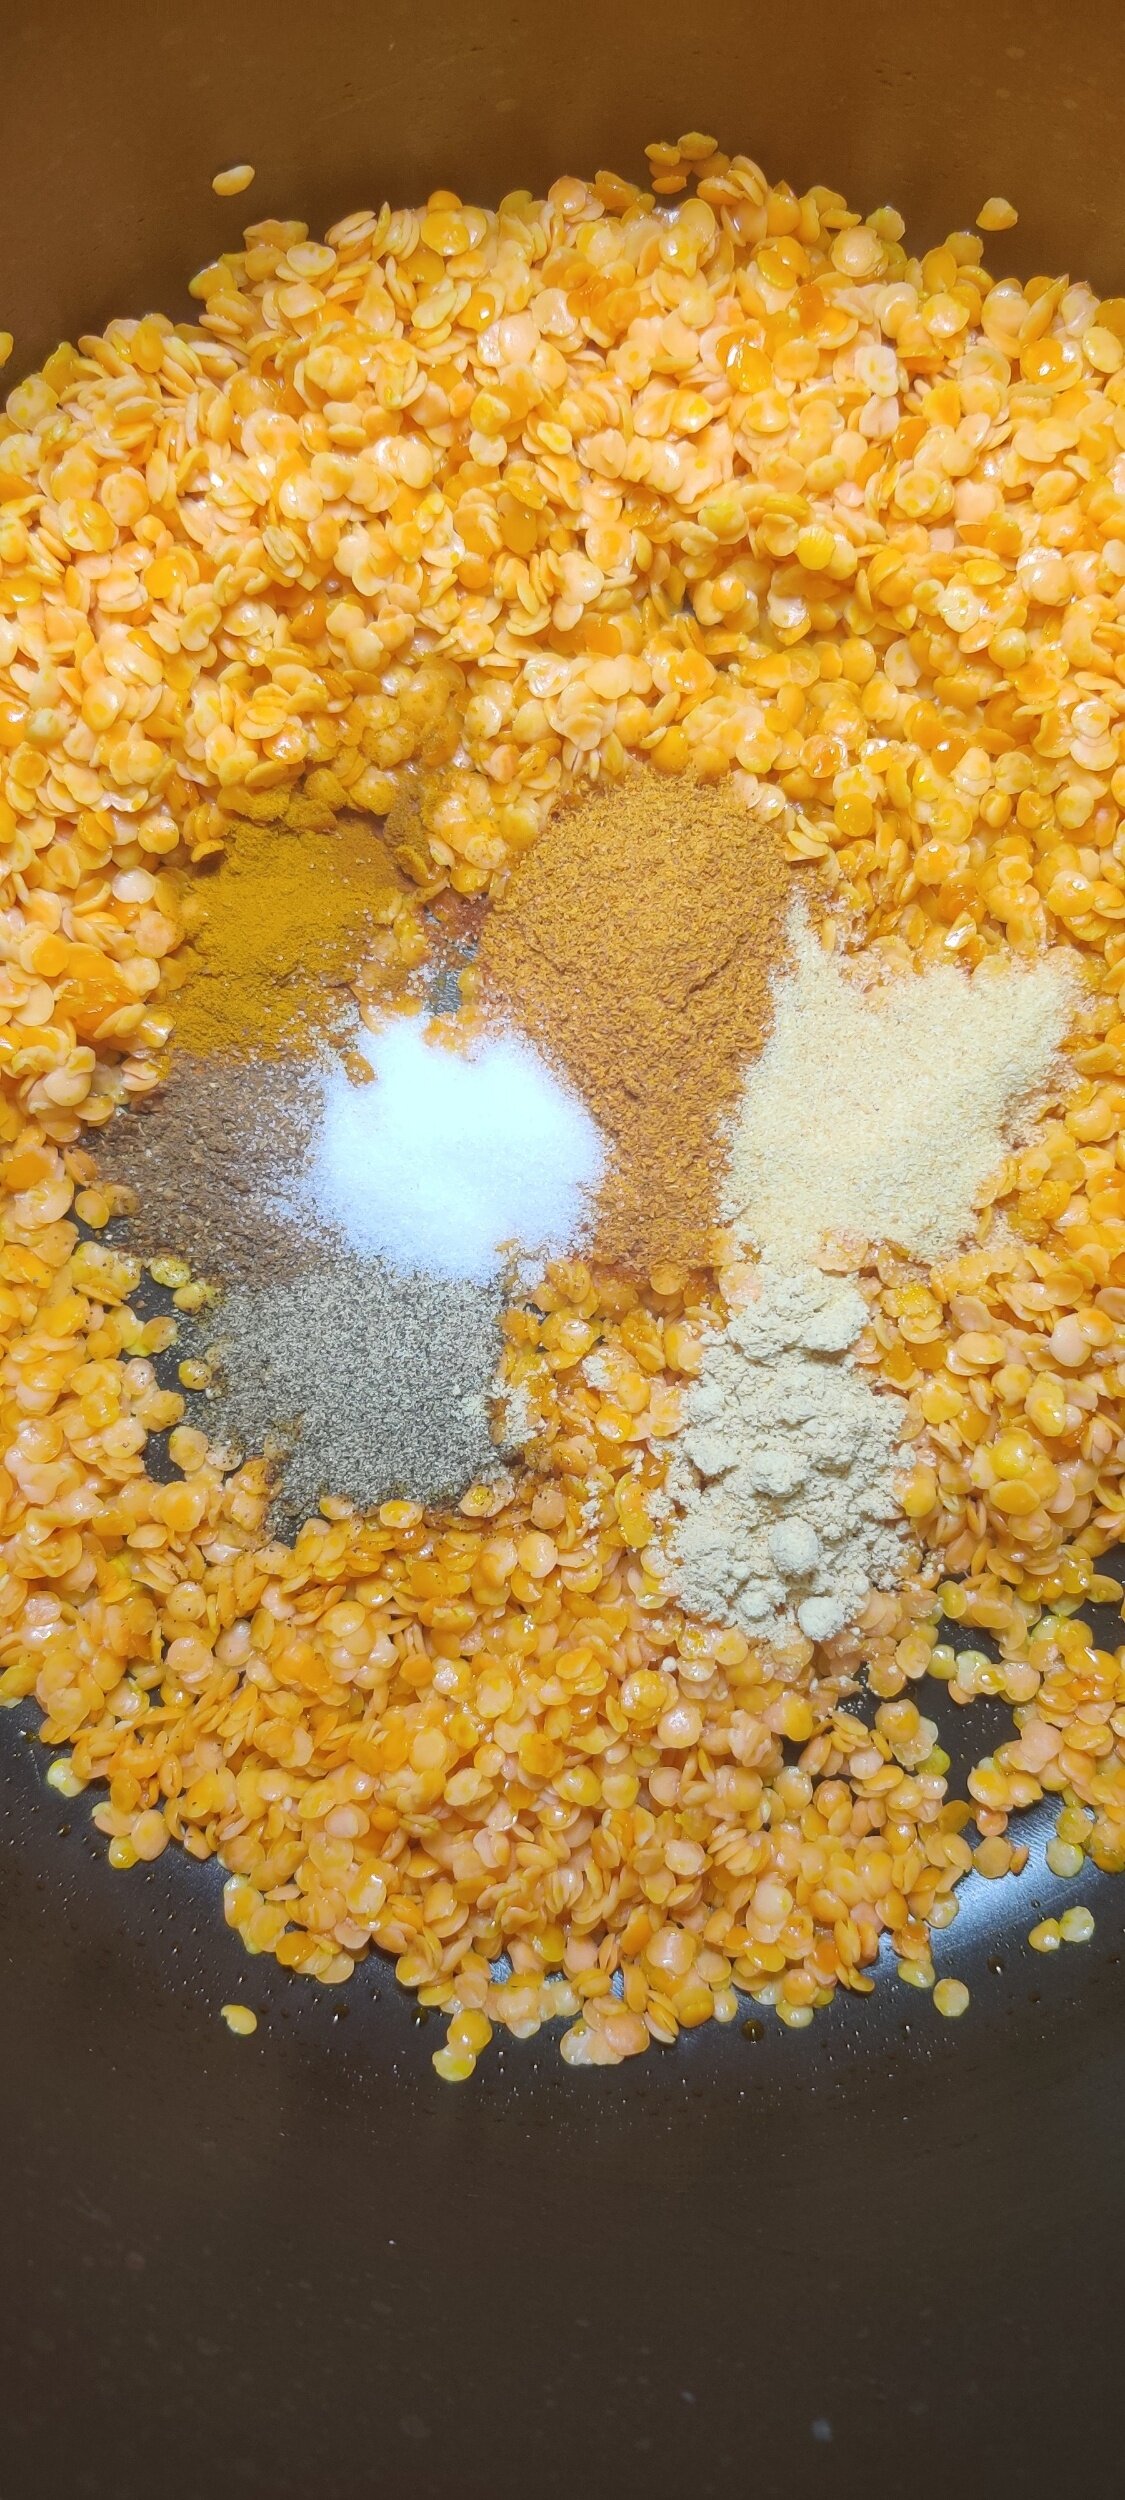
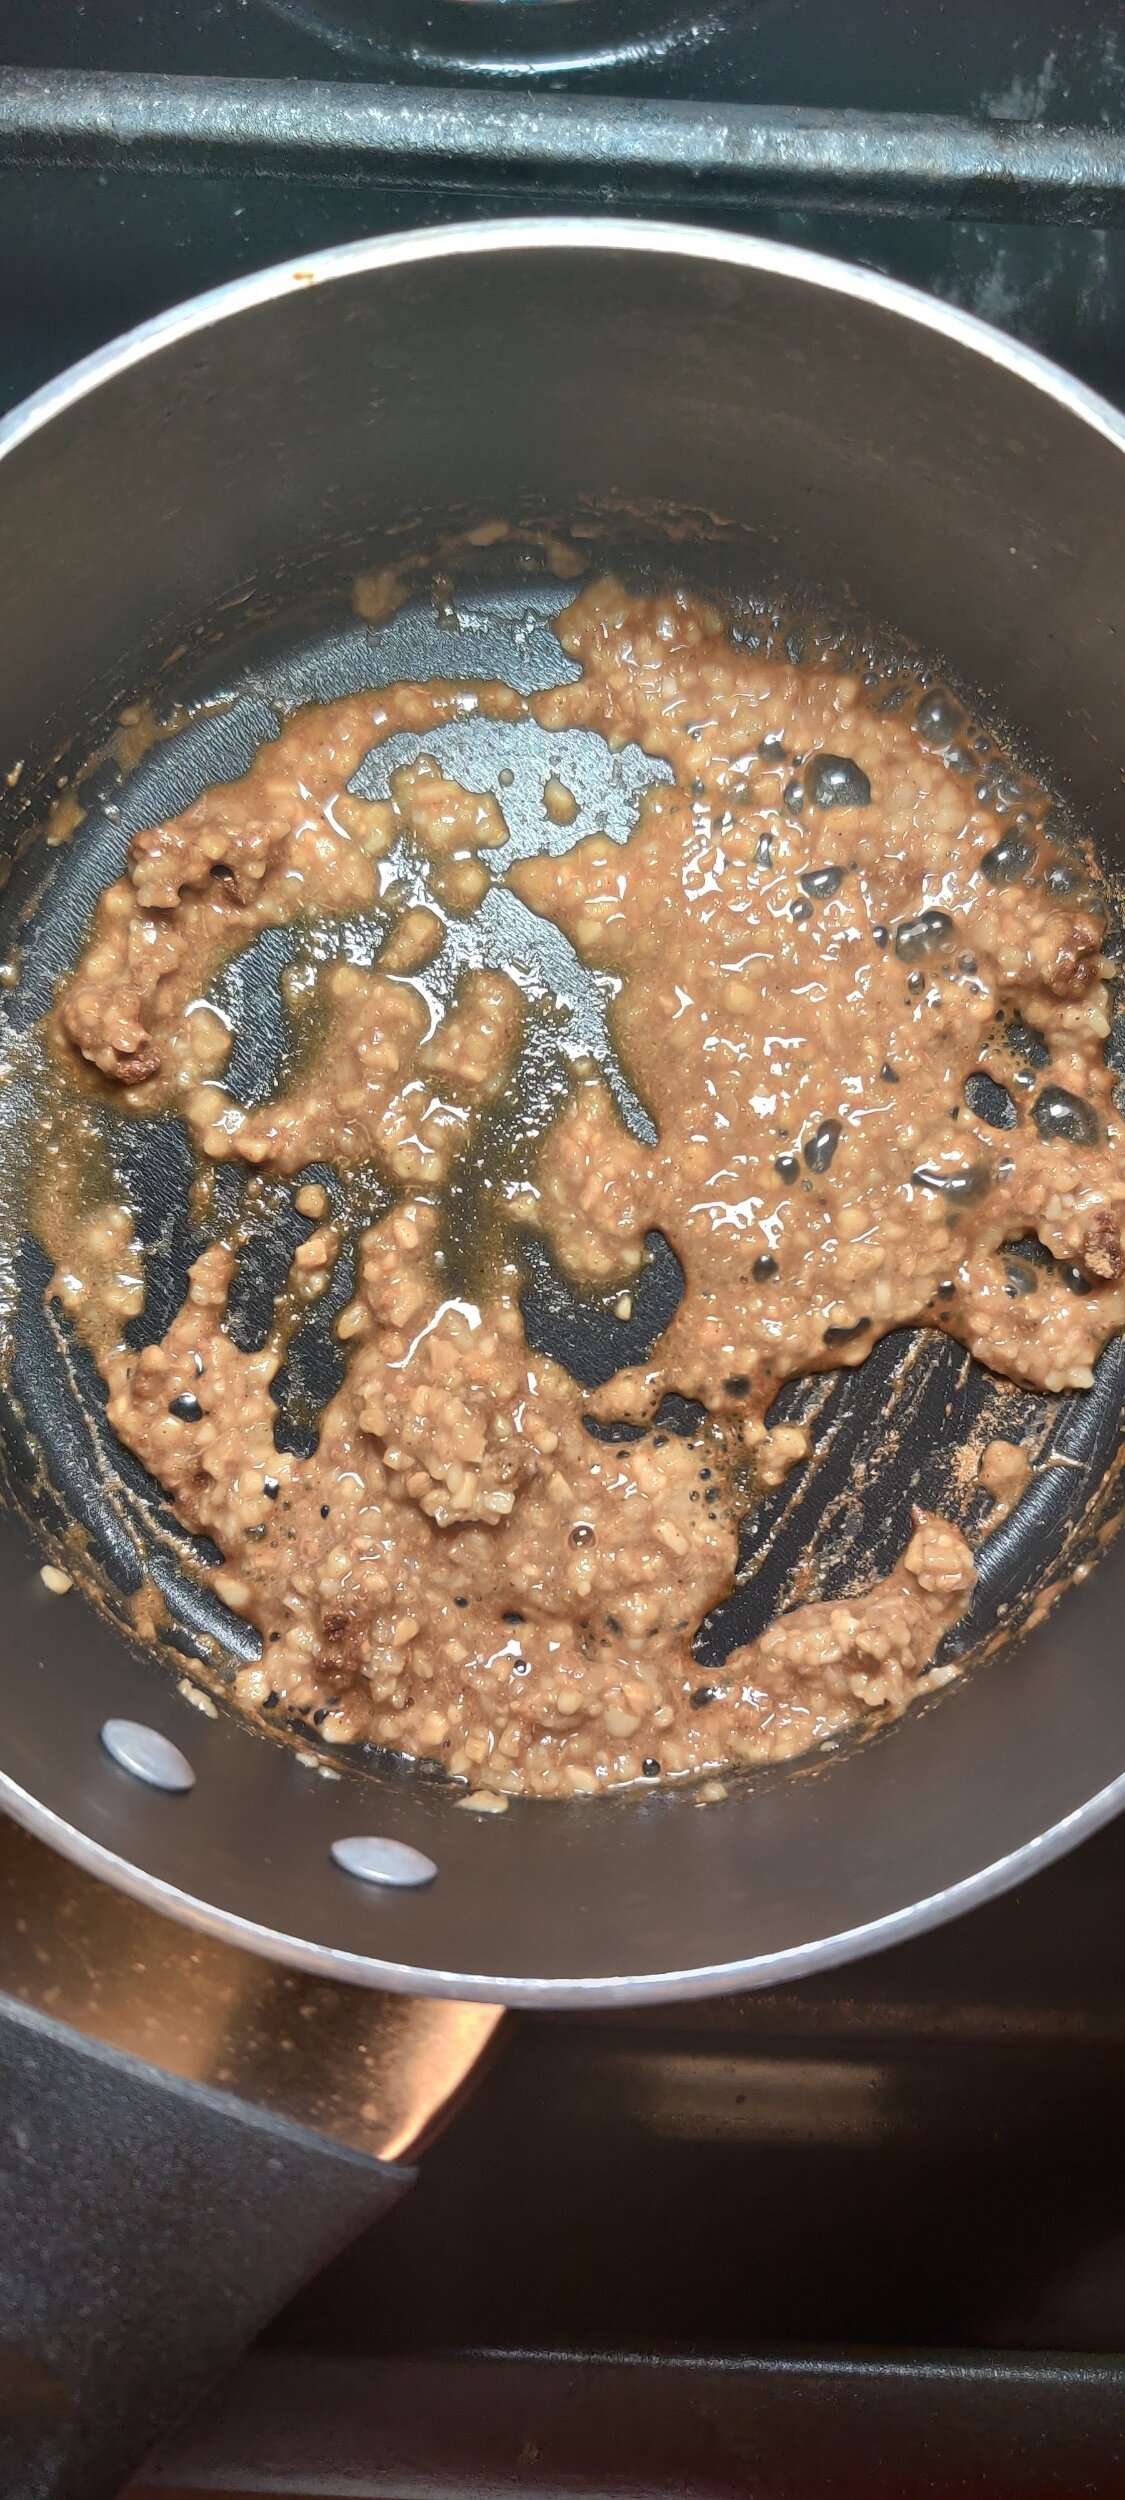
In a large pot, melt the butter with the vegetable oil. Add the onion paste and garlic and cook on medium-low heat, stirring frequently for 5 minutes. Add the spices, salt, pepper, and bouillon cubes. Simmer for an additional 5 minutes or until the onion paste looks drier and the water content is reduced.
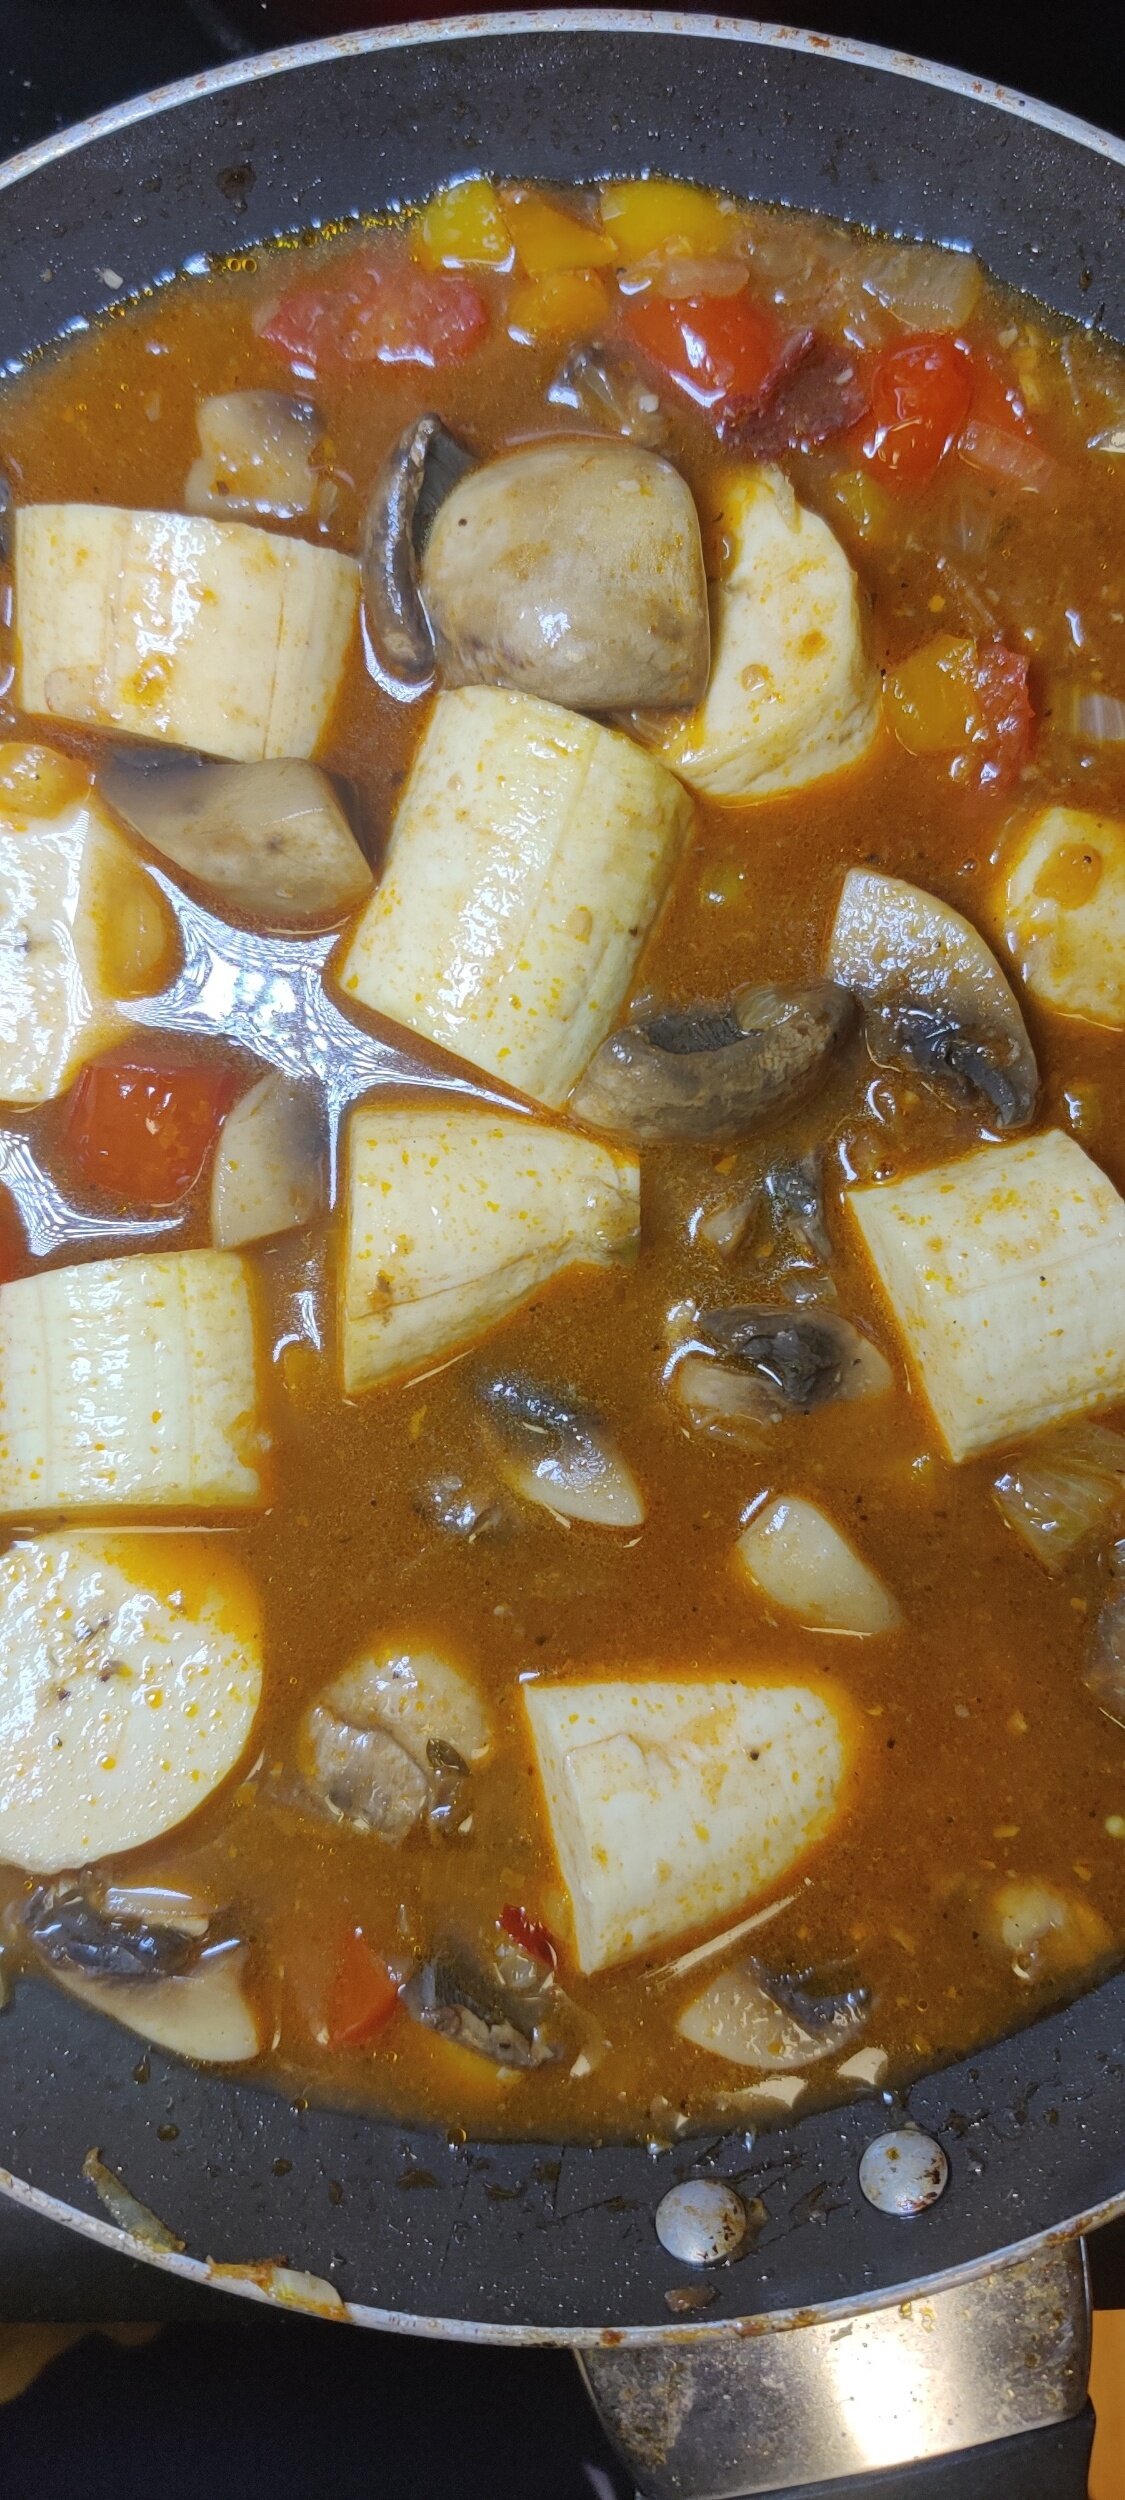
Add the tomato sauce and continue to simmer for about 15-20 minutes, stirring frequently.
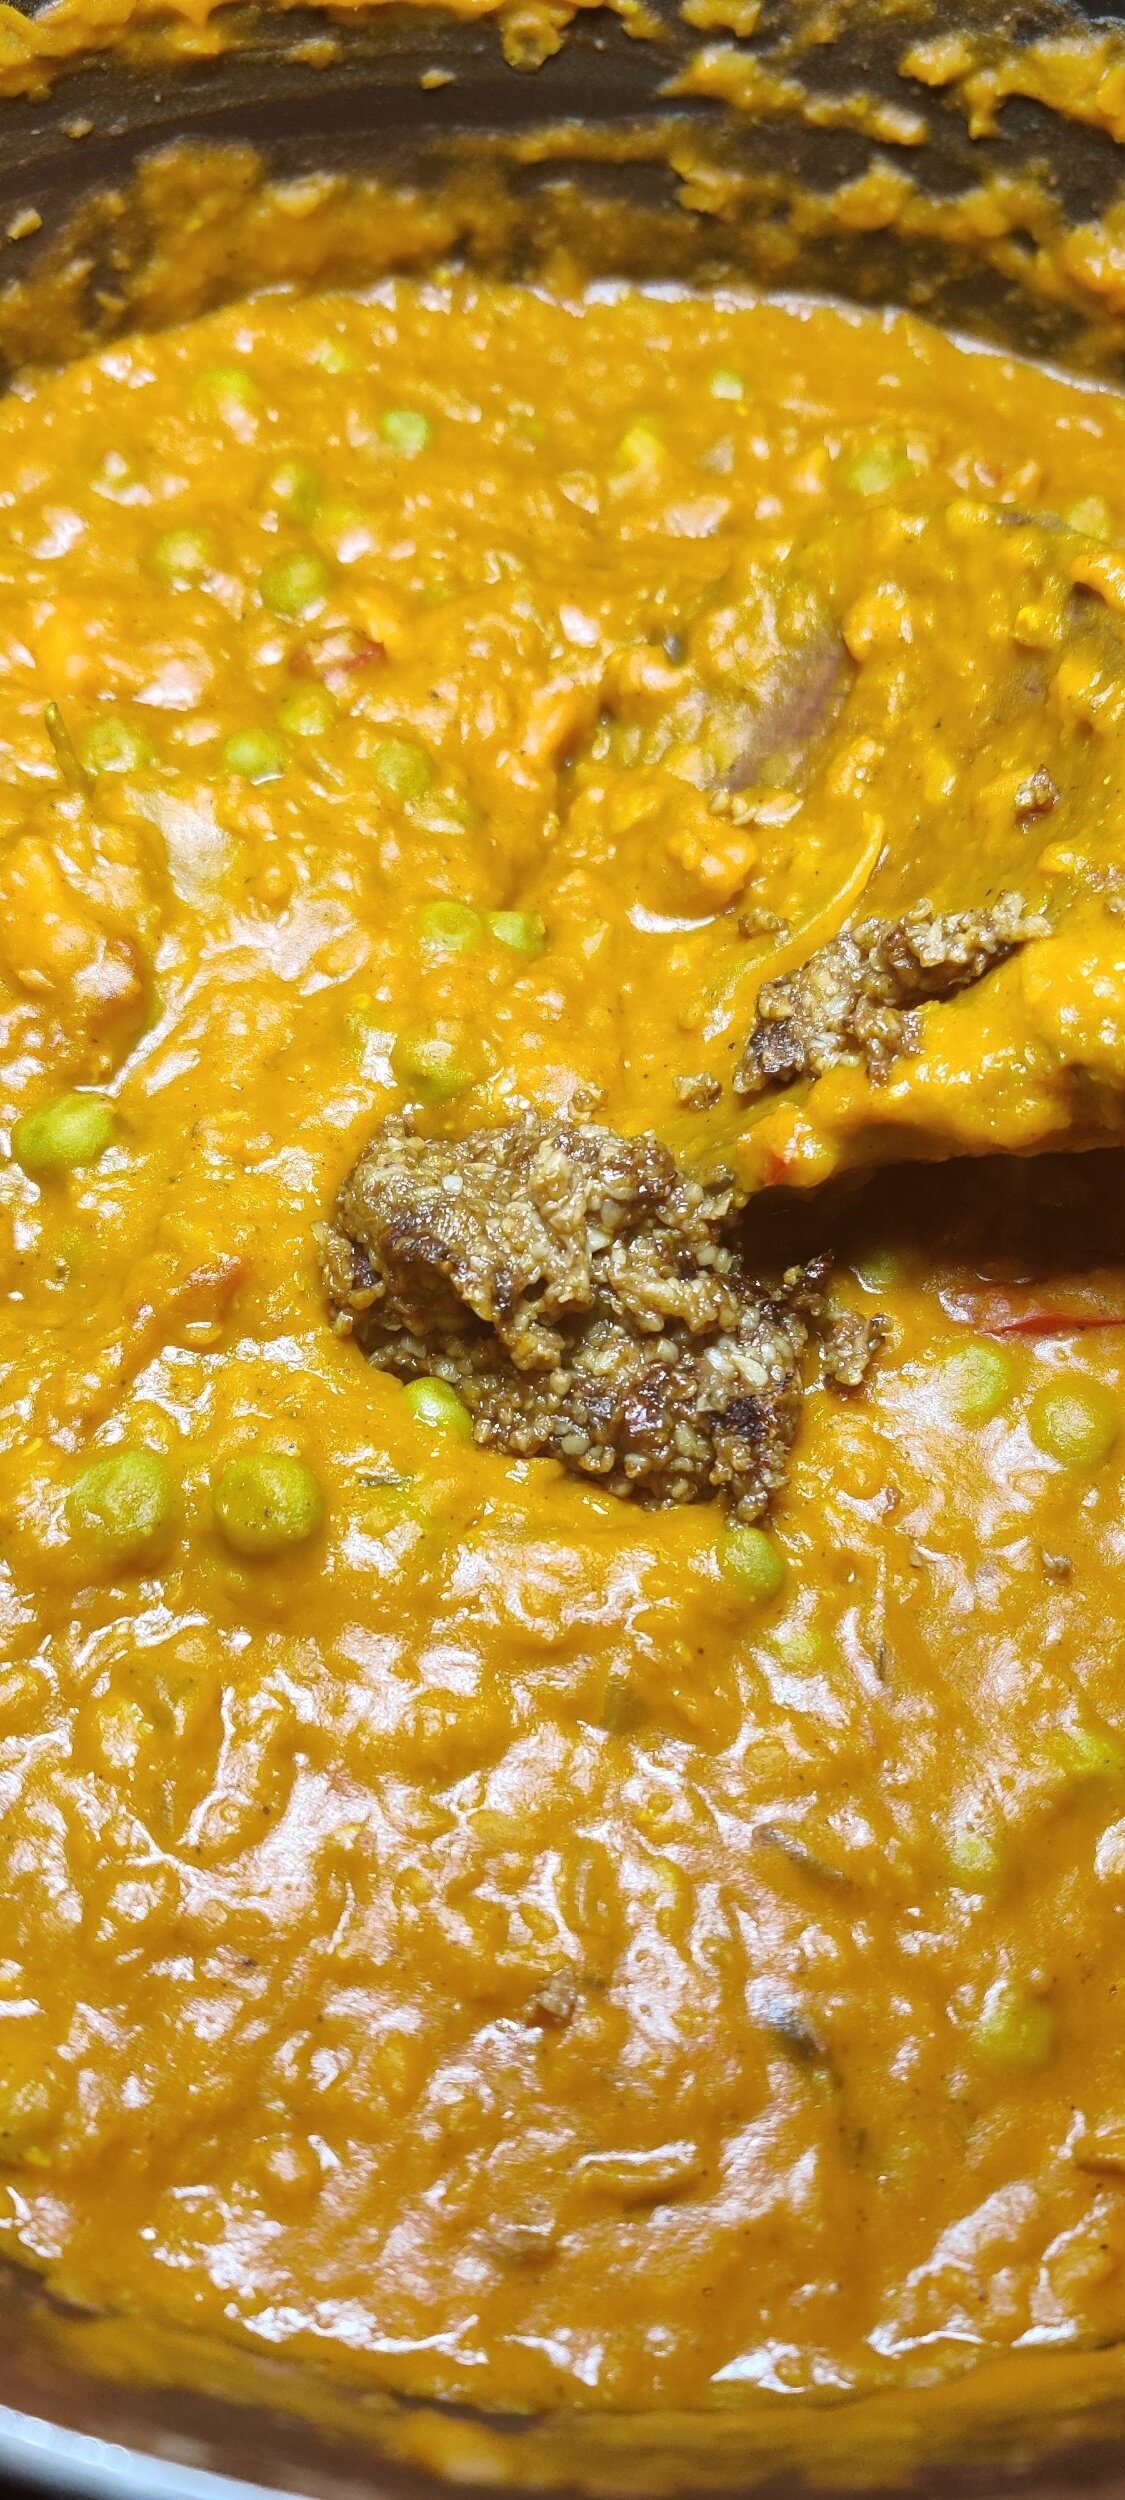
Finally, add the rice and frozen peas. Top with water, cover with foil and a lid, and steam cook for 30 minutes until the rice is done. You can check from time to time to make sure the bottom isn’t burning. Note - the foil will help to keep all the flavours in!
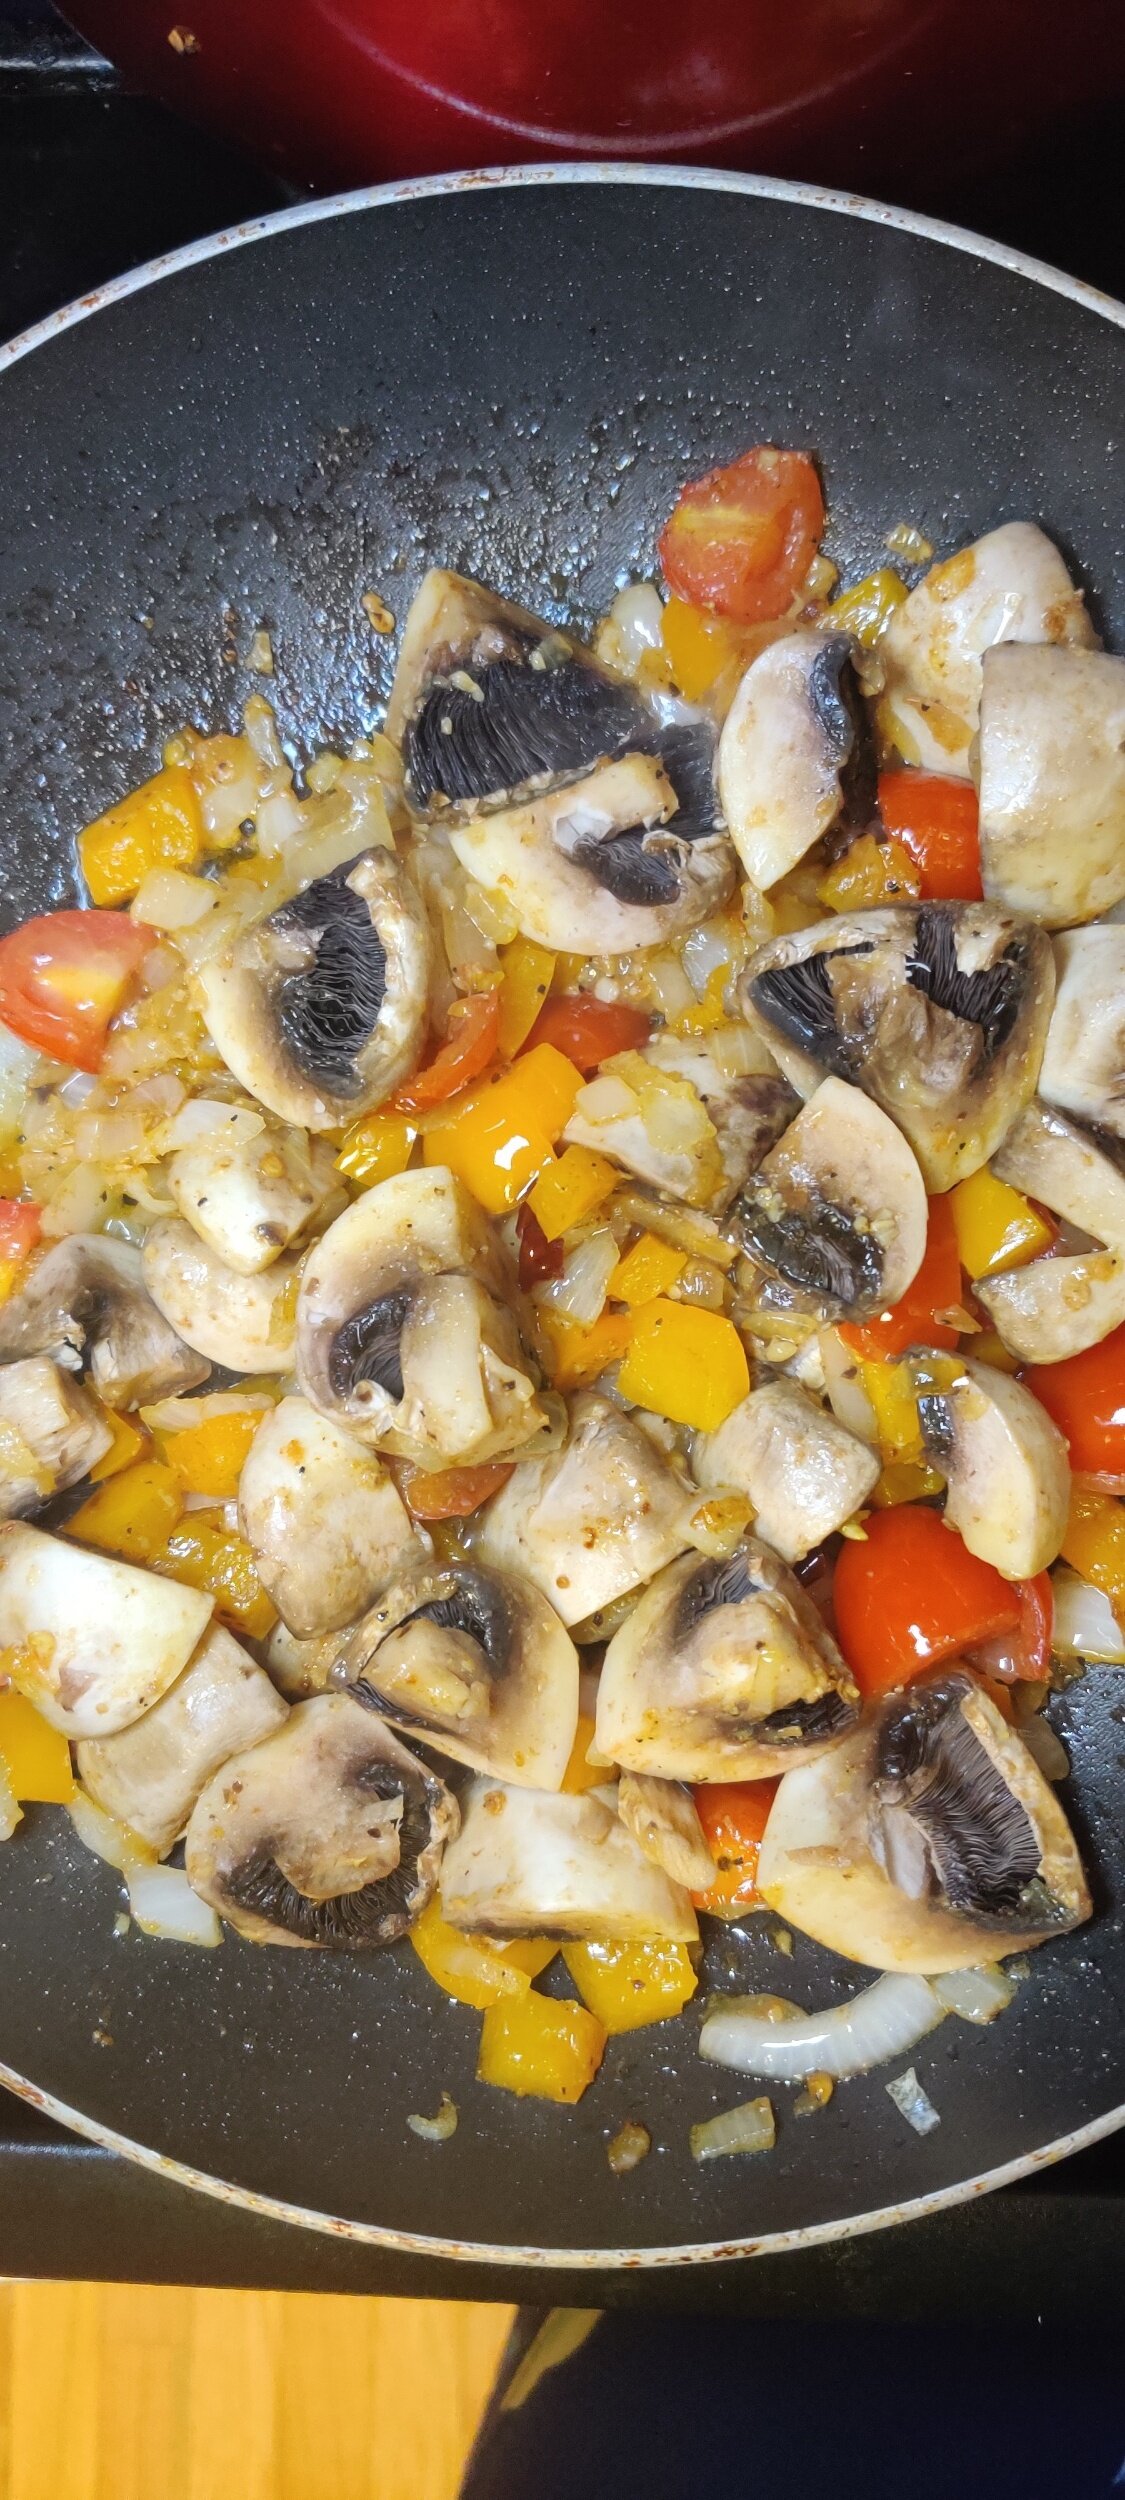
Prepare your vegetables for stuffing. Hollow out the insides carefully with a knife, and drizzle with olive oil. Dust with garlic powder, salt, pepper, then top with fresh thyme.
In a 400F oven, bake your vegetables for about 25 minutes, until they have softened (but don’t overcook).
Remove your vegetables and let them cool for about 5 minutes, then using a teaspoon scoop the rice into the tomatoes and mushrooms. Serve hot!

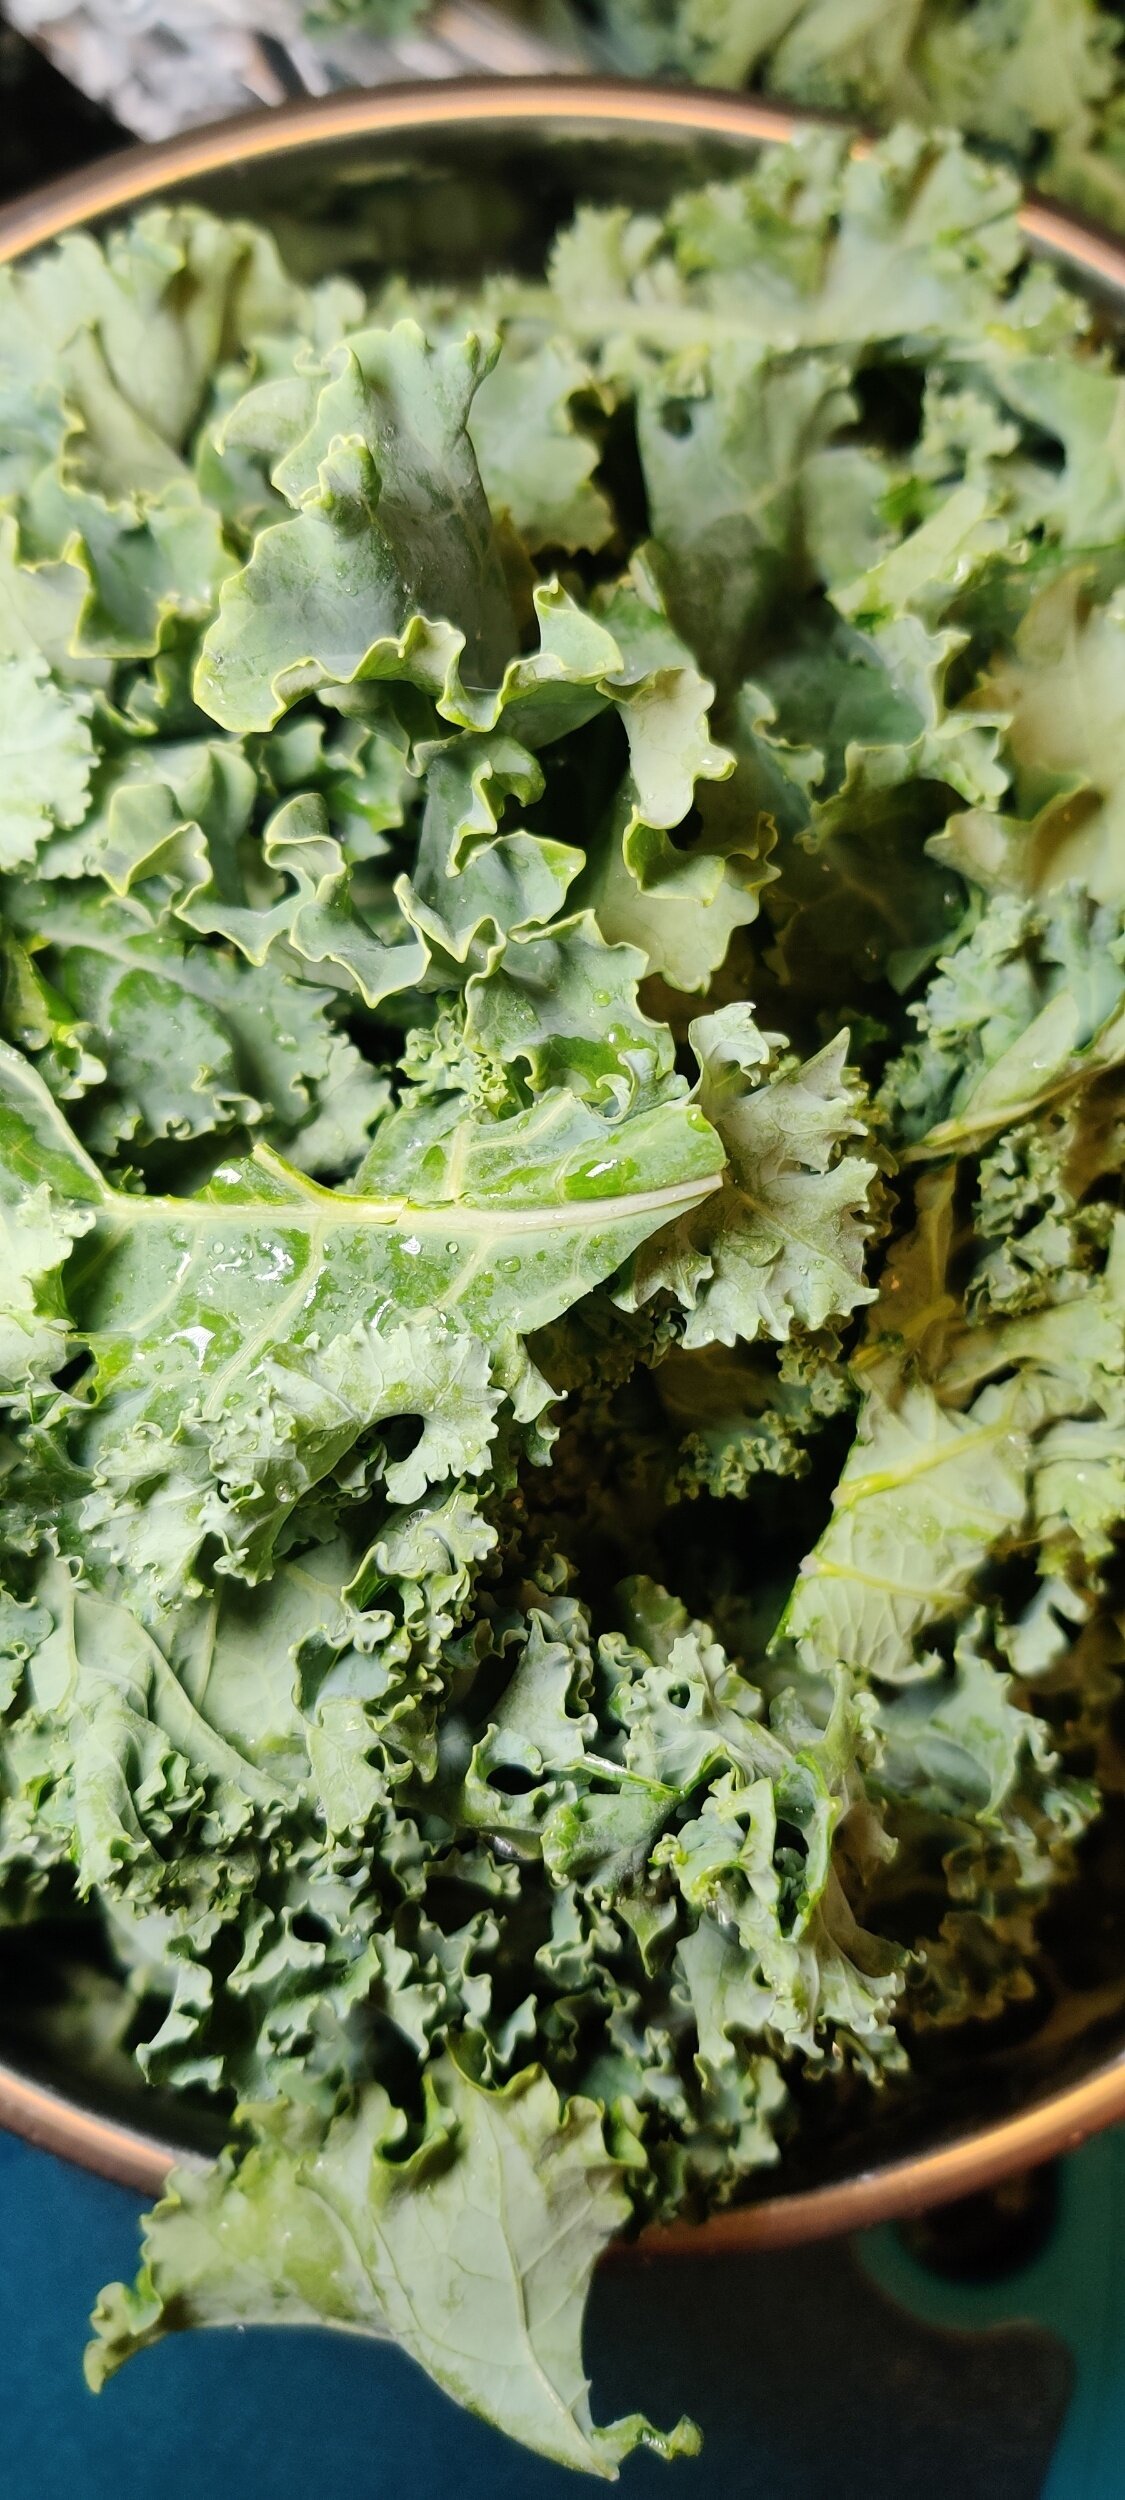
East African Mashed Kale Stew (Sukuma Wiki) with Chapati
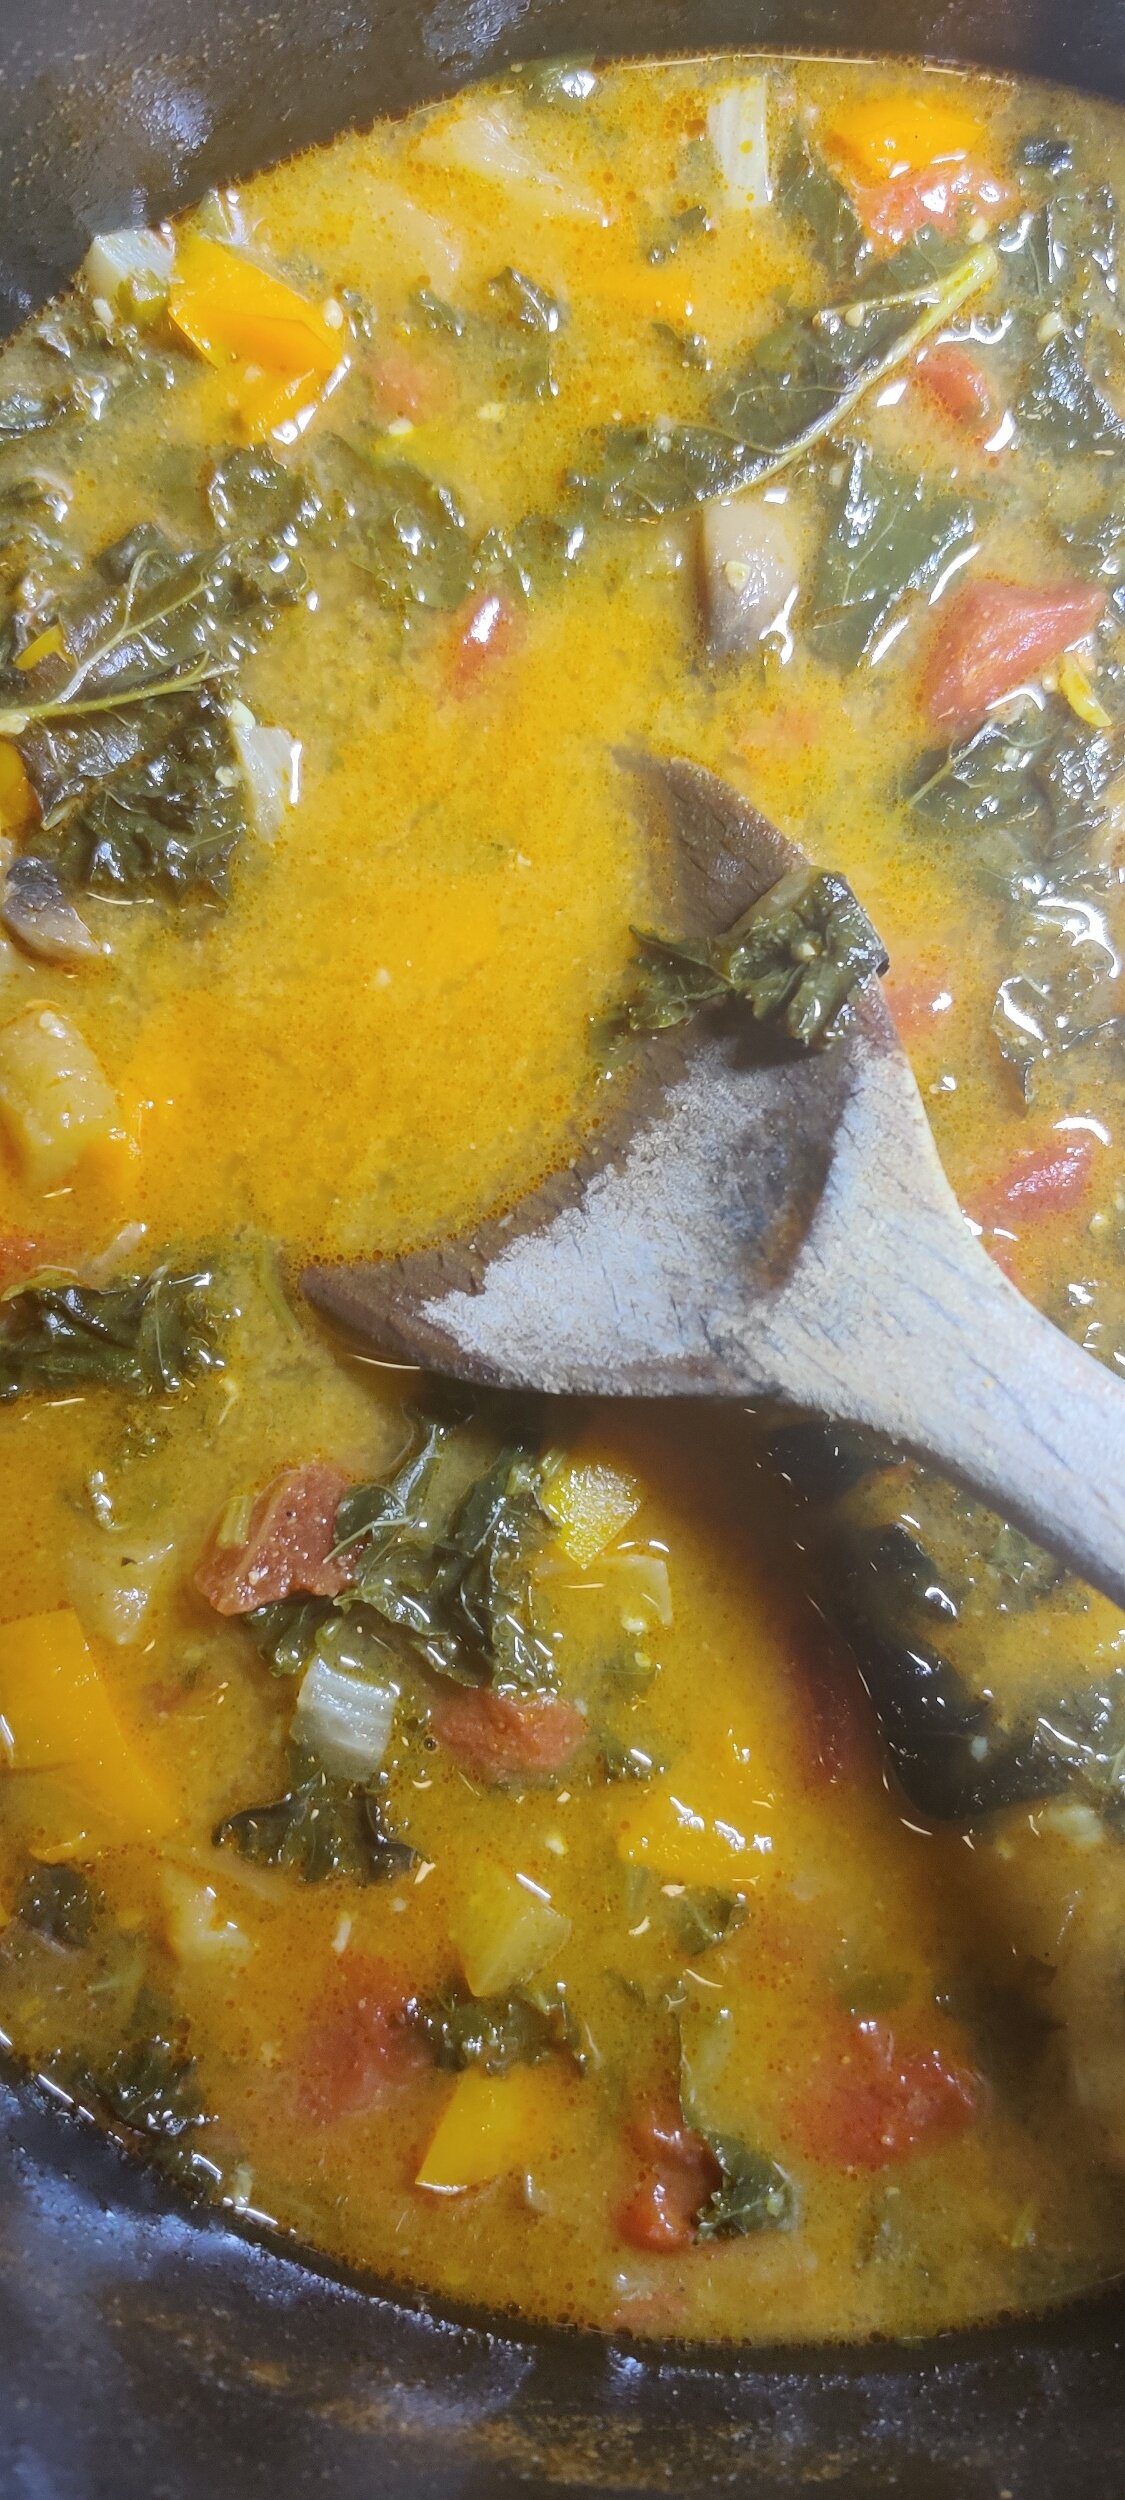
This dish is inspired by one of East Africa’s most beloved comfort foods: Sukuma Wiki, a flavorful sautéed kale or collard green dish often served with chapati or ugali. Common across countries like Kenya, Uganda, and Tanzania, Sukuma Wiki is a simple, affordable way to stretch meals, the name literally means “stretch the week” in Swahili.
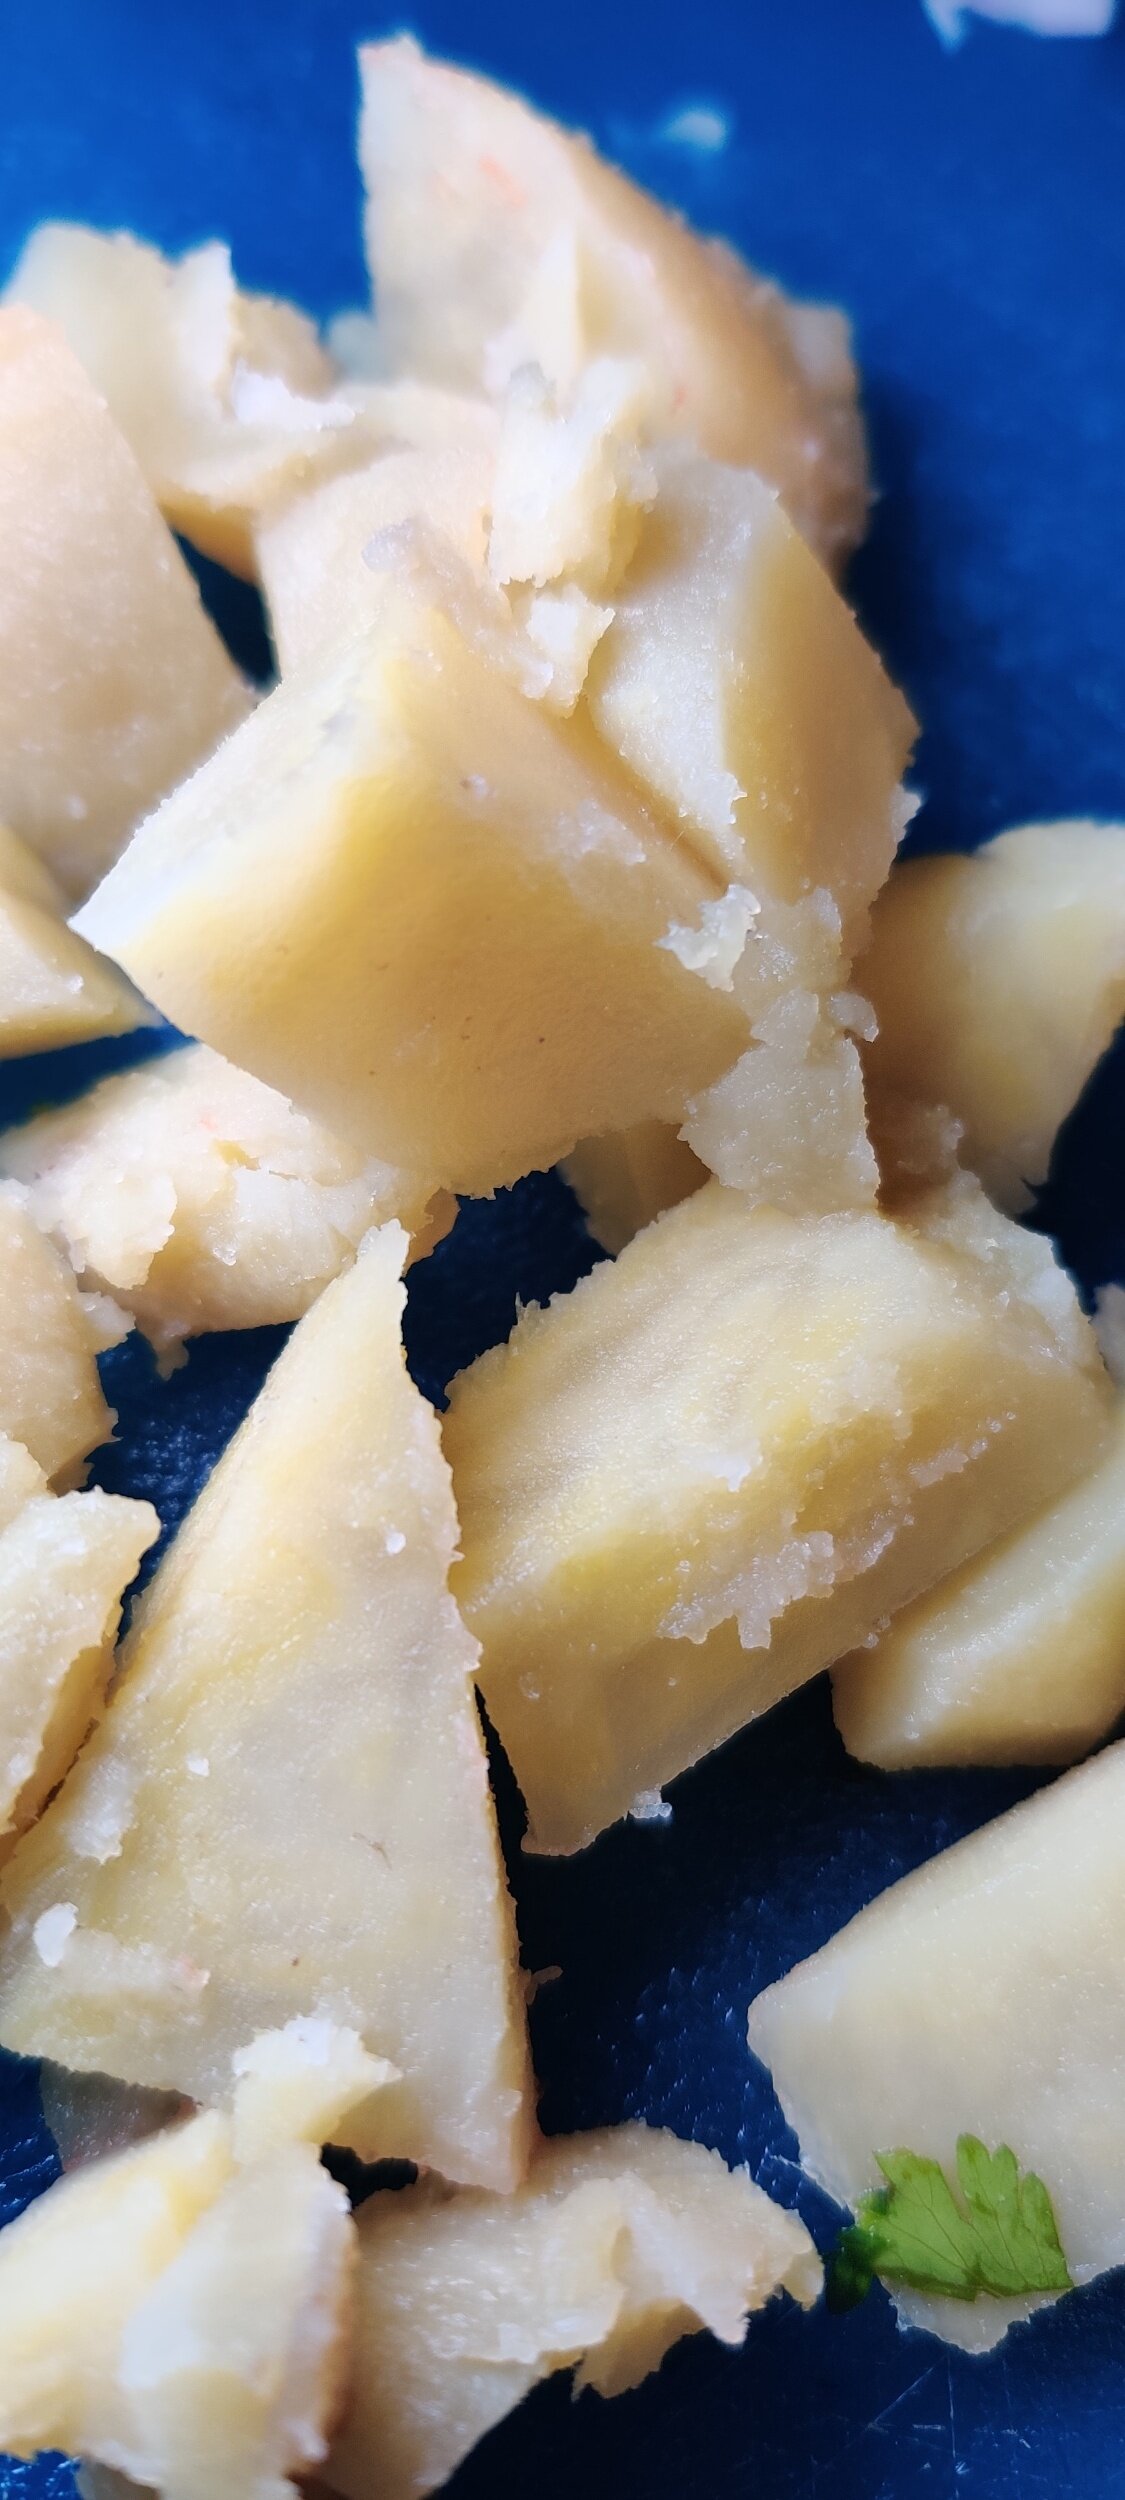
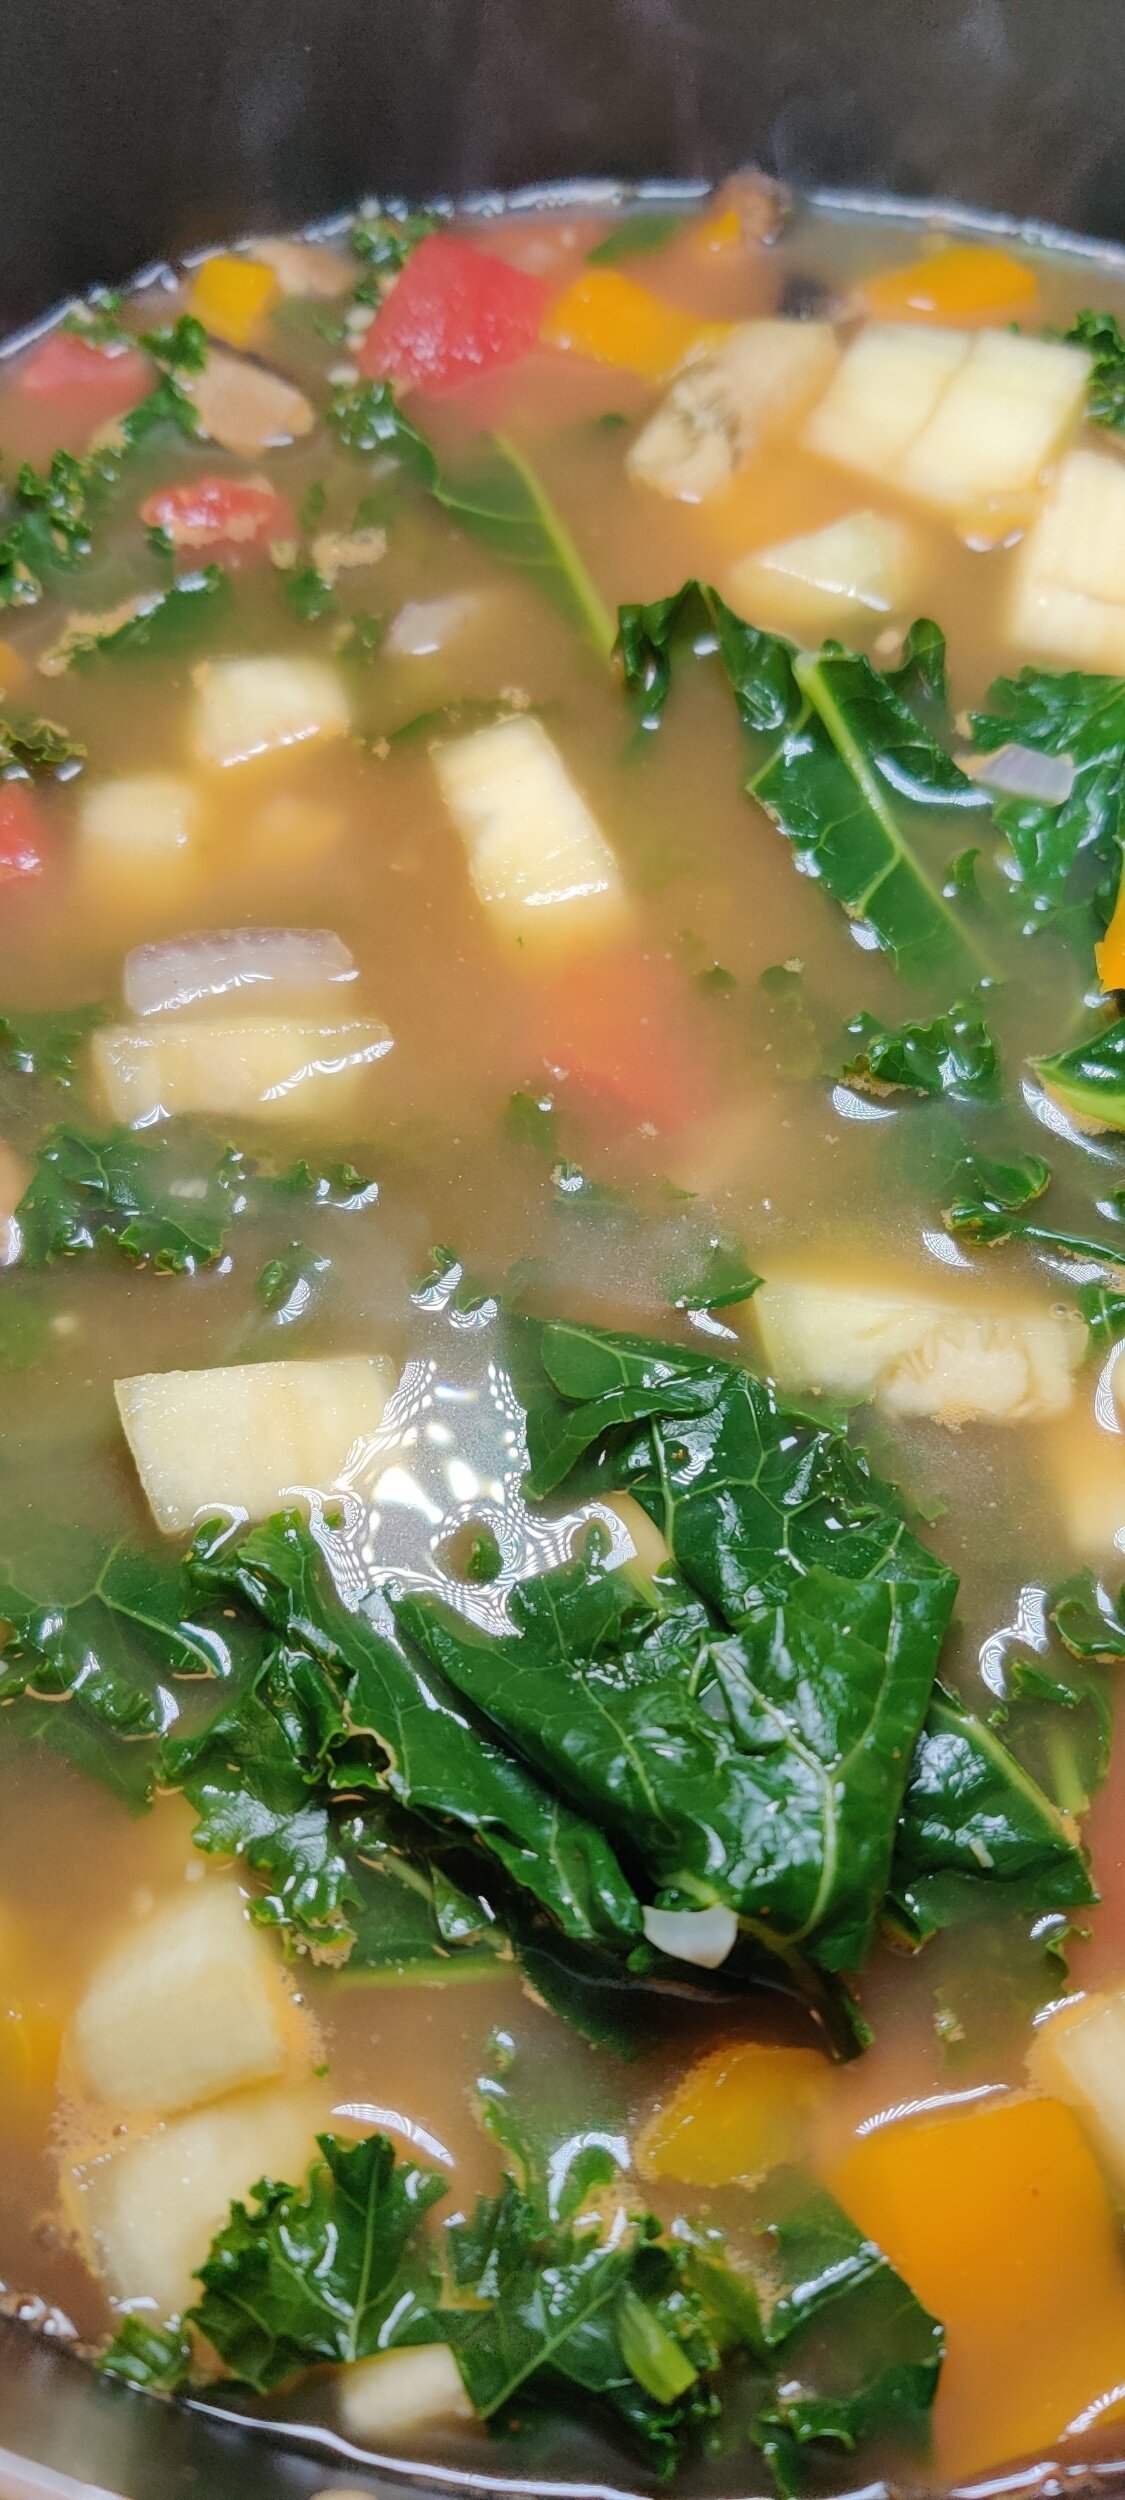
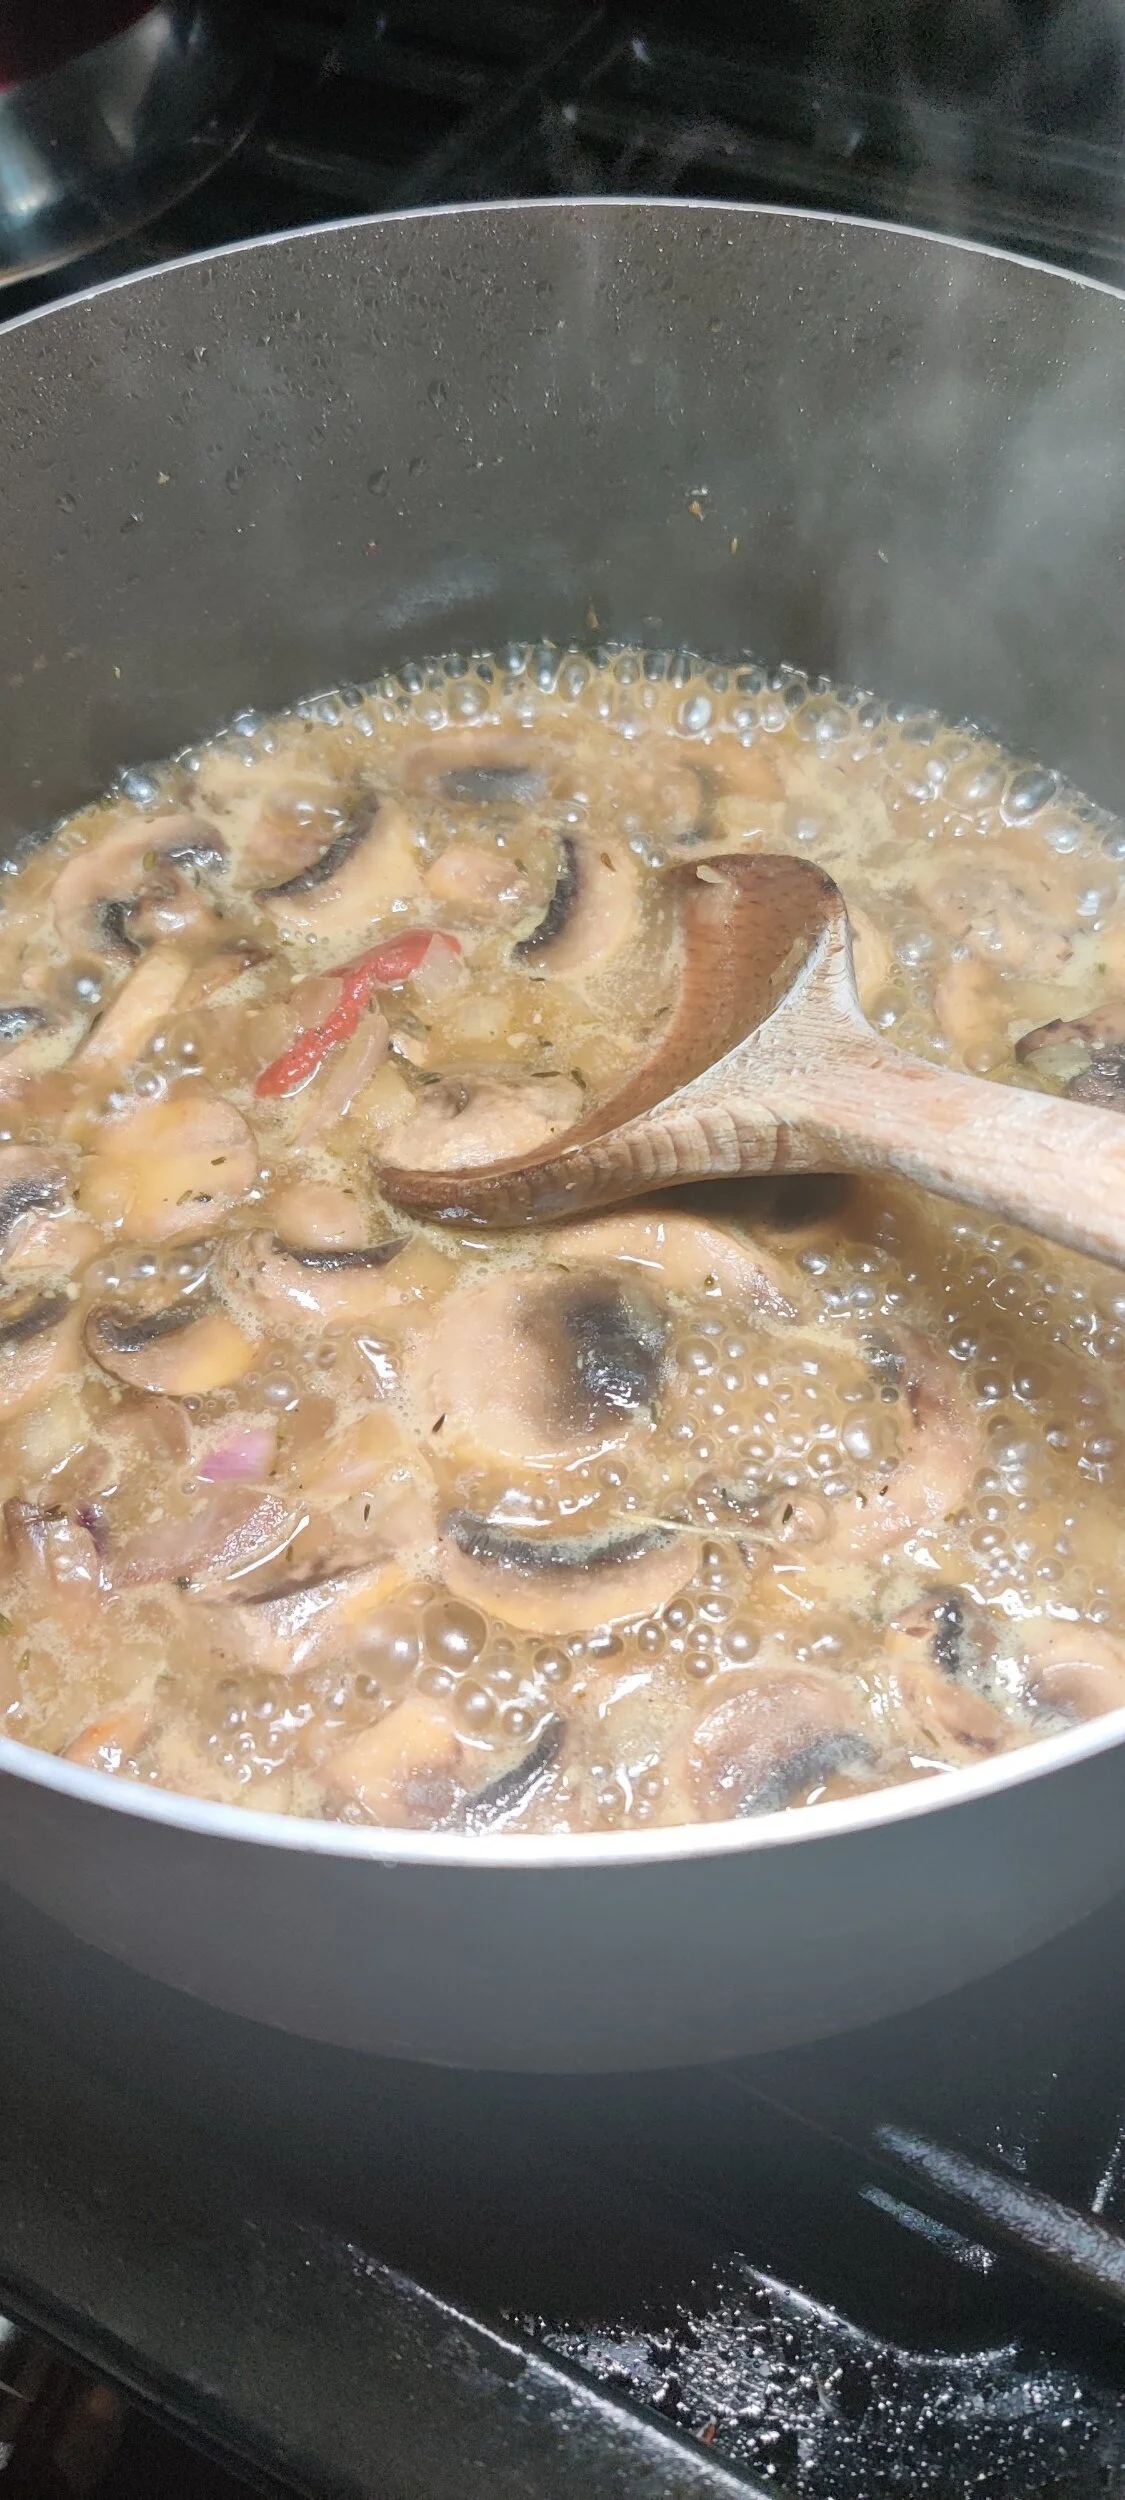
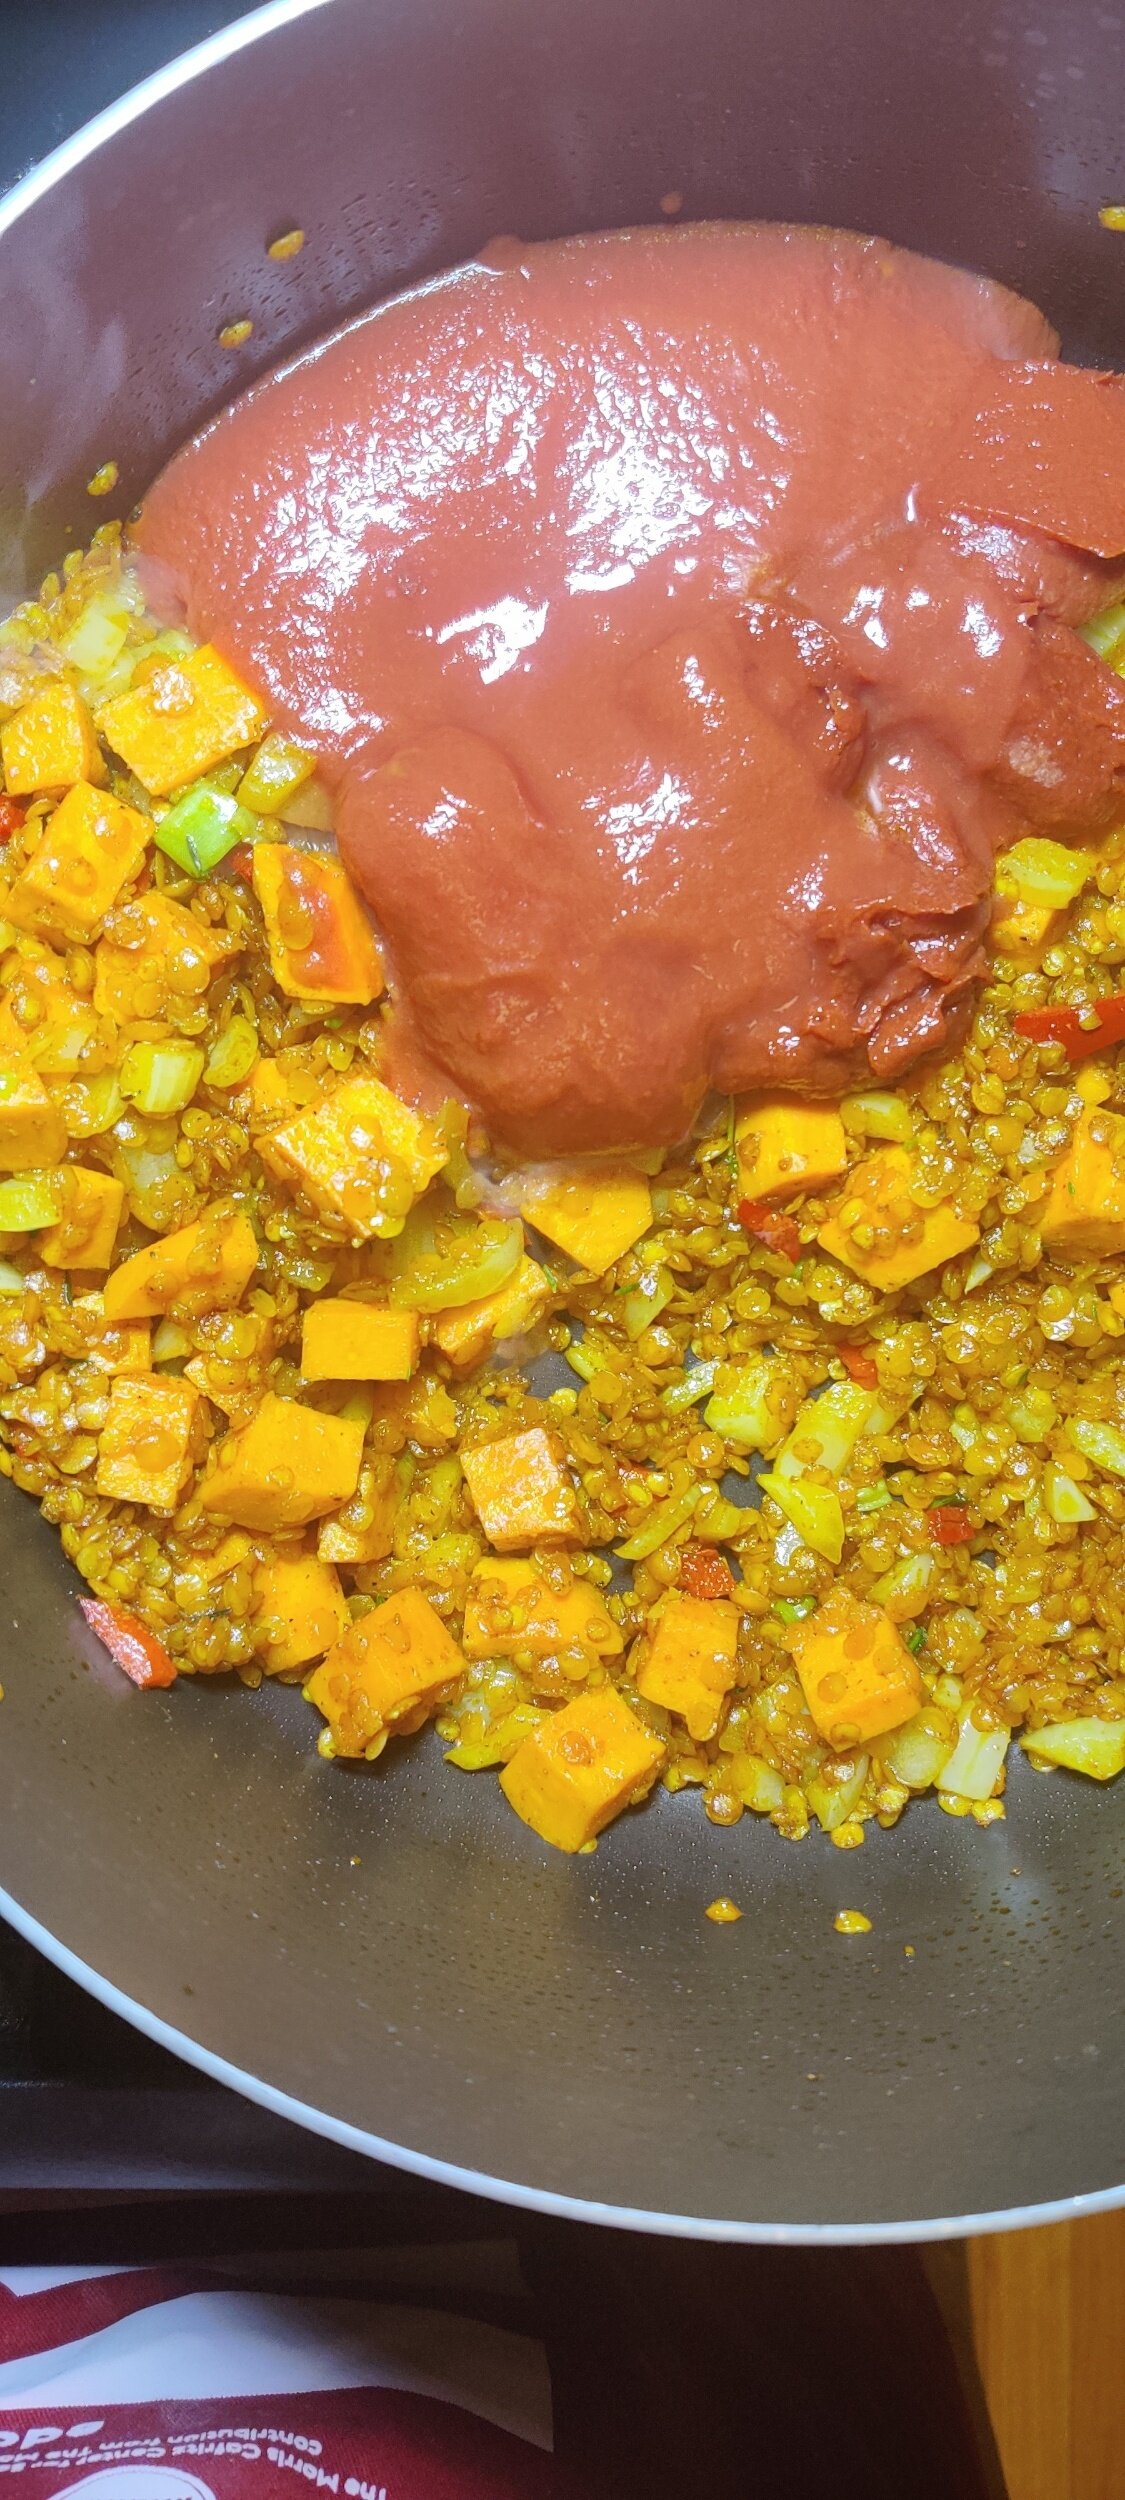
I’ve taken that foundation and turned it into a heartier, stew-like version by adding peanut butter, yam, mushrooms, and eggplant for extra richness. This version leans into bold spices and a creamy texture, making it filling enough to enjoy as a main dish.
While this stew draws heavily from Sukuma Wiki, I was also inspired by other traditions across the continent. In Zimbabwe, pumpkin leaves (muboora) are cooked with peanut butter to create a deeply savory side or main. They’re often overlooked, but when cooked right, they're just as good as kale or collard greens. Since I’m currently in the United States, I’ve used kale (muriwo) as a substitute, it’s readily available and holds up beautifully in stews.
In Rwanda, a dish called isombe uses ground cassava leaves stewed in a similar way, often served with plantains and, of course, chapati, my favorite flatbread of all time.
I’ve paired this stew with East African chapati, which is soft, flaky, and layered. It’s made differently from Indian chapati, using a coiled rolling technique that creates those signature flaky layers. You can find my chapati recipe [here] if you’d like to make it from scratch.
This dish is warm, deeply nourishing, and full of flavor. It’s a beautiful mix of traditions and ingredients that come together to celebrate African cooking in a way that’s comforting and easy to recreate at home.
 with Chapati")
East African Mashed Kale Stew (Sukuma Wiki) with Chapati
A hearty, comforting East African-inspired kale stew packed with vegetables, spices, and richness from peanut butter. Serve with chapati for a complete meal.
Ingredients
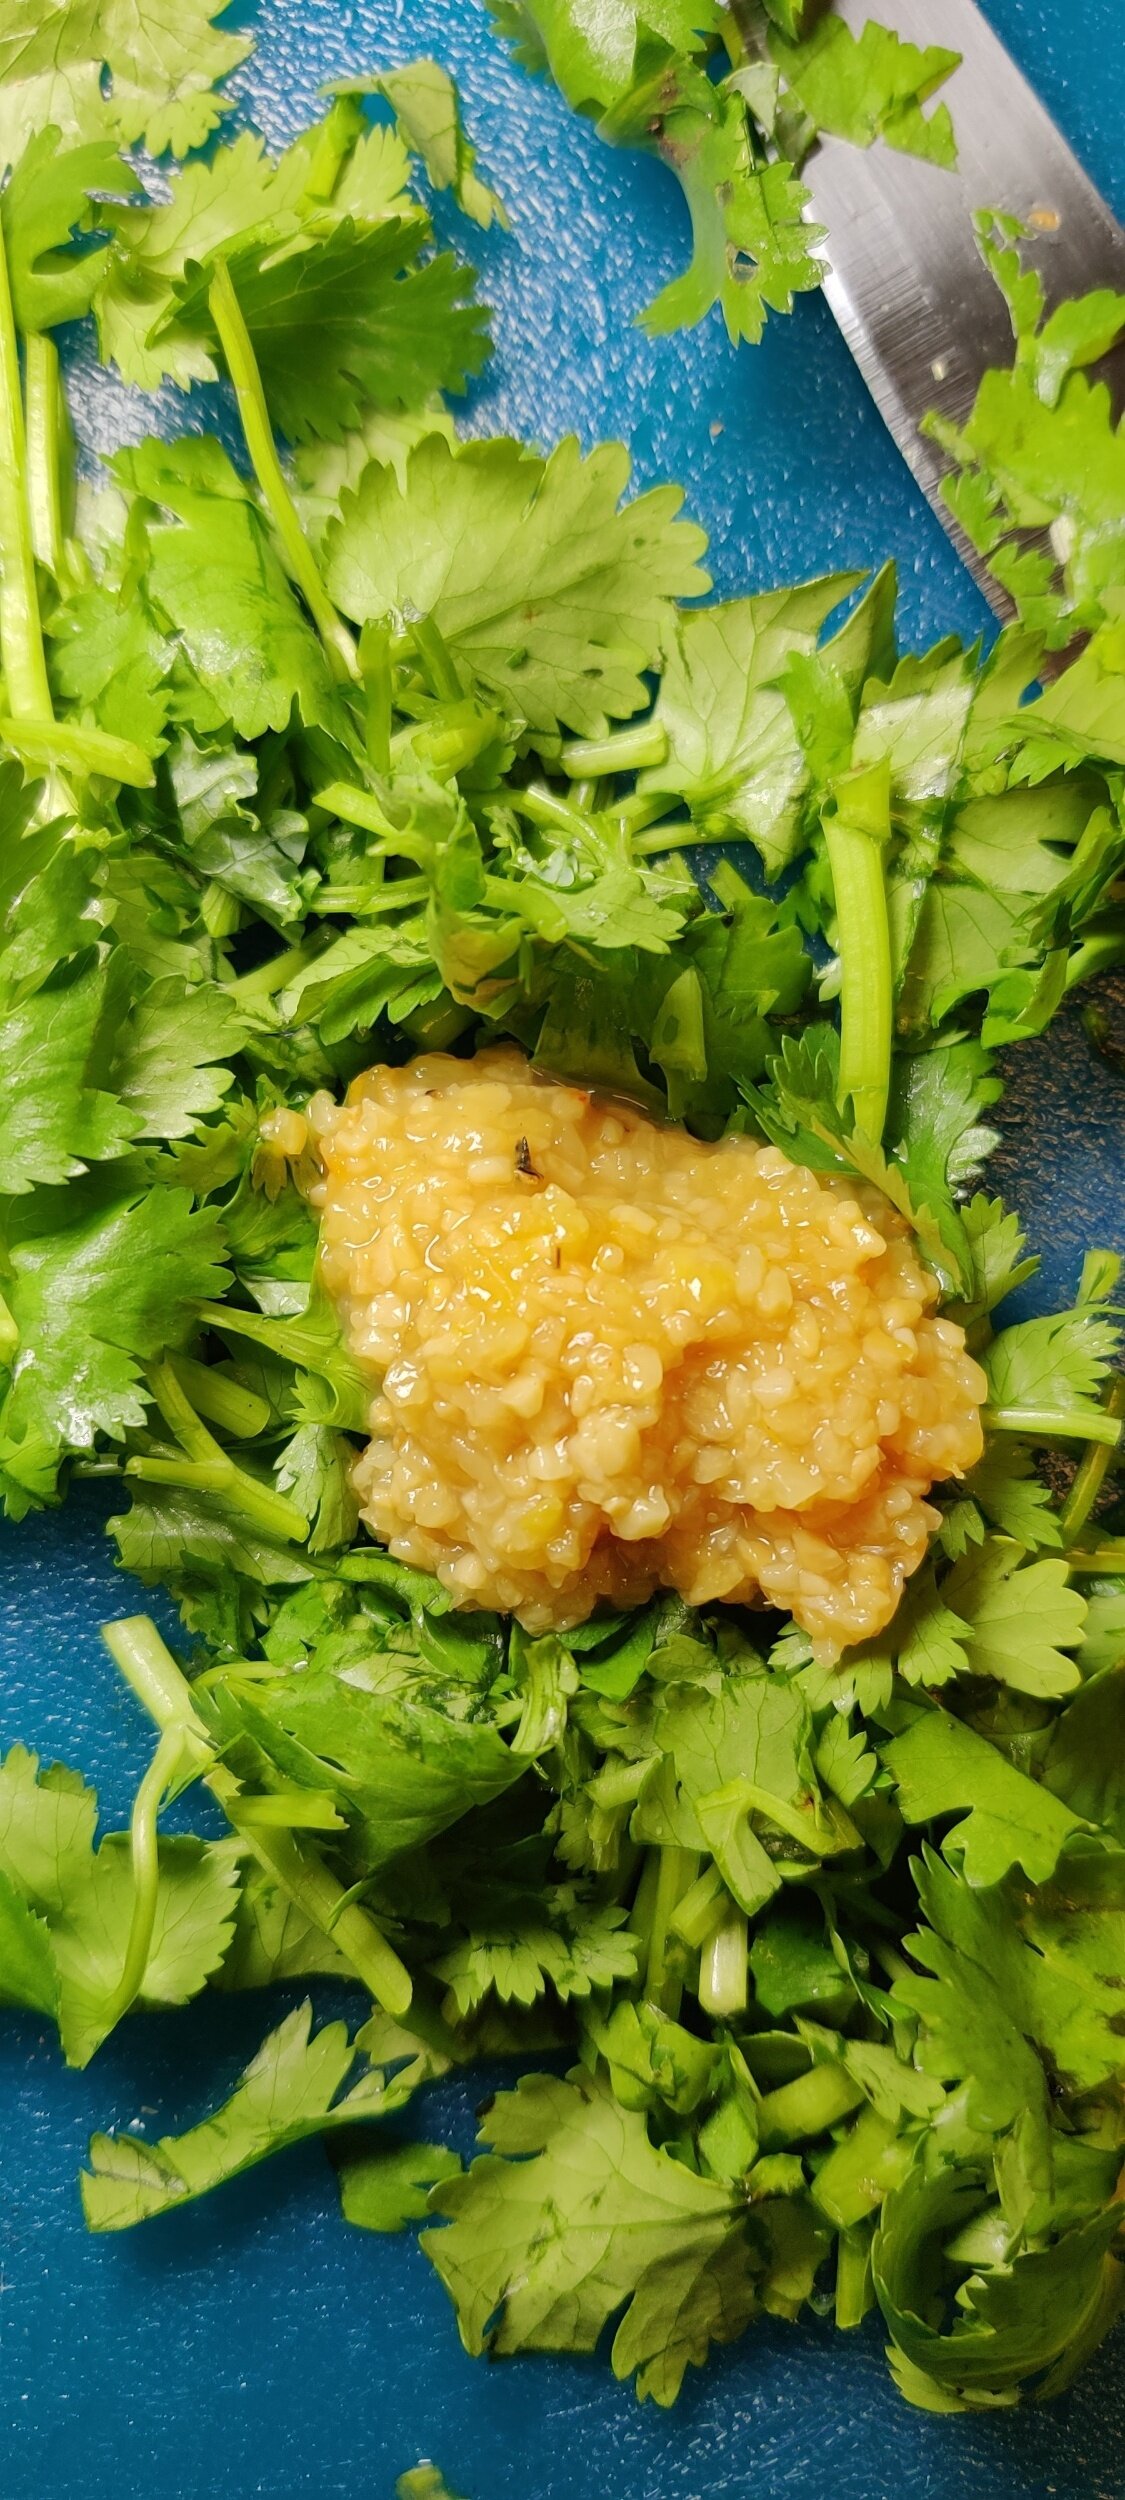
- 1 pound kale, chopped
- 2 tablespoons garlic, minced
- ¼ cup fresh parsley, chopped
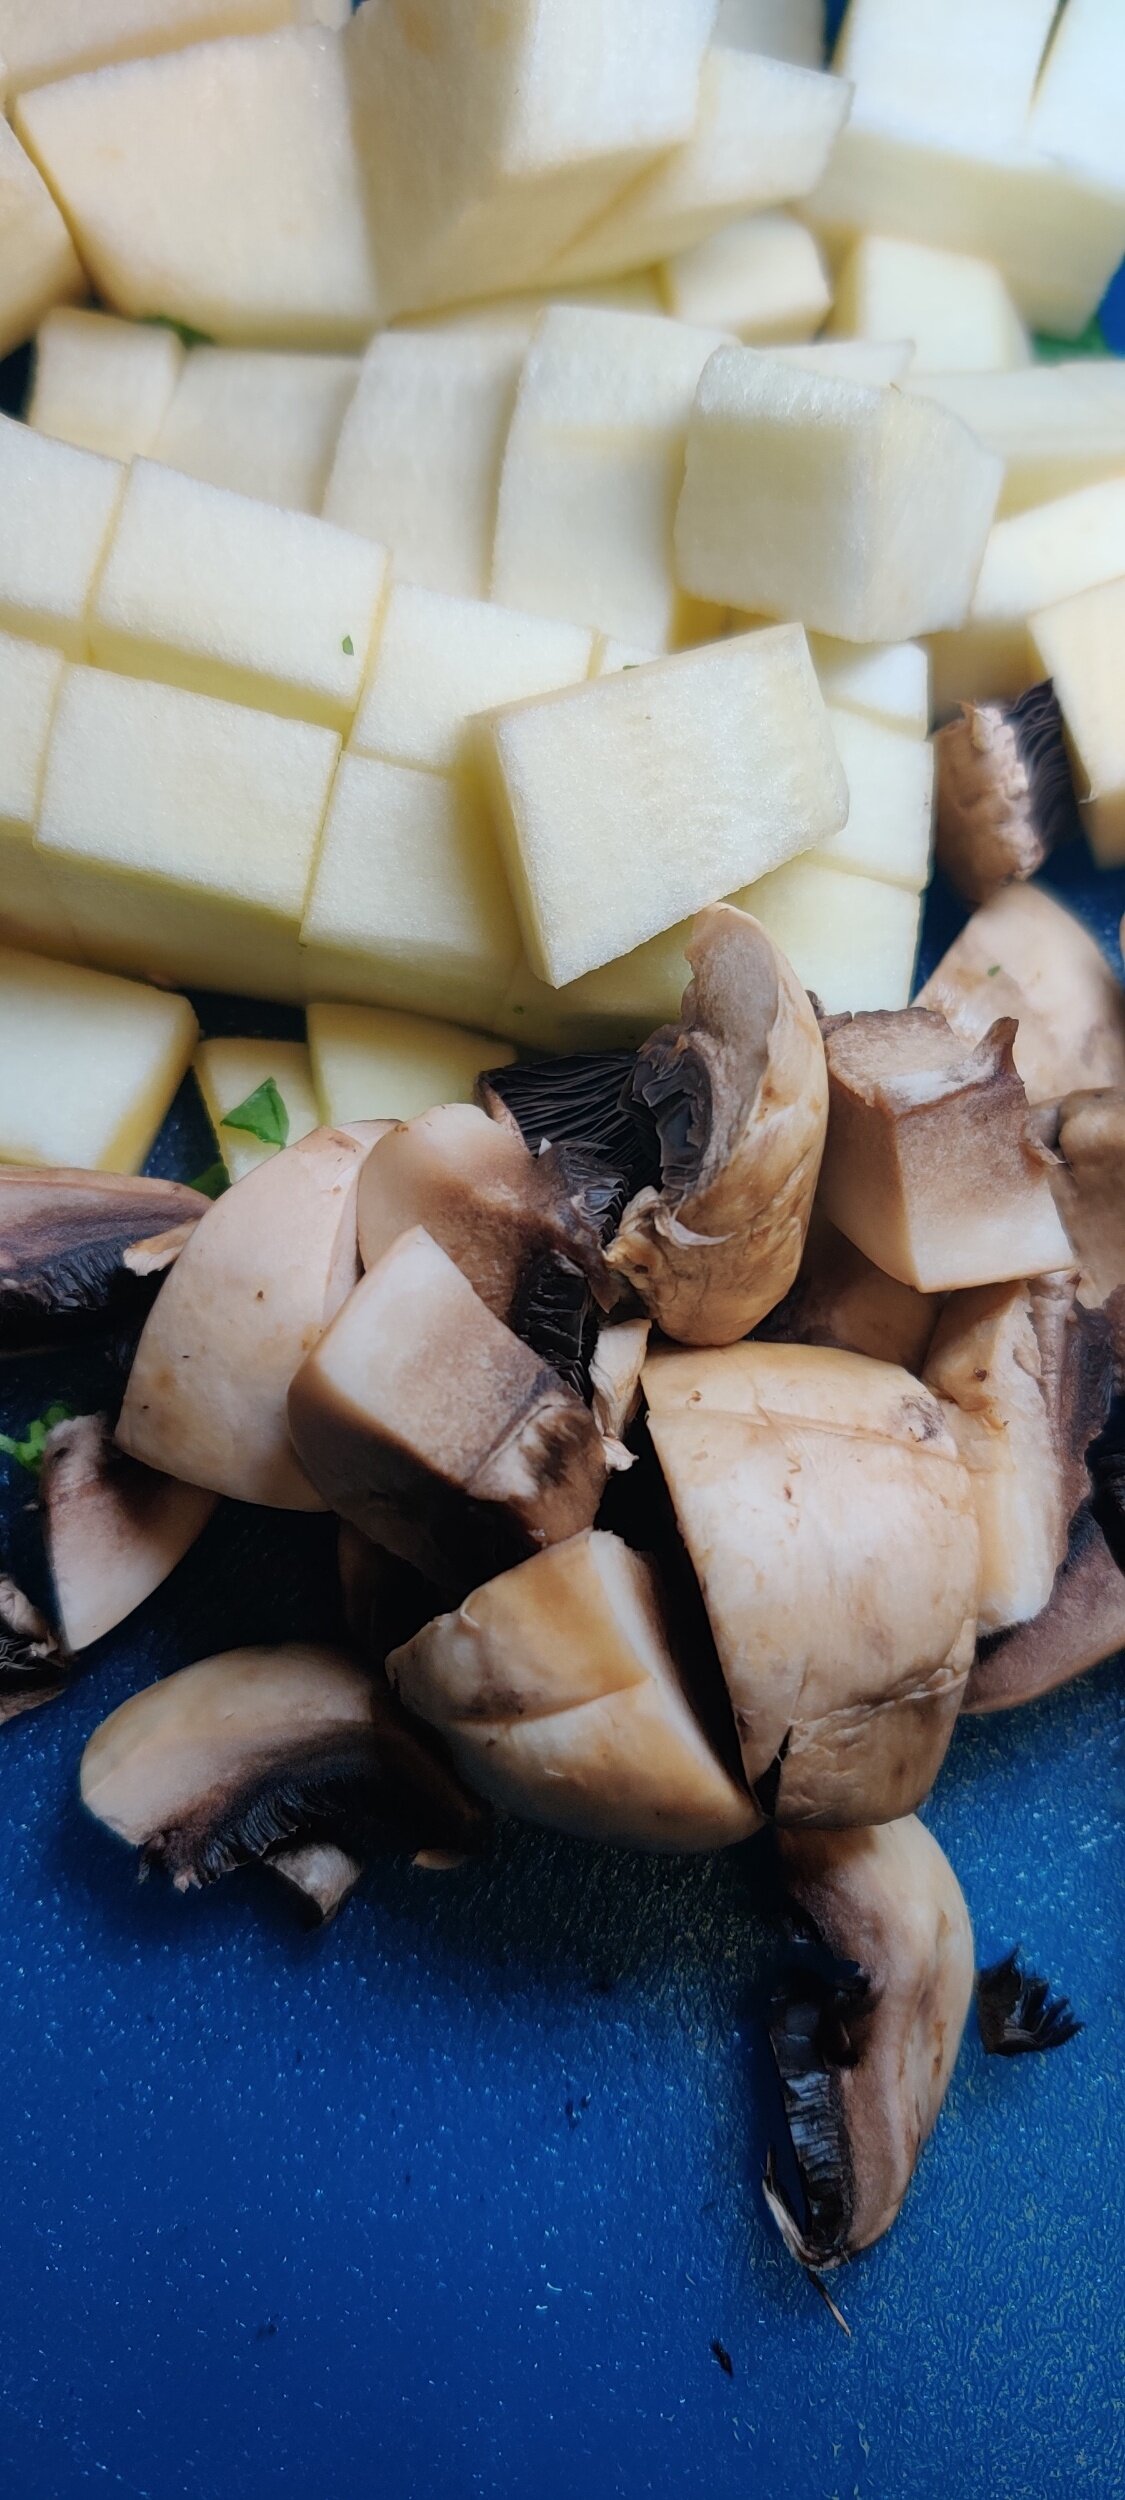
- ½ large eggplant, chopped
- ½ cup mushrooms, chopped
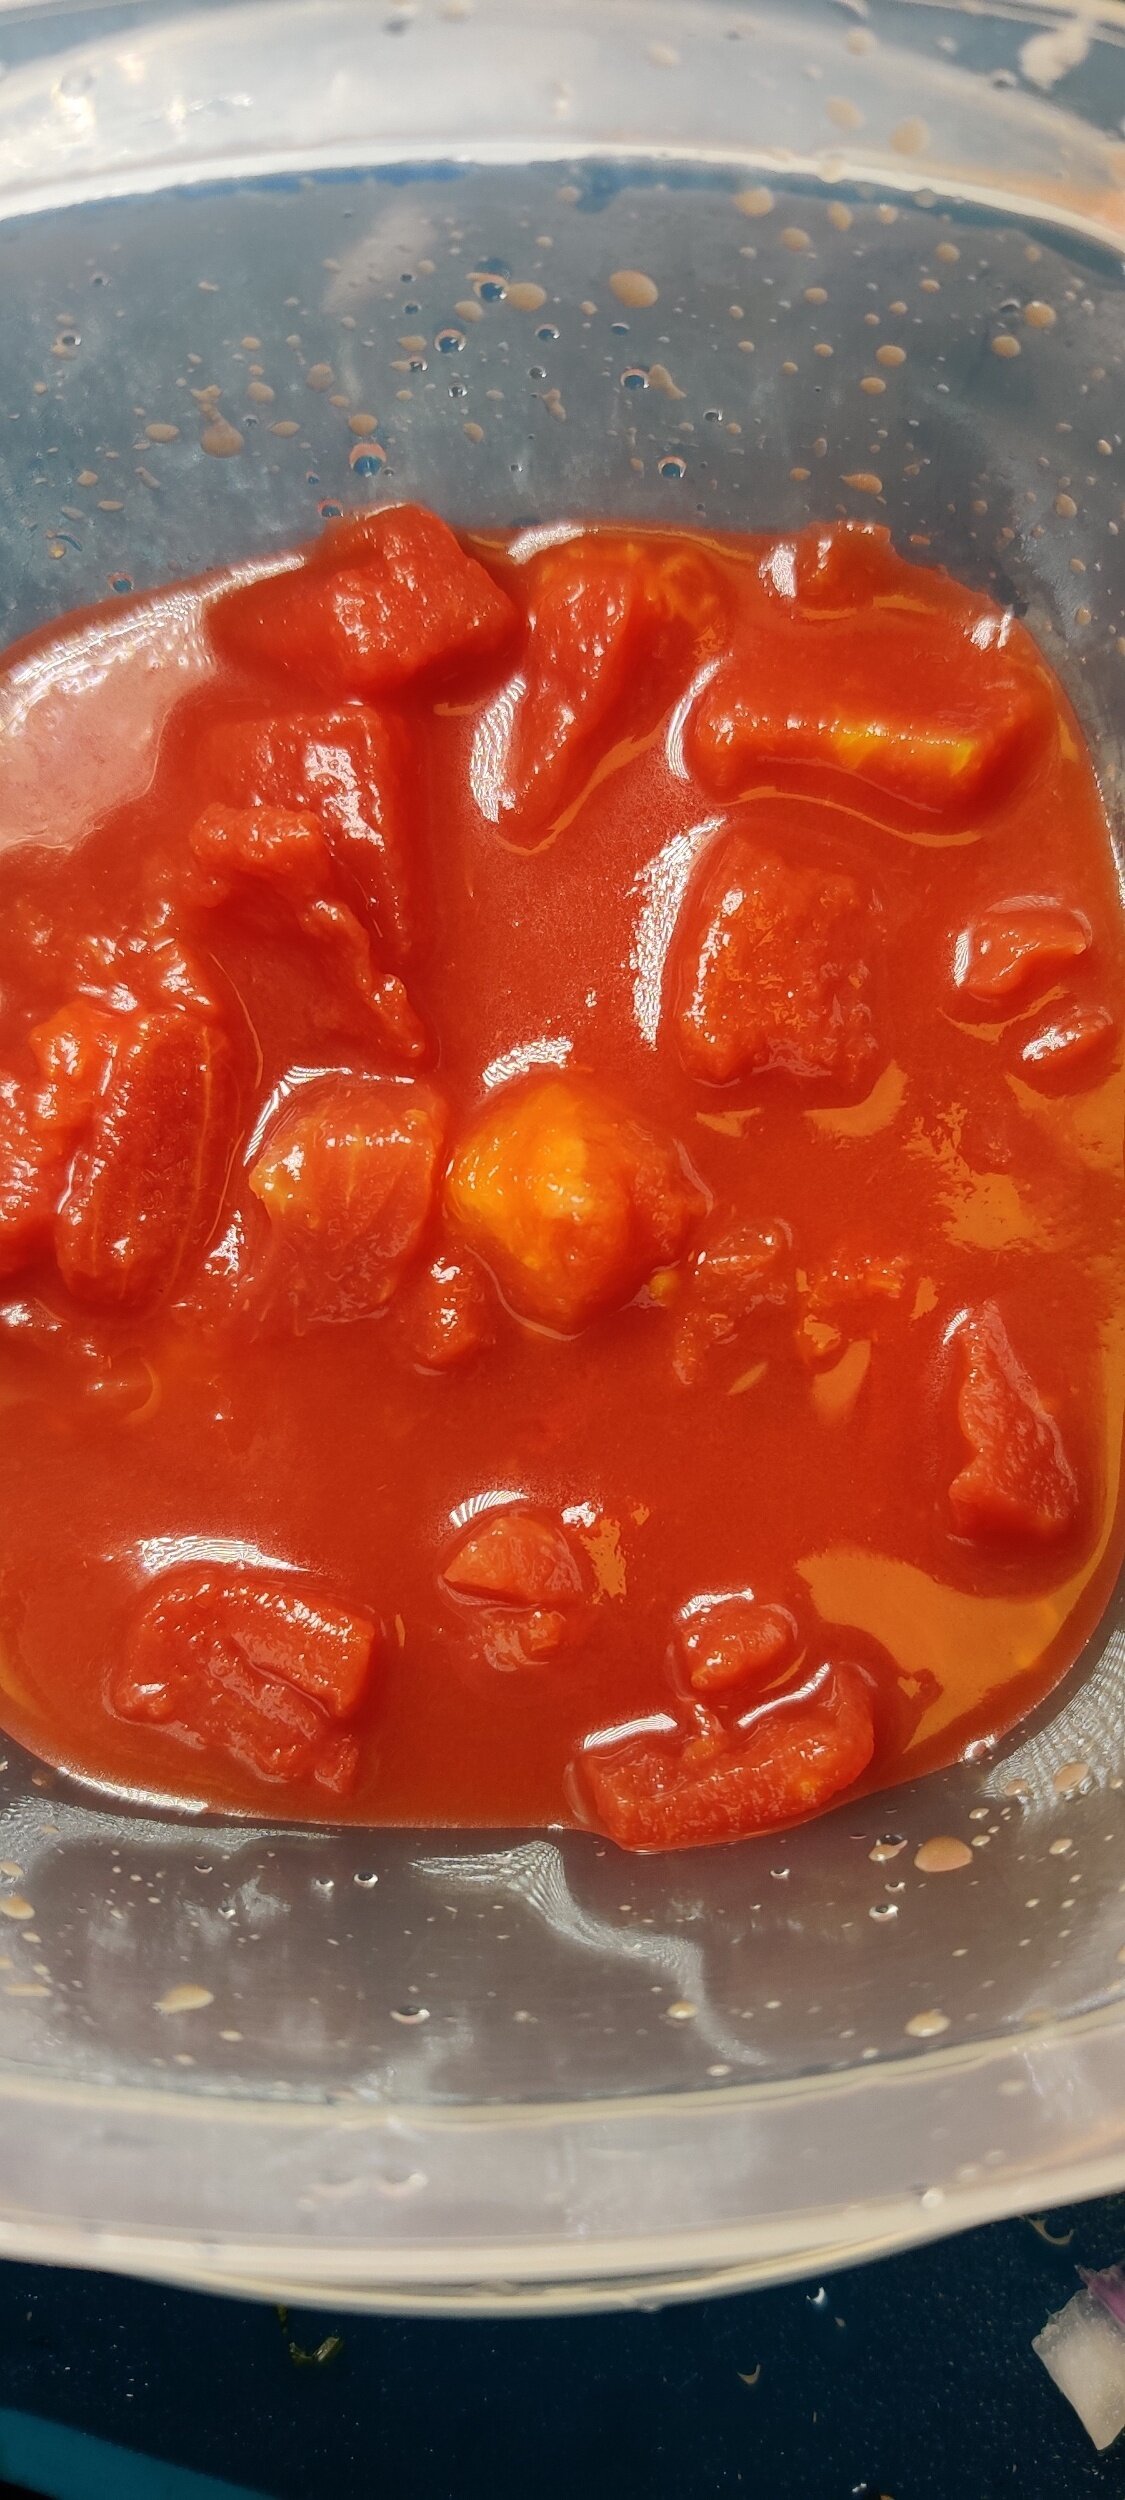
- 1 large tomato or 1 (14-ounce) can diced tomatoes
- ½ white-fleshed yam or sweet potato, chopped
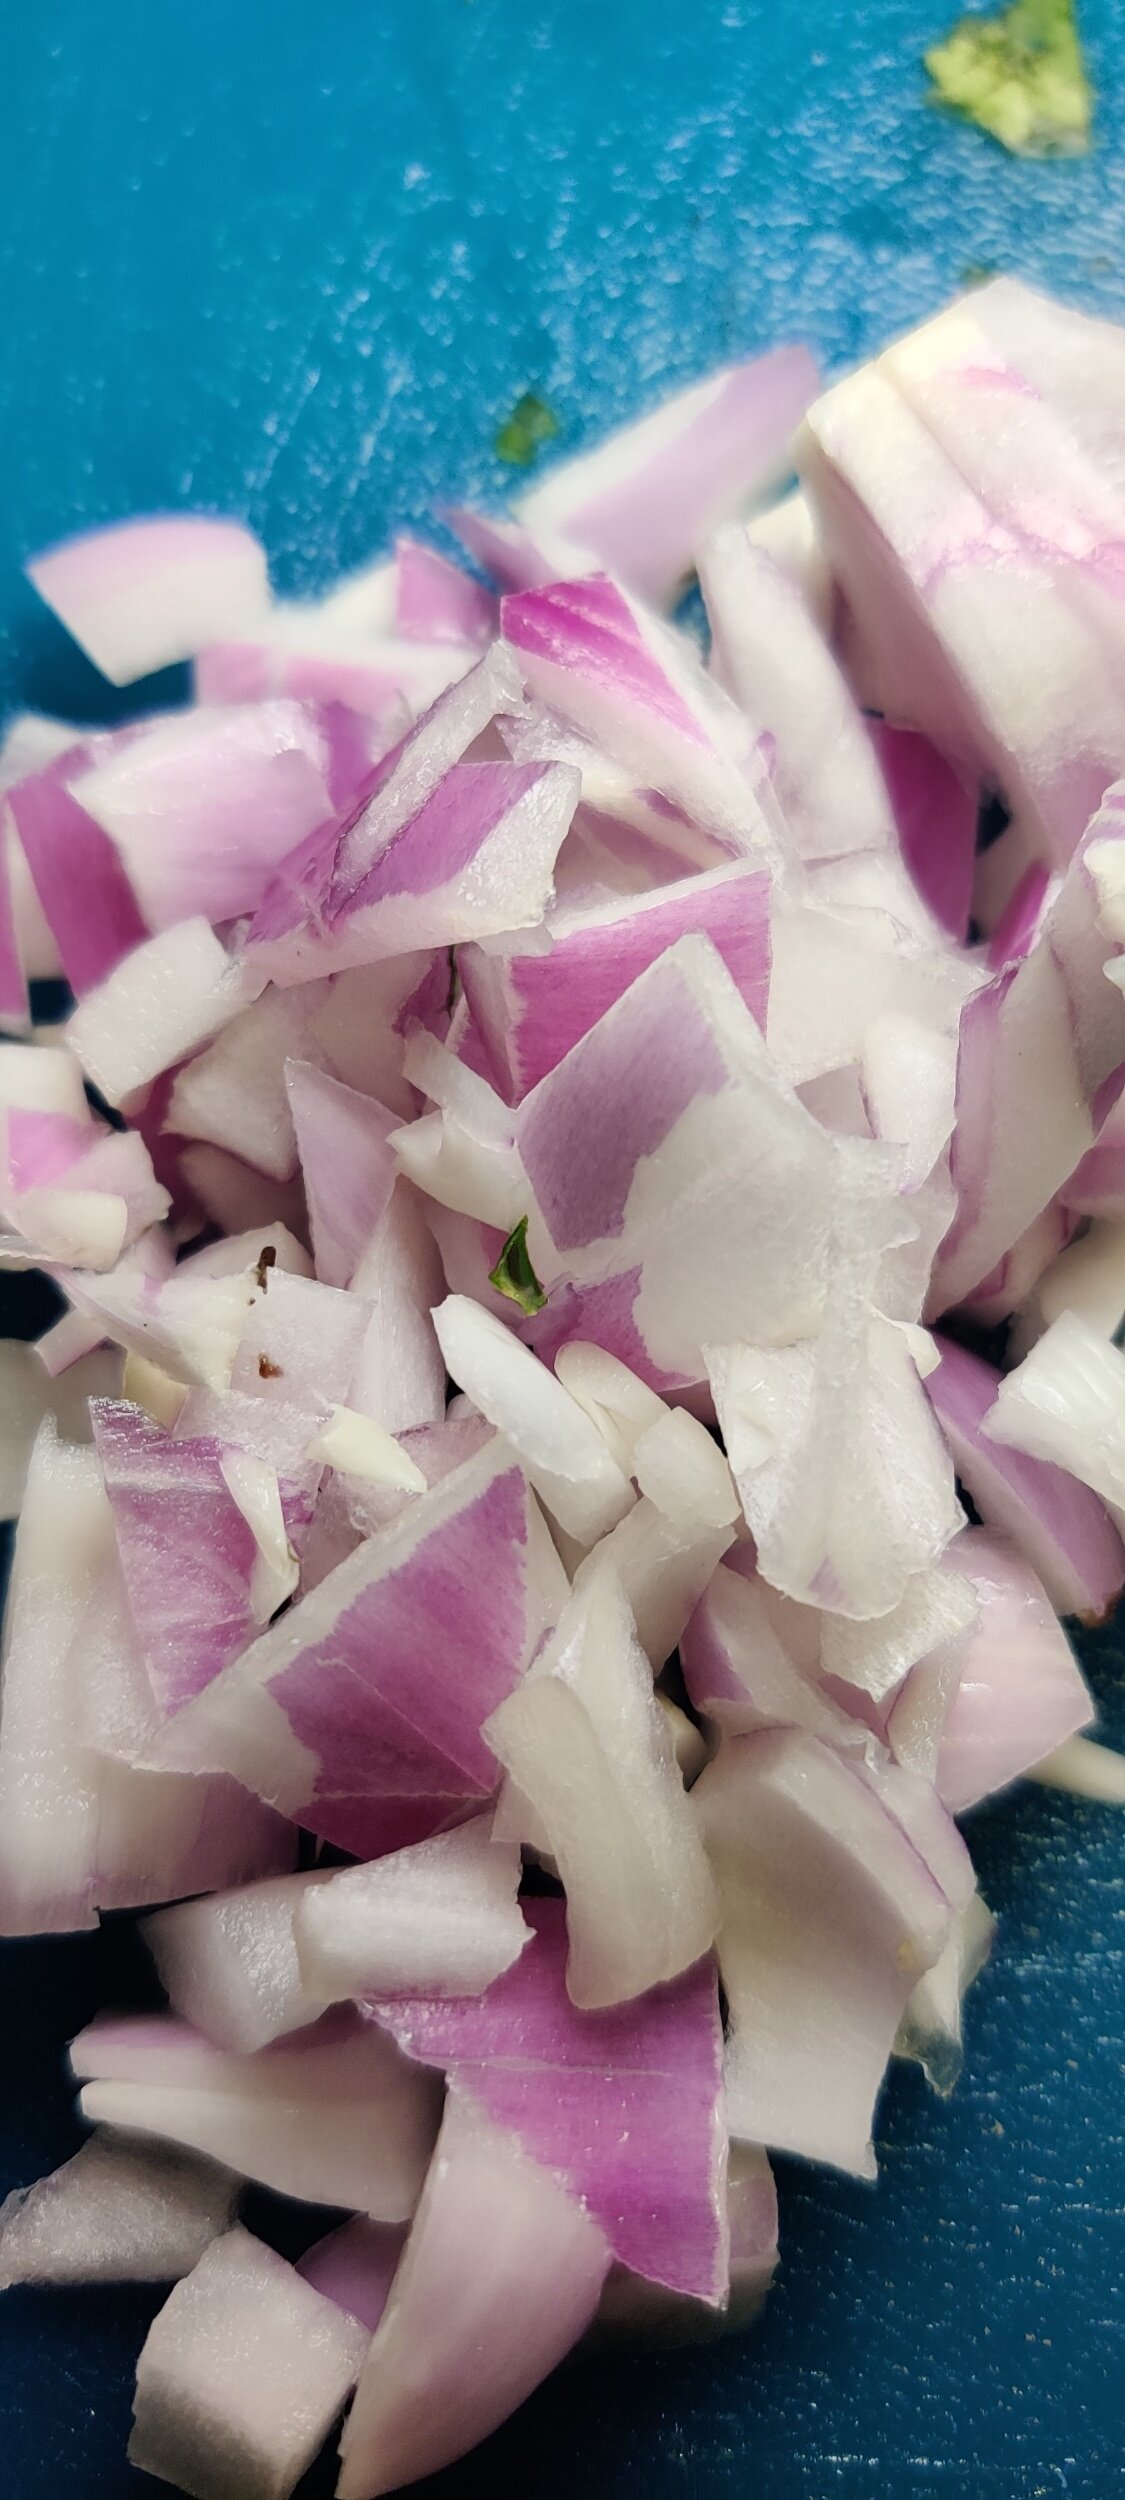
- ½ large onion, chopped
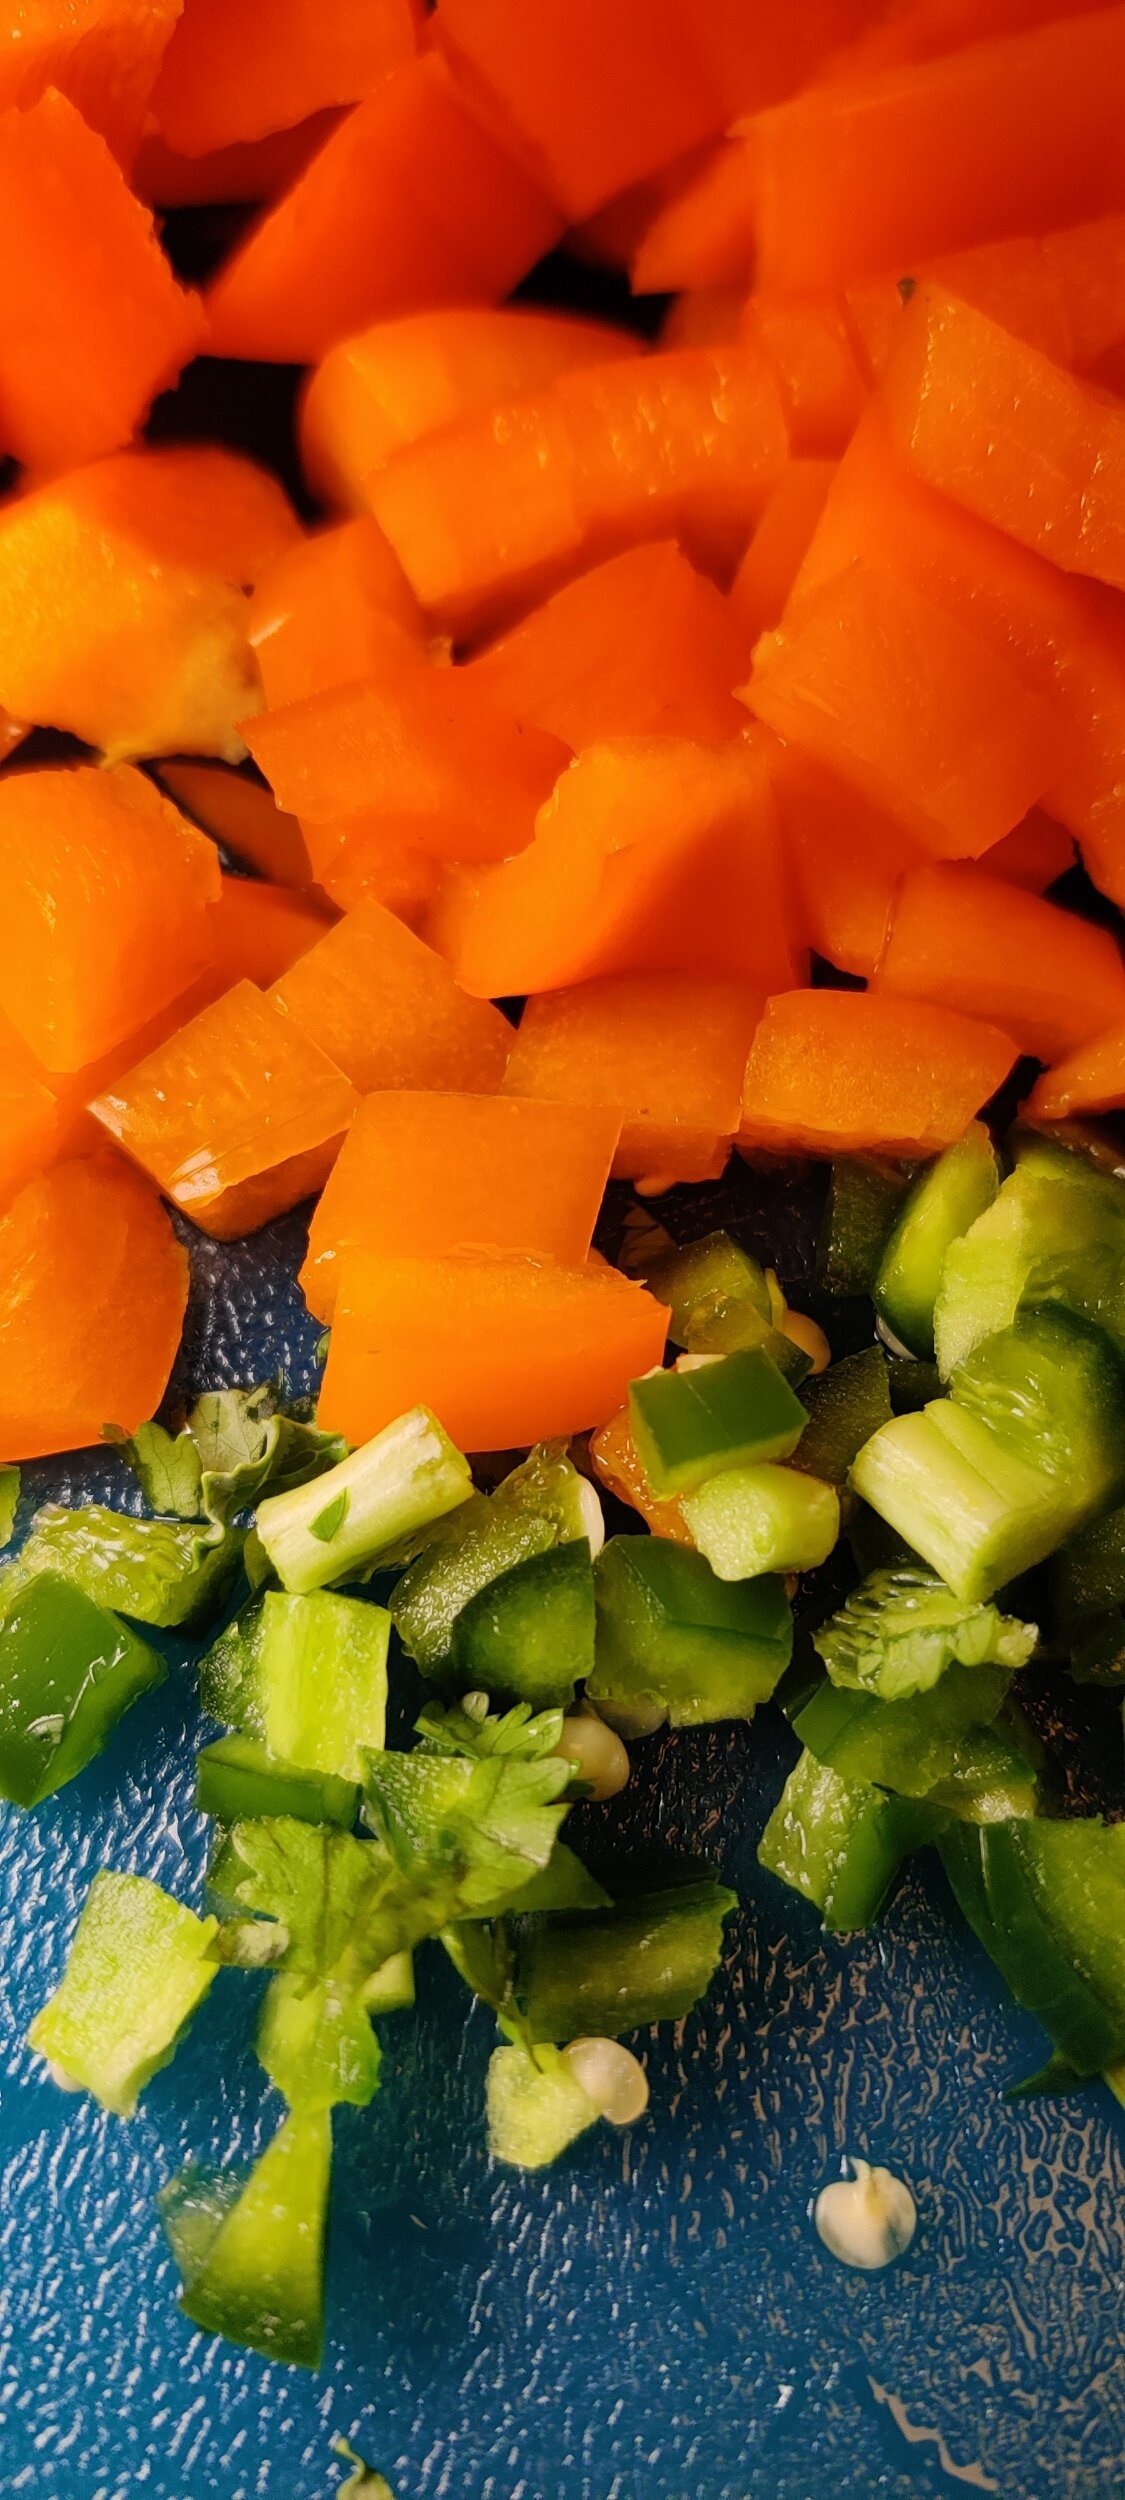
- ½ large bell pepper, chopped
- ½ jalapeño, chopped
- 6 cups beef broth
- 2 vegetable bouillon cubes
- 1 tablespoon salt
- 2 tablespoons black pepper
- 1 tablespoon chili flakes
- ½ cup peanut butter
- 2 cups water
- 2 tablespoons vegetable oil
- 1 teaspoon fenugreek
- 1 teaspoon cumin
- 1 teaspoon coriander
- 1 teaspoon paprika
- 1 teaspoon sugar
- 1 teaspoon fennel
- ¼ cup chopped parsley (for garnish or added at the end)
Instructions
- Heat the vegetable oil in a large pot over medium heat. Add the chopped kale and cook until wilted and the edges begin to crisp slightly.
- Stir in the garlic and parsley. Cook for 2 minutes, until fragrant.
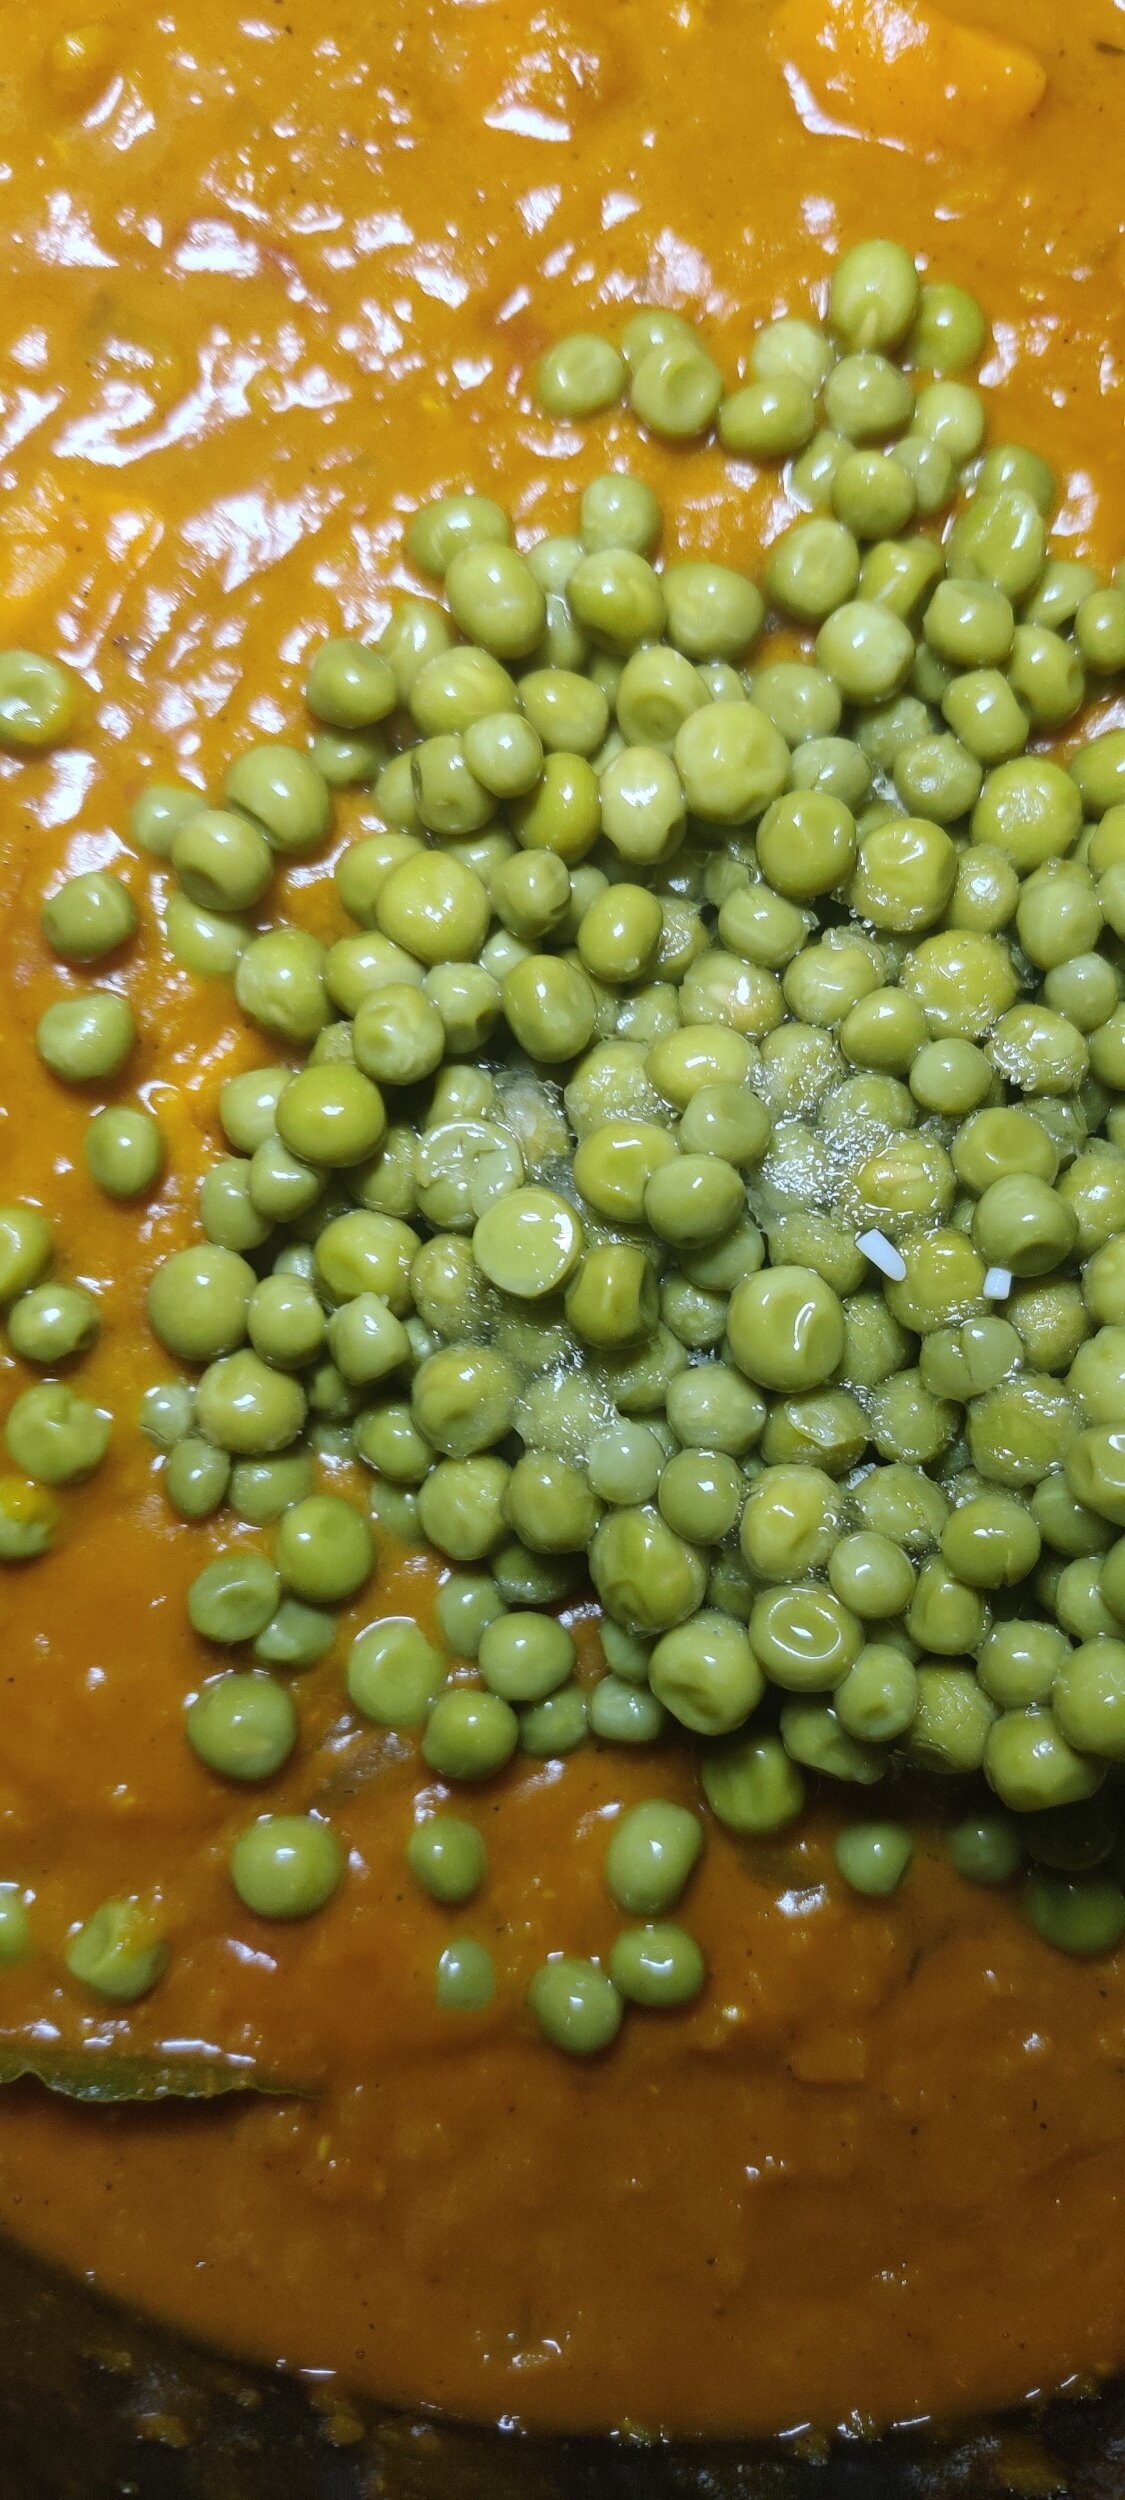
- Add the onion, eggplant, mushrooms, and all the spices (fenugreek, cumin, coriander, paprika, sugar, fennel, salt, pepper, and chili flakes). Sauté for another 2 minutes.
- Add the bell pepper and jalapeño, and cook for 1 more minute.
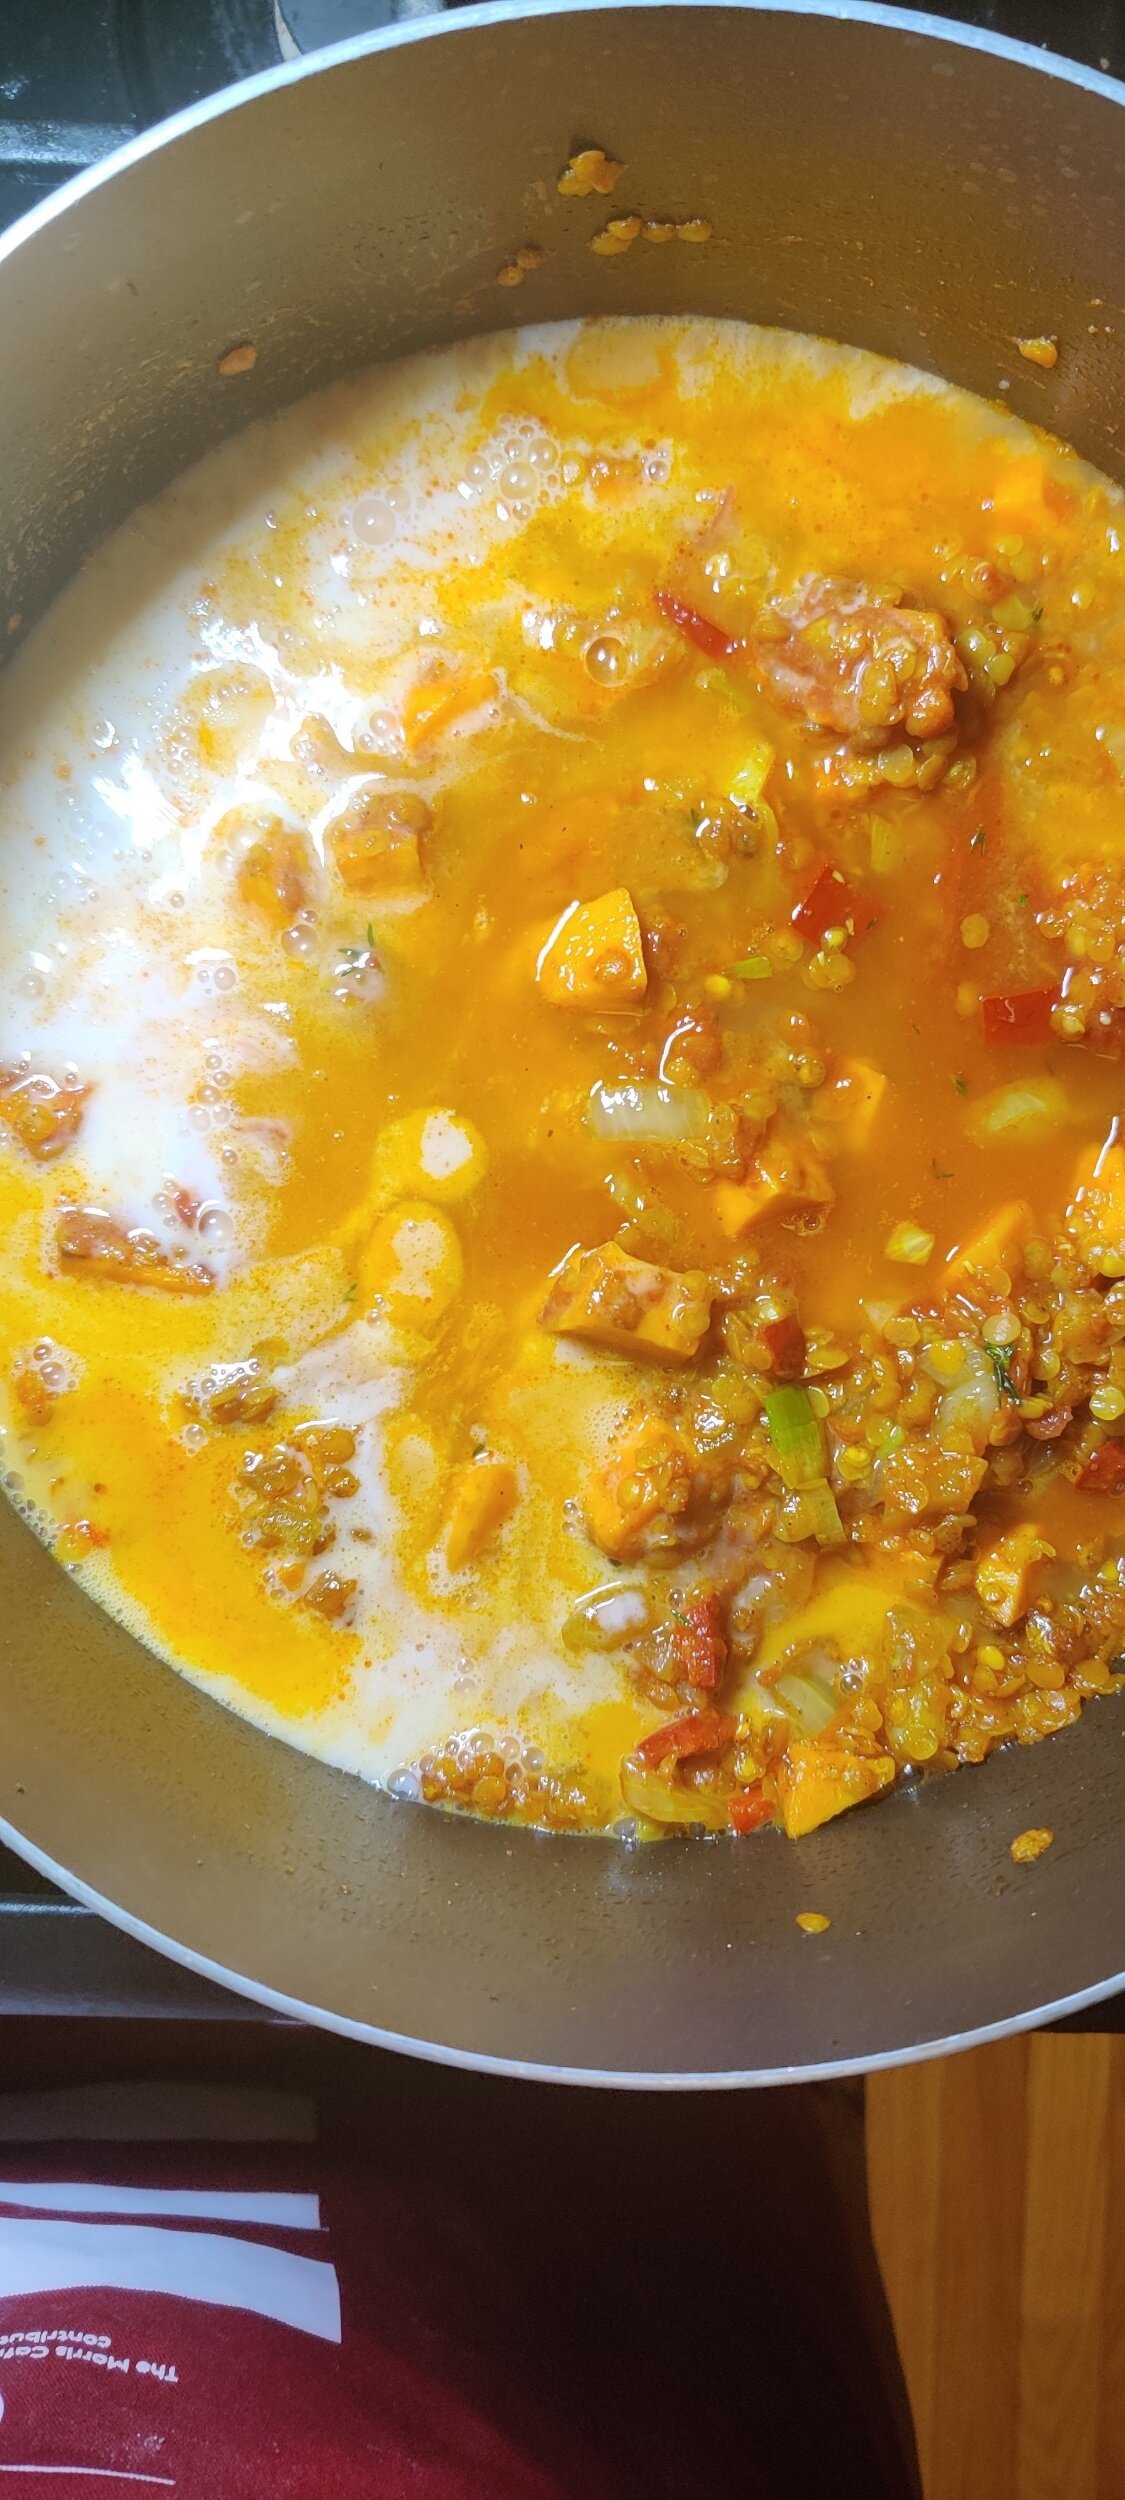
- Stir in the tomato, yam (or sweet potato), bouillon cubes, water, and beef broth.
- Reduce the heat to low, cover, and let the stew simmer for about 35 minutes. Stir occasionally and add more water if the stew becomes too thick.
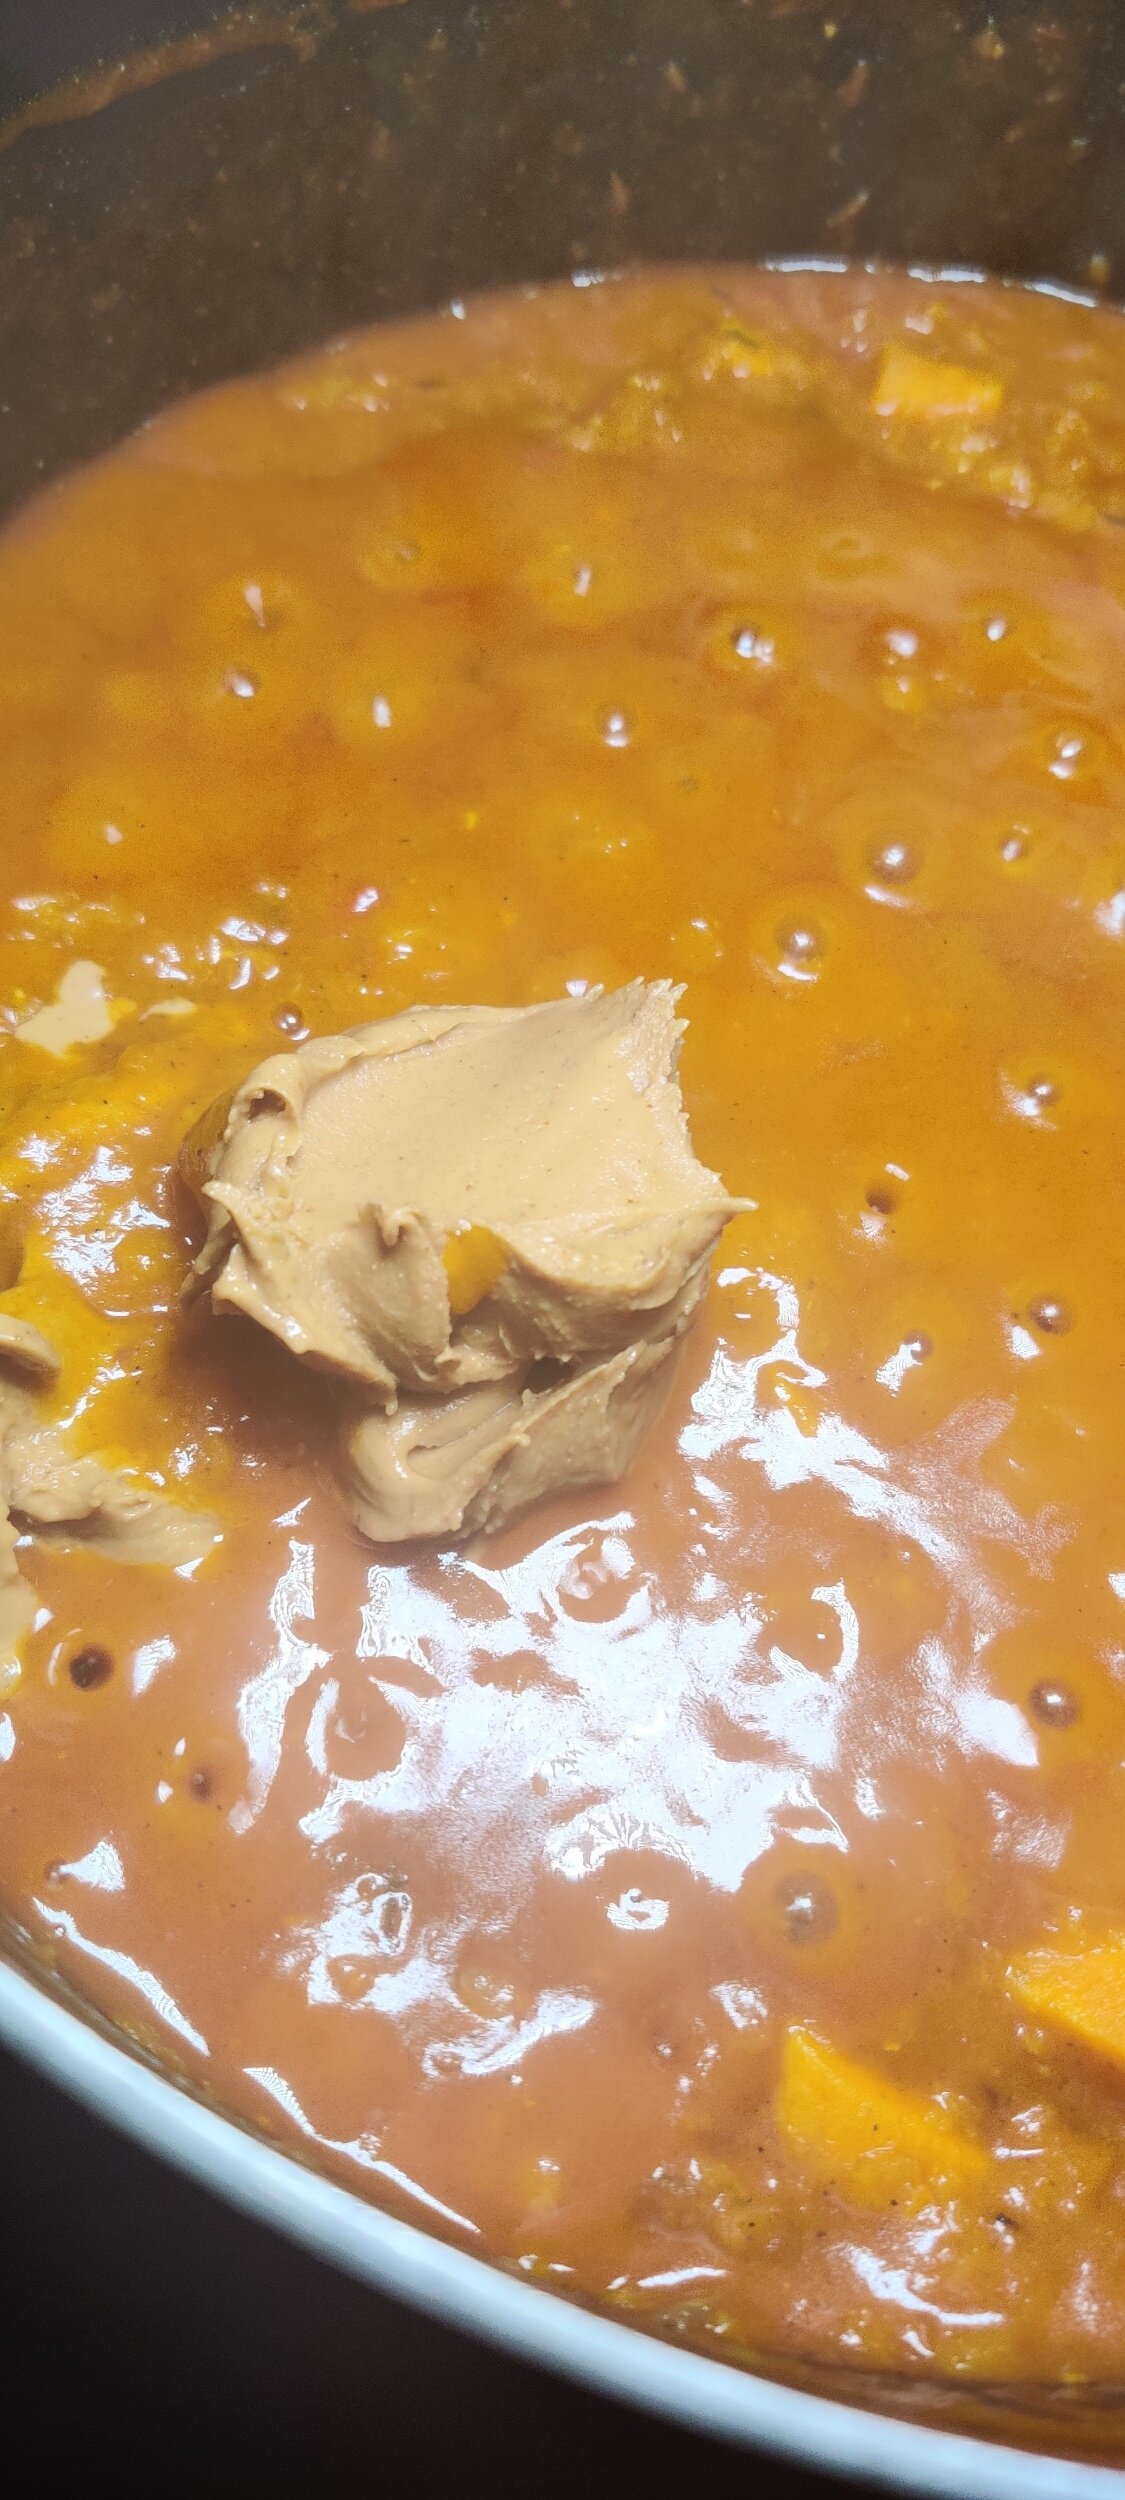
- Once the vegetables are soft and the flavors are well developed, stir in the peanut butter and simmer for 5 more minutes. Taste and adjust seasoning as needed.
- Serve hot, ideally with freshly made chapati or another flatbread.
Notes
Tips:
- The richer your broth, the more flavorful the stew will be. Homemade stock or beef bone broth adds incredible depth.
- While traditionally made with beef broth, this stew can easily be made vegetarian or vegan by using a well-seasoned vegetable broth.
- You can also blend part of the stew for a smoother texture or leave it chunky, depending on your preference.
I am not a certified nutritionist and any nutritional information on dontmissmyplate.com should only be used as a general guideline.

How to Make East African Chapati – Step-by-Step Recipe
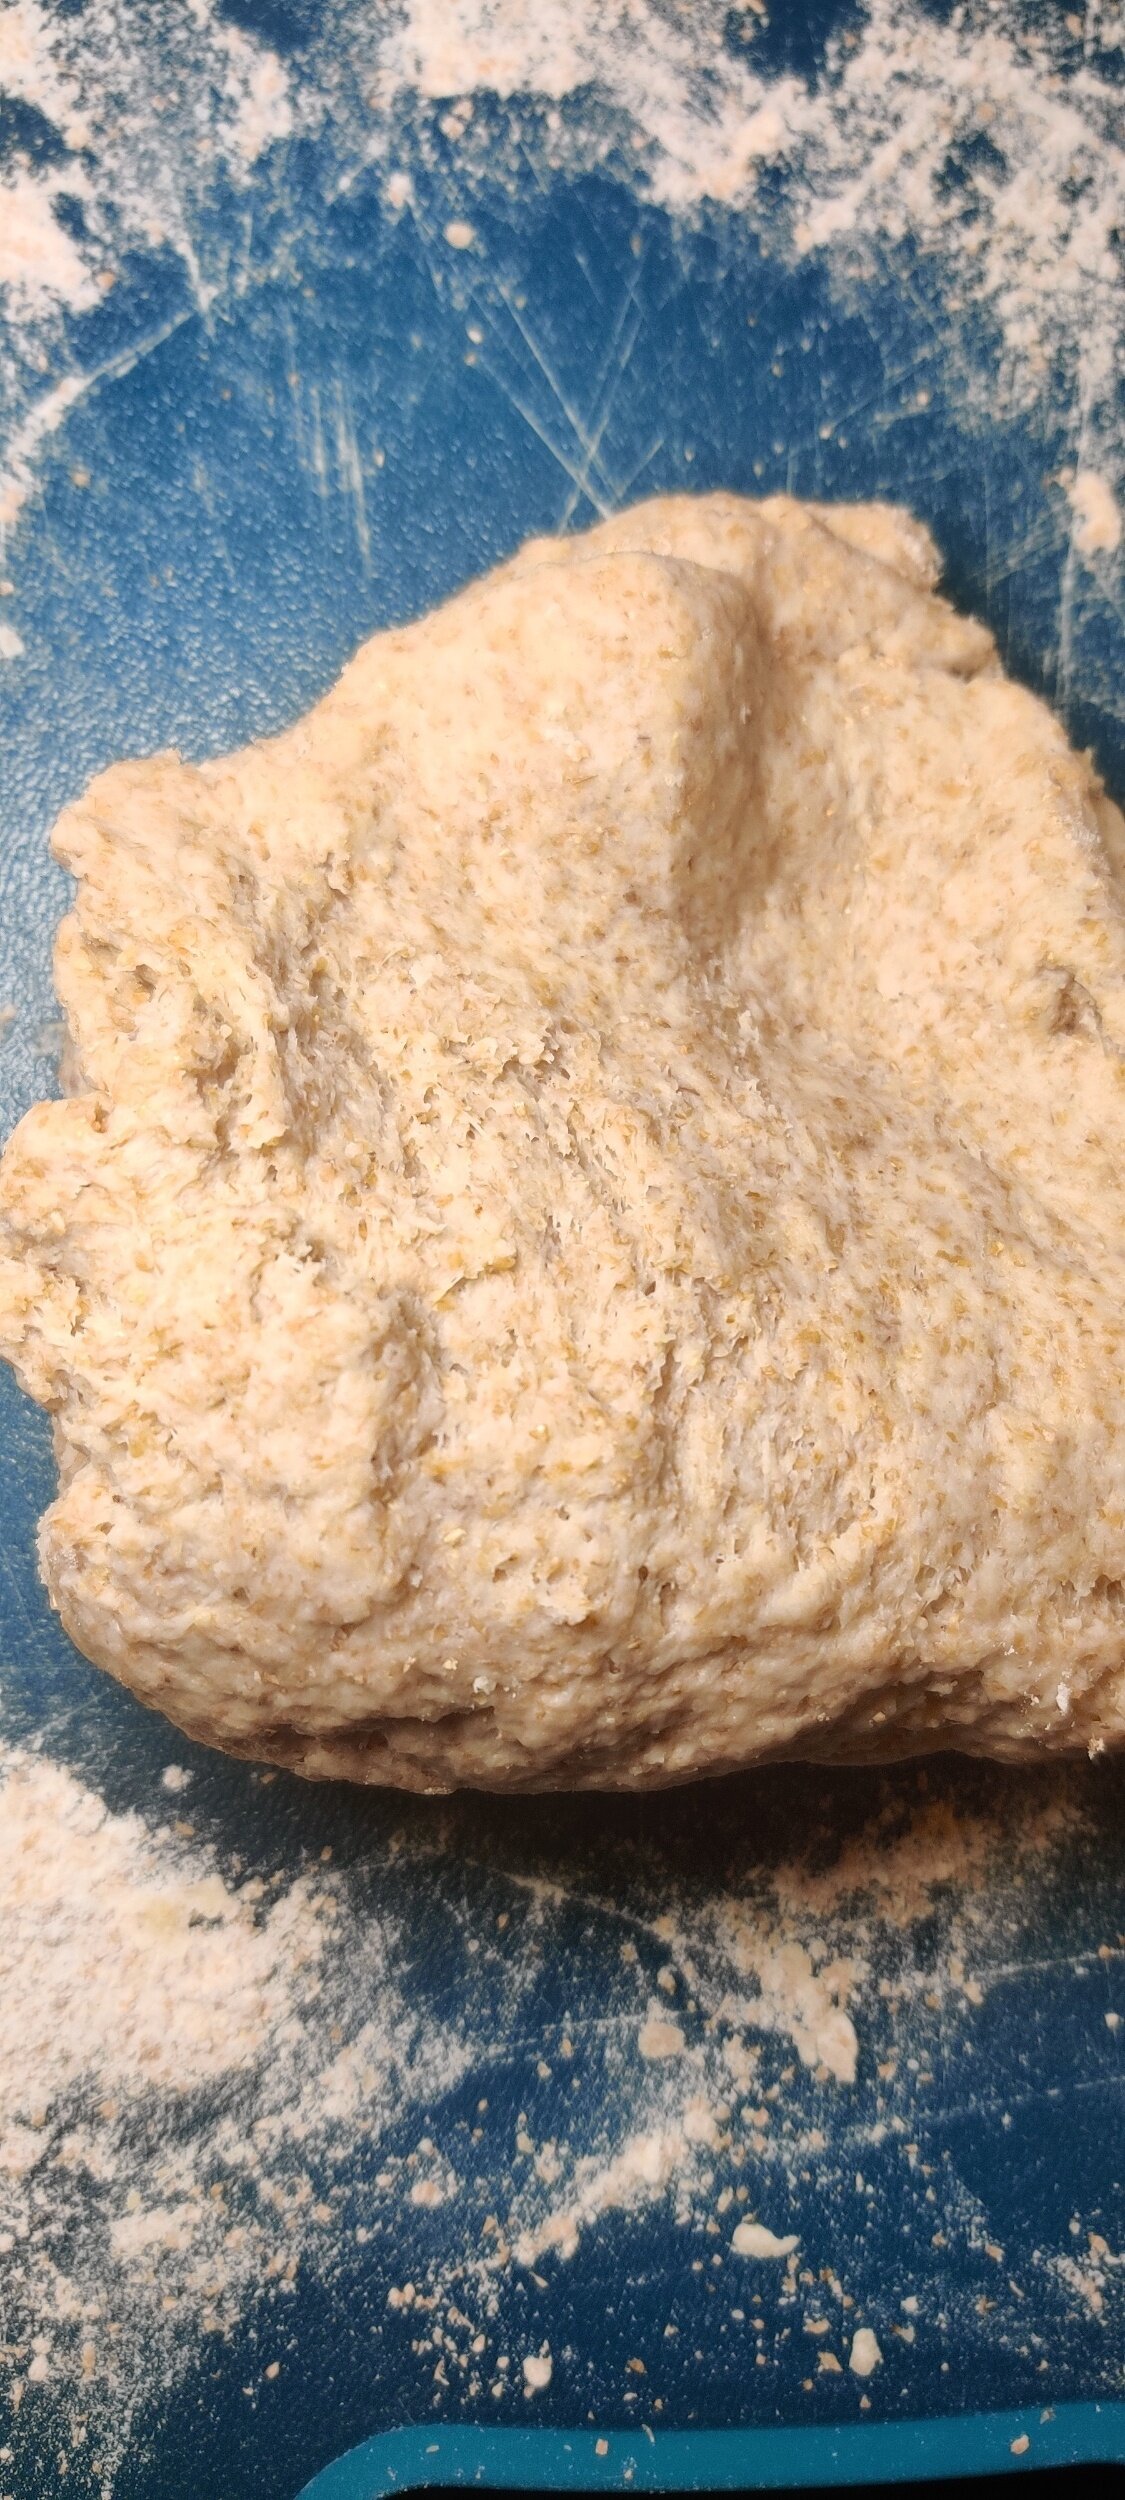
Chapati is one of the most beloved and widely eaten flatbreads in East Africa. Popular in countries like Kenya, Uganda, and Tanzania, it’s a staple at family dinners, street food stalls, and festive gatherings. While chapati originated from the Indian subcontinent and was introduced to Africa through trade and migration, it has evolved into a distinct East African version that is softer, flakier, and richer than its Indian counterpart.
What sets East African chapati apart is the generous use of oil or ghee in both the dough and the cooking process. This gives the bread its signature soft texture and golden, flaky layers. When made well, chapati is slightly crisp on the outside, soft and chewy on the inside, and perfectly seasoned with just the right amount of salt and fat.
In many African homes, bread is more than just food. It plays an important cultural role at the table and is often shared during meals as a symbol of hospitality. Chapati in particular is used to scoop up stews, beans, or vegetables, making it an essential part of everyday meals and celebrations. For many, learning to make chapati from scratch is a family tradition passed down through generations.
I originally created this recipe to pair with a mashed kale stew, but it's incredibly versatile. Chapati is also perfect with curries, lentils, grilled meats, or simply served as a side with a variety of other dishes.
If you’ve ever ended up with dry or tough chapatis, this recipe offers a few simple but essential tips. Be generous with the oil or ghee, knead the dough thoroughly to build elasticity, and give it time to rest before rolling. For extra flaky layers, try the folding and coiling method described in the recipe. These steps make a big difference in achieving that classic East African chapati texture.
Whether served with sukuma wiki, lentils, or a cup of tea, this chapati brings the flavor and comfort of East African home cooking to your kitchen.


How to Make East African Chapati – Step-by-Step Recipe
A soft, flaky flatbread that's a staple across East Africa. This chapati is easy to make, incredibly versatile, and perfect with stews, curries, or on its own.
Ingredients
- 1 cup whole-wheat flour (you can substitute all-purpose flour if desired)
- 1 cup all-purpose flour, plus extra for dusting
- 1 teaspoon salt
- 2 tablespoons olive oil or ghee, plus extra for brushing
- ¾ cup hot water
Instructions
- In a large bowl, combine the whole-wheat flour, all-purpose flour, and salt.
- Using a wooden spoon or spatula, mix in the oil or ghee. Gradually add the hot water in two parts, mixing until a soft, elastic dough forms. Don’t skimp on the oil or ghee, this helps prevent dry chapatis.
- Turn the dough out onto a lightly floured surface. Knead for about 10 minutes until smooth and pliable.
- Divide the dough into 8 to 10 equal portions, depending on your preferred chapati size.
- Cover and let rest for 10 minutes.
- On a floured surface, roll out each dough ball into a round shape, similar to a tortilla but slightly thicker.
- Lightly brush each side with oil or ghee, then dip both sides in flour, shaking off any excess.
- Heat a dry, non-stick pan over medium-high heat.
- Place one chapati in the pan and cook for about 30 seconds, or until brown spots begin to form. Flip and cook the other side. Repeat with the remaining dough.
- If you'd like to create distinct layers inside your chapati, follow these extra steps after dividing the dough:
- Take each dough ball and fold it back and forth like a fan or piece of paper.
- Alternatively, roll it up tightly like a carpet.
- Coil the folded dough into a spiral shape (like a cinnamon roll), then cover and let rest under a damp towel for 30 minutes.
- After resting, gently press each dough coil flat and roll it out again into a round shape.
- Lightly brush both sides with oil/ghee, press into flour, and shake off the excess.
- Cook as described above.
Notes
Serving and Storage Tips
- Serve chapatis warm, ideally right off the pan.
- To store, wrap them tightly in foil or a clean cloth to keep them soft and prevent drying out.
I am not a certified nutritionist and any nutritional information on dontmissmyplate.com should only be used as a general guideline.
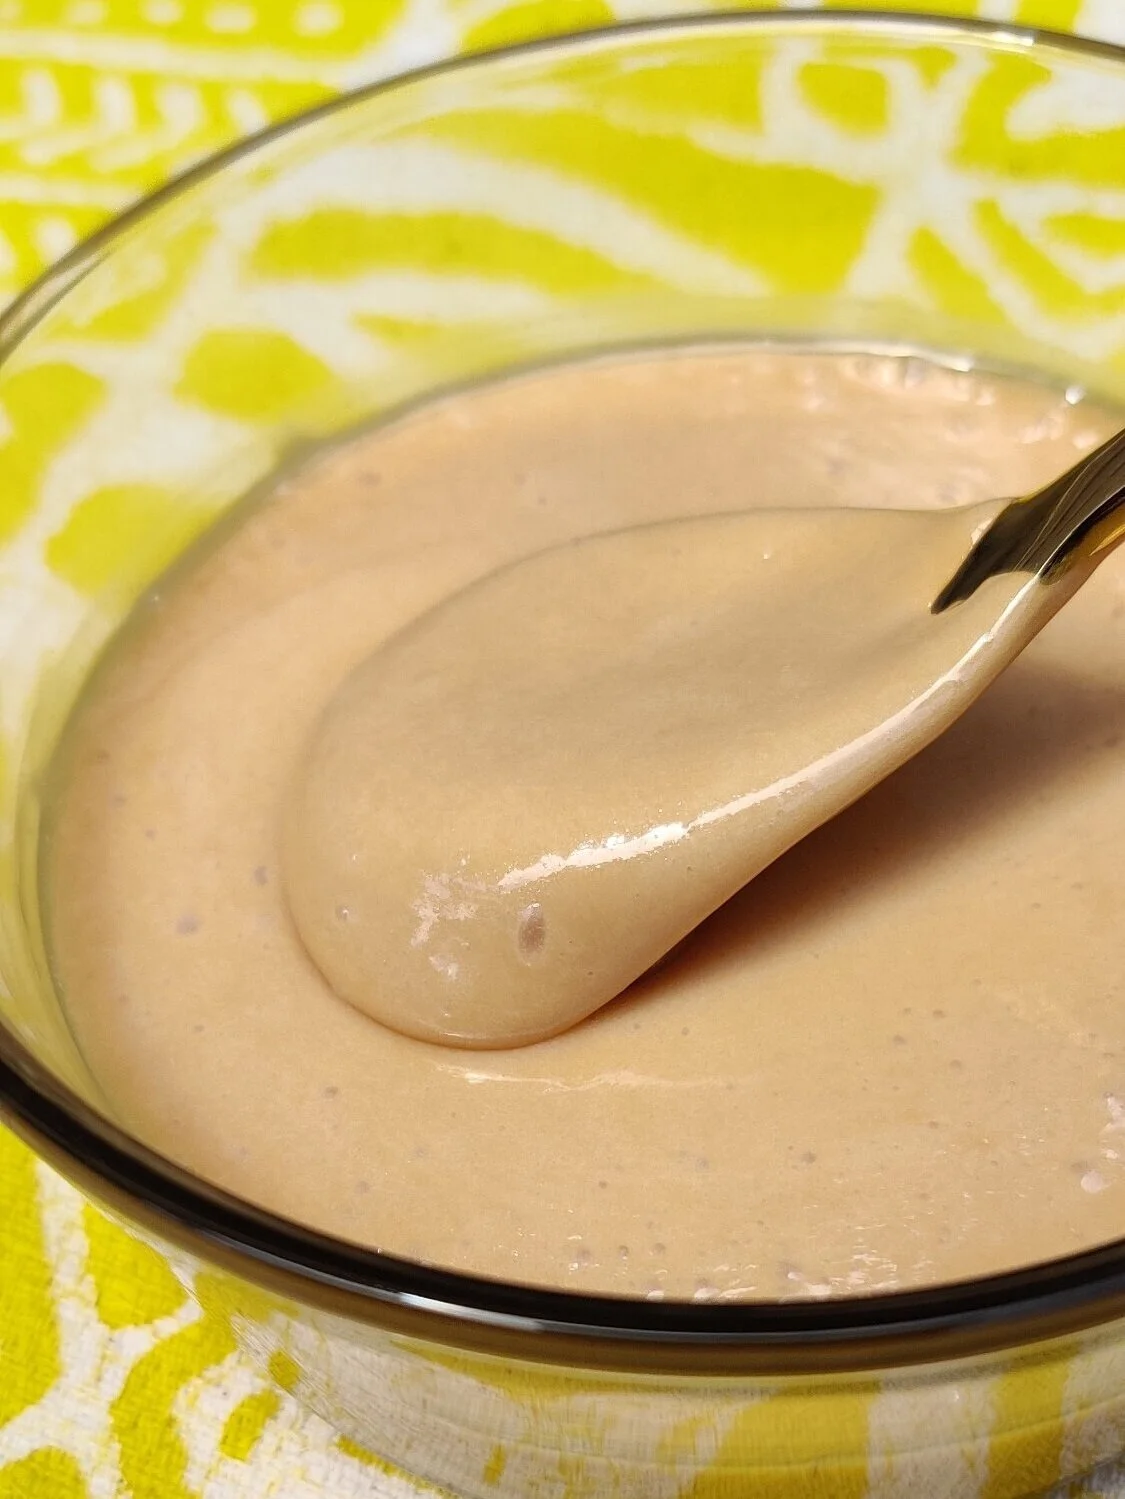
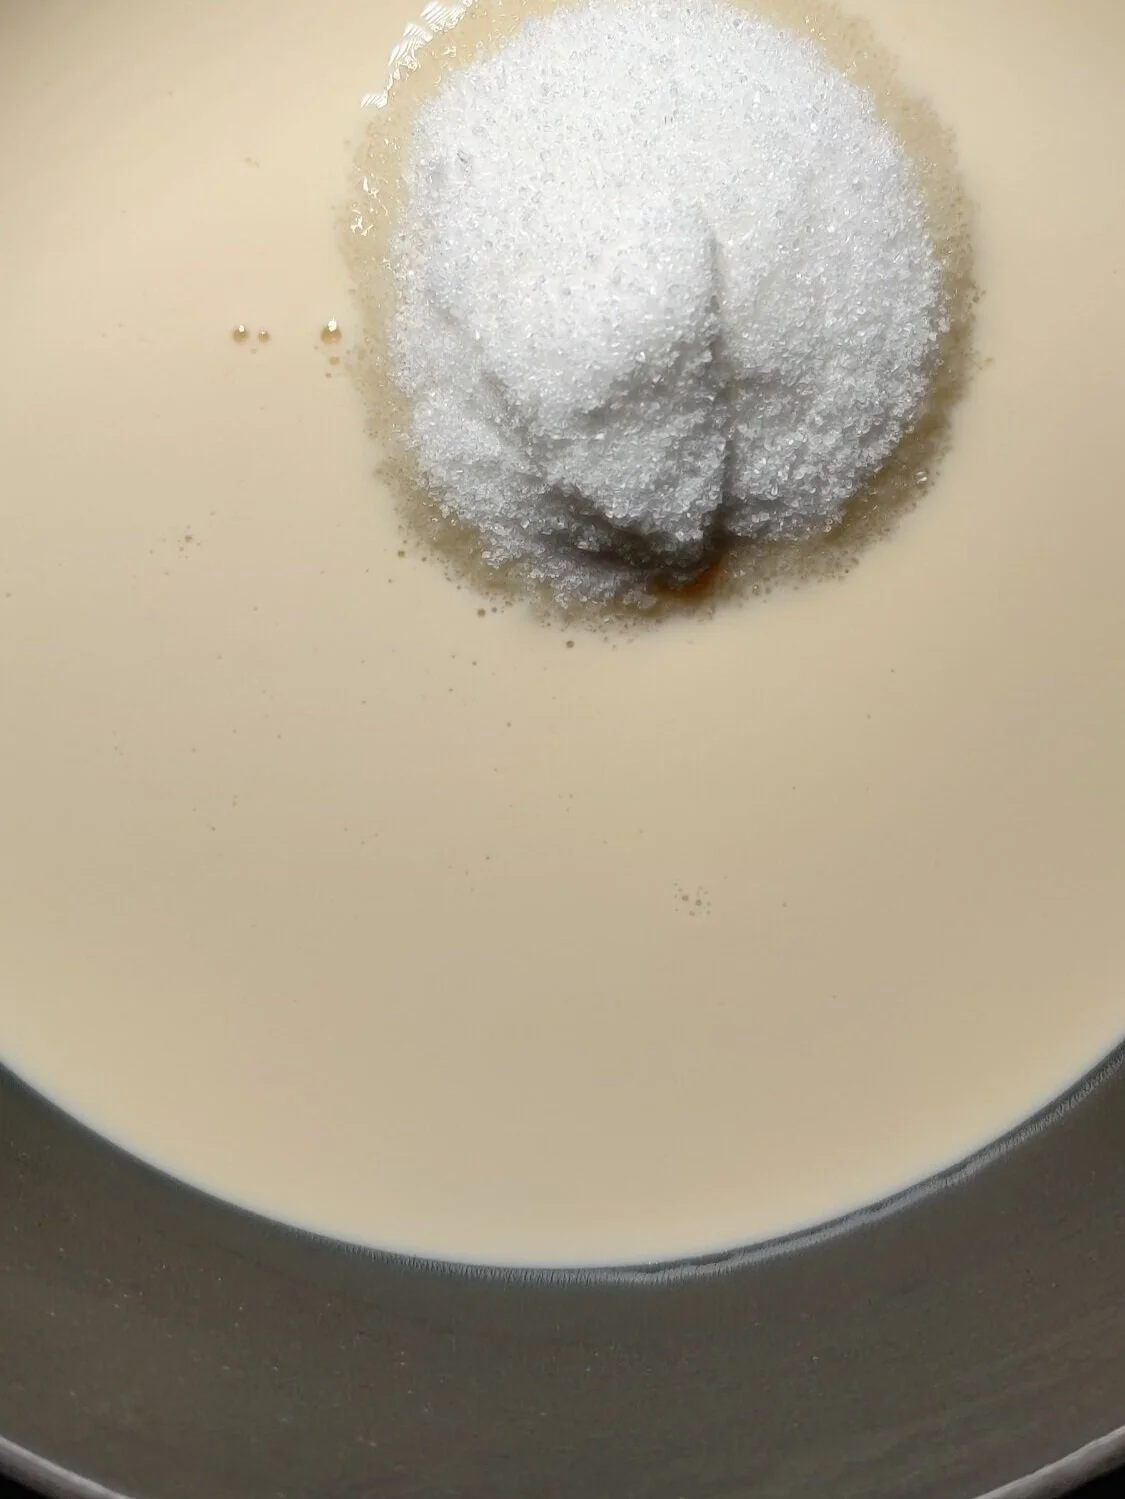
Salted Goat Milk Caramel (Cajeta)
I’m a firm believer that caramel is the best thing ever created.
You can use it as a condiment for your desserts, add it to or on top of cake frosting, or make candy. Most people use cow’s milk for caramel, and you can whip up a delicious vegan version with coconut milk. But how about goat’s milk? It may seem like an unusual choice, but for those of us who grew up drinking it occasionally, it has a unique flavour and tang worth exploring.
You can test it out and try my tiger nut chocolate cake recipe with goat milk cream cheese frosting.
In Mexico, it’s common to make caramel with goat’s milk, and it’s called cajeta. Give it a try!
Ingredients
3/4 cup white sugar
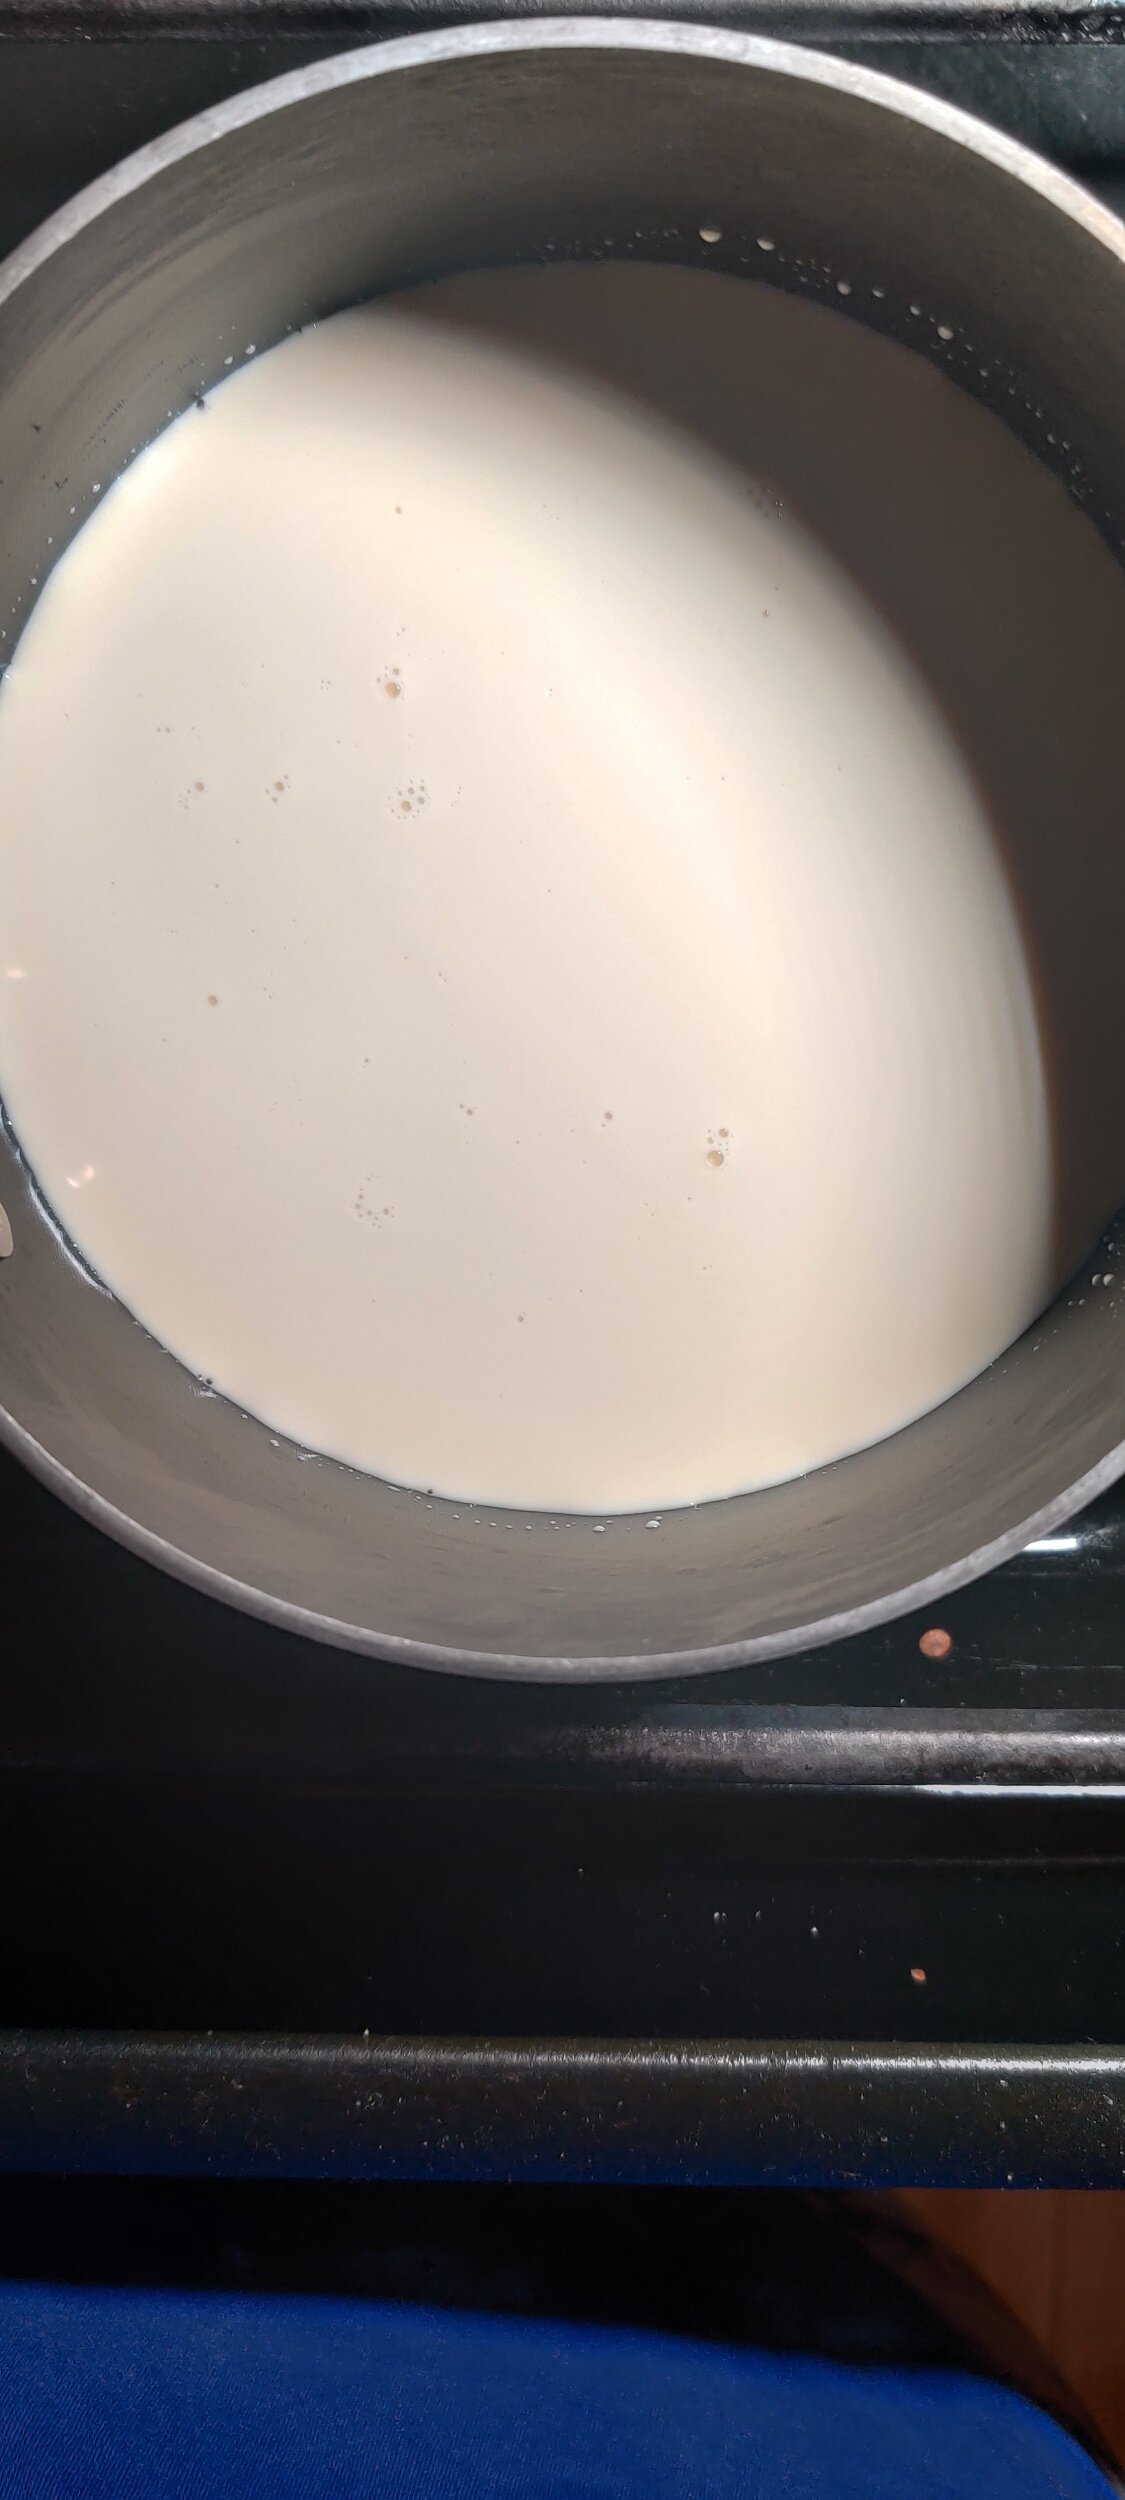
1 cup goat milk
1 1/2 tablespoons butter
2 pinches sea salt crystals
1/2 teaspoon baking soda
1/2 teaspoon vanilla
1/2 teaspoon cinnamon

Instructions
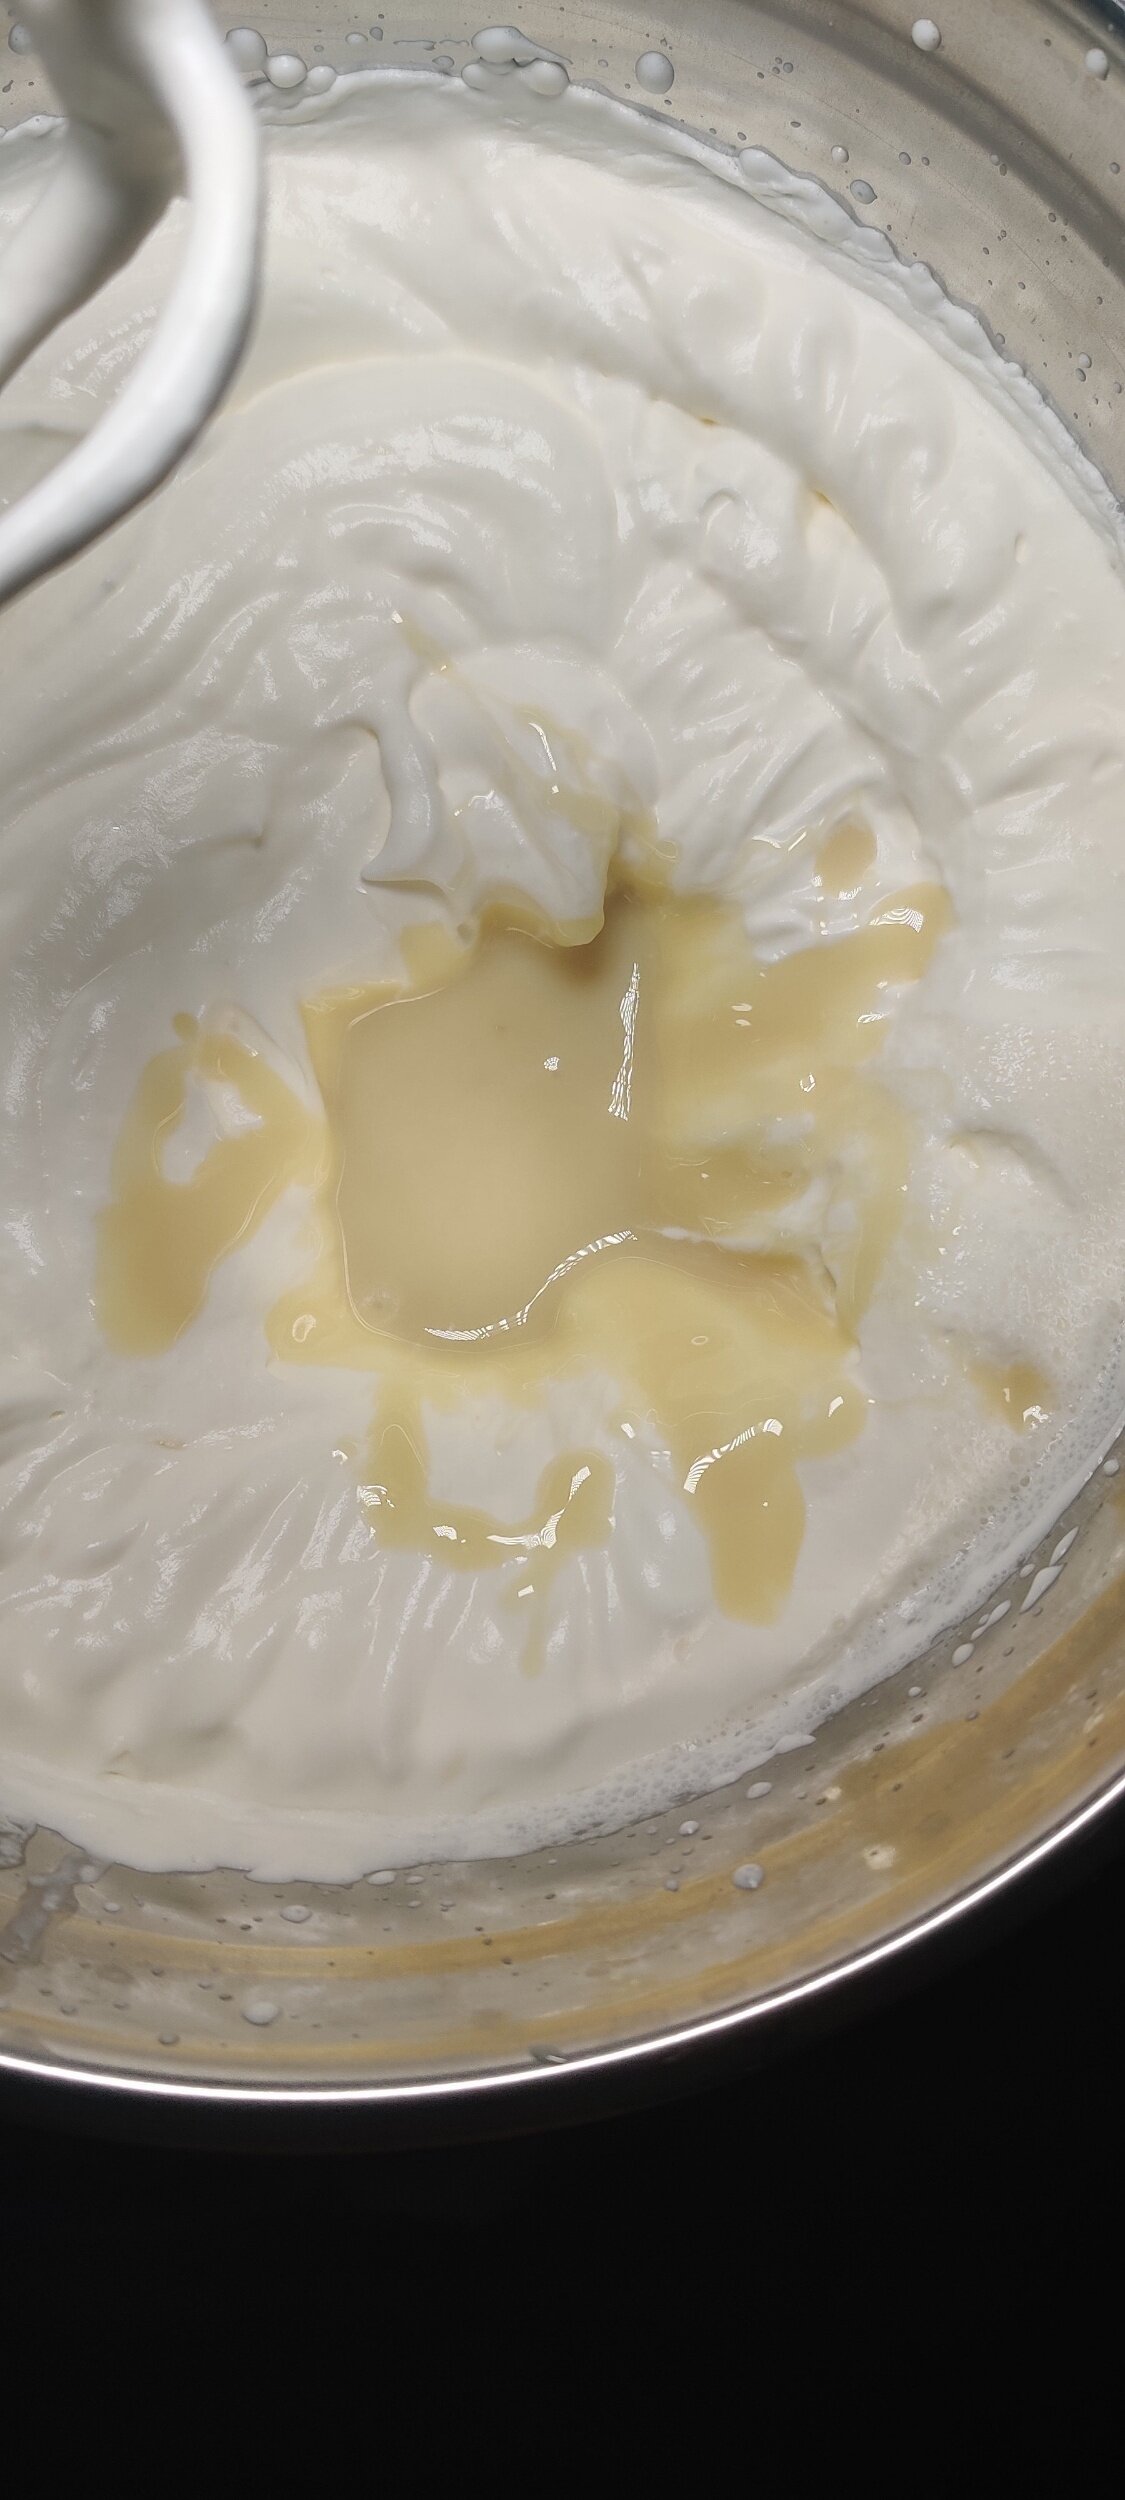
In a medium-sized pot, bring the butter, sugar, and goat milk to a boil.
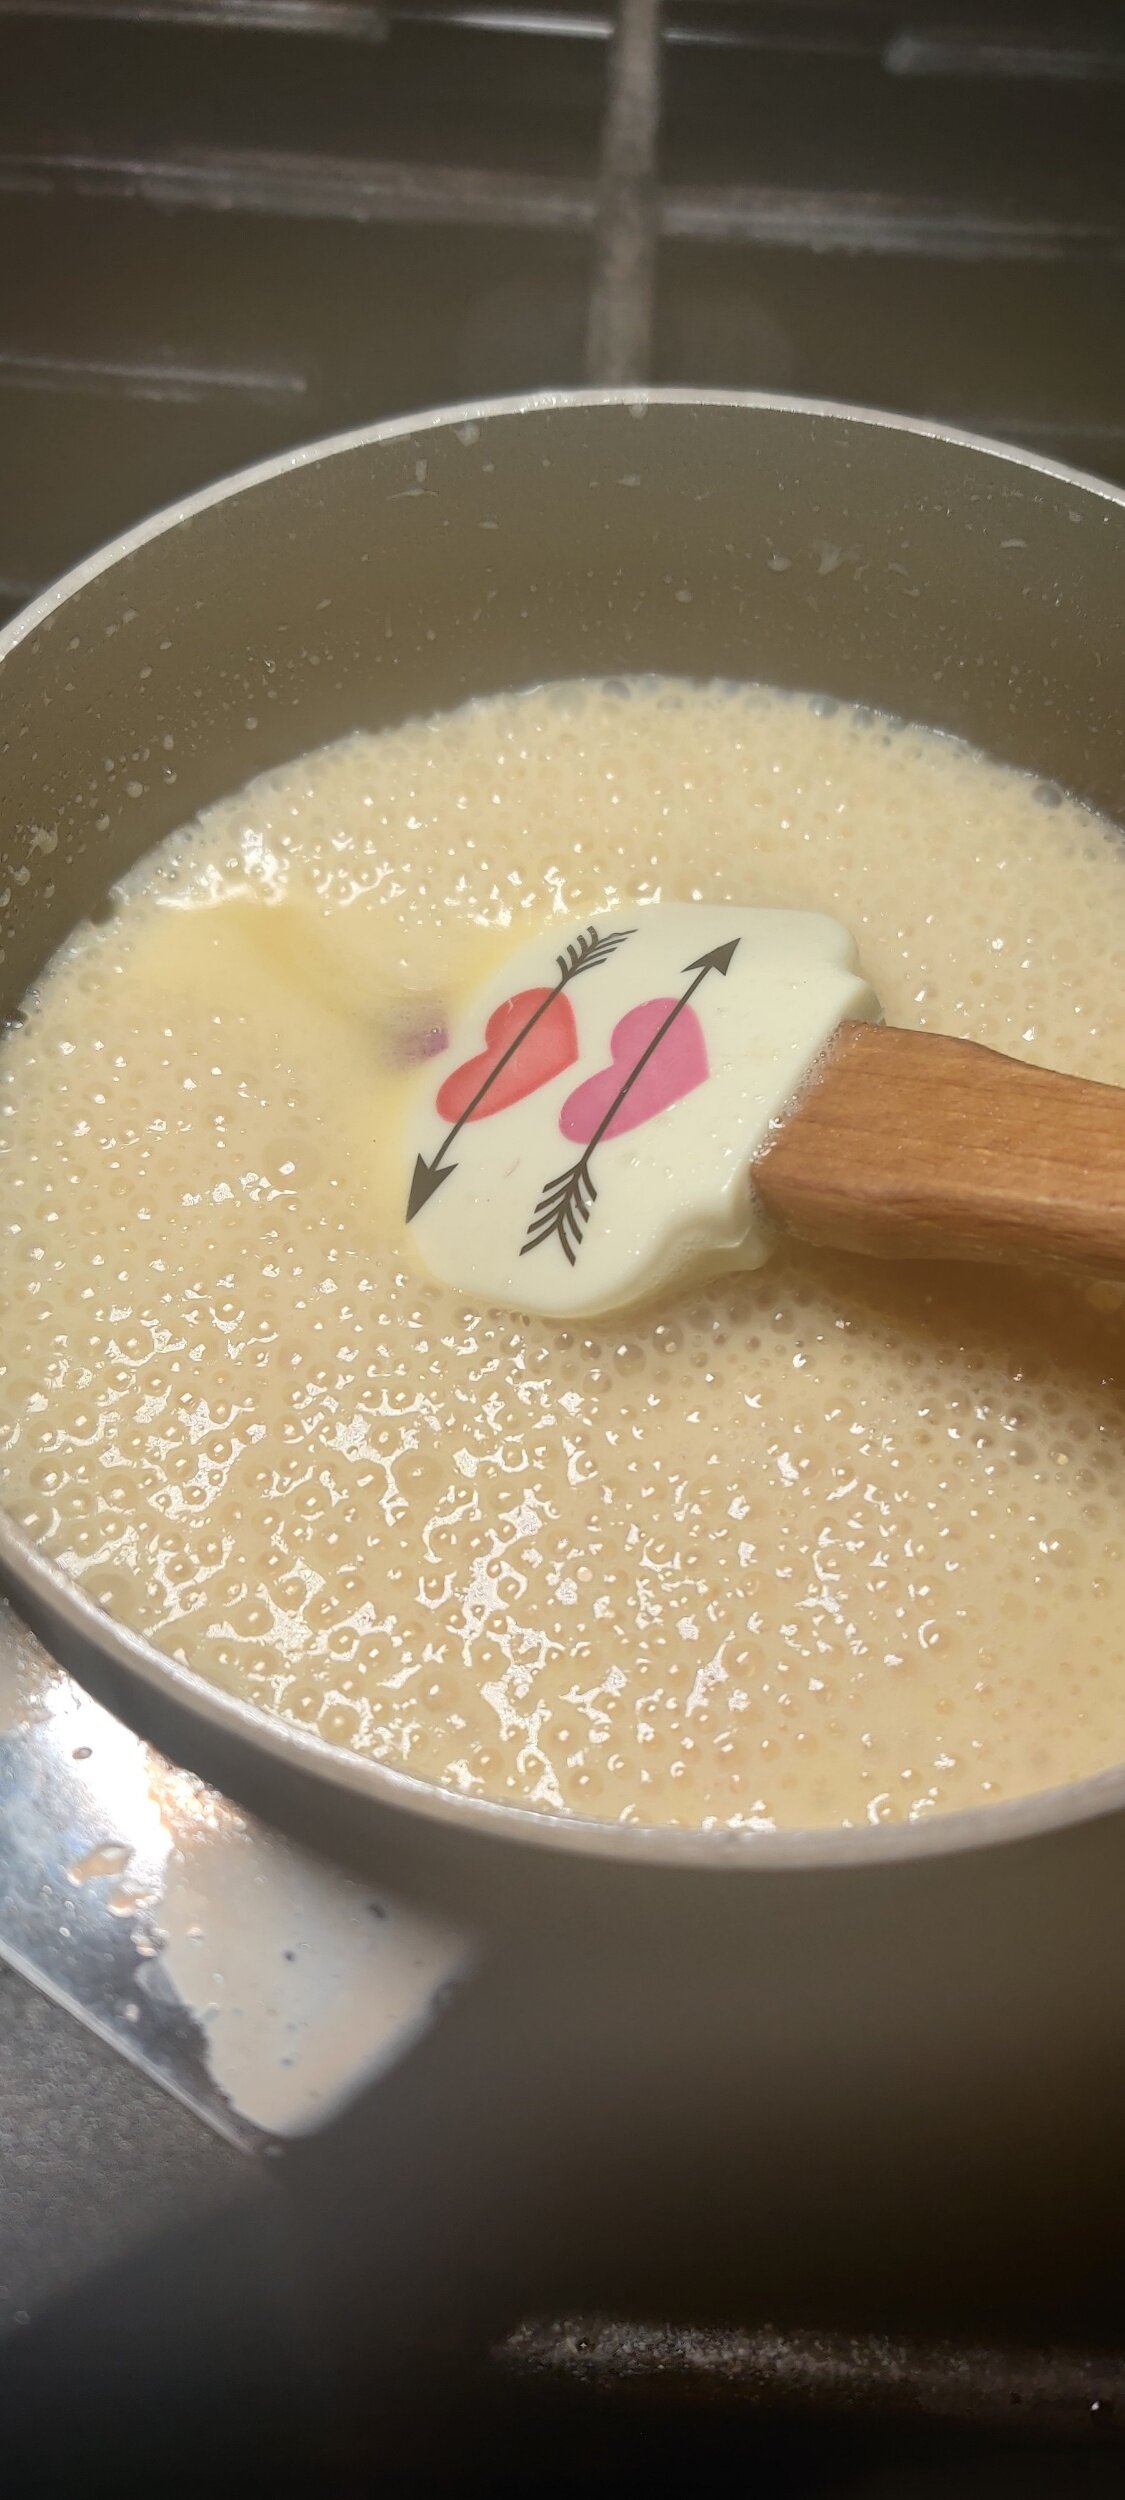
Reduce the heat, then stir frequently for 10 minutes. The caramel will start to thicken.
Allow the caramel to continue to thicken more, and stir frequently for another 10 minutes.
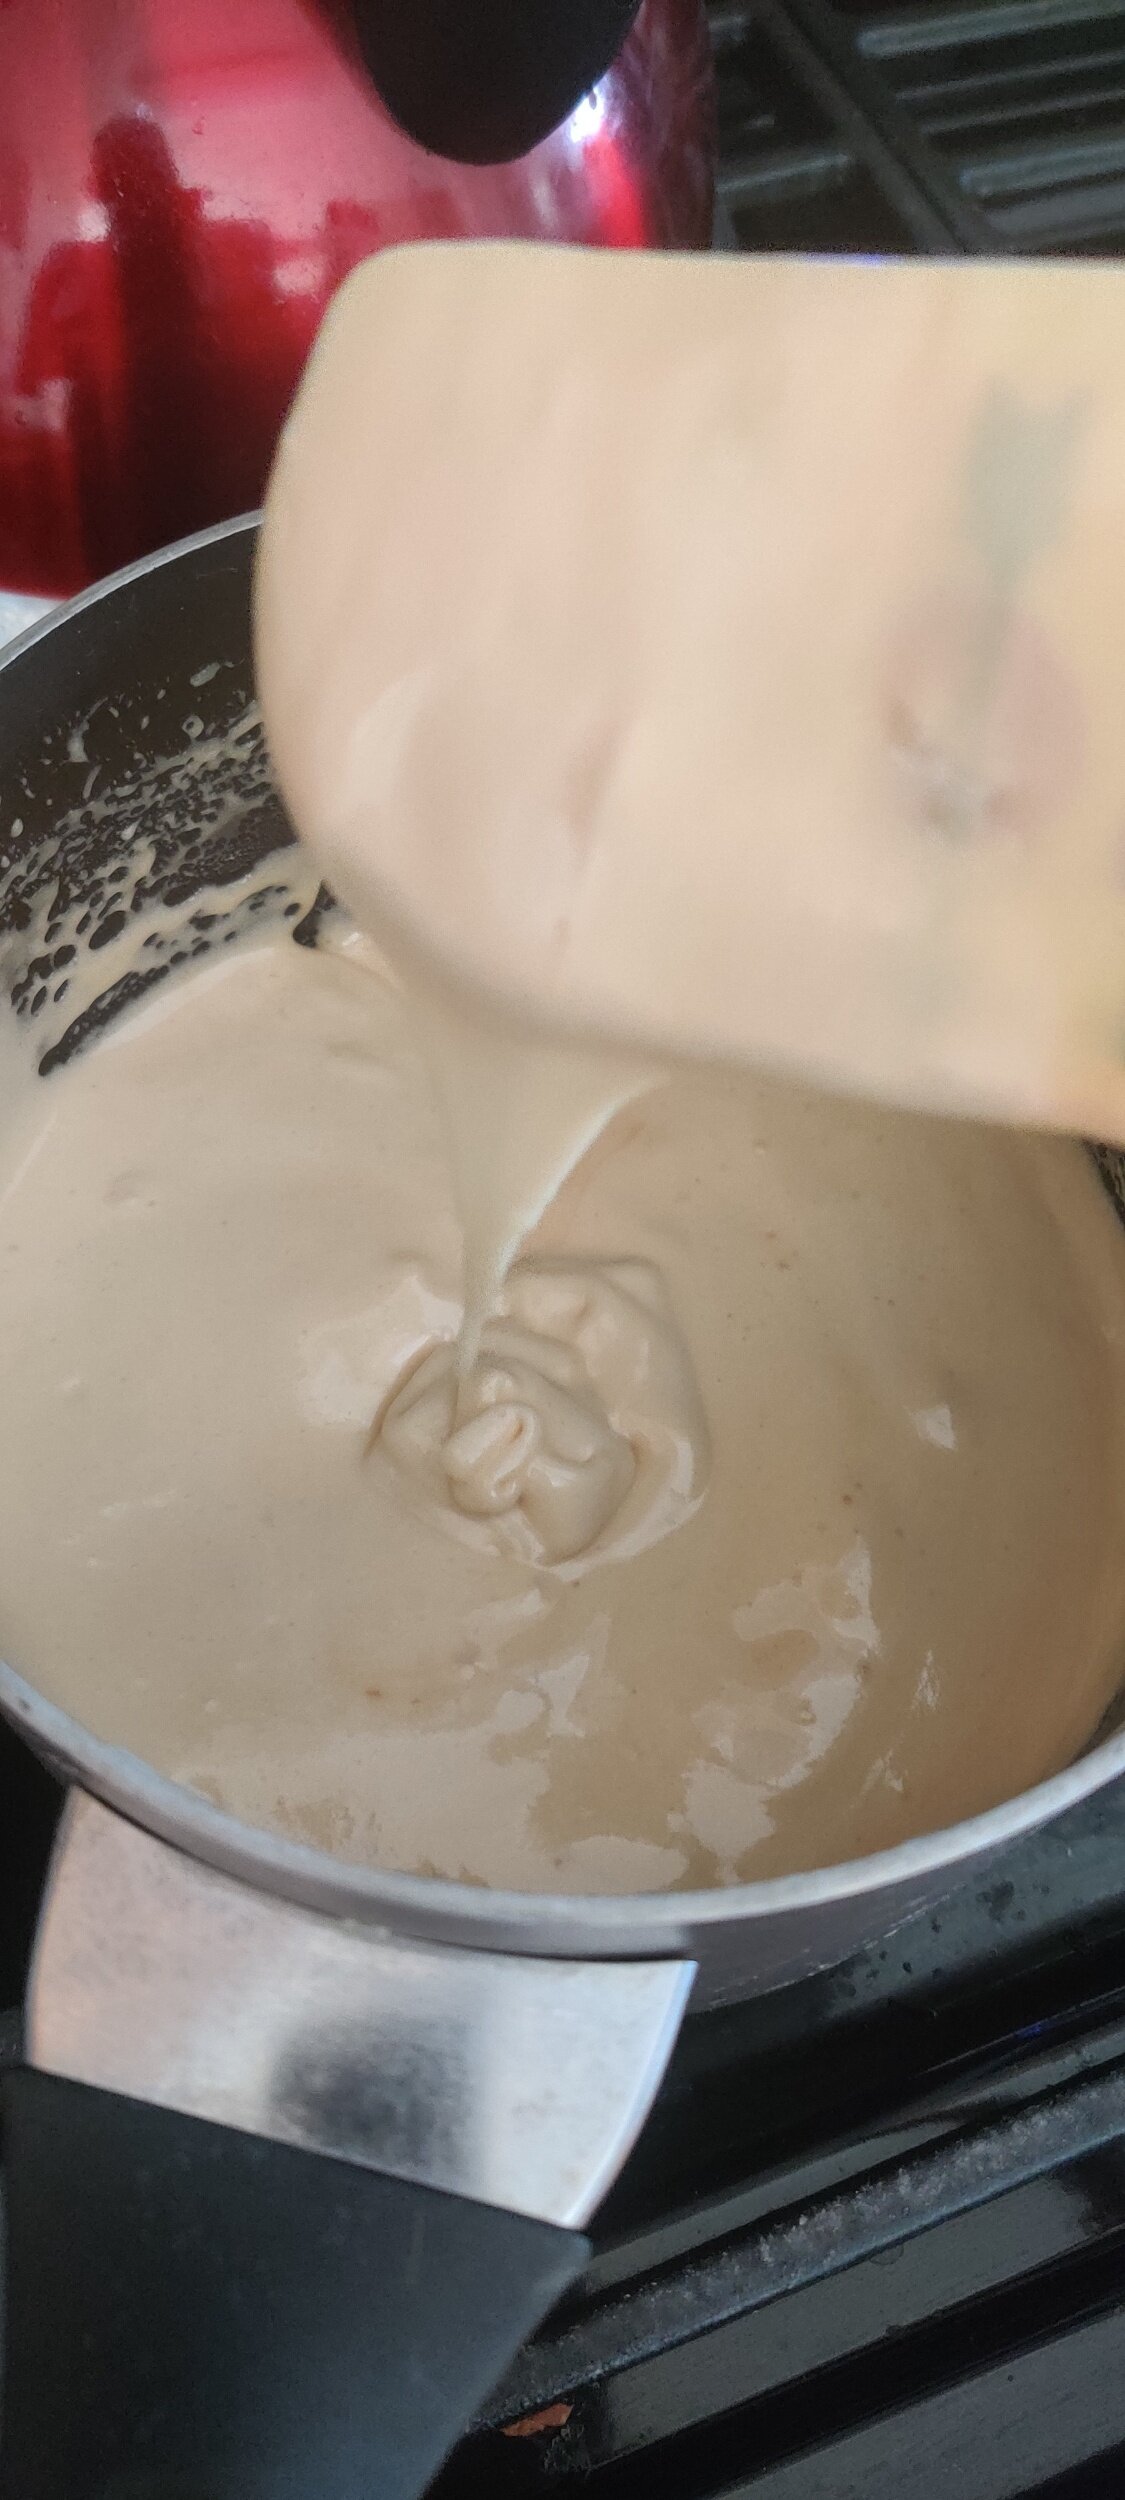
Remove from the stovetop, then stir in the baking soda, salt, and vanilla.
Allow the cajeta to cool, it will eventually darken in colour.
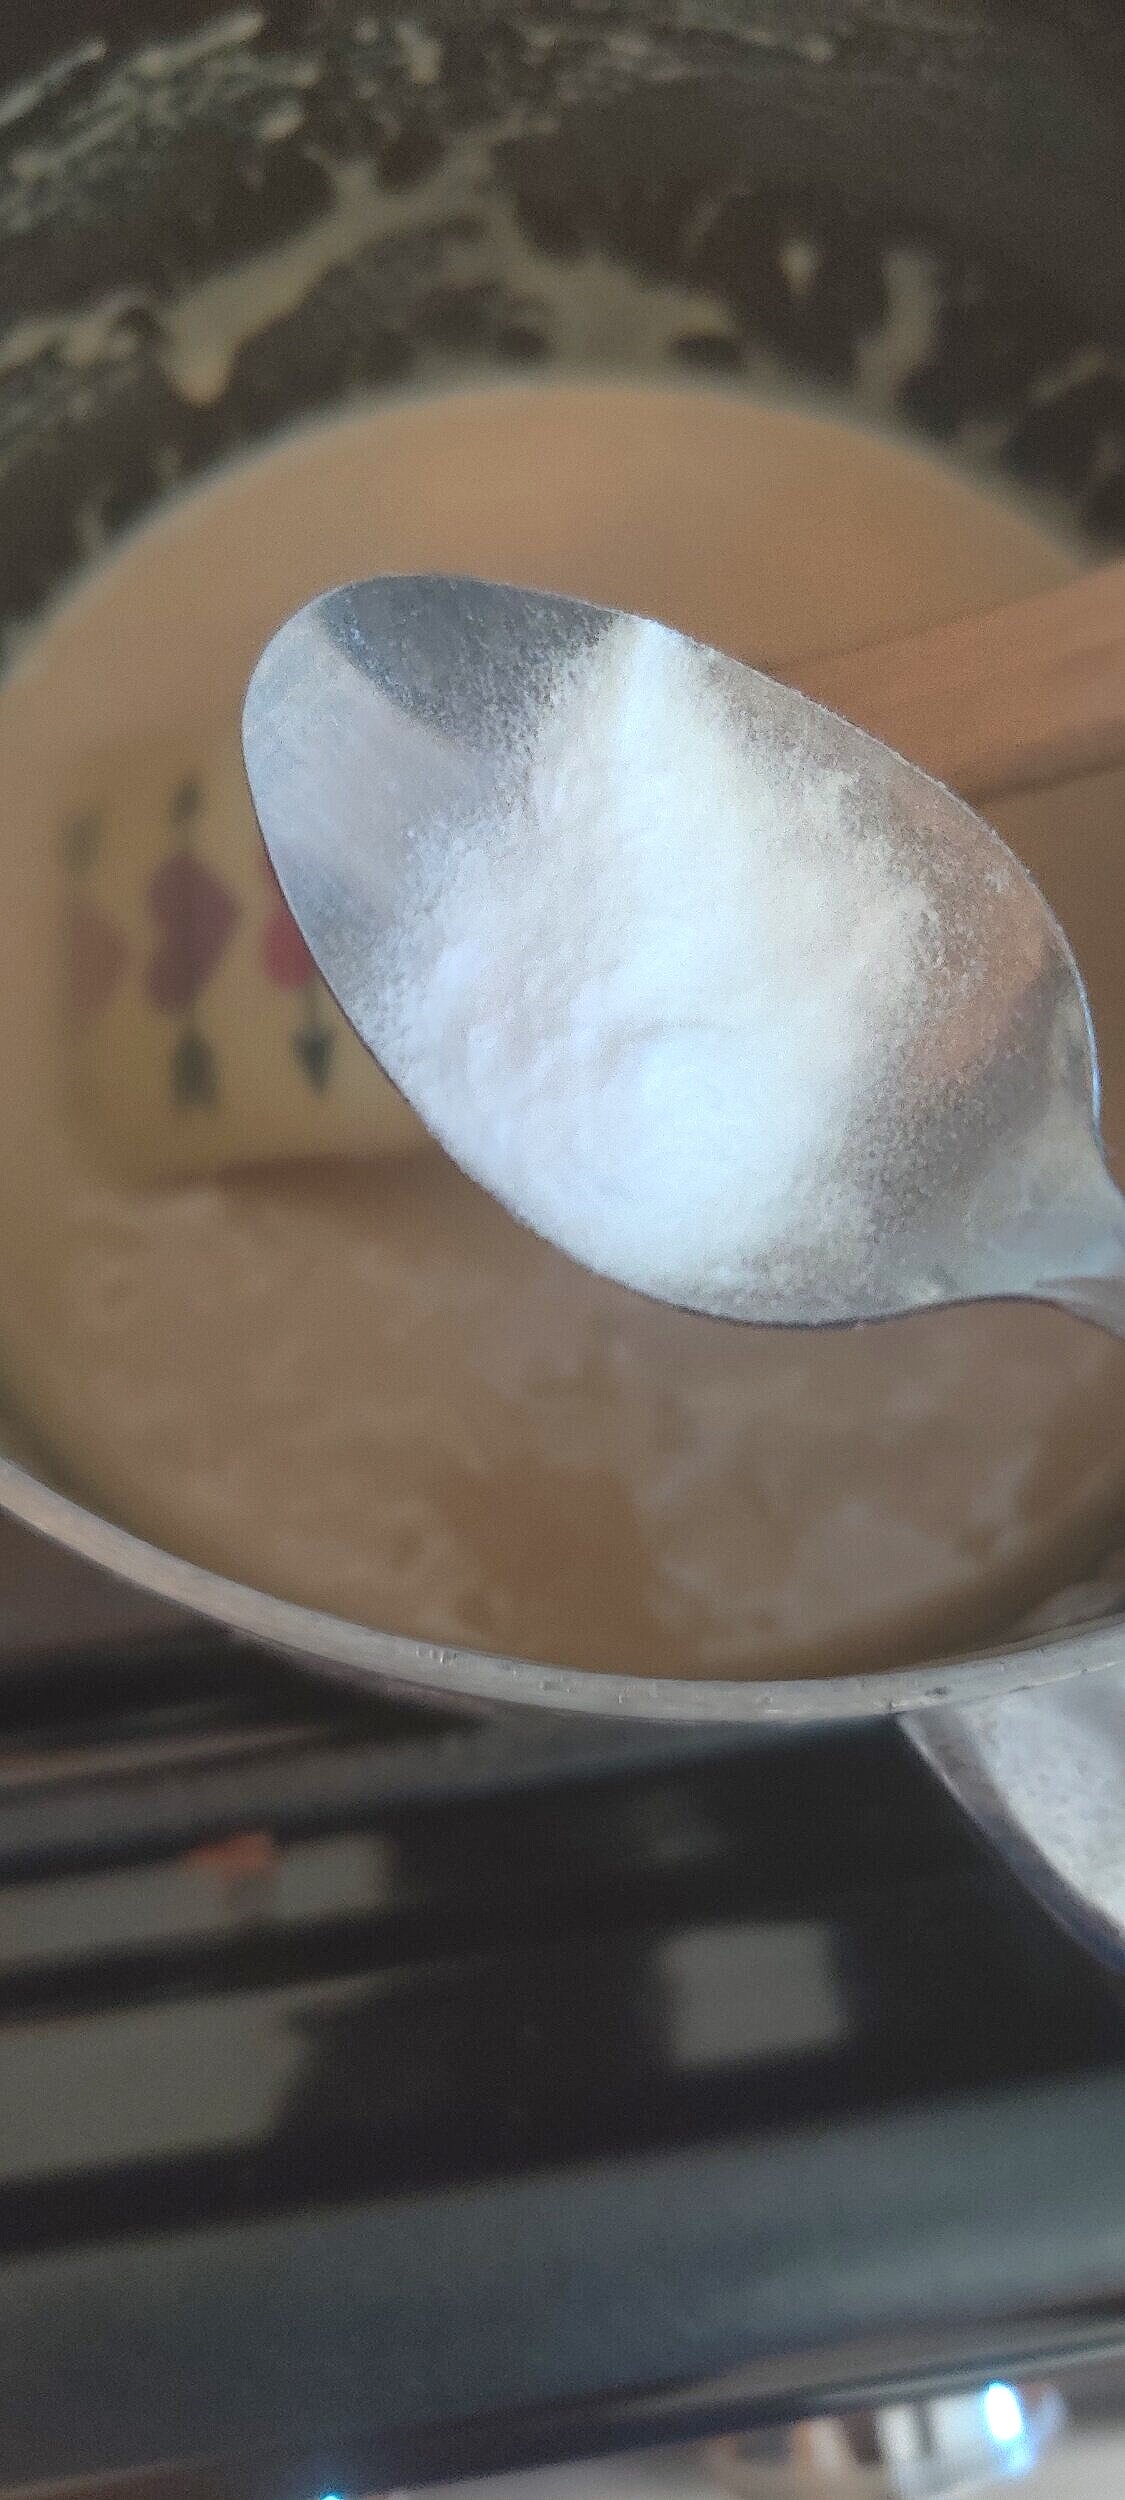
Store in an airtight container and use as needed within 3 months!

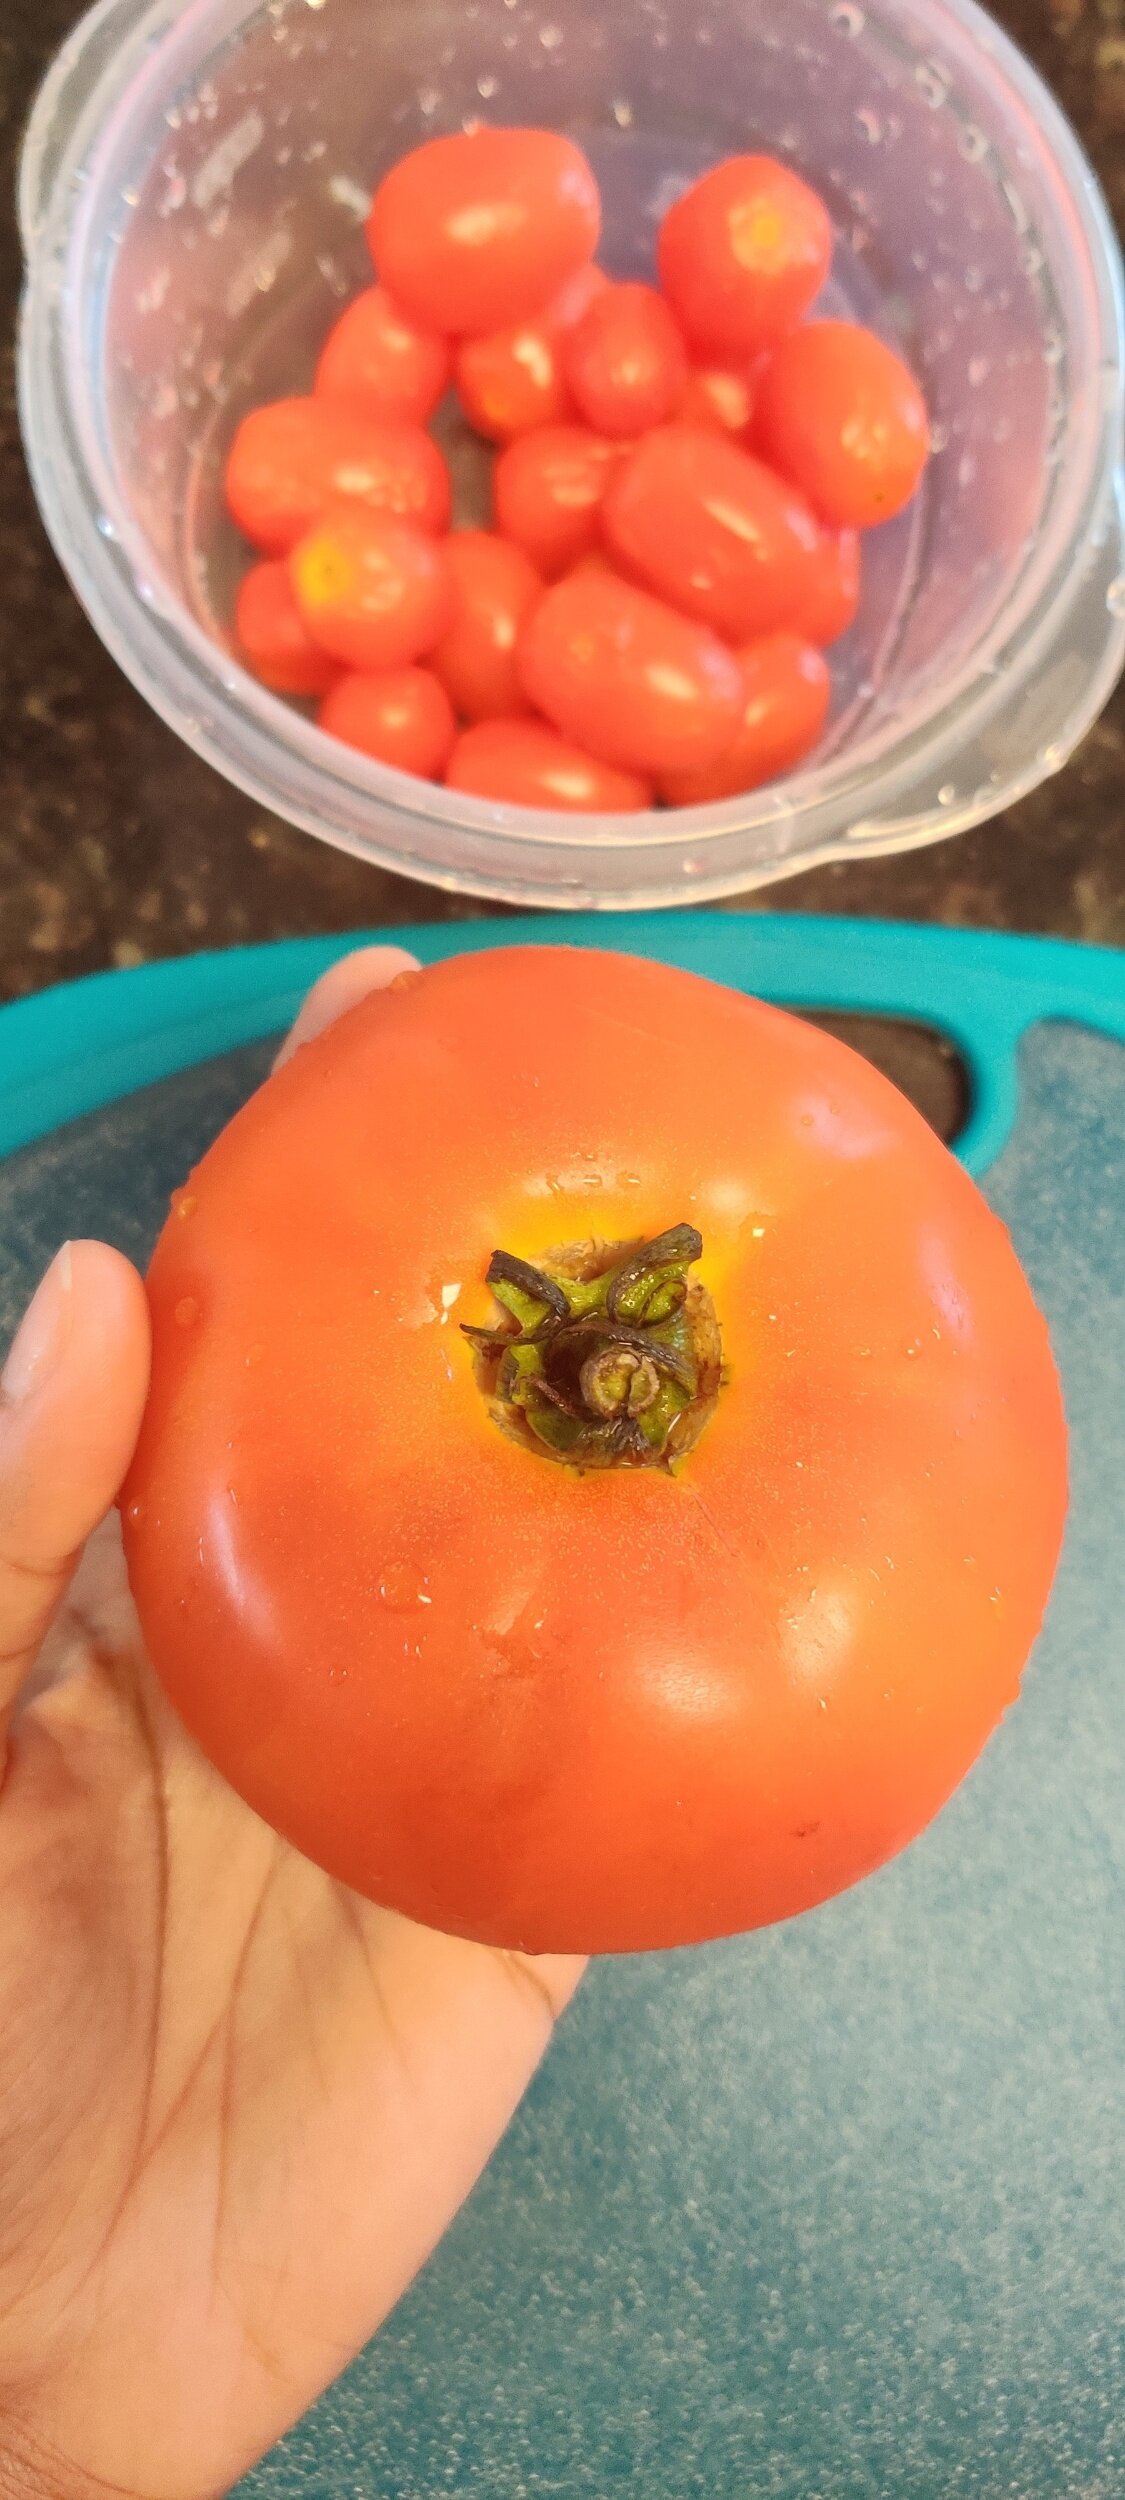
Tomato, Thyme and Cheese Galette
Do you need a delicious summertime pie for brunch or dinner? If you are a lover of fresh tomatoes and thyme, this galette is for you! It's an amazing combination of sweet and savoury and perfect on a hot day. The cheese base provides the fat, which the acidity and the tartness from the tomatoes cut through. Then you have the pie crust which offers a crunchy, buttery, flakey texture.
I love this galette pie and hope you will try it! You can serve it as it is or with a small scoop of sour cream.
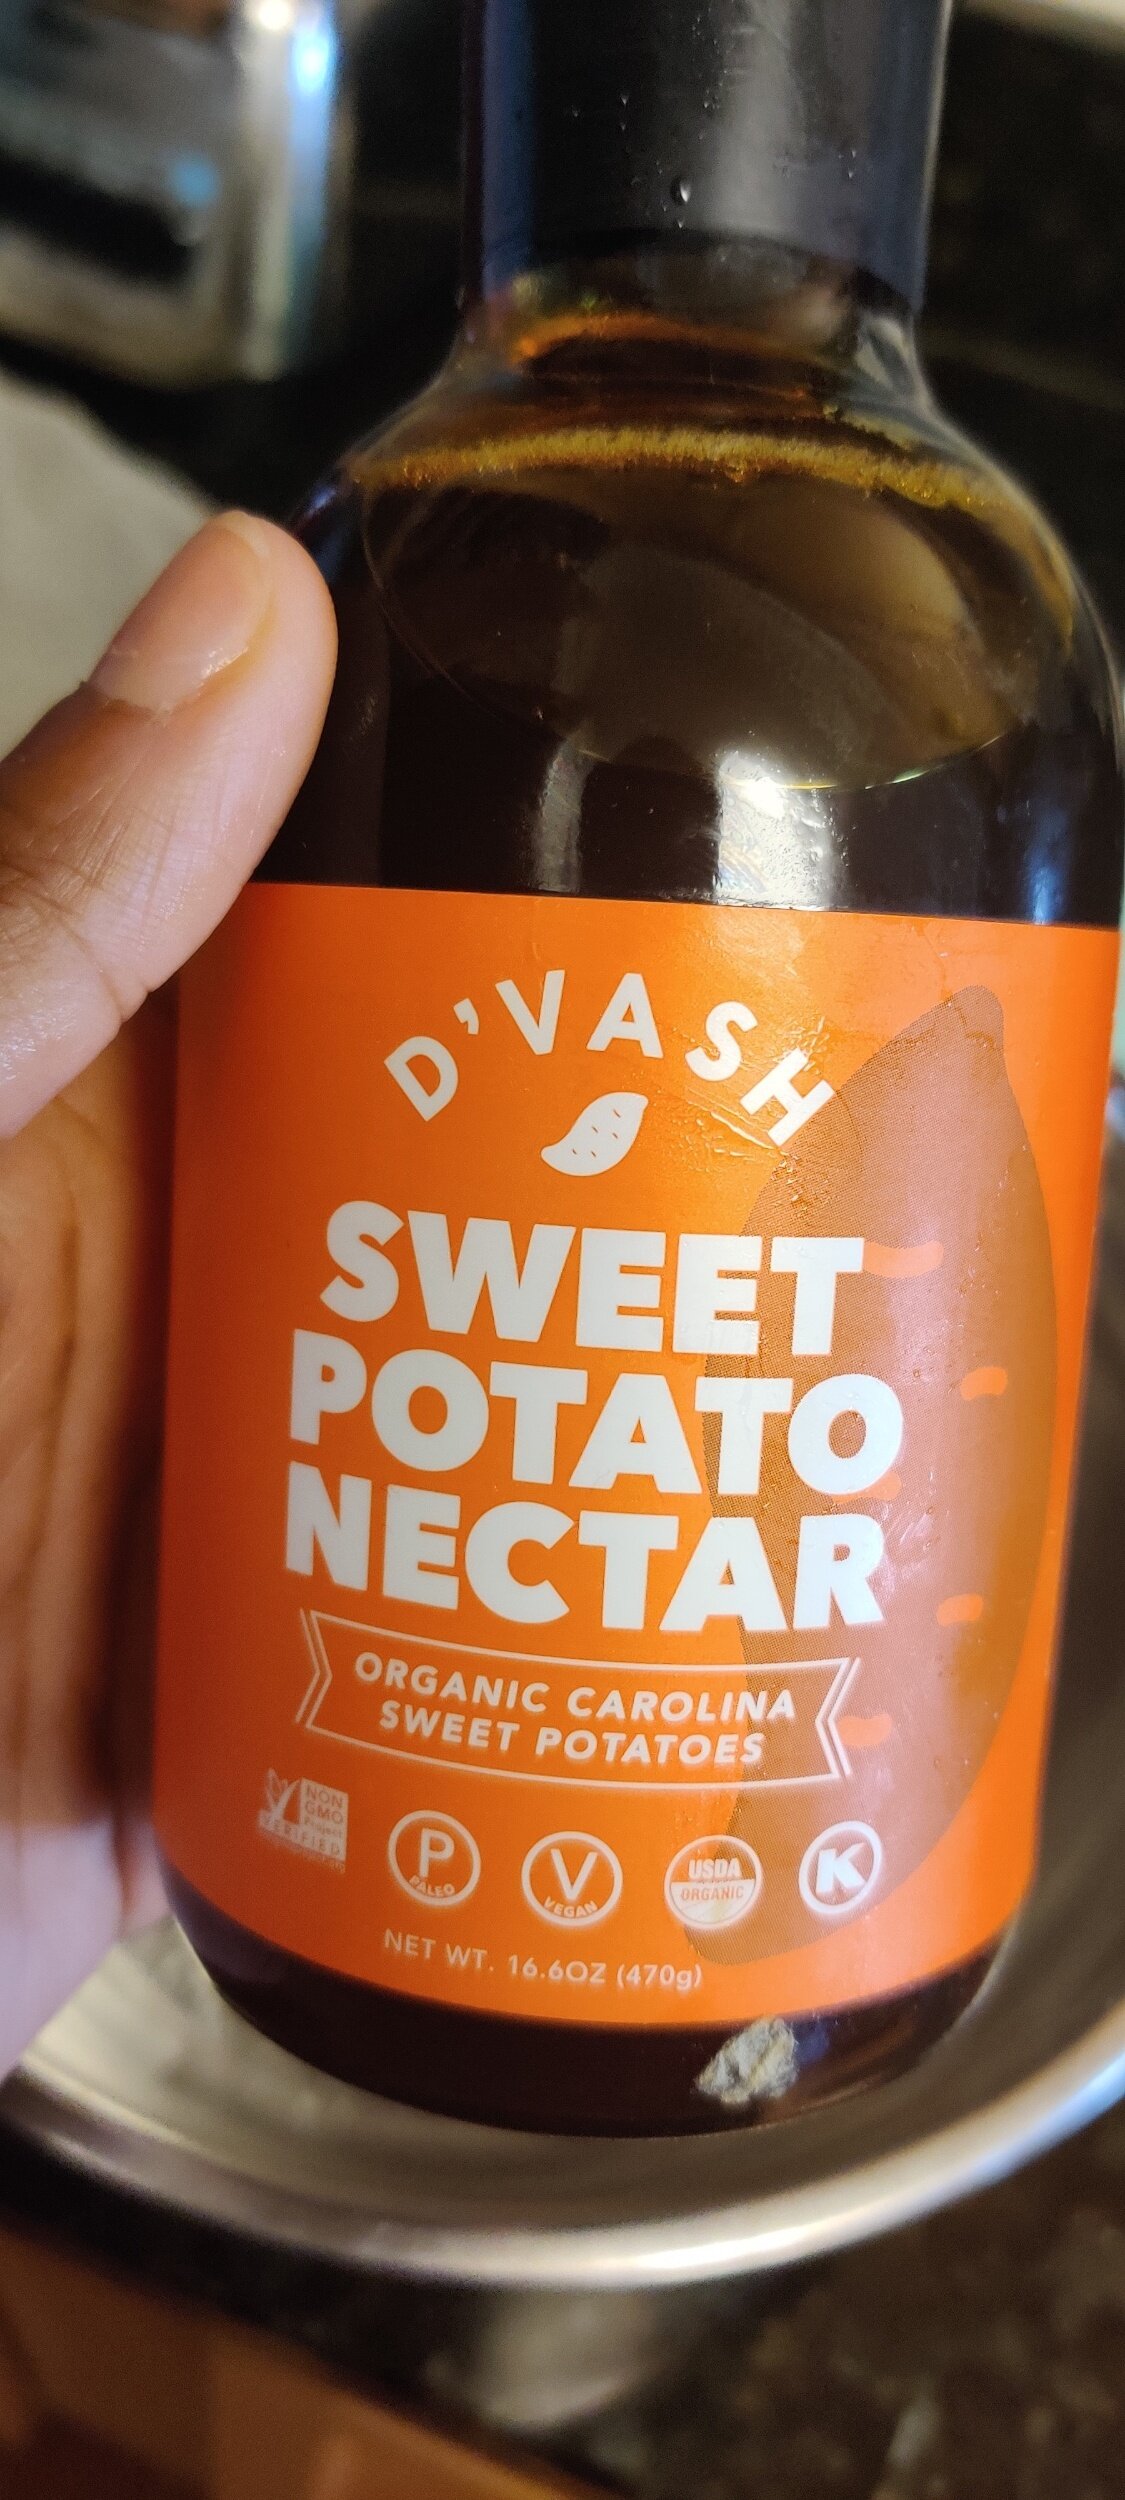
The sweet potato nectar in the marinade adds a subtle sweetness as well as a concentrated, depth of flavour that mingles well with the tomatoes.
The great thing about this free from crust pie is that it doesn't have to be perfect, so have fun with it!
Ingredients
1 large beefsteak tomato
1/4 cup cherry tomatoes
1 tablespoon fresh thyme
1 tablespoon dried thyme
1/4 cup sweet potato nectar (I used D’Vash but you can use another plant-based sweetener)
1 teaspoon salt
1 tablespoon black pepper
1 teaspoon coarsely ground steak seasoning
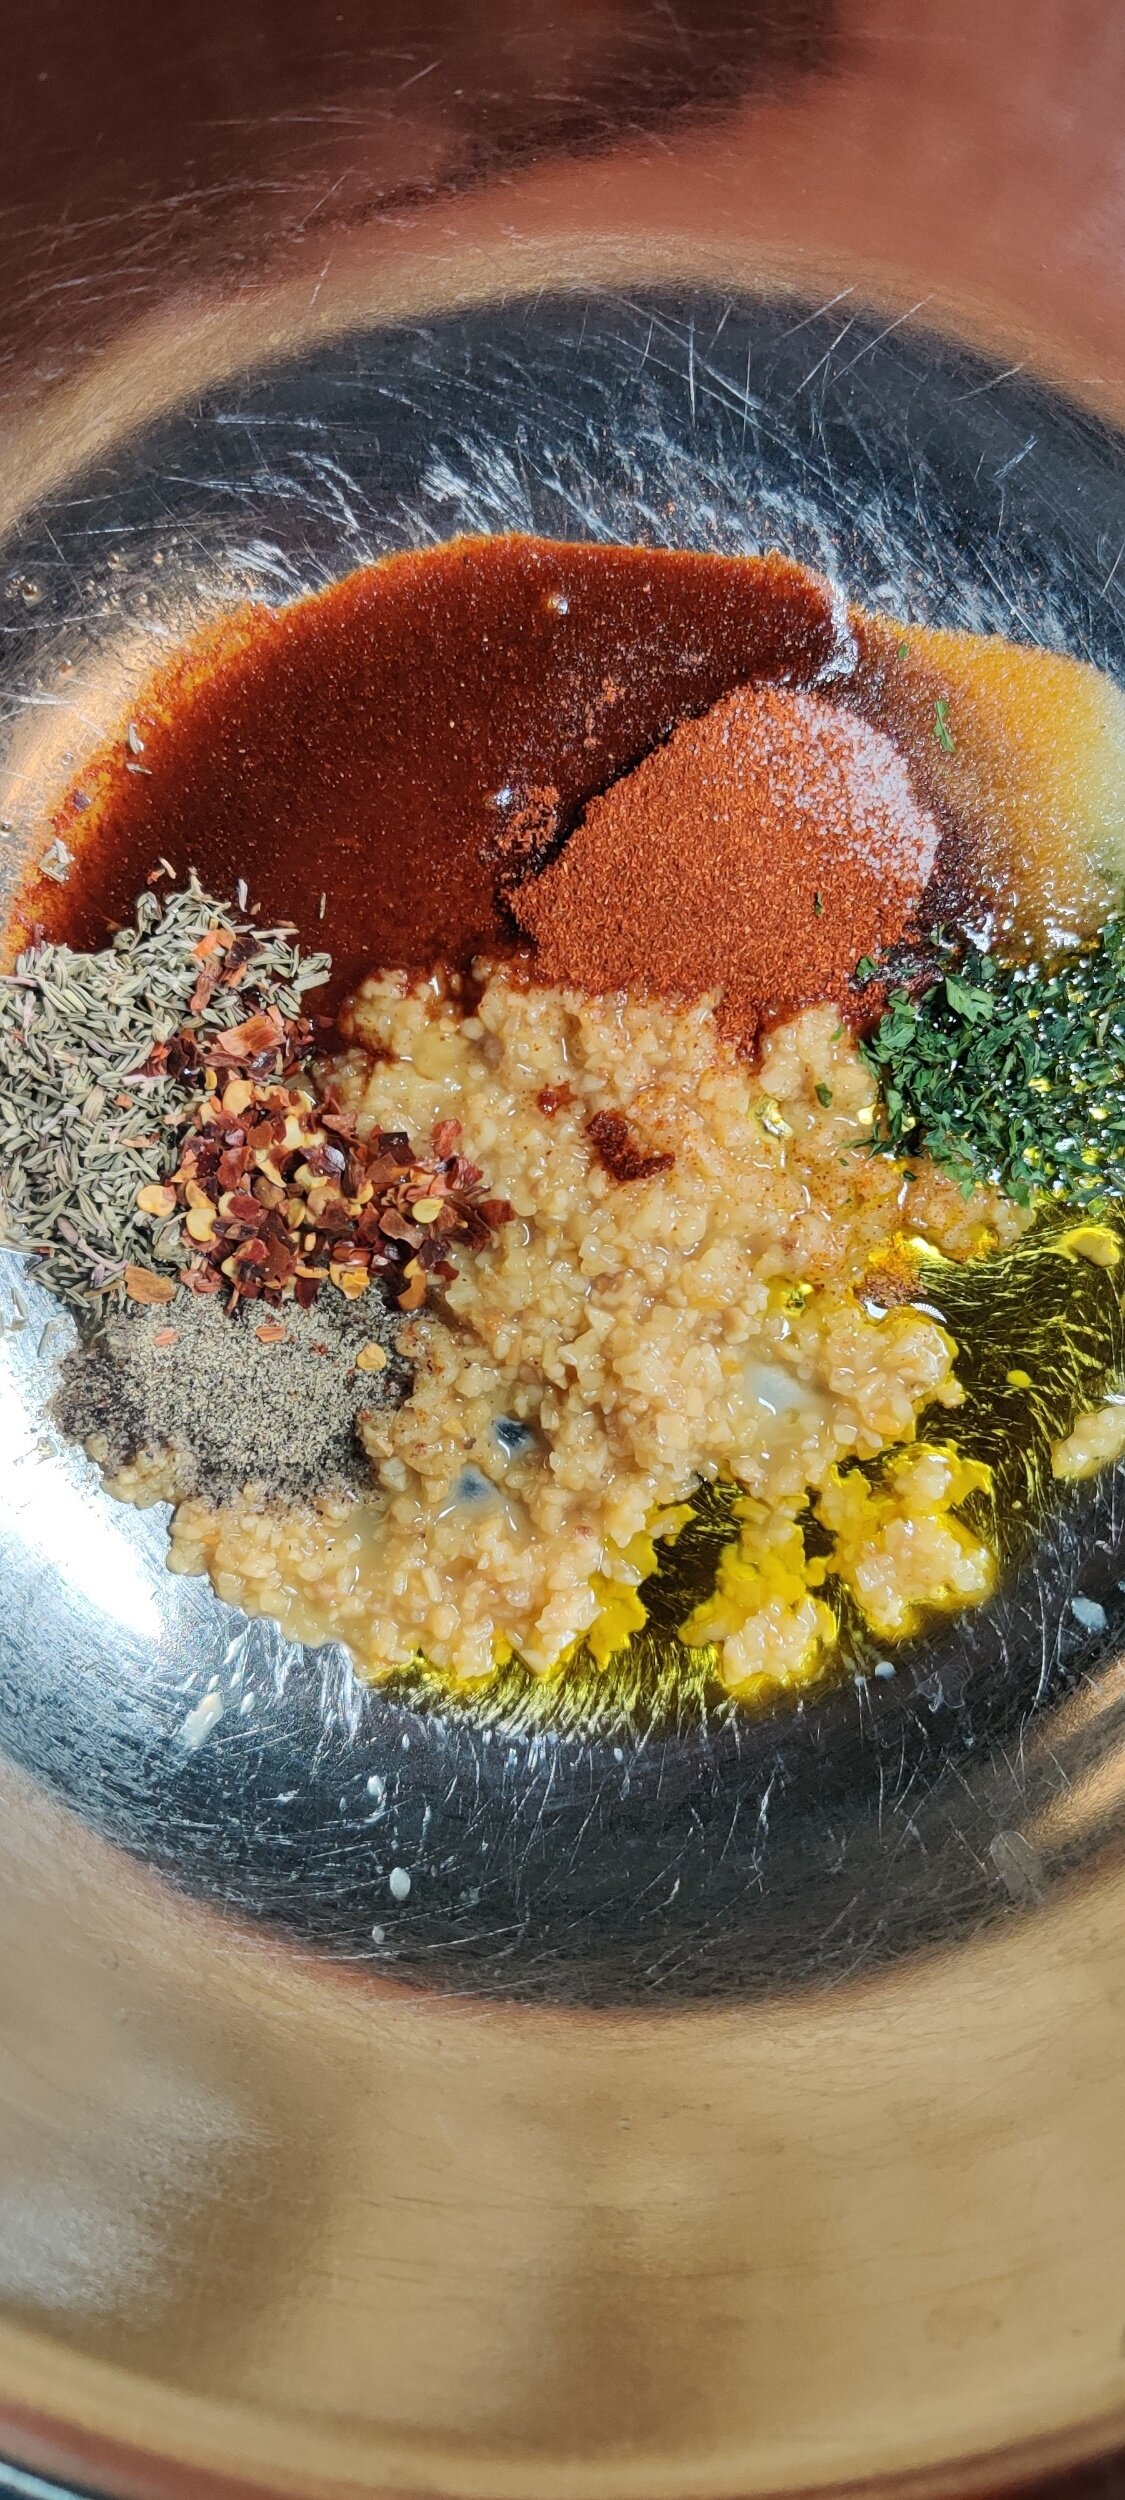
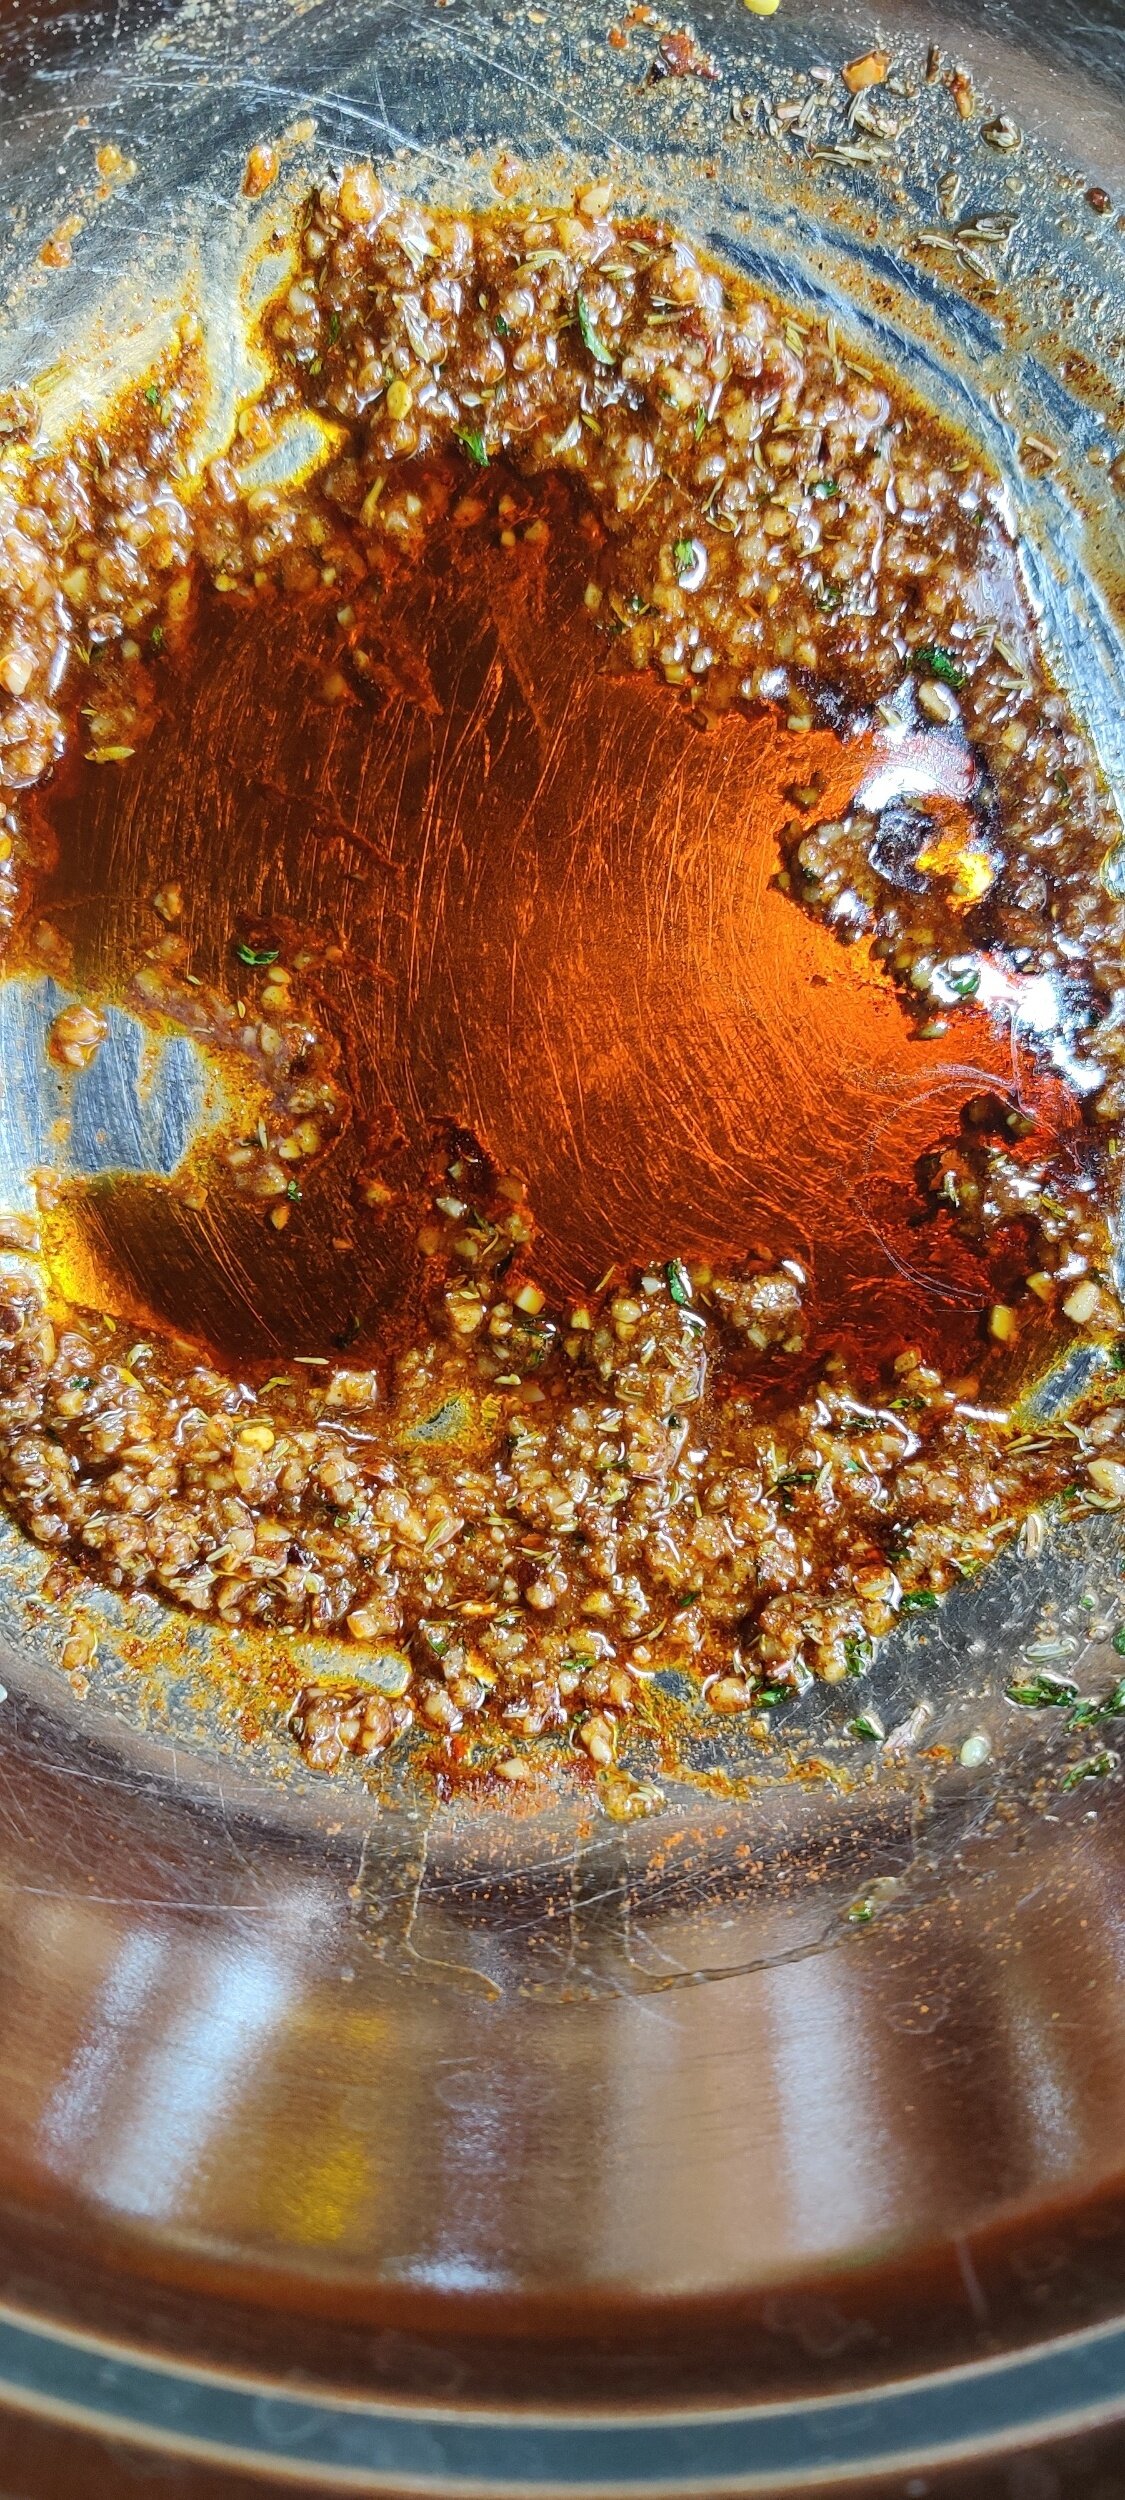
1 teaspoon chili flakes
1 heaped teaspoon garlic, minced
1 tablespoon Worchester sauce
1 tablespoon olive oil
1 tablespoon smoked paprika
1 teaspoon dried parsley
1 pie crust
1 egg, beaten
Cheese base:
1/8 cup heavy cream
1/3 cup cheddar cheese, grated
1 tablespoon queso fresco, crumbled
1/2 teaspoon fresh thyme
1/2 teaspoon dried thyme
1 teaspoon smoked paprika
1 teaspoon cayenne pepper
1/2 teaspoon salt
1 teaspoon black pepper
1 tablespoon sour cream


Instructions
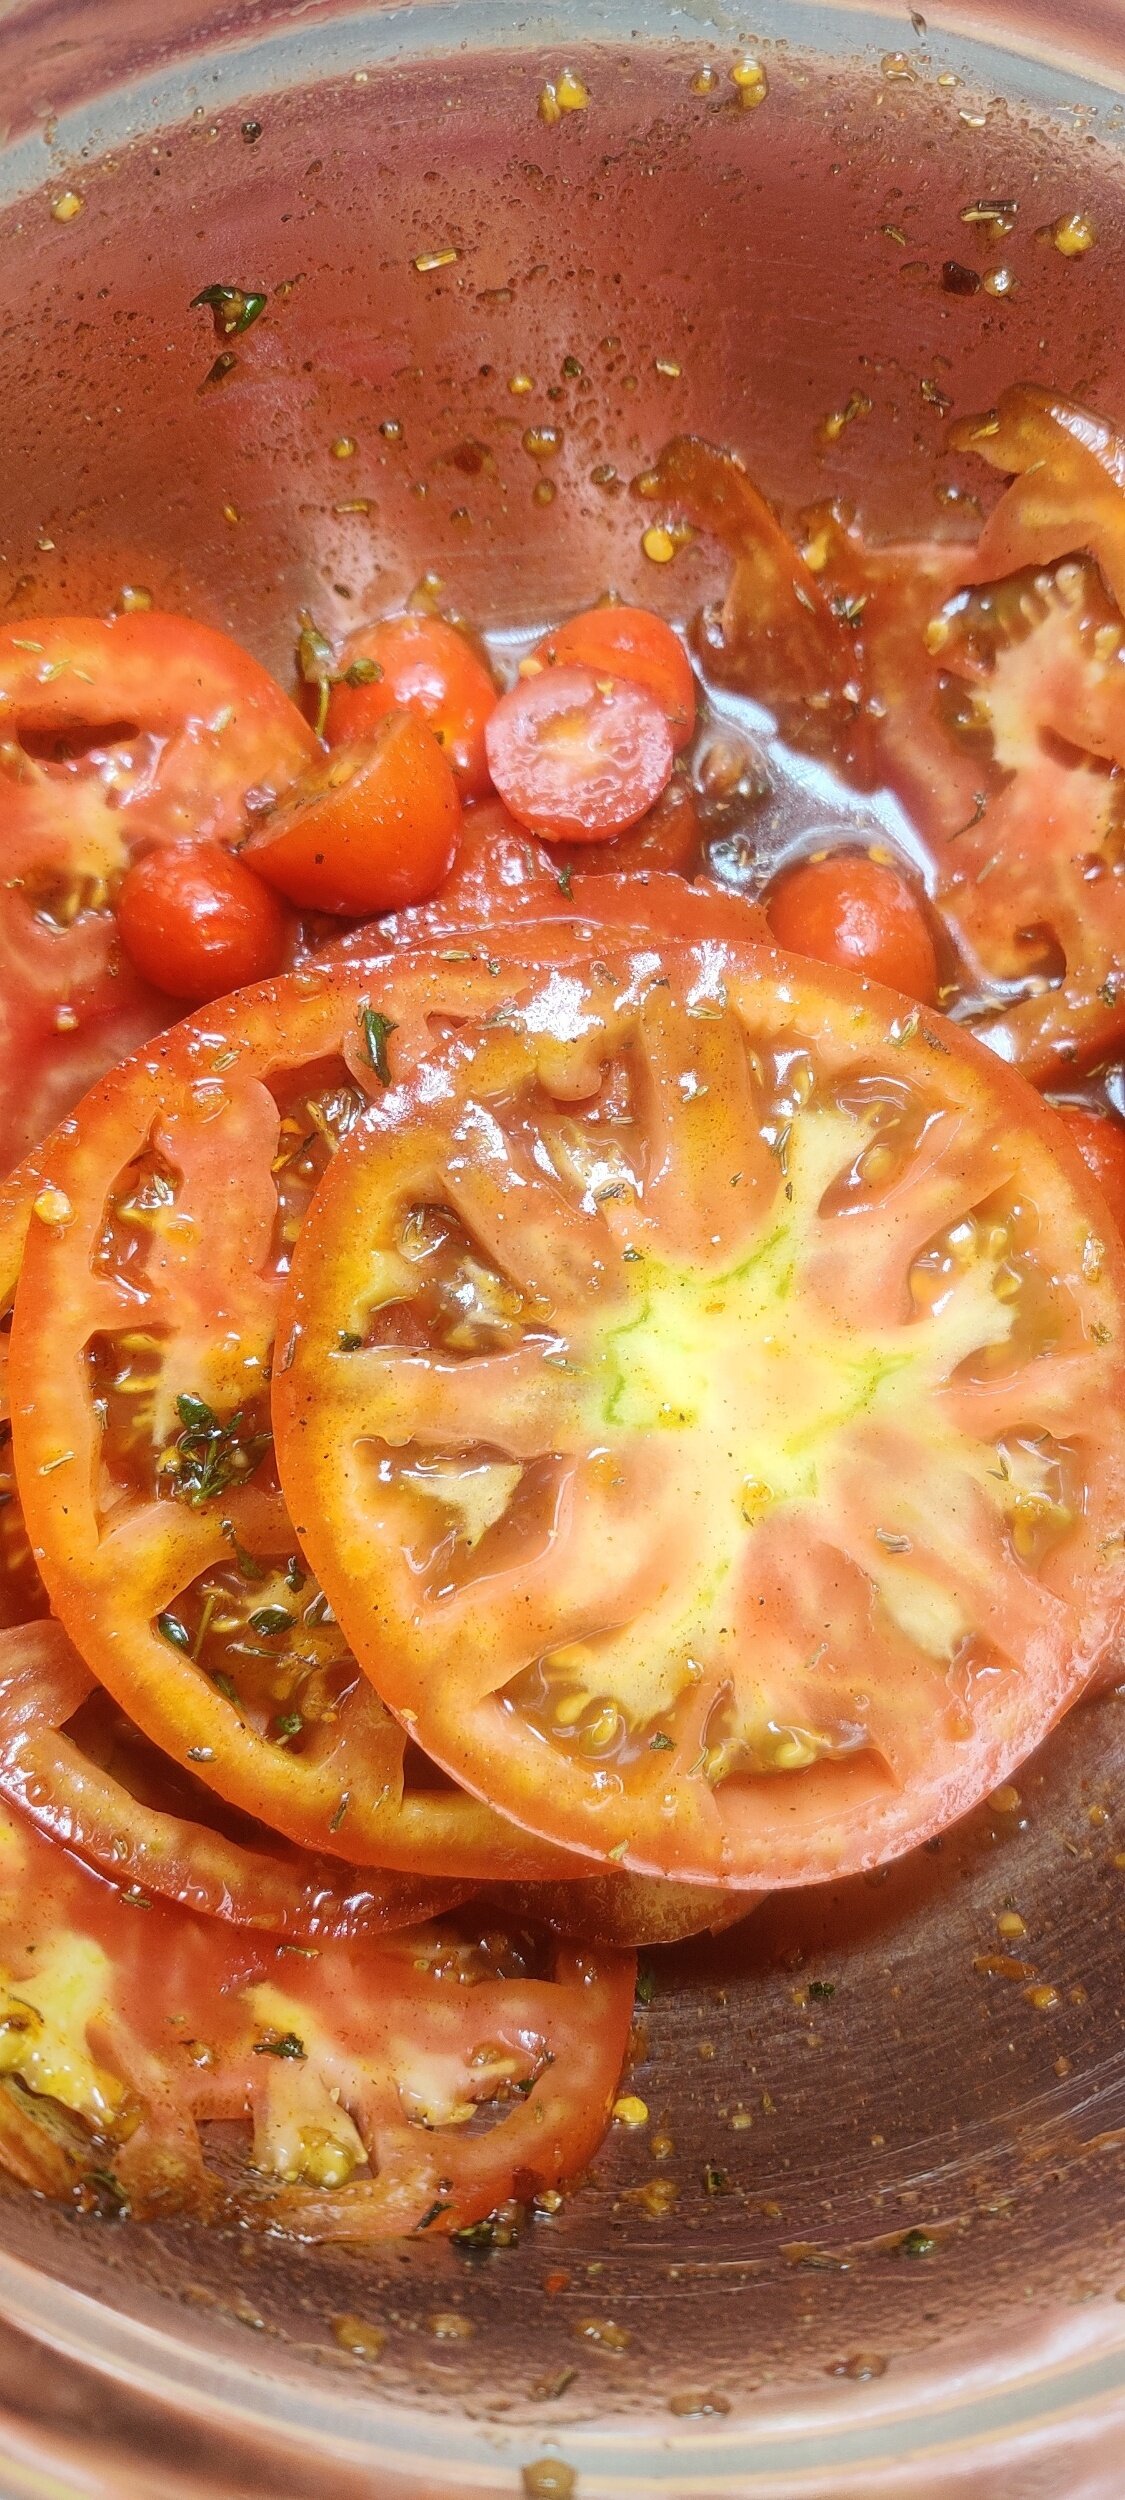
Prepare your tomatoes. Thinly slice the beefsteak tomato and slice the cherry tomatoes in half.
Make the marinade. Whisk together the olive oil, garlic, paprika, salt, pepper, Worchester, sweet potato nectar, chilli flakes, and thyme in a bowl. Place the tomatoes in the bowl and gently mix until all are coated evenly. Set aside.
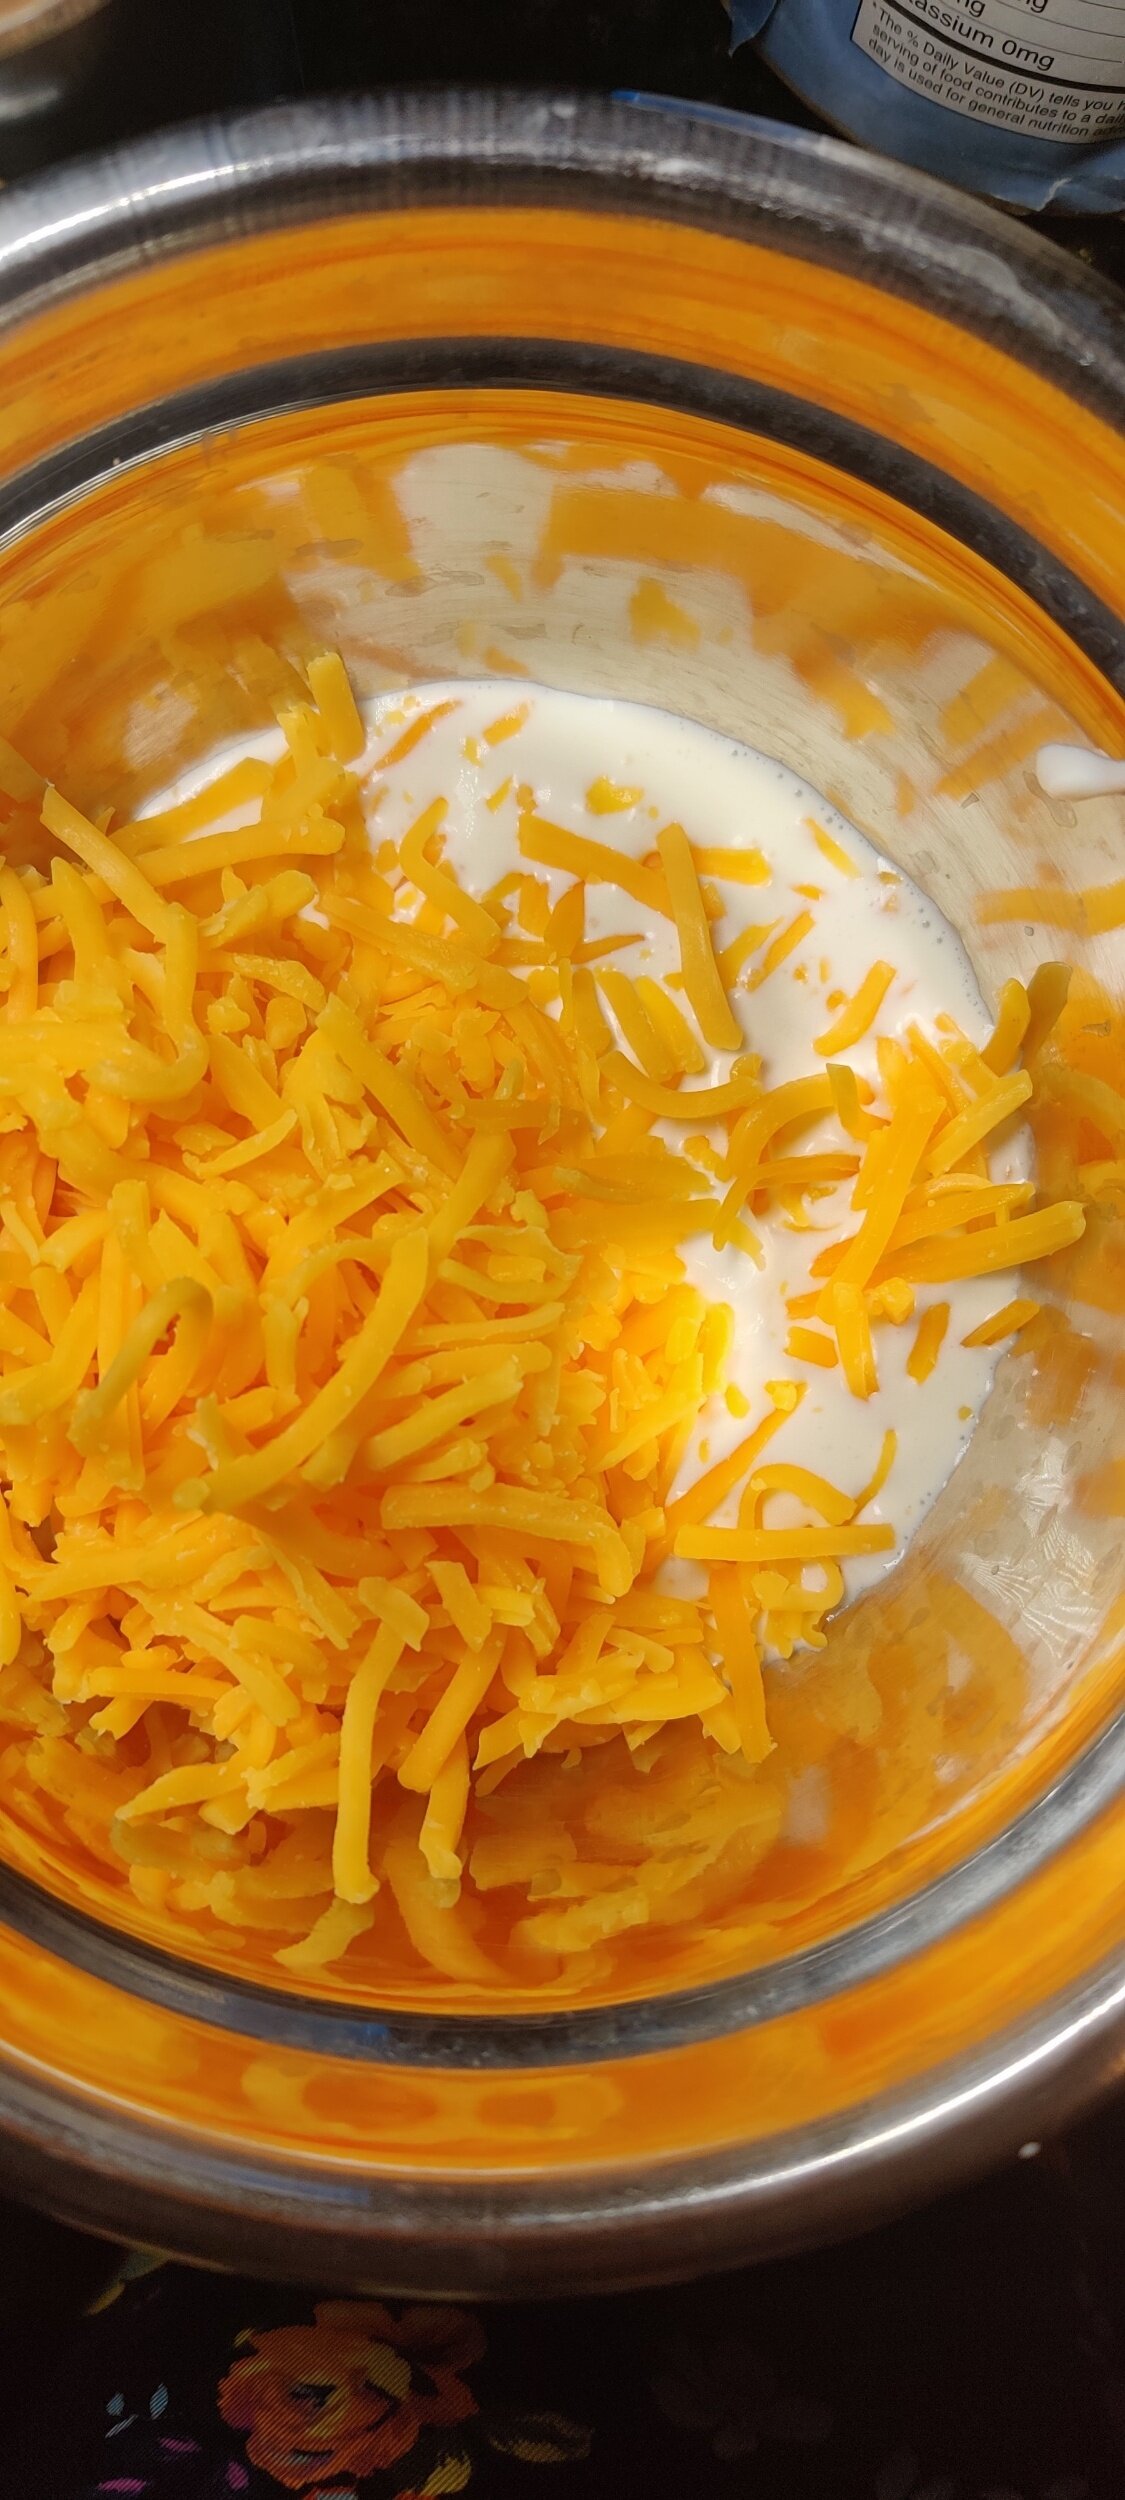
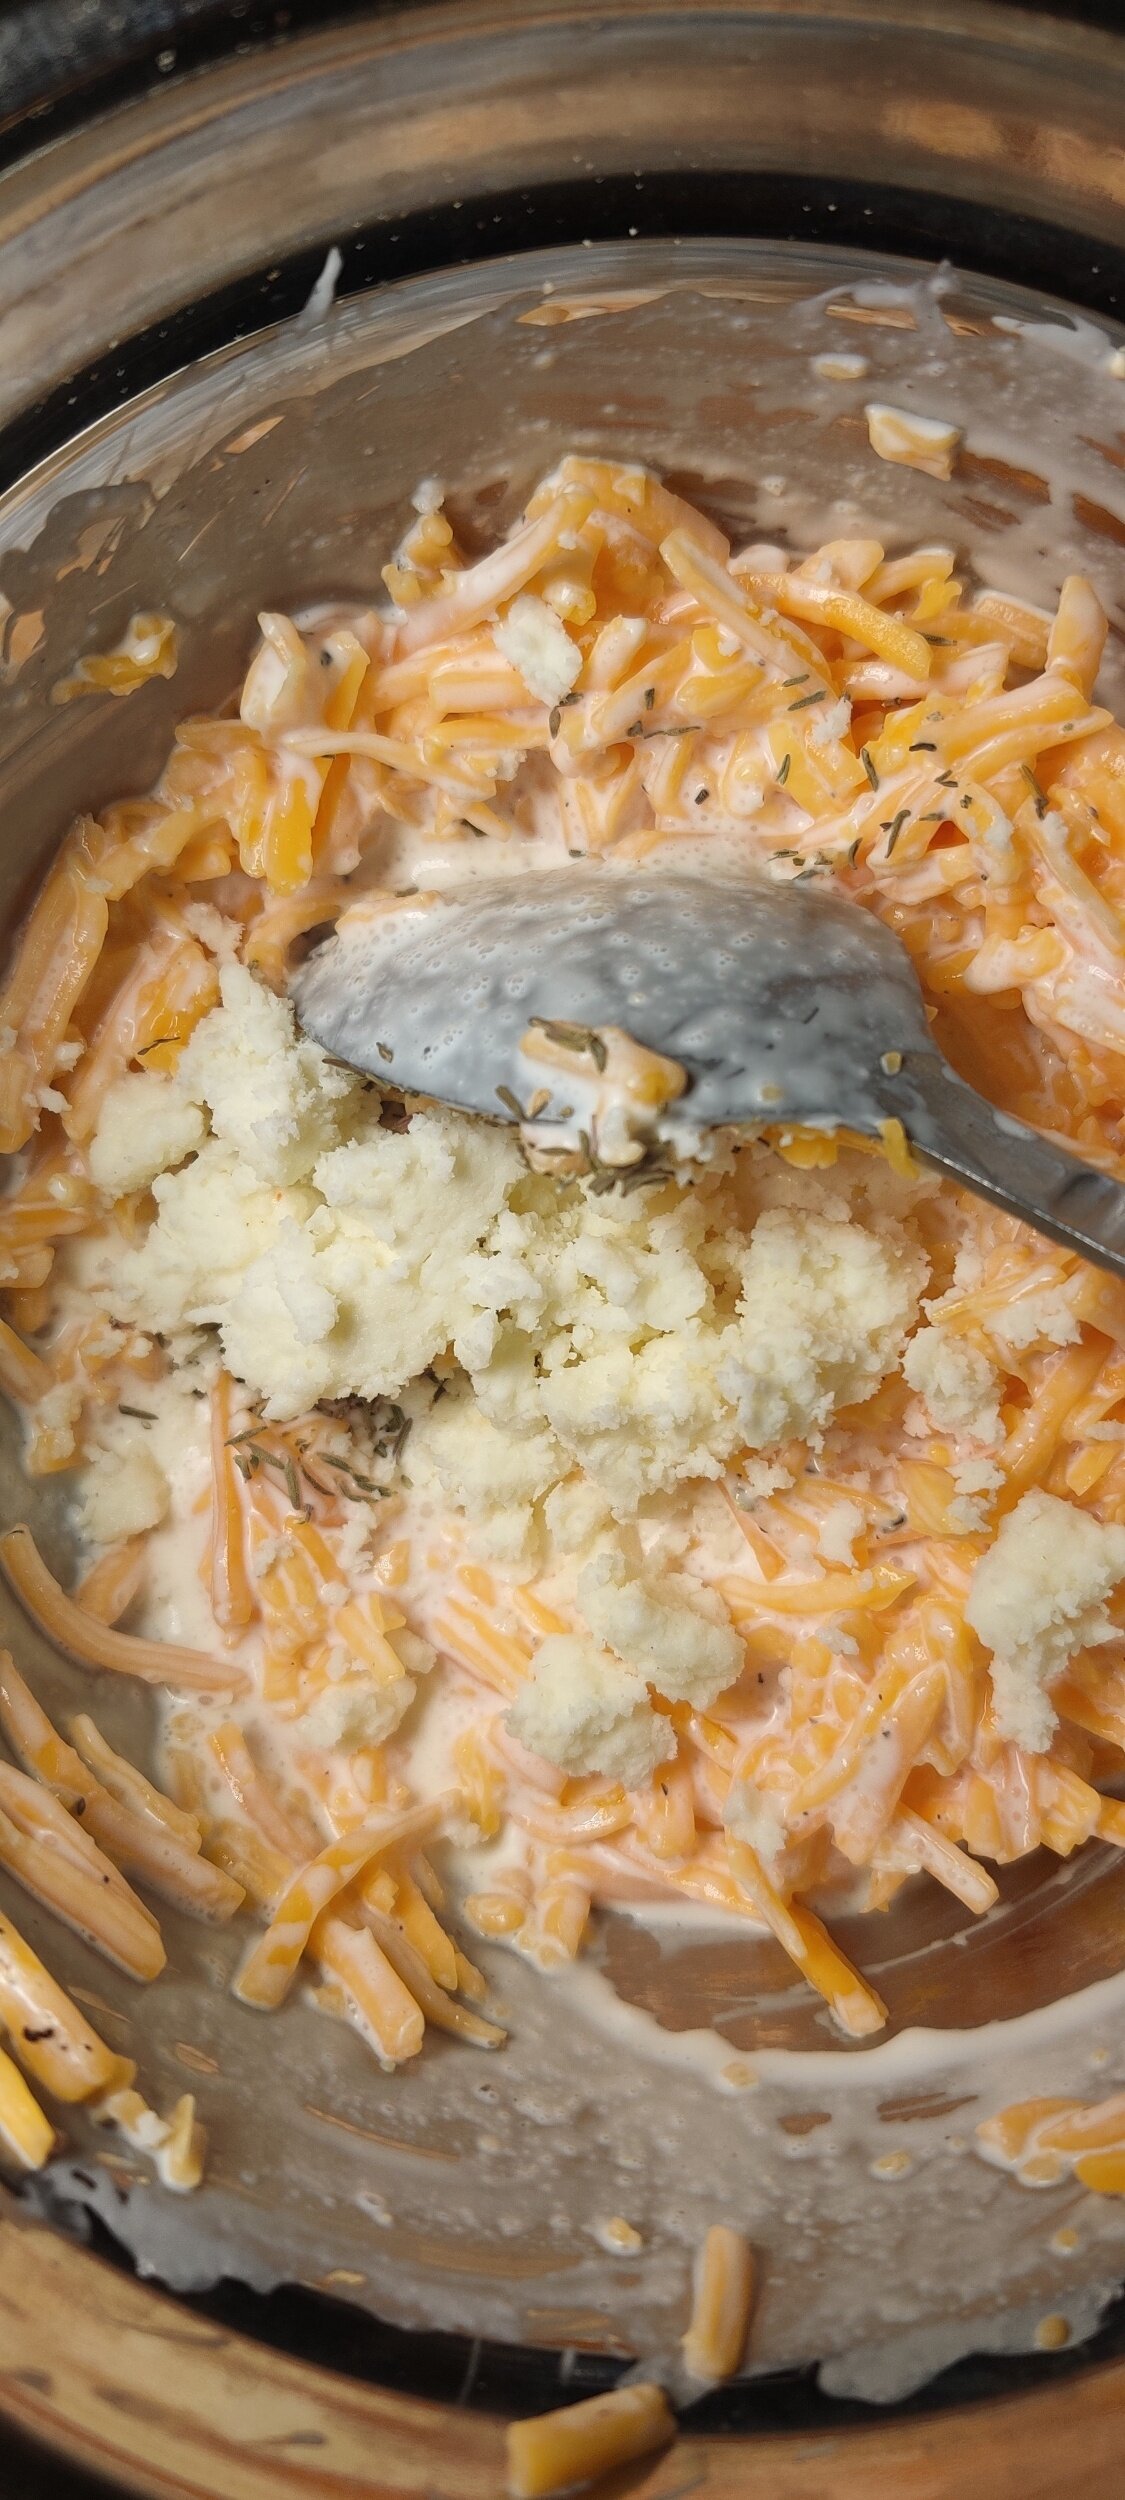
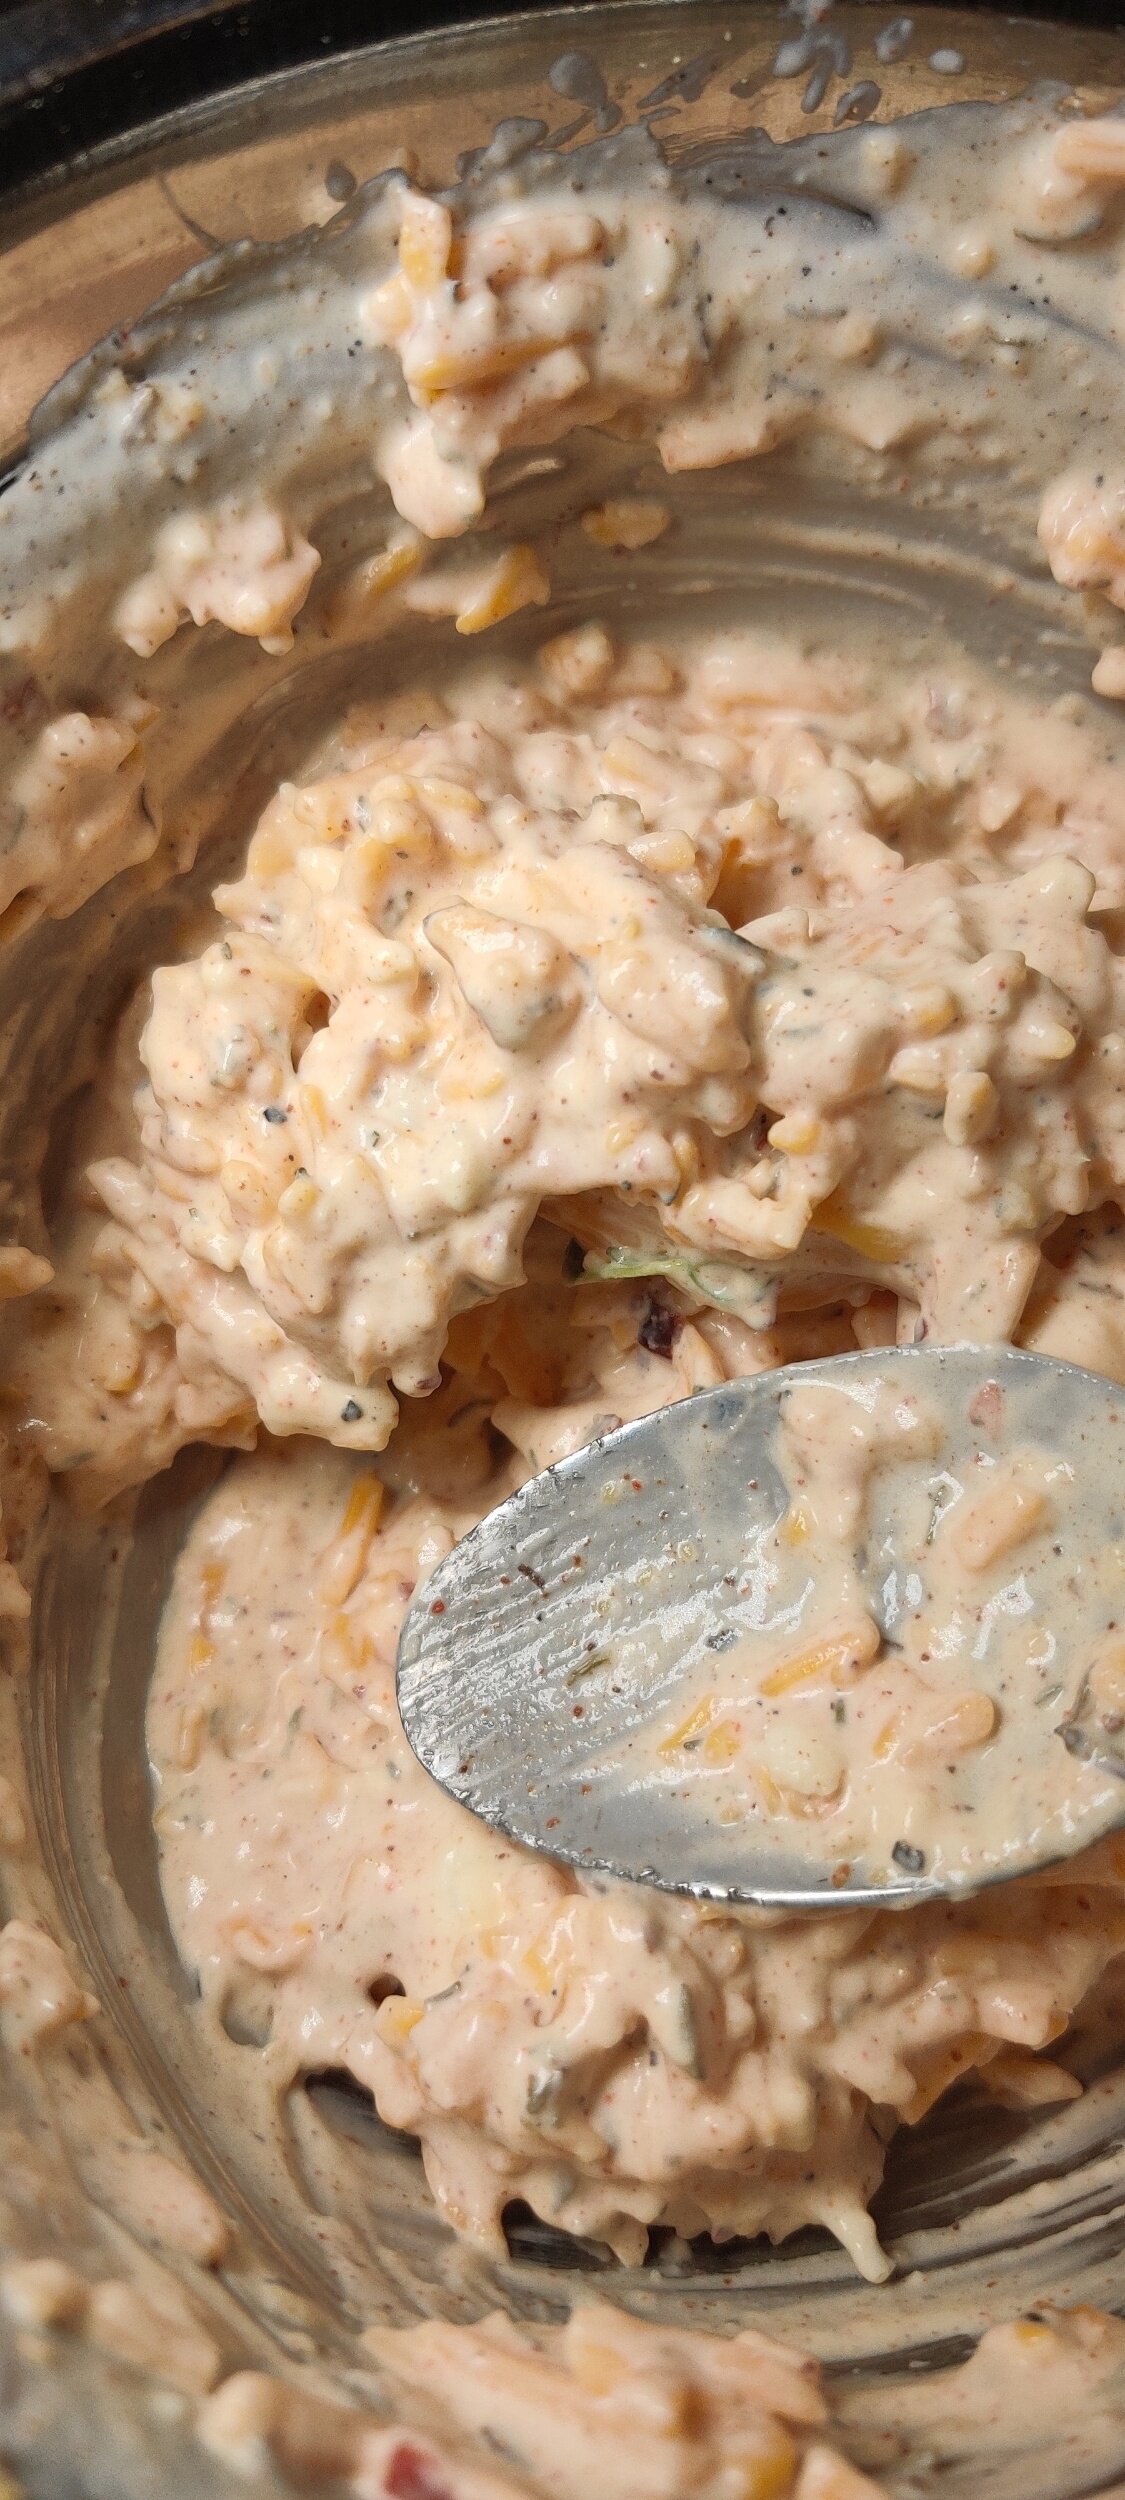
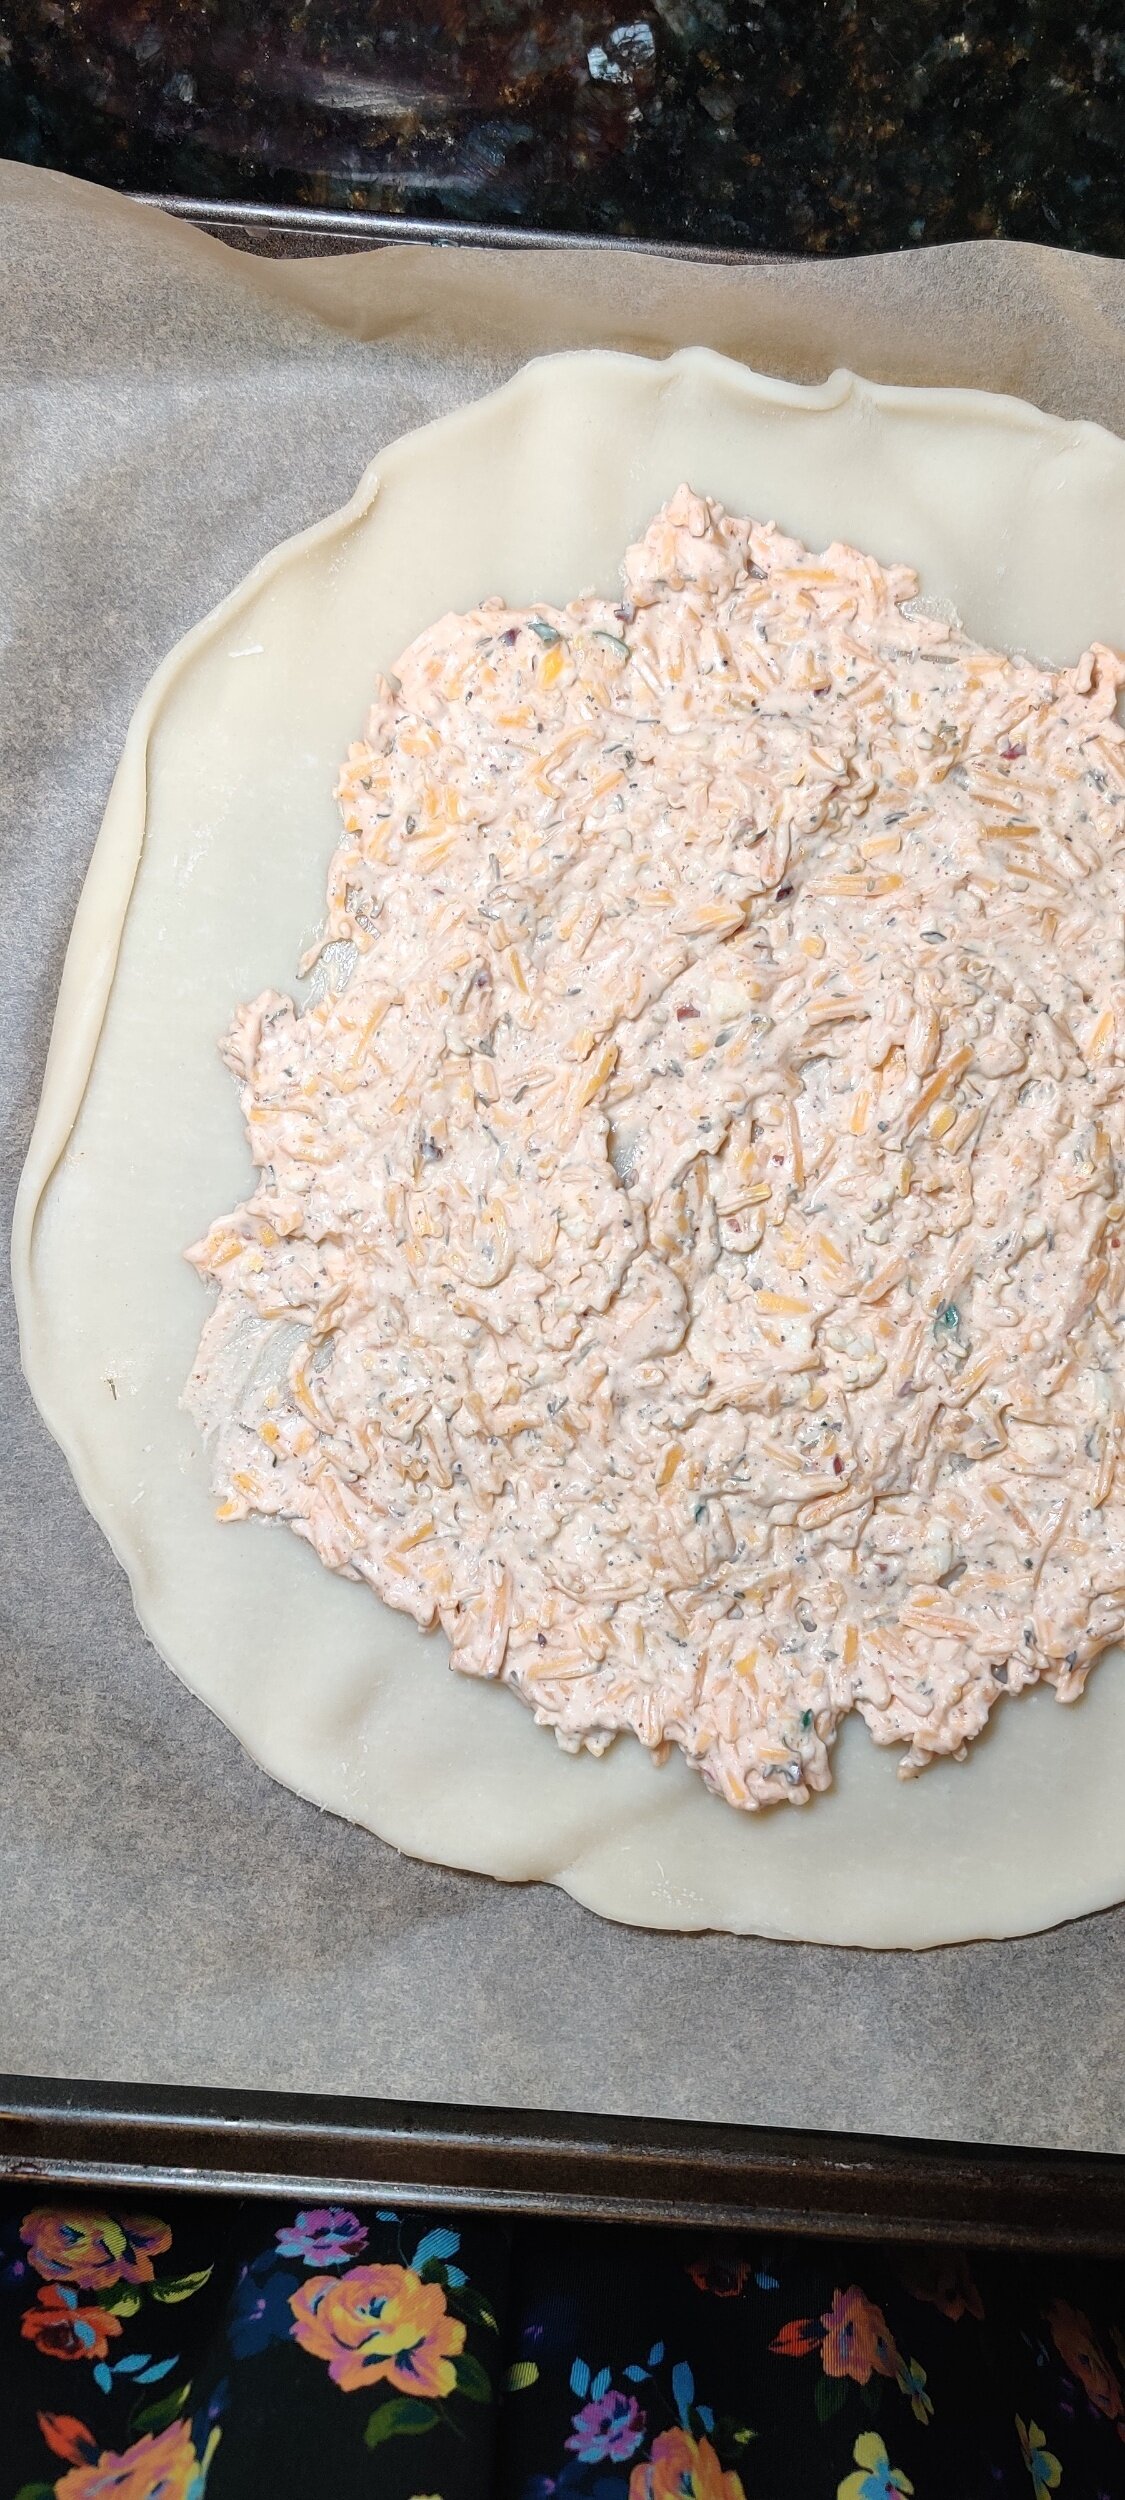
Make the cheese base. Mix the cheddar cheese, queso cheese, seasoning, fresh thyme, heavy cream, and sour cream. Taste and make sure you like the flavour. Spread the cheese mix over the centre of the pie crust, leaving a few inches to fold over.
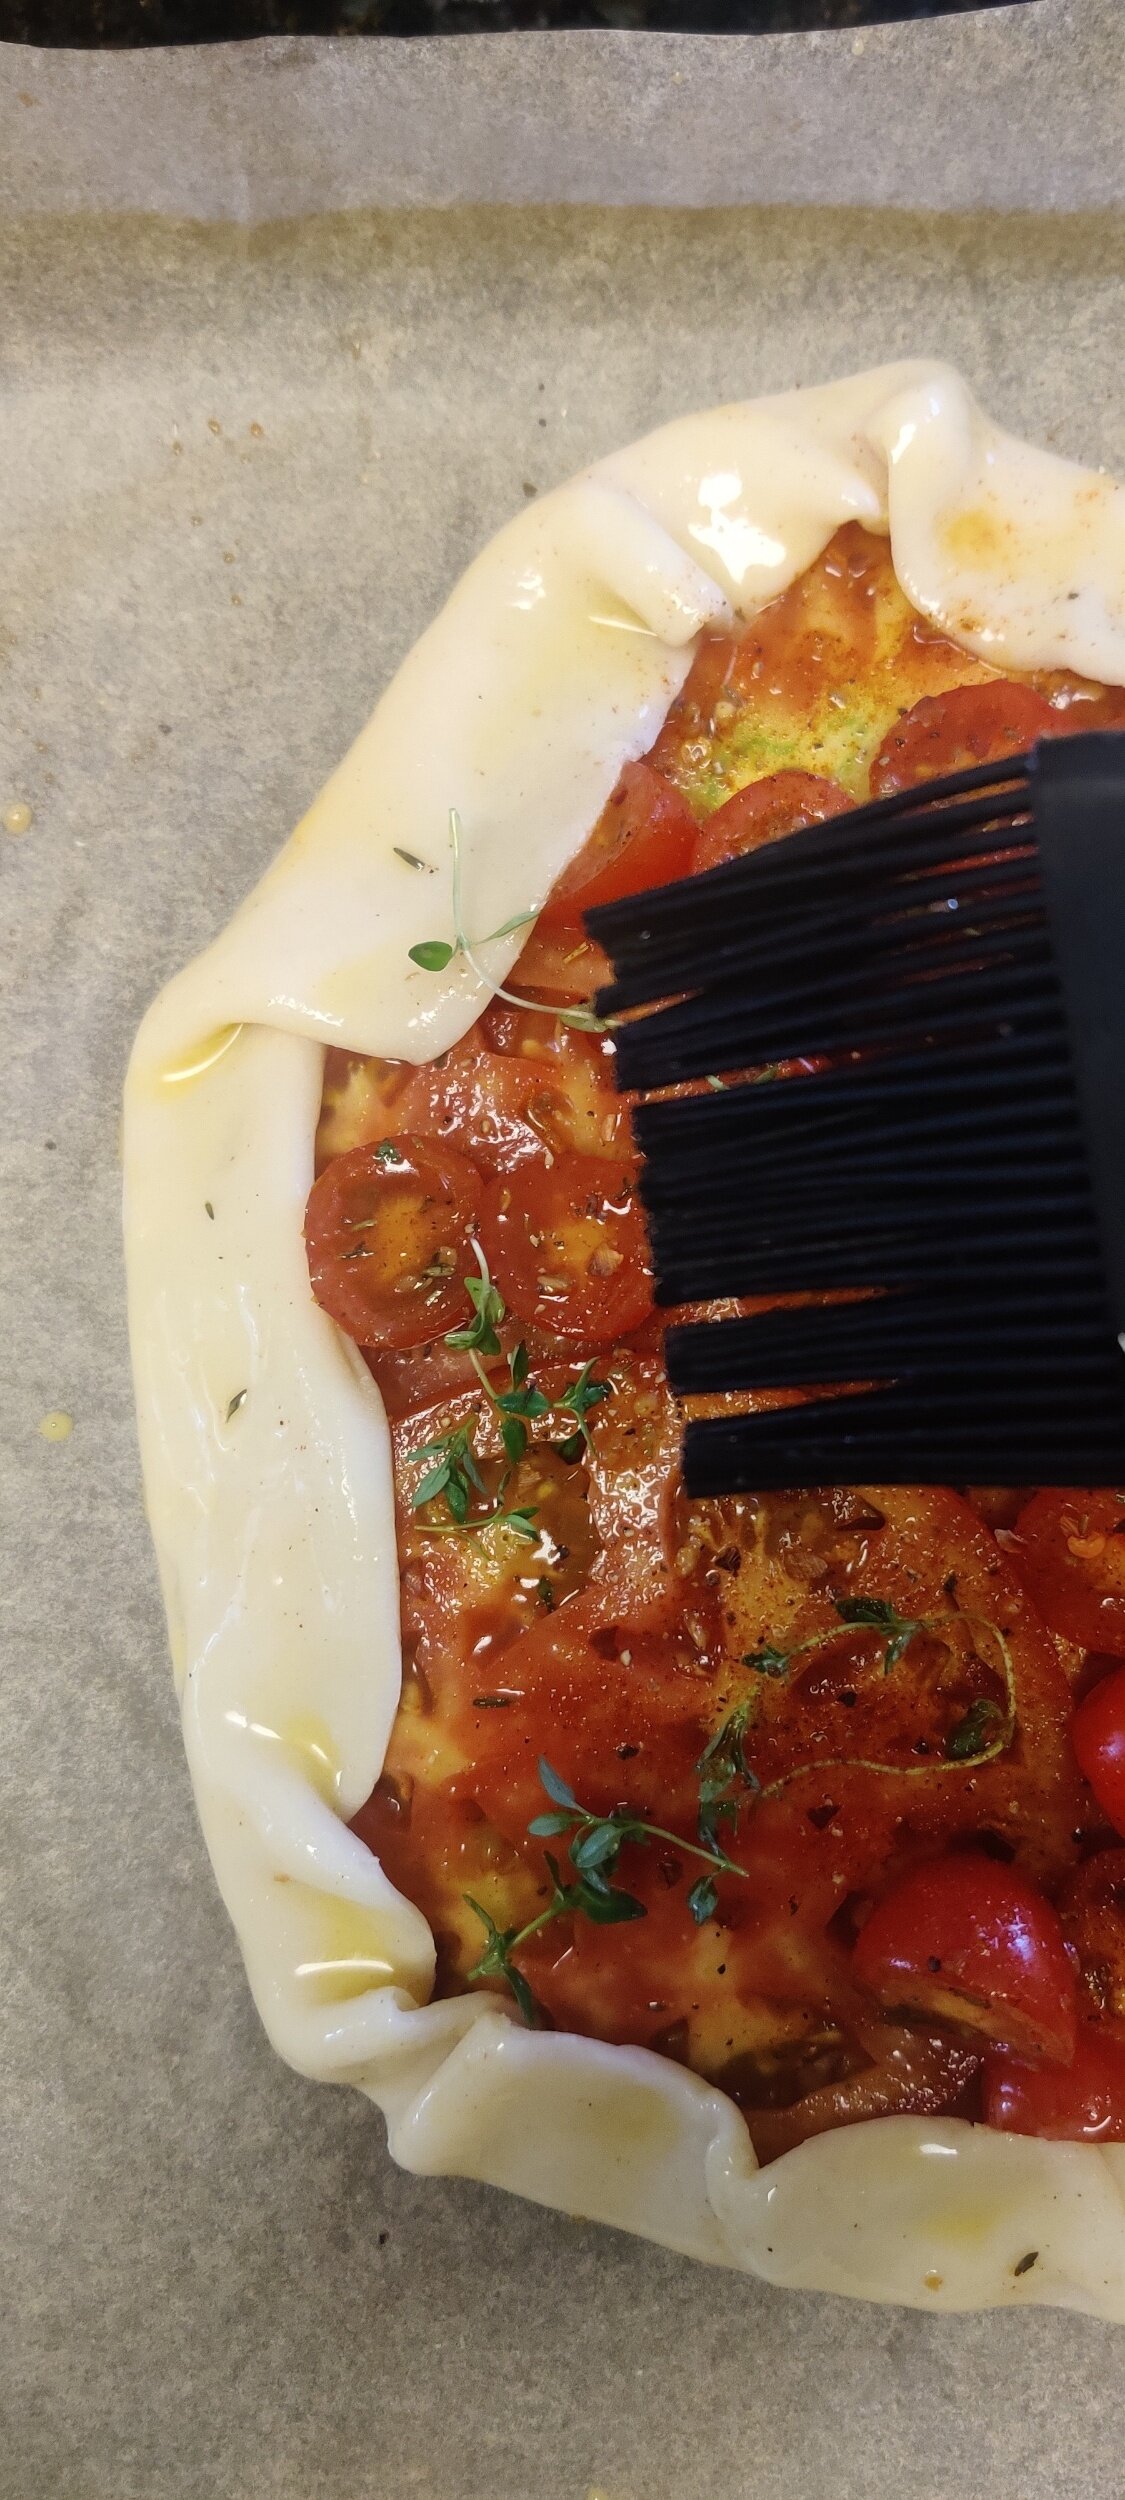
Lay the marinaded tomatoes on top, then fold the edges of the pie crust to encase the filling (leave the remaining liquid out).
Brush the sides of the pie with the egg wash, then sprinkle with the steak seasoning for texture and taste.
Bake in a 425F oven for 25-30 minutes. Watch so the crust and tomatoes on top don't burn.
Remove the galette from the oven and garnish with fresh thyme, chili flakes, queso, and a drizzle of olive oil.

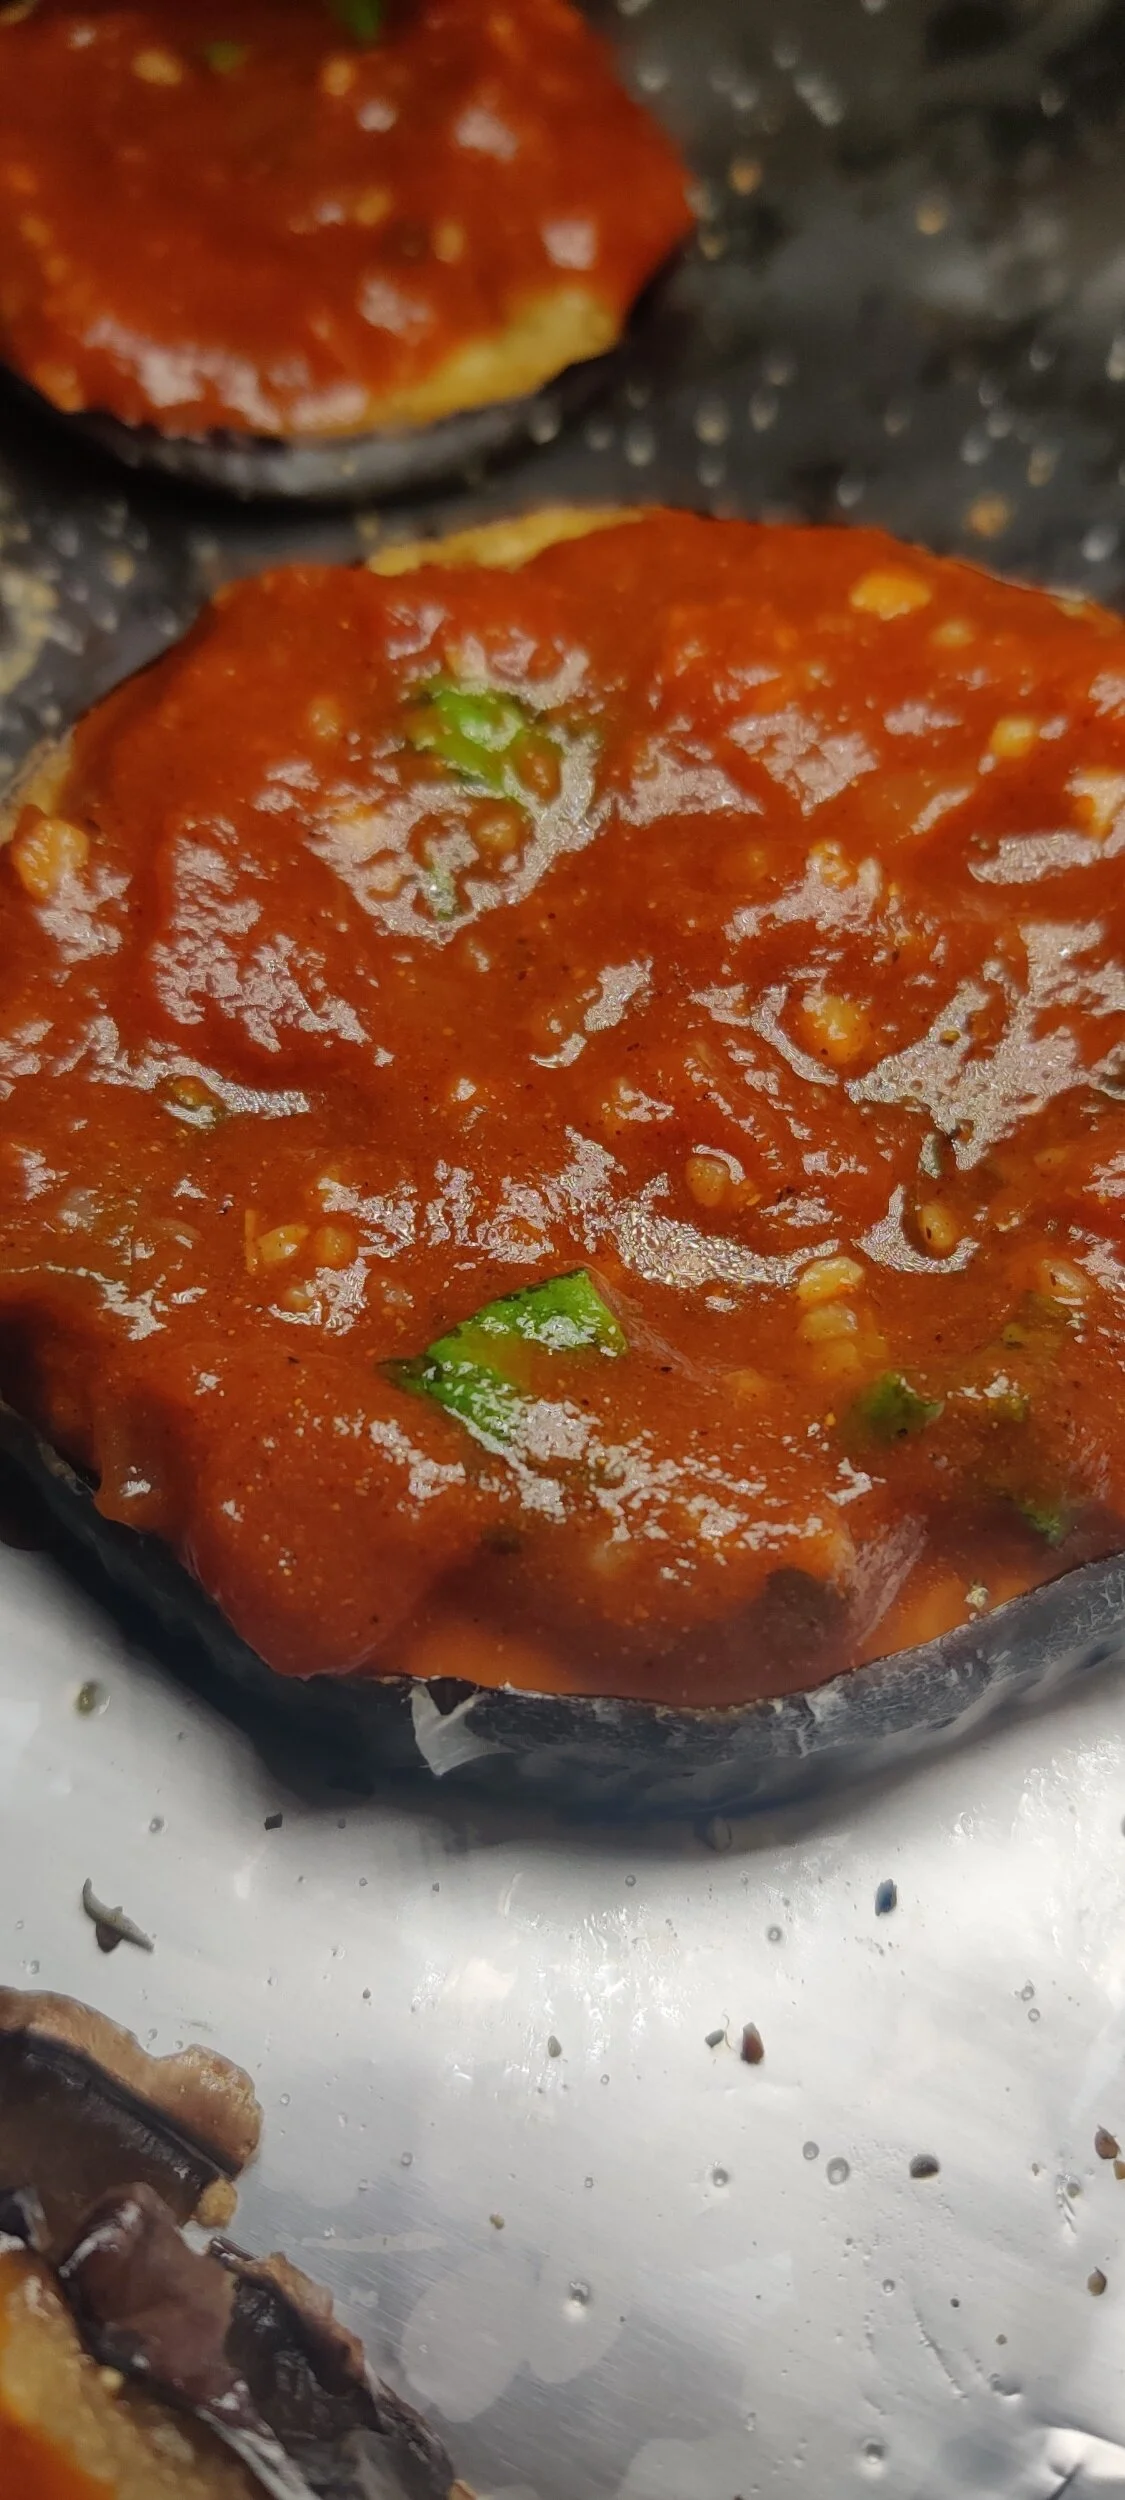
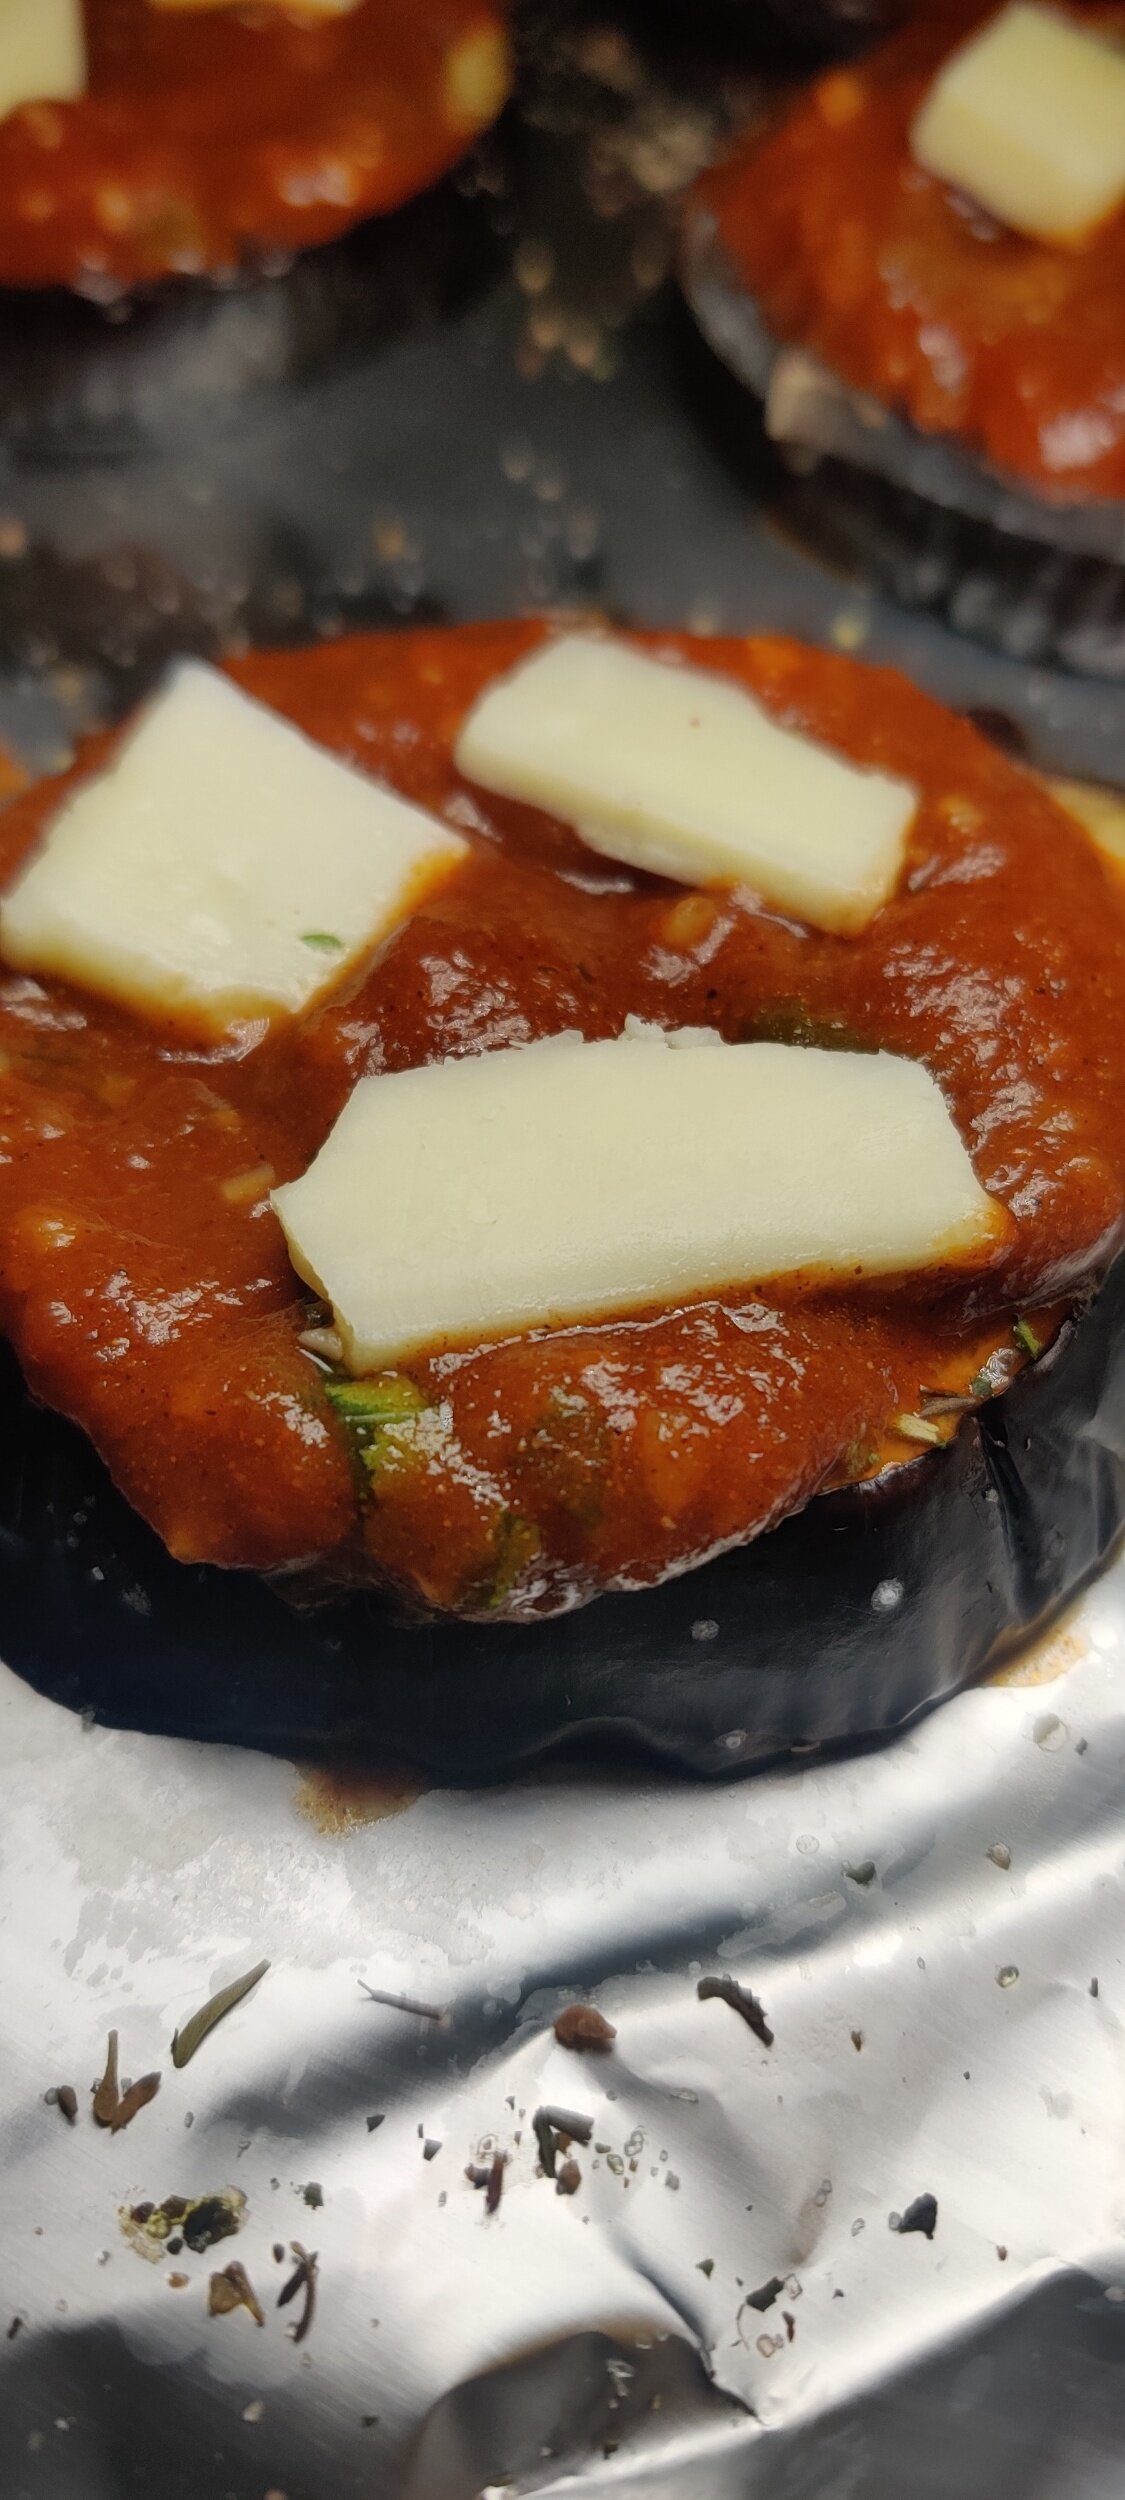
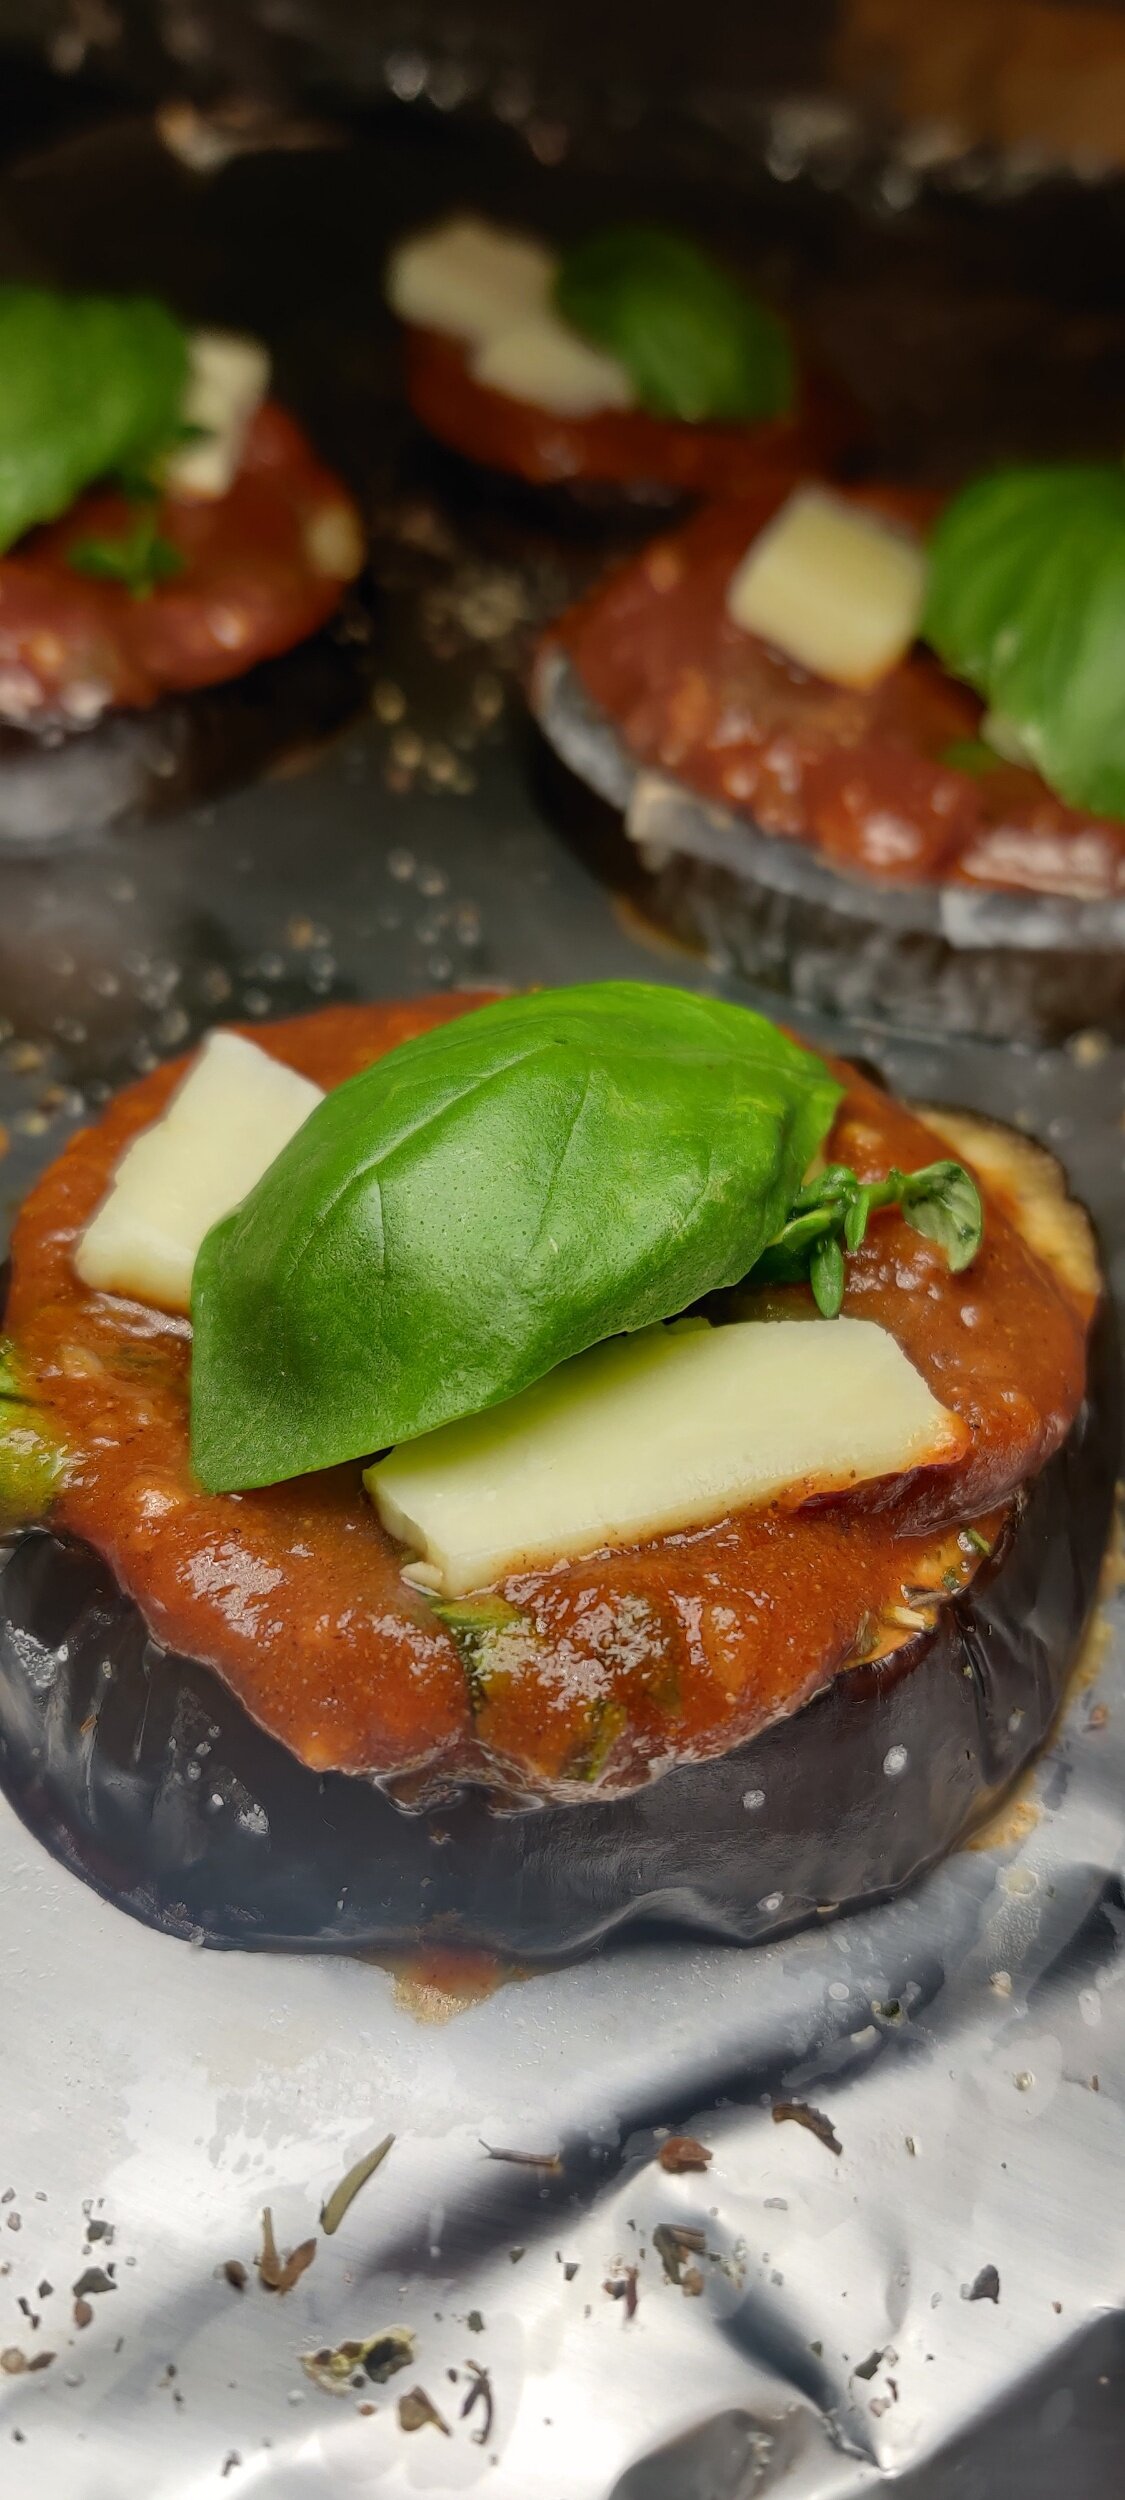
Ras El Hanout- Spiced Eggplant Crust Mini Pizzas
If you have some leftover eggplant and don't know what to do with it, make some mini Margherita pizzas! These crustless babies are keto, low-carb, and vegetarian, with umami taste similar to mushrooms. They absorb flavour like a sponge!
Speaking of flavour, instead of a regular, tomato sauce, I wanted a flavour that would pack a punch and not rely on the cheese. I seasoned the pizza base with homemade ras el hanout, a spice blend prevalent in North Africa, particularly in Algeria, Morocco and Tunisia. It’s a mix of intense, complex flavours (better if you can grind it up to from whole spices)! The ras el hanout enhances the sauce and goes well with the eggplant, and is often used to season meat, fish, couscous and other vegetables.
I love the spice mix because there are no hard rules in terms of ratios, but generally cumin, cardamom, cinnamon, coriander, turmeric, ginger, paprika, black pepper, and cayenne pepper make a feature.
The name ras el hanout translates to ‘head of the shop’, alluding to a blend of the best spices in store!
Also, if you can get your hands on fresh herbs, use them! This will give your pizzas a fresh bite.
Ingredients
1/2 large eggplant
Olive oil
1 tablespoon dried thyme
1 tablespoon fresh thyme
1 tablespoon fresh basil, chopped
5 basil leaves
Dried parsley
1 heaped teaspoon garlic
1 teaspoon Worchester sauce
1/4 cup tomato salsa
1/2 cup tomato ragu
Salt and black pepper
Mozzarella or sharp cheddar, cut into small squares
Chili flakes
Ras el hanout:
1 teaspoon salt
1 teaspoon black pepper
1/2 teaspoon cumin
1 teaspoon cinnamon
1 teaspoon coriander
1/4 teaspoon cardamom
1/2 teaspoon cloves
1/2 teaspoon turmeric
1/2 teaspoon cayenne pepper
1/2 teaspoon ginger
1 teaspoon smoked paprika
1/2 teaspoon nutmeg
(Makes about 1/4 cup)

Instructions
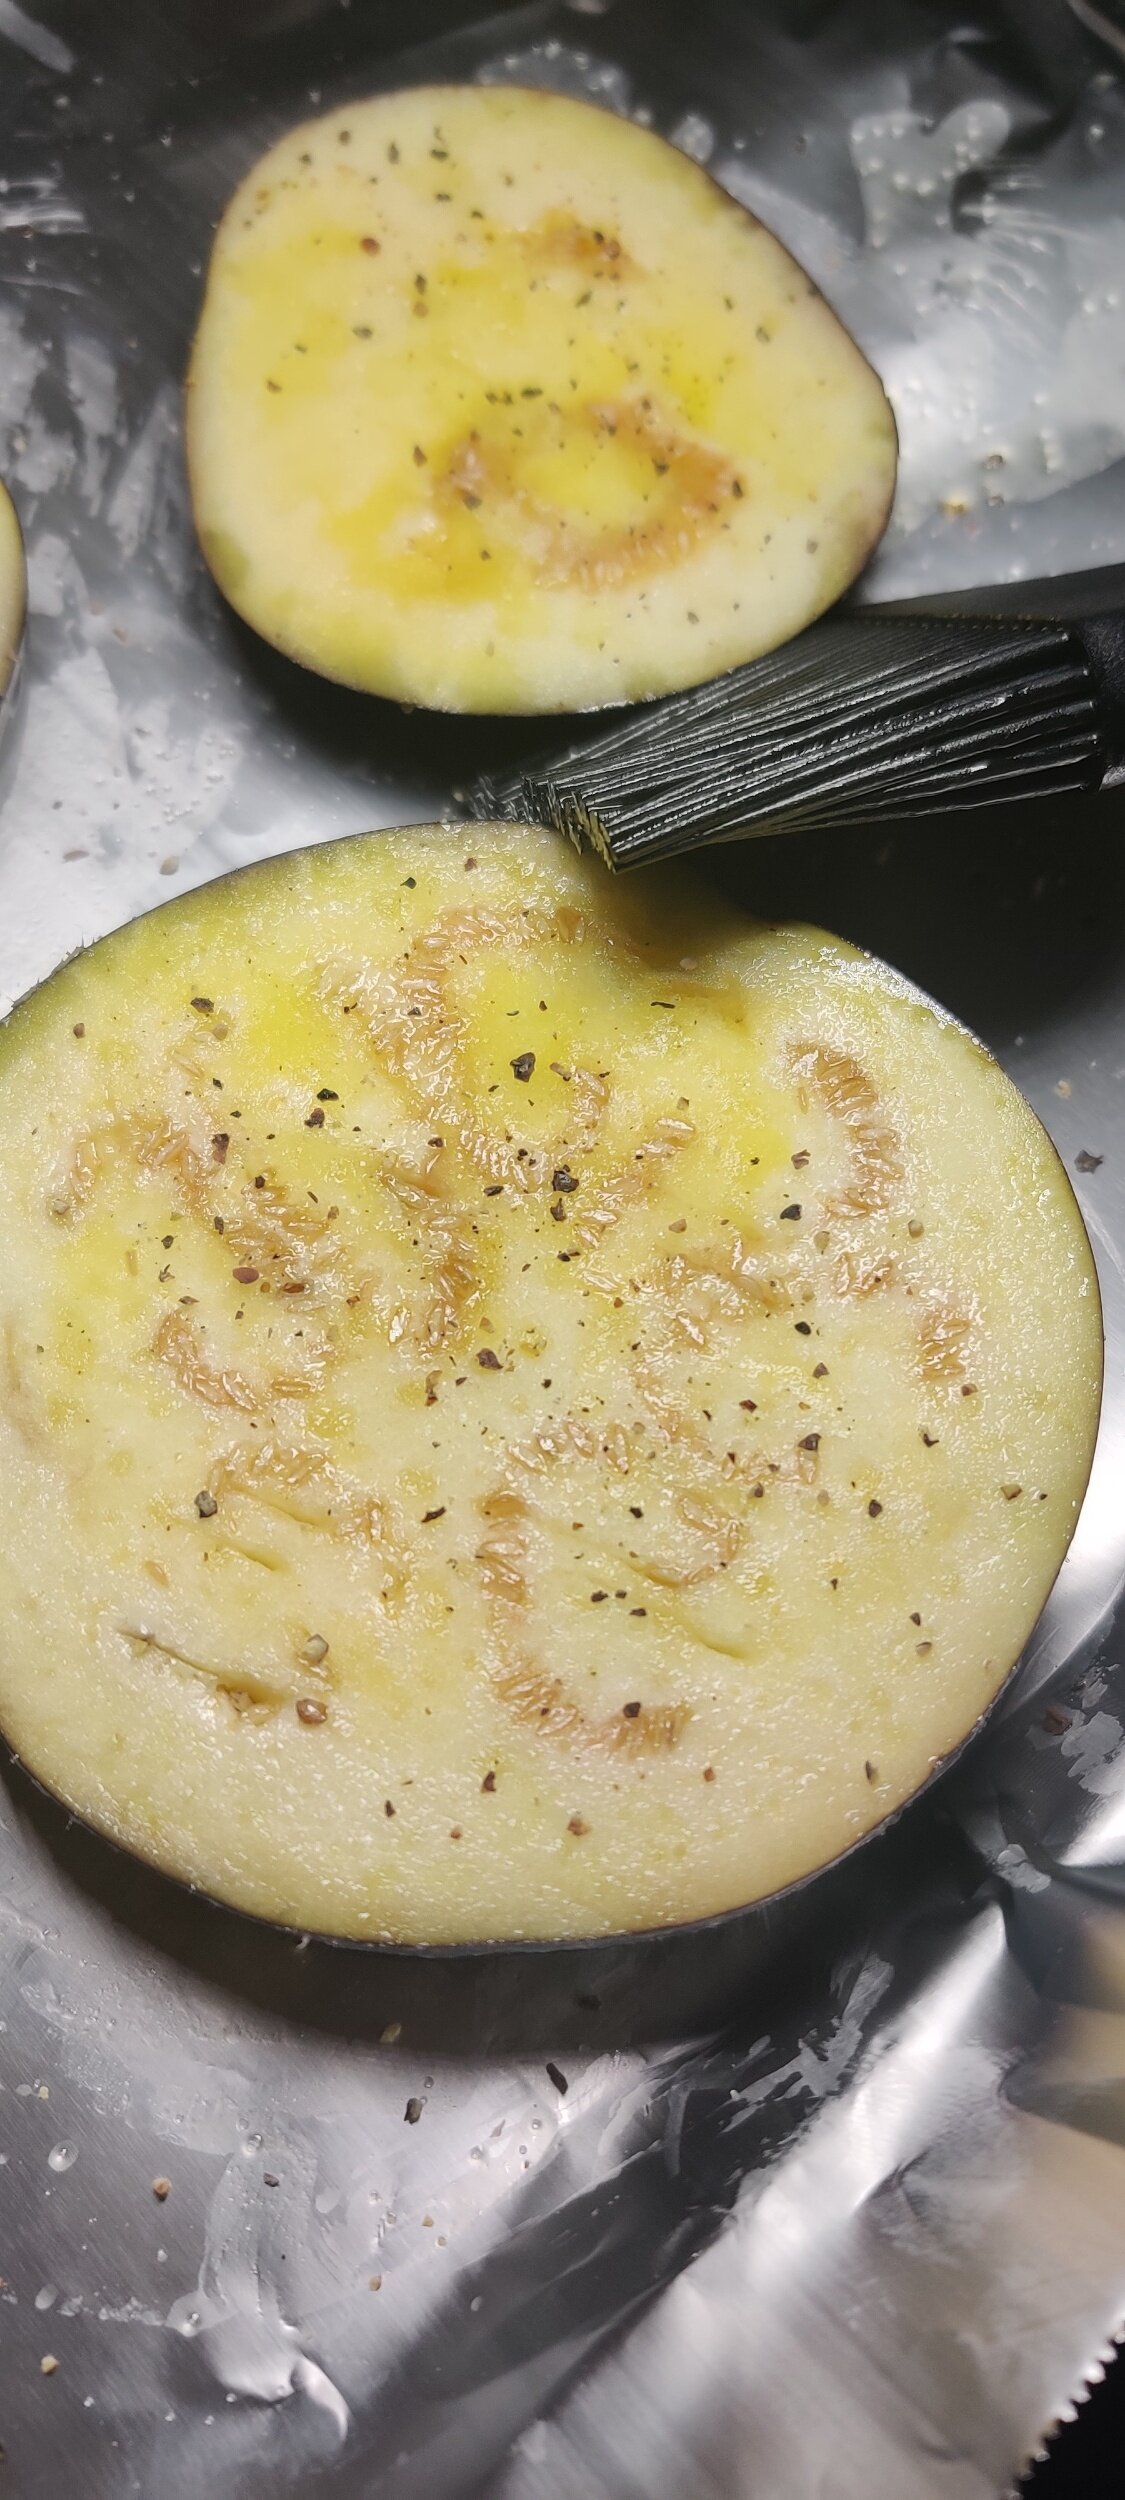
Cut your eggplant into thick slices (not too thin, they will shrink a bit in while baking). Brush them generously with olive oil and sprinkle with dried thyme, salt, and pepper on both sides. Bake at 400F for 15 minutes.
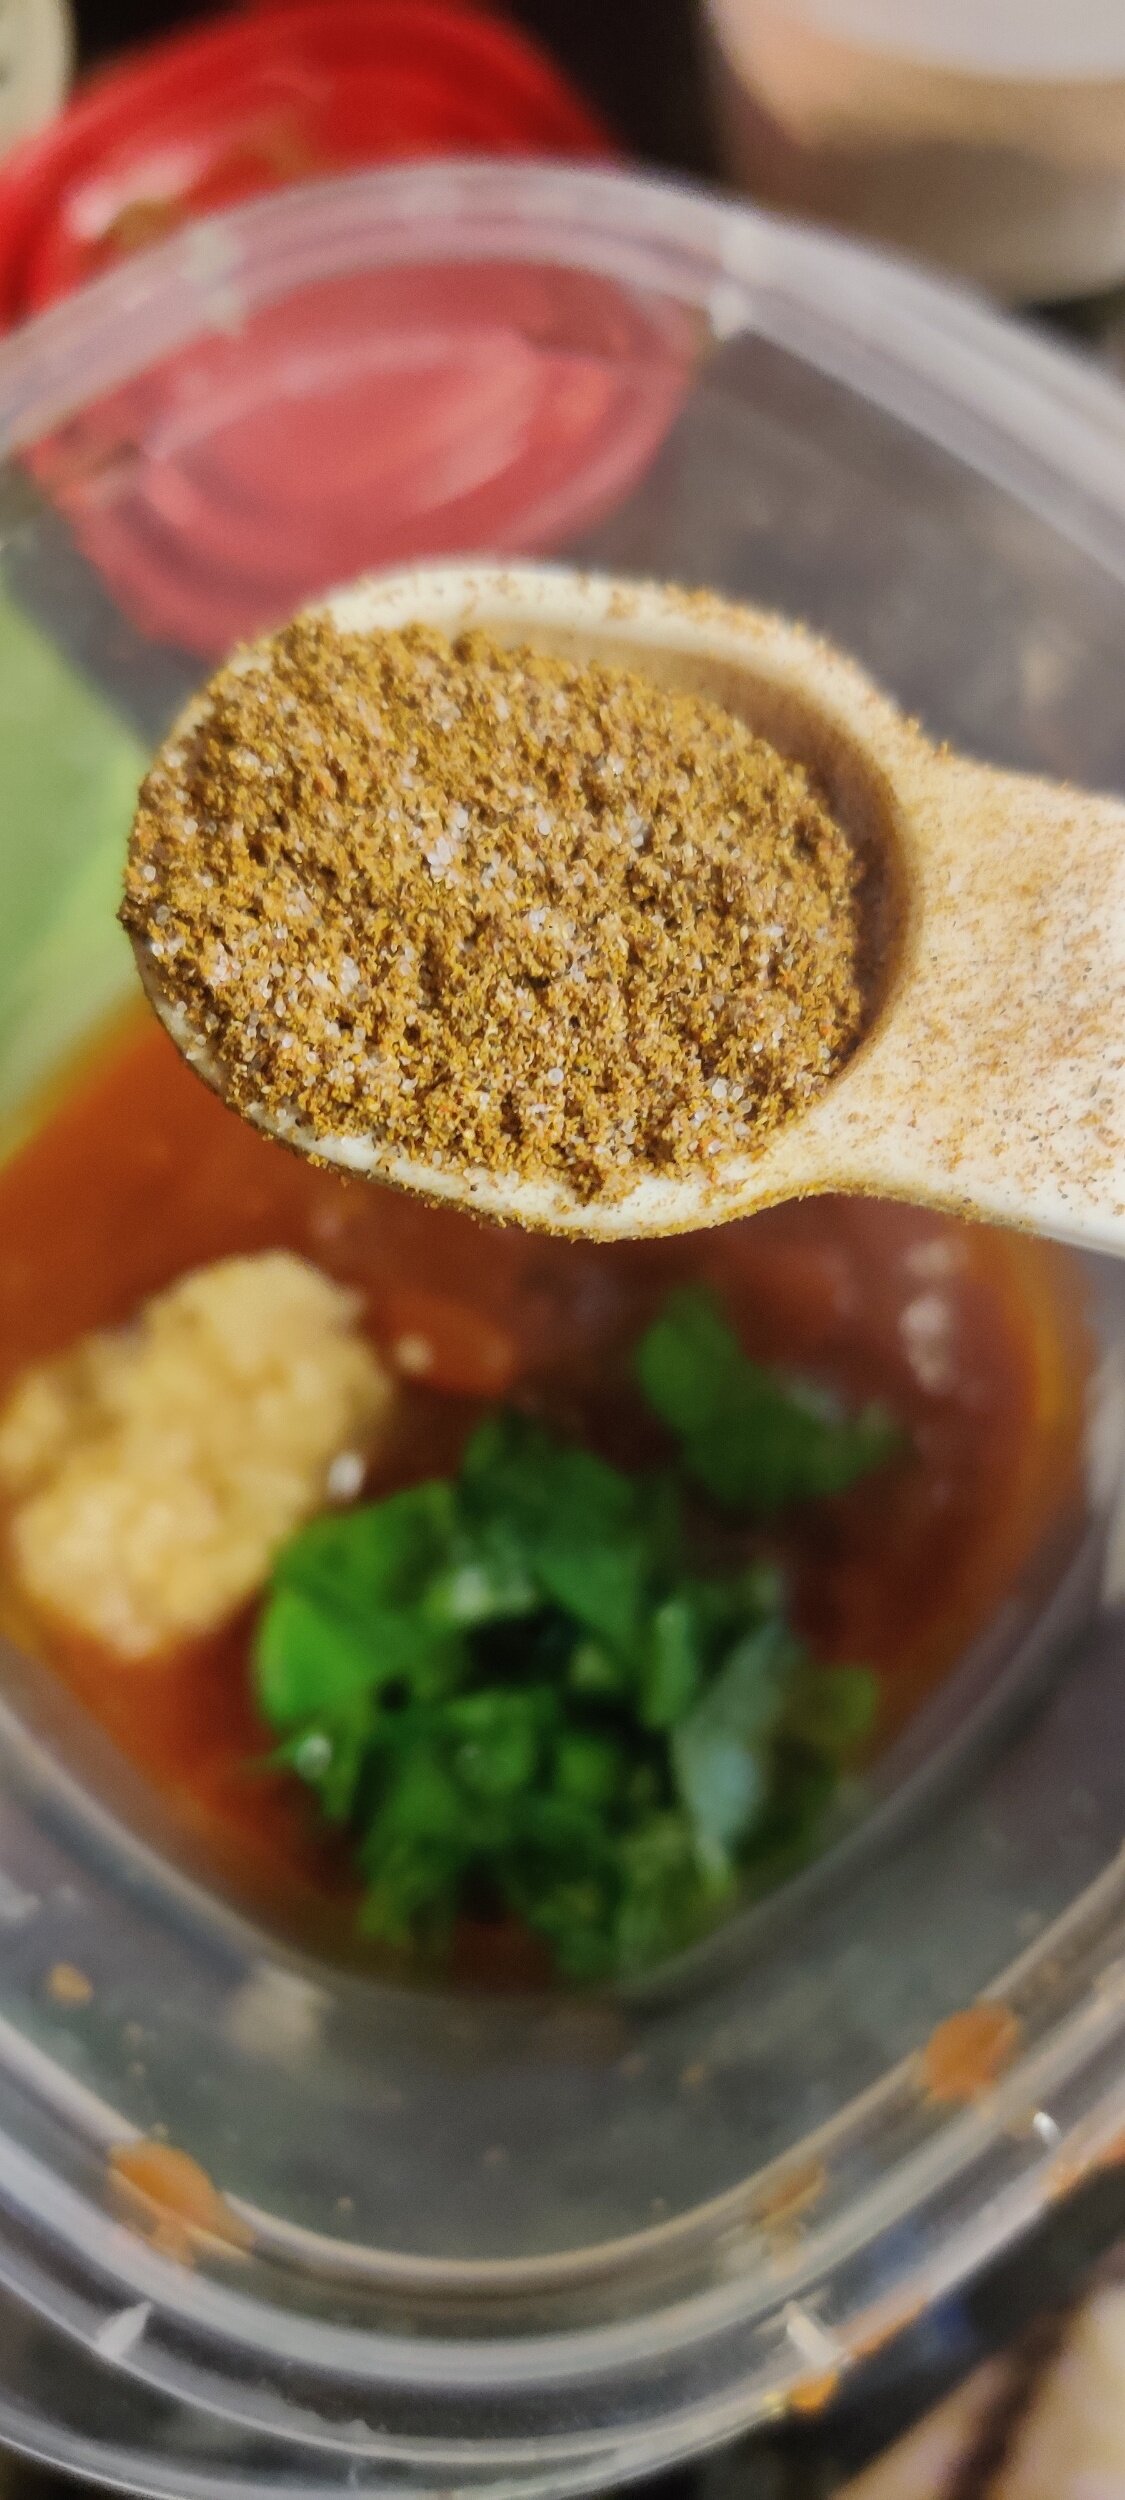
While the eggplant is in the oven, prepare your spiced tomato sauce in a small bowl. Mix the ragu, salsa, Worchester sauce, garlic, and basil. Blend the spices in a small container where you can store what remains. Add one teaspoon to the tomato sauce and mix well.
Remove the eggplant from the oven and top with the tomato sauce, cheese squares, fresh thyme, and basil leaves.
Bake for another 10 minutes and until the cheese starts to melt.
Serve hot and garnish with chilli flakes, parsley, and ground pepper.

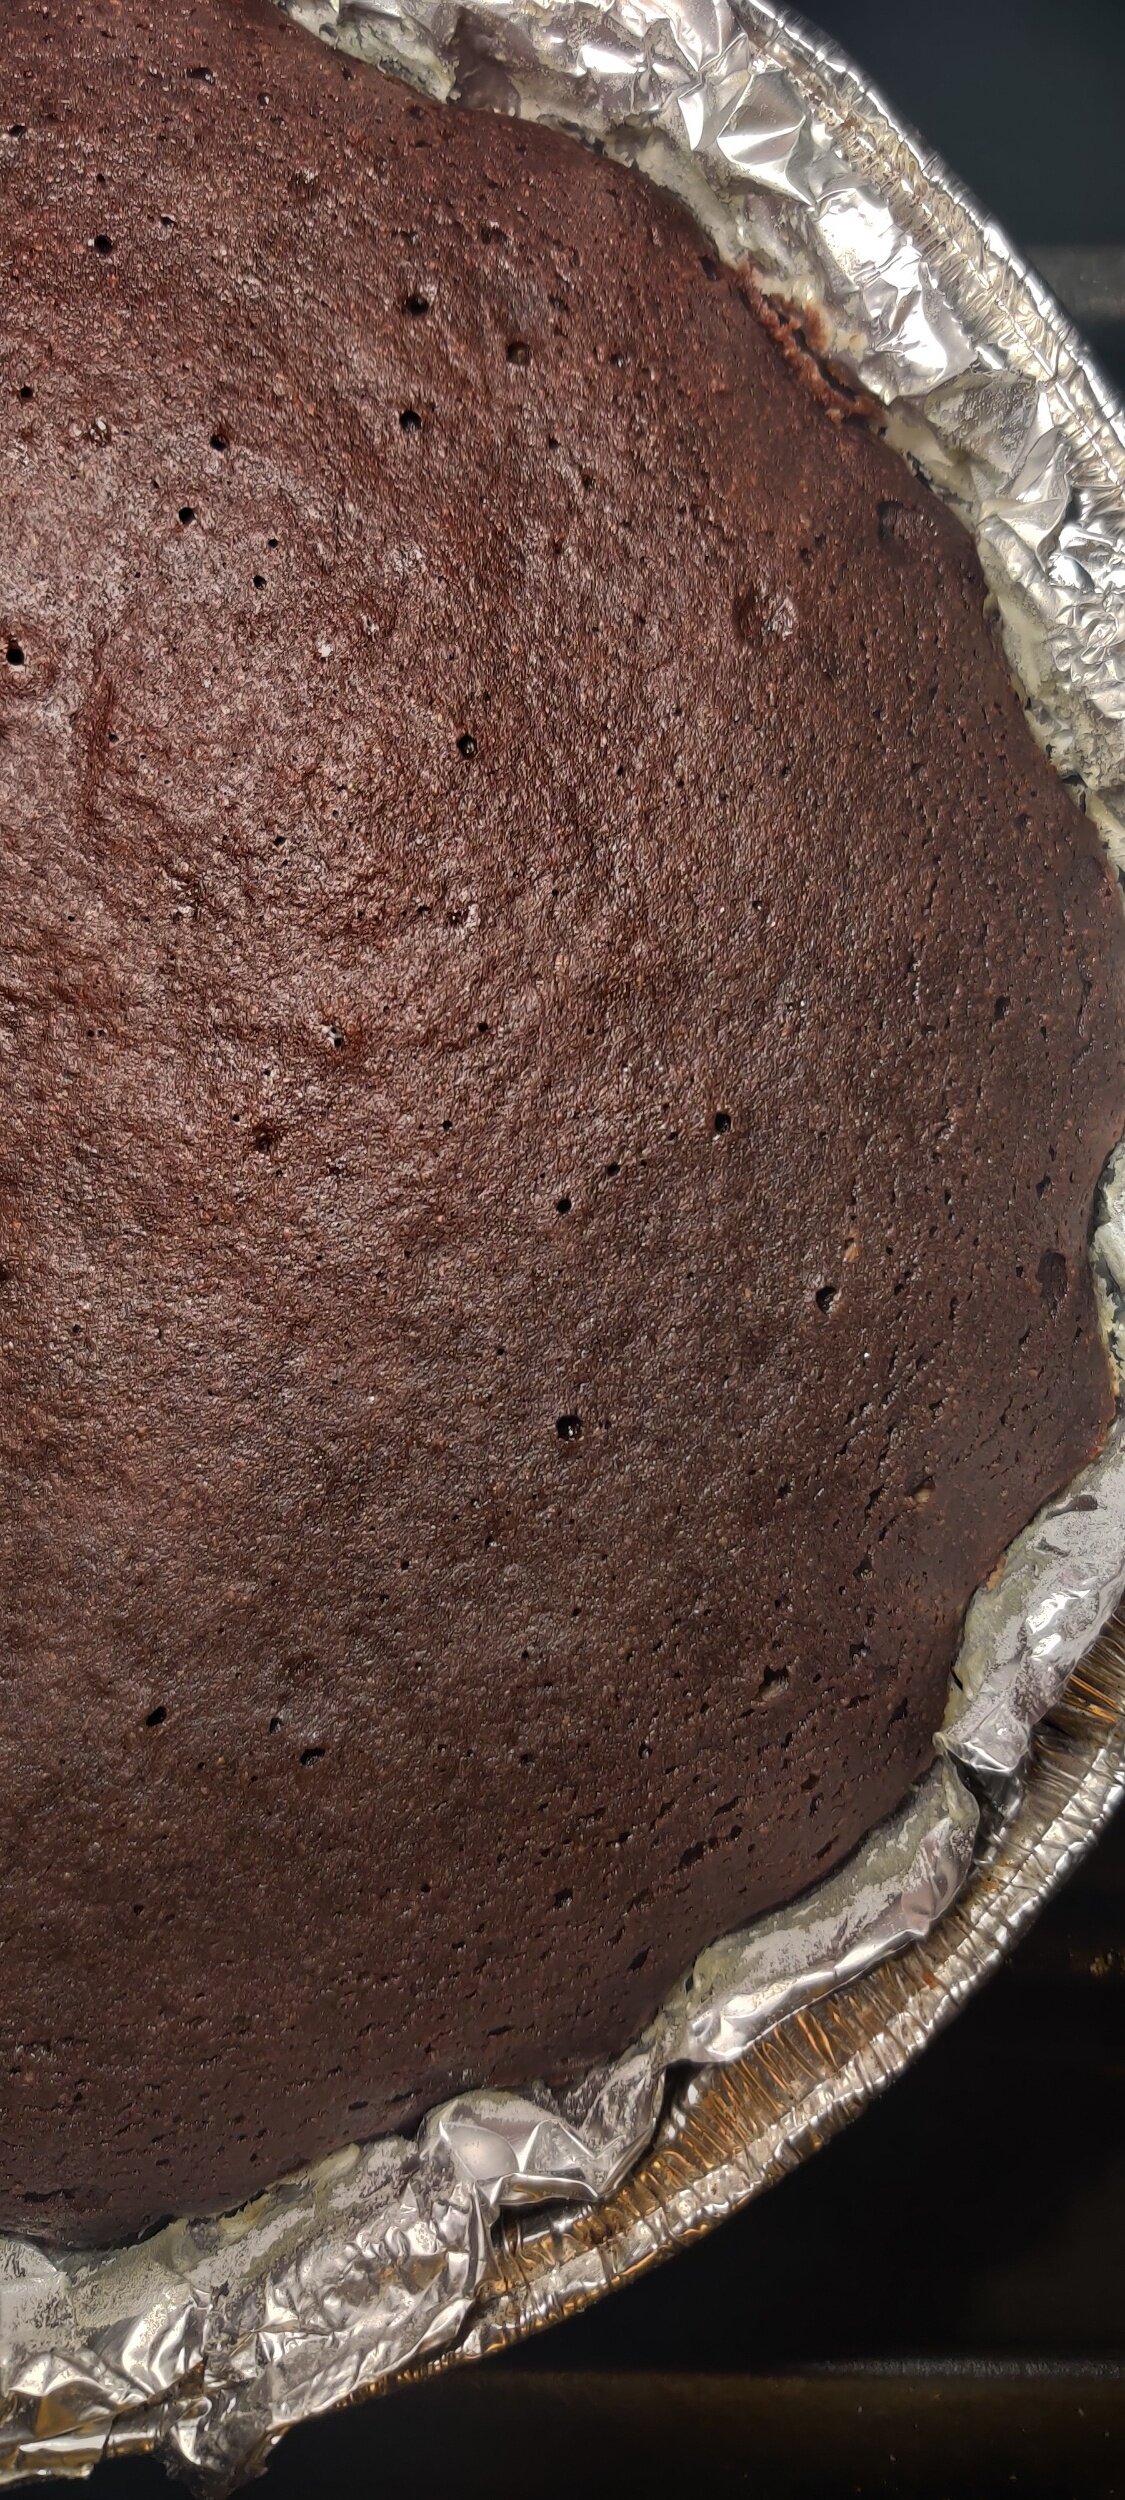
Tigernut Chocolate Cake with Goat Milk Cream Cheese Frosting
I love chocolate cake. I think it's safe to say that most people do. It is, after all, an all-time classic for dessert lovers. This cake, however, uses two ingredients that are considered unconventional, making for a gritty, earthy tasting cake, but still delicious. The cake is moist, not too sweet, and the frosting just melts in your mouth!
If you need to balance the texture a bit you can serve the cake with ice cream or a berry coulis!
This is a flourless cake, and the substitute I used was tigernut flour. The ancient grain dates back to the Egyptians and is considered a superfood by some. Alternatively, you could use almond, cassava, or any other gluten-free flour. Tigernut is a starchy root with a nutty taste, and they are great for your gut due to their prebiotic fibre content.
Many ancient grains that are better alternatives health-wise compared to the processed grains we eat today. The good news is a lot of them are making a comeback!
I also used goat milk in both the batter and the cream cheese frosting. Goat milk has a very unique, tangy flavour compared to cow's or plant-based milk, giving the frosting a subtle, earthy taste as well.
I also used Greek yoghurt cream cheese, which ensured the frosting didn’t have the metallic taste the sugar often gives the icing!


Ingredients
Cake:
1/3 cup white sugar
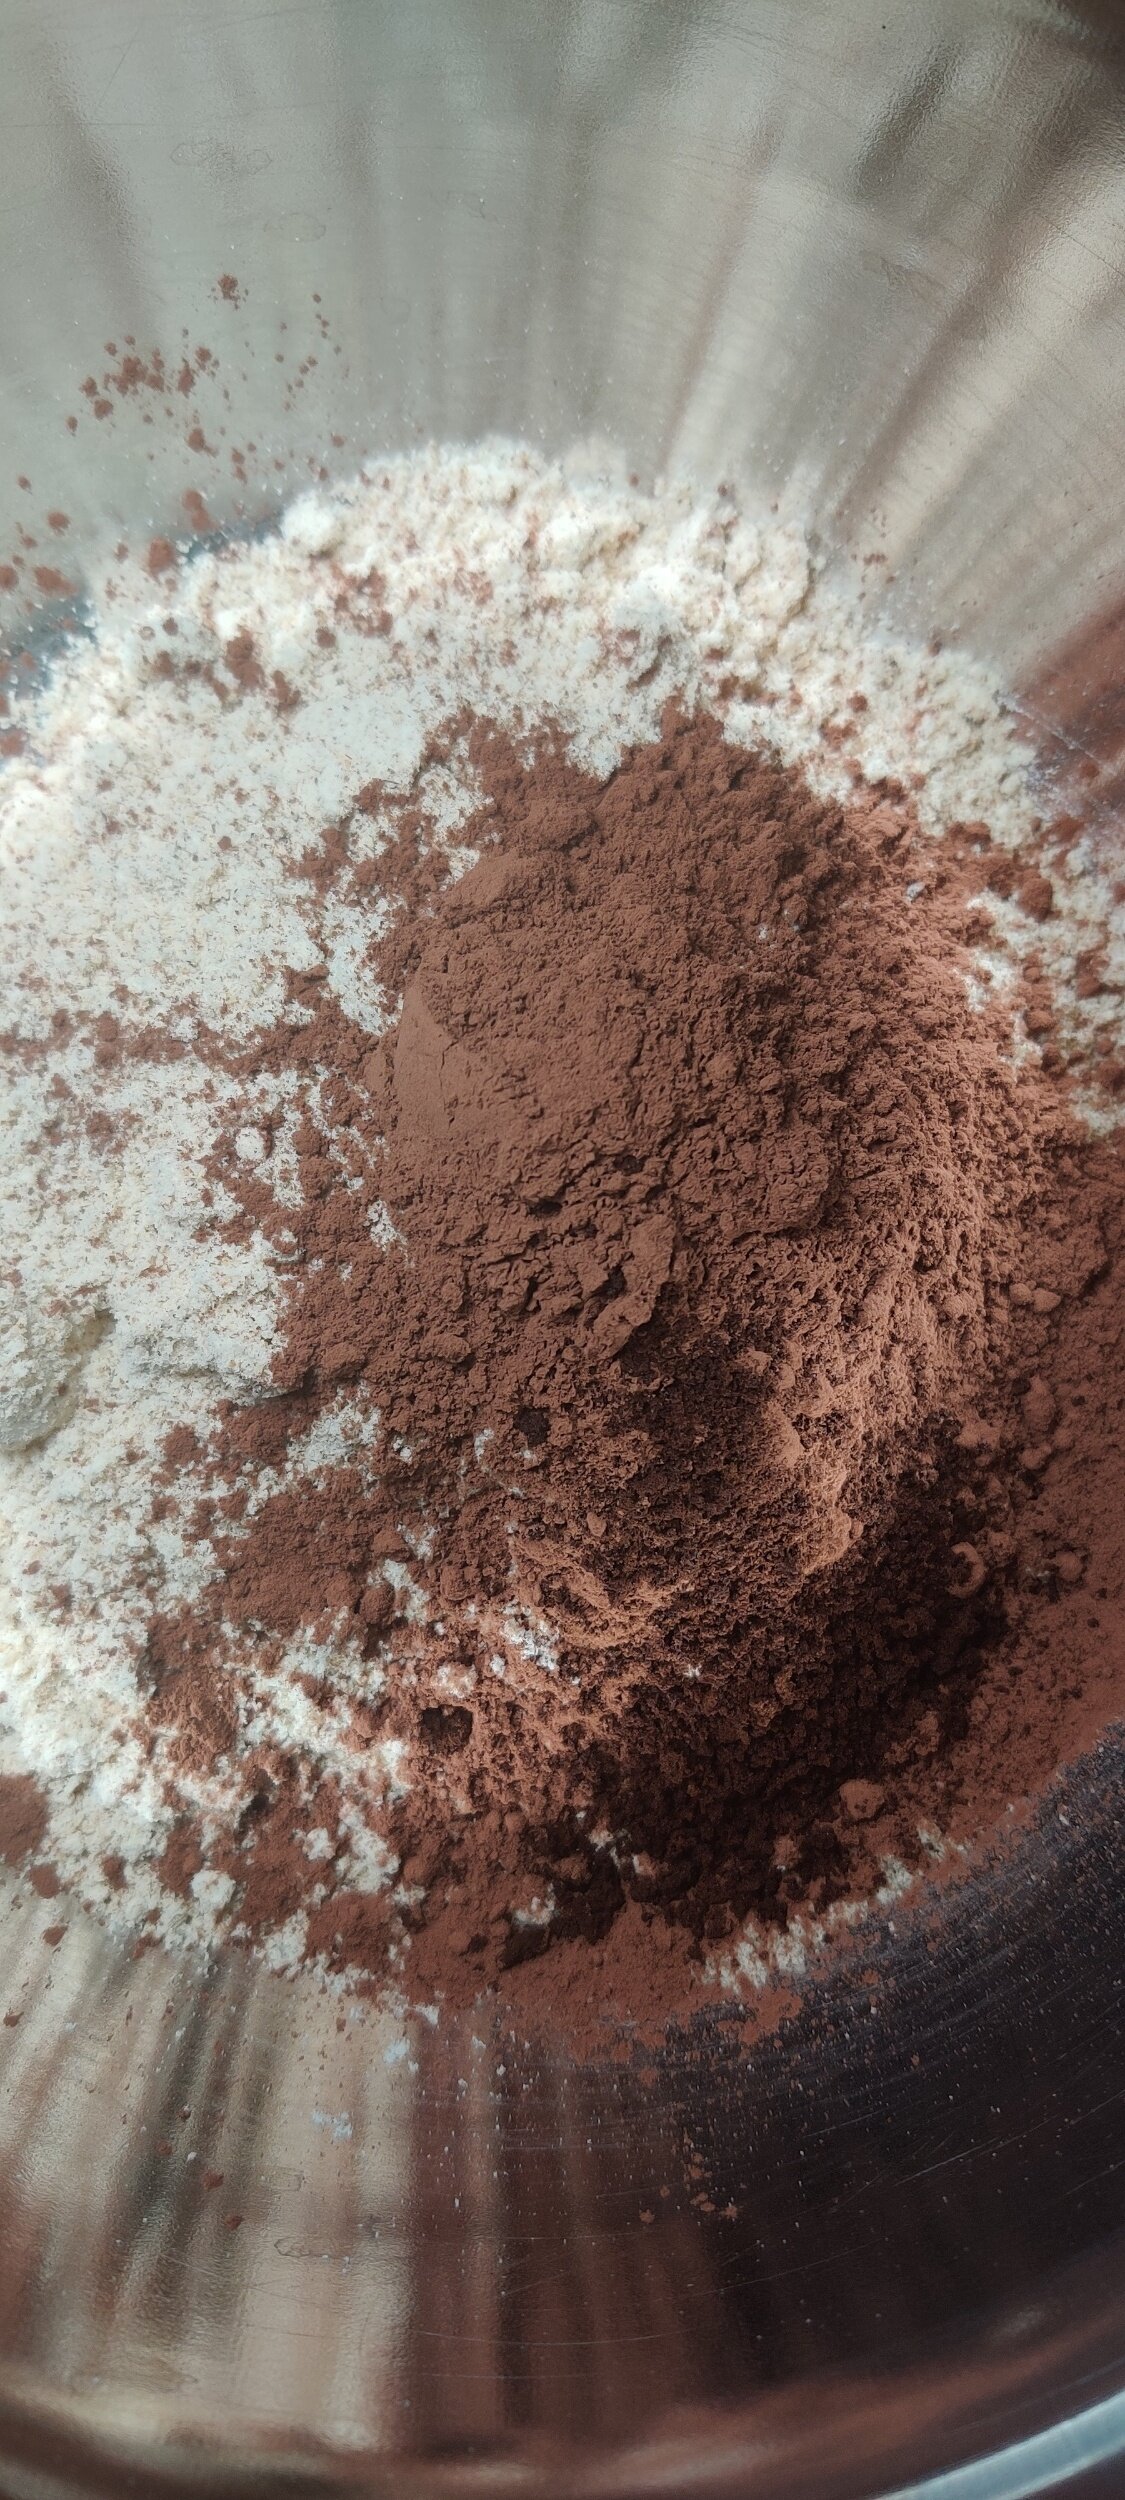
6 tablespoons cocoa powder
2 teaspoons vanilla
1 teaspoon espresso powder
1/3 cup goat milk
1/2 teaspoon salt
1 1/2 cups tigernut flour
1/2 teaspoon almond extract
2 1/4 teaspoons baking powder
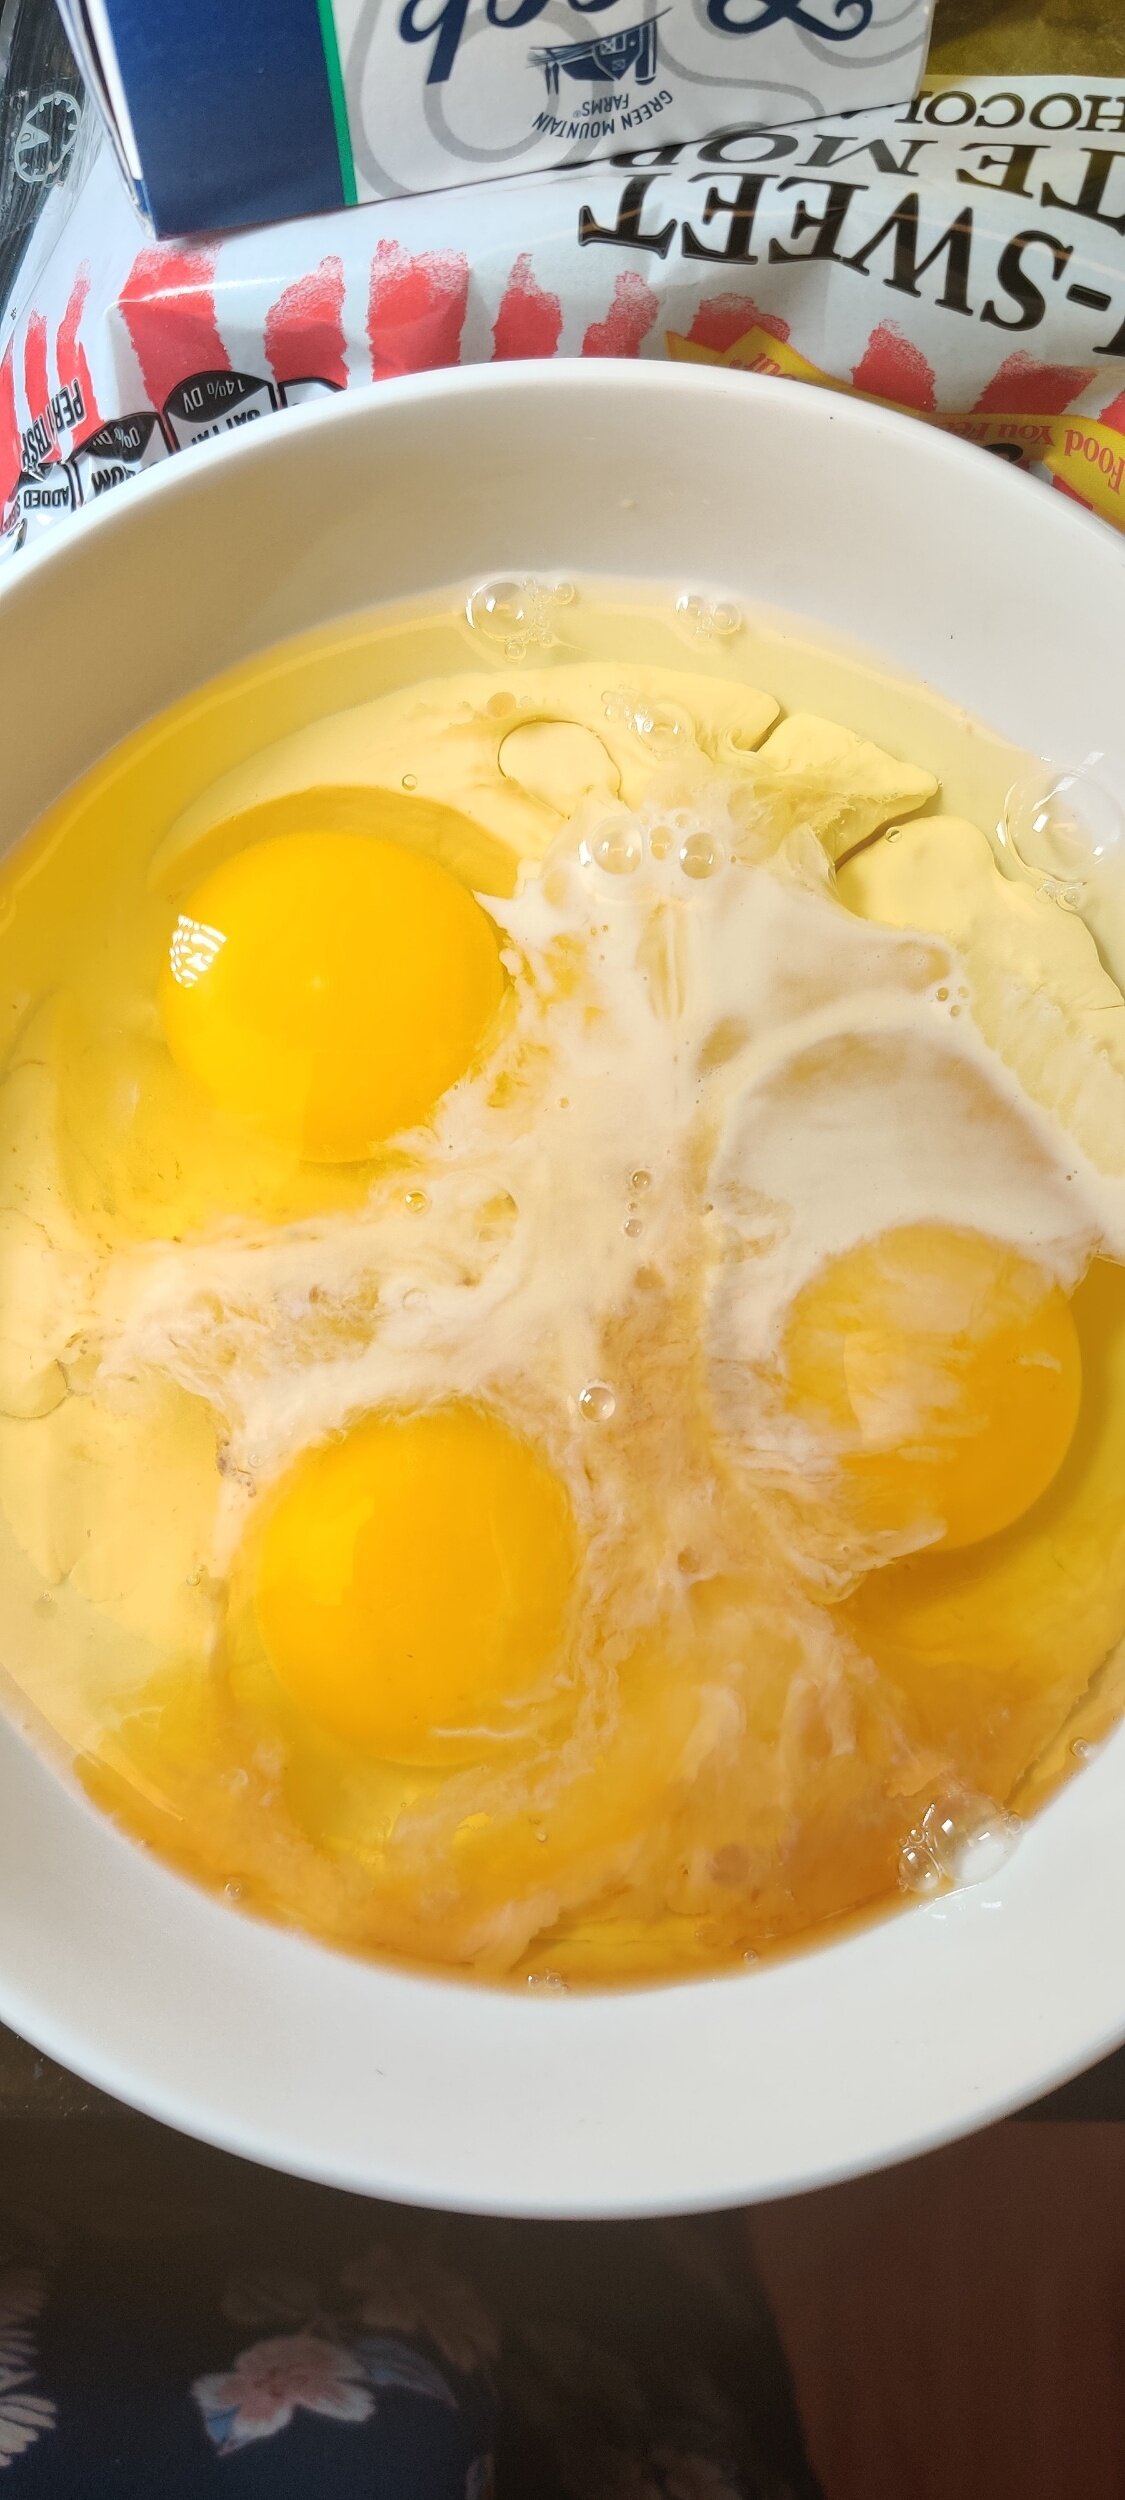
3 eggs
Frosting:
1 packet (8 ounce) Greek yoghurt cream cheese (room temperature)
1/4 cup melted chocolate
2 1/2 tablespoons goat milk
1/4 cup butter (room temperature)
Pinch of salt
1/2 teaspoon espresso powder
1/2 teaspoon lemon juice
1 1/2 cups icing sugar
1 1/2 teaspoons vanilla
1/2 cup cocoa powder

Instructions
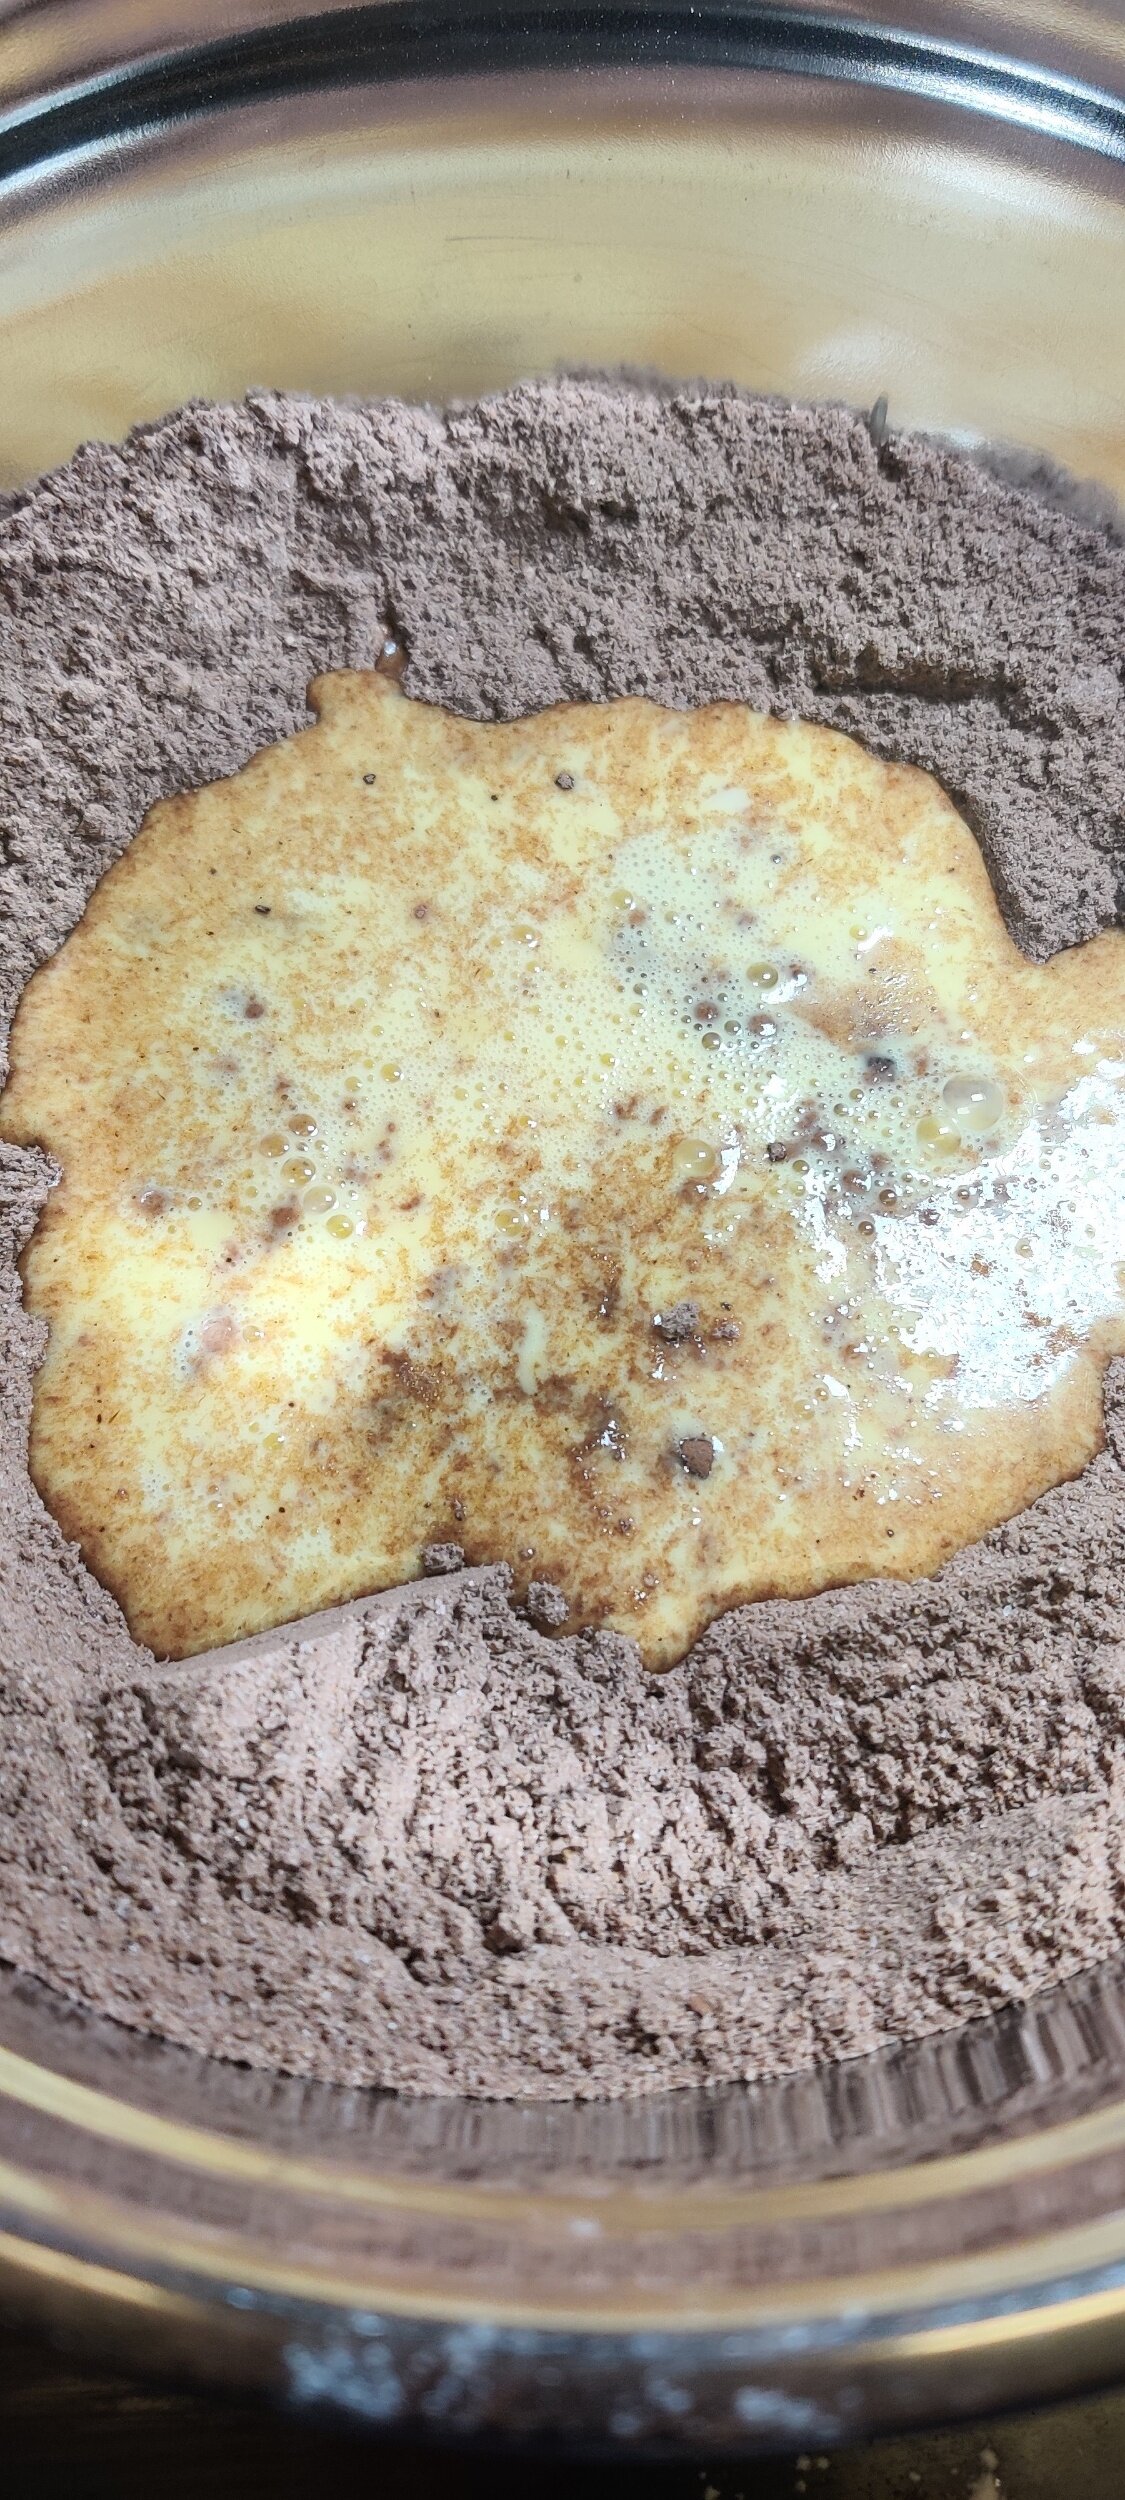
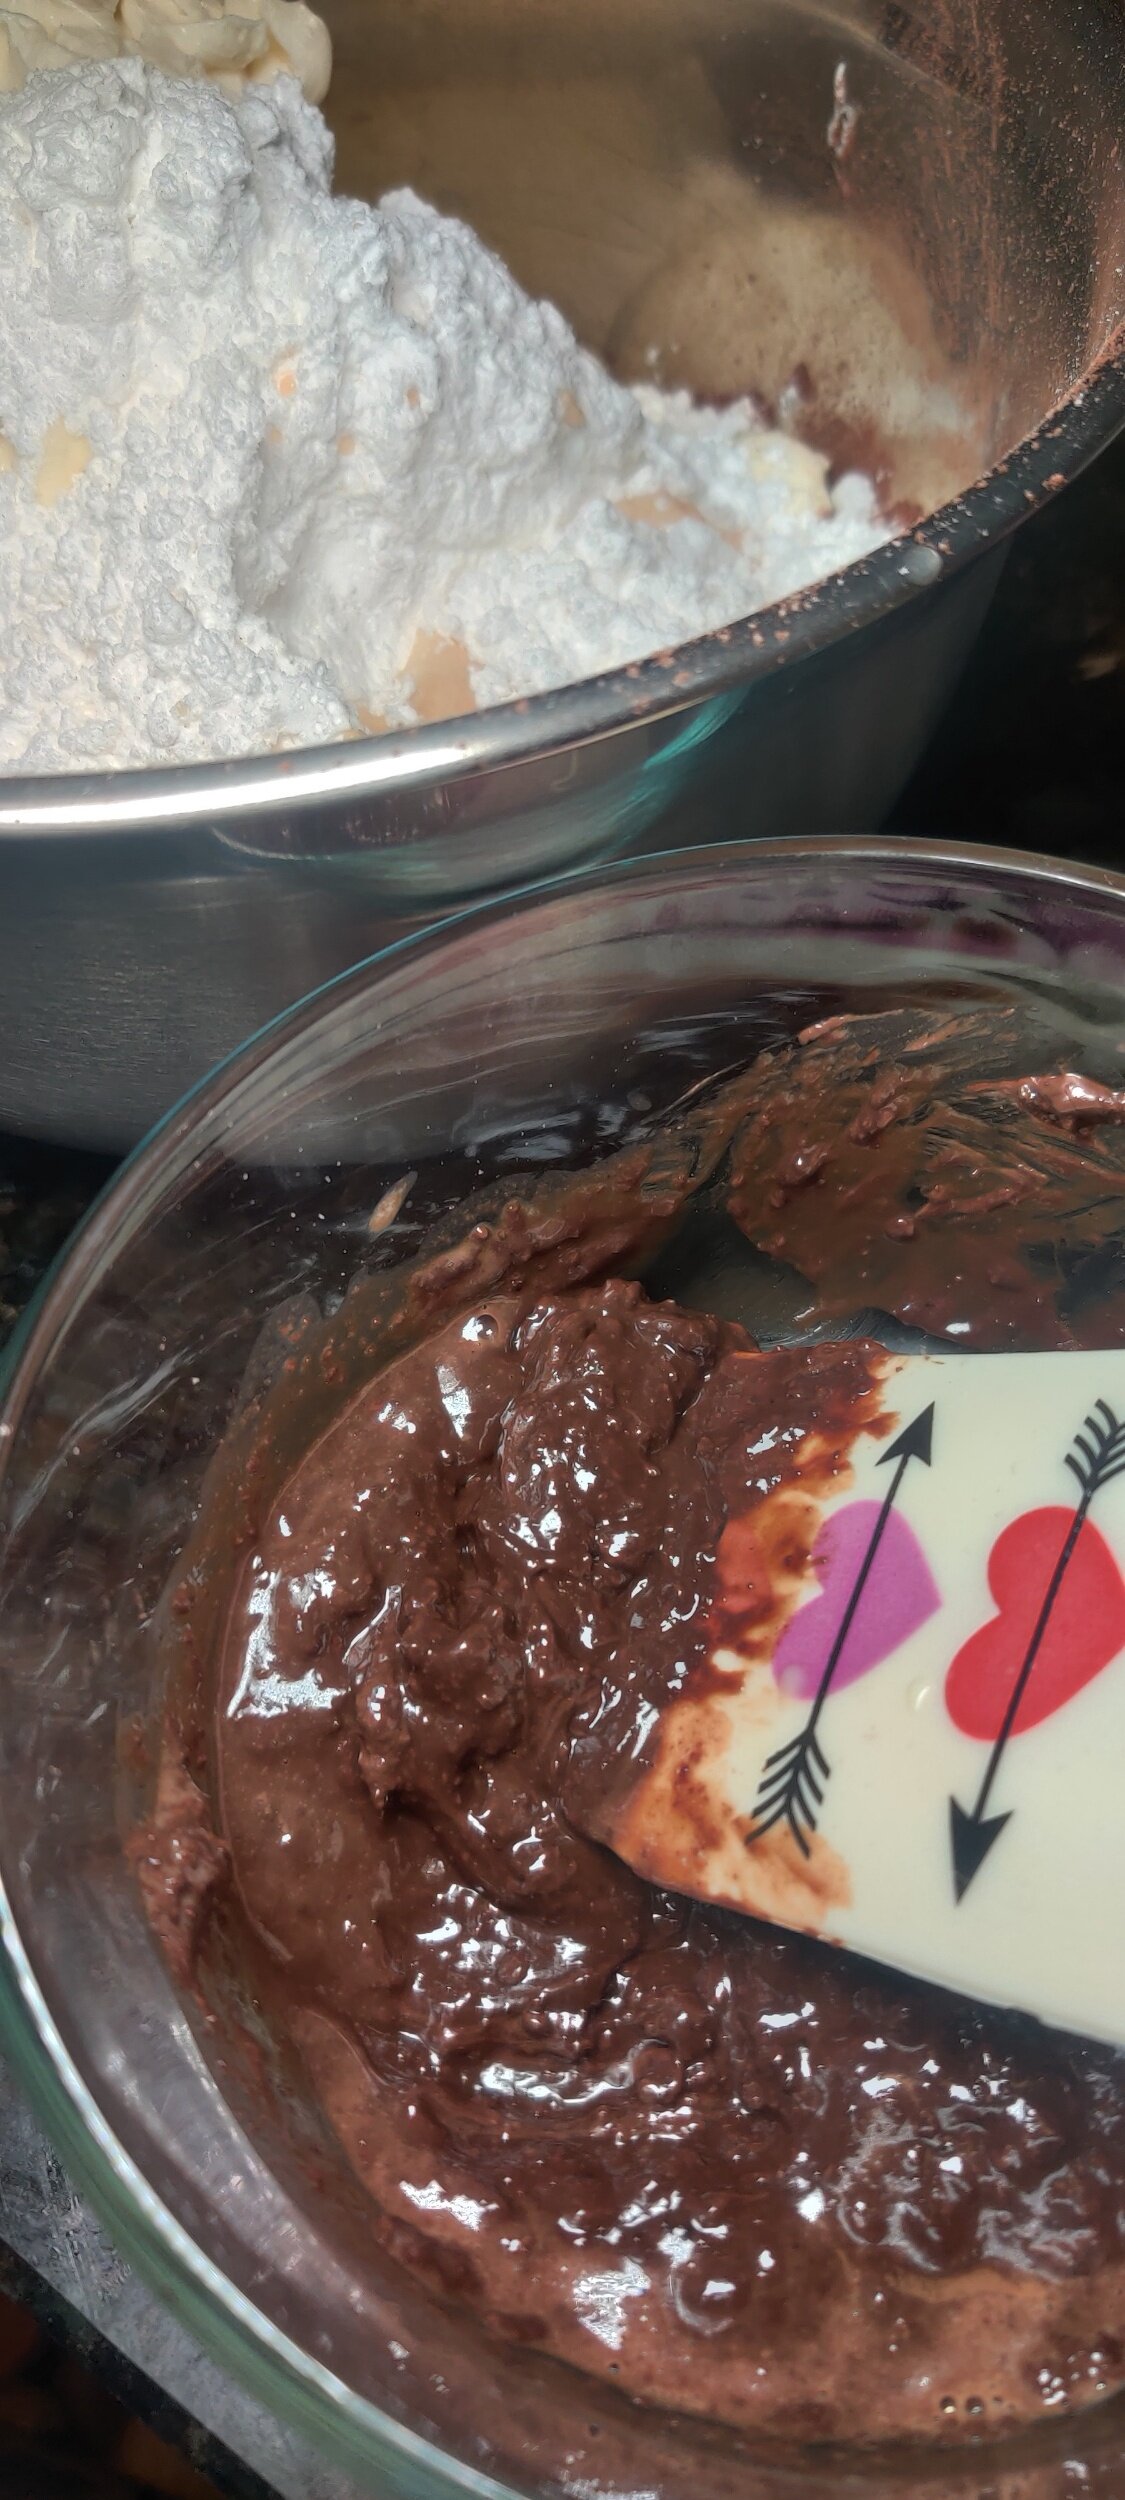
For the cake, in a large bowl mix the dry ingredients and make sure there are no lumps.
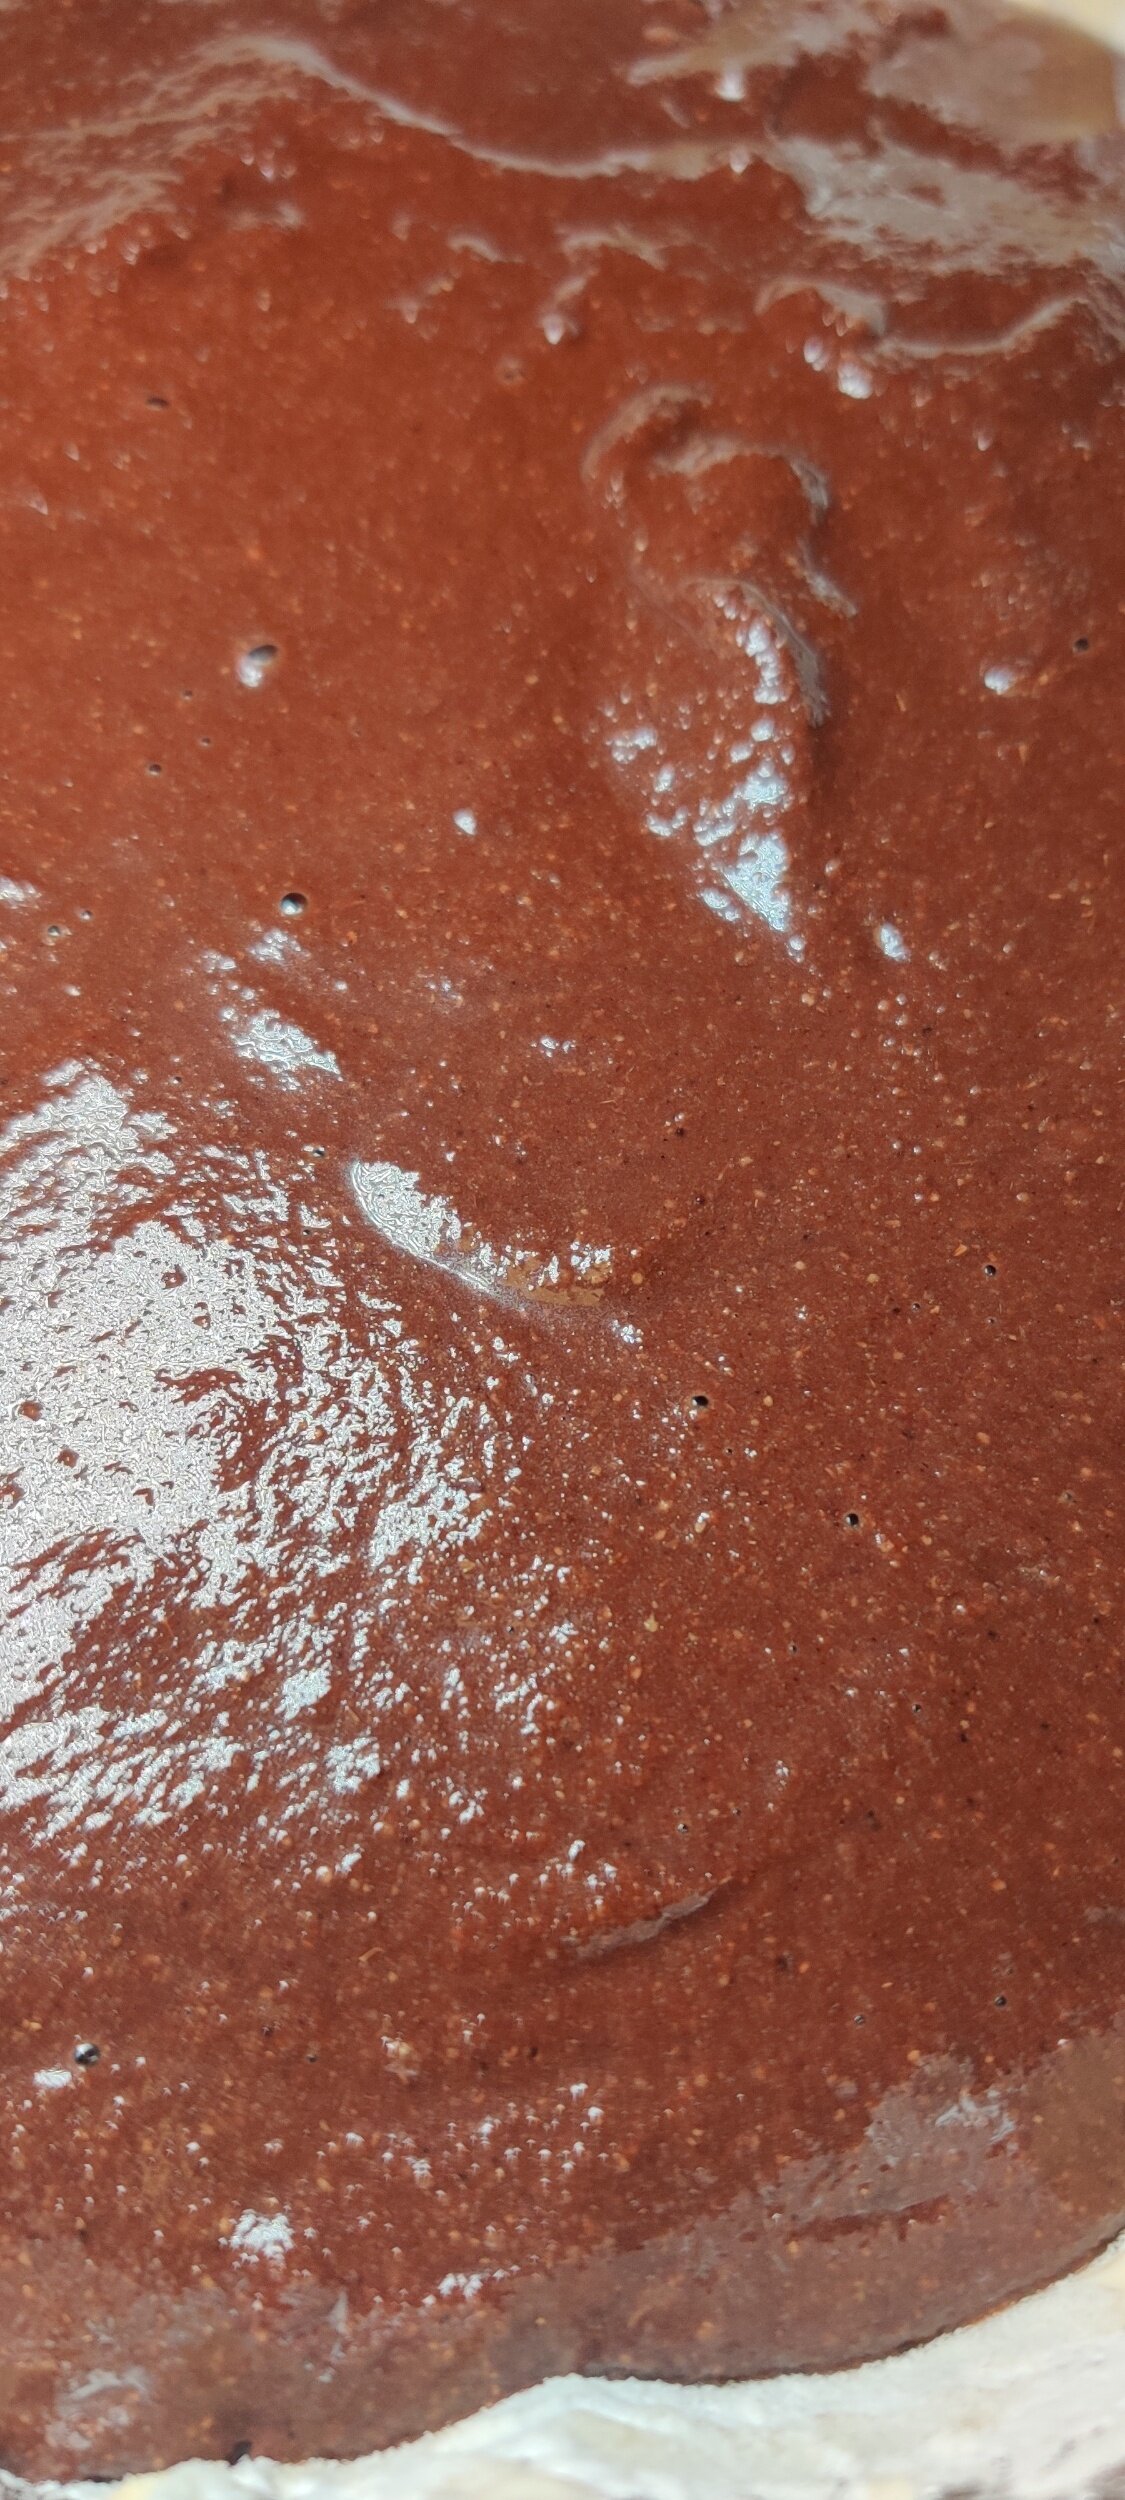
Make a well then pour in the beaten wet ingredients. Fold the egg mixture into the batter and mix until smooth and well incorporated with no lumps.
Prepare a baking tin (I used an 8-inch cake tin) and pour in the batter.
Bake at 350F for 15-20 minutes or until the cake firms and a toothpick comes out clean in the middle. Set aside to cool.
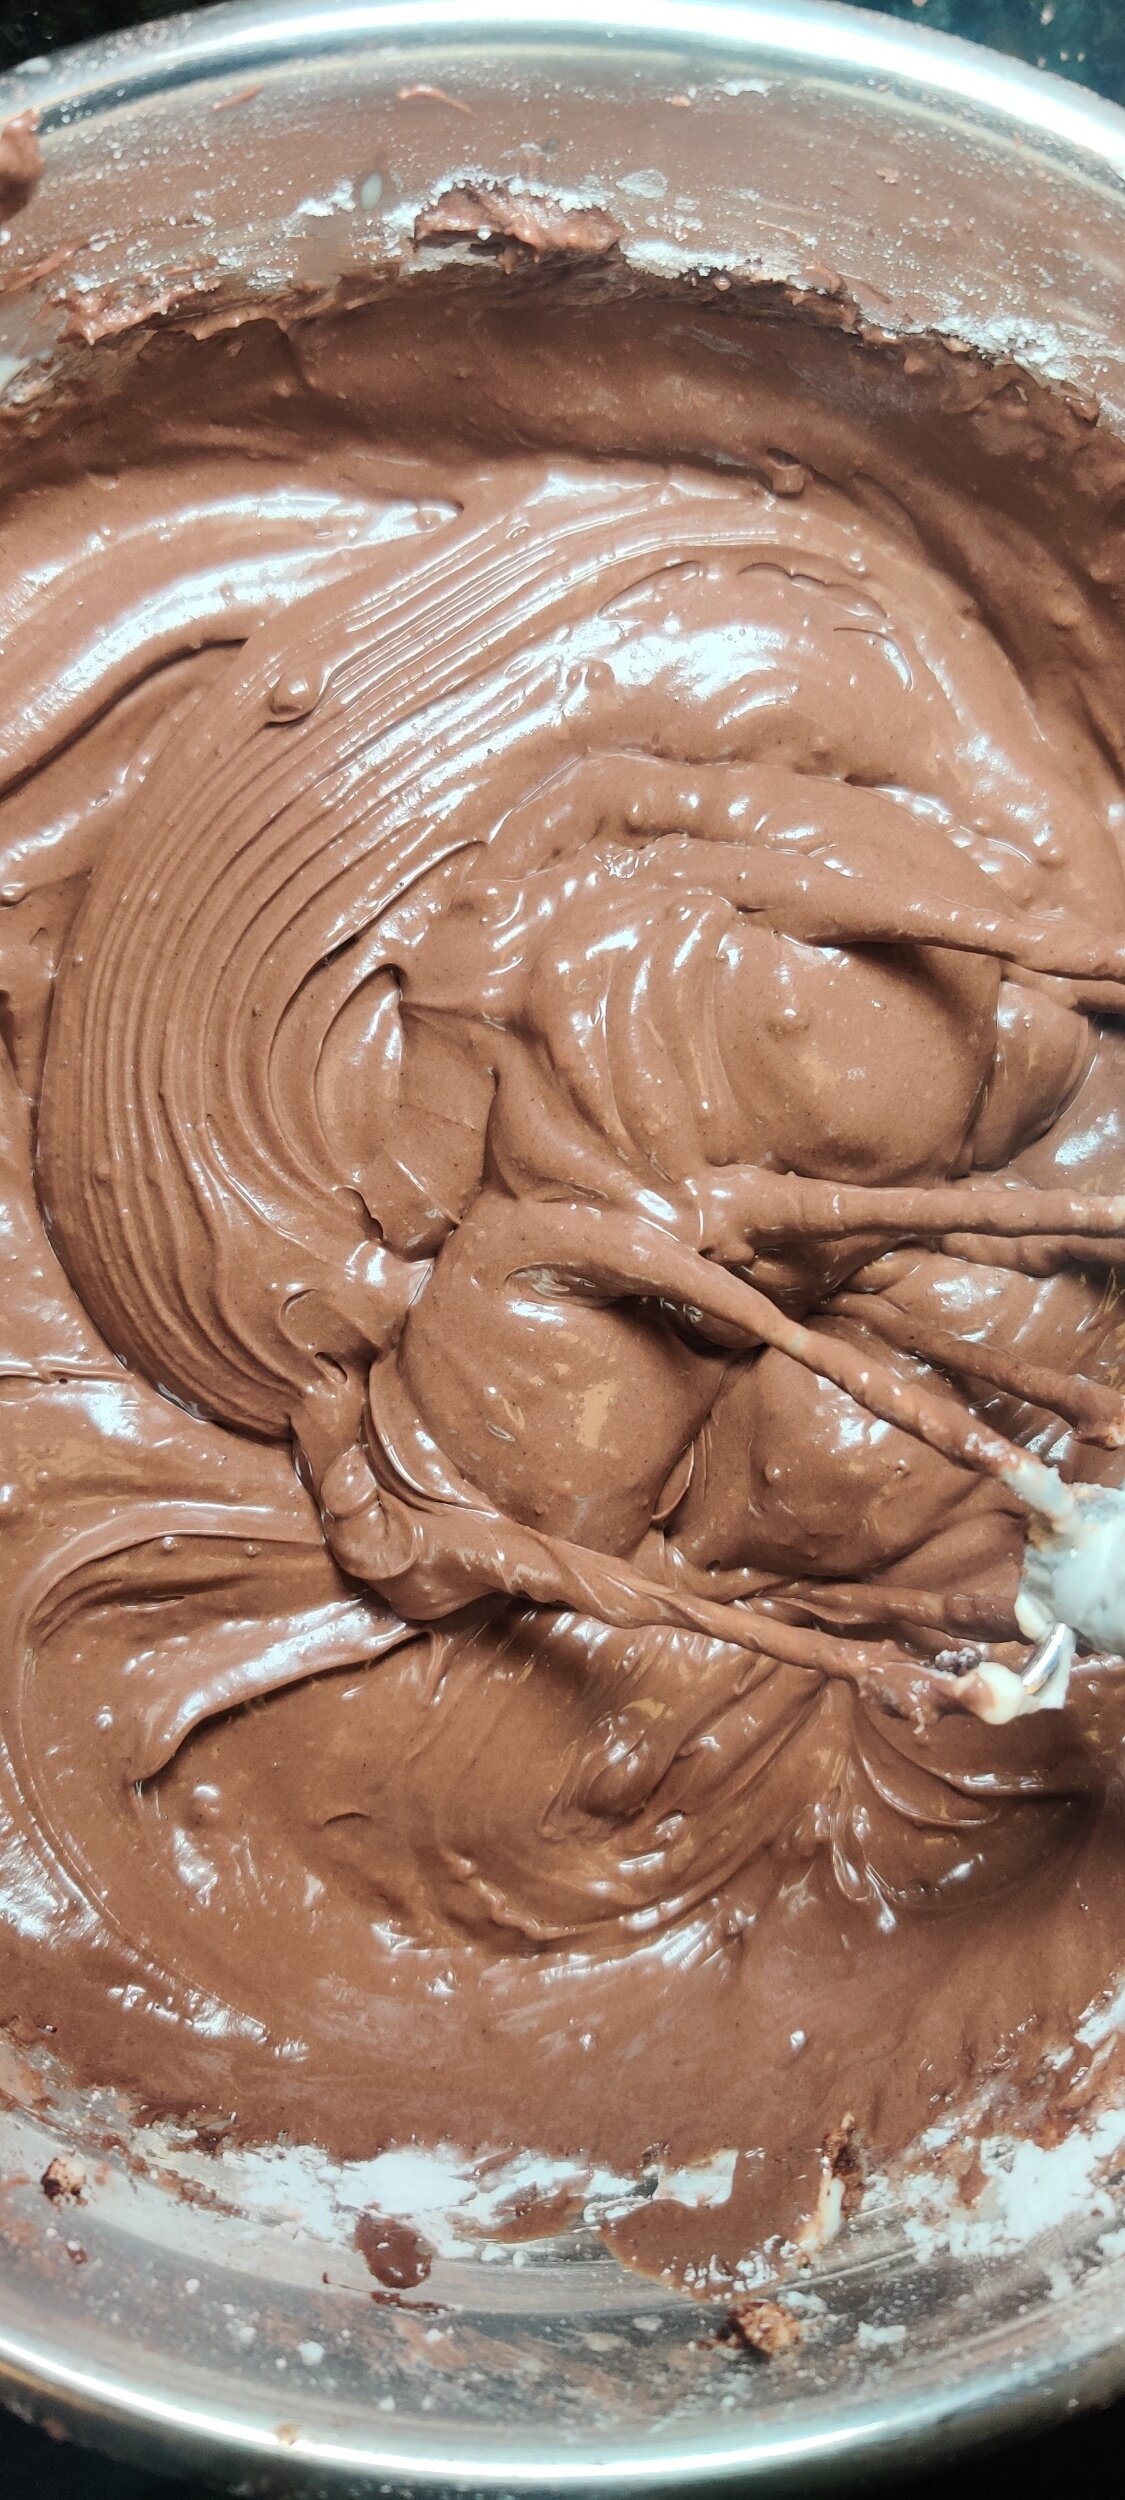
Make the frosting. With an electric mixer, blend all the ingredients. Add more icing sugar or milk according to your desired frosting consistency.
Chill the frosting in the fridge until you are ready to frost the cooled cake!

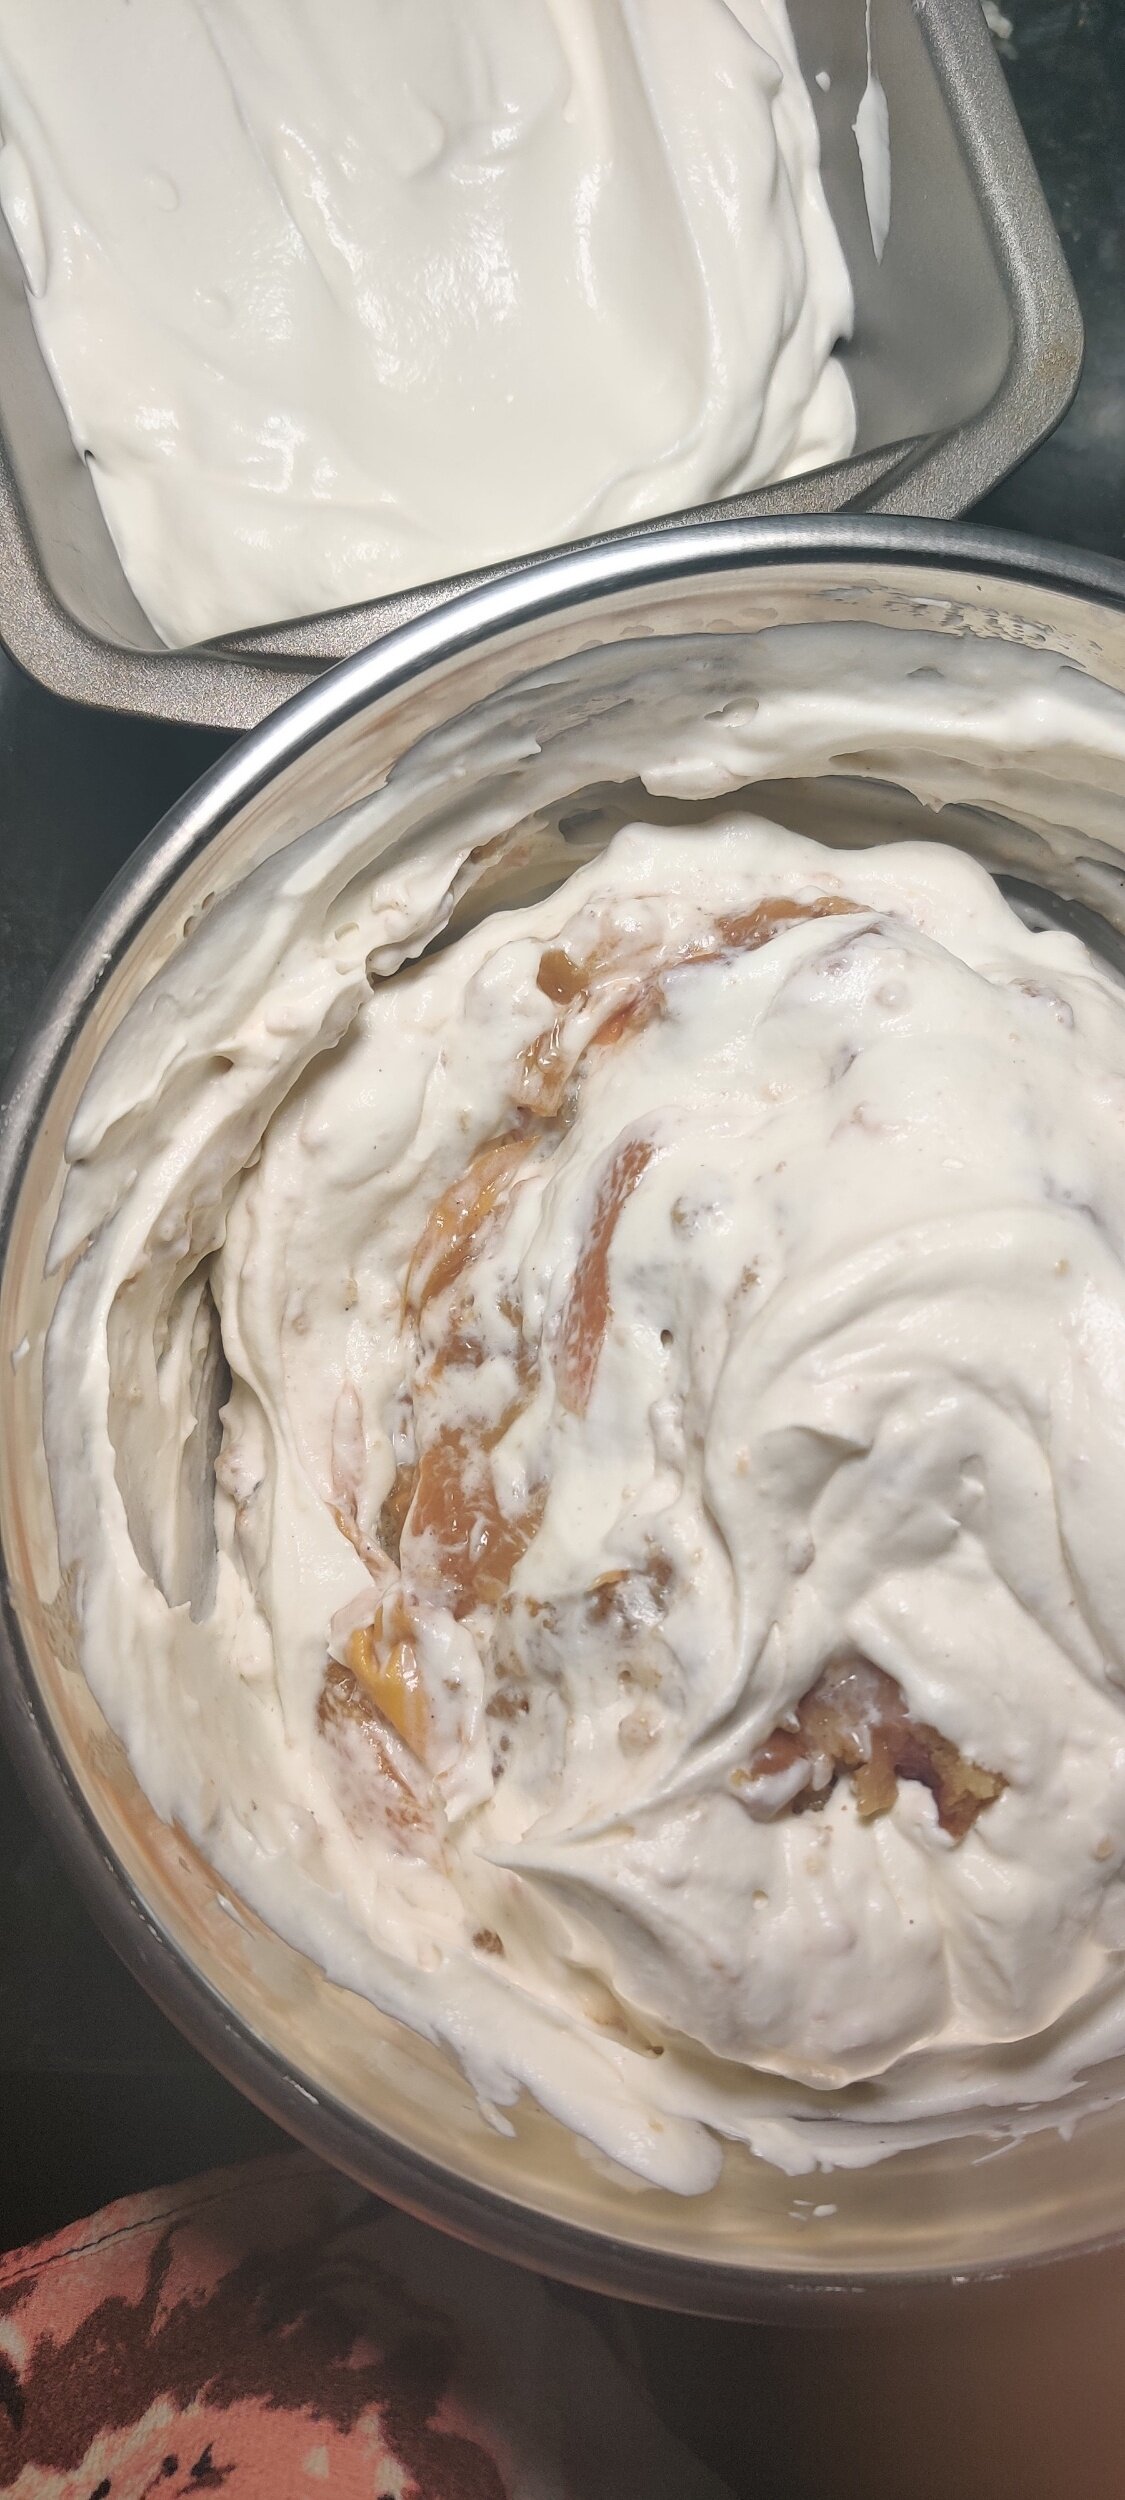
Bourbon Peach Crumble Ice Cream (No-Churn)
Summertime calls for pies, tarts, and cakes that feature fresh, seasonal fruit. Heavy hitters include strawberries, blueberries, lemons, and peaches, and I love it! But why not turn these dessert classics into something to cool you down like ice cream? It’s fun, delicious, and will please the kids if you have any around!
And no, you do not need an ice cream maker for this recipe, it’s no-churn.
The heavy whipping cream makes up for the churning process which adds air to prevent large ice crystals forming. This makes for a smoother, creamier finished product. The condensed milk serves as your ice cream base typically prepared with milk, sugar, cream and eggs.
I have made homemade ice cream before. For while I thought it was difficult it doesn't have to be! All you need is your base/condensed milk, some heavy cream, and your flavours. If you do it right it comes pretty close to what you get in the stores. You may never buy again and make your own from now on.
This ice cream takes the favoured peach crumble (or cobbler) and turns it into a decadent dessert, hope you enjoy it!
If you don’t consume dairy, there are alternatives for whipping cream and condensed milk on the market.
Ingredients
1 (14-ounce) can condensed milk, chilled
2 cups heavy cream
1 cup peach crumble or cobbler (you can use my recipe)
1 teaspoon bourbon


Instructions
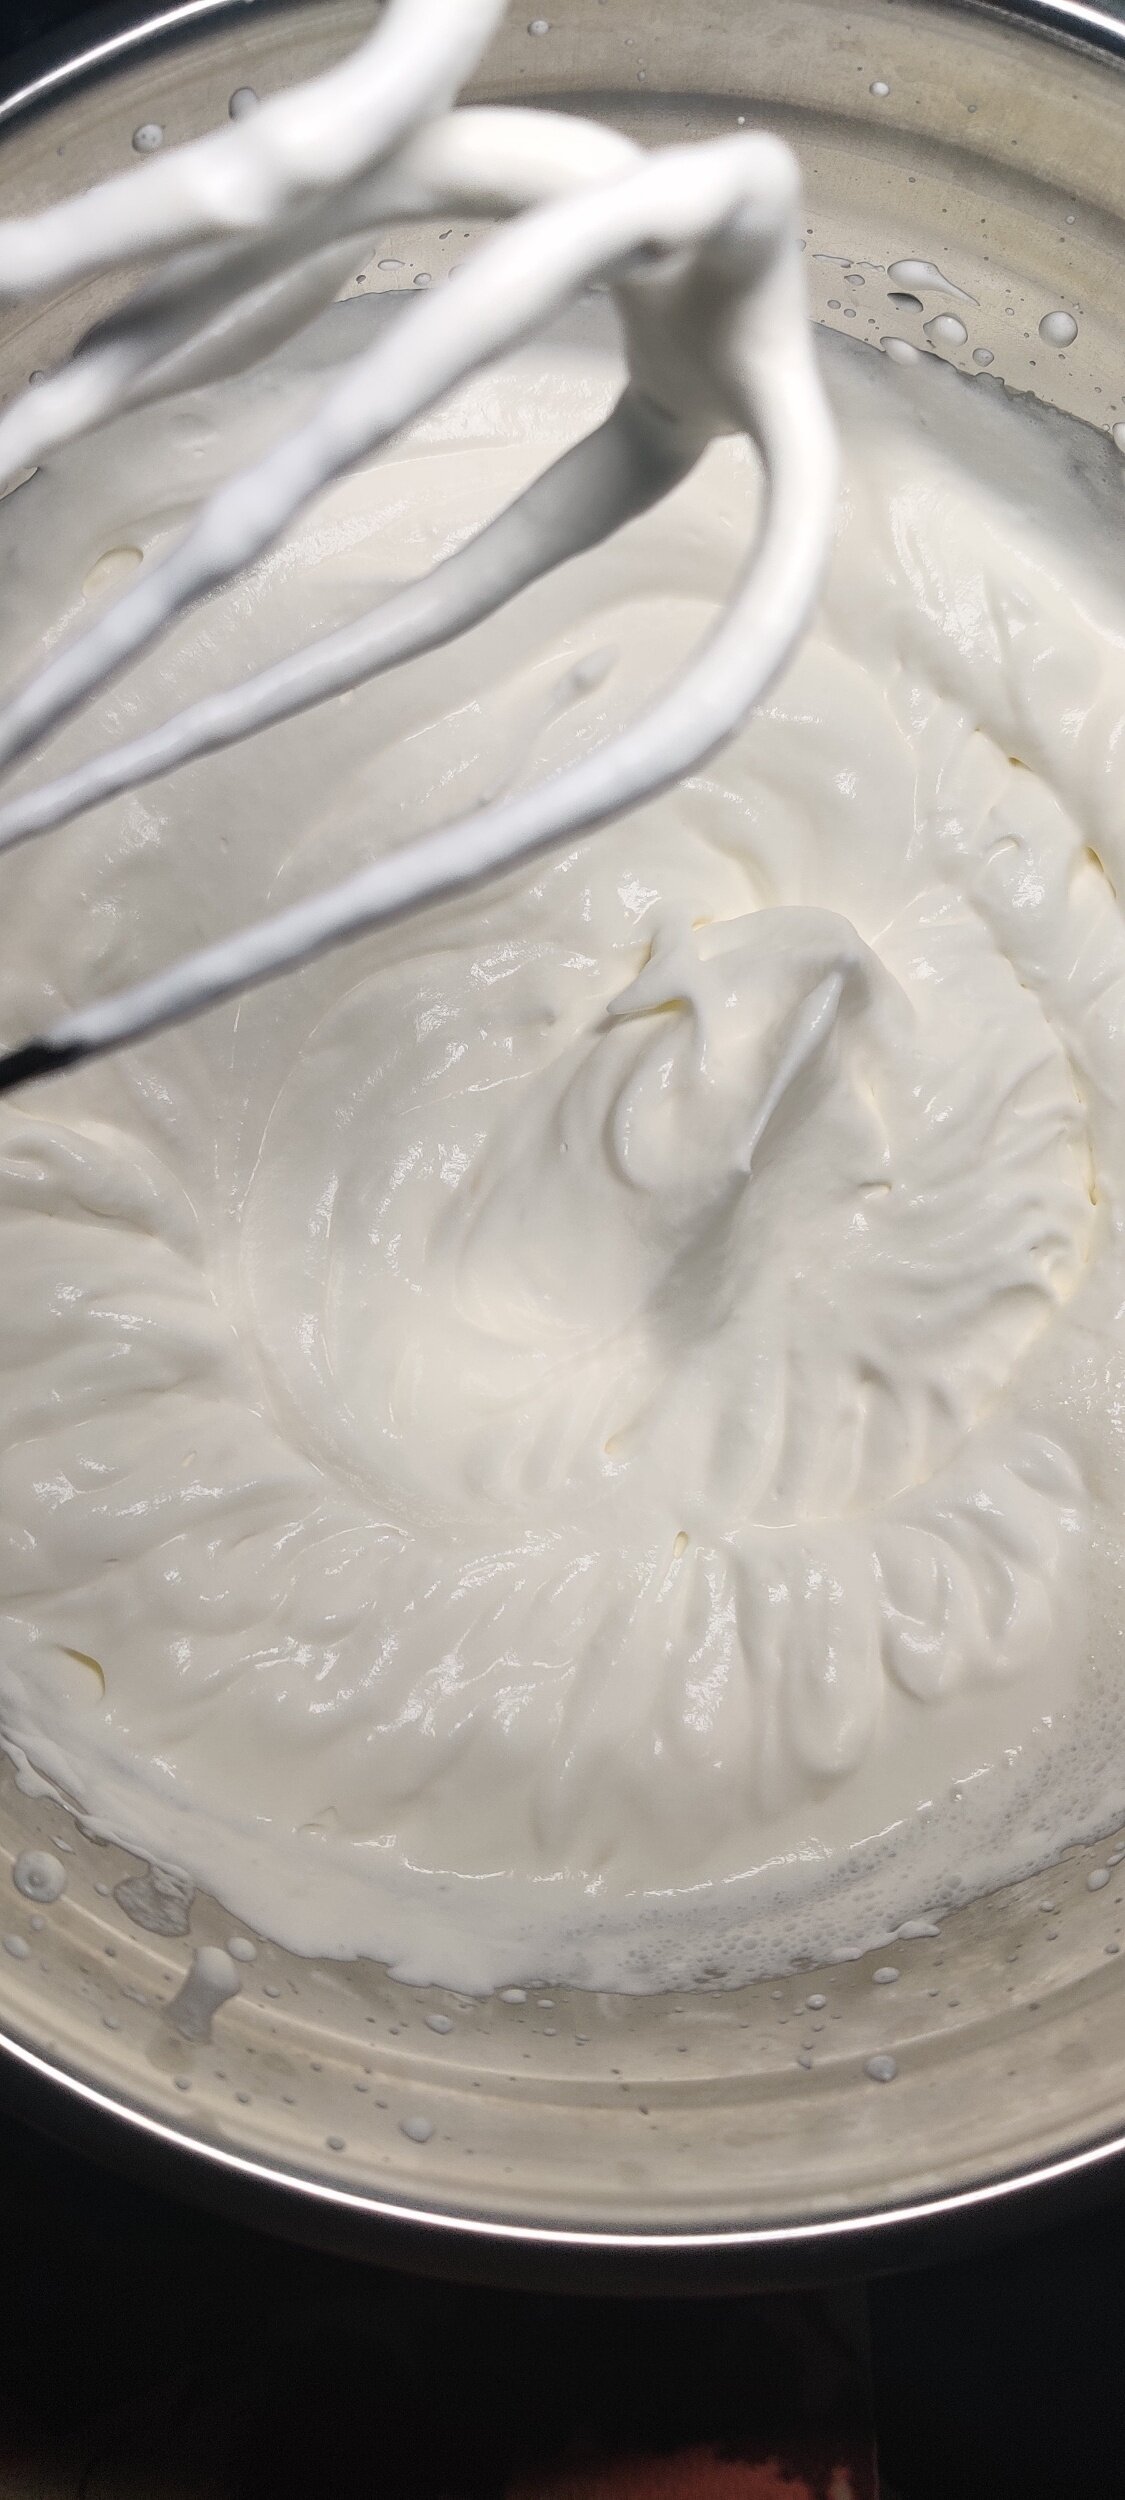
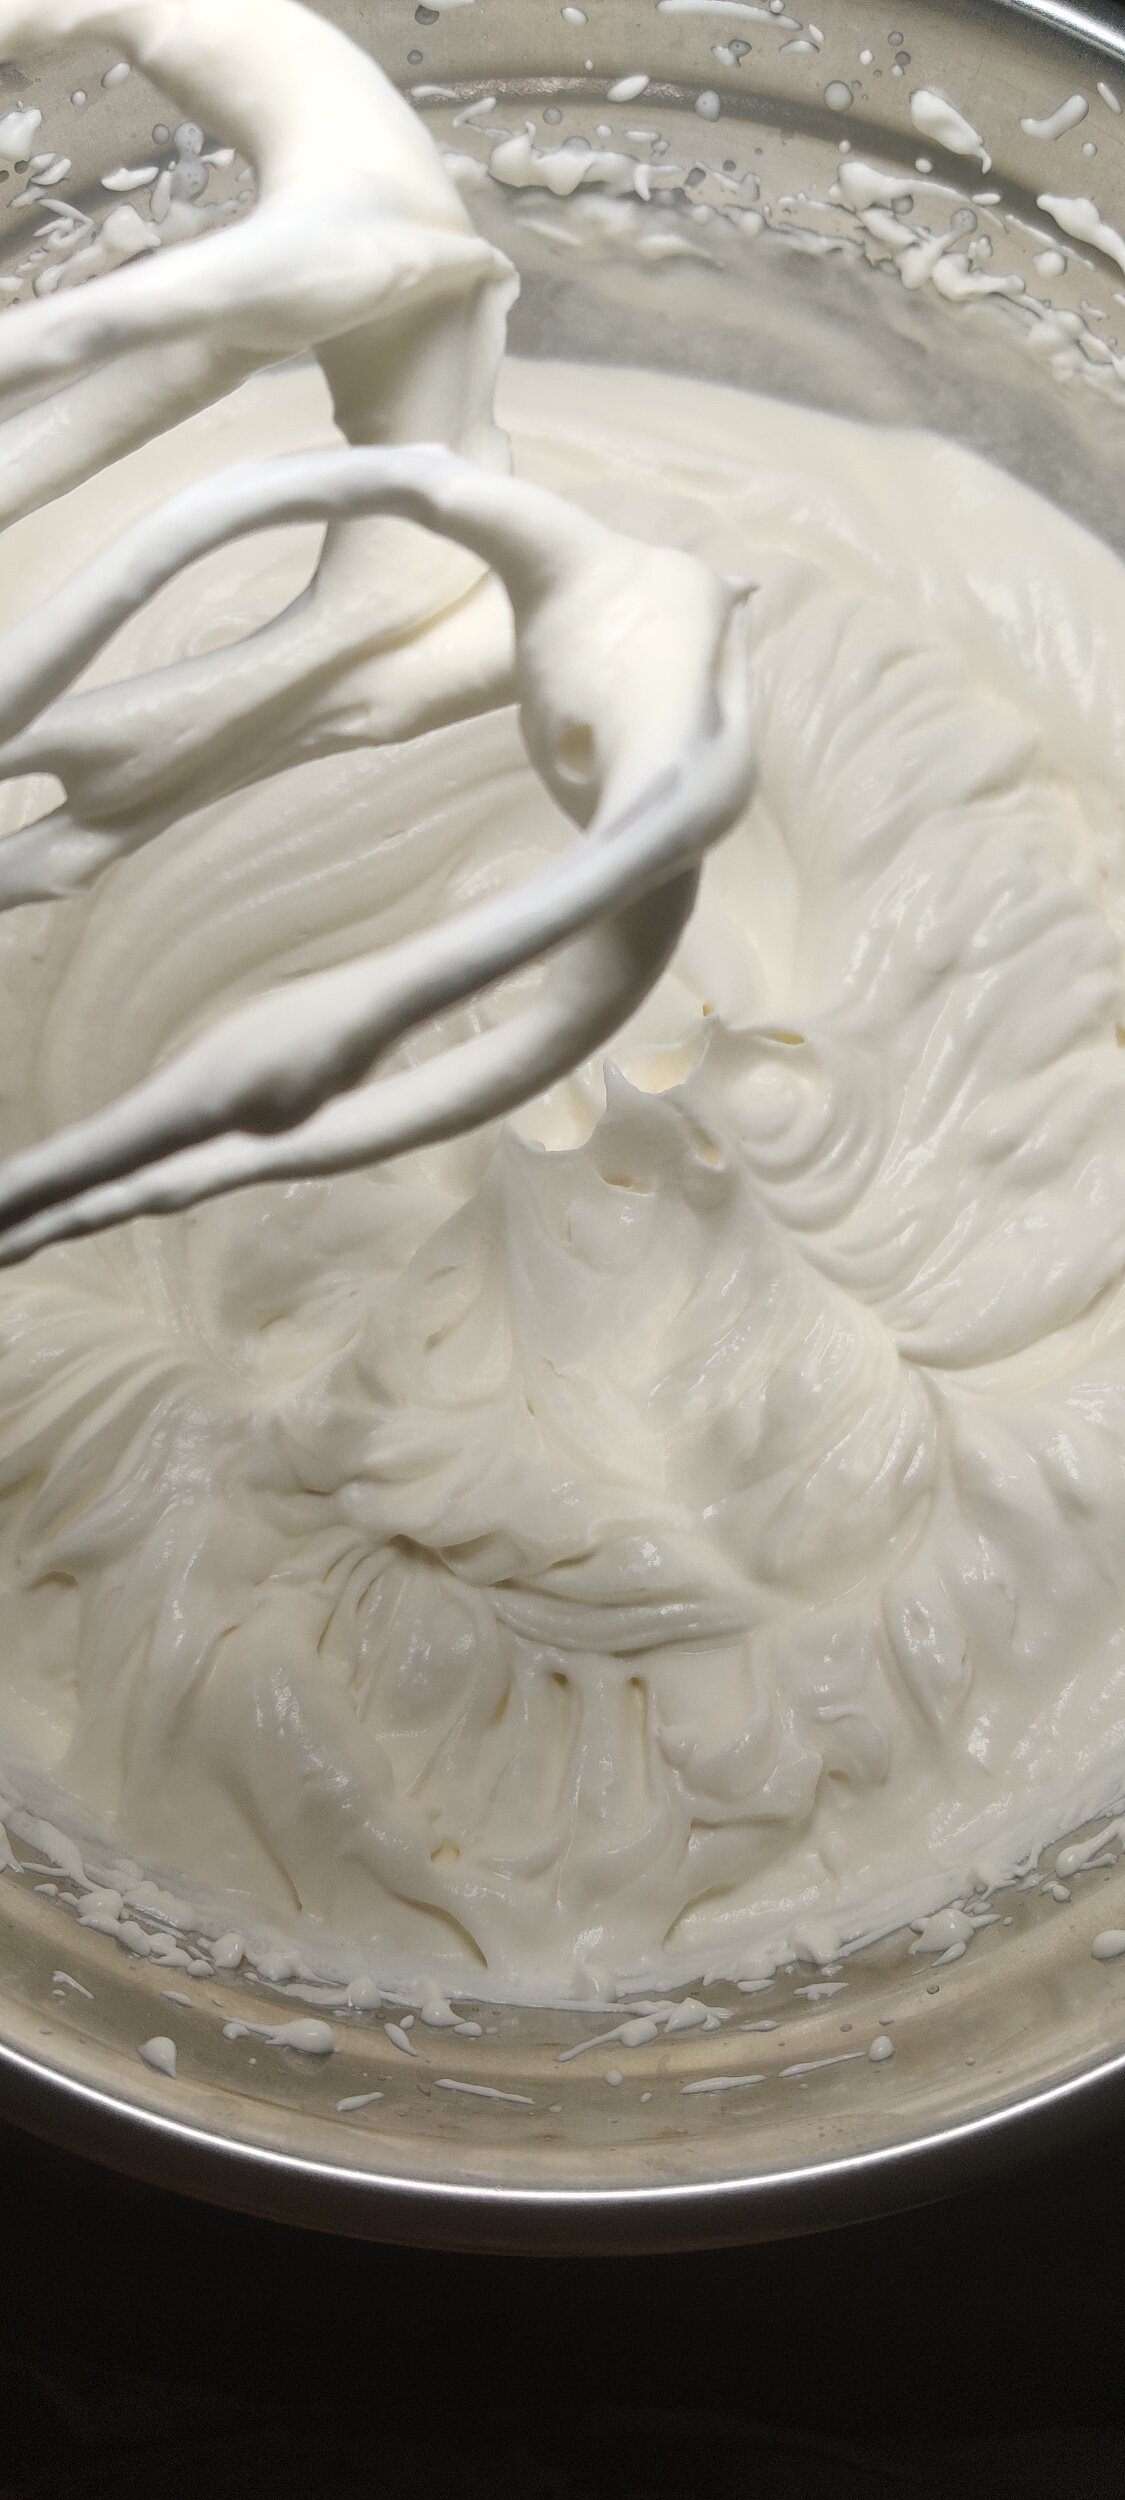
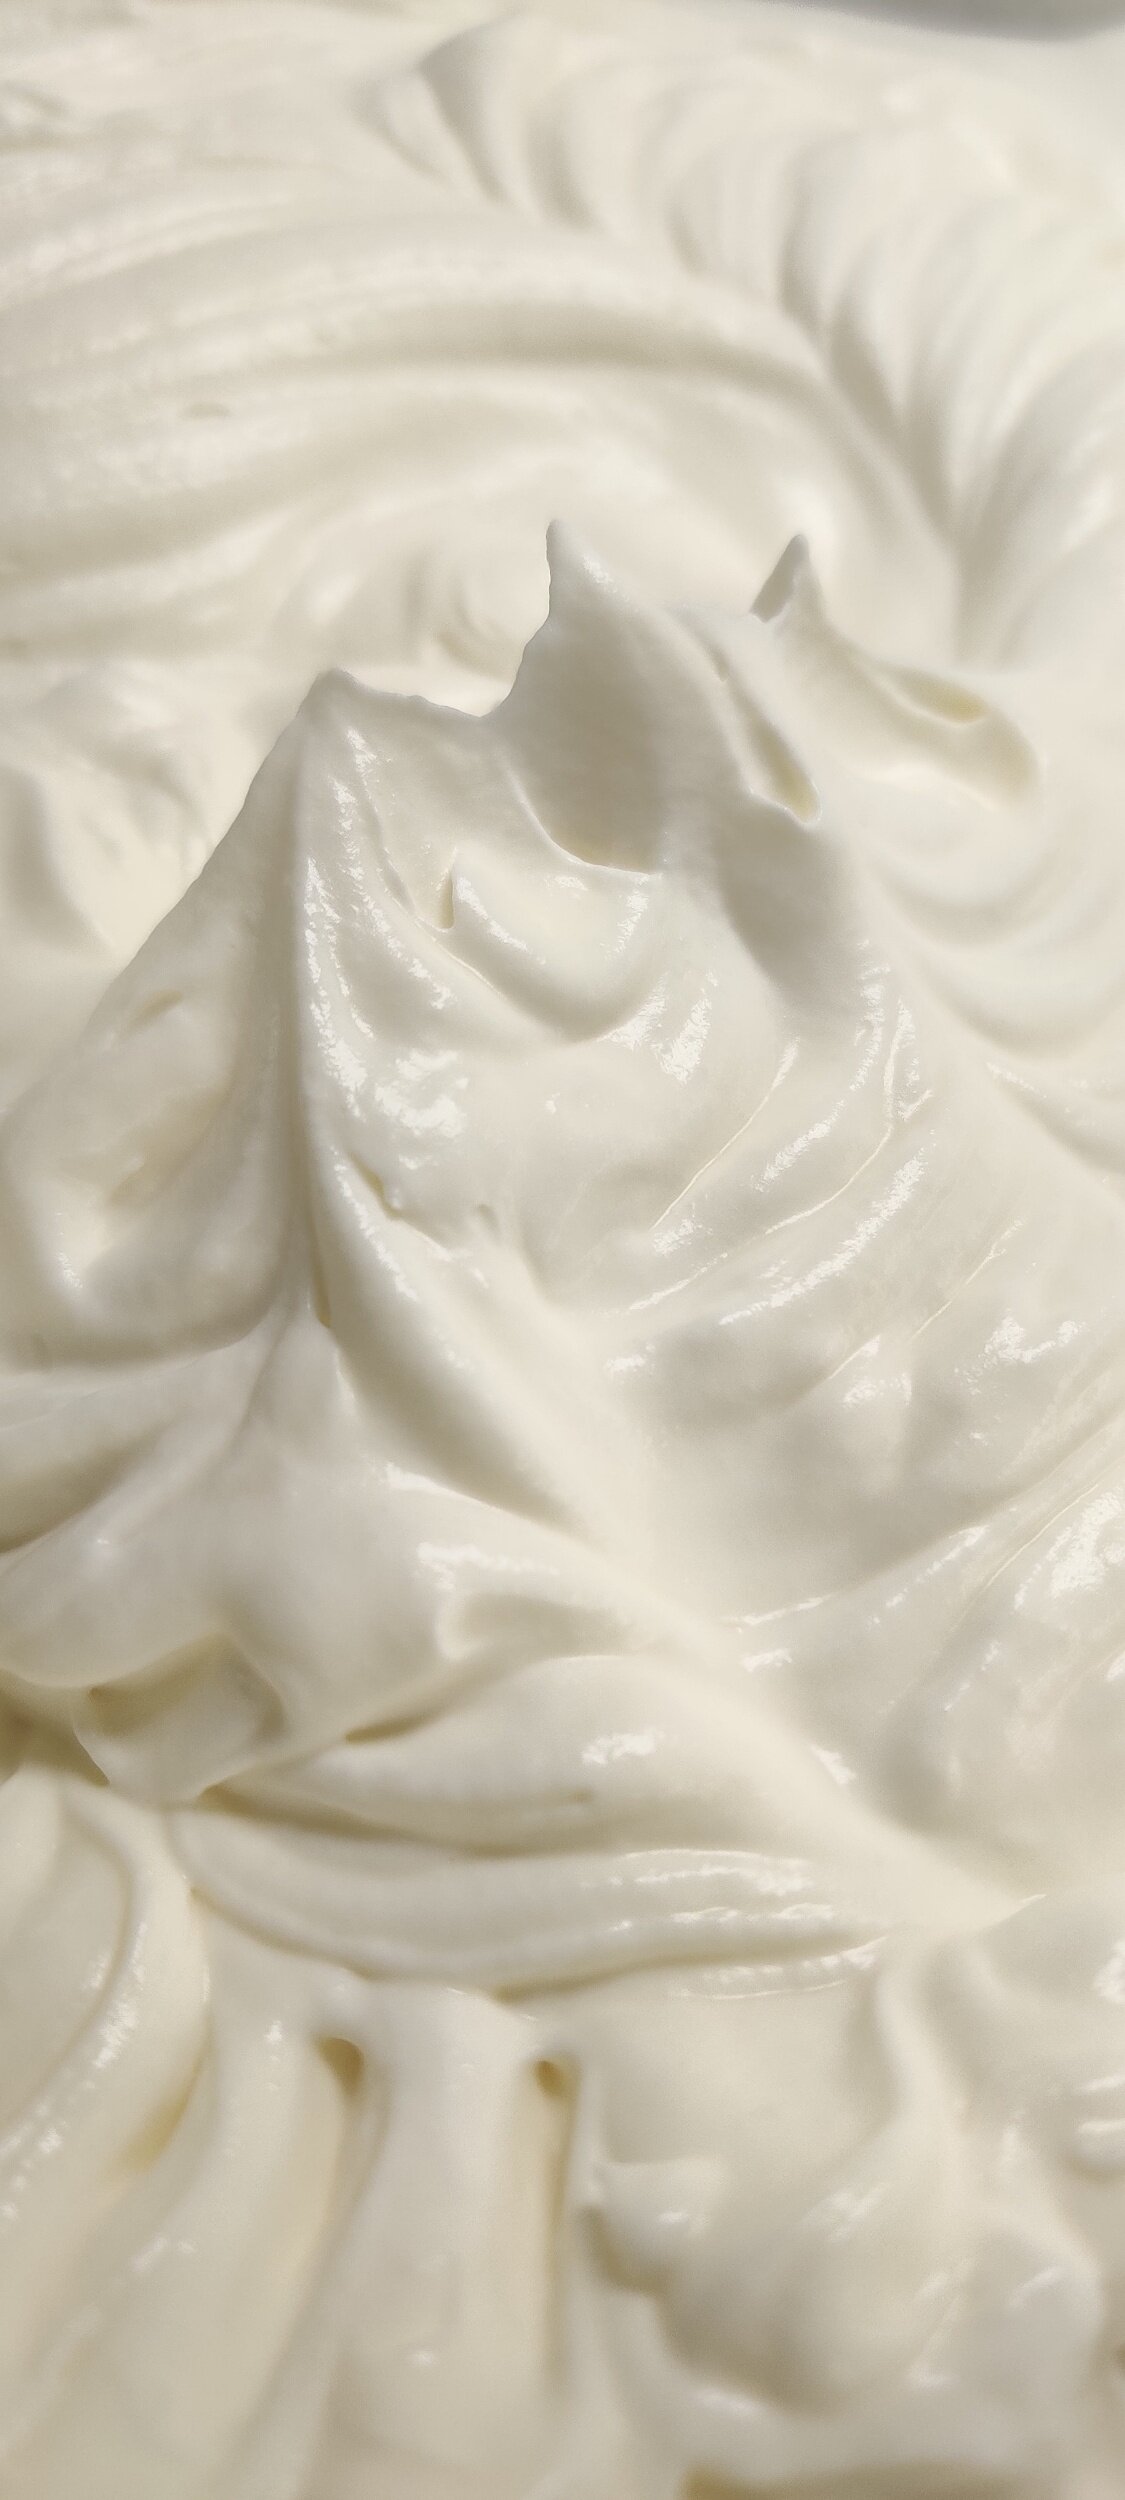
Whip the heavy cream with an electric or stand mixer until soft peaks form about 3-4 minutes. The cream should stand but with a slight slump.
Fold in the condensed milk then beat until stiff peaks form, another 3-4 minutes. The cream should look thicker with a wavy pattern. Fold in the bourbon.
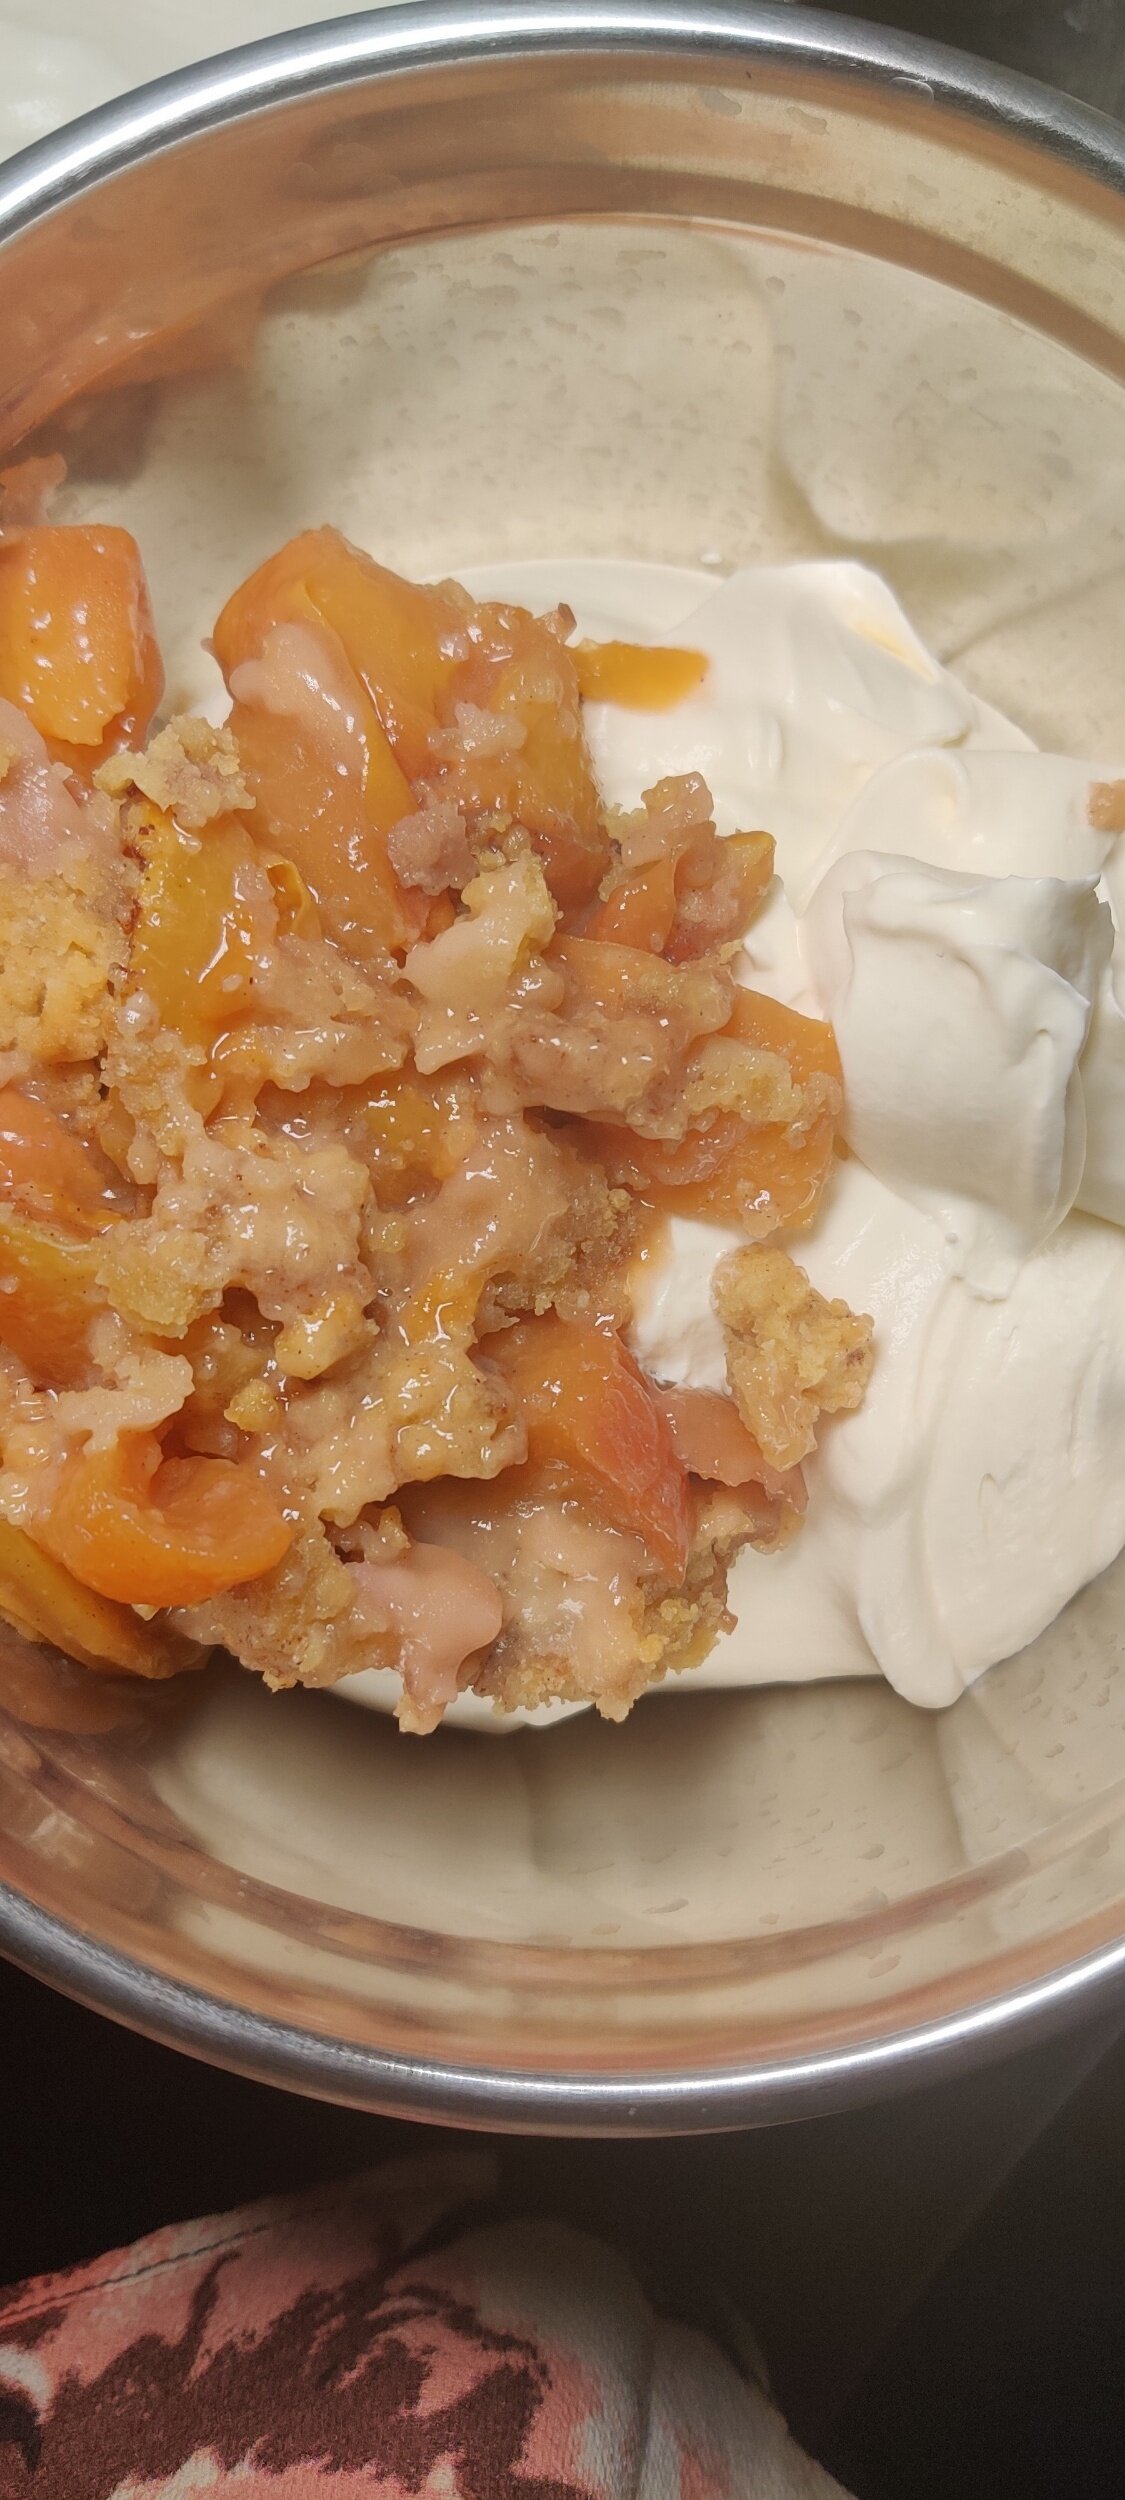
In a small bowl, mix about 1 1/2 cups of ice cream with the peach crumble.
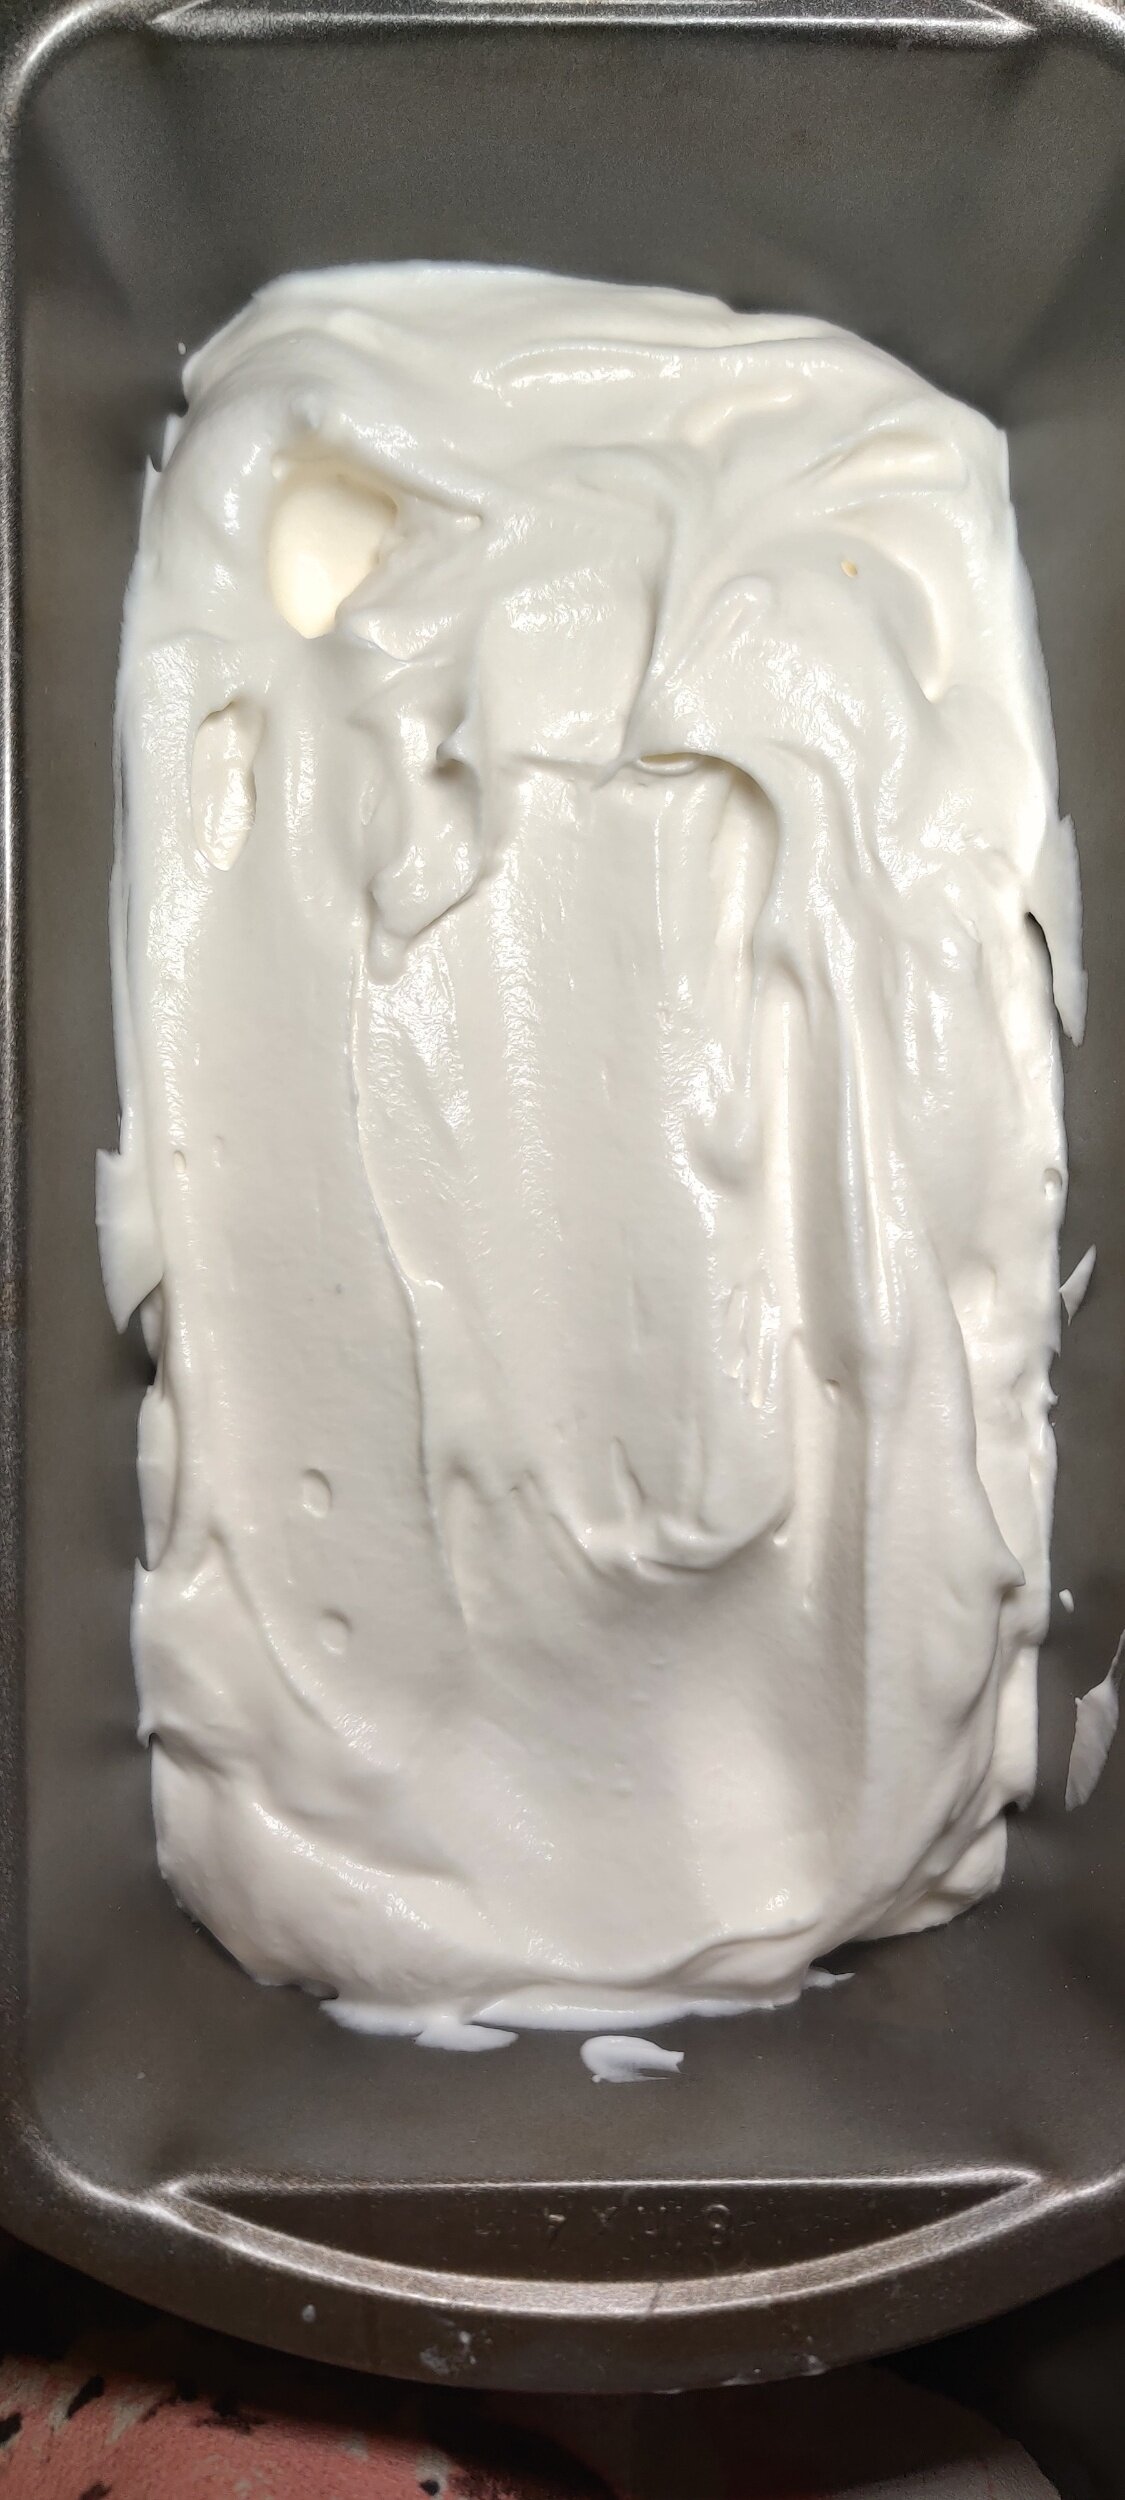
In your loaf pan or ice cream container, fill it halfway with the rest of the ice cream, then add the portion with the crumble on top. Take a knife or spoon and swirl to distribute the crumble. You can sprinkle some on top if you desire as well!
Before placing in the freezer overnight or for at least 6 hours, make sure the ice cream is airtight! If not, ice crystals may on the surface. You can also place a piece of wax paper on top to help prevent this in addition to sealing.
Serve with sugar cones or as a side to peach crumble or any other dessert!

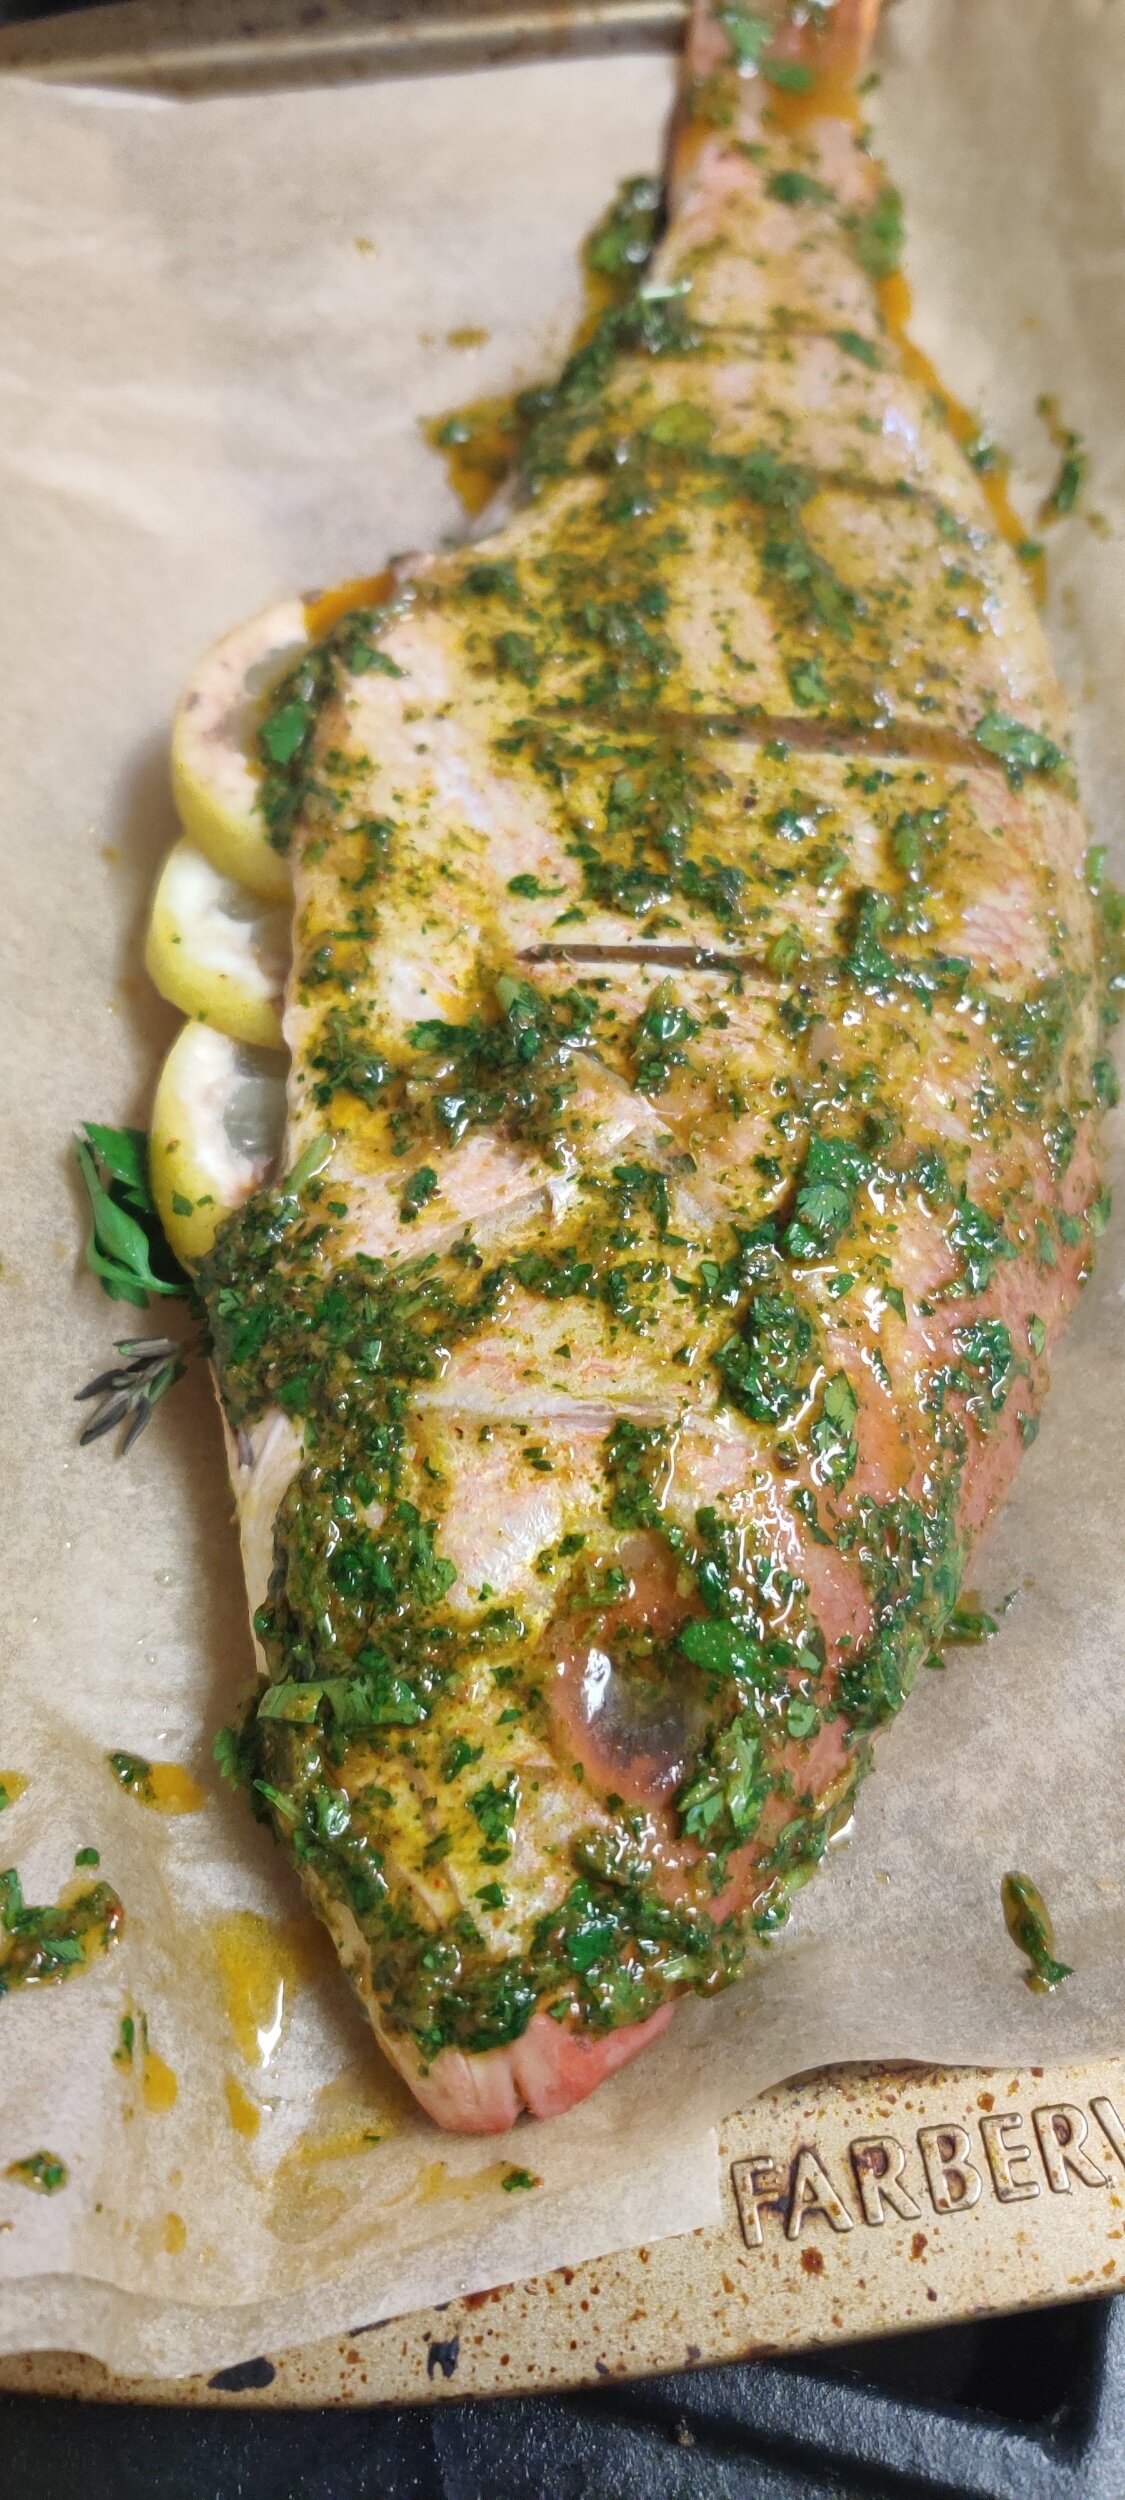
Chermoula Red Snapper with Peanut Butter Rice
This dish is a combination of a lot of different influences. Meals like this that make me appreciate the exposure I've had to food from my background, visiting restaurants, reading, and exploring in the kitchen.
Let’s start with the peanut butter rice!
This is a favoured way of preparing rice in Zimbabwe. It’s an easy, affordable way to add protein to the rice when there is no meat, but even when there is adds an interesting dimension to rice. If you haven’t tried peanut butter rice, I encourage it of course!

The second most important thing, the fish and the marinade!
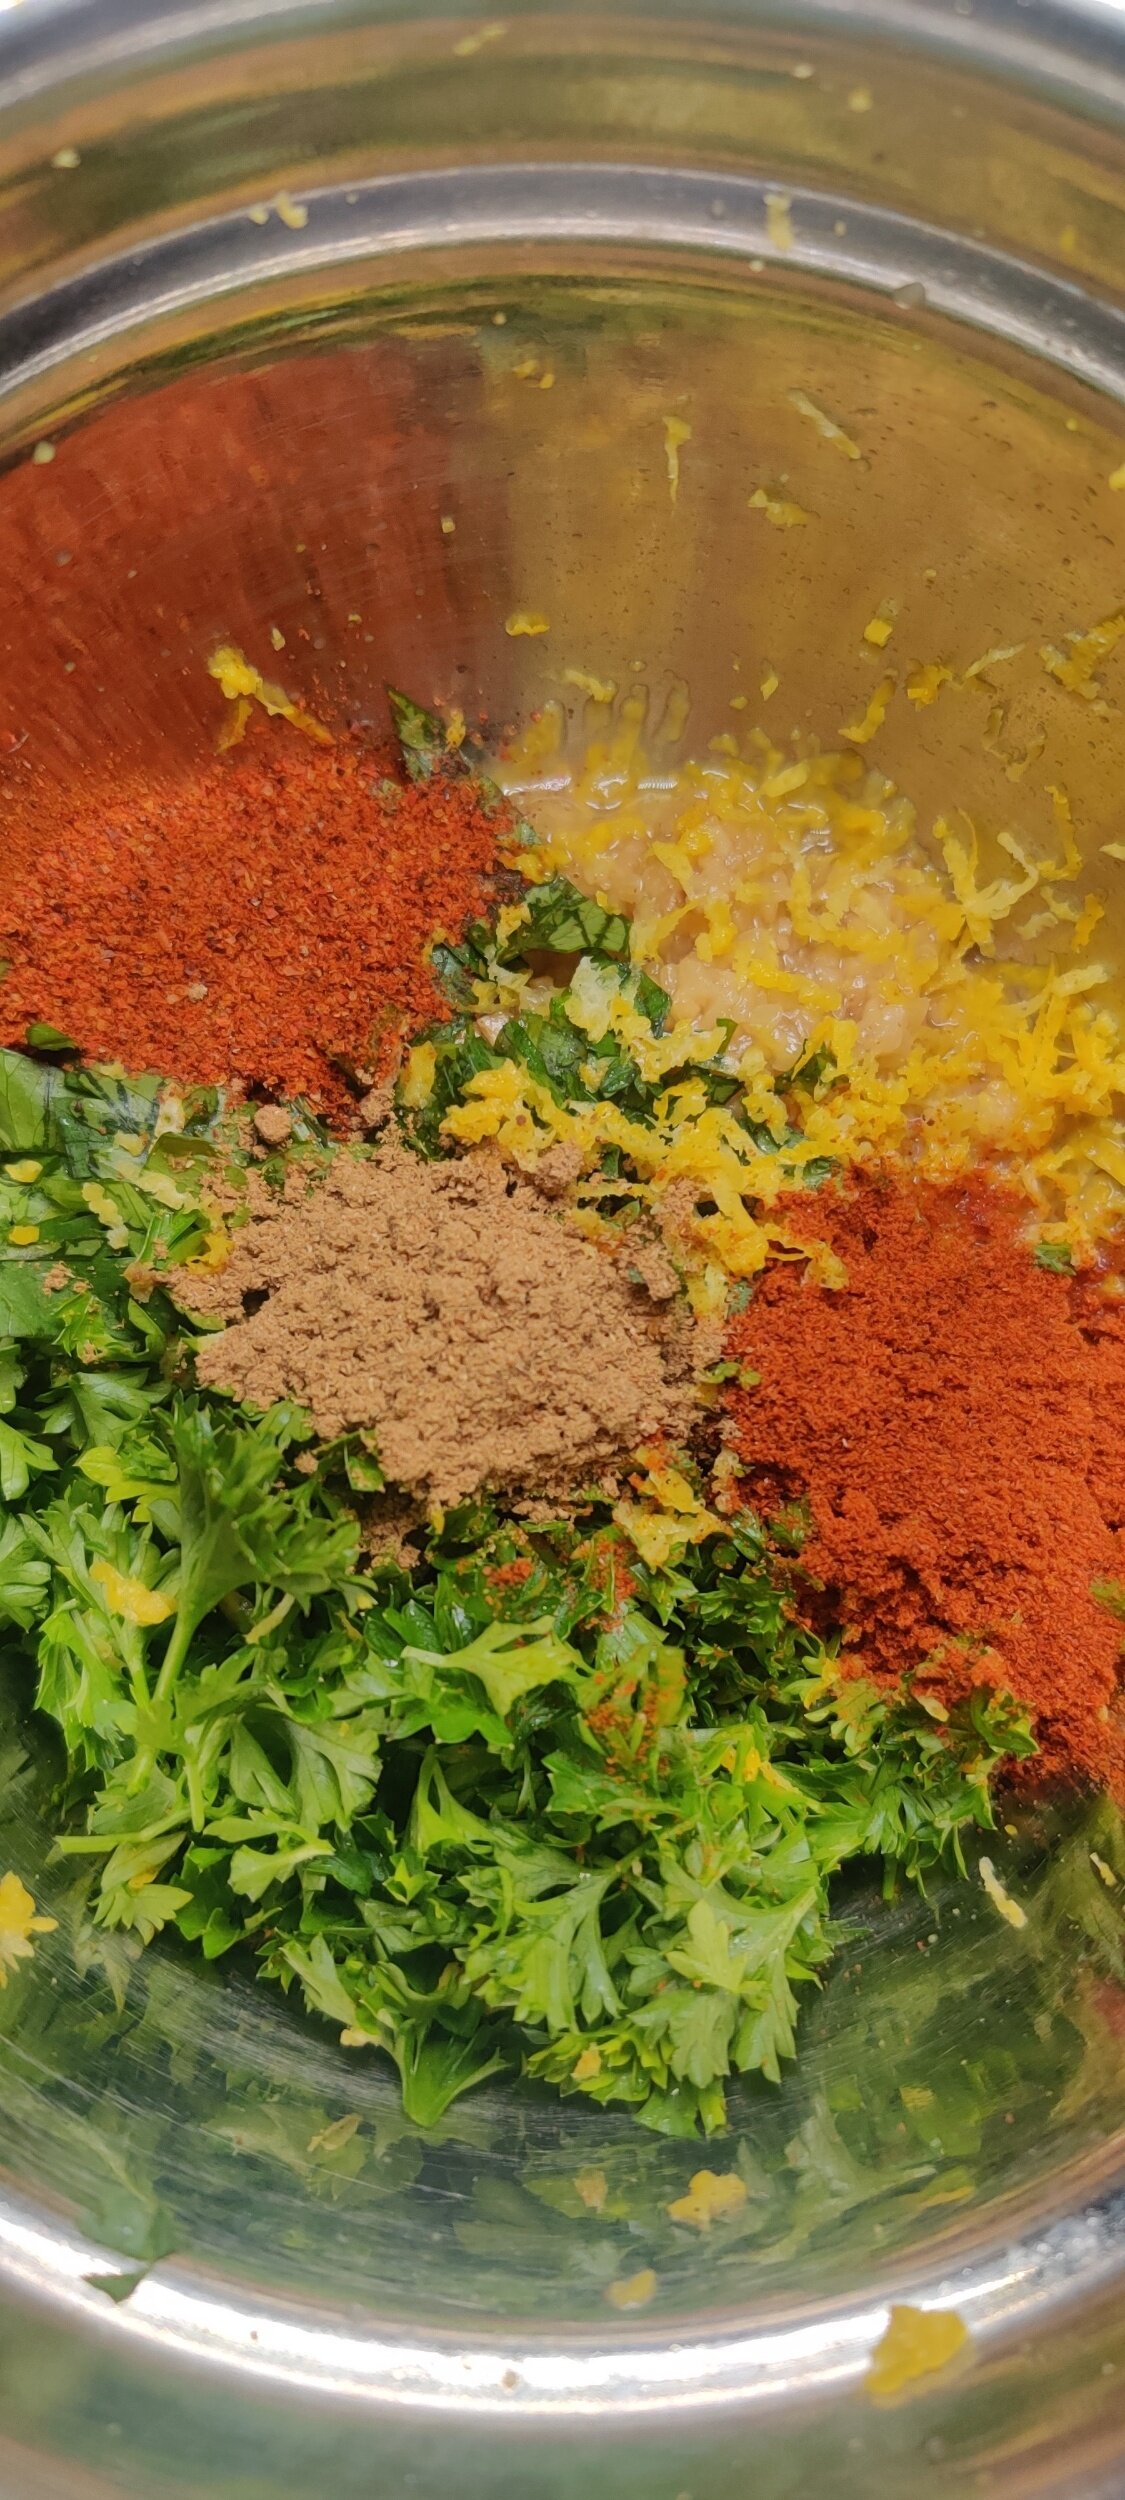
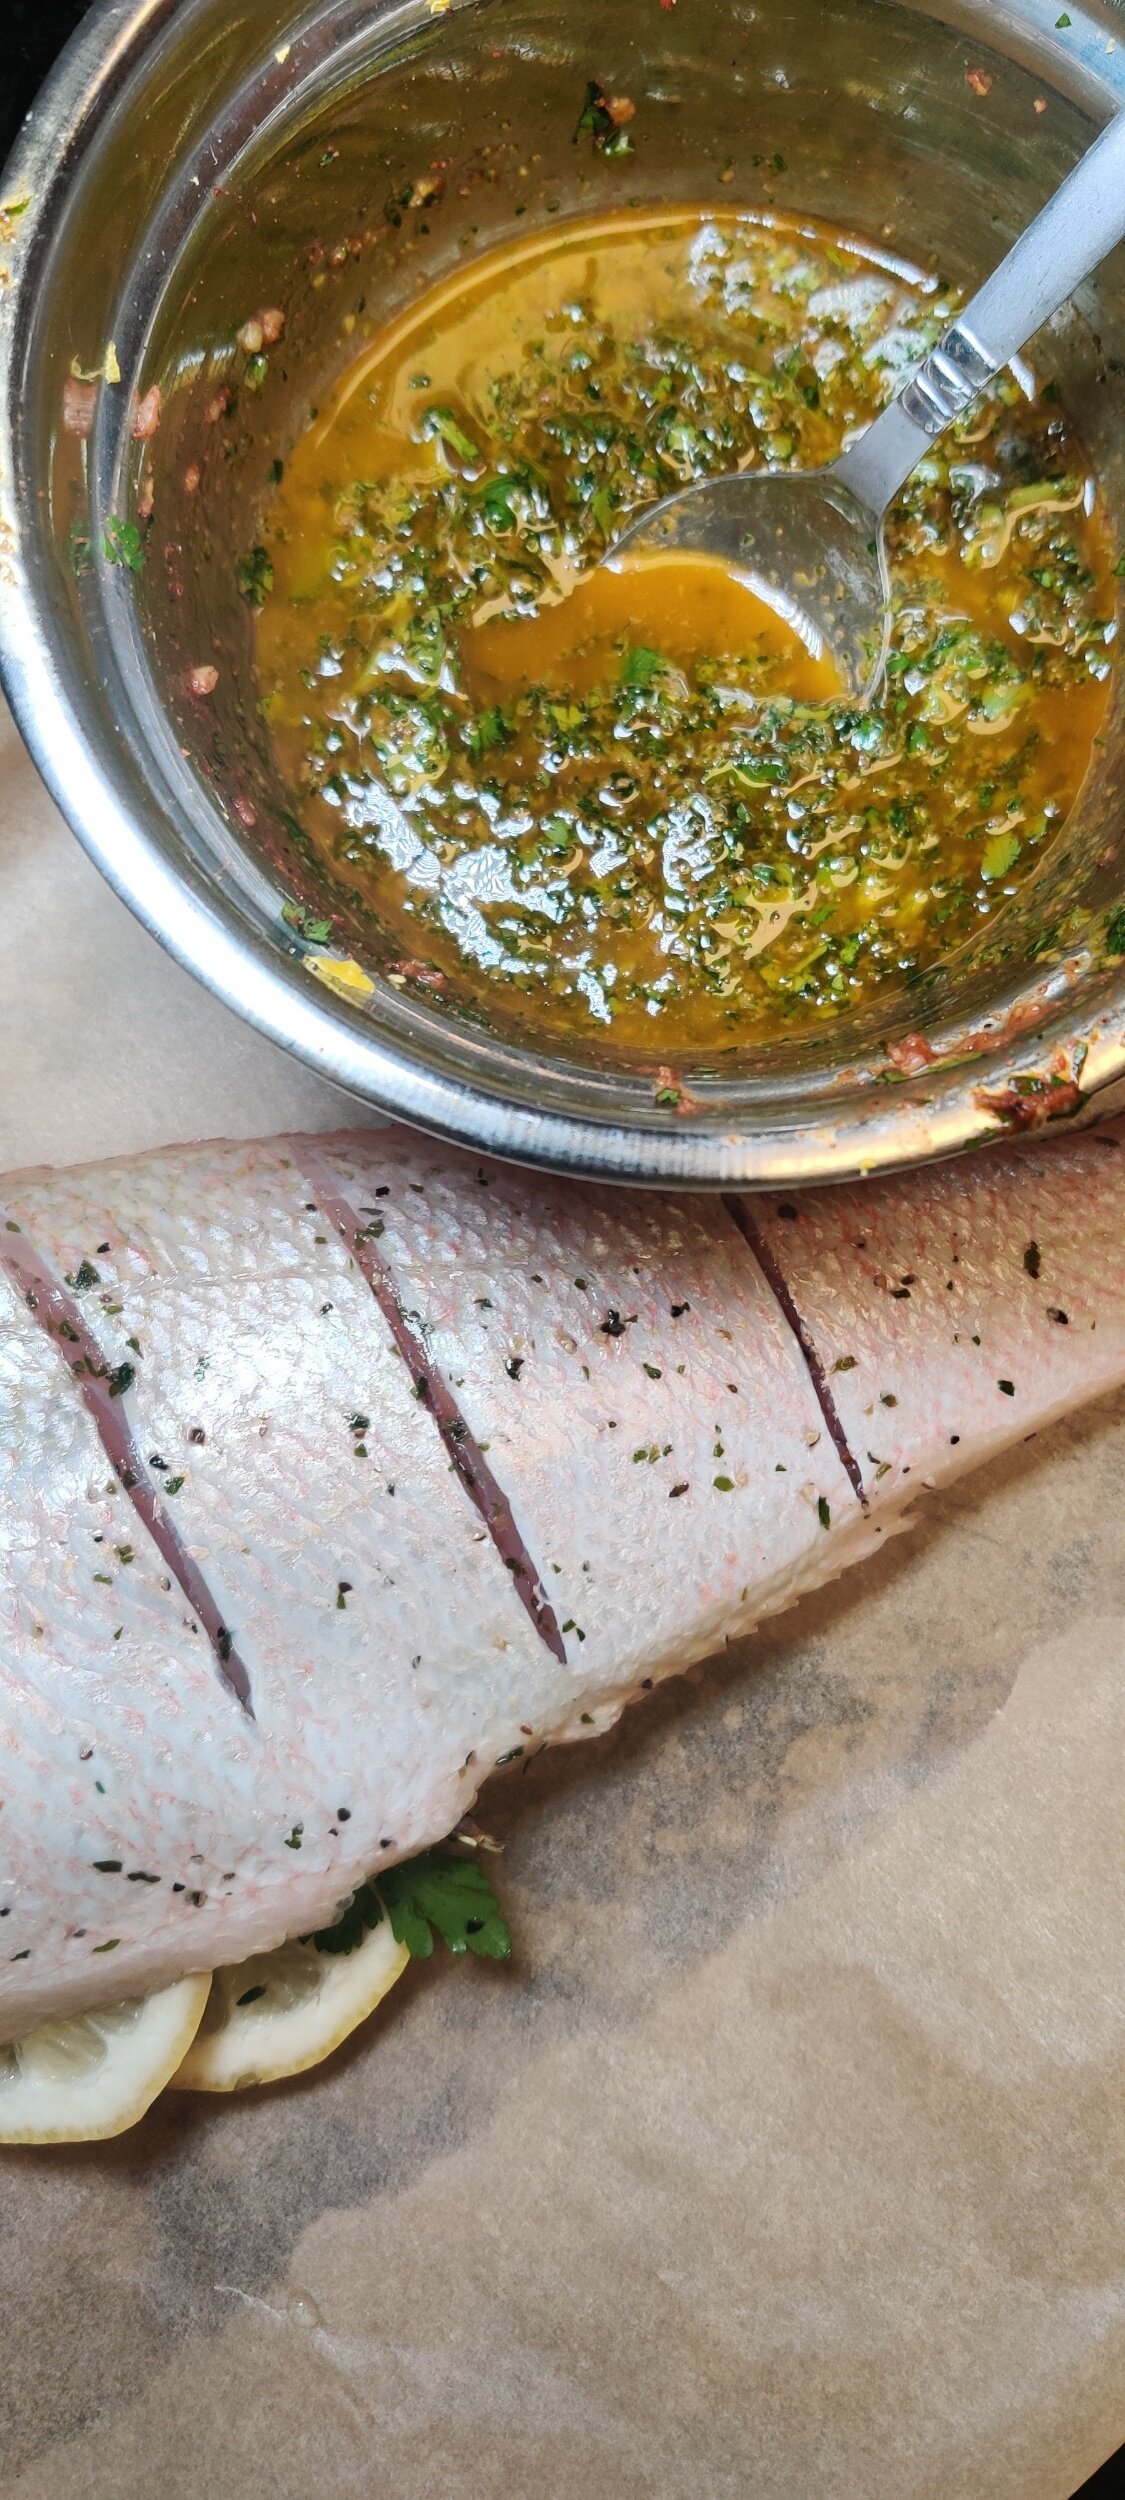
Chermoula is a herb marinade used to season fish and vegetables in Morocco, Tunisia, Libya, and other parts of North Africa. It adds a rich taste to even the mildest fish. Once you make it you will be using it forever.
As for the red snapper, once clean, stuff it with simple herbs and add some lemon slices for favour on the inside. You can also get it from the butcher prepared for you, but that doesn’t mean you can’t add seasoning!

Ingredients
Chermoula and fish:
1 red snapper, cleaned
1/2 cup parsley, chopped
1/4 cup cilantro, chopped
1 teaspoon cumin
1/2 teaspoon black pepper
Pinch of salt
1 teaspoon paprika
1/2 cup olive oil
1 tablespoon lemon zest
4 teaspoons garlic, minced
1 teaspoon chili powder
4 lemon slices
1 thyme sprig
1 parsley spring
Peanut butter rice:
1 cup white rice
1/3 cup peanut butter
1/2 teaspoon black pepper
1/4 teaspoon salt
1/4 hot cup water
1 3/4 cups water
1 vegetable sachet or bouillon
1 tablespoon olive oil
1 teaspoon garlic, minced
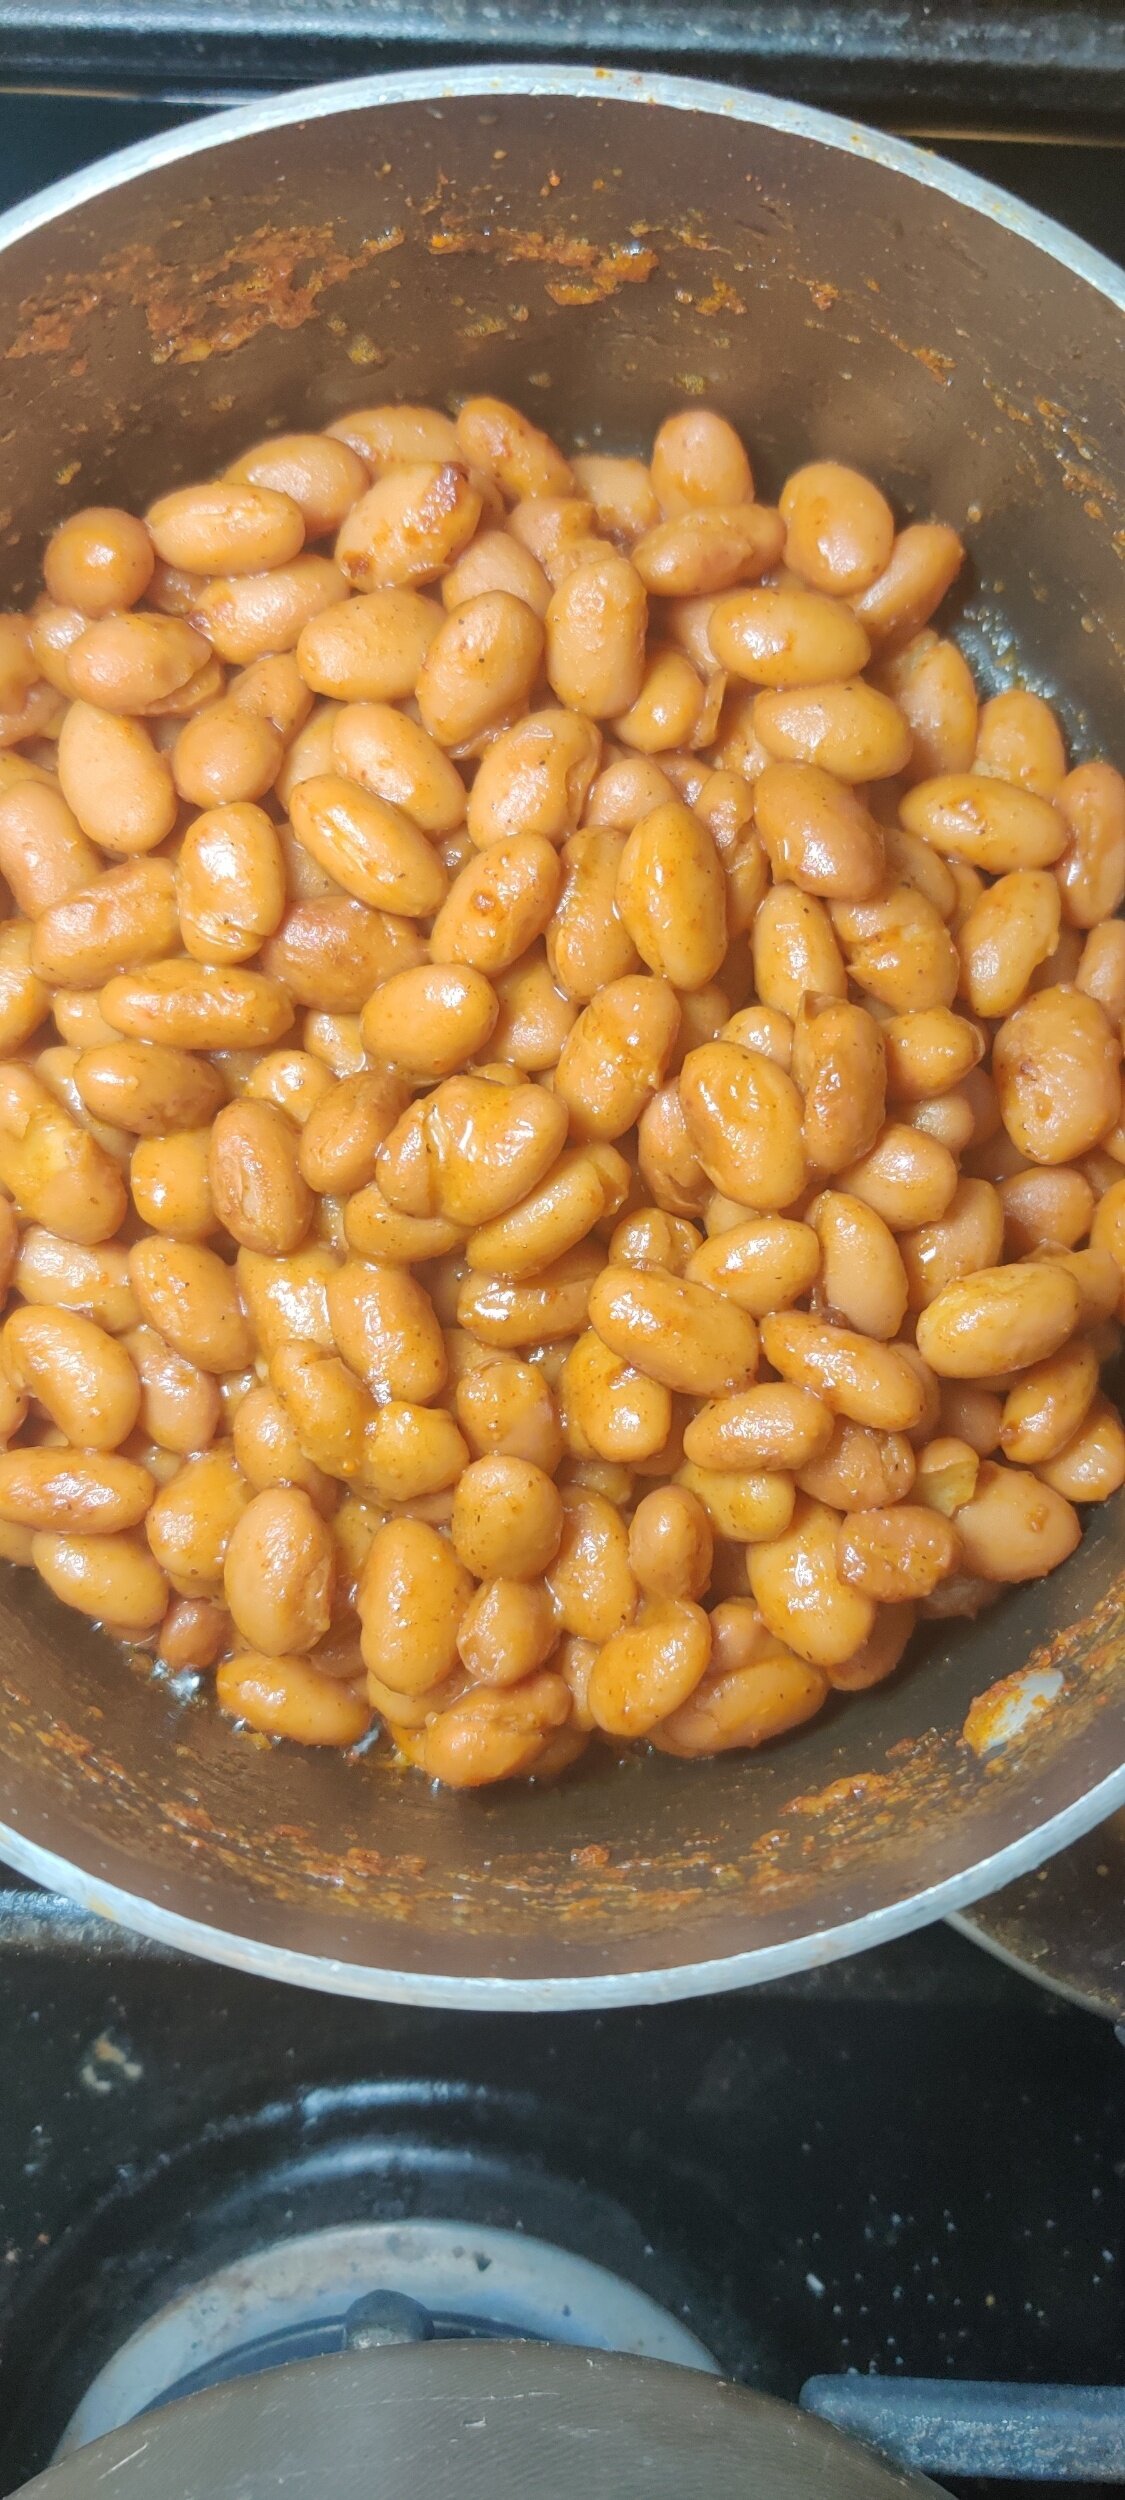
Beans:
1 teaspoon paprika
1 teaspoon chili powder
1 can pinto beans (sugar beans if you can get them, that was my first choice!)
1 teaspoon black pepper
1/2 teaspoon salt
1/2 cup water
1/2 vegetable bouillon, crushed
1 tablespoon Scotch bonnet pepper sauce
Instructions
Prepare the chermoula. In a blender or food processor, add the parsley, cilantro, lemon zest, paprika, cumin, and chilli powder. Mix on low while adding the olive oil to create a paste, so don’t blend until it turns into a liquid! If you accidentally do, add some more parsley to thicken.
For the red snapper, if it isn’t already, stuff the fish with the herb sprigs and lemon slices. Baste the fish on both sides with the chermoula and chill what remains for later. Bake the fish at 450F on each side for 10-15 minutes. When done, the fish should flake easily using a fork. You can also check the internal temperature and go by what’s recommended. Set aside to rest.
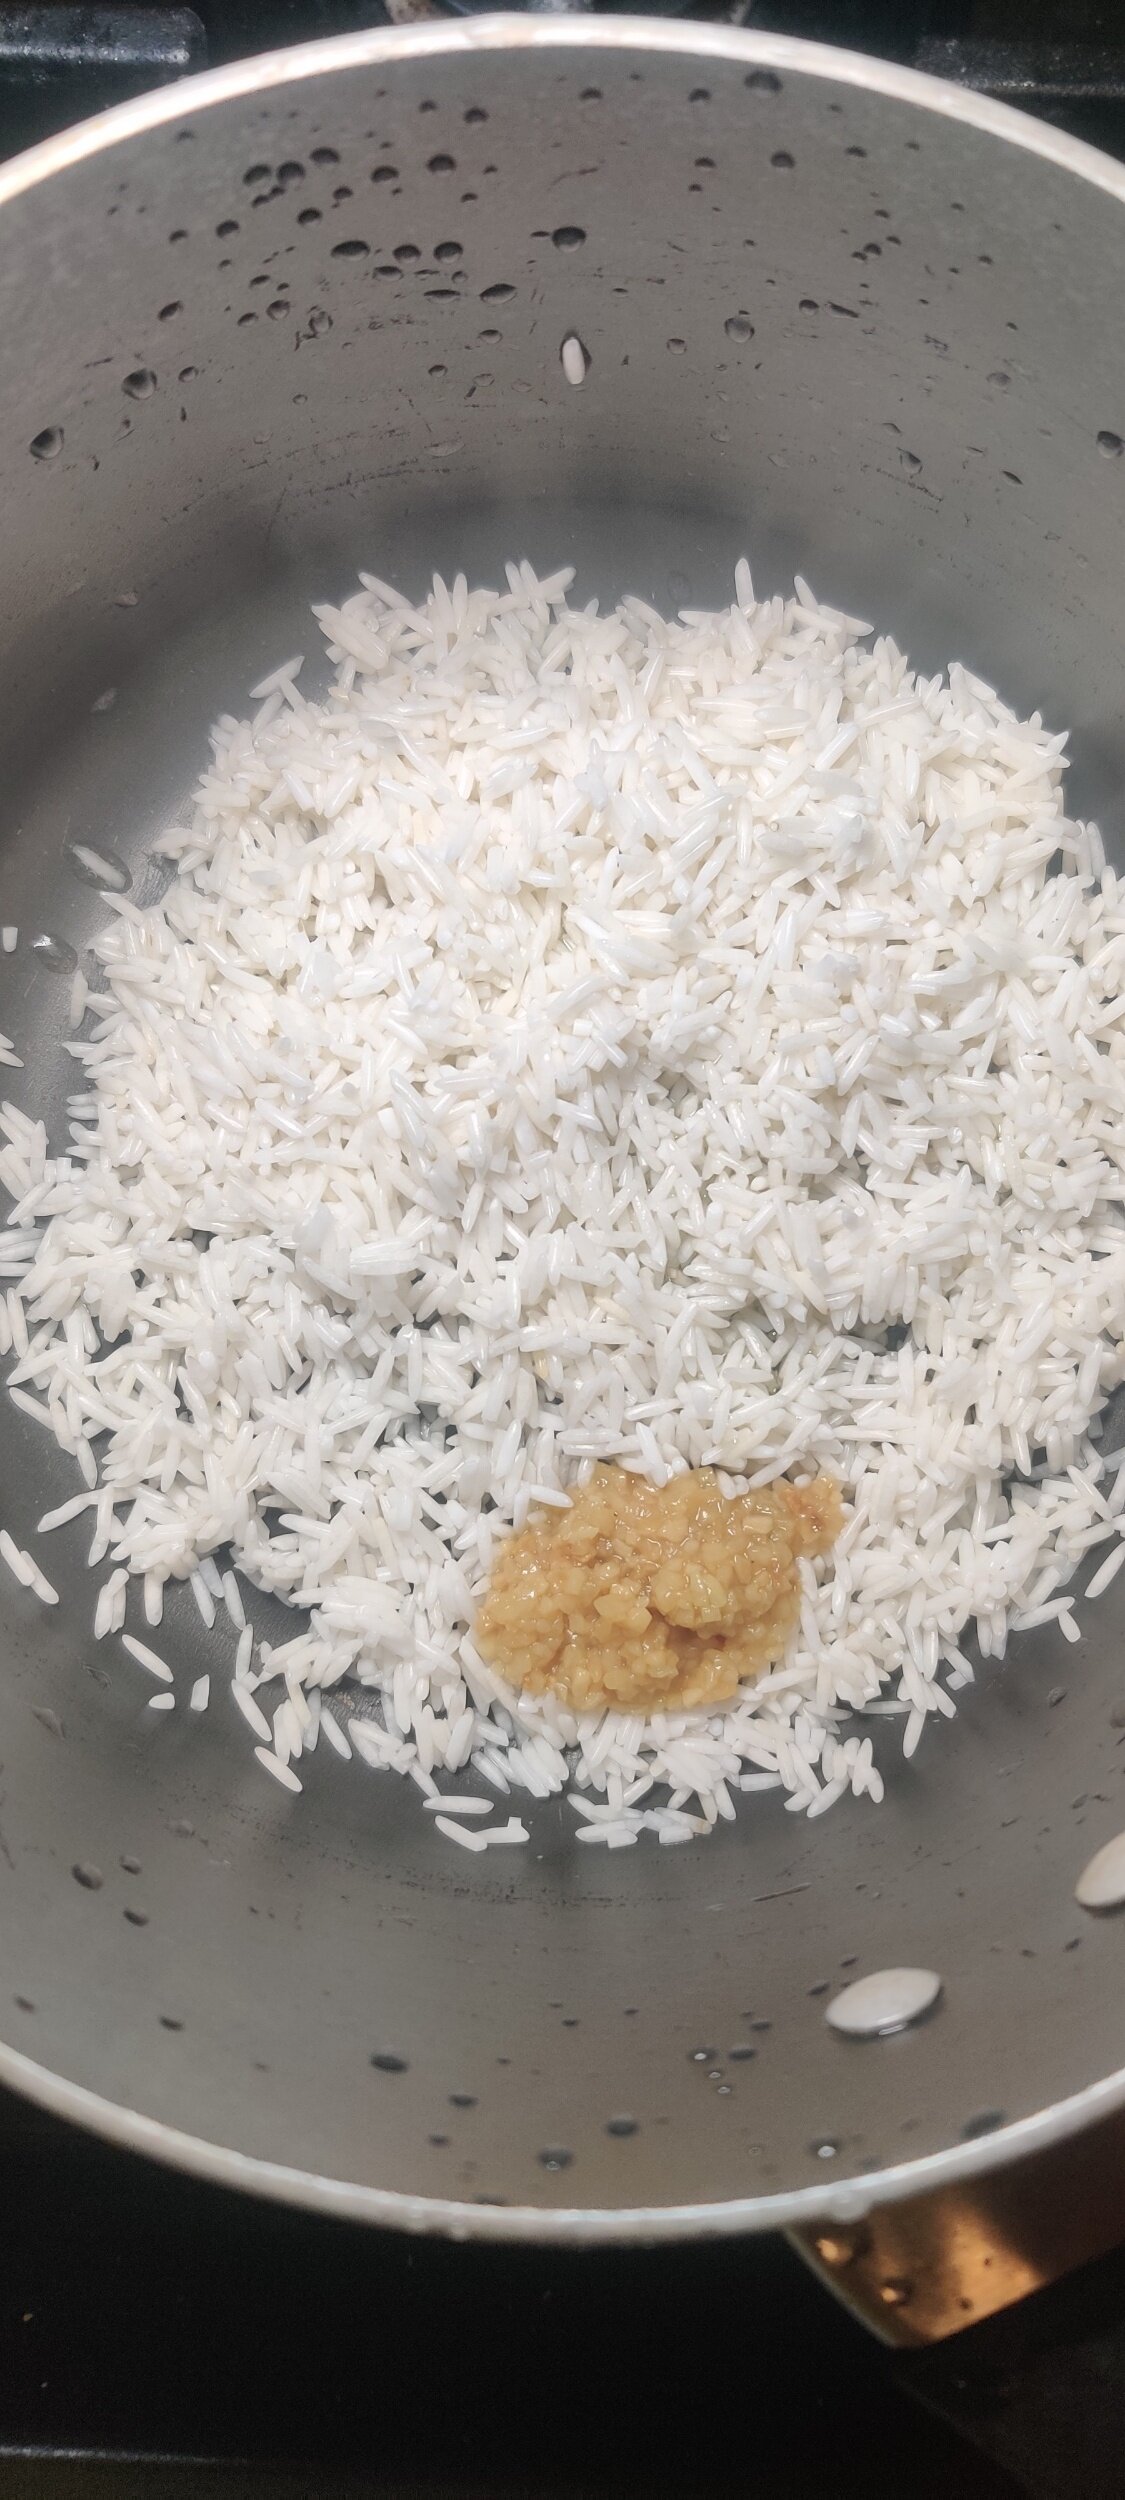
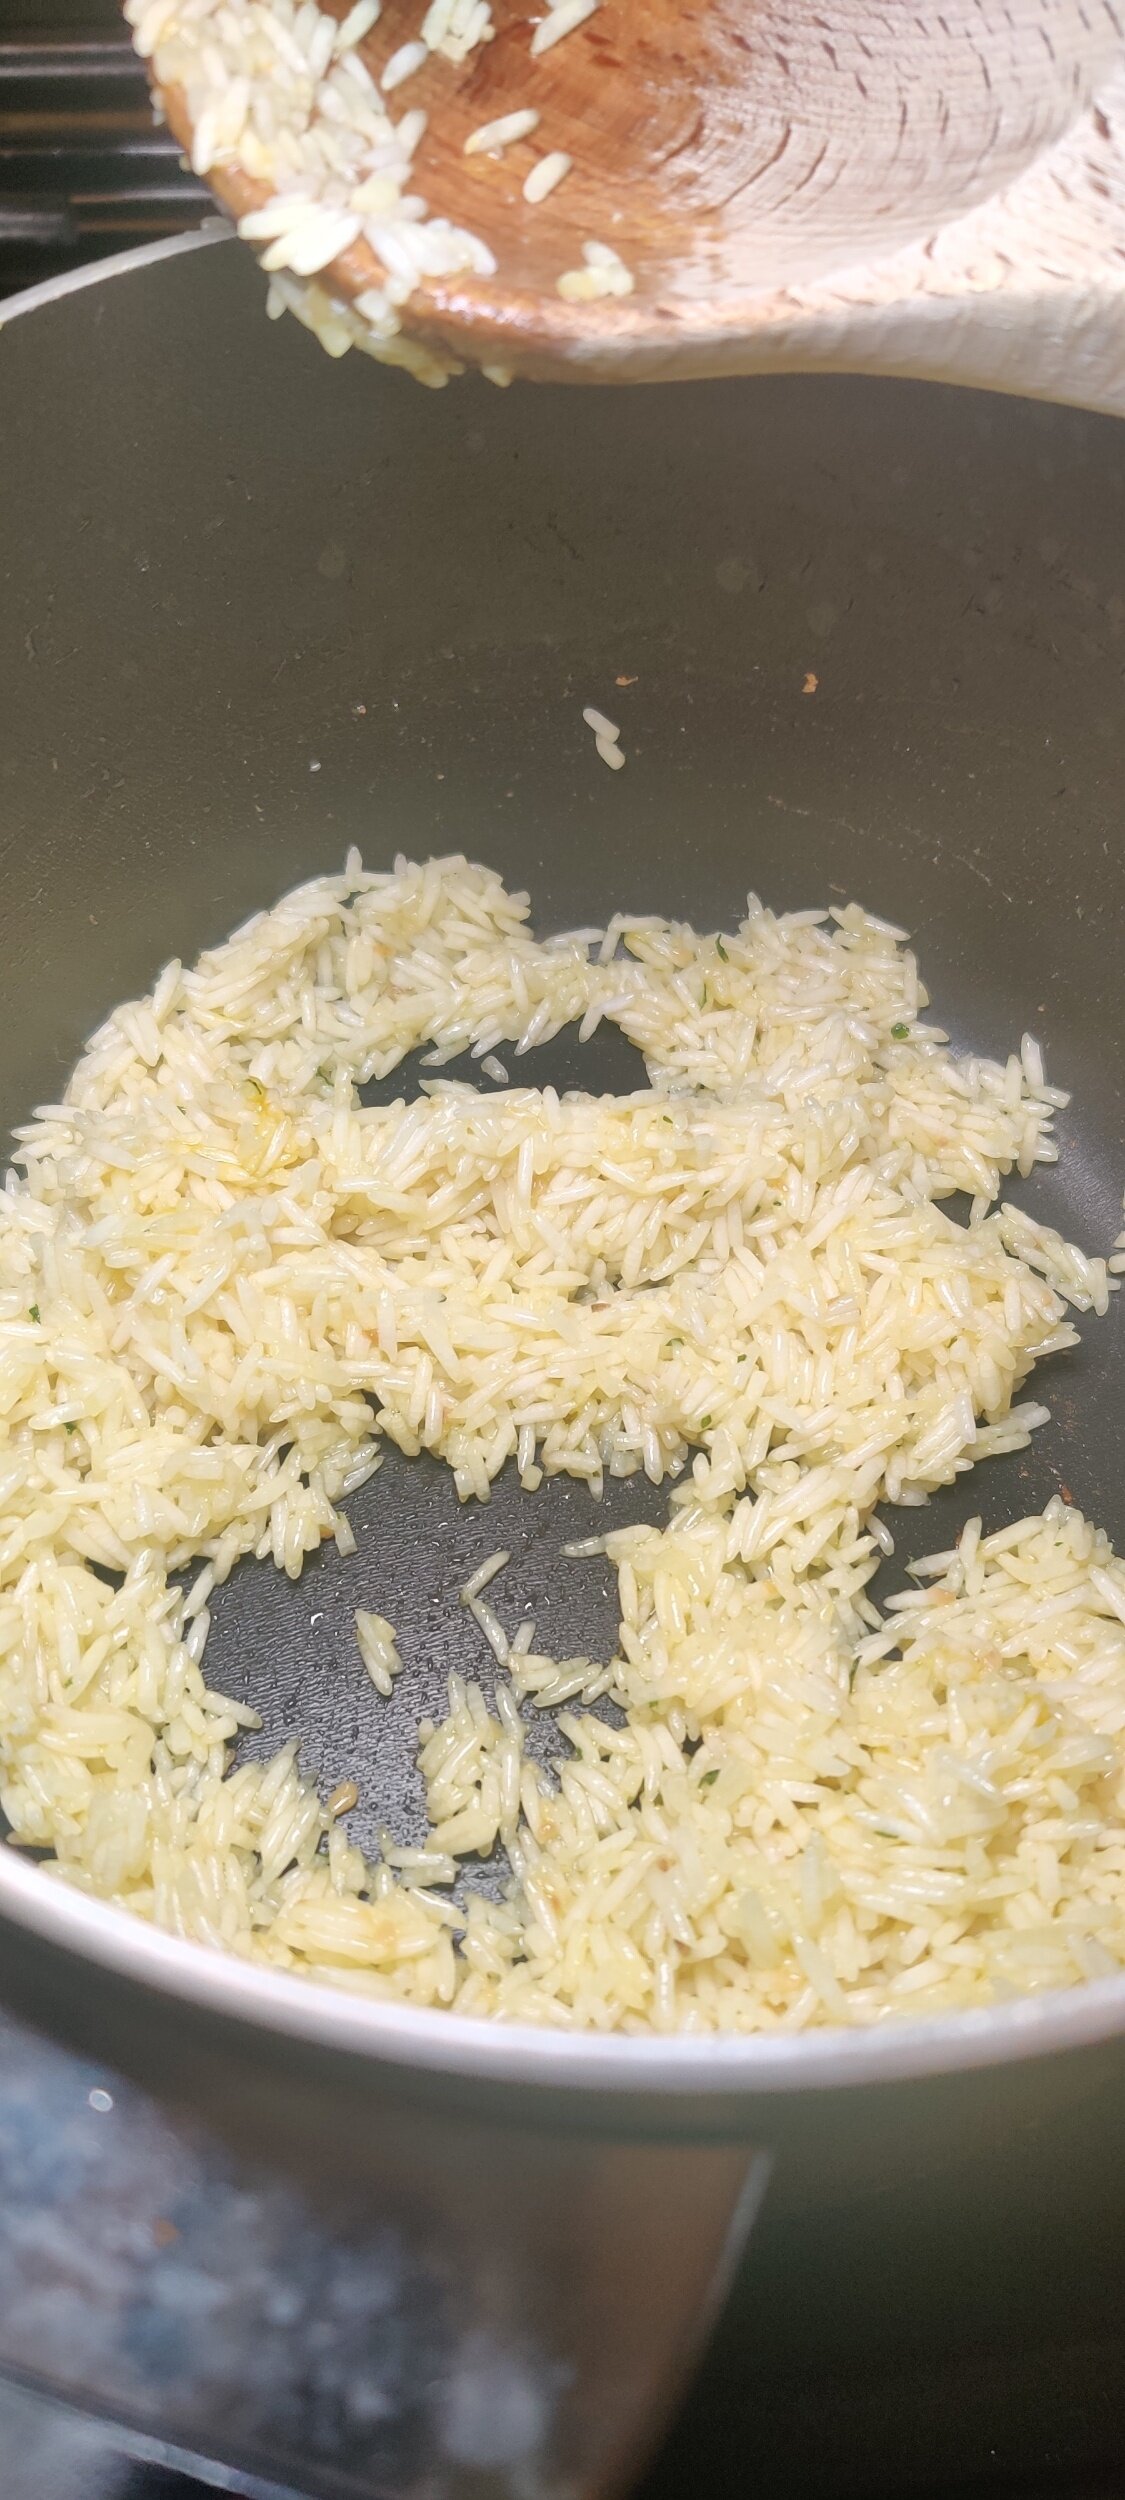
While the fish bakes, prepare your rice. Cook the rice with garlic and olive oil before adding the broth sachet. Follow up with 1 3/4 cups water (or whatever rice quantity you want according to the package) and simmer with a lid until the water has evaporated - you want your rice on the drier side because the peanut butter will be added.
Mix the hot water with the peanut butter to make a smooth paste and mix it into the rice. Steam with the lid on for 5 minutes, then remove from heat.
For the beans, sauté them in the oil, bouillon, and spices for about 3 minutes, then simmer in water for about 5-7 minutes. Since canned beans are cooked this should not take long otherwise the beans will break down into mush.
Use the chermoula to baste the cooked snapper and serve with the hot beans and peanut butter rice, feeds 2!

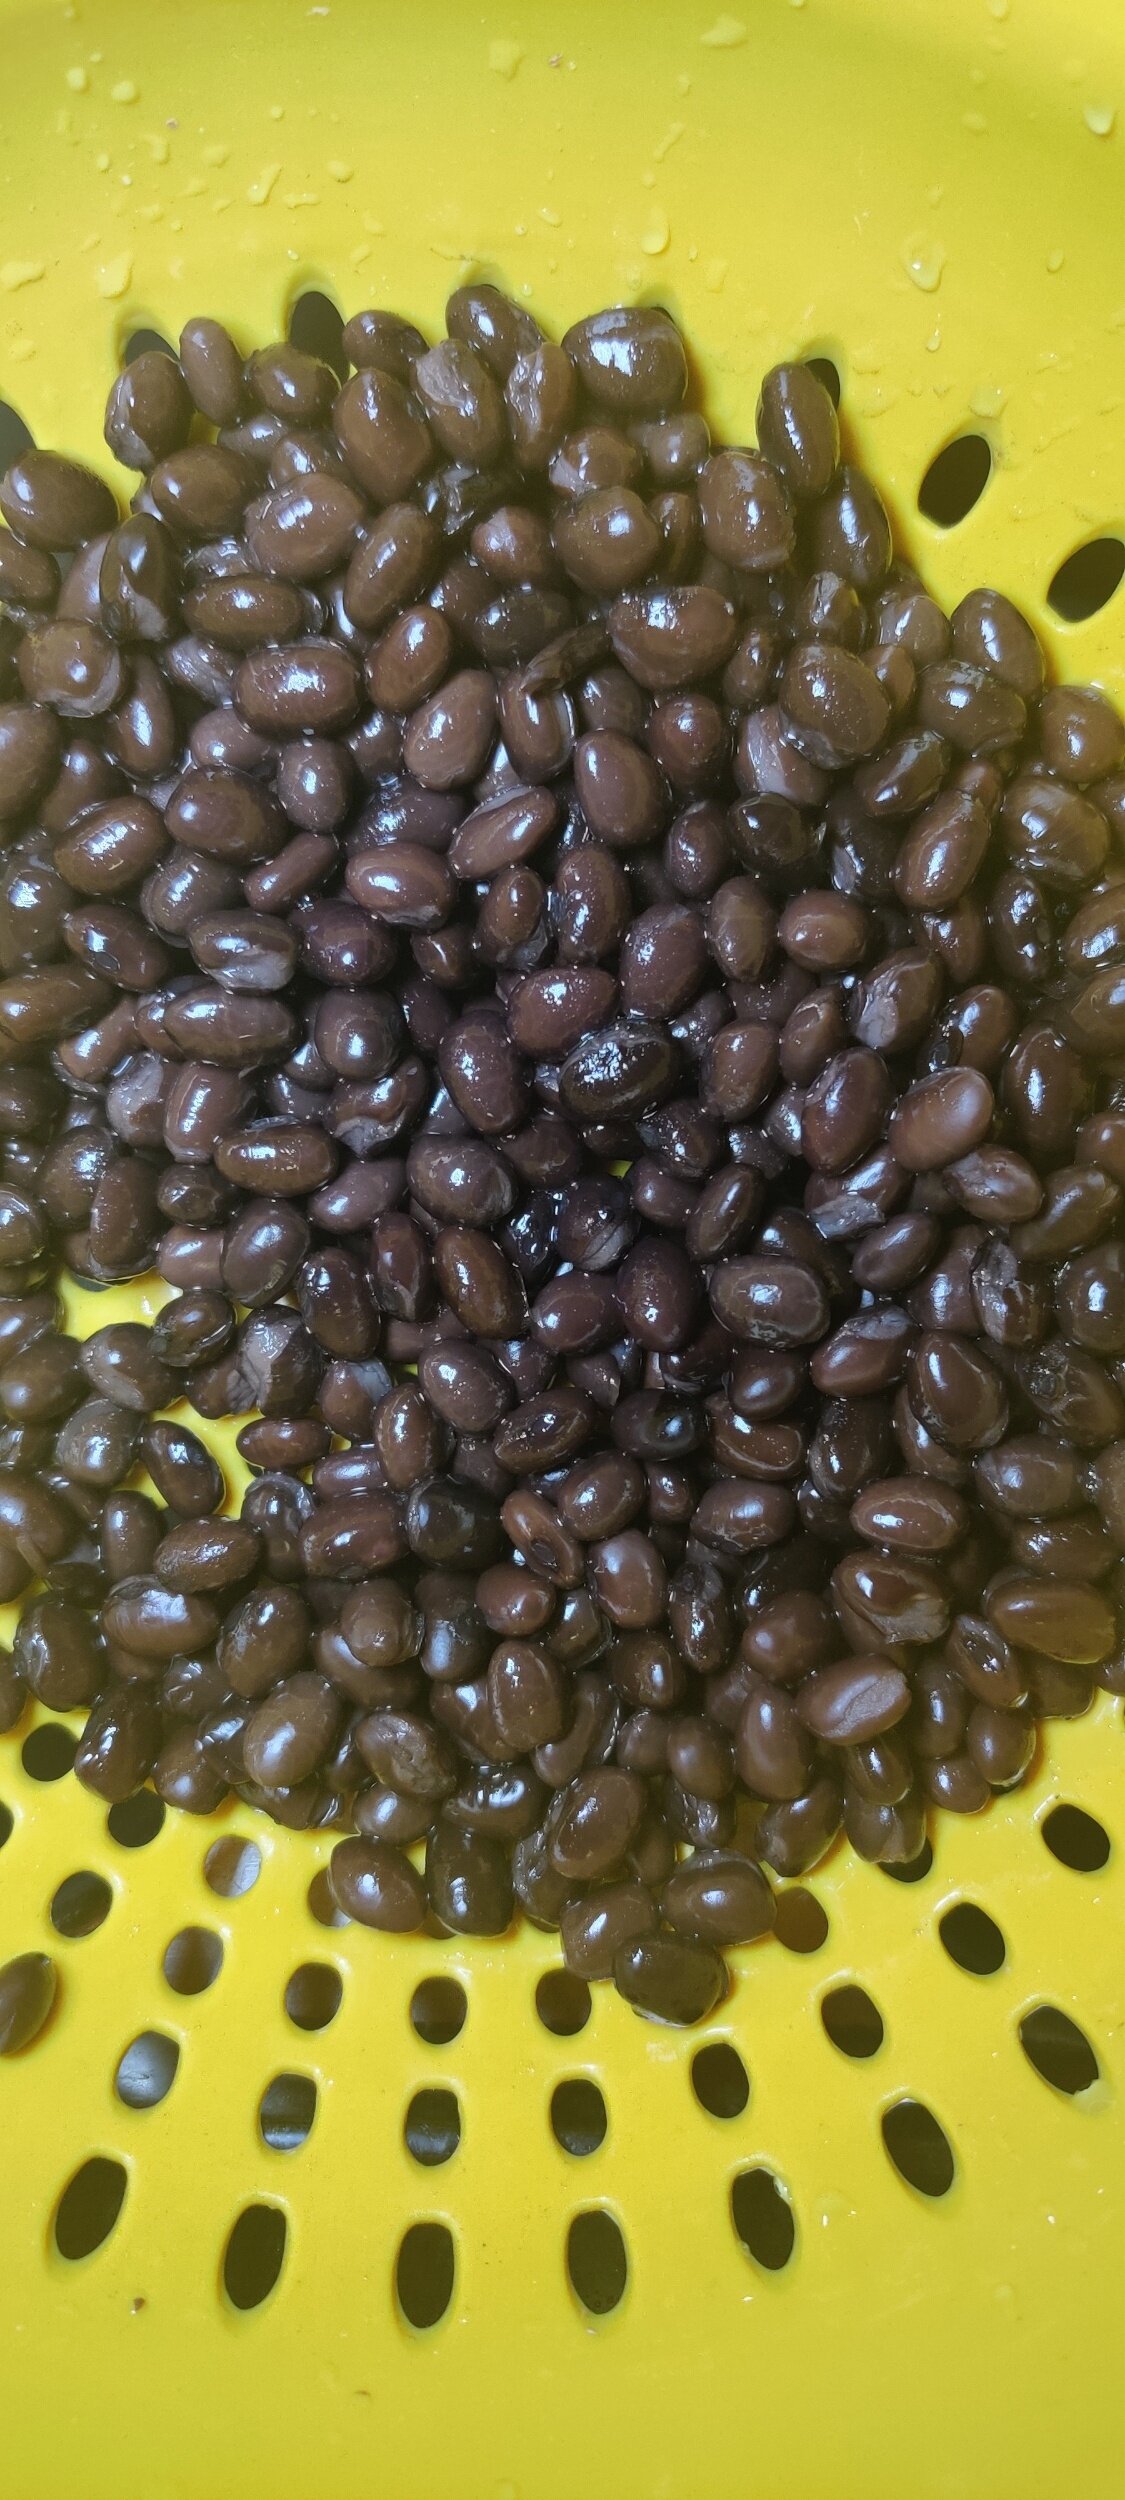
Plantain Stew with Black Beans
If you're looking for a rich, plant-based meal, this is it. I was inspired to cook these plantains and make them the star of the dish like matoke, Uganda’s national dish that uses East African Highlands bananas. They are starchy bananas made into a stew and sometimes mashed, often mixed or served alongside stewed beef. I substitute the beef with mushrooms and still got a great flavour with simple spices and broth. This melody makes for a comforting dish that is mostly guilt-free!
Ugandan cuisine does have some elements also found in Zimbabwe such as ugali (thick corn porridge), but cooked bananas play an unparalleled role in the region as a whole which I don't see in Southern Africa.
Many people are familiar with fried plantains, but they are just as delicious stewed!
Since you already have starch in this dish, I would suggest pairing the plantains with some high protein beans! I seasoned my black beans with a pepper sauce, and it all came together perfectly.
Ingredients
2-3 plantains, chopped
1/2 white onion, finely chopped
1 tablespoon garlic, minced
1 tablespoon black pepper
1 teaspoon salt
1/2 bell pepper, chopped
2 dried peppers, finely chopped
8 ounces mushrooms (1/2 pound, cubed)
1/2 cup tomatoes, chopped
2 cups vegetable or beef broth
2 cups water
2 vegetable or beef bouillons
1/2 teaspoon Usavi mix
1/2 teaspoon coriander
Lemon juice
2 dried chili peppers, finely minced (keep the seeds for more heat)
1/3 cup tomato ragu sauce
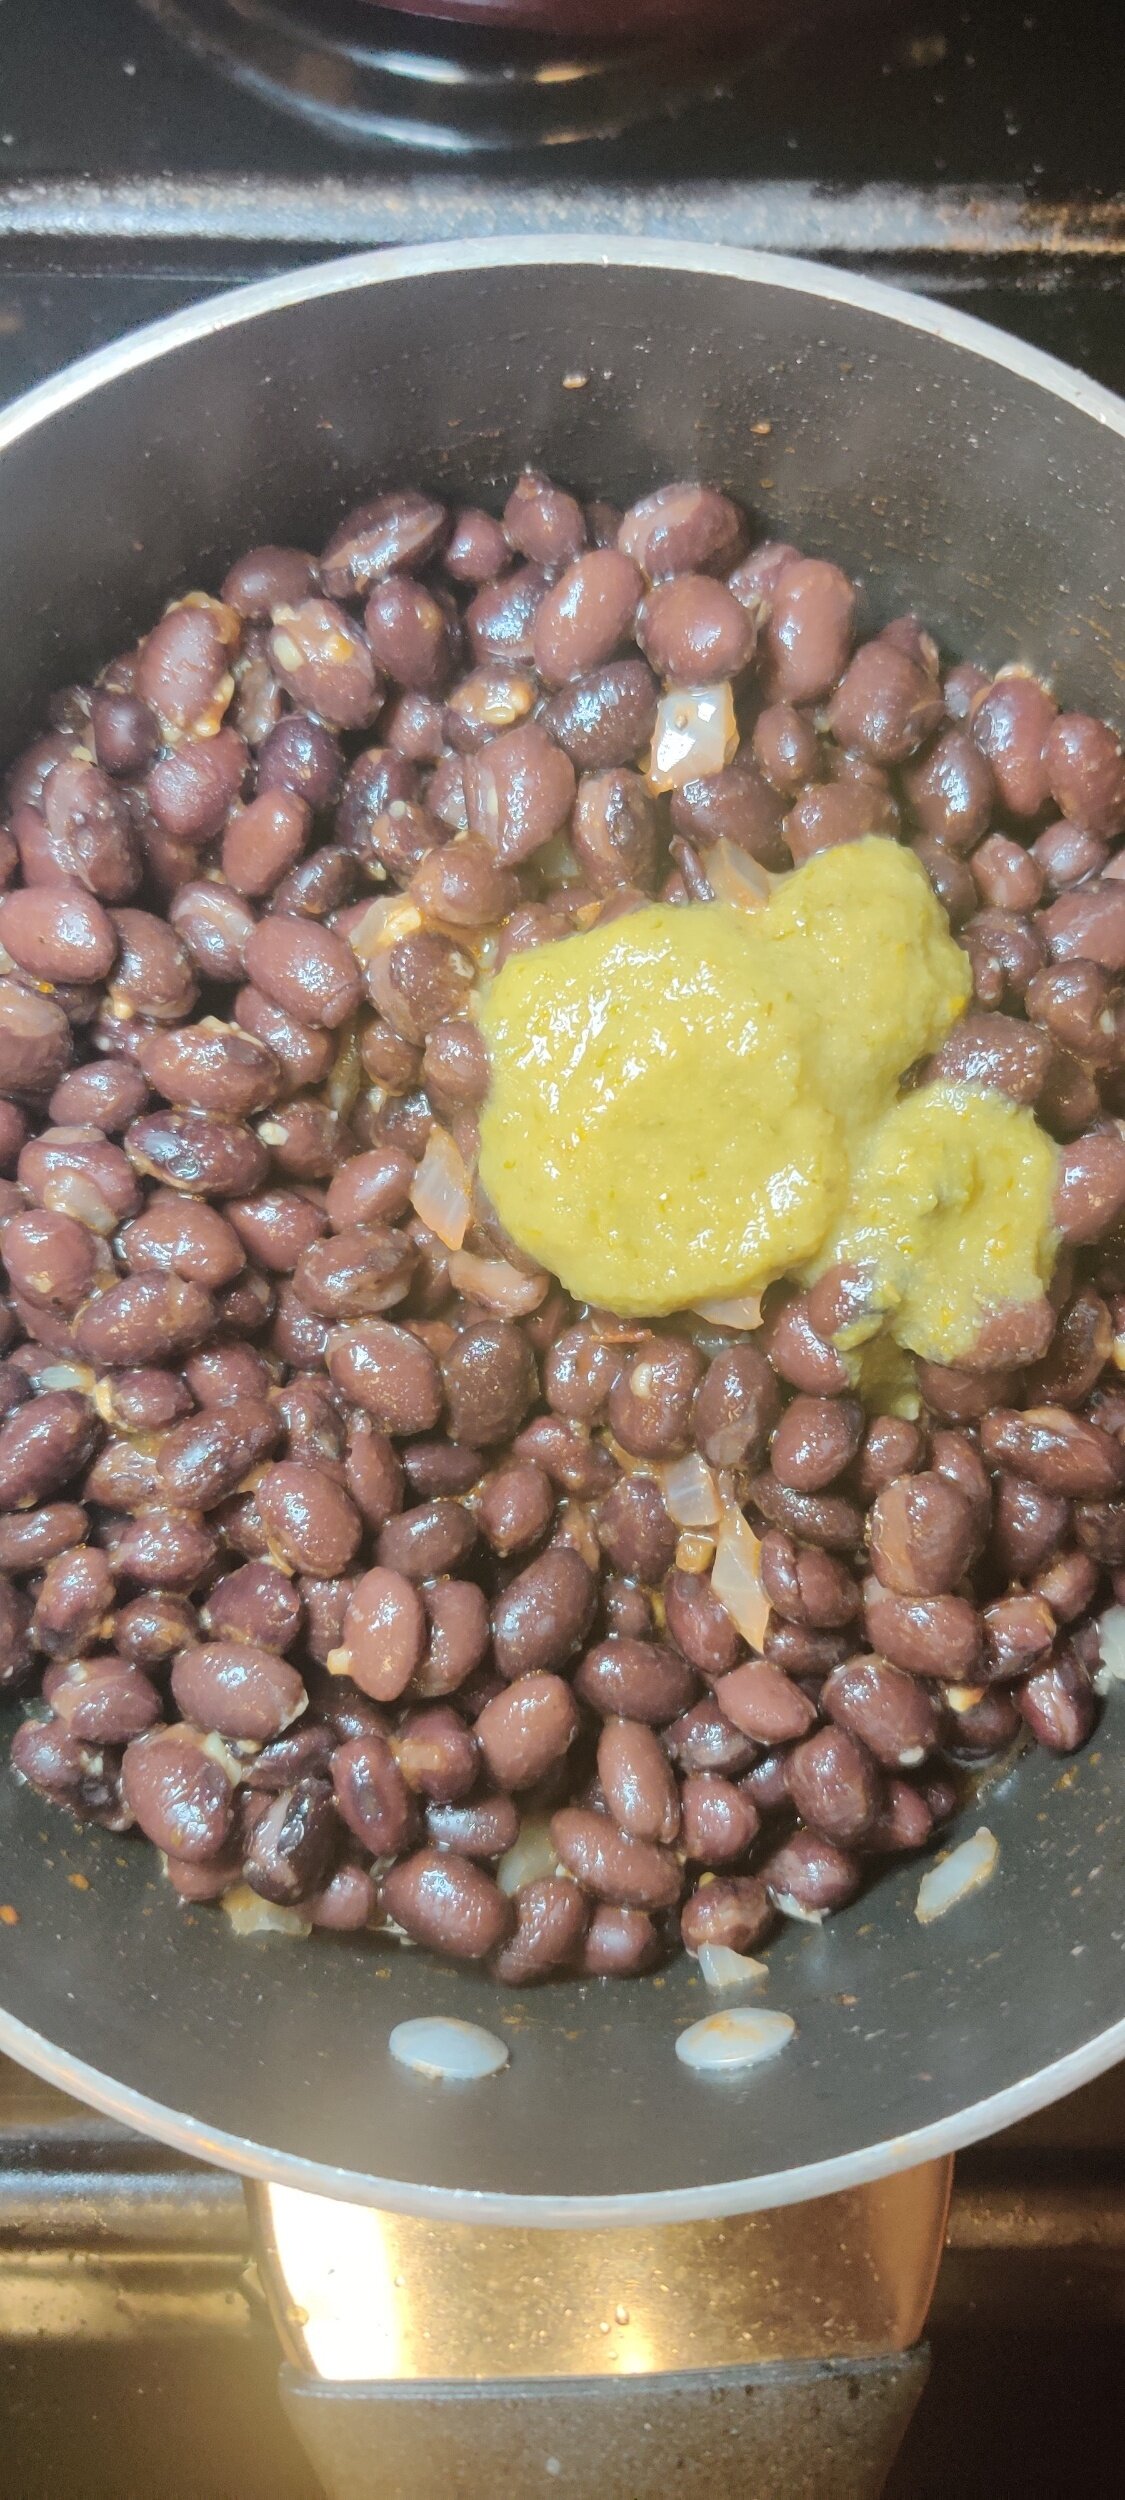
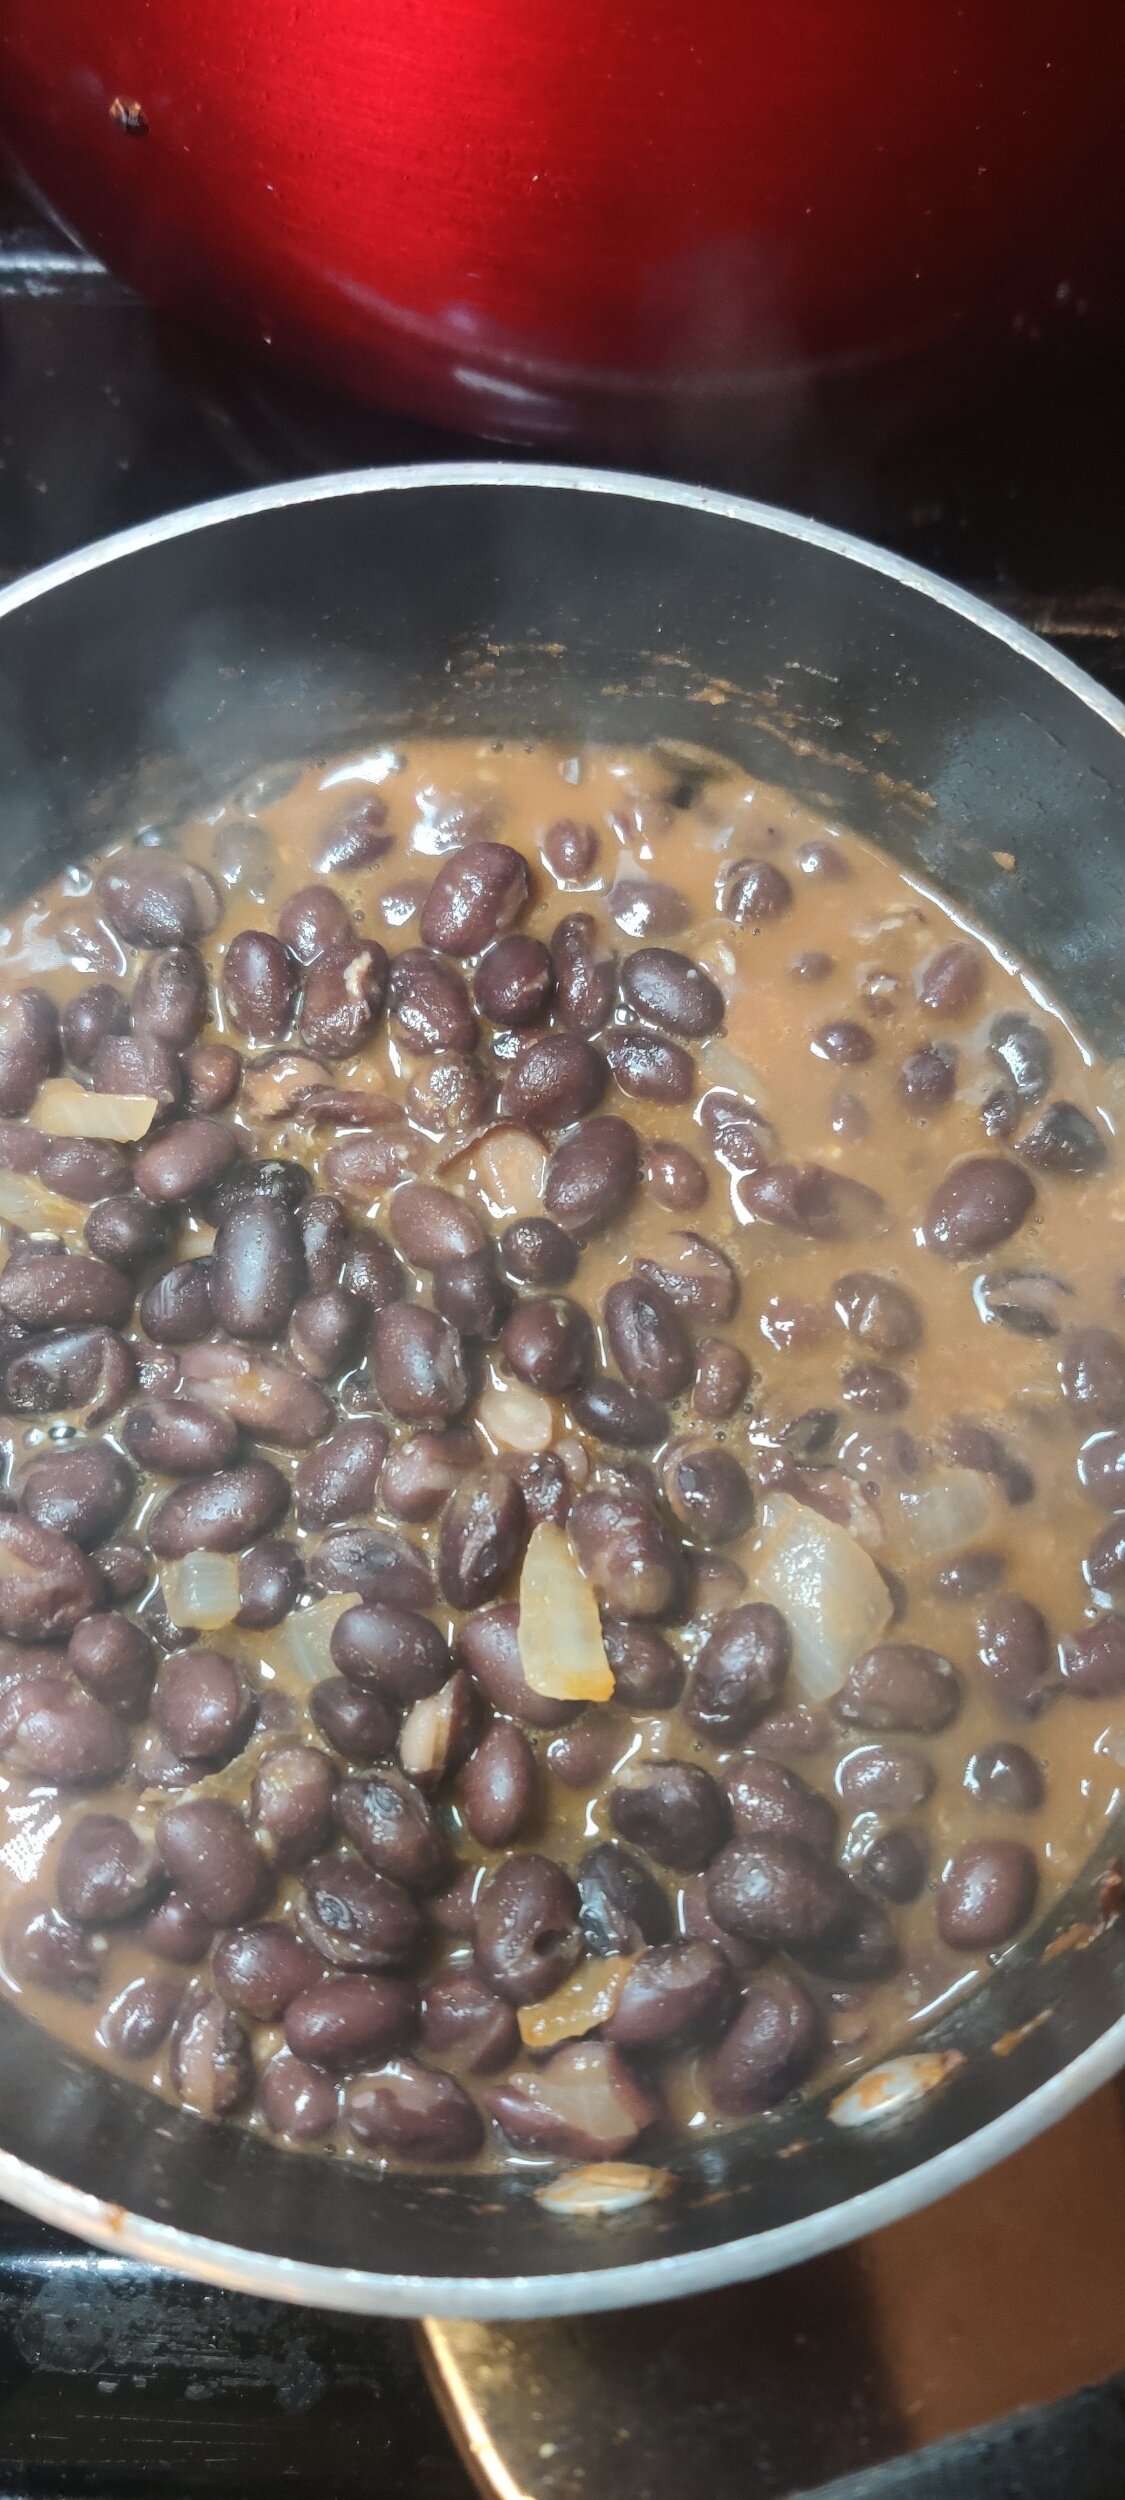
Black beans:
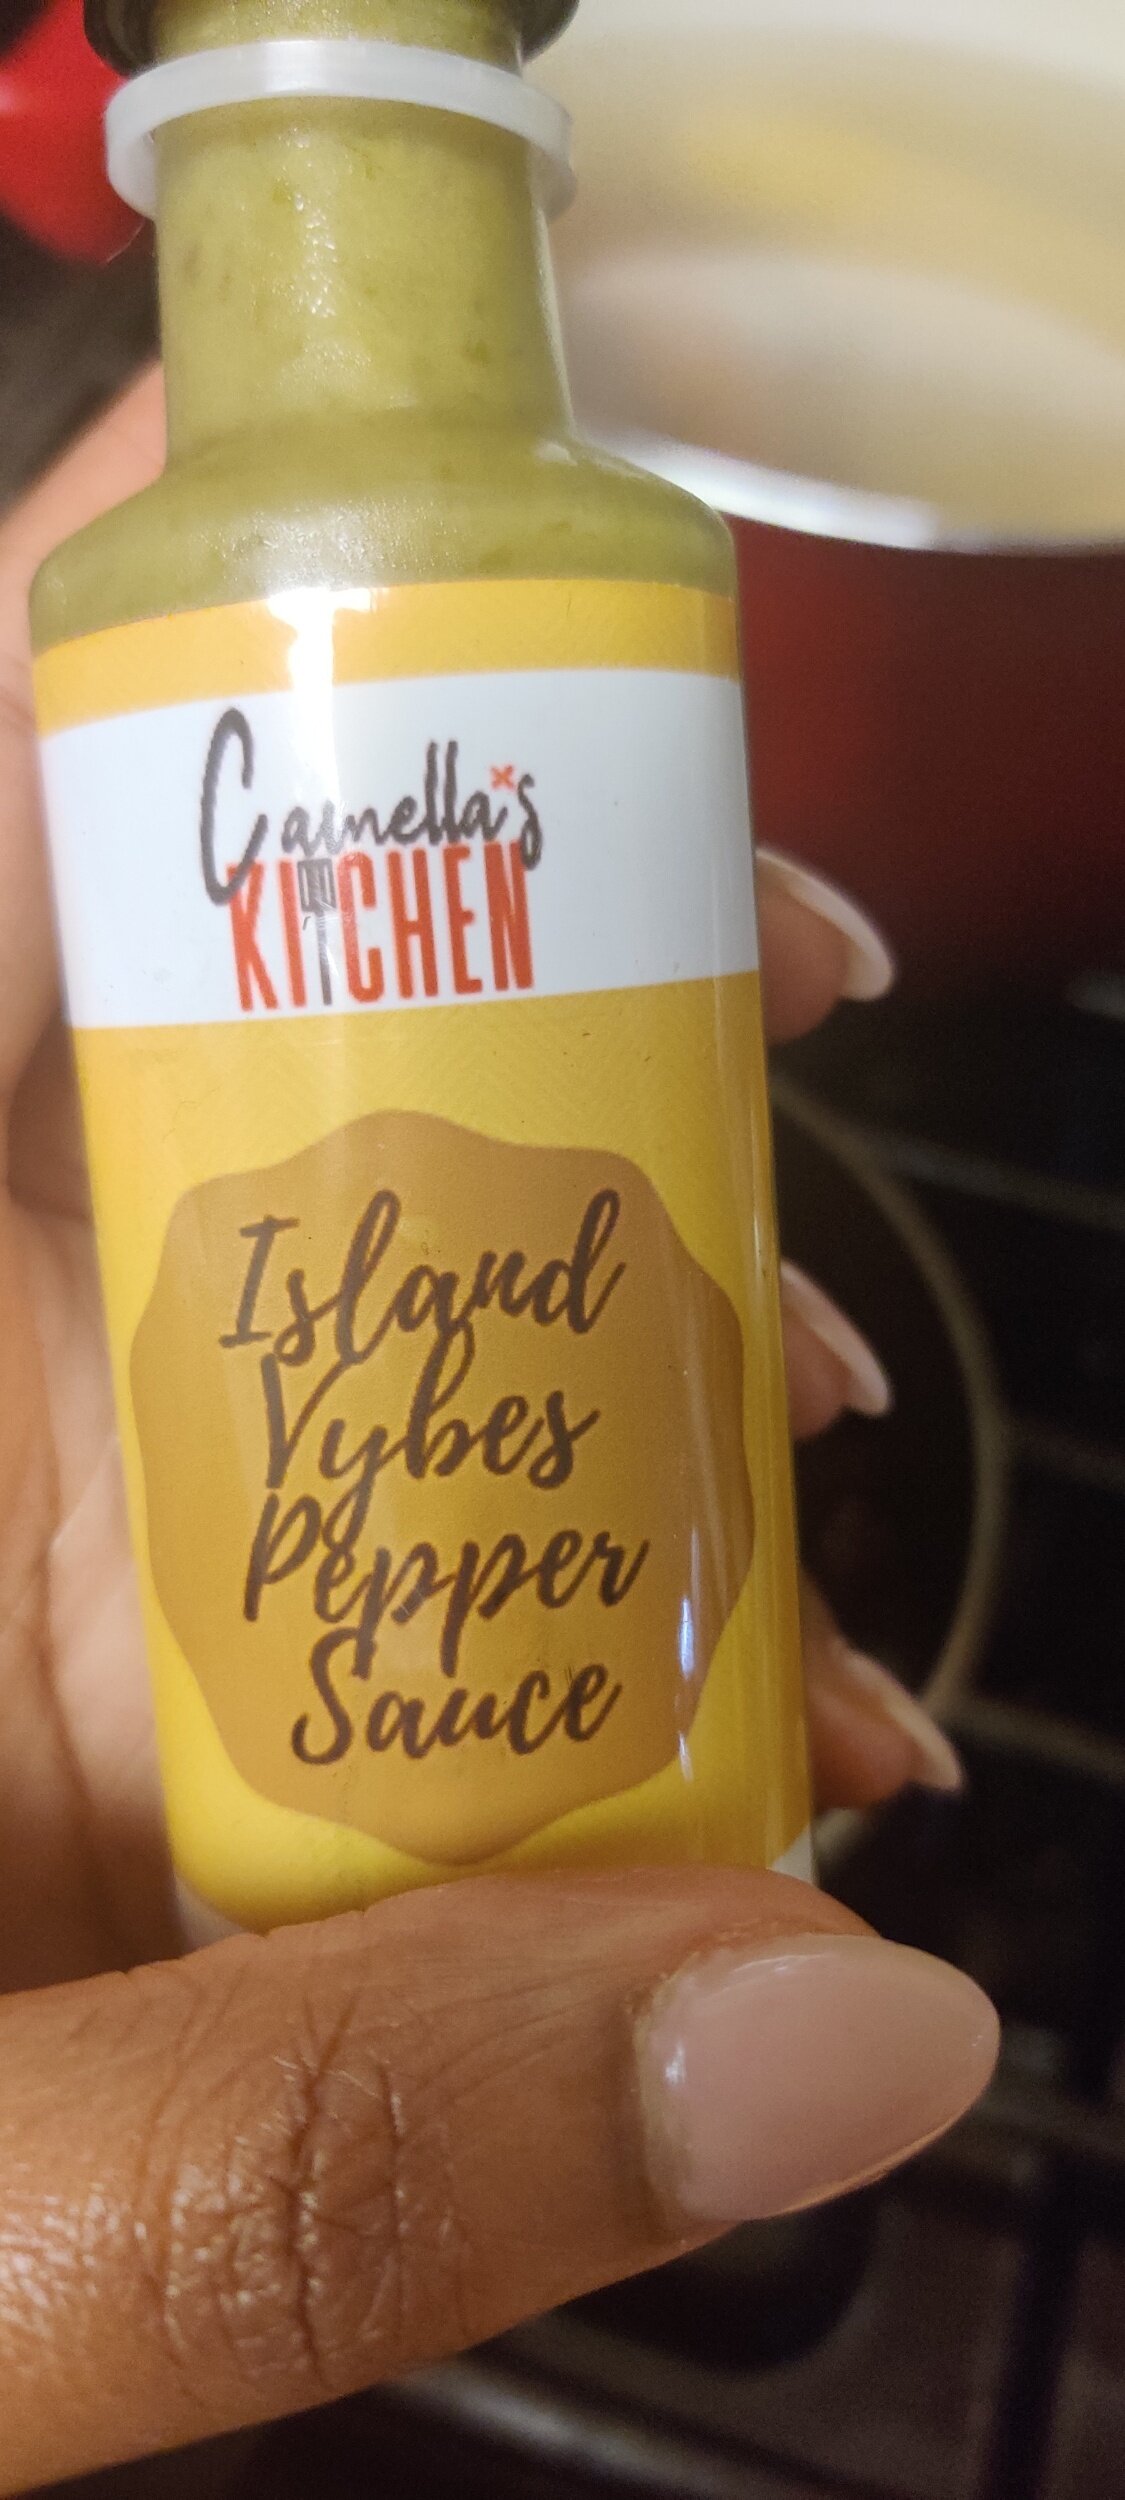
1 tablespoon pepper sauce (I used Camella's kitchen)
1/4 cup onion, finely chopped
1/2 teaspoon salt
1 can black beans
1 teaspoon black pepper
1/4 cup tomato ragu sauce
1/4 cup water

Instructions
Cut your plantains or green bananas into small pieces lengthwise, toss in lemon juice and set aside.
Saute the onion and pepper in the vegetable oil, cook for 3-4 minutes.
Add the spices, chilli peppers, and the garlic, cook for another 2 minutes until fragrant.
Add the tomato, mushrooms, and ragu, cook for 5 minutes to sweat out the tomato.
Add the bouillons and water. Reduce the heat and simmer for 10 minutes.
Add the plantains and the broth, season with additional salt and pepper if needed. Simmer for another 20 minutes or until the plantains have softened.
As the plantains simmer, prepare the beans (or whatever side you have in mind). Cook the onion, water, ragu, salt, and black pepper for about 3 minutes, until the onions softened.
Add the beans and pepper sauce, simmer for about 3-5 minutes, season to taste and serve with the plantain stew.
Serves 2-3 people!

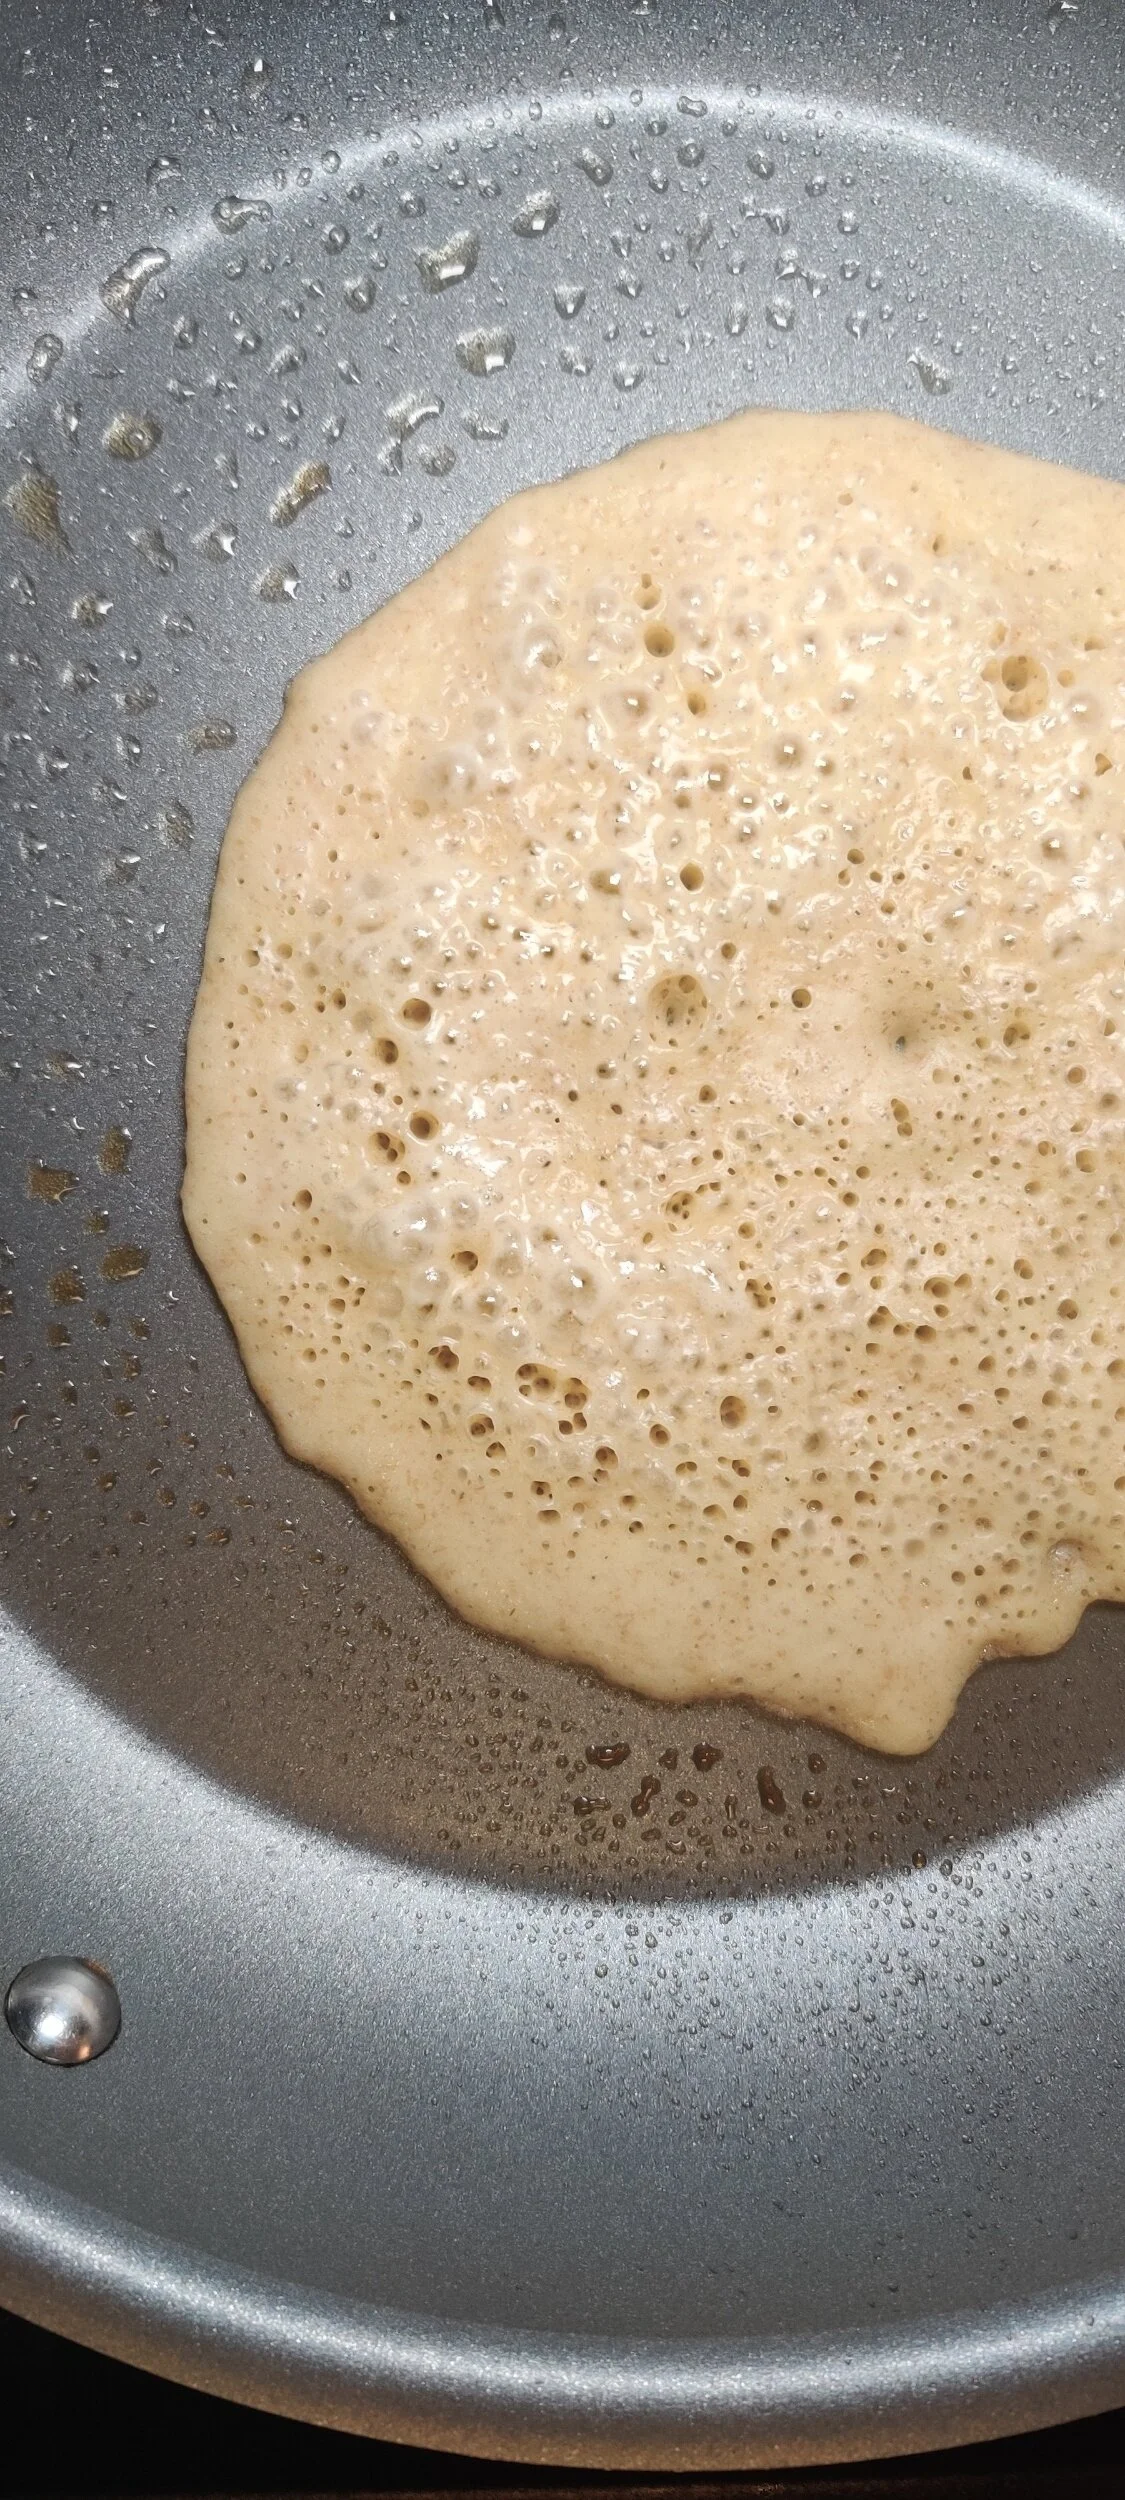
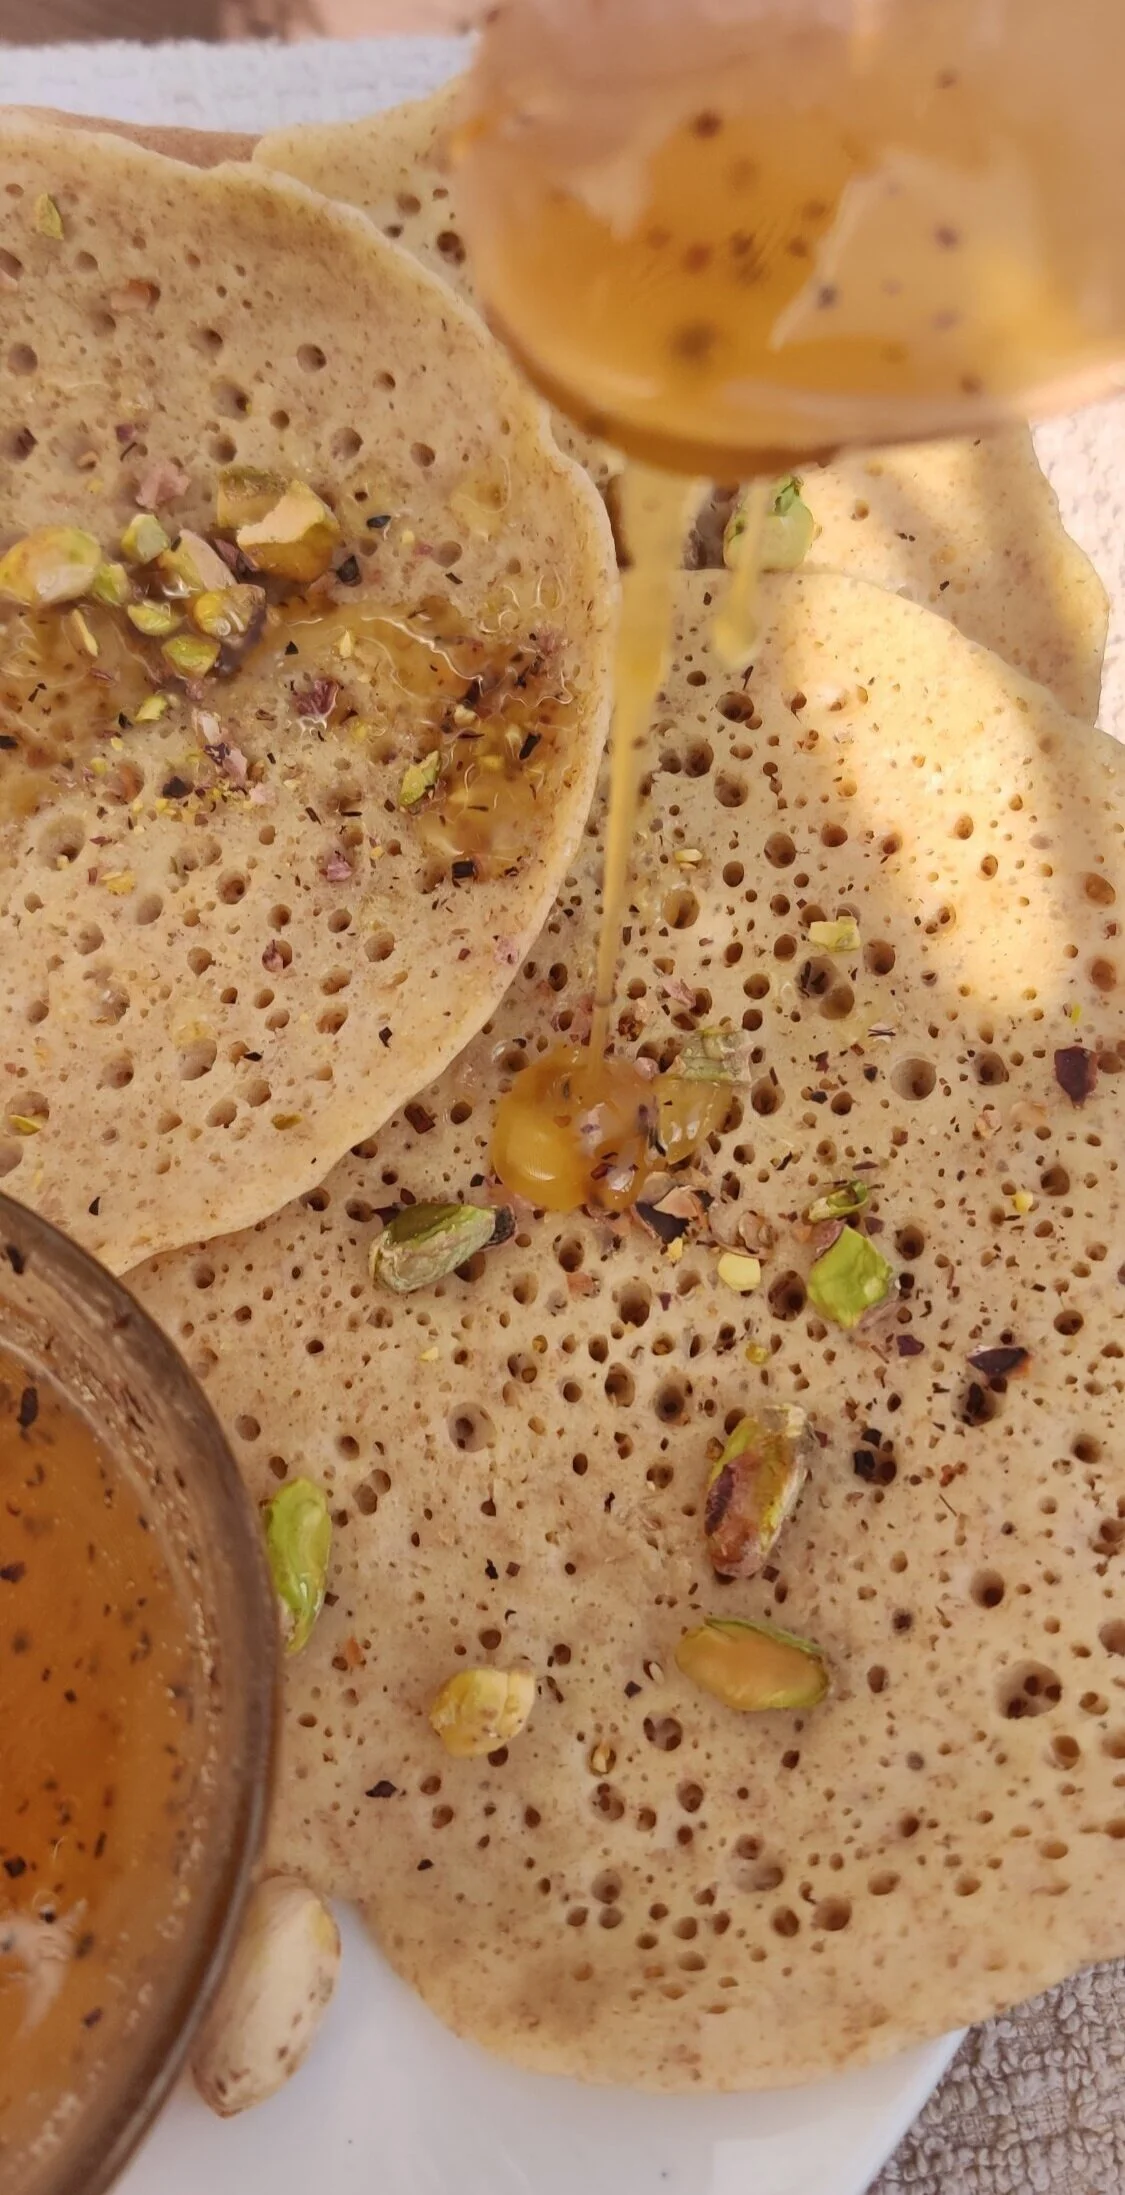
Pistachio and Orange Pancakes
I had some pistachios and had been reading up on North African cooking, plus, it was breakfast time! I was instantly inspired by baghrirs, which, with the addition of yeast, are enjoyed in the North African region, often served with a mix of honey and butter. They are also known as Moroccan pancakes. The spongy appearance and texture come from the yeast and semolina flour, but I used regular whole wheat flour, they came out great!
Raisins are a common addition, but I decided to add pistachios to the mix as a topping to add crunch and compliment the citrus element. Pistachios are also no stranger to Maghreb kitchens! Cooking with citrus is underrated, but commonly paired with pistachio so I grated in some orange. I have made orange glaze for babka which I sprinkled pistachios over, and that was delicious proof! It also helps that orange mixed with honey is a glorious combination.
The holes allow the pancakes to soak up your sauce.
These pancakes serve as a fabulous breakfast, brunch or tea time addition, definitely try them out! I will be making these more often.


Ingredients
1 cup all-purpose flour
1 cup whole-wheat or semolina flour
2 teaspoons baking powder
1/4 cup pistachios, crushed
1/2 teaspoon fast acting dry yeast
1 cup warm water
1 teaspoon salt
1/2 teaspoon white sugar
1/8 + 1/8 teaspoon almond extract
1/4 teaspoon vanilla
1 cup milk
2 eggs
1 teaspoon orange zest
1 teaspoon orange juice
1/2 orange herbal tea bag
1/2 cup honey
4 tablespoons butter
Instructions
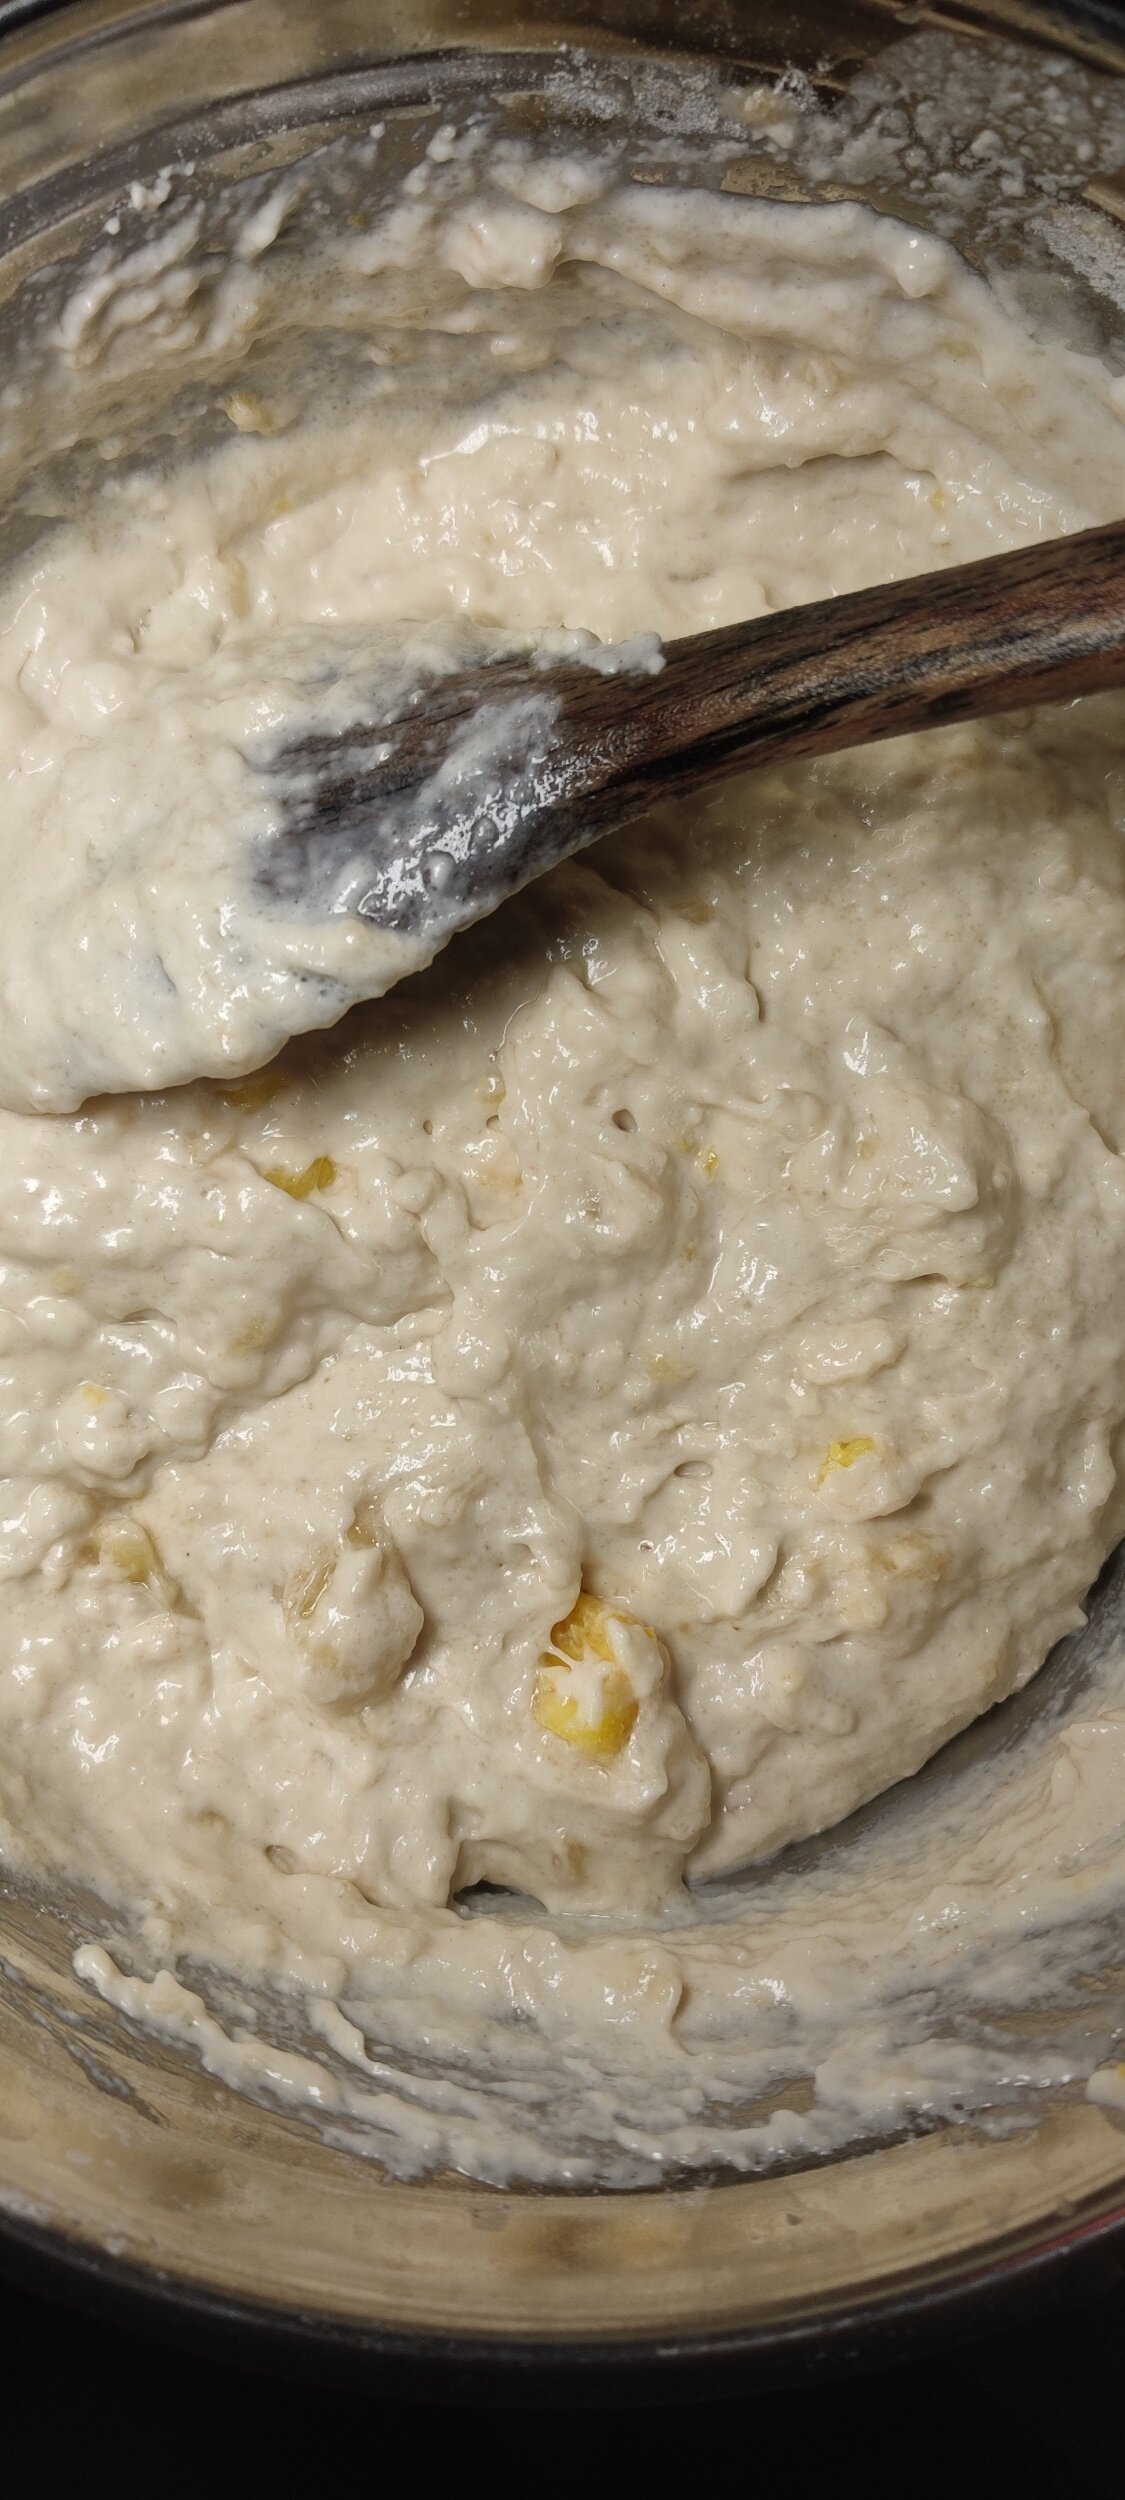
In a blender (or bowl where you'll use a hand mixer), add the sugar, water, and yeast. Sit until the yeast activates and foams, in about 5-10 minutes.
Add the flours, milk, baking powder, salt, vanilla, 1/8 teaspoon almond extract, and eggs. Beat the mixture until smooth and the flour is all incorporated with no lumps. Sit the batter for 35 minutes.
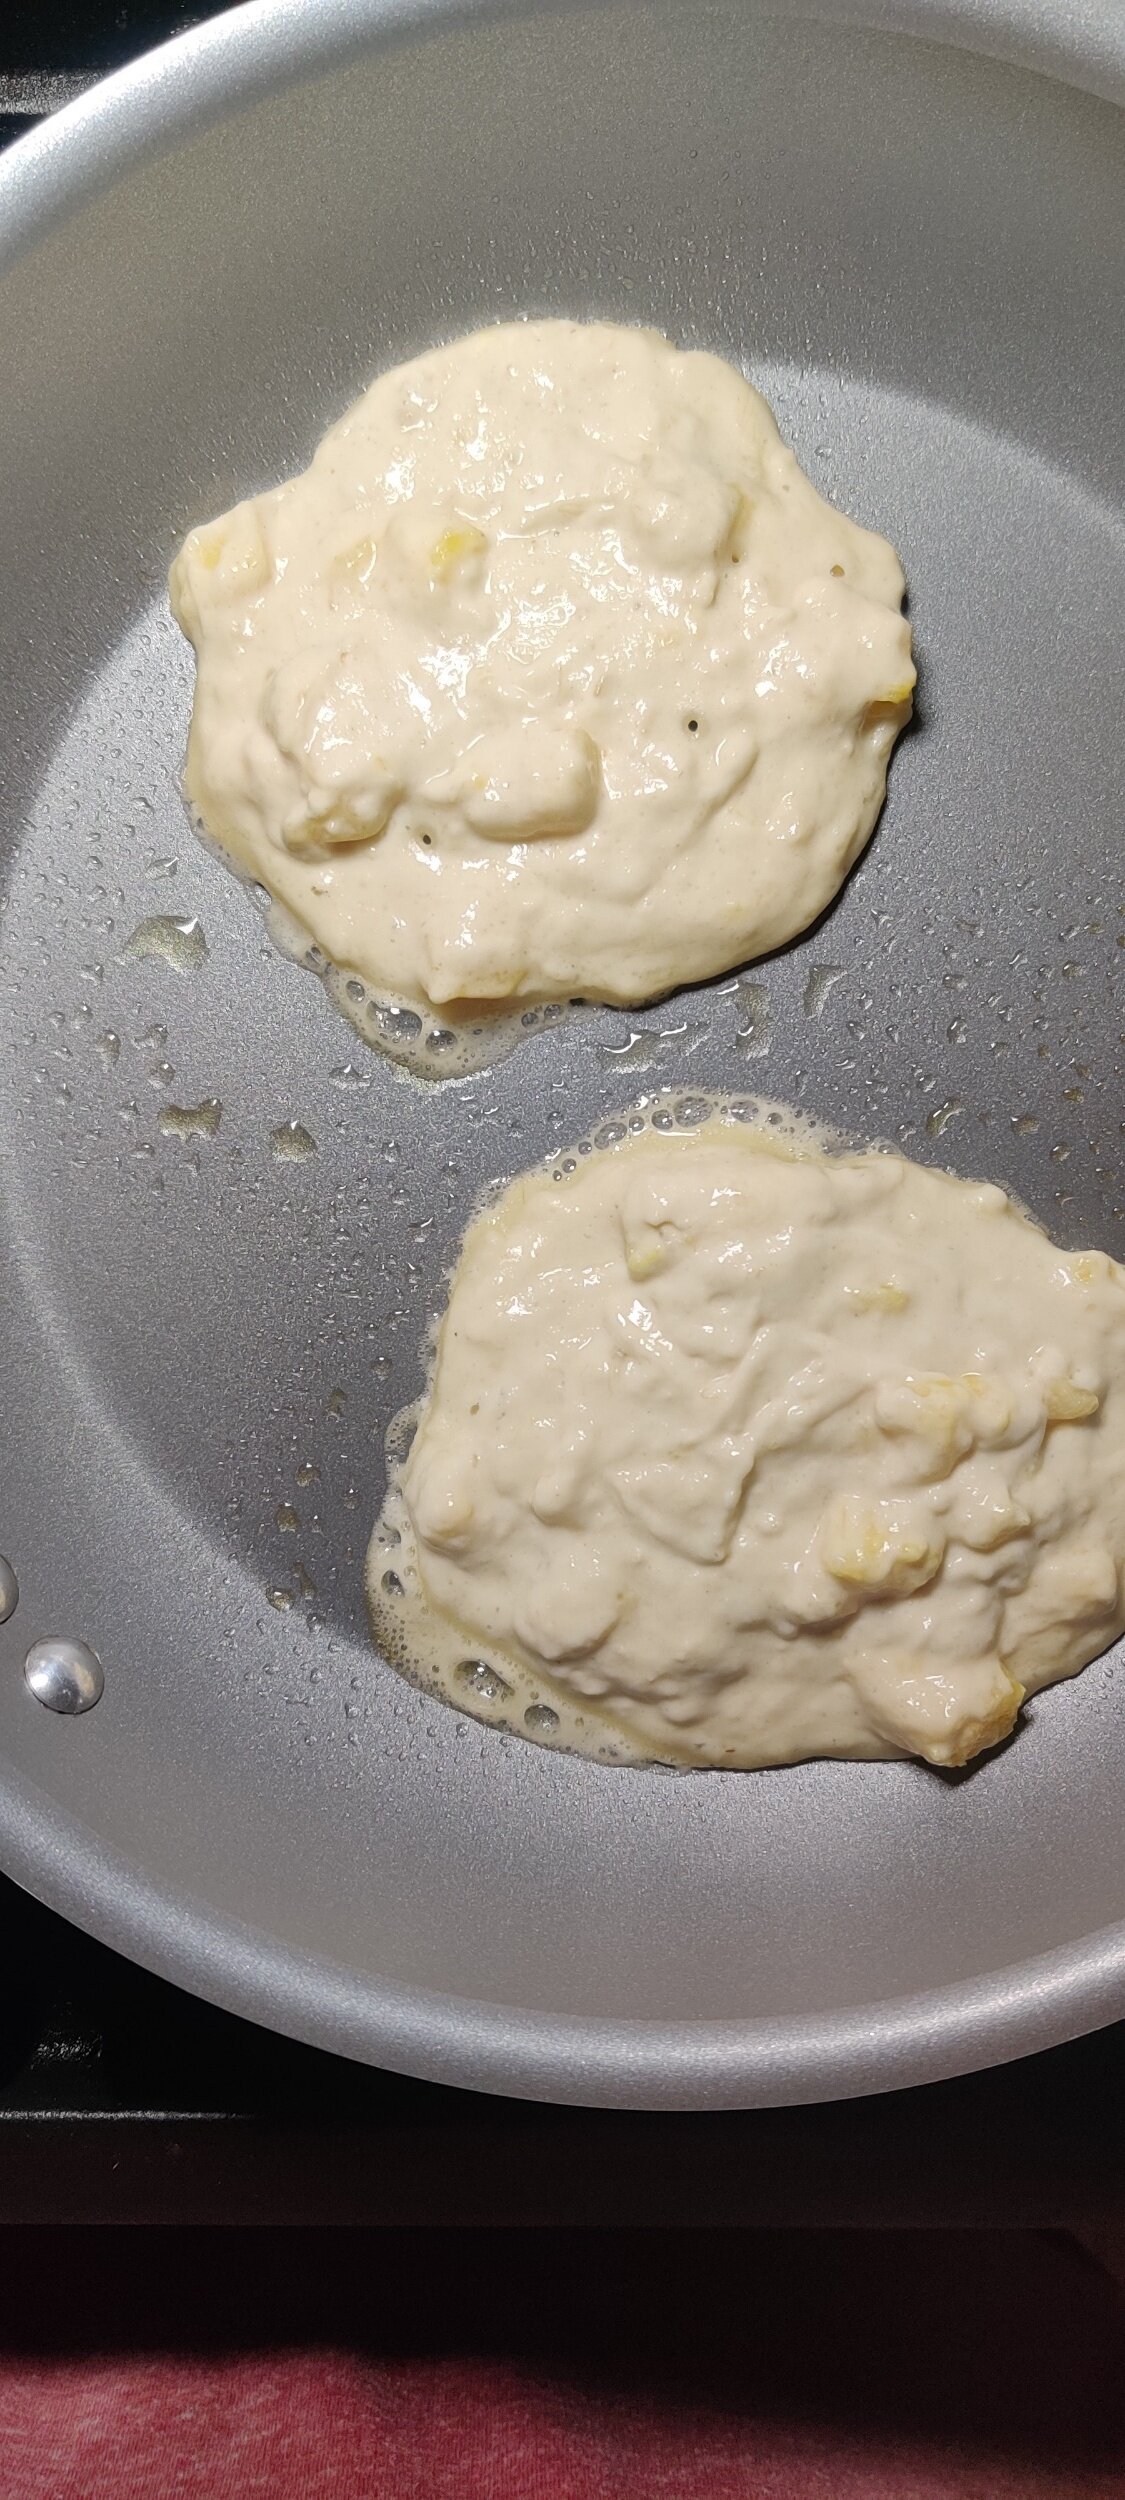
Scoop a 1/4 cup on a non-stick pan and cook until bubbles show and burst, don't turn over! Just remove from heat once the pancake has browned underneath.
Heat the butter, orange zest, orange juice, 1/8 teaspoon almond extract, and honey in the microwave until the butter melts, stir well. Mix in the tea bag contents.
Pour the hot honey orange butter sauce over your pancakes, sprinkle with pistachios and serve! Makes 12-16 pancakes.
Tip: as you cook your pancakes, occasionally blend your batter for a few seconds to revive the fluffy factor.

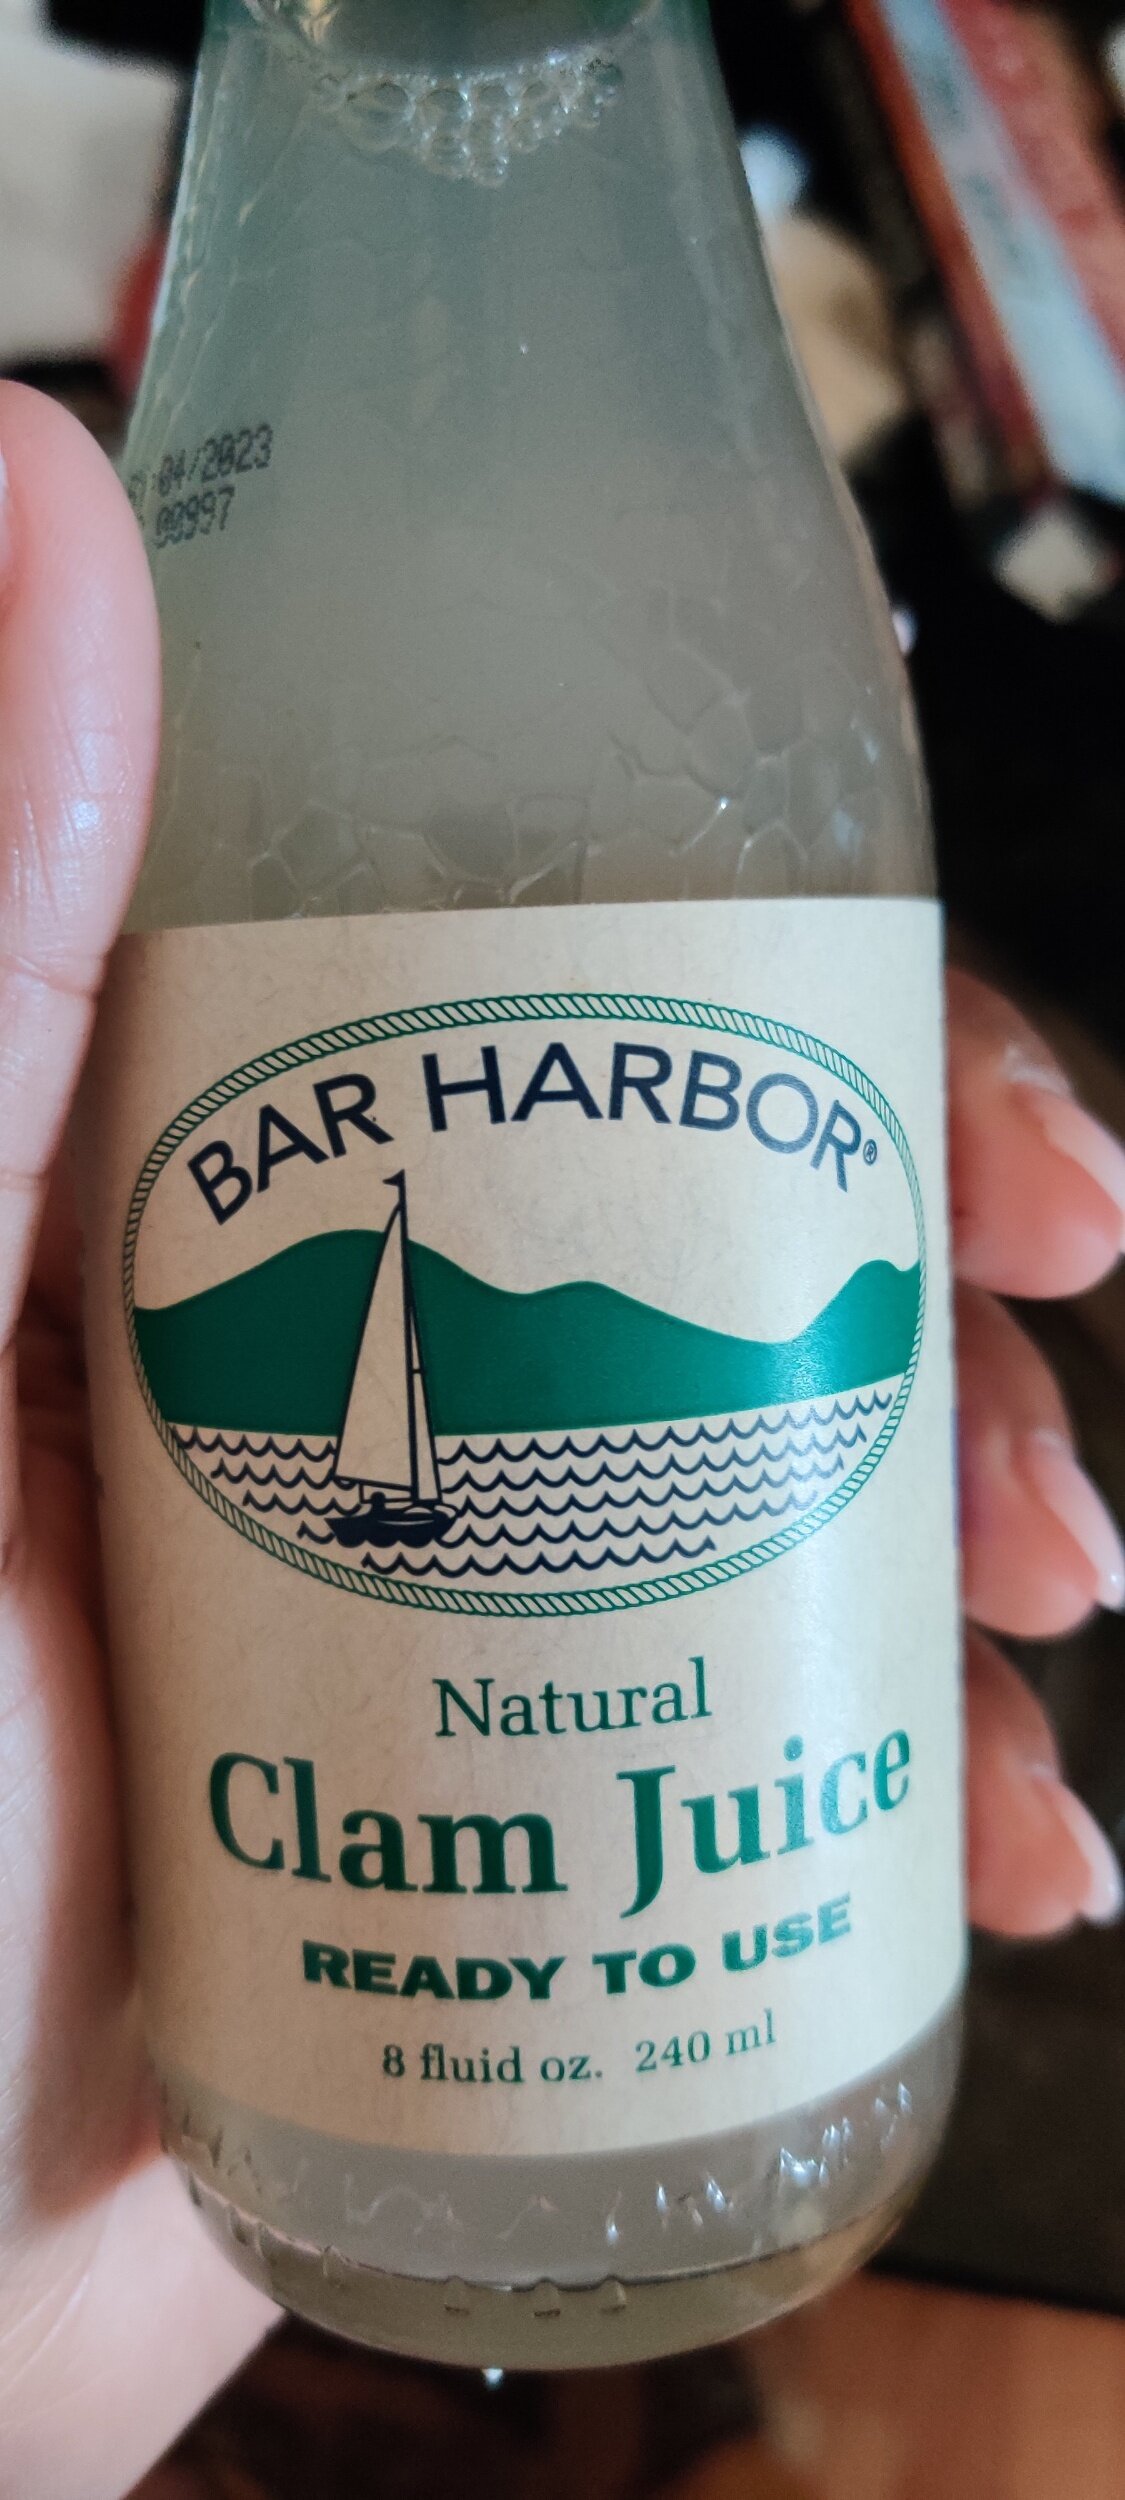
Corn and Sweet Potato Chowder
As someone who has lived on the East Coast of the United States, close enough to New England, I don't eat enough chowder! On restaurant menus, I always thought it wasn't as exciting enough option to kick off a 3-course menu comparatively speaking.
I had some leftover corn and sweet potatoes in the freezer and decided to make some chowder (basically a soup or stew with some potatoes, corn, and cream or milk thickened with a roux or crackers).
I didn't add any clams or other type of seafood as traditionally used, but I did have some clam juice handy and a few strips of bacon in the fridge to help enhance the flavour of the vegetables.
Dear plant-based eaters, you don't need bacon or clam juice, butter and the vegetable broth is enough!
Ingredients
1 cup sweet corn kernels
1 cup sweet potato, chopped
1 cup clam juice
1 teaspoon butter (use 1 tablespoon if you don't use bacon)
2 strips of bacon, chopped
1 vegetable bouillon
2 cups water
3/4 can coconut milk
1 teaspoon salt
1 teaspoon thyme
1 tablespoon black pepper
2 teaspoons chili powder
2 teaspoons paprika
4 tablespoons flour
1 tablespoon garlic, minced
1/2 white onion, chopped
1 cup carrots, finely chopped


Instructions
Cook the bacon until it starts to get crisp around the edges and the oil seeps out, for about 3-4 minutes. Add the onion and garlic, saute for about 3 minutes until the onions begin to soften.
Add the seasoning and the vegetable bouillon, crush and mix until everything is well incorporated and your pot is flagrant, for about another 2 minutes.
Add the carrots and flour, cook for about 2 additional minutes.
Add the water, corn, sweet potato and clam juice, stirring to make sure there are no lumps or dry bits of flour. Bring to a boil. Reduce the heat and simmer for 15-20 minutes until the sweet potatoes are soft. Add additional broth or water if you need it.
Add the coconut milk gradually, stirring to thicken the soup. Let it simmer for another 5-10 minutes.
Enough for 4, serve with warm bread or crackers!

Chickpea Curry with Flatbread
There's nothing like a hot curry served with warm flatbread and a condiment to cool the tongue. I love chickpea curry, and even if you’re an avid meat eater if seasoned right you’ll love it too. It's a good transitional dish if you're trying to eat less meat and adopt a plant-based diet.
Chickpea curry and flatbread work for weeknights, weekends, rainy days, winter days. The meal lacks much of the grease and calories we associate with other comfort food.
Chickpeas have several health benefits such as improving digestion and reducing cholesterol, while curry helps reduce inflammation and boosts your immune system.
If you're intimidated by making bread, this flatbread shortcut offers an easy fix and delicious side to your curry.
Ingredients
1/2 large red onion, chopped
1 heaped teaspoon garlic, minced
1 teaspoon cumin
2 bay leaves
1/2 teaspoon salt
1 tablespoon hot Madras curry powder
1 teaspoon garlic powder
1 teaspoon chili powder
1 teaspoon black pepper
1 teaspoon parsley
1 teaspoon cinnamon
1/4 teaspoon cardamom
1/4 teaspoon cloves
1 teaspoon coriander
1 teaspoon chili flakes (optional)
1/4 cup marsala cooking wine
1 vegetable bouillon
2 cups water
1 cup coconut milk
1 tablespoon butter
1 tablespoon olive oil
2 tablespoons tomato paste
1 cup peeled tomatoes in sauce
1 teaspoon spicy mango chutney (I used Camella’s Kitchen’s)
1 tablespoon scotch bonnet pepper hot sauce (optional)
1 teaspoon chili flakes (optional)
Flatbread:
1 cup plant-based yoghurt
1 cup whole-wheat flour
1 tablespoon garlic and herb seasoning (optional - I used Primal Palate)
1 teaspoon baking powder
Video Tutorial
Instructions
Prepare your flatbread. You can store it in the warmer drawer until the curry is ready.
Mix the flour, baking powder, herbs, and yoghurt to form a soft dough. It may be slightly sticky. Using your hands or a rolling pin on a lightly floured surface, divide the dough into 4 parts and shape into flat, circular discs.
Brush them on one side with olive oil. On high heat in a greased skillet, cook the flatbreads until bubbles start to puff up, for about 2 minutes. Flip over and cook for another 1-2 minutes.
Prepare your curry. In a pot, sauté the onion and garlic in the butter and olive oil for about 3 minutes, until the onions start to soften.
Add your spices, cook for about 2 minutes until fragrant.
Add the tomato paste, the cooking wine, the mango chutney, vegetable bouillon, water, coconut milk, peeled tomatoes and salt. Mix and reduce heat, simmer for about 5 minutes.
Add the chickpeas, bay leaf, chili flakes, and scotch bonnet sauce, simmer on low heat for another 20 minutes. Mix occasionally to help thicken the curry.
Serve hot with flatbread and chopped pineapples and bananas on the side. Enough for 2-4 people.

Sadza with Butter Bean Kale Relish
Ah yes, I love a meal that tastes like home. Home being Zimbabwe in this case. There's nothing like a plate of hot relish (stewed vegetables) and sadza (thick corn/maize meal porridge). This is considered one of the cornerstones of our cuisine and feeds millions of people across the country. It's kind of like how pasta is to the Italians dare I say!
Perhaps I'm biased, but it's some of the best-tasting comfort food, and not smothered in fat either. I made it vegan although some Zimbabweans would request some grilled or in-bone meat. You can do without it.
The one thing I'd insist you include if possible is the Usavi mix. It's a spice brand you'll find in most households but is essentially just a blend of cornstarch, salt, sugar, turmeric, coriander, garlic, fennel, methee/fenugreek, cumin, and paprika. Some people like to add curry powder to their relish, but I find that changes the flavour profile into something completely different. This is all about simple deliciousness!
Ingredients
1 can butter/Lima beans (keep the sauce)
1 tablespoon garlic, minced
1 tablespoon olive oil
1/2 onion, chopped
1/4 tomato, chopped
2 tablespoons Usavi mix
1/2 teaspoon salt
1 tablespoon chili flakes
1 teaspoon black pepper
1/4 cup water
1 tablespoon butter
2 tablespoons vegetable
3 cups chopped kale
Sadza:
1 cup white corn/maize meal
3/4 cup cold water
2 1/2 - 4 cups boiling water (depending on how thick you want your sadza)
1/2 teaspoonsalt


Instructions
Heat the olive oil and butter, saute the garlic and onions for about 3 minutes to sweat them out.
Add the Usavi mix, salt, and pepper, cook for another 2 minutes to bring out the flavours.
Add the chopped kale and cook until wilted down, then add the tomato and vegetable oil and fry for 2 minutes.
Add the beans along with the sauce from the can, chilli flakes, and water. Reduce heat and simmer for about 10 minutes, stirring occasionally. Set aside.
Prepare your sadza. In a pot, make a paste using the cold water and a 1/2 cup of maize meal, add the salt. When you add the cold water, do it gradually to keep control of the consistency of the paste, you don’t want clumps and it should all come together.
Place the pot over medium-high heat and add 1/2 cup of boiling water. With a wooden spoon, stir quickly and get rid of any lumps. You want a smooth porridge to form. If you need to, use a whisk!
Add the rest of the hot water a 1/2 cup at a time, still stirring or whisking to ensure you still develop a smooth porridge. At this point, it will start to bubble or kwata. Reduce to medium-low heat and place a lid on top. Careful not to get burnt. Let the sadza cook for about 10 minutes.
Once cooked, fold in the rest of the corn/maize meal. You’ll want to use a twisting or figure-8 motion with your wooden spoon to make sure all the dry mix is coated and you incorporate air. This is the final step to make it a thick, dough-like consistency. You can add more corn/maize meal depending on the texture and consistency you want.
Put the lid back on and sit on low heat to allow the sadza to rest for about 5 minutes. You might hear it 'breathing' or puffing at this point.
When ready to serve, dip your wooden spoon in some cold water to prevent too much sticking. Mould your sadza into a round shape and serve with your relish, enough for 2 people.
Tip: to smoothen your sadza use cling wrap as you shape it.
Also, eat with your (washed) hands! It tastes better.

Herring and Salmon Toast with Pineapple Salsa
There's nothing like a crispy slice of toast with smoked or tinned fish on top. It's an elegant appetizer you can also serve as a light snack. My go-to has often been the Mediterranean-style Tapa de Sardinas (Spanish sardines), but herrings work just as well. They aren't as rich in calcium, but just as delicious and almost identical! I add salmon to the dish in the form of spread to mimic salmon cream cheese. You can get it store-bought but why not make your own version?
I used MSC-certificated products, sustainably caught fish as I did with my Cornmeal Tuna Cakes. As I've mentioned before, you can identify their products by a (clearly visible) little blue label!
Tinned fish is underrated but it's so versatile.
Pineapple always adds freshness to whatever you serve it with. It also adds a little bit of acidity which, in this case, helps cut through the oil from the fish. You also end up with a very colourful plate!
Ingredients
2 tablespoons sour cream
1 teaspoon garlic, minced
1/2 teaspoon mustard
1/2 teaspoon salt
1/2 teaspoon black pepper
1/2 teaspoon parsley
1/2 teaspoon dill
1 1/2 tablespoons Wild-caught pink salmon, boneless and skinless (Chicken of the Sea)
1/4 teaspoon chili flakes
2 slices whole grain bread
1 teaspoon clam juice
4 Kipper snack herring fillets (Crown Prince)
1/2 teaspoon olive oil
Salsa:
1 tablespoon tomato, finely chopped
2 tablespoons pineapple, finely chopped
1 teaspoon scotch bonnet hot sauce
1 tablespoon sweet corn
1/2 teaspoon parsley
1/2 teaspoon black pepper
Pinch of salt


Instructions
In a small bowl, mix the sour cream, garlic, mustard, dill, salt, chili flakes, pepper, olive oil, salmon, and clam juice until well combined.
In another bowl, mix the corn, salt, pineapple,tomato, parsely, pepper, and hot sauce.
Lightly toast your bread.
Spread the salmon cream over your toasts, top with the herring, followed by the pineapple salsa.
Serve at room temperature as or with a simple garden salad!

Creamy Mushroom Soup with Plantain Fufu
I love mushrooms and appreciate fufu even though I'm more familiar with its starchy cousin sadza (a thick maize/cornmeal porridge).
Fufu is pounded or ground cassava or yam cooked with water often served with vegetable relish, soup or meat stew. It is central to many West African dishes.
I used plantain fufu flour. I love plantains, and they are gluten-free, high in antioxidants, fibre and several other nutrients. You can use other types of ground or pounded root or starchy vegetable such as malanga.
Groundnut or pepper soup are commonly served with fufu, but I was inspired to use mushrooms instead, or more specifically nhedzi. This is a type of mushroom found in Zimbabwe often served as a rich broth-based soup. I used what I could get my hands on - namely dried shiitake (which helps add extra flavour) and cremini mushrooms. I add the coconut milk element to make the soup creamier. Not surprisingly, cream of mushroom soup is very popular, I hope you try the recipe out!
Ingredients
1 cup dried shiitake mushrooms, rehydrated
1 1/2 cups frozen cremini mushrooms
1/3 cup vegetable oil
1 tablespoon butter
2 tablespoons Worchester sauce
1/4 cup cooking marsala wine
1 1/2 teaspoons salt
2 tablespoons olive oil
2 tablespoons black pepper
1/2 teaspoon chili flakes
2 tablespoons thyme
2 teaspoons cumin
1/2 cup yellow onion, chopped
1/2 cup red onion, chopped
1 tablespoon garlic, minced
1 teaspoon garlic powder
1 tablespoon Royco Usavi mix (optional)
2 tablespoons flour
1/2 cup coconut milk (or heavy cream)
1 vegetable bouillon
2 cups water
1 tablespoon tomato paste
Plantain fufu:
1/2 - 1 cup plantain fufu powder (I used Tropiway’s)
1-2 cups water
Depends on how much you need for serving.


Instructions
In a medium pan, fry the shiitake mushrooms in vegetable oil with 1/2 teaspoon salt, 1 teaspoon black pepper, 1 teaspoon thyme, 1 teaspoon cumin, 1 teaspoon garlic powder, and 2 tablespoons Worchester sauce.
Fry for 5-7 minutes, or until the mushrooms start to crisp up around the edges without burning, set aside.
In a large pot, saute the onions and minced garlic in butter and olive oil for about 3 minutes. Add 1 teaspoon salt, 1 tablespoon black pepper, 1 teaspoon cumin, 1 tablespoon Usavi mix, and 1 tablespoon thyme. Cook for another 2-3 minutes until fragrant.
Add the frozen mushrooms to the pot, cook until the water has melted and the mushrooms are mixed in well. Add the vegetable bouillon (crush it), water, and cooking wine. Reduce the heat and simmer for about 10 minutes.
Whisk in the flour until the soup begins to thicken and it's completely dissolved. Add the coconut or cream and 3/4 of the shiitake mushrooms, simmer for another 5 minutes.
In another pot, prepare the fufu according to the box's instructions. All you will need is water and the fufu powder, which you will knead and shape with a wooden spoon and your hands into a dough.
Serve the fufu ball(s) with the soup ladled on top or to the side with the rest of the fried mushrooms.

Cornmeal Tuna Cakes
People love going to relax at the beach. People love indulging in seafood from fresh oysters to grilled fish and curried shrimp. People love partying on yachts and competitively sailing boats. The question is, are people doing what it takes to protect the bodies of water that make these experiences possible? Not only do oceans provide beautiful beaches, delicious seafood and amazing memories, but they also provide food for millions of people. They provide oxygen in the air we breathe and hold 97% of the earth's water.
We need to protect the oceans from the pollution that kills ecosystems like the coral reef. We need to reduce the emissions that contribute to global warming, which raise sea levels and threaten natural habitats and coastal areas where people live. We need to reduce the amount of plastic that ends up in the stomachs of sea turtles and sea birds. We need to protect the oceans from overfishing and ensure food security for everyone.
June 8 marks World Oceans Day, and one of the key messages is that we can help the oceans by making more sustainable choices when we purchase seafood. How do you identify what’s sustainable? Buy MSC branded products marked with a little blue label. They are easy to spot as you can see below! The products are sustainably caught and you can trace back to the source. MSC is a science-based global nonprofit dedicated to the prevention of overfishing worldwide. You can read more about their work at www.msc.org.

Tinned fish is a versatile ingredient and one of many MSC-approved products. I was challenged to make something creative and decided to treat tinned tuna in a similar way to crab, and replace the breadcrumbs with cornmeal bread to give the cakes added sweetness and a soft but gritty texture.
Next time you need seafood, find the products in the grocery store with the MSC label! Make the right choice when you shop, your decision contributes to a #BigBlueFuture and a delicious meal.
Ingredients
3 (5-ounce) tuna cans
1/2 cup scallions, finely chopped
2 cups cornbread, crumbled
1/4 cup mayonnaise
2 eggs, beaten
1 teaspoon salt
1 teaspoon black pepper
1 tablespoon fish spice
1 tablespoon dill
1 tablespoon parsley
2 tablespoons olive oil
1 tablespoon Dijon mustard
2 tablespoons Worchester sauce
1 tablespoon sour cream
1 tablespoon garlic, minced
1 teaspoon Cajun seasoning
1/2 teaspoon lemon juice
1 tablespoon chili pepper, chopped
Cornmeal
Vegetable oil


Instructions
Add all the ingredients to a large bowl and mix everything with your hands until evenly incorporated.
Heat some vegetable oil in a pan on medium heat.
Coat your hands with cornmeal and shape the cakes, but don't make them too thick to ensure they cook through.
Fry the cakes in batches until each side is crispy and golden brown.
Serve hot with aioli and guacamole! Makes about 10-12 cakes.

Lentil Peanut Stew
Dhal is a lentil or split pea curry popular in parts of the Caribbean with its origins in India. In Zimbabwe, peanut stew involves cooking peanut butter with chili, spices, vegetables and starch or protein (typically chicken). The dish is common in many other parts of West and southern Africa.
I had to combined the two and it worked seamlessly! This is in no way an exact rendition of either dish, I'm not an expert.
This is based this off what I have tasted eating at various restaurants, grew up eating in my own culture as a Zimbabwean, and read.
I wanted to serve the stew with plantains so I needed a thicker consistency but dhal is typically blended into a soup texture. You can do what works best for you. I did, however, add sautéed garlic and cumin, which is meant to add a smoky element to the dhal.
This is a hearty, tasty meal perfect for weeknights, enjoy!
Ingredients
1 1/2 cups lentils
1/2 large sweet potato, diced
1 cup coconut milk
1/2 cup peanut butter
3 cups water
2 tablespoons Worchester sauce
2 tablespoons tomato paste
1 tablespoon hot madras curry powder
1 tomato + 1/3 cup tomato sauce
1/2 large yellow onion, diced
1 teaspoon salt
1 tablespoon black pepper
1 small chili pepper, finely chopped
1 teaspoon turmeric
1/2 teaspoon garam masala
2 tablespoons palm oil (or vegetable oil)
1/2 cup frozen peas
1/2 teaspoon ginger
3 tablespoons garlic, minced
2 tablespoons ground cumin
1 scallion, chopped
2 bay leaves
Instructions
Wash the lentils and sweet potato.
In a large pot mix in the lentils with palm oil and the spices. Cook for 3 minutes.
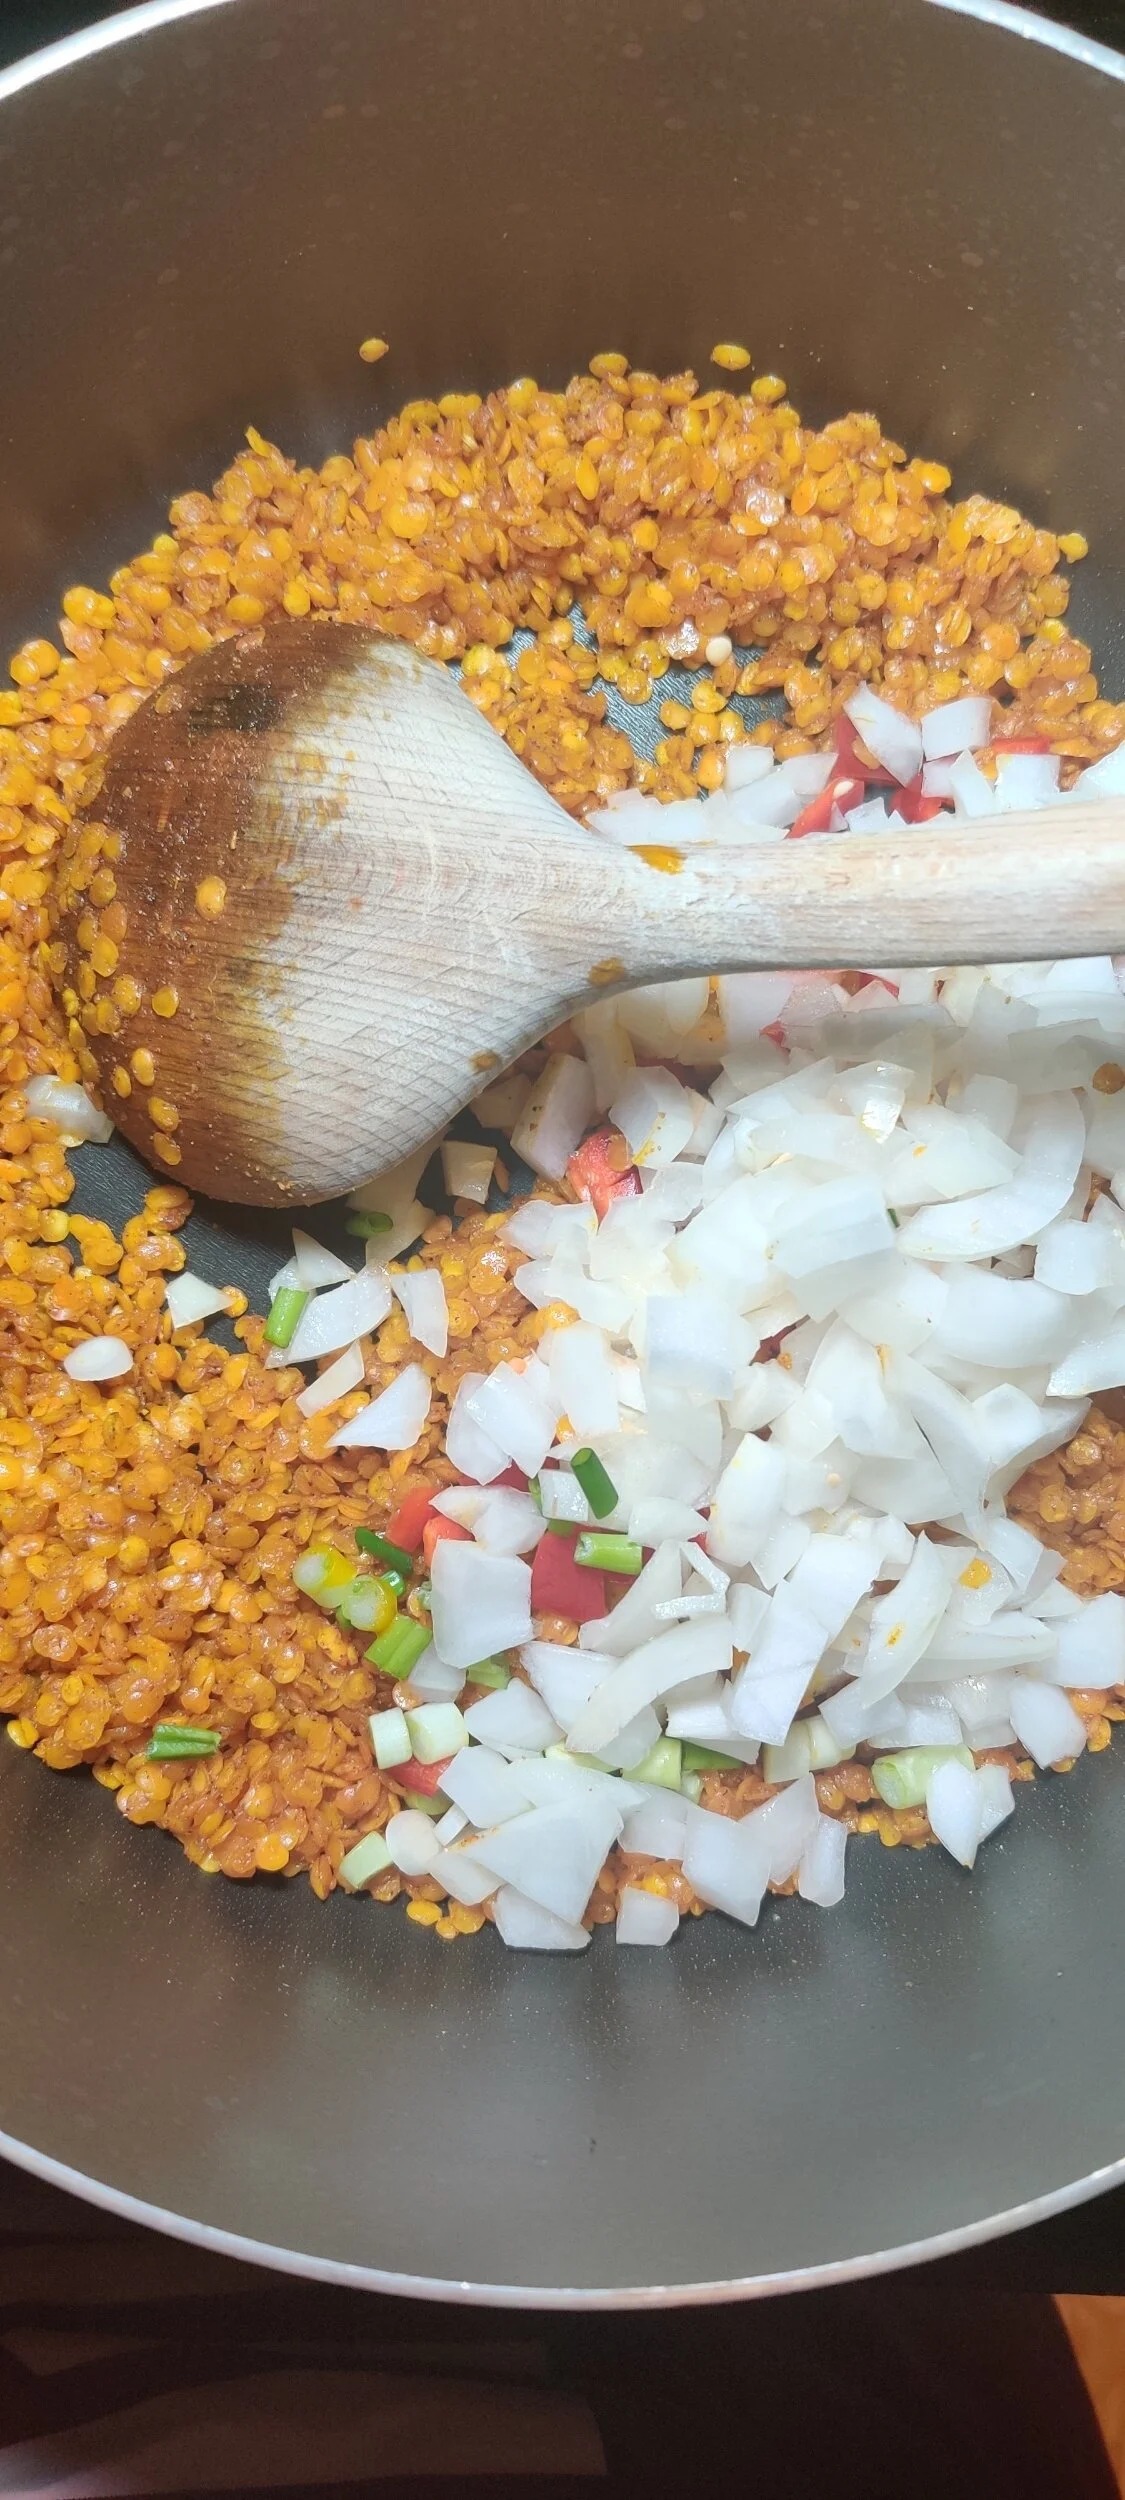
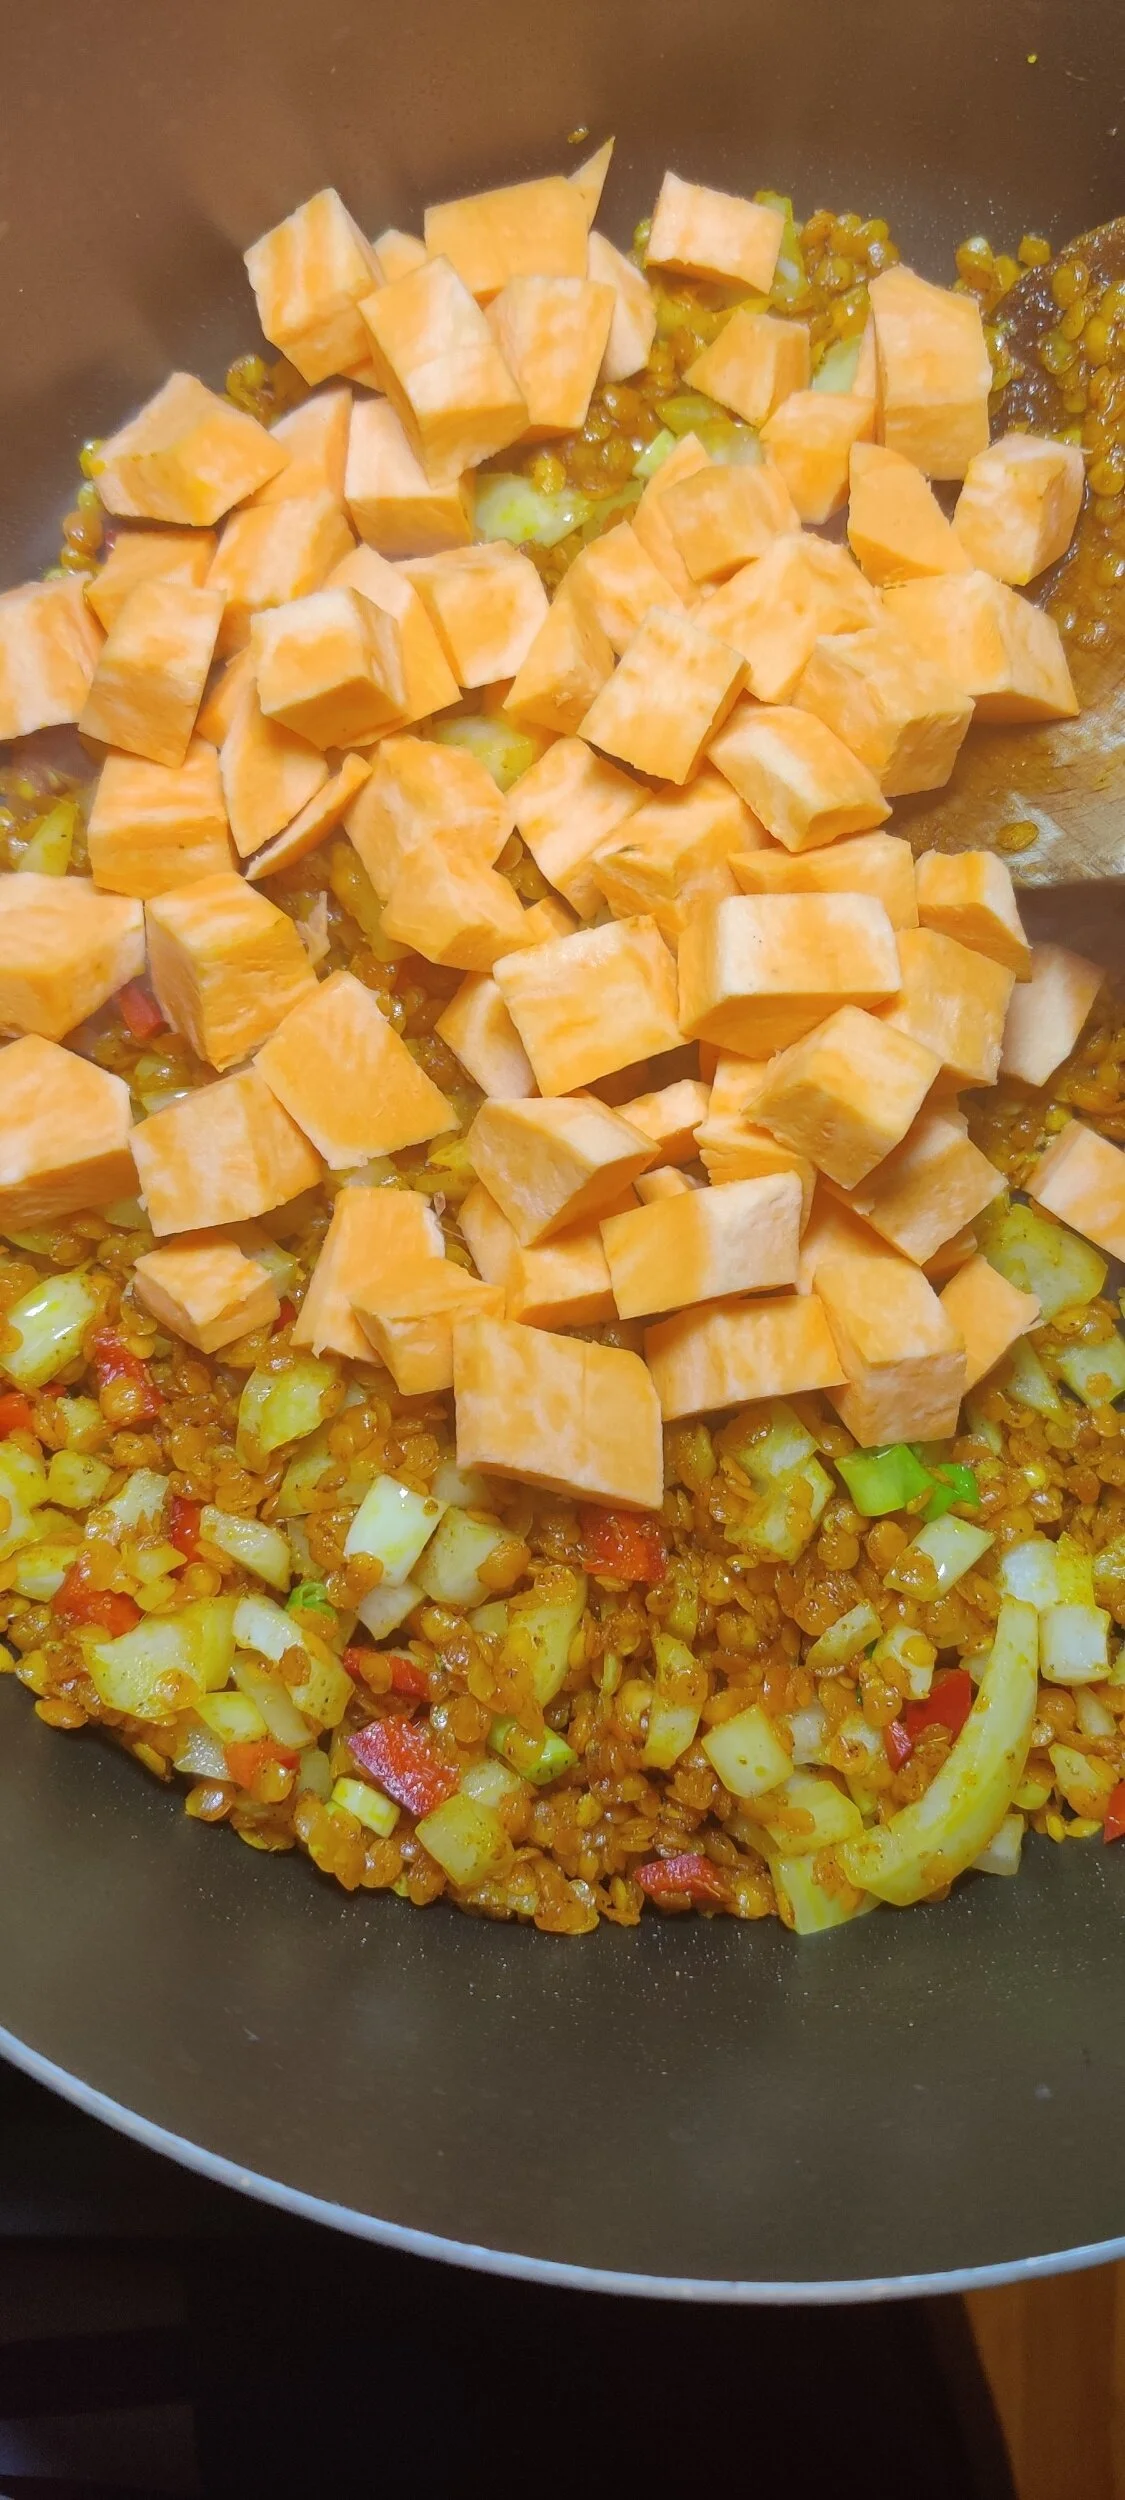
Add the onions, chili pepper, sweet potato and scallion, cook for another 2 minutes.
Add the tomato paste, sauce, and tomato. Cook for 2 minutes.
Add the water and coconut milk, then simmer for about 25 minutes with the bay leaves until the sweet potato is softened and the lentils break down easily.
About halfway through add the peanut and stir until incorporated.
In a small separate pan, heat the garlic and cumin until almost burnt, then add to the stew. Remove the bay leaves.
Serve hot with plantains, rice or flatbread.

Pina Colada Pancakes
Who doesn't like a good Pina Colada? The coconut milk and pineapple juice cocktail is laced with rum to give it a nice tropical punch. Why not transfer this to the breakfast classic pancakes? The drink is said to have originated in Puerto Rico.
No alcohol required of course! (Unless brunch cocktails are involved).
All you need to do is substitute the milk and add the pineapple for some added moisture.
Make it a fun pancake board while you're at it and bring out the cherries and coconut flakes! If you can get those fancy cocktail umbrellas, all the better.
These pancakes are quite moist, ladle them on the thinner side to make sure they are cooked through.
Ingredients
1/2 cup pineapple, finely chopped
2 cups of coconut milk
1/2 teaspoon rum extract
1 tablespoon coconut oil
2 bananas
1/4 cup coconut flour
1 1/2 cups all-purpose flour
1/4 cup water (optional)
1 teaspoon granulated or coconut sugar
Cooking spray or vegan butter
Instructions
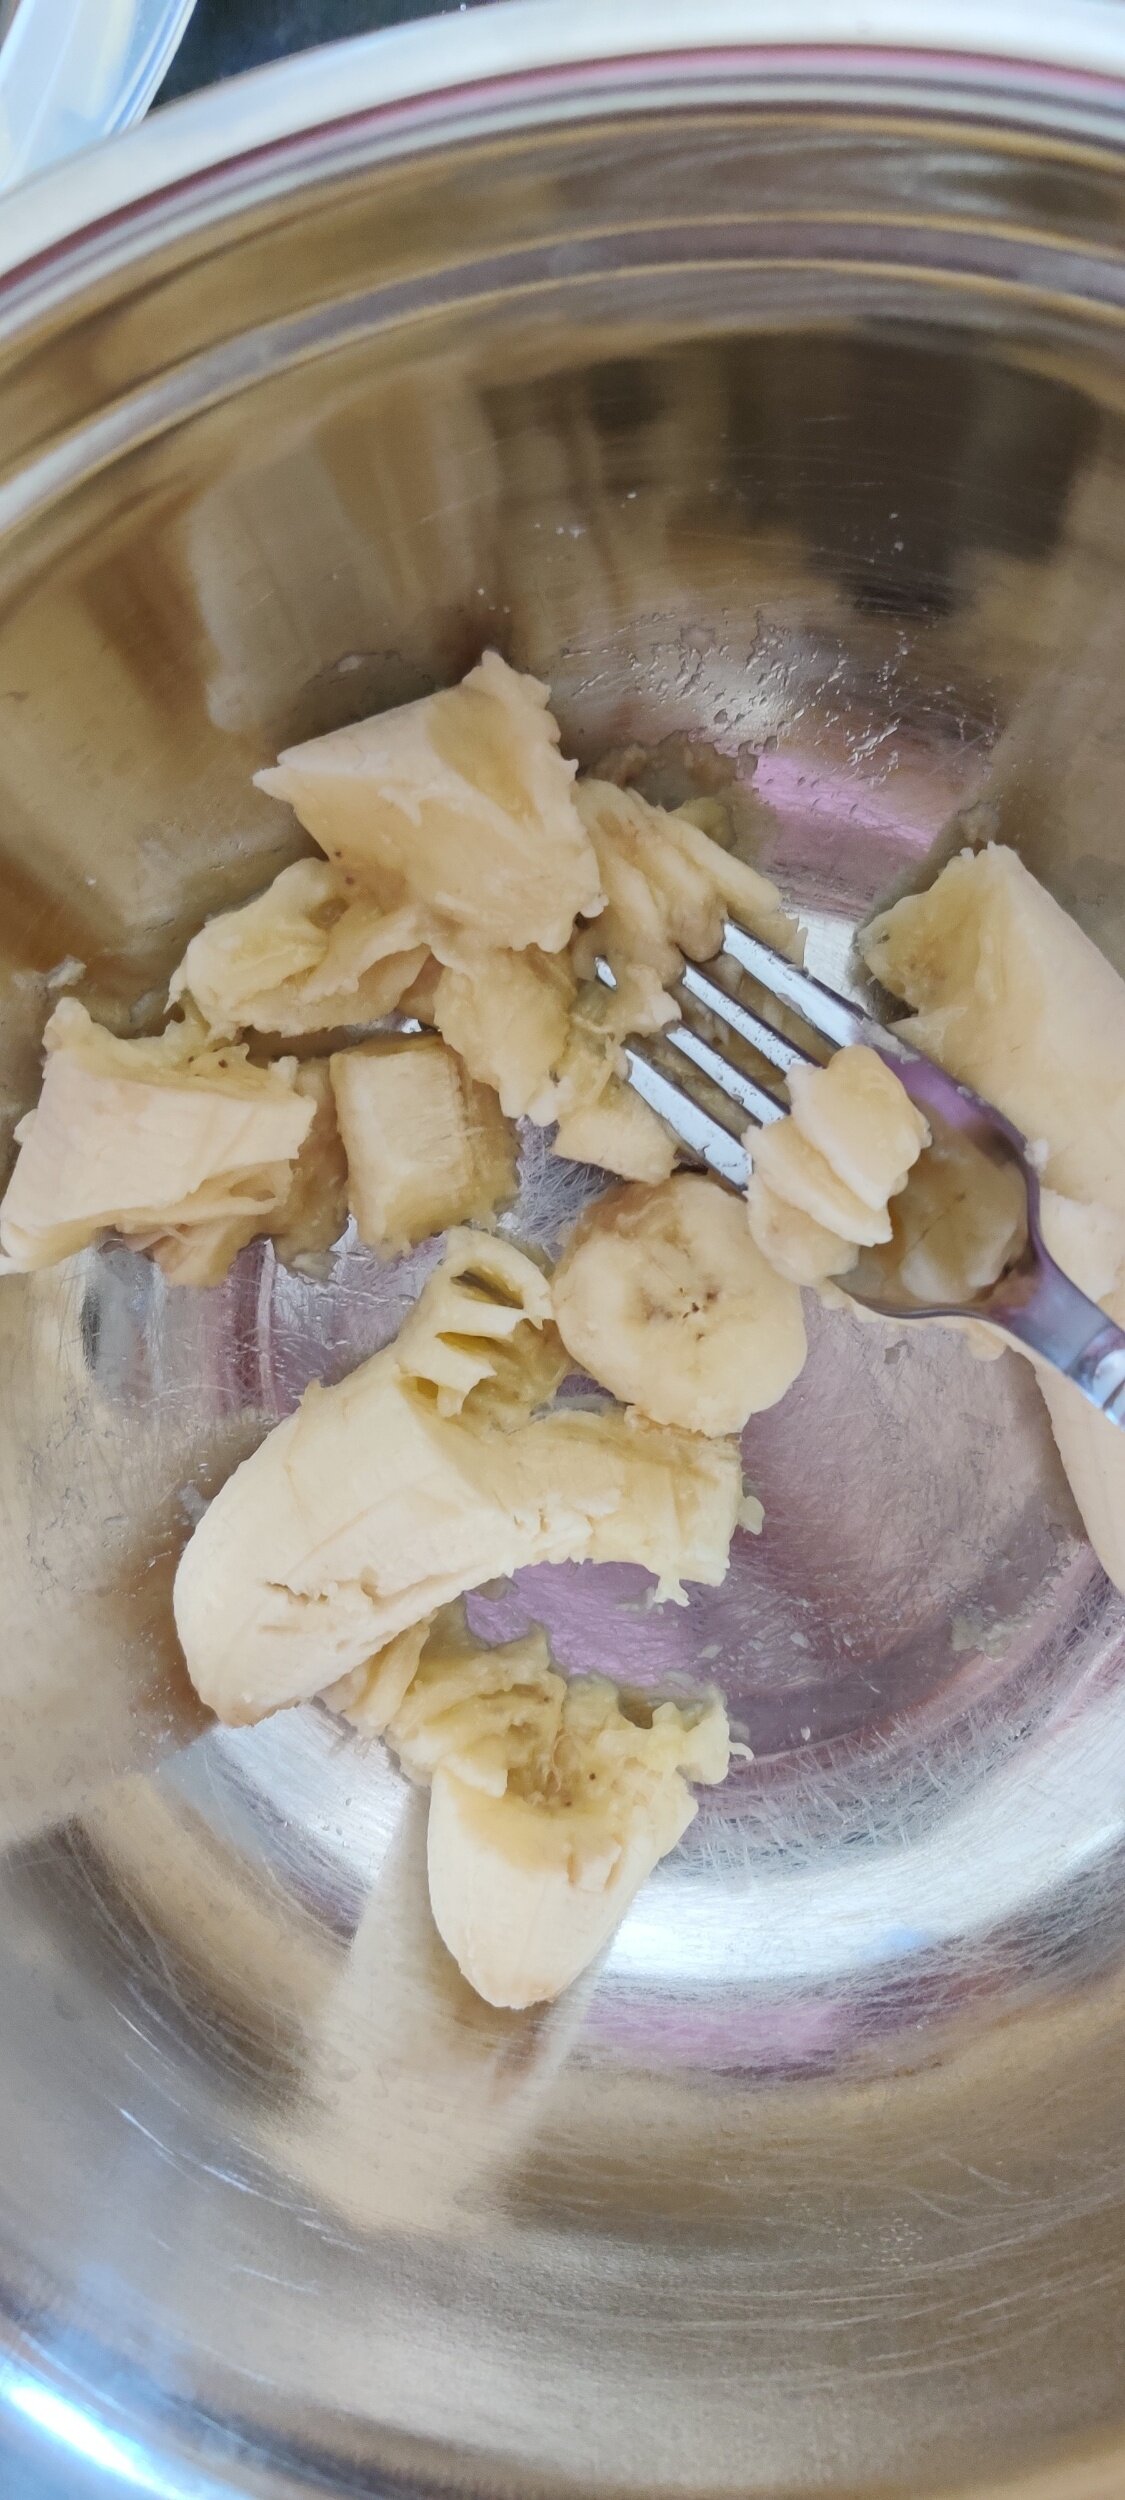
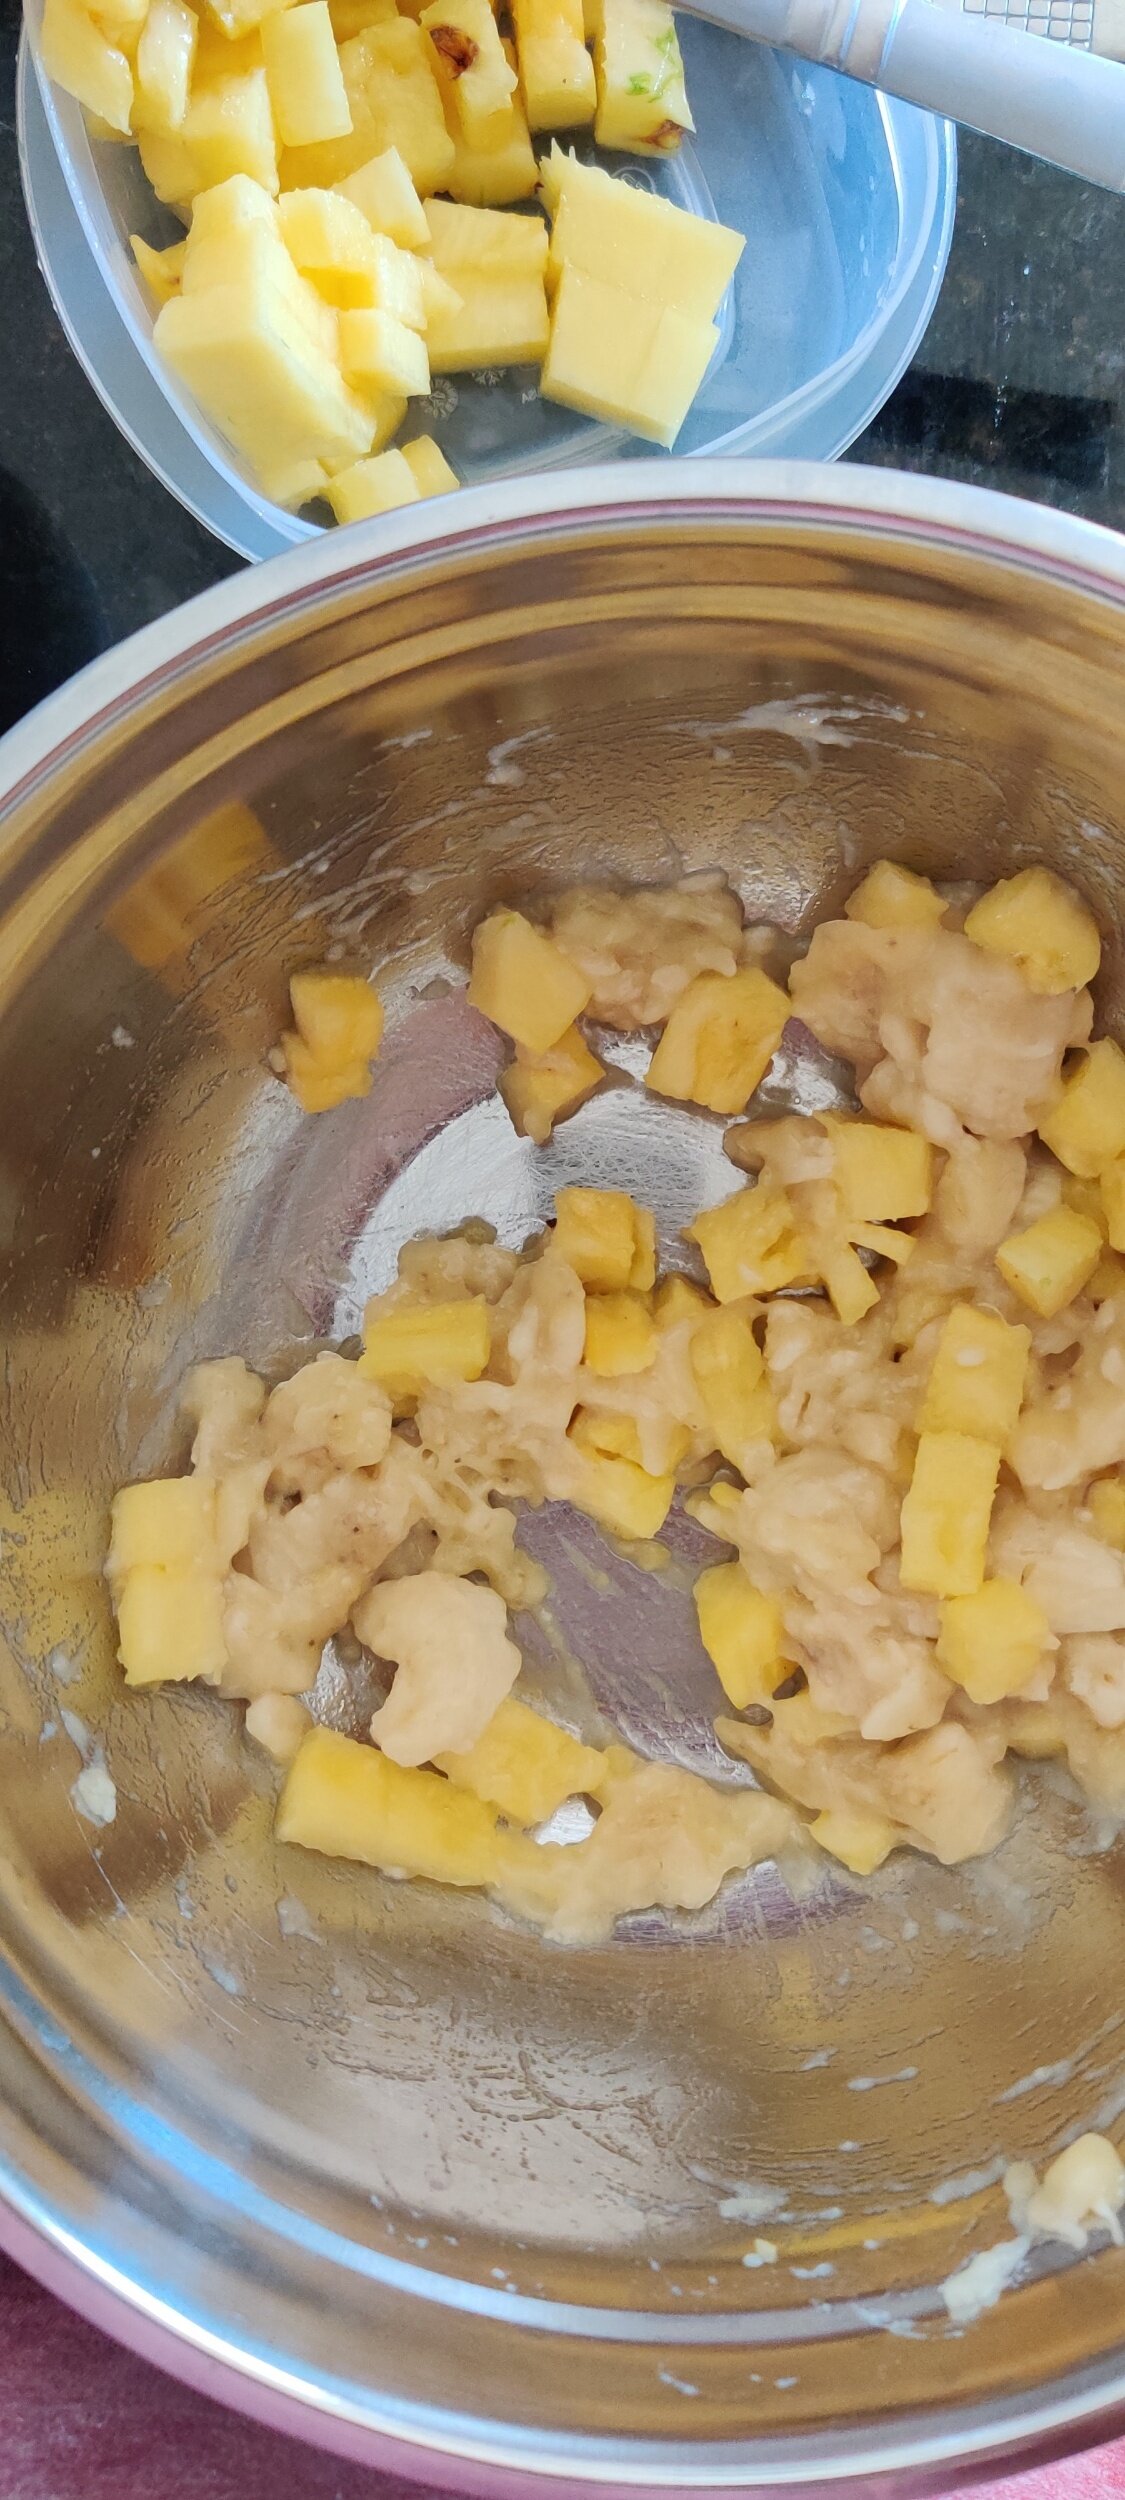
Mash the bananas, then mix in the finely chopped pineapple.
Add the rum extract and coconut oil, mix well, then add the coconut milk.
Add the sugar, coconut, and all-purpose flours and mix until the batter is evenly incorporated and wet, try not to overmix.
Ladle about 1/4 cup of batter onto a griddle or greased non-stick pan. When you start to see bubbles and the edges start to come off the pan, flip.
Cook for 2-3 minutes on the other side until they are done.
Makes about 10-12 pancakes. Serve with cherries, pineapple, coconut flakes, and syrup.


Finger Millet Peanut Butter Porridge
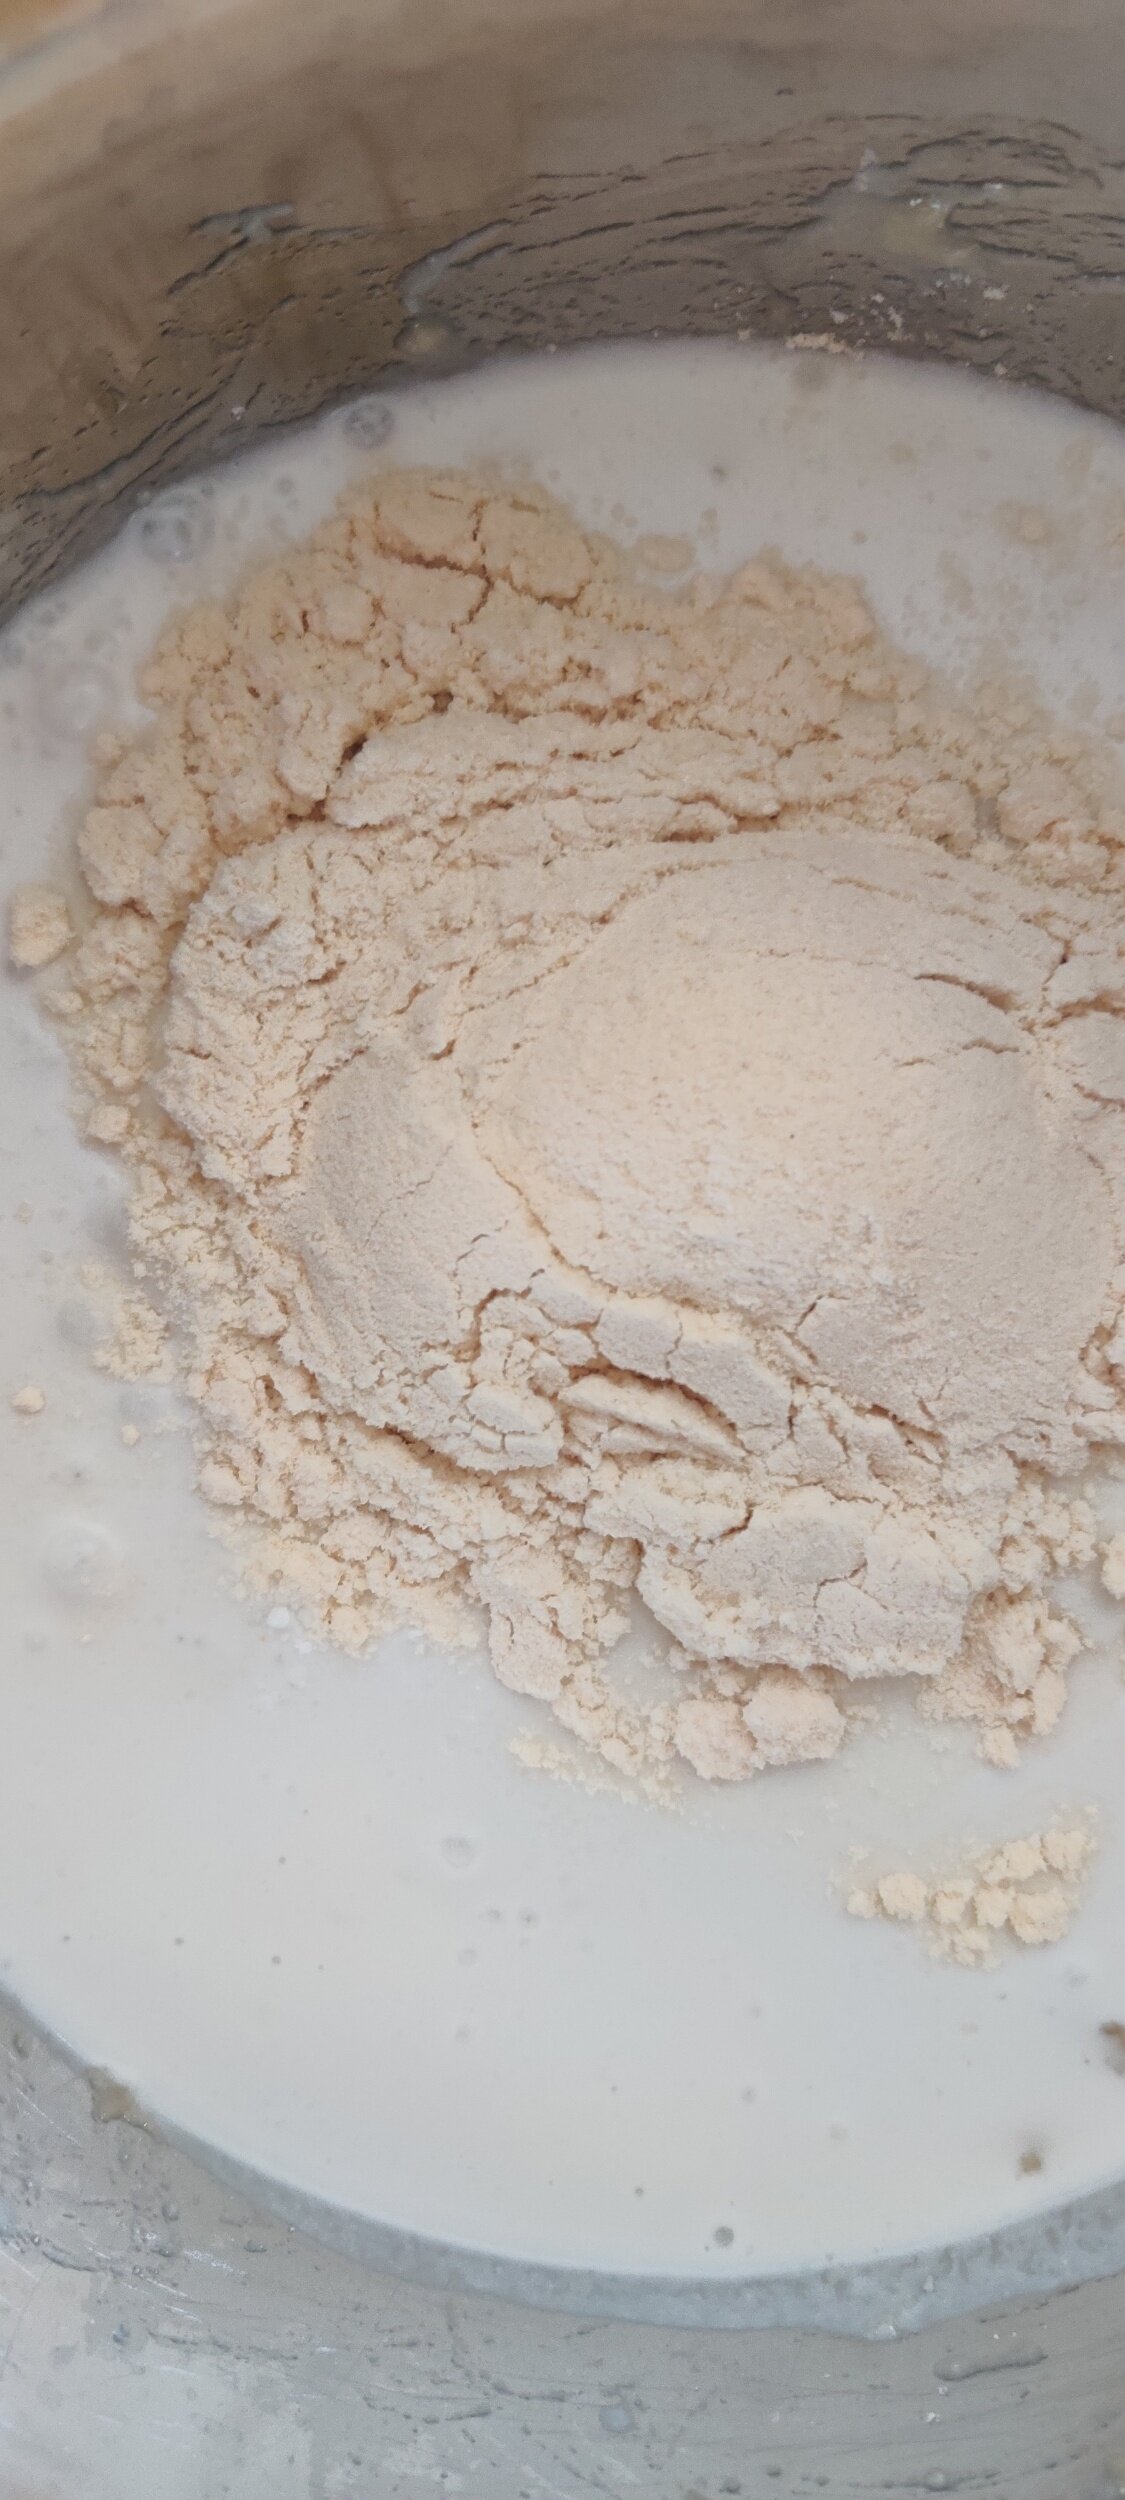
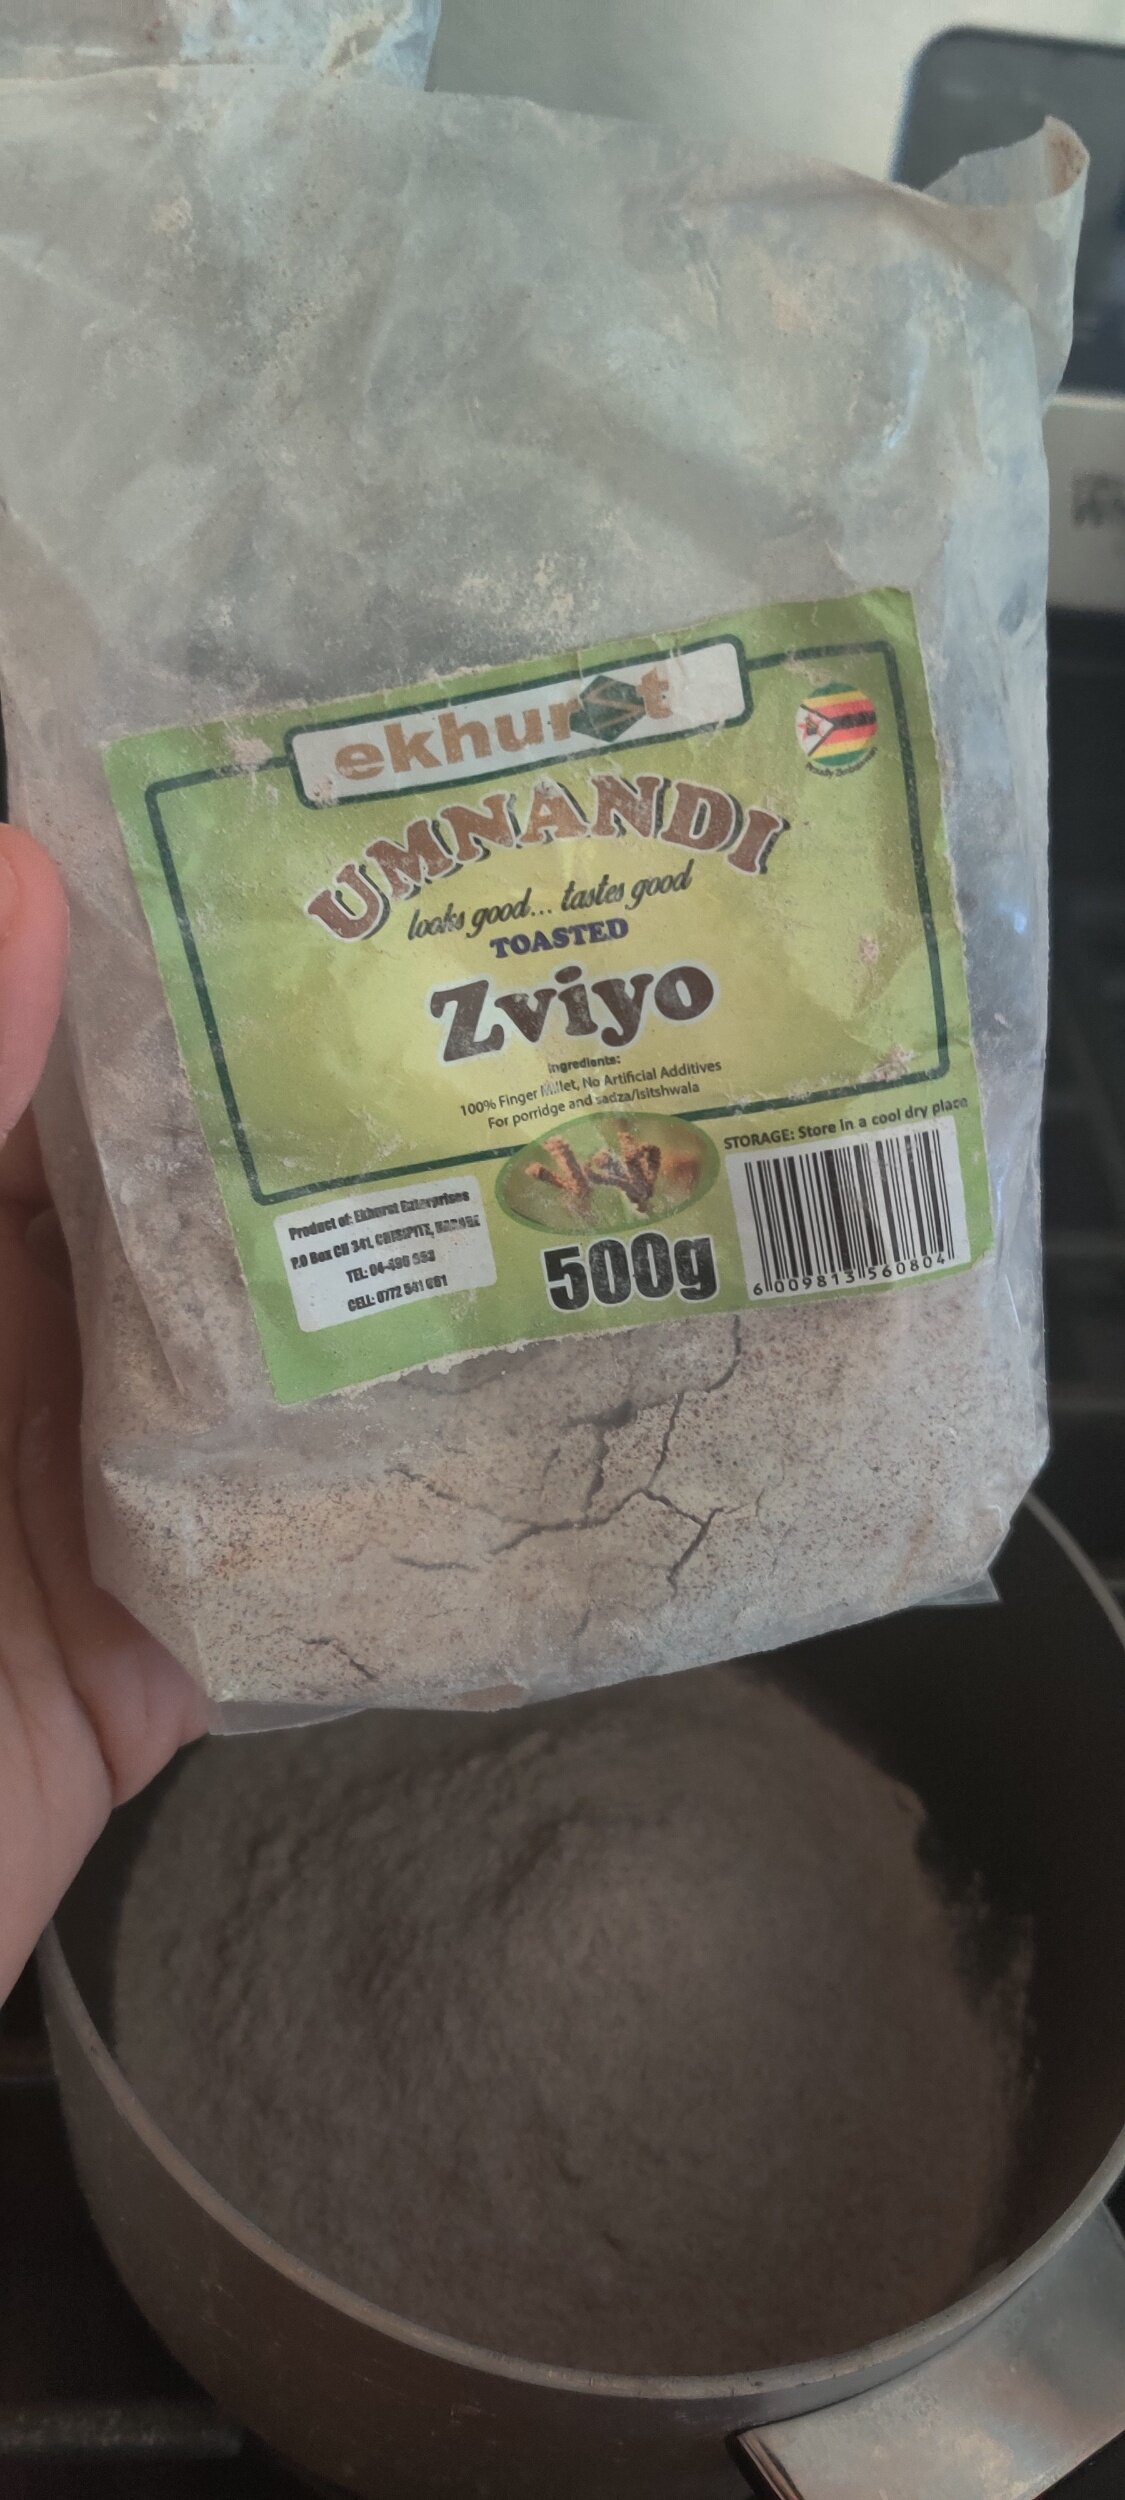
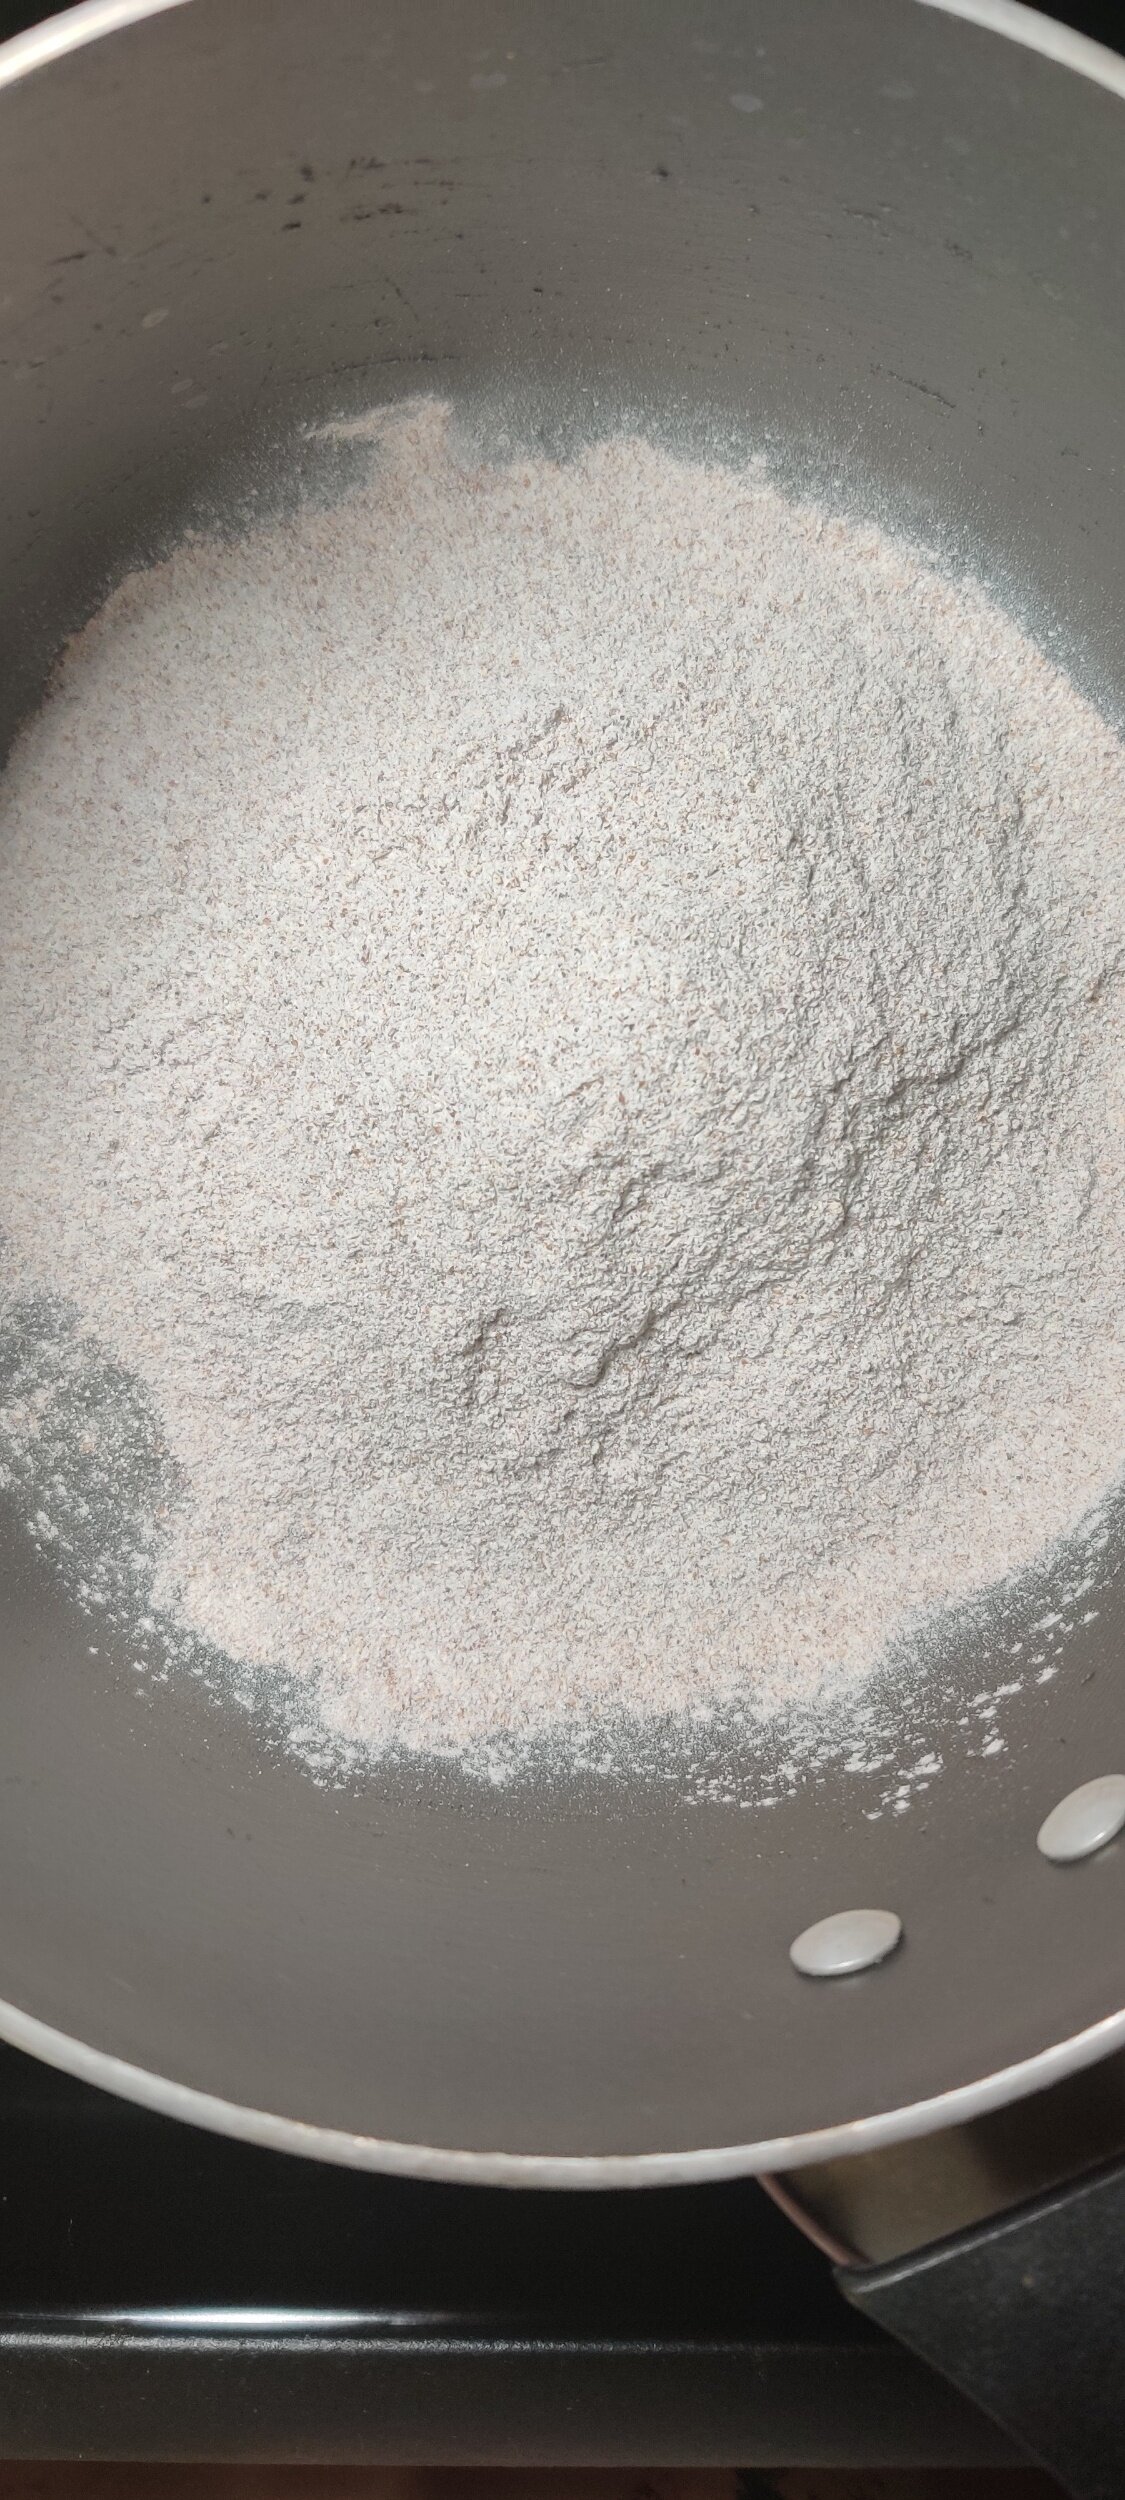
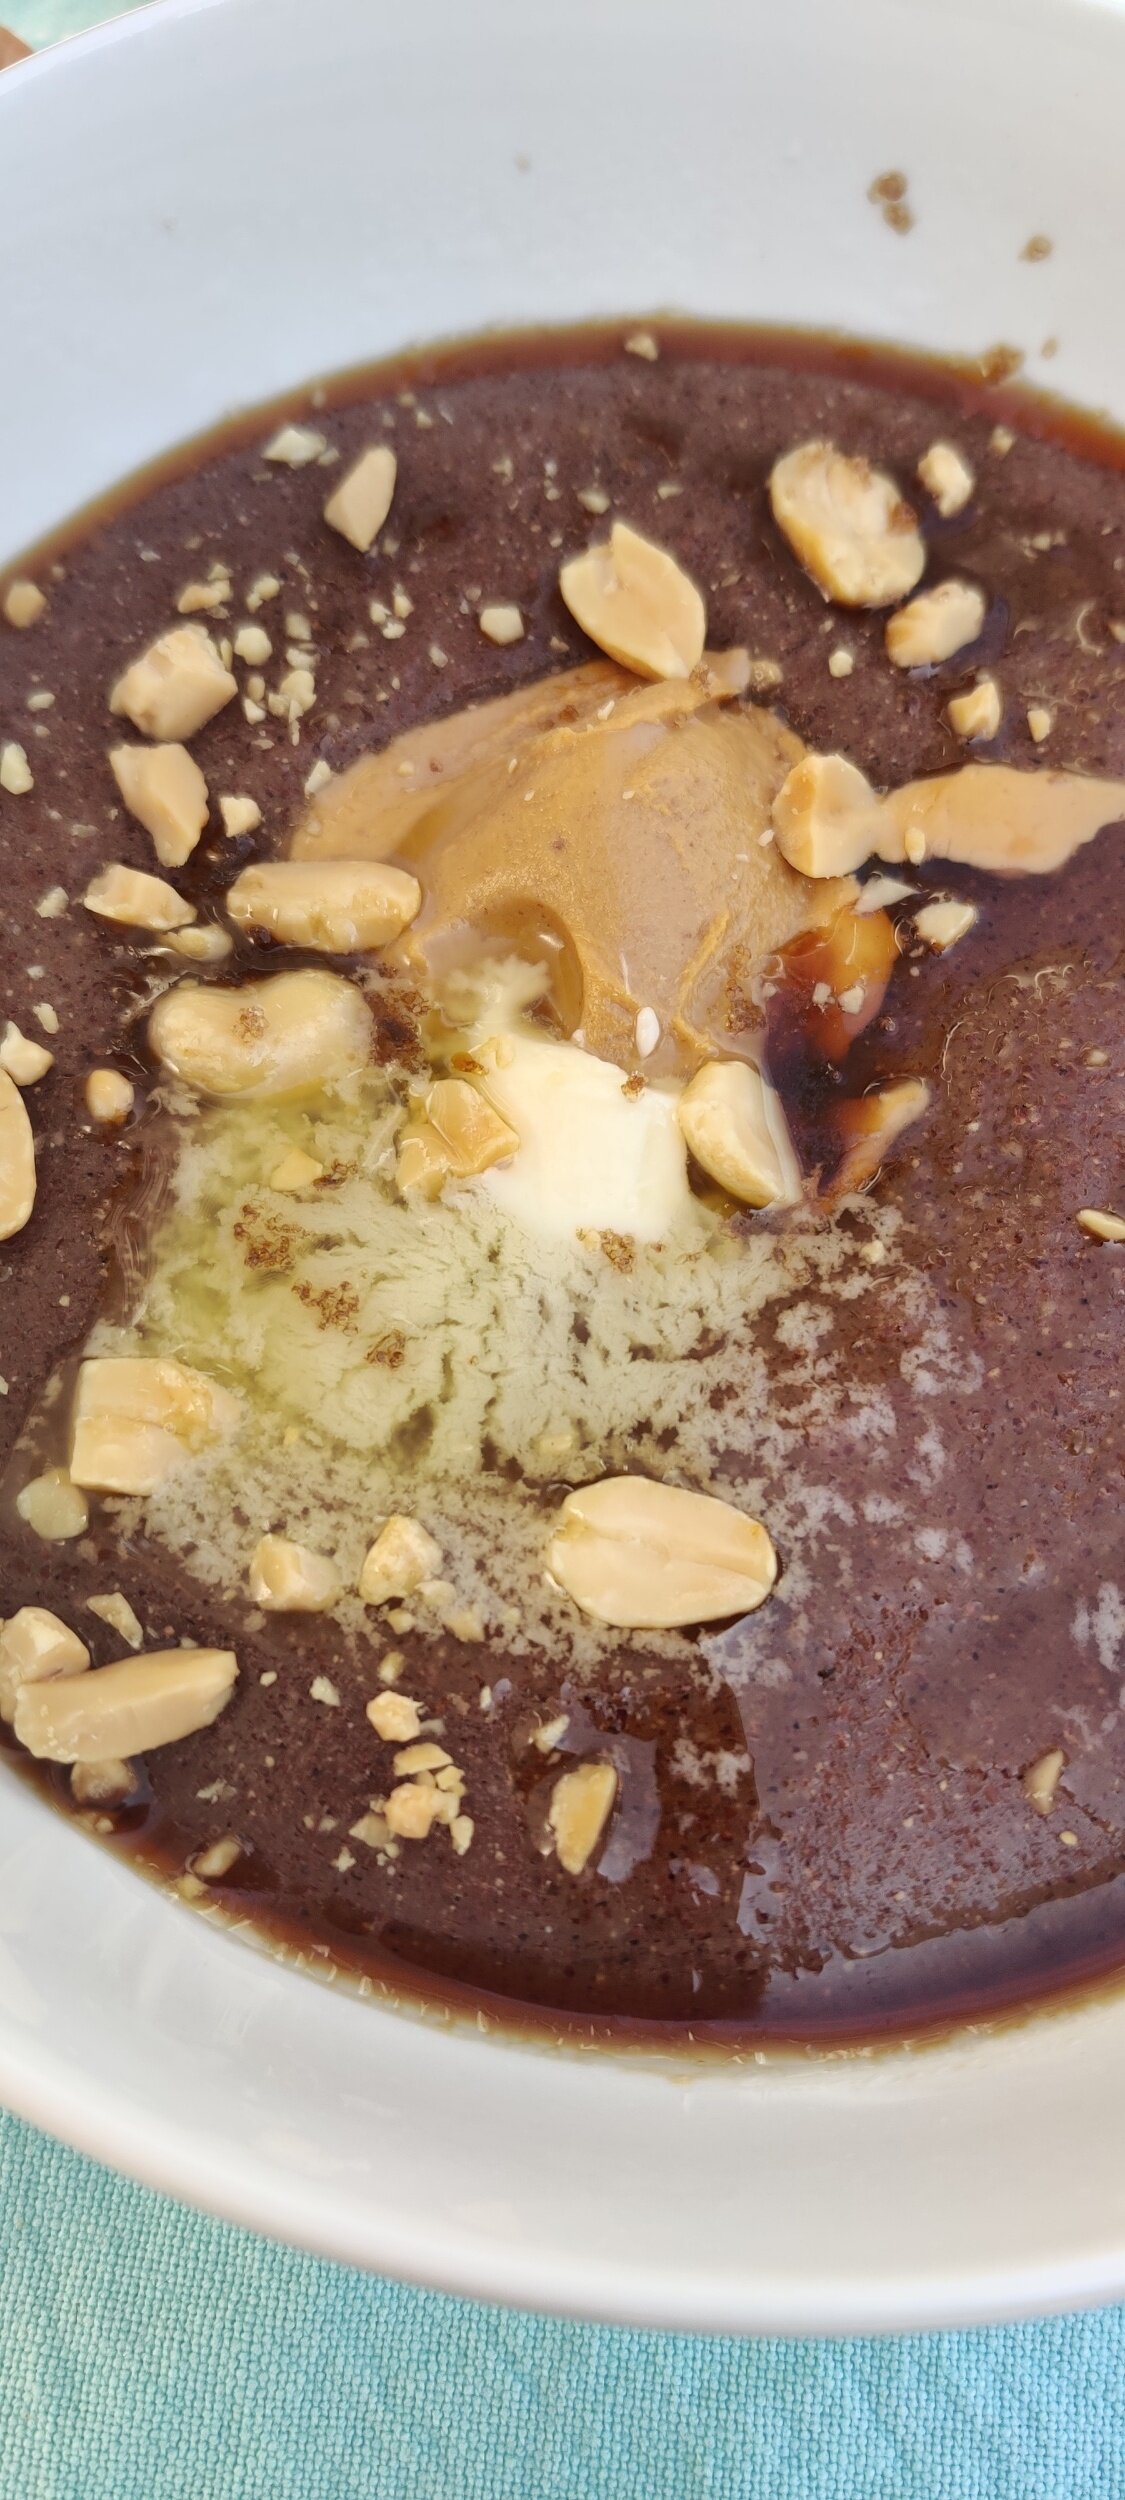
Most people enjoy porridge as oatmeal, but it's also quite popular in cornmeal form with an array of toppings. I grew up eating it pretty plain, save for butter, sugar, honey or peanut butter. I used to love it in the morning before school, especially during the winter. Porridge is a very popular breakfast option for most Zimbabweans. It's cheap and can keep you full for hours. Peanuts also feature prominently in African cuisine, so you won't find a shortage of meals that include them. Luckily, peanut butter is amazing! Ground millet is a healthier option with tons of calcium and tastes better than ground cornmeal porridge in my opinion. So try this recipe out, it's comforting and delicious!
Ingredients
1 cup finger millet, ground and toasted
2 1/2 cups hot water
1 cup cold water
1/2 teaspoon salt
1 teaspoon butter
1 tablespoon peanut butter
1 teaspoon honey
1 teaspoon sugar
1 teaspoon peanuts (to garnish)


Instructions
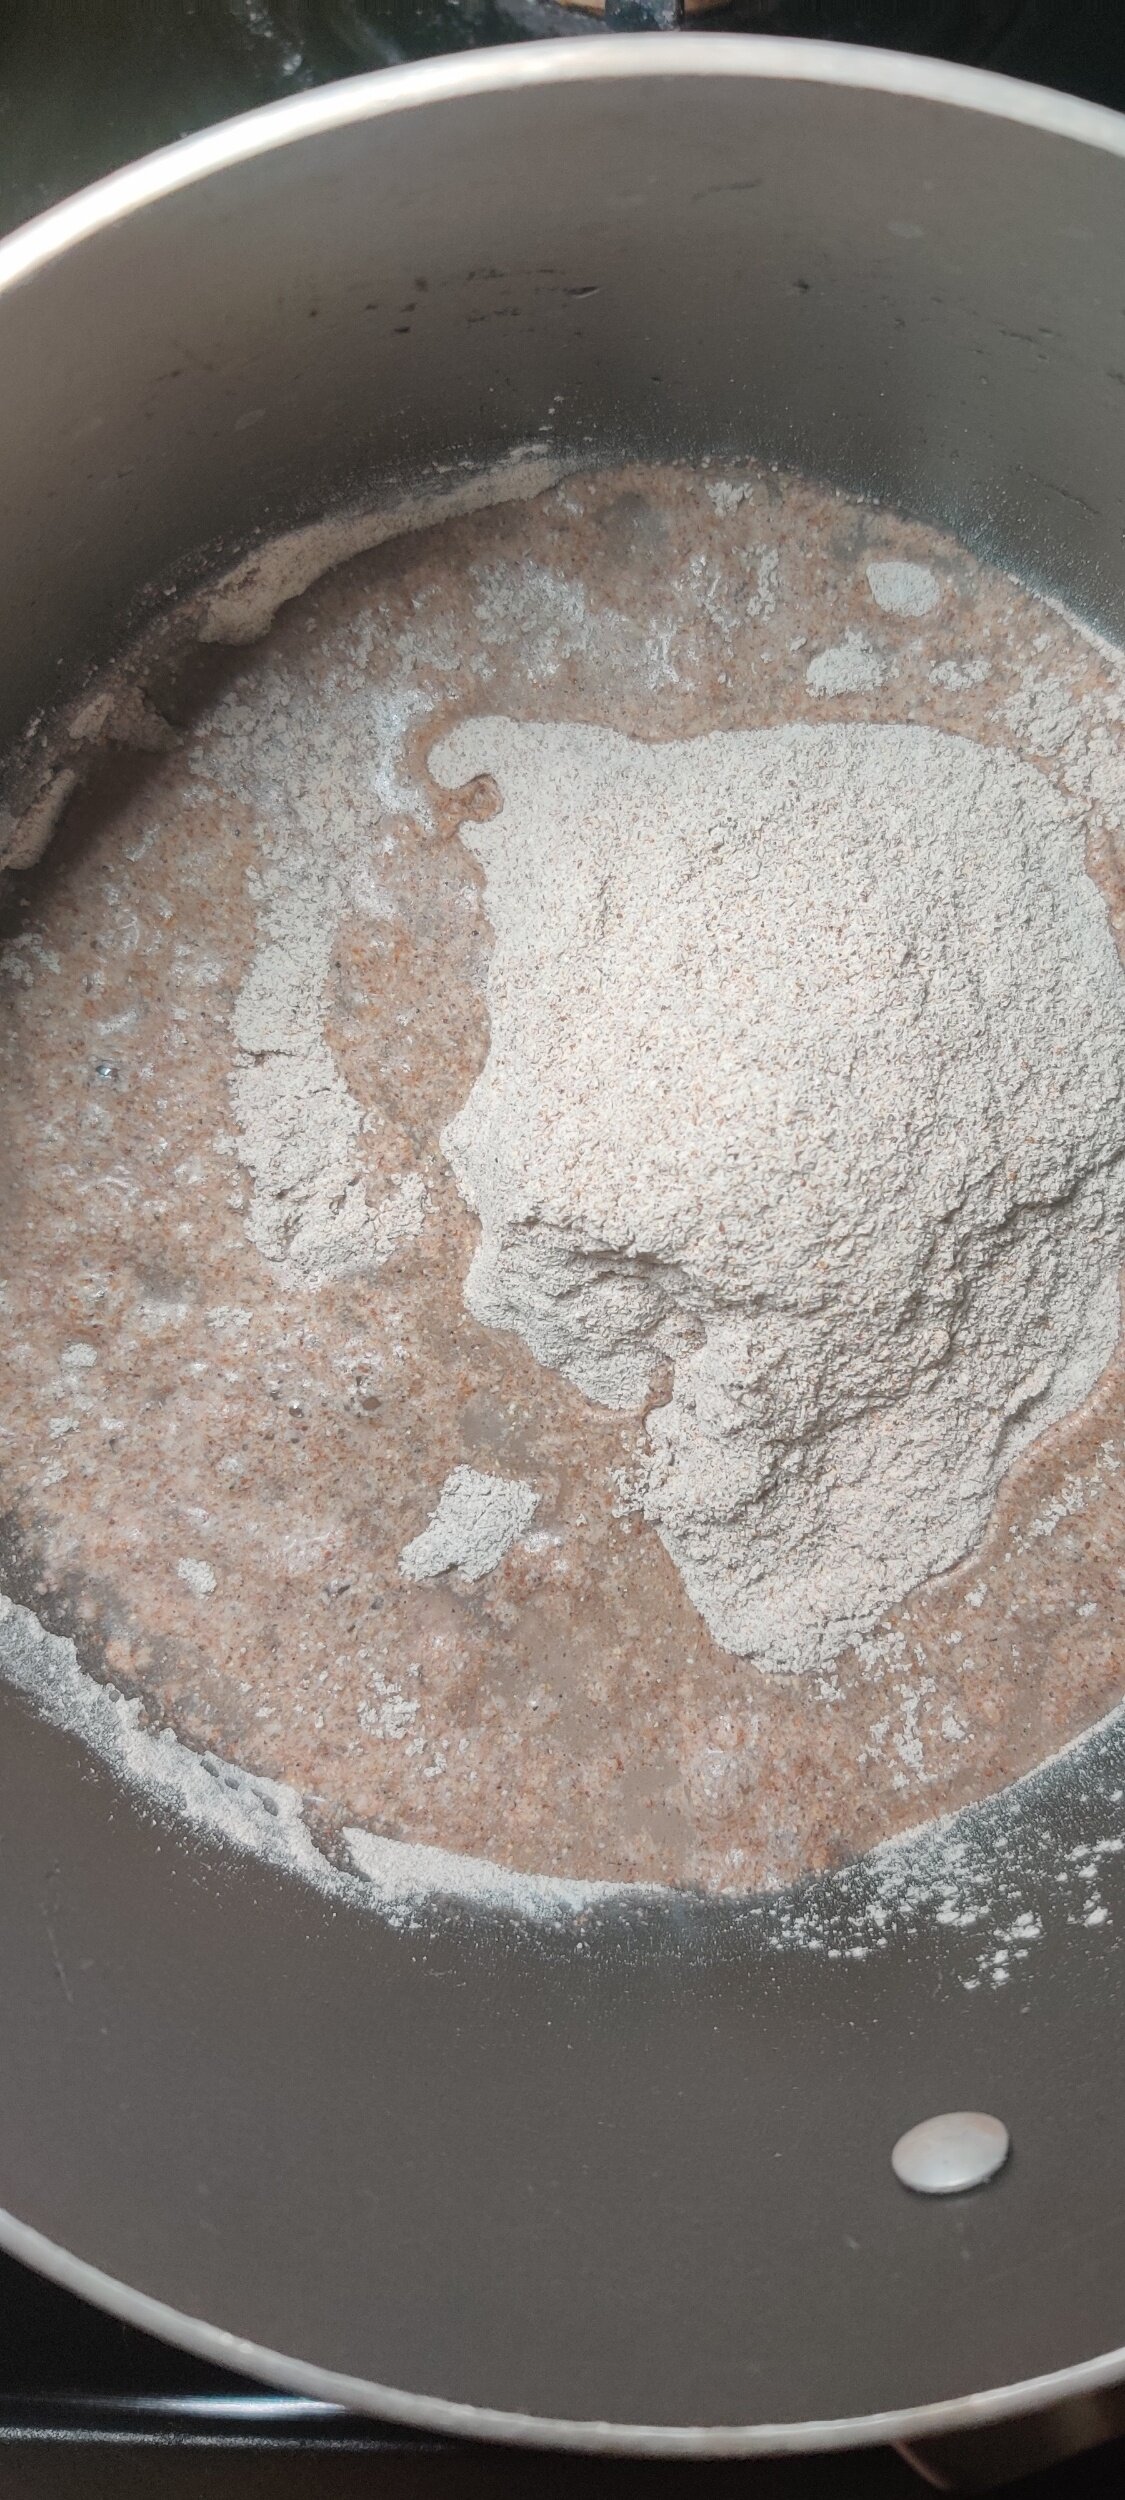
Combine the millet and cold water to make a paste.
Add the boiled water and stir with a wooden spoon or whisk to remove the lumps.
Reduce the temperature and simmer covered for 10-15 minutes.
Serve hot with sugar, honey, butter, and peanut butter.