
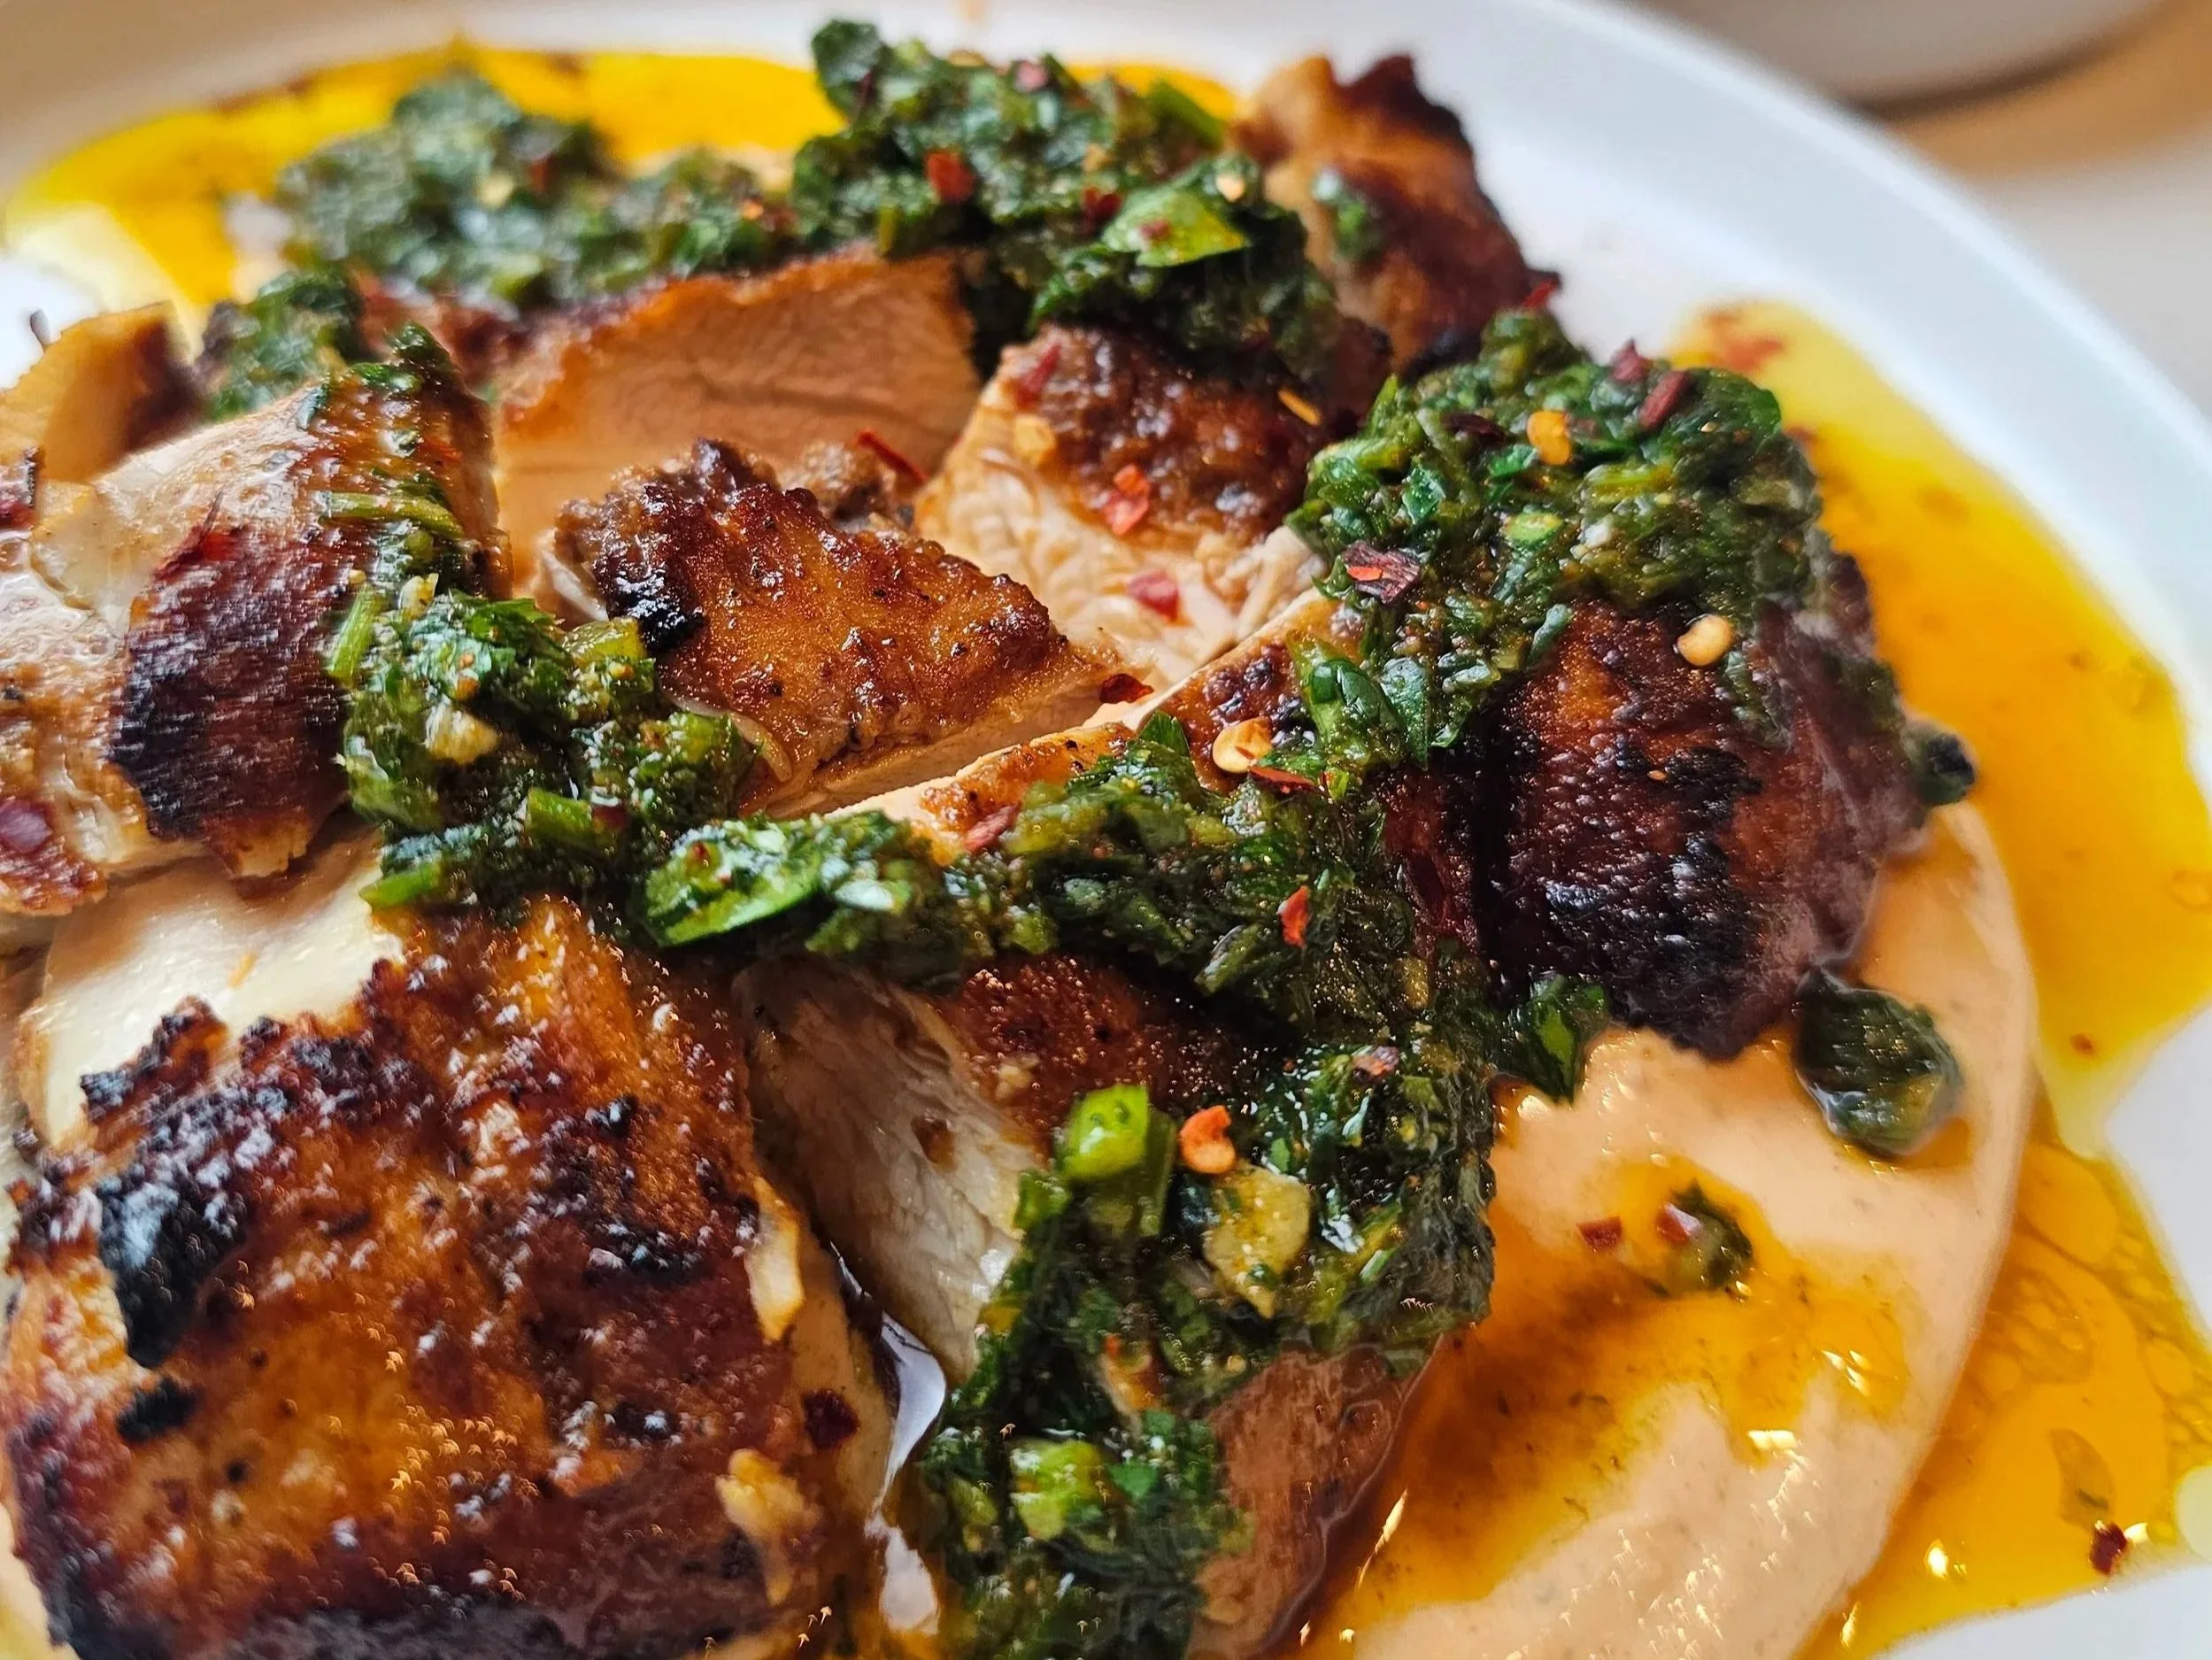
Harissa Chicken with Chermoula Sauce
Some recipes are born in your kitchen. Others follow you home from a restaurant and refuse to leave your mind.
I was inspired to make this after trying an unforgettable appetizer at Cordelia Fishbar on Valentine’s Day in DC. The chicken was extremely succulent, with perfectly crisped with skin-on goodness (breast? thigh? still debating), deeply savory, and served over a harissa-kissed yogurt that tied everything together. It didn’t taste marinated in harissa, but the warmth was there, subtle, layered, intentional.
So naturally, I did what any home cook on a flavor mission would do: I made it my own.
In my version, the chicken is marinated in harissa for bold depth. I used my often-neglected Ninja indoor grill and air fryer, and it delivered that perfect char and gentle smokiness that feels like summer, even when it’s not. And the real star? Chermoula.
If you’ve been following my kitchen journey, you already know: I’ve been championing chermoula for a while now. Think of it as North Africa’s answer to chimichurri—bright, herbaceous, alive. It reflects the Afro-fusion influences and close-to-my-roots flavors that continue shaping my evolution as a home cook. I’ve used it with croaker fish alongside peri peri and harissa, and it never disappoints.
This dish is smoky, herbaceous, creamy, spicy, and fresh all at once. The kind of layered flavor that tastes like you planned ahead—even if you just wanted something impressive for dinner.

Fluffy Macademia Nut Pancakes with Honey Rooibos Syrup
Some breakfasts tell a story before you even take a bite. Macadamia nuts, known for their rich, buttery texture and creamy crunch, may be native to Australia and famously grown in Hawaii, but today South Africa is one of the world’s largest producers and exporters. Their subtle sweetness and velvety bite instantly elevate a simple pancake.
I’ve loved macadamias for years, especially in white chocolate macadamia cookies (yes, the classic Subway version was a longtime favorite). There’s something about that creamy, slightly soft crunch against sweetness that just works. Bringing that same comfort into pancakes felt natural.
For the syrup, I leaned into rooibos tea, a naturally caffeine-free red tea grown exclusively in South Africa’s Cederberg region. As the world’s leading producer and exporter of rooibos, South Africa has made this smooth, gently honeyed tea a global staple. Its warm, almost vanilla-like notes pair beautifully with honey and citrus.
That’s where the orange zest comes in. Bright citrus cuts through the richness of the nuts and butter, lifting the entire dish so it doesn’t feel heavy. A whipped honey butter adds an airy, creamy finish — lighter than a pat of cold butter and easier to melt into every fluffy layer. The result is balanced: nutty, fragrant, lightly sweet, and vibrant all at once.
Together, creamy macadamias and aromatic rooibos transform everyday pancakes into something globally inspired, nostalgic, and perfect for a slow weekend morning.


Lucky Charms and Kale Pancakes
St. Patrick’s Day is the perfect excuse to make breakfast a little more magical, and a lot more green. These Lucky Charms and Kale Pancakes are bright, festive, and secretly packed with greens. Yes, really.
The kale blends right into the batter, giving the pancakes their vibrant color without overpowering the flavor. Kids see green pancakes and marshmallow cereal on top. You know they’re getting a boost of leafy greens to start the day. Everybody wins.
They’re thin, tender, lightly sweet, and perfect for March celebrations, but honestly? They work all year long as a fun weekend breakfast. Whether you’re celebrating St. Patrick’s Day or just trying to sneak in more veggies before school, these pancakes make healthy feel festive.


3 Bold Sauces for Quick Fish and Chicken Meals
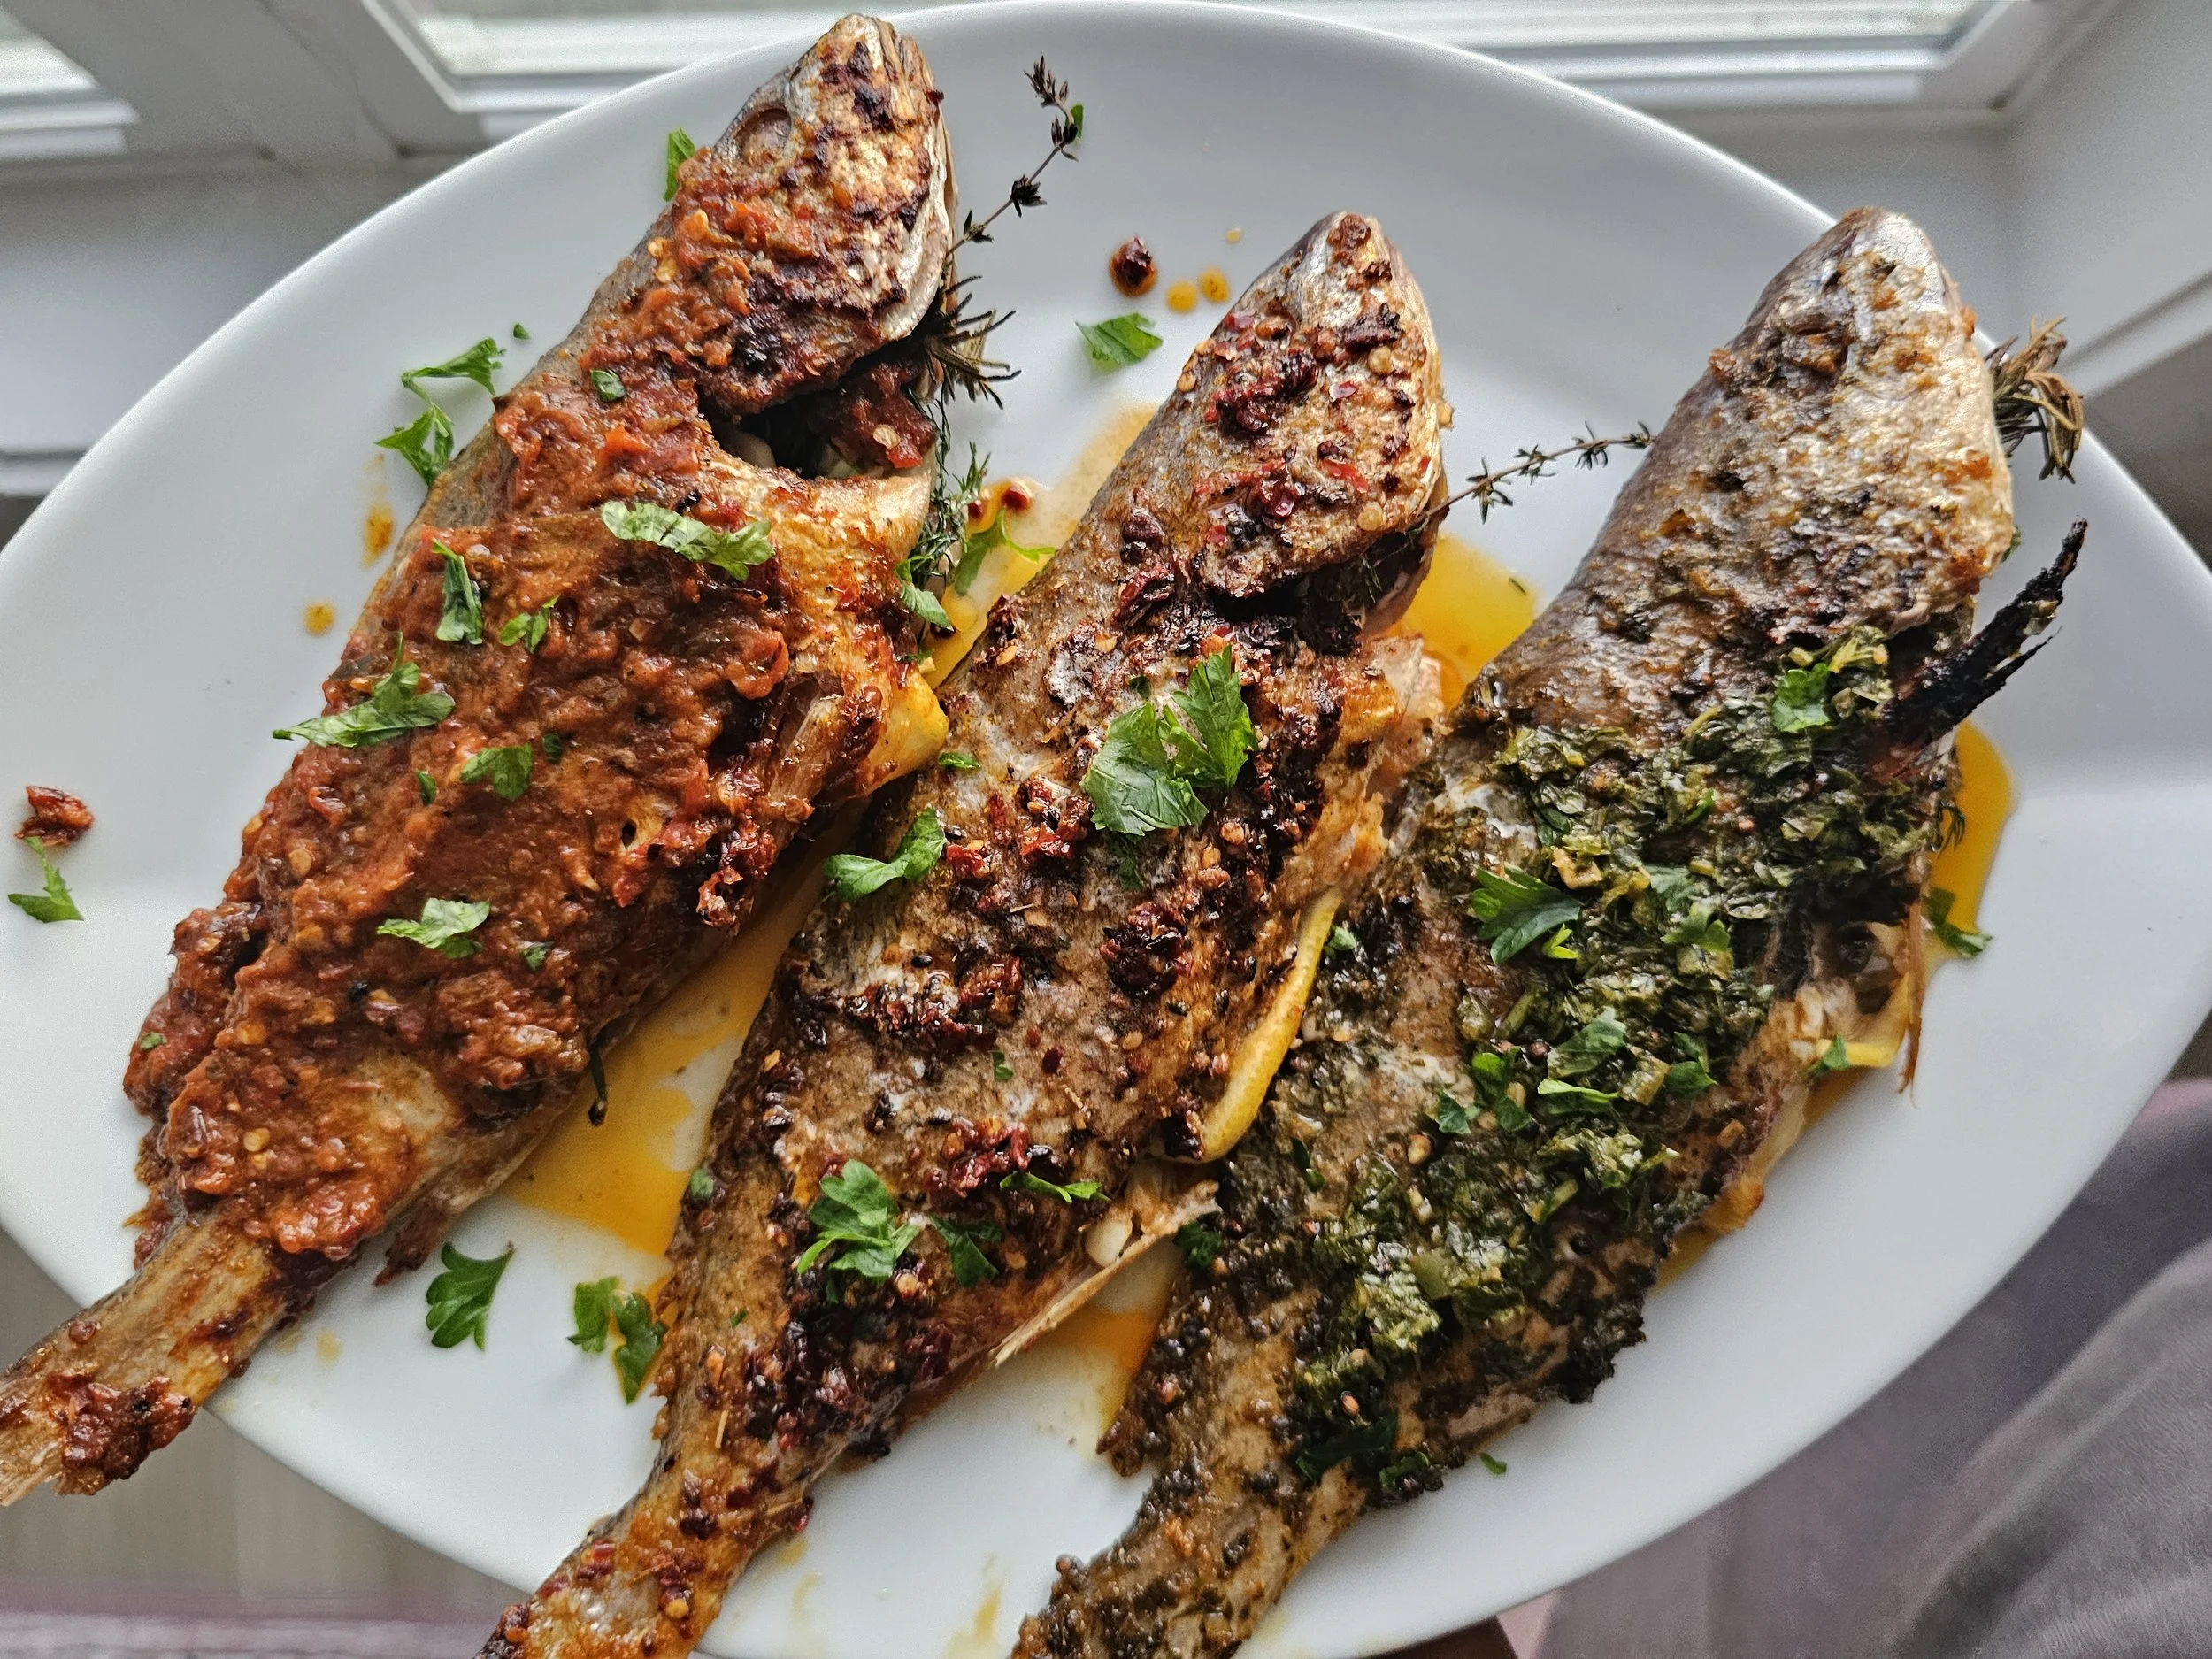
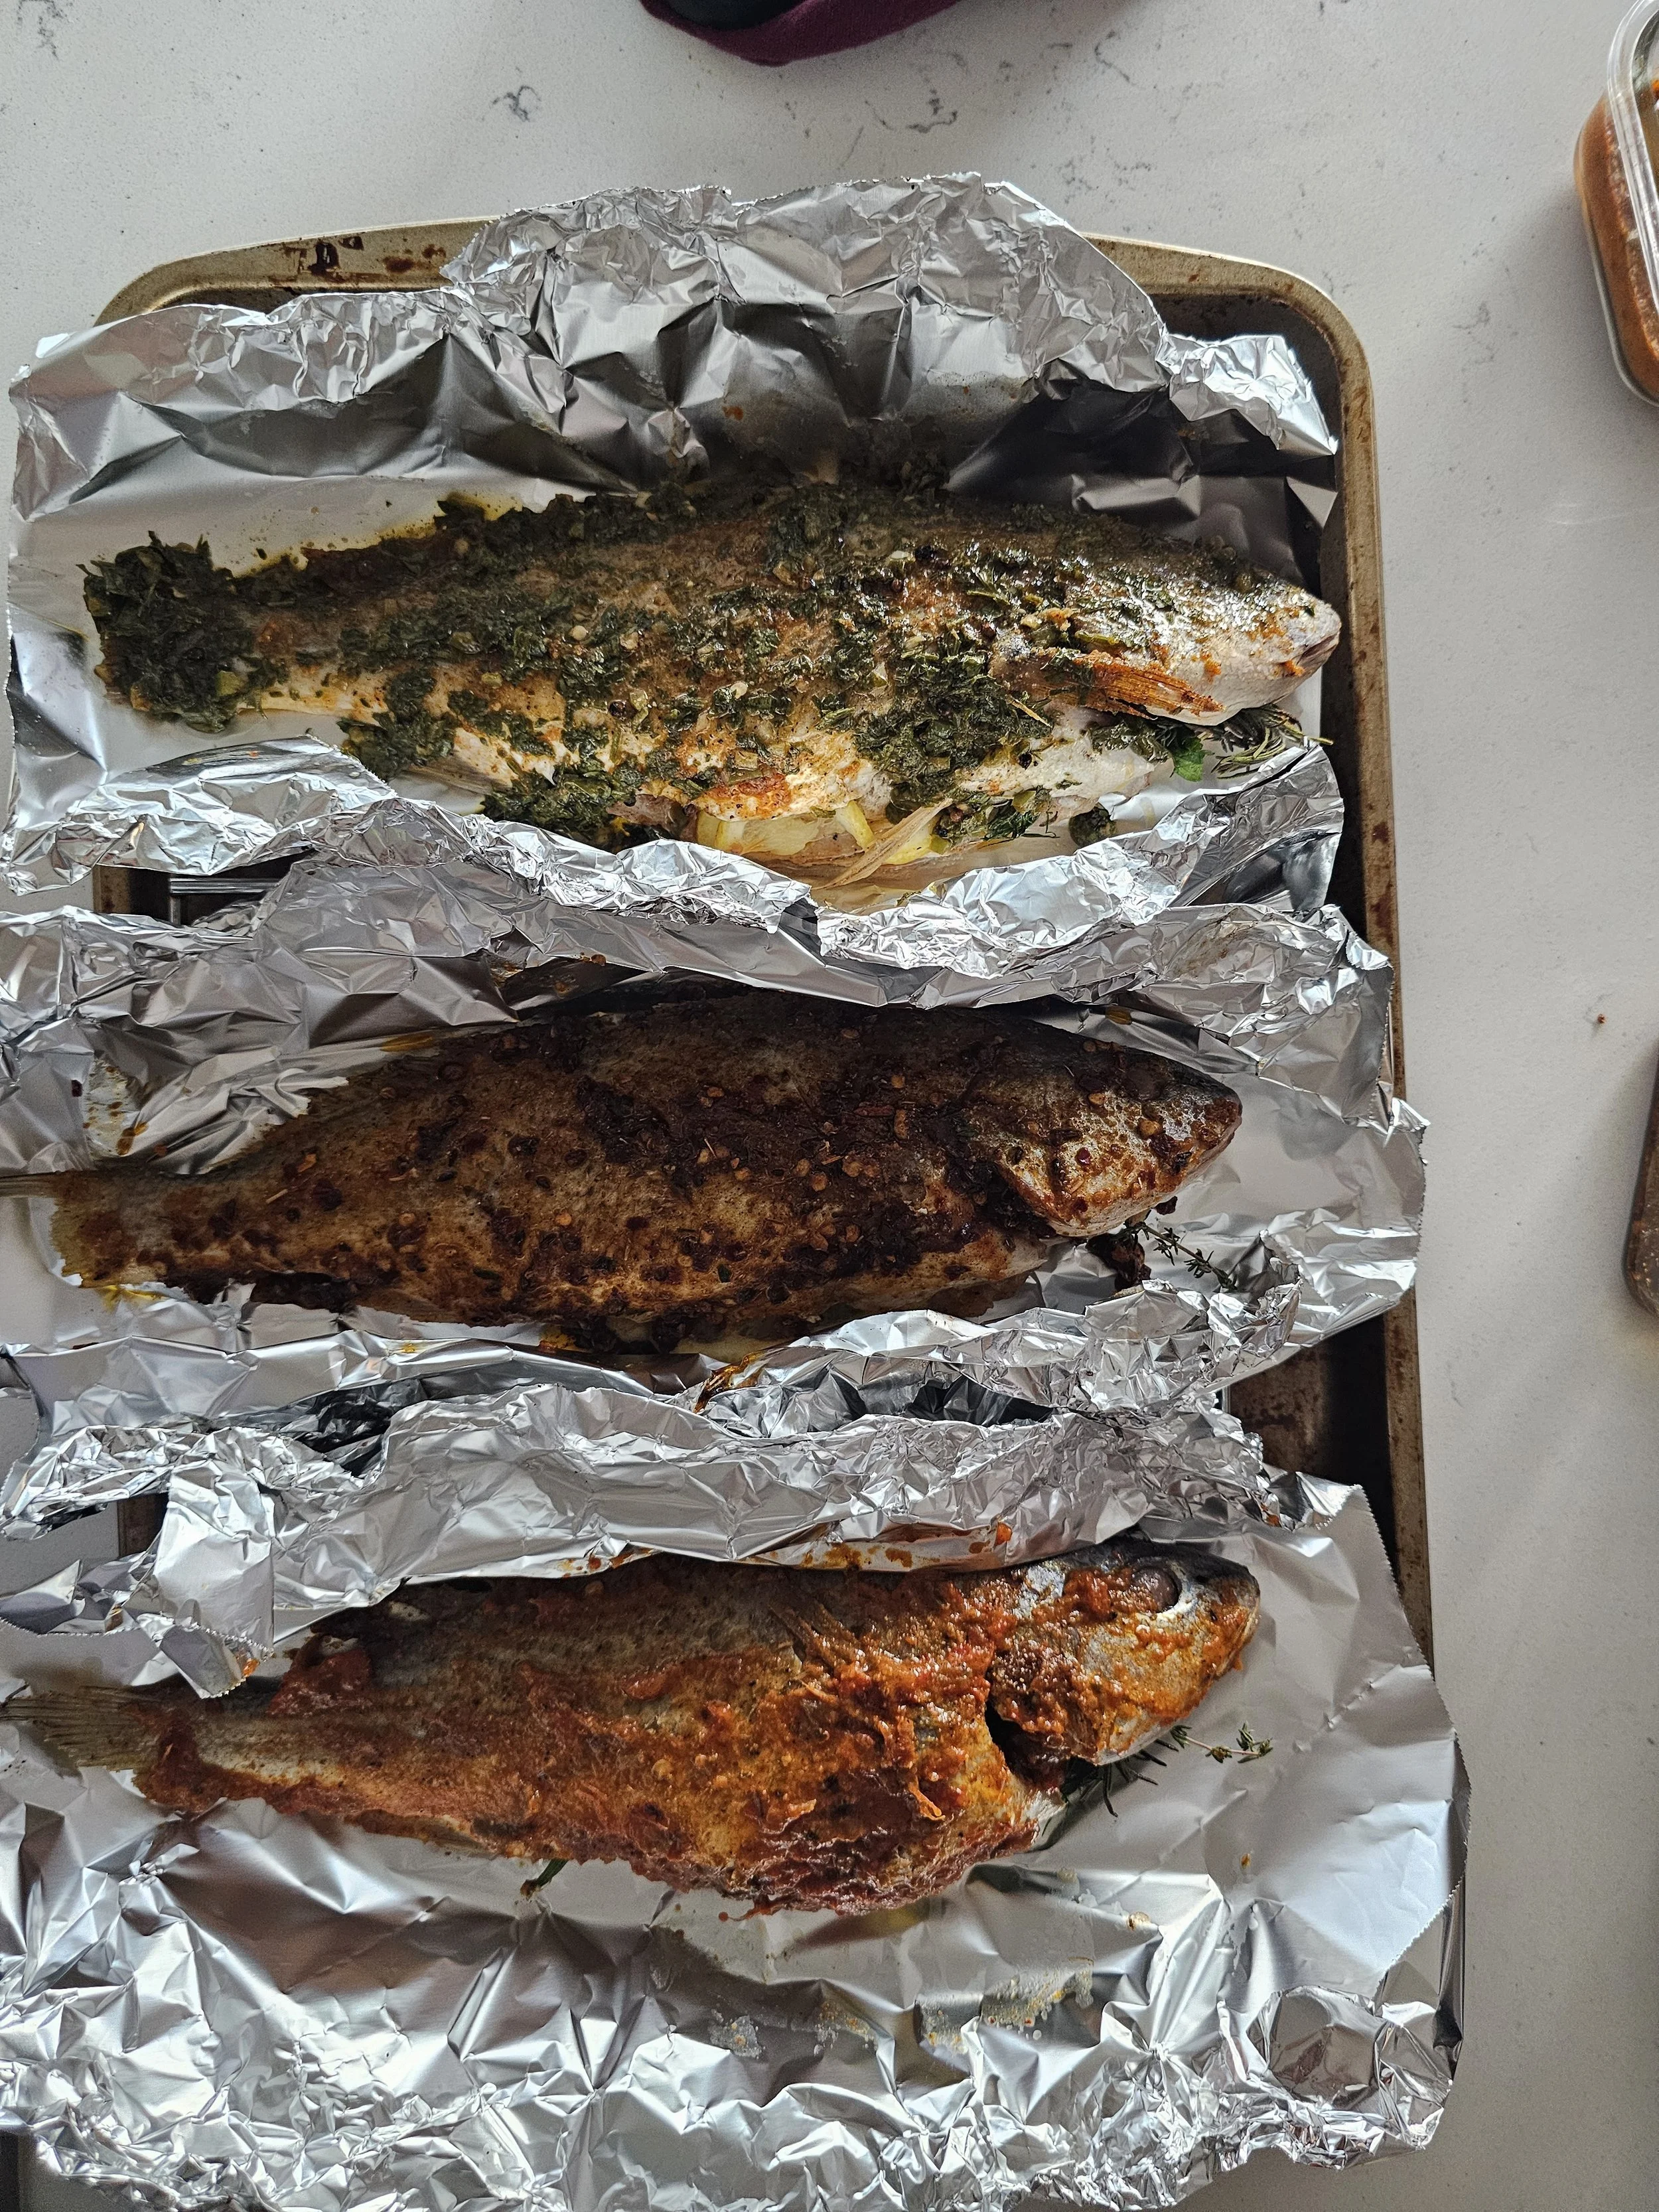
Tired of the same old dinner routine? It’s time to awaken your taste buds with bold African flavors that transform ordinary fish and chicken into extraordinary meals. Enter Chermoula, Harissa, and Peri Peri — three iconic pan sauces that bring heat, herbs, and zest to your plate.
What These Sauces Do for Your Food
Each sauce isn’t just a topping — it’s a flavor powerhouse that enhances the natural qualities of your fish, chicken, or even vegetables, making every bite a journey.
Chermoula: Fresh, Herbal, and Bright
Chermoula works wonders with delicate proteins like fish, thanks to its fresh herbs and citrus that brighten and complement rather than overpower. When paired with chicken, it adds a vibrant, zesty lift that cuts through the meat’s richness, creating balance and freshness.
On fish: It enhances the ocean-fresh taste while adding an aromatic herbal punch. Think grilled or pan-seared fish with that perfect tangy finish.
On chicken: It adds freshness and complexity, making roast or grilled chicken feel light, fragrant, and irresistibly flavorful.
Harissa: Smoky Heat That Builds Depth
Harissa’s smoky, spicy notes are ideal for heartier proteins like chicken. It adds warmth and complexity, creating a deep, layered flavor that intensifies with cooking. For fish, it’s a bold flavor partner that can stand up to richer, fattier varieties like salmon or mackerel without overwhelming them.
On chicken: Harissa creates a smoky, fiery crust that’s perfect for grilling or roasting — your taste buds will thank you for the kick.
On fish: It adds a punchy spice layer, especially great with oily fish, giving them a fiery upgrade that’s rich and vibrant.
Peri Peri: Tangy, Fiery, and Versatile
Peri Peri’s bright acidity and fiery chilies make it a versatile champion for both fish and chicken. The lemon and vinegar notes cut through fat and protein, making it ideal for grilled or pan-fried dishes.
On chicken: It creates that classic fiery, tangy glaze that caramelizes beautifully on the grill, keeping the meat juicy with a spicy zing.
On fish: Perfect for firm, meaty fish like swordfish or tuna, Peri Peri adds a zesty heat that wakes up every bite without masking the natural flavor.
How to Make These Sauces at Home
Chermoula: Blend fresh cilantro, parsley, garlic, lemon juice, olive oil, cumin, and coriander until smooth.
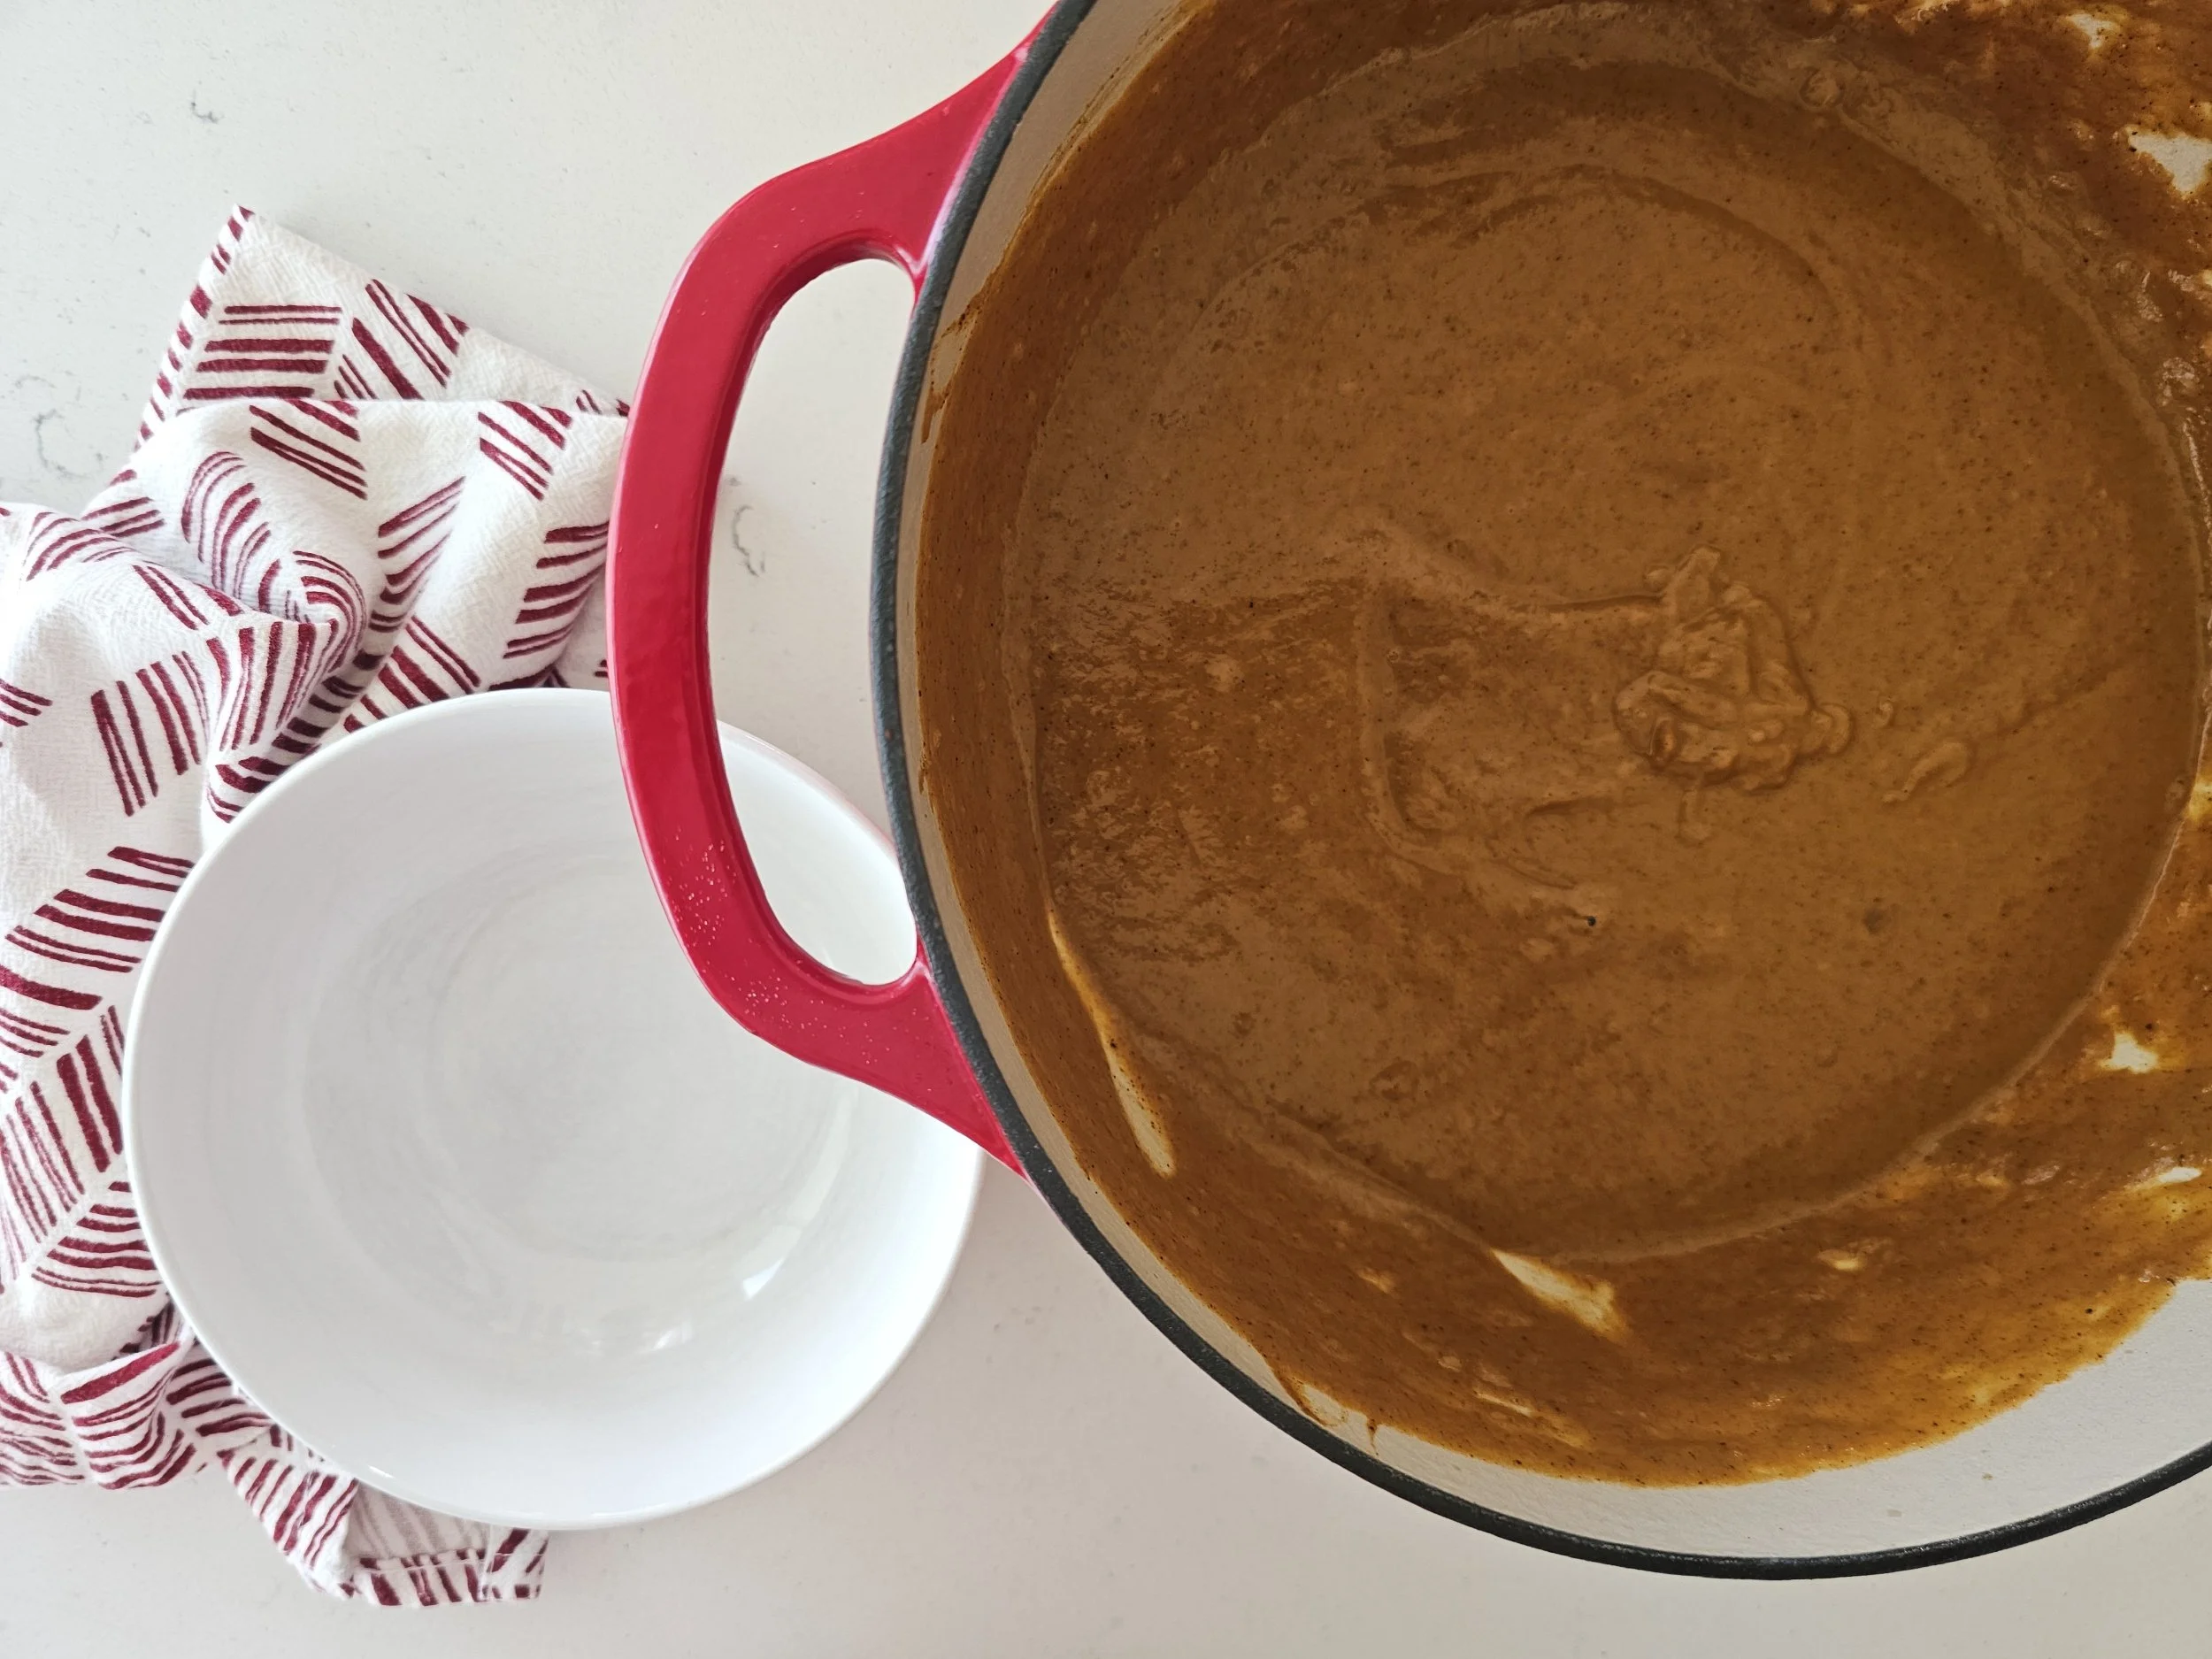
Harissa: Roast red peppers, chili, and garlic; blend with smoked paprika, cumin, coriander, and olive oil for a smoky paste.
Peri Peri: Mix African bird’s eye chilies (or serranos), garlic, lemon juice, vinegar, olive oil, and herbs into a tangy, spicy sauce.
Why These Sauces Matter
These sauces aren’t just add-ons — they bring life to your dishes. They brighten, spice, or deepen flavors, making even the simplest weeknight meal memorable. Plus, they’re easy to prepare and keep in your fridge for an instant upgrade anytime.
Ready to spice up your fish and chicken dinners?
Try these African-inspired sauces for a quick, bold flavor boost that will have you rethinking what’s possible in your kitchen.


Mushroom, Apple, and Goat Cheese Quiche
You may have noticed a certain fruit appearing frequently in my recent posts. With a surplus of apples on hand, I am always looking for creative ways to use them before they go bad, and this quiche is one of my favorite solutions. While apples are often thought of in sweet recipes, they bring a wonderful balance to savory dishes. Their natural sweetness and crisp texture pair beautifully with earthy, rich flavors.
For this quiche, I have layered wild mushrooms with a generous amount of apples along with pancetta to add savory umami. The combination is elevated with goat cheese and Parmigiano-Reggiano, which provide creamy richness and depth, while fresh parsley and sage add bright herbal notes that lift the flavors. Every bite offers a harmony of textures: tender, buttery pastry, soft mushrooms, slightly crisp apples, and creamy, melty cheese.
I have always loved a good quiche, especially when it is packed with seasonal produce and bold flavors. This version is fairly simple to make but delivers impressive results, making it perfect for brunch, a light lunch, or a sophisticated appetizer.
The earthy mushrooms and savory pancetta contrast beautifully with the sweet-tart apples, and the creamy cheeses tie everything together. This quiche feels elevated without being fussy and is a perfect way to celebrate the season’s bounty while putting extra apples to good use. I hope you enjoy this recipe as much as I enjoyed creating it. It is comforting, flavorful, and always a crowd-pleaser.


Mushroom, Apple, and Goat Cheese Quiche
A cozy, savory-sweet quiche layered with sautéed mushrooms, tender apples, caramelized aromatics, and creamy goat cheese. Baked in a flaky crust and finished with crisp pancetta and herbs, this dish balances comfort and elegance—perfect for brunch, lunch, or anytime you want something hearty with a touch of flair.
Ingredients
- 2 apples (1 diced, 1 thinly sliced for topping)
- 2 oz shiitake or wild mushrooms
- ½ red onion, chopped
- 1 garlic clove, minced
- 4 teaspoons goat cheese, divided
- ¼ cup grated Parmesan cheese
- ½ teaspoon chili flakes
- 1 teaspoon salt
- 1 tablespoon black pepper
- 1 teaspoon cumin
- 1 tablespoon cooking wine
- 1 tablespoon soy sauce
- 1 teaspoon garlic powder
- 5 eggs
- ⅓ cup + 2 tablespoons coconut milk or cream, divided
- ⅛ teaspoon fenugreek powder
- ½ teaspoon paprika
- ⅛ teaspoon nutmeg
- ⅛ teaspoon cinnamon
- 1 teaspoon Italian seasoning
- 2 tablespoons butter
- 2 tablespoons olive oil
- 1 pie crust, thawed
- 1/3 cup pancetta, cooked
- 1 tablespoon fresh parsley, chopped (optional garnish)
- Fresh sage leaves (optional)
Instructions
- If using a frozen pie crust, thaw it according to package instructions. Keep it cool. Fit it into your pie dish and set aside.
- Peel, core, and dice one apple. Slice the second apple into thin wedges. Chop the onion and mince the garlic.
- Combine chili flakes, nutmeg, fenugreek, Italian seasoning, black pepper, salt, cinnamon, cumin, and paprika in a small bowl.
- Heat the olive oil in a cast-iron skillet over medium heat. Cook the pancetta until nearly crispy. Remove and set aside.
- Add the butter to the skillet. Cook the spices for 1-2 minutes to release flavors, then sauté the garlic and onion for 2–3 minutes, until softened.
- Add the diced apples and soy sauce. Cook for 2–3 minutes.
- Add the mushrooms, sage, and 2 tablespoons of coconut milk or cream. Let everything simmer briefly.
- In a bowl, whisk the eggs, Parmesan, half the goat cheese, a pinch of salt and pepper, and ⅓ cup coconut milk or cream.
- Stir the mushroom mixture into the egg mixture. Pour into the prepared pie crust.
- Arrange the apple slices on top. Add the pancetta, parsley, sage, and the remaining goat cheese in small bits. Cover crust edges with foil to prevent over-browning if desired.
- Bake at 400°F (200°C) for 25 minutes, or until the center is set.
- Let cool for 5–10 minutes before serving.
Nutrition Facts
Calories
245Fat (grams)
17 gCarbs (grams)
16 gFiber (grams)
1 gSugar (grams)
4 gProtein (grams)
10 gI am not a certified nutritionist and any nutritional information on dontmissmyplate.com should only be used as a general guideline.

Roasted Sweet Potato Pie Soup
As Thanksgiving approaches and the air turns crisp, sweet potatoes reach their peak. Earthy, sweet, and full of warmth, they embody the essence of the season. This Roasted Sweet Potato Pie Soup captures all the cozy flavors of fall in one creamy, comforting bowl, a beautiful and unexpected starter for your Thanksgiving table.
In Zimbabwe, sweet potatoes don’t get nearly as much attention as they do in other cuisines, which is a shame.
The closest dish that comes to mind is nhopi, a traditional pumpkin-and-peanut-butter dish (often served for dessert or breakfast) that sometimes includes maize meal for thickness. It’s hearty, rich, and deeply comforting, the kind of food that fills both stomach and soul.
Inspired by that same spirit, along with the classic sweet potato pie found on American Thanksgiving menus, this soup transforms roasted sweet potatoes into something smooth, aromatic, and luxurious. It tastes like the beloved pie reimagined, familiar yet refined, with hints of umami from onion and pancetta.
Blended with coconut milk and warm spices like cinnamon and nutmeg, it celebrates the versatility of fall ingredients while embracing the season’s cozy comfort. Whether served as a starter for a festive feast or enjoyed on a cool evening, this soup brings both comfort and elegance to the table.


Roasted Sweet Potato Pie Soup
Cozy up with this creamy, warmly spiced sweet potato soup that tastes just like your favorite pie, with a savory twist. Roasted sweet potatoes, smoky pancetta, and fragrant spices swirl together in a silky coconut milk base. Perfect for chilly nights and holiday vibes.
Ingredients
- 2 large sweet potatoes
- 1/8 cup olive oil
- 1 teaspoon salt
- 1 teaspoon cinnamon
- 1 teaspoon black pepper
- 1 teaspoon paprika
- 1 tablespoon brown sugar
- 1/3 cup pancetta
- 1/2 medium red onion
- 2 cloves garlic
- 1 heaped tablespoon cinnamon (plus extra for garnish)
- 1 teaspoon nutmeg
- 1/2 teaspoon ground cloves
- 1 teaspoon salt
- 1 teaspoon black pepper
- 2 teaspoons ginger
- 1 teaspoon smoked paprika
- 1 tablespoon brown sugar
- 1 can coconut milk or heavy cream
- 3 cups chicken broth (or 3 bouillon cubes + 3 cups water)
- 2 tablespoons butter
- 1/8 cup red wine
- Mexican cream or sour cream (optional, for garnish)
Instructions
- Preheat oven to 400°F (200°C).
- Peel and chop sweet potatoes into small pieces. Toss with olive oil, salt, cinnamon, black pepper, and paprika.
- Bake for 40 minutes. Remove from oven and set aside, reserving a few pieces for garnish.
- Finely chop the red onion and mince the garlic. Set aside.
- In a large pot or Dutch oven, cook pancetta over medium heat until fat renders. Remove from heat and stir in half the butter.
- Add onion and garlic, cooking for 2 minutes until onions soften.
- In a small bowl, mix cinnamon, nutmeg, cloves, salt, pepper, ginger, smoked paprika, and brown sugar. Add the spice mix to the pot with the remaining butter, and cook for 1-2 minutes until fragrant.
- Add broth and half the coconut milk. Bring to a boil, then reduce heat and simmer for 10 minutes to develop flavors.
- Stir in the roasted sweet potatoes and cook for another 5-7 minutes. Remove from heat.
- After about 10 minutes of slight cooling, use an immersion blender to puree the soup, gradually adding the remaining coconut milk for creaminess.
- Season to taste, then stir in red wine to bring the flavors together.
- Serve hot, garnished with cream, reserved roasted sweet potato pieces, pancetta bits, and a dusting of cinnamon.
Nutrition Facts
Calories
360Fat (grams)
23 gCarbs (grams)
33 gFiber (grams)
5 gSugar (grams)
11 gProtein (grams)
6 gI am not a certified nutritionist and any nutritional information on dontmissmyplate.com should only be used as a general guideline.

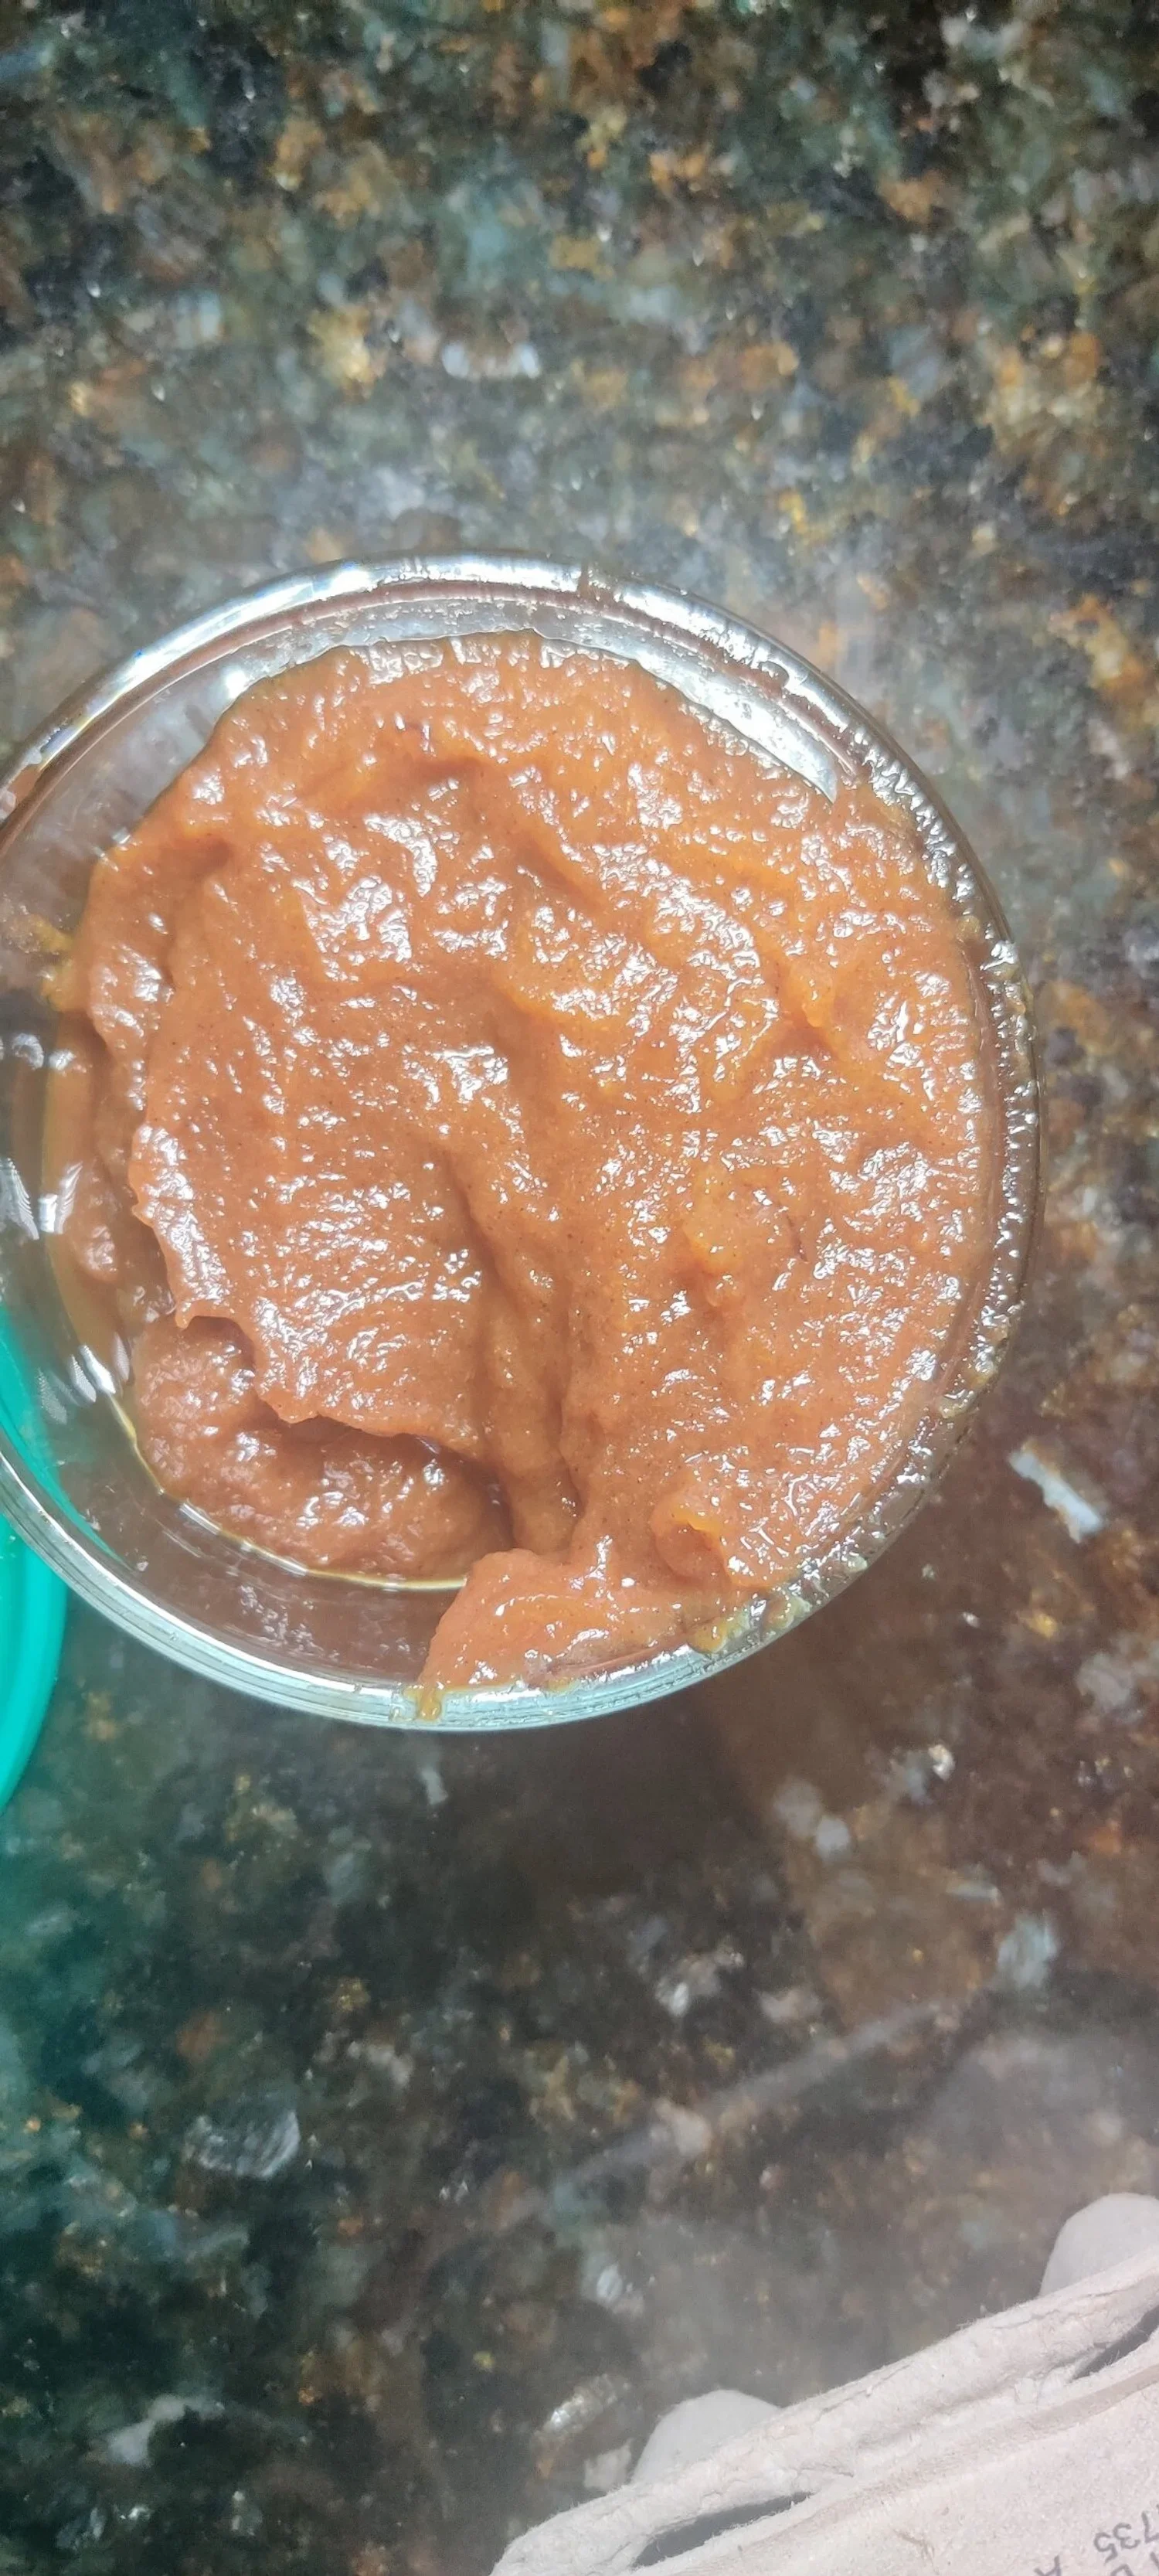
How to Make Apple Butter at Home | Cozy Autumn Recipe
With a surplus of apples from a crisp autumn day at the orchard, I found myself searching for ways to make the most of these fragrant, juicy fruits. I’ve always loved apples, but I didn’t grow up eating apple butter. Discovering it as an adult completely changed the way I think about apples. Homemade apple butter is a simple yet transformative way to turn an abundance of apples into a silky, richly spiced spread that enhances breakfast, baking, and even savory dishes.
One of my favorite ways to use apple butter is as a natural sweetener in recipes. In fact, one of my most creative recipes, featured by Feed Feed , was an apple butter babka, which combined the depth of spiced apple butter with tender, buttery layers of dough. Apple butter opens the door to countless possibilities, from drizzling it over pancakes to swirling it into oatmeal, using it in baked goods, or even adding it to sauces for a subtle, naturally sweet complexity.
The beauty of apple butter is not just its flavor but its versatility. Infused with fall spices like cinnamon, nutmeg, cloves, and ginger, it captures the essence of the season in every spoonful. It’s comforting, warming, and makes your kitchen smell incredible as it simmers on the stove. Plus, it’s a healthier alternative to refined sugar, adding natural sweetness along with the nutrients of the fruit itself.
Making apple butter is both practical and rewarding. It’s a way to preserve the flavor of freshly picked apples, celebrate the season, and create a pantry staple that elevates everything from baked goods to simple toast. Once you make it, you’ll find yourself thinking of new ways to incorporate this spiced, velvety spread into your fall cooking and beyond.


Ways to Use Apple Butter
Homemade apple butter is incredibly versatile — sweet, silky, and spiced just right. Here are a few delicious ways to enjoy it:
Spread it: Slather on toast, biscuits, pancakes, waffles, or warm muffins.
Bake with it: Swirl into quick breads, cakes, or muffins for moisture and flavor. Try it in my Apple Butter Babka, one of my favorite creative bakes!
Sweeten naturally: Use as a refined-sugar alternative in oatmeal, yogurt, or smoothies.
Pair with cheese: Serve alongside a cheese board with sharp cheddar, brie, or goat cheese.
Upgrade sauces and glazes: Stir into BBQ sauce, salad dressings, or marinades for a rich, sweet depth.
Gift it: Jar it up and share it as a cozy homemade fall or holiday gift.

Homemade Spiced Apple Butter
Transform your fall apple harvest into a rich, spiced, and velvety spread. Perfect on toast, in baked goods, or as a natural sweetener in your favorite recipes.
Ingredients
- 4 large apples, peeled, cored, and chopped
- 1 cup apple juice, orange juice, or water
- 3 tablespoons light brown sugar
- 1 teaspoon apple cider vinegar (or regular vinegar)
- 1 teaspoon lemon juice
- ½ teaspoon ground cinnamon
- ¼ teaspoon ground nutmeg
- ¼ teaspoon ground cloves
Instructions
- Peel, core, and chop the apples into small pieces.
- In a large pot or Dutch oven, combine the apples, juice (or water), brown sugar, vinegar, lemon juice, cinnamon, nutmeg, cloves, and salt. Bring the mixture to a boil over medium heat.
- Reduce the heat to low, cover, and simmer for about 1½ to 2 hours, stirring occasionally. The apples should become very soft and easy to mash.
- Remove from the heat and let cool for about 10 minutes. Transfer to a blender or use an immersion blender to puree until smooth and creamy.
- Pour the apple butter into clean glass jars or airtight containers. Refrigerate for up to 3–4 weeks, or freeze for longer storage (6 months for best texture).
Nutrition Facts
Calories
35Carbs (grams)
9 gSugar (grams)
7 gI am not a certified nutritionist and any nutritional information on dontmissmyplate.com should only be used as a general guideline.

Pork Chop and Apple Skillet
I was inspired to update this recipe after an afternoon of apple picking. Handling all those crisp, fragrant apples made me think about the classic pairing of pork and apples—a combination I had never fully questioned before, but one that clearly has roots both in tradition and in nature. Historically, pigs would forage for fallen apples in the fall, which naturally complemented the richness of their meat. Over time, this pairing became a culinary classic, and it’s easy to see why.
Growing up, pork chops were a staple in my household, often served at braais (barbeques) or as simple weeknight dinners with mashed potatoes and peas. There’s something inherently satisfying about pork chops; I always ate them down to the bone. They carry a subtle, natural sweetness that pairs beautifully with a wide variety of flavors. Apples, with their acidity and tartness, provide a perfect counterpoint, balancing the richness of the pork while adding freshness and brightness to the plate.
This skillet recipe celebrates that harmony. The pork is seared to a gorgeous, glistening brown, while the apples and onions soften and caramelize in a creamy, herb-infused sauce. A touch of crispy pancetta adds depth and saltiness, making every bite rich, comforting, and visually stunning. It’s a dish that’s approachable enough for weeknights but elegant enough to serve to guests—a certified people-pleaser that combines nostalgia, flavor, and seasonal inspiration all in one skillet.

Pork Chop and Apple Skillet
Pork chops serve as the ultimate lunch or dinner, and when paired with apples make for a tangy, sweet and succulent meal. Don't be afraid to use fruit in your savory dishes, this one is worth it!
Ingredients
- 2 bone-in center-cut pork chops (1 to 1½ inches thick)
- 2-4 tablespoons olive oil
- 2 tablespoons soy sauce
- 2 tablespoons Worcestershire sauce
- ½ teaspoon paprika
- ½ teaspoon salt
- ½ teaspoon black pepper
- ½ teaspoon steak and chops seasoning
- ½ teaspoon dried herbs (Italian seasoning, rosemary, or oregano)
- ½ teaspoon garlic powder
- 1 teaspoon dried herbs
- 1 teaspoon flour
- 1/4 teaspoon cumin
- 1 bouillon cube to dissolved in equal parts water (or ¾ cup chicken stock)
- 1/4 teaspoon salt
- ½ teaspoon black pepper
- 1 teaspoon Royco Usavi Mix (no-sodium all-purpose seasoning)
- ½ large red onion, thinly sliced
- 1 large apple (Honeycrisp or Granny Smith work well), thinly sliced
- ¼ cup diced pancetta
- 2 tablespoons cooking oil
- 2 tablespoons butter
- 2 sprigs fresh rosemary
- 1 teaspoon mustard
- 1 teaspoon soy sauce
- ¼ cup cream or coconut milk
- Fresh parsley (to garnish)
Instructions
- Marinate the pork chops for at least 4 hours, up to 8 hours.
- In a bowl, container, or zip-top bag, combine oil, Worcestershire sauce, and soy sauce to coat the pork chops.
- Add paprika, garlic powder, dried herbs, salt, black pepper, and steak and chops seasoning.
- Add extra oil if needed to ensure the pork is fully coated.
- Cover and refrigerate until ready to cook.
- Prepare the Base Seasoning:
- Combine dried herbs, flour, cumin, chicken bouillon cube, black pepper, salt, and Royco Usavi Mix — this will be added to the sauce later to build flavor.
- Prepare the Apples and Onion:
- Peel (if desired) and slice the apples and red onion into wedges — not too thin, not too thick — for optimal texture.
- In a skillet, sauté the pancetta in cooking oil until it starts to brown and becomes slightly crunchy.
- Remove the pancetta and set aside, leaving the rendered fat in the pan.
- Brown the pork chops on each side in the same pan.
- Add butter and rosemary to baste the chops and infuse aromatics. This helps the pork sear beautifully.
- Remove the pork chops. If the internal temperature is not yet 145–160°F (63–71°C), they will finish cooking in the sauce.
- Using the same oil, cook the onions until they begin to caramelize.
- Add the apples and cook until slightly softened.
- Add butter and seasonings to release flavor and aromatics; cook for 2–3 minutes.
- Add the prepared base seasoning and water or chicken stock to the pan.
- Add soy sauce and stir to combine.
- Reduce the heat to low and return the pork chops to the pan. Cover and simmer until the pork chops are fully cooked (check with a meat thermometer).
- Once the pork is cooked through, stir in the cream and reserved pancetta.
- Cook for an additional 3–4 minutes to thicken the sauce and meld flavors.
- Remove from heat and garnish with fresh parsley.
- Serve with grits, beans, or a starch of your choice.
Nutrition Facts
Calories
333Fat (grams)
16.36 gCarbs (grams)
13.57 gProtein (grams)
32.38 gI am not a certified nutritionist and any nutritional information on dontmissmyplate.com should only be used as a general guideline.

Peri-Peri Chicken Livers with Onion Gravy
A Love Letter to Chicken Livers
Chicken livers were one of the first foods that made me feel connected to both comfort and culture. My earliest memory of them goes back to childhood, when my mother would cook livers and giblets from a whole chicken. She’d serve them at breakfast alongside eggs, toast, baked beans, and a rich onion gravy. I loved them. They were hearty, soulful, and full of flavor.
Years later, I was pleasantly surprised to spot chicken livers on the menu at Nando’s, the Southern African–Portuguese fusion chain. Their peri-peri livers transported me right back to my mom’s kitchen table.
There was even a period in my life when I had anemia, and liver became a medical necessity. At first, I ate it just for the iron. But soon I realized: chicken liver wasn’t just good for me, it was truly delicious.
Why Eat Liver?
I’ll never understand why people call liver “gross.” Yes, it’s organ meat, but when cooked right, it’s tender, savory, and deeply satisfying.
It’s also one of the most nutrient-dense foods you can eat, packed with:
Iron – especially heme iron, which the body absorbs easily
Vitamin B12 – crucial for energy and red blood cell formation
Vitamin A – supports vision and immune health
Selenium – helps maintain thyroid function
Folate – essential for cell growth and repair
High-quality protein
Think of it as nature’s multivitamin, only far more flavorful.
Chicken Livers in Southern Africa
In Southern Africa, chicken livers aren’t just an afterthought, they’re a star. They’re often cooked with onions, tomatoes, garlic, chili, and bold spices to make a rich, saucy dish. At home, they’re served with pap (maize porridge) or sadza, while restaurants often offer them with bread as a starter. This culinary tradition influenced chains like Nando’s, which helped spread peri-peri chicken livers around the world.
Why This Recipe Works
Flour dredge for texture – Lightly coating the livers in flour helps them brown evenly and naturally thickens the gravy.
Blooming the spices – Cooking peri-peri and coriander with onions unlocks deeper flavor.
Onions cooked two ways – Caramelized but still crisp, they add both sweetness and bite.
Quick sear, gentle simmer – Locks in flavor while keeping the livers tender.
Creamy finish – A splash of cream (or milk + powdered milk) balances richness and rounds out the sauce.
Resting time – Allowing the dish to sit off the heat helps the flavors settle.
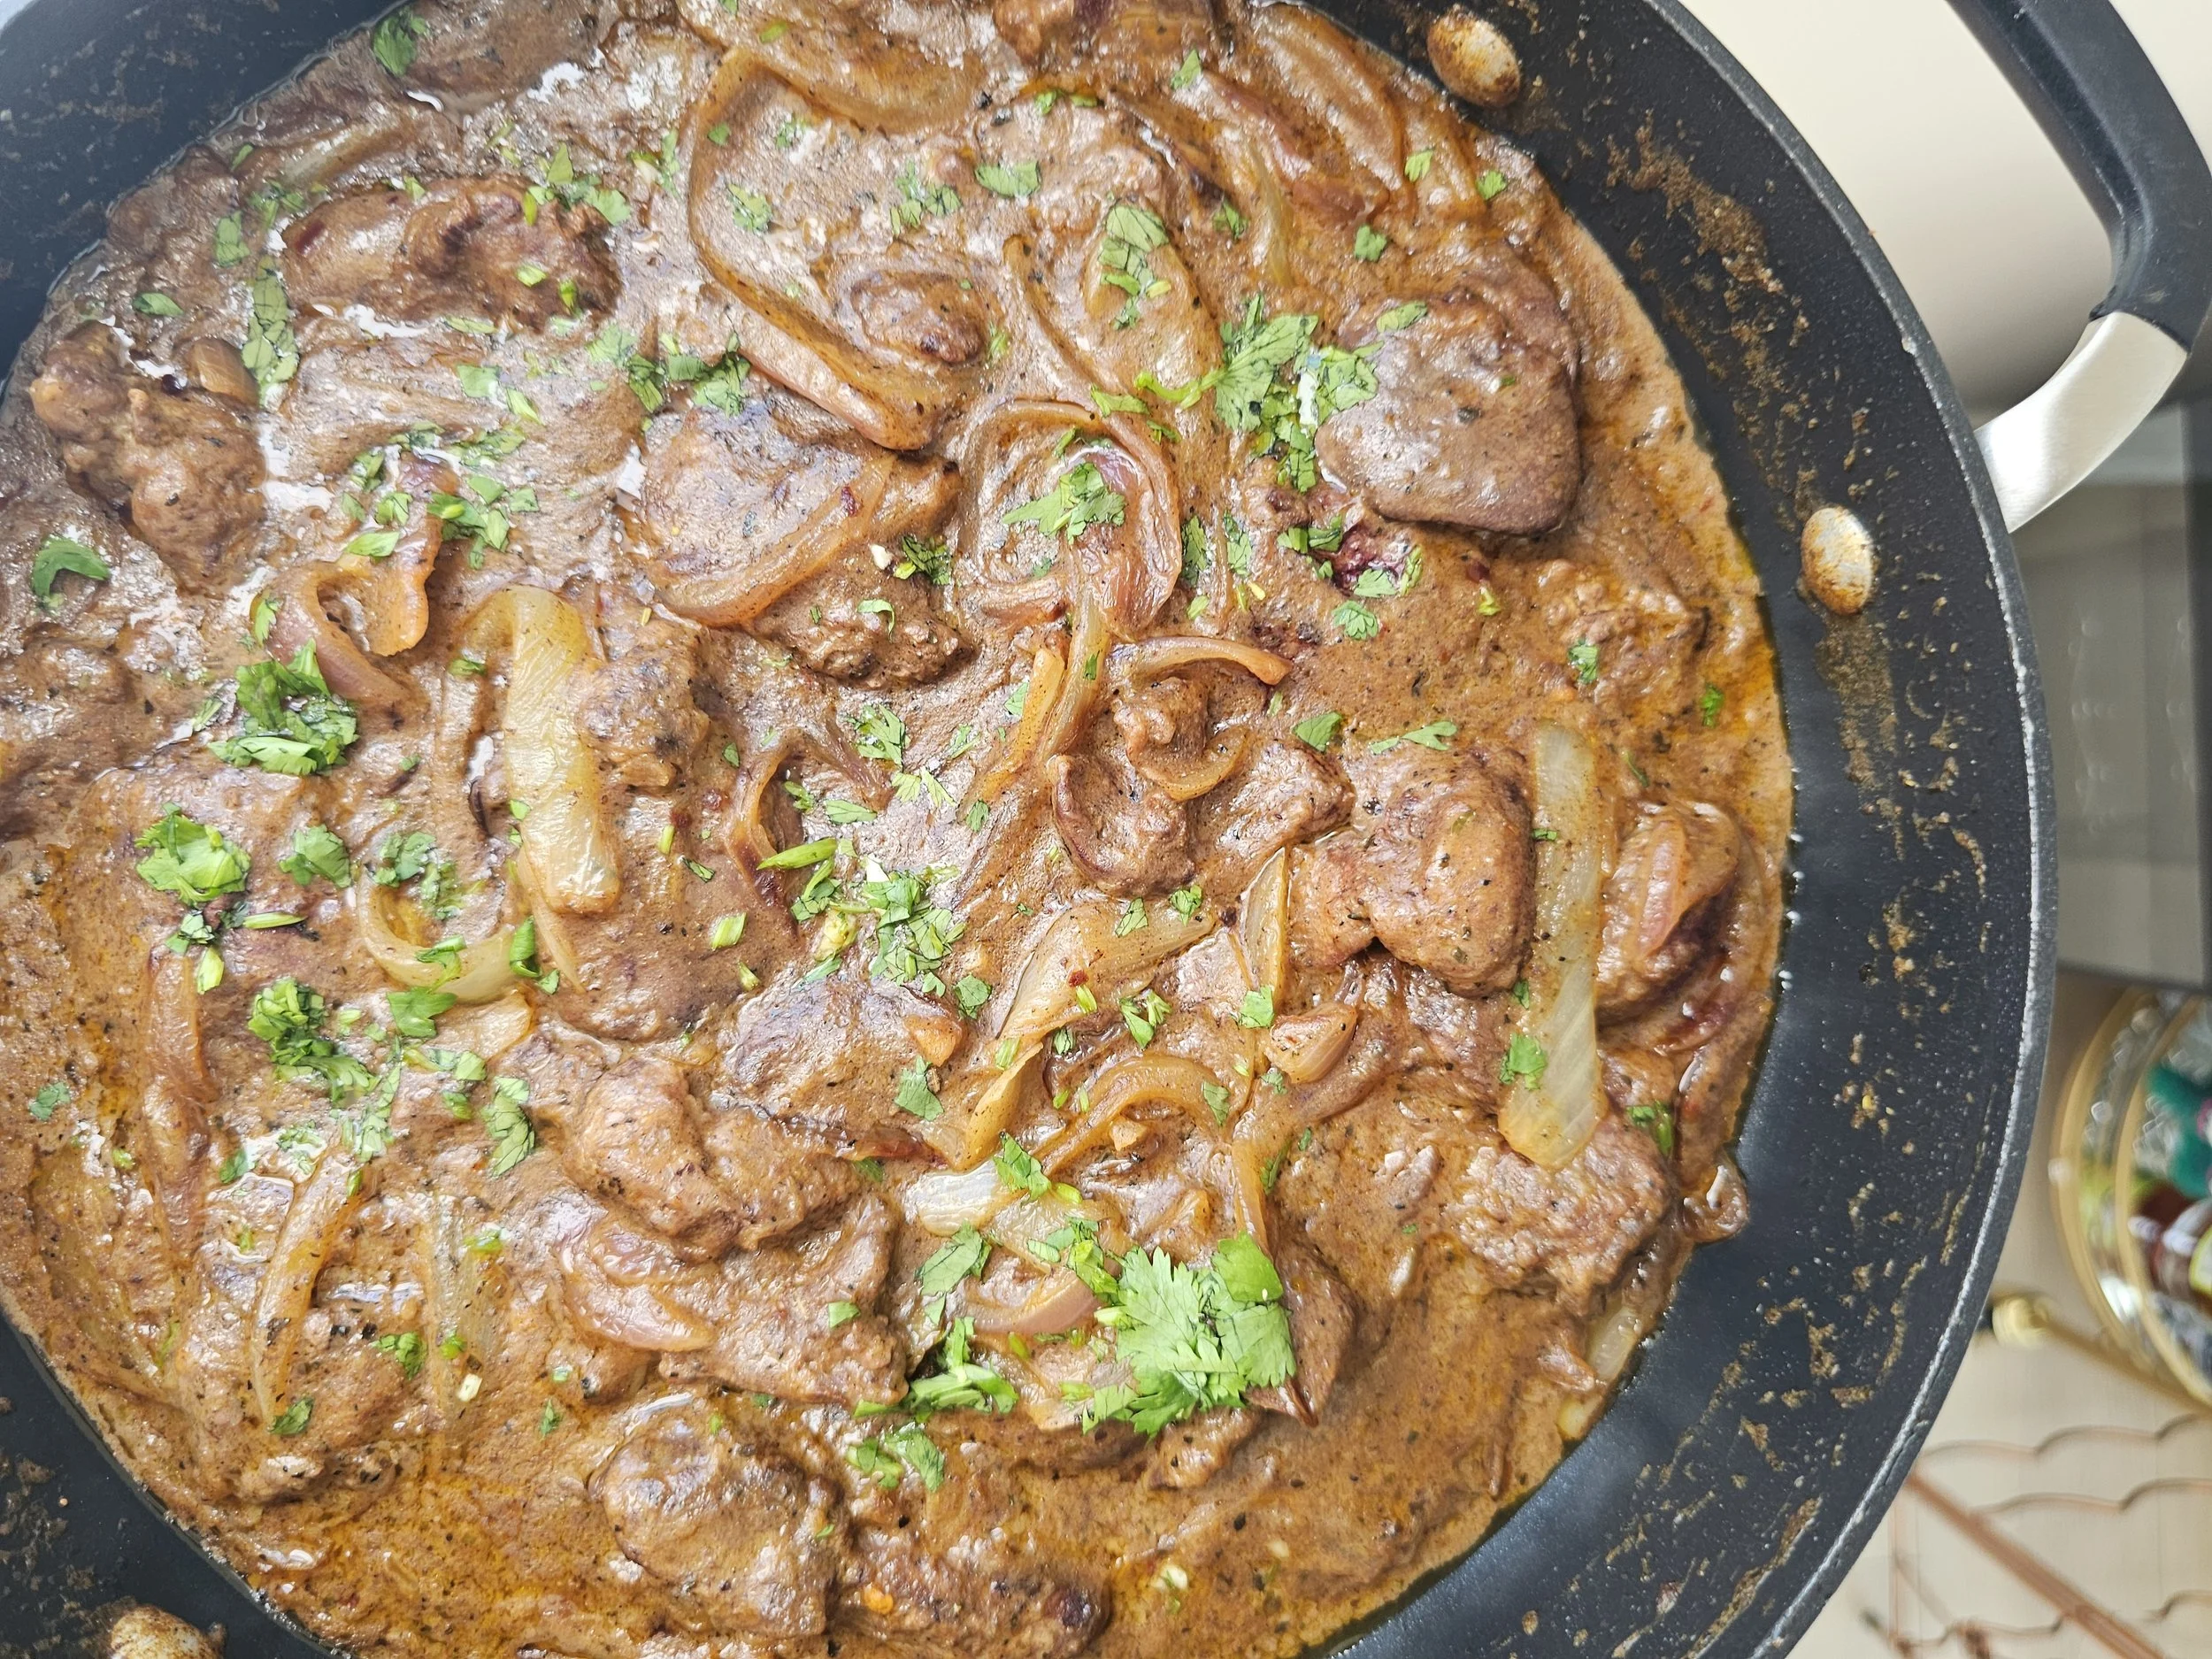


Peri-Peri Chicken Livers with Onion Gravy
Rich, spicy, and comforting, these Peri-Peri Style Chicken Livers in Onion Gravy bring bold Southern African and Portuguese-inspired flavors to your table.
Ingredients
- 510 g (about 1.2 lb) chicken livers, cleaned and patted dry
- ½ medium red onion
- ½ medium yellow onion
- 2–3 garlic cloves, minced
- 2 teaspoons Portuguese or peri-peri chicken spice (I used Robertsons)
- ½ teaspoon garlic powder
- ½ teaspoon onion powder
- ½ teaspoon chilli flakes
- ½ teaspoon black pepper
- ½ teaspoon Italian seasoning
- ½ teaspoon ground coriander
- 1 teaspoon Royco Usavi Mix (or another mild, low-sodium all-purpose seasoning with some thickening)
- ¼ cup + 2 tablespoons flour, seasoned with 1/4 teaspoon of salt, black pepper, and garlic powder each
- ⅔ cup chicken stock
- 4 tablespoons cooking oil
- 3 tablespoons butter
- Salt and black pepper, to taste
- 3 teaspoons powdered milk + ½ cup water (or substitute with cream)
- 1 tablespoon tomato paste
- 1 lemon (use half to clean the livers and the other half to finish once cooked)
- Fresh parsley, for garnish
Instructions
- After soaking the chicken livers briefly in water with a bit of lemon juice, pat them dry with paper towels. Trim away any connective tissue or excess fat.
- Slice the onions into thin wedges and mince the garlic.
- Combine all your dry seasonings (except the all-purpose seasoning) and set aside.
- In a shallow bowl, season ¼ cup of flour with salt, black pepper, and garlic powder. Lightly coat the livers in the seasoned flour and shake off any excess.
- Heat 2 tablespoons of oil and 1 tablespoon of butter in a large, deep pan over medium-low heat.
- Add the red and yellow onions along with the garlic. Cook until golden and lightly caramelized but still slightly crisp.
- Add 1 tablespoon of oil and 1 tablespoon of butter, then stir in the combined spices, letting them bloom for 1–2 minutes.
- Remove the onion mixture from the pan and set aside.
- Add the remaining oil and butter to the pan. Sear the livers for 3–4 minutes per side until browned but not fully cooked through.
- Return the onions to the pan.
- Add the chicken stock, all-purpose seasoning, and tomato paste. Stir to combine and deglaze the pan.
- Simmer gently for 5–7 minutes, or until the livers reach an internal temperature of 160°F (71°C). Avoid overcooking.
- Stir in the powdered-milk-and-water mixture (or cream) and cook for 1–2 more minutes until the sauce thickens slightly.
- Remove from the heat and let the dish rest for 5 minutes.
- Squeeze the juice from the remaining half lemon over the livers and garnish with chopped parsley.
- Serve hot with fresh bread, pap/sadza, or mashed potatoes.
Nutrition Facts
Calories
370Fat (grams)
23.5 gCarbs (grams)
11 gFiber (grams)
1.5 gProtein (grams)
29 gI am not a certified nutritionist and any nutritional information on dontmissmyplate.com should only be used as a general guideline.


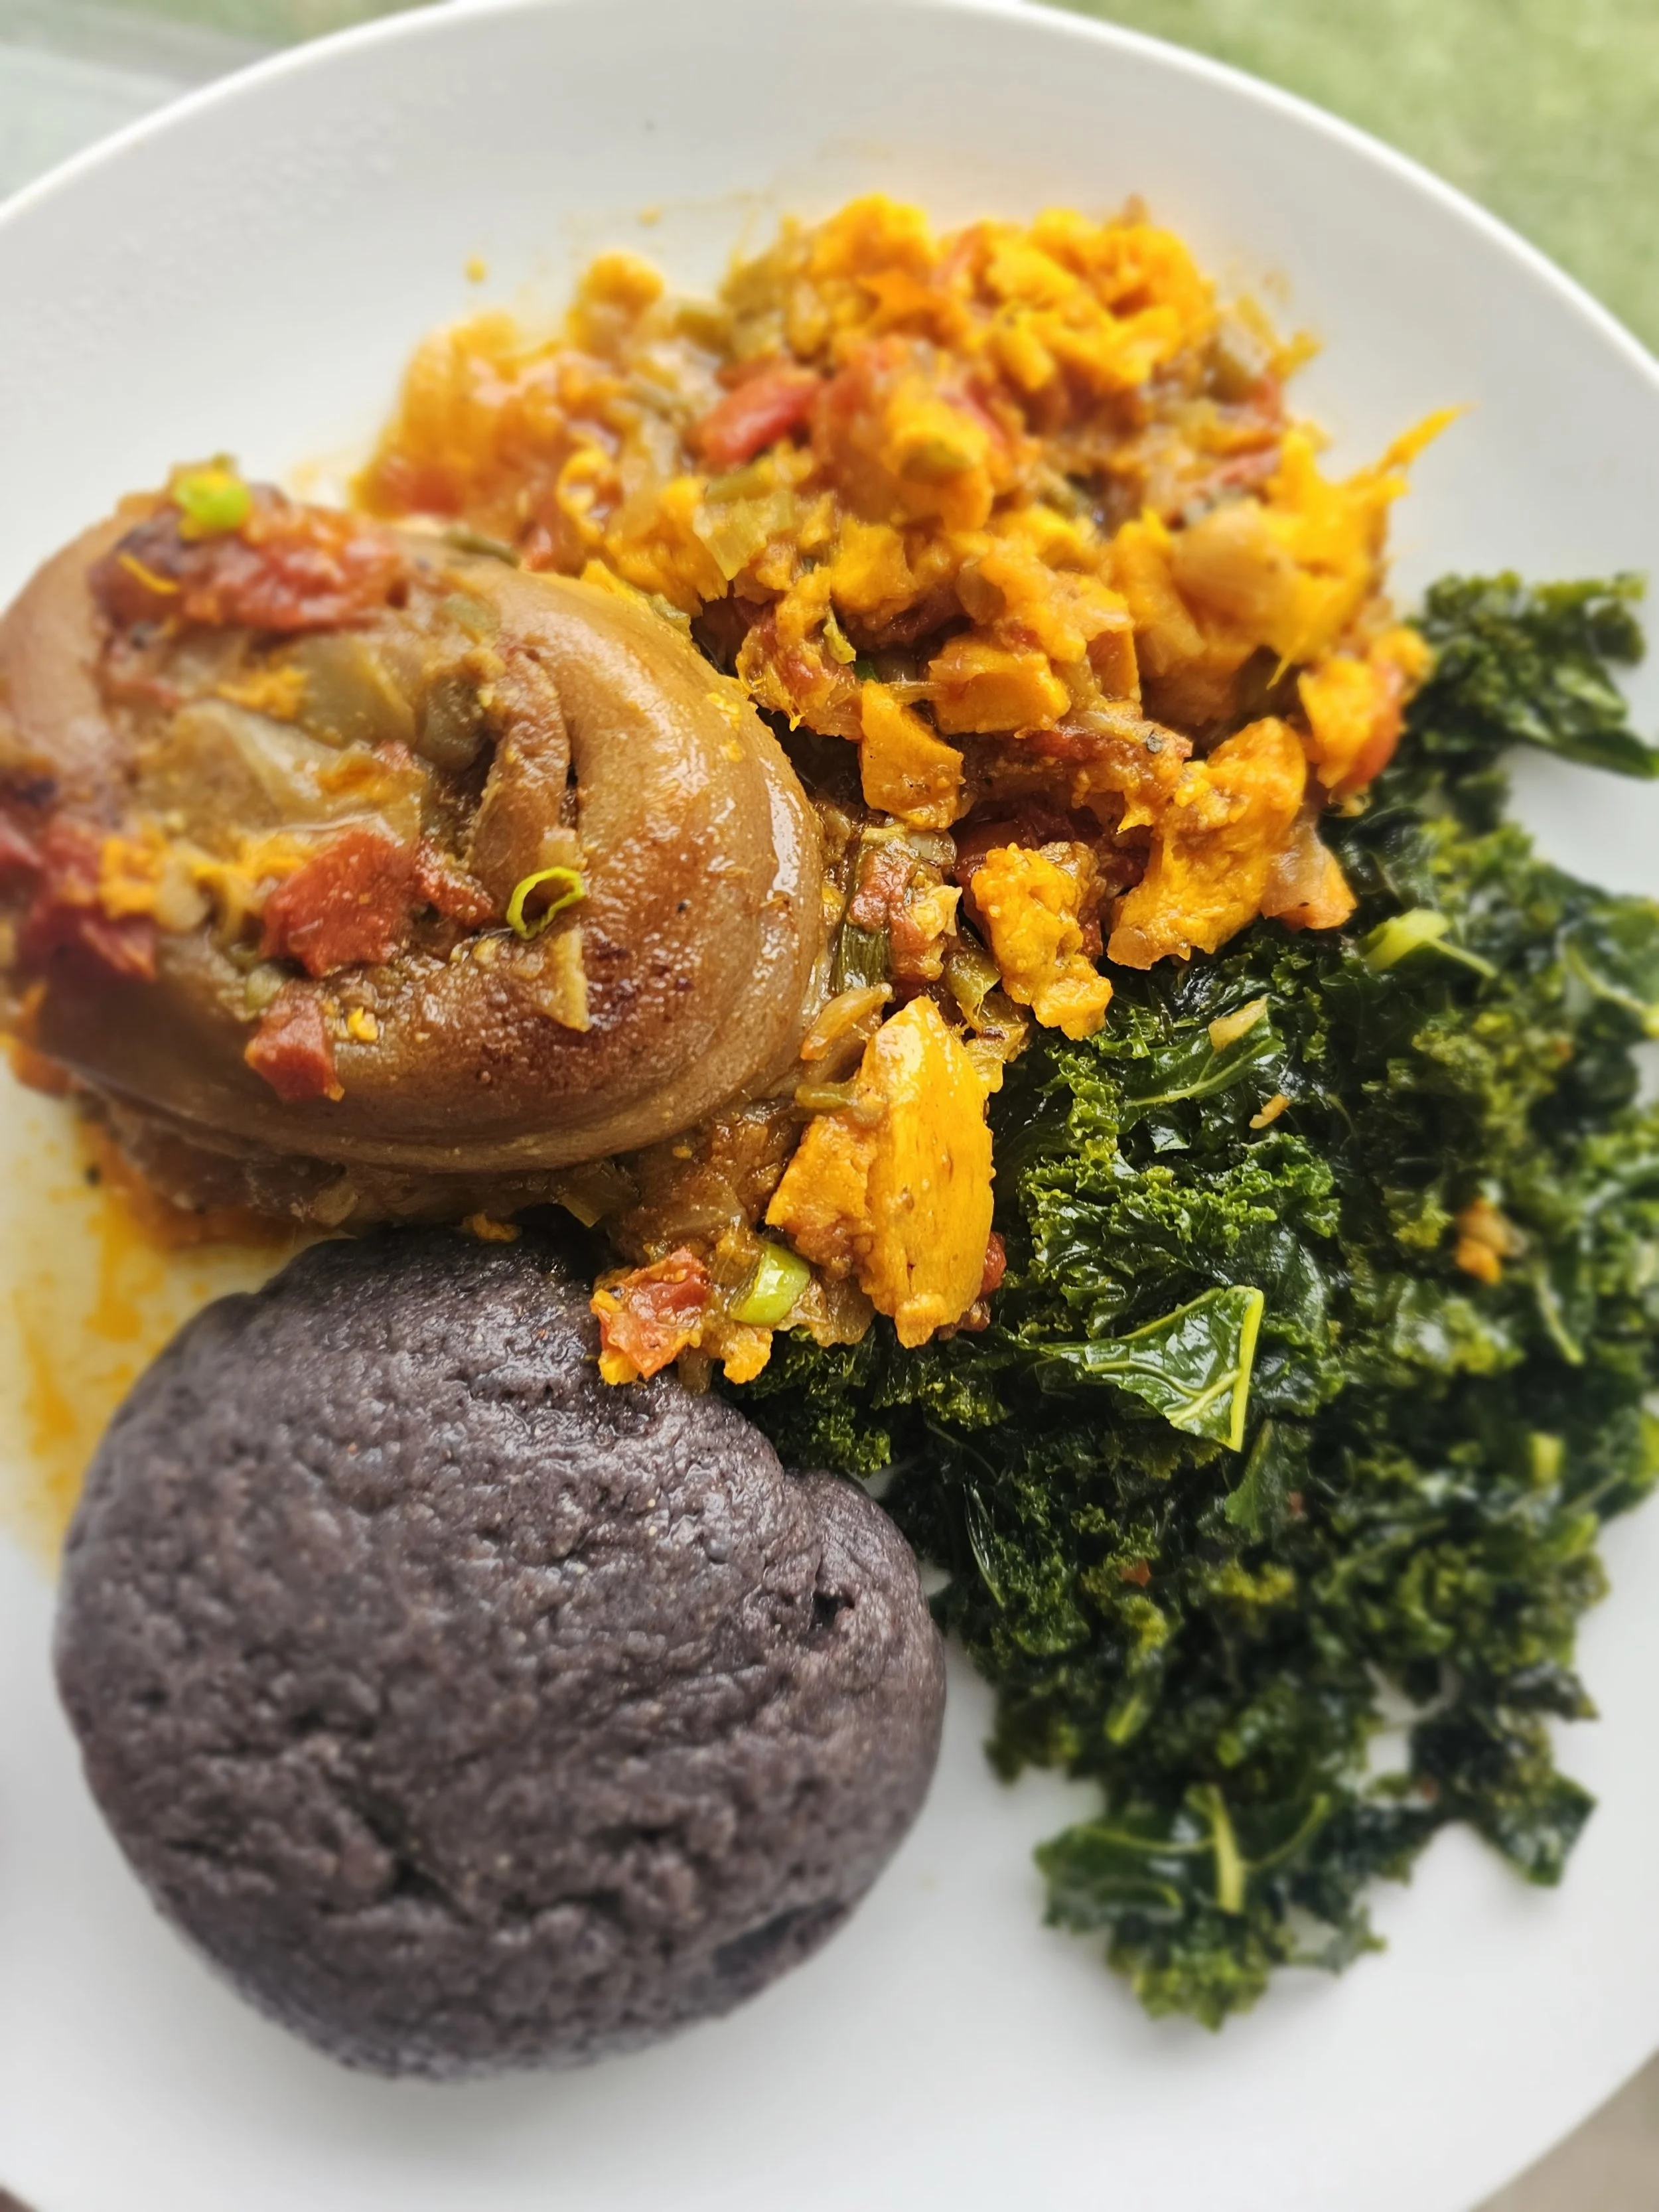
Stewed Pork Hocks with Sweet Potato (Mazondo)
If delicacies could walk… or rather, trot. Few cuts of meat are as humble yet deeply flavorful as pork hocks. Known for their tough skin, bone, and rich connective tissue, pork hocks have long been transformed by cultures that understand the value of slow cooking. In the American South, ham hocks brought deep, smoky flavor to pots of collard greens and beans, a survival food turned soulful cuisine. In Zimbabwe, they take on a new identity as mazondo, pig’s feet or ankles, revered as a delicacy. Often served in bars, homesteads, and special gatherings, mazondo is slow-cooked with onions, chilies, tomatoes, and spices until it’s meltingly tender.
In this recipe, I brought that tradition into the stew pot, giving the hocks a good sear to lock in flavor, then letting them braise low and slow with bold aromatics, rich seasoning, and an unexpected but powerful addition: sweet potato. While in Zimbabwe sweet potatoes (mbambaira) are typically enjoyed boiled or roasted as a standalone snack or side, they have an untapped potential when added to stews. Here, the sweet potato doesn’t just add subtle, earthy sweetness — it also brings nutrition and natural starch that gently thickens the broth as it cooks down, tying everything together in a rich, velvety texture.
Before cooking, I soak the hocks in red wine vinegar. This isn’t just for cleaning and tenderizing, but also to cut through the richness and add a subtle tang that balances the stew. It's a simple step, but it makes all the difference when working with fatty, collagen-rich cuts.

Prep and Cooking Tips for Mazondo
1. Soaking = Better Flavor and Cleaner Broth
Soaking pork hocks in vinegar and water helps clean the meat, neutralize strong odors, and tenderize it slightly. Rinse well after soaking to avoid excess acidity in the stew.
2. Sear for Maximum Flavor
Don’t skip the browning step, it adds deep, caramelized flavor that builds the base of your stew. Let the hocks sear undisturbed for a few minutes per side to get a good crust.
3. Low and Slow is Key
This stew rewards patience. Keep the heat low and let the hocks simmer gently for 2.5 to 3 hours. Rushing will result in chewy meat and thin broth.
4. Sweet Potato Choices Matter
Use a firm, orange-fleshed sweet potato or yam that holds up to long cooking. Softer varieties may break down too much, though that can also be desirable for thickening.
5. Customize the Heat
Adjust the chili to your preference. For mild stew, remove seeds from the chili or use a milder pepper. For more heat, add fresh chili near the end of cooking or include crushed chili flakes.
6. Make it Ahead
Like most stews, this tastes even better the next day. The flavors deepen and the texture improves after resting. Store in the fridge overnight and reheat gently.
7. Serving Suggestions
Traditionally served with sadza in Zimbabwe, but it's also excellent with rice, mashed potatoes, or crusty bread to soak up the broth. Try pairing it with sautéed greens for a full meal.
8. Skim the Fat (or Don’t)
Pork hocks release a good amount of fat. You can skim some off the top during or after cooking, or stir it back in for maximum richness, up to you.
9. Broth Boost
If you have homemade broth, use it! It gives the stew more body and complexity than water and bouillon alone.
10. Leftover Ideas
Leftover stew can be shredded and used in tacos, wraps, or even spooned over pap/sadza for a quick second-day meal.
With each spoonful, you're tasting tradition, technique, and transformation. The vinegar, the hocks, the sweet potato, each element speaks to how simple ingredients, handled with care and patience, can deliver deeply rooted, unforgettable flavor.
")
Stewed Pork Hocks with Sweet Potato (Mazondo)
Discover a rich, slow-cooked Pork Hock Stew (Mazondo) with sweet potato, inspired by Zimbabwean flavors and Southern soul food traditions. Tender pork hocks are soaked in vinegar, seared, and simmered with tomatoes, chili, and spices for a hearty, flavorful dish.
Ingredients
- 4 large pork hocks
- 1/3 cup red wine vinegar (for soaking)
- 1 tablespoon salt
- 1 tablespoon black pepper
- 1 large sweet potato or yam, peeled and cubed
- 1 large yellow onion, chopped
- 4 Roma tomatoes, chopped
- 1 chili pepper, finely chopped
- 2 large cloves garlic, minced
- 2 spring onions, sliced
- 2 bouillon cubes + 2 cups water (or homemade broth)
- 1/2 tablespoon Royco Usavi Mix (or your preferred all-purpose seasoning)
- 1/2 tablespoon Shishanyama spice (or BBQ meat rub)
- 2 tablespoons Worcestershire sauce
- 1 teaspoon cumin
- 1 teaspoon paprika
- 1 teaspoon oregano
- Cooking oil (coconut or olive oil)
- 2 tablespoons butter
Instructions
- Rinse the pork hocks under cold water. Place them in a large bowl and soak in red wine vinegar with enough water to cover. Let sit for 10 minutes, then drain and pat dry—very dry, so they brown nicely.
- Season the hocks with salt and pepper. In a large oven-proof pot roast dish or Dutch oven, heat a bit of oil over medium-high heat. Sear the hocks on all sides until golden and well browned. Remove and set aside.
- In the same pot, sauté the onion, garlic, chili, and spring onions until softened and fragrant. Add the Royco Usavi Mix, Shishanyama, and bouillon cubes. Cook for 1–2 minutes to bloom the spices, adding a bit more oil if needed. Stir in the tomatoes and Worcestershire sauce and cook for another 1–2 minutes.
- Add the cubed sweet potatoes, followed by the broth (or water), cumin, paprika, and oregano. Let everything simmer for 3–4 minutes to start developing the base of the stew.
- Transfer the pork hocks to a deep roasting pan or heavy pot. Pour the sweet potato and tomato mixture over the hocks, making sure they’re mostly submerged. The liquid will reduce and become the stew.
- Cover and simmer on low heat at 325°F for 2.5 to 3 hours, until the meat is fall-off-the-bone tender and the sweet potatoes are soft. When checking occasionally during cooking, avoid over-mixing to prevent the sweet potatoes from breaking down into a soup-like consistency.
- If there's more liquid than you'd prefer with about 30 minutes remaining, increase the temperature to 350°F.
- Finish with chopped fresh spring onions. Adjust seasoning with extra salt, pepper, or chili flakes if you like more heat. Serve hot with sadza, rice, or thick bread, and sautéed kale (muriwo) on the side.
I am not a certified nutritionist and any nutritional information on dontmissmyplate.com should only be used as a general guideline.

Honey-Glazed Tofu with Beet Purée, Roasted Mushrooms, and Eggplant Crisp
This dish started with a trip to the farmer’s market, where the deep purple of late-season eggplants and the vibrant reds of fresh beets caught my eye. A few days later, with some tofu and mushrooms already waiting in the fridge, it all started to come together. This recipe is a great way to make use of what you have and stop you from being so quick to toss older vegetables in the fridge. It took a while for me to use the Japanese eggplant!
The beets were roasted and blended into a smooth, earthy-sweet purée. The eggplant was sliced thin and baked until golden and crisp around the edges. Tofu was pressed and roasted until perfectly crisp, then tossed in a sticky glaze of honey and soy sauce. Mushrooms, slightly forgotten in the back of the fridge, got a second life in the oven with olive oil and ras el hanout—a North African spice blend that adds warmth, complexity, and just a hint of spice I love cooking with.
What came together was a dish full of contrast and character: soft and crisp, sweet and savory, humble and elegant. It’s proof that a few fresh ingredients and some leftovers can become something unexpected and deeply flavorful. Whether served as a starter, a shared small plate, or the centerpiece of a plant-based meal, it delivers on texture, color, and bold flavor, with just the right touch of comfort and creativity.
Tips for Making Beet Purée Smooth and Velvety
1. Roast or Steam the Beets Thoroughly
Roasting (wrapped in foil at 400°F/200°C for 45–60 minutes) brings out their natural sweetness and softens them deeply. Steaming also works well and helps preserve the vivid color. Make sure the beets are fork-tender—completely soft—before blending.
2. Peel for Smooth Texture
After cooking and cooling slightly, remove the skins by rubbing them off with a paper towel or your hands. Leaving the skins on can lead to a gritty texture in the purée.
3. Use a High-Speed Blender
A blender will yield a much smoother purée than a food processor. Add a small amount of liquid to help it blend evenly—this can be water, olive oil, cream, coconut milk, lemon juice, or vinegar, depending on your flavor goals. Blend in stages, starting slow and increasing speed for 1–2 minutes to achieve a silky consistency.
4. Strain for Extra Smoothness (Optional)
For an ultra-smooth finish, pass the purée through a fine-mesh sieve or chinois after blending. This removes any remaining fibrous bits.
5. Add a Fat or Binder for Creaminess
Incorporating a bit of butter, cream, Greek yogurt, or olive oil enhances texture and richness. For a vegan option, use tahini or avocado oil.

Honey-Glazed Tofu with Beet Purée, Roasted Mushrooms, and Eggplant Crisp
A beautifully plated vegetarian dish that balances bold flavors and contrasting textures: crisp honey-glazed tofu, silky beet purée, roasted mushrooms, and crunchy eggplant slices. Perfect for showcasing seasonal produce in a refined and modern way.
Ingredients
- 14 oz (400 g) firm tofu
- 1 tablespoon soy sauce
- 1 tablespoon teriyaki sauce
- 1 teaspoon garlic powder
- 1 teaspoon onion powder
- 1 tablespoon baking powder
- 1 teaspoon salt
- 1 teaspoon black pepper
- 1 teaspoon paprika
- 1 teaspoon chili flakes
- 1 teaspoon dried oregano
- Sesame seeds, for garnish
- Sprouts or fresh parsley, for garnish
- 4 tablespoons honey
- 4 tablespoons soy sauce
- 4 teaspoons sesame oil
- 4 teaspoons rice vinegar
- 2 large beets, roasted or boiled
- ¼ cup + 3 tablespoons olive oil (total: 7 tablespoons or ~105 ml)
- 2 teaspoons rice vinegar
- 1½ teaspoons salt
- ½ cup broth or water (about 120 ml)
- 8 oz (225 g) wild or brown button mushrooms, sliced
- 1 tablespoon olive oil
- 1 tablespoon dried thyme
- 1 teaspoon garlic powder
- 1 tablespoon rice vinegar
- 1 tablespoon ras el hanout (Moroccan spice blend)
- 1 Japanese eggplant, sliced
- 1 to 2 tablespoons olive oil
- ½ teaspoon salt
- ½ teaspoon black pepper
Instructions
- Start with the beets, since they take the longest. Remove the stems, peel, and dice. In a bowl, toss with olive oil, salt, pepper, and oregano. Wrap tightly in foil and bake at 400°F (200°C) for 45–60 minutes, tossing halfway through, until fork-tender.
- Remove excess moisture from the tofu. Either microwave the block wrapped in paper towels for 2 minutes or gently press and let drain for at least 10 minutes.
- Slice the tofu into 1-inch cubes. In a bowl, toss with soy sauce, teriyaki sauce, garlic powder, onion powder, salt, oregano, paprika, black pepper, and chili flakes. Coat well, then add baking powder to help crisp the surface. Spread the tofu on parchment paper and bake at 400°F for 35–40 minutes, flipping halfway, until golden brown. Be careful not to burn.
- In a bowl, toss mushrooms with olive oil, ras el hanout, oregano, garlic powder, and rice vinegar. Spread on a baking sheet and bake at 400°F for 25 minutes, flipping halfway. Season to taste if needed.
- Trim the top and slice very thinly (a mandoline works great). Discard any discolored sections. Toss slices in olive oil, salt, and pepper. Spread on a baking sheet and bake alongside the mushrooms for 25–30 minutes, flipping halfway, until crisp and slightly golden.
- Once the tofu is ready, combine soy sauce, honey, and sesame oil in a small saucepan over medium heat. Cook for 3–5 minutes, stirring, until thickened enough to coat the back of a spoon. Do not overcook. Toss the tofu in the glaze just before serving. If the sauce thickens while sitting, rehydrate with a splash of soy sauce and rice vinegar.
- Once the roasted beets have cooled slightly, transfer to a blender. Add rice vinegar and begin blending. Slowly drizzle in olive oil and/or broth as you blend until the purée is smooth—this can take up to 10 minutes. Taste and adjust seasoning. If you like a bit of texture (as I do), leave it slightly rustic.
- Spoon the beet purée onto the plate first. Add 2–3 pieces of glazed tofu on top, followed by roasted mushrooms and crispy eggplant slices. Garnish with sesame seeds, fresh sprouts, or parsley. Drizzle with extra glaze if desired.
I am not a certified nutritionist and any nutritional information on dontmissmyplate.com should only be used as a general guideline.

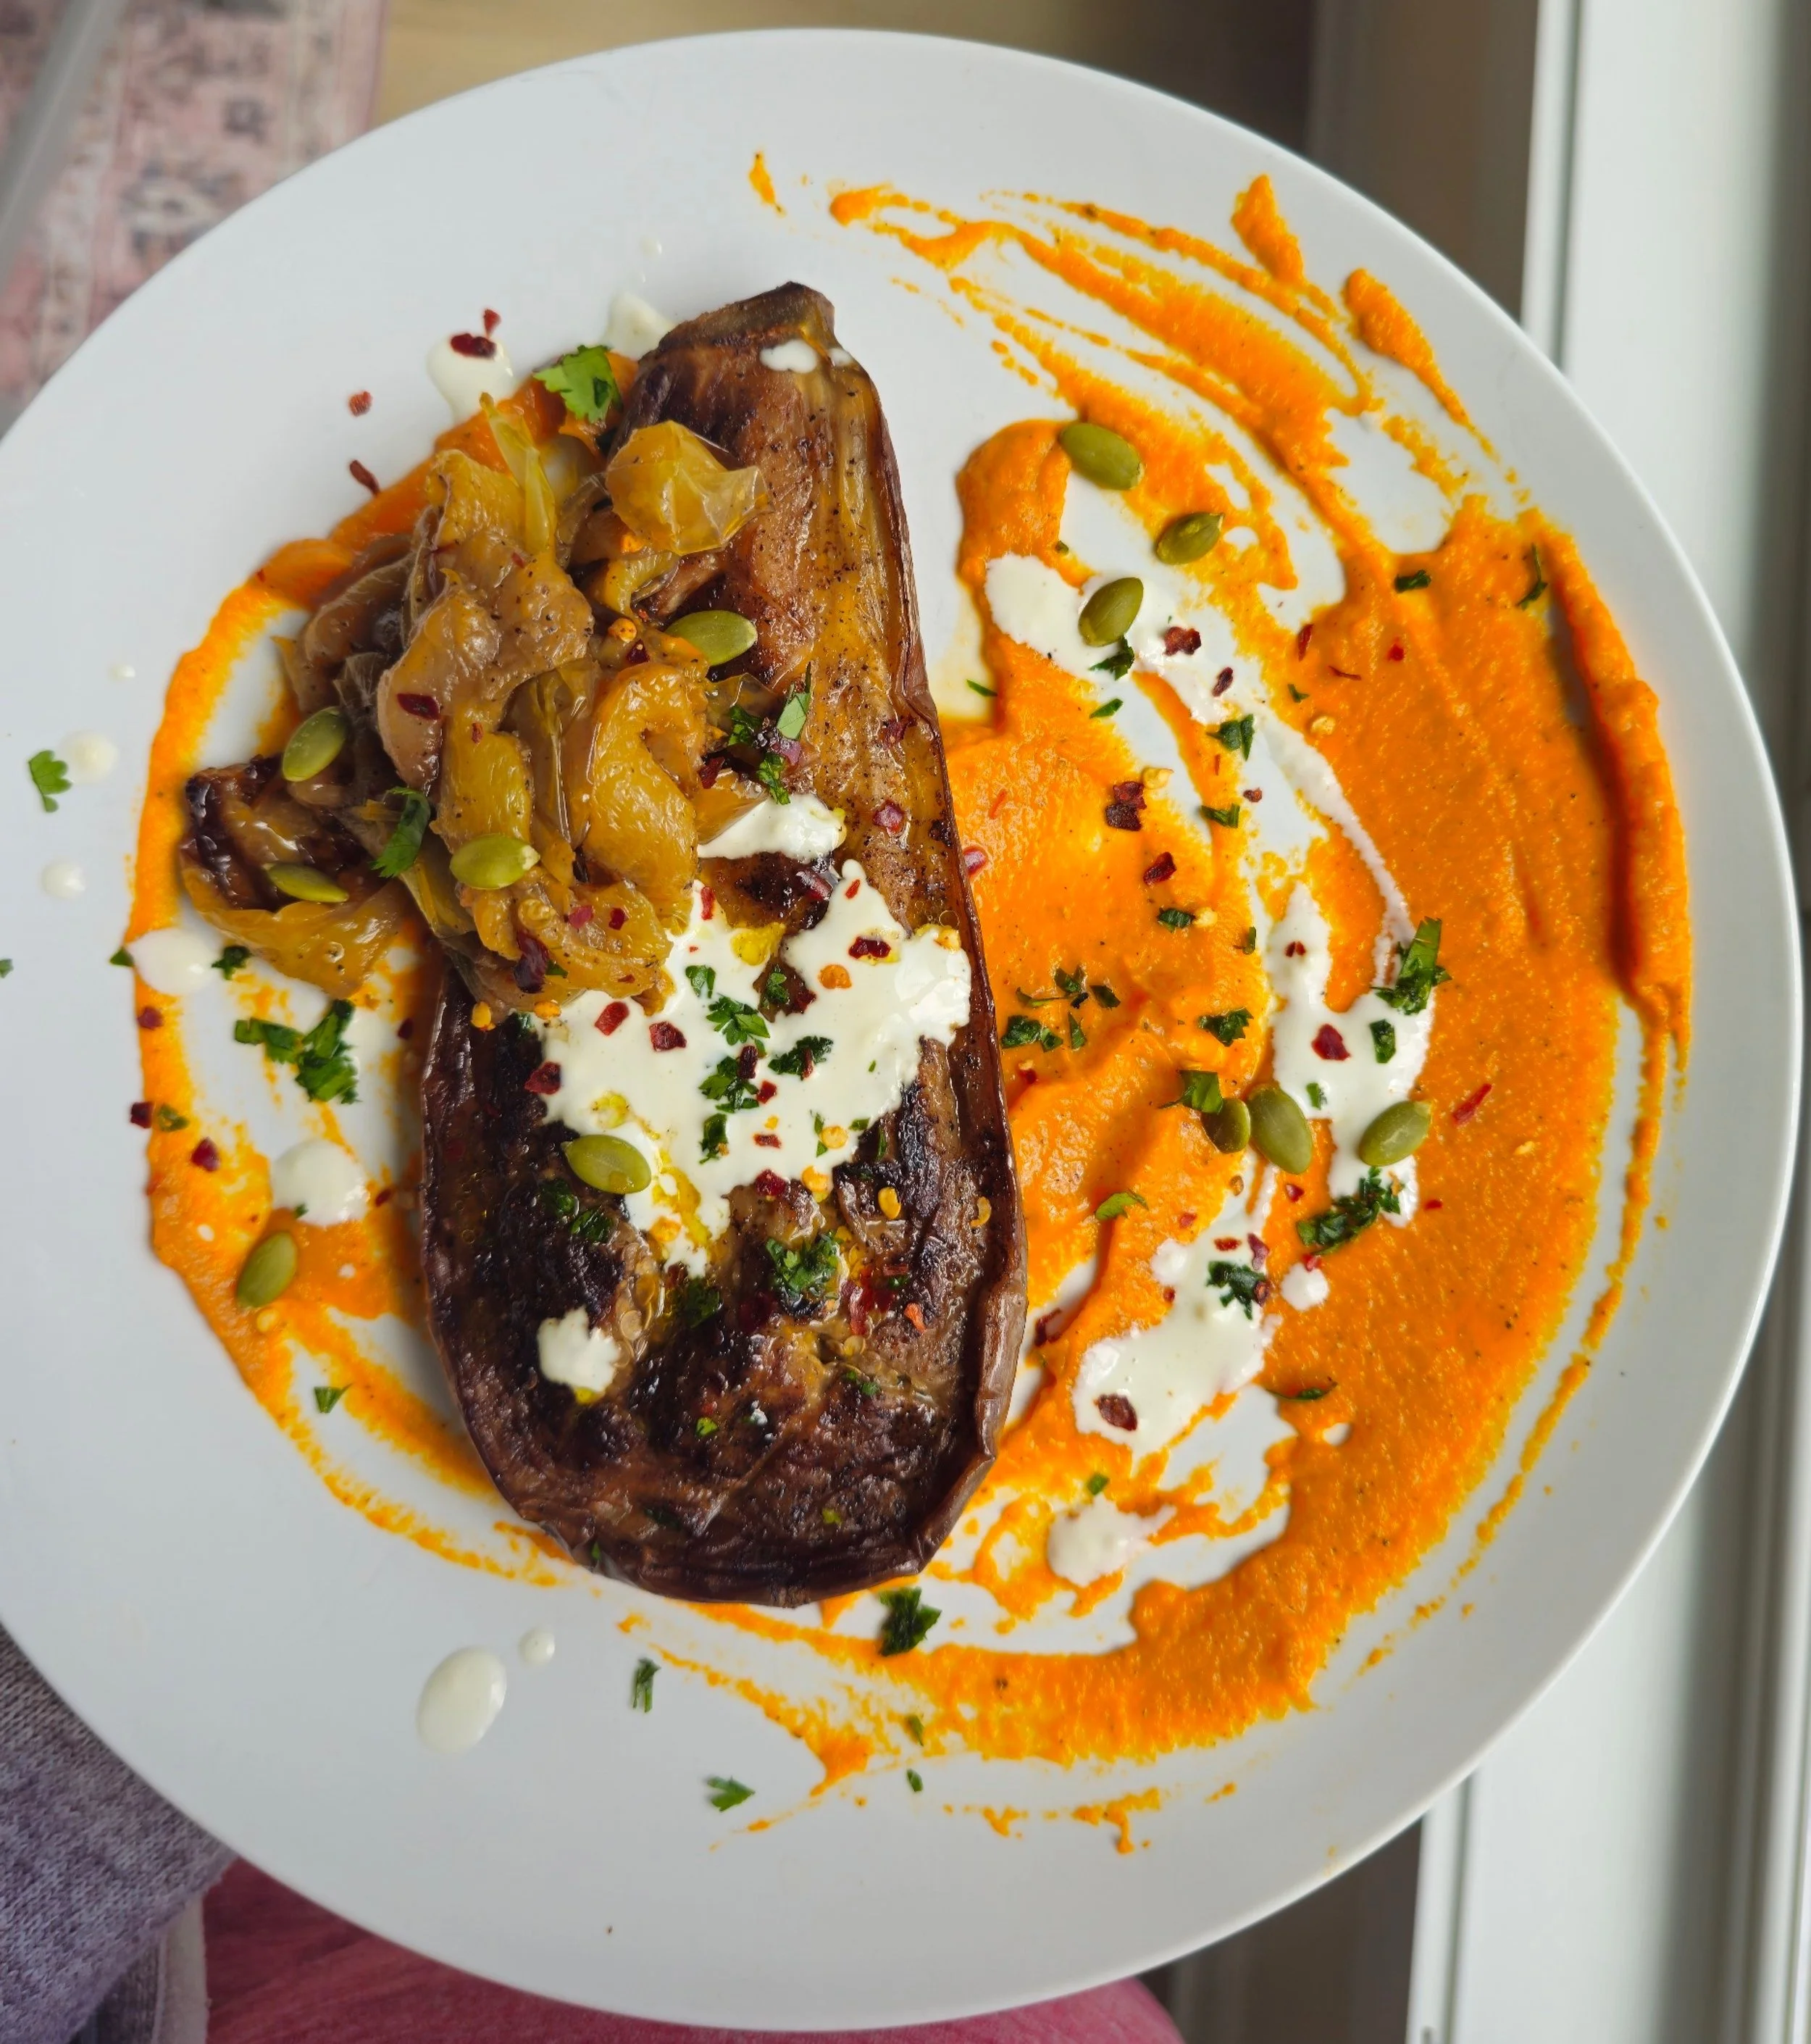
Roasted Eggplant and Blistered Peppers with Carrot and Sweet Potato Purée
As usual, this dish started at the farmers market — one of my favorite places to find inspiration. I love picking up vegetables I haven’t cooked with before, or ones I don’t use often enough. Sometimes it’s the shape or color that draws me in. This time, it was a mix of eggplants: a striking graffiti eggplant, a classic American, and some slender Japanese varieties. I didn’t end up using the Japanese eggplants in this recipe (they’ll star in something else soon), but the others became the foundation for this vibrant, plant-based plate.
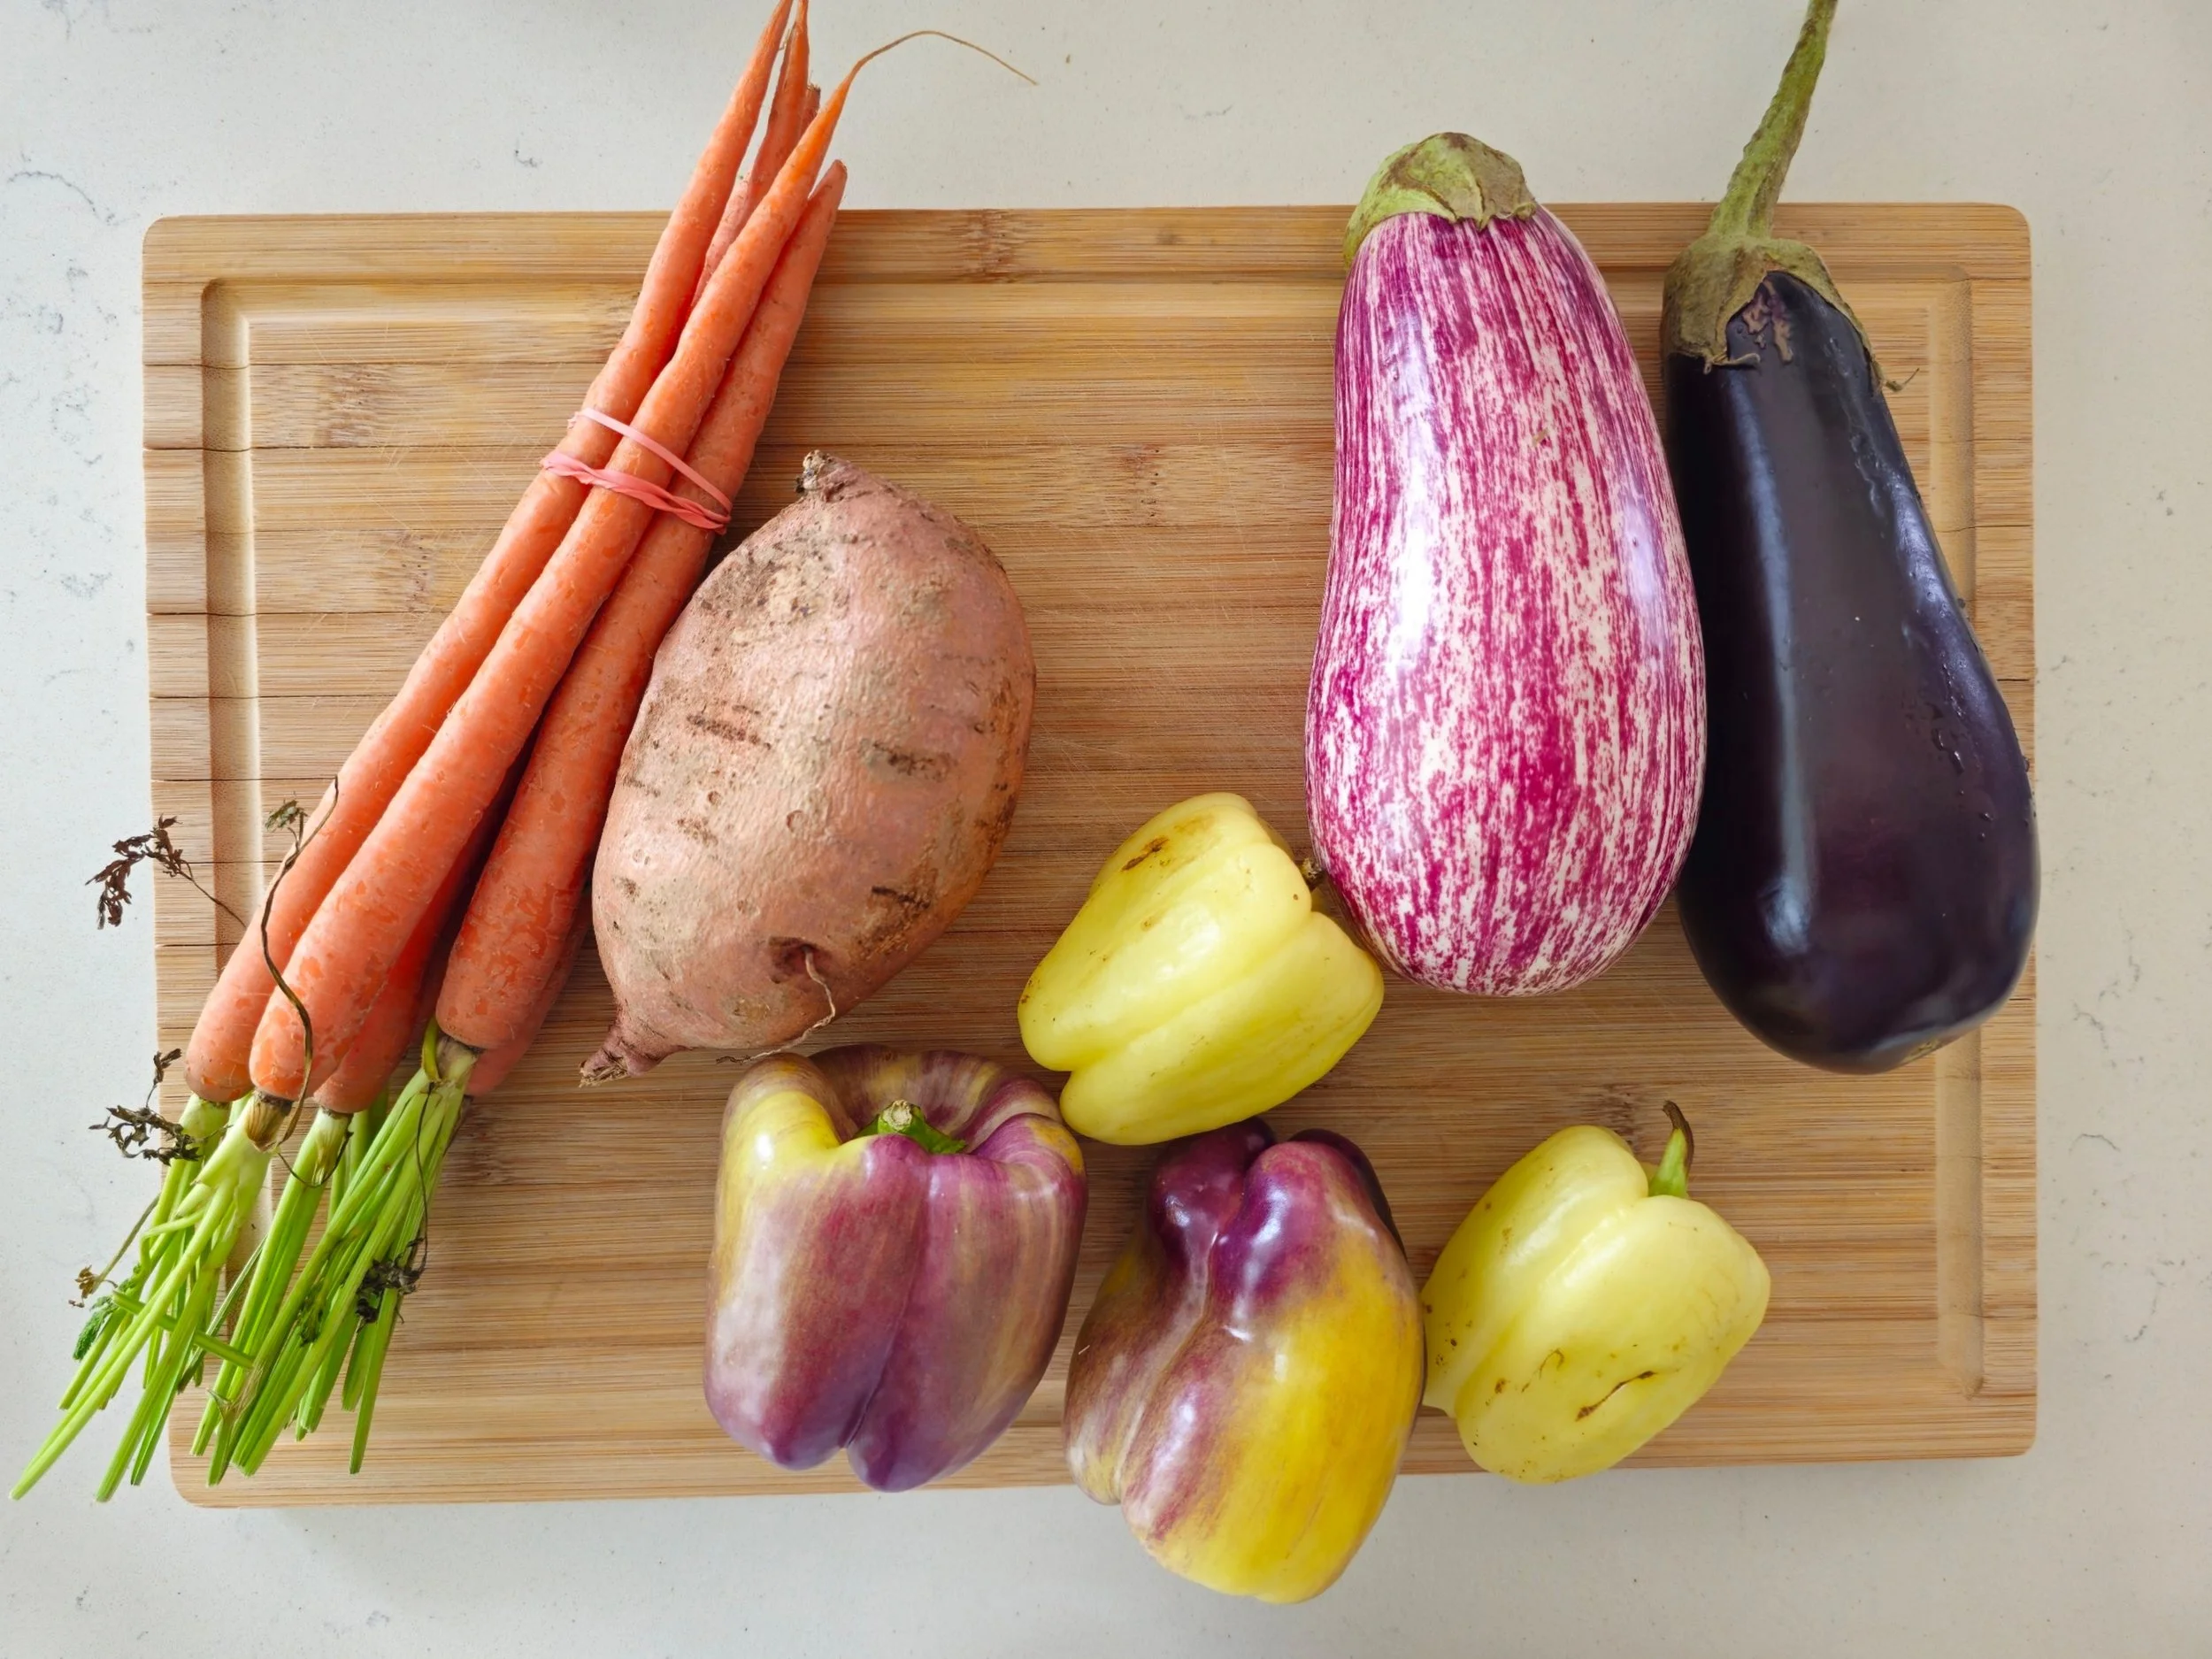
I also came across a basket of purple, white, and white bell peppers — softer, sweeter, and more delicate than the standard green or red. The white ones almost looked like frosted glass, and the purples had this beautiful, muted lavender tone. I couldn’t resist grabbing a few, even though I wasn’t sure how I’d use them yet. They ended up being perfect for blistering: their thinner skins charred quickly, adding a subtle smokiness without overpowering their natural sweetness.
I cross-hatched the eggplants and pan-seared them first to give them a beautiful char, then finished them in the oven for that perfect melt-in-your-mouth texture. I had carrots on hand and was originally going to roast them, but visually I knew they’d shine more as a purée. Since I’d also picked up a sweet potato, I blended them together for a purée that’s not only naturally sweet, but also thick enough to support the roasted vegetables on top. The blistered peppers, in all their unusual colors, add not just contrast, but personality to the finished dish.
This is a recipe that’s all about contrast: tender eggplant, creamy purée, and blistered skins, all coming together in one beautiful, nourishing plate.
Why I’m Choosing Graffiti Eggplants from Now On
I used both graffiti and American (globe) eggplants in this recipe, and the difference was clear. Graffiti eggplants are smaller with thin, purple-and-white striped skin and a naturally sweeter, creamier flesh. American eggplants are larger, darker, and have a firmer, spongier texture with a hint of bitterness. While both roasted well, the graffiti eggplants stood out for their tender texture and balanced flavor. For future versions of this dish, I’ll be reaching for graffiti eggplants — they’re perfect for plant-based recipes where texture and flavor really matter.

Roasted Eggplant and Blistered Peppers with Carrot and Sweet Potato Purée
Inspired by a farmers market bounty, this vibrant dish features charred eggplant, a silky carrot–sweet potato purée, and blistered heirloom peppers. It’s all about contrast—creamy, tender, smoky, and sweet in every bite.
Ingredients
- 2 medium to large graffiti and/or American eggplants
- Drizzle of olive oil
- 2 tablespoons coconut, sesame or peanut oil
- 2 teaspoons sea salt crystals
- 2 teaspoons black pepper
- 2 teaspoons Aromat (or all-purpose seasoning)
- 1 bunch carrots (about 4–5 medium carrots)
- 4–6 white and purple bell peppers
- 1 tablespoon + 1/8 cup olive oil
- 1 tablespoon Aromat (or all-purpose seasoning)
- 1 tablespoon black pepper
- 1 medium or large sweet potato
- 1 teaspoon cinnamon
- 1 teaspoon smoked paprika
- 1/4 teaspoon cumin
- 1/2 teaspoon oregano (dried or fresh)
- 1/4 teaspoon garlic powder
- 1–2 tablespoons milk or cream
- 1–2 tablespoons olive oil
- 1 tablespoon honey
- 1 teaspoon salt
- 1 teaspoon black pepper
- 1 tablespoon rice vinegar or lemon juice
- 2 tablespoons fresh parsley, chopped
- 1 teaspoon chili flakes (plus extra for garnish)
- Mexican crema or crema sauce, for drizzling
- Pumpkin seeds (optional), for garnish
Instructions
- Preheat the oven to 450°F (or use a grill if preferred).
- Toss the peppers with 1 tablespoon of olive oil and season with Aromat and black pepper.
- Roast on a tray until the skins blister and begin to blacken (about 15–20 minutes), turning once or twice.
- Once done, place the peppers in a bowl with the remaining olive oil. Peel off any extremely charred skin and slice.
- Peel and chop the sweet potato and carrots into chunks.
- Boil or steam until tender (15–20 minutes); test with a fork.
- Drain, then add olive oil, milk or cream, honey, salt, pepper, and spices.
- Add a splash of rice vinegar or lemon juice for brightness, if desired.
- Blend until smooth, adding more olive oil or milk for a silky texture.
- Slice the eggplants in half lengthwise.
- Score the flesh in a crosshatch pattern (deep but not all the way through).
- Drizzle and brush with olive oil, then sprinkle sea salt over the surface to help release moisture. Let sit for 10 minutes.
- Blot off excess moisture, then season with black pepper and Aromat.
- Heat coconut or peanut oil in a grill pan over medium-high heat. Sear the eggplants cut-side down for 5–7 minutes, then flip and cook the other side for 3 minutes.
- Transfer to a baking dish, cover with foil, and roast at 375°F for 25–30 minutes or until soft and golden inside. Check often, as time may vary based on eggplant size.
- Spoon a generous layer of warm carrot–sweet potato purée onto each plate.
- Place a roasted eggplant half on top.
- Drizzle with Mexican crema and layer the blistered peppers over or around the eggplant.
- Garnish with pumpkin seeds, fresh parsley, and chili flakes.
- Optional: Finish with a drizzle of olive oil or use the pepper-infused oil for extra flavor.
Notes
Serving Suggestions:
- Serve warm or at room temperature.
- This makes a beautiful vegetarian main course or a vibrant side dish alongside grilled chicken, fish, or tofu.
I am not a certified nutritionist and any nutritional information on dontmissmyplate.com should only be used as a general guideline.

Pasta Salad with Roasted Patty Pan Squash, Cherry Tomatoes and Basil
This vibrant pasta salad is a true celebration of summer produce and culinary discovery.
Lately, I’ve been exploring my local farmers market more intentionally—not just to shop, but to discover. Every trip brings something unexpected. On a recent visit, I came across three seasonal gems I’d never cooked with before. One of them was patty pan squash, a beautiful, scallop-edged vegetable that’s been cultivated since ancient times but is often overlooked today.
Curious and inspired, I turned those market finds into this golden, herb-filled summer pasta salad. Roasted patty pan becomes tender and caramelized, complemented by sweet cherry tomatoes and heaps of fresh basil. A bold yet simple vinaigrette made with avocado oil and red wine vinegar brings everything together.
This salad is sunshine in a bowl—bright, grounding, and alive with flavor. If you’ve ever hesitated to try an unfamiliar vegetable, let this be your sign. Sometimes the most unexpected ingredients lead to your next favorite dish.
Roasted Patty Pan Squash Summer Salad
Patty pan squash, with its scalloped edges and buttery texture, is an ancient variety of summer squash that deserves a fresh moment in the spotlight. When roasted, it turns golden and tender, its caramelized edges playing beautifully against sweet, blistered cherry tomatoes and fragrant handfuls of basil. Tossed with a bold avocado oil and red wine vinaigrette, this dish is light yet satisfying—perfect as a vibrant side or a nourishing meal on its own.
Lately, I’ve been wandering my local farmers market with more intention—not just to stock up, but to explore. Every visit reveals something unexpected. On a recent trip, I discovered three seasonal gems I’d never cooked with before. Patty pan squash was one of them: unfamiliar yet inviting, and steeped in history.
That curiosity turned into this sun-drenched summer salad. Roasting brings out the squash’s richness, while the tomatoes add bursts of sweetness. Fresh basil layers in brightness, and the vinaigrette ties it all together with just the right tang.
It’s a dish that celebrates simplicity, seasonality, and the joy of trying something new. If you’ve ever walked past a curious vegetable and wondered what to do with it—this is your sign to say yes.
Tips:
For extra smoky depth, roast the squash until the edges are deeply caramelized.
Harissa varies in heat—taste before adding more.
Make it a full meal by adding grilled chicken, shrimp, or tofu.


Pasta Salad with Roasted Patty Pan Squash, Cherry Tomatoes and Basil
This summer pasta salad features roasted patty pan squash, blistered cherry tomatoes, and fresh basil tossed in a smoky harissa vinaigrette. A vibrant, easy recipe perfect as a side dish or light main—seasonal, flavorful, and ready in under 30 minutes.
Ingredients
- 1 cup cherry tomatoes, halved if large
- 1 teaspoon Aromat seasoning (or your favourite all-purpose seasoning)
- ½ teaspoon black pepper
- 1 teaspoon oregano
- 1 teaspoon harissa seasoning
- 2–4 small-medium patty pan squash, sliced into wedges
- 2 tablespoons avocado oil
- 2 tablespoons Aromat seasoning
- 1 teaspoon black pepper
- 1 teaspoon garlic powder
- 1 teaspoon smoked paprika
- 1 1/2 cups short pasta, cooked (e.g., rigatoni, fusilli)
- 3 tablespoons avocado oil
- 1 tablespoon red wine vinegar
- 1 teaspoon mustard
- 1/4 teaspoon salt
- 1/4 teaspoon black pepper
- 1/8 cup fresh basil leaves, thinly sliced
- Optional toppings: crumbled goat cheese and almonds
Instructions
- Preheat your oven to 425°F (220°C).
- Slice the cherry tomatoes and toss them with avocado oil, Aromat (or all-purpose seasoning), oregano, black pepper, and harissa seasoning.
- Slice and quarter the patty pan squash into wedges. In a separate bowl, drizzle with avocado oil and season with Aromat, black pepper, garlic powder, and smoked paprika.
- Spread the tomatoes and squash on one or two baking sheets, keeping them in a single layer. Roast for 15–25 minutes, or until the squash is golden and tender and the tomatoes are soft and blistered. Keep a close eye on the tomatoes and rotate the baking sheet halfway through for even cooking.
- While the vegetables roast, cook the pasta in well-salted water until al dente. Drain and rinse with cool water to stop the cooking process.
- In a small bowl, whisk together the olive oil, vinegar, mustard, salt, and pepper.
- In a large bowl, combine the pasta and roasted patty pan squash. Drizzle in a bit of the dressing and toss gently to coat.
- On individual plates or a large serving dish, start with a few roasted tomatoes. Add the pasta and squash mixture, then drizzle with more vinaigrette. Finish with fresh basil, crumbled goat cheese, and toasted almonds.
- Serve at room temperature or chilled.
Nutrition Facts
Calories
408Fat (grams)
237 gCarbs (grams)
148 gProtein (grams)
21 gI am not a certified nutritionist and any nutritional information on dontmissmyplate.com should only be used as a general guideline.

Harissa Cauliflower Steak and Puree with Chimichurri
Cauliflower steak is proof that a humble vegetable can take center stage with the right preparation and bold flavors. Thick-cut slices of cauliflower are roasted or grilled until golden and tender, transforming into a hearty, satisfying dish. What truly sets this version apart is the use of North African spices—think warm cumin, smoky harissa, and toasted nuts like almonds or pistachios. These aromatic, earthy flavors bring depth and complexity, turning a simple cauliflower steak into a magnificent, flavor-packed experience.
Not Your Hospital Cauliflower
I remember the first time I heard of cauliflower steak. It didn’t immediately appeal to me. In fact, I only started paying attention to it when I went vegan for about nine months. Like many people, I associated cauliflower with bland, overcooked hospital food—soggy, flavorless, and uninspired. But I quickly learned how wrong I was.
When prepared the right way, cauliflower can truly shine. It becomes tender and crisp, rich with flavor, and—yes—magnificent. Especially when paired with bold seasonings like cumin, toasted almonds, or North African spice blends like harissa, cauliflower in steak form is elevated into something special. These flavors bring out its natural nuttiness and depth, turning a humble vegetable into the star of the plate.
Tips for Perfect Cauliflower Steaks
1. Choose the Right Cauliflower
Pick a large, firm head of cauliflower with tight, white florets. A larger head gives you more surface area to cut sturdy "steaks" without them falling apart.
2. Cut Carefully
Slice straight through the center to get thick steaks—about ¾ to 1 inch thick. You’ll usually get 2–3 solid steaks from one head. The rest can be roasted as florets.
3. Don't Skimp on Seasoning
Cauliflower loves bold flavors. Use a generous amount of oil and spice rub so the steaks get a nice crust. North African spices like harissa, cumin, coriander**, paprika, and a dash of cinnamon really elevate it.
4. Preheat Your Pan or Oven
Whether roasting or pan-searing, make sure your cooking surface is hot. This helps caramelize the edges and gives a golden-brown crust without overcooking the center.
5. Use a Cast-Iron Skillet (If You Can)
For the best sear, use a cast-iron skillet. It distributes heat evenly and gives the steaks a nice char.
6. Finish with Texture and Acidity
Top with toasted almonds or pistachios for crunch, and a drizzle of lemon juice or tahini sauce to brighten the dish and balance the spices.
7. Don’t Waste the Extra Bits
Any florets or broken pieces left over can be roasted alongside the steaks, tossed into a salad, or blended into soup later.
Why Chimichurri Is the Perfect Match for Roasted Cauliflower
If you're looking to take your roasted cauliflower to the next level, chimichurri is your secret weapon. This vibrant Argentinian sauce — made with fresh parsley, garlic, vinegar, olive oil, and a hint of chili — adds a zesty, herbaceous punch that beautifully complements cauliflower's earthy sweetness.
When the cauliflower comes out of the oven golden and crisp, a generous drizzle of chimichurri instantly livens up each bite. The acidity from the vinegar balances the caramelized edges, while the herbs bring a fresh, garden-bright contrast to the warmth of the roasted veggies.chili flakes.
For more cauliflower recipes, check out more on the website including Cauliflower Tumeric Chickpea Soup, Cauliflower Piccata, Fried Cauliflower 'Chicken’ Sandwich, Cauliflower Kedgeree with Farro and Raisins, Creamy Roasted Broccoli and Cauliflower Bake, and Mushroom, Broccoli and Cauliflower Stirfry.

Coconut Eggplant and Lentil Masala Curry
A cozy, plant-based curry with creamy lentils, tender eggplant, and fragrant coconut—served with spiced rice.
Hearty, fragrant, and deeply satisfying, this Eggplant and Lentil Coconut Curry is comfort in a bowl. Slow-cooked eggplant melts into a spiced lentil base, infused with ginger, garlic, and creamy coconut milk for a rich, velvety finish. Served with fluffy aromatic rice—steamed with warming spices like cardamom, cinnamon, or bay leaf—it’s a nourishing, plant-based dish that’s as cozy as it is flavorful. Whether you're looking for a weeknight dinner or a meatless showstopper for guests, this curry brings warmth and depth to any table.
Cooking eggplant is all about unlocking its rich, silky texture and ability to soak up flavor. When properly cooked, eggplant transforms from firm and spongy to tender and luscious, making it perfect for curries, stews, and roasts. Salting it beforehand can help reduce any bitterness and improve its ability to brown, while slow cooking allows it to absorb spices and sauces deeply. Whether roasted, sautéed, or simmered, eggplant acts like a sponge for bold aromatics—especially in dishes like coconut curries where it adds both body and depth.
General Tips for Cooking Eggplant
Salt First (Optional but Helpful):
Lightly salt sliced or cubed eggplant and let it sit for 20–30 minutes. This draws out excess moisture and any bitterness, helping it cook more evenly and brown better.Don’t Undercook It:
Eggplant should be fully tender when done—undercooked eggplant can be spongy or rubbery. Cook it until it’s soft and creamy inside.Use Enough Oil (or Bake/Roast):
Eggplant absorbs oil quickly, so don’t be afraid to use a bit more when pan-frying or roasting. Alternatively, brush with oil and bake at a high temperature for a healthier option.Pair with Bold Flavors:
Eggplant soaks up spices and sauces beautifully. It works especially well with garlic, ginger, curry spices, tomatoes, and coconut milk.Roast or Grill for Extra Depth:
Roasting or grilling brings out eggplant’s natural sweetness and gives it a smoky, rich flavor—perfect for dips, salads, or hearty stews.
A rich, spiced plant-based curry inspired by East African flavors, with tender eggplant, hearty lentils, and creamy coconut milk.
Combining lentils and eggplant creates a beautiful balance of texture and depth—soft, creamy eggplant melds with hearty lentils to form a rich, comforting base that’s both nourishing and satisfying. This pairing is common in many African and Indian-influenced dishes, especially in East African coastal cooking, where flavors are bold, layered, and full of warmth.
In East African cuisine, particularly along the Swahili coast, the use of spices like cumin, coriander, turmeric, and cloves is deeply rooted in centuries of trade with India and the Arabian Peninsula. Coconut milk is another hallmark of the region’s cooking, adding creaminess and a subtle sweetness that tempers the heat of spices while enriching the overall dish. When combined, lentils, eggplant, aromatic spices, and coconut create a dish that’s deeply flavorful, comforting, and rooted in tradition—perfect for sharing and savoring.


Coconut Eggplant and Lentil Masala Curry
Discover the rich, comforting flavors of lentils and eggplant simmered with creamy coconut milk—a staple in East African coastal cuisine. This nourishing plant-based dish blends hearty lentils with silky eggplant and bold, layered spices for a satisfying vegan meal inspired by African and Indian culinary traditions. Perfect for fans of coconut curry and wholesome comfort food.
Ingredients
- 1 large eggplant, chopped
- 1 small onion, chopped
- 1 teaspoon ground ginger
- 1/2 teaspoon paprika
- 2 teaspoons masala curry powder
- 1 teaspoon oregano
- 1 teaspoon salt (plus 1 teaspoon extra to remove water from eggplant)
- 1 teaspoon chilli flakes
- 1 can coconut, full cream
- 1/2 cup green lentils
- 2 cups chicken broth
- 1 teaspoon black pepper
- 1/4 teaspoon cumin
- 1/2 teaspoon Royco Usavi mix, chicken (optional)
- 2 bay leaves
- 1/2 cup fire-roasted tomatoes, diced
- 3 garlic cloves
- 2 tablespoons ghee
- 2 tablespoons olive oil
- 2 tablespoons sesame seed oil
- 1 tablespoon soy sauce
- 1 tablespoon red wine vinegar
- 1 teaspoon fish sauce
- 1 teaspoon rice vinegar
- 2 tablespoons + 1/2 cup fresh cilantro, roughly chopped (optional)
- 1/3 cup silvered almonds (optional)
Instructions
- Slice the eggplant in half and sprinkle with 1 teaspoon salt to draw out excess moisture. Let sit, then pat dry when ready to prepare.
- Peel and mince the garlic cloves. Roughly chop your washed parsley.
- In a separate bowl, combine your spices: ginger, masala curry powder, paprika, oregano, salt, pepper, chili flakes, and any other spices.
- Chop the eggplant into bite-sized pieces and sauté with the sesame oil until softened and golden brown. Remove from the pan and set aside.
- In the same pot, melt ghee over medium heat. Sauté the onion and garlic for 2–3 minutes, or until the onions are translucent. Add the spice mix and stir to bloom the flavors for about 1 minute (add a bit more ghee or the olive oil if needed.
- Deglaze the pot with soy sauce. Add the tomato, red wine vinegar, and lentils. Stir and cook for 1–2 minutes, then pour in the broth to cover and bring to a boil. Reduce heat and simmer for about 15 minutes, or until the lentils are softened.
- Add the eggplant back to the pot, followed by the coconut milk, bay leaves and 2 tablespoons parsley. Simmer for another 10 minutes.
- Finish with a splash of fish sauce and rice vinegar. Season to taste. Remove from heat and let sit for 2–3 minutes.
- Serve topped with extra parsley, sliced almonds, and a scoop of aromatic rice.
Nutrition Facts
Calories
378Fat (grams)
24.9 gCarbs (grams)
27.5 gFiber (grams)
12.6 gSugar (grams)
8.8 gProtein (grams)
10.2 gI am not a certified nutritionist and any nutritional information on dontmissmyplate.com should only be used as a general guideline.

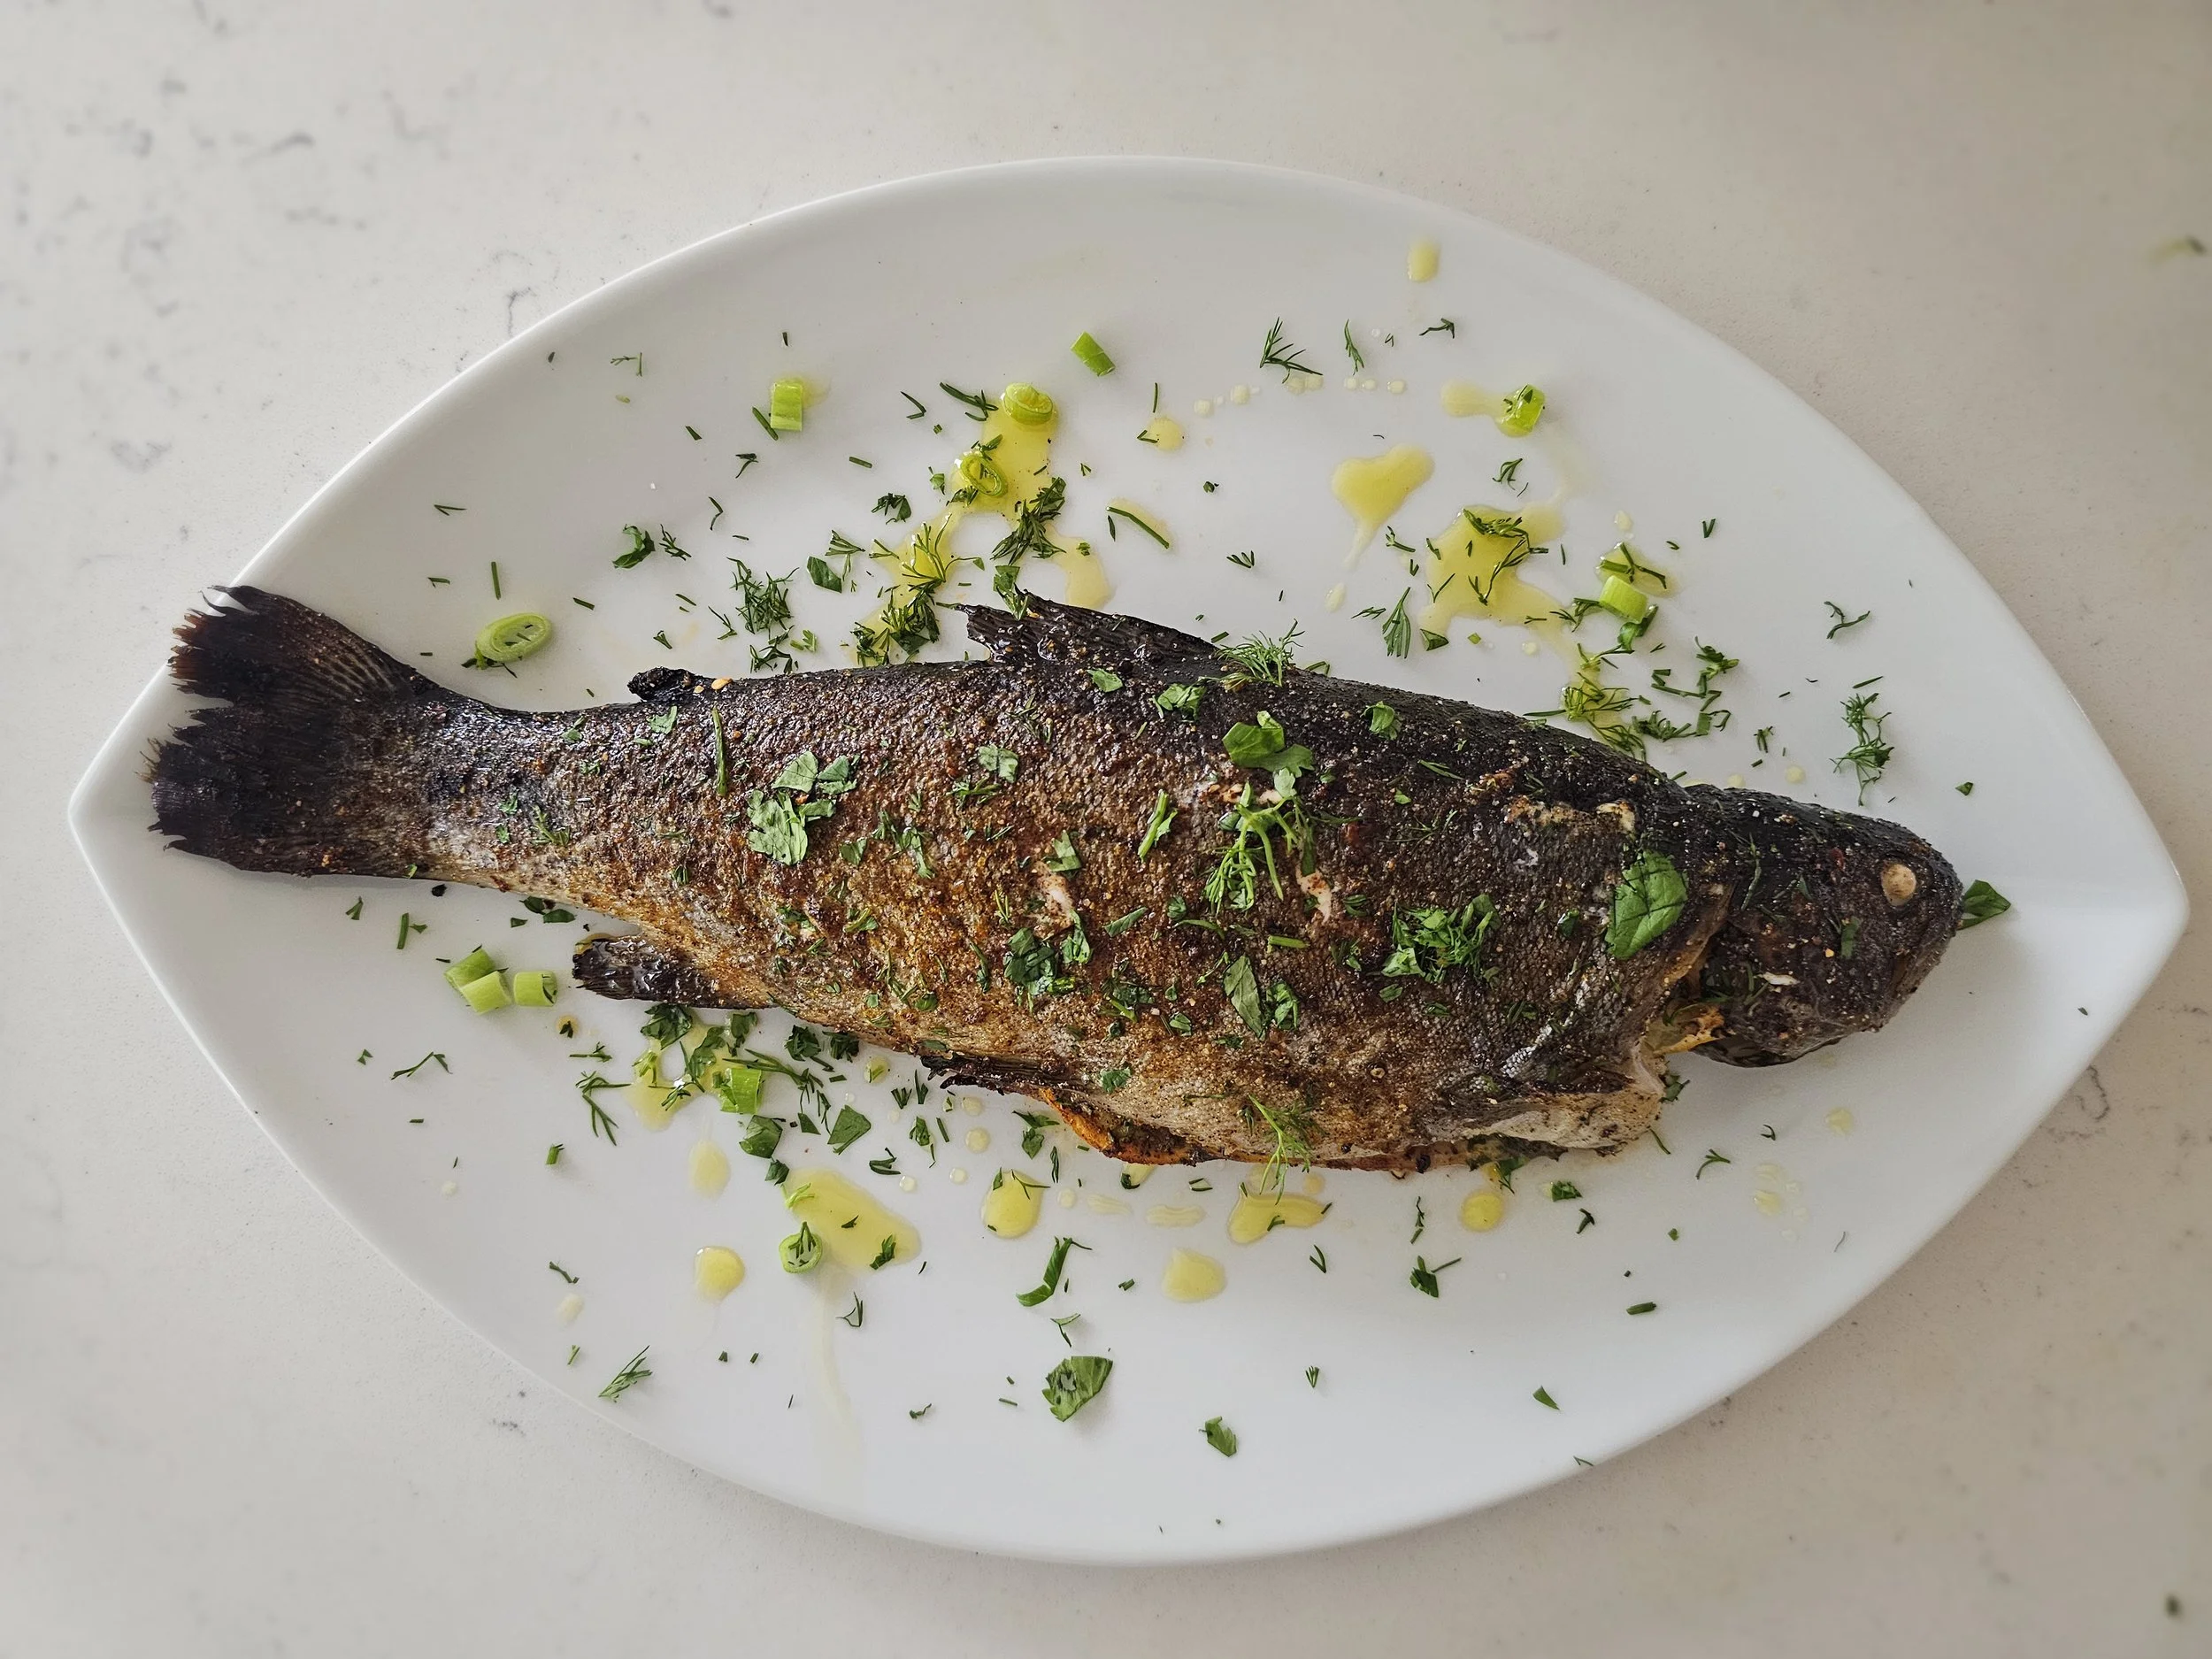
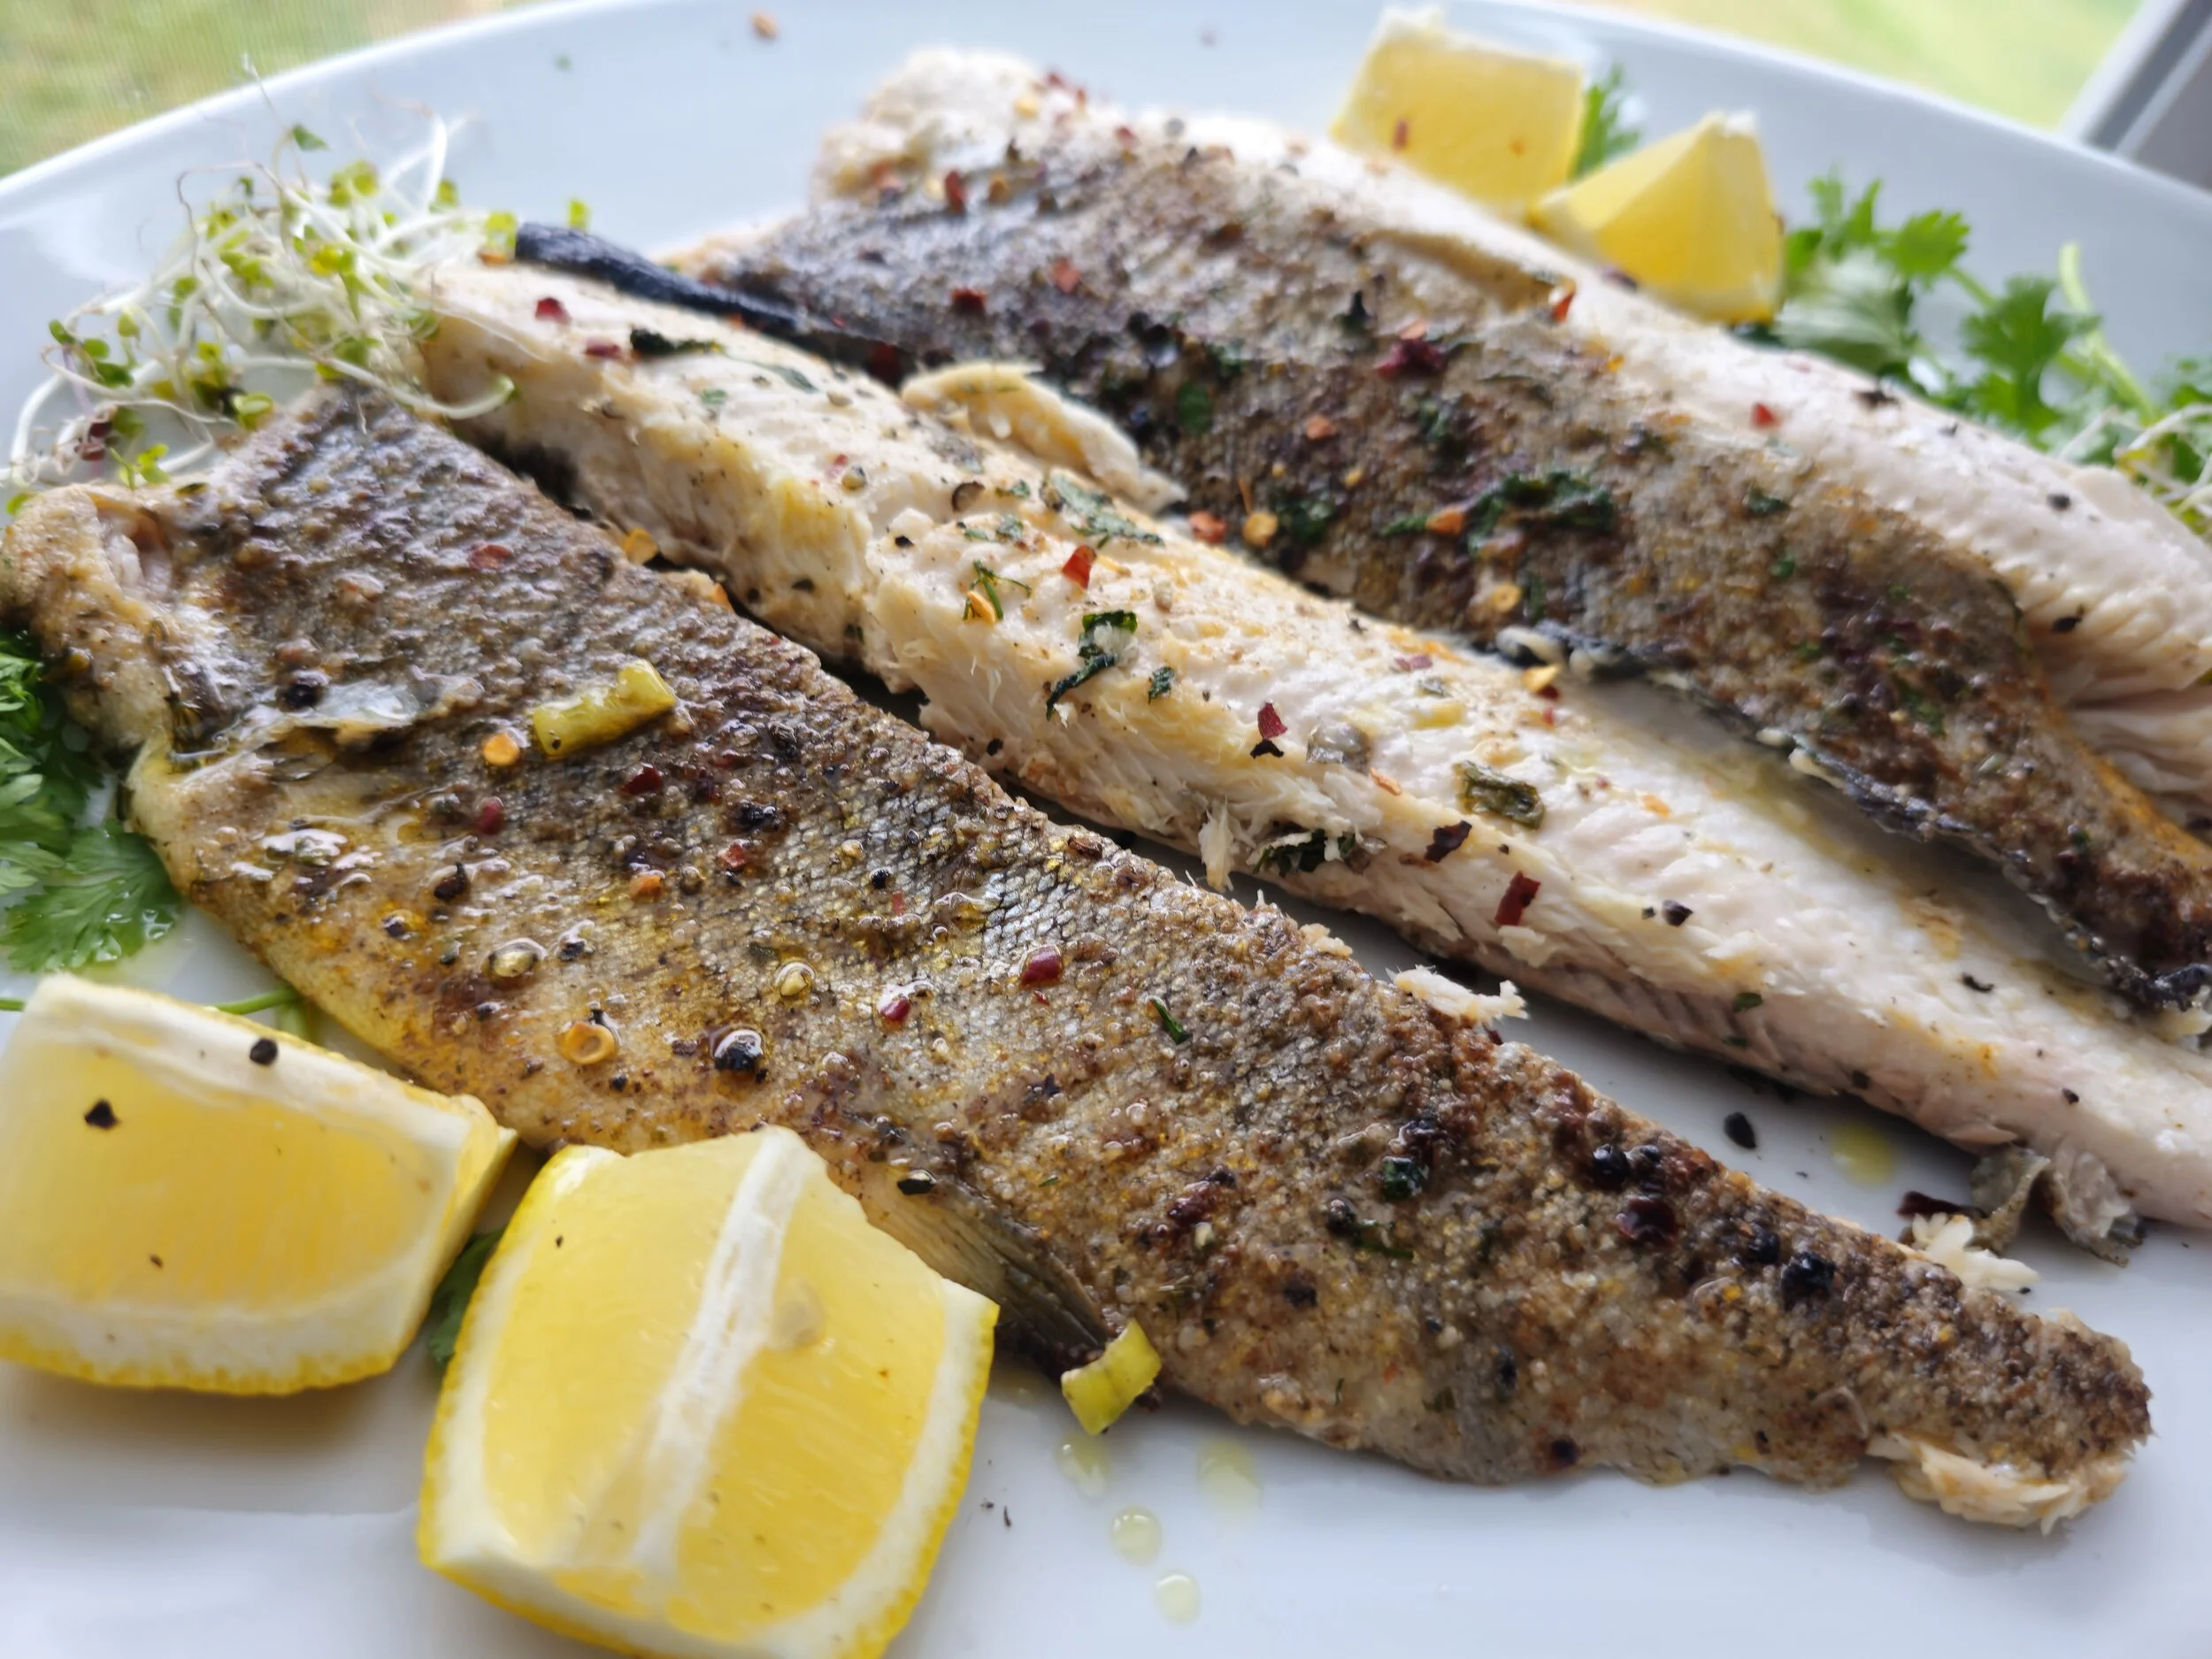
Blackened Pan-Seared Trout with Herbed Yogurt Sauce
Marinated Alpine Trout, Blackened Warm with African Spices, Served with Creamy Dill Yogurt Sauce
Bold, soulful, and full of contrast, this Blackened (Alpine) Trout with Herbed Yogurt Sauce is a true flavor celebration. The trout is first marinated for hours in a blend of African-inspired spices, allowing the warmth of paprika, cumin, and subtle heat to deeply infuse the flesh. Just before searing, it’s pressed with fresh dill, which blackens beautifully—creating a crispy, herb-crusted finish that’s both rustic and elegant. Served with a cool, yogurt sauce brightened with lime and fresh herbs, this dish strikes a perfect balance of spice, creaminess, and charred depth. Ideal for a dinner that feels both homey and elevated.
Tip for Perfectly Cooked Trout
Start skin-side down in a medium-hot, oiled pan and don’t move it. Alpine trout (also known as Arctic Char) has delicate flesh and naturally high fat, so let it sear undisturbed for 3–4 minutes until the skin is crisp and releases easily. This locks in moisture and prevents sticking, but you’ll want to keep an eye out to prevent the oil and butter form burning. Baste the fish, for 2-3 minutes, then flip it gently and finish cooking for another 1-2 minutes on the other side. The fish is best when just cooked through and still tender—overcooking will mute those beautiful spices and dry it out.
Alpine Trout (Arctic Char) vs. Salmon vs. Rainbow Trout: What’s the Difference?
If you’ve never cooked with Alpine trout or Arctic char before, you’re in for a treat. Often called a hidden gem of the seafood world, it’s a cousin to both salmon and rainbow trout, and brings the best of both to your plate. But how does it compare?
| Fish | Flavor | Texture | Fat Content | Best Cooking Methods | Pairs Well With |
|---|---|---|---|---|---|
| Arctic Char (Alpine Trout) | Mild, buttery, slightly sweet | Tender, flaky | Medium-high | Pan-searing, roasting, grilling | Bold spices, brown butter, citrus, herbed yogurt |
| Salmon | Rich, stronger, slightly oily | Firm, meaty | High | Grilling, baking, smoking | Dill, mustard, sweet glazes, creamy sauces |
| Rainbow Trout | Light, slightly nutty | Soft, delicate | Low-medium | Pan-frying, baking whole, steaming | Lemon, garlic, herbs, butter |
This dish is the perfect canvas for African spices like cumin, paprika, coriander, and berbere—flavorful but not overpowering. Its buttery richness holds up to a crispy sear and balances beautifully with the tangy herbed yogurt sauce I serve alongside.
If you can’t find it, rainbow trout is a great substitute for a lighter version, while salmon will give you a heartier, more robust twist.

Blackened Pan-Seared Trout with Herbed Yogurt Sauce
This bold and easy fish recipe features Alpine trout marinated in African-inspired spices like paprika, cumin, and coriander. Seared with fresh dill for a crispy herb crust, it’s served with a creamy yogurt sauce brightened with lime and fresh herbs. Perfectly balanced, flavorful, and ready in under 30 minutes — a healthy seafood dish that feels both elevated and approachable.
Ingredients
- ½ cup plain Greek yogurt
- 1 tablespoon olive oil
- Juice of ½ lime or lemon
- 1 teaspoon garlic powder
- 1 tablespoon fresh parsley, chopped (or fresh rosemary)
- 1 tablespoon fresh cilantro, chopped (or fresh thyme)
- ½ teaspoon salt (adjust to taste)
- 1 teaspoon black pepper
- Optional: 1-2 teaspoons soy sauce
- 1 large Alpine Trout (Arctic Char) fillet
- 1 teaspoon herbed salt
- 1 teaspoon black pepper
- 2 tablespoons olive oil
- 1 garlic clove, grated or finely minced
- Optional: 1 teaspoon garlic powder
- 1 teaspoon ground coriander
- ½ teaspoon ground cumin
- ½ teaspoon smoked paprika
- Juice of ½ lime or lemon
- Zest of 1 lime or lemon
- ¼ teaspoon cayenne pepper
- ½ teaspoon ground ginger
- 1/4 teaspoon ground cloves
- Optional: ½ teaspoon Berbere spice
- 1 sprig of fresh dill
- 1 fresh sprig of thyme
- 2-4 tablespoons butter
- 2 tablespoons olive oil
- 2-3 lime/lemon wedges
- Optional: Crushed almonds and chilli flakes to garnish
- 2 cups arugula
- 1/3 cup broccoli sprouts
- 1/2 cup shredded carrots
- 2-3 tablespoons olive oil
- 1/4 cup chopped almonds
- 1/2 avocado, diced
- 1 tablespoon feta cheese
- 1 tablespoon raisins
- 1 tablespoon pumpkin seeds
- 1 teaspoon salt
- 1 teaspoon black pepper
- Optional: 1 tablespoon nutritional yeast
Instructions
- Pat the fish dry thoroughly for a crispier finish. Season both sides with herbed salt and black pepper (especially if you plan to eat the skin).
- In a small bowl, combine olive oil, garlic powder, minced garlic, coriander, cumin, paprika, lime juice, and zest. Add cayenne pepper, ginger, and optionally cloves or Berbere spice. Mix well.
- Coat the fish fillet evenly with the marinade. Add extra olive oil as needed to cover the surface. Optionally, tuck in fresh dill on both sides. Cover and refrigerate for 15–20 minutes.
- In a separate bowl, mix yogurt with olive oil, lime juice, herbed salt, black pepper, garlic (powder or fresh), and your choice of fresh herbs (e.g., parsley, cilantro, rosemary, thyme). Add a splash of soy sauce for umami, if desired. Chill until ready to serve.
- In a large bowl, combine arugula, broccoli sprouts, and shredded carrots. Drizzle with olive oil and toss. Top with avocado, feta, raisins, pumpkin seeds, salt, pepper, and optional nutritional yeast. Toss again and set aside.
- Heat olive oil in a pan over medium-high heat. Once hot, place the fillet skin-side down and sear for 1–2 minutes. You can drizzle any remaining marinade over the fish at this stage.
- Tip: For a cleaner taste, remove the fresh dill and gently scrape off excess seasoning. For a bolder, charred finish, leave it on.
- Add 2 tablespoons of butter to the pan along with any leftover fresh herbs. Watch your heat carefully to avoid burning the fats. Lower the heat if necessary. Use a spoon to baste the melted butter over the fish as it cooks.
- Flip the fillet carefully to crisp up the flesh side. Cook until the fish is just done—firm and opaque throughout—then remove from the heat.
- Remove the yogurt sauce from the fridge. Add a dollop to your plate or serving platter. Lay the cooked fish over the sauce. Serve with your salad and lemon or lime wedges on the side.
- Top the fish with a spoonful of extra yogurt, crushed almonds, and a sprinkle of chili flakes for heat and crunch.
I am not a certified nutritionist and any nutritional information on dontmissmyplate.com should only be used as a general guideline.

Shepherd’s Pie with Oxtail and Sweet Potato
Oxtail is a prized ingredient in many cuisines, celebrated for its tender, fall-off-the-bone texture and its ability to develop a rich, flavorful gravy when braised low and slow. Swapping out regular mashed potatoes for sweet potatoes adds a natural sweetness that perfectly complements the deep umami of the oxtail, while warm spices like cinnamon, garlic, and black pepper enhance the overall depth of flavor.
If you're looking for a foundational recipe or want to start with a classic preparation, be sure to check out the Oven-Braised African Oxtail Stew or the Oxtail and Butternut Stew—both are great bases for this dish.
Shepherd’s Pie is a timeless comfort food, traditionally made with ground lamb and topped with creamy mashed potatoes. In this bold twist, I’m elevating the classic by using slow-braised oxtail and a silky sweet potato mash. The result? A deeply satisfying dish that combines the comforting essence of traditional Shepherd’s Pie with the rich, indulgent flavors of slow-cooked oxtail.
This dish is a fusion of African and Caribbean culinary traditions, blending familiar comfort with bold innovation. Whether you're a longtime fan of Shepherd’s Pie or just looking for a new way to enjoy oxtail, this recipe is a must-try. With its savory oxtail gravy and naturally sweet, golden-baked sweet potato topping, it’s a next-level comfort food you’ll want to make again and again.


Shepherd’s Pie Tips for Rich Meats
I walked here so you can run! It’s an unusual recipe, but honestly worth a try.
1. Skim the Fat
Oxtail is incredibly flavorful but also quite fatty. After braising, let the stew cool slightly and skim off excess fat from the top. You can even refrigerate it for an hour or so—the fat will solidify, making it easier to remove.
2. Shred the Meat Well
Once cooked, remove the oxtail pieces, shred the meat, and discard any excess fat or connective tissue. This helps keep the filling tender, not greasy.
3. Balance the Richness
Counterbalance the rich oxtail with acidity or brightness. Add a splash of red wine vinegar, Worcestershire sauce, or a bit of lemon juice to the gravy to cut through the richness. Even a spoonful of tomato paste during braising helps with depth and balance.
4. Use a Thick Gravy
A watery filling will soak into the mash and ruin the texture. Make sure your gravy is thick enough to hold its shape, reduce it until it coats the back of a spoon. A little flour or cornstarch slurry can help if needed.
5. Choose a Sturdy Mash
Sweet potato mash works beautifully here, but keep it thick, not too creamy or runny. A looser mash can sink into the filling. A touch of butter and a splash of cream is enough, don't overdo it.
6. Add Texture on Top
For a golden crust, rough up the surface of your mash with a fork, then brush lightly with butter or egg wash before baking. You can also sprinkle breadcrumbs or grated cheese for added crunch and depth.
7. Bake Until Bubbling
Don’t just warm it through, bake until the top is golden and the filling is bubbling around the edges. This helps marry the layers and gives that classic Shepherd’s Pie texture.

Zimbabwean Finger Millet Porridge (Sadza ReZviyo) with Beef Stew
In Zimbabwean cuisine, sadza rezviyo (finger millet porridge) is a beloved staple, cherished for its deep, earthy flavor and rich nutritional benefits. Unlike traditional maize-based sadza, this version is made with finger millet (zviyo), an ancient grain packed with fiber, iron, and a nutty taste that pairs beautifully with hearty stews.
To complete this comforting meal, we’re serving it with nyama (beef stew)—slow-cooked to perfection with aromatic spices, tomatoes, and onions. The result is a wholesome, satisfying dish that embodies the warmth of Zimbabwean home cooking. Whether you’re reconnecting with your roots or exploring African flavors for the first time, this recipe is a must-try!

Zimbabwean beef stew, or nyama, is a comforting and flavorful dish that brings together tender beef, aromatic spices, and rich, savory gravy. Slow-cooked to perfection, this hearty stew features ingredients like tomatoes, onions, garlic, and fragrant herbs, creating a depth of flavor that pairs beautifully with traditional sides. Whether served with sadza rezviyo (finger millet porridge), rice, or dumplings, this dish is a staple in Zimbabwean households, offering warmth and nourishment in every bite. Perfect for family meals or special gatherings, this beef stew is a true celebration of Zimbabwean home cooking.


White Sadza vs. Zviyo (Finger Millet Sadza)
Both white sadza and zviyo (finger millet sadza) are popular staples in Zimbabwean cuisine, but they differ in terms of their base ingredients, texture, nutritional content, and cultural significance.
1.. Base Ingredient
White Sadza: Made from maize (corn) meal, white sadza is the most common form of sadza in Zimbabwe. The maize is ground into a fine powder, which is then cooked into a thick, smooth porridge.
Zviyo (Finger Millet Sadza): Made from finger millet, zviyo is a gluten-free grain that is milled into a finer flour. Finger millet is often used in traditional African dishes due to its rich nutritional profile and slightly nutty flavor.
2. Nutritional Content
White Sadza: While maize sadza provides a good source of carbohydrates, it is lower in nutritional value compared to finger millet. It lacks the higher levels of iron, calcium, and fiber found in finger millet.
Zviyo (Finger Millet Sadza): This is a highly nutritious alternative, packed with iron, calcium, magnesium, and dietary fiber. Finger millet is also considered to be more digestible and easier on the stomach, making it a great choice for individuals looking to boost their nutrient intake.
3. Texture and Flavor
White Sadza: The texture is typically smooth, firm, and dense, with a mild, neutral flavor that easily complements rich stews and vegetables.
Zviyo (Finger Millet Sadza): The texture is often a bit more grainy and hearty than white sadza. Its flavor is slightly **earthy and nutty**, offering a more complex taste that pairs well with savory dishes, especially those rich in spices.
4. Cultural and Regional Significance
White Sadza: As the more commonly consumed form of sadza in Zimbabwe, white sadza is seen as a symbol of comfort and is typically served with a variety of meats, vegetables, and stews.
Zviyo (Finger Millet Sadza): Traditionally consumed in rural areas, finger millet sadza is often considered a healthier option, especially for those with dietary restrictions or seeking to add more nutrients to their diet. In some regions, it’s also regarded as a more traditional meal.
Both types of sadza have their place in Zimbabwean cuisine, and the choice between them largely depends on personal preference and health considerations. Whether you enjoy the smooth comfort of white sadza or the nutrient-packed punch of zviyo, each offers a delicious base for a variety of flavorful dishes!
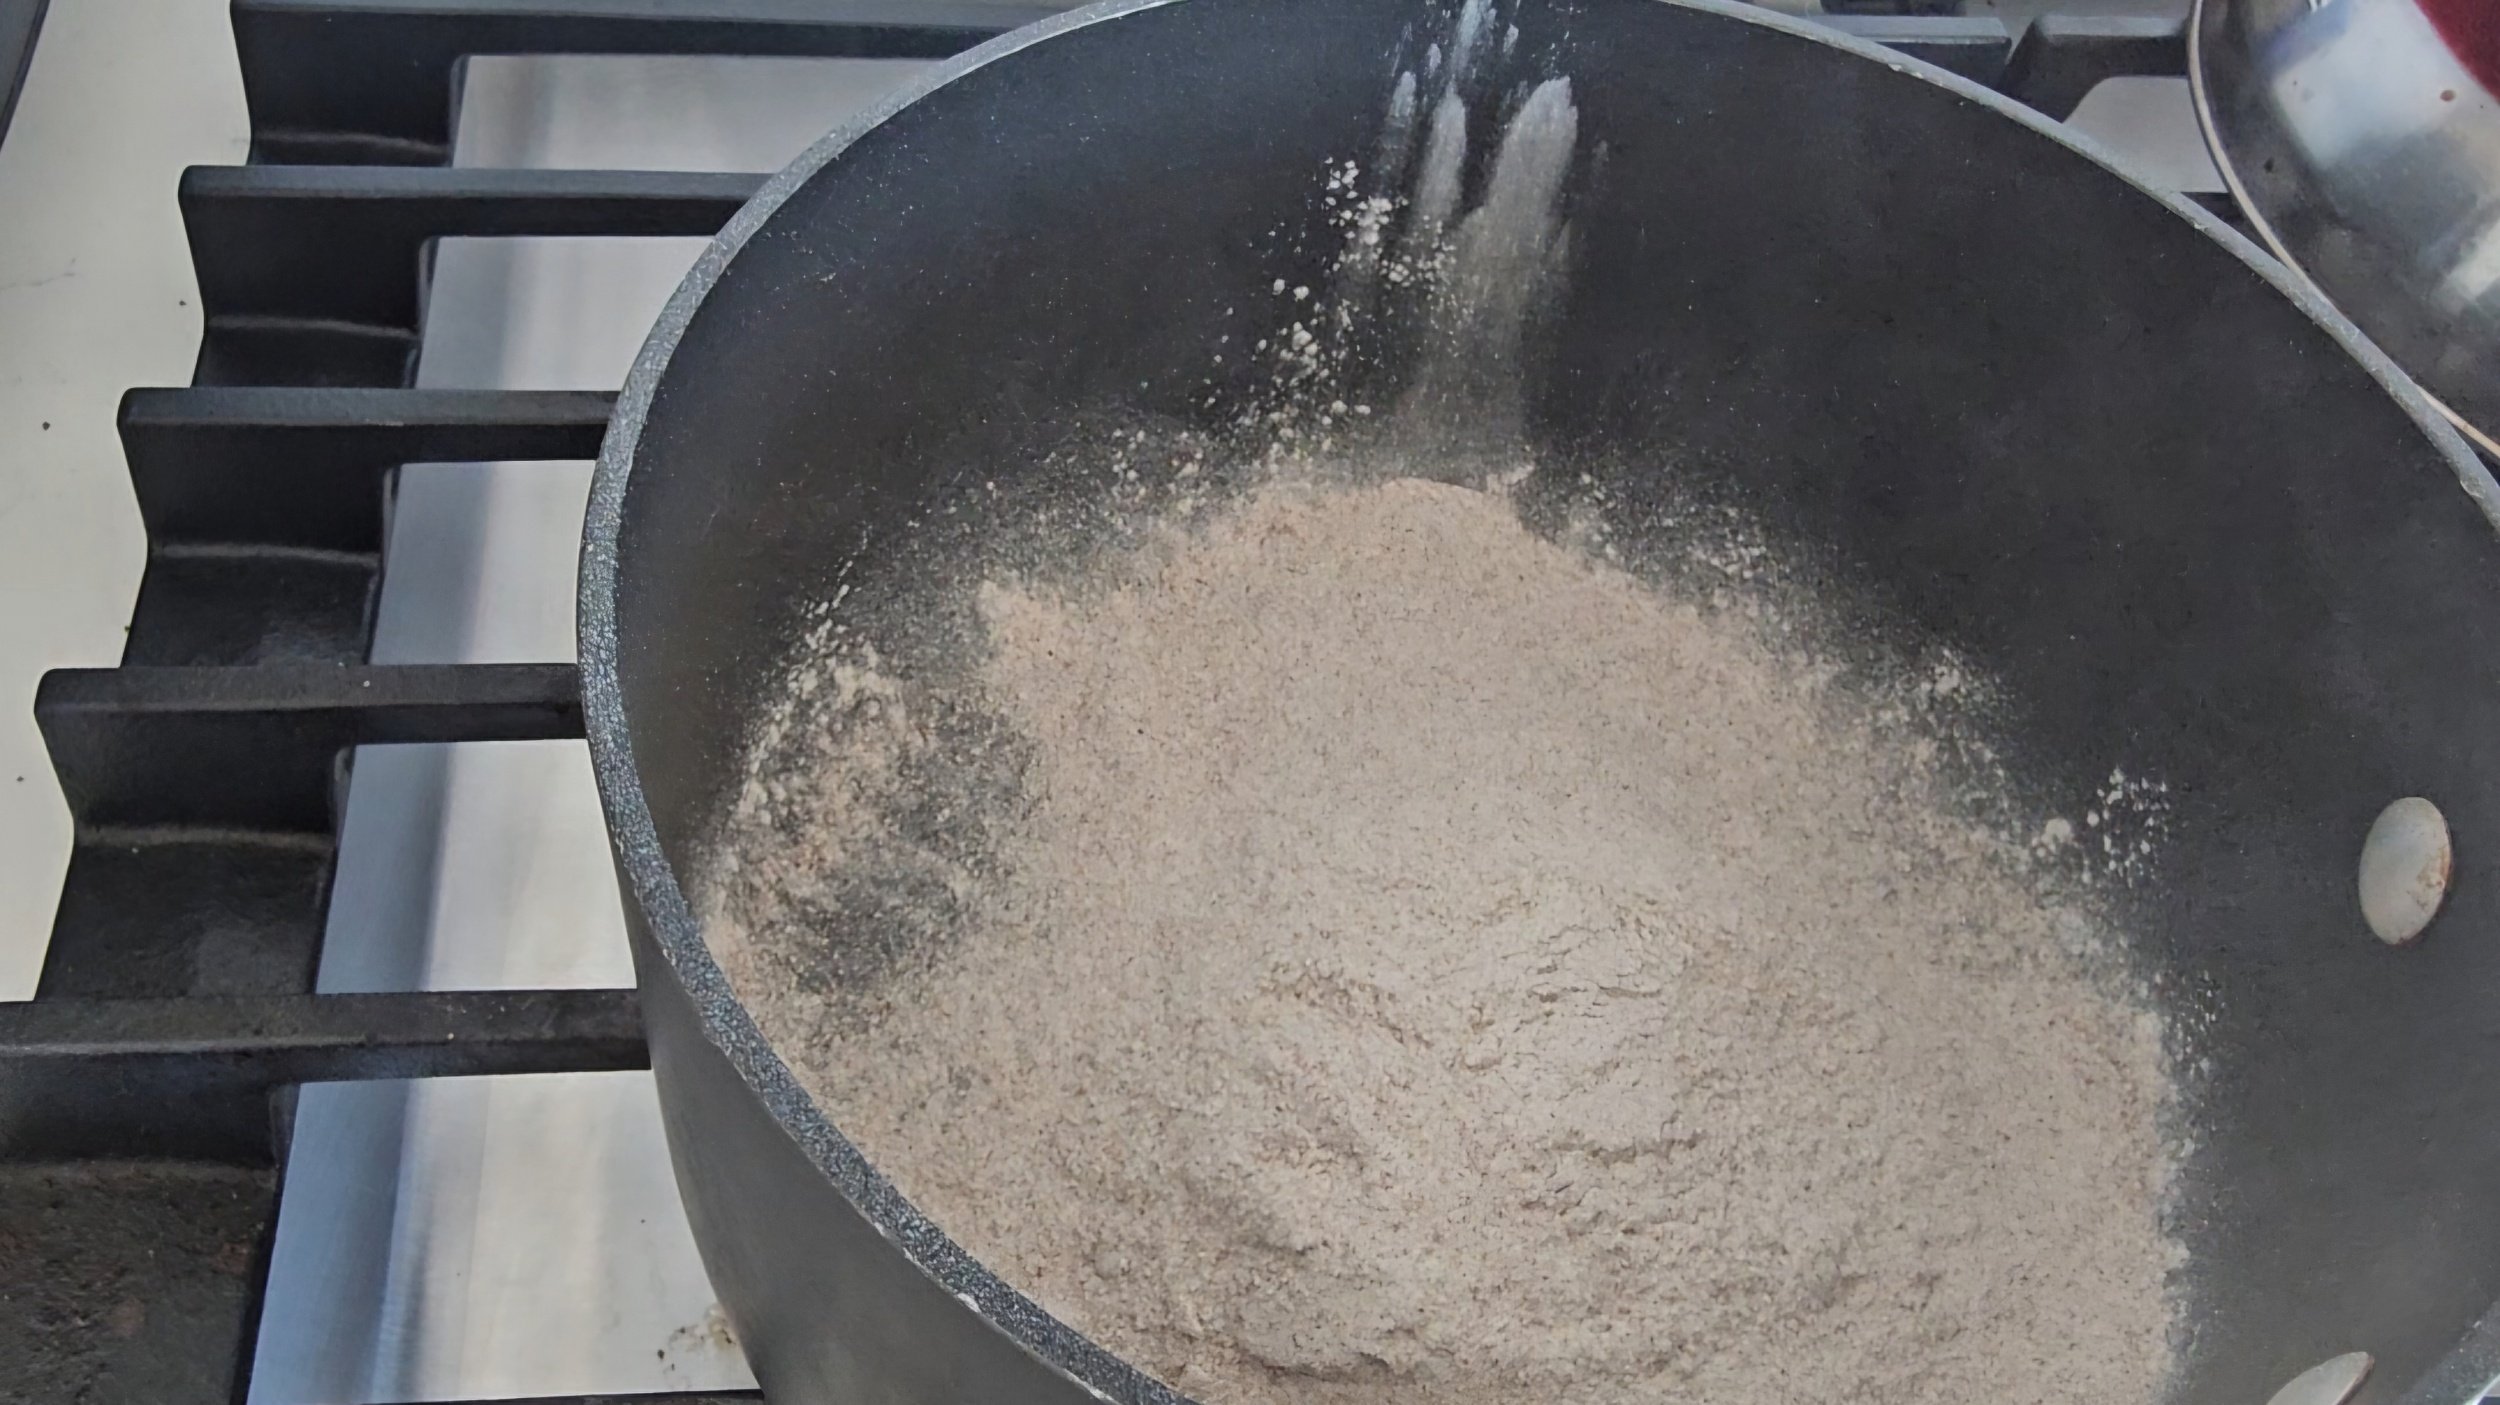


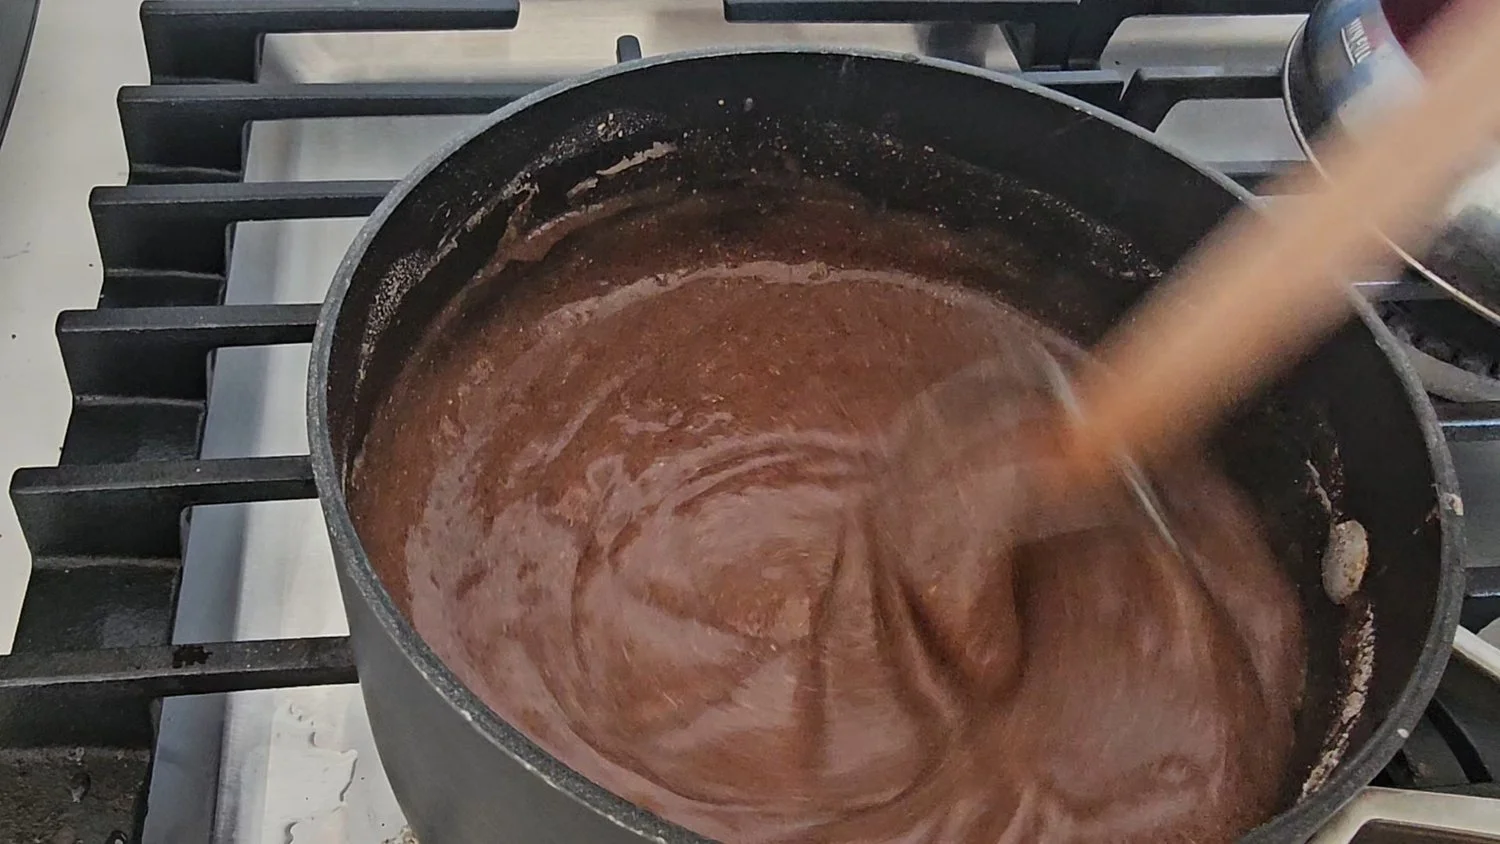


 with Beef Stew")
Zimbabwean Finger Millet Porridge (Sadza reZviyo) with Beef Stew
Sadza rezviyo (finger millet porridge) is a Zimbabwean staple with a deep, earthy flavor and rich nutrients. Paired with nyama—a slow-cooked beef stew with aromatic spices, tomatoes, and tender short ribs—this dish is comforting and flavorful. Simmered with herbs, chili, and a touch of red wine, the stew’s bold flavors perfectly complement the wholesome, nutty taste of sadza rezviyo. A must-try for those reconnecting with their roots or exploring African cuisine!
Ingredients
- 1 ½ lbs beef stew cubes
- 1 ½ lbs chuck short ribs
- 4 beef bouillon cubes
- 3–4 cups water
- 1/8 cup Worcestershire sauce
- 1/8 cup red wine or cooking wine
- 1 bunch kale, chopped
- 1 ½ yellow onions, diced
- 2 tomatoes, chopped
- 1 chili pepper, finely chopped
- 3 spring onions, chopped
- 2 garlic cloves, minced
- 2 tablespoons fresh thyme
- 2 tablespoons butter
- 2 tablespoons olive oil (more if needed)
- 1 tablespoon Royco Usavi Mix Beef (optional, all-purpose soup seasoning)
- 1 tablespoon dried oregano
- 1 tablespoon black pepper
- 1 tablespoon seasoning salt
- 1 tablespoon smoked paprika
- 1 tablespoon chilli flakes
- 1- 1 1/2 cups toasted rapoko (finger millet), millet, or sorghum meal (adjust as needed)
- ½ cup cold water
- 1 tsp seasoned salt
- 2 cups hot water (adjust as needed)
Instructions
- Prepare your vegetables by chopping the onions, tomatoes, garlic, and kale, and measure out your ingredients.
- Heat your Dutch oven or large pot, and melt your fats. Add the beef and cook until browned on both sides, then remove and set aside.
- Add the onions and cook for 1–2 minutes until translucent. Follow with the garlic and cook for another minute.
- Add the seasonings and spices, cooking for another 1–2 minutes to activate the flavors. Add a little extra oil if needed. Deglaze the pot by adding your liquids, scraping up the browned bits.
- Add the tomatoes and cook for another 2–3 minutes, then stir in the bouillon cubes.
- Return the beef to the pot, then add water in proportion to the bouillon cubes.
- Bring to a boil, then reduce to a simmer for 1 ½ – 2 hours, or until the meat is tender.
- Season with salt and pepper to taste, then add the kale. Stir and allow it to wilt. You can also add more chili flakes if desired.
- Simmer for 5 minutes, then remove from heat. Turn your attention to the Sadza.
- In a non-stick or steel pot, use a wooden spoon or mugoti to mix the cold water with 1/2 cup of millet until a smooth paste forms. Add your seasoning.
- On medium to medium-high heat, gradually add water in 1/2-cup increments while stirring constantly until the porridge begins to simmer violently, or kwata. As the porridge thickens, switch to a whisk or musika to remove or prevent lumps—smoother porridge results in smoother sadza and a better eating experience!
- Cover the pot with a lid and let the porridge cook for 15–20 minutes on low-medium heat.
- Once the porridge is cooked, gradually add the remaining millet, 1/2 cup at a time, using the whisk or musika to incorporate the dry meal into the dough. Stop when you reach your preferred consistency—thick but not overly dry. For a softer texture, add less millet.
- Once fully combined, switch to the wooden spoon or mugoti. Using a figure-eight motion (kumona), aerate and knead the dough until it becomes smooth, slightly sticky, and clings to the spoon.
- Reduce the heat to low, partially cover the pot, and let it rest for about 5 minutes before serving.
- For an extra step, use cling wrap to shape the sadza into a smooth ball or oval before serving.
I am not a certified nutritionist and any nutritional information on dontmissmyplate.com should only be used as a general guideline.