
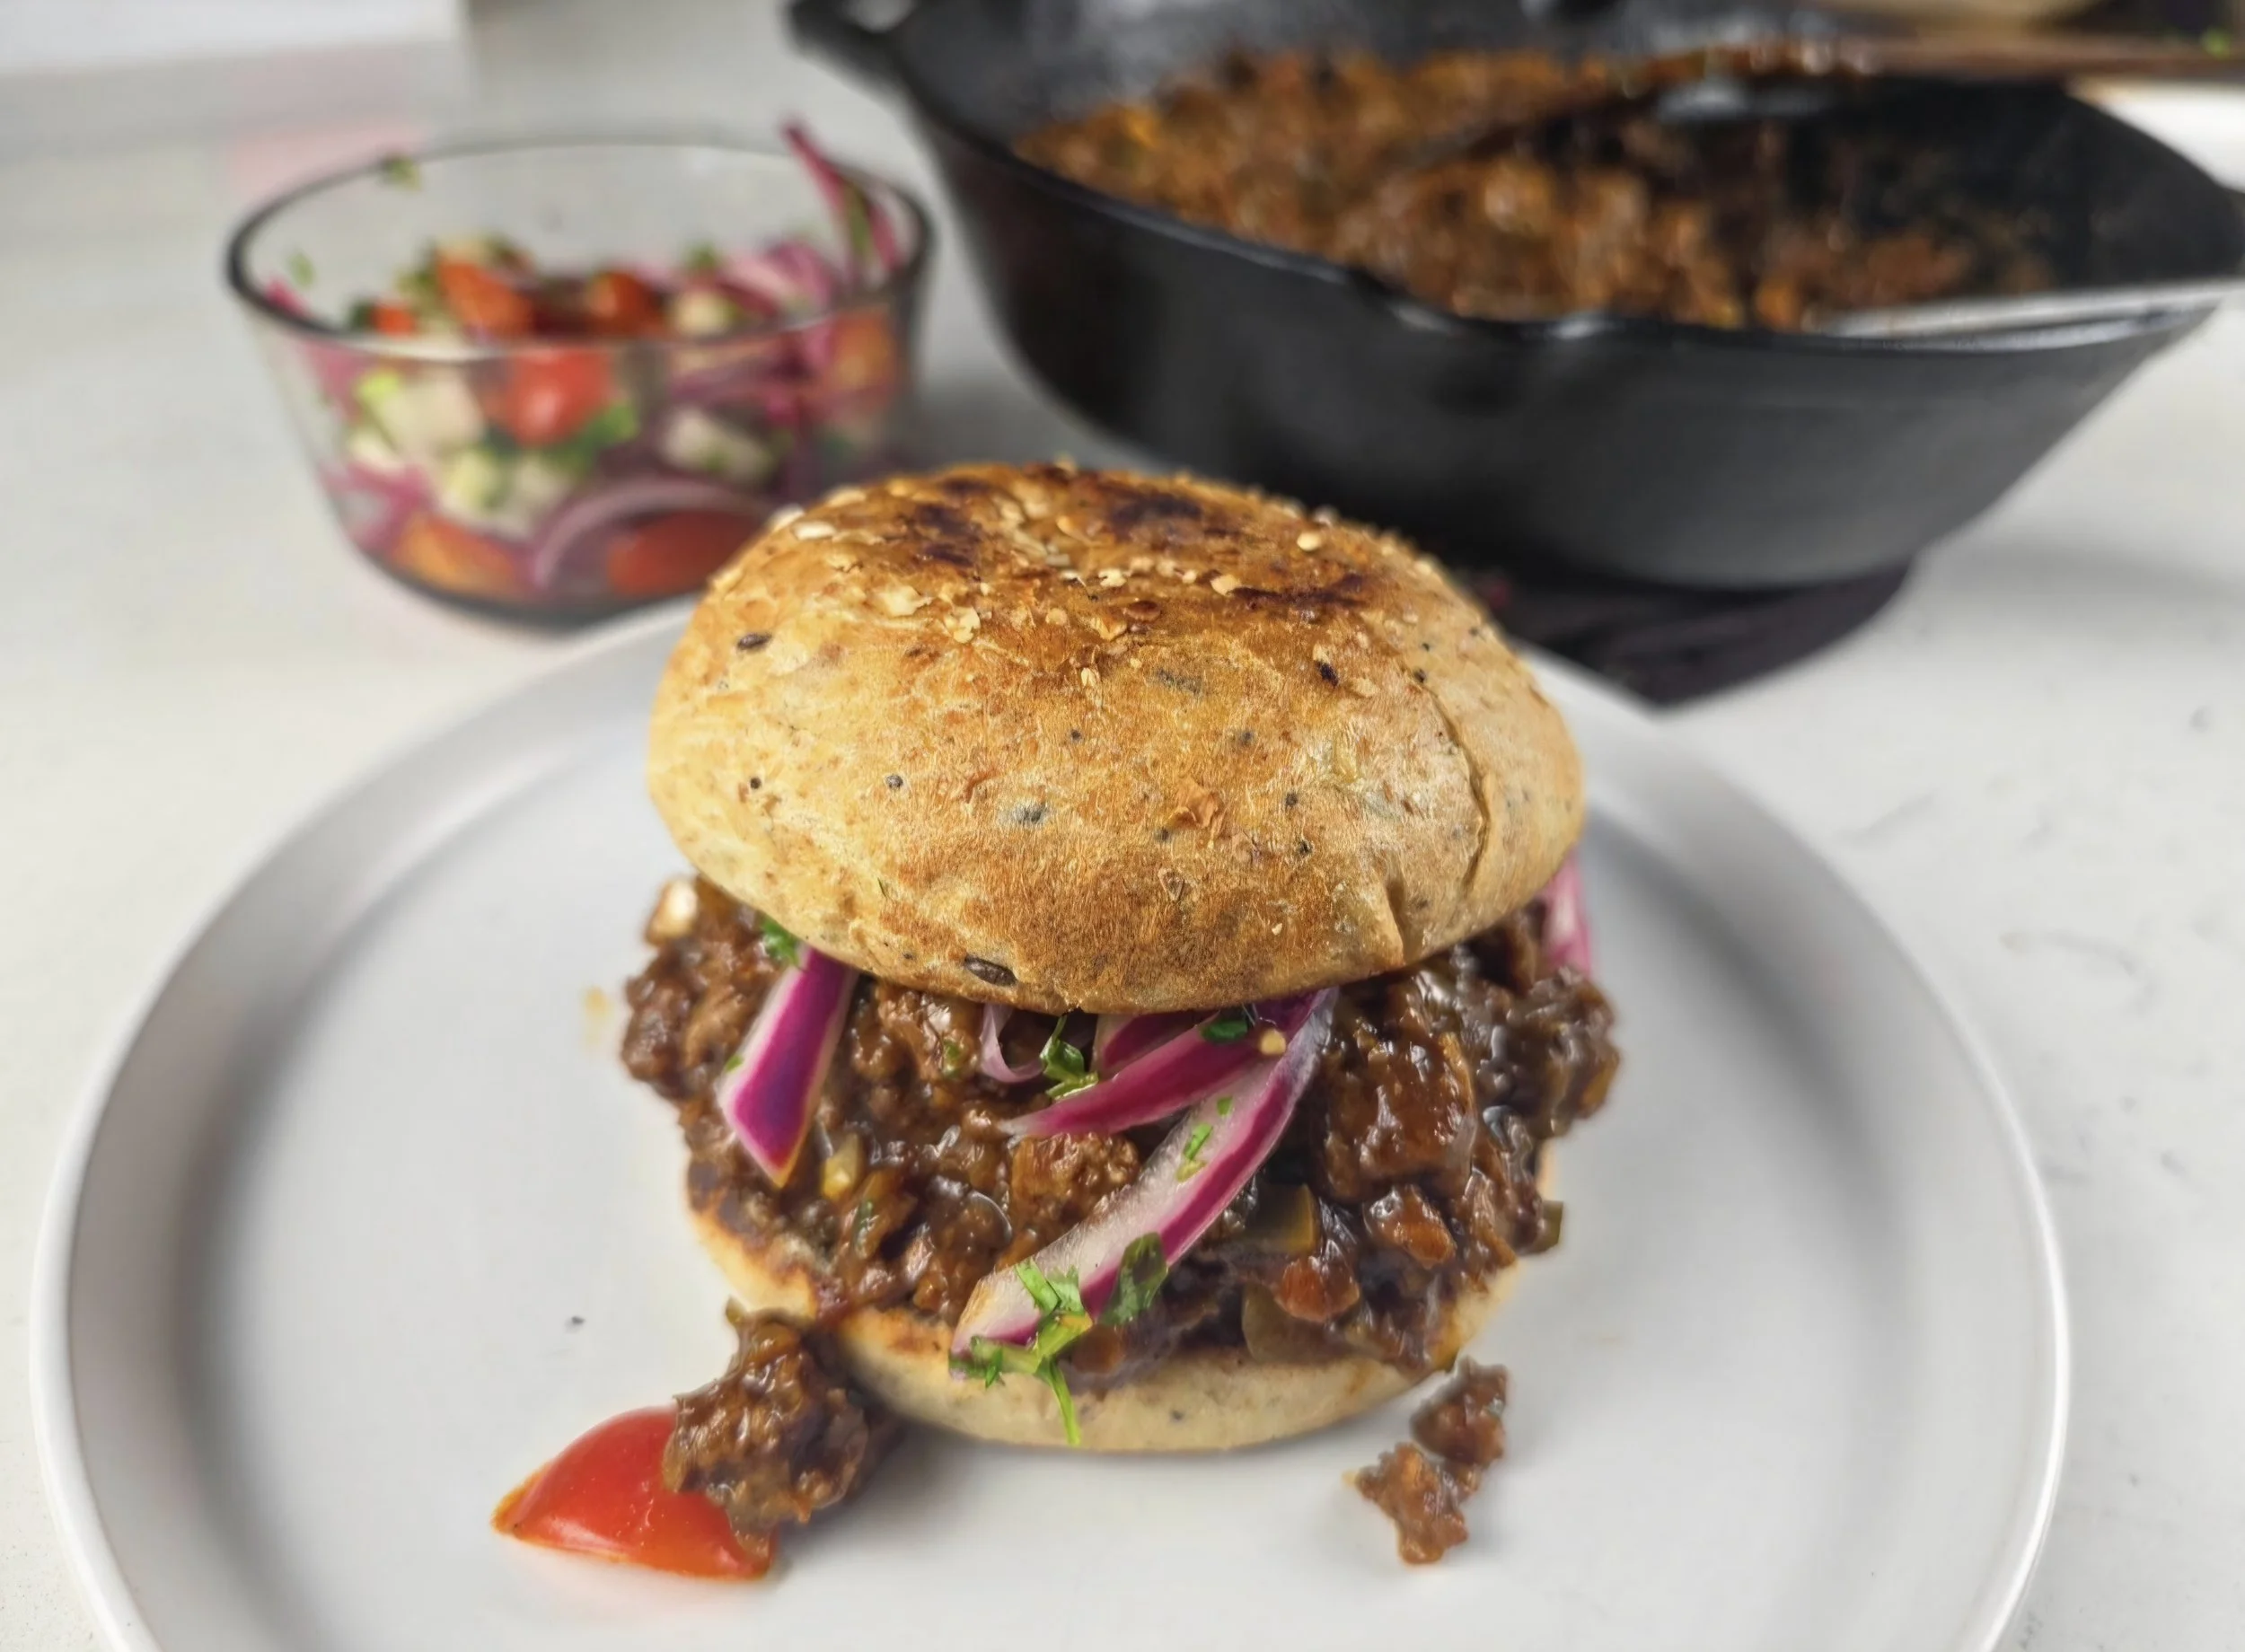
Goat Sloppy Joes
Sloppy Joes are one of those classic American comfort foods that are easy to love: saucy ground meat, a toasted bun, plenty of flavor, and a dinner that comes together without requiring hours in the kitchen. This version keeps everything that makes a sloppy Joe satisfying, but gives it an East African-inspired flavor profile with ground goat, warm spices, coconut cream, and a bright, quick-pickled kachumbari-style topping.
Ground goat takes the place of the more traditional ground beef. Goat is widely eaten across East Africa, where it appears in everything from stews and curries to grilled dishes, and it's also popular across parts of Southern Africa. Its rich flavor works especially well with the warm spices used here, while still fitting naturally into the familiar sloppy Joe format.
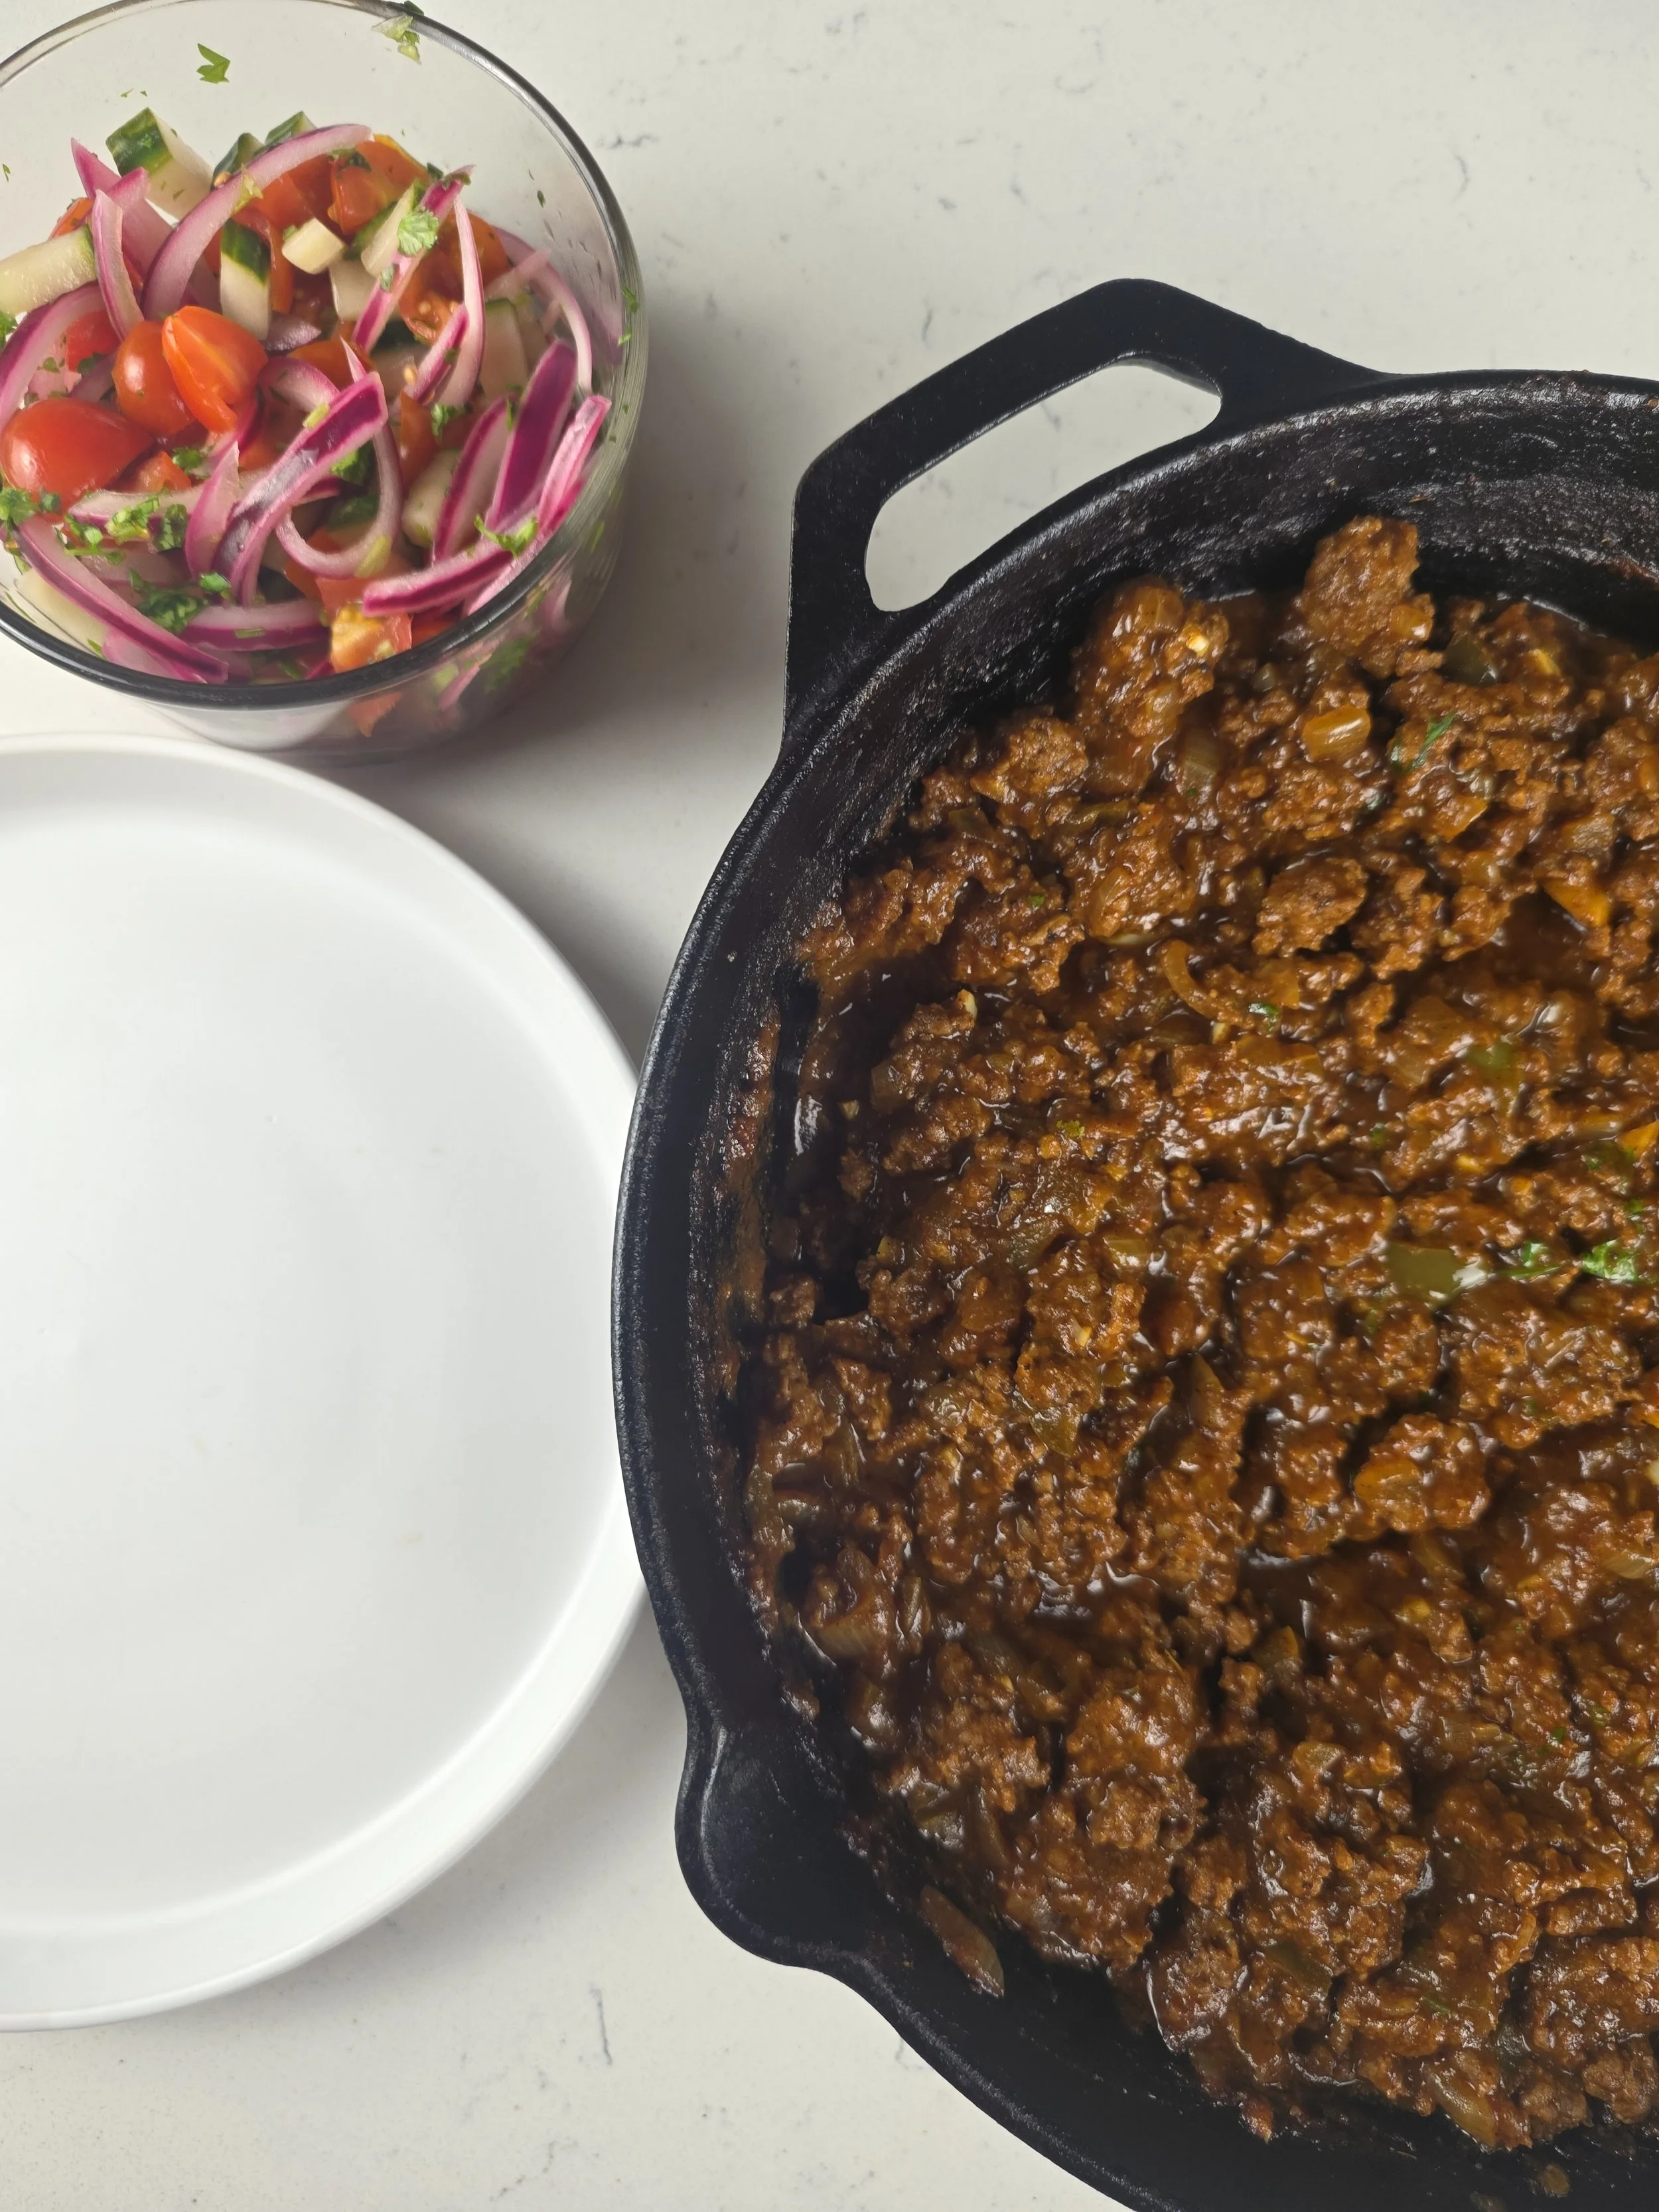
The seasoning brings together pilau seasoning, curry powder, cumin, coriander, ginger, garlic, smoked paprika, and chile. The result is deeply savory and aromatic, with enough warmth and spice to make the filling interesting without losing the comforting character of a sloppy Joe. The sauce keeps the sweet, tangy, tomato-rich qualities you'd expect, with tomato sauce, ketchup, brown sugar, Worcestershire sauce, and broth. Coconut cream is added toward the end to make the sauce richer and round out the spices. It doesn't turn the filling into a coconut curry; it simply adds another layer of flavor and helps create the thick, glossy sauce that makes a sloppy Joe so good.
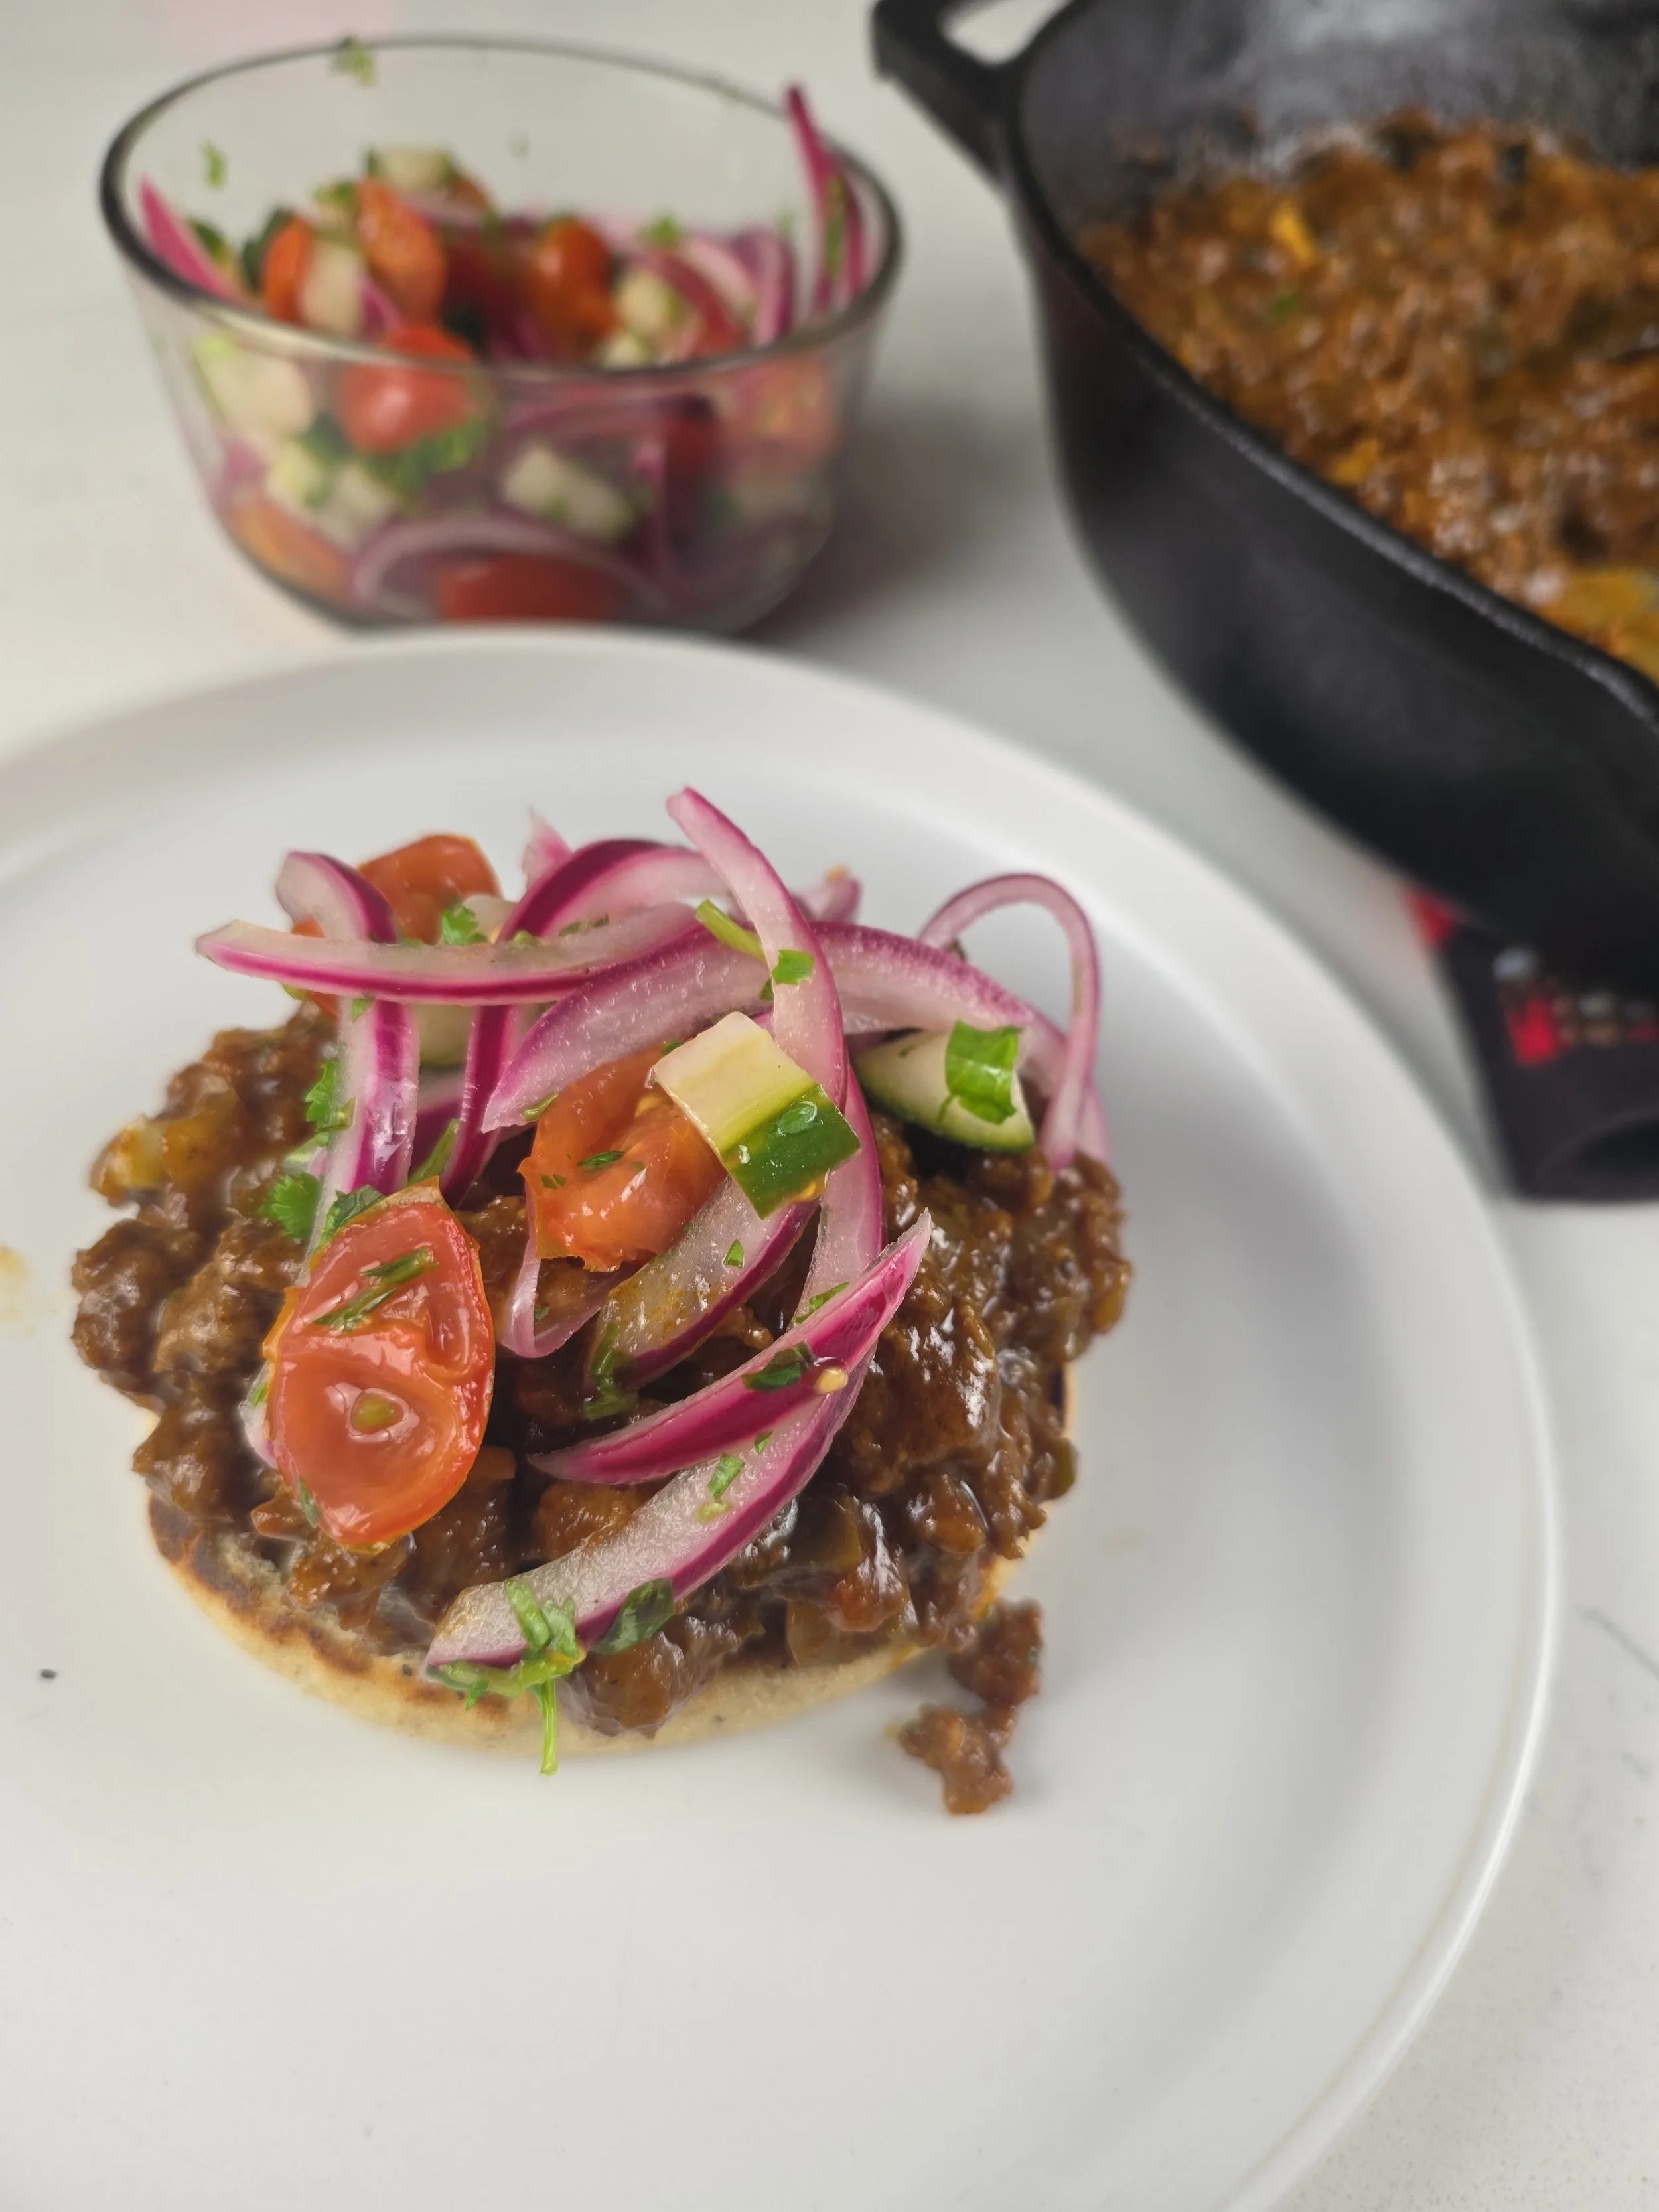
Then comes the part that really brings everything together: a quick-pickled kachumbari-inspired topping. Kachumbari is a fresh East African salad commonly made with tomatoes and onions, often with cucumber and fresh herbs. Here, those vegetables get a quick pickle with vinegar, giving them a bright, tangy crunch that cuts through the richness of the goat.
And this is still very much an easy weeknight dinner. The goat cooks in one skillet, the sauce comes together with pantry staples, and the quick-pickled topping can be made while the meat simmers. There's no complicated technique or long list of steps—just a few smart layers of flavor that make an otherwise familiar sandwich feel completely different.
For the best result, don't skimp on the sauce, and toast the buns well before assembling. The toasted bun gives the sloppy Joe enough structure to hold all that saucy filling without immediately becoming soggy. Add the pickled vegetables right before serving for the best crunch.

Goat Sloppy Joes
Saucy ground goat simmered with warm East African-inspired spices, tomato, and coconut cream, piled onto toasted buns and topped with a bright, tangy kachumbari-style pickle.
Ingredients
- 1 lb ground goat
- 1 tbsp neutral oil or beef tallow
- 1 tbsp butter
- ½ medium yellow onion, finely diced
- ½ green bell pepper, finely diced
- 1 small jalapeño, finely diced
- 3 garlic cloves, minced
- 1½ tsp pilau seasoning
- 1 tsp curry powder
- ½ tsp smoked paprika
- ½ tsp ground cumin
- ½ tsp ground coriander
- 1 tsp ground ginger
- ¼ tsp cayenne pepper
- ½ tsp salt
- 1 tsp light brown sugar
- 1 tbsp tomato paste
- ½ cup tomato sauce
- ¼ cup ketchup
- 1 tbsp Worcestershire sauce
- 1 cup beef broth
- ⅓ cup coconut cream
- ½ cup quartered cherry tomatoes
- ½ small-to-medium red onion, thinly sliced
- ¼ cup diced cucumber
- ½ cup water
- ¼ cup apple cider vinegar
- 1 tsp salt
- 1 tsp sugar
- 1 bay leaf
- 3–4 whole allspice berries
- 4 multigrain buns, buttered
- Quick-pickled kachumbari-style topping
- Fresh cilantro and lime juice, for finishing
Instructions
- Heat the oil in a large skillet over medium-high heat. Add the ground goat and cook for 5–7 minutes, breaking it apart as it browns.
- Add the onion, green bell pepper, and jalapeño. Cook for 4–5 minutes, until softened and beginning to brown.
- Add the garlic and cook for 30 seconds.
- Add the butter and entire spice blend and stir for about 30 seconds, allowing the spices to become fragrant.
- Add the tomato paste and cook for 1 minute.
- Add the tomato sauce, ketchup, Worcestershire sauce, and broth (or bouillon cube and water). Stir well.
- Reduce the heat to medium-low and simmer uncovered for 8–10 minutes, stirring occasionally. The mixture should be thick but still generously saucy. Add another splash of water or broth if needed.
- Stir in the coconut cream and simmer for another 2–3 minutes. Taste and adjust the seasoning if needed.
- Toast the buns until lightly golden. This helps prevent the saucy filling from making the buns soggy.
- Spoon the goat filling onto the toasted buns and top with the quick-pickled kachumbari-style vegetables.
- Finish with fresh cilantro and serve immediately.
- Combine the water, vinegar, salt, sugar, bay leaf, and allspice in a small saucepan and bring to a boil.
- Pour the hot pickling liquid over the tomatoes, onion, and cucumber.
- Let sit for 10–15 minutes while the goat cooks.
- Drain well before serving and add fresh chopped cilantro.
Notes
- Ground goat has a naturally rich, distinctive flavor that works especially well with the warm spices in this recipe. Ground beef can be used instead if goat isn't available.
- Keep the goat mixture saucy. If it becomes too thick while simmering, add a little extra water or broth until it reaches a loose, spoonable consistency.
- Toast the buns well before assembling. This gives them enough structure to hold the saucy filling and helps prevent them from becoming soggy.
- Make the quick-pickled tomato, onion, and cucumber topping first so it has time to absorb the tangy brine while you prepare the goat. Drain it well before assembling to keep the toasted buns from becoming soggy.
- The topping is best added just before serving so the vegetables retain as much texture as possible.
Nutrition Facts
Calories
600Fat (grams)
27 gSat. Fat (grams)
10 gCarbs (grams)
59 gFiber (grams)
6 gSugar (grams)
16 gProtein (grams)
31 gI am not a certified nutritionist and any nutritional information on dontmissmyplate.com should only be used as a general guideline.
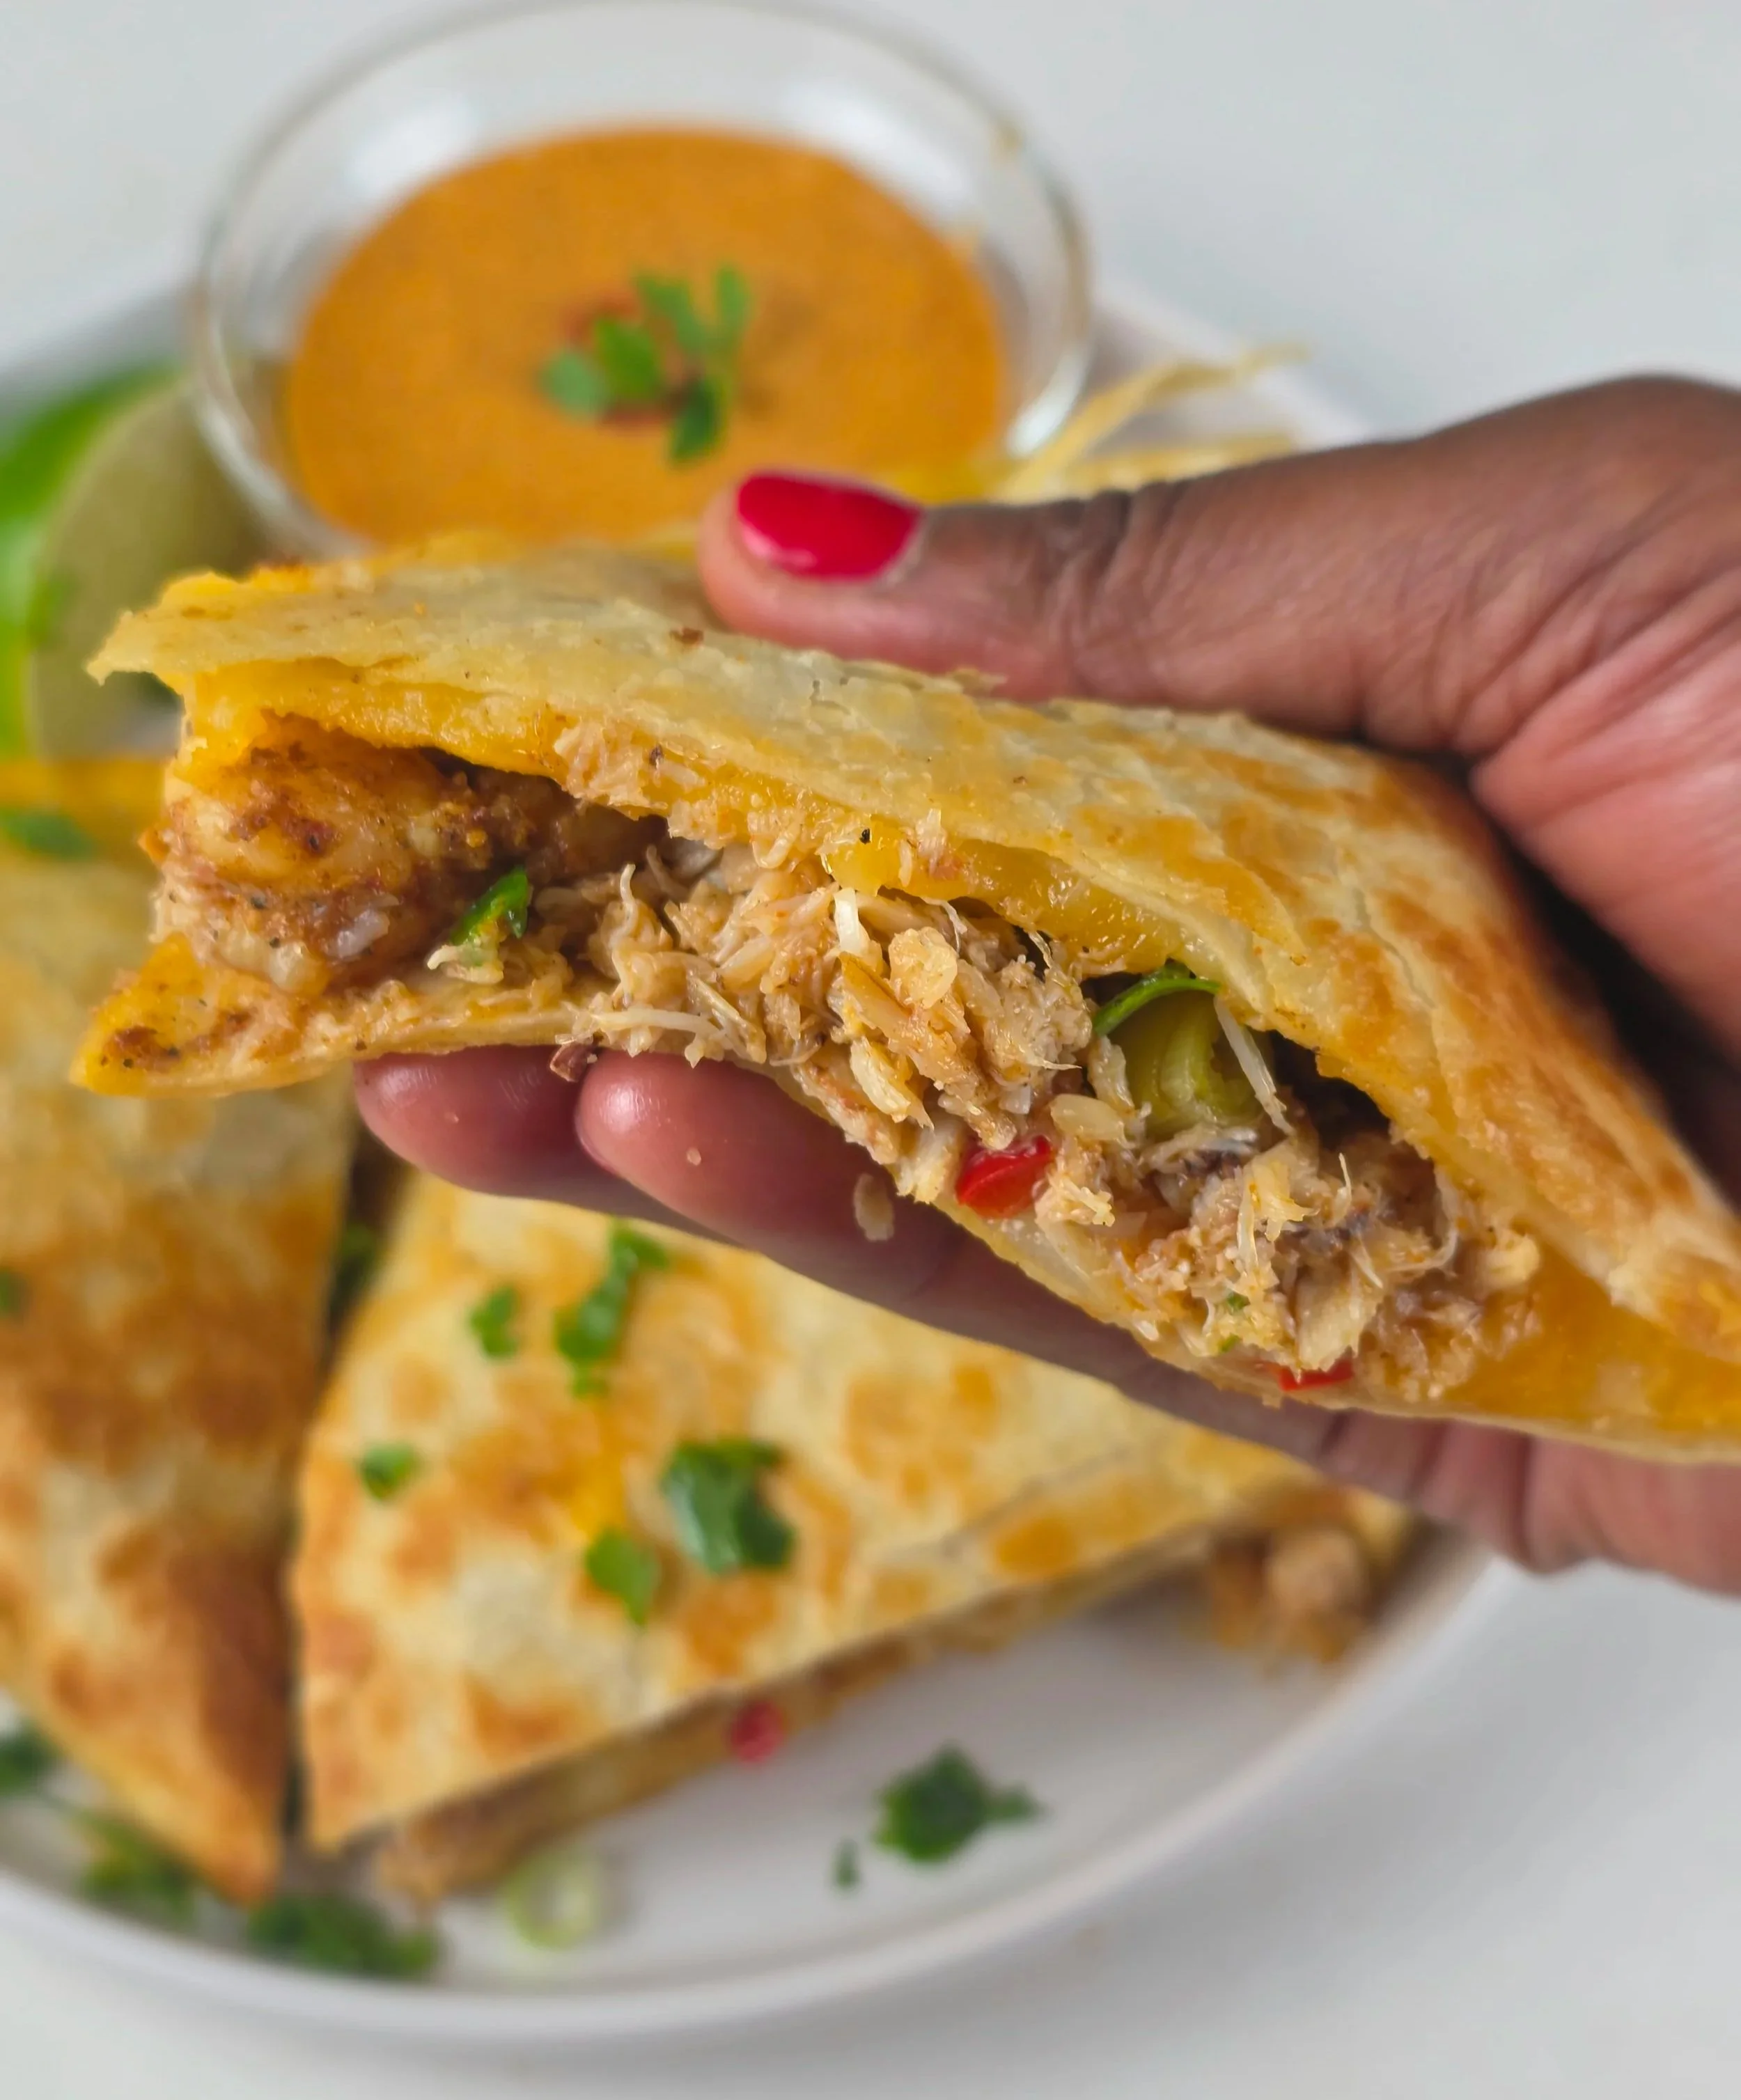
Berbere Bang Bang Crab & Shrimp Quesadillas
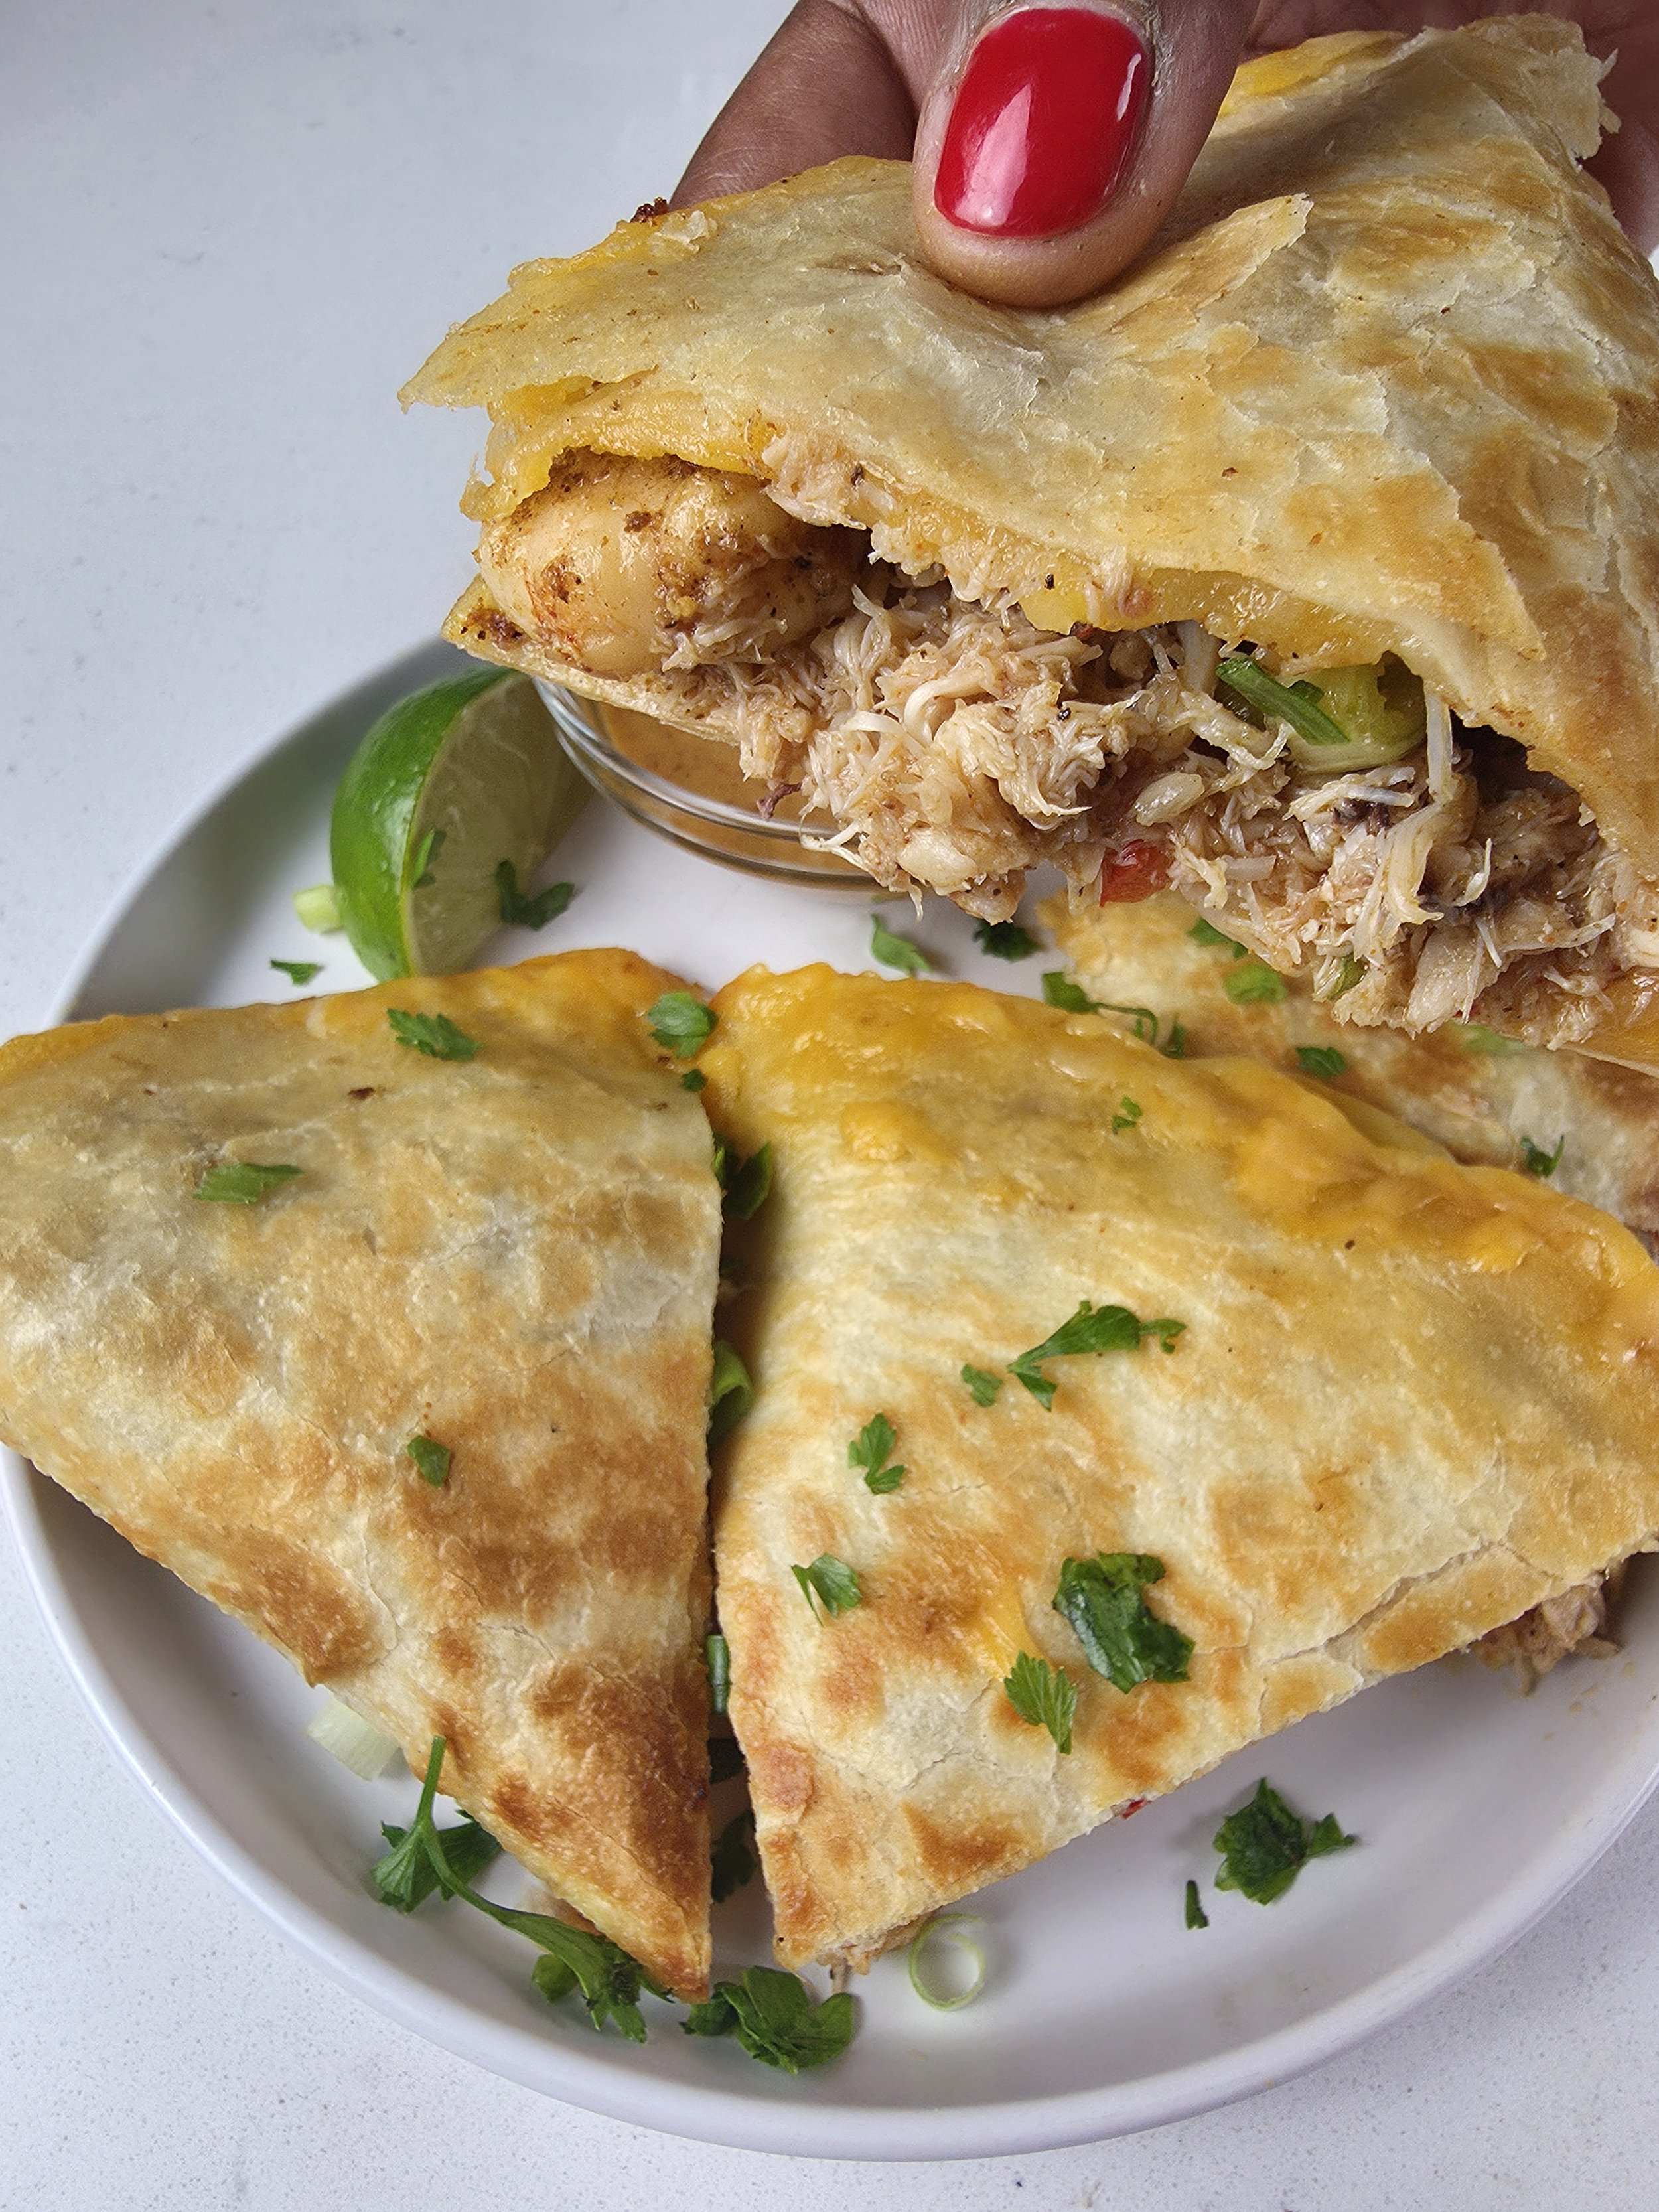
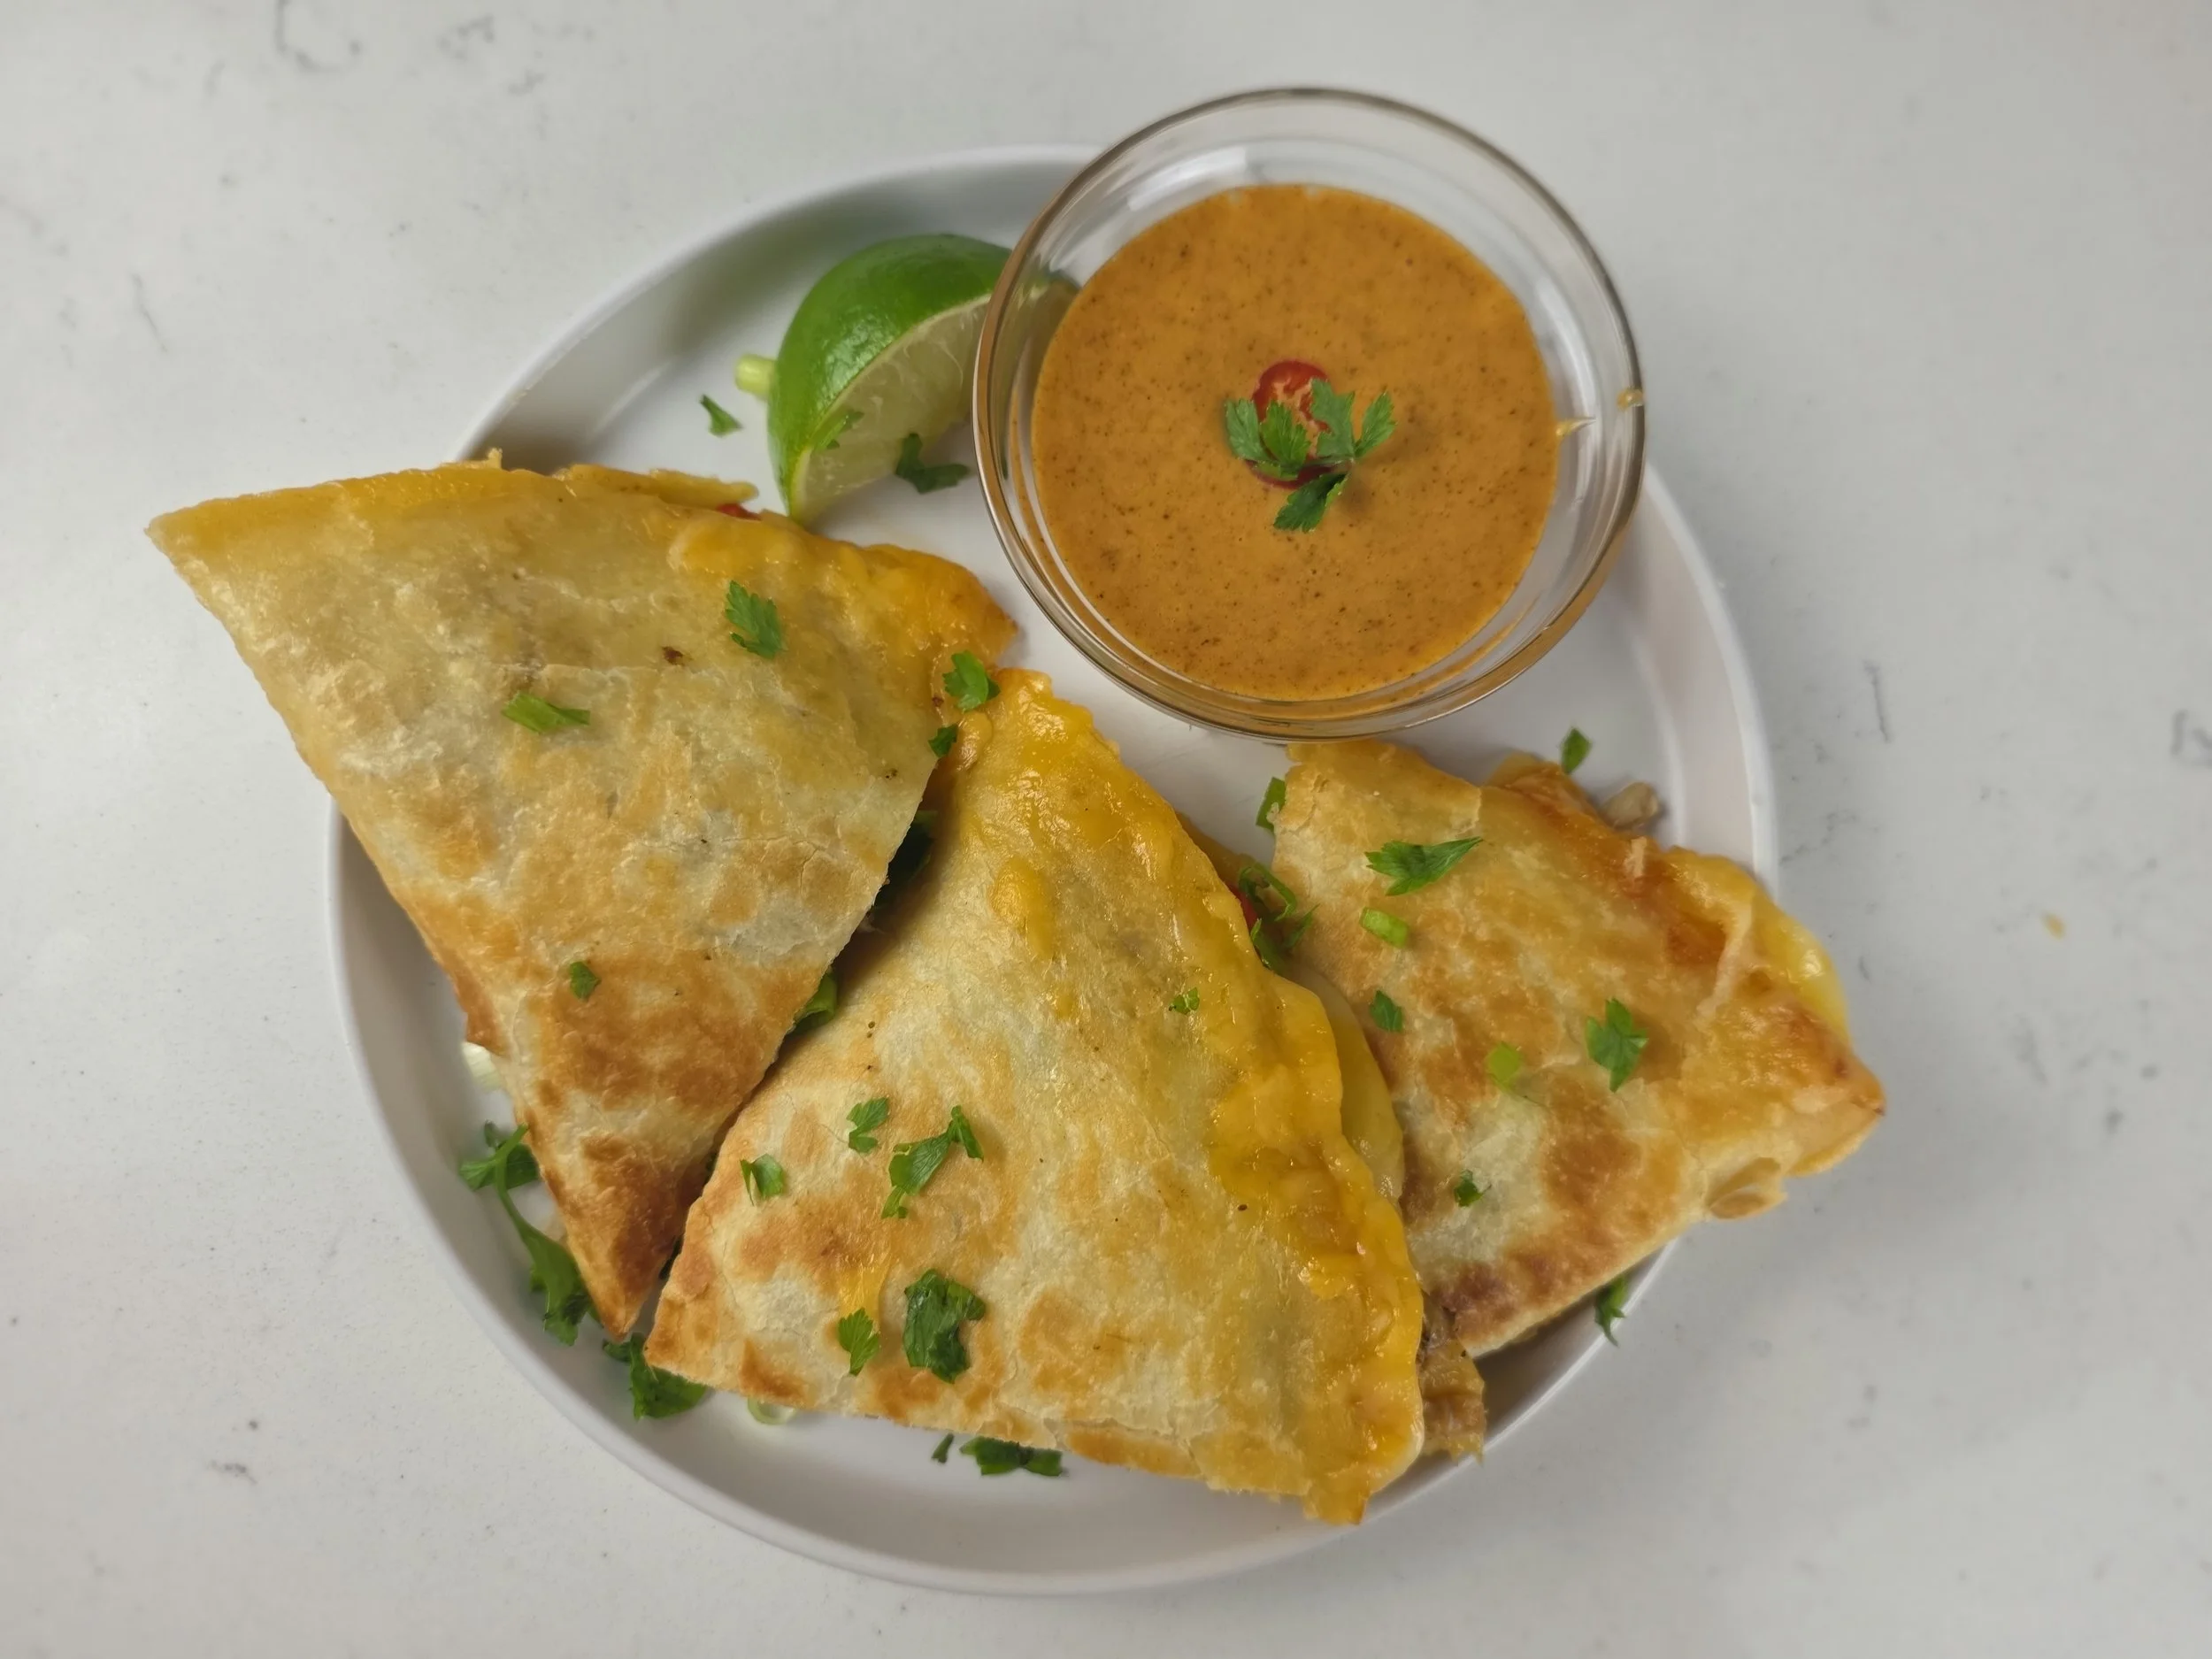
These quesadillas take a familiar cheesy favorite and give it a seafood-forward Afrofusion twist. They're packed with sweet lump crab, whole seasoned shrimp, melted Monterey Jack and Colby cheese, fresh red chili, and a creamy homemade Bang Bang sauce layered with fragrant berbere.
Quesadillas are one of those wonderfully adaptable foods that can take on almost any flavor profile, and this version is a great example. The combination of seafood and cheese might not be the first pairing that comes to mind for everyone, but here it absolutely works. The mild, creamy cheese provides the perfect backdrop for sweet crab and juicy shrimp, while berbere brings warmth, chile heat, and aromatic depth.
Berbere is one of the spices I reach for again and again, especially when I'm cooking seafood. I love the way its combination of chile and warm spices works with the natural sweetness of shrimp and crab. I've used it in recipes like my Blackened Salmon with Berbere Cream Sauce, and here I've taken it in a completely different direction by building it into both the seafood seasoning and the Bang Bang sauce. The result is a quesadilla that's creamy, spicy, savory, slightly sweet, and packed with flavor. The Berbere Bang Bang sauce is the signature element, adding a creamy, sweet-and-tangy finish with enough berbere to make its presence known without overwhelming the seafood.
This is also the kind of recipe I love for summer: quick enough for a weeknight lunch or dinner, fun enough for a casual gathering, and indulgent enough to feel like something you'd order at a restaurant. The seafood comes together quickly, while the quesadillas get golden and crisp in a skillet. For the cheese, I use Monterey Jack because it melts beautifully, with Colby adding a little more flavor. I intentionally use a generous amount for that dramatic cheese pull, but you can absolutely adjust the amount to your preference—the seafood is the star, after all.
There are a few tricks that make a big difference.
Don't overcook the shrimp; they only need a few minutes in a hot skillet and should be removed as soon as they're opaque and cooked through. The lump crab is already cooked, so you're simply warming it with garlic, butter, seasoning, lime, and scallions. Cooking it too long can dry it out and take away its delicate texture. I also recommend having all of your fillings ready before you start cooking the tortillas. Once the quesadilla is golden and the cheese has melted, fill it while it's still hot. As it cools, the melted cheese can seal the edges together, making the quesadilla difficult to open and fill neatly.
I like to finish these with fresh scallions, chili, and sauce on the side for dipping. Since the quesadillas are rich and cheesy, something fresh and acidic makes the perfect accompaniment. Try serving them with a simple lime-dressed green salad, cucumber and tomato salad, crunchy cabbage slaw, avocado and citrus salad, or even fresh fruit with lime and chili. I would skip the fries here—the quesadilla is already doing plenty of heavy lifting.

Berbere Bang Bang Crab & Shrimp Quesadillas
Golden 10-inch quesadillas filled with whole seasoned shrimp, tender lump crab, Monterey Jack and Colby cheese, and fresh red chili, finished with a creamy, sweet-and-spicy Berbere Bang Bang sauce. Berbere is used throughout the recipe to give the seafood and sauce a warm, aromatic chile flavor.
Ingredients
- ½ cup mayonnaise
- 2 tablespoons sweet chili sauce
- 1 tablespoon honey
- 1 tablespoon fresh lime juice
- 1 teaspoon hot sauce
- 2 teaspoons berbere seasoning
- ¼ teaspoon garlic powder
- Pinch of salt
- ½ lb whole shrimp, peeled and deveined
- 1 teaspoon neutral oil
- ½ teaspoon berbere seasoning
- ¼ teaspoon garlic powder
- ¼ teaspoon onion powder
- ¼ teaspoon chili powder
- ¼ teaspoon salt
- ⅛ teaspoon black pepper
- 1 teaspoon fresh lime juice
- 8 oz lump crab meat, well drained
- 1 teaspoon neutral oil (to coat when seasoning)
- ½ teaspoon Old Bay seasoning
- 1 tablespoon thinly sliced green onion
- 1 teaspoon butter (for warming)
- 1 small garlic clove, finely minced
- 1 teaspoon fresh lime juice
- 2 large 10-inch flour tortillas
- 1½ cups shredded Monterey Jack and Colby cheese, combined
- ½–1 fresh red chili, thinly sliced into rings
- 1 tablespoon thinly sliced green onion, reserved for garnish
- Ghee or neutral oil, for cooking
Instructions
- Make the Berbere Bang Bang Sauce: Whisk together the mayonnaise, sweet chili sauce, honey, lime juice, hot sauce, berbere seasoning, garlic powder, and salt. Cover and refrigerate while preparing the rest of the recipe.
- Season the shrimp: Pat the shrimp very dry and keep them whole. Toss with a little oil, then season with the berbere, garlic powder, onion powder, chili powder, salt, and black pepper. Set aside for a few minutes while preparing the crab.
- Prepare the crab: Drain the crab and gently check for any shell pieces, keeping the lumps as intact as possible. In a bowl, season the crab with a little oil, Old Bay seasoning, and sliced green onion.
- Cook the shrimp: Heat 1 teaspoon ghee or neutral oil in a skillet over medium-high heat. Add the whole shrimp in a single layer and cook for approximately 1½–2 minutes per side, depending on size, until opaque and just cooked through (145°F). Turn off the heat and add 1 teaspoon lime juice. Remove the shrimp from the skillet immediately and set aside. Do not overcook.
- Warm the crab: Reduce the skillet to medium-low heat. Add the butter and minced garlic and cook for approximately 30 seconds. Add the seasoned lump crab and gently warm for 1–2 minutes. The crab is already cooked, so you're simply warming it and allowing the seasonings to coat it. Turn off the heat, add 1 teaspoon lime juice, and set aside.
- Cook the first quesadilla: Heat a nonstick skillet over medium-low to medium heat and lightly coat with ghee or neutral oil. Place one 10-inch tortilla in the skillet.
- Spread approximately ¾ cup of the cheese mixture over one half of the tortilla, using more or less depending on your preference. Add several thin rings of red chili as the cheese melts. Once the tortilla begins to brown and the cheese is melting, fold the tortilla over.
- Cook for 2–3 minutes, until lightly golden underneath and the cheese is beginning to melt. Carefully flip and cook another 2–3 minutes, until golden. Remove from the skillet and place on a cutting board.
- Fill while hot: This step is important! Carefully open the folded quesadilla while it is still hot, before the melted cheese has cooled and sealed the edges together. Add half of the crab, half of the shrimp, and some of the remaining green onion. Gently close the quesadilla.
- Cut the quesadilla into 3 wedges. Repeat the process with the second tortilla.
- Finish and serve: Garnish with the remaining sliced green onion and a few thin rings of fresh red chili. Serve immediately with Berbere Bang Bang sauce for dipping.
Notes
- Use a flavorful berbere blend. Berbere is essential to this recipe and is used in the shrimp, crab, and Bang Bang sauce. Different blends vary in heat and intensity, so adjust to your preference.
- Don't overcook the seafood. Cook the shrimp just until opaque and cooked through, and gently warm the already-cooked crab so it stays tender.
- Fill the quesadilla while it's hot. Have the seafood ready before cooking the tortillas, then fill each quesadilla immediately after cooking. Once the melted cheese cools, it can seal the tortilla shut and make it difficult to open neatly.
- Adjust the cheese to your preference. The recipe uses a generous ¾ cup per 10-inch tortilla for a dramatic cheese pull, but you can use less if you prefer a lighter quesadilla. Serve with a fresh salad or slaw to balance the richness.
Nutrition Facts
Calories
550Fat (grams)
38 gSat. Fat (grams)
13 gCarbs (grams)
35 gFiber (grams)
2 gSugar (grams)
8 gProtein (grams)
30 gI am not a certified nutritionist and any nutritional information on dontmissmyplate.com should only be used as a general guideline.
Passion Fruit-Glazed Chicken Wings
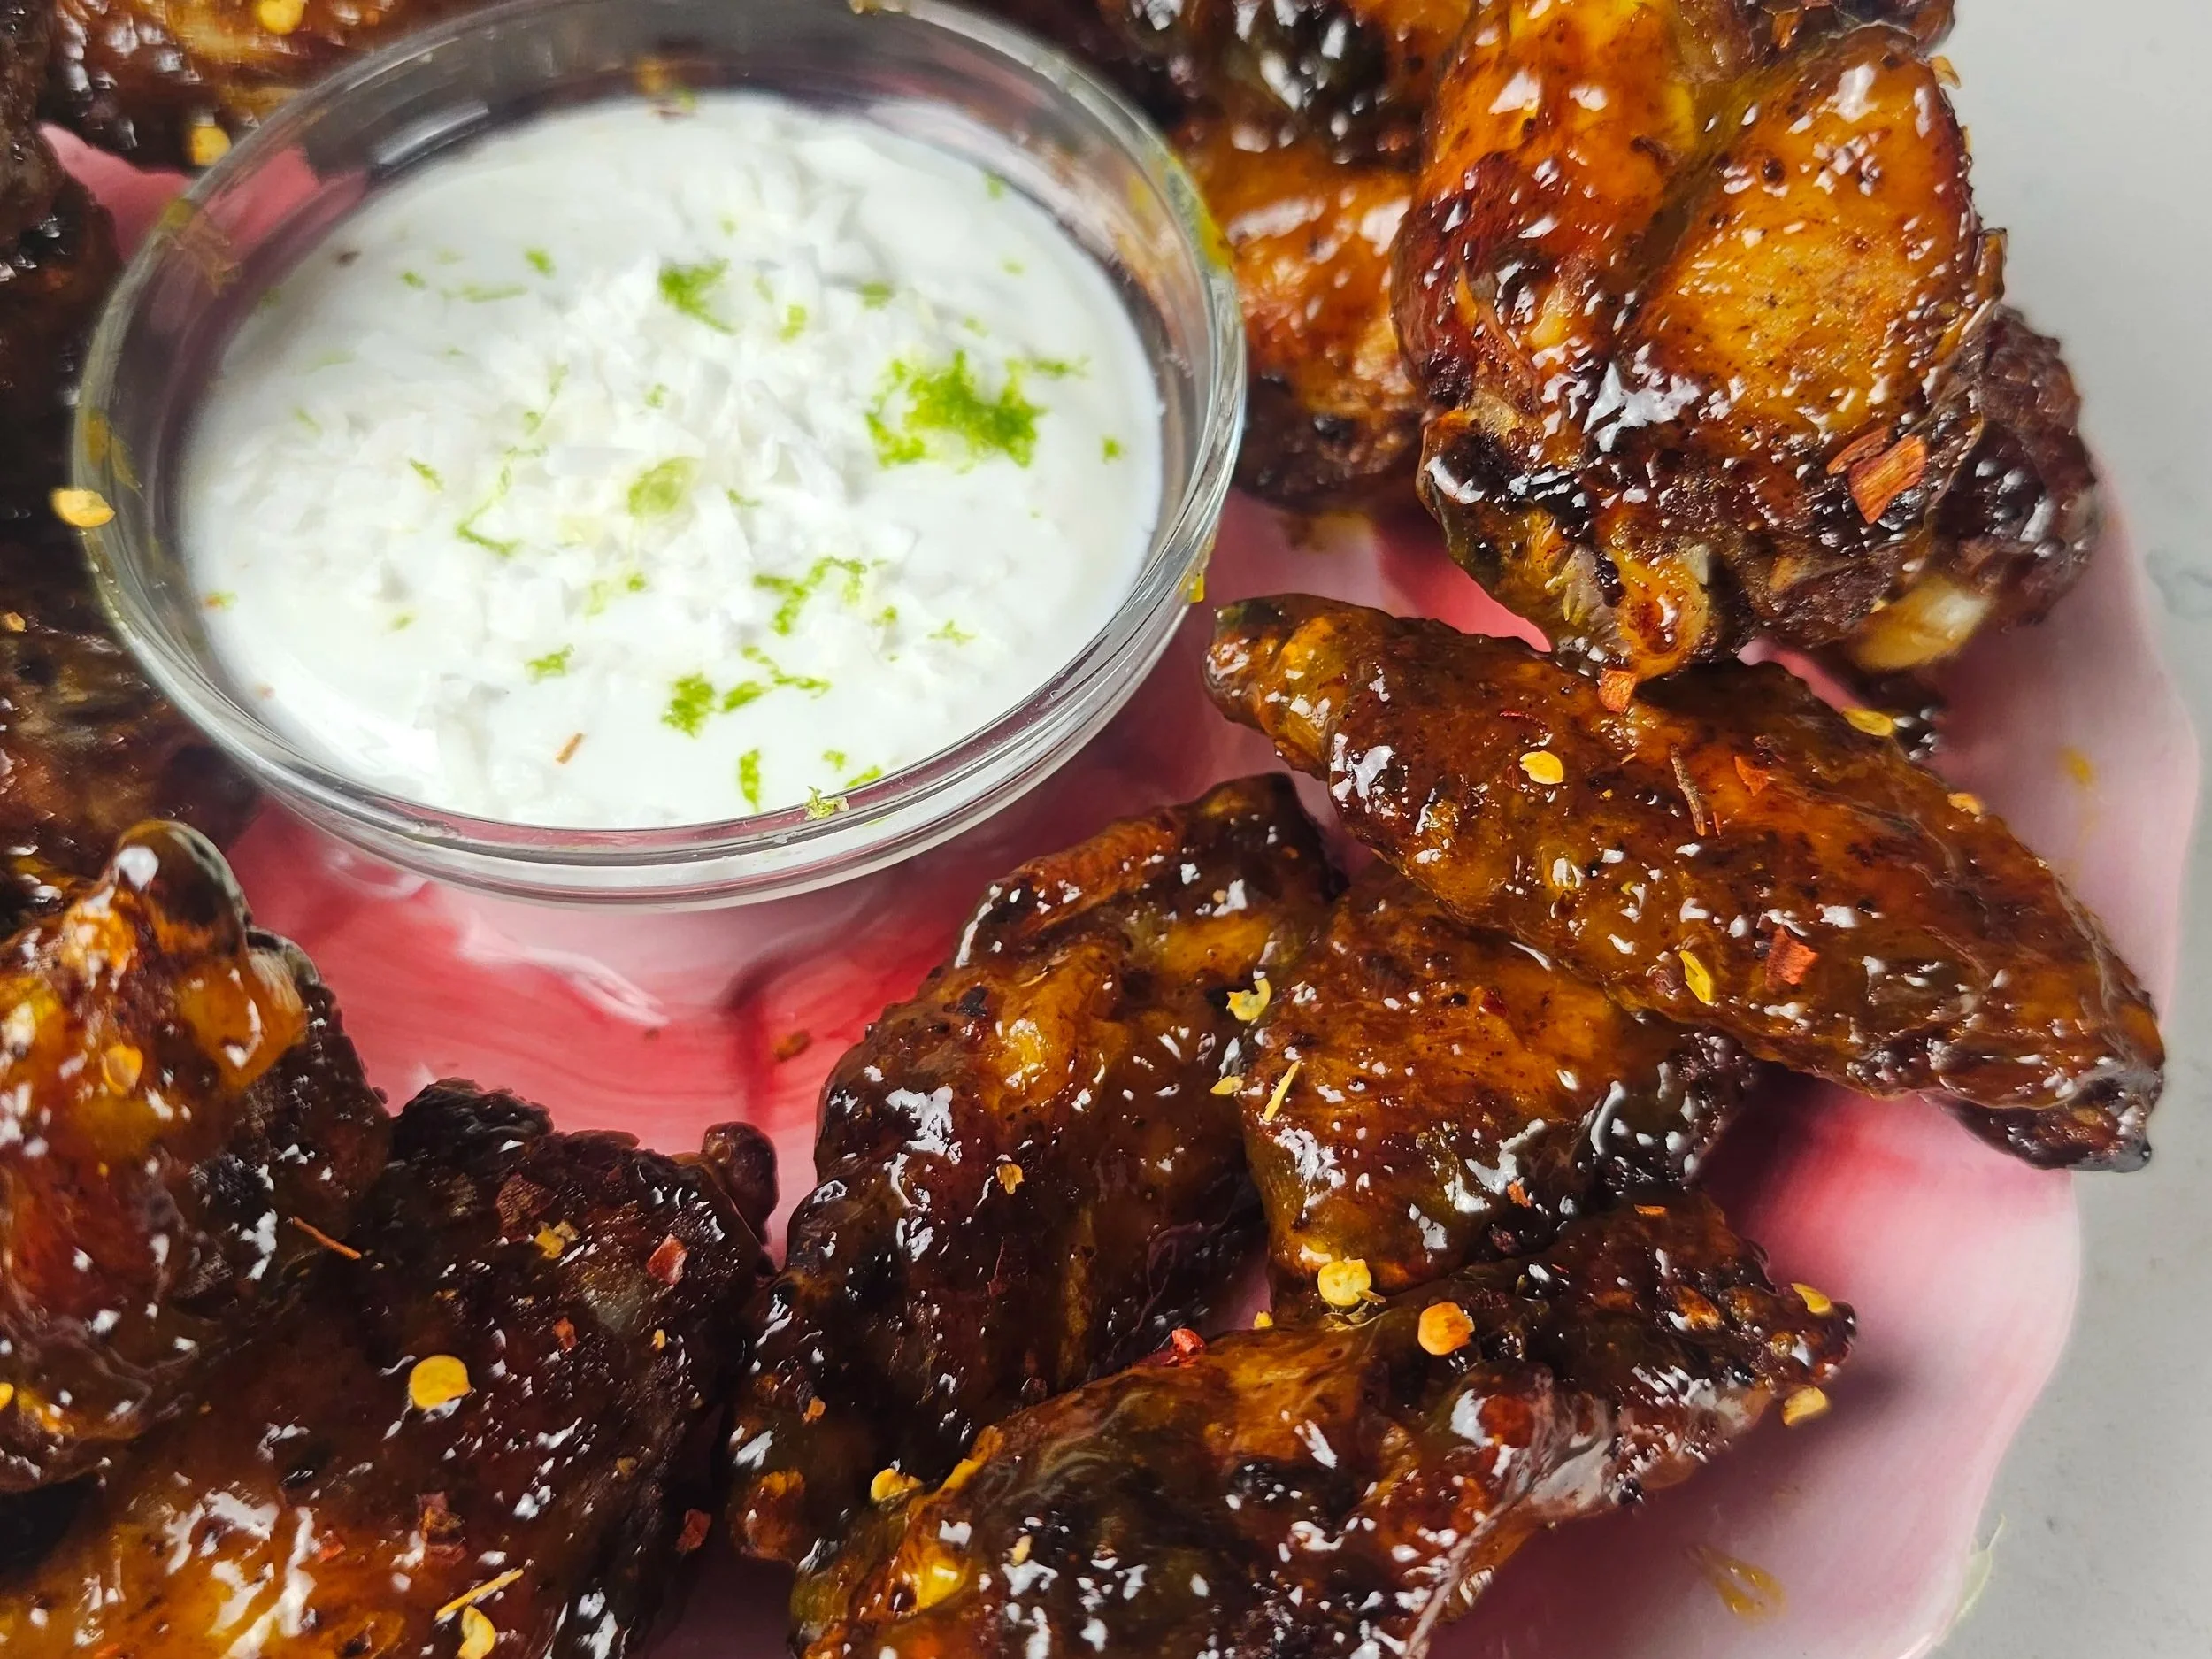
These passion fruit glazed chicken wings are crispy, sticky, and bursting with tropical flavour, made using an air fryer for convenience and finished with a glossy, caramelised glaze that clings to every bite. Passion fruit is widely used across East African cuisine and other tropical food cultures for its naturally sharp acidity, floral sweetness, and ability to cut through rich, fatty meats like chicken wings. When reduced into a glaze, it becomes intensely aromatic, balancing tartness with sweetness in a way that feels both refreshing and deeply savoury.
This recipe highlights how tropical fruit glazes can transform everyday chicken wings into something vibrant and elevated. Passion fruit is especially effective because of its high acidity and fragrant seed pulp, but it can also be interchanged with other tropical fruits like pineapple or mango for different sweetness profiles, or even adjusted with a touch of citrus such as lime to enhance brightness. The key is balance — the glaze should never be overly sharp or overly sweet, but reduced until it lightly coats the wings in a sticky, glossy layer.
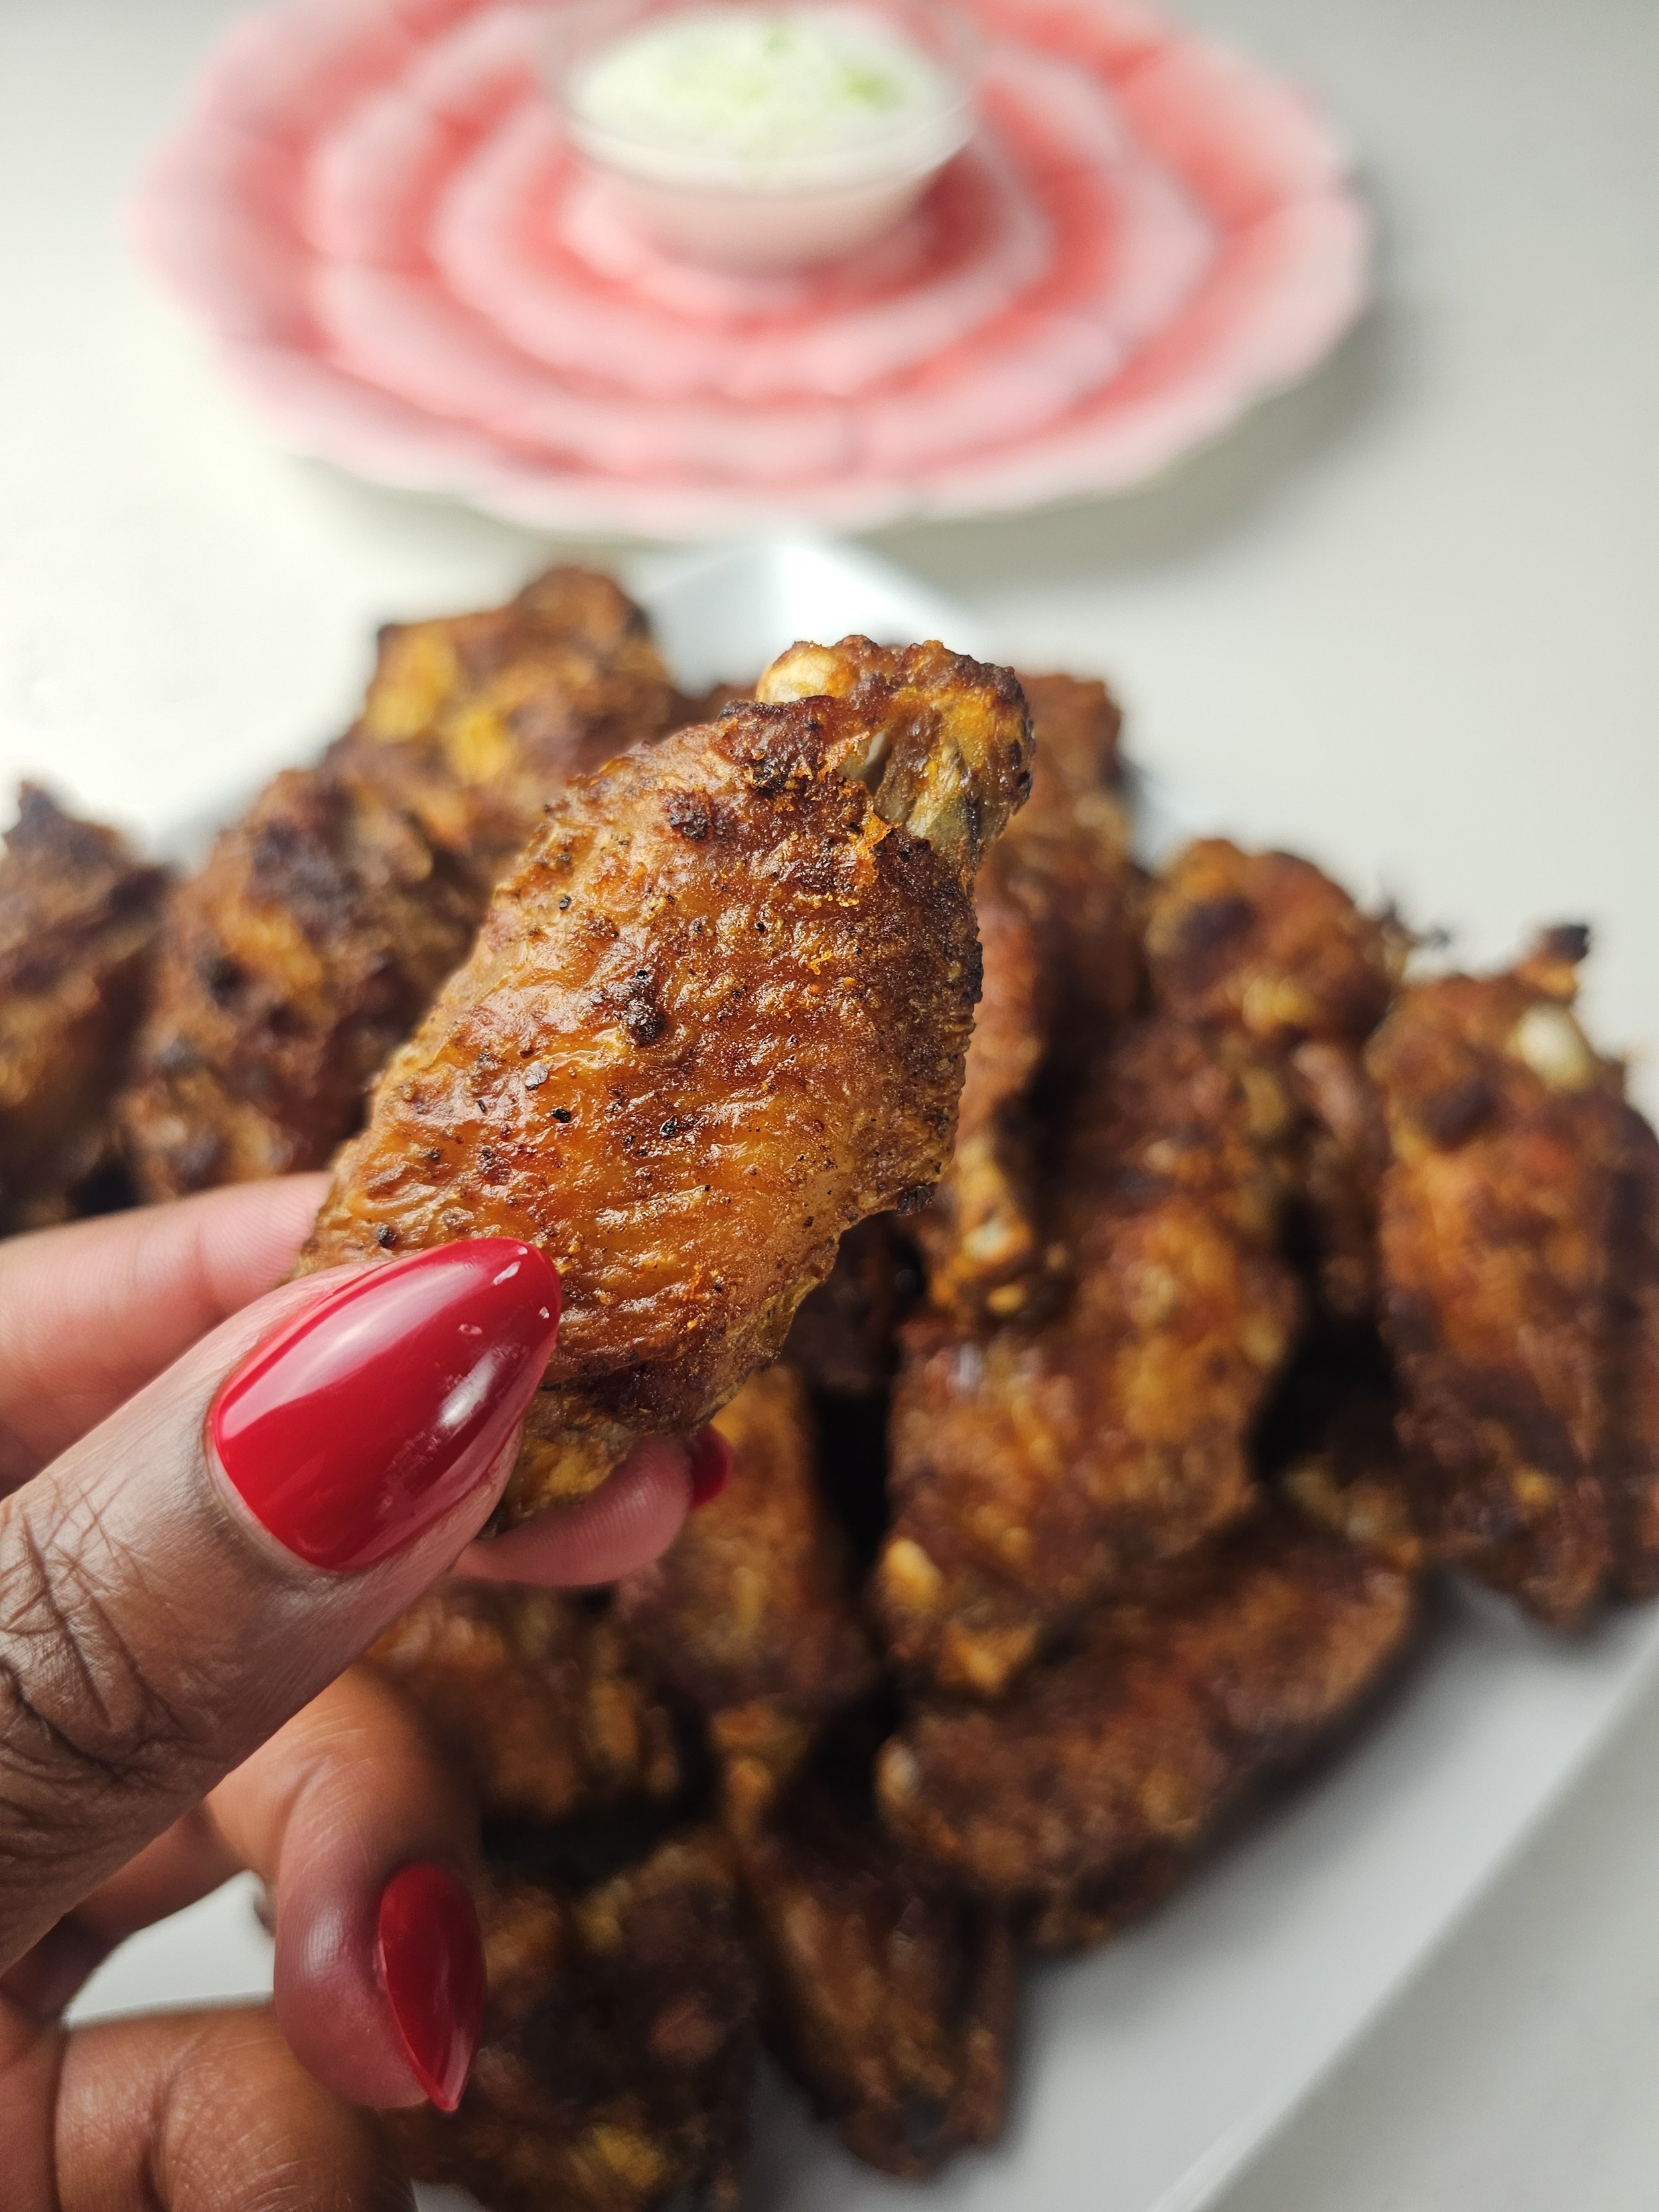
The wings themselves are seasoned with a simple chicken spice blend and other seasonings and air fried for about 20 minutes until golden, crispy on the outside, and juicy inside. Unlike deep frying, the air fryer creates a clean crisp texture while still allowing the skin to render and caramelize when coated in glaze.
These wings are perfect for game nights, casual weekend cooking, summer gatherings, or when you want a fast but flavour-packed meal with a tropical twist. Served with a coconut lime Greek yogurt dip, they deliver contrast: spicy, sweet, tangy wings paired with a cool, creamy finish.
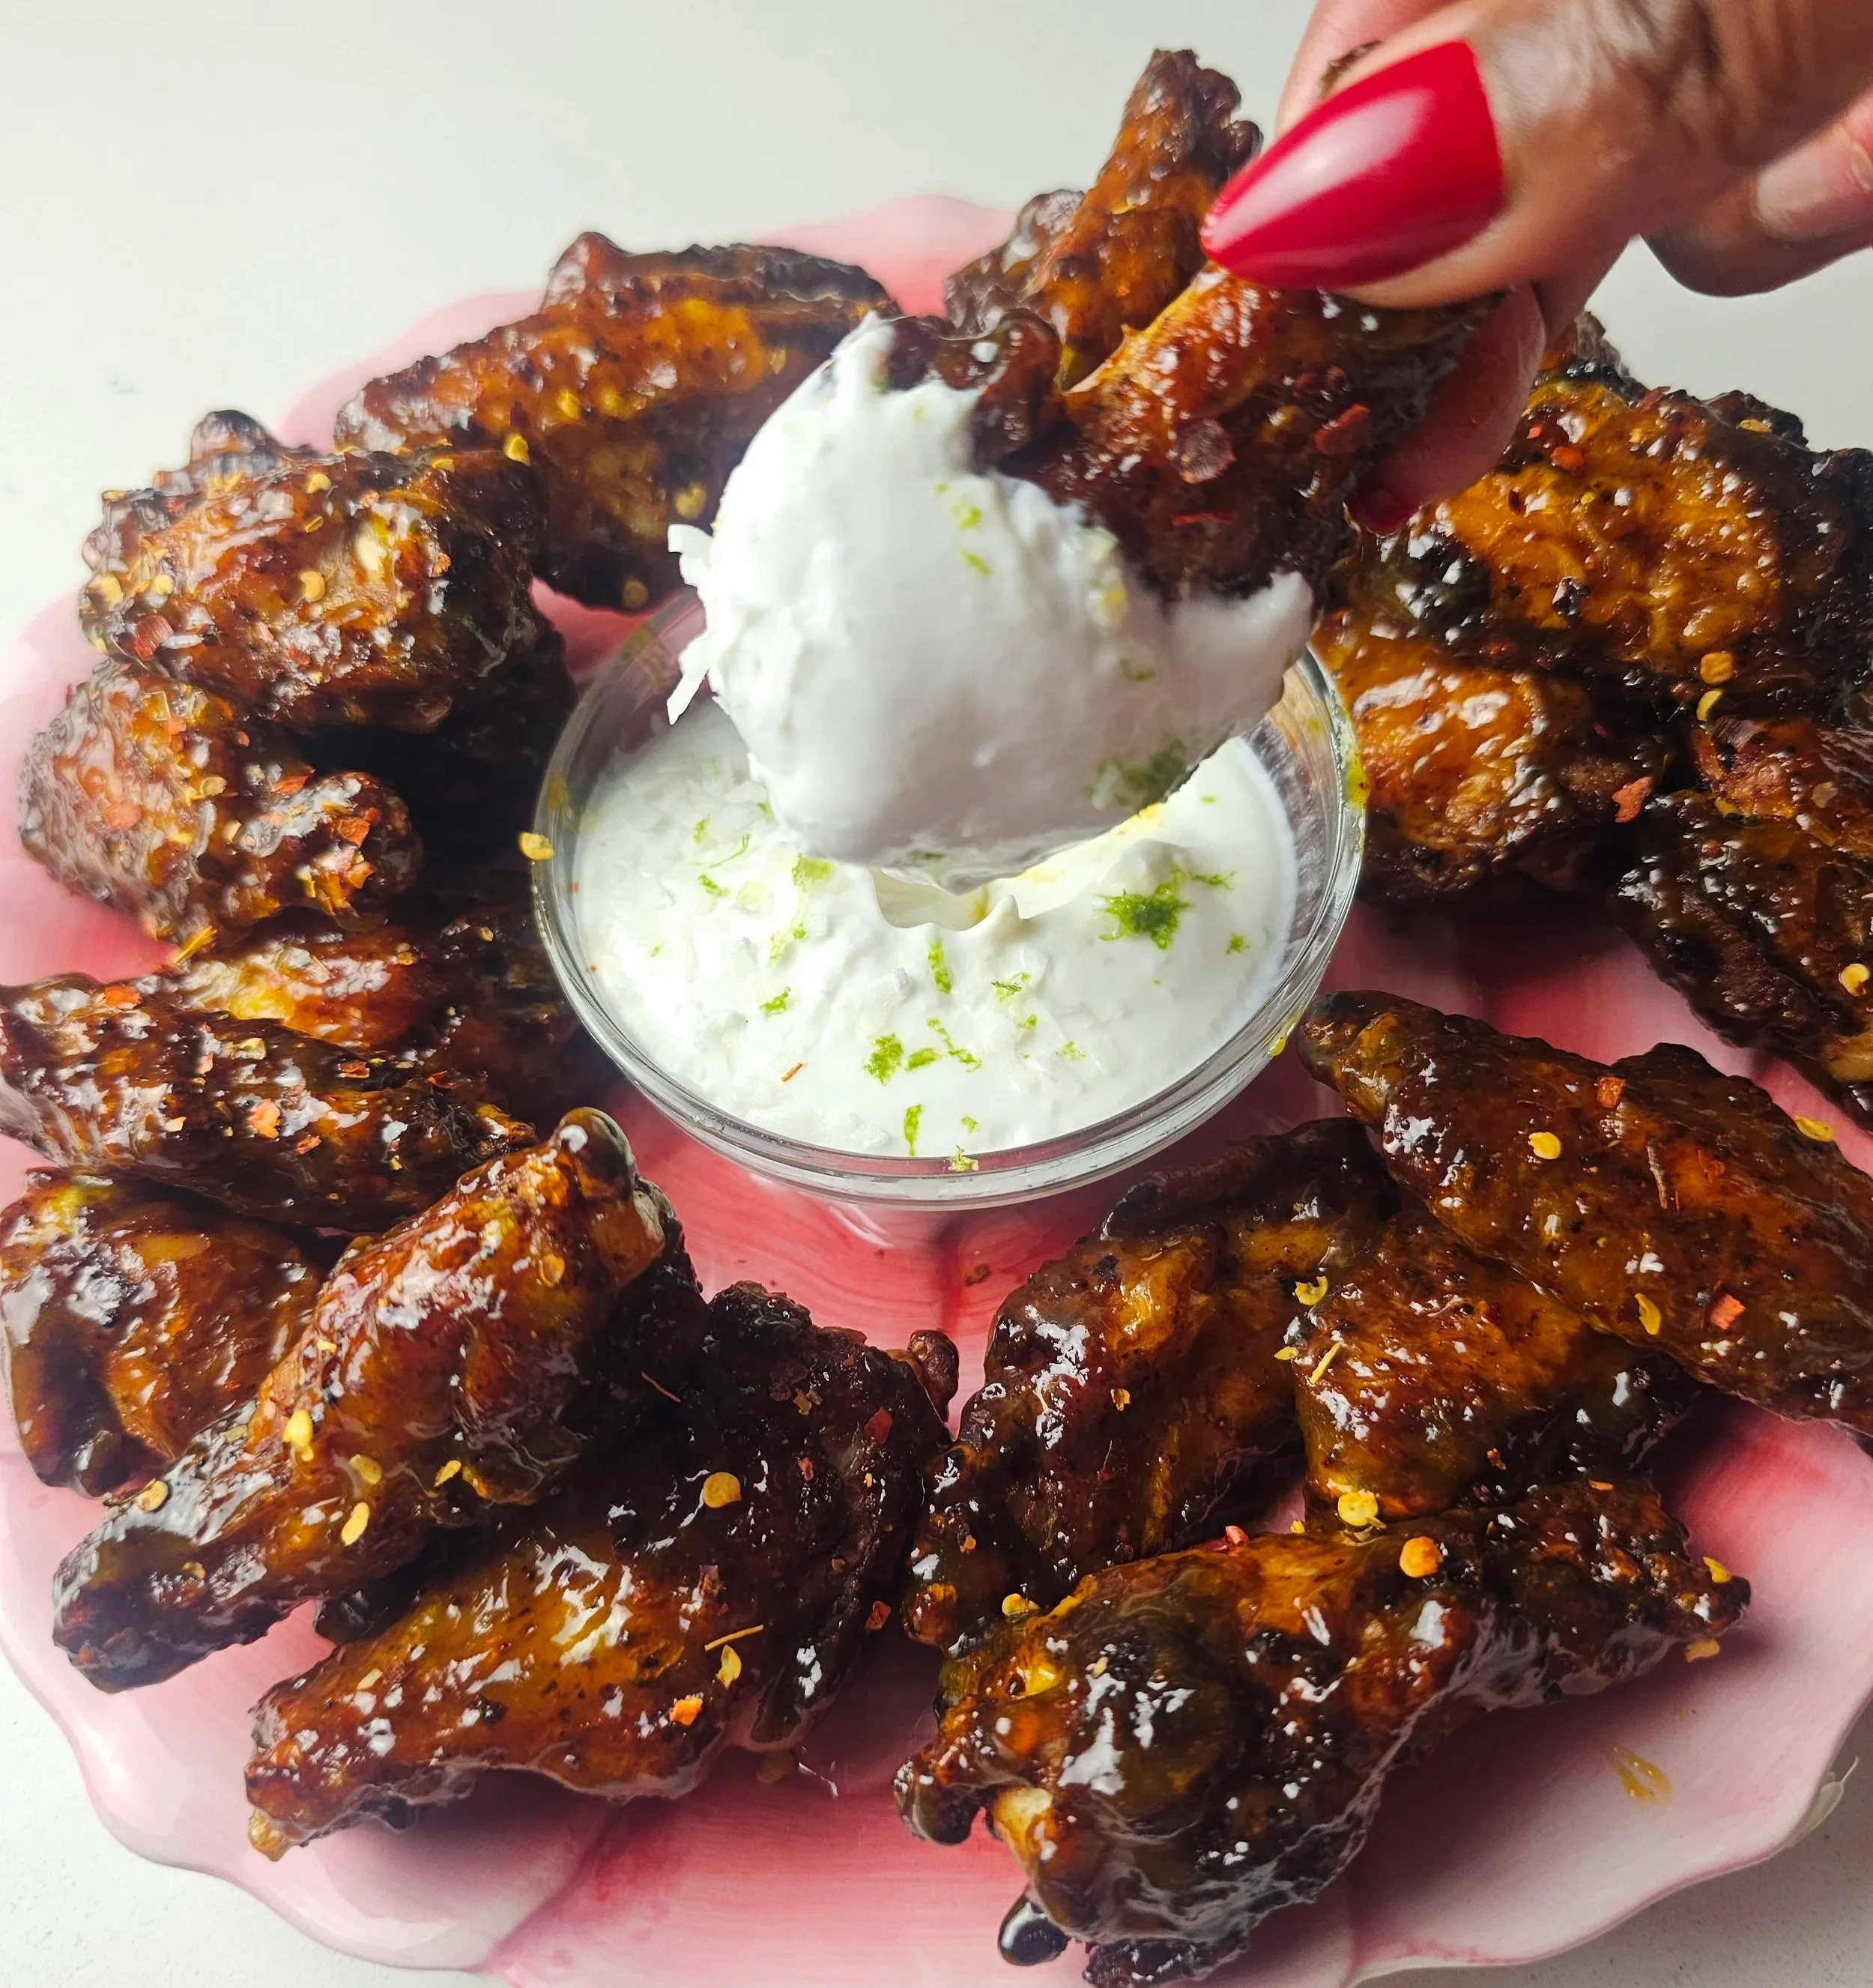

Passion Fruit-Glazed Chicken Wings
Passion fruit glazed chicken wings cooked in the air fryer until crisp and golden, then coated in a glossy tropical glaze made from reduced passion fruit pulp, water, sugar, honey, and lime. These wings balance acidity and sweetness while keeping the wings juicy inside and crisp outside. Serve with a coconut lime yogurt dip for cooling contrast.
Ingredients
- 3 lbs chicken wings (drums and flats)
- 2 tbsp oil
- 2 tsp salt
- 1½ tsp black pepper
- 1½ tsp smoked paprika
- 1½ tsp onion powder
- 1½ tsp garlic powder
- ½ tsp ground ginger
- 1 tbsp chicken spice seasoning (I used Robertson's)
- ¾ cup frozen passion fruit pulp (thawed) - optional swaps: mango or pineapple can be used for a sweeter, less acidic glaze profile.
- ¼ cup water
- 2 tbsp honey
- Pinch of salt
- Lime juice (optional to balance)
- Chili flakes (optional)
- ¼ cup granulated sugar (start point, add more to balance)
- ½ cup Greek yogurt
- 1–2 tbsp coconut unsweetened flakes
- Zest of ½ lime
- Juice of ½ lime
- Pinch of salt
Instructions
- In a large bowl, add the oil and seasonings with the chicken and marinate for at least 30 minutes in the fridge.
- Preheat air fryer and cook at 200°C / 400°F for 18–20 minutes, and shake or flip halfway through. Wings should be crisp, golden, fully cooked, but still juicy inside. You may need to do this in batches of 2-3 depending on the side of your air fryer.
- To make the glaze while the chicken cooks, add the passion fruit pulp, water, sugar, honey and salt to a saucepan. Heat over medium-low heat until gently simmering. Stir occasionally and simmer 5–8 minutes.
- IMPORTANT: Watch the texture - you want it glossy, slightly thickened and still pourable (NOT jam). Then adjust - If it’s too tart / sharp → add 1 tbsp sugar, stir, simmer 1–2 min → repeat if needed (don’t jump big amounts). If it’s too sweet → add ½ tsp lime juice max.
- Toss wings in warm glaze in a large bowl and plate. You can also air fry 2–3 min after glazing to set coating.
- For the dip, mix yogurt, lime, and salt. Top with coconut flakes.
- Adjust seasoning and chill or serve immediately
Notes
- 18–20 minutes is ideal for juicy air fryer wings (20 min = best balance, longer if you want crispier, up to 25)
- Passion fruit glaze should be reduced but still pourable. not jam. Keep tasting and adjusting until you reach your desired balance and tossing with the wings. Glaze works best when balanced with sweetness and lime dilution.
- Wings do not need to be hot before glazing.
- Air fryer finish after glazing improves gloss and photo quality.
- 3 lbs serves 4–6 people depending on appetite
Nutrition Facts
Calories
490Fat (grams)
30 gCarbs (grams)
16 gProtein (grams)
32 gI am not a certified nutritionist and any nutritional information on dontmissmyplate.com should only be used as a general guideline.
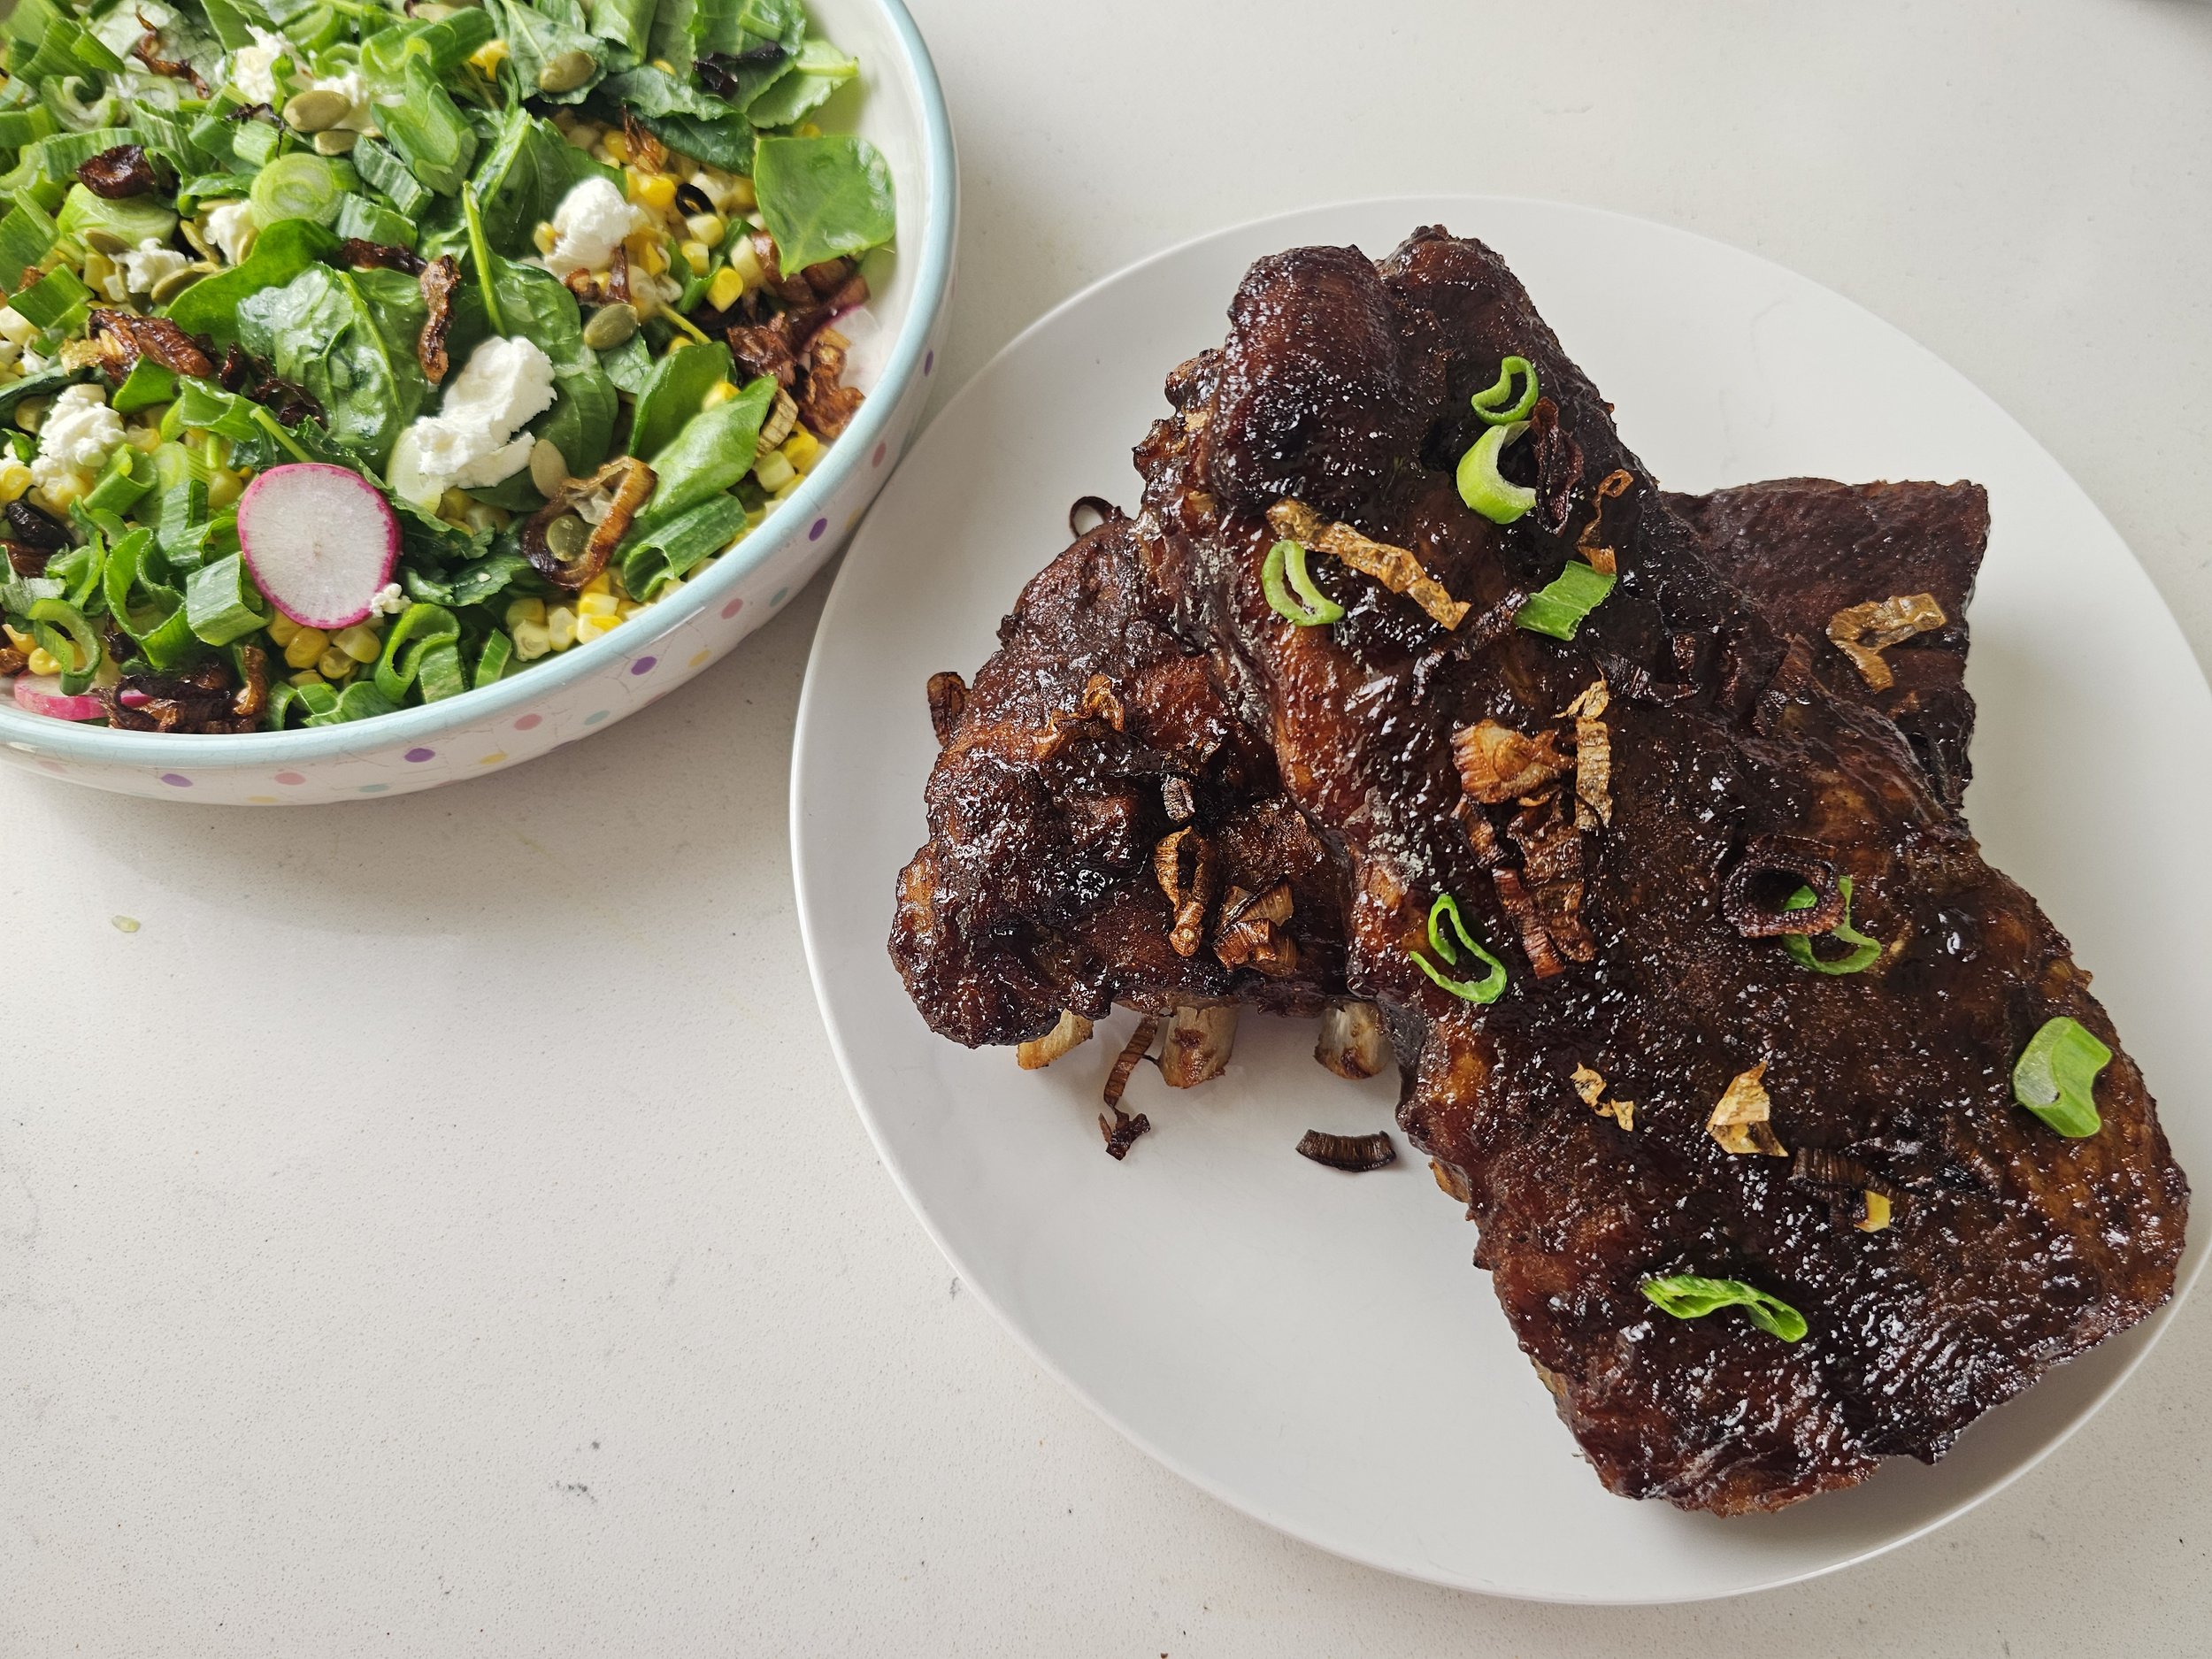
Tamarind-Glazed Baby Back Pork Ribs
Let’s talk about ribs.
I’ve always had a serious weakness for them. There is something about that sticky, smoky, sweet and savory bite that just hits differently. My first real memory of ribs was at a place called Spur, tucked inside a Holiday Inn in Harare, and I remember being completely obsessed. That was the moment I understood why ribs have such universal appeal. They are messy, rich, comforting, and a little indulgent in the best way.
For this recipe, I wanted to bring that same cookout energy into summer with a twist that reflects how I cook now. Simple, bold, and built for real home kitchens.
One of the key elements here is tamarind, a classic ingredient used across East African cooking and many other global cuisines. It has that deep tangy sweetness that works beautifully in savory dishes, which is exactly why it pairs so well with ribs. That sweet and sour balance cuts through the richness of the meat and creates a sticky glaze you cannot stop going back for. If you are not into sweet and sour, a classic BBQ sauce will also work.
I keep the ribs straightforward with simple seasoning, oven baking, and a high heat finish until caramelized. Nothing complicated. The focus is flavor, texture, and accessibility so it can be recreated easily at home.
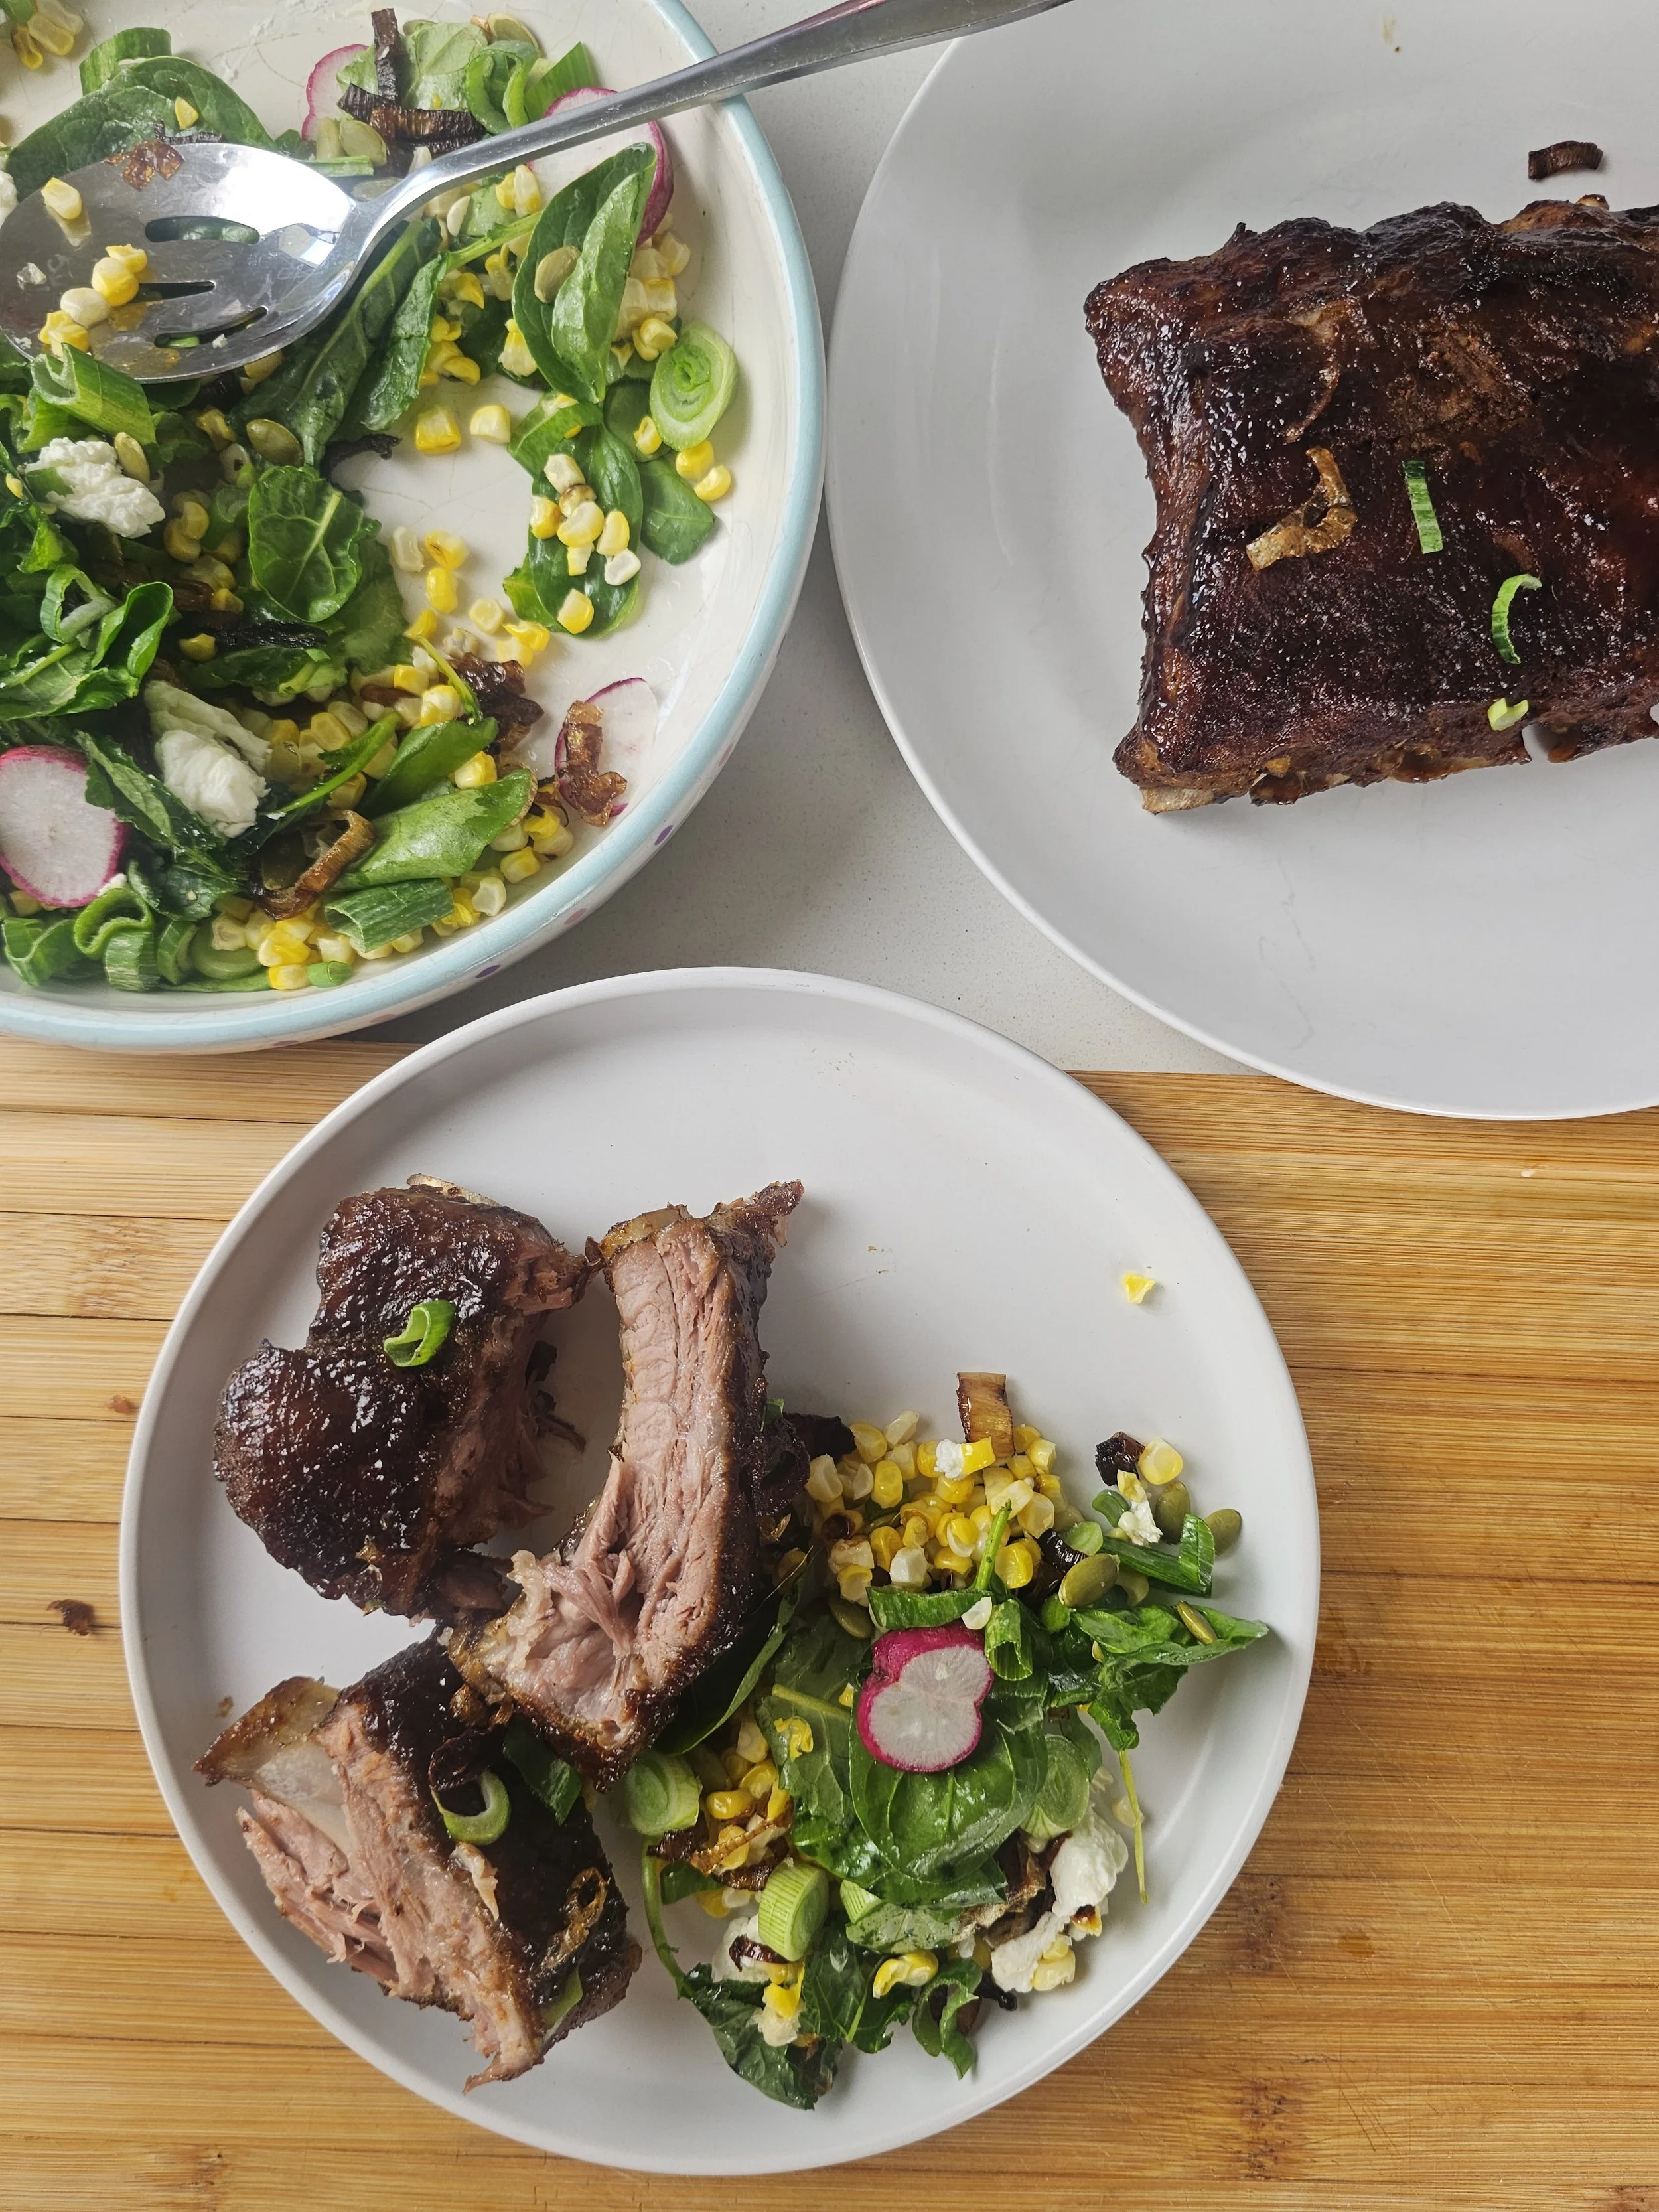
The farmers’ market influence is in the side dish, not the ribs. A corn salad made with seasonal corn, radish, goat cheese, pumpkin seeds, and spring onions. I use the spring onions two ways, fresh for brightness and fried for crunch, adding contrast and texture without overcomplicating the plate.
In the end, it comes together as a dish that feels like summer. Sweet heat from the glaze, freshness from the salad, richness from the ribs, and crunch in every bite.
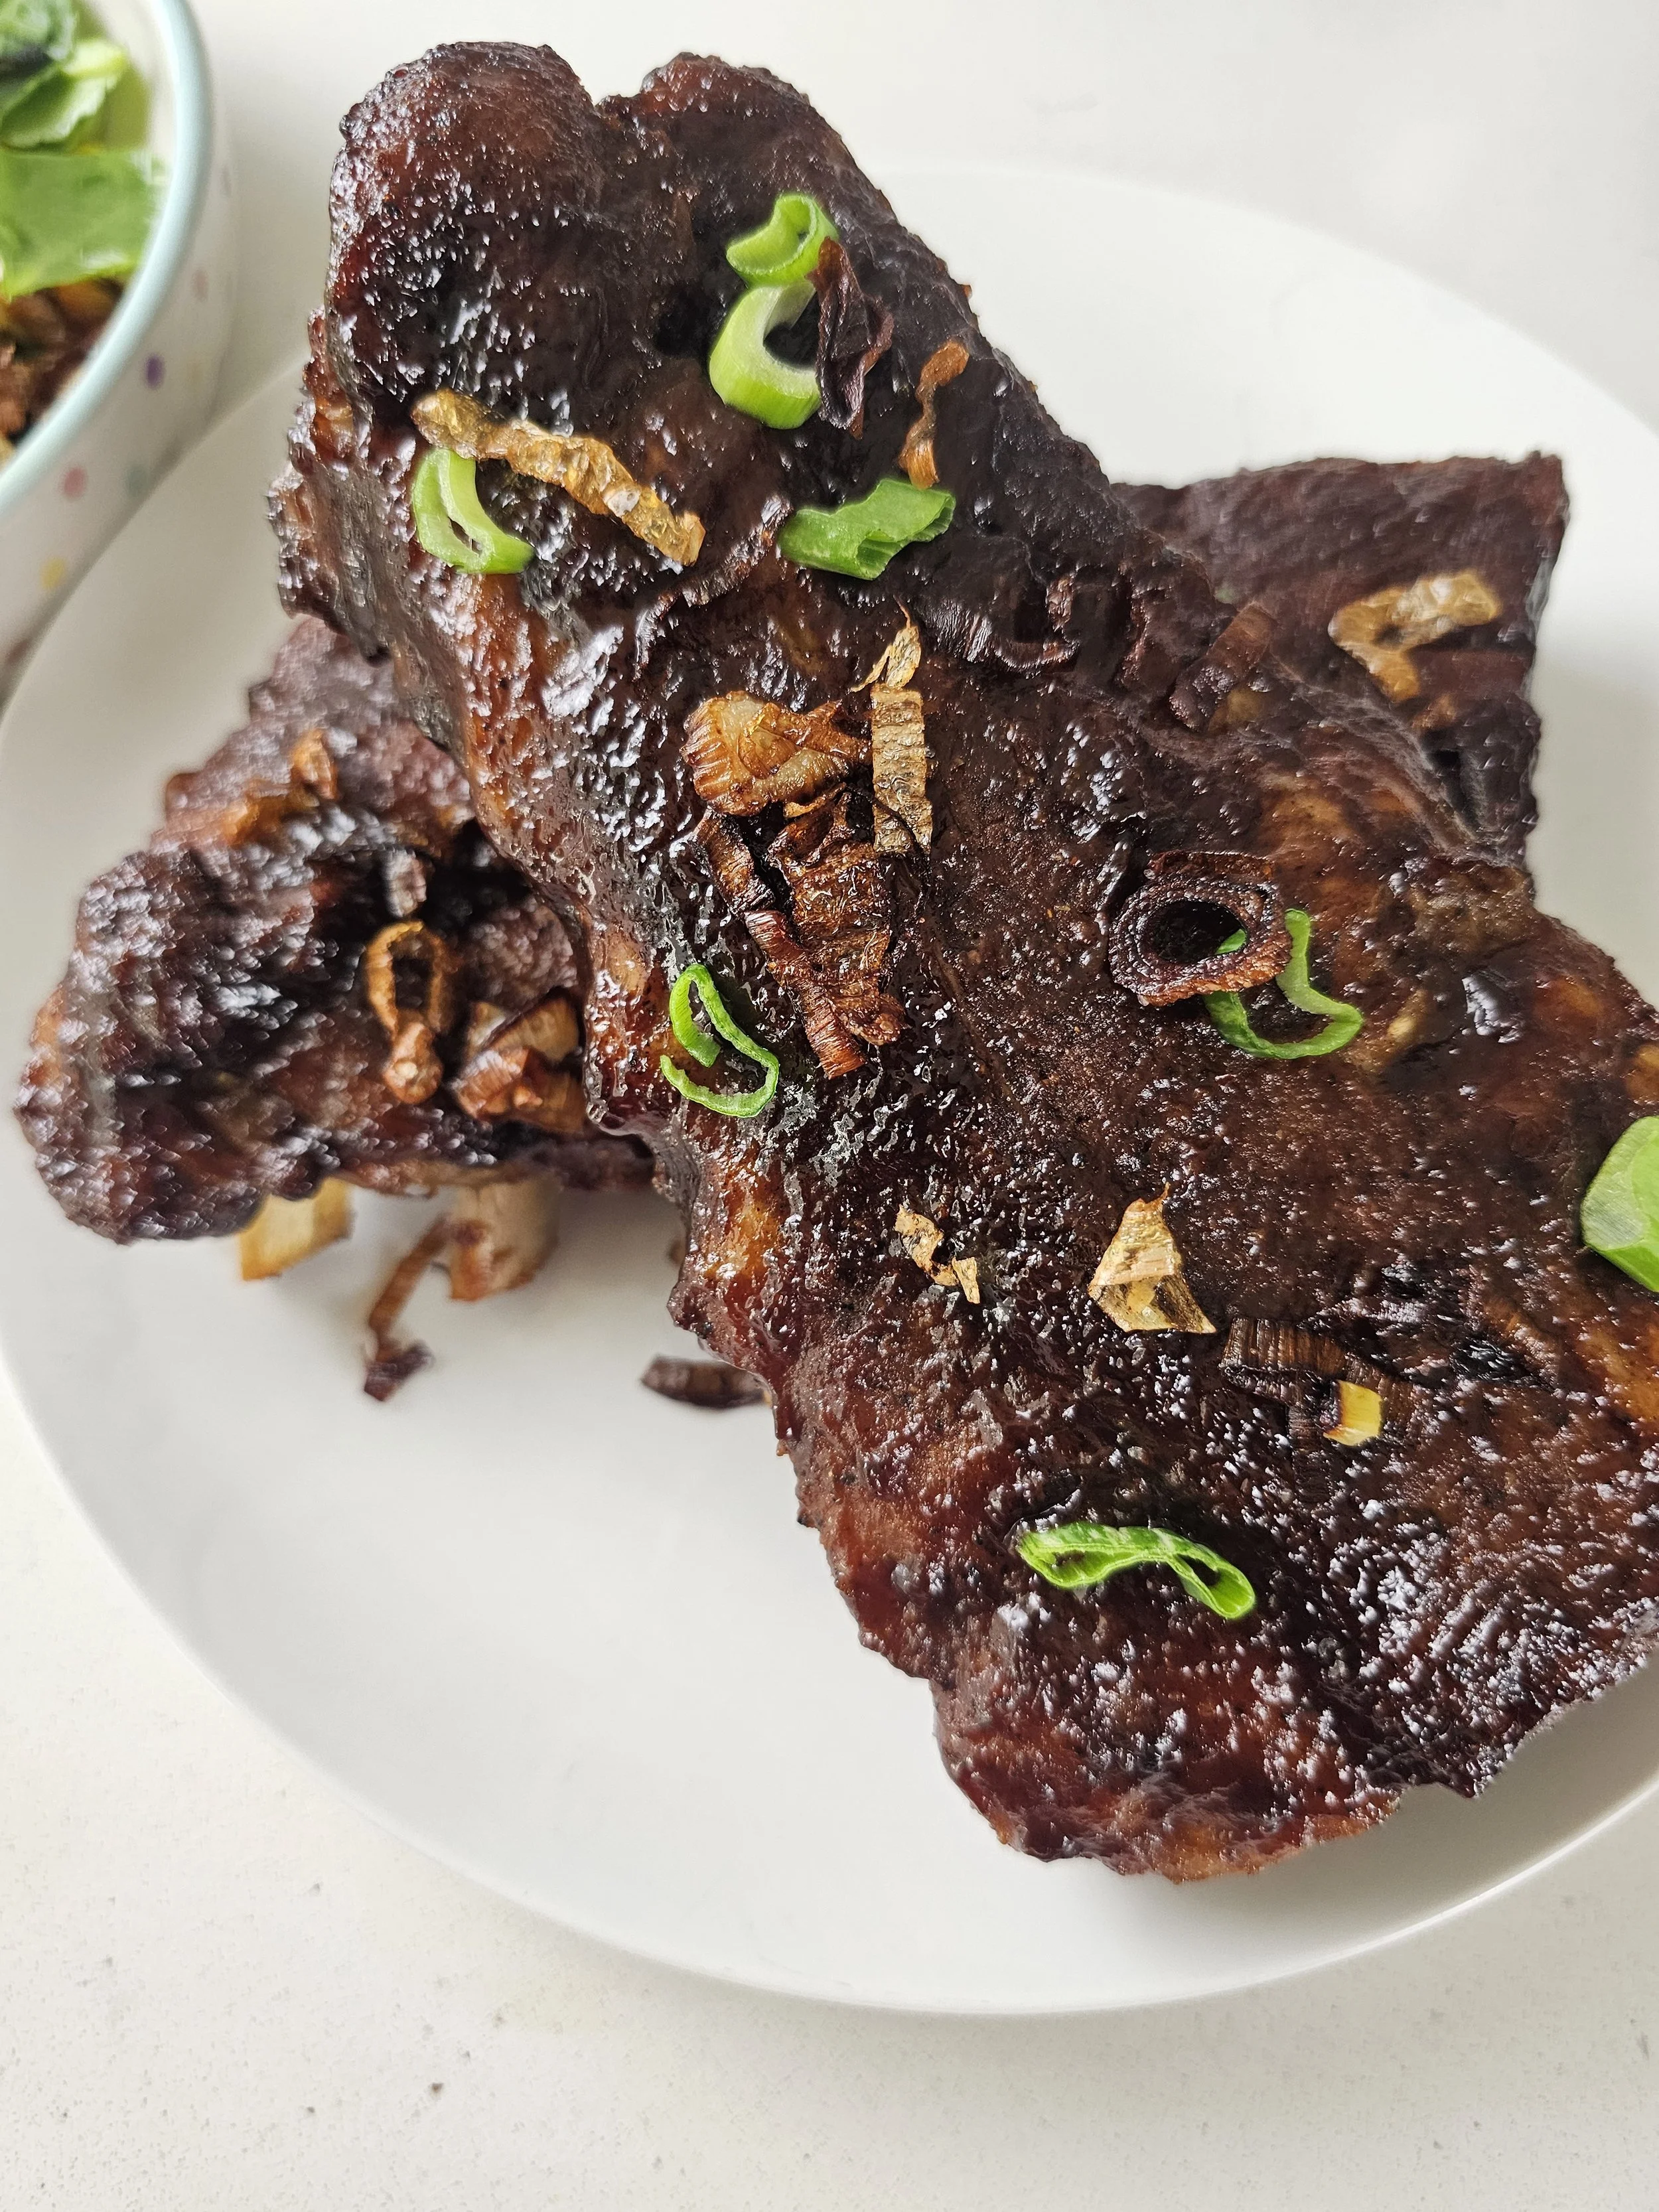
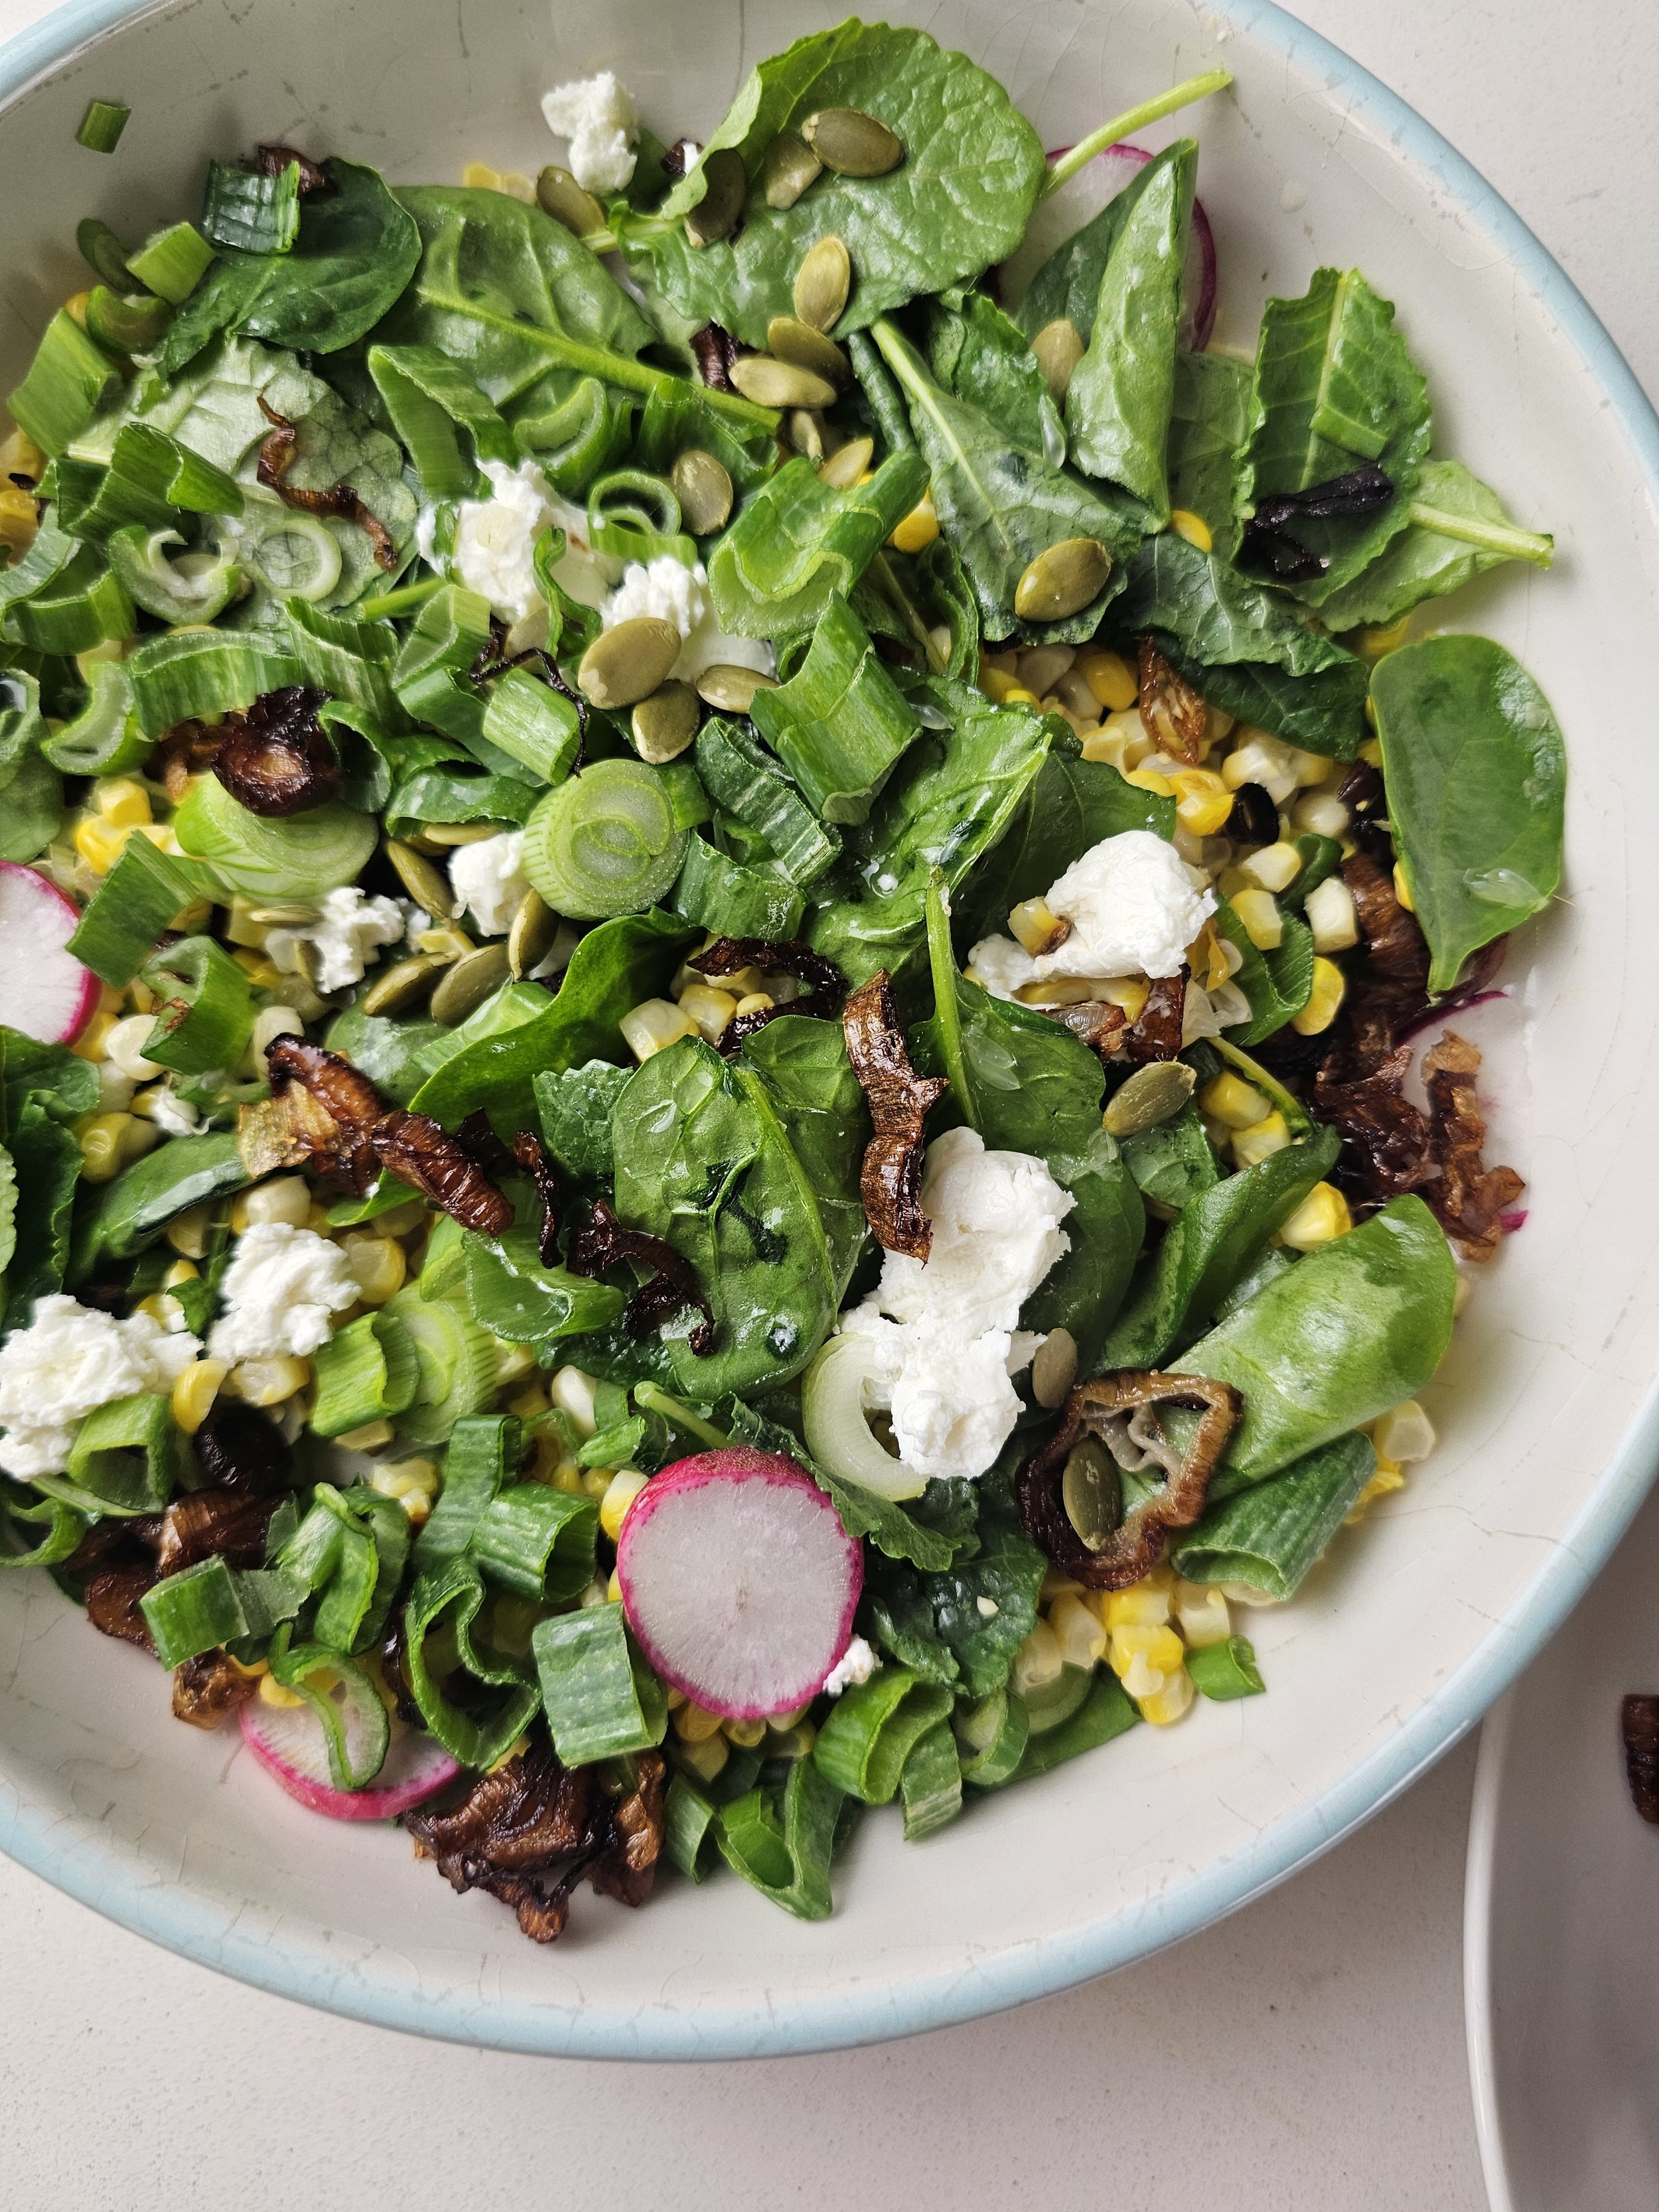

Tamarind-Glazed Baby Back Pork Ribs
Tender baby back ribs baked in the oven, then coated in a glossy tamarind glaze with a bright sweet-sour depth and gentle smokiness. Served with a fresh seasonal corn salad with goat cheese, crisp radish, and spring onions, it brings easy summer cookout vibes with a subtle East African-inspired twist.
Ingredients
- 1 rack baby back pork ribs
- 1½ tsp seasoned salt
- 1 tsp black pepper
- 1 tbsp BBQ seasoning (I used Robertson's)
- 1 tsp smoked paprika
- 1 tsp garlic powder
- 3 tbsp tamarind concentrate
- 3 tbsp brown sugar
- 2 tbsp soy sauce
- Juice of ½–1 lime (adjust to taste)
- 1–2 tsp water (or more, if needed for looseness)
- 2-3 corn cobs (charred or grilled on grill plate)
- 1–2 tbsp olive oil (your chili olive oil works)
- 1 cup salad greens (spring and spinach mix)
- 1–2 tsp white balsamic vinegar
- 2-3 small radish (thin sliced)
- Pumpkin seeds
- Goat cheese (crumbled)
- 1 bunch spring onions (with large bulbs, to be fried and used fresh)
- Salt and pepper to taste
Instructions
- Set oven to Oven: 300°F (150°C)
- season ribs and rub every surface, nook and cranny.
- Wrap ribs tightly in foil and palce on a bakign tray.
- Bake for 2 to 2½ hours.
- while that bakes, make the tamarind glaze. just mix iall the infgrindeitns together, heat on medium ubtil it gently. bubbles, then reuce to lwo for 5-88 mnutes ubtil thciiken, or rather a hioney consitincy. use water to help if needed and taste and adjsut as neeed.
- then rpepr your salad, on a grill plate grill the corn until soften with black rbwon spots, rotinaint got about 10-15 min utes. tey to keep the heat steayd for even cooking. mix aeveryhing then nd hold off on dressing until ready to serve.
- once the ribs are done, uncover and brus with th glaze. set oven to broil at 500F/xxC for 2-5 mon tues, deopneding on your oven snd th epsoiton of the bakign tray. make sure you keep an eye you dont want it to burn!
- Serve immedialey with salad.
I am not a certified nutritionist and any nutritional information on dontmissmyplate.com should only be used as a general guideline.
Mango Ginger Cream Ice Lollies (Popsicles)
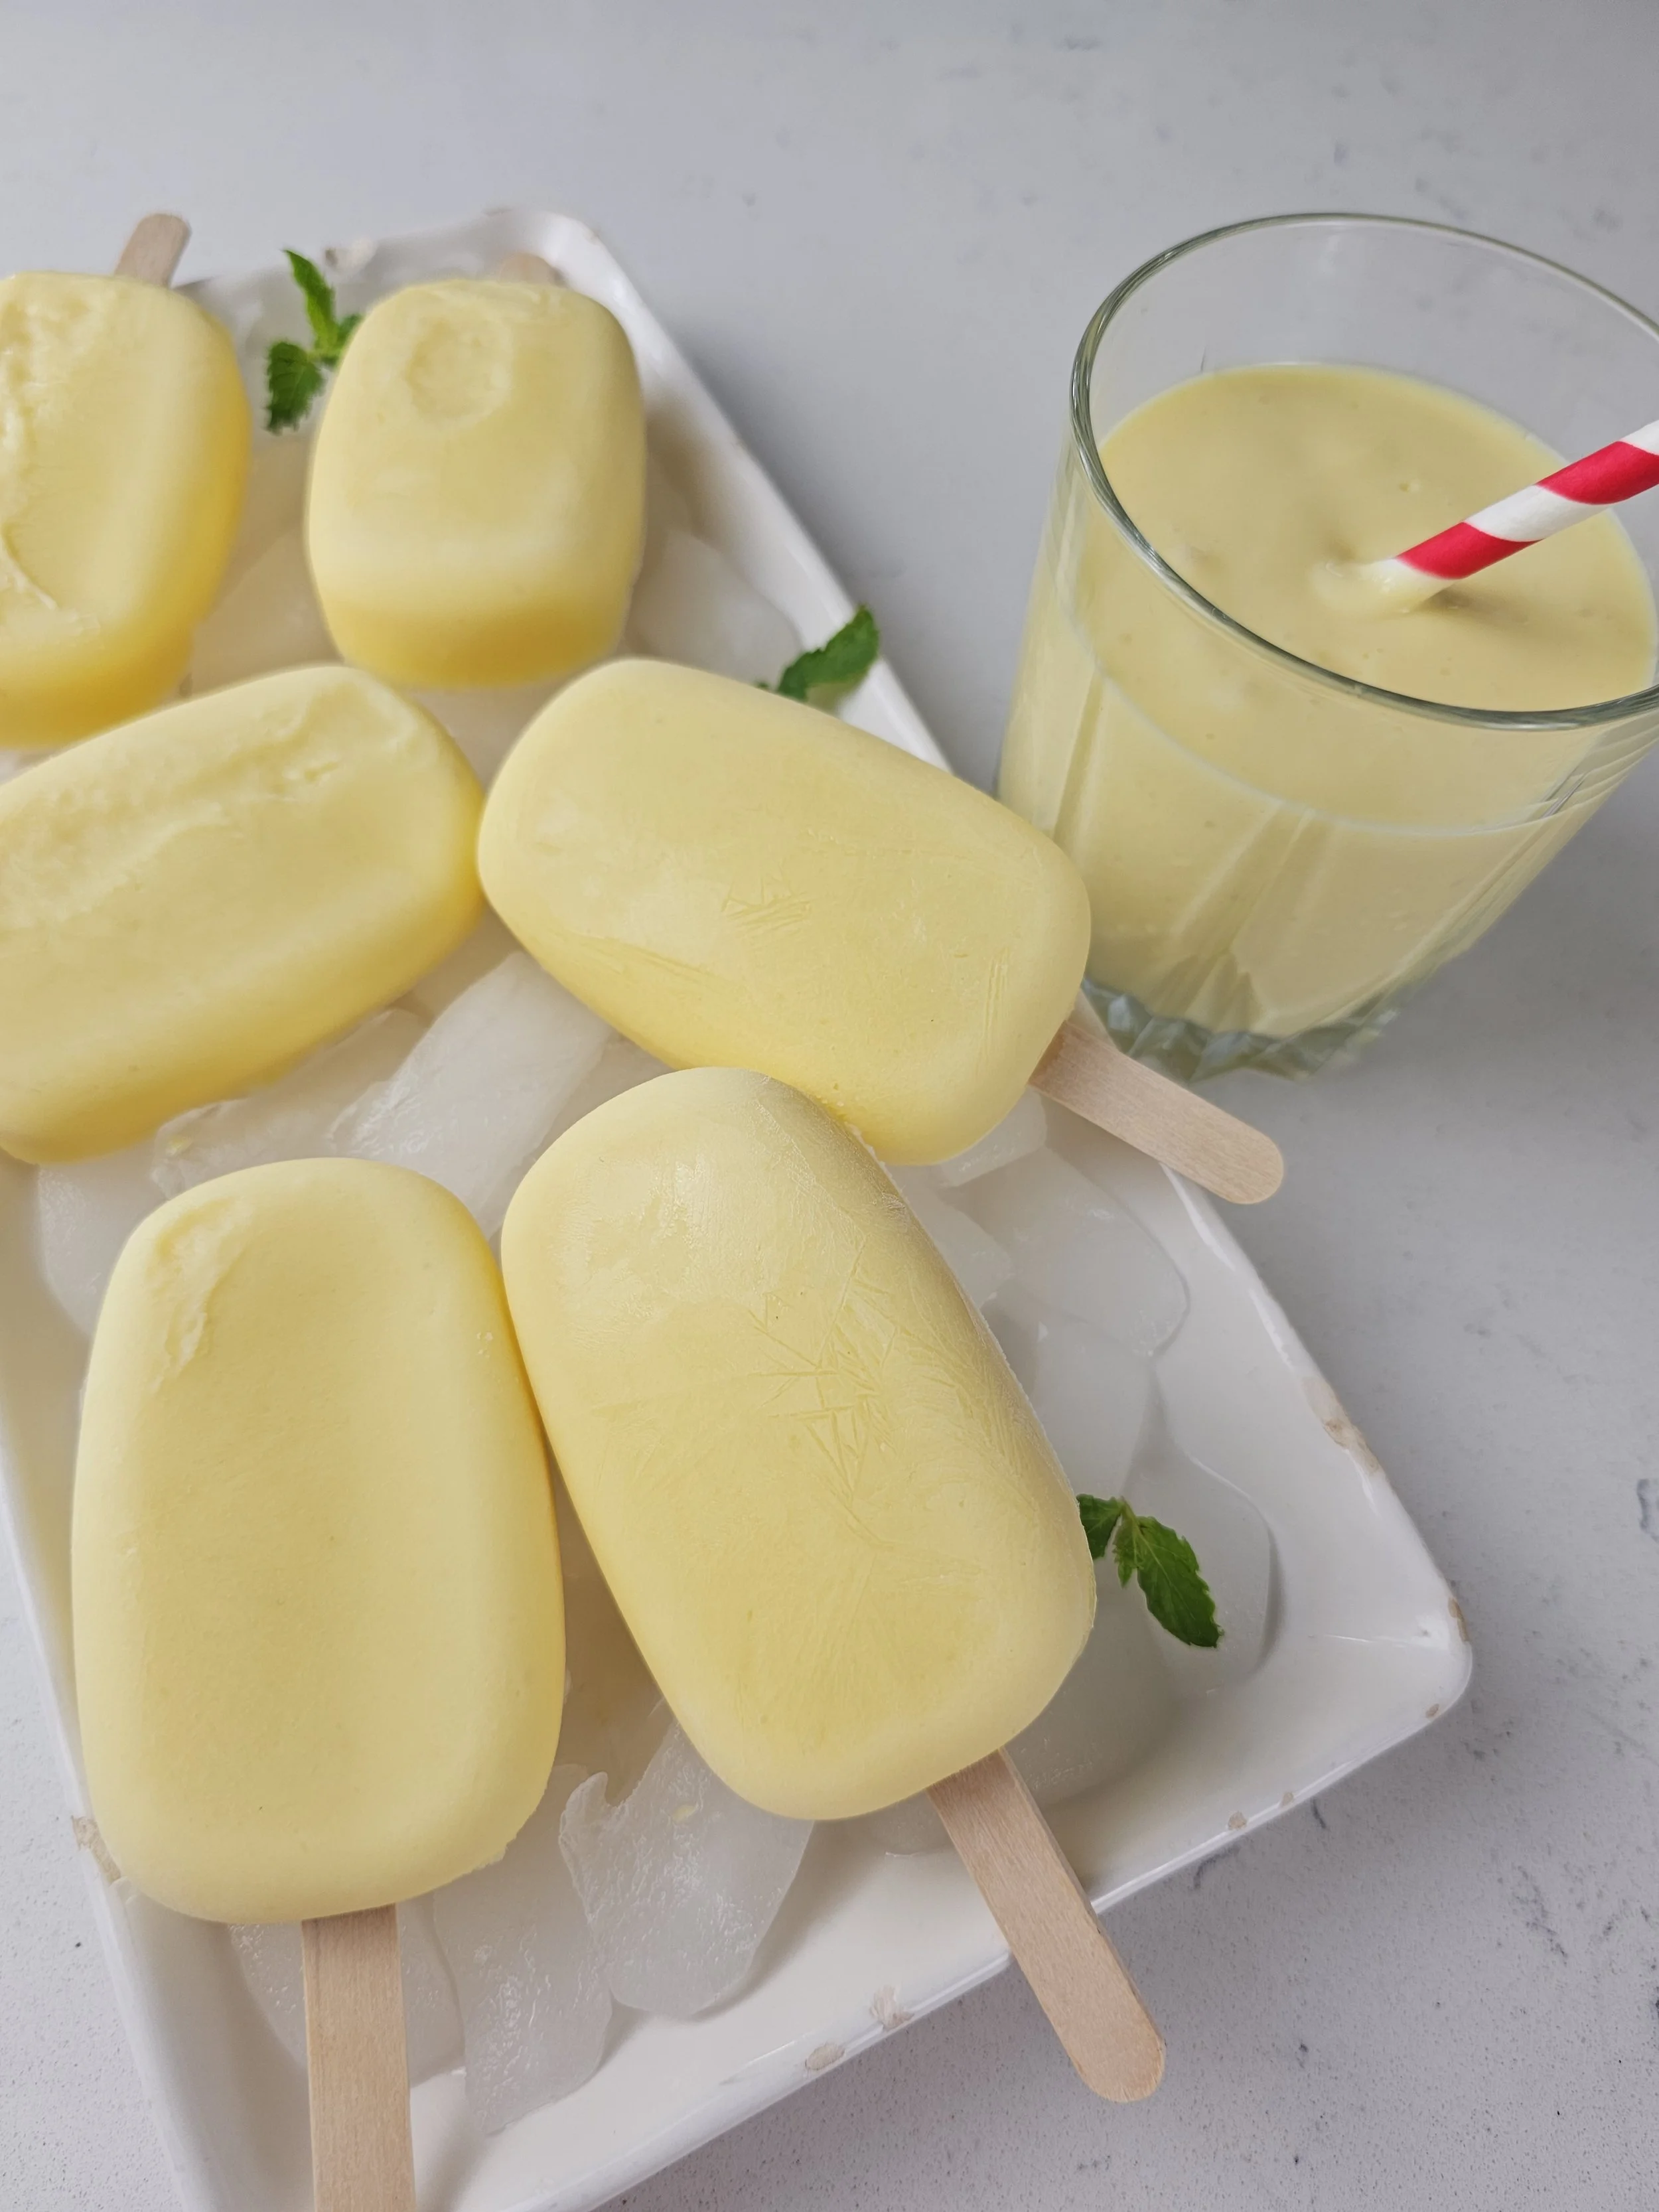
Some recipe ideas come from childhood memories, others come from travel. This one started with a mango ginger milkshake at Nairobi Street Kitchen.
The combination immediately stood out to me. Mango and ginger aren't unusual ingredients on their own, but together they create something special: the sweetness of ripe mango balanced by the warmth and gentle bite of fresh ginger.
Across East Africa, ginger appears in drinks and desserts in ways that often differ from what many people are familiar with elsewhere. Seeing how ingredients are used differently from one country to another is one of my favorite parts of exploring food cultures.
After trying the milkshake, I couldn't stop thinking about how well those flavors would work as a frozen dessert. The creaminess of the drink already felt halfway between a milkshake and ice cream, making it a natural candidate for an ice lolly.
These Mango Ginger Ice Lollies transform that inspiration into a refreshing summer treat. Made with real mango, fresh ginger infusion, cream, and ice cream, they're fruity, creamy, and just spicy enough to keep you coming back for another bite.
Whether you're looking for a unique frozen dessert or simply want a new way to enjoy mango season, these ice lollies capture the flavor combination that inspired them in Nairobi.
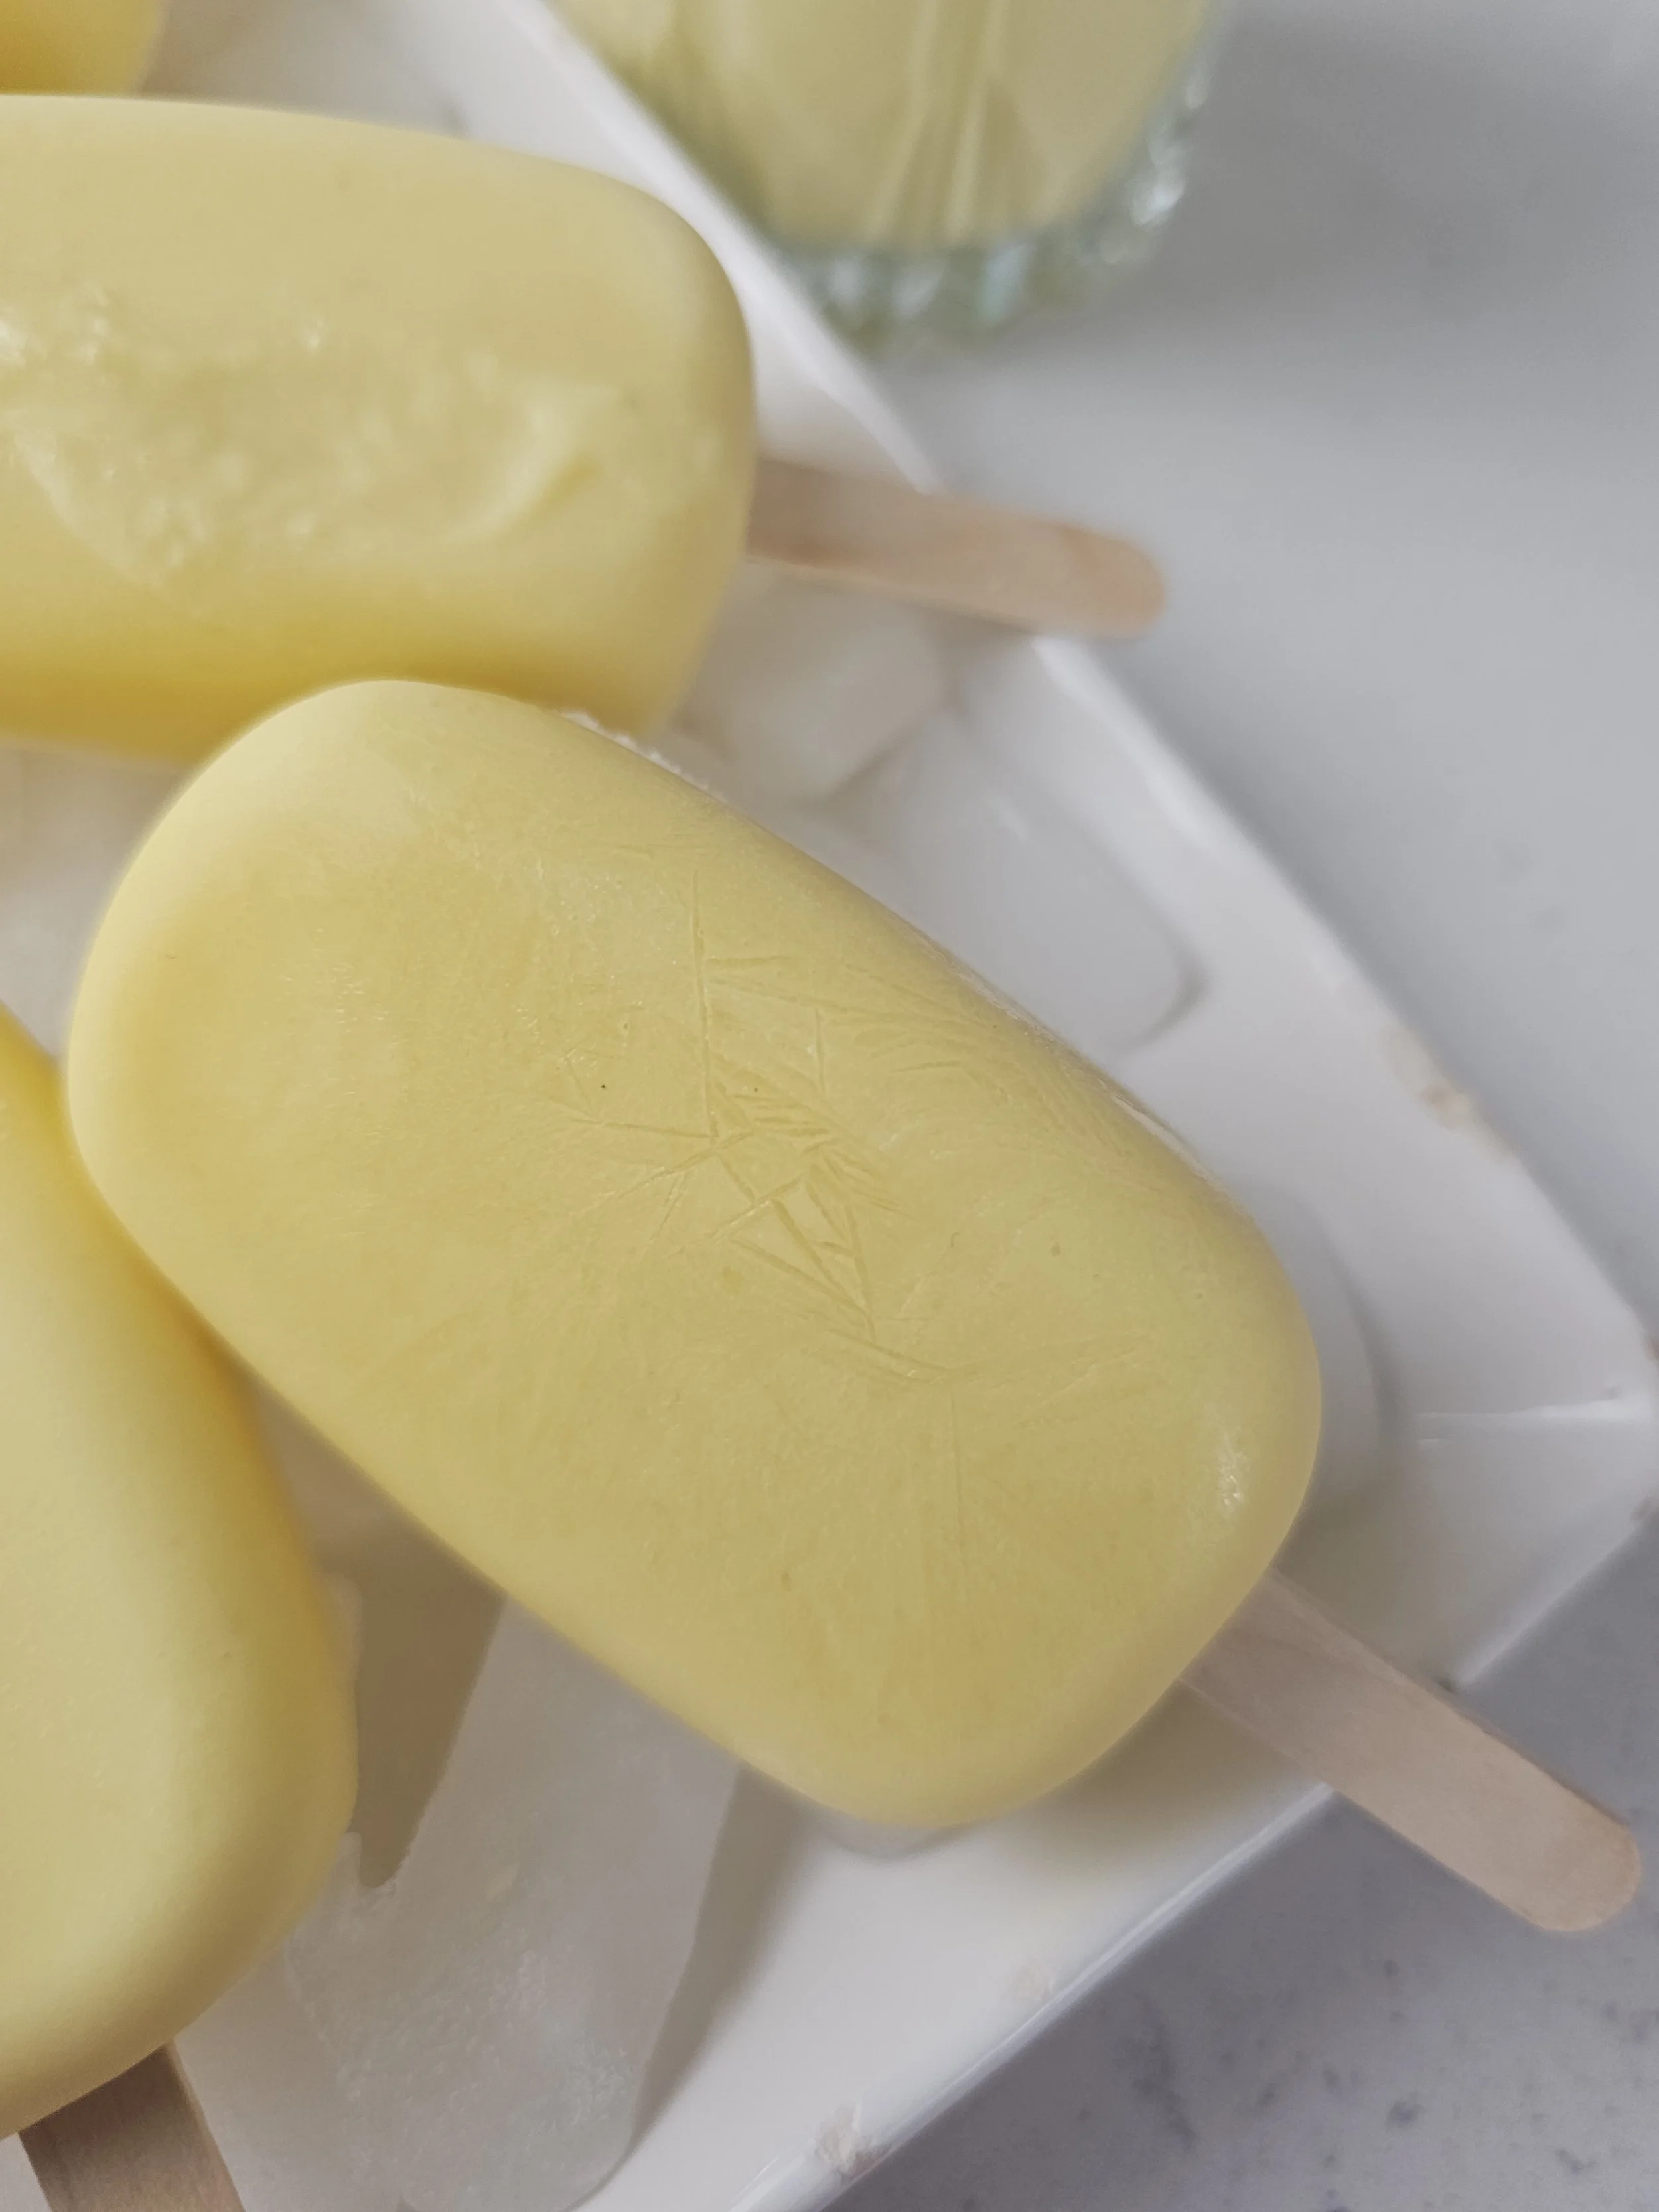

Mango Ginger Ice Lollies
A creamy mango and ginger ice lolly inspired by a memorable milkshake in Nairobi. Sweet mango, fresh ginger, cream, and ice cream come together in this refreshing frozen dessert.
Ingredients
- 2 tbsp freshly grated ginger
- ¼ cup water
- 2½ cups frozen mango chunks
- 1 cup vanilla ice cream
- 3 tbsp heavy cream (for blending and added creaminess if needed)
- Juice of ½ lime
- Pinch of salt
- 2–4 tbsp ginger infusion, to taste
Instructions
- Step 1: Make the Ginger Infusion
- 1. Combine the grated ginger and water in a small bowl.
- 2. Let sit for 10–15 minutes.
- 3. Strain through a fine mesh sieve, pressing gently to extract as much liquid as possible.
- 4. Discard the solids and reserve the ginger liquid.
- Step 2: Blend the Ice Lolly Base
- 1. Add the frozen mango, vanilla ice cream, heavy cream, lime juice, salt, and 3 tablespoons of ginger infusion to a blender.
- 2. Blend until smooth.
- 3. If the mixture is too thick, add milk one tablespoon at a time until thick but pourable.
- 4. Taste and add additional ginger infusion if desired. The ginger flavour should be slightly stronger than you want in the finished ice lolly, as freezing will mellow it.
- Step 3: Fill the Moulds
- 1. Pour the mixture evenly into 6 ice lolly moulds.
- 2. Leave a little space at the top for expansion.
- 3. Insert sticks or lids.
- Step 4: Freeze
- 1. Freeze for 6–8 hours or overnight until completely solid.
- Step 5: Serve
- 1. Briefly run the outside of the moulds under warm water for 2–3 seconds.
- 2. Gently release the ice lollies.
- 3. Serve immediately.
Notes
- The sweetness of the final ice lollies will depend on the ripeness of the mango and the brand of ice cream used.
- Lime juice brightens the flavour and helps balance the richness of the cream and ice cream.
- The pinch of salt enhances both the mango and ginger flavours without making the ice lollies taste salty.
- For a stronger ginger kick, increase the ginger infusion gradually and taste as you go.
Nutrition Facts
Calories
120Fat (grams)
5 gCarbs (grams)
18 gFiber (grams)
1.5 gSugar (grams)
15 gProtein (grams)
2 gI am not a certified nutritionist and any nutritional information on dontmissmyplate.com should only be used as a general guideline.
Ugandan Rolex Egg Wrap (Street Food Recipe)
Good street food does not need to stay on the street. It can absolutely live in your kitchen.
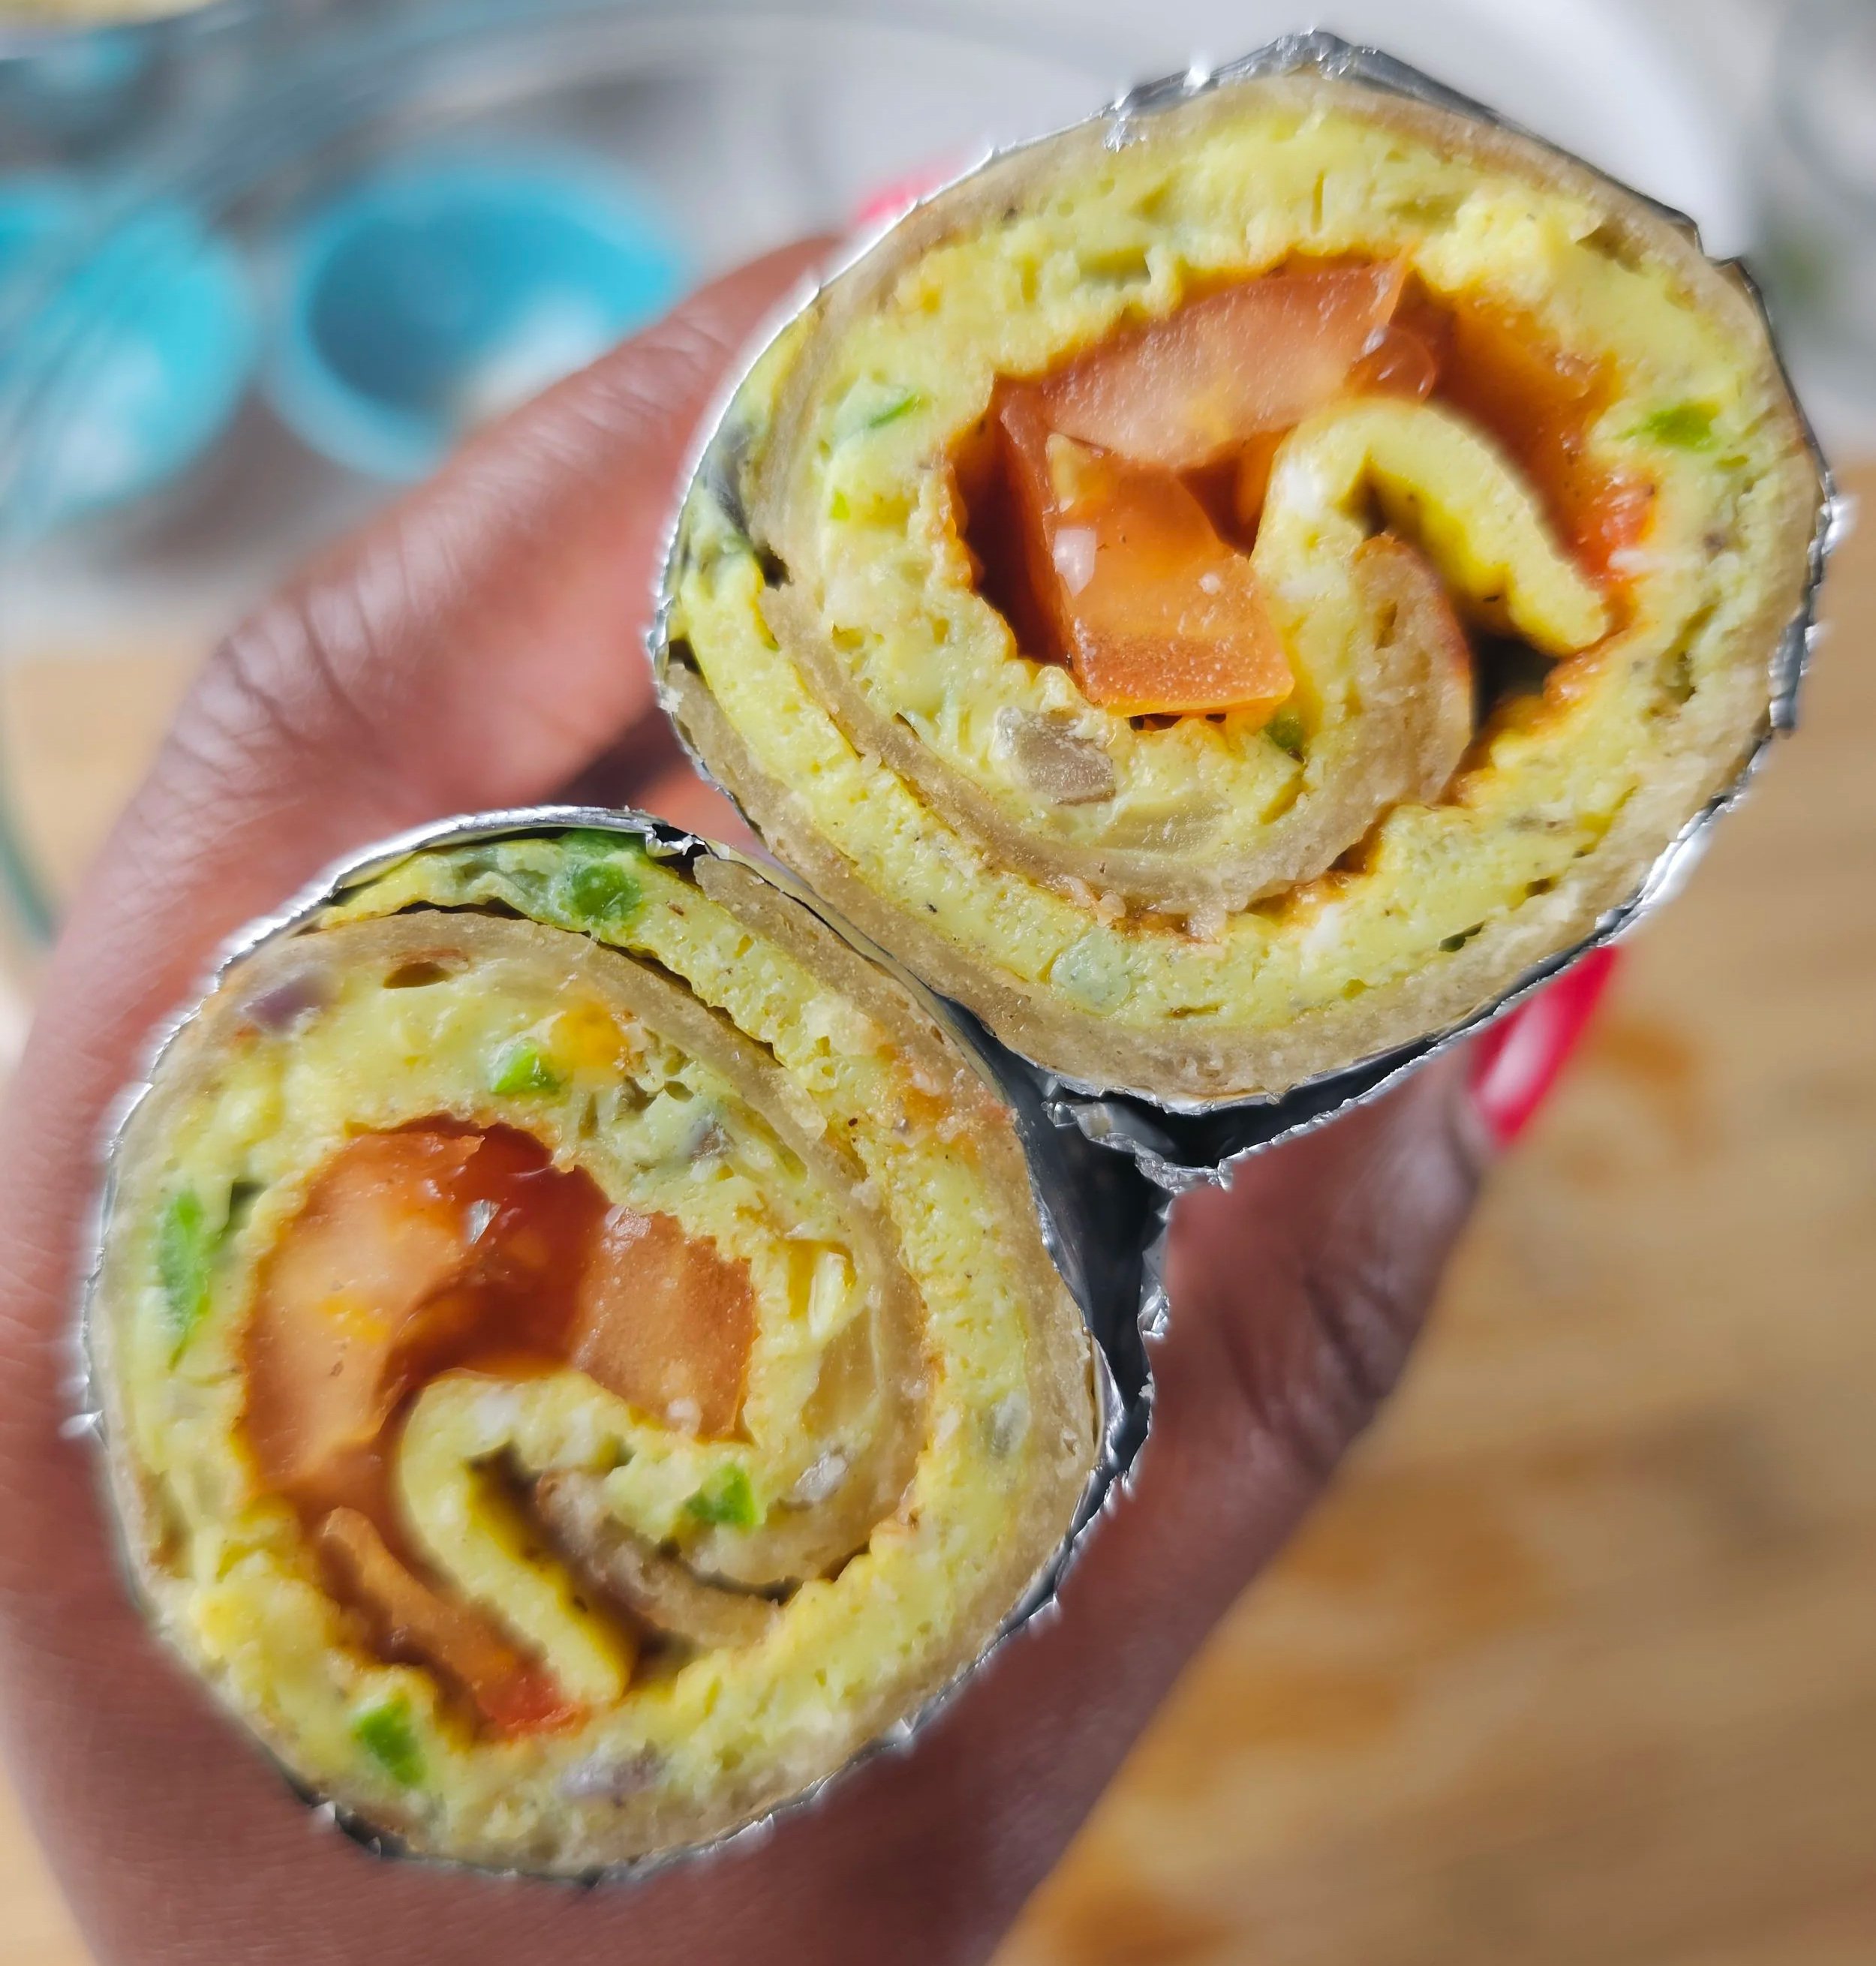
The Rolex is a beloved Ugandan street food made from a simple vegetable omelette wrapped in soft chapati, a flaky unleavened flatbread similar to roti. I have spent time in Uganda and other parts of East Africa, and I draw inspiration from the way street food culture shows up across the region, fast, fresh, and deeply satisfying.
Across East Africa, chapati is a staple that shows up at breakfast, lunch, and everything in between. It is often used as the base for quick handheld meals like the Rolex, which makes it one of the most practical and versatile snacks you can make at home.
For me, this recipe is part of a wider way of cooking, taking inspiration from street foods across Uganda and the region, then recreating them in a home kitchen where they are just as accessible, flexible, and fun to eat.
The Rolex is exactly what it sounds like. Eggs are cooked into a thin omelette, layered with vegetables, and rolled tightly in flatbread to create a warm portable wrap. It works just as well for breakfast as it does for a midday snack or quick dinner.
There is no single correct way to make it. Some versions are simple with just eggs, onion, and tomato, while others are packed with cabbage, peppers, or whatever you have on hand. That flexibility is what makes it such a perfect everyday dish. It adapts to your kitchen and your schedule.
In this version, I keep it simple, fast, and home friendly so you can recreate it without special ingredients or long prep times. It is proof that street food does not have to stay on the street. It can become part of your everyday cooking rhythm.
Whether you are looking for a quick breakfast wrap, an easy lunch, or a satisfying snack, this Ugandan Rolex is the kind of recipe that fits into real life. No rules, just good food.
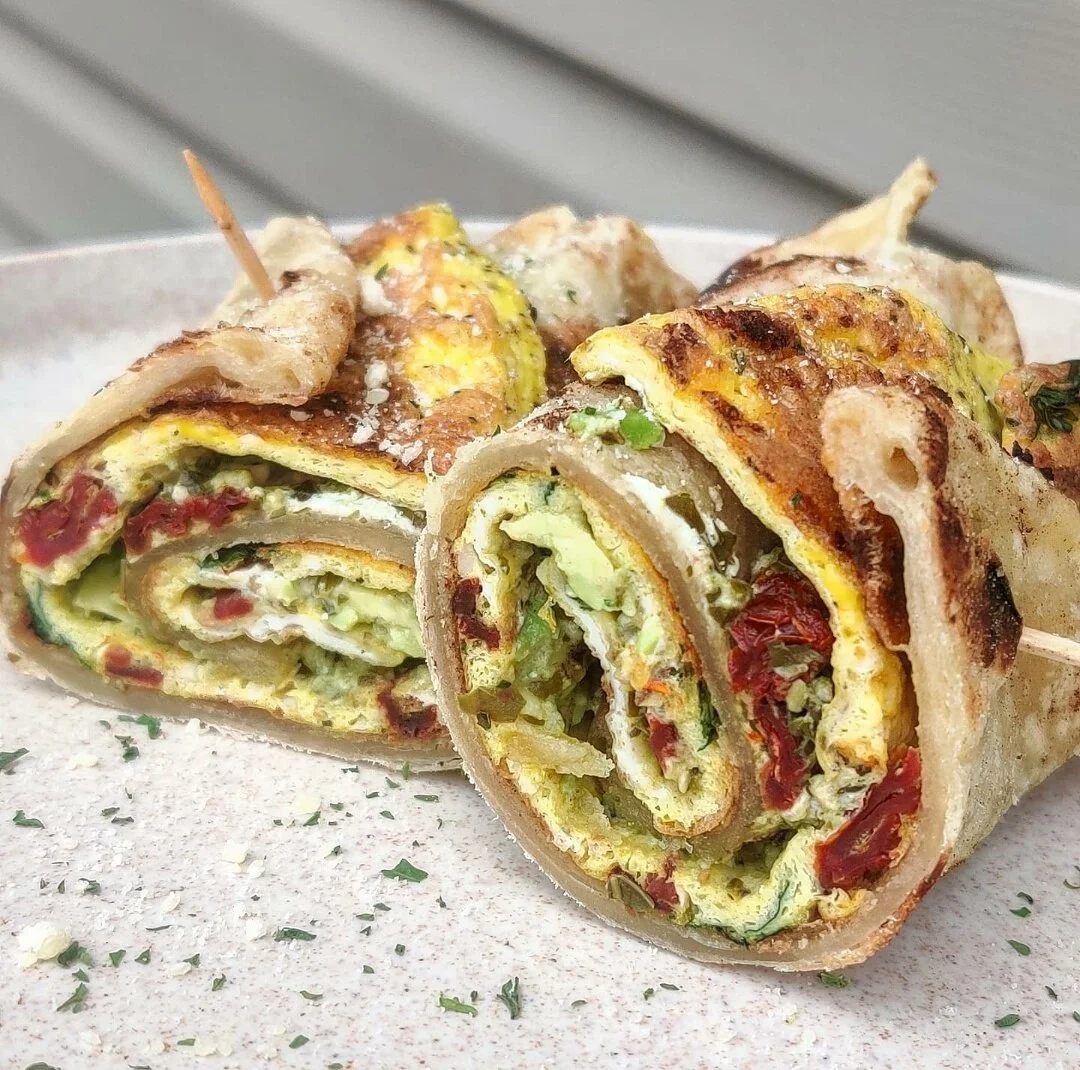
Ugandan Rolex (Omelette Rolled in Chapati)
A delicious and satisfying East African street food classic, fluffy vegetable omelette wrapped in soft, flaky chapati flatbread. This “rolex” is customizable, quick to make, and perfect for breakfast, brunch, or anytime you want a flavorful, handheld meal.
Ingredients
- 1 cup all-purpose flour
- 1 teaspoon salt
- 1 tablespoon vegetable oil, plus extra for cooking
- 1/4 cup hot water + 1 tablespoon hot water (adjust as needed)
- 4 eggs
- 1/2 teaspoon black pepper
- 1 tablespoon fresh parsley, chopped
- 1 teaspoon Italian seasoning
- 1 teaspoon dried parsley
- Pinch of salt
- 2 tablespoons pesto
- 1/4 cup Parmesan cheese, grated
- 2 tablespoons sun-dried tomatoes, chopped
- 2 tablespoons goat cheese
- 1 avocado, mashed or sliced with lemon juice
Instructions
- In a medium bowl, mix the flour and salt. Add the vegetable oil and mix. Gradually add the hot water while stirring to form a soft dough. On a lightly floured surface, knead the dough for about 5 minutes until smooth. Shape into a ball, then divide into two equal pieces. Cover and let rest for 10 minutes.
- On a lightly floured surface, roll each dough ball into a circle about 1/4 inch thick and roughly the size of the pan you’ll use to cook the omelette.
- Lightly brush each chapati with oil, then press into a lightly floured shallow plate. Flip and repeat.
- Heat a non-stick pan over medium-high heat and lightly oil it. Cook each chapati for about 15 seconds per side, flipping once, until you see brown spots and the chapatis are cooked through. Set aside.
- In a bowl, beat the eggs with black pepper, fresh parsley, Italian seasoning, dried parsley, salt, Parmesan cheese, half of the goat cheese, and half of the sun-dried tomatoes.
- Pour the egg mixture into the hot pan and cook omelettes one at a time until set.
- Place each omelette on top of a chapati. Top each with half an avocado and 1 tablespoon of pesto. Sprinkle with the remaining sun-dried tomatoes and goat cheese.
- Roll up each chapati tightly to form a “rolex.” Cut each in half, secure with toothpicks, and serve hot.
I am not a certified nutritionist and any nutritional information on dontmissmyplate.com should only be used as a general guideline.