

Deviled Eggs with Chakalaka
When the weather begins to warm after a harsh winter, nothing kicks off a celebration of the new season like a colorful, flavorful appetizer. Enter Chakalaka Deviled Eggs, a South African twist on a classic seasonal party favorite.
Deviled eggs have long been associated with springtime, symbolizing rebirth and renewal, historically aligned with the end of Lent, when eggs were restricted.
This recipe combines a creamy, tangy yolk filling with the vibrant, spicy flavors of chakalaka, a beloved vegetable relish made from peppers, onions, carrots, and tomatoes, seasoned with curry and warm spices. Chakalaka is traditionally served alongside grilled meats and starchy sides like pap or sadza, making it a familiar and festive flavor profile.
These eggs are perfect for a wide range of events, from braais and cookouts to picnic spreads and upscale cocktail gatherings. They bring a pop of color, a touch of heat, and a playful nod to South African flavors, making them a springtime appetizer that’s as delicious as it is eye-catching.

Deviled Eggs with Chakalaka
Bright, flavorful, and a little spicy, these Chakalaka Deviled Eggs combine creamy yolks with the vibrant South African relish chakalaka. Perfect for spring gatherings, braais, picnics, or cocktail parties, they bring color, heat, and bold flavor to any appetizer spread.
Ingredients
- 1/2 medium onion, diced
- 1/2 large red bell pepper, diced
- 1 large garlic clove, minced
- 1 Thai chili, finely chopped
- 1 medium carrot, diced
- 1/4 cup baked beans in tomato sauce
- 1/4 cup fire-roasted diced tomatoes
- 1/4 tsp cayenne
- 1/2 tsp smoked paprika
- 1 tsp curry powder
- 1/4 tsp Royco Usavi beef seasoning
- 1/4 tsp salt
- 1/4 tsp black pepper
- 1/4 tsp ground coriander
- 1/4 tsp ground ginger
- 1 tsp chicken bouillon concentrate
- 1 cup water
- 1/4 cup ketchup/tomato sauce
- 1 tbsp tomato paste
- 1–2 tbsp Worcestershire sauce
- 1–2 tsp rice vinegar
- 1 tbsp chutney
- Ghee or oil, for cooking
- 6 large eggs
- 3 tbsp mayonnaise
- 1 tsp Dijon mustard
- 1 tsp lemon juice
- 2–3 tbsp prepared chakalaka (from above)
- 2 tbsp plain yogurt or sour cream (optional)
- Salt and pepper, to taste
- Optional garnish: smoked paprika, chopped parsley
Instructions
- Cook the eggs: Place the eggs in a pot and cover with 1 inch of cold water. Bring to a boil, then cover, turn off the heat, and let sit 10 minutes.
- Transfer to an ice bath for 5 minutes, then drain. Place in the fridge.
- Prepare chakalaka: Assemble your spices and chop your vegetables. Heat some ghee or oil in a pan and sauté the onions and garlic until soft. Add spices and bouillon; cook for at least 30 seconds.
- Add the bell pepper and chili pepper then cook 1–2 minutes. Stir in the tomato paste, Worcestershire sauce and ketchup to deglaze.
- Simmer vegetables: Add the carrots, diced tomatoes, baked beans, and water. Simmer for 15 minutes until thickened, stirring occasionally.
- Stir in the chutney, and vinegar, then season to taste. Set aside to cool, then add at least 1/2 cup to a bowl and use an immersion blender to smoothen slightly. Be sure to keep the texture and don't make soup!
- Make filling: Peel and halve the eggs and remove the yolks gently to a bowl.
- Mash the yolks, then mix in the mayonnaise, mustard, lemon juice, yogurt (if using), salt, and pepper. Stir in 2–3 tbsp chakalaka.
- Use an immersion blender to make it smoother if desired, but keep a few chunks for texture.
- Assemble eggs: Spoon or pipe yolk mixture into the egg whites.
- Garnish with smoked paprika, a little reserved chakalaka, and parsley.
- Chill until serving.
Notes
- Storage: These are best fresh! Refrigerate up to 24 hours.
- Yogurt or sour cream is optional. It adds extra creaminess and a subtle tang to the filling, which can mellow the spice from the chakalaka. Omit it if you prefer a firmer, more traditional deviled egg texture.
Nutrition Facts
Calories
82Fat (grams)
6.3 gSat. Fat (grams)
1.2 gCarbs (grams)
2.5 gFiber (grams)
0.7 gProtein (grams)
4.5 gI am not a certified nutritionist and any nutritional information on dontmissmyplate.com should only be used as a general guideline.
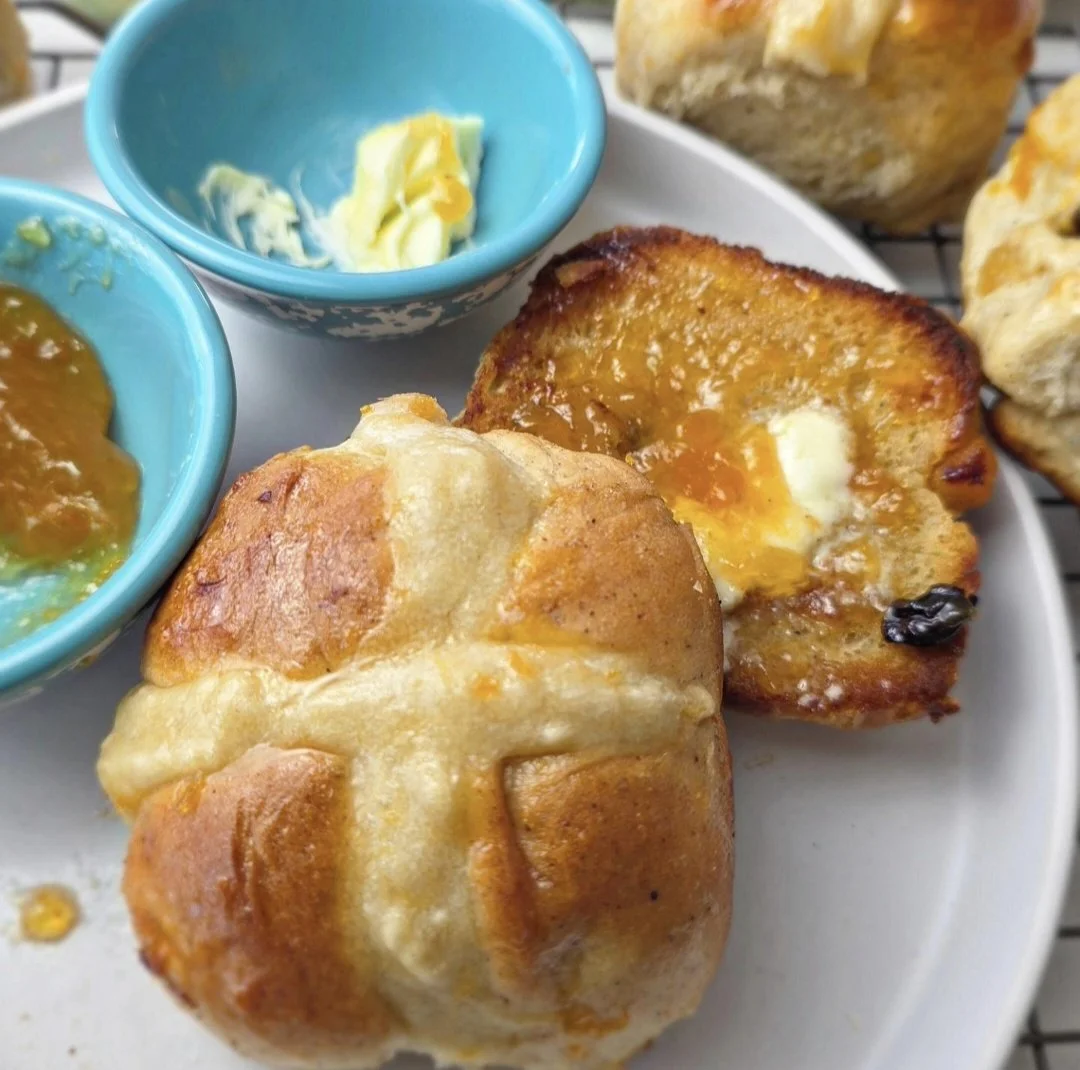
Hot Cross Buns With Apricot Glaze
Hot cross buns have always held a special place in my heart. Growing up, I would rush into the bakery every Easter just to see them. A whiff of that warm, cinnamon-spiced aroma, the soft crumb, and the sweet glaze was enough to make me giddy. That said, no one in my household ever made them from scratch, so I always wanted to learn how to do it myself.
The ritual of the cross on top, the spices tucked inside, and the little bursts of sweetness from dried fruit feel celebratory, comforting, and alive. They are also steeped in history, traditionally tied to Lent and long-standing Easter traditions.
While baking hot cross buns can seem intimidating, but you can absolutely make your own incredible batch at home!
One of my favorite debates is how to eat them. Fresh from the oven, they are irresistible. But toasted the next day with butter and a smear of apricot jam or preserves, they take on a whole new dimension.
That balance of warmth, sweetness, and richness is exactly why I love them so much. The addition of apricots in the dough and a glossy apricot glaze on top gives them extra brightness and depth of flavor.


Hot Cross Buns With Apricot Glaze
Soft, spiced hot cross buns with diced apricots and a shiny apricot glaze. Perfect for Easter, brunch, or anytime you want a special treat. Lightly toast for best flavor and serve with butter or jam.
Ingredients
- 1/3 cup + 1 tbsp sugar
- 1 cup warm milk
- 1 packet (2 1/4 tsp) instant yeast
- 4 cups all-purpose flour
- 1 tsp salt
- 2 tsp ground cinnamon
- 1/2 tsp ground nutmeg
- Pinch of cardamon
- 1 egg
- 1/4 cup unsalted butter, softened
- 1/3 cup dried apricots, chopped
- 1 tsp lemon juice + 1/2 tsp zest
- 1/2 cup raisins
- 1/2 cup all-purpose flour
- 5–7 tbsp water (adjust for a thick, pipeable paste)
- 3 tbsp apricot jam
- 1–2 tsp water, just enough to loosen so it spreads easily
- Optional: 1/2 tsp lemon zest for extra brightness
- Whipped butter with lemon zest (optional for serving)
Instructions
- Preheat the oven to 350°F (175°C).
- Toss the chopped apricots with lemon juice and zest. Microwave for 30 seconds, then set aside to cool.
- In the bowl of a stand mixer, combine the flour, sugar, salt, cinnamon, and nutmeg.
- In a separate bowl, whisk together the warm milk and a small amount of the sugar. Add the yeast, cover, and let sit for 5–10 minutes, until foamy.
- Using the dough hook attachment, add the egg and the yeast mixture to the dry ingredients. Mix on low speed until a rough dough forms. Increase to medium speed and knead for about 5 minutes, until the dough becomes smooth, elastic, and begins to pull away from the sides of the bowl. The dough should stretch when pulled, or spring back slowly when lightly pressed.
- Add the softened butter in small pieces, mixing until fully incorporated.
- Mix in half of the apricots and raisins until evenly distributed.
- Transfer the dough to a lightly oiled bowl or Dutch oven and cover. Let rise in a warm, draft-free place for about 1 hour, or until doubled in size.
- Gently punch down the dough, then fold in the remaining apricots and raisins.
- Turn the dough out onto a lightly floured surface. Divide into 12 equal portions and shape each into a smooth ball. You can weigh them for accuracy.
- Arrange the buns in a greased baking dish, leaving a little space between each. Cover and let rise for 45 minutes, until puffed and slightly touching.
- In a small bowl, mix the flour and water until a thick, smooth paste forms. Transfer to a piping bag or a plastic bag with a corner snipped, then pipe crosses over the buns.
- Bake for 20 to 25 minutes. If the buns are still pale by then, increase the temperature to 375°F and bake for an additional 5 to 7 minutes, checking frequently to prevent burning.
- Warm the apricot jam with a small amount of water until smooth. Brush over the buns immediately after baking.
- Allow to cool slightly before serving. Best enjoyed warm, or toasted with butter and apricot jam within 1 to 2 days.
Notes
- Overnight dough (optional): If you want extra depth of flavor, the dough can be made ahead. After mixing and kneading (before the first rise), place it in a lightly oiled bowl, cover tightly, and refrigerate overnight. The dough will slowly rise in the fridge. The next day, allow it to sit at room temperature for 30–45 minutes before shaping and proceeding with the recipe. This step is completely optional — the buns can also be made fresh from start to finish.
- Adding dried fruit: Incorporate half of the dried fruit during kneading to prevent tearing the dough. After the first rise, fold in the remaining fruit to ensure even distribution.
- Apricot glaze: Brush the glaze while the buns are still hot. This gives them the best shine and helps lock in moisture.
- Serving suggestions: Hot cross buns are delicious fresh from the oven, but you can also lightly toast them. Pair with butter, apricot jam, or whipped butter with a hint of lemon zest for a more elevated flavor.
- Storage: At room temperature, store in an airtight container for 1–2 days.
- For longer storage, freeze fully cooled buns in a freezer-safe bag or container. Thaw at room temperature or lightly toast from frozen before serving.
- Appearance vs. flavor: Don’t worry if the crosses aren’t perfectly shaped, taste and texture are what matter most.
Nutrition Facts
Calories
230Fat (grams)
7 gCarbs (grams)
37 gSugar (grams)
12 gProtein (grams)
6 gI am not a certified nutritionist and any nutritional information on dontmissmyplate.com should only be used as a general guideline.

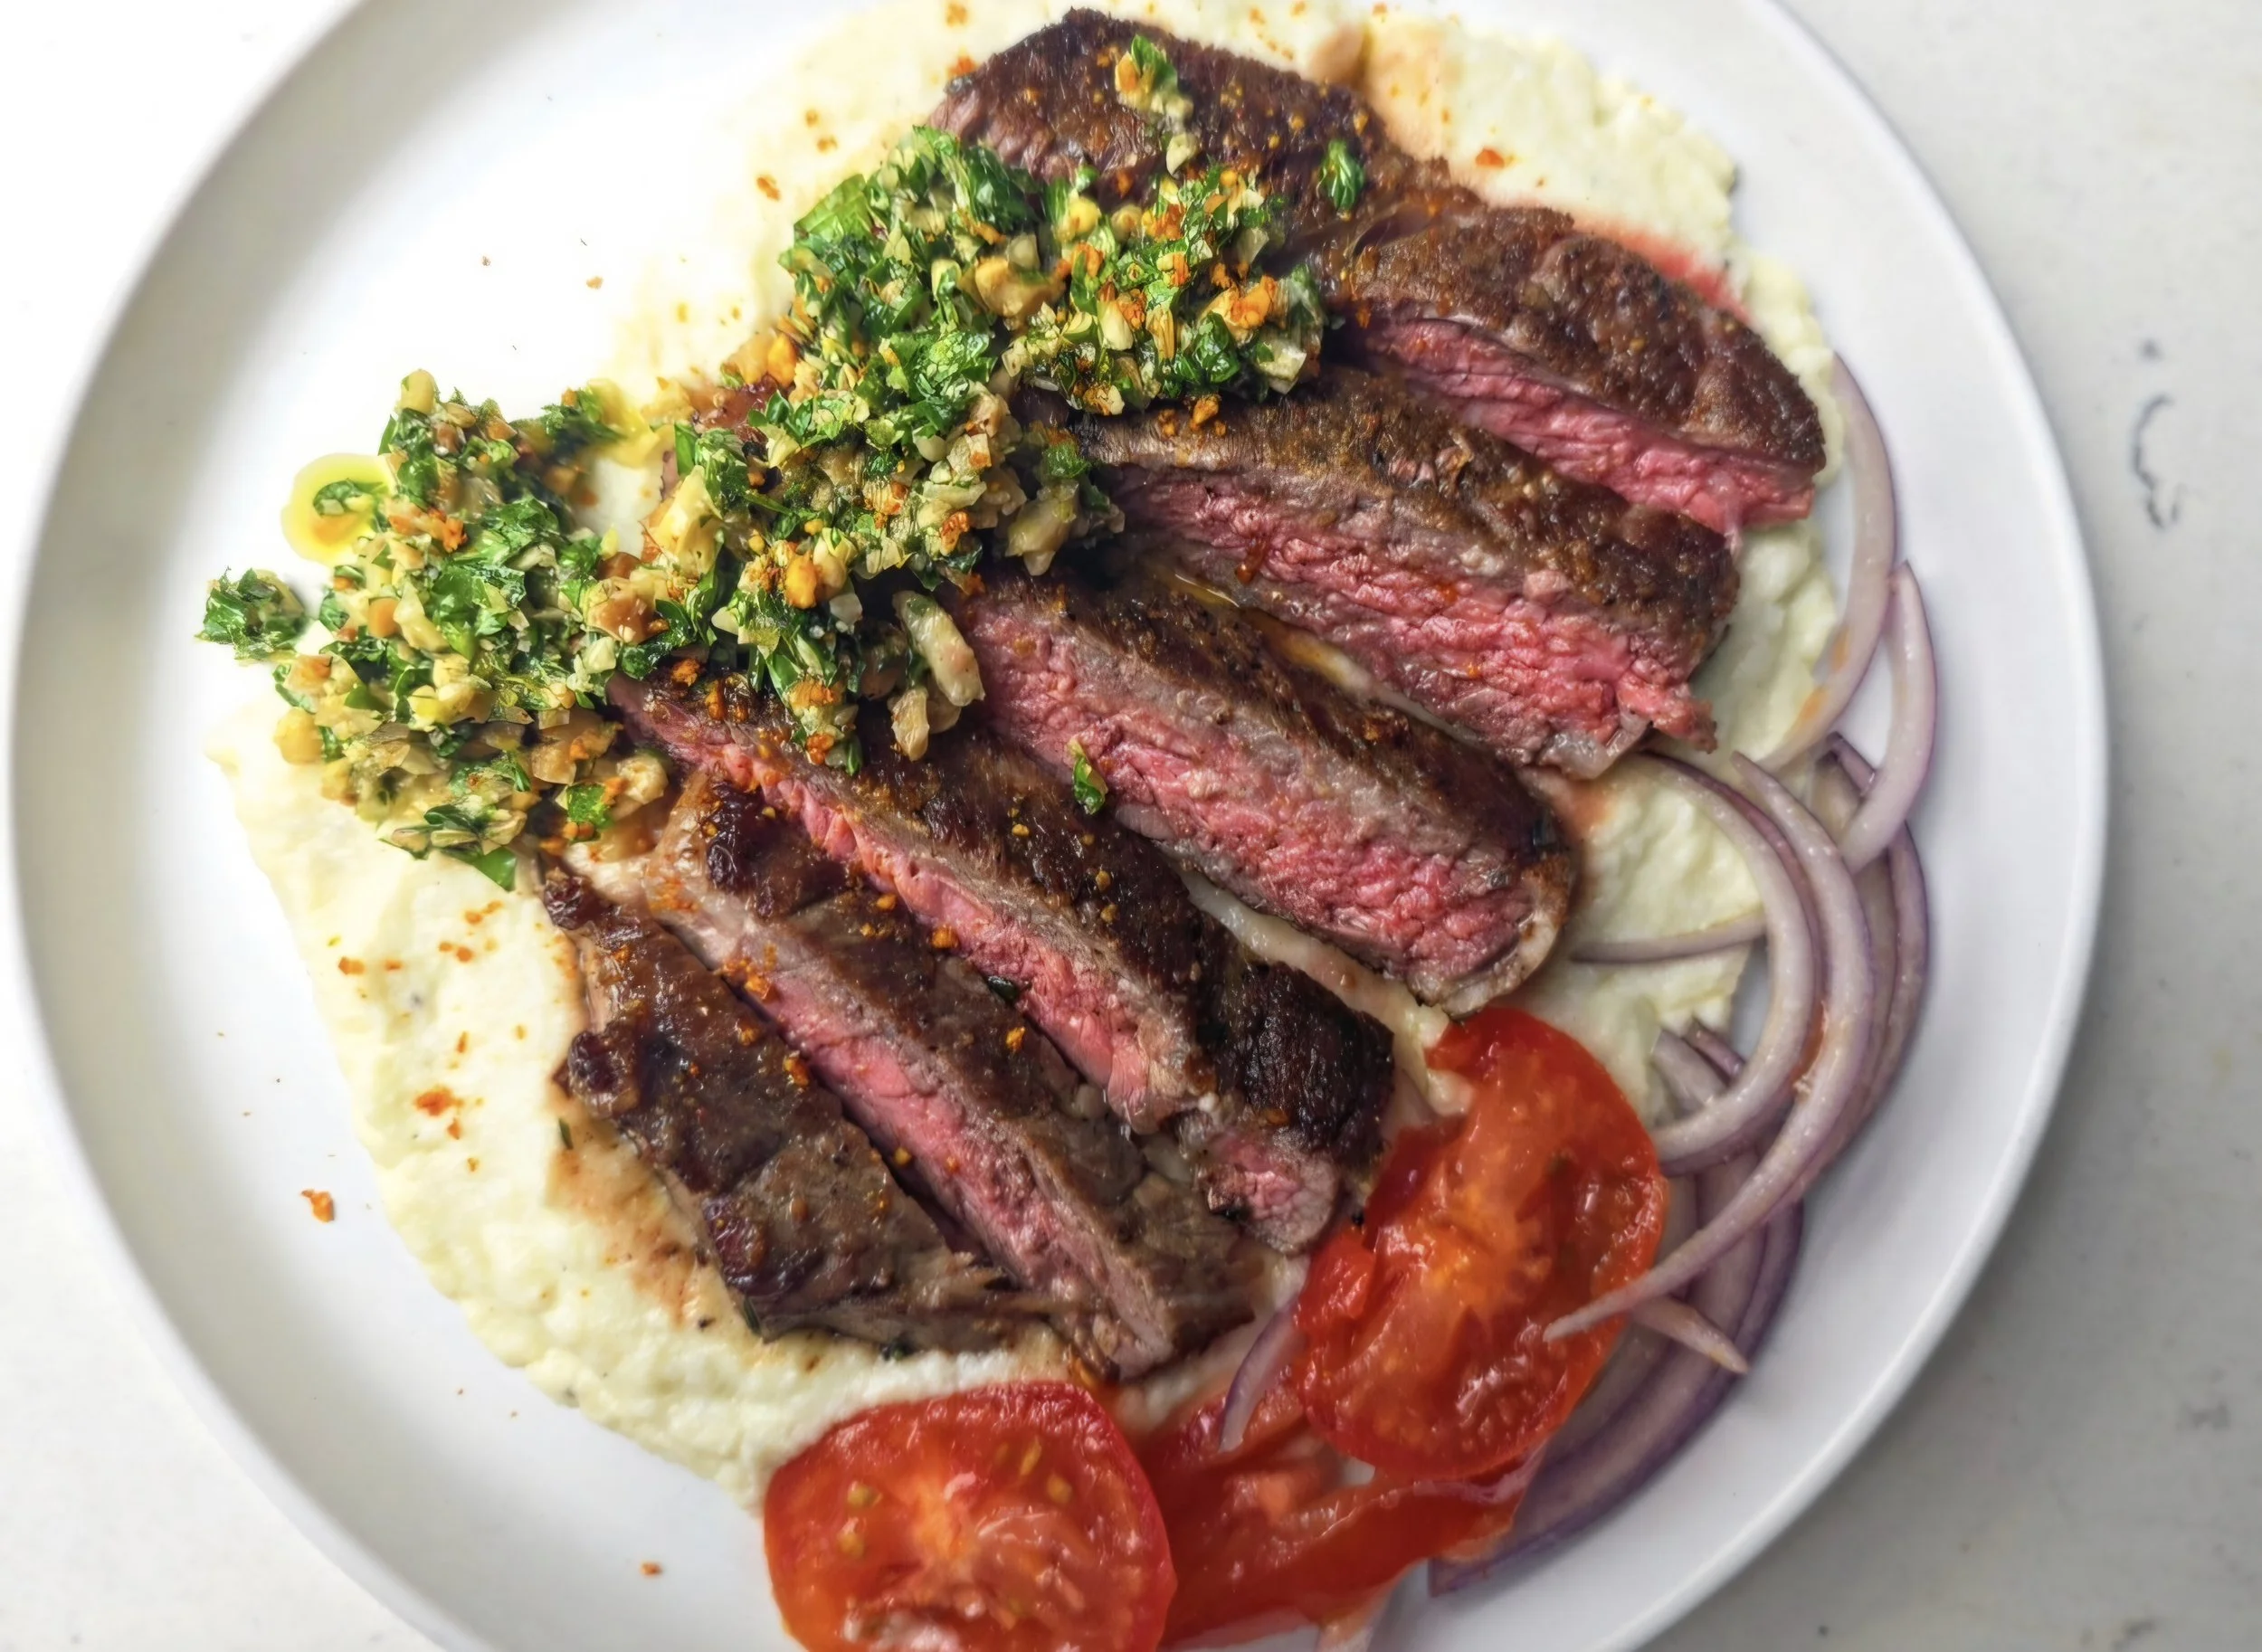
Spicy Suya Steak with Creamy Cauliflower Puree
I’ve traveled to Nigeria twice, and one thing that always stands out is suya, a spicy, nutty grilled meat you’ll find on nearly every street corner, late-night food stall, and even on restaurant menus. In formal dining settings, you’ll see it offered alongside fiery jollof rice, peppered fish, grilled snail, or sweet, flame-kissed plantains, each dish bold, vibrant, and packed with flavor.
Suya is more than just a quick bite; it’s a whole experience, from the smoky aroma of open flames to the bold, layered heat of the spice blend known as yaji.
Yaji is what gives suya its signature character, a deeply flavorful mix of ground peanuts, chili, ginger, garlic, and warming spices. It’s savory, slightly smoky, a little fiery, and unmistakably nutty. In many ways, it echoes the richness of peanut-based stews found across West and Southern Africa, but in a dry rub form that clings beautifully to grilled meat.
This recipe is inspired by those street food moments but reimagined for the home kitchen. It takes the essence of suya and brings it into a more composed, plated dish, pairing a suya-style steak with a fresh peanut gremolata and a silky cauliflower purée. It’s a bit of a fusion, street food meets steakhouse, bold spice meets subtle creaminess.
You can find pre-made suya powder, but I’ll also show you how to make it at home easily so you can bring those flavors into your own kitchen anytime.

Suya Steak with Cauliflower Puree and Peanut Gremolata
Turn any weeknight into steak night with this bold, Nigerian-inspired recipe. Tender steak gets a nutty, spicy suya crust, topped with a bright, crunchy peanut gremolata. Served alongside silky cauliflower purée, it’s a balanced, flavorful dinner that feels indulgent but is quick enough for a weekday.
Ingredients
- 3 tbsp roasted peanuts, finely ground
- 1 tsp smoked paprika
- 1 tsp cayenne pepper (adjust to taste)
- 1 tsp garlic powder
- 1 tsp onion powder
- ½ tsp ground ginger
- 1 small (Maggi) bouillon cube, crushed
- 1/2 tsp salt
- Optional (1/2 tsp black or white pepper)
- 2 thin steaks (~¾-inch thick)
- 4 tbsp neutral (or peanut) oil
- 2 tbsp butter
- 2 garlic cloves, smashed
- 2 thyme sprigs
- Salt and pepper (to rub on steaks before searing)
- 1 small head cauliflower, chopped
- 2 tbsp butter
- 1/3–1/2 cup cream
- 1 bay leaf
- 1 sprig thyme
- Salt and pepper to taste
- Optional for thinning (1/8 cup broth)
- 2 tbsp chopped roasted peanuts
- 1 tbsp fresh parsley, chopped
- 1 tbsp fresh cilantro, chopped
- 1 tsp lemon juice
- Pinch of salt
- Sliced tomato and red onion
- Light squeeze of lemon
- Pinch of salt
Instructions
- First, prepare the suya spice (yaji) mix. Combine ground peanuts, paprika, cayenne, garlic powder, onion powder, ginger, and salt.
- Season the steaks with salt and pepper, then rub the suya spice evenly over them. Place on a wire rack and let sit at room temperature for at least 30 minutes while you prepare everything else. This helps remove excess moisture for a better crust and deeper flavor.
- Chop and boil the cauliflower until tender (about 10 minutes). Drain well to prevent a watery purée.
- In a saucepan, warm the butter, cream, thyme, and bay leaf. Season with salt, pepper, and all-purpose seasoning.
- Remove the aromatics, then blend the cauliflower with the warm cream mixture until silky. For a smoother texture, add a splash of chicken broth if needed. You want it smooth and creamy, not soupy. Set aside and keep warm.
- Prepare the gremolata by mixing chopped peanuts, parsley, cilantro, lemon juice, and salt. Set aside.
- Slice the red onion and tomatoes, toss with lemon juice and salt, and set aside.
- Now cook the steak. Preheat a cast iron skillet over medium-high heat for 3–5 minutes until hot (you may see a little smoke). Add 2 tablespoons of oil per steak.
- If your steak is thin (about ¾ inch), sear the first side for 1 to 1¼ minutes. Flip and sear for at least 30 seconds, then pour off excess oil. Add butter, garlic, and thyme, and baste for about 30 seconds per side.
- Check the internal temperature with a thermometer — 130–132°F for medium. Continue flipping every 30 seconds until cooked to your preference.
- To plate, spoon the cauliflower purée onto a plate. Slice the steak against the grain and place over the purée.
- Top with peanut gremolata and finish with extra yaji seasoning. Serve with the tomato-onion salad on the side.
Nutrition Facts
Calories
450Fat (grams)
30 gCarbs (grams)
10 gFiber (grams)
3 gProtein (grams)
35 gI am not a certified nutritionist and any nutritional information on dontmissmyplate.com should only be used as a general guideline.

Pepper Steak Meat Pies
Meat pies come in all shapes and sizes, but one of my favourites will always be the handheld pepper steak pie. Growing up, these flaky, golden pies were everywhere—filled with rich, peppery beef and perfect as a quick, satisfying snack. Whether grabbed on the go or enjoyed with a cold Fanta or Coca-Cola, they’re a staple across Zimbabwe and much of Southern Africa.
Across the region, meat pies are a true comfort food. Walk into almost any bakery and you’ll find different variations, from beef and onion to curry steak, all wrapped in a buttery crust and baked until golden. This homemade version focuses on the classic pepper steak filling, known for its deep flavour and subtle heat from freshly ground black pepper.
If you’re looking for an easy homemade meat pie recipe with a flaky crust and a rich, savoury filling, this is a great place to start. Inspired by Zimbabwean bakery-style pies, these pepper steak pies are warm, comforting, and full of nostalgic flavour.
Perfect for lunch, snacks, or meal prep, these homemade pepper steak meat pies are a must-try for anyone who loves savoury baking.

Zimbabwean Meat Pies: Pepper Steak
Flaky homemade pepper steak meat pies filled with tender, peppery beef. A classic Southern African savory pie perfect for snacks or meals.
Ingredients
- 1.5 lbs chuck or blade steak, cut into medium bite-sized chunks
- 1 large onion, finely chopped
- 1 tbsp garlic, minced
- 1 tbsp Royco Usavi beef mix (optional)
- 2 tbsp flour
- 2 tsp black pepper (plus extra to finish)
- 1 tsp paprika
- 1/2 tsp chili powder
- 1/2 tsp garam masala
- 1/4 tsp cayenne
- 1 tsp steak seasoning
- 1 tsp salt
- Pinch ground cloves
- 1 tsp dried thyme
- 1 tsp Worcestershire sauce
- 1 tsp tomato paste
- 1/4 cup sherry
- 1/2 cup red wine
- 1 to 1½ cups beef broth (as needed)
- 1 tbsp beef bouillon powder
- 1 tbsp butter
- 2 sheets puff pastry
- 1 egg (for egg wash)
Instructions
- Prepare the beef coating
- In a medium bowl, combine the flour, paprika, cayenne (if using), salt, and black pepper.
- Add the beef chunks and toss well until each piece is evenly coated with the flour mixture.
- Brown the beef
- Heat 2–3 tablespoons of oil in a large, deep pan over medium-high heat.
- Add the beef in a single layer, working in batches to avoid overcrowding.
- Cook each batch until all sides are nicely browned (about 3–4 minutes per batch). Remove browned beef and set aside on a plate.
- Cook the aromatics
- In the same pan, add the chopped onions. Cook over medium heat for 3–4 minutes until soft and lightly golden.
- Add minced garlic and thyme leaves, stirring for about 1 minute until fragrant.
- Deglaze the pan
- Pour in the sherry, scraping up any browned bits from the bottom of the pan.
- Stir in the red wine, tomato paste, and Worcestershire sauce. Let simmer for 2–3 minutes.
- Add broth and return beef
- Pour in the beef broth or bouillon, then return the browned beef to the pan. Stir to combine.
- Braise the beef
- Cover the pan with a lid and reduce the heat to low.
- Simmer gently on the stove at 325–350°F (160–175°C) for 1½ to 2 hours, or place the covered pan in a preheated oven at the same temperature.
- Stir occasionally, and add a little more broth if the sauce becomes too thick before the beef is tender.
- The beef is done when it is fork-tender and the sauce has thickened to a rich consistency.
- Finish the filling
- Remove the pan from heat. Stir in 2 tablespoons of butter and a small pinch of freshly ground black pepper.
- Taste and adjust seasoning if needed.
- Let the filling cool completely before using it to fill your meat pies.
- Cut the pastry
- Roll out your pastry to about ⅛ inch thick.
- Cut into squares (roughly 4–5 inches, depending on desired pie size).
- Add the filling
- Place 1–2 tablespoons of the cooled pepper steak filling in the center of each pastry square.
- Spread slightly, leaving a small border around the edges.
- Top with second layer
- Place a second pastry square or layer over the filling.
- Press the edges together gently, then seal with a fork.
- Pierce the tops a few times with a fork to allow steam to escape.
- Chill before baking
- Place the assembled pies on a baking tray lined with parchment paper.
- Refrigerate for 20–30 minutes. This helps the pastry hold its shape and bake evenly.
- Egg wash and bake
- Brush the tops with beaten egg for a golden finish.
- Bake in a preheated oven at 400°F (200°C) for 20–25 minutes, or until the pastry is puffed and golden brown.
- Serve
- Remove from oven and let cool slightly before serving.
- Perfect warm as a snack, lunch, or part of a Southern African-inspired spread.
Notes
- Use chuck or blade steak only for best tenderness and avoid generic “stew meat” (inconsistent results)
- Proper browning is essential for flavor
- Cook low and slow, this is what makes the meat tender
- Filling should be thick, not watery, before assembling
- Cooling the filling prevents soggy pastry
Nutrition Facts
Calories
320Fat (grams)
18 gCarbs (grams)
18 gI am not a certified nutritionist and any nutritional information on dontmissmyplate.com should only be used as a general guideline.
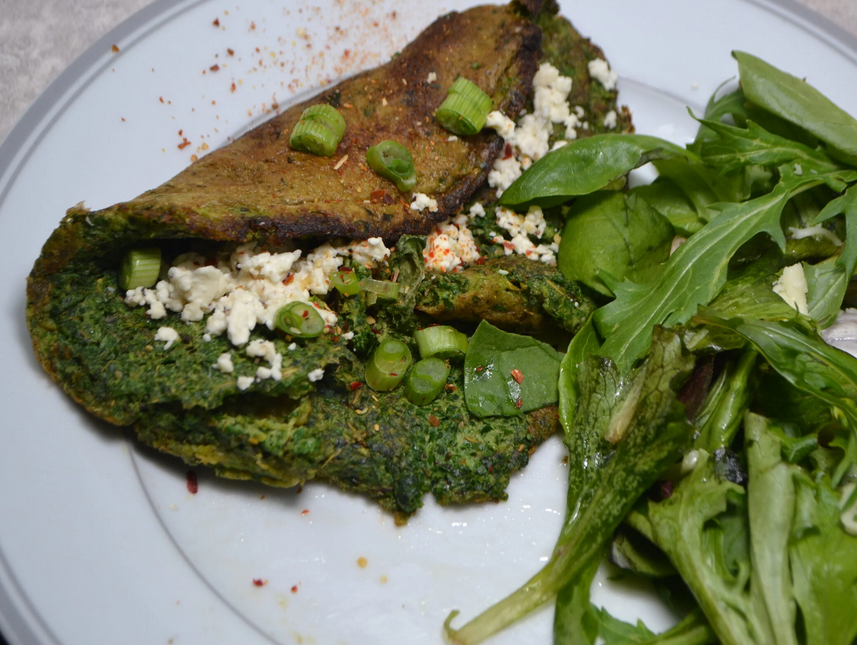
4-Leaf Spinach Omelette
Start your morning with a festive green twist! This 4-Leaf Spinach Omelette is smooth, vibrant, and full of flavor, perfect for St. Patrick’s Day—or any day you want a protein-packed, veggie-loaded breakfast. Blended with fresh spinach and subtly seasoned with onion, salt, and pepper, these omelettes can easily be customized with herbs like parsley, chives, or tarragon for extra aroma and depth.
Quick to make and satisfying to eat, each omelette is light, fluffy, and versatile. Top each with feta, green onions, or your favorite cheese. Whether you’re cooking for kids, guests, or just treating yourself, this omelette brings color, comfort, and energy to your plate.
Prep and cook time below reflects making 4 omelettes (1 per person).

4-Leaf Spinach Omelette
A vibrant, protein-packed spinach omelette, blended smooth and cooked to perfection. Quick, nutritious, and perfect for a festive St. Patrick’s Day breakfast or any day you want a green, veggie-loaded start.
Ingredients
- 8–12 eggs (2–3 per omelette)
- 4 cups spinach
- 2 tsp onion powder
- 1 tsp salt
- 1 tsp black pepper
- 8 tbsp butter (2 tbsp per omelette)
- 1/4 cup feta cheese
- 4 tsp chopped green onion
Instructions
- 2–3 eggs
- 1 cup spinach
- 1/2 tsp onion powder
- 1/4 tsp salt
- 1/4 tsp black pepper
- 2 tbsp butter
- 1 tbsp feta cheese
- 1 tsp chopped green onion
- Blend all ingredients (except feta and green onion) until smooth.
- Heat butter in a skillet over medium-low heat. Pour in the omelette mixture and cook to your desired doneness.
- Fill the omelette with feta and green onion, fold, and serve hot.
Notes
- For a fluffier omelette, whisk eggs lightly before blending.
- Swap feta for goat cheese or omit for a dairy-free version.
- Spinach can be lightly steamed before blending if you prefer a milder flavor.
Nutrition Facts
Calories
265Fat (grams)
21 gCarbs (grams)
3 gFiber (grams)
1 gProtein (grams)
15 gI am not a certified nutritionist and any nutritional information on dontmissmyplate.com should only be used as a general guideline.
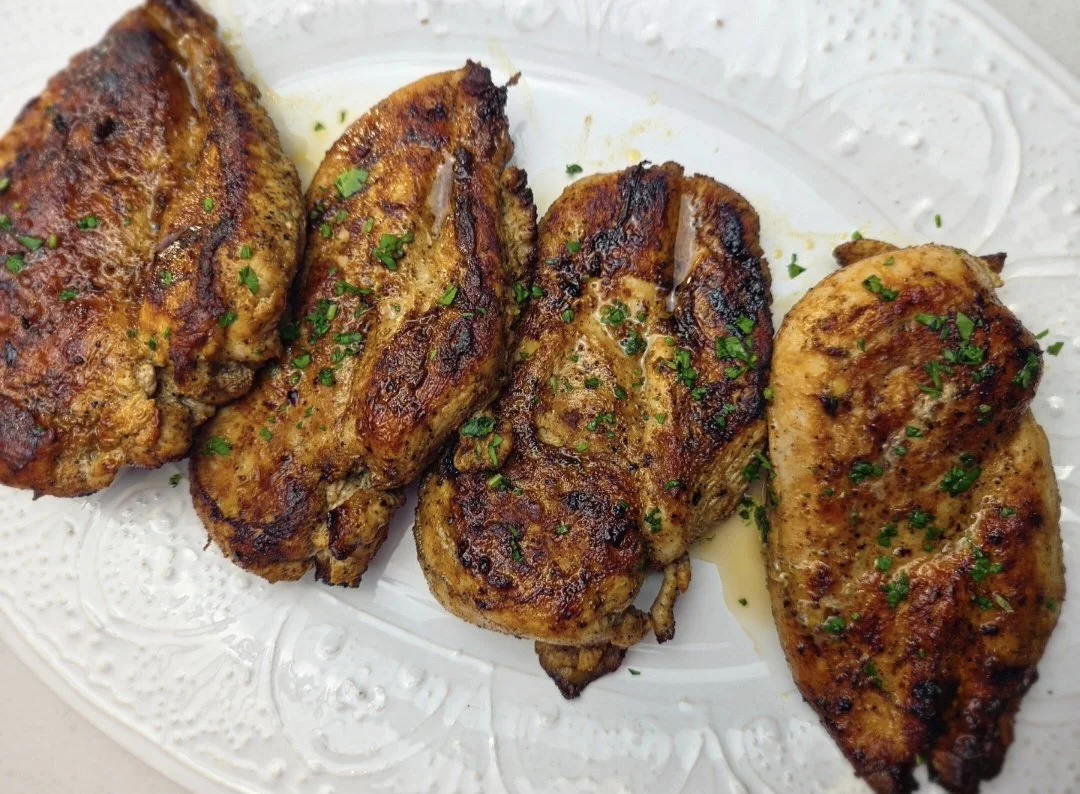
Tender, Moist Chicken Breasts for Easy Weeknight Meals
Chicken breasts have a reputation for being dry or bland, but with the right technique they can be incredibly tender, juicy, and full of flavor. This recipe uses a simple trick that makes a big difference: a quick marinade made with pickled jalapeño juice. The jalapeño brine acts as a shortcut brine, helping the chicken retain moisture while adding a subtle tangy kick that enhances the seasoning without making the dish spicy.
After marinating, the chicken is pounded to an even thickness so it cooks quickly and evenly. This step is key for juicy chicken breasts because it prevents the thinner parts from drying out while the thicker center finishes cooking. The chicken is then seared in ghee in a hot cast iron skillet, creating a beautiful golden crust and adding a rich, nutty flavor.
Ghee works especially well for this recipe because it has a higher smoke point than butter, allowing the chicken to sear properly without burning. Once the chicken develops that golden crust, it can finish cooking quickly in the oven if needed, ensuring the center reaches the perfect temperature without overcooking the outside.
The final step is one of the best parts: a drizzle of melted ghee combined with the flavorful pan drippings. Spoon this over the rested chicken breasts and finish with fresh parsley and a squeeze of lime for brightness. The result is tender, juicy chicken with layers of flavor — savory spices, a hint of jalapeño tang, and the richness of ghee.
This recipe is simple enough for a weeknight dinner but flavorful enough to serve for guests. Pair it with roasted vegetables, rice, or a fresh salad for a balanced and satisfying meal.
Why This Recipe Works
This chicken breast recipe hits the sweet spot between simplicity and flavor. The pickled jalapeño juice acts as a quick brine, keeping the chicken juicy while adding a subtle tang. Pounding the breasts to an even thickness ensures they cook evenly, while searing in ghee creates a golden, flavorful crust. Finishing in the oven if needed guarantees perfectly cooked, tender chicken every time. These small but deliberate steps make this recipe reliable for weeknight dinners or special meals.
Tips for Juicy Chicken Breasts
Even thickness matters: Use a mallet to flatten the breasts to about ½–¾ inch so they cook evenly.
Don’t skip the brine: Even a short 30–45 minute soak in pickled jalapeño juice keeps the meat moist and adds subtle flavor.
Rest before slicing: Let the chicken rest for 5 minutes after cooking to lock in juices.
Ghee finish: Spoon melted ghee and pan drippings over the cooked chicken for extra richness and a glossy finish.
Serving Suggestions
Serve this juicy chicken breast alongside simple sides like roasted vegetables, garlic mashed potatoes, or a fresh green salad. A squeeze of lime on top brightens the flavors and balances the richness of the ghee. You can also pair it with rice, quinoa, or warm bread to make it a complete, satisfying meal.

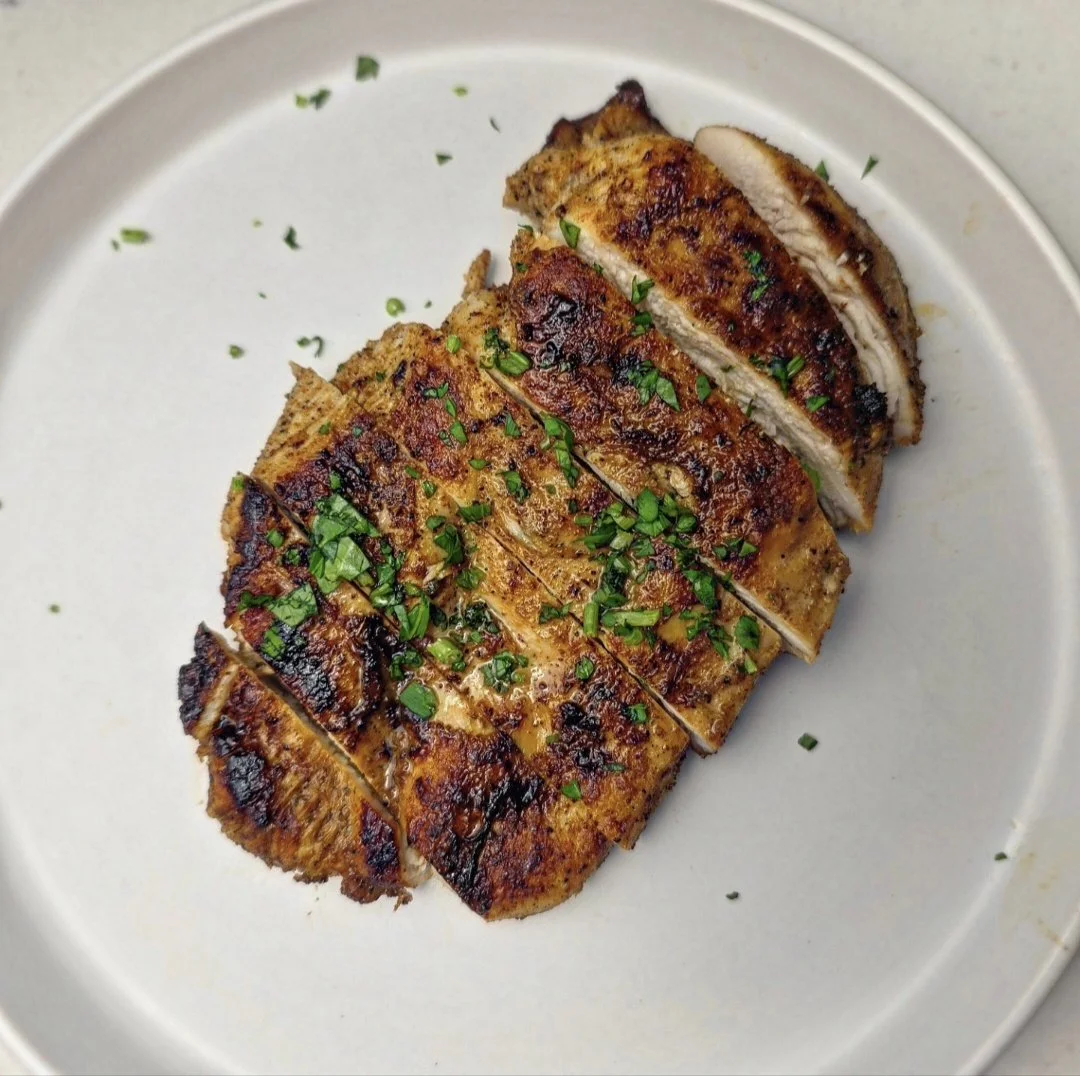
Tender, Moist Chicken Breasts for Easy Weeknight Meals
These chicken breasts stay perfectly juicy thanks to a quick brine in pickled jalapeno juice and a golden sear in ghee. Finished in the oven with a drizzle of ghee, they’re tender, flavorful, and ready for any weeknight meal. Quick, simple, and packed with a subtle kick.
Ingredients
- 4 large chicken breasts, patted dry
- 2 tbsps olive oil (for the marinade)
- 1 tbsp pickled jalapeño juice
- 1 tsp garlic powder
- 1 tsp onion powder
- 1 tsp paprika
- ½ tsp cumin
- 1 tsp chicken seasoning
- 1 tbsp ghee (for searing)
- 1 tbsp ghee (for finishing)
- Fresh parsley, chopped, for garnish
- Fresh lime wedges, for serving (optional)
Instructions
- Pat the air-chilled chicken breasts dry. Place them in a large zip-top bag and use a mallet to gently pound them to an even thickness of about ½–¾ inch (1.3–2 cm). Pounding inside the bag keeps juices from splattering and helps the chicken cook evenly.
- In a bowl, mix your seasonings with a little oil and the pickled jalapeño juice. Add the chicken breasts and turn to coat well.
- Refrigerate for at least 30 minutes, ideally about 45 minutes, and no longer than 60 minutes.
- Remove the chicken from the refrigerator and pat the breasts dry again before cooking.
- Heat a cast-iron skillet over medium-high heat and melt 2 tablespoons ghee.
- Sear the chicken 3–4 minutes per side without moving it, until golden brown. Cook in batches if needed, adding more ghee between batches. Let the first pieces rest on a plate while you cook the remaining chicken.
- Check the thickest part of the chicken with a thermometer. Chicken breasts should reach 165°F (74°C). Because thickness can vary, thinner pieces may already be fully cooked after searing.
- If the chicken hasn’t reached temperature, preheat the oven to 400°F (200°C). Place the chicken in a baking dish with 2–4 tablespoons water, lightly tent with foil, and bake about 5 minutes or until the internal temperature reaches 165°F (74°C).
- Let the chicken rest 5 minutes. Meanwhile, melt 2–4 tablespoons more ghee and combine it with any drippings from the resting plate and skillet. Spoon this over the chicken.
- Top with fresh parsley and serve with fresh lime wedges for brightness.
Notes
- Pro Tip: Pounding the chicken to an even thickness (about ½–¾ inch) helps it cook quickly and evenly, preventing dry spots.
- Brine Tip: The pickled jalapeño juice acts as a quick brine, helping the chicken stay juicy while adding a subtle tangy kick.
- Cooking Tip: Chicken breast thickness varies. Always cook until the internal temperature reaches 165°F (74°C).
Nutrition Facts
Calories
220Fat (grams)
10 gCarbs (grams)
2 gProtein (grams)
30 gI am not a certified nutritionist and any nutritional information on dontmissmyplate.com should only be used as a general guideline.
Coriander Shepherd’s Pie with Creamy Mashed Potatoes
Shepherd’s pie is one of those classic comfort foods that feels like home no matter where you grew up. I’ve always loved it in its traditional form, with a rich, savory meat mixture with peas and carrots, topped with creamy, golden mashed potatoes, but I also enjoy giving classics a subtle twist.
Whether you’re here for St. Patrick’s Day or just need a weekend-night comfort dish, I’ve got you covered.
If you grew up in—or have visited—Southern Africa, you’re likely familiar with the braai (barbecue)-flavored sausage, boerewors, beloved for its smoky, aromatic taste. What makes it stand out is the toasted coriander flavor, and it’s remarkable how it dances with beef, pork, vinegar, and other spices, creating a unique signature taste. Why not imprint this flavor on shepherd’s pie to give it personality? It’s something you can do quickly in your kitchen, merging two culinary traditions in a nod to boerewors, without using the sausage directly.
In this version, I toasted coriander seeds, ground them, and added them along with cloves and other warming spices. The result is a meat layer that’s deeply flavorful but subtle enough to let the creamy mashed potato topping shine.
The mashed potatoes, made with buttered potatoes and a ricer, are luxuriously velvety, enriched with cream and fresh thyme, giving that comforting, golden finish that makes shepherd’s pie irresistible. This dish celebrates a classic comfort food while giving it a personal, cultural twist, making it familiar yet distinctly Southern African.
If you want something even more indulgent and creative, try my Oxtail and Sweet Potato Shepherd’s Pie.

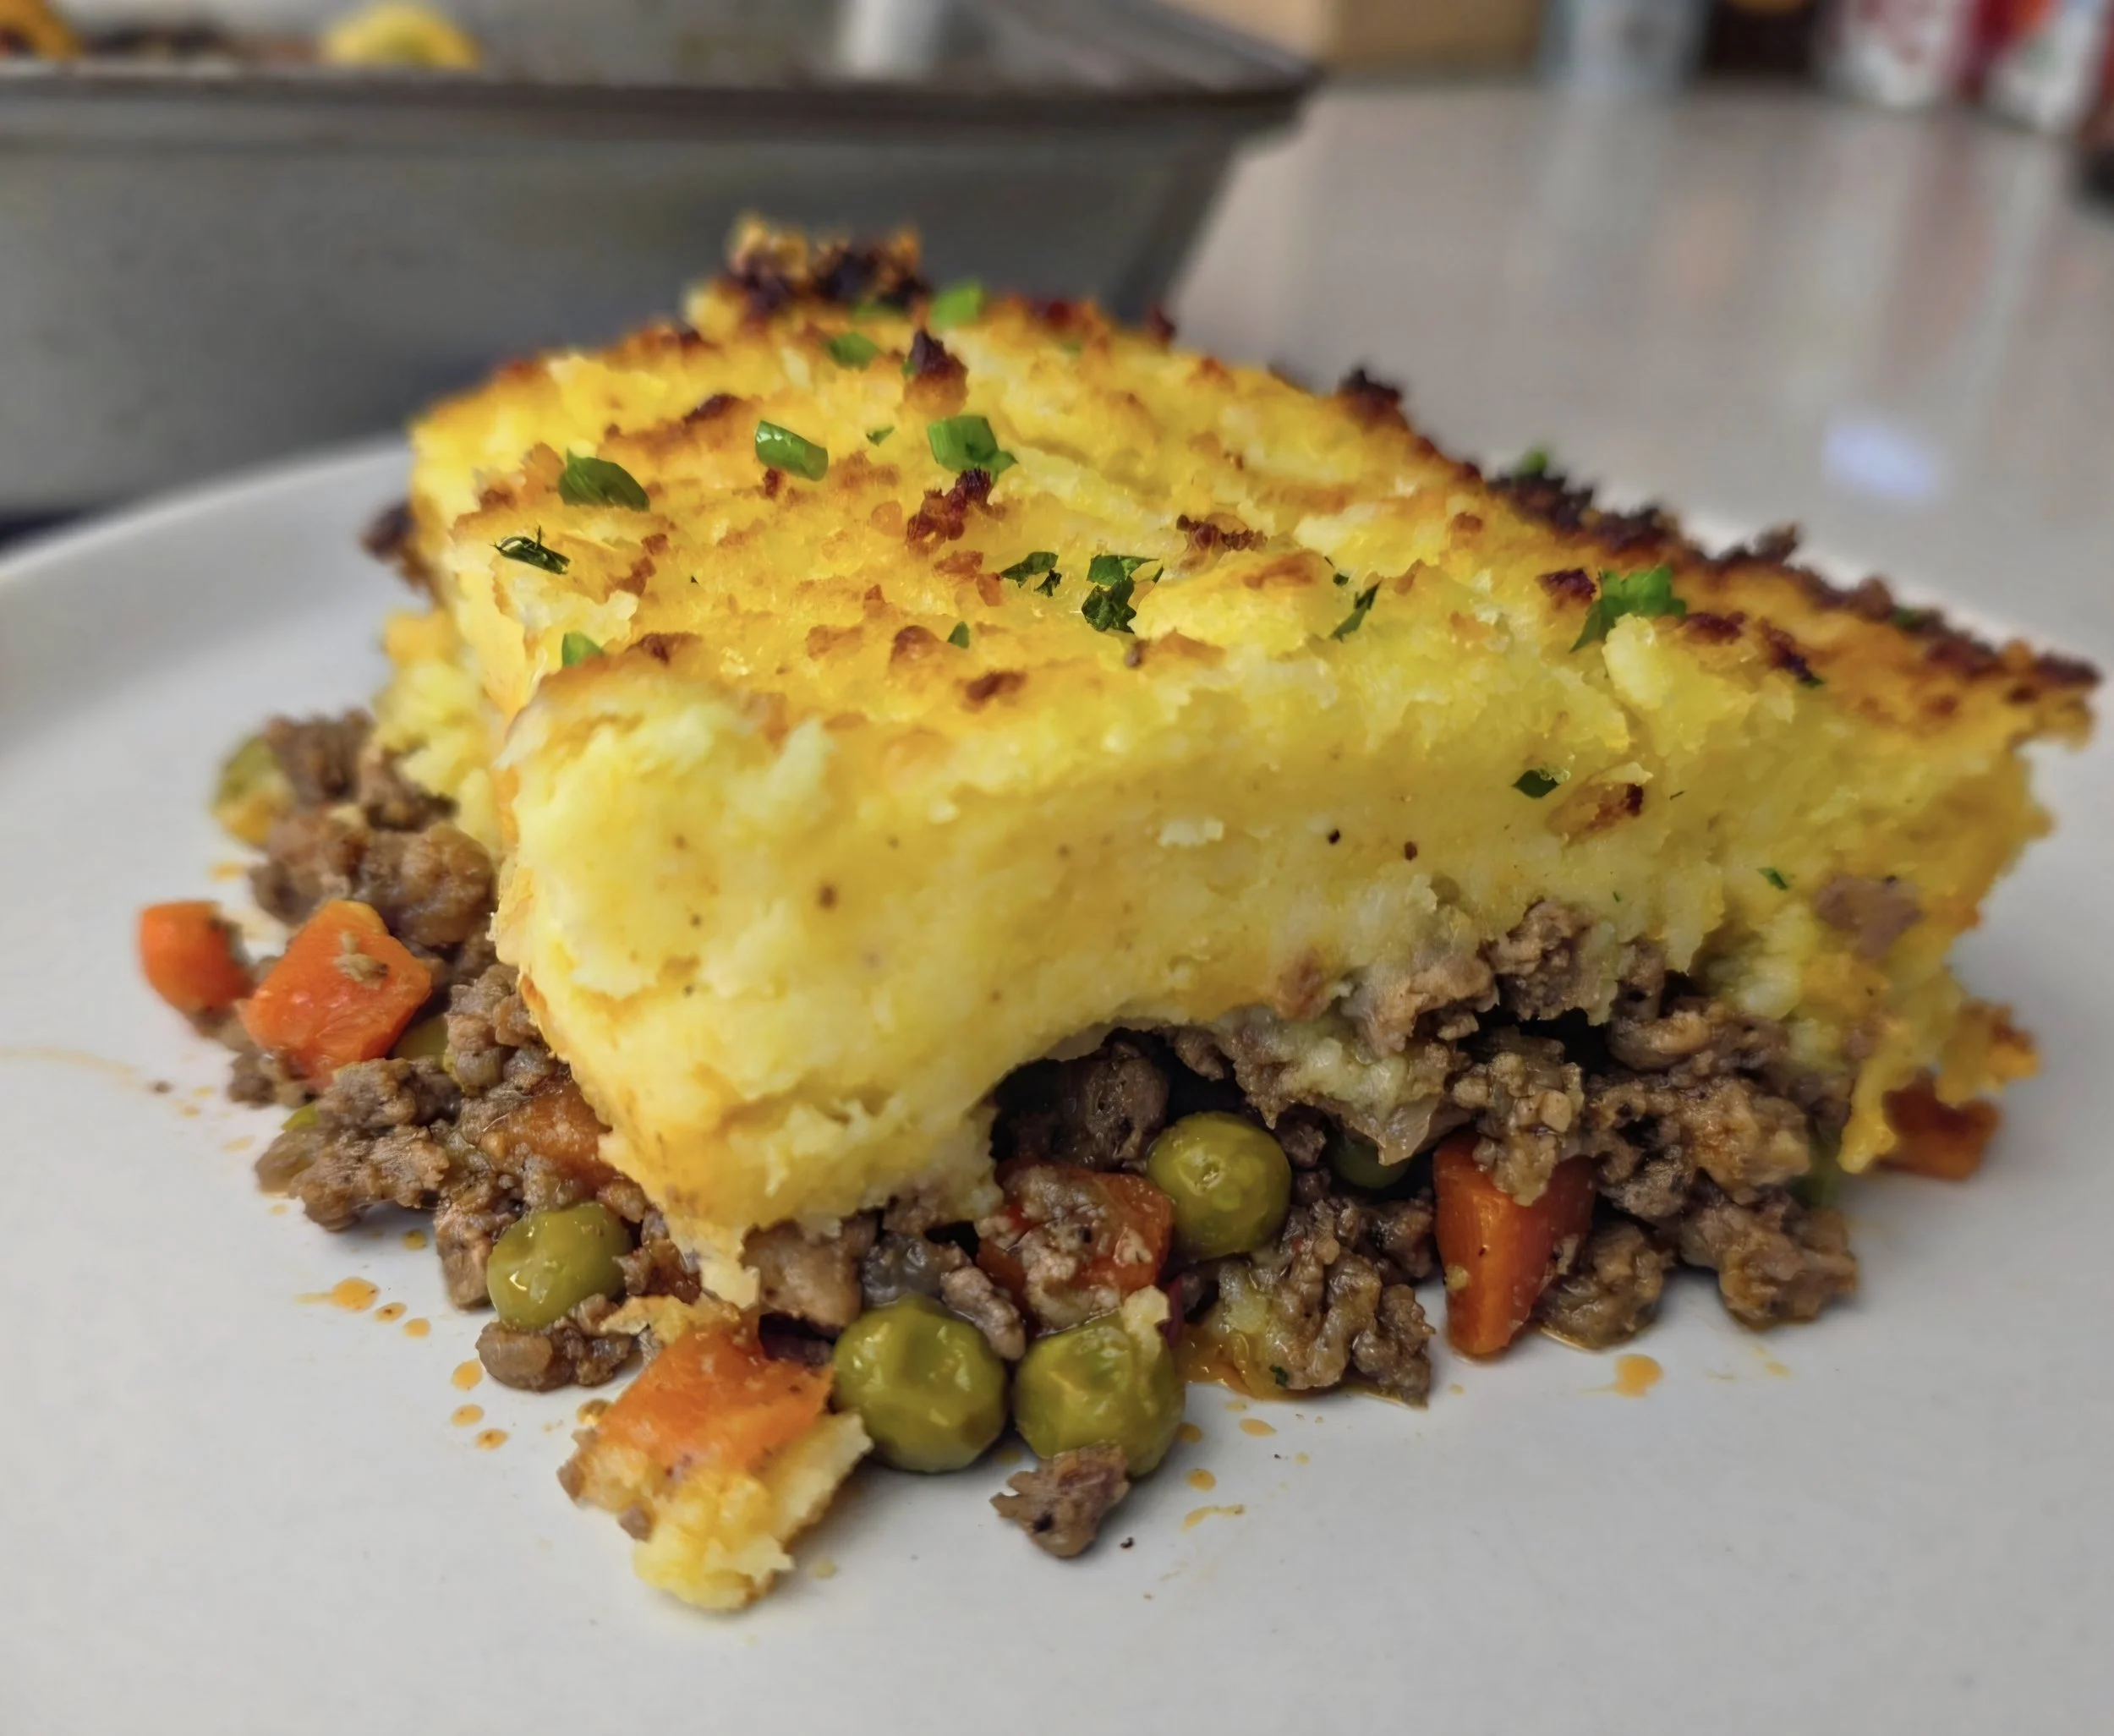
Coriander Shepherd’s Pie with Creamy Mashed Potatoes
This Southern African–inspired shepherd’s pie layers beef and pork with toasted coriander seeds, subtle ground coriander, bay leaf, and a savory pan sauce. The mashed butter potatoes are enriched with cream and butter, then broiled for golden, crispy edges.
Ingredients
- 4–5 medium butter potatoes, peeled and cubed
- 2 tablespoons butter
- ½–¾ cup cream (adjust to ensure potatoes are creamy, not dry)
- 2 bay leaves
- ⅛ teaspoon ground nutmeg
- Salt and pepper, to taste
- ¼ cup grated Parmesan
- 1 egg, lightly beaten
- 1 lb ground beef
- 1 lb ground pork
- 1 medium onion, finely chopped
- 3 cloves garlic, minced
- 1 teaspoon whole coriander seeds (toasted and coarsely ground with a spice grinder or pestle and mortar)
- ¼ teaspoon ground coriander
- 1 teaspoon black pepper
- 1 teaspoon seasoned salt (optional)
- 1 bay leaf
- 1 tablespoon tomato paste
- 1½ tablespoons Worcestershire sauce
- 1–2 teaspoons red or white vinegar (white preferred)
- 1 bouillon cube (optional, or 1¼ cups broth if not using cubes)
- 1 cup frozen peas and carrots
- 1 tablespoon ghee, butter, or oil
- Additional salt, to taste
- Fresh parsley, chopped
Instructions
- Toast coriander seeds in a dry skillet over medium heat until fragrant, about 1–2 minutes. Grind coarsely with a spice grinder or pestle and mortar. Set aside.:
- Peel and cube butter potatoes. Bring to a boil in salted water and cook until tender, about 15–20 minutes. Drain and set aside.
- Heat ghee, butter, or oil in a large skillet over medium heat.
- Add onion and garlic and sauté until translucent and fragrant, about 5 minutes.
- Add toasted coriander seeds and ground coriander to bloom the spices, stirring for 30–60 seconds to release aroma.
- If using a bouillon cube, add it now and stir to dissolve. Otherwise, add 1¼ cups broth after.
- Stir in remaining seasonings (bay leaf, black pepper, seasoned salt).
- Add ground beef and pork. Cook until browned, letting the meat absorb the aromatics and spices.
- Stir in Worcestershire sauce, vinegar (white preferred), and tomato paste. Cook for 1–2 minutes.
- Add water or broth if needed for a saucy consistency. Taste and adjust seasoning, this is key to avoid blandness.
- Stir in frozen peas and carrots and mix thoroughly.
- Warm cream gently over low heat until simmering, then reduce heat. Add bay leaf, butter, nutmeg, salt, and pepper. Stir to combine.
- Add Parmesan, then remove bay leaf.
- Pass boiled potatoes through a ricer into a large bowl.
- Pour warm cream mixture over potatoes, folding gently until smooth and creamy. Add more cream if needed to achieve desired consistency.
- Tip: Do not overmix to avoid gluey potatoes.
- Fold in the beaten egg to help the topping set during baking.
- Transfer meat mixture to a baking dish.
- Spoon mashed potatoes over the meat and smooth with a spoon. Create shallow grooves or patterns with a fork for even browning.
- Bake at 400°F (200°C) for 15 minutes, then broil for 3–5 minutes until the top is golden and slightly crisp.
- Remove from oven, sprinkle with chopped parsley, and serve.
Nutrition Facts
Calories
460Fat (grams)
28 gCarbs (grams)
19 gFiber (grams)
3 gProtein (grams)
25 gI am not a certified nutritionist and any nutritional information on dontmissmyplate.com should only be used as a general guideline.
Braai Toastie (South African Grilled Cheese)
There’s a reason a braai is more than just a barbecue. Fires are lit early, conversations stretch for hours, and food comes in waves. In South Africa, somewhere between turning the chops and checking the coals, someone inevitably reaches for a Braai Toastie, or braaibroodjie. This South African grilled cheese is the perfect snack while the meat cooks. Cheese, onions, tomatoes, and a swipe of Mrs Ball’s chutney all come together in bread brushed with butter to stay crisp. Every bite captures the relaxed, communal energy of a braai, and it’s exactly the kind of snack that keeps the day flowing.
In Southern Africa, braai culture crosses borders. However, this sandwich, for whatever wild reason, is less well-known outside South Africa. That said, the idea of eating something indulgent while waiting for the meat to cook is universal. The trick is choosing the right ingredients: Roma tomatoes for firm, low-moisture slices, red onions for gentle sweetness and color, and a mix of cheeses (Gouda and extra sharp cheddar) that melt beautifully but still have flavor. Adding a layer of mayo helps keep the bread crisp even with juicy tomatoes and chutney.
Chakalaka (a spicy vegetable relish), is usually served as a side or condiment at a braai, packed with spice and flavor. For this toastie, I used the chakalaka-flavored Mrs Ball’s fruit chutney to capture that essence, adding gentle heat and depth that works beautifully with the cheese. However, you can use any brand, or apricot or peach preserves as an alternative.
In terms of preparation, these sandwiches are traditionally pressed in a metal braai grid over coals, giving them a smoky, crisp finish. At home, a grill pan or panini press works just as well. The key is even pressure so the bread crisps, the cheese melts, and everything stays together.
Every bite is creamy, sweet, savory, and a little smoky. Whether you’re at a fire, in your kitchen, or sharing with friends, a Braai Toastie is comfort food, communal food, and a little indulgence all in one.
If it’s cold where you are and you want a complimentary soup, try this sweet potato pie soup inspired by the classic dessert: https://www.dontmissmyplate.com/how-to-cook/2025/11/4/sweet-potato-pie-soup
")
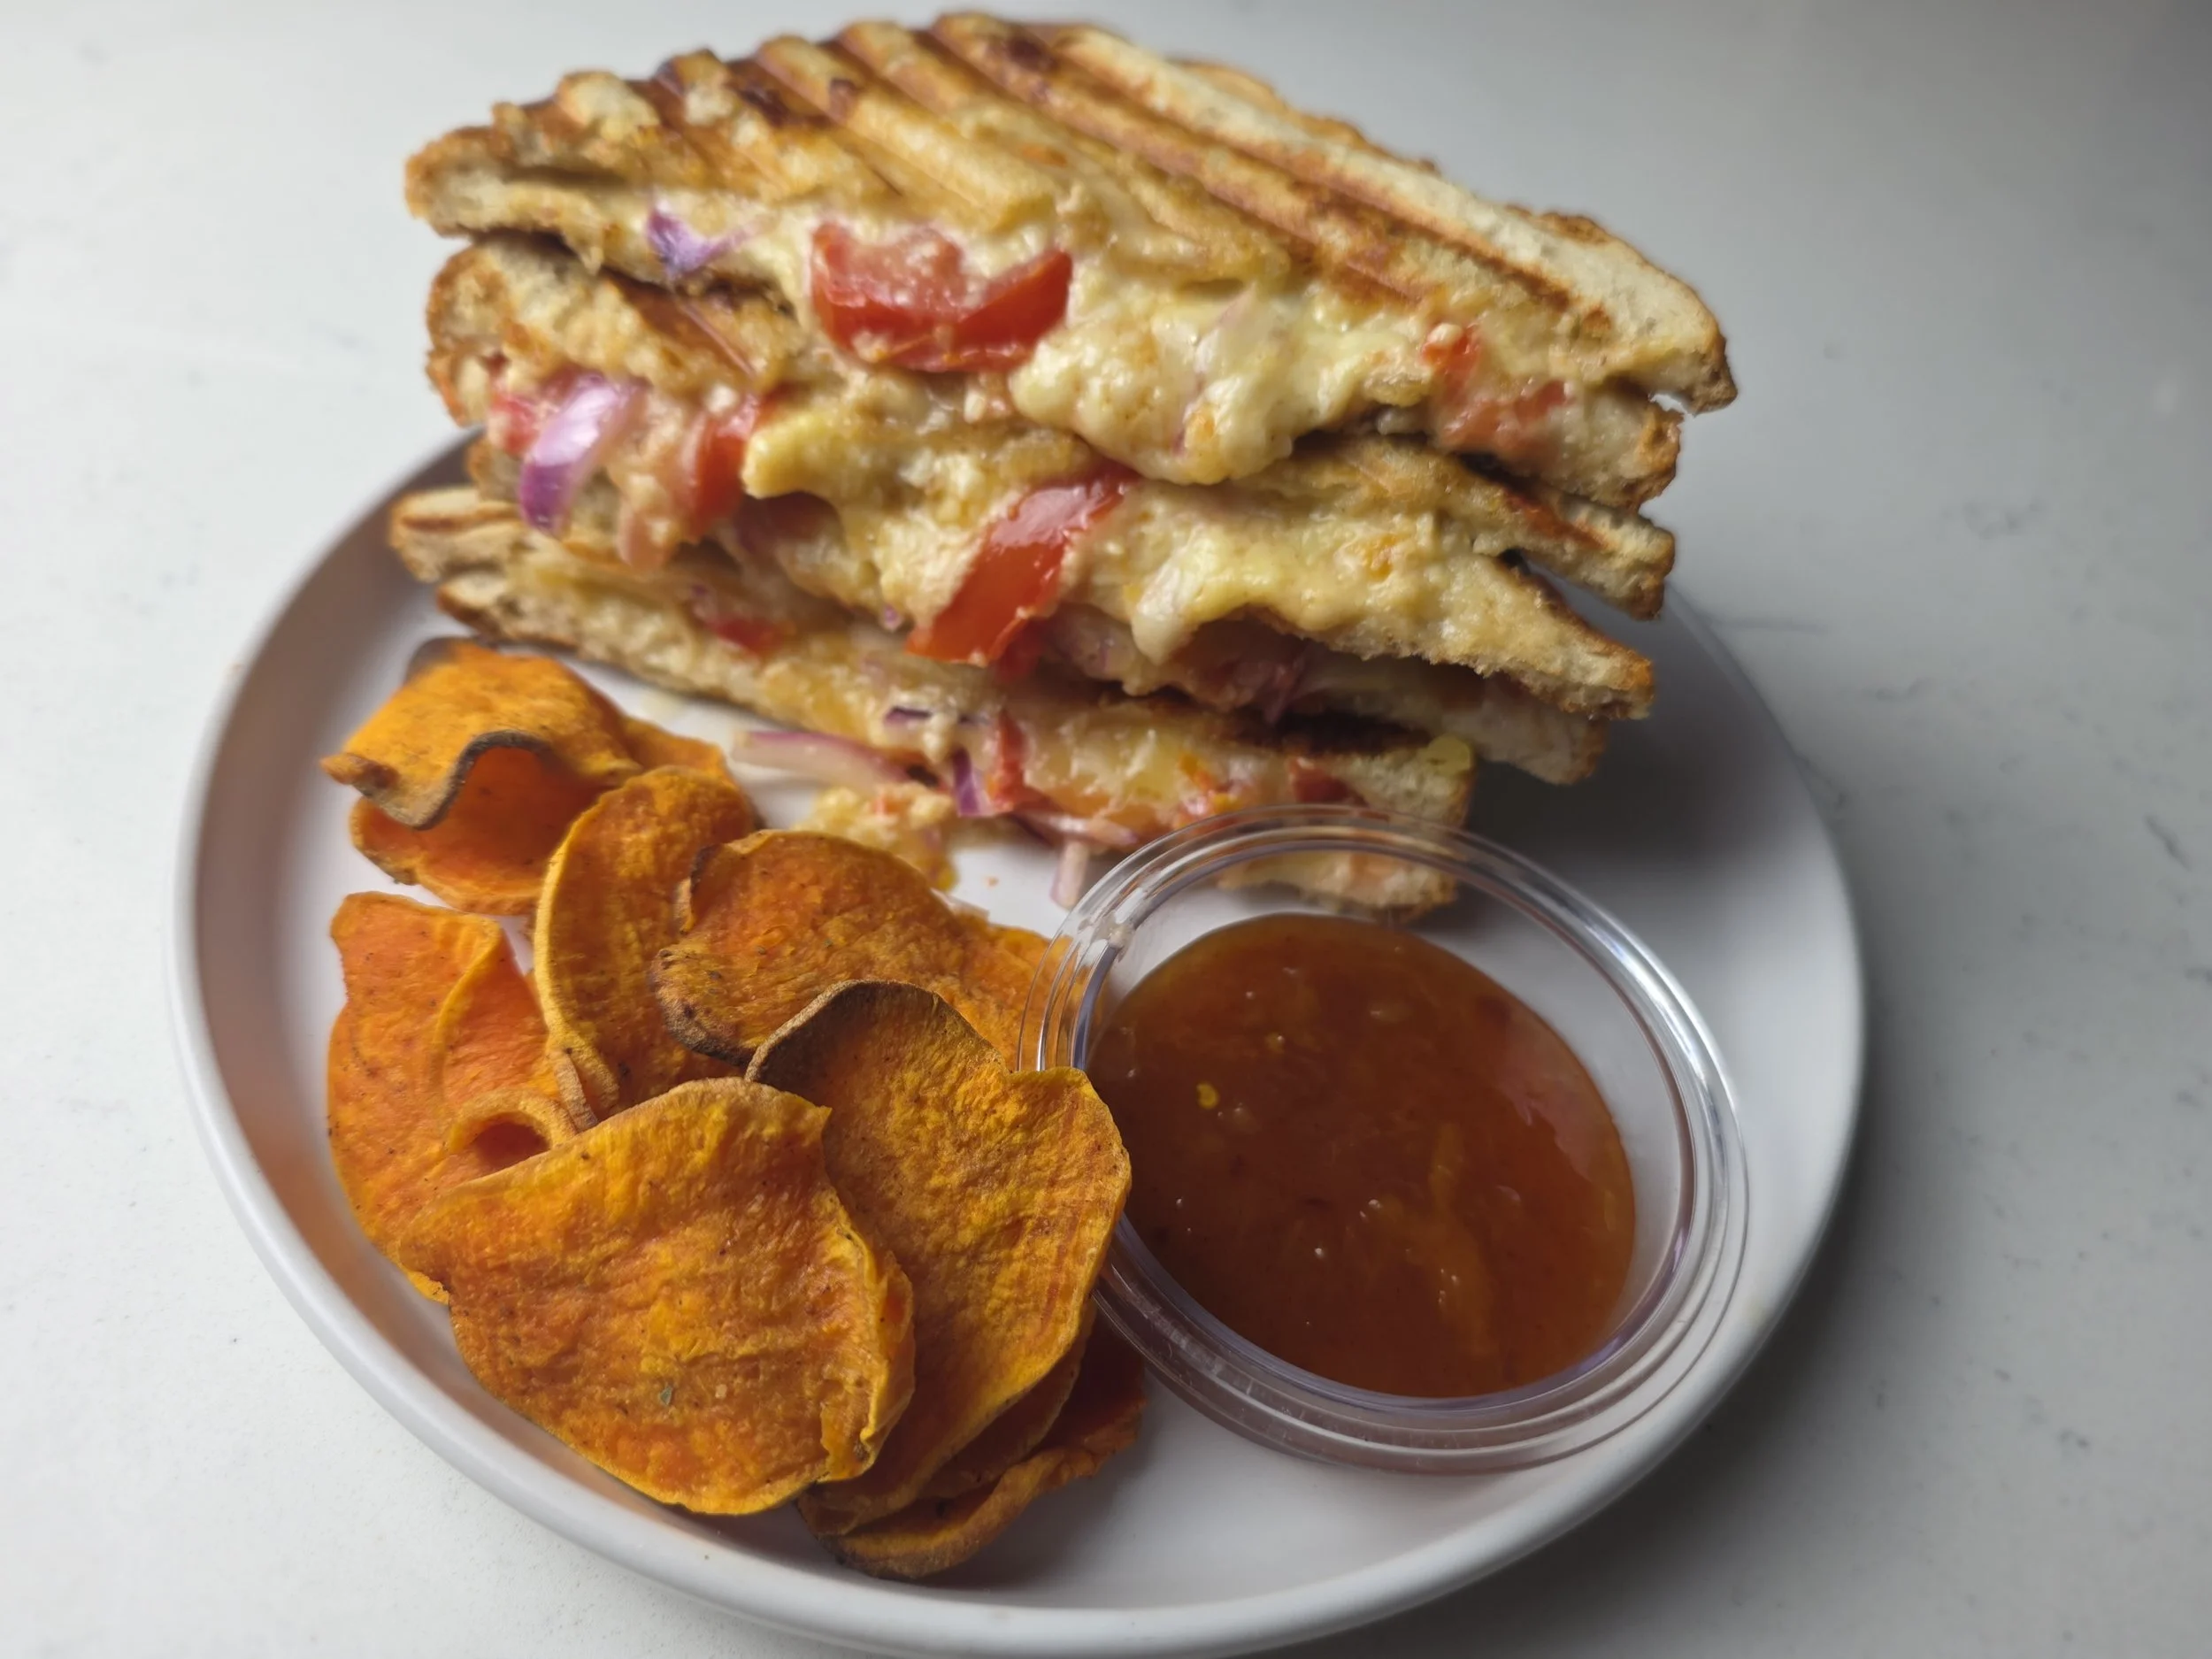
Braai Toastie (South African Grilled Cheese)
Tender, cheesy Braai Toastie with Gouda, sharp cheddar, Roma tomatoes, red onions, and a swipe of chakalaka Mrs H.S. Ball’s chutney. Quick, melty, and indulgent, the perfect sandwich for lunch or a weekend treat. Serve with sweet potato crisps or soup.
Ingredients
- 2 medium sweet potatoes
- 1–2 tsp olive oil
- 2 tbsp Old Bay seasoning
- 1 tsp garlic powder
- 1 tsp smoked paprika
- ½ tsp onion powder
- 4 slices sturdy white bread (e.g., sourdough)
- 1–2 tbsp mayonnaise (optional, keeps bread moist)
- Butter for brushing outside of bread
- 2–3 Roma tomatoes, sliced
- ⅓ red onion, thinly sliced
- ⅓ cup Gouda cheese, grated
- ¼ cup extra sharp cheddar cheese, grated
- 2–4 tsp Mrs H.S. Ball’s chutney (chakalaka flavor recommended) or apricot/peach preserves
Instructions
- Preheat oven to 375°F (190°C).
- Peel and thinly slice sweet potatoes. Pat dry.
- Toss slices in olive oil, then season with Old Bay, garlic powder, smoked paprika, and onion powder.
- Spread in a single layer on a baking sheet. Bake 20 minutes, flipping halfway through.
- Optional: bake an additional 3–5 minutes for extra crispiness, watching closely to avoid burning.
- Alternative: air-fryer at 375°F (190°C) for 10–12 minutes, shaking halfway.
- Slice tomatoes. Sprinkle lightly with salt and pat to remove excess moisture.
- Slice onion into thin wedges.
- Grate Gouda and cheddar cheeses.
- Spread mayonnaise on the inside of the bread slices (optional).
- Layer cheese, then tomatoes and onions evenly.
- Add chutney (chakalaka preferred; apricot or peach preserves work too).
- Butter the outside of the bread.
- Press sandwiches in a panini press or grill until golden brown and cheese is melted. Serve immediately.
Nutrition Facts
Calories
500Fat (grams)
25 gCarbs (grams)
45 gFiber (grams)
6 gSugar (grams)
8 gProtein (grams)
20 gI am not a certified nutritionist and any nutritional information on dontmissmyplate.com should only be used as a general guideline.
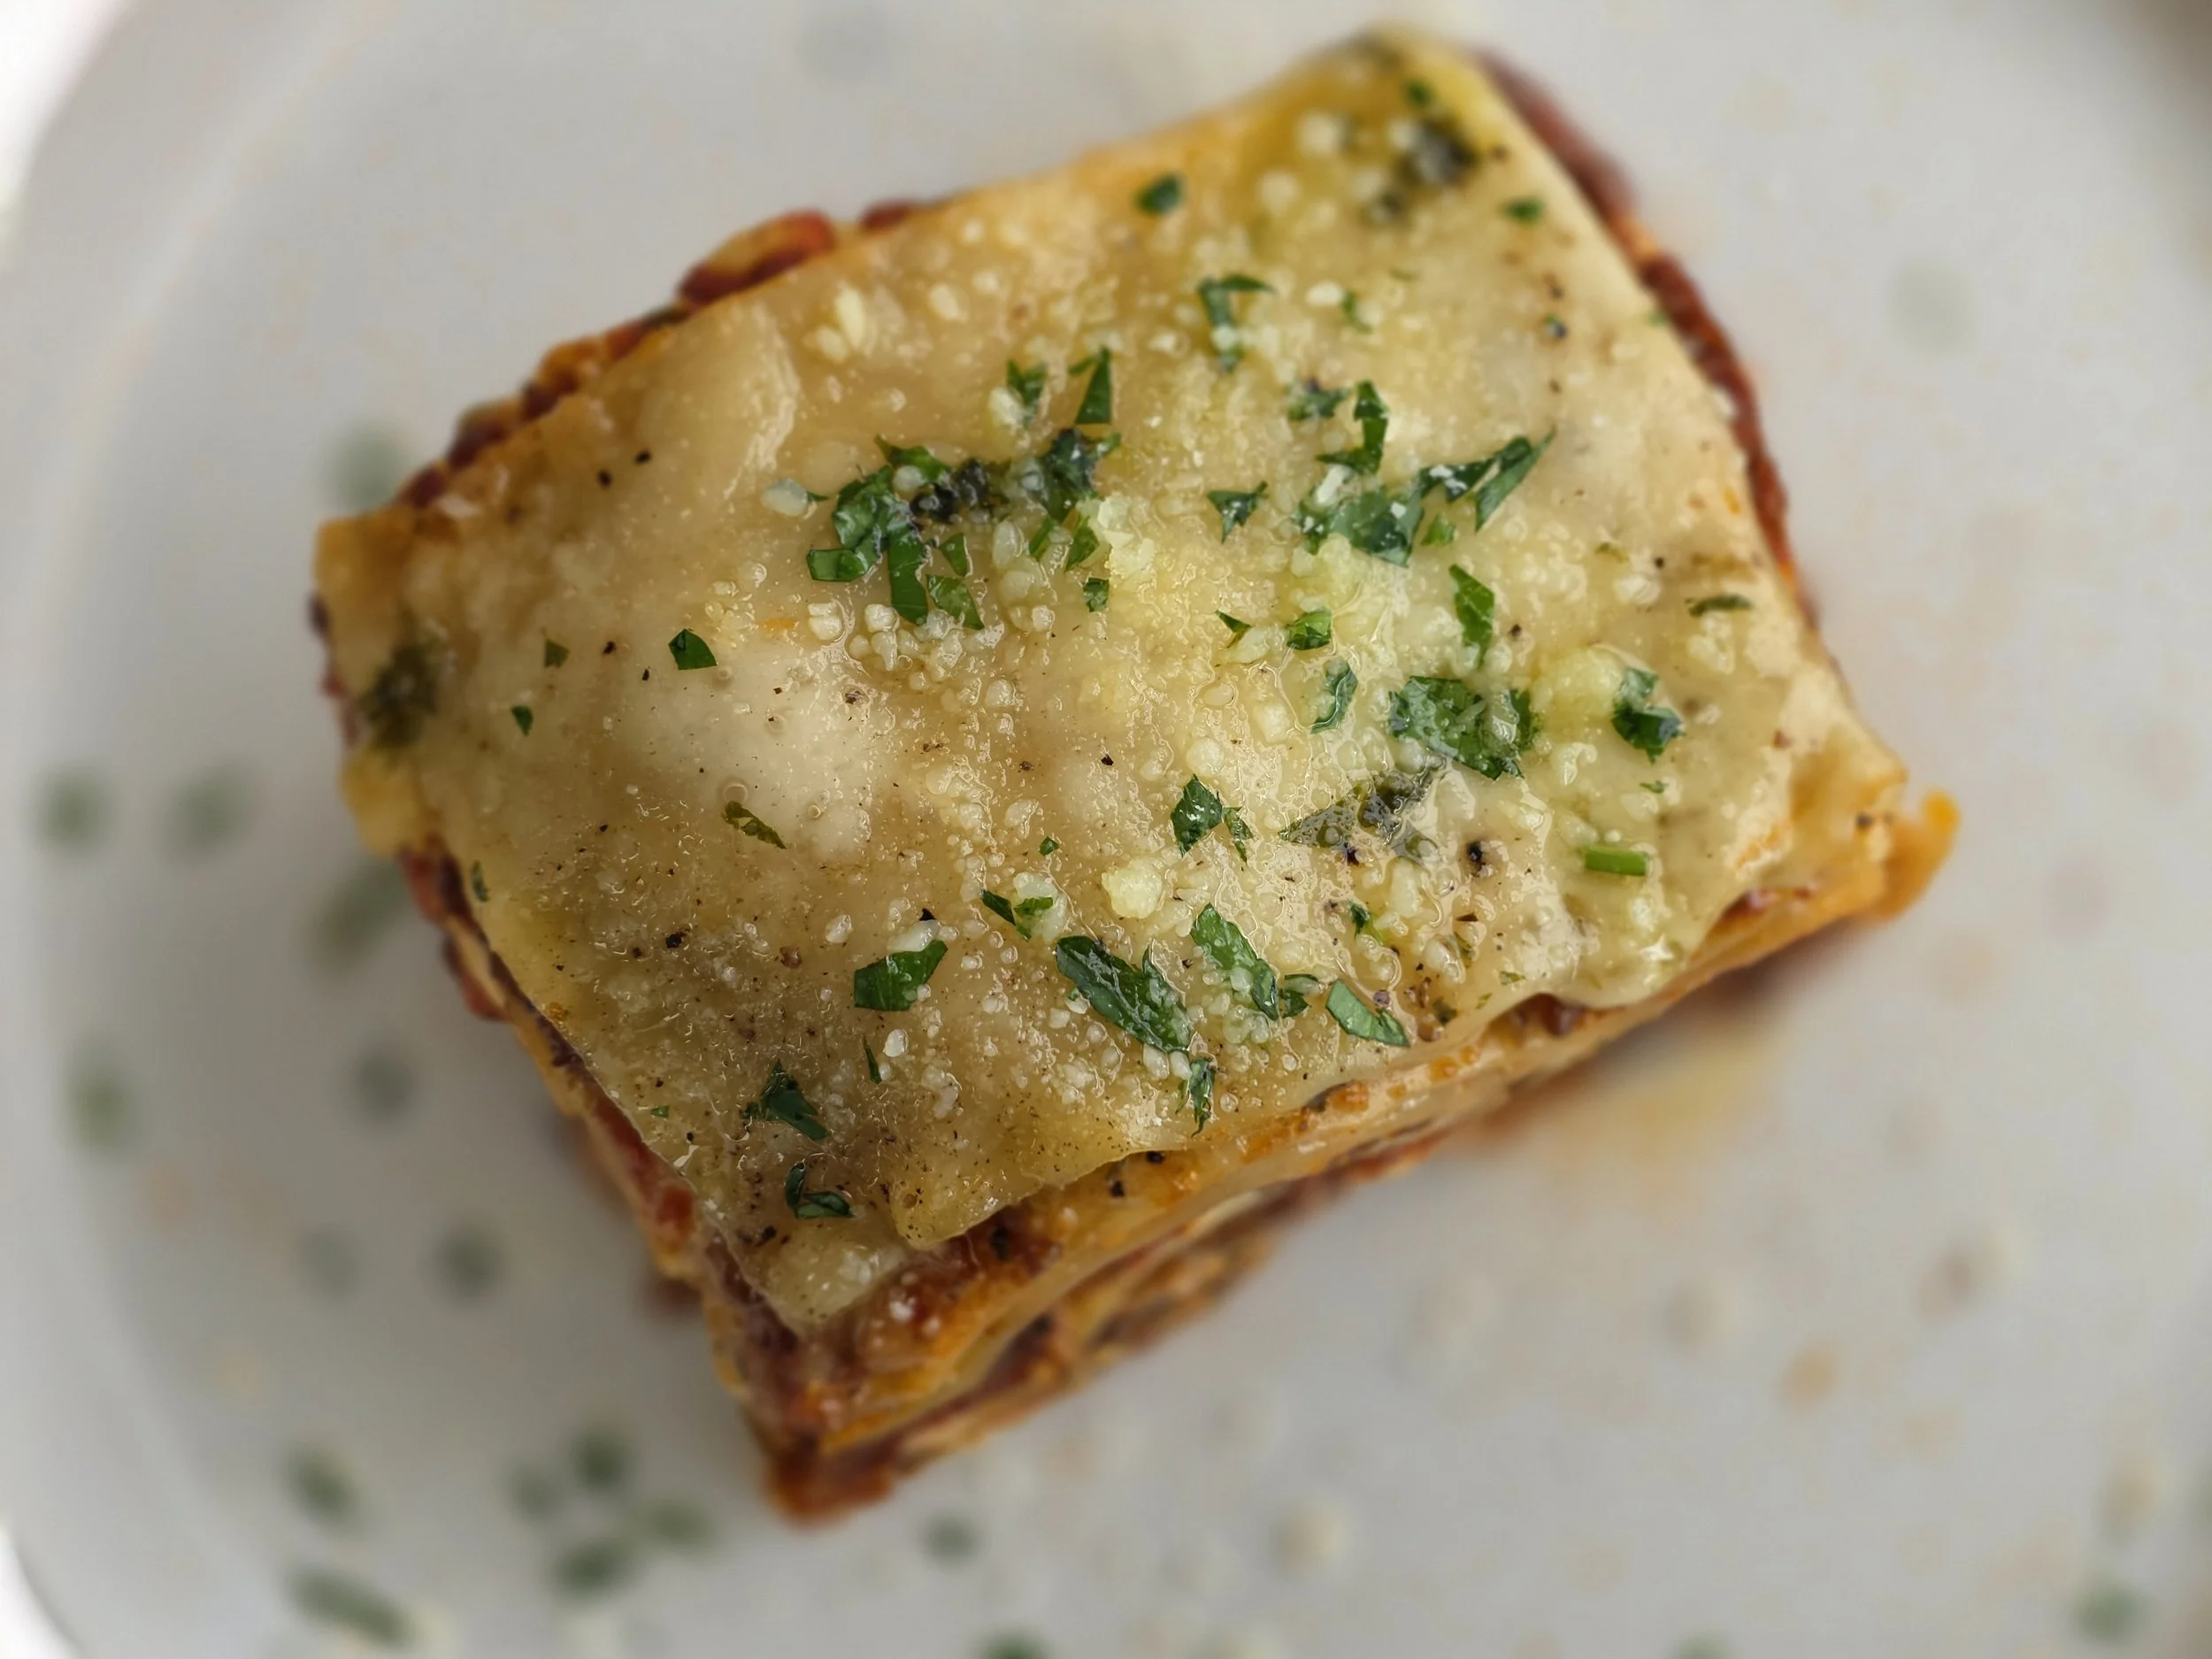
Ricotta Lasagna with Rich Meat Sauce
Lasagna is one of those dishes that feels both familiar and celebratory. It’s comfort food at its best — layers of tender pasta, rich meat sauce, and molten cheese that stretches with every forkful. For many, it brings back memories of slow Sundays, full kitchens, and generous slices served straight from the pan.
This version leans into that comforting spirit while keeping things simple and practical. Instead of a béchamel sauce, I use a creamy ricotta mixture that adds structure and a subtle tang, creating defined layers that slice beautifully. Parmesan is folded directly into the meat sauce for extra depth and savory richness, so every bite feels hearty and balanced.
Ricotta-style lasagna is widely loved for a reason. It delivers creaminess without heaviness and pairs perfectly with mozzarella and Parmesan for that golden, bubbly finish. The result is a satisfying, no-fuss lasagna that’s perfect for family dinners, gatherings, or making ahead for the week.

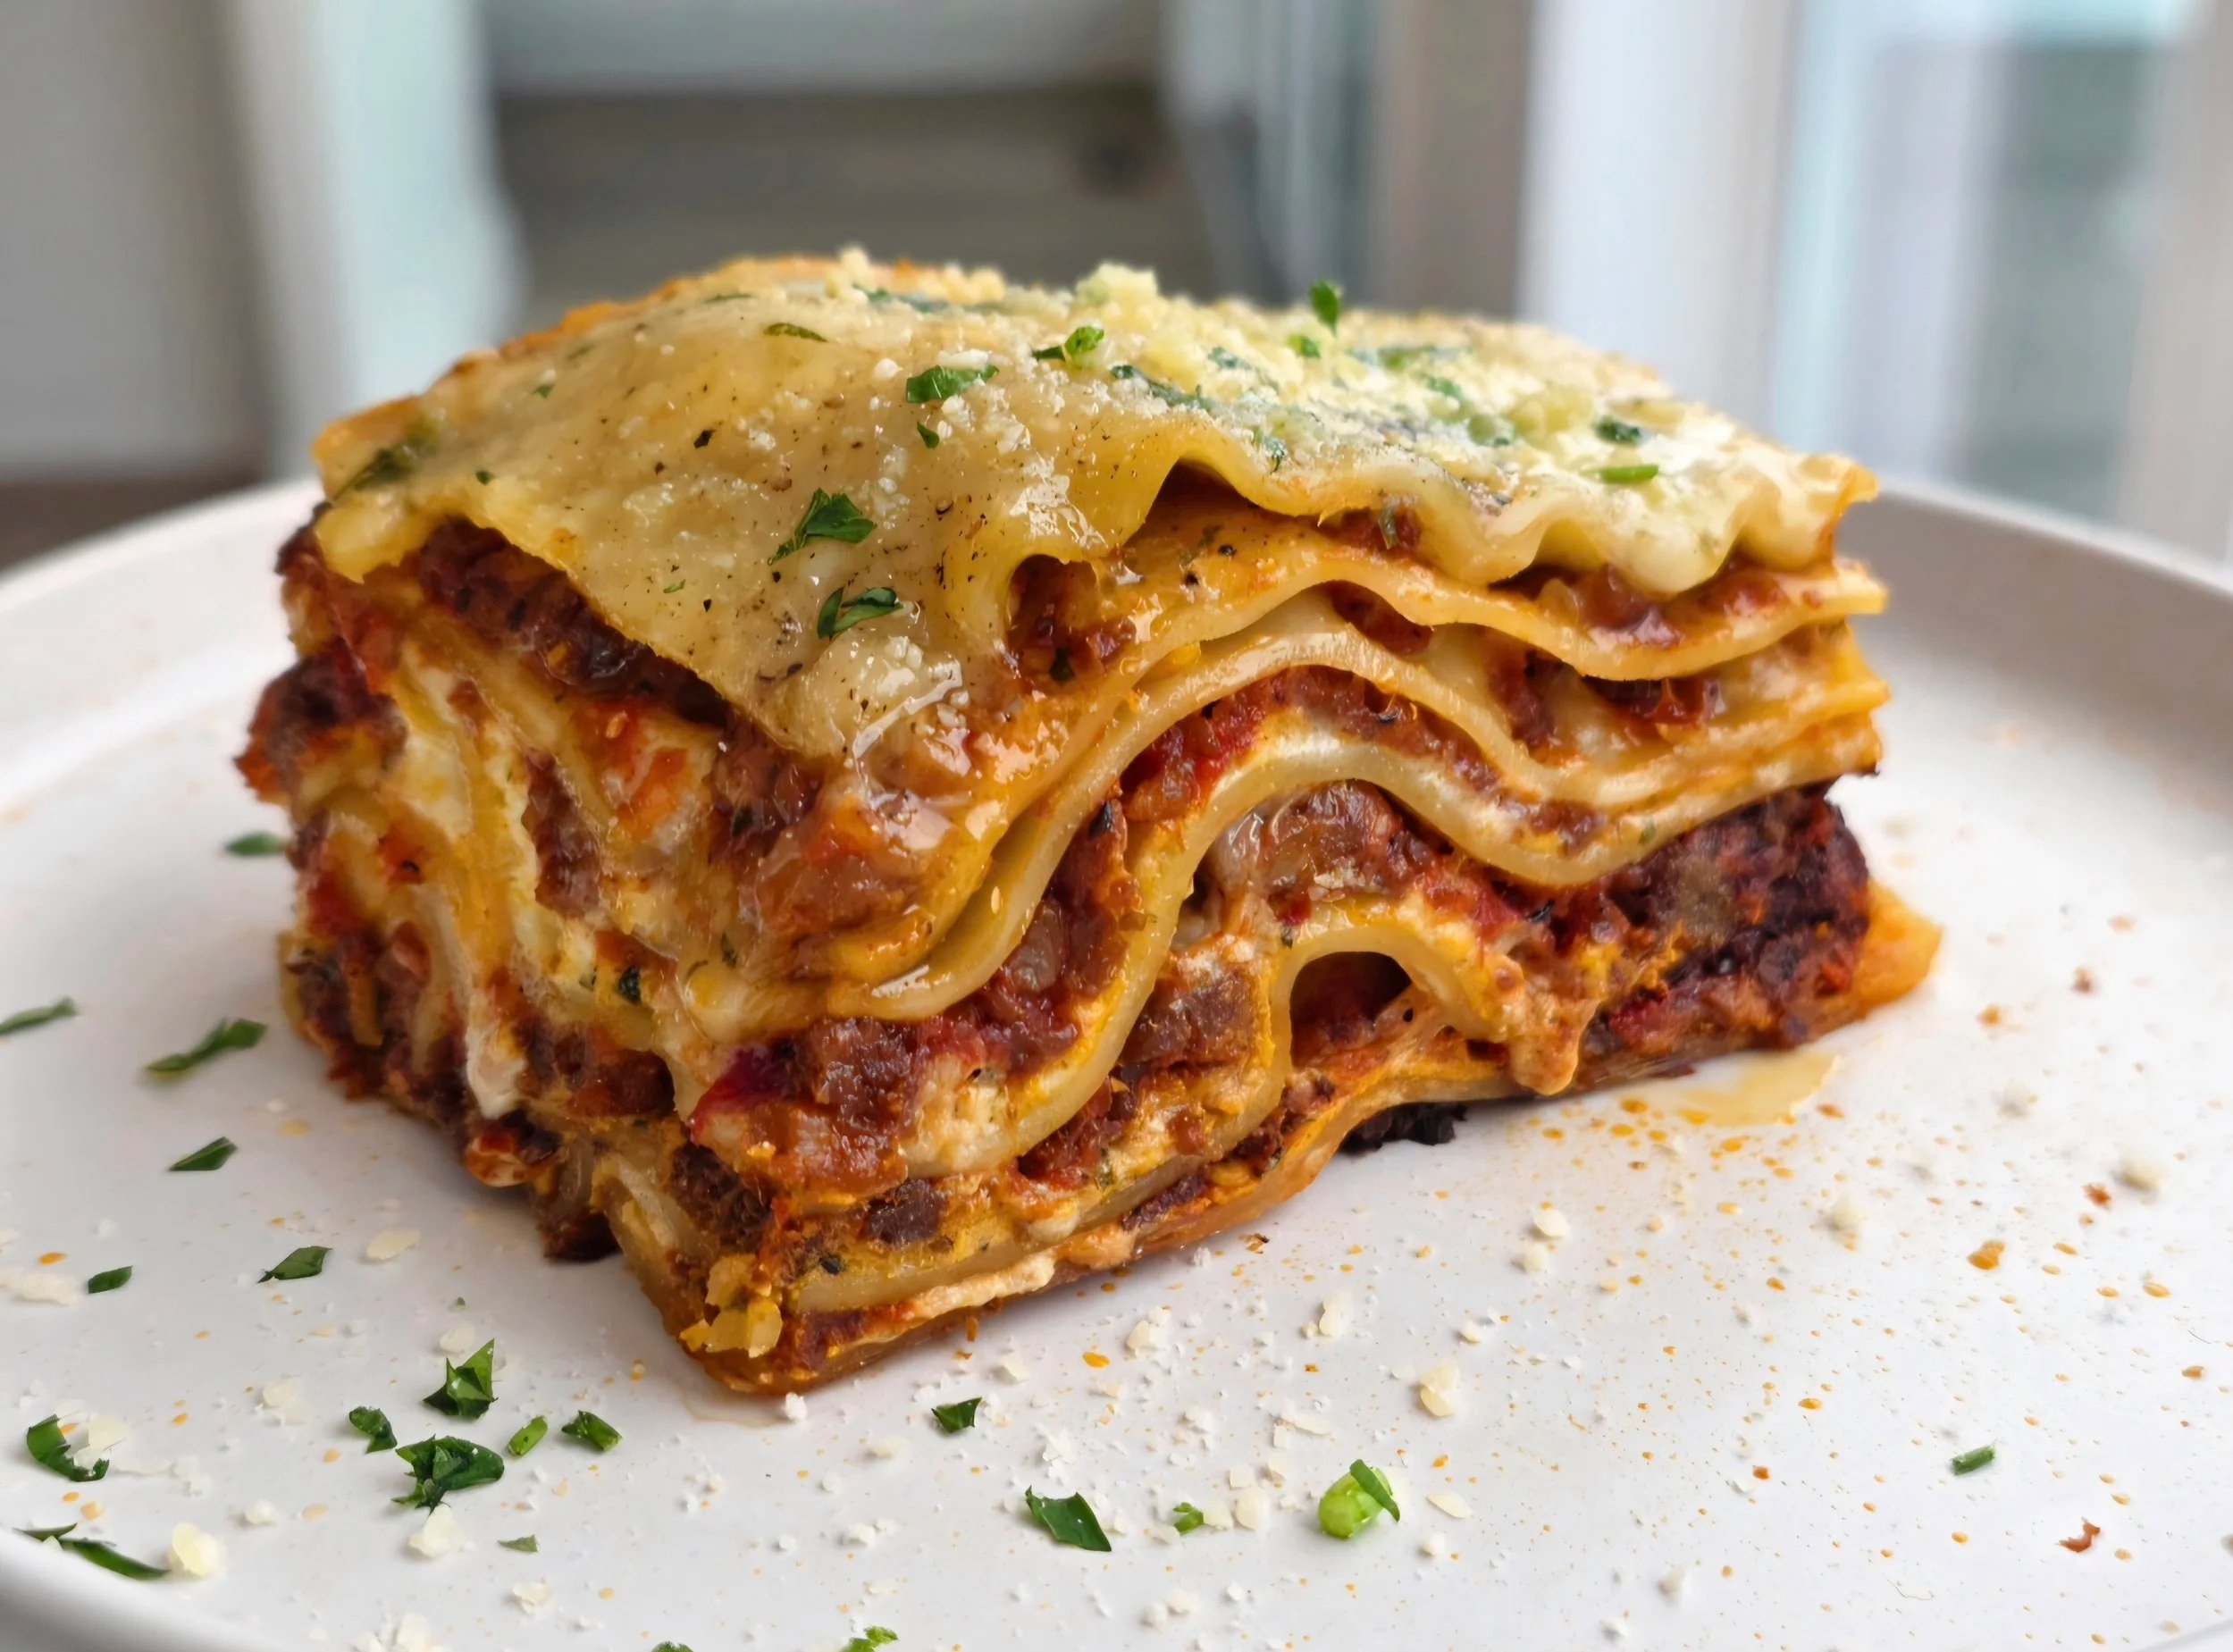
Ricotta Lasagna with Rich Meat Sauce
This lasagna combines a rich, spiced meat sauce with layers of creamy ricotta, mozzarella, and Parmesan. Skip béchamel — my version is practical, flavorful, and sliceable. Perfect for family dinners or meal prep.
Ingredients
- 1 lb ground beef
- 1 lb hot Italian sausage
- 1 medium onion (~1 cup), finely chopped
- 4 cloves garlic, minced
- 1/3 cup tomato paste
- 1 (28 oz) can crushed tomatoes (~3½ cups)
- 1 cup beef broth (or water + 2 bouillon cubes)
- 1 tbsp Worcestershire sauce
- 1 tsp red wine vinegar
- 1 tbsp sugar
- 1 tsp oregano
- ½ tsp paprika
- ½ tsp black pepper
- ½ tsp seasoned salt
- Pinch chili flakes
- Pinch onion powder
- Pinch garlic powder
- 1/3 cup grated Parmesan (added directly to sauce)
- Optional: umami mix or beef flavoring
- 15 oz ricotta (~1½ cups)
- 1 egg
- ¼ cup grated Parmesan
- 1–2 tsp fresh or dried basil
- ½ tsp salt
- ¼ tsp pepper
- 1 lb dry lasagna noodles (~12–16 sheets)
- 3–4 cups freshly grated mozzarella
- ½ cup grated Parmesan for topping
Instructions
- Bring a large pot of generously salted water to a rolling boil.
- Add the lasagna noodles and cook according to package directions until al dente (tender but still slightly firm, they will continue cooking in the oven). Stir occasionally to prevent sticking.
- Drain and lay the noodles flat on lightly oiled baking sheets or clean kitchen towels to prevent sticking. (If using no-boil noodles, skip this step.)
- Preheat the oven to 375°F (190°C).
- Heat tallow or oil in a large skillet or Dutch oven over medium heat. Add the ground beef and sausage and cook until browned, breaking it up with a spoon. Drain excess fat if needed.
- Add the chopped onion and cook until softened, about 5 minutes. Stir in the garlic and cook for 30 seconds, until fragrant.
- Stir in the tomato paste and cook for 1–2 minutes to deepen the flavor.
- Add the crushed tomatoes, beef broth, Worcestershire sauce, red wine vinegar, sugar, Italian seasoning, salt, and pepper. Stir well to combine.
- Reduce the heat and simmer for 30–45 minutes, stirring occasionally, until the sauce thickens and becomes spoonable.
- Stir in ⅓ cup Parmesan cheese and remove from heat.
- In a medium bowl, combine the ricotta, egg, ¼ cup Parmesan, basil, salt, and pepper. Mix until smooth.
- Spread a thin layer of meat sauce (about ½ cup) across the bottom of a 9x13-inch baking dish.
- Lay three noodles over the sauce. Spread ⅓ to ½ cup of the ricotta mixture evenly over the noodles. Sprinkle about ½ cup mozzarella on top, then spoon a layer of meat sauce over the cheese.
- Repeat these layers two to three more times, keeping them even for clean slices.
- For the final layer, choose your preferred finish.
- For a classic soft, saucy top, finish with noodles, then spread the remaining meat sauce over them. Top with the remaining mozzarella and ½ cup Parmesan.
- If you prefer a more defined noodle-and-cheese finish (as shown in the photo), add one final noodle layer and top directly with mozzarella and Parmesan, without sauce on top.
- Cover the dish loosely with foil, spraying the underside with cooking spray to prevent sticking.
- Bake for 25 minutes covered.
- Remove the foil and bake for an additional 15–20 minutes, until bubbling at the edges and lightly golden on top.
- If you’d like a deeper golden finish, switch the oven to broil for 1–3 minutes at the end. Watch closely, as the cheese can brown quickly.
- Let the lasagna rest for 10–15 minutes before slicing. This helps the layers set and makes serving much easier.
Nutrition Facts
Calories
540Fat (grams)
32 gCarbs (grams)
38 gFiber (grams)
4 gSugar (grams)
7 gProtein (grams)
34 gI am not a certified nutritionist and any nutritional information on dontmissmyplate.com should only be used as a general guideline.
Dry vs Wet Peri-Peri Chicken
Peri-peri chicken is more than just a spicy grilled dish; it is the result of history, migration, and bold flavor.
The sauce traces back to Mozambique, where African bird’s eye chilies were blended with garlic, citrus, vinegar, and oil by Portuguese settlers. From there, peri-peri spread across Southern Africa and into Portugal, evolving slightly in every region it touched.
I grew up in Zimbabwe, where peri-peri is everywhere. Every last Friday of the month, my dad would take us to Nandos for chicken coated in that tangy, spicy, smoky sauce. It was sharp from vinegar, hot from chilies, and salty enough to make you reach for another bite immediately. Years later, I had the opportunity to taste peri-peri chicken in Portugal, and recognized the same roots, just expressed a little differently.
That is the beauty of peri-peri: there is not just one version.
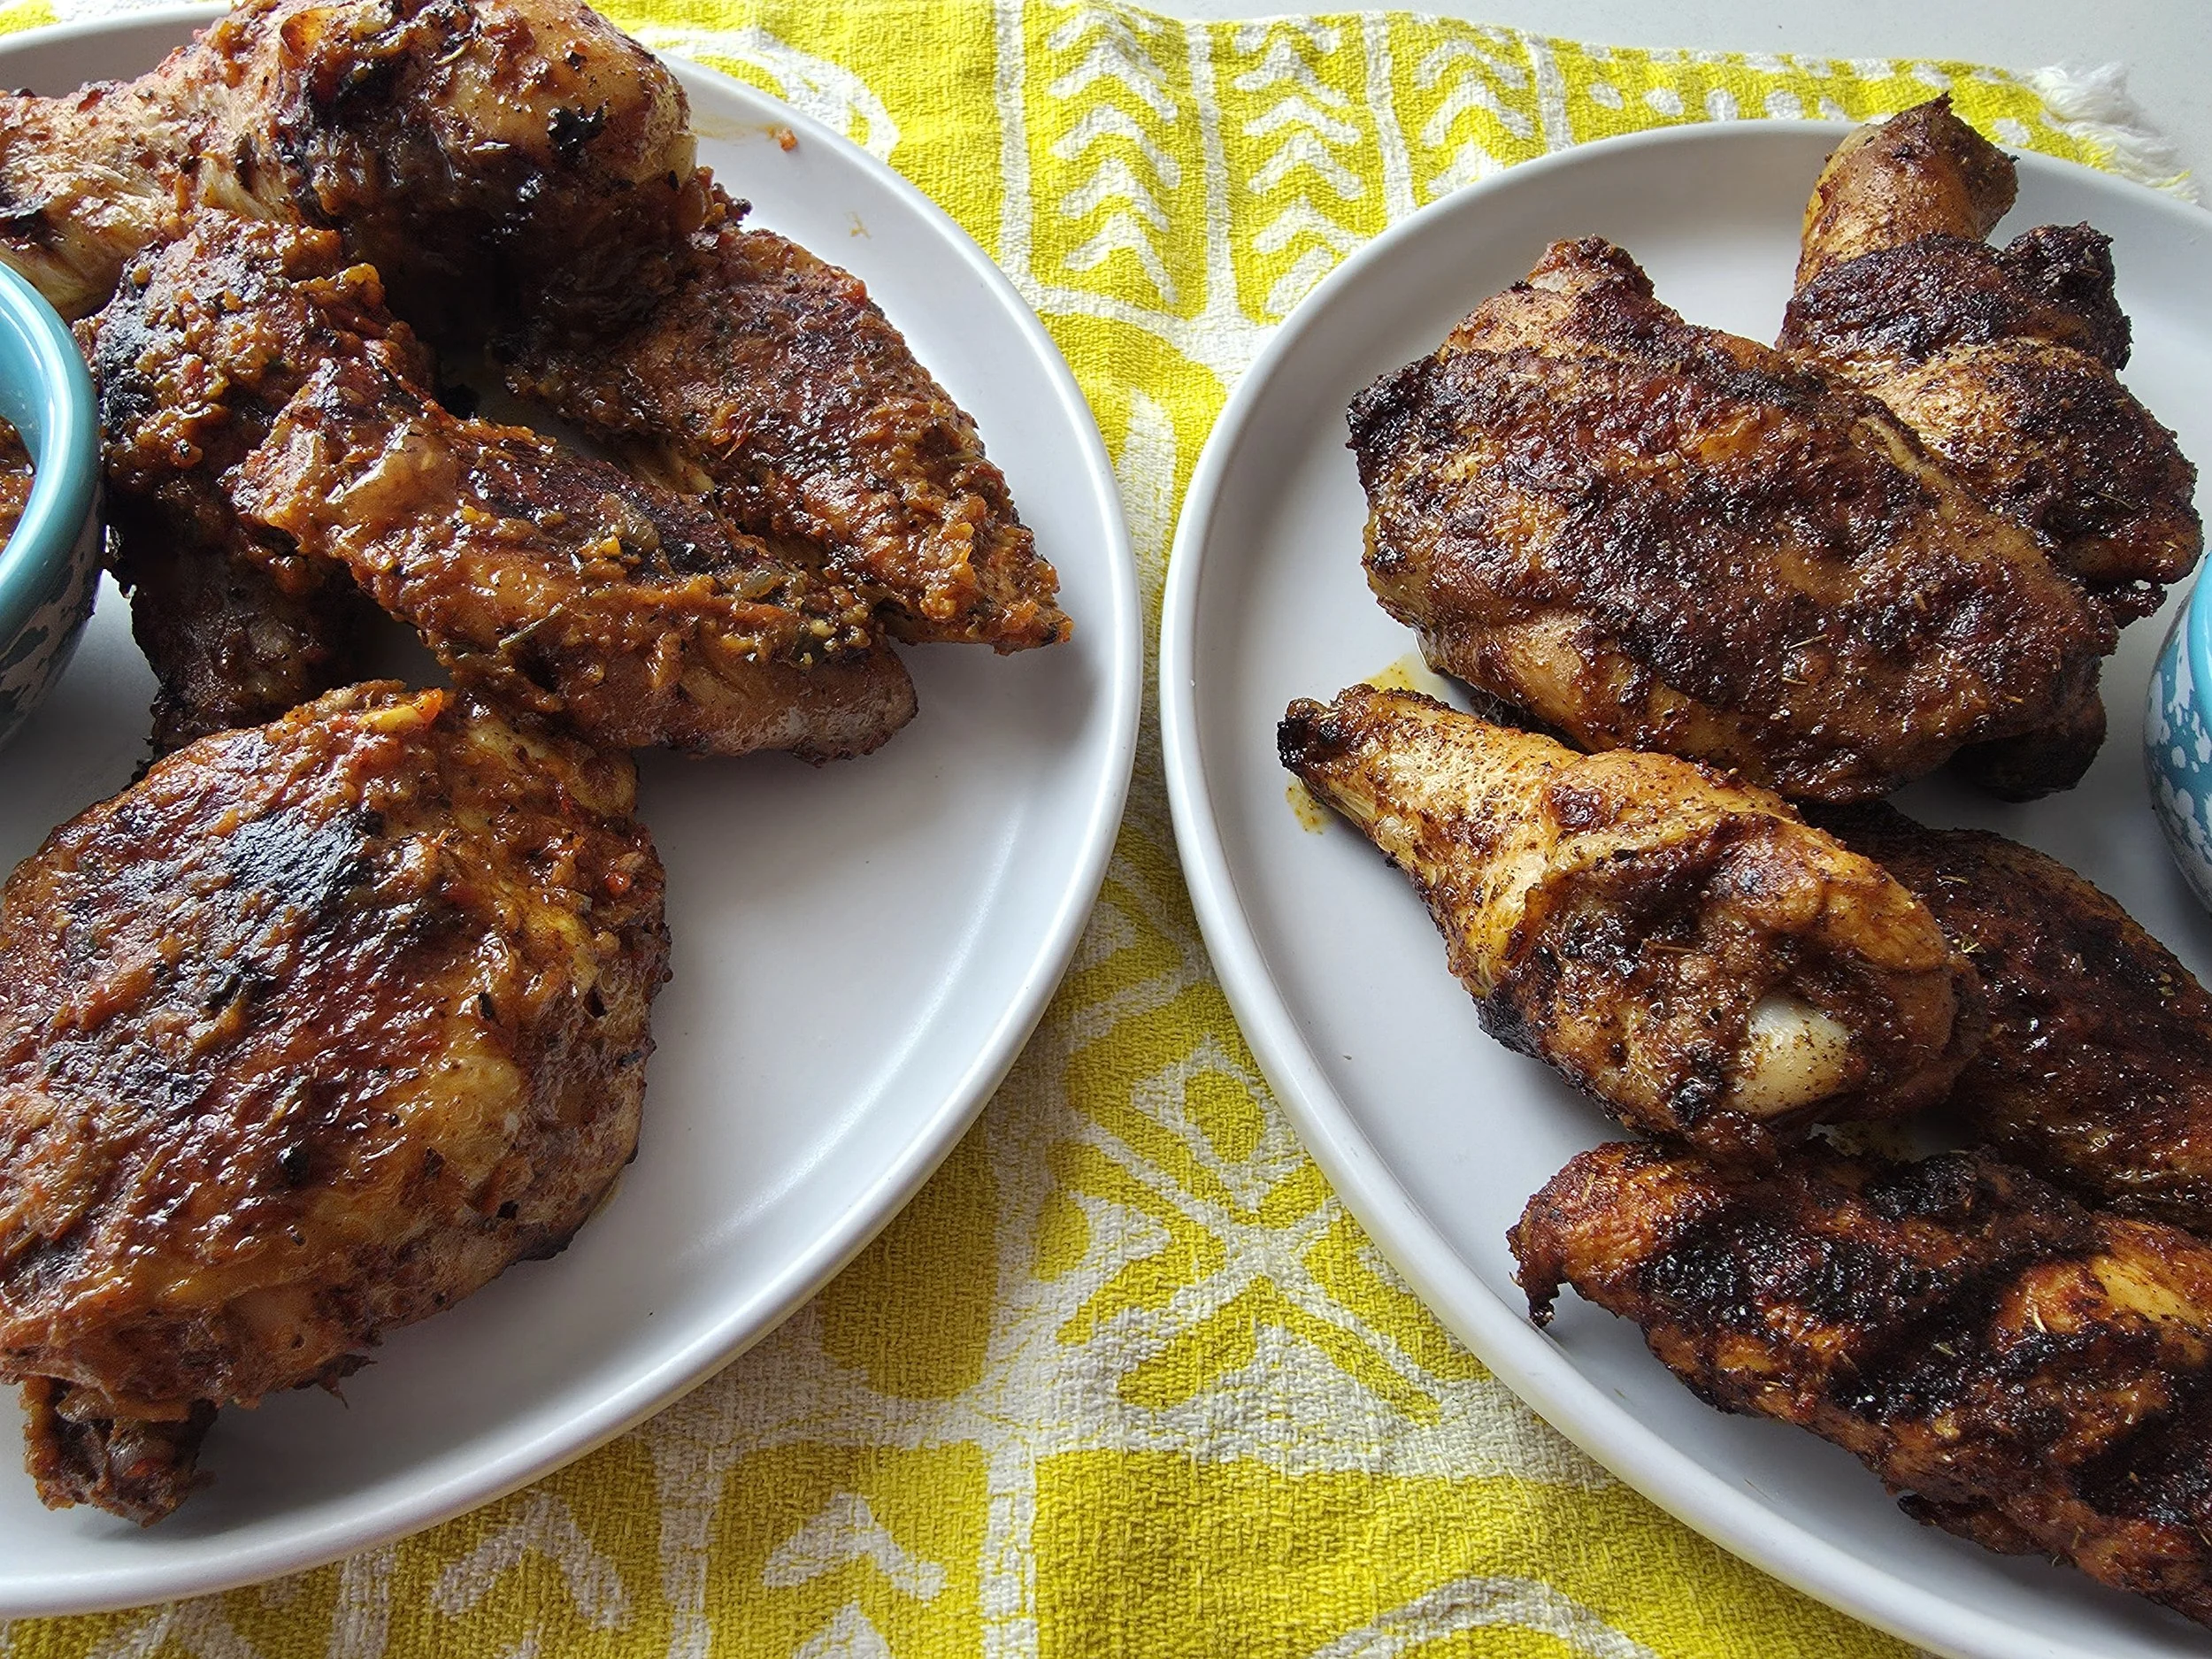
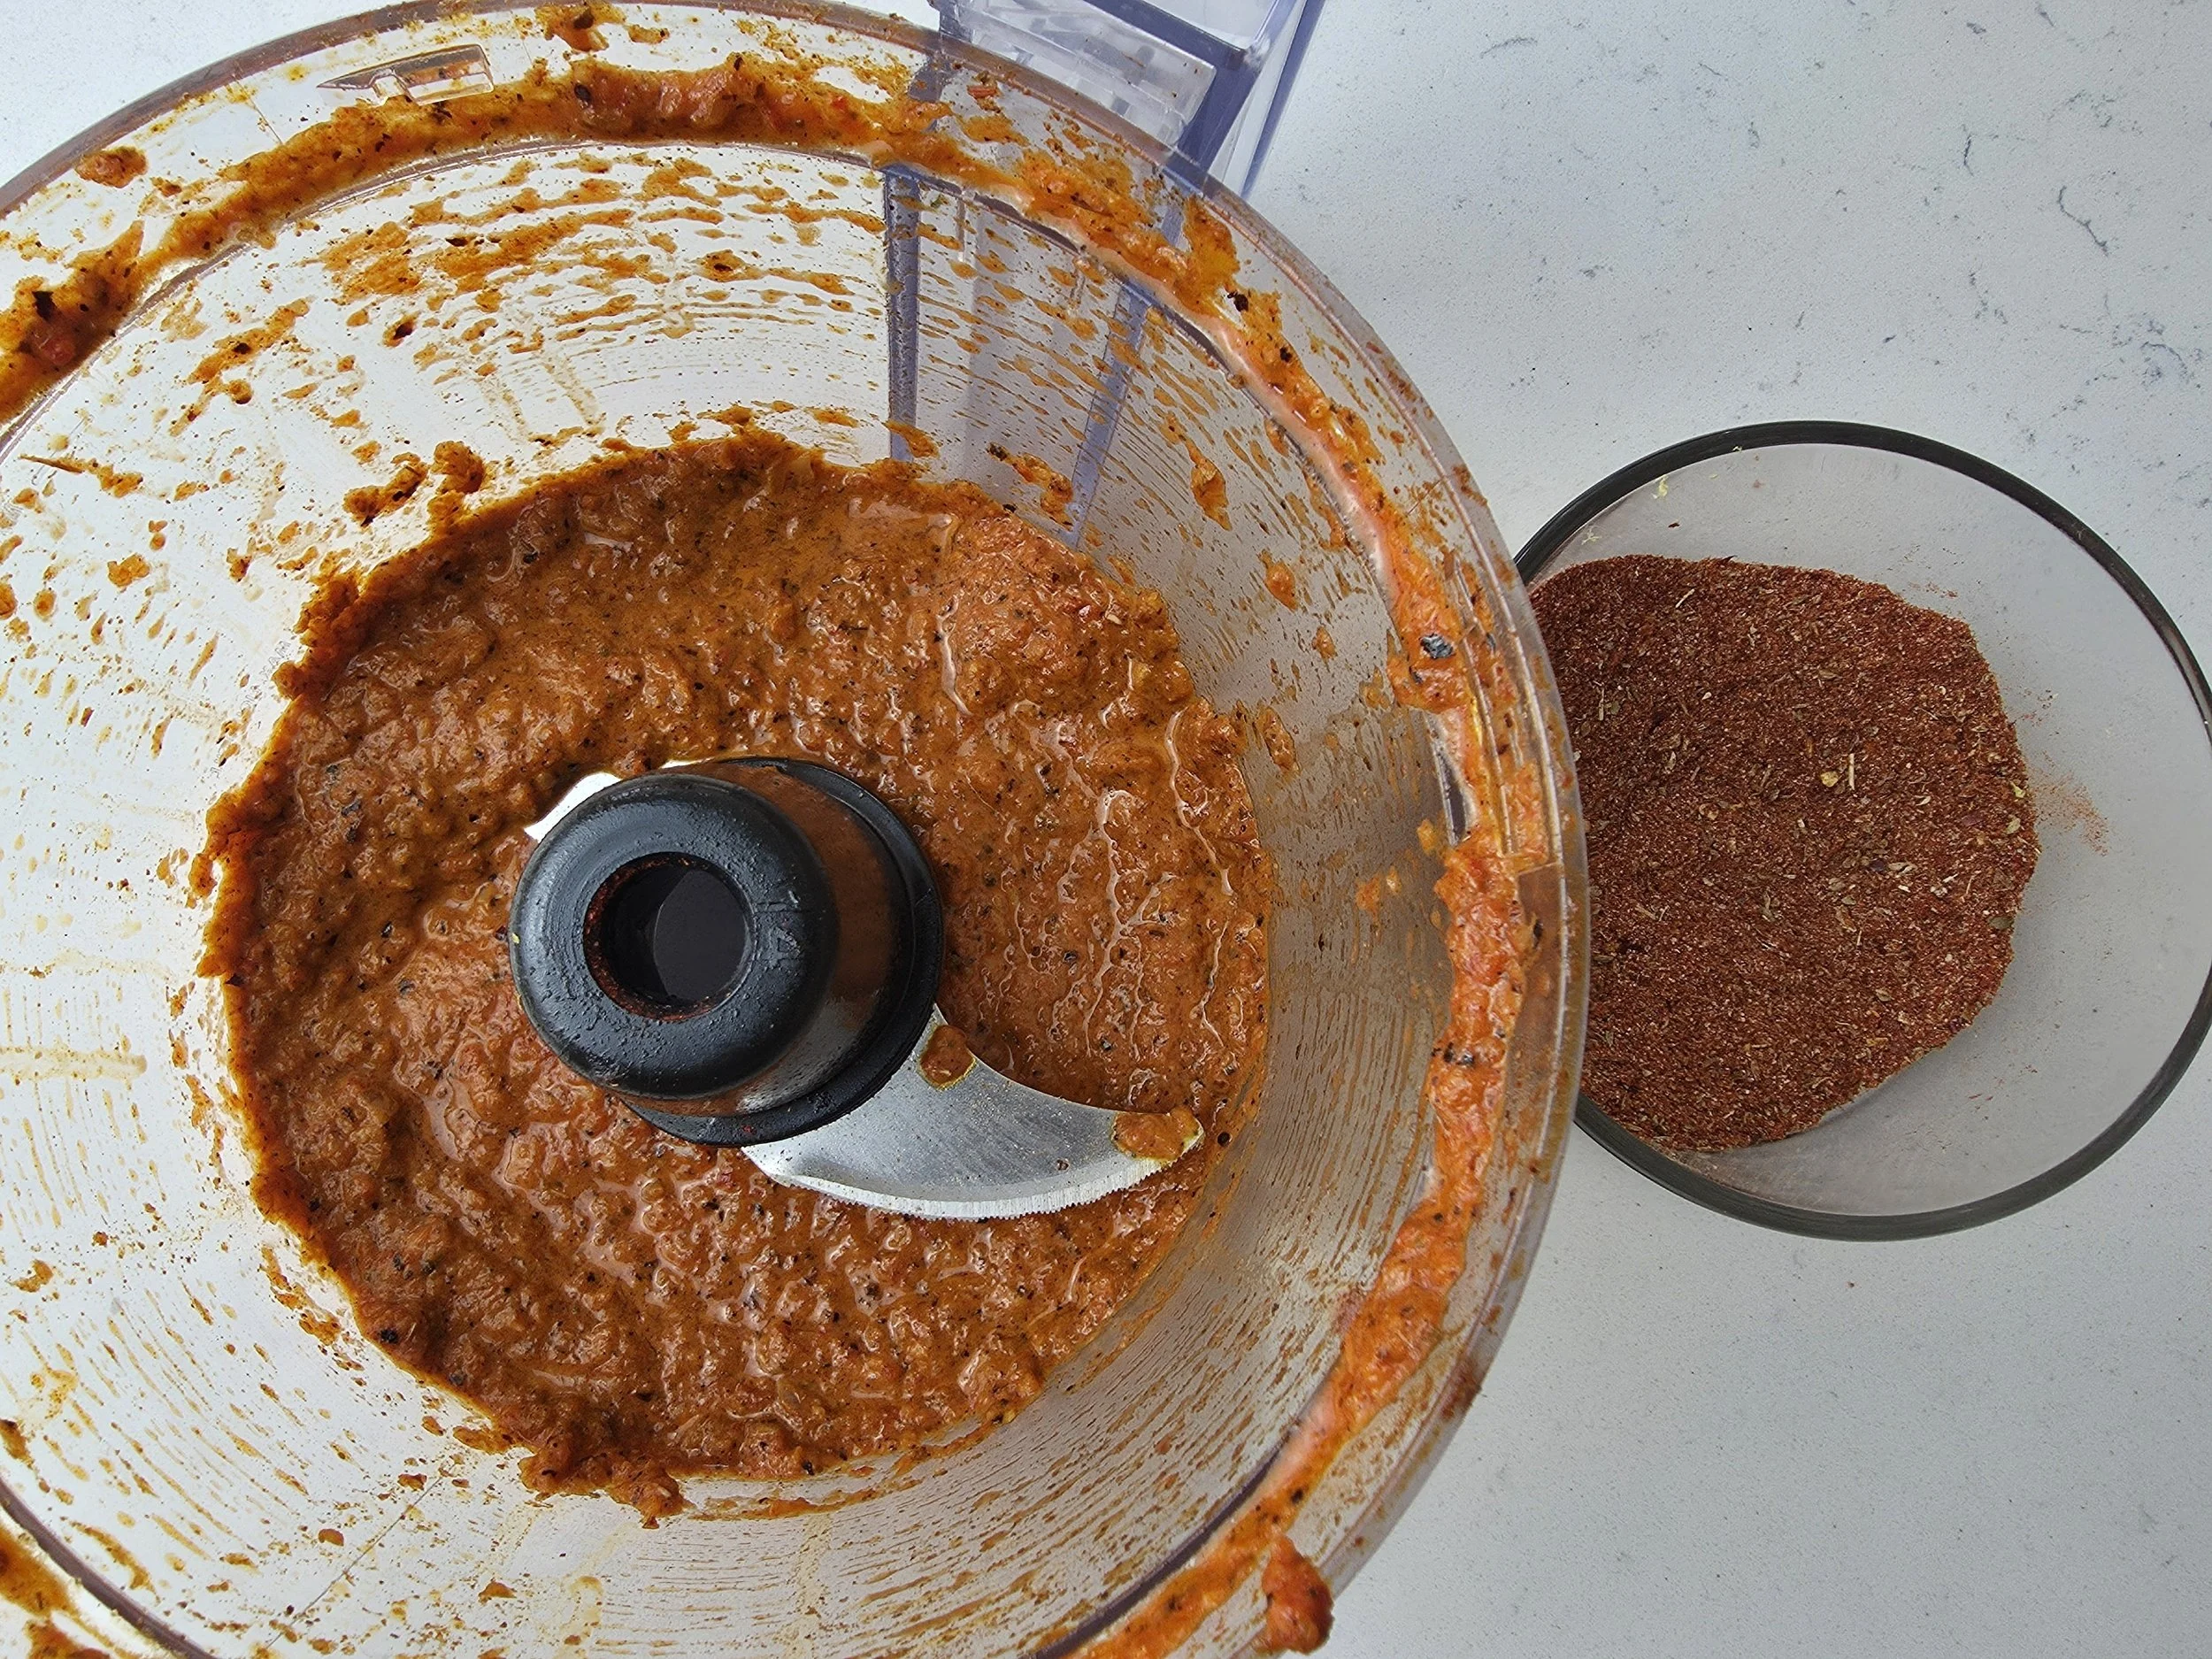
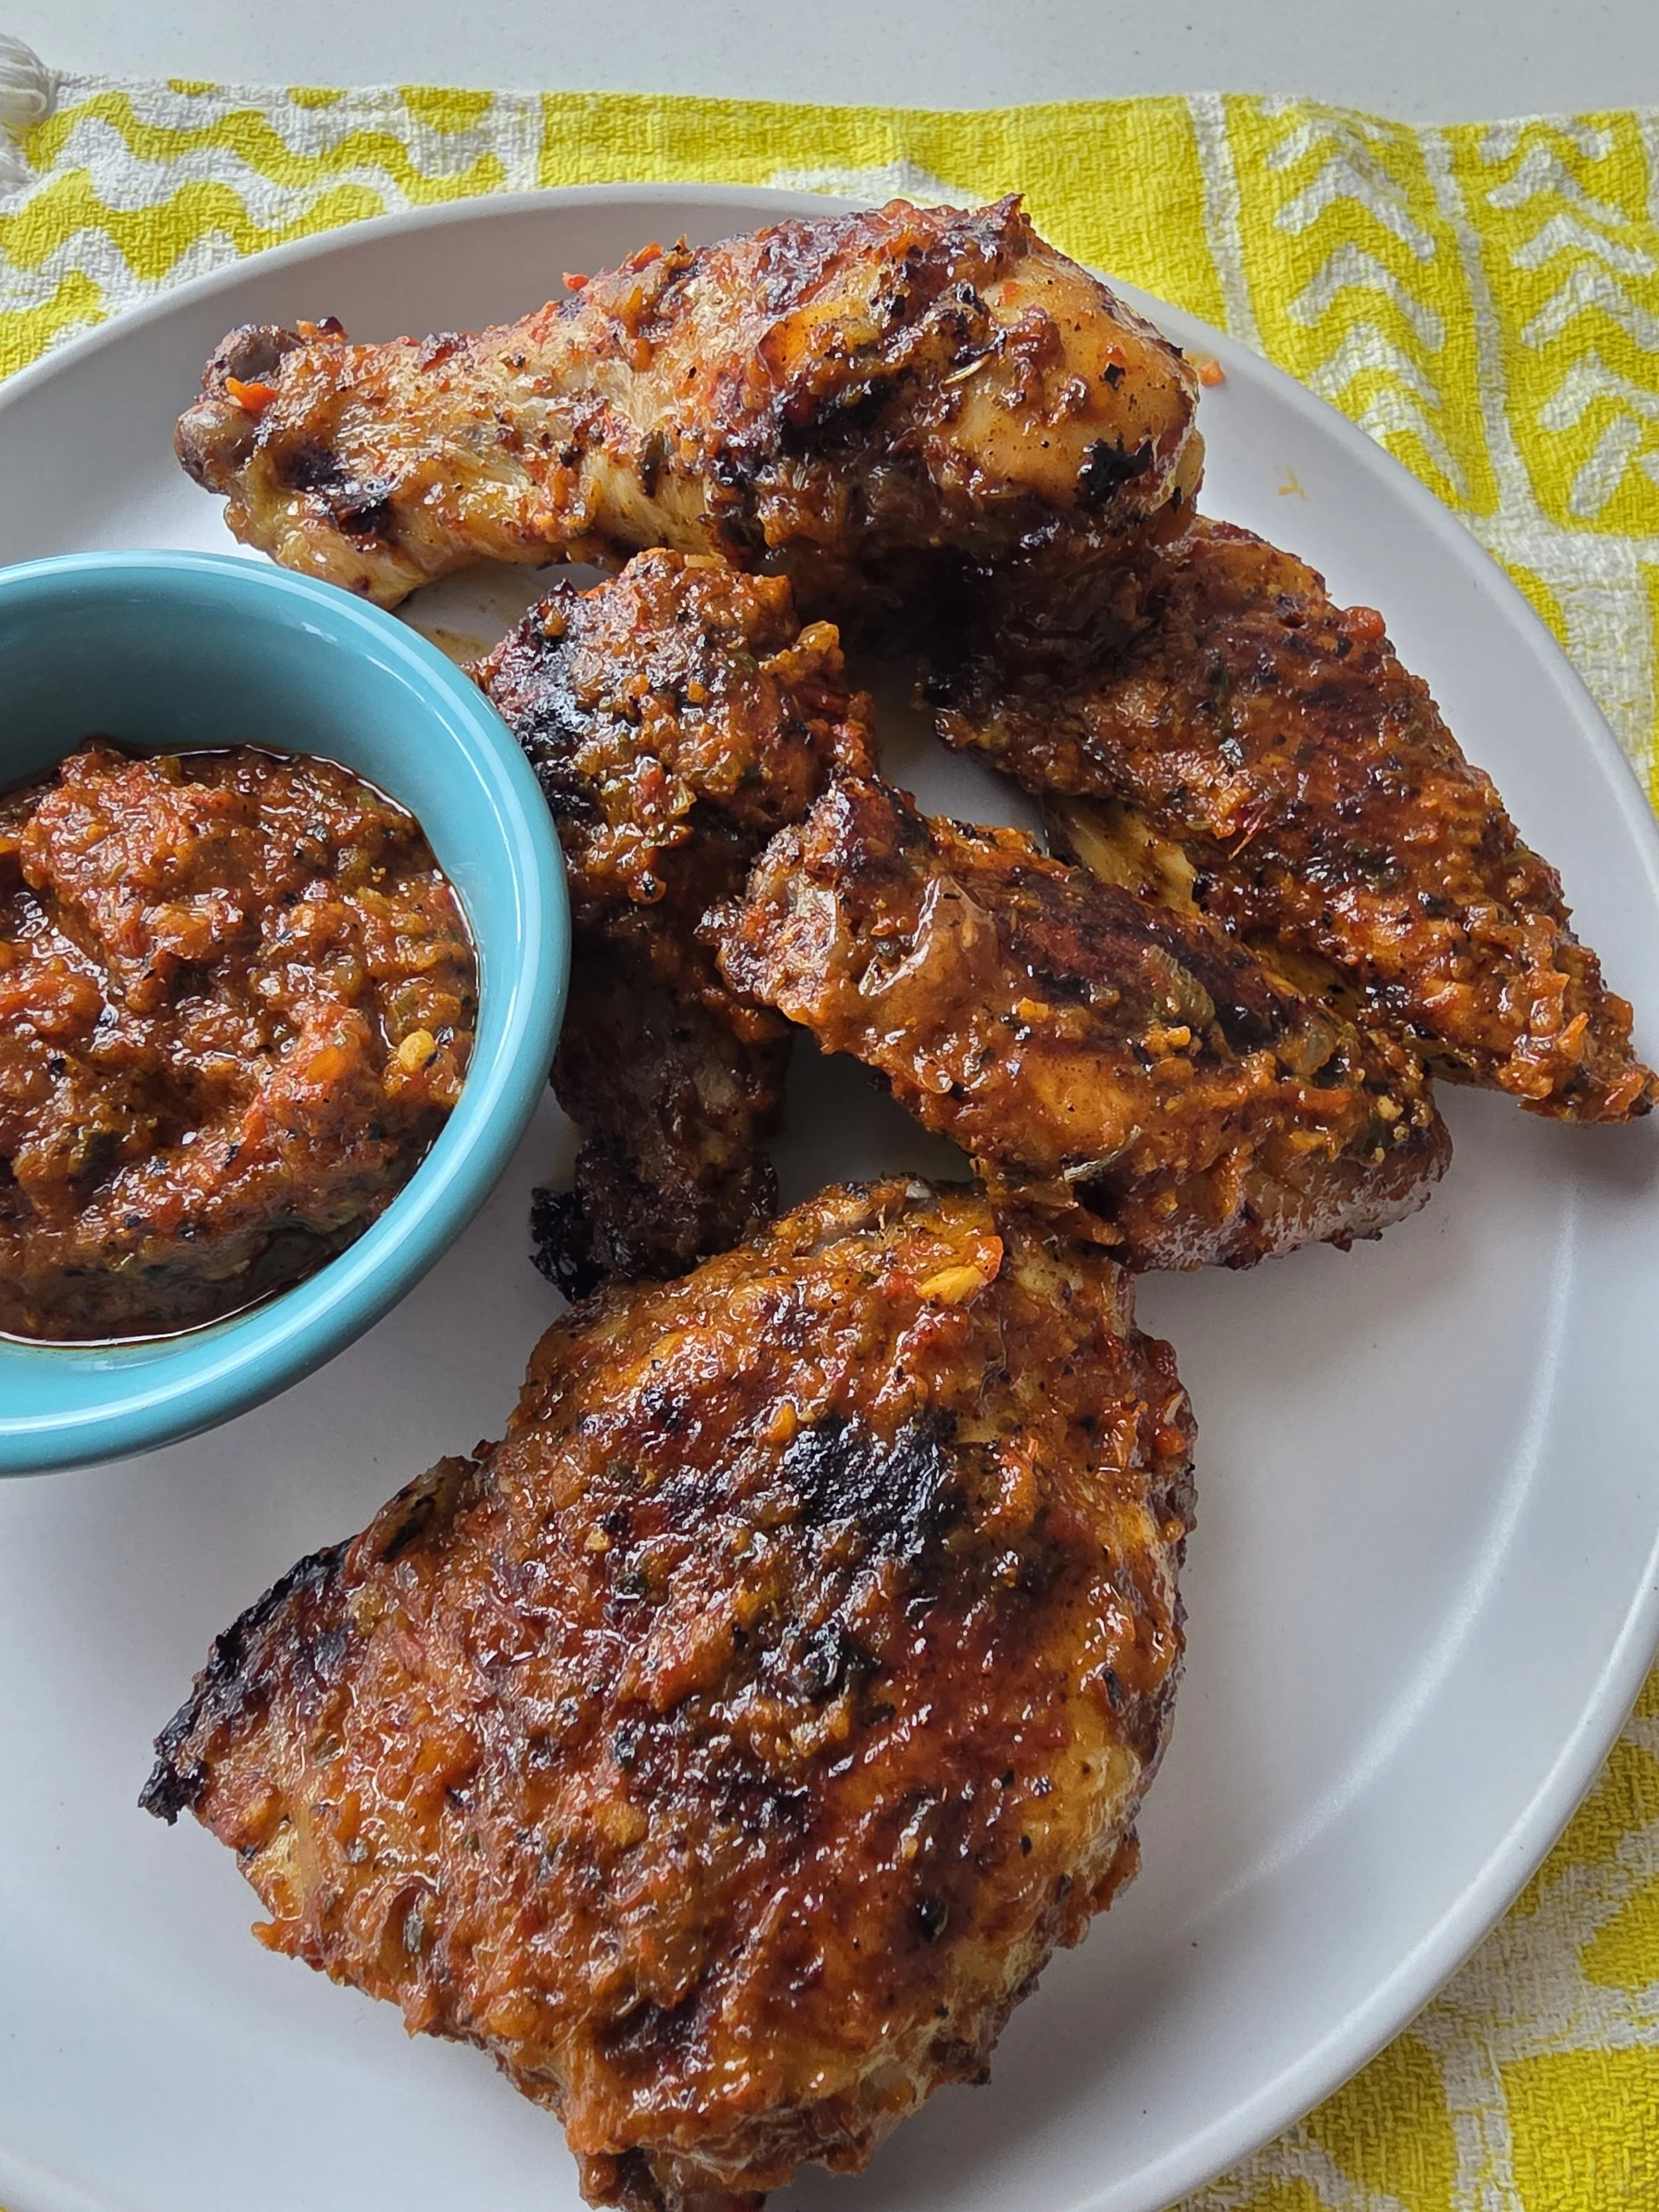
Some prefer a dry rub, smoky, crisp, and spice-forward, perfect for grilled or roasted chicken with crunchy skin. Others love the wet marinade, blended with chilies, garlic, oil, lemon, and vinegar, soaking into the meat and creating a bold, saucy finish.
Note: For the wet marinade, I typically broil my vegetables in the oven at 400°F for about 25 minutes to get the best flavor. In this recipe, I had defrosted what I had on hand, so I used a cast iron skillet instead — this helped avoid steaming and gave me more control over the char.
Choosing the Right Chili Makes All the Difference
What defines great peri-peri is not just heat — it’s balance:
• Heat from fresh chilies (traditionally African bird’s eye)
• Tang from vinegar or lemon
• Enough salt to make everything pop
• Sometimes a touch of sweetness from roasted peppers or a pinch of sugar
The type of chili you use matters. Bird’s eye chilies are classic, but depending on what’s available where you live, Thai chilies, serranos, or even habanero can work beautifully, each bringing a slightly different kind of heat. I’ve even used Fresno peppers, which gave the chicken a beautiful red color, though the sauce leaned a bit sweeter.
In this post, I’m showing you both styles, dry and wet, so you can choose your favorite or try both. Whether you love crispy skin or juicy, sauce-coated chicken, peri-peri is all about bold flavor done right.
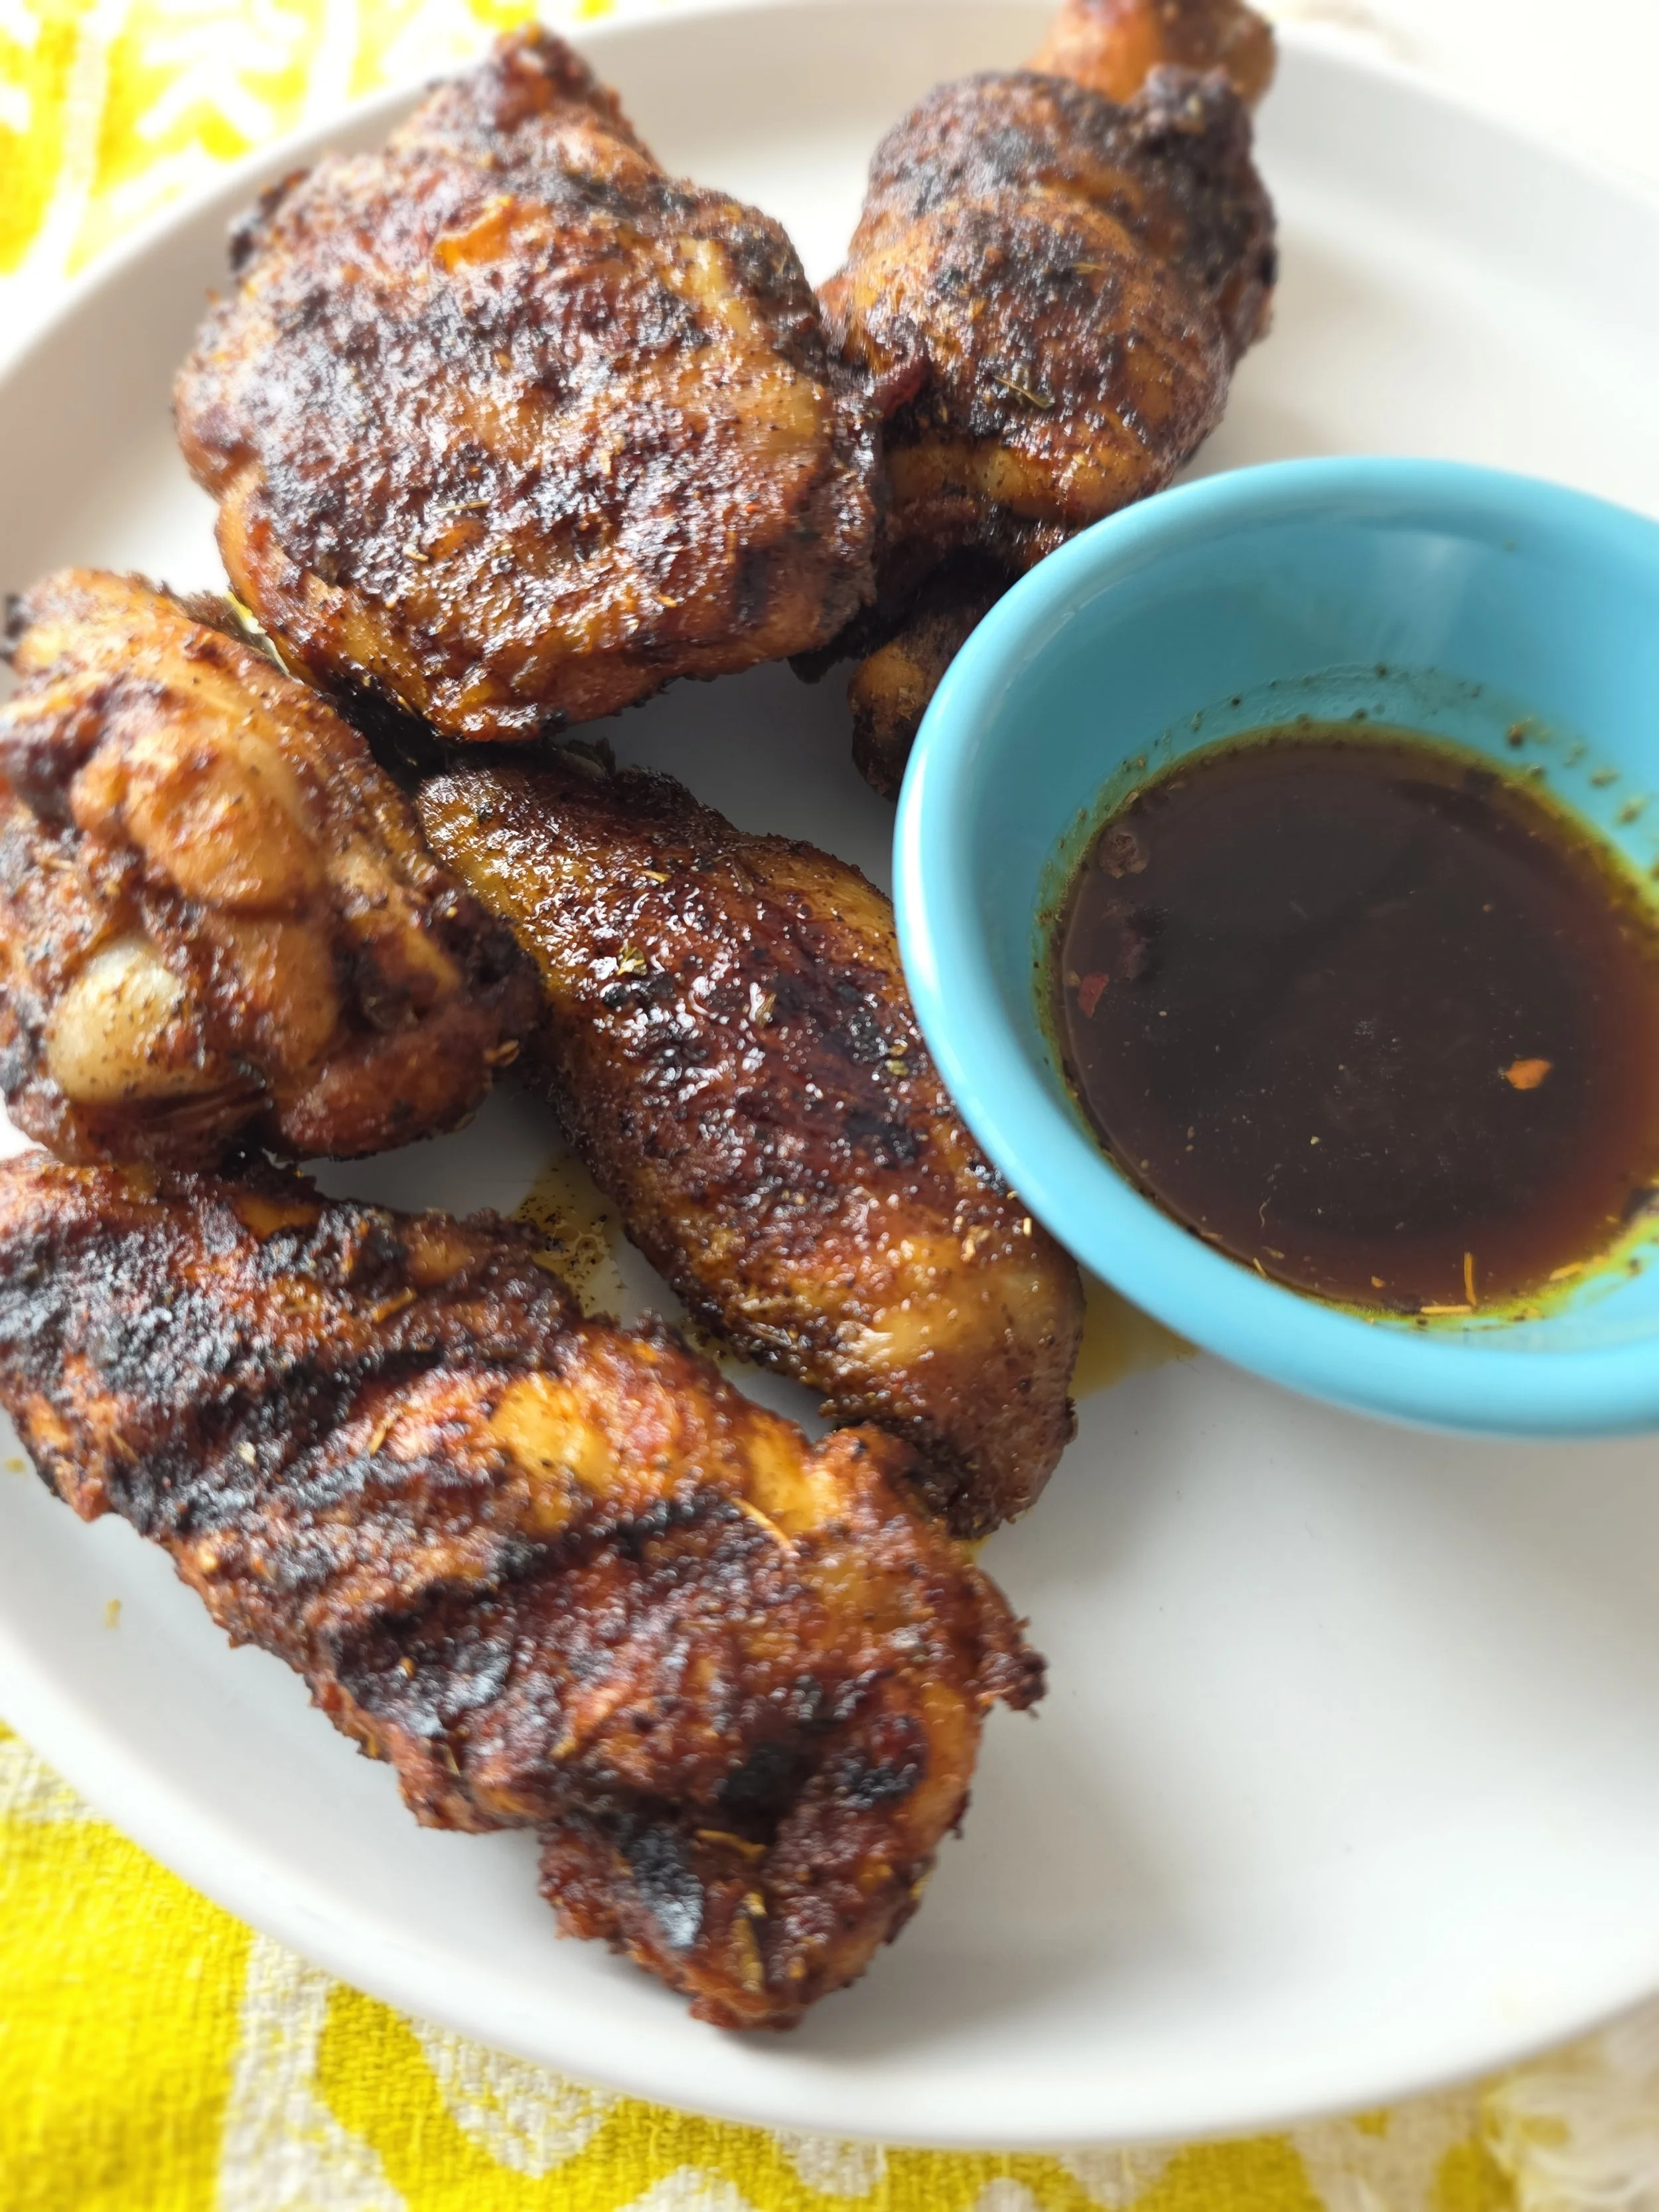
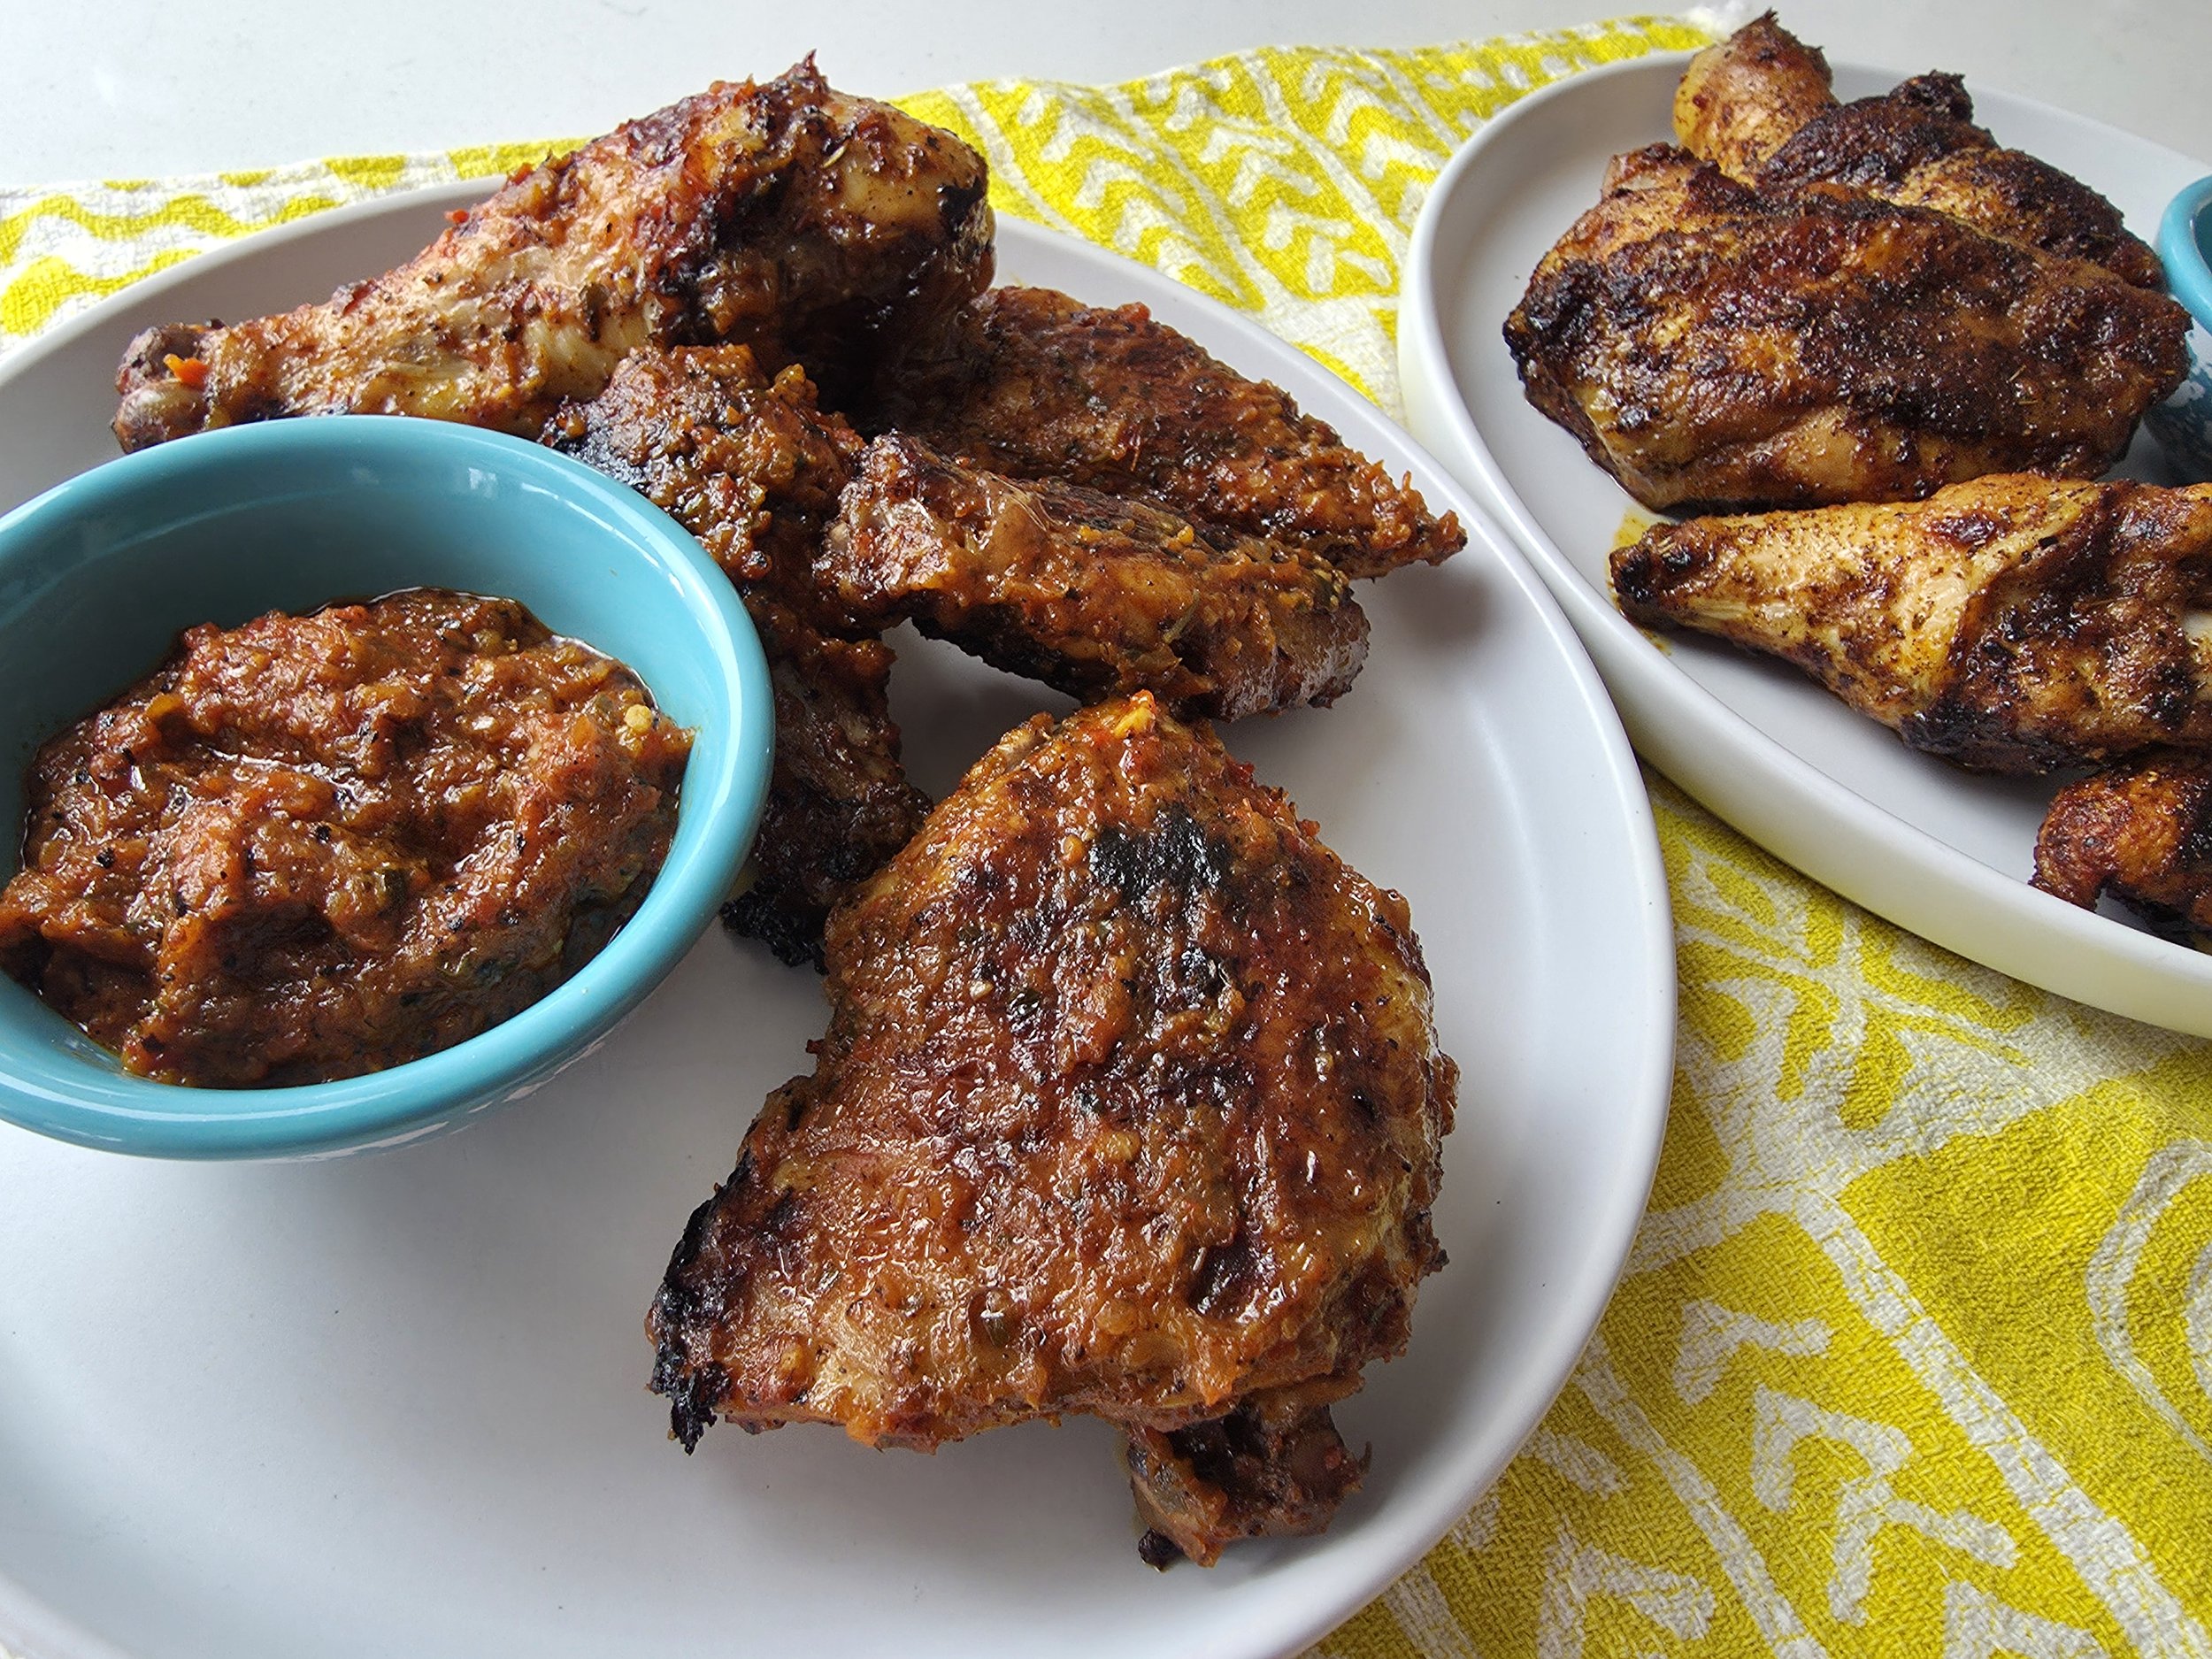

Crispy or Juicy Peri-Peri Chicken
Learn how to make peri-peri chicken two ways: a crispy dry rub or a juicy wet marinade. Packed with bold African-inspired flavors, this recipe balances heat, tang, and seasoning for perfectly cooked chicken every time. Easy to follow and perfect for grilling, roasting, or weeknight dinners.
Ingredients
- 2 tbsp smoked paprika
- 1 tbsp paprika
- 3 tsp oregano (or 2 tsp oregano + 1 tsp dried thyme)
- 1 tsp bay leaf powder (optional)
- 1 tsp cumin
- 1 tsp coriander
- 1 tsp garlic powder
- 1 tsp onion powder
- 1 tsp cayenne pepper
- Zest of 1/2 lemon
- 1 1/2 tsp salt
- 1/2 tsp black pepper
- Pinch of sugar
- 1/2 to 1 tsp chili flakes (optional)
- 1 tsp salt
- 1 tsp paprika
- 1 tsp smoked paprika
- 1 tsp oregano
- 2 garlic cloves
- 1/3 large onion
- 1/2 large red or orange bell pepper
- 1 whole habanero (adjust for spice level)
- 2–3 tbsp olive oil, plus extra for charring vegetables
- 2 tbsp lemon juice
- 1 tsp lemon zest
- 1/2 tsp vinegar (red or white; white gives more zing — add 1/4 tsp at a time)
- 1 tsp chili flakes (optional)
- Fresh parsley
- 2 drumsticks
- 2 thighs
- 2 drumettes
- 2 winglettes
- 2 tenders
- Chicken spice (for wet marinade chicken)
- Lemon pepper seasoning (for dry rub chicken)
- Butter (for dry rub chicken finish)
Instructions
- Mix all spices together and stir in the lemon zest.
- Pat the chicken dry. Lightly season with lemon pepper, drizzle with a little olive oil, then coat with the spice rub. Refrigerate for at least 1–2 hours for maximum flavor.
- Store any leftover rub in the fridge and use within 3 days.
- Before cooking, pat the chicken dry again to remove excess moisture.
- Sear on a grill pan for 3–4 minutes per side.
- Transfer to a wire rack over a baking tray and bake at 375°F for 18–22 minutes, flipping halfway and removing pieces as they reach temperature.
- Broil at 500°F for 2–3 minutes to crisp the skin. Watch carefully to avoid burning.
- Melt butter and stir in some remaining peri-peri (1 tbsp at a time). Brush or toss the chicken in this sauce. Reserve some for serving.
- Combine the dry spices. Set aside with the lemon juice, vinegar, and olive oil.
- In a lightly greased cast iron skillet (use high smoke point oil), char the bell pepper on both sides. Add onion and garlic to develop color and deepen flavor. Remove each ingredient once charred.
- In a small blender or food processor, blend the peppers, onion, garlic, lemon juice, spices, and olive oil until smooth.
- Add vinegar and lemon zest. Adjust salt, tang, and heat to taste.
- Lightly season the chicken with chicken spice. Coat with the marinade and refrigerate for at least 1–2 hours.
- Pat off excess marinade before cooking.
- Sear for 3–4 minutes per side, then transfer to a parchment-lined baking tray. Bake for 20–22 minutes at 375°F, flipping halfway and removing pieces as they reach temperature.
- Simmer the remaining sauce for at least 5 minutes. Add a splash of water if needed, plus fresh parsley, lemon zest, salt, or vinegar to adjust flavor. Brush over cooked chicken and serve extra on the side.
Notes
- Chicken: These amounts were used for testing with a whole chicken butchered at home. Use your preferred cuts and adjust cooking times accordingly. Always cook to proper internal temperature.
- Wet Marinade Pepper Choice: If possible, use bird’s eye chili first. If unavailable, Thai chili or habanero work well. Each has different heat levels and flavor characteristics, so adjust according to your spice preference.
- Scaling: Double the wet marinade as you increase the chicken quantity. The dry rub can be made in larger batches and stored (refrigerated if it contains fresh zest).
- Charring Vegetables: If using fresh vegetables, you can broil at 400°F for about 25 minutes, flipping halfway, to achieve smoky char before blending. If vegetables were previously frozen, use cast iron on the stovetop to avoid steaming.
Nutrition Facts
Calories
450Fat (grams)
30 gCarbs (grams)
5 gProtein (grams)
35 gI am not a certified nutritionist and any nutritional information on dontmissmyplate.com should only be used as a general guideline.

Coconut Lime Shrimp Tacos with Fresh Basil
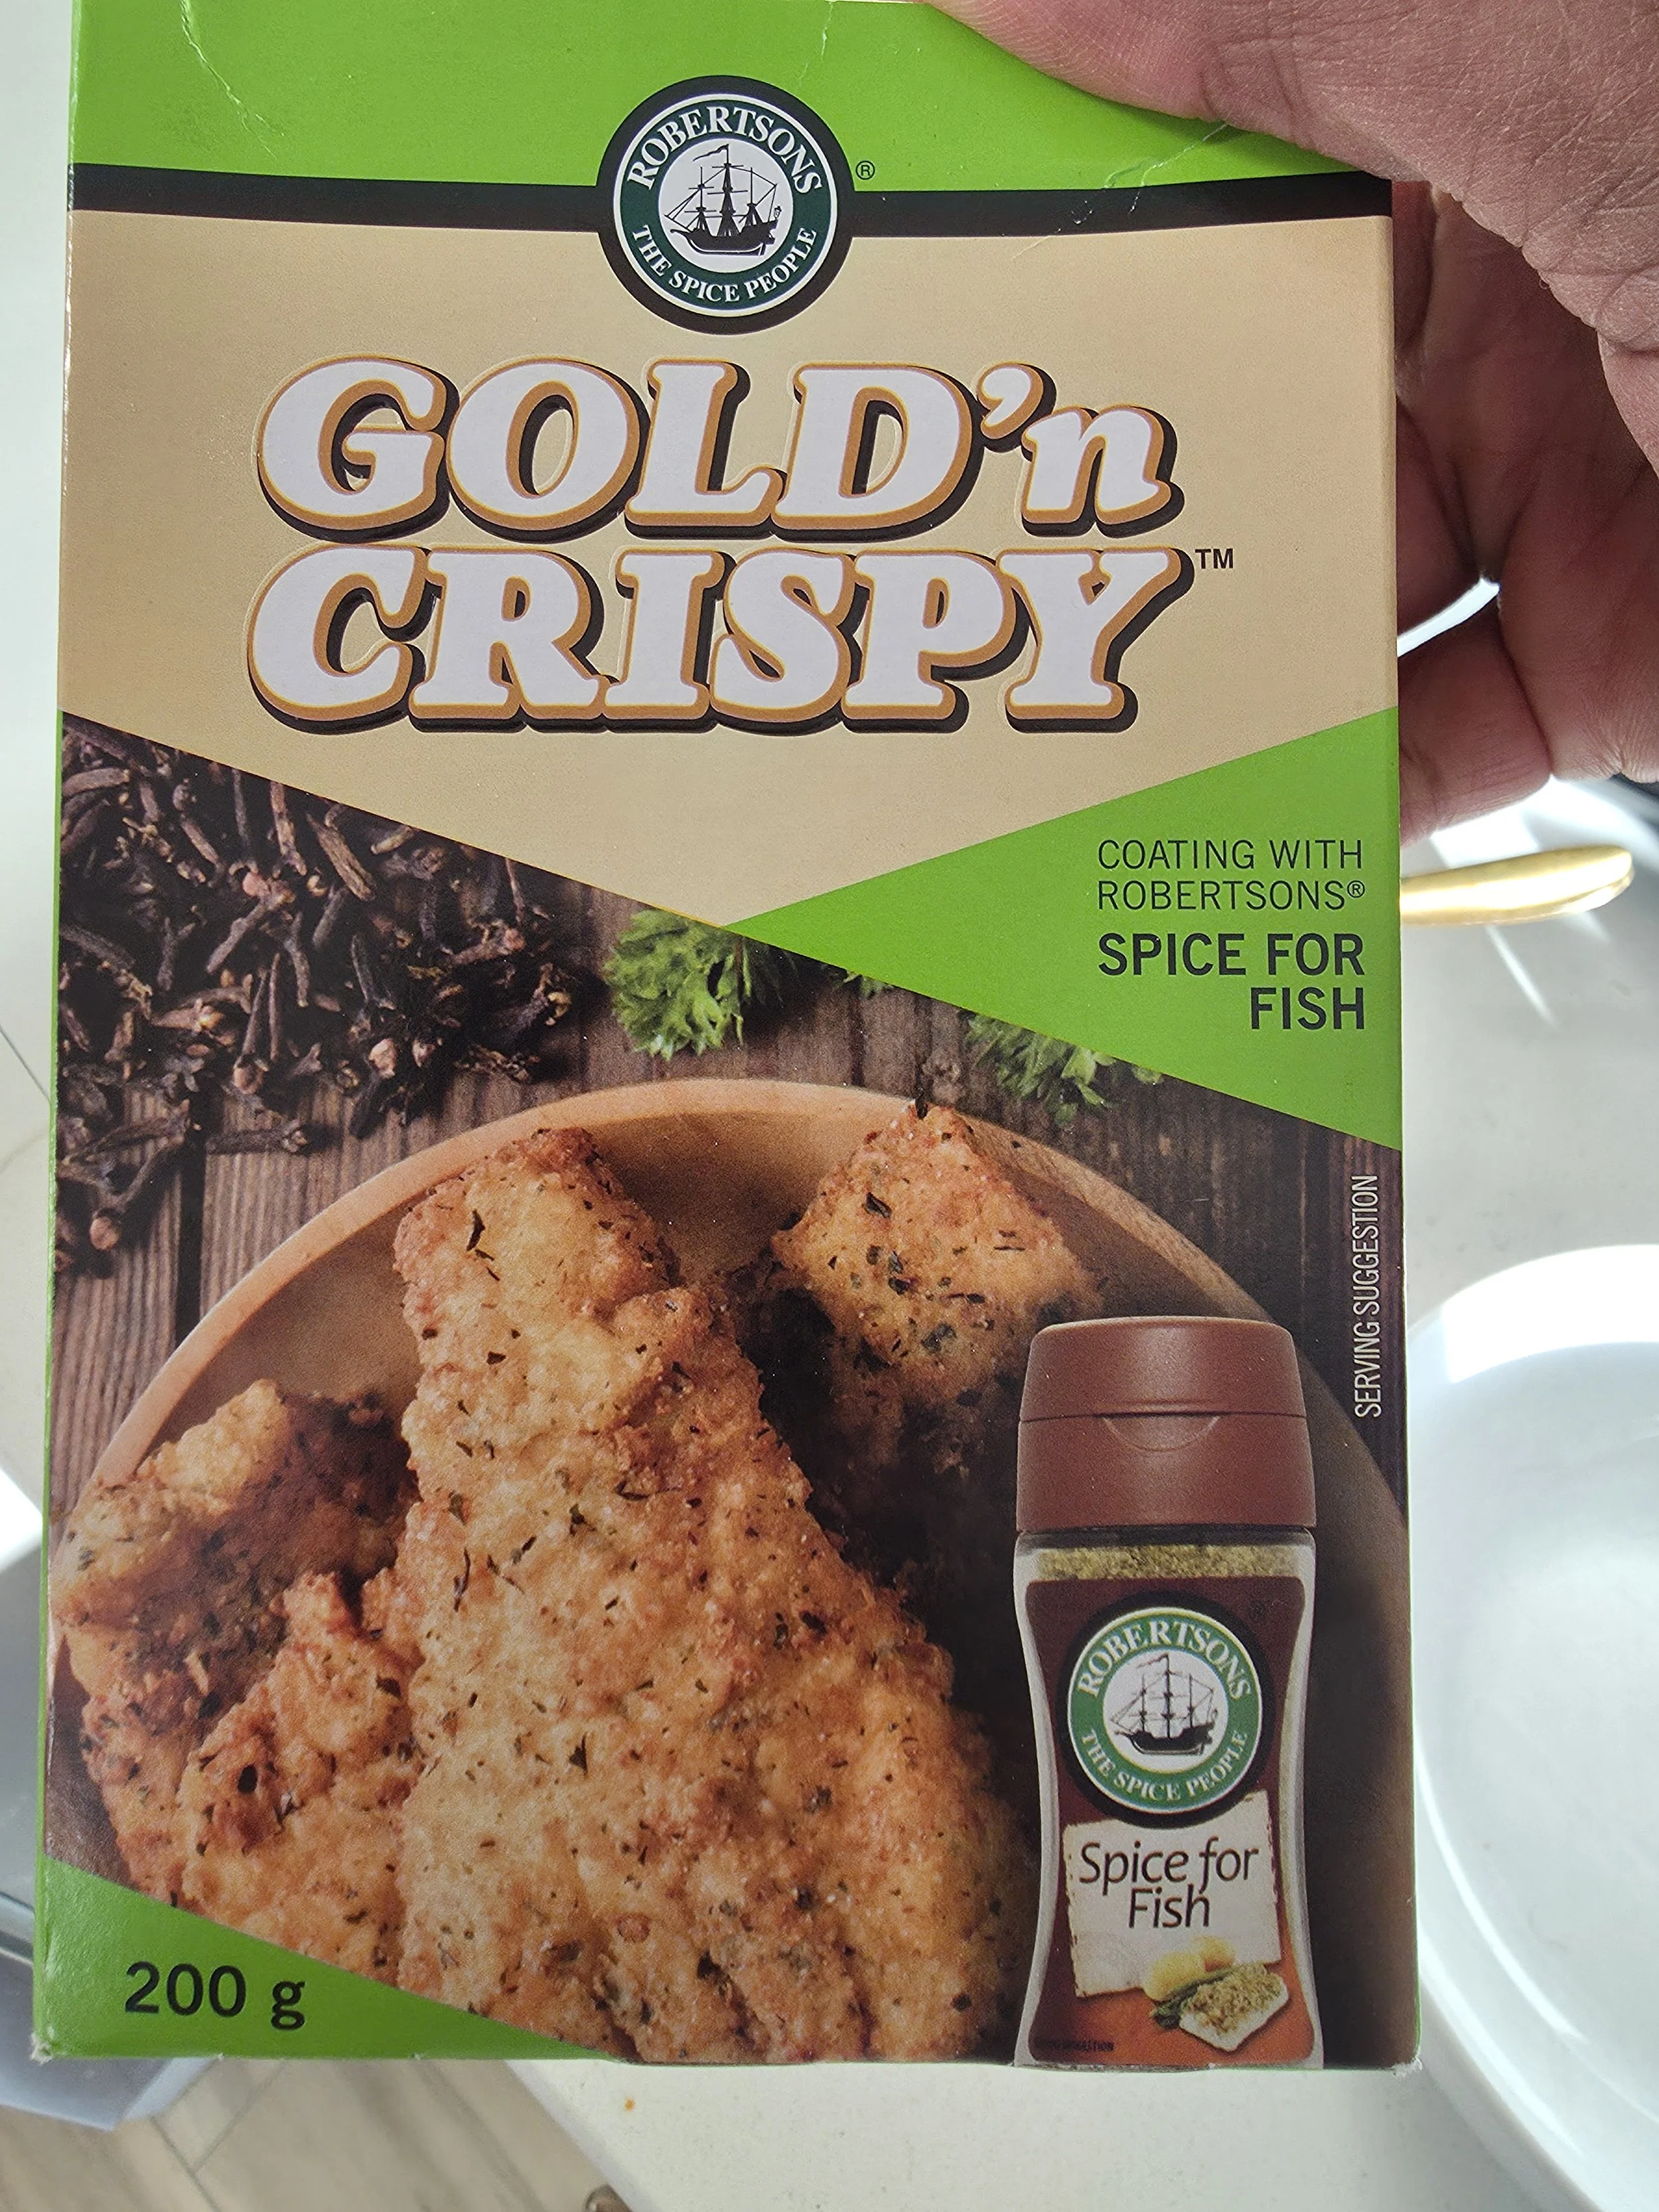
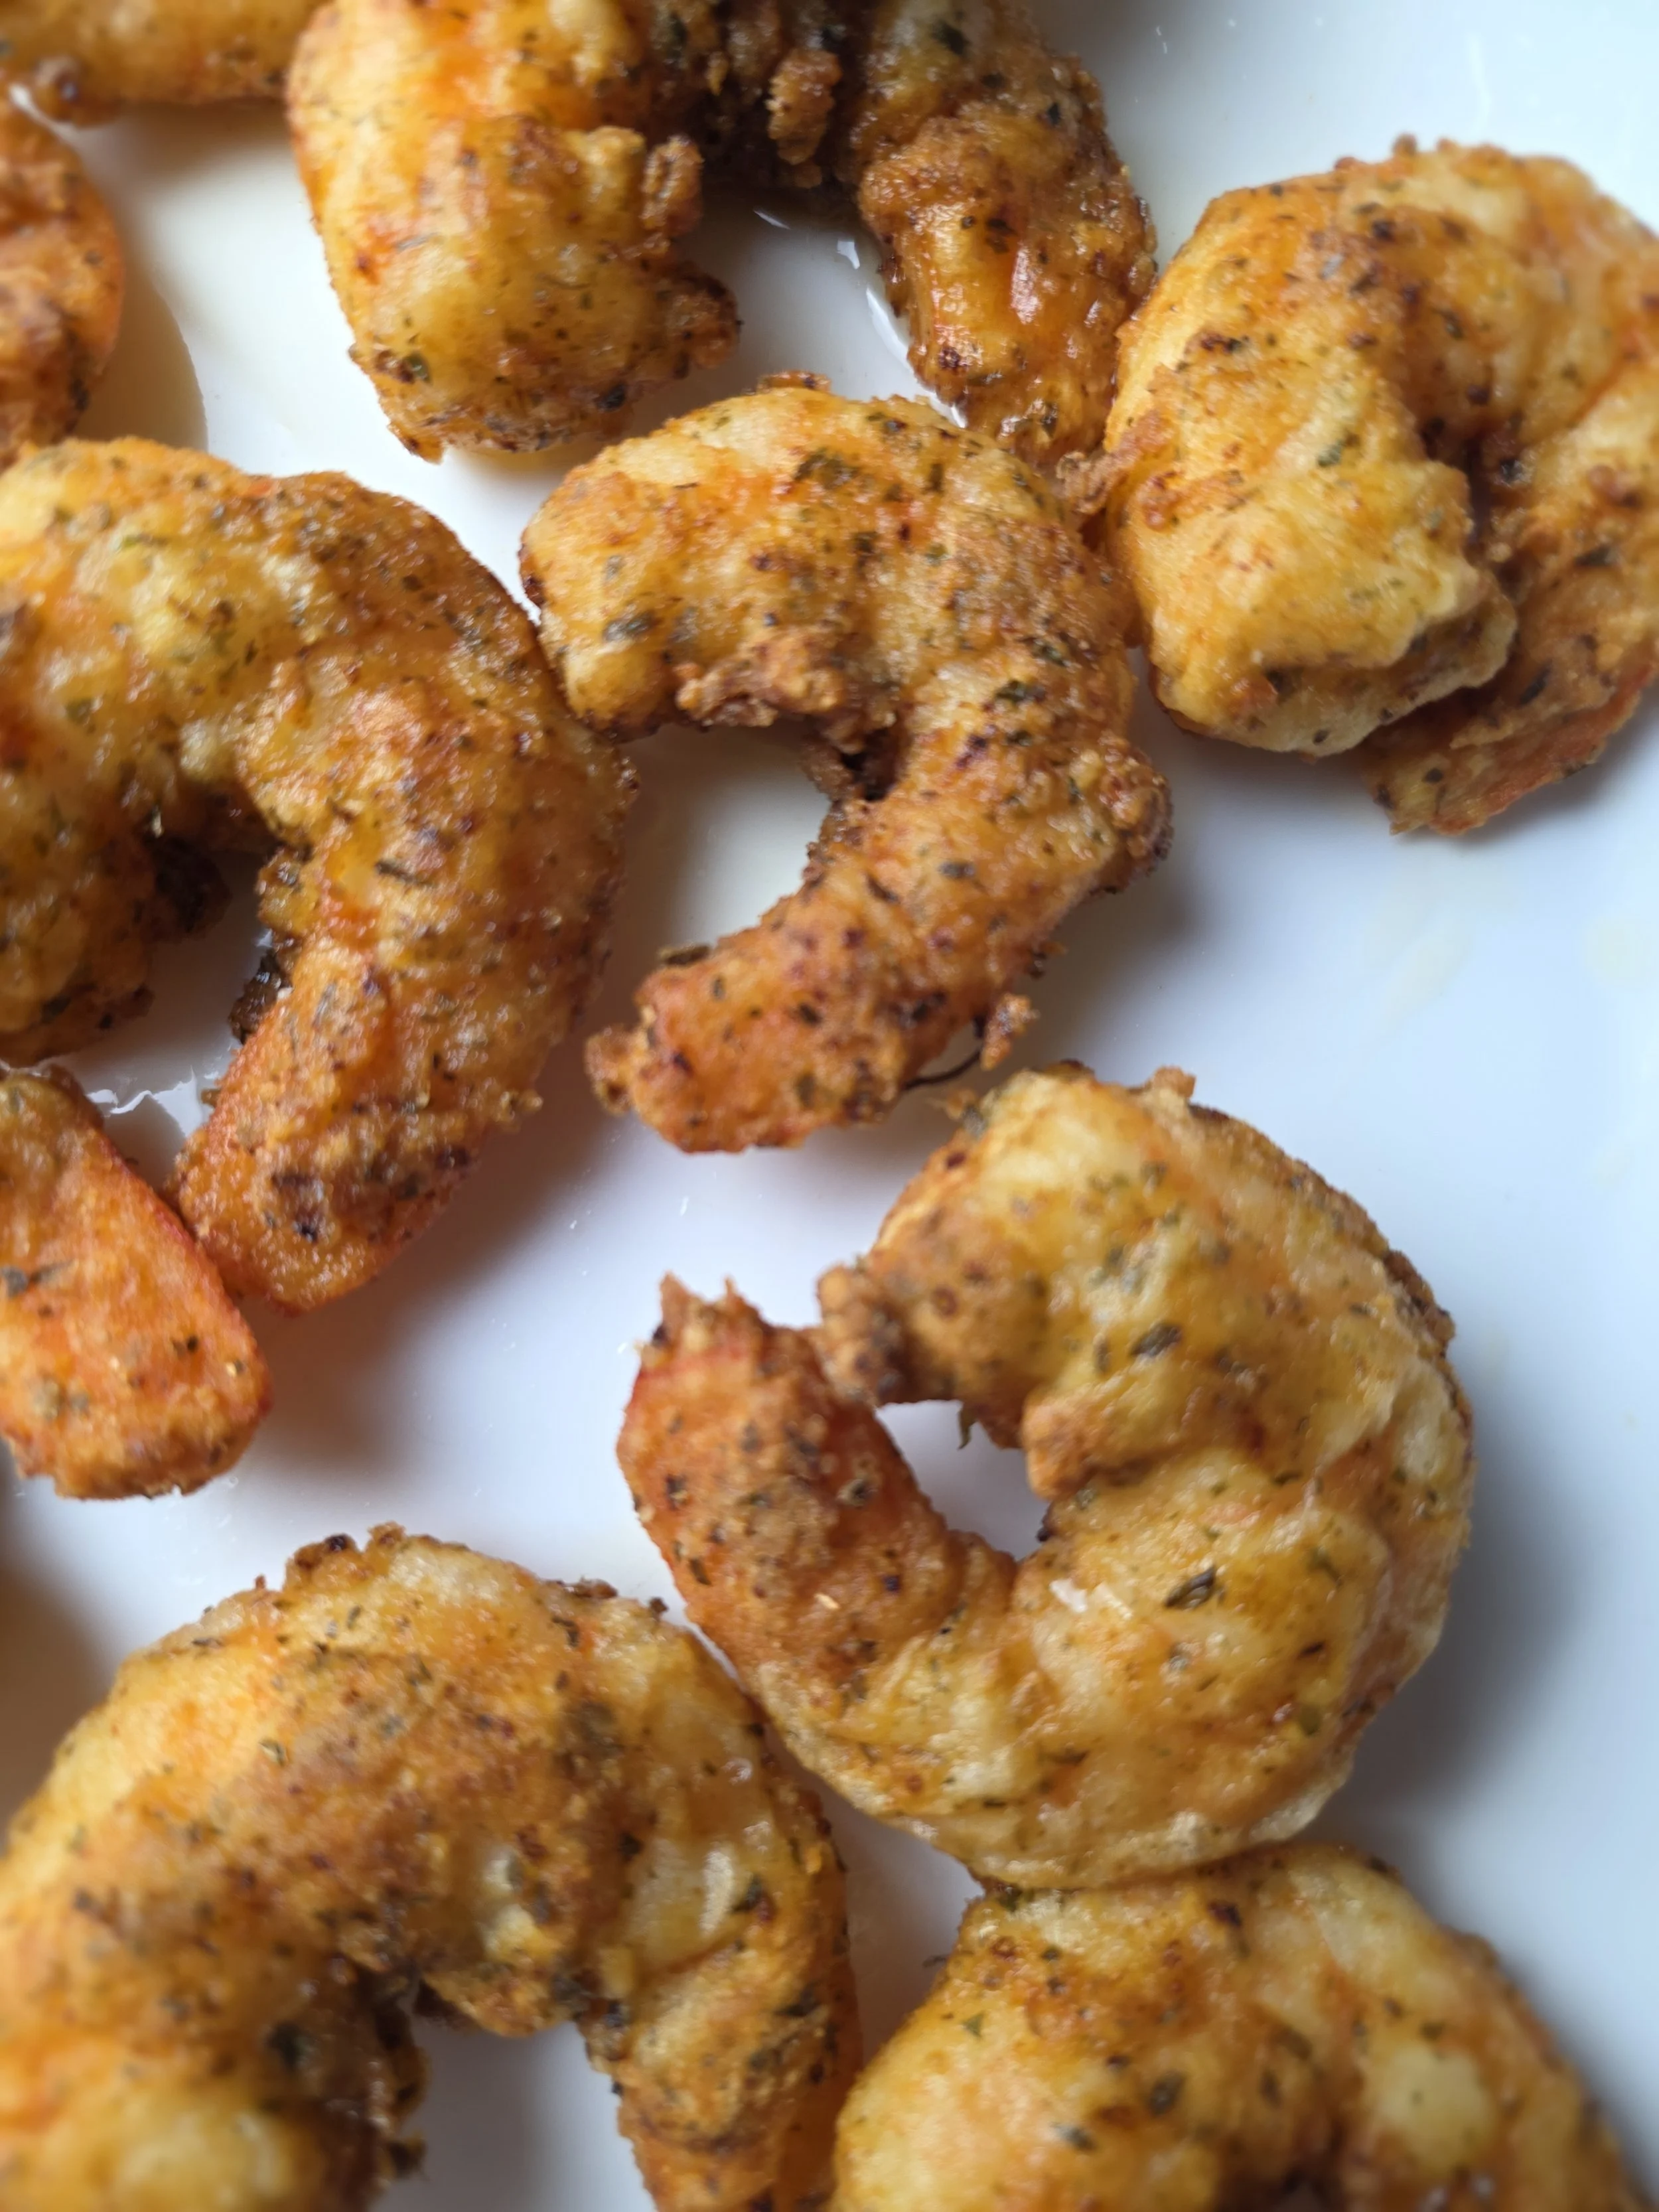
I started this recipe with a bunch of wilted basil I didn’t want to go to waste, and before I knew it, I also had some shrimp calling my name, and suddenly, shrimp tacos were born. Who needs an excuse to make these? I decided to try Robertsons Gold'n Crispy Fish Coating on the shrimp, usually meant for fillets, and it gave each bite a perfectly crunchy, umami-packed finish.
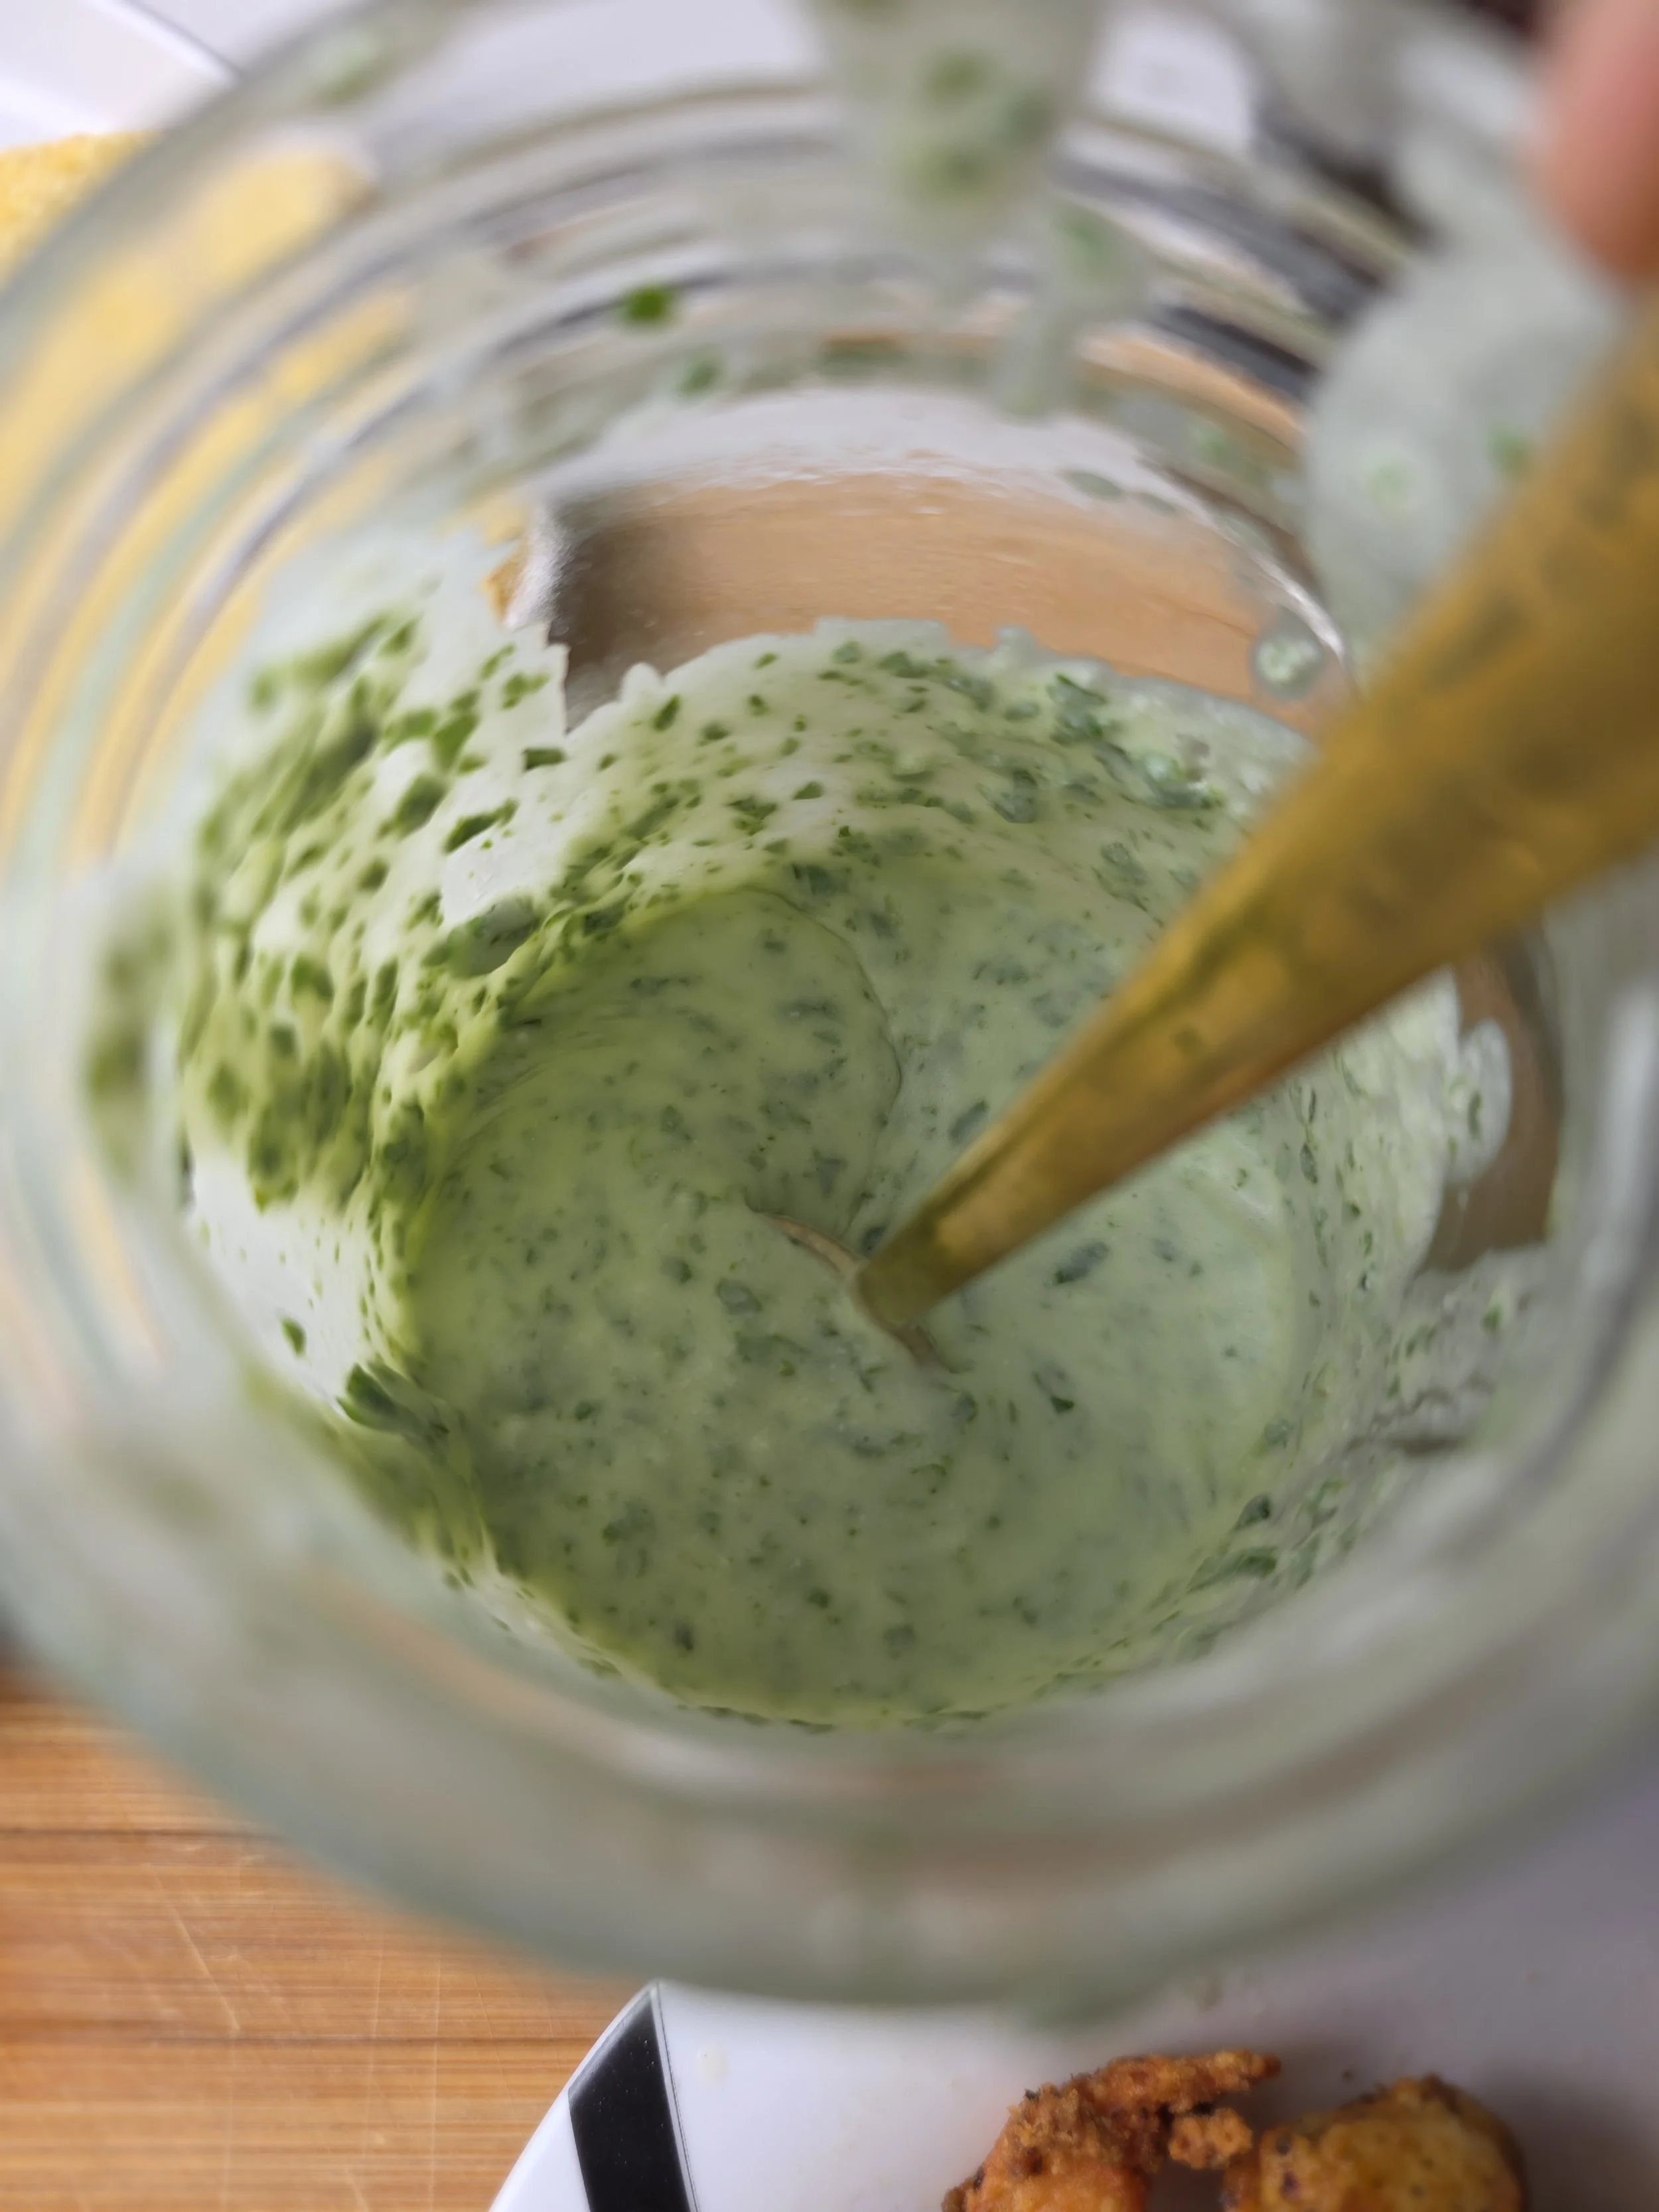
The real star is the coconut cream basil lime sauce. Coconut cream brings a smooth richness with a subtle sweetness, fresh basil adds a bright, slightly peppery herb note, and lime cuts through with a sharp citrus lift. Together they create a sauce that is creamy but fresh, balanced but bold, and the perfect complement to the crispy shrimp.
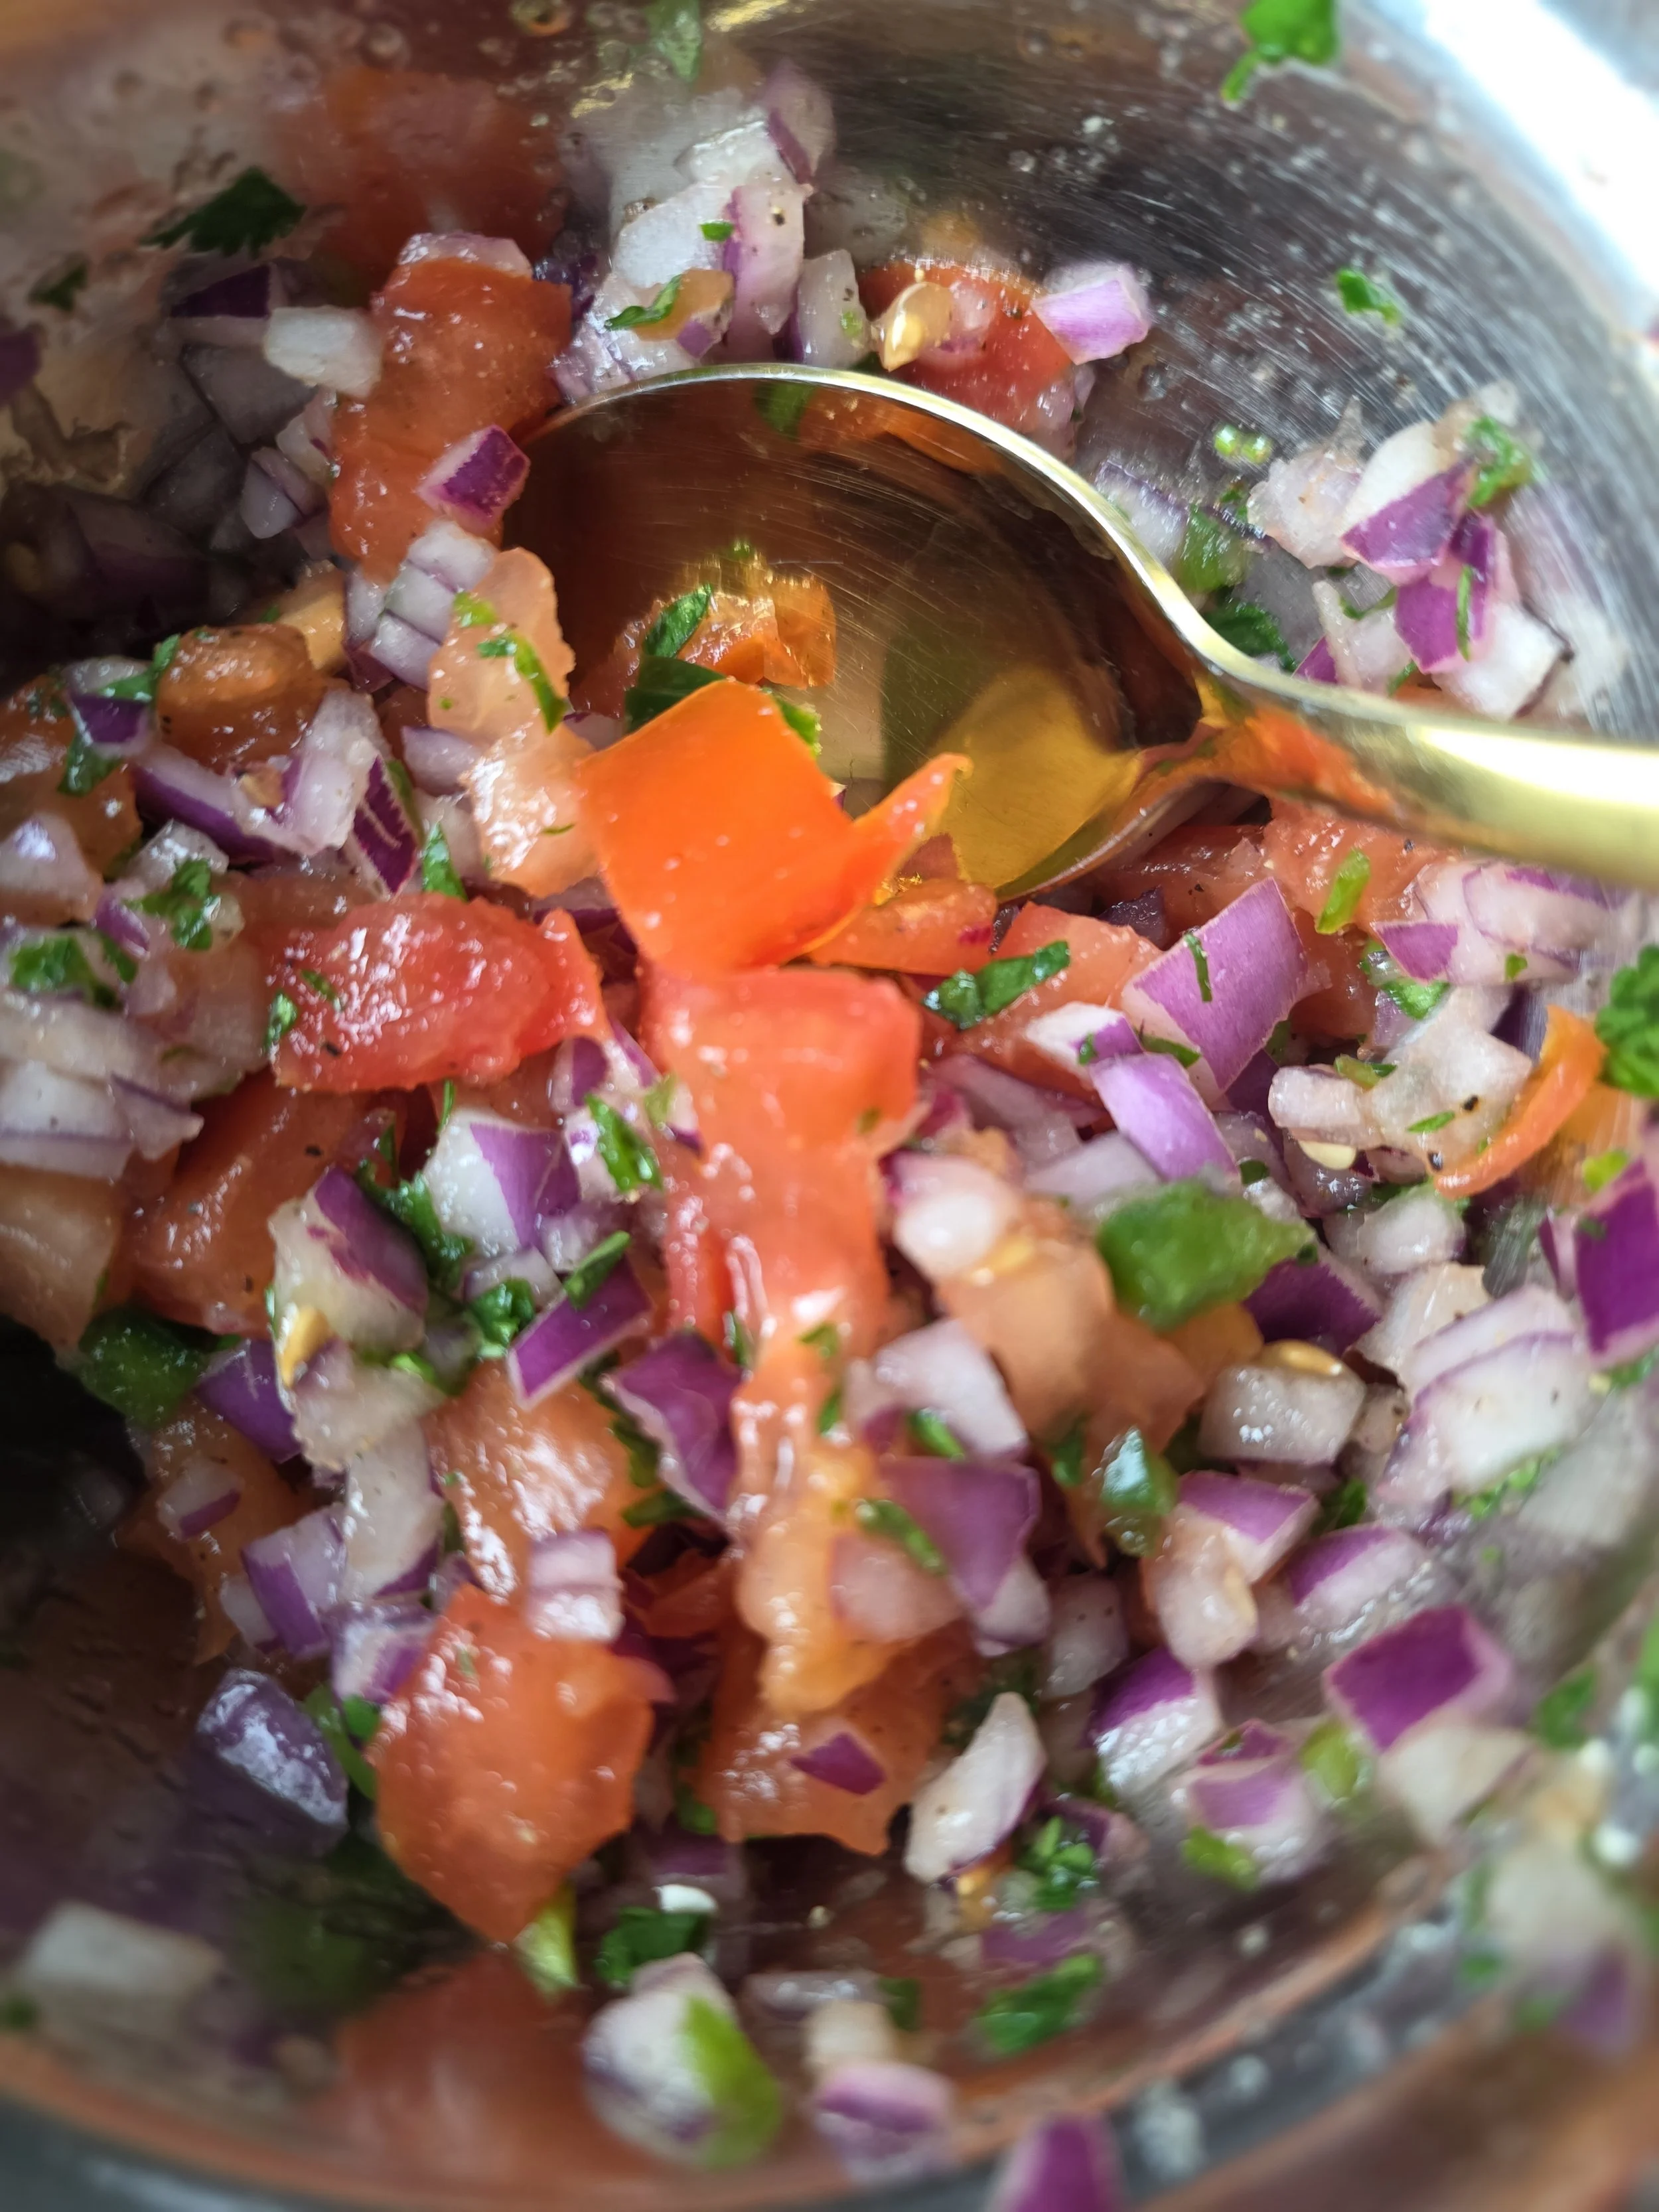
Layered with sliced avocado and fresh pico de gallo, these tacos are bursting with vibrant, irresistible flavor.
Shrimp tacos are one of those easy, no-fuss meals that work for lunch or dinner, and a good sauce really makes all the difference. It ties everything together and elevates a simple dish into something special.
DIY Crispy Coating for Shrimp
If you can’t track down Robertson’s Gold’n Crispy Fish Coating, no worries — you can make a crunchy coating at home. Just mix some all-purpose flour with a little cornstarch for extra crispness, then season with salt, black pepper, paprika, garlic powder, and a pinch of cayenne if you like a little kick. The cornstarch helps the shrimp get that perfect golden crunch, while the seasoning layers in flavor. It’s an easy swap that works just as well and keeps your tacos irresistibly crispy.


Coconut Lime Shrimp Tacos with Fresh Basil
Shrimp tacos finished with a creamy coconut basil lime sauce that steals the show. Fresh, herb-forward, and perfectly balanced with avocado and pico de gallo.
Ingredients
- 4 corn tortillas
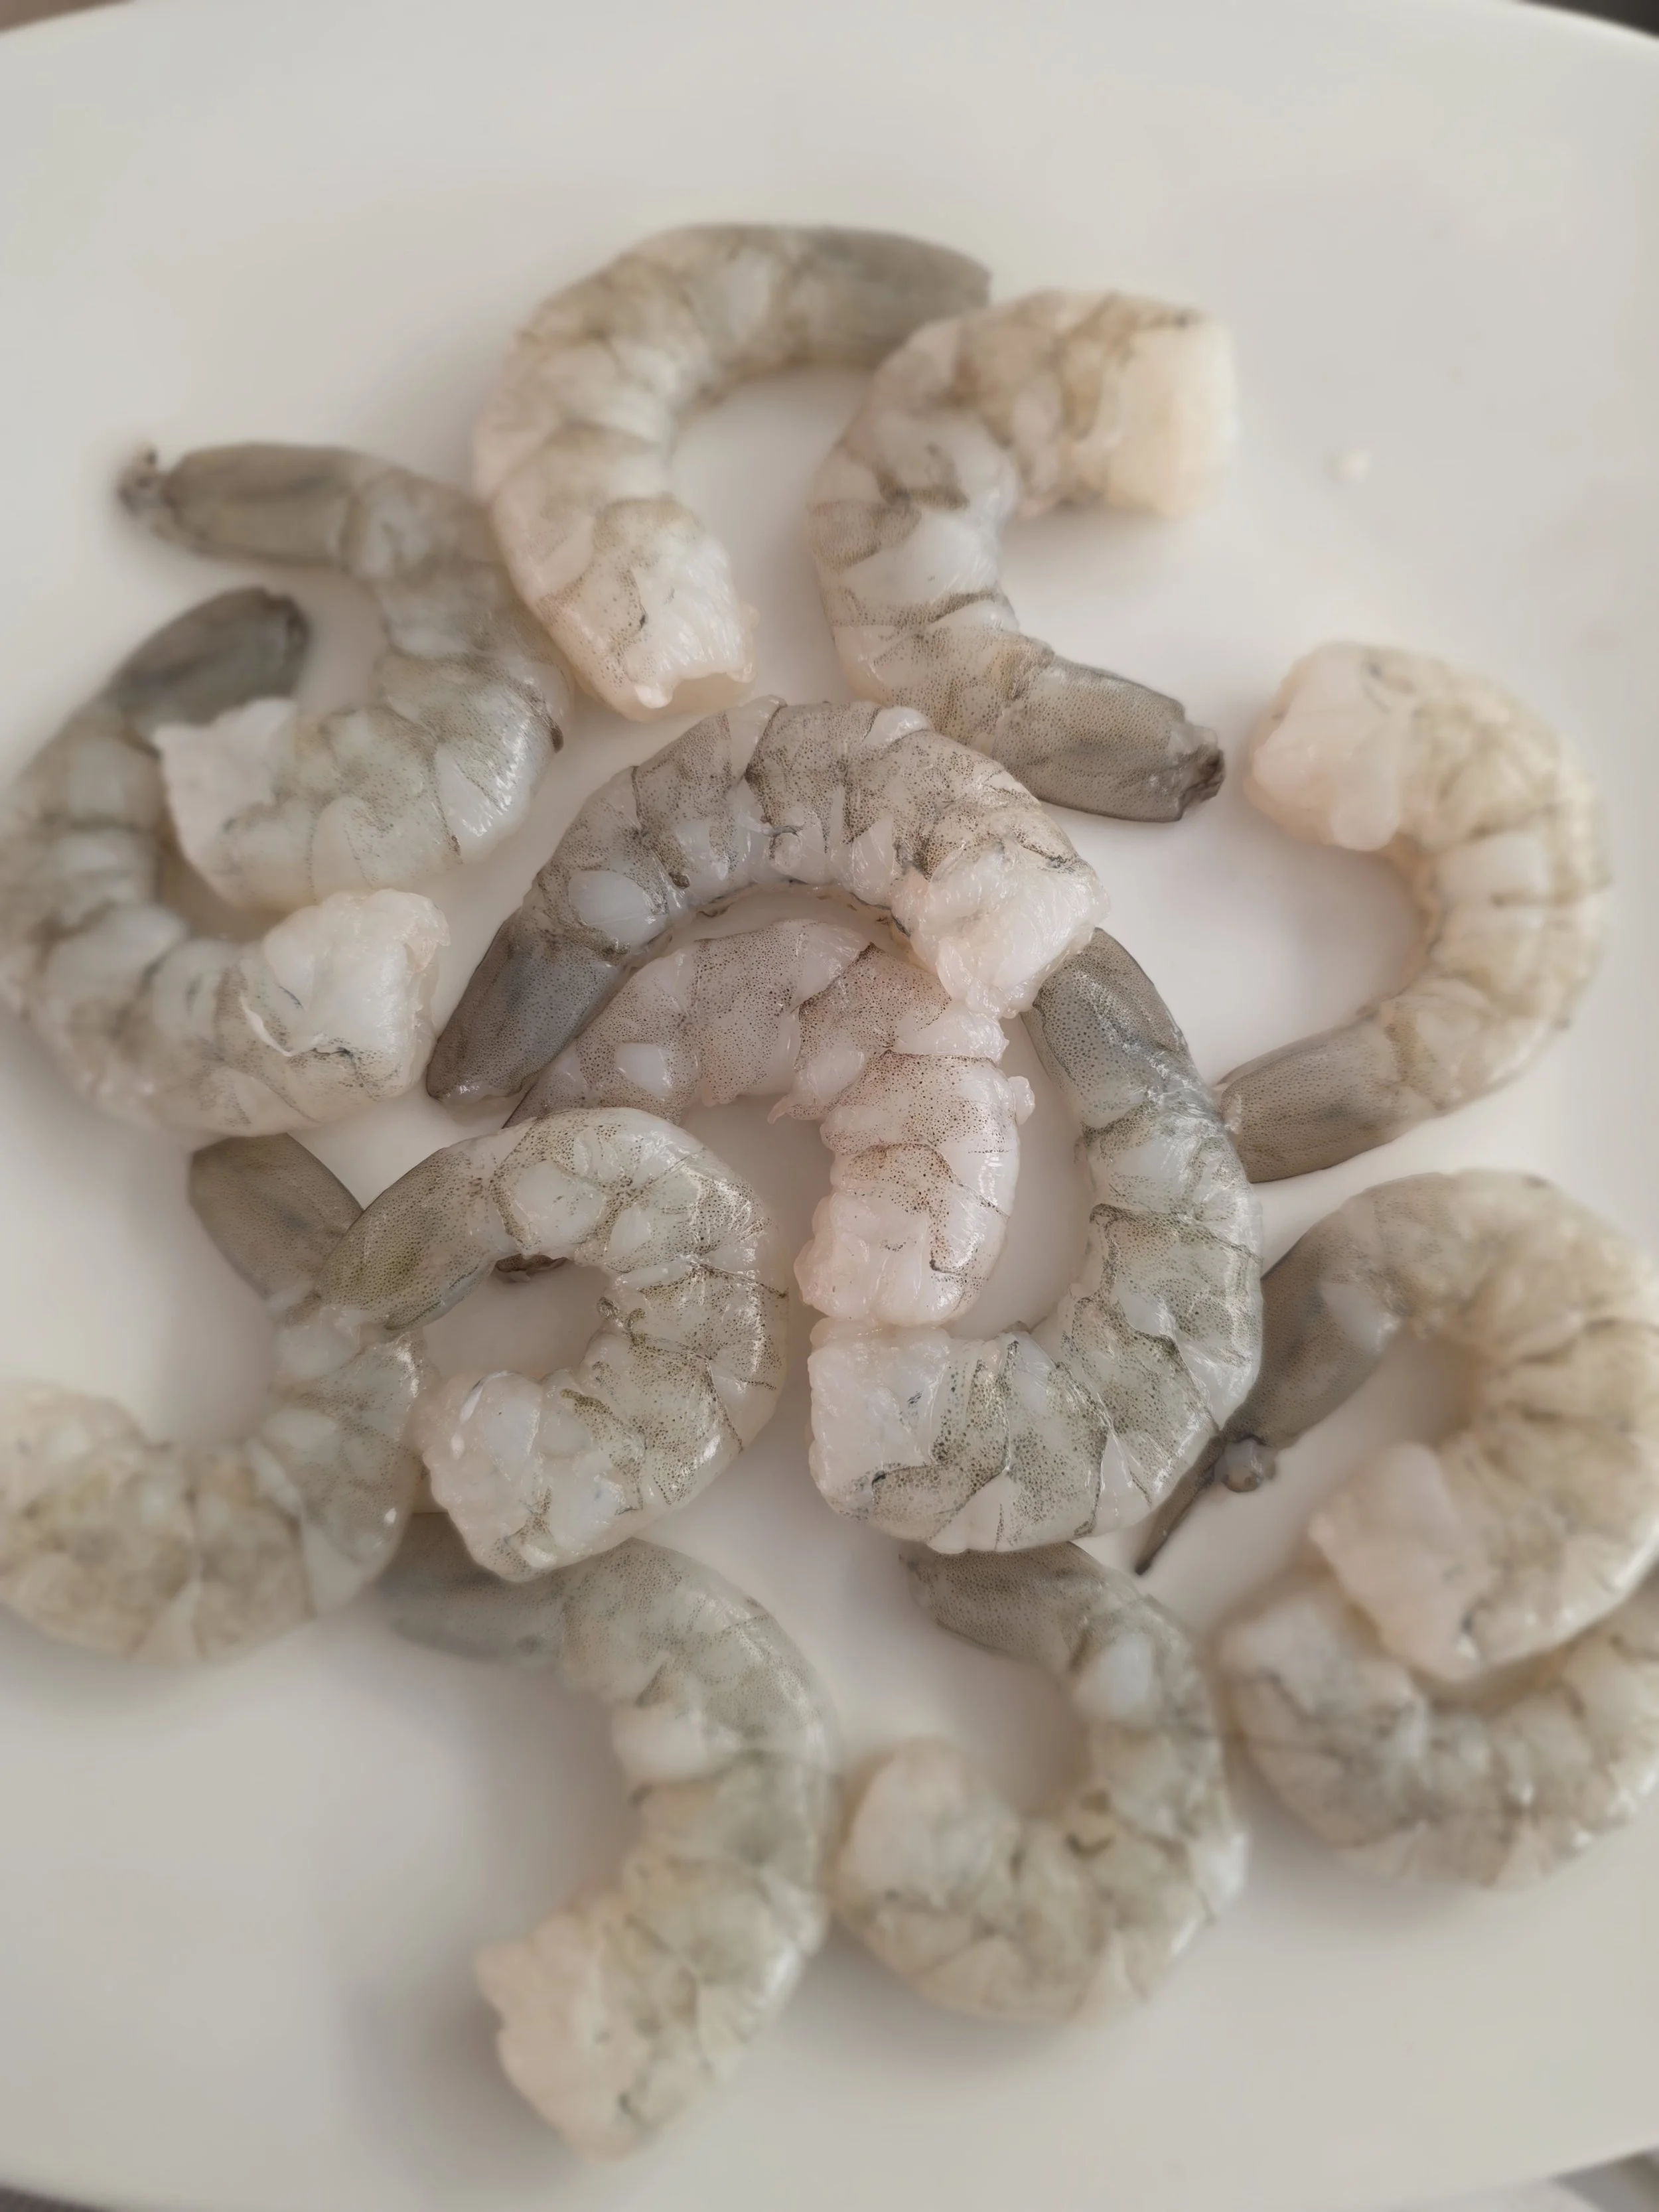
- 1/2 lb jumbo or large shrimp
- 1 cup Robertson’s Gold’n Crispy Fish Coating
- 1 egg, beaten
- 1 tsp Old Bay Seasoning (optional)
- Peanut oil (or another high-smoke point frying oil)
- 1–2 avocados, sliced
- Feta or goat cheese, for garnish
- Pico de Gallo:
- 2 Roma tomatoes, chopped
- 1/2 red onion, chopped
- 1/4 cup cilantro, chopped
- Juice of 1/2 lime
- Salt and pepper to taste
- Optional: diced jalapeño for a kick
- 1/2 cup fresh basil (even if slightly wilting)
- 5.4 oz coconut cream (1 small can)
- Juice of 1/2 lime (about 2 tbsp)
- 1 garlic clove
- 1 tbsp honey
- 1/2 tsp salt
- Zest of 1/2 lime
Instructions
- Prepare the Basil Coconut Lime Sauce:
- Remove basil leaves from stems and chop.
- In a food processor or small blender, combine basil, coconut cream, lime juice, garlic, honey, salt, and lime zest.
- Blend until smooth and creamy; small basil shards will remain, giving a fresh green tint. Taste and adjust seasoning.
- Cover and chill.
- Prepare Pico de Gallo:
- Combine chopped tomatoes, red onion, cilantro, lime juice, salt, pepper, and optional jalapeño. Chill until ready to serve.
- Prepare the Shrimp:
- Remove tails and pat shrimp dry.
- Set up a dredging station with beaten egg (seasoned with Old Bay, if using) and Robertson’s coating.
- Dip shrimp into the egg, then coat with the fish coating. Shake off excess and place on a clean plate. Repeat for all shrimp.
- Cook the Shrimp:
- Heat oil in a skillet or fryer to 350°F (175°C).
- Fry shrimp 2–3 minutes per side, until golden brown. Transfer to a paper towel-lined plate to drain.
- Assemble the Tacos:
- Warm corn tortillas.
- Layer shrimp, sliced avocado, pico de gallo, and basil coconut lime sauce.
- Top with feta or goat cheese and serve immediately.
Nutrition Facts
Calories
420Fat (grams)
28 gCarbs (grams)
23 gFiber (grams)
5 gSugar (grams)
5 gProtein (grams)
22 gI am not a certified nutritionist and any nutritional information on dontmissmyplate.com should only be used as a general guideline.
Harissa Chicken with Chermoula Sauce
Some recipes are born in your kitchen. Others follow you home from a restaurant and refuse to leave your mind.
I was inspired to make this after trying an unforgettable appetizer at Cordelia Fishbar on Valentine’s Day in DC. The chicken was extremely succulent, with perfectly crisped with skin-on goodness (breast? thigh? still debating), deeply savory, and served over a harissa-kissed yogurt that tied everything together. It didn’t taste marinated in harissa, but the warmth was there, subtle, layered, intentional.
So naturally, I did what any home cook on a flavor mission would do: I made it my own.
In my version, the chicken is marinated in harissa for bold depth. I used my often-neglected Ninja indoor grill and air fryer, and it delivered that perfect char and gentle smokiness that feels like summer, even when it’s not. And the real star? Chermoula.
If you’ve been following my kitchen journey, you already know: I’ve been championing chermoula for a while now. Think of it as North Africa’s answer to chimichurri—bright, herbaceous, alive. It reflects the Afro-fusion influences and close-to-my-roots flavors that continue shaping my evolution as a home cook. I’ve used it with croaker fish alongside peri peri and harissa, and it never disappoints.
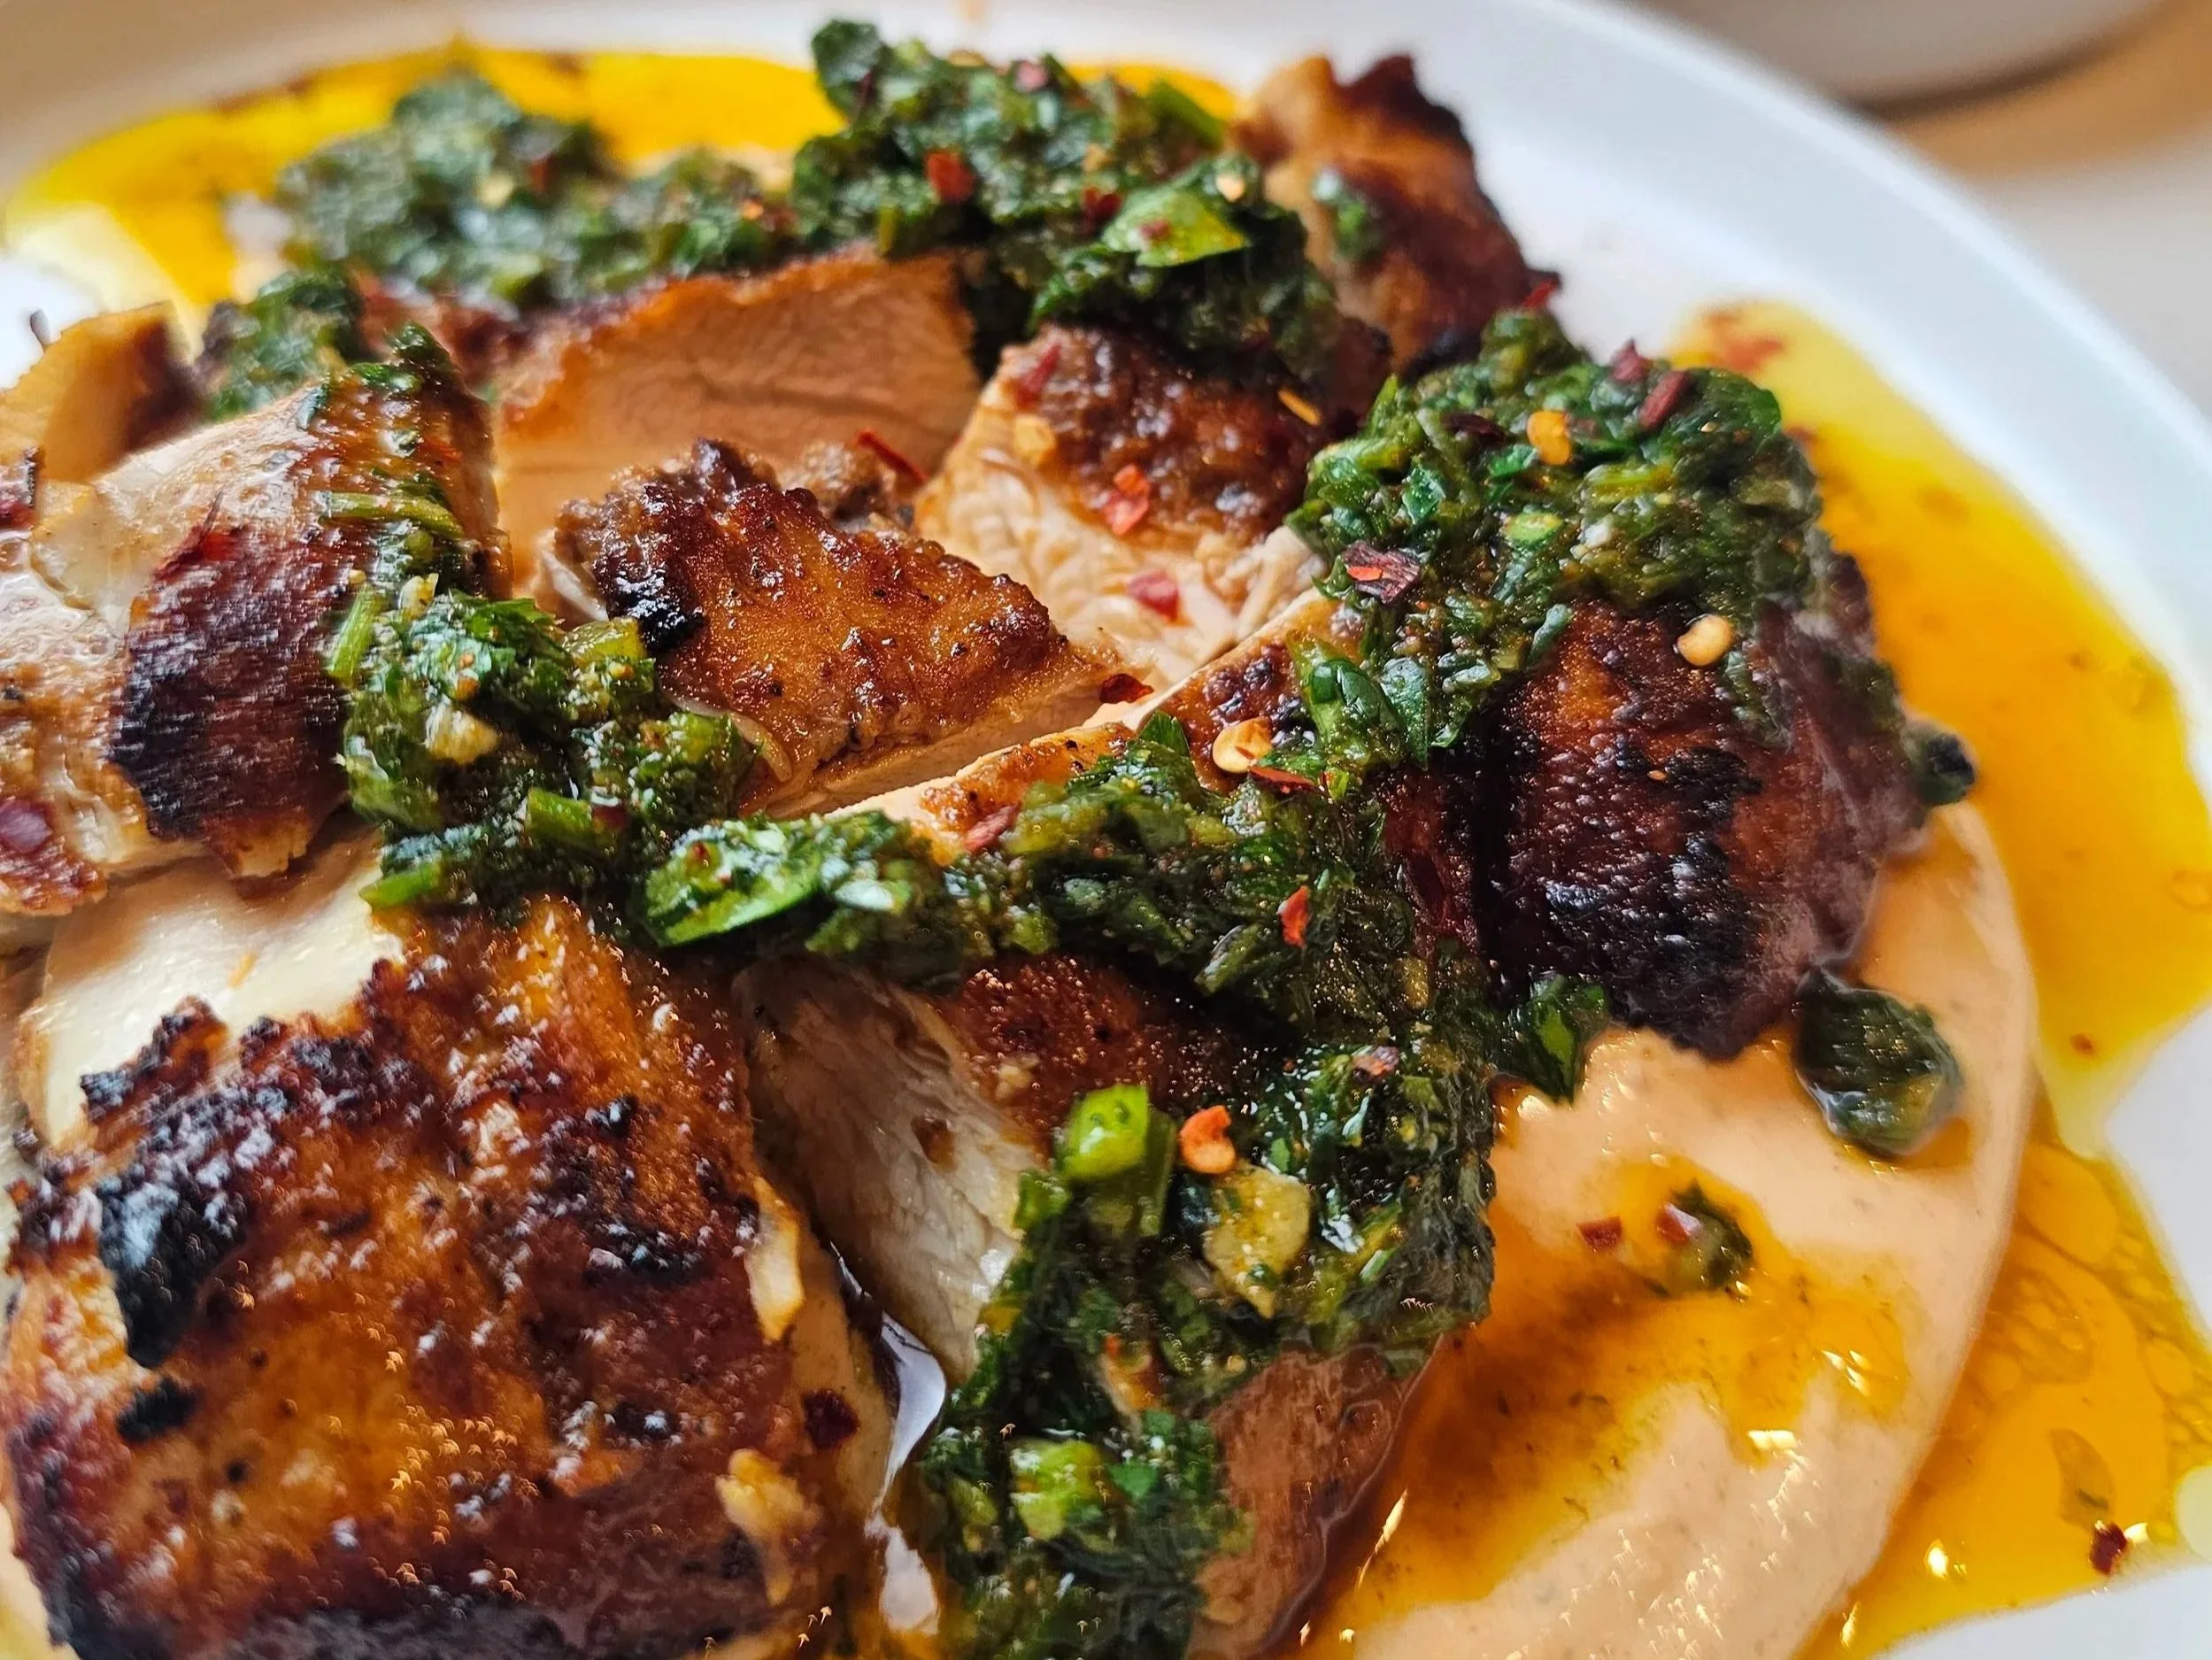
This dish is smoky, herbaceous, creamy, spicy, and fresh all at once. The kind of layered flavor that tastes like you planned ahead—even if you just wanted something impressive for dinner.

Harissa Chicken with Chermoula Sauce
Smoky grilled Harissa Chicken with creamy harissa yogurt and vibrant chermoula. Juicy, bold, and herb-forward, this North African–inspired dish serves 4 and is perfect for weeknight dinners or entertaining.
Ingredients
- 1 cup parsley, finely chopped
- ½ cup cilantro, finely chopped
- 3 garlic cloves, minced
- 1 jalapeño, finely diced
- ½ tsp smoked paprika
- ½ tsp ground coriander
- ½ tsp cumin
- ½ tsp salt
- ¼ tsp black pepper
- 2–4 tbsp olive oil
- 4 large chicken thighs (skinless, bone-in)
- 1.5 tbsp harissa
- 3–4 tbsp olive oil
- ½ tsp garlic powder
- ½ tsp oregano
- ½ tsp cumin
- 1 tsp chicken seasoning
- ½ tsp smoked paprika
- ½ tsp black pepper
- ½ tsp onion powder
- Juice of ½ lemon
- 1 tbsp sesame oil
- 2/3 cup plain Greek yogurt
- Chilli flakes (optional)
Instructions
- Chermoula: Mix parsley, cilantro, garlic, jalapeño, spices, and olive oil. Set aside. Optional: warm slightly before serving.
- Harissa Marinade and Yogurt: In a bowl, combine harissa, olive oil, garlic powder, oregano, chicken seasoning, smoked paprika, black pepper, onion powder, lemon juice, and sesame oil. Reserve 1–2 tbsp and stir into Greek yogurt; refrigerate for yogurt sauce. Coat the chicken in the remaining marinade and refrigerate for at least 1 hour. If you are pressed for time, 30 minutes works, and overnight will give the deepest flavor.
- Grill Chicken: Preheat grill to medium. Pat chicken dry. Grill 7 minutes per side (14 minutes total) until internal temperature reaches 165°F. Rest 5 minutes, then cut into squares.
- Assemble: Spoon harissa yogurt on plates, add grilled chicken, top with chermoula, and sprinkle chili flakes if desired.
Notes
- Pat chicken dry for better char; fresh lemon brightens the dish; chermoula can be extra sauce.
Nutrition Facts
Calories
460Fat (grams)
32 gCarbs (grams)
6 gFiber (grams)
1 gSugar (grams)
2 gProtein (grams)
38 gI am not a certified nutritionist and any nutritional information on dontmissmyplate.com should only be used as a general guideline.

Fluffy Macademia Nut Pancakes with Honey Rooibos Syrup
Some breakfasts tell a story before you even take a bite. Macadamia nuts, known for their rich, buttery texture and creamy crunch, may be native to Australia and famously grown in Hawaii, but today South Africa is one of the world’s largest producers and exporters. Their subtle sweetness and velvety bite instantly elevate a simple pancake.
I’ve loved macadamias for years, especially in white chocolate macadamia cookies (yes, the classic Subway version was a longtime favorite). There’s something about that creamy, slightly soft crunch against sweetness that just works. Bringing that same comfort into pancakes felt natural.
For the syrup, I leaned into rooibos tea, a naturally caffeine-free red tea grown exclusively in South Africa’s Cederberg region. As the world’s leading producer and exporter of rooibos, South Africa has made this smooth, gently honeyed tea a global staple. Its warm, almost vanilla-like notes pair beautifully with honey and citrus.
That’s where the orange zest comes in. Bright citrus cuts through the richness of the nuts and butter, lifting the entire dish so it doesn’t feel heavy. A whipped honey butter adds an airy, creamy finish — lighter than a pat of cold butter and easier to melt into every fluffy layer. The result is balanced: nutty, fragrant, lightly sweet, and vibrant all at once.
Together, creamy macadamias and aromatic rooibos transform everyday pancakes into something globally inspired, nostalgic, and perfect for a slow weekend morning.


Fluffy Macademia Nut Pancakes with Honey Rooibos Syrup
Fluffy macadamia nut pancakes topped with a rich honey-rooibos syrup and whipped honey-butter. Light, nutty, and citrus-kissed, these pancakes are perfect for breakfast, brunch, or a special treat. Easy to make and packed with flavor, they’re a modern twist on classic pancakes with a touch of gourmet flair.
Ingredients
- 1/2 cup butter (1 stick, room temperature)
- 2–3 tbsp honey
- 1 tsp orange zest
- 1–2 drops vanilla extract
- Pinch fo salt
- 1/2 cup honey
- 2-3 tbsp strongly brewed rooibos tea (loose leaf or 2 tea bag)
- 2 tsp orange juice
- Pinch of salt
- 1 1/2 cups all-purpose flour
- 2 tsp baking powder
- 1/2 tsp baking soda
- 1 tbsp sugar
- 1 1/4 cup buttermilk milk
- 1 egg
- 3 tbsp melted butter
- 1/2 tsp vanilla extract
- 1/2 cup macadamia nuts
Instructions
- Whip butter until fluffy with electric mixer.
- Gradually add honey and mix.
- Stir in orange zest and vanilla.
- Chill until ready to serve, then scoop on top of pancakes when serving.
- Warm honey in a small saucepan.
- Stir in rooibos tea until fully dissolved and syrup reaches desired strength. If you want the syrup thicker, use less honey.
- Take off heat and stir in the orange juice and pinch of salt. Set aside.
- In a bowl, whisk together the flour, baking powder, sugar, and salt.
- In another bowl, combine the milk, egg, and melted butter.
- Gently fold the wet ingredients into the dry ingredients until just combined — a few lumps are okay because overmixing can make the pancakes tough. Set the batter aside and prepare the syrup.
- Heat a non-stick pan over medium heat.
- Fold the macadamia nuts into the batter just before cooking to prevent them from sinking to the bottom and to keep them crunchy.
- Scoop ¼–⅓ cup of batter per pancake onto the pan.
- Cook for 2–3 minutes per side, or until bubbles form on the surface and the edges and bottom are golden brown.
- Serve hot with syrup and whipped honey-butter.
Notes
- Macadamia nuts: Lightly toast in a dry pan to enhance flavor if not roasted.
- Pancake batter: Don’t overmix; lumps keep pancakes fluffy.
- Syrup: Adjust rooibos strength to taste; thicker syrup clings better.
- Serving ideas: Great for breakfast, brunch, or weekend treats. Add fresh fruit for extra flair.
Nutrition Facts
Calories
380Fat (grams)
17 gCarbs (grams)
48 gFiber (grams)
2 gProtein (grams)
6 gSugar (grams)
20 gI am not a certified nutritionist and any nutritional information on dontmissmyplate.com should only be used as a general guideline.

Lucky Charms and Kale Pancakes
St. Patrick’s Day is the perfect excuse to make breakfast a little more magical, and a lot more green. These Lucky Charms and Kale Pancakes are bright, festive, and secretly packed with greens. Yes, really.
The kale blends right into the batter, giving the pancakes their vibrant color without overpowering the flavor. Kids see green pancakes and marshmallow cereal on top. You know they’re getting a boost of leafy greens to start the day. Everybody wins.
They’re thin, tender, lightly sweet, and perfect for March celebrations, but honestly? They work all year long as a fun weekend breakfast. Whether you’re celebrating St. Patrick’s Day or just trying to sneak in more veggies before school, these pancakes make healthy feel festive.


Lucky Charms and Kale Pancakes
Festive green kale pancakes blended smooth and topped with Lucky Charms for a fun St. Patrick’s Day breakfast. Lightly sweet, kid-friendly, and secretly packed with leafy greens, perfect for brunch or weekend mornings.
Ingredients
- 2 ½ cups all-purpose flour
- 4 large eggs
- 6 cups chopped fresh kale
- 1 ½ cups Irish cream–style half-and-half (non-alcoholic)
- ¼ cup maple syrup or sugar
- 2 tsp vanilla extract
- 1 tsp baking powder (for fluffiness)
- ½ tsp baking soda (optional, for extra lift if you have an acidic liquid)
- 1 tsp salt
- Butter for cooking
- Lucky Charms cereal and whipped cream, for garnish
Instructions
- Wash and chop kale into small pieces so it mixes evenly into the batter.
- In a large bowl, whisk together eggs, half-and-half, maple syrup, and vanilla.
- In a separate bowl, mix flour, baking soda, salt, and optional baking powder.
- Gradually add dry ingredients to wet ingredients, stirring until just combined. Fold in chopped kale. Batter will be thick. Optional: For a smoother batter, pulse the mixture briefly in a blender or food processor.
- Heat a nonstick or cast-iron skillet over medium heat. Add a small pat of butter. Spoon batter onto the skillet, spreading slightly. Cook until bubbles form on top, then flip carefully. Cook another 2–3 minutes until golden and cooked through. Adjust heat if needed for thick pancakes.
- Stack pancakes, top with Lucky Charms and serve plain with butter, maple syrup, or whipped cream.
Notes
- This batter is hearty and dense because of the kale—don’t worry, that’s intentional!
- Baking powder is necessary for rise.
- Optional buttermilk swap:
- Replace up to ½ cup of the half-and-half with buttermilk → add ½ teaspoon baking soda.
- Replace all 1 ½ cups of the half-and-half with buttermilk → add 1 ½ teaspoons baking soda.
- Flour substitutions: You can replace up to ½ cup of all-purpose flour with cake flour for a slightly lighter texture.
Nutrition Facts
Calories
450Fat (grams)
16 gCarbs (grams)
65 gFiber (grams)
6 gSugar (grams)
20 gProtein (grams)
15 gI am not a certified nutritionist and any nutritional information on dontmissmyplate.com should only be used as a general guideline.
3 Bold Sauces for Quick Fish and Chicken Meals
Tired of the same old dinner routine? It’s time to awaken your taste buds with bold African flavors that transform ordinary fish and chicken into extraordinary meals. Enter Chermoula, Harissa, and Peri Peri — three iconic pan sauces that bring heat, herbs, and zest to your plate.
What These Sauces Do for Your Food
Each sauce isn’t just a topping — it’s a flavor powerhouse that enhances the natural qualities of your fish, chicken, or even vegetables, making every bite a journey.
Chermoula: Fresh, Herbal, and Bright
Chermoula works wonders with delicate proteins like fish, thanks to its fresh herbs and citrus that brighten and complement rather than overpower. When paired with chicken, it adds a vibrant, zesty lift that cuts through the meat’s richness, creating balance and freshness.
On fish: It enhances the ocean-fresh taste while adding an aromatic herbal punch. Think grilled or pan-seared fish with that perfect tangy finish.
On chicken: It adds freshness and complexity, making roast or grilled chicken feel light, fragrant, and irresistibly flavorful.
Harissa: Smoky Heat That Builds Depth
Harissa’s smoky, spicy notes are ideal for heartier proteins like chicken. It adds warmth and complexity, creating a deep, layered flavor that intensifies with cooking. For fish, it’s a bold flavor partner that can stand up to richer, fattier varieties like salmon or mackerel without overwhelming them.
On chicken: Harissa creates a smoky, fiery crust that’s perfect for grilling or roasting — your taste buds will thank you for the kick.
On fish: It adds a punchy spice layer, especially great with oily fish, giving them a fiery upgrade that’s rich and vibrant.
Peri Peri: Tangy, Fiery, and Versatile
Peri Peri’s bright acidity and fiery chilies make it a versatile champion for both fish and chicken. The lemon and vinegar notes cut through fat and protein, making it ideal for grilled or pan-fried dishes.
On chicken: It creates that classic fiery, tangy glaze that caramelizes beautifully on the grill, keeping the meat juicy with a spicy zing.
On fish: Perfect for firm, meaty fish like swordfish or tuna, Peri Peri adds a zesty heat that wakes up every bite without masking the natural flavor.
How to Make These Sauces at Home
Chermoula: Blend fresh cilantro, parsley, garlic, lemon juice, olive oil, cumin, and coriander until smooth.
Harissa: Roast red peppers, chili, and garlic; blend with smoked paprika, cumin, coriander, and olive oil for a smoky paste.
Peri Peri: Mix African bird’s eye chilies (or serranos), garlic, lemon juice, vinegar, olive oil, and herbs into a tangy, spicy sauce.
Why These Sauces Matter
These sauces aren’t just add-ons — they bring life to your dishes. They brighten, spice, or deepen flavors, making even the simplest weeknight meal memorable. Plus, they’re easy to prepare and keep in your fridge for an instant upgrade anytime.
Ready to spice up your fish and chicken dinners?
Try these African-inspired sauces for a quick, bold flavor boost that will have you rethinking what’s possible in your kitchen.


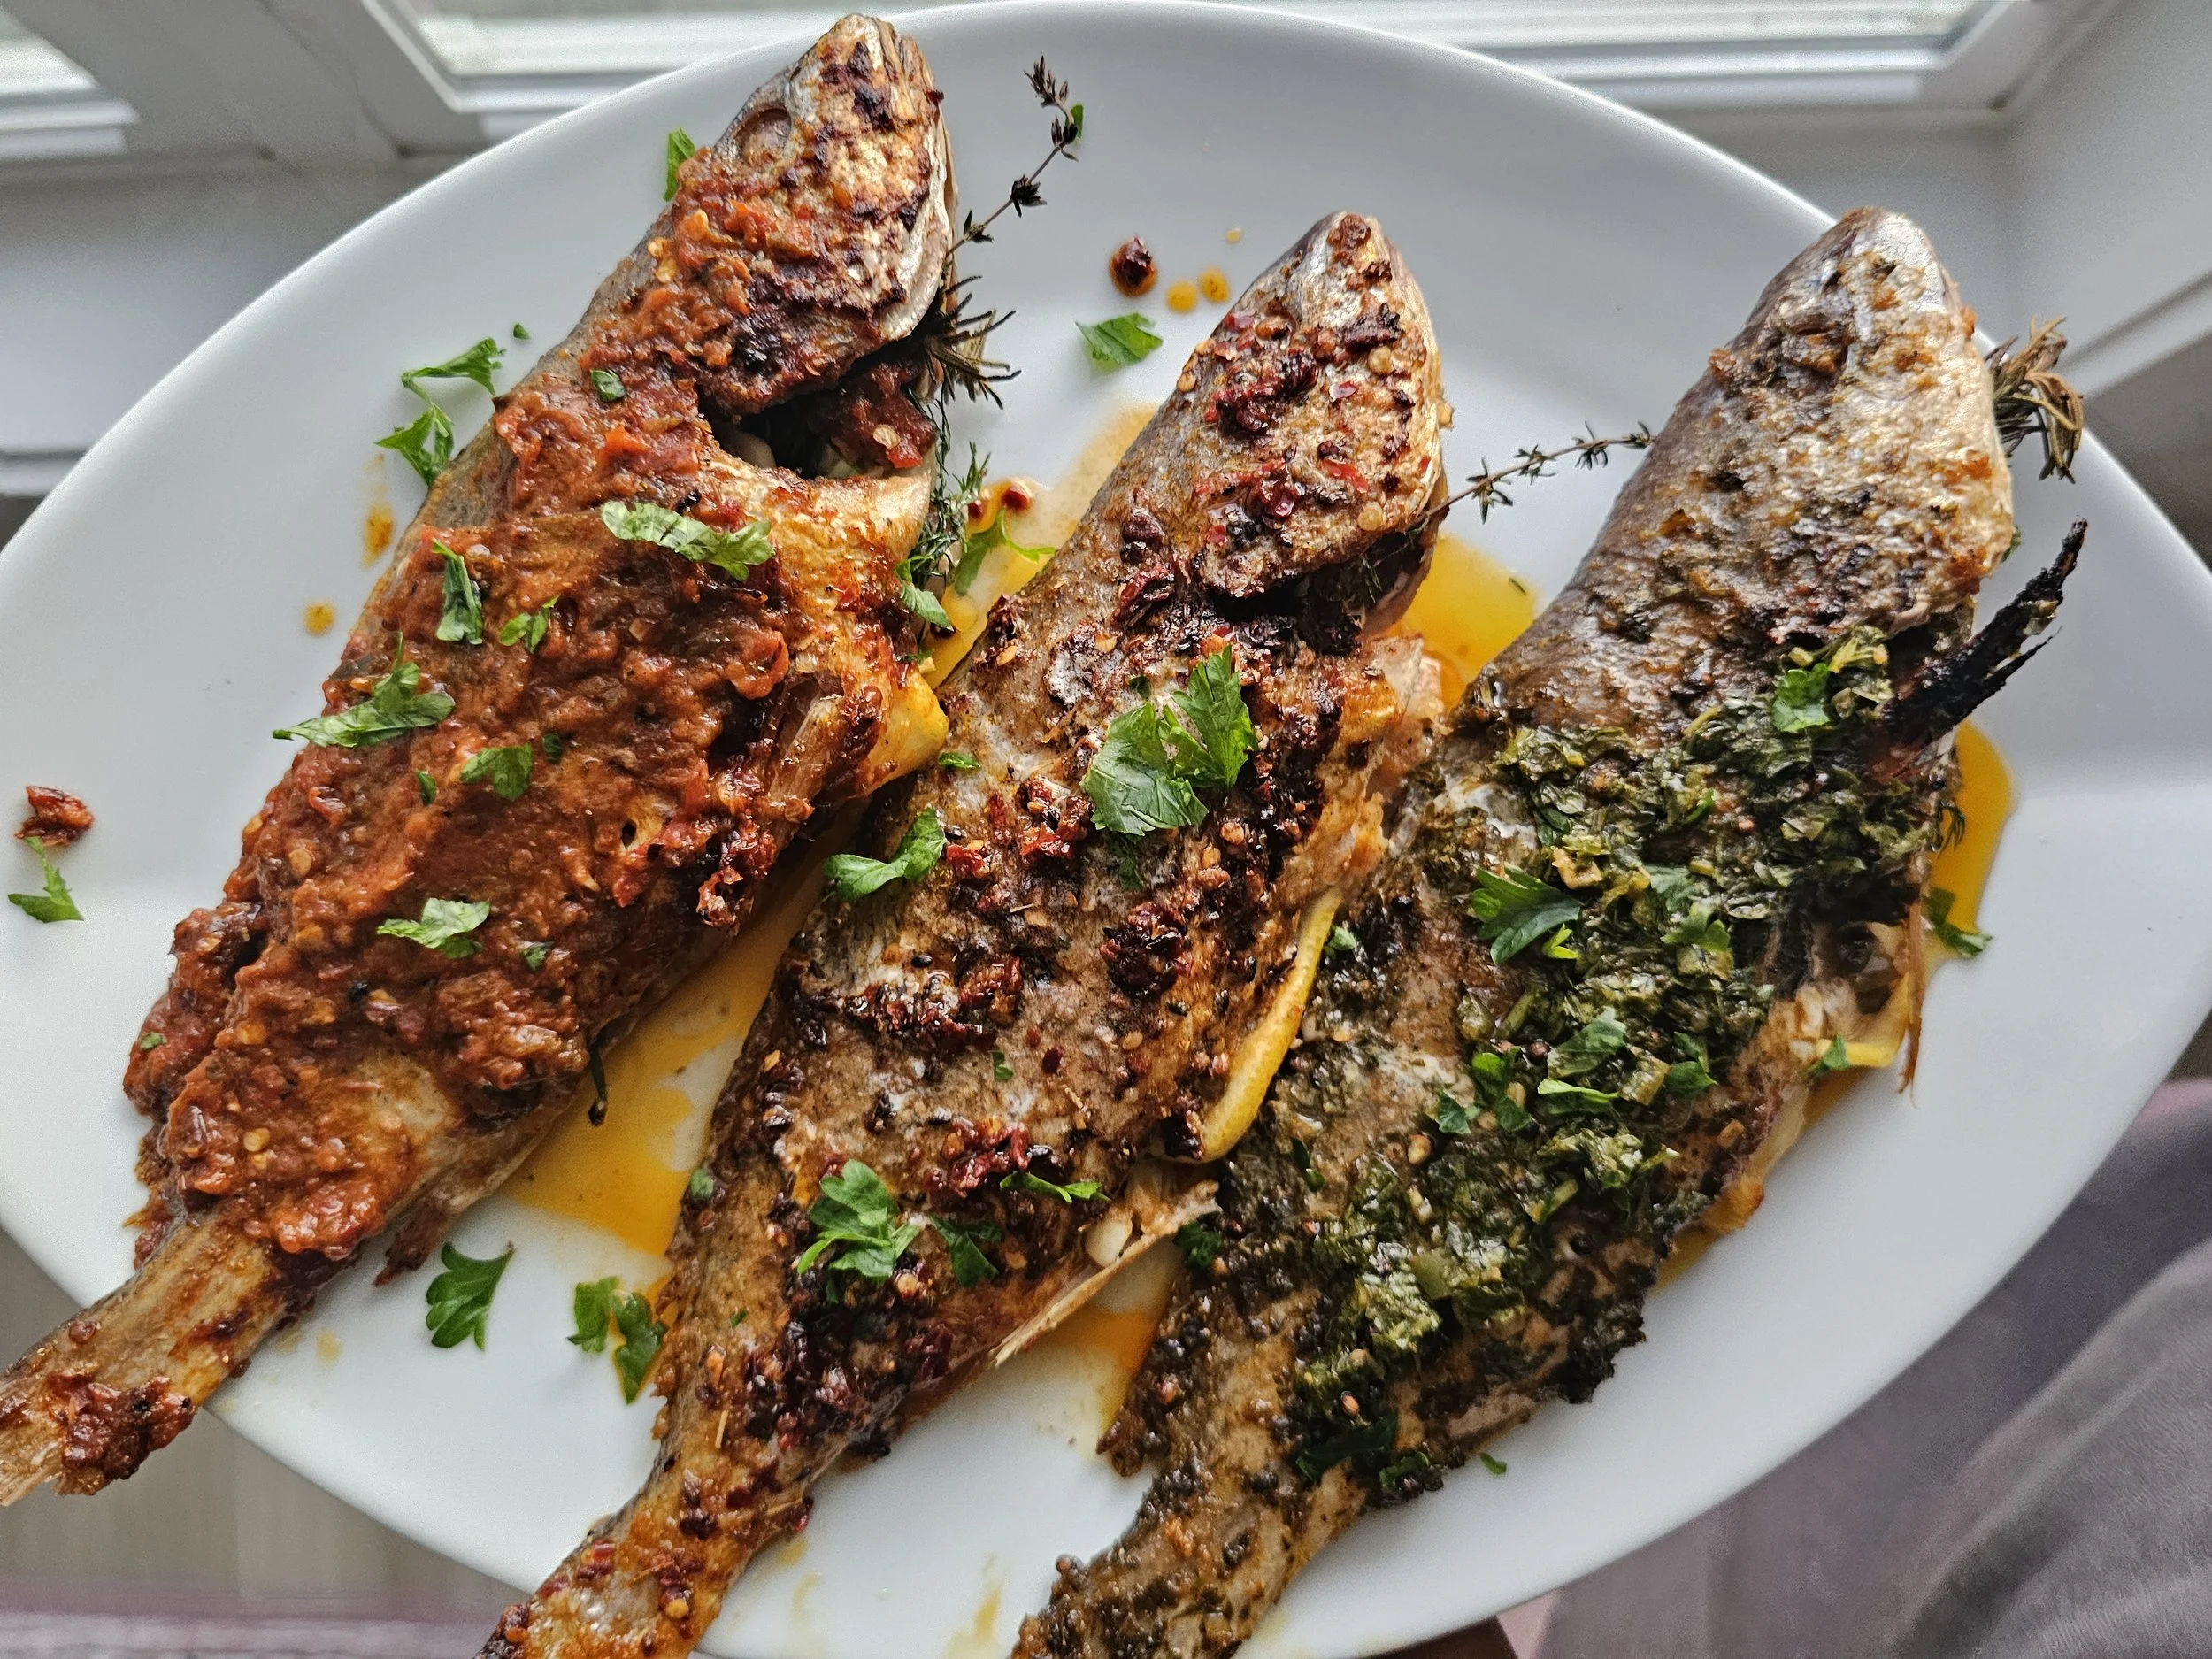
3 Bold Sauces for Quick Fish and Chicken Meals
Juicy, tender croaker fish with a flavorful seasoned crust and three African-inspired sauces—Chermoula, Peri-Peri, and Harissa. Each portion is generous, perfect for a solo dinner with bold flavor and crispy-tender fish.
Ingredients
- 3 small-medium croakers, cleaned
- 3 tsp paprika
- 3 tsp ground coriander
- 1 ½ tsp garlic powder
- 1 ½ tsp black pepper
- 3 tsp herbed salt
- 2–3 tbsp flour (for dusting)
- 2–3 tbsp olive oil
- 1–2 lemon slices
- 2–3 garlic cloves, sliced or lightly crushed
- 2–3 sprigs fresh thyme
- A few sprigs fresh dill
- ½ cup fresh parsley, chopped
- ¼ cup fresh cilantro, chopped
- 1 small jalapeño, finely minced (seeds in for heat, out for mild)
- 1–2 cloves garlic, minced (≈ 1 tsp)
- 1 tsp paprika
- ½ tsp ground cumin
- ½ tsp ground coriander
- 1 tsp honey (adjust to taste)
- ½ tsp salt (adjust to taste)
- 3 tbsp olive oil (≈ ¼ cup)
- Juice of 1 lemon (≈ 3 tbsp)
- 1 cup red bell pepper, sliced (about 1 medium pepper)
- ½ cup onion, sliced (about 1 small onion)
- 3 garlic cloves (you can peel them for smoother blending)
- 1 small red chili or 1 tsp chili flakes
- 1½ tsp smoked paprika
- 3 tbsp olive oil (just under ¼ cup)
- ¾ tsp salt (adjust after blending)
- 1½ tsp red wine vinegar
- ½ tsp dried oregano
- 1½ tsp cumin
- 1½ tsp smoked paprika
- ¾ tsp ground coriander
- 1–2 tbsp chili flakes (¼ cup would be wild — stick to tablespoons unless you’re fearless)
- 2 garlic cloves, minced
- ¼ cup olive oil
- ¾ tsp salt
Instructions
- Mix paprika, coriander, garlic powder, black pepper, and herbed salt. Use part of this mix to season flour.
- Rub each fish with olive oil.
- Sprinkle the dry rub evenly over all fish, then lightly dust with the seasoned flour.
- Stuff each fish with lemon slices, garlic, thyme, and dill.
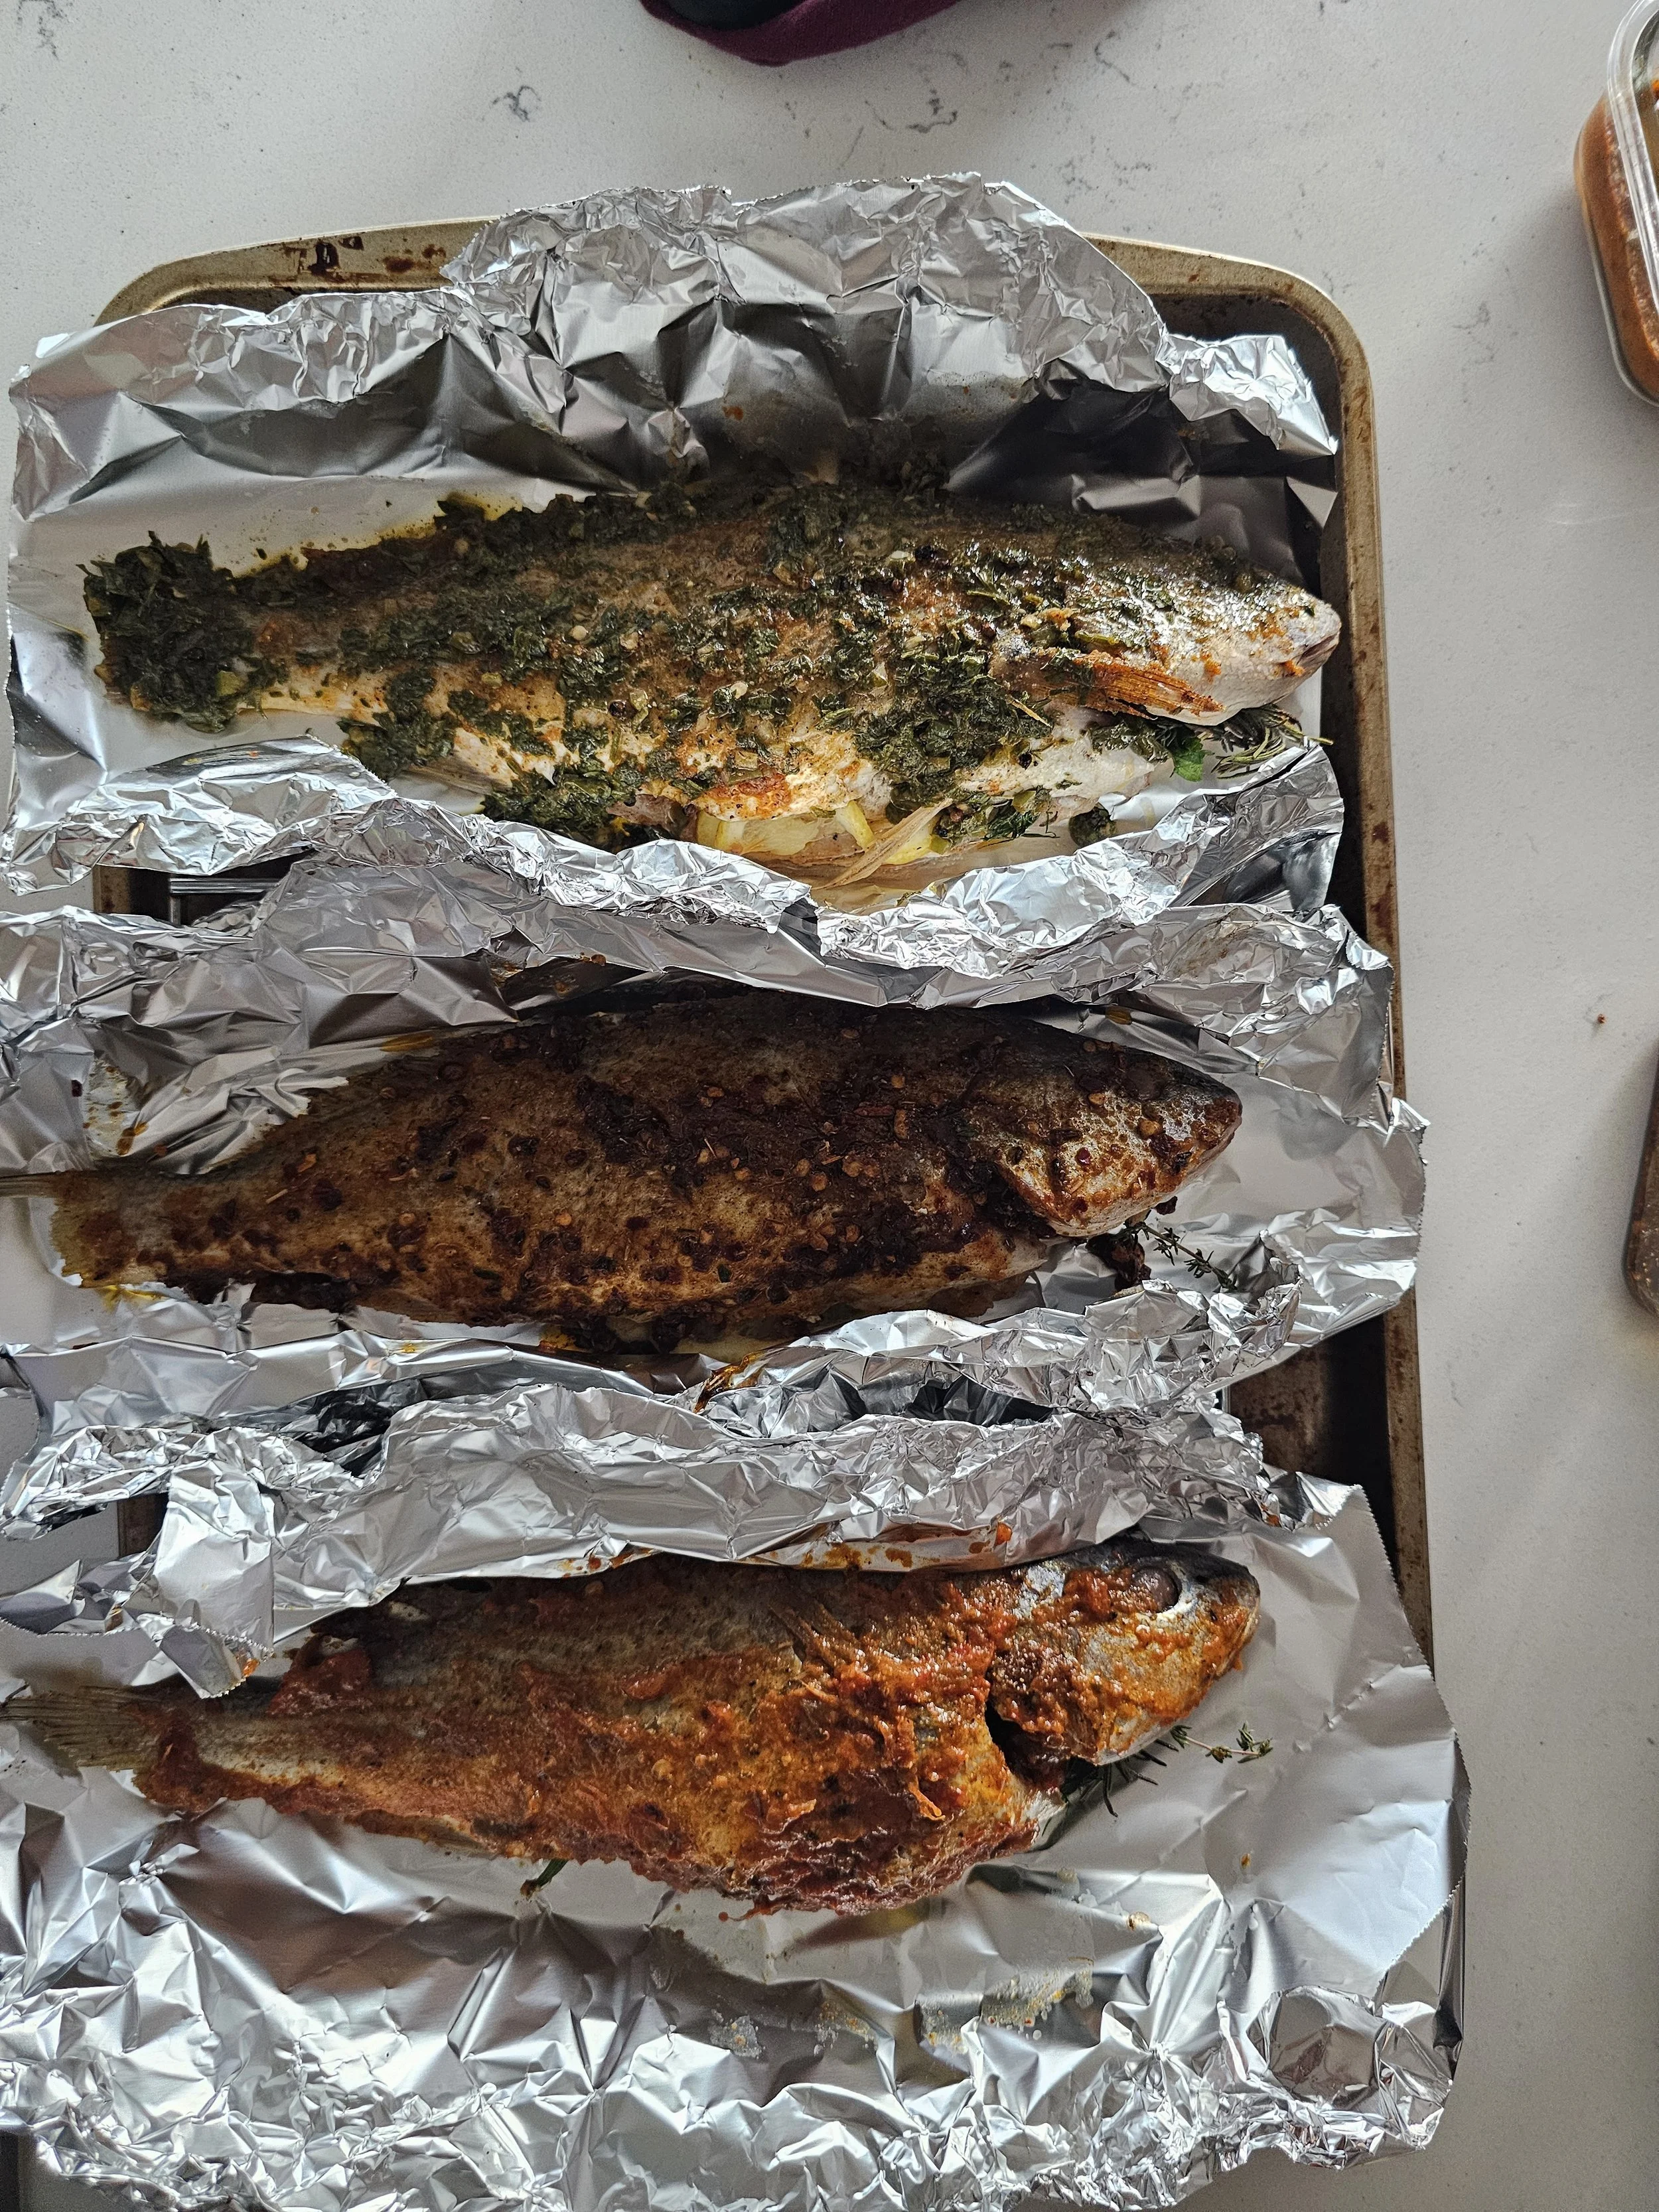
- Preheat oven to 400°F (200°C). Place fish in foil on a rack over a baking tray. Bake 12–15 mins until just cooked through.
- Chermoula: Mix parsley, cilantro, garlic, paprika, cumin, salt, olive oil, and lemon juice into a loose paste.
- Peri-Peri: Roast onion, pepper, and garlic under broiler ~20 mins until lightly charred. Peel garlic, then blend with smoked paprika, olive oil, salt, chili, vinegar, and oregano into a smooth paste.
- Harissa: Mix cumin, smoked paprika, coriander, chili flakes, garlic, olive oil, and salt into a thick paste.
- Remove from foil. Spoon your chosen sauce over each fish, baste with drippings, and broil 3–5 mins for a lightly caramelized top.
- Serve with extra sauce on the side.
Notes
- The measurements for each sauce are for one fish with an extra portion to serve on the side.
- The dry rub should be enough for all three fish.
- Bake the fish in foil first to keep it juicy, then remove foil before spooning on the sauces.
- Broil briefly after adding sauce to caramelize the top without overcooking.
- Extra sauce can be served on the side if desired.
Nutrition Facts
Calories
250Fat (grams)
10 gCarbs (grams)
3 gFiber (grams)
1 gProtein (grams)
28 gI am not a certified nutritionist and any nutritional information on dontmissmyplate.com should only be used as a general guideline.

Mushroom, Apple, and Goat Cheese Quiche
You may have noticed a certain fruit appearing frequently in my recent posts. With a surplus of apples on hand, I am always looking for creative ways to use them before they go bad, and this quiche is one of my favorite solutions. While apples are often thought of in sweet recipes, they bring a wonderful balance to savory dishes. Their natural sweetness and crisp texture pair beautifully with earthy, rich flavors.
For this quiche, I have layered wild mushrooms with a generous amount of apples along with pancetta to add savory umami. The combination is elevated with goat cheese and Parmigiano-Reggiano, which provide creamy richness and depth, while fresh parsley and sage add bright herbal notes that lift the flavors. Every bite offers a harmony of textures: tender, buttery pastry, soft mushrooms, slightly crisp apples, and creamy, melty cheese.
I have always loved a good quiche, especially when it is packed with seasonal produce and bold flavors. This version is fairly simple to make but delivers impressive results, making it perfect for brunch, a light lunch, or a sophisticated appetizer.
The earthy mushrooms and savory pancetta contrast beautifully with the sweet-tart apples, and the creamy cheeses tie everything together. This quiche feels elevated without being fussy and is a perfect way to celebrate the season’s bounty while putting extra apples to good use. I hope you enjoy this recipe as much as I enjoyed creating it. It is comforting, flavorful, and always a crowd-pleaser.

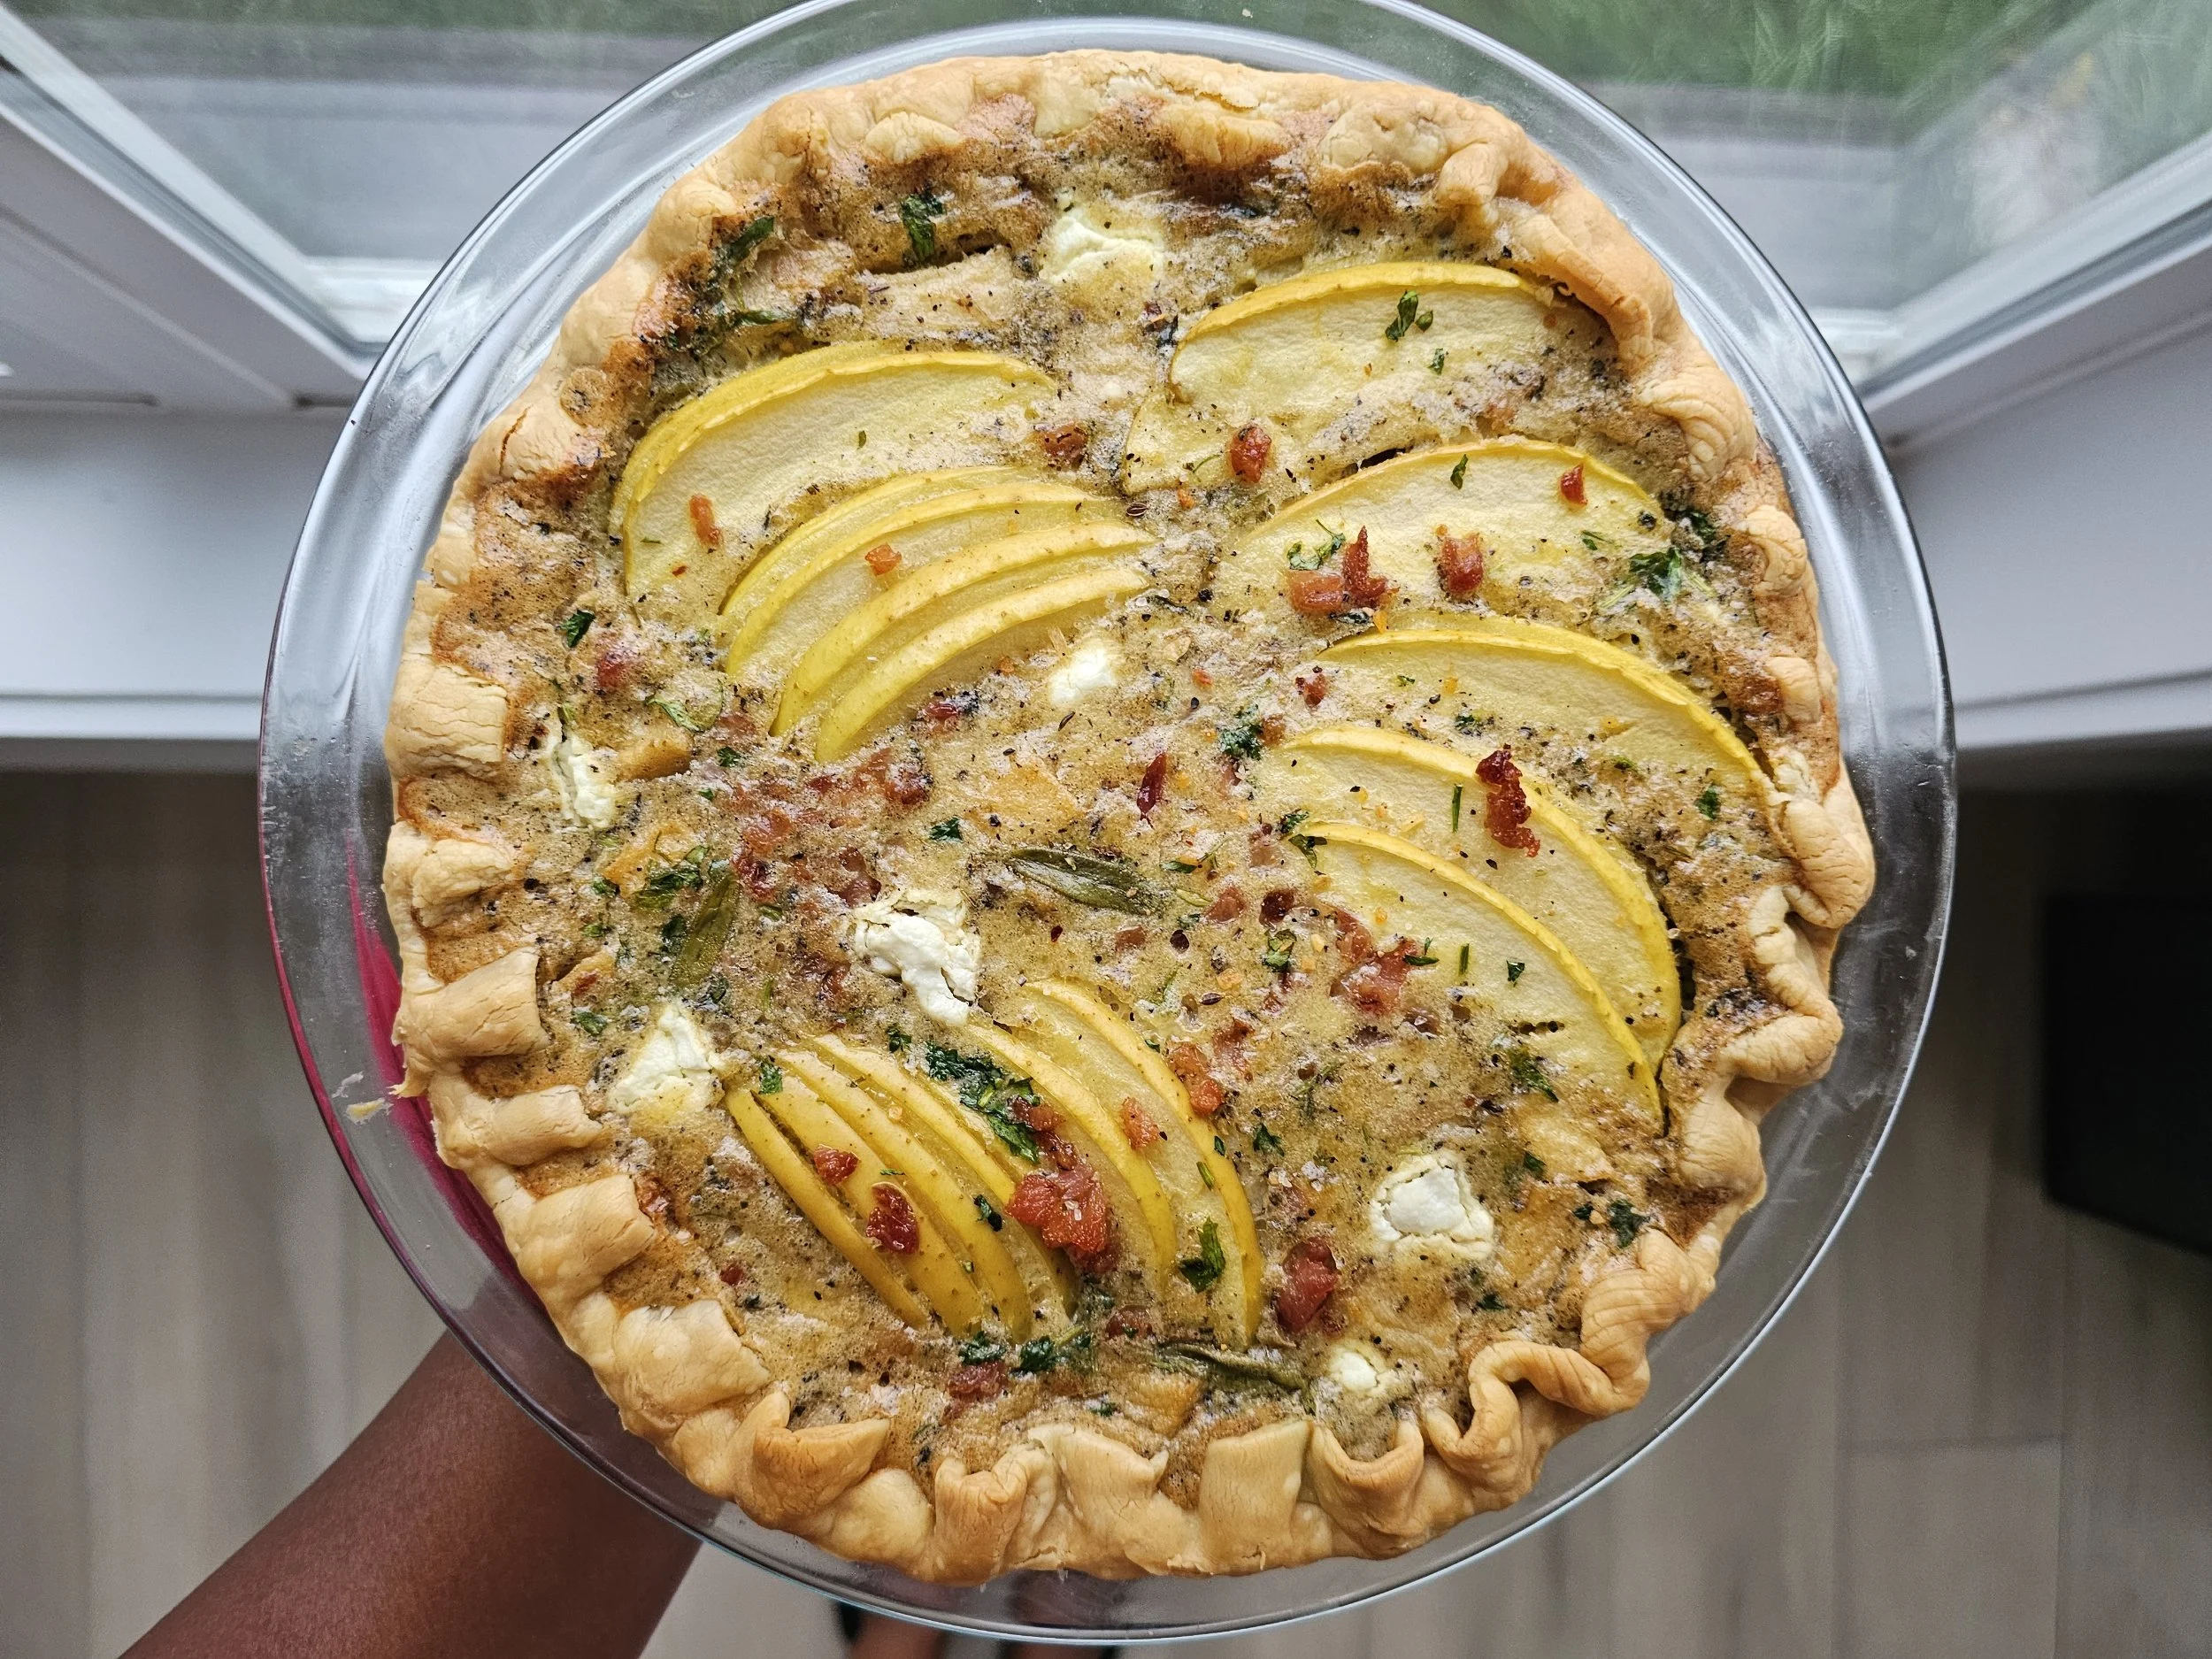

Mushroom, Apple, and Goat Cheese Quiche
A cozy, savory-sweet quiche layered with sautéed mushrooms, tender apples, caramelized aromatics, and creamy goat cheese. Baked in a flaky crust and finished with crisp pancetta and herbs, this dish balances comfort and elegance—perfect for brunch, lunch, or anytime you want something hearty with a touch of flair.
Ingredients
- 2 apples (1 diced, 1 thinly sliced for topping)
- 2 oz shiitake or wild mushrooms
- ½ red onion, chopped
- 1 garlic clove, minced
- 4 teaspoons goat cheese, divided
- ¼ cup grated Parmesan cheese
- ½ teaspoon chili flakes
- 1 teaspoon salt
- 1 tablespoon black pepper
- 1 teaspoon cumin
- 1 tablespoon cooking wine
- 1 tablespoon soy sauce
- 1 teaspoon garlic powder
- 5 eggs
- ⅓ cup + 2 tablespoons coconut milk or cream, divided
- ⅛ teaspoon fenugreek powder
- ½ teaspoon paprika
- ⅛ teaspoon nutmeg
- ⅛ teaspoon cinnamon
- 1 teaspoon Italian seasoning
- 2 tablespoons butter
- 2 tablespoons olive oil
- 1 pie crust, thawed
- 1/3 cup pancetta, cooked
- 1 tablespoon fresh parsley, chopped (optional garnish)
- Fresh sage leaves (optional)
Instructions
- If using a frozen pie crust, thaw it according to package instructions. Keep it cool. Fit it into your pie dish and set aside.
- Peel, core, and dice one apple. Slice the second apple into thin wedges. Chop the onion and mince the garlic.
- Combine chili flakes, nutmeg, fenugreek, Italian seasoning, black pepper, salt, cinnamon, cumin, and paprika in a small bowl.
- Heat the olive oil in a cast-iron skillet over medium heat. Cook the pancetta until nearly crispy. Remove and set aside.
- Add the butter to the skillet. Cook the spices for 1-2 minutes to release flavors, then sauté the garlic and onion for 2–3 minutes, until softened.
- Add the diced apples and soy sauce. Cook for 2–3 minutes.
- Add the mushrooms, sage, and 2 tablespoons of coconut milk or cream. Let everything simmer briefly.
- In a bowl, whisk the eggs, Parmesan, half the goat cheese, a pinch of salt and pepper, and ⅓ cup coconut milk or cream.
- Stir the mushroom mixture into the egg mixture. Pour into the prepared pie crust.
- Arrange the apple slices on top. Add the pancetta, parsley, sage, and the remaining goat cheese in small bits. Cover crust edges with foil to prevent over-browning if desired.
- Bake at 400°F (200°C) for 25 minutes, or until the center is set.
- Let cool for 5–10 minutes before serving.
Nutrition Facts
Calories
245Fat (grams)
17 gCarbs (grams)
16 gFiber (grams)
1 gSugar (grams)
4 gProtein (grams)
10 gI am not a certified nutritionist and any nutritional information on dontmissmyplate.com should only be used as a general guideline.

Roasted Sweet Potato Pie Soup
As Thanksgiving approaches and the air turns crisp, sweet potatoes reach their peak. Earthy, sweet, and full of warmth, they embody the essence of the season. This Roasted Sweet Potato Pie Soup captures all the cozy flavors of fall in one creamy, comforting bowl, a beautiful and unexpected starter for your Thanksgiving table.
In Zimbabwe, sweet potatoes don’t get nearly as much attention as they do in other cuisines, which is a shame.
The closest dish that comes to mind is nhopi, a traditional pumpkin-and-peanut-butter dish (often served for dessert or breakfast) that sometimes includes maize meal for thickness. It’s hearty, rich, and deeply comforting, the kind of food that fills both stomach and soul.
Inspired by that same spirit, along with the classic sweet potato pie found on American Thanksgiving menus, this soup transforms roasted sweet potatoes into something smooth, aromatic, and luxurious. It tastes like the beloved pie reimagined, familiar yet refined, with hints of umami from onion and pancetta.
Blended with coconut milk and warm spices like cinnamon and nutmeg, it celebrates the versatility of fall ingredients while embracing the season’s cozy comfort. Whether served as a starter for a festive feast or enjoyed on a cool evening, this soup brings both comfort and elegance to the table.
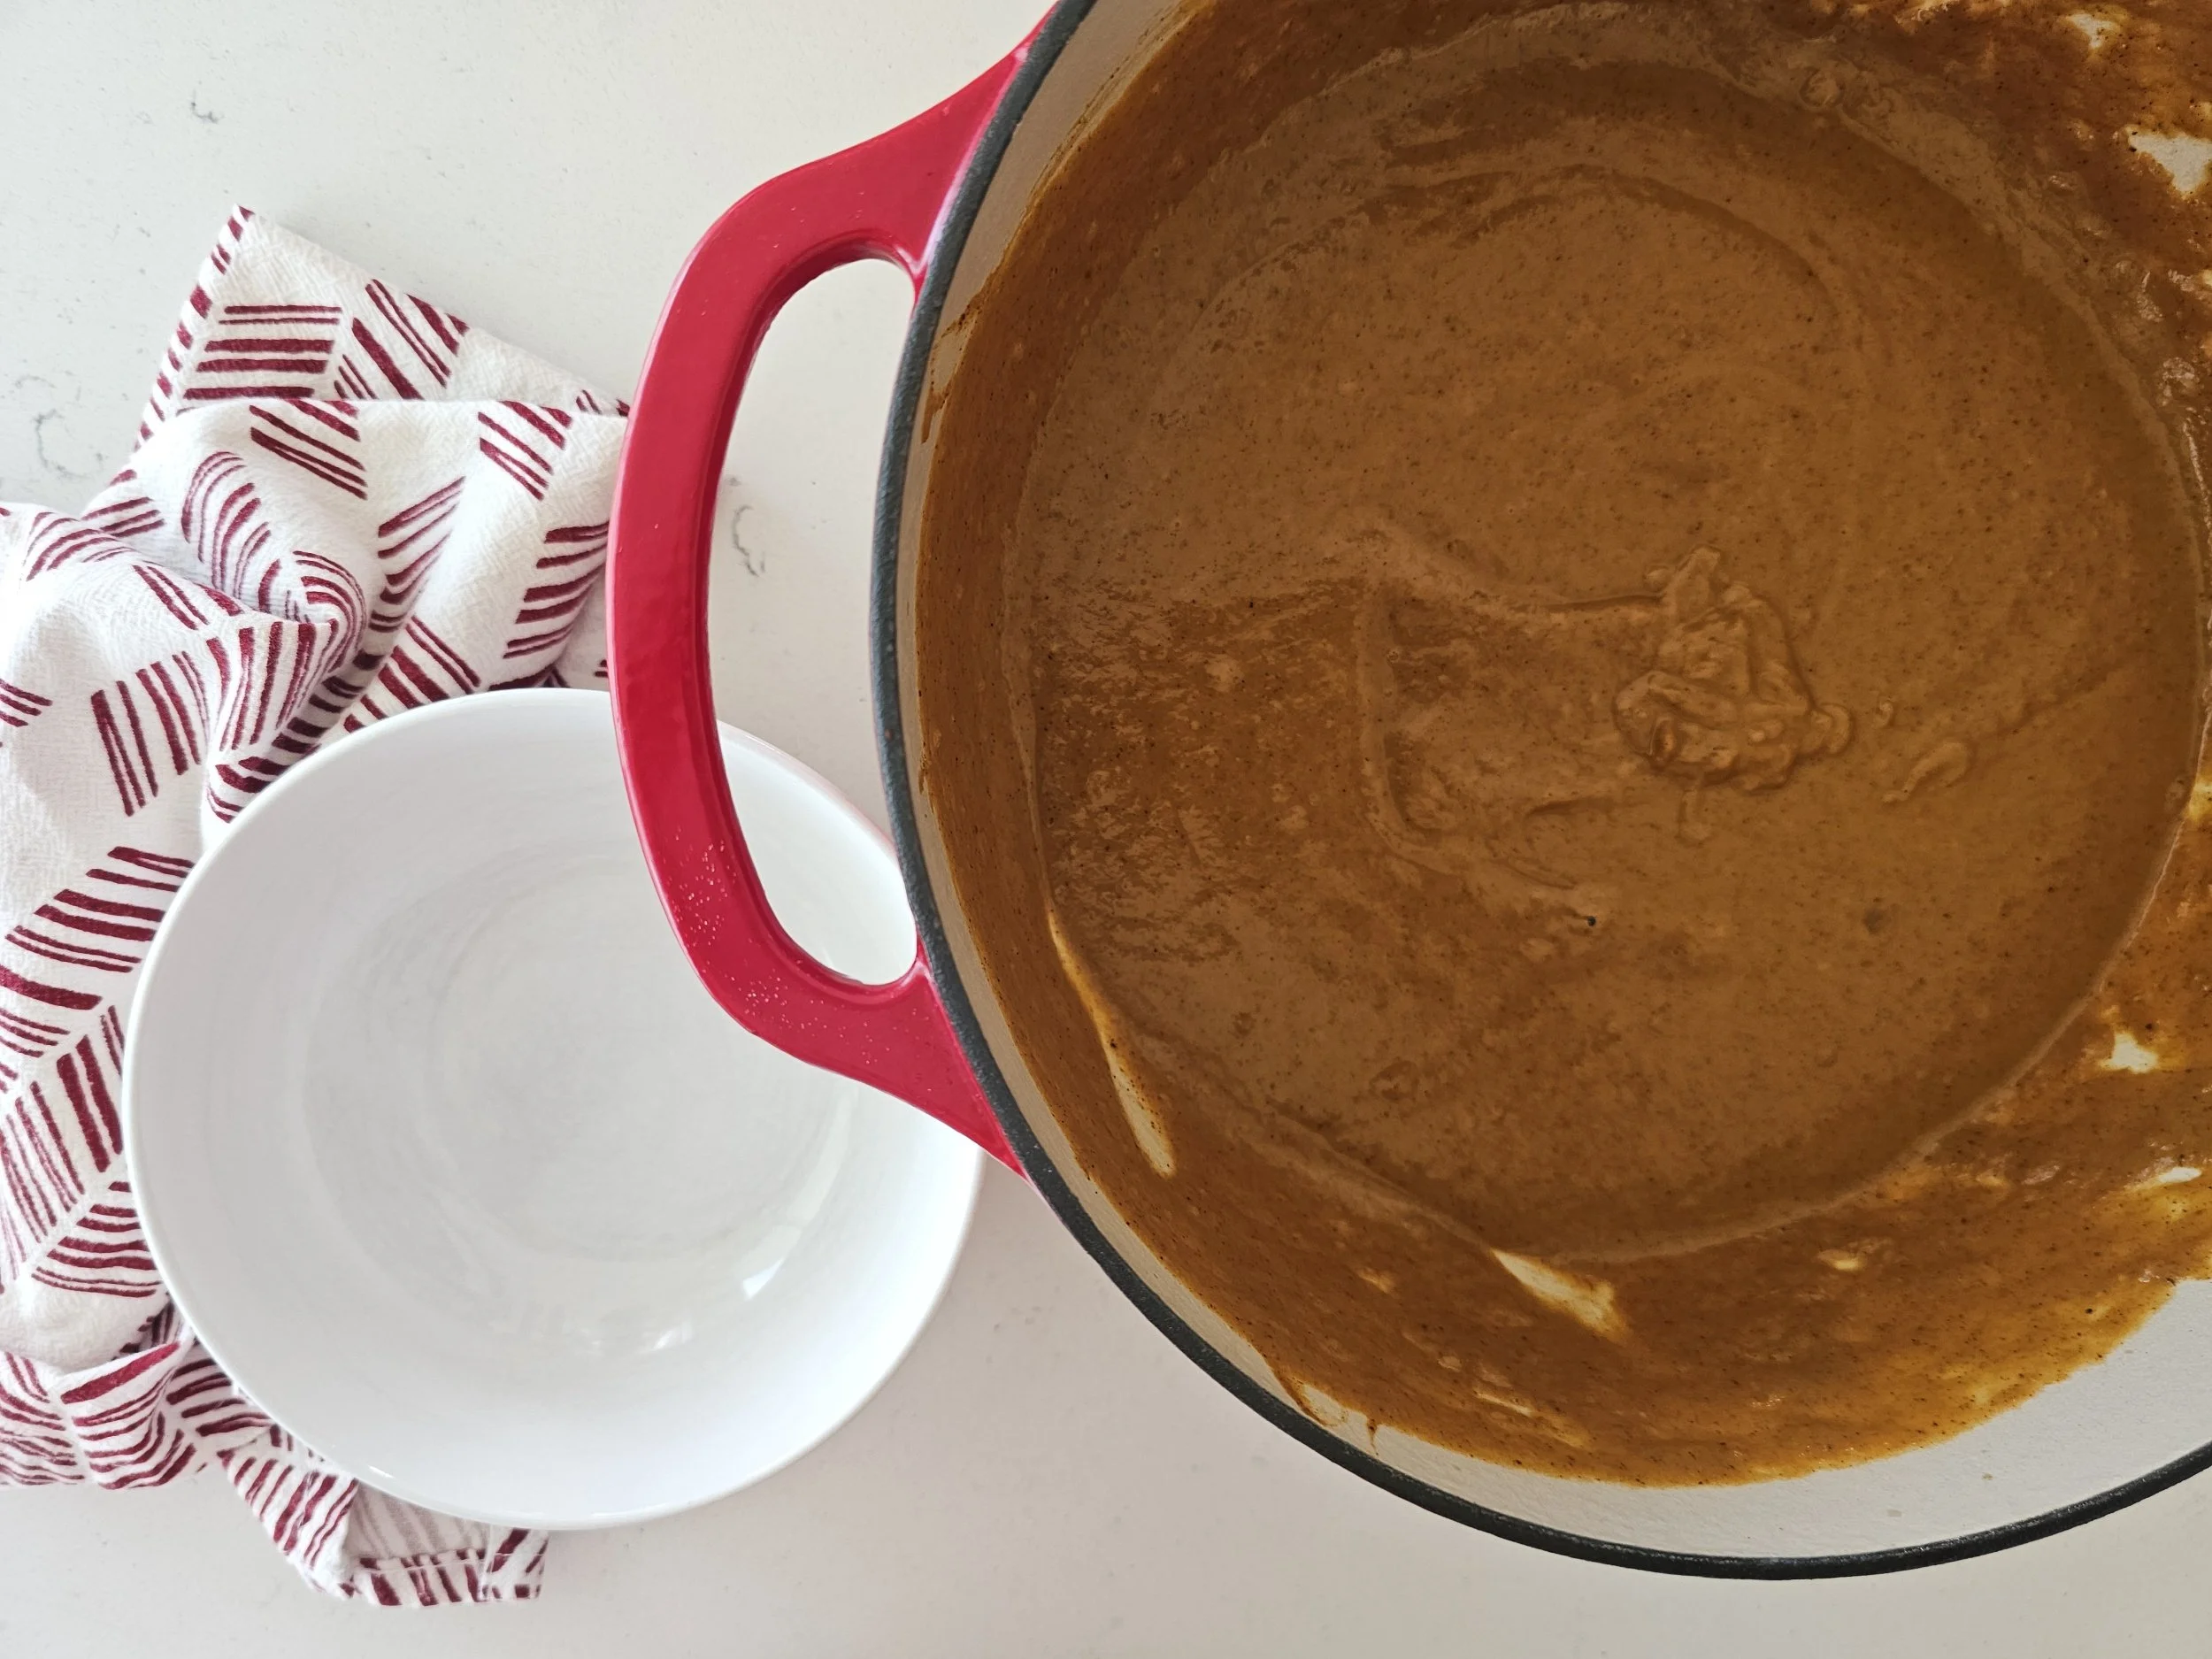


Roasted Sweet Potato Pie Soup
Cozy up with this creamy, warmly spiced sweet potato soup that tastes just like your favorite pie, with a savory twist. Roasted sweet potatoes, smoky pancetta, and fragrant spices swirl together in a silky coconut milk base. Perfect for chilly nights and holiday vibes.
Ingredients
- 2 large sweet potatoes
- 1/8 cup olive oil
- 1 teaspoon salt
- 1 teaspoon cinnamon
- 1 teaspoon black pepper
- 1 teaspoon paprika
- 1 tablespoon brown sugar
- 1/3 cup pancetta
- 1/2 medium red onion
- 2 cloves garlic
- 1 heaped tablespoon cinnamon (plus extra for garnish)
- 1 teaspoon nutmeg
- 1/2 teaspoon ground cloves
- 1 teaspoon salt
- 1 teaspoon black pepper
- 2 teaspoons ginger
- 1 teaspoon smoked paprika
- 1 tablespoon brown sugar
- 1 can coconut milk or heavy cream
- 3 cups chicken broth (or 3 bouillon cubes + 3 cups water)
- 2 tablespoons butter
- 1/8 cup red wine
- Mexican cream or sour cream (optional, for garnish)
Instructions
- Preheat oven to 400°F (200°C).
- Peel and chop sweet potatoes into small pieces. Toss with olive oil, salt, cinnamon, black pepper, and paprika.
- Bake for 40 minutes. Remove from oven and set aside, reserving a few pieces for garnish.
- Finely chop the red onion and mince the garlic. Set aside.
- In a large pot or Dutch oven, cook pancetta over medium heat until fat renders. Remove from heat and stir in half the butter.
- Add onion and garlic, cooking for 2 minutes until onions soften.
- In a small bowl, mix cinnamon, nutmeg, cloves, salt, pepper, ginger, smoked paprika, and brown sugar. Add the spice mix to the pot with the remaining butter, and cook for 1-2 minutes until fragrant.
- Add broth and half the coconut milk. Bring to a boil, then reduce heat and simmer for 10 minutes to develop flavors.
- Stir in the roasted sweet potatoes and cook for another 5-7 minutes. Remove from heat.
- After about 10 minutes of slight cooling, use an immersion blender to puree the soup, gradually adding the remaining coconut milk for creaminess.
- Season to taste, then stir in red wine to bring the flavors together.
- Serve hot, garnished with cream, reserved roasted sweet potato pieces, pancetta bits, and a dusting of cinnamon.
Nutrition Facts
Calories
360Fat (grams)
23 gCarbs (grams)
33 gFiber (grams)
5 gSugar (grams)
11 gProtein (grams)
6 gI am not a certified nutritionist and any nutritional information on dontmissmyplate.com should only be used as a general guideline.

How to Make Apple Butter at Home | Cozy Autumn Recipe
With a surplus of apples from a crisp autumn day at the orchard, I found myself searching for ways to make the most of these fragrant, juicy fruits. I’ve always loved apples, but I didn’t grow up eating apple butter. Discovering it as an adult completely changed the way I think about apples. Homemade apple butter is a simple yet transformative way to turn an abundance of apples into a silky, richly spiced spread that enhances breakfast, baking, and even savory dishes.
One of my favorite ways to use apple butter is as a natural sweetener in recipes. In fact, one of my most creative recipes, featured by Feed Feed , was an apple butter babka, which combined the depth of spiced apple butter with tender, buttery layers of dough. Apple butter opens the door to countless possibilities, from drizzling it over pancakes to swirling it into oatmeal, using it in baked goods, or even adding it to sauces for a subtle, naturally sweet complexity.
The beauty of apple butter is not just its flavor but its versatility. Infused with fall spices like cinnamon, nutmeg, cloves, and ginger, it captures the essence of the season in every spoonful. It’s comforting, warming, and makes your kitchen smell incredible as it simmers on the stove. Plus, it’s a healthier alternative to refined sugar, adding natural sweetness along with the nutrients of the fruit itself.
Making apple butter is both practical and rewarding. It’s a way to preserve the flavor of freshly picked apples, celebrate the season, and create a pantry staple that elevates everything from baked goods to simple toast. Once you make it, you’ll find yourself thinking of new ways to incorporate this spiced, velvety spread into your fall cooking and beyond.


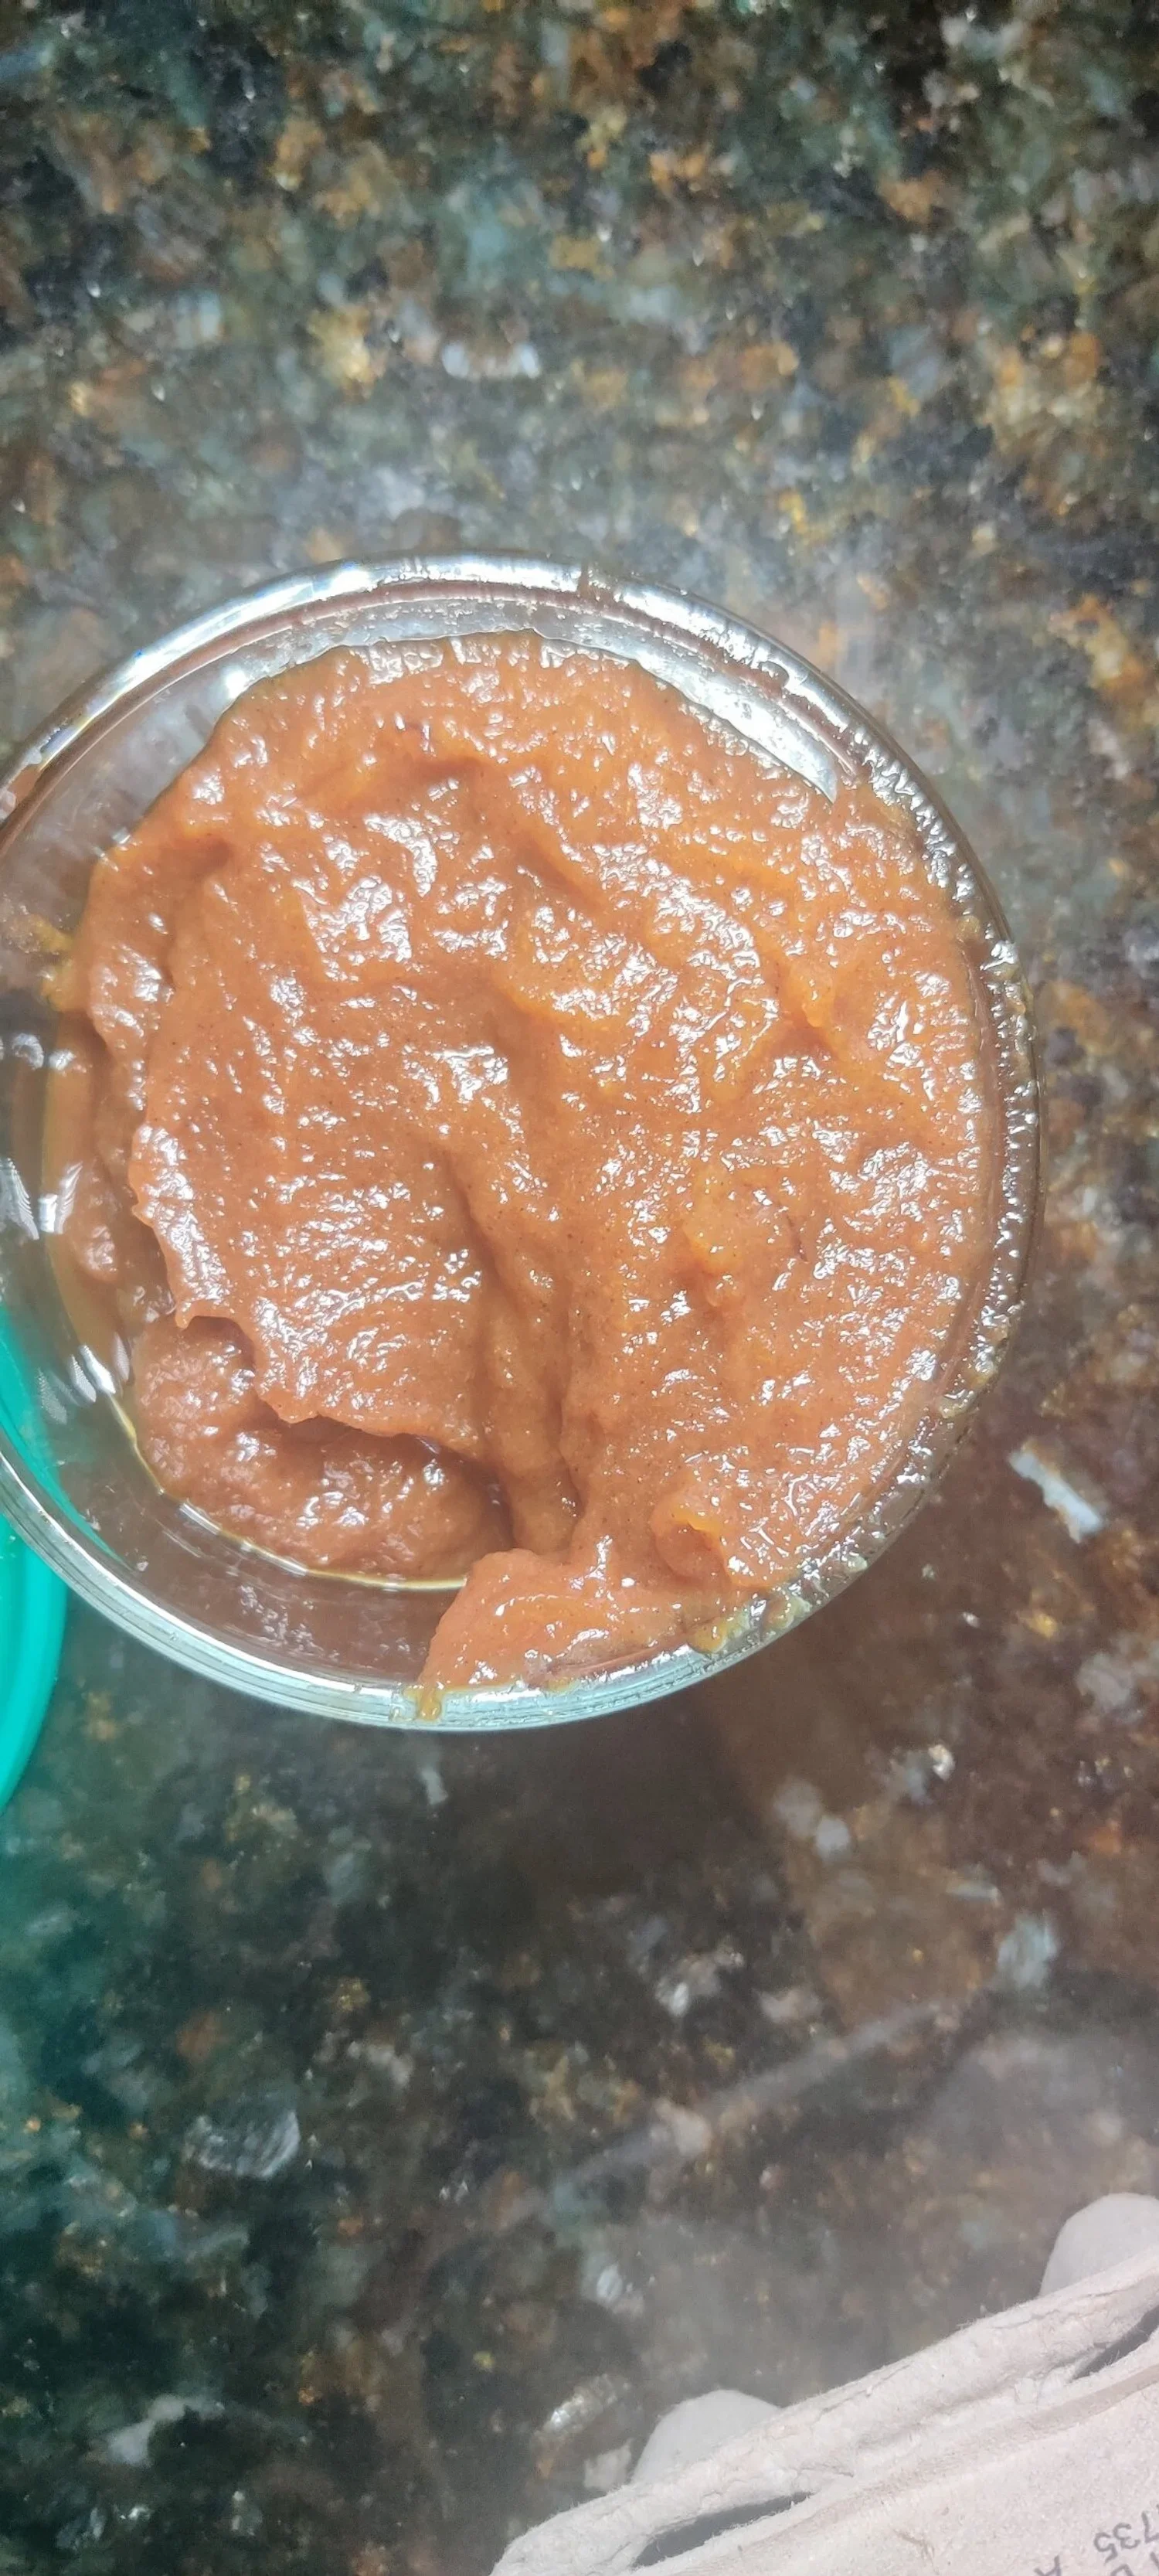
Ways to Use Apple Butter
Homemade apple butter is incredibly versatile — sweet, silky, and spiced just right. Here are a few delicious ways to enjoy it:
Spread it: Slather on toast, biscuits, pancakes, waffles, or warm muffins.
Bake with it: Swirl into quick breads, cakes, or muffins for moisture and flavor. Try it in my Apple Butter Babka, one of my favorite creative bakes!
Sweeten naturally: Use as a refined-sugar alternative in oatmeal, yogurt, or smoothies.
Pair with cheese: Serve alongside a cheese board with sharp cheddar, brie, or goat cheese.
Upgrade sauces and glazes: Stir into BBQ sauce, salad dressings, or marinades for a rich, sweet depth.
Gift it: Jar it up and share it as a cozy homemade fall or holiday gift.

Homemade Spiced Apple Butter
Transform your fall apple harvest into a rich, spiced, and velvety spread. Perfect on toast, in baked goods, or as a natural sweetener in your favorite recipes.
Ingredients
- 4 large apples, peeled, cored, and chopped
- 1 cup apple juice, orange juice, or water
- 3 tablespoons light brown sugar
- 1 teaspoon apple cider vinegar (or regular vinegar)
- 1 teaspoon lemon juice
- ½ teaspoon ground cinnamon
- ¼ teaspoon ground nutmeg
- ¼ teaspoon ground cloves
Instructions
- Peel, core, and chop the apples into small pieces.
- In a large pot or Dutch oven, combine the apples, juice (or water), brown sugar, vinegar, lemon juice, cinnamon, nutmeg, cloves, and salt. Bring the mixture to a boil over medium heat.
- Reduce the heat to low, cover, and simmer for about 1½ to 2 hours, stirring occasionally. The apples should become very soft and easy to mash.
- Remove from the heat and let cool for about 10 minutes. Transfer to a blender or use an immersion blender to puree until smooth and creamy.
- Pour the apple butter into clean glass jars or airtight containers. Refrigerate for up to 3–4 weeks, or freeze for longer storage (6 months for best texture).
Nutrition Facts
Calories
35Carbs (grams)
9 gSugar (grams)
7 gI am not a certified nutritionist and any nutritional information on dontmissmyplate.com should only be used as a general guideline.

Pork Chop and Apple Skillet
I was inspired to update this recipe after an afternoon of apple picking. Handling all those crisp, fragrant apples made me think about the classic pairing of pork and apples—a combination I had never fully questioned before, but one that clearly has roots both in tradition and in nature. Historically, pigs would forage for fallen apples in the fall, which naturally complemented the richness of their meat. Over time, this pairing became a culinary classic, and it’s easy to see why.
Growing up, pork chops were a staple in my household, often served at braais (barbeques) or as simple weeknight dinners with mashed potatoes and peas. There’s something inherently satisfying about pork chops; I always ate them down to the bone. They carry a subtle, natural sweetness that pairs beautifully with a wide variety of flavors. Apples, with their acidity and tartness, provide a perfect counterpoint, balancing the richness of the pork while adding freshness and brightness to the plate.
This skillet recipe celebrates that harmony. The pork is seared to a gorgeous, glistening brown, while the apples and onions soften and caramelize in a creamy, herb-infused sauce. A touch of crispy pancetta adds depth and saltiness, making every bite rich, comforting, and visually stunning. It’s a dish that’s approachable enough for weeknights but elegant enough to serve to guests—a certified people-pleaser that combines nostalgia, flavor, and seasonal inspiration all in one skillet.

Pork Chop and Apple Skillet
Pork chops serve as the ultimate lunch or dinner, and when paired with apples make for a tangy, sweet and succulent meal. Don't be afraid to use fruit in your savory dishes, this one is worth it!
Ingredients
- 2 bone-in center-cut pork chops (1 to 1½ inches thick)
- 2-4 tablespoons olive oil
- 2 tablespoons soy sauce
- 2 tablespoons Worcestershire sauce
- ½ teaspoon paprika
- ½ teaspoon salt
- ½ teaspoon black pepper
- ½ teaspoon steak and chops seasoning
- ½ teaspoon dried herbs (Italian seasoning, rosemary, or oregano)
- ½ teaspoon garlic powder
- 1 teaspoon dried herbs
- 1 teaspoon flour
- 1/4 teaspoon cumin
- 1 bouillon cube to dissolved in equal parts water (or ¾ cup chicken stock)
- 1/4 teaspoon salt
- ½ teaspoon black pepper
- 1 teaspoon Royco Usavi Mix (no-sodium all-purpose seasoning)
- ½ large red onion, thinly sliced
- 1 large apple (Honeycrisp or Granny Smith work well), thinly sliced
- ¼ cup diced pancetta
- 2 tablespoons cooking oil
- 2 tablespoons butter
- 2 sprigs fresh rosemary
- 1 teaspoon mustard
- 1 teaspoon soy sauce
- ¼ cup cream or coconut milk
- Fresh parsley (to garnish)
Instructions
- Marinate the pork chops for at least 4 hours, up to 8 hours.
- In a bowl, container, or zip-top bag, combine oil, Worcestershire sauce, and soy sauce to coat the pork chops.
- Add paprika, garlic powder, dried herbs, salt, black pepper, and steak and chops seasoning.
- Add extra oil if needed to ensure the pork is fully coated.
- Cover and refrigerate until ready to cook.
- Prepare the Base Seasoning:
- Combine dried herbs, flour, cumin, chicken bouillon cube, black pepper, salt, and Royco Usavi Mix — this will be added to the sauce later to build flavor.
- Prepare the Apples and Onion:
- Peel (if desired) and slice the apples and red onion into wedges — not too thin, not too thick — for optimal texture.
- In a skillet, sauté the pancetta in cooking oil until it starts to brown and becomes slightly crunchy.
- Remove the pancetta and set aside, leaving the rendered fat in the pan.
- Brown the pork chops on each side in the same pan.
- Add butter and rosemary to baste the chops and infuse aromatics. This helps the pork sear beautifully.
- Remove the pork chops. If the internal temperature is not yet 145–160°F (63–71°C), they will finish cooking in the sauce.
- Using the same oil, cook the onions until they begin to caramelize.
- Add the apples and cook until slightly softened.
- Add butter and seasonings to release flavor and aromatics; cook for 2–3 minutes.
- Add the prepared base seasoning and water or chicken stock to the pan.
- Add soy sauce and stir to combine.
- Reduce the heat to low and return the pork chops to the pan. Cover and simmer until the pork chops are fully cooked (check with a meat thermometer).
- Once the pork is cooked through, stir in the cream and reserved pancetta.
- Cook for an additional 3–4 minutes to thicken the sauce and meld flavors.
- Remove from heat and garnish with fresh parsley.
- Serve with grits, beans, or a starch of your choice.
Nutrition Facts
Calories
333Fat (grams)
16.36 gCarbs (grams)
13.57 gProtein (grams)
32.38 gI am not a certified nutritionist and any nutritional information on dontmissmyplate.com should only be used as a general guideline.

Peri-Peri Chicken Livers with Onion Gravy
Chicken livers were one of the first foods that made me feel connected to both comfort and culture. My earliest memories of them go back to childhood, when my mother would cook the livers and giblets from a whole chicken and serve them alongside eggs, toast, baked beans, and a rich onion gravy. It was the kind of breakfast that stayed with you. Hearty, deeply flavorful, and surprisingly comforting.
Years later, I was delighted to find chicken livers on the menu at Nando's. Their peri-peri livers immediately transported me back to my mother's kitchen table. Although the flavors were different, the feeling was the same. There was something familiar about that combination of tender livers, onions, spice, and sauce.
My appreciation for liver deepened even further during a period when I struggled with anemia. What started as a practical way to increase my iron intake quickly became something I genuinely looked forward to eating. Chicken liver is one of the most nutrient-dense foods available, packed with iron, vitamin B12, vitamin A, folate, selenium, and high-quality protein. It's often described as nature's multivitamin, but unlike most healthy foods, it also happens to be incredibly satisfying when prepared well.
That is something many people miss about liver. It often gets a bad reputation from being overcooked. When treated properly, chicken livers are tender, rich, and full of flavor. They absorb spices beautifully and pair particularly well with ingredients like onions, garlic, tomatoes, and chili.
Across Southern Africa, chicken livers are far more than a forgotten ingredient. They're a staple found in home kitchens, roadside eateries, and restaurant menus alike. They're often simmered in richly seasoned sauces and served with bread, pap, or sadza. This tradition eventually found a wider audience through chains like Nando's, whose peri-peri chicken livers introduced many people around the world to a dish that Southern Africans had been enjoying for generations.
This recipe draws inspiration from those flavors. The livers are lightly coated to help them brown beautifully, then cooked with onions, garlic, coriander, and peri-peri seasoning before being finished with a touch of cream. The result is a rich, savory dish with just enough heat and a silky sauce that begs to be spooned over bread, rice, pap, or sadza.
Whether you're already a liver lover or trying to give it a second chance, this is the recipe I'd start with.
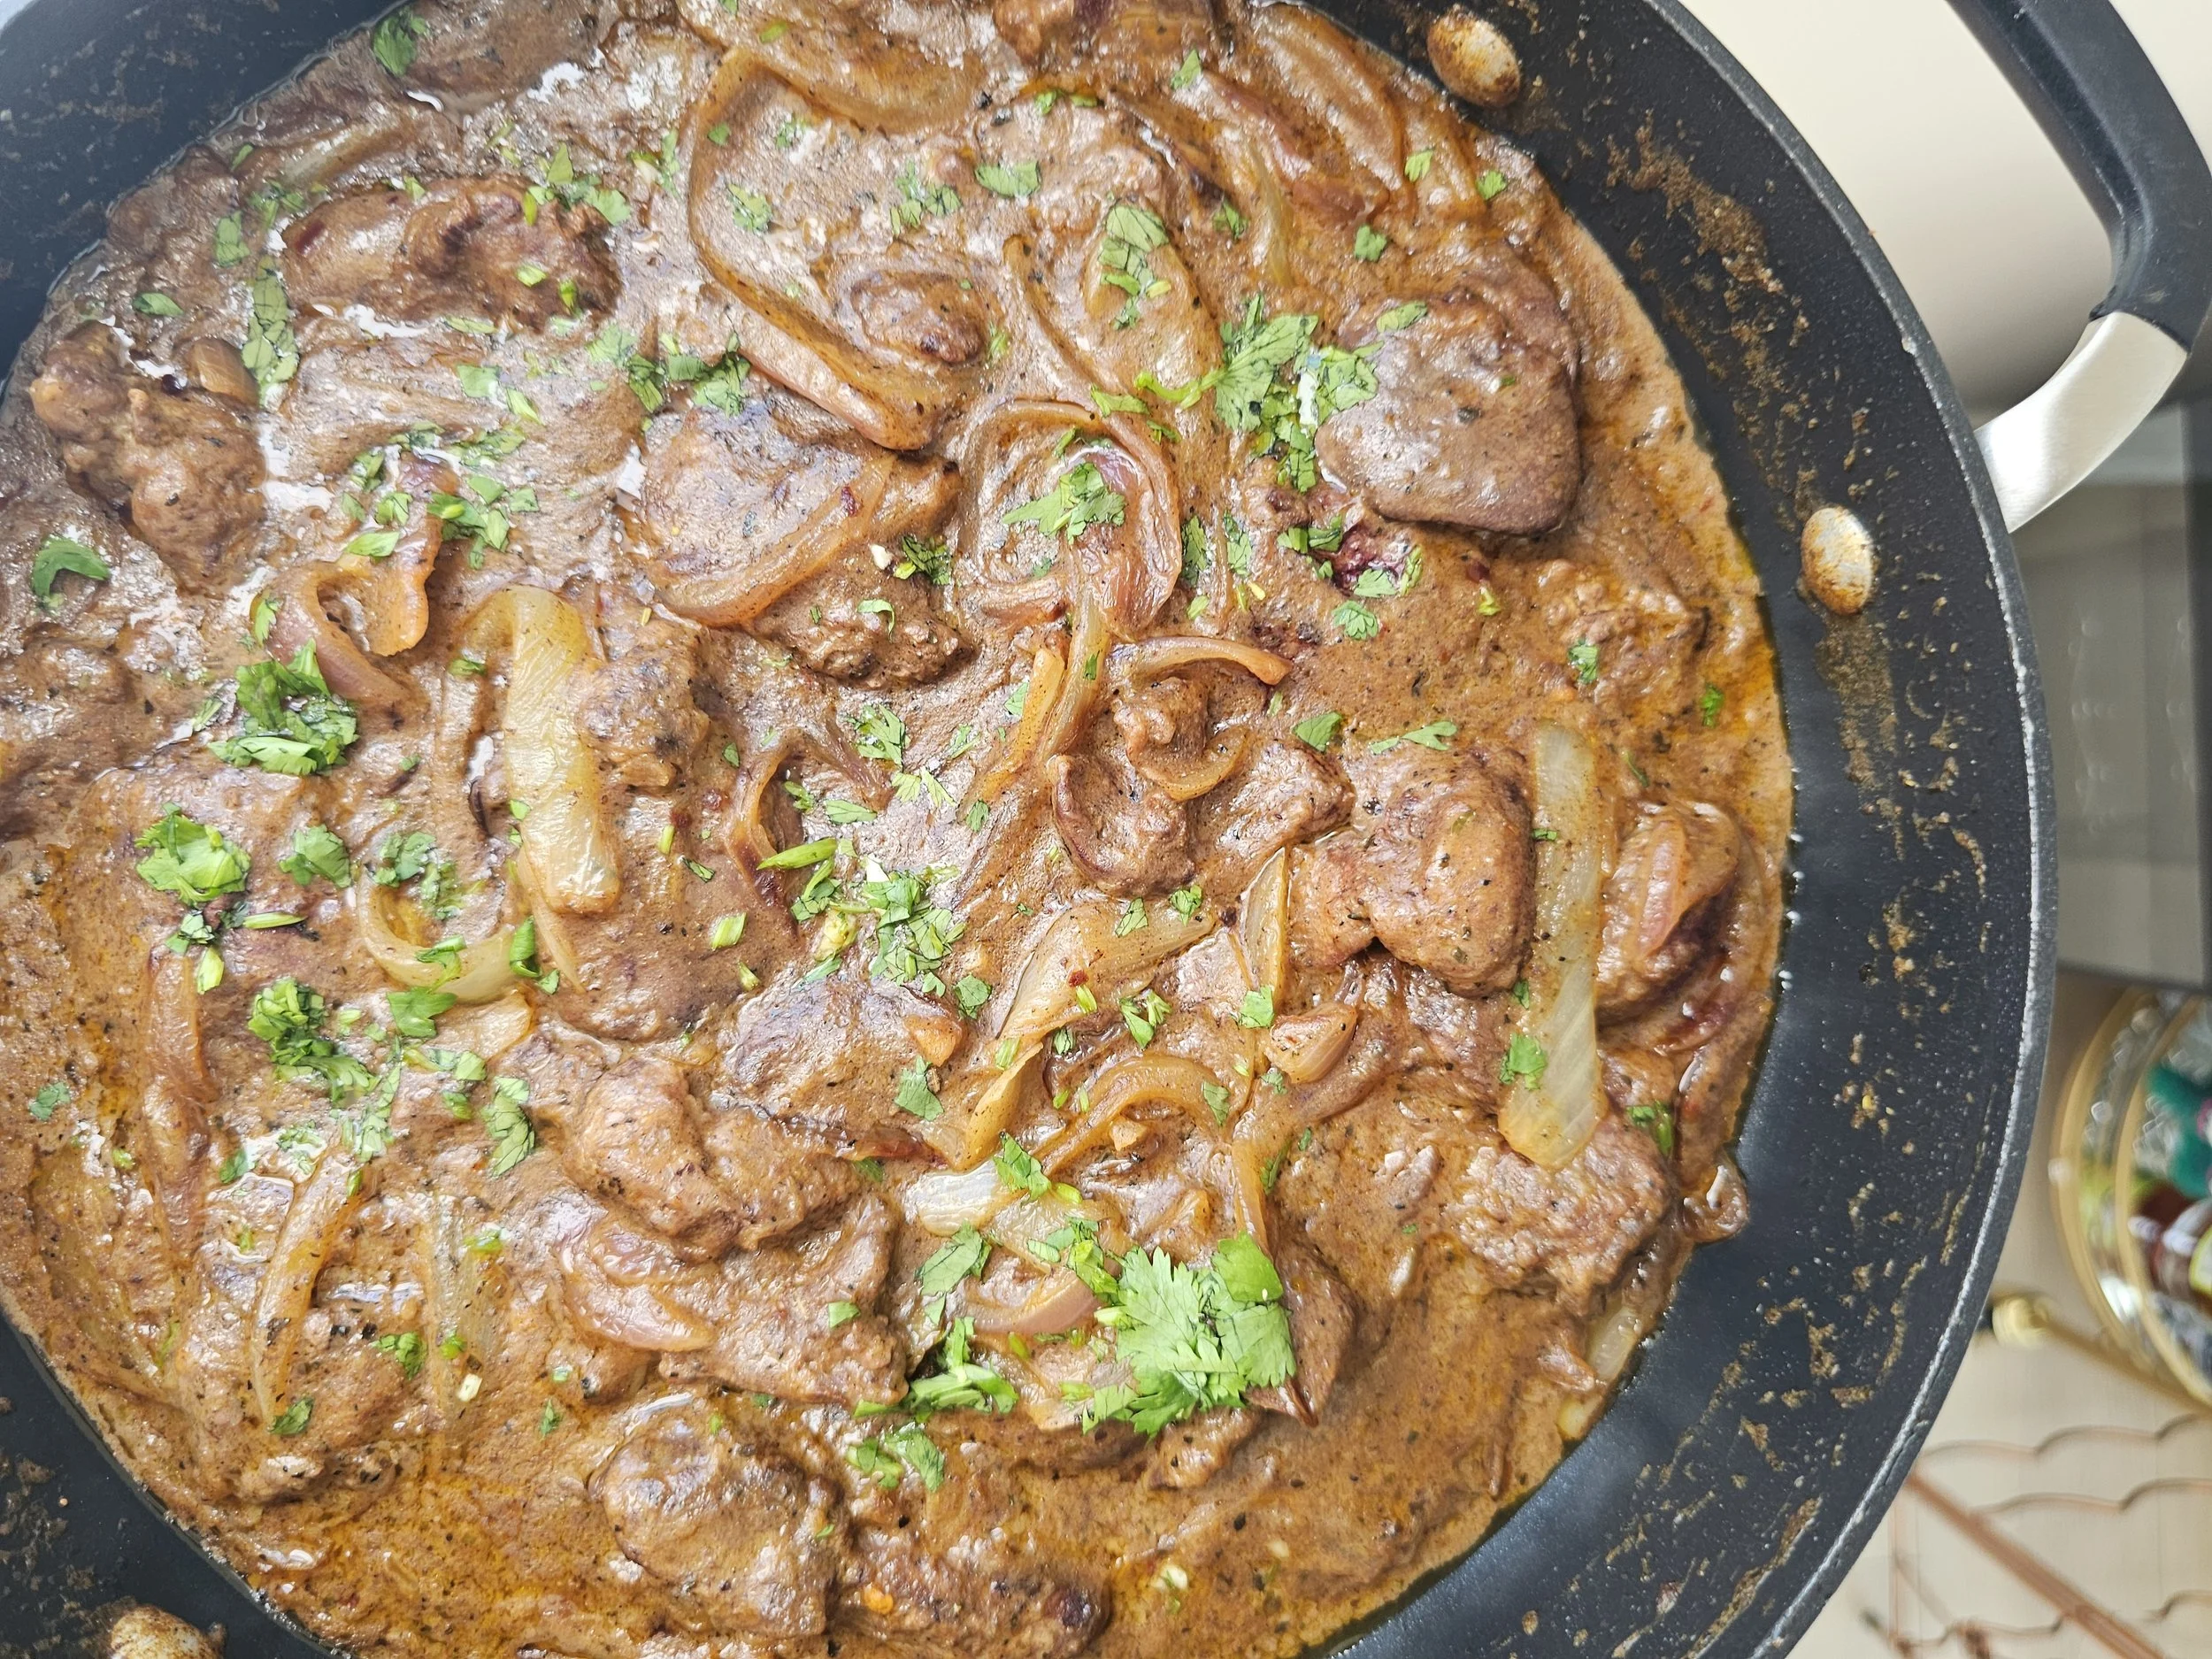


Peri-Peri Chicken Livers with Onion Gravy
Rich, spicy, and comforting, these Peri-Peri Style Chicken Livers in Onion Gravy bring bold Southern African and Portuguese-inspired flavors to your table.
Ingredients
- 510 g (about 1.2 lb) chicken livers, cleaned and patted dry
- ½ medium red onion
- ½ medium yellow onion
- 2–3 garlic cloves, minced
- 2 teaspoons Portuguese or peri-peri chicken spice (I used Robertsons)
- ½ teaspoon garlic powder
- ½ teaspoon onion powder
- ½ teaspoon chilli flakes
- ½ teaspoon black pepper
- ½ teaspoon Italian seasoning
- ½ teaspoon ground coriander
- 1 teaspoon Royco Usavi Mix (or another mild, low-sodium all-purpose seasoning with some thickening)
- ¼ cup + 2 tablespoons flour, seasoned with 1/4 teaspoon of salt, black pepper, and garlic powder each
- ⅔ cup chicken stock
- 4 tablespoons cooking oil
- 3 tablespoons butter
- Salt and black pepper, to taste
- 3 teaspoons powdered milk + ½ cup water (or substitute with cream)
- 1 tablespoon tomato paste
- 1 lemon (use half to clean the livers and the other half to finish once cooked)
- Fresh parsley, for garnish
Instructions
- After soaking the chicken livers briefly in water with a bit of lemon juice, pat them dry with paper towels. Trim away any connective tissue or excess fat.
- Slice the onions into thin wedges and mince the garlic.
- Combine all your dry seasonings (except the all-purpose seasoning) and set aside.
- In a shallow bowl, season ¼ cup of flour with salt, black pepper, and garlic powder. Lightly coat the livers in the seasoned flour and shake off any excess.
- Heat 2 tablespoons of oil and 1 tablespoon of butter in a large, deep pan over medium-low heat.
- Add the red and yellow onions along with the garlic. Cook until golden and lightly caramelized but still slightly crisp.
- Add 1 tablespoon of oil and 1 tablespoon of butter, then stir in the combined spices, letting them bloom for 1–2 minutes.
- Remove the onion mixture from the pan and set aside.
- Add the remaining oil and butter to the pan. Sear the livers for 3–4 minutes per side until browned but not fully cooked through.
- Return the onions to the pan.
- Add the chicken stock, all-purpose seasoning, and tomato paste. Stir to combine and deglaze the pan.
- Simmer gently for 5–7 minutes, or until the livers reach an internal temperature of 160°F (71°C). Avoid overcooking.
- Stir in the powdered-milk-and-water mixture (or cream) and cook for 1–2 more minutes until the sauce thickens slightly.
- Remove from the heat and let the dish rest for 5 minutes.
- Squeeze the juice from the remaining half lemon over the livers and garnish with chopped parsley.
- Serve hot with fresh bread, pap/sadza, or mashed potatoes.
Nutrition Facts
Calories
370Fat (grams)
23.5 gCarbs (grams)
11 gFiber (grams)
1.5 gProtein (grams)
29 gI am not a certified nutritionist and any nutritional information on dontmissmyplate.com should only be used as a general guideline.